Protective styling has become the cornerstone of healthy curl care for good reason—it’s one of the most effective ways to minimize breakage, reduce manipulation, and give your curls the break they need from daily styling stress. Whether you’re dealing with tight coils, loose waves, or anything in between, finding the right protective hairstyle can mean the difference between hair that thrives and hair that struggles. The best part? Protective styles don’t have to be boring or uncomfortable. They can be beautiful, versatile, and genuinely protective at the same time if you know what you’re doing.
The key to successful protective styling isn’t just picking any style and calling it a day. It’s about understanding which styles actually work for your specific curl pattern, hair density, and lifestyle, then executing them in a way that’s tight enough to protect without being so tight that you’re creating tension at the edges. A poorly installed protective style can do more harm than good, which is why specifics matter. You want to know not just what the style is, but how to install it safely, how long you can wear it, what products keep your curls hydrated underneath, and when it’s time to take it down before damage occurs.
Real protective styling also means being honest about your hair’s needs. Some styles work beautifully for thick, dense hair but can feel too heavy for finer curl textures. Others are perfect for travel or active lifestyles but require more styling skill to install properly. The goal is to find your match—a style that protects your hair while fitting your routine, your skill level, and what makes you feel confident. Let’s walk through the most effective protective hairstyles that actually work, including what makes each one special, how to do it right, and what you need to know before you commit.
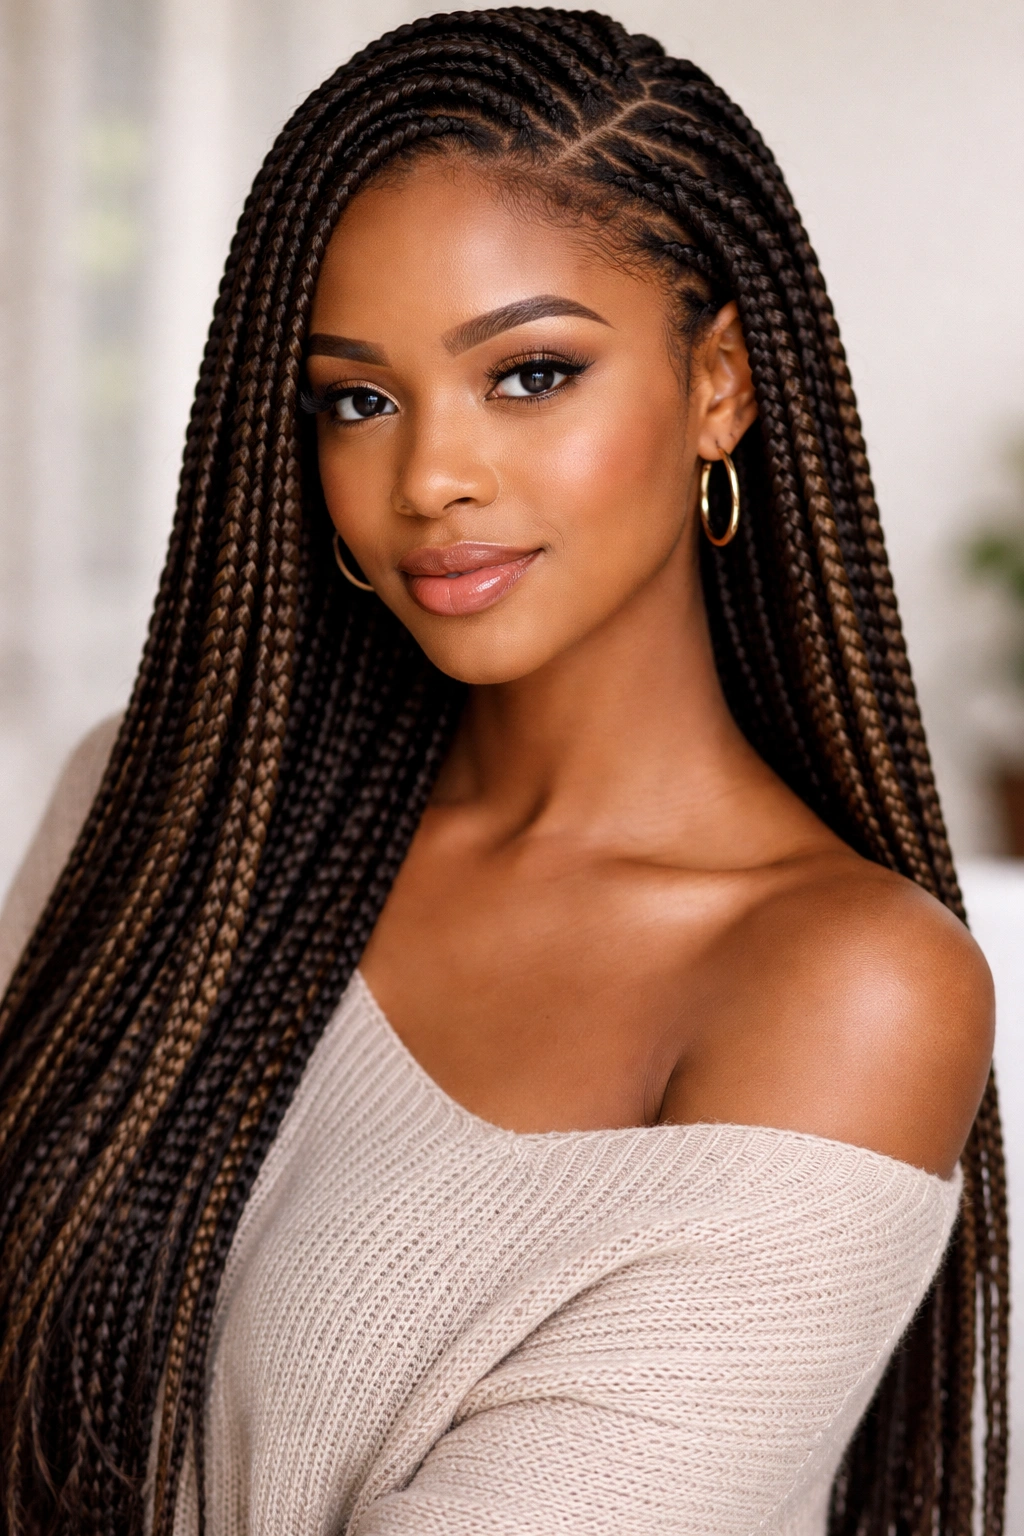
1. Box Braids
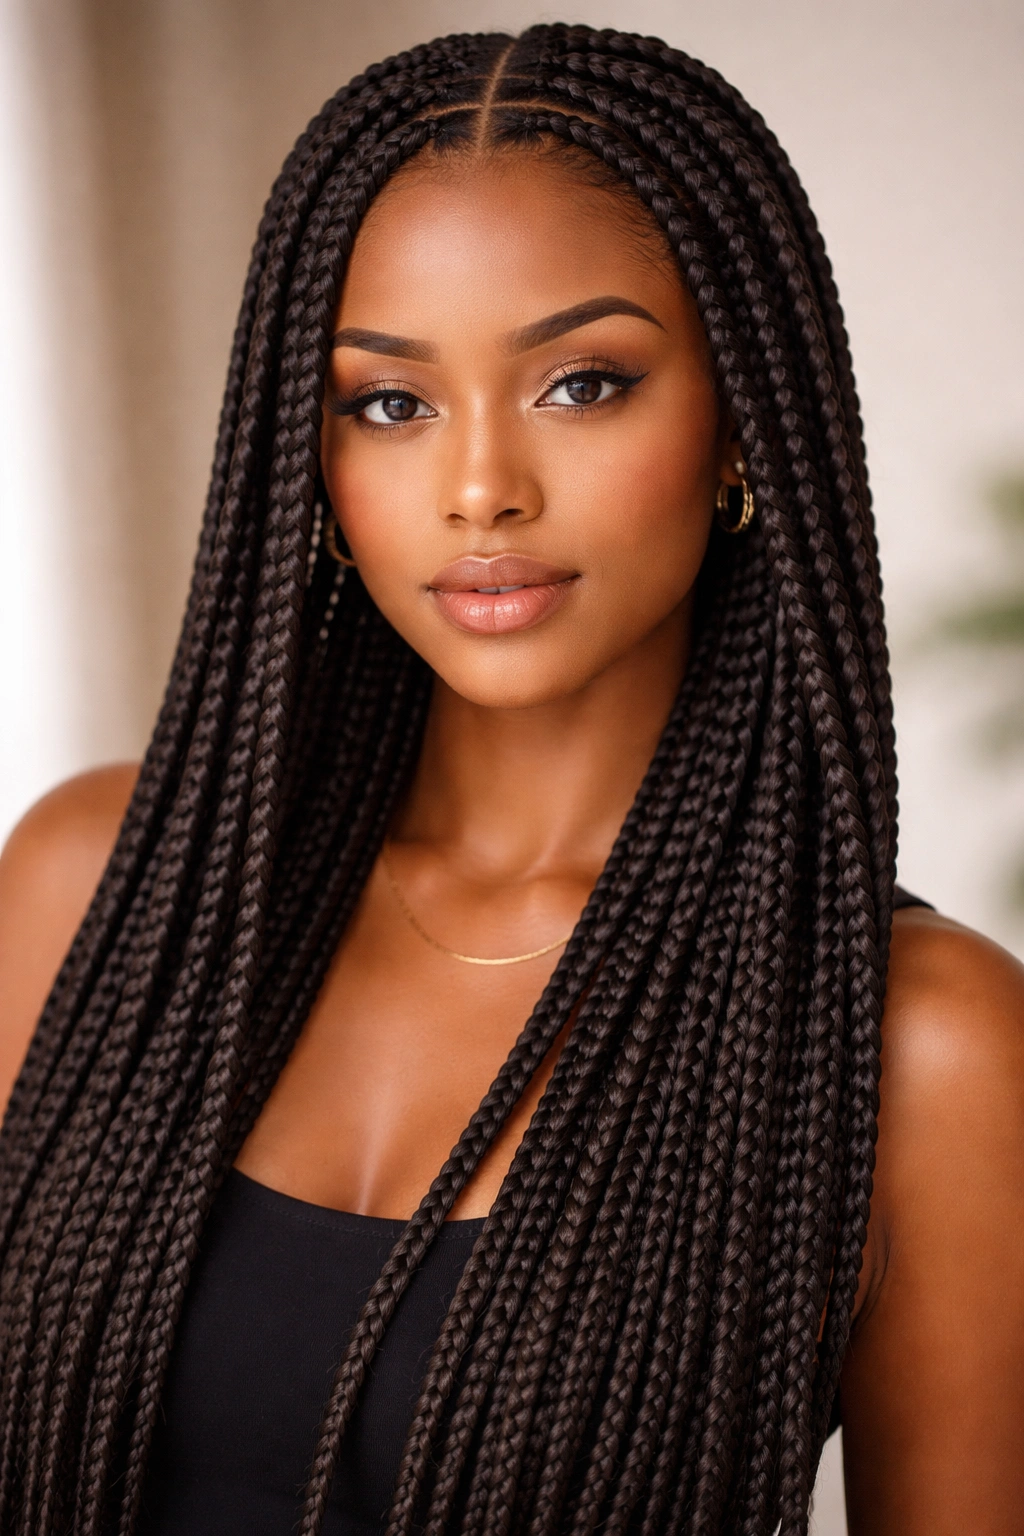
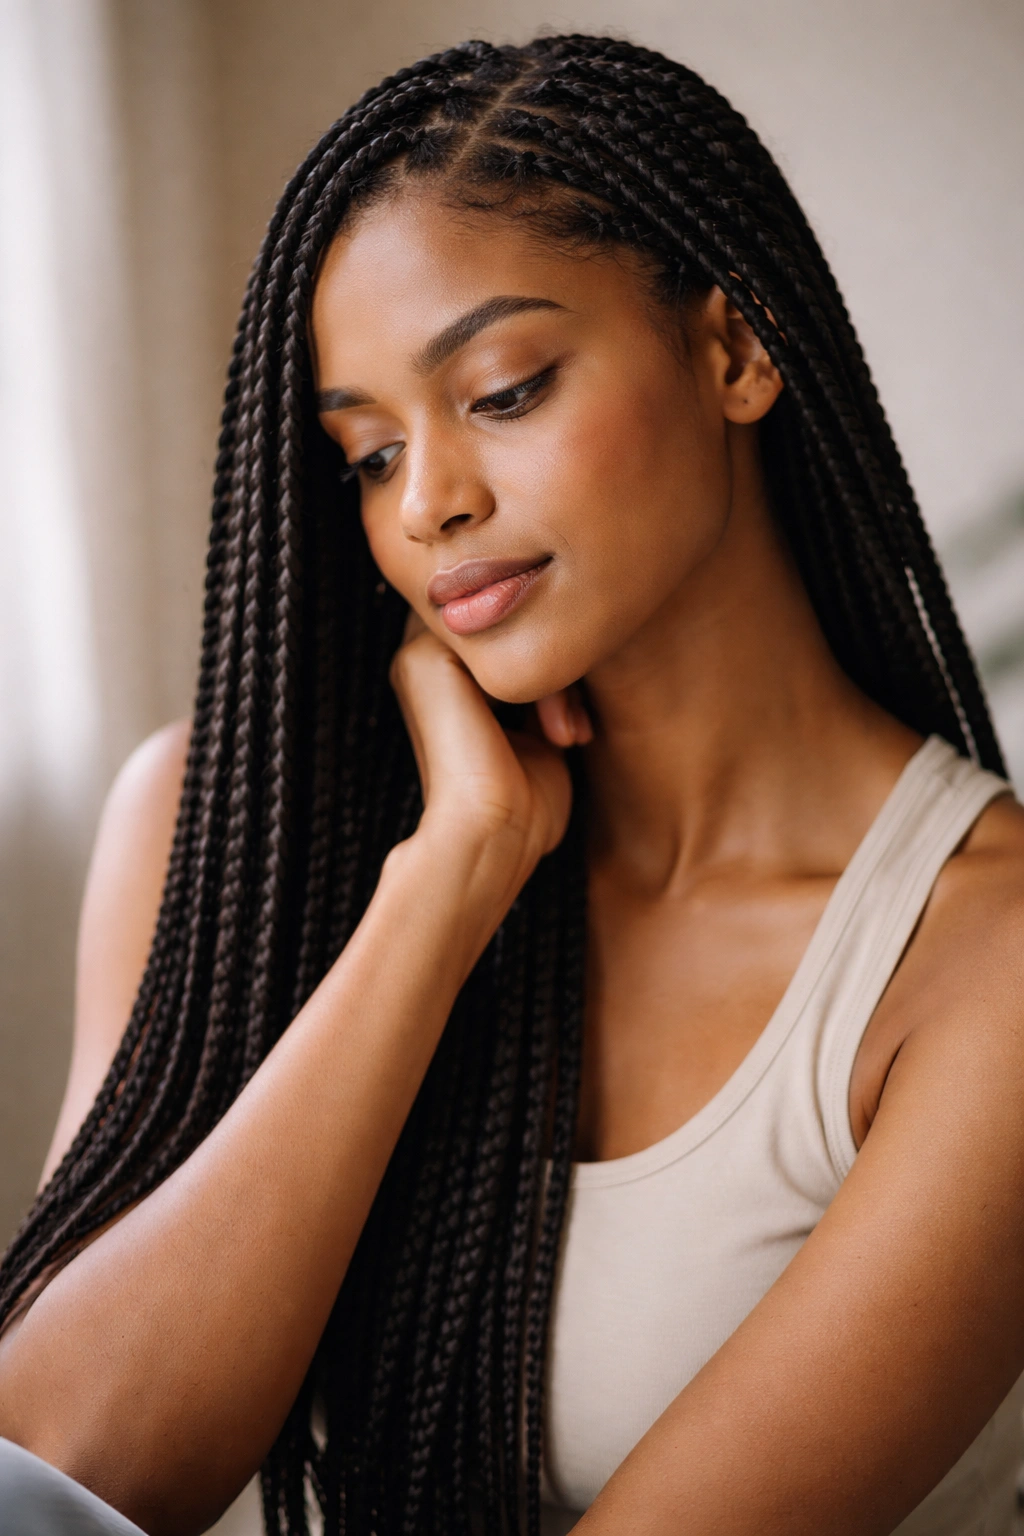
Box braids are arguably the most recognizable protective style, and they’ve earned that reputation honestly. They’re called “box” braids because the sections of hair are divided into square or rectangular boxes, creating a grid pattern across your scalp. When done well, this style can last 6 to 8 weeks with proper maintenance, and it keeps your curl ends tucked away from environmental damage, friction, and daily manipulation.
Why They’re Highly Protective
Box braids work because they keep hair in a contained, twisted state that doesn’t allow for tangling or breakage from friction. Your curl ends—the most vulnerable part of your hair—are tucked inside the braid where they’re protected from harsh weather, rubbing against fabric, and the constant styling and restyling that loose curls endure. Because the braids are installed individually, there’s less daily manipulation compared to other styles, which means less stress on your curls overall.
What You Need to Know Before Installing
- Braid size matters: Thicker braids put less tension on the scalp and may feel more comfortable for extended wear. Thinner braids look sleeker but can feel heavier and create more tension at the roots, especially if your hair is dense.
- Installation time is real: Box braids take 4 to 8 hours to install, depending on your hair thickness, braid size, and braider’s skill. Budget accordingly and don’t try to rush the process.
- Tension should be comfortable: If your scalp is burning or aching after 24 hours, the braids are too tight. A good braider can create beautiful, neat braids without creating excessive tension.
- Moisture underneath matters: Your hair still needs hydration under the braids. Use a lightweight leave-in conditioner or braid spray every 3 to 4 days to keep your curls hydrated throughout the style.
Pro tip:
Sleep on a silk or satin pillowcase even with braids installed. This reduces frizz, helps your braids last longer, and prevents unnecessary friction that can cause the hair wrapped around the braid to break.
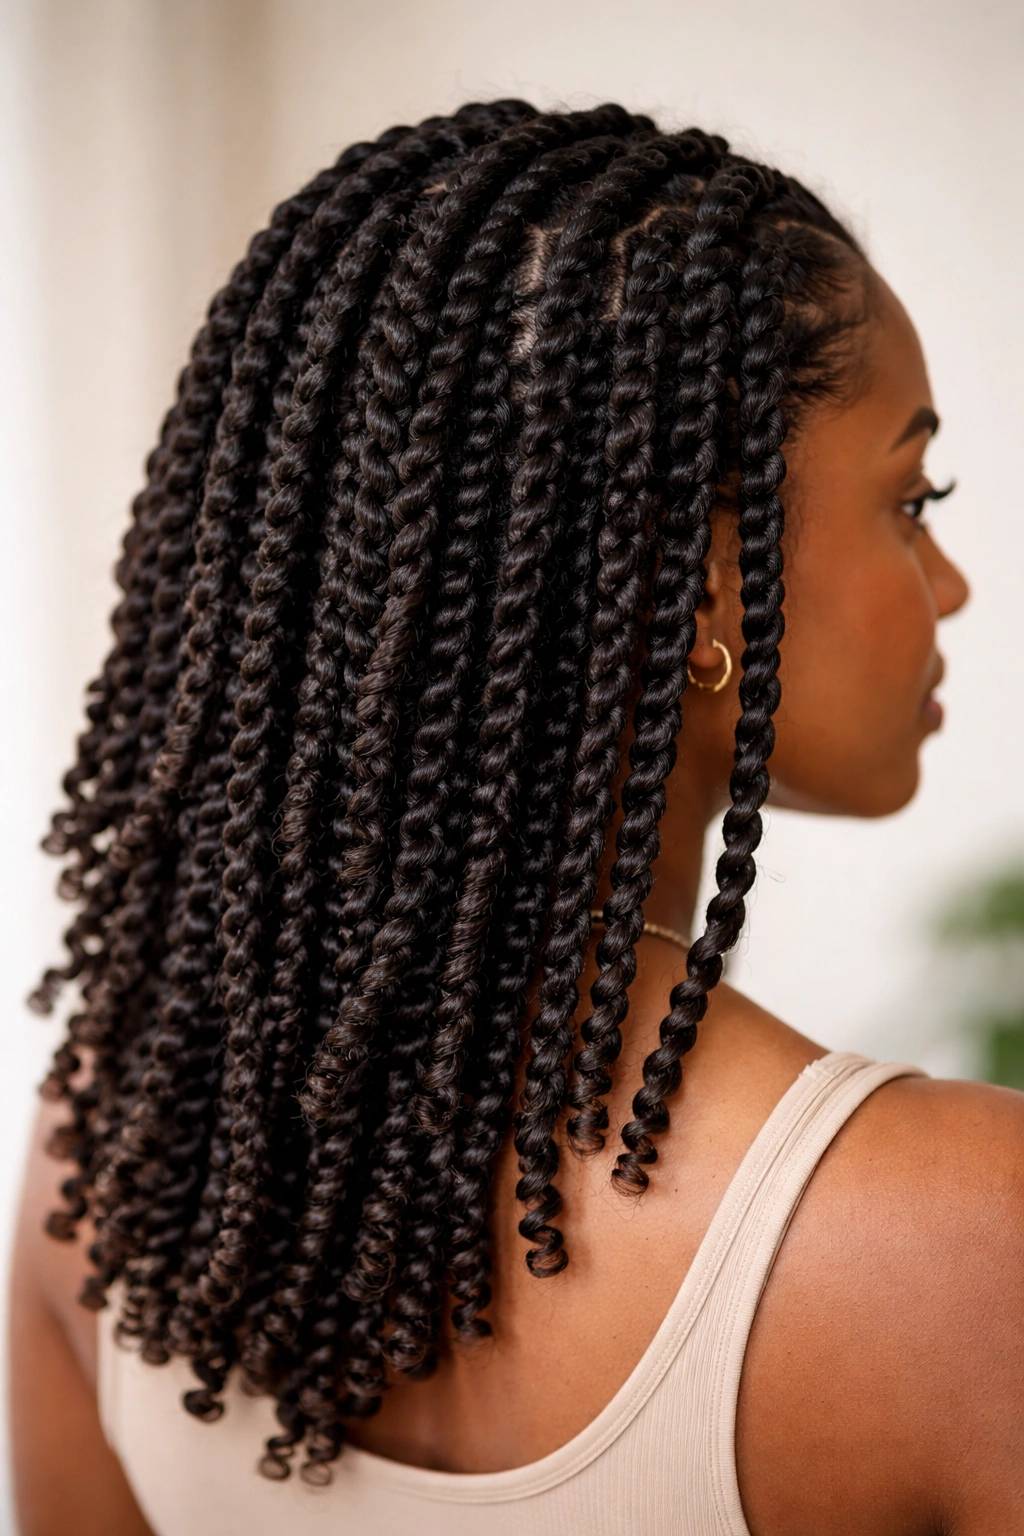
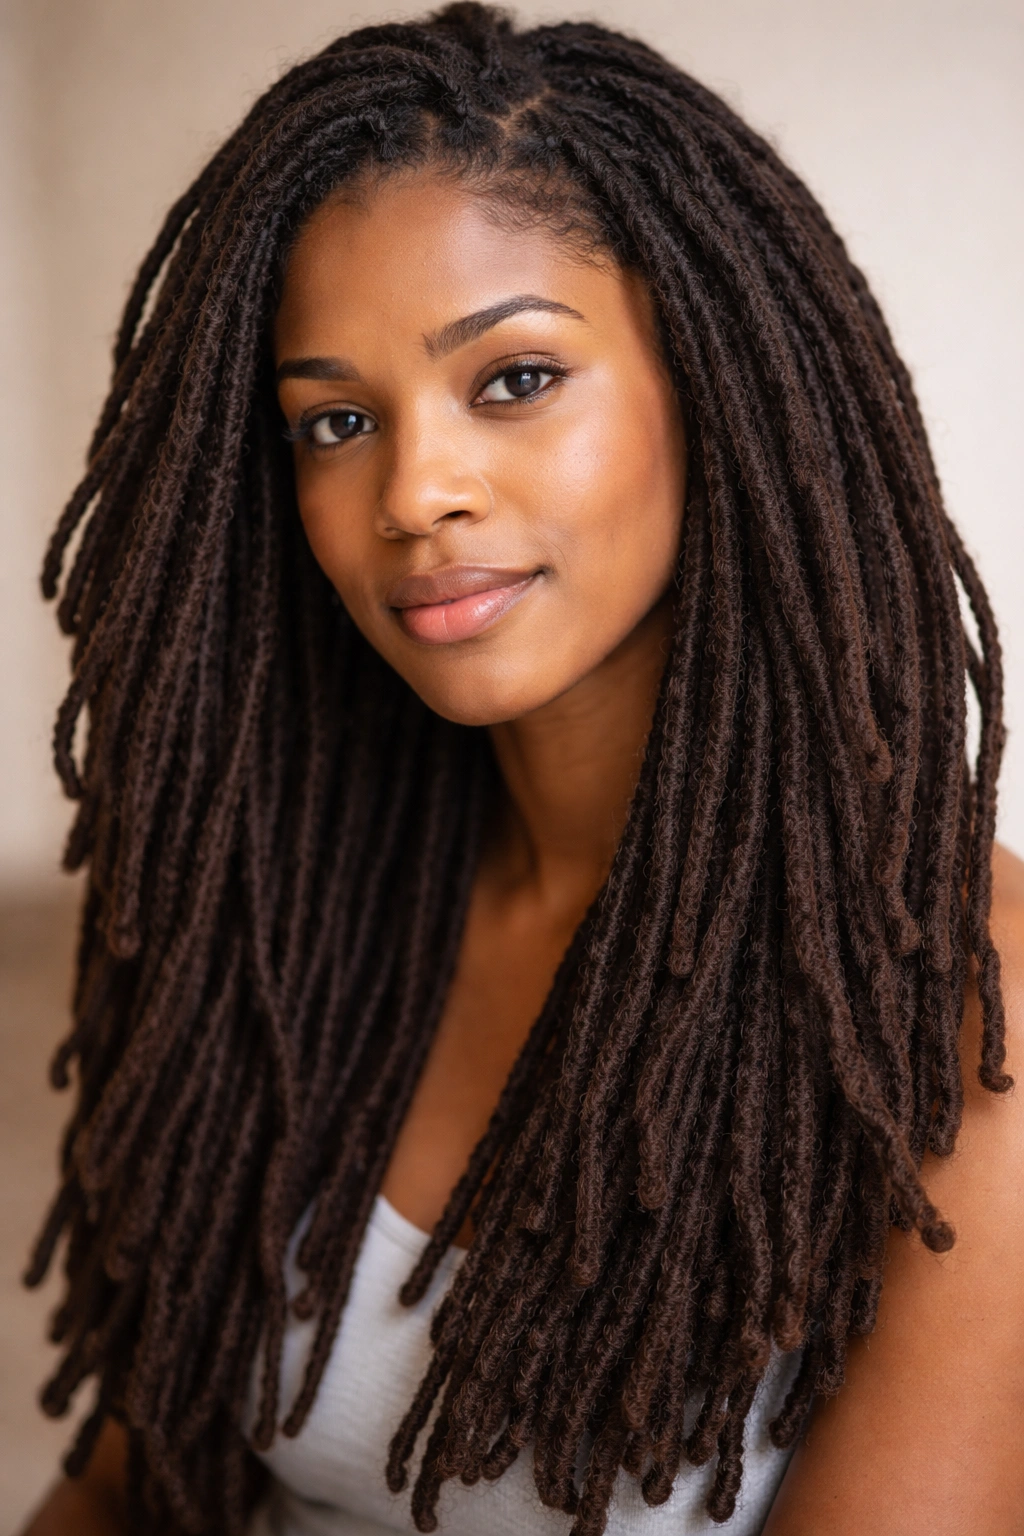
2. Passion Twists
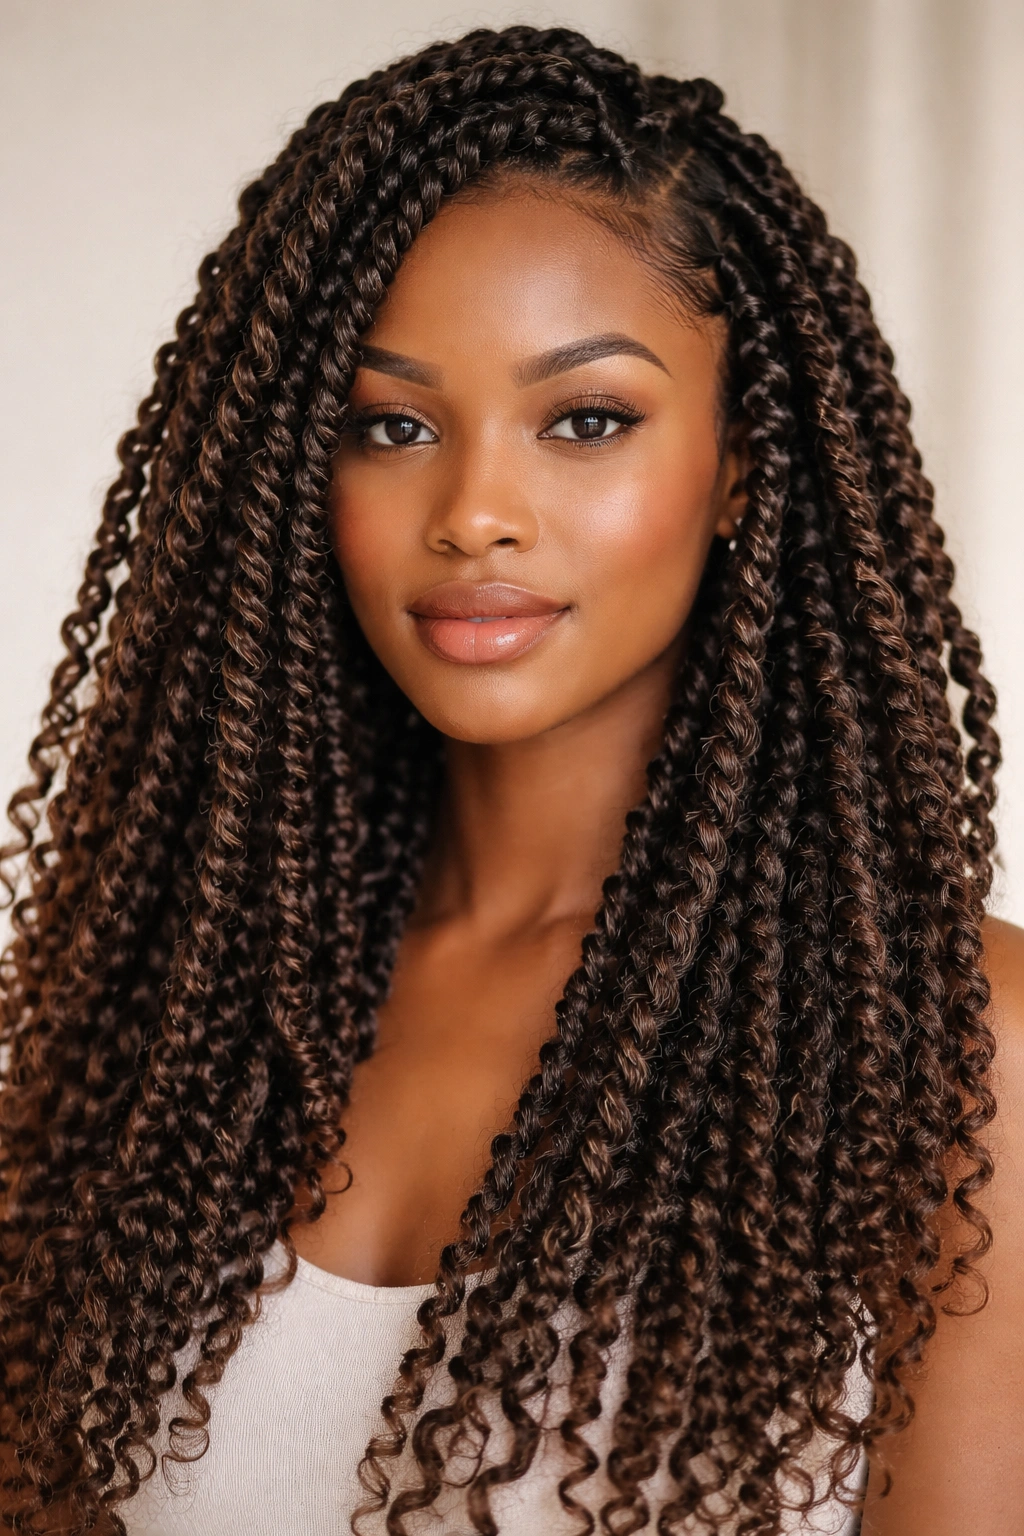
Passion twists have exploded in popularity because they look intricate and beautiful while being surprisingly gentle on your hair and scalp. They’re made by twisting your hair together with synthetic hair or human hair extensions, creating a rope-like texture that’s softer and finer than box braids. The result is a style that looks voluminous, feels lightweight, and can actually be quite comfortable for 4 to 6 weeks of wear.
How They Protect Your Curls
The beauty of passion twists is that they’re installed with a gentler tension than box braids, making them ideal if you have a sensitive scalp or finer hair. Your hair is still protected from external damage and constant manipulation, but the twists themselves are softer to the touch and less likely to create the tension marks that tighter styles can leave. The softer texture also means there’s typically less stress on your edges.
Installation and Maintenance
- Installation requires some skill: Passion twists need to be twisted properly so they don’t unravel, which means finding an experienced braider is important. The twists should spiral smoothly without loose sections that will frizz quickly.
- Synthetic vs. human hair: Synthetic passion twists are more affordable and colorful, but they don’t stretch or breathe as well. Human hair blends in more naturally with your own curls and typically lasts longer without tangling.
- They loosen over time: Unlike box braids, passion twists naturally loosen and soften as you wear them. By week 5 or 6, they may start to unravel or look frizzy. Plan to remove them before they get too loose and matted.
- Moisturizing strategy: Because the twists are created with extensions, your hair beneath has less airflow. Spray your twists with a lightweight braid spray every 4 to 5 days and focus moisture on your natural hair roots.
Worth knowing:
Passion twists feel softer initially, but they can tangle more easily than box braids as they age. Keep your twists separated at night (sleep with them in a loose pineapple or braid) to prevent them from tangling together.
3. Crochet Braids
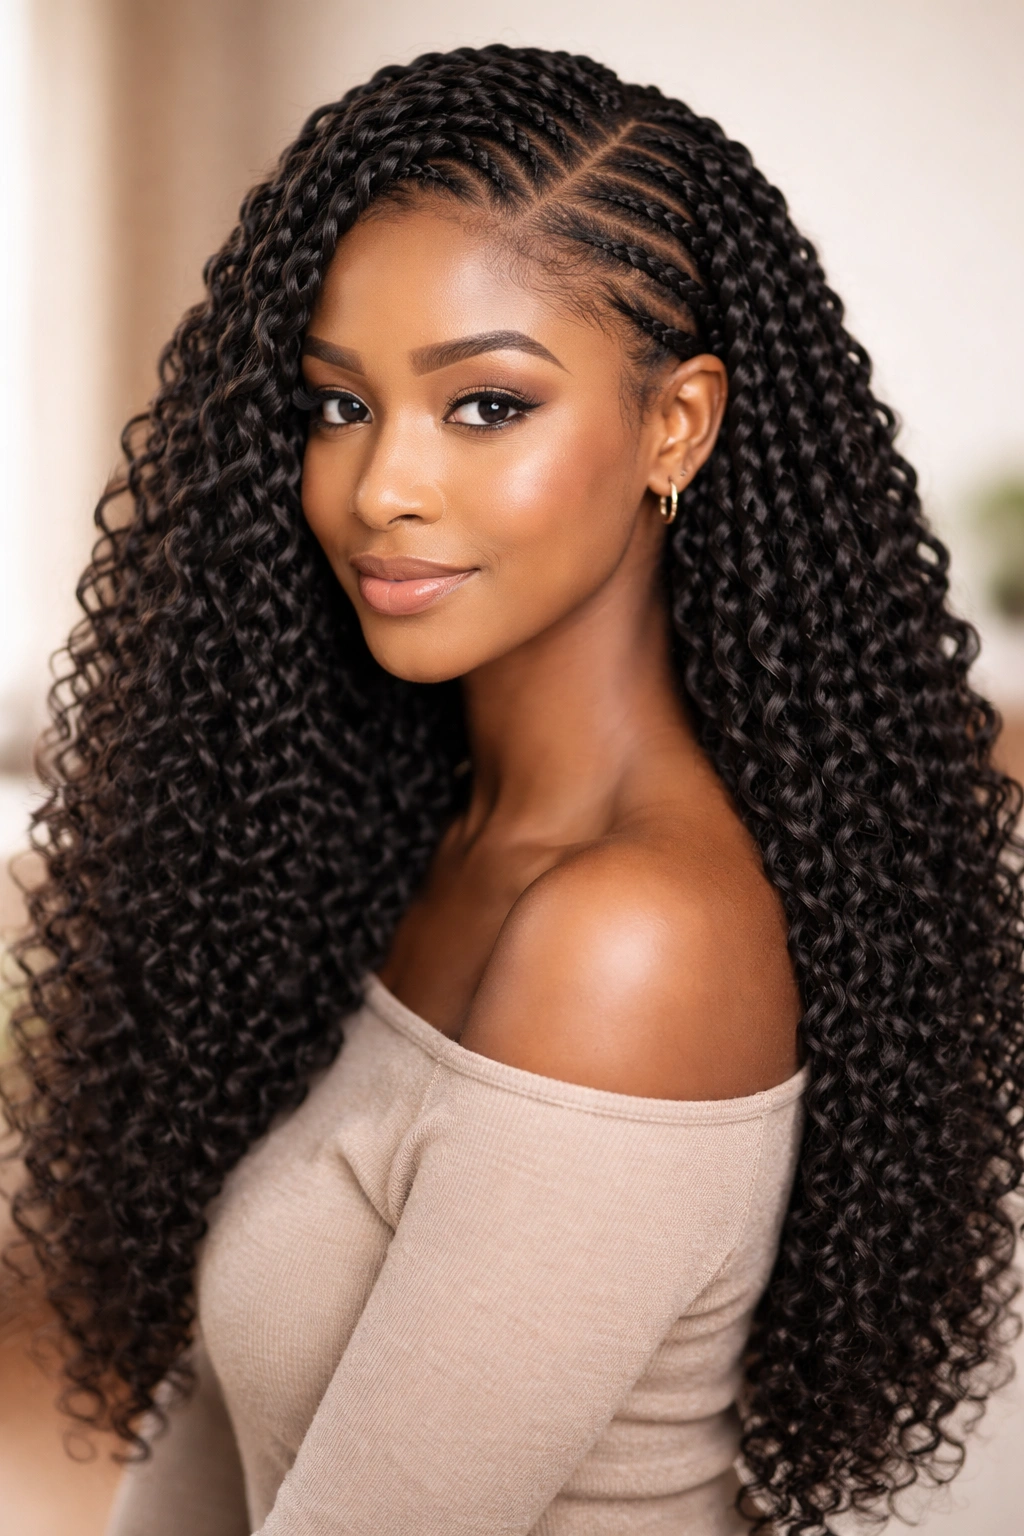
Crochet braids use a crochet hook to attach pre-made braids or twists to your hair, creating a protective style that takes just 1 to 3 hours to install—a huge time advantage over hand-twisted styles. You can switch up your look by using different braid styles, textures, and colors, which makes this style incredibly versatile while still being genuinely protective.
The Protective Power of Crochet Braids
Because the style is installed with tension using a crochet hook, your natural hair can remain in a protective state for 4 to 8 weeks with minimal manipulation. Your curl ends are encased in the crochet braids, protected from friction and environmental stress. The faster installation time also means you’re spending less time sitting with tension on your scalp, which can be a relief if you’re sensitive to the scalp tension of traditional braiding.
Installation and Material Choices
- Foundation matters: The base braids that hold the crochet hair need to be neat and secure. Poor foundation braids will cause your crochet hair to sit unevenly and potentially slip out over time.
- Pre-made braid options: You can use pre-made straight braids, wavy braids, curly braids, or textured bohemian-style braids. Your choice should complement your natural curl pattern and create a cohesive look.
- Installation tension: Crochet installation should never feel like your braider is literally yanking your hair. The tension should be controlled, and you should feel secure attachment without scalp soreness.
- Hair attachment quality: Higher-quality synthetic or human hair extensions will last longer without tangling, frizzing, or breaking. Cheaper options may mat and tangle within 2 to 3 weeks.
Quick facts:
- Installation speed: 1.5 to 3 hours depending on the amount of hair and technique used
- Typical wear length: 4 to 8 weeks with proper care
- Best for: People who want a quick protective style with flexibility in texture and color
- Maintenance ease: Minimal manipulation needed; most people sleep in a pineapple or bonnet
Pro tip: If your hairline feels tender after crochet installation, apply a light oil to the edges and avoid pulling on the style too much. If pain persists beyond 24 hours, remove the style—it’s a sign of too much tension.
4. Flat Twists
Flat twists look like cornrows but are made by twisting two sections of hair together instead of crossing three sections, which creates a flatter, more elegant appearance. They’re stunning as a protective style because they look polished and intentional, they don’t require added extensions, and they’re less taxing on your hair than braids because there’s typically less tension involved.
Why Flat Twists Are Excellent for Protection
Flat twists keep your hair twisted and contained, reducing tangles and breakage from daily friction and manipulation. Because they’re made with just your natural hair, there’s no added weight or tension from extensions. This makes them ideal if you have finer hair, a sensitive scalp, or you’re just coming back from a period of heavy protective styling and want something gentler. They also feel lighter and move more naturally than some other styles, which many people find more comfortable for everyday wear.
Creating and Maintaining Flat Twists
- Section size and tension: Flat twists should be twisted with moderate tension—tight enough to stay neat for 4 to 6 weeks but not so tight that your edges ache. The thickness of each twist should be consistent across your head so the style looks intentional and even.
- They work best on already-textured hair: If your curls are still very wet or soaking when you install flat twists, they’ll take forever to fully dry and may develop mildew or mold underneath. Twist damp-to-wet hair (not soaking wet) so they dry quickly.
- Moisture penetration: Because flat twists are your natural hair twisted together, moisture can actually penetrate better than in styles made with extensions. This is one of the genuine advantages—your hair is protected but still hydrated.
- Styling options: Flat twists can be worn loose for a romantic, undone look, or you can gather them into an updo or puff at the back of your head, giving you styling flexibility within the protective style.
What to watch for:
Flat twists can loosen noticeably after 4 to 5 weeks of wear, especially at the ends. Plan to remove them before they become too frizzy and unraveled, or consider touching them up at the ends if you want to extend the style.
5. Bantu Knots
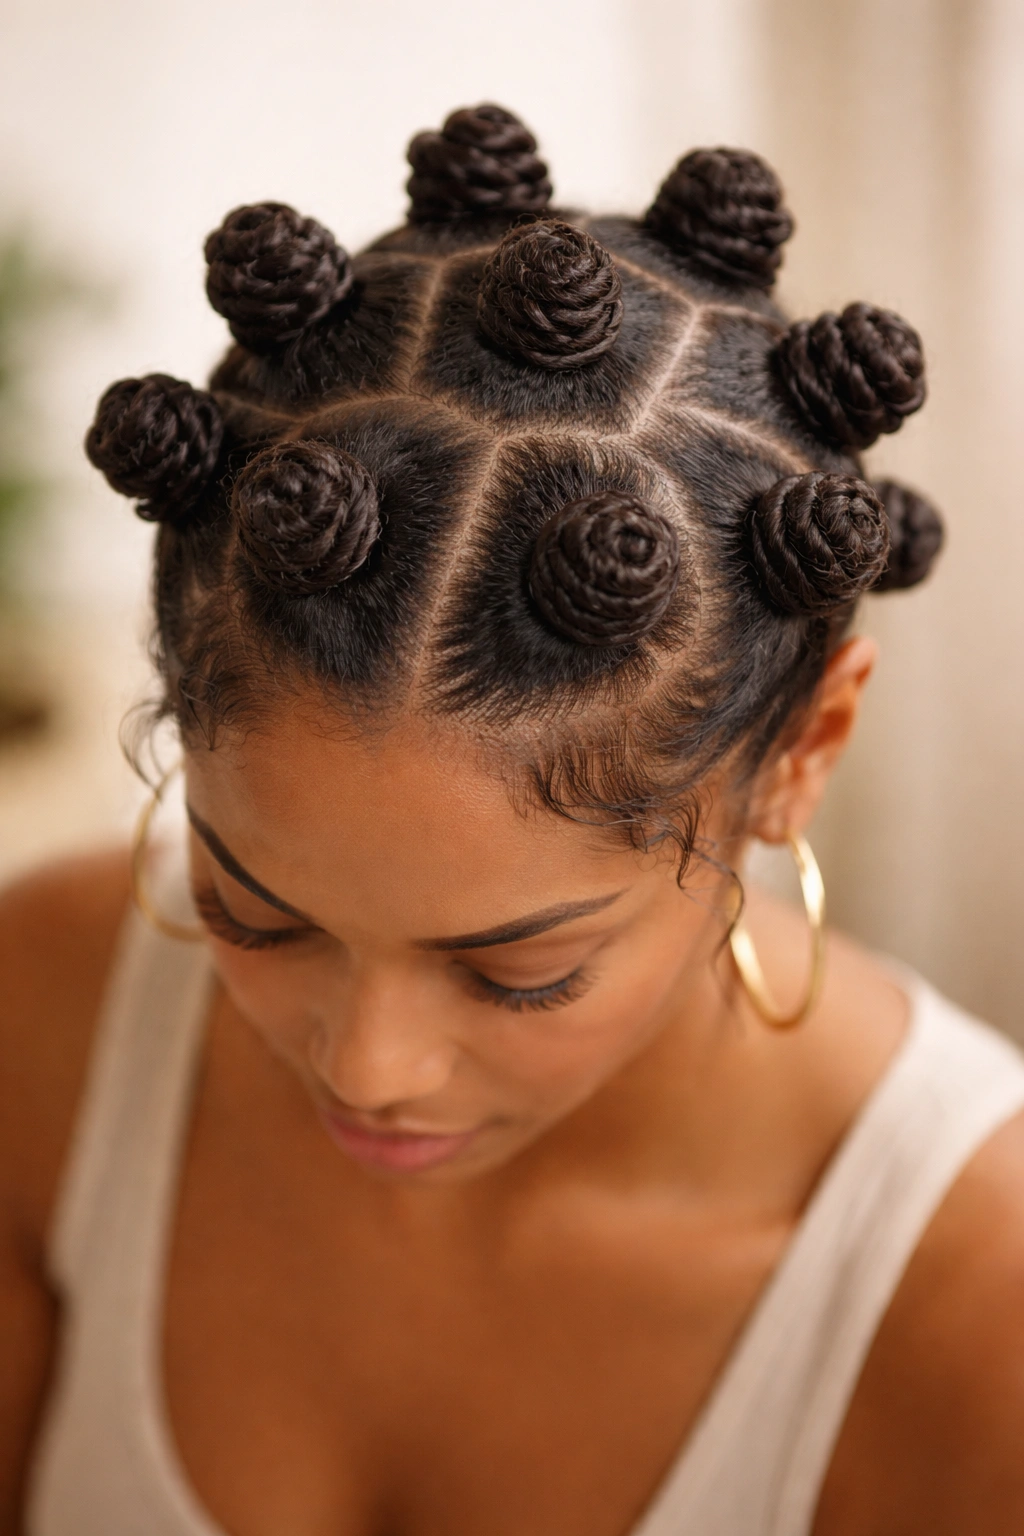
Bantu knots are an ancient protective style where you twist your hair into a spiral and then coil it at the base of the spiral, securing it in place with the twisted hair itself. When you undo Bantu knots, you get gorgeous, defined curls that look like you just left a salon—but the real magic is the protection they provide for weeks beforehand.
How Bantu Knots Protect and Define
Because your hair is twisted and coiled, it’s in a protected state that minimizes breakage and frizz while the knots themselves create a beautiful curl definition that actually comes from the structure of the knot, not from heat or chemicals. Your curl ends are completely enclosed inside the knot, shielded from environmental exposure and friction. Bantu knots are also a pure protective style made with just your natural hair, no extensions, which means less tension and weight overall.
Installation, Wear Time, and Results
- Installation is time-intensive: Bantu knots take 2 to 4 hours to install, depending on how many knots you’re doing and the size of your hair sections. Larger knots install faster but create looser curls when undone; smaller knots take longer but create tighter curl definition.
- Wear time before takedown: Most people wear Bantu knots for 1 to 3 weeks before taking them down to enjoy the curl-out. However, you can wear them longer for protection; they don’t necessarily need to be undone at a specific time.
- The curl definition: When you undo Bantu knots, the size and tightness of the curl you get depends entirely on how tight the knot was twisted and coiled. Loose knots create wavy curls; tight knots create very defined, tight curls. This gives you some styling control.
- Scalp health: Because Bantu knots use only your hair and are typically installed with moderate tension, they tend to be gentler on the scalp than braids with extensions. Many people report Bantu knots feeling comfortable even after 3 to 4 weeks.
Insider note:
If you have very thick, dense hair, Bantu knots can feel heavy and create tension at the roots. Try installing fewer, larger knots (maybe 10 to 15 instead of 30) to reduce the weight and tension while still getting protective benefits.
6. Puffs and Puff Hairstyles
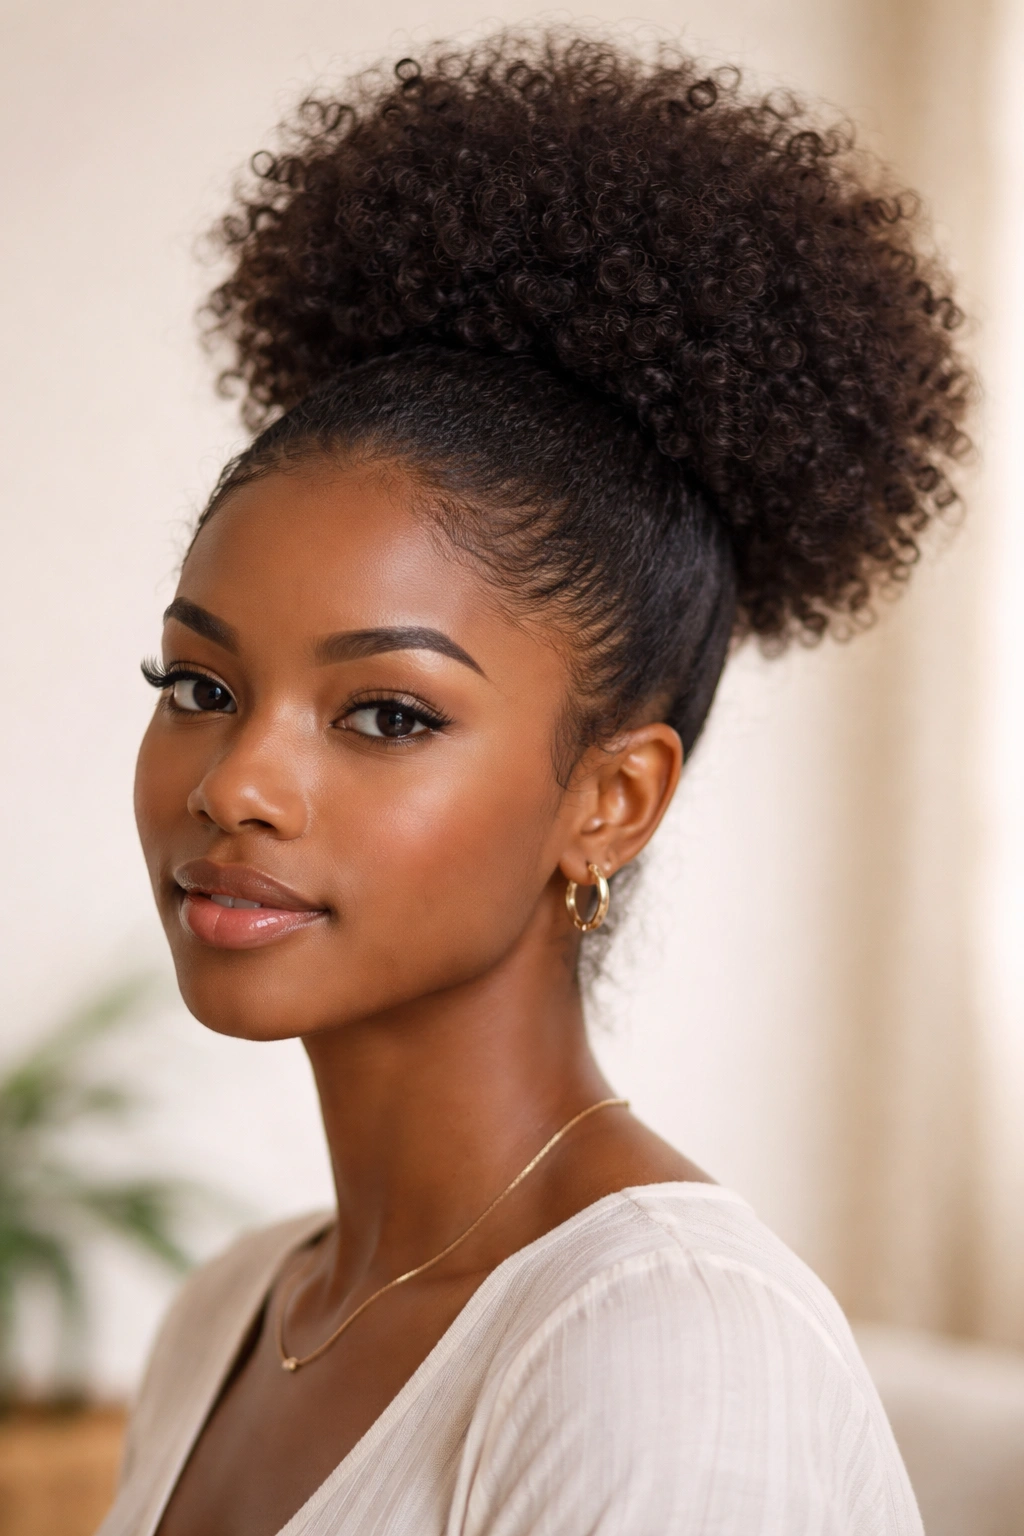
A puff is simply your curly hair gathered and secured at the crown or back of your head into a rounded, voluminous shape. It’s one of the easiest protective styles to install (just takes a few minutes with a scarf and some product), and it keeps the majority of your hair tucked up and protected while still allowing flexibility and movement in your daily life.
The Simplicity and Effectiveness of Puffs
What makes puffs genuinely protective is that you’re keeping most of your hair contained in one place, reducing daily manipulation, tangling, and friction from rubbing against clothing or surfaces. Because puffs require no braiding or twisting of the hair itself, there’s minimal tension and zero risk of breakage from tight styles. You can wear a puff for an entire week, shower in it (with a shower cap), and readjust it as needed without causing damage.
Creating and Maintaining Puffs for Weeks of Wear
- Puff placement options: High puffs at the crown look youthful and playful; low puffs at the nape feel more elegant. Side puffs are also a gorgeous option that looks intentional and styled. The placement you choose should be comfortable for sleeping and sitting.
- Base products and techniques: Use a lightweight smoothing cream or edge control on the base to control frizz and keep the puff neat. Avoid heavy butters or pomades that will weigh your hair down. A silk scarf worn overnight helps keep the puff smooth and protected while you sleep.
- Moisture strategy: Puffs are excellent for moisture retention because your hair is gathered but not twisted tight, allowing products to penetrate. Use a leave-in conditioner on the bulk of your hair before puffing up, and mist daily or every other day to maintain hydration.
- Wear time and refreshing: You can wear the same puff shape for up to a week if you keep moisture consistent and sleep with it protected. After a week, take the puff down, rehydrate your hair with a deep conditioner treatment, and then re-puff it for another week.
Quick facts:
- Installation time: 5 to 10 minutes once you have the technique down
- Comfort level: Most puffs are comfortable enough to wear daily
- Best for: Busy lifestyles, minimal manipulation, easy protective styling
- Styling versatility: Works as a base for clips, bands, scarves, and other accessories
Worth knowing: High puffs can create tension on your hairline if secured too tightly. Use a soft elastic or scarf to gather the base, and avoid pulling so hard that your hair strains or your edges feel tender.
7. Twists (Two-Strand Twists)
Two-strand twists are the OG protective style—your hair is divided into sections and each section is twisted by wrapping two strands around each other in a spiral. They’re protective, beautiful, relatively quick to install compared to braids, and they create gorgeous waves or curls when you take them down.
Why Twists Are Such Effective Protectors
Twists keep your hair twisted and contained, which dramatically reduces tangling, frizz, and the friction that causes breakage. Because the style is made with just your natural hair (no extensions), there’s no added weight or tension beyond what the twist itself creates. Twists also allow your hair to breathe better than styles with extensions, which means moisture and products can penetrate more effectively. You can wear twists for 4 to 8 weeks, and they actually improve over time—the longer you wear them, the more defined they become.
Installation and Long-Term Wear
- Installation speed: Two-strand twists take 2 to 4 hours to install, making them faster than box braids but requiring more skill than some other styles.
- Section size and twist tightness: Larger sections create thicker twists that install faster and are gentler on the scalp. Smaller sections create finer, more intricate twists that look neater but require more time and can feel heavier overall. Medium sections are often the sweet spot.
- Moisture retention: Because twists have good airflow and are made of just your hair, moisture actually penetrates well. Spray your twists with a lightweight leave-in conditioner or braid spray every 3 to 4 days.
- Frizz management: Twists naturally frizz and loosen over time. Sleep on a silk or satin pillowcase and consider wearing a bonnet or pineapple to keep them neat. By week 6 to 8, they’ll feel soft and lived-in rather than defined.
Pro tip:
If your twists unravel at the ends early, seal them with a tiny bit of clear nail polish on the very ends, or tie a small invisible rubber band around each twist tip. This keeps them from unraveling prematurely while you’re wearing them.
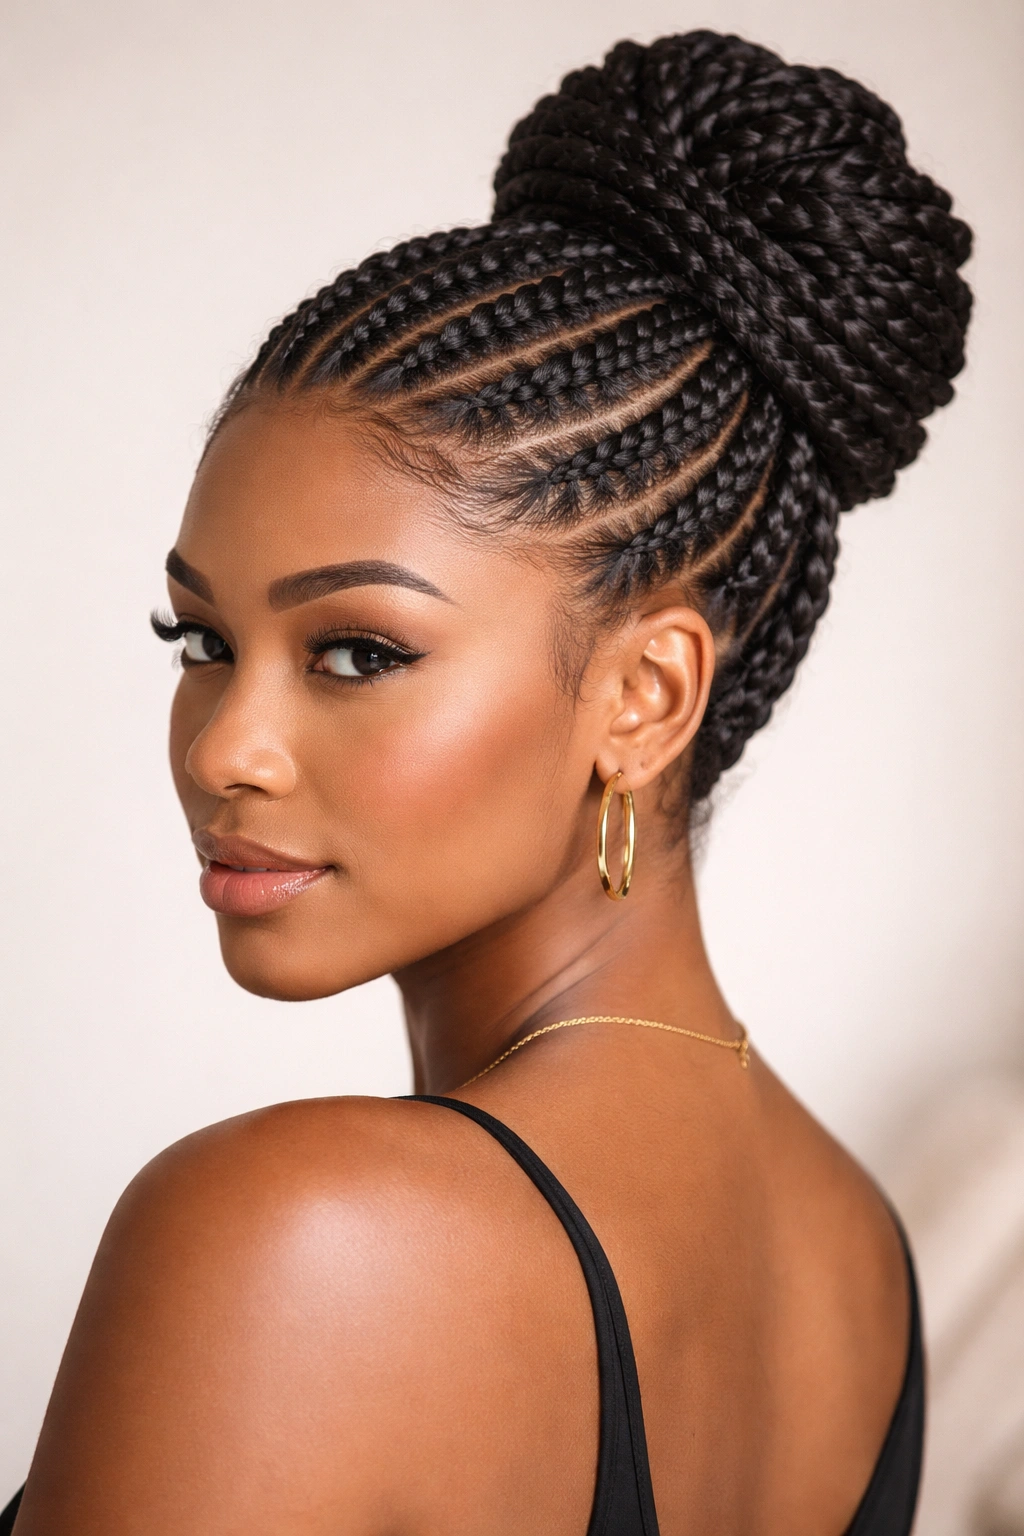
8. Braided Buns and Twisted Buns
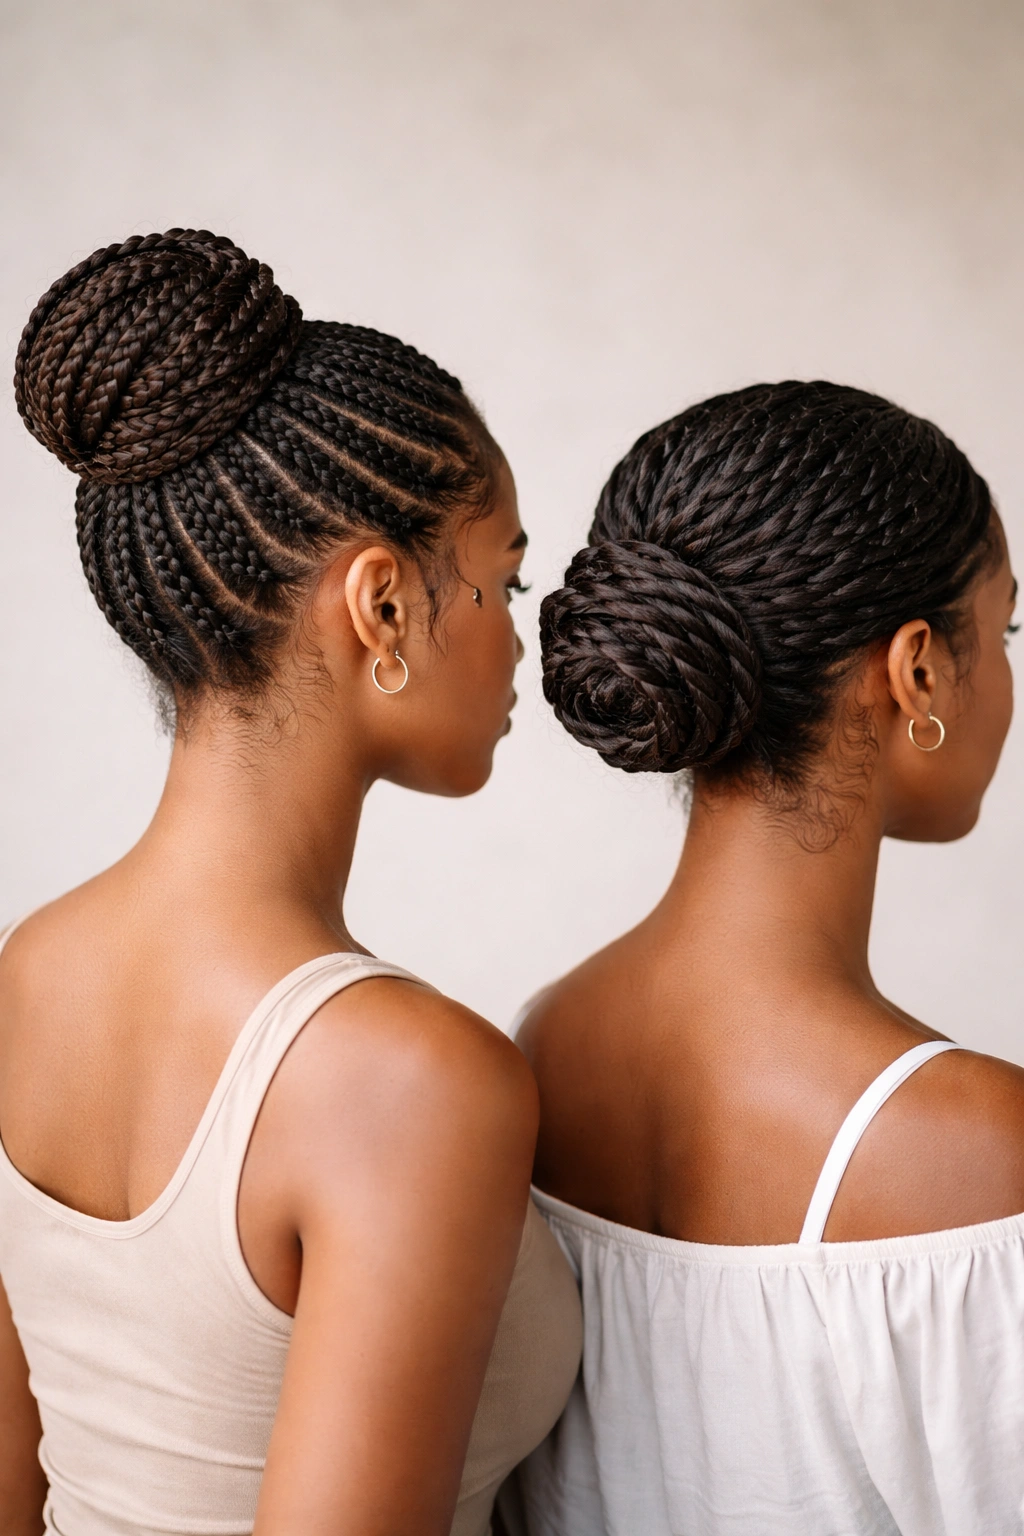
Taking your braids or twists and securing them into a bun is the ultimate protective style—you’re protecting your hair with the braid or twist itself, and then you’re tucking all of that up and away into a compact bun, which minimizes exposure and manipulation even further. This works whether you have box braids, crochet braids, flat twists, or two-strand twists as your base.
How Buns Amplify Protective Benefits
A bun created from braids or twists is protection on top of protection. The braids or twists themselves are keeping your hair twisted and protected, and then gathering them into a bun keeps the entire style compact, prevents movement and friction, and reduces daily manipulation almost entirely. This is ideal if you work in professional environments where you need a polished look, or if you want maximum protection for your hair with minimal day-to-day fussing.
Creating Comfortable, Sustainable Buns
- Bun placement matters: Low buns at the nape feel more professional and put less tension on your hairline; high buns look younger but can create tension if your braids or twists are thick and heavy. Middle buns are also an option that looks balanced and modern.
- Securing without breakage: Use a soft elastic, scarf, or hair fork to secure your bun instead of tight bobby pins that can pull and break your braids. A silk or satin scarf wrapped around the base of the bun keeps it protected and neat.
- Tension and comfort: The bun should feel secure but not painfully tight. You should be able to sleep comfortably without your scalp aching. If it’s tender after 24 hours, it’s too tight.
- Styling within the style: Braided or twisted buns can be sleek and polished, or they can be soft and undone with a few pieces loose around the face. You have flexibility in how put-together the style looks.
What to know:
If you’re wearing your braids or twists in a bun for extended periods (like daily at work), alternate the bun placement between high, middle, and low throughout the week. This distributes tension differently and prevents tension damage to any single part of your hairline.
9. Crown Braids and Halo Braids
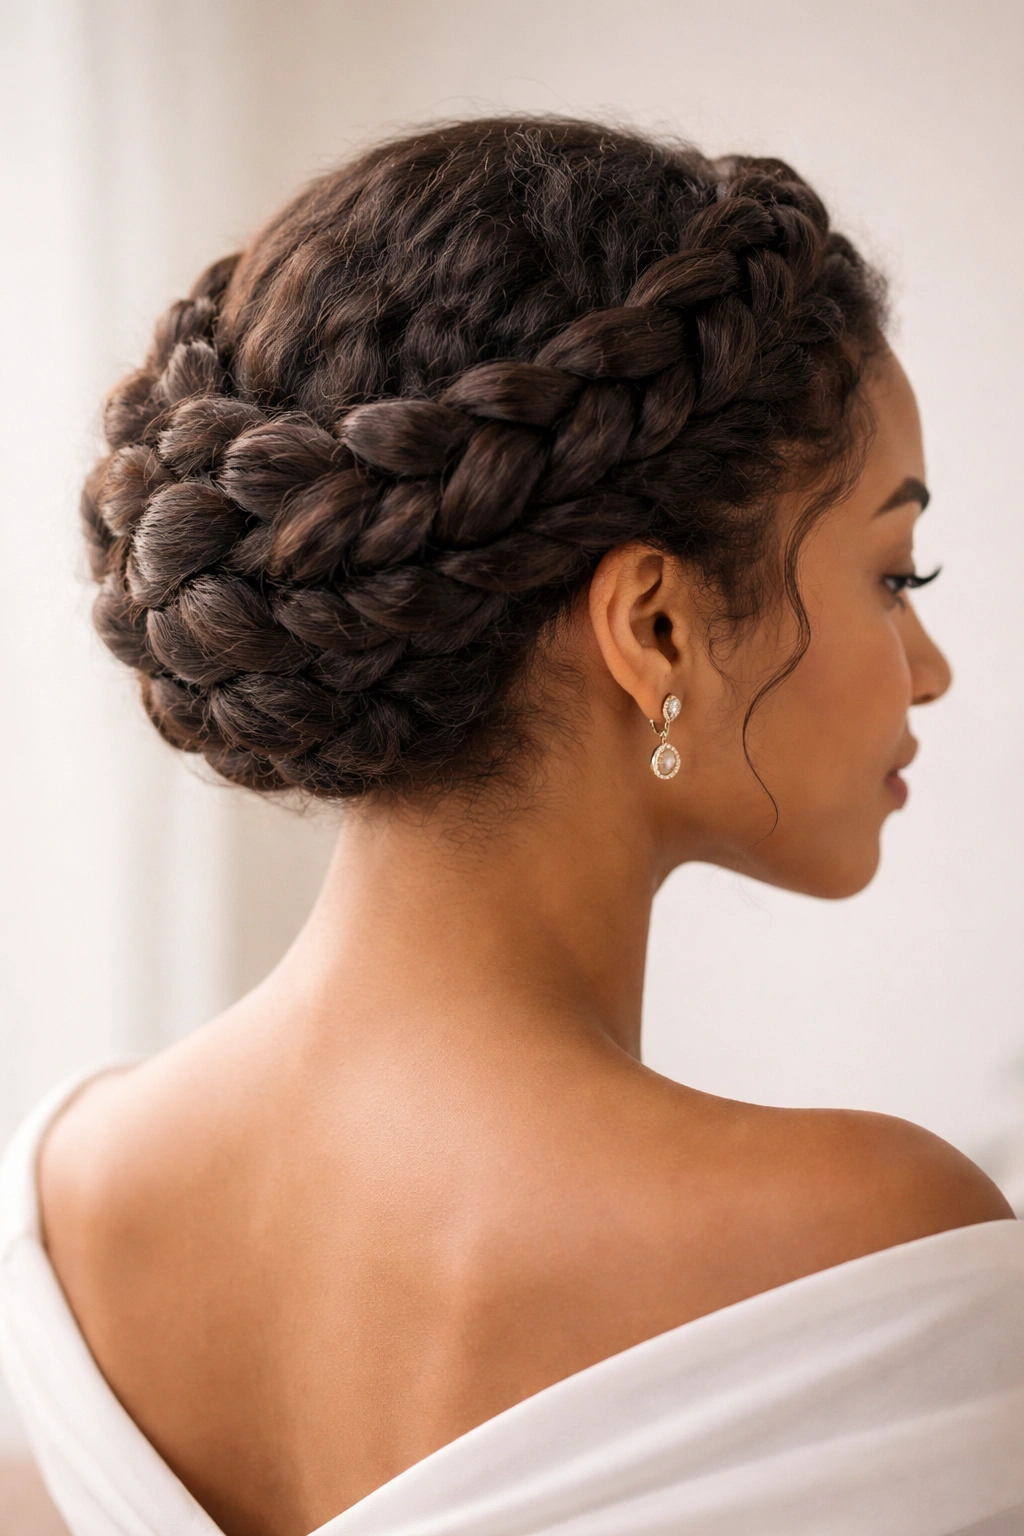
Crown or halo braids circle your head like a crown, with the braids starting at one temple and curving up and around to the other side, or starting at the nape and circling the head. This style is protective because your hair is braided and contained, but it’s also beautiful and elegant—it looks like you put significant effort into your hair, even though the protection comes naturally from the braided structure.
Protective and Aesthetic Appeal Combined
Crown braids work because the hair is braided (protected from tangling and breakage) while the placement is open and visible, making it look more intentional and styled than other protective styles. You’re getting genuine protective benefits—your hair is braided and contained—while also achieving a look that feels more aesthetically finished. The ends of the braid can be tucked underneath other sections, hidden, or pinned to fully contain them.
Installation and Styling Variations
- Single crown vs. multiple crowns: A single crown braid is faster to install and looks elegant and simple. Multiple crown braids create more visual interest and protect more of your hair in braided sections, though they take longer to install.
- Braid style options: Crown braids can be French braids, Dutch braids, or regular three-strand braids—each creates a different visual effect. French braids curve with your head and look soft; Dutch braids stand out more and look bolder.
- Securing the ends: The ends of your crown braids can be tucked underneath and pinned, wrapped around the base of another braid section, or secured with small elastics at the nape. The placement should be intentional and secure.
- Wear time: Crown braids can be worn for 5 to 7 days before needing to be redone. They look freshest in the first 3 to 4 days but remain protective even as they loosen slightly.
Insider note:
Crown braids look stunning with real hair extensions woven into the braid itself, which adds volume and creates a thicker, more dramatic crown. However, they work beautifully with just your natural hair too—it just depends on the look you’re going for.
10. Locs (If Transitioning or Maintaining)
Locs are a long-term commitment rather than a temporary protective style, but they deserve mention because they’re genuinely one of the most protective hairstyles available. Once fully matured, locs are a permanent or semi-permanent style that protects your hair 24/7 by keeping it twisted and contained, eliminating daily manipulation entirely, and creating a low-maintenance routine that’s protective by design.
Why Locs Are Ultimate Protection
Locs keep your hair in a perpetually twisted, contained state where tangling is nearly impossible and daily manipulation is nonexistent. Once your locs are established and mature, you’re essentially in a protective style indefinitely. You still need to care for and maintain locs, but the protective benefit is automatic and continuous. Many people who loc their hair report that their hair is healthier overall because it’s not being manipulated, styled, or exposed daily.
Understanding the Commitment and Timeline
- Starter locs and mature locs: Starter locs (the first 3 to 6 months) are baby locs that haven’t fully matured. They require more manipulation during the maturation process and aren’t as protective initially. Once mature, locs lock up completely and become very low-manipulation.
- Installation methods: Locs can be started through sisterlocks (very thin, requiring precision installation), traditional freeform locs (completely natural, no manipulation), or traditional locs started with interlocking, palm rolling, or braiding. The method you choose affects how they look and how they’re maintained.
- Maintenance schedule: Mature locs need to be maintained every 4 to 8 weeks, depending on growth and your preference for how neat they look. The maintenance process is quick compared to other styles but is more permanent in nature.
- Length and thickness: Locs grow with your hair, so they get longer and fuller over time. Thick locs are less maintenance-heavy than thin locs, but thin locs are more styling-versatile and work for more professional environments.
Quick facts:
- Timeline to full maturation: 6 months to 2 years depending on the method and hair type
- Protective benefit: Continuous and automatic once mature
- Reversibility: Locs can be removed, but it’s a lengthy, intensive process
- Best for: People ready for a long-term or permanent commitment to a protective style
Worth knowing: If you’re considering locs, understand that they’re a significant commitment and not easily reversible. However, they’re genuinely one of the healthiest long-term protective styles because they eliminate daily manipulation entirely.
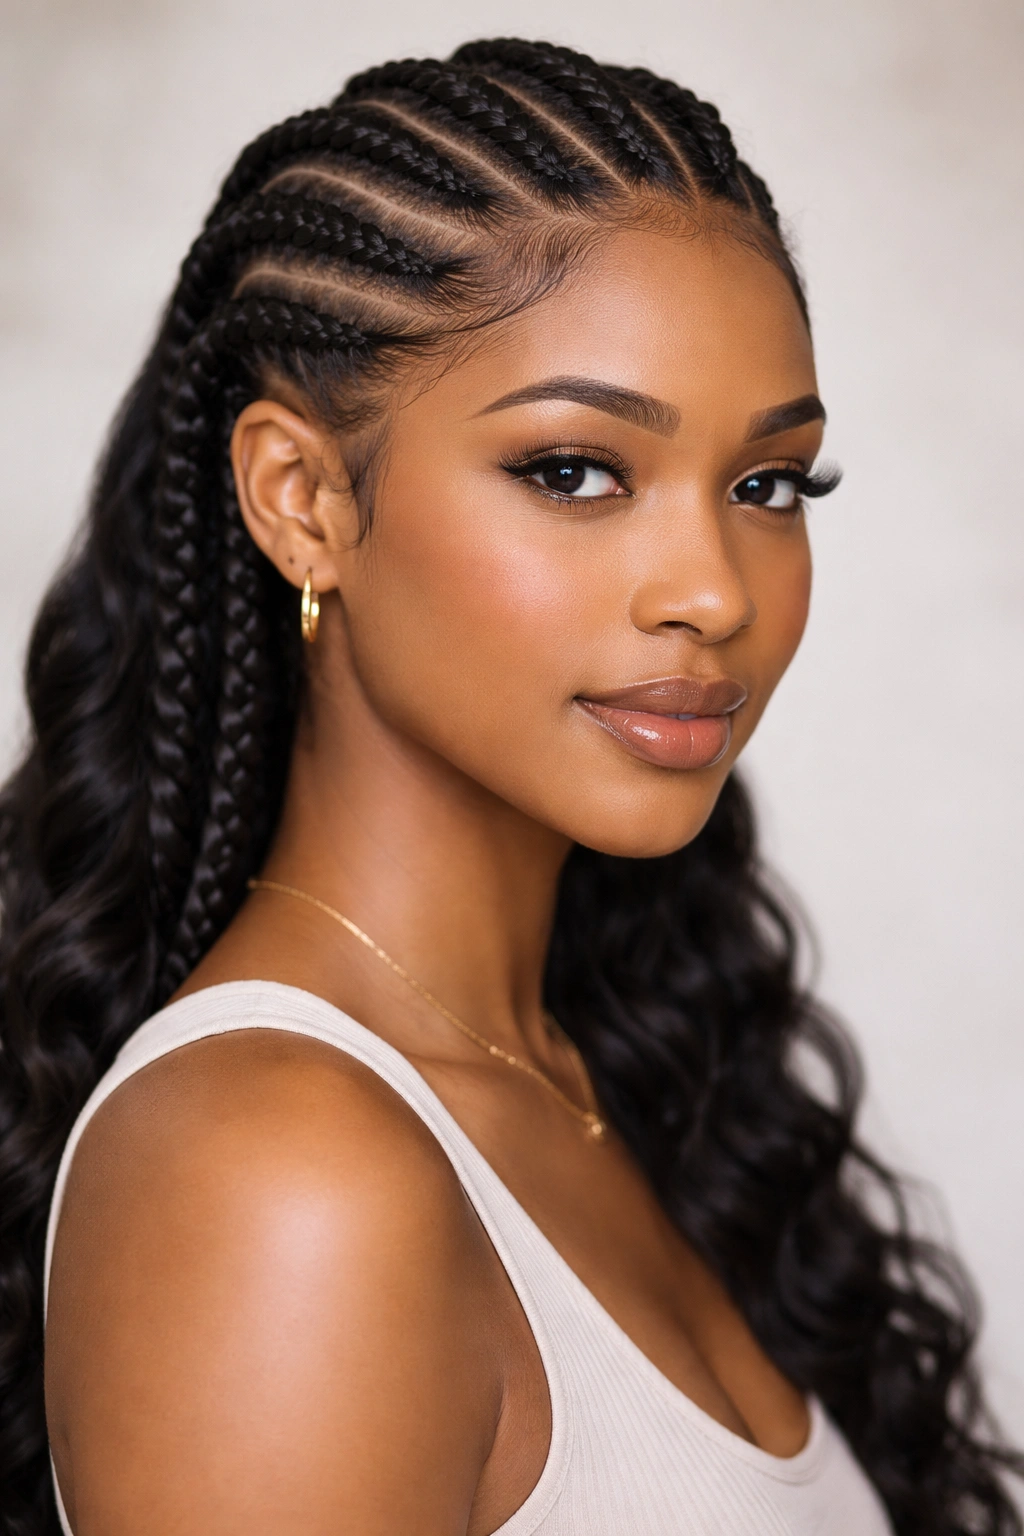
11. Cornrows and Cornrow Updos
Cornrows are braids created close to the scalp by adding hair from the scalp into the braid as you work downward. They’re protective because your hair is braided and contained, and they can be styled into various patterns and then gathered into updos for even more protection. Cornrows can be worn for 4 to 6 weeks when properly installed and maintained.
The Protective Structure of Cornrows
Cornrows keep your hair braided and close to the scalp, minimizing movement and friction that would otherwise cause breakage and tangling. Because they’re braided along the scalp, tension is distributed along the entire length of the braid rather than concentrated at the base (like with some other styles), which can make them feel more comfortable for extended wear. Gathering cornrows into an updo provides even more protection and a polished, intentional appearance.
Creating Lasting, Comfortable Cornrows
- Scalp health and tension: Healthy cornrows should be tight enough to last 4 to 6 weeks without loosening, but not so tight that they create burning, aching, or tension headaches. If your scalp hurts more than 24 hours after installation, the braids are too tight.
- Parting patterns: Cornrows can follow straight parts, curved parts, or geometric patterns. The pattern you choose should be intentional and neat. Uneven parts make the style look sloppy and create uneven tension.
- Updo options: Gather cornrows into a high bun, low bun, ponytail, or wrap them around each other at the base of your head. The updo placement should feel balanced and secure without pulling.
- Moisture underneath: Cornrows benefit from a lightweight leave-in conditioner or braid spray every 3 to 4 days. The braids sit close to the scalp, so airflow is limited and you need to be intentional about moisture.
Pro tip:
Use a scarf or bonnet at night to help keep your cornrows neat and protected from rubbing against your pillowcase. This reduces frizz and helps the style last longer.
12. Braided Extensions (Human Hair Braids)
Braided extensions made from human hair are a premium protective option where a braider creates braids using your hair blended with high-quality human hair extensions. This option gives you the protection of braids with the added benefit of styling versatility, longevity, and a finished look that blends seamlessly with your natural hair.
Why Human Hair Braids Offer Extended Protection
Human hair extensions blend in naturally with your curls, creating a cohesive style that doesn’t look noticeably extended. Because the braids are created with a blend of your hair and quality human hair, the style can last 6 to 10 weeks with proper care—longer than styles made with just your hair. The human hair can be styled, curled, straightened, or dyed, giving you flexibility within the protective style itself.
Investment, Installation, and Maintenance
- Cost consideration: High-quality human hair extensions are an investment (typically $200 to $600+ depending on quantity and quality), but they last much longer and move more naturally than synthetic options, making them worth the investment if you’ll wear braids regularly.
- Quality matters significantly: Cheap human hair can tangle easily, mat quickly, and look dull. Investment-grade human hair has a strong cuticle, moves naturally, shines beautifully, and resists tangling for the entire wear period.
- Installation time: Human hair braids take 5 to 8 hours to install because the braider is working with finer hair. It’s time-intensive but results in a beautiful, natural-looking style.
- Styling flexibility: Because it’s human hair, you can curl your braids with a curling iron, straighten sections, or style them in various ways. This versatility means you can change your look within the same protective style.
What to know:
Human hair braids need consistent moisture just like your natural hair does. Use a lightweight leave-in spray every 2 to 3 days and deep condition your natural hair underneath every week or every other week to keep everything hydrated.
Final Thoughts
The best protective hairstyle is the one that actually protects your hair while fitting into your real life—your schedule, your skill level, your hair type, and what makes you feel like yourself. Some protective styles take hours to install but last 8 weeks with minimal care. Others take 10 minutes to create but need daily attention. Some require you to visit a professional braider; others you can do at home.
The common thread across all genuinely protective styles is that they keep your hair in a contained, low-manipulation state that reduces breakage, tangling, and daily stress on your curls. Your hair needs these breaks from constant styling and exposure, which is why protective styling isn’t something to feel guilty about or see as “lazy”—it’s actually one of the smartest, most intentional things you can do for long-term curl health.
Pay attention to how your hair feels and looks under each style. If certain styles leave your edges tender or your curls dried out, adjust either the technique (less tension, more moisture) or switch to a different style that works better for your hair’s unique needs. Your curls will tell you what’s working if you listen to them.