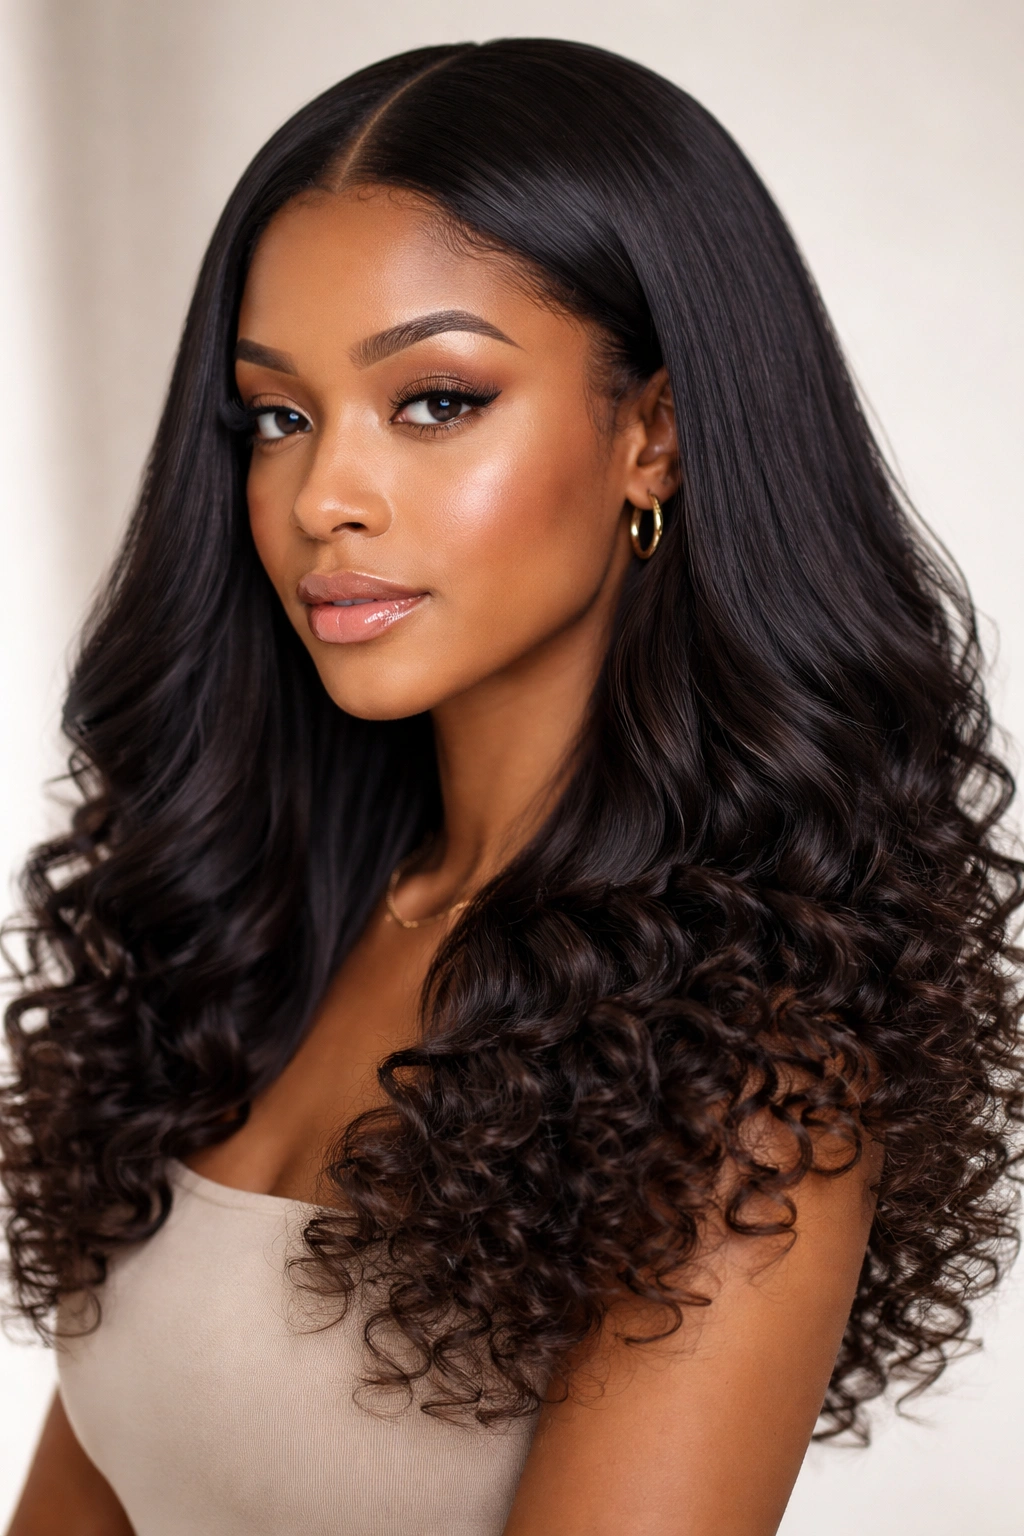
Quick weave styles have revolutionized how people with curly hair approach protective styling without the commitment of traditional weaves or the daily manipulation that natural curls demand. Unlike permanent weaves that require months of growth and maintenance underneath, quick weaves are clip-in, sew-in, or bonded extensions that you can install in an hour or two, wear for a few days or weeks, and then remove completely. For curly hair specifically, quick weaves offer something invaluable: they give your natural texture a genuine break while allowing you to experiment with different lengths, volumes, and styles that your own hair might take years to achieve. The beauty here is that you’re not damaging your curl pattern in the process—you’re protecting it during a period of rest.
The curly hair community has discovered that strategic quick weave styling can actually accelerate curl health and retention. When your curls get a break from styling, manipulation, and environmental exposure, they have time to restore moisture balance and strengthen their structure. This is especially true if you’re coming out of a season where you’ve been doing a lot of heat styling, color treating, or constant protective styling that’s caused some tension on your hairline or ends. Quick weaves also let you maintain your appearance during transition periods—whether you’re growing out color, transitioning from relaxed to natural hair, or simply managing a rough patch where your curls aren’t cooperating.
What makes quick weaves truly quick is the flexibility. You’re not locked into a style for three months. You can switch up your look weekly, remove it whenever you feel like it, and adjust based on how your natural curls are responding underneath. This article covers ten of the most versatile, curly-hair-friendly quick weave styles that work for different occasions, hair lengths, and lifestyle needs. Each style teaches you something different about how to complement curly texture, maintain your natural hair while wearing extensions, and maximize the protective benefits these styles offer.
1. The Textured Wavy Overlay
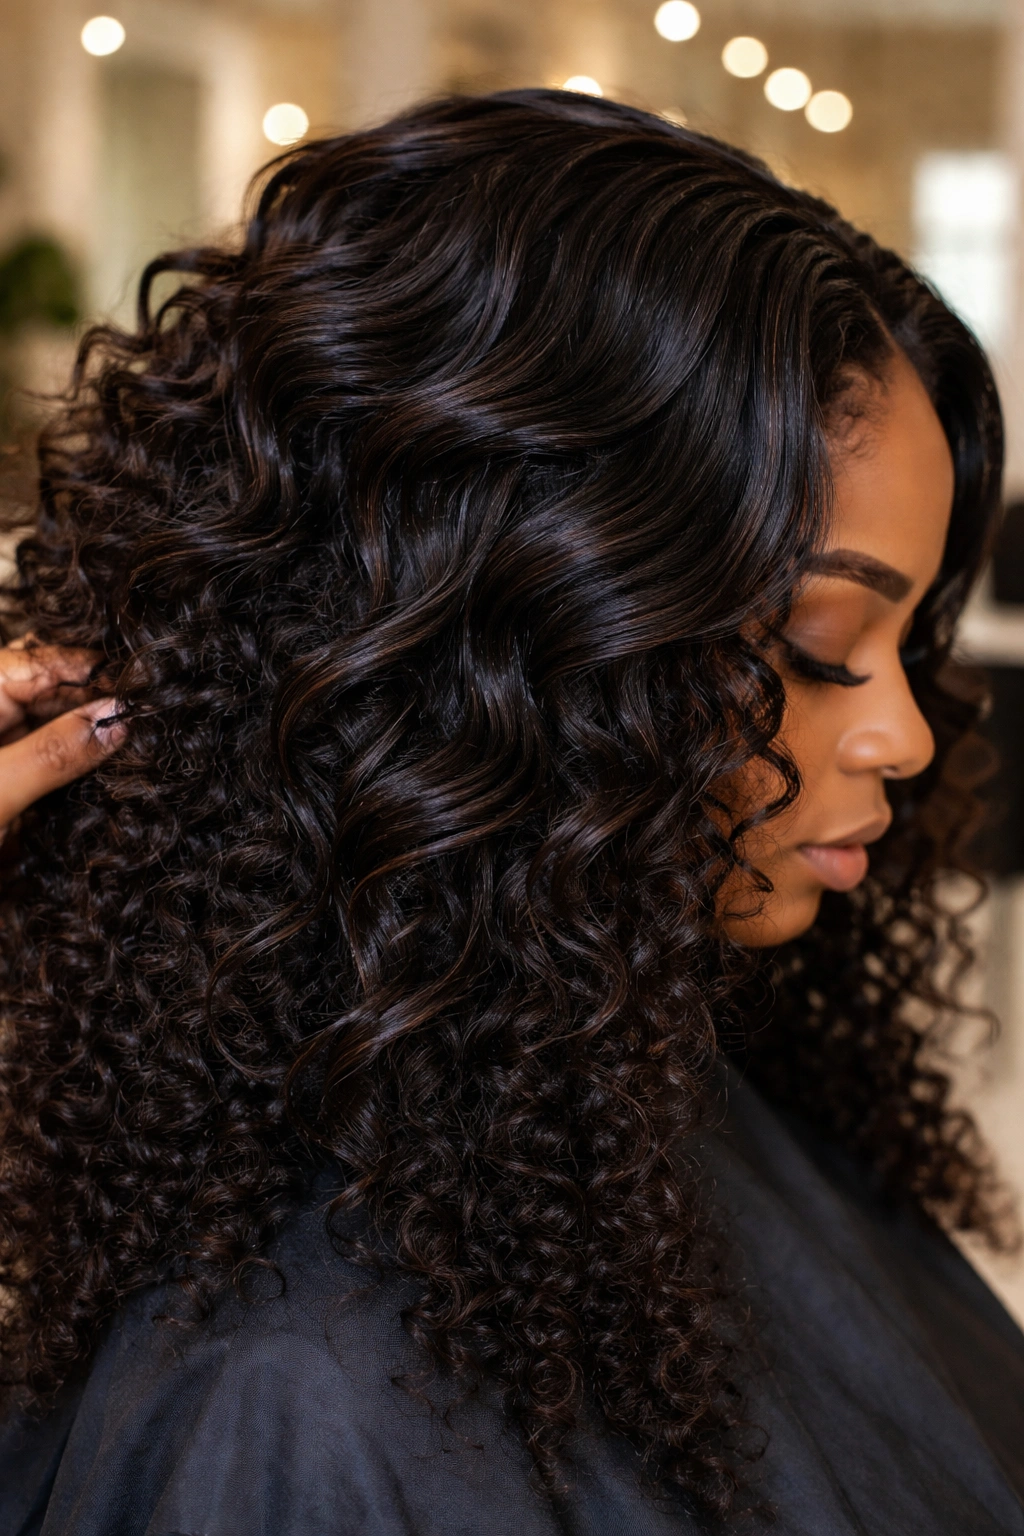
This style layers a curly or wavy quick weave over your natural curls so both textures blend seamlessly. Instead of fully covering your curl pattern, you’re creating depth and dimension by letting parts of your natural texture show through or frame the style. The quick weave here serves as a volume enhancer and a way to extend the look without completely covering what you’ve already grown. This works especially well if you have medium to thick-density curls that can hold their shape and catch light beautifully.
Why This Technique Stands Out
The textured wavy overlay works because it respects your natural curl pattern instead of fighting against it. You’re not trying to make straight hair look curly or vice versa—you’re working with what you have and amplifying it. The overlay gives you the protective benefits of a quick weave (reduced manipulation, moisture retention underneath) while still celebrating the texture you were born with. This dual-texture approach photographs beautifully and turns heads because people can immediately see it’s a thoughtful style choice, not a default protective style.
Installation and Maintenance Tips
- Part your natural curls into 4-6 large sections and secure each with a clip
- Install the quick weave base (usually a lace or silk closure) over a wig cap that covers your natural hair
- Leave the deepest, most textured parts of your curl pattern visible at your edges and throughout
- Refresh the curls in both your hair and the weave every 2-3 days with a curl cream or lightweight mousse
- Wear a silk bonnet at night to preserve both your curls and the wave pattern in the extensions
- This style typically lasts 2-3 weeks before you’ll want to remove it and give your hair another break
Pro tip: Use a curl-defining mousse on both your natural curls and the quick weave extensions together when you style—it makes the two textures blend so seamlessly that people won’t be able to tell where one ends and the other begins.
2. The Slicked-Back High Bun with Curly Ponytail

This is the go-to style when you want minimal effort but maximum polish. You slick your entire hairline straight back and secure all your hair—both natural and weave—into a high, centered bun. The curly quick weave ponytail becomes the focal point, and because everything is pulled back tightly, your edges and scalp get complete rest. This style works for everything from casual weekend wear to professional settings because the clean, geometric shape reads as intentional and well-groomed.
What Makes This Style Protective
The slicked-back approach removes all tension from your natural curls and edges, which is exactly what you need during a protective style period. Your hairline gets uninterrupted rest, and your curls underneath the wig cap aren’t being compressed or disturbed by any other styling products or methods. The tight hold also means you’re not constantly adjusting or fussing with the style throughout the day, which reduces the micro-manipulations that add up to real damage over time.
How to Nail the Execution
- Moisturize your hairline generously and apply a silicone-based edge control to smooth flyaways back
- Use a fine-tooth comb or small brush to slick hair back into a neat, centered parting
- Gather all your hair—natural and weave—at the crown in a high ponytail holder
- Wrap the ponytail around itself to create a bun shape and secure with bobby pins
- Apply extra edge control to your hairline, temples, and the nape of your neck for a polished finish
- This style can safely stay installed for 3-4 weeks if you care for your scalp properly
Worth knowing: A slicked-back bun only works if your hairline is genuinely slicked—not just partially smoothed. Spend the extra 30 seconds getting every hair in place. It’s the difference between looking polished and looking like you forgot to finish getting ready.
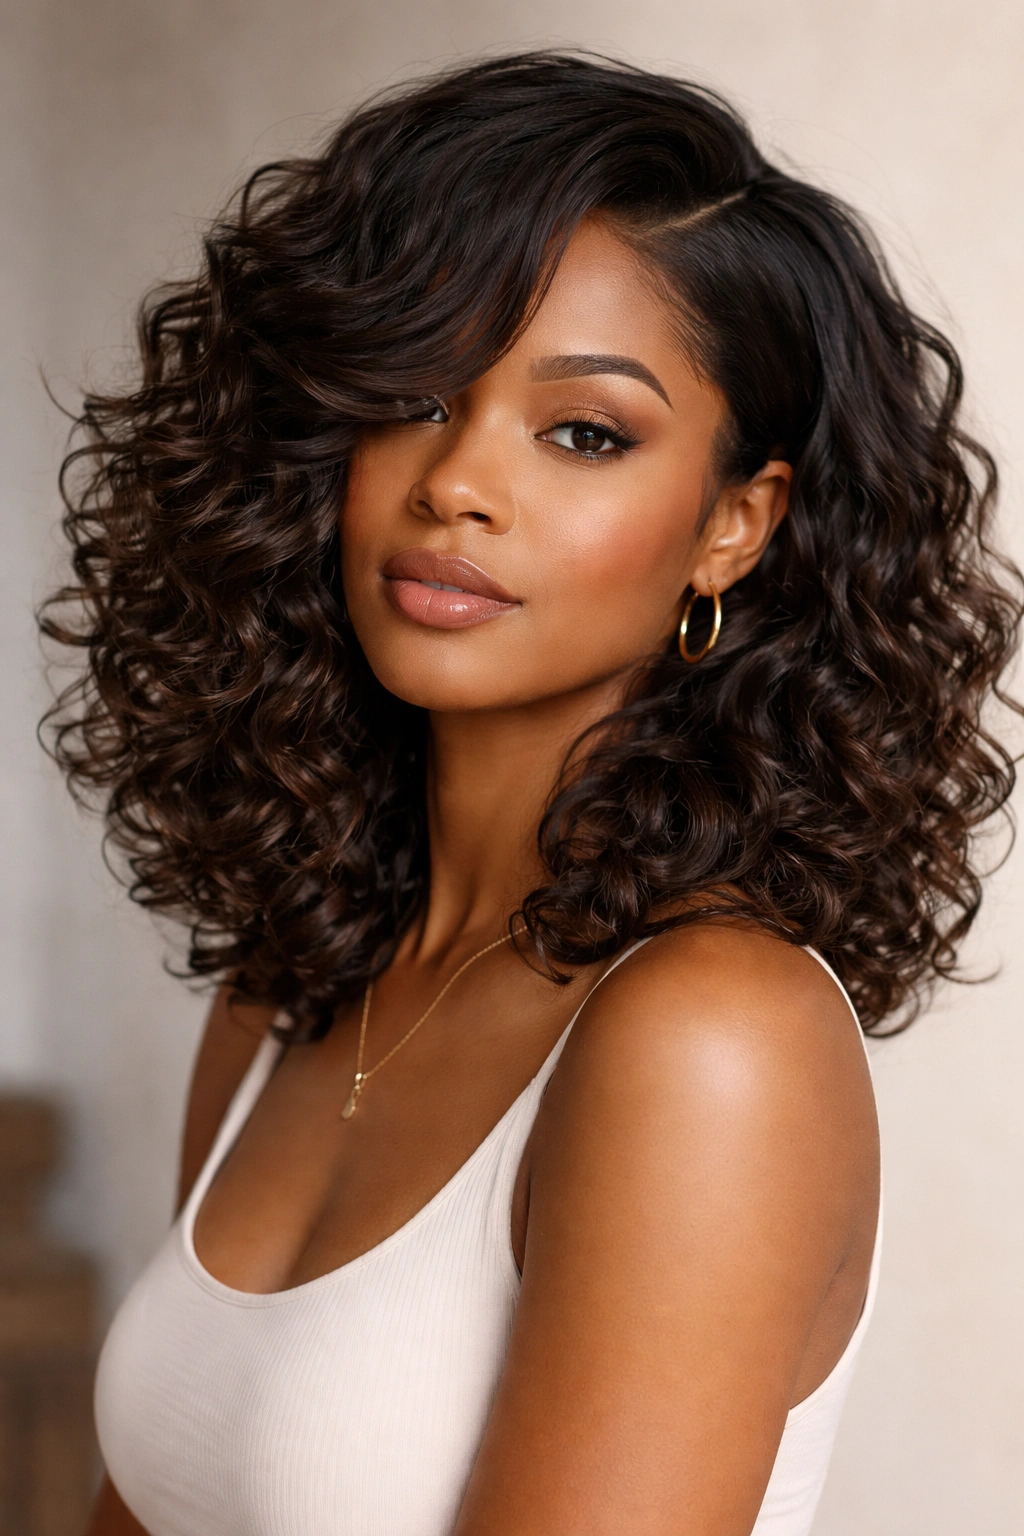
3. The Side-Swept Curly Bob
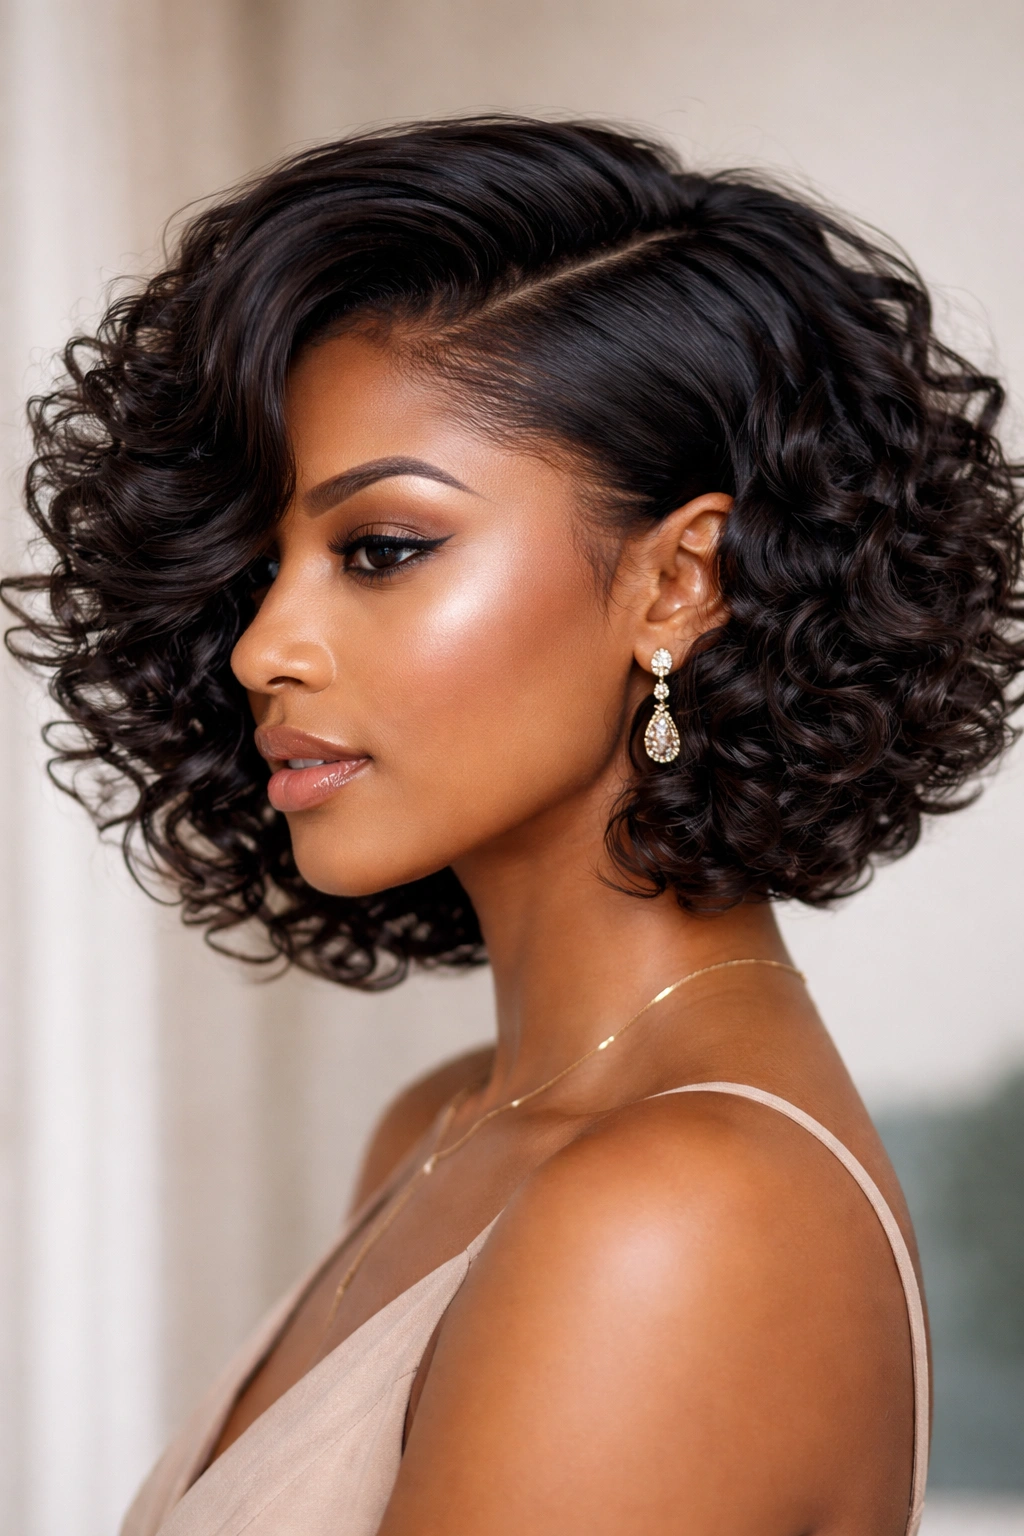
Quick weave bobs are one of the most underrated styles for curly hair because they deliver the visual impact of a major hair transformation without the commitment or damage of cutting your actual hair. A side-swept bob with the quick weave curled throughout gives you that bouncy, voluminous, picture-perfect look that curly girls spend hours trying to achieve with their natural hair alone. The side part adds asymmetry and movement, and because it’s just an extension, you can take it off whenever you want and revert to your natural texture.
Why Bobs Work So Well on Curly Hair
A great curly bob has natural volume built into the shape—the curl pattern itself creates the illusion of thickness and dimension. With a quick weave bob, you’re getting a cut style that’s specifically designed to work with curl, not against it. The shorter length also means the extensions weigh less on your head, putting less tension on your hairline and making the style more comfortable to wear for extended periods. Bobs also frame the face beautifully, which is why they’ve remained a classic across every texture.
Installation and Care Requirements
- Have your quick weave bob installed by someone experienced with curly textures—the curl pattern needs to be positioned to enhance face shape
- The bob should hit somewhere between your chin and shoulders, depending on your face shape and how much volume you want
- Curl the entire style with a curling wand or large barrel every 2-3 days to maintain definition and bounce
- Sleep with your bob in a silk bonnet or on a silk pillowcase to reduce frizz and maintain curl integrity
- Apply lightweight curl cream or serum to the ends every other day—bobs show frizz more easily because hair isn’t length-weighted
- Plan on wearing this style for 2-3 weeks before it starts looking tired
Insider note: The key to making a curly bob look expensive and intentional—not synthetic—is irregular curl placement. Ask your installer to vary the size and direction of curls throughout so it doesn’t look like a uniform, manufactured texture.
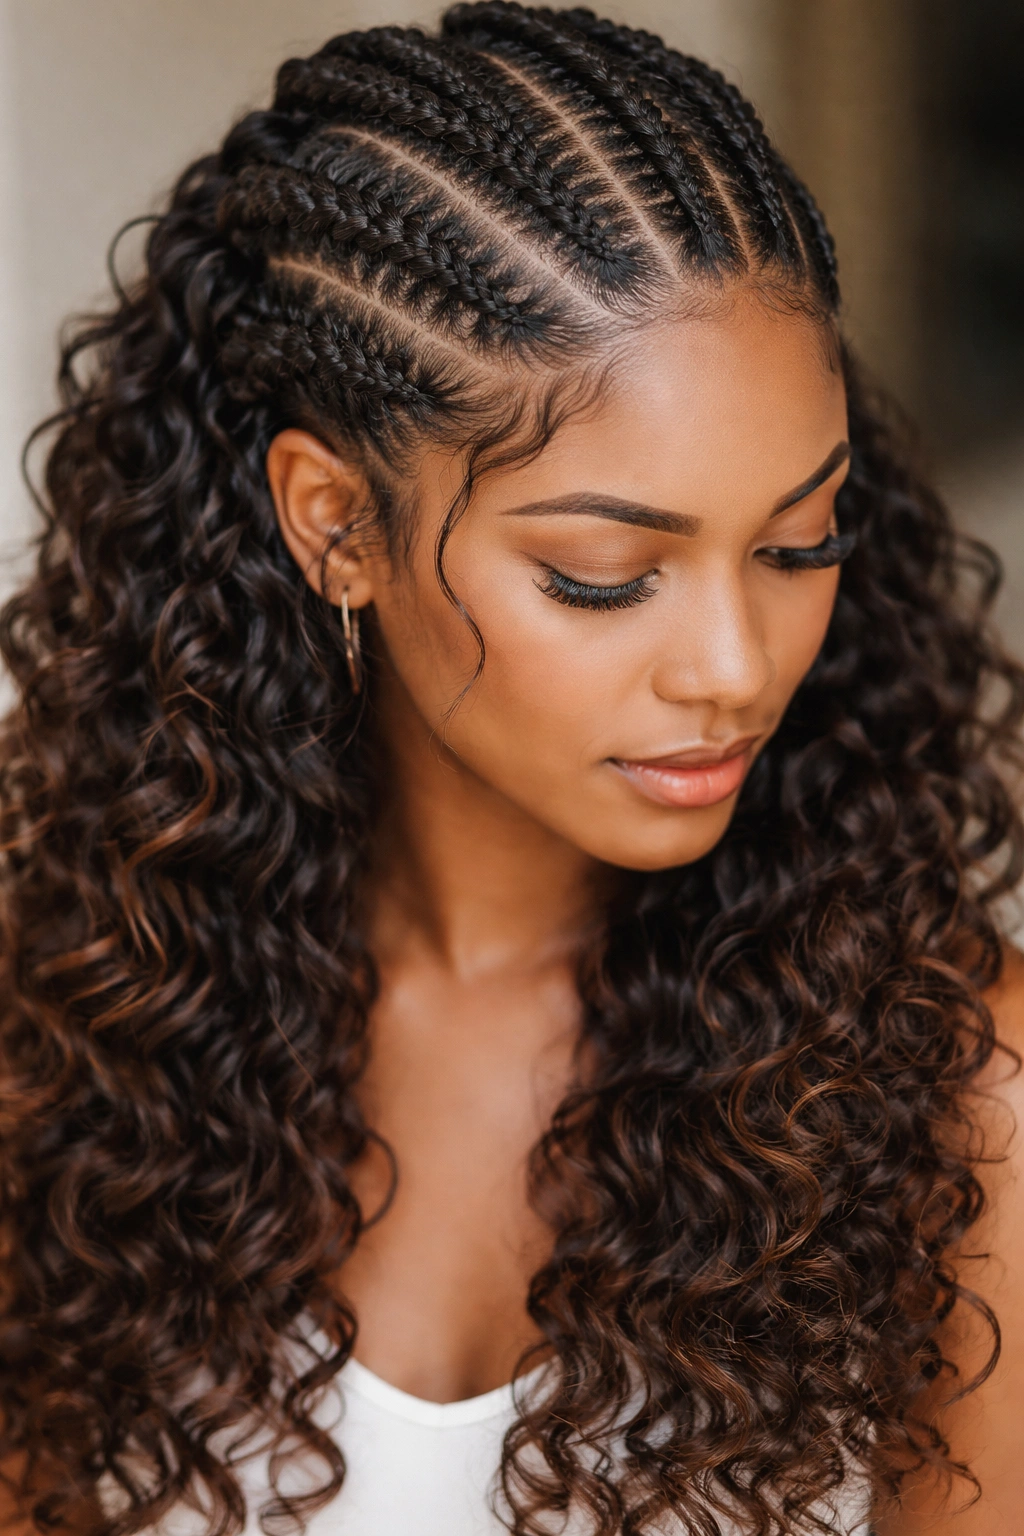
4. The Cascading Braided Crown with Loose Curls

This style takes a protective approach by incorporating a braided element (usually your own hair) that crowns the head, then allowing a voluminous curly quick weave to cascade down. It’s the perfect hybrid between a protective style and a glamorous style—your hairline and crown area get the benefit of being braided and secured, while the rest of the style looks effortlessly bouncy and beautiful. This works especially well if you’re attending an event where you want to look polished but you’re also prioritizing hair health.
The Protective Element
The braided crown does the heavy lifting here in terms of protection. Your natural edges are braided and secured, which means they’re not experiencing tension from being pulled into a tight style, but they’re also not exposed and vulnerable. The braids give you a clean base for the quick weave to attach to, and they keep your hairline in place without any tight elastic bands that could cause breakage. When you remove the style, your braids can stay in for another 2-3 days if you want extra layering protection.
Creating the Full Effect
- Cornrow or three-strand braid your hair from one temple, across the crown, and toward the opposite ear—think a crown shape
- Secure the braid ends with small elastics that match your hair color
- Install a quick weave cap over the braids for a smooth base
- Attach or sew the curly quick weave extensions into the braid structure
- The loose curls should fall to about mid-back or lower, creating visible contrast with the structured crown
- Refresh curls daily with a curl spray and separate curls gently with your fingers
- This style lasts 3-4 weeks and gives your hair incredible rest underneath
Pro tip: Sleep with your head elevated on a silk pillowcase so the braids don’t flatten and the curls maintain their bounce. Pressure from your pillow can definitely undo the shape you’ve created.
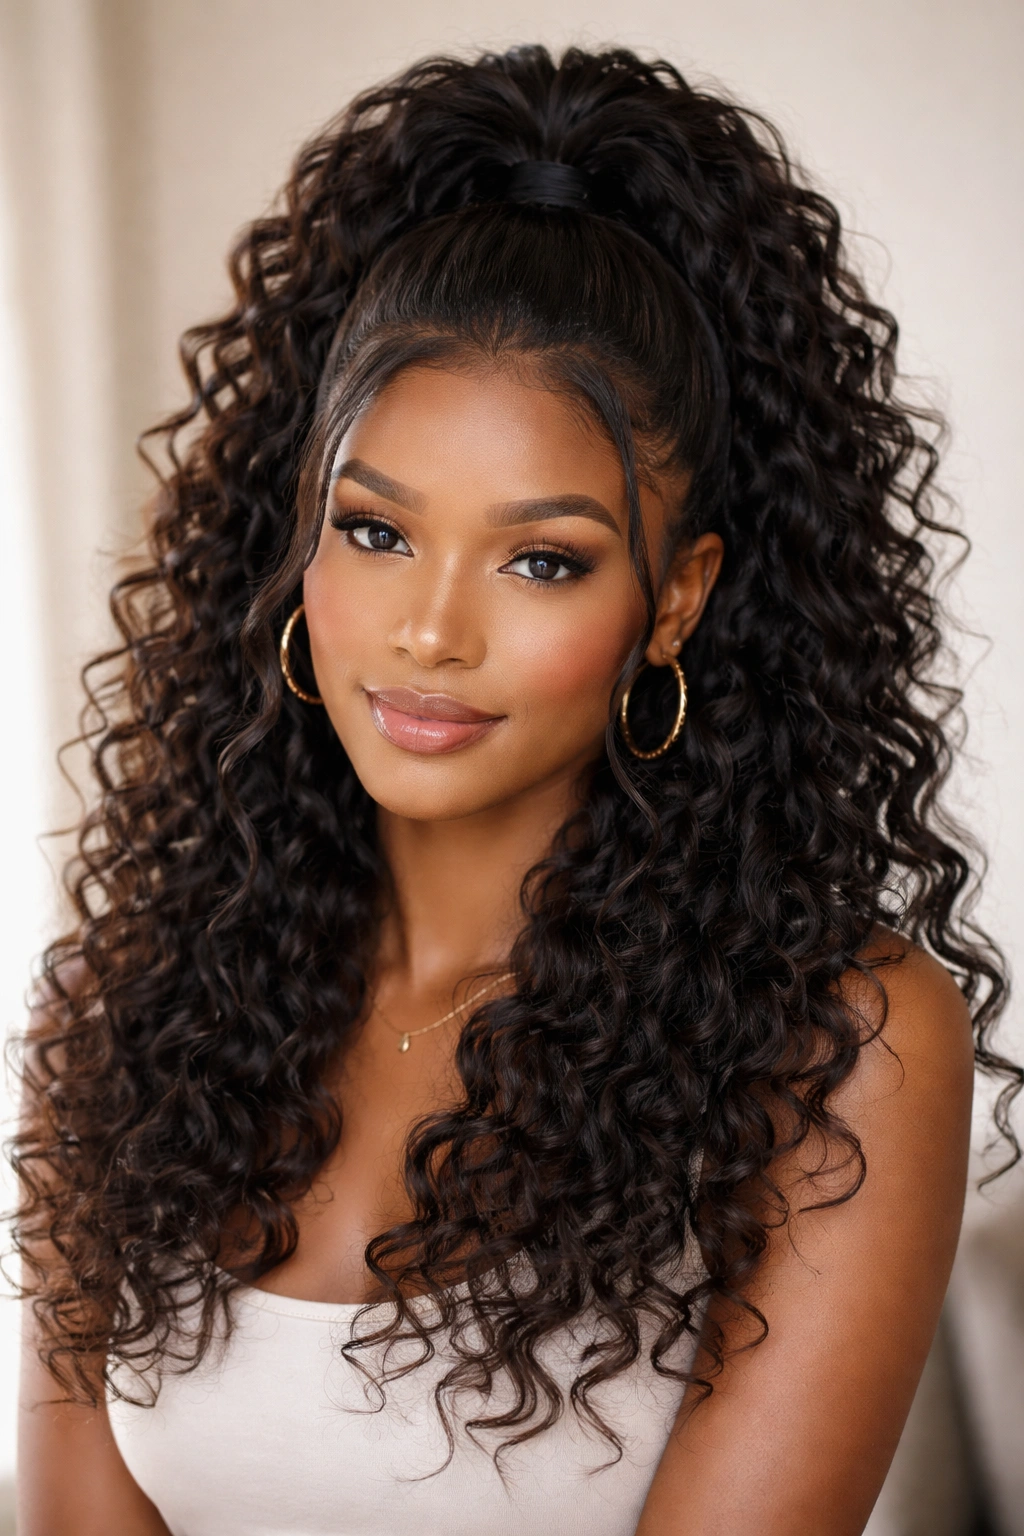
5. The Space Buns with Textured Curls
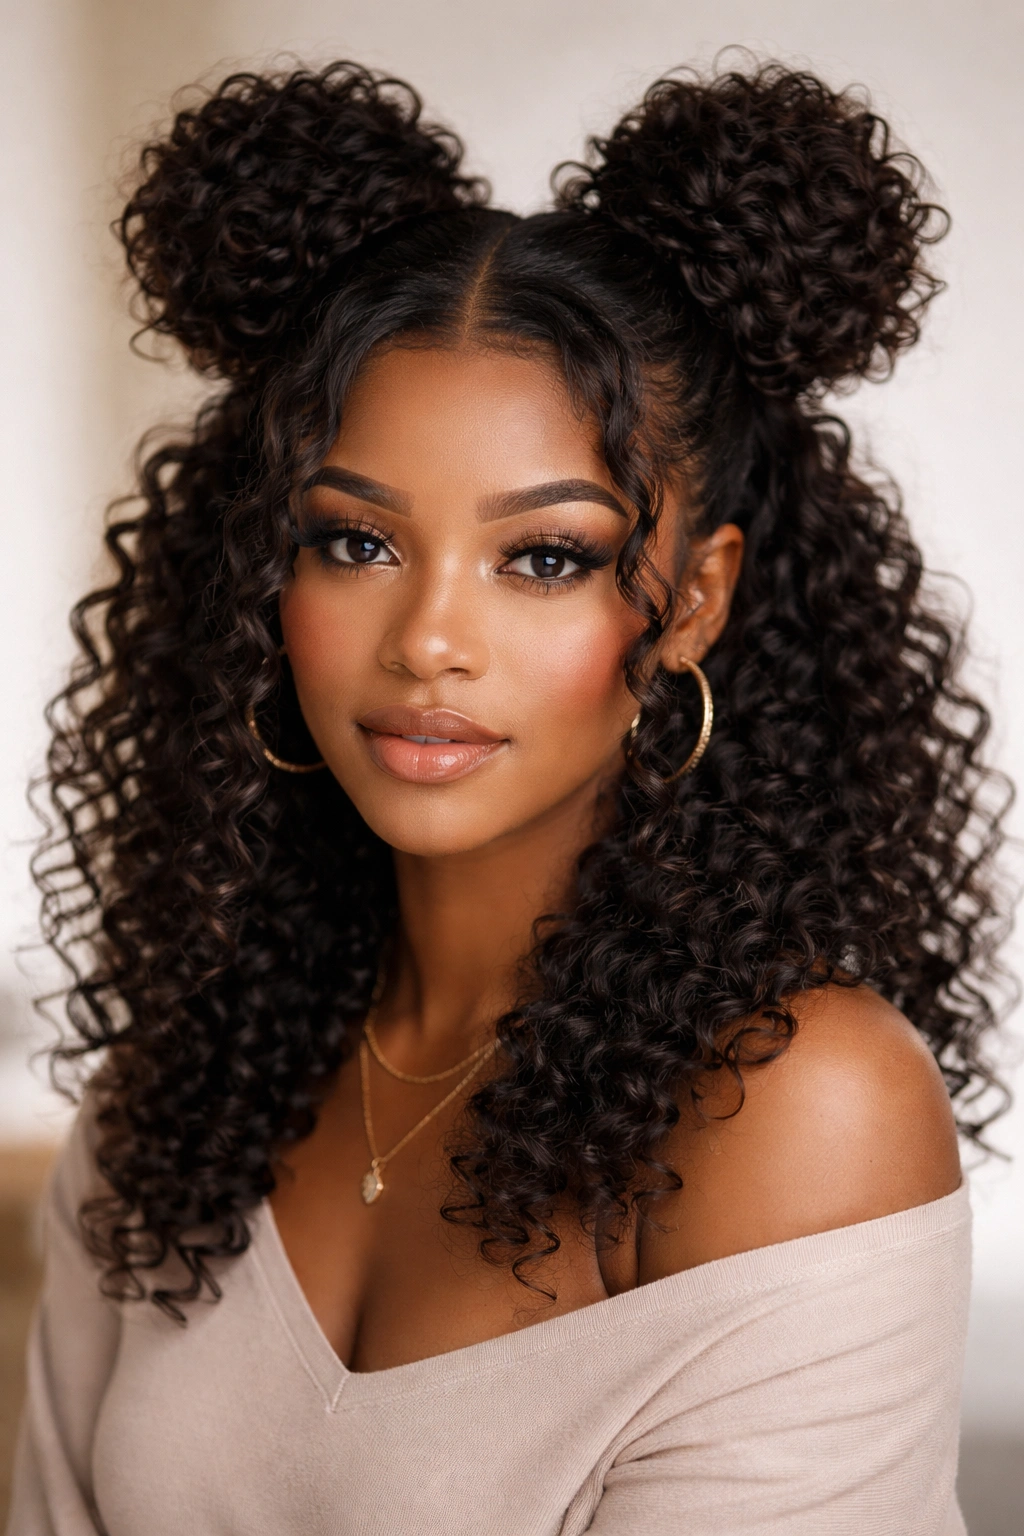
Space buns take quick weaves into fun, youthful territory while still being completely protective of your actual hair. You create two high buns on either side of your head using a combination of your natural hair and the quick weave curls, then let the remaining curls fall loose and full. This style practically screams confidence and creativity—it’s not trying to be “realistic” hair. It’s a statement. And because your natural hair is tucked into buns at the crown, your hairline and most vulnerable areas get real protection while you still get to wear something visually fun.
When Space Buns Make Sense
This style is perfect for casual settings, creative workplaces, college environments, or any situation where you want personality and visual impact without seeming overly formal. The playfulness also gives you permission to be less precious about the style—you can let some curls fall loose, embrace some texture variation, and generally have fun with it. Space buns are also genuinely protective of your ends because they’re gathered up and not experiencing length-weight or environmental stress while they hang freely.
The Styling Process
- Section your hair into two equal halves, parting down the center from your forehead to the nape
- Create a bun on each side of your head at approximately ear level, about 2-3 inches away from your part
- Wrap curly quick weave extensions around each bun base to increase volume and fullness
- Secure each bun with bobby pins and wrap around with additional quick weave hair if you want extra dimension
- Leave the remaining curly quick weave hair loose and free-flowing below the buns
- Fluff and separate the loose curls with your fingers to maximize volume
- Lightly mist with a flexible hold spray to keep everything in place without stiffness
Worth knowing: Space buns look best when the buns are genuinely substantial and the loose curls are wildly voluminous. Don’t try to keep this style dainty or subtle—go big. The proportions are what make the style work visually.
6. The Goddess Braids with Curly Extensions
Goddess braids are thicker, more structured cousins to regular braids—they’re usually Dutch or reverse braids that are intentionally chunky and statement-making. When you combine goddess braids (made from your own hair) with curly quick weave extensions woven through them, you get a style that’s protective, beautiful, and genuinely intricate-looking. The braids are usually done in pairs or a larger pattern, and they can be styled to sweep across your head, loop, or frame your face. This style signals that you’ve put thoughtful effort into your appearance without looking overdone.
The Protective Architecture
Goddess braids excel at protection because they distribute tension evenly across your entire head rather than concentrating it at one point (like a tight bun). Your hairline gets rest from the braiding pattern, and your curls underneath are completely untouched and undisturbed. The extensions are incorporated into the braid structure, so the weight is distributed throughout the braids rather than hanging heavily on your natural hair. This is one of the longest-lasting quick weave styles—you can comfortably wear goddess braids for 4-5 weeks.
Installation Fundamentals
- Prep your hair with a moisturizing leave-in and let it air dry or blow dry on low heat
- Divide your hair into sections based on your braid pattern (two side-by-side braids, or a more complex pattern)
- Create thick Dutch braids, incorporating quick weave extensions as you braid to add thickness and length
- Weave the extensions throughout the braid structure rather than just attaching them at the base
- Gently pull and fluff each braid section to increase the size and visible dimension
- Finish with a light flexible-hold spray to tame flyaways without making braids stiff
- Refresh your braids every 4-5 days by carefully re-fluffing them and spritzing with hydrating mist
Pro tip: The size of your goddess braids matters enormously. Thicker braids photograph better, last longer without getting thin and stringy, and distribute weight more evenly across your scalp.
7. The Sleek Straight Quick Weave with Curly Ends
Sometimes the most protective move is going completely straight and sleek on top while keeping the bulk of your natural curls tucked underneath. This style uses straight quick weave extensions through the crown and mid-lengths, while the ends feature curly, textured extensions that create a beautiful color or texture contrast. It’s a hybrid style that gives you geometric sleekness at the top (perfect for professional settings) while delivering visual interest and movement at the bottom.
Why Contrast Works
The visual contrast between the sleek top and curly bottom makes this style inherently more interesting than a uniform texture would be. Straight roots with curly ends also feel very intentional and designer—it’s a style choice, not just what grew out. And from a protective standpoint, you’re still keeping your natural curls completely undisturbed underneath while getting to rock a totally different texture on top. This works beautifully if you have curly hair but want flexibility to show up at professional environments looking very polished.
Execution Details
- Install a lace or silk closure at your hairline and cover with a wig cap for smoothness
- Apply a heat protectant spray to the closure and any hair that might come in contact with heat tools
- Use a flat iron set to 350-380°F to straighten the quick weave top section completely
- Make sure edges are super sleek—use a small flat iron and edge control for refined hairline definition
- Blend where the straight section meets the curly section so there’s no harsh line of demarcation
- The curly section should start around mid-back or lower for visual impact
- Sleep on a silk pillowcase or bonnet to prevent the straight section from picking up moisture and frizzing
- This style typically lasts 2-3 weeks before it starts losing the crisp straight texture
Worth knowing: This style requires a bit more daily maintenance than others because the straight sections are prone to picking up humidity and frizz. Use a smoothing serum on damp days to keep the straight section sleek.
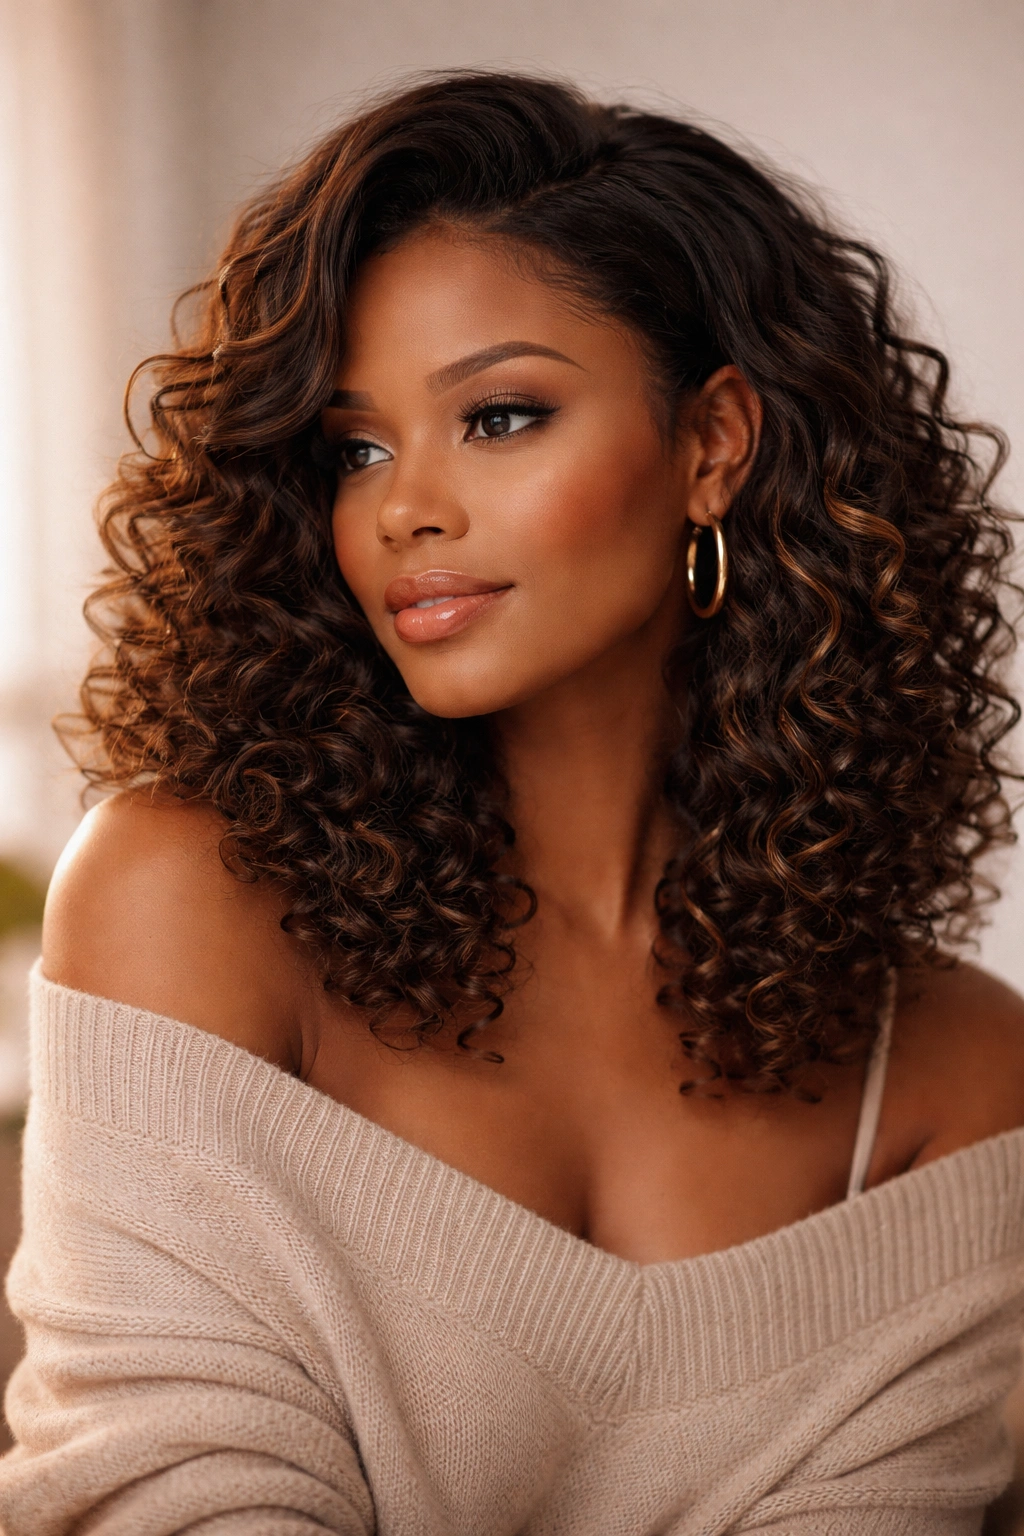
8. The Layered Curly Lob with Side Part
A lob (long bob) quick weave with purposeful layering gives you movement, dimension, and that effortlessly expensive look that people spend money on hair stylists to achieve. The side part adds asymmetry, and the layers create the illusion of motion even when you’re standing still. This style works because curly textures already have built-in volume, so layering just enhances what’s naturally there. The length usually falls somewhere between shoulder and mid-back, giving you enough room for the layers to be visible without the hair looking sparse.
The Volume and Movement Factor
Layers in curly hair create something straight hair can’t quite achieve: natural-looking dimension that comes from the texture itself, not just length. Each layer catches light differently, and the curl pattern makes each layer visible and distinct. A well-layered curly lob looks undone in the best possible way—like your hair just falls that way. For curly hair specifically, the layers prevent that brick-wall effect where all your curls cluster together at the bottom, and instead they distribute throughout the entire style.
Getting the Layers Right
- Ask your quick weave installer to create graduated layers throughout—longer in the front, shorter toward the crown
- The longest layers should hit at least to shoulder length to maintain weight
- Intermediate layers should land about 2-3 inches above the longest section
- Shorter layers near the crown add lift and prevent the style from looking heavy
- Side part should be positioned about 2-3 inches from your natural hair part, creating visible asymmetry
- Curl the entire lob with a medium or large-barrel curling wand, curling each layer away from the face
- Style with a curl cream or mousse to define curl pattern and reduce frizz
- This style lasts 2-3 weeks and works best if you refresh curls every 2-3 days
Insider note: The secret to making a layered lob look intentional and expensive (not choppy) is graduated layers where each layer is only slightly shorter than the one below it. Dramatic jumps in length look less polished.
9. The Twisted Crown with Waterfall Curls

This style incorporates twisted sections of your own hair around your crown (protective styling for your hairline) while allowing curly quick weave extensions to flow freely from underneath and cascade down your back like a waterfall. The twists are usually 2-3 on each side, running from temple to back, and they frame the face while keeping it completely tension-free. It’s romantic, protective, and visually sophisticated—perfect for special occasions or just when you want to feel extra.
The Romantic Protective Combo
Twists are one of the gentlest protective styling techniques because they require minimal tension and no tight elastics pulling on your hairline. Your natural curls stay tucked under the extensions, getting complete rest from manipulation and environmental exposure. The twisted crown frames your face beautifully without pulling, and the cascading curls give you fullness and length that feels genuine rather than obviously weaved-in. This style walks the perfect line between protective and glamorous.
Creating the Waterfall Effect
- Section your hair into 2-3 parts on each side of your head, starting at your temple
- Twist each section gently but firmly, incorporating quick weave extensions into the twist structure
- Each twist should spiral back toward your ear and pin at the base of your crown
- Leave the bulk of your curly quick weave loose, starting underneath where the twists are pinned
- The loose curls should flow straight down your back with as much volume as possible
- Gently separate and fluff the loose curls to maximize fullness and movement
- Pin the twists securely but not so tightly that they create tension on your scalp
- Refresh this style every 2-3 days by re-fluffing the loose curls and adjusting pins as needed
- Wear for 3-4 weeks before removing for hair rest
Pro tip: Use bobby pins in a color that matches your hair color, and position them horizontally rather than vertically—horizontal pins hold better and are less visible in photos.
10. The Textured Half-Up Half-Down with Clip-In Pieces
Sometimes the quickest, most manageable quick weave option is the half-up half-down approach, where you secure curly extensions into a half-up position and let your curly quick weave fall freely below. This style gives you the best of both worlds: your hairline and upper scalp get the protective benefit of a half-up style (no tension, no tight bands if you do it right), and you still get to show off length and volume with the free-flowing curls below. It’s one of the easiest quick weave styles to maintain and perfect for people who want protection without committing to a fully “done” style.
Why Half-Up Half-Down Works for Everyone
Half-up half-down styles inherently look softer and less severe than fully pulled-back styles, which means they work for more face shapes and professional settings. There’s also flexibility in how high you take the half-up—it can sit at your actual crown, or lower and looser for a more casual vibe. For protective styling, keeping the upper half of your hair gently gathered still gives you significant break time for your curls while keeping the style wearable and versatile. You can also easily convert the style throughout the day by removing the clip or adding more clips without touching your hair underneath.
Styling Steps for Maximum Hold
- Section your hair from temple to temple across the top of your head at about mid-crown level
- Secure this section with a clip that matches your hair color—a large claw clip works beautifully
- Make sure the clip is tight enough to hold but not so tight that it’s pulling uncomfortably
- Use quick weave extension pieces clipped into the top section to add volume and fullness
- Leave the bottom half completely loose and free-flowing, curled and fluffed for maximum volume
- Spritz the entire style lightly with a flexible-hold spray
- When you sleep, you can either remove the clip entirely and sleep with hair down, or keep the clip in a silk bonnet
- This style can last 3-4 weeks depending on how often you manipulate it
Worth knowing: The key to making half-up half-down look intentional rather than accidental is making sure the upper section has visible volume and dimension. Don’t let it sit flat against your head—add clip-in extensions to the section and fluff it out so it looks like a genuine style choice.
Final Takeaways
Quick weave styles are genuinely transformative for curly-haired people who want protective styling options that feel fresh, versatile, and achievable in just an hour or two of installation time. Each of these ten styles serves a different mood, occasion, and level of commitment—some are polished and professional, others are playful and creative, and some are purely about maximizing protection while minimizing effort. The common thread across all of them is that they give your natural curls a real, measurable break from manipulation, tension, and environmental exposure.
The most important thing to remember is that quick weaves work best when you’re caring for your hair underneath them just as carefully as you care for the extensions themselves. Keep your scalp moisturized, sleep with protection (a silk bonnet or bonnet-friendly pillowcase), and don’t leave a style in so long that your edges start breaking from neglect. Quick weaves should make your curl journey easier, not more complicated.
Rotate between these styles based on what your hair needs in any given month. Maybe you do a protective style one month, then a styling break, then another protective style. Maybe you switch styles weekly to keep things fresh while still giving your curls consistent rest. The magic of quick weaves is that you have complete control—you’re not locked into one look, one installation timeline, or one approach. Use that flexibility to build a styling routine that actually works for your life and your hair’s unique needs.