If you’ve got curly hair and you’ve tried to work out, you know the struggle is real. Sweat, humidity, frizz, and the battle to keep your curls defined while your hair’s bouncing around your face — it’s enough to make you want to skip the gym altogether. The truth is, most standard sports hairstyles weren’t designed with curl patterns in mind. They’re built for straight or wavy hair, which means they slip, loosen, and fall flat after fifteen minutes of activity.
The good news? There are legitimately brilliant hairstyles specifically engineered to hold curly hair in place during intense physical activity while keeping your curls intact and beautiful afterward. The key is understanding what makes a hairstyle actually work for curls — it’s not just about tension and bobby pins. It’s about strategic placement, moisture retention, protective techniques, and choosing methods that don’t stretch or stress your curl pattern. When you get the formula right, you can crush your workout and walk out with curls that look almost as good as when you started.
This article walks you through ten of the most reliable, tested hairstyles for keeping curly hair secure during sports and exercise. Each one comes with the specific technique to nail it, the products that genuinely help it hold, and the real-world situations where it works best. Whether you’re hitting the gym, running outdoors, playing sports, or doing high-impact cardio, you’ll find a hairstyle here that actually keeps your curls in check — and keeps them looking good.
1. The High Bun with Scarf Wrap
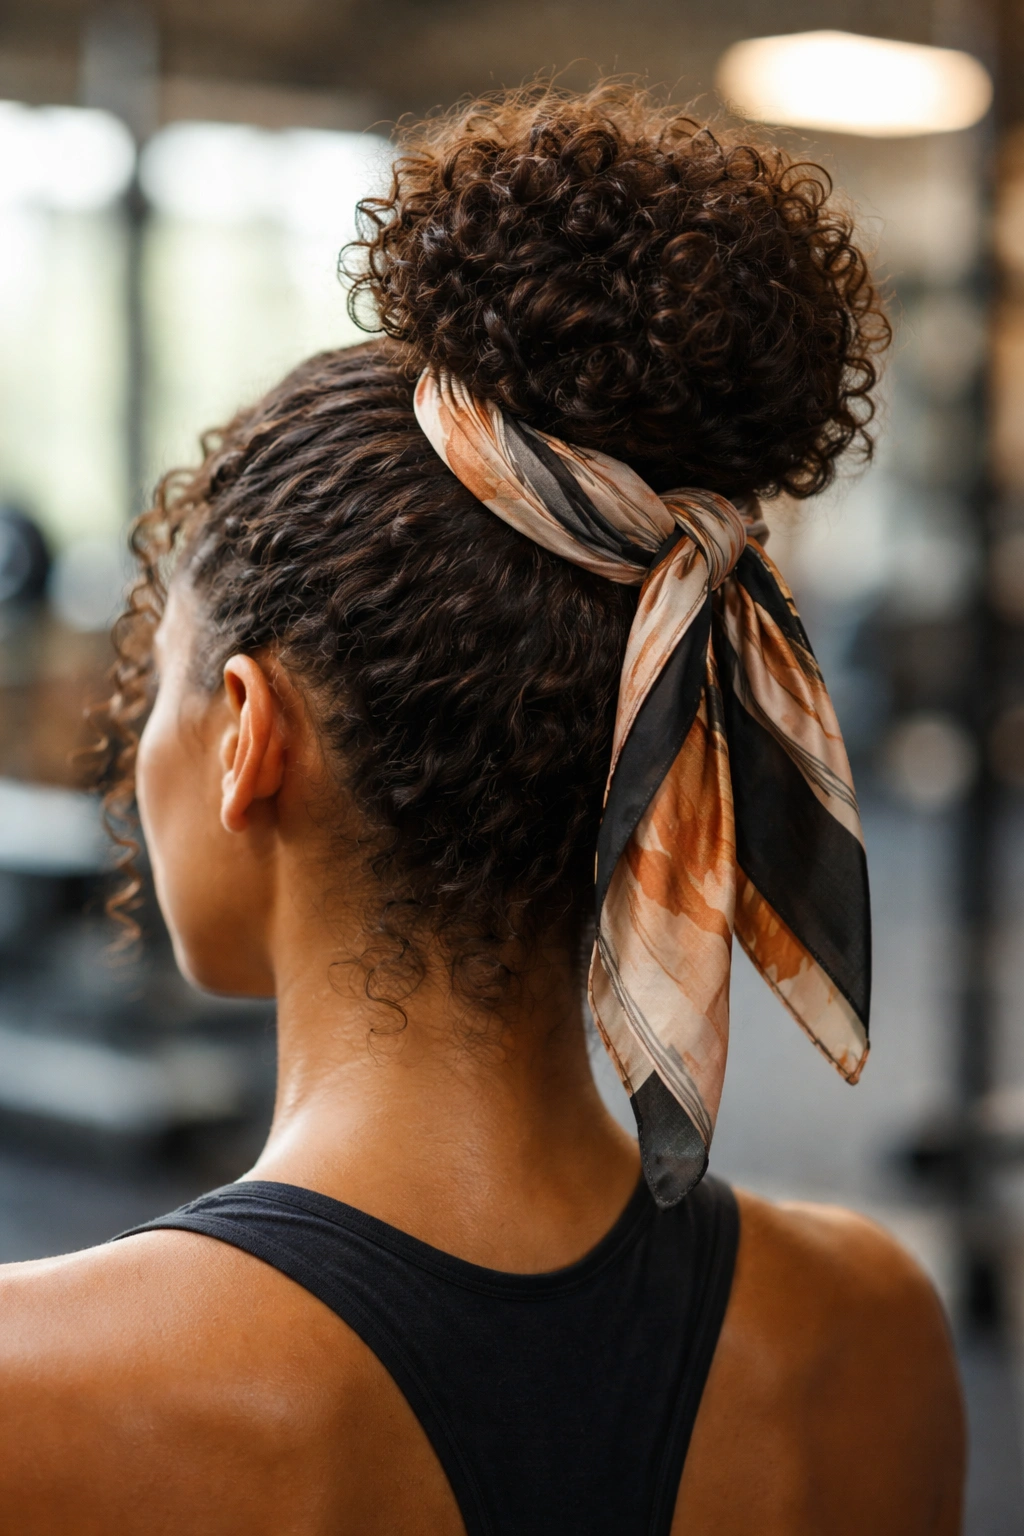
The high bun is the workhorse of sports hairstyles for curly hair, but only when you execute it correctly. A standard bun pulls too tightly at the roots and straightens your curl pattern, plus it slides down as sweat builds up. The scarf-wrap version changes everything — the silk or satin scarf prevents slip, reduces friction against the hair, and adds enough anchoring power that the bun stays put through serious sweat.
Why This Style Works for Curls
The scarf wrap creates friction without tension. Unlike standard bobby pins that grab individual strands, a scarf distributed around the base of your bun grips your entire hair mass evenly. This means the bun stays locked in place through jumping, running, and directional movement — the exact situations where standard buns fail. The silk or satin material is also crucial because it won’t absorb sweat the way cotton does, keeping your curls from getting weighed down and frizzy at the base.
The placement also matters more than most people realize. A high bun sits directly on top of your head where sweat-induced slip is most likely to happen. By wrapping the scarf around the bottom and sides of the bun where it’s most likely to slide, you’re addressing the actual problem point rather than just securing the top.
How to Build a High Bun That Holds
Start with hair that’s already in its curl pattern — don’t brush or comb it once you’ve set your curls. Brush your curls gently upward while they’re still damp, applying a gel or mousse as you go to encourage your curls to form as you create the bun. Gather all your hair at the crown of your head into a high ponytail, keeping the gathering point at the very top of your head, not in the middle. Twist the ponytail tightly, then wrap it around its own base to form the bun. Secure with 3-4 hair sticks or spiral bobby pins distributed around the base — don’t use standard bobby pins because they pop out more easily with curls.
The scarf wrap goes on last. Use a silk or satin scarf about 2-3 inches wide. Position it at the back and sides of your head, wrapping it around the base of the bun once, then bringing the ends around the sides of your head and tying it at the back. The scarf should feel snug but not tight enough to cause tension headaches. Test it by gently tugging at different points of the bun — it should barely budge.
Products That Help It Hold
A strong-hold mousse or gel applied during the gathering phase keeps curls structured while you’re building the bun. Look for products that don’t flake or crunch — the last thing you want is product buildup visible when you take down your bun. A light hairspray applied after the scarf is wrapped adds an extra lock-down layer, especially the edges and any face-framing pieces. The hairspray should be flexible enough that it doesn’t crack or feel stiff when you remove the bun.
Pro tip: Prep your high bun the night before if possible, loosely securing it with the scarf. This lets your curls set into the bun shape, making them hold even stronger during your workout. You can actually sleep with the bun loosely in place (use a pineapple method with very loose ties), and by morning your curls are pre-formed into the bun structure.
2. Braided Crown with Butterfly Clips
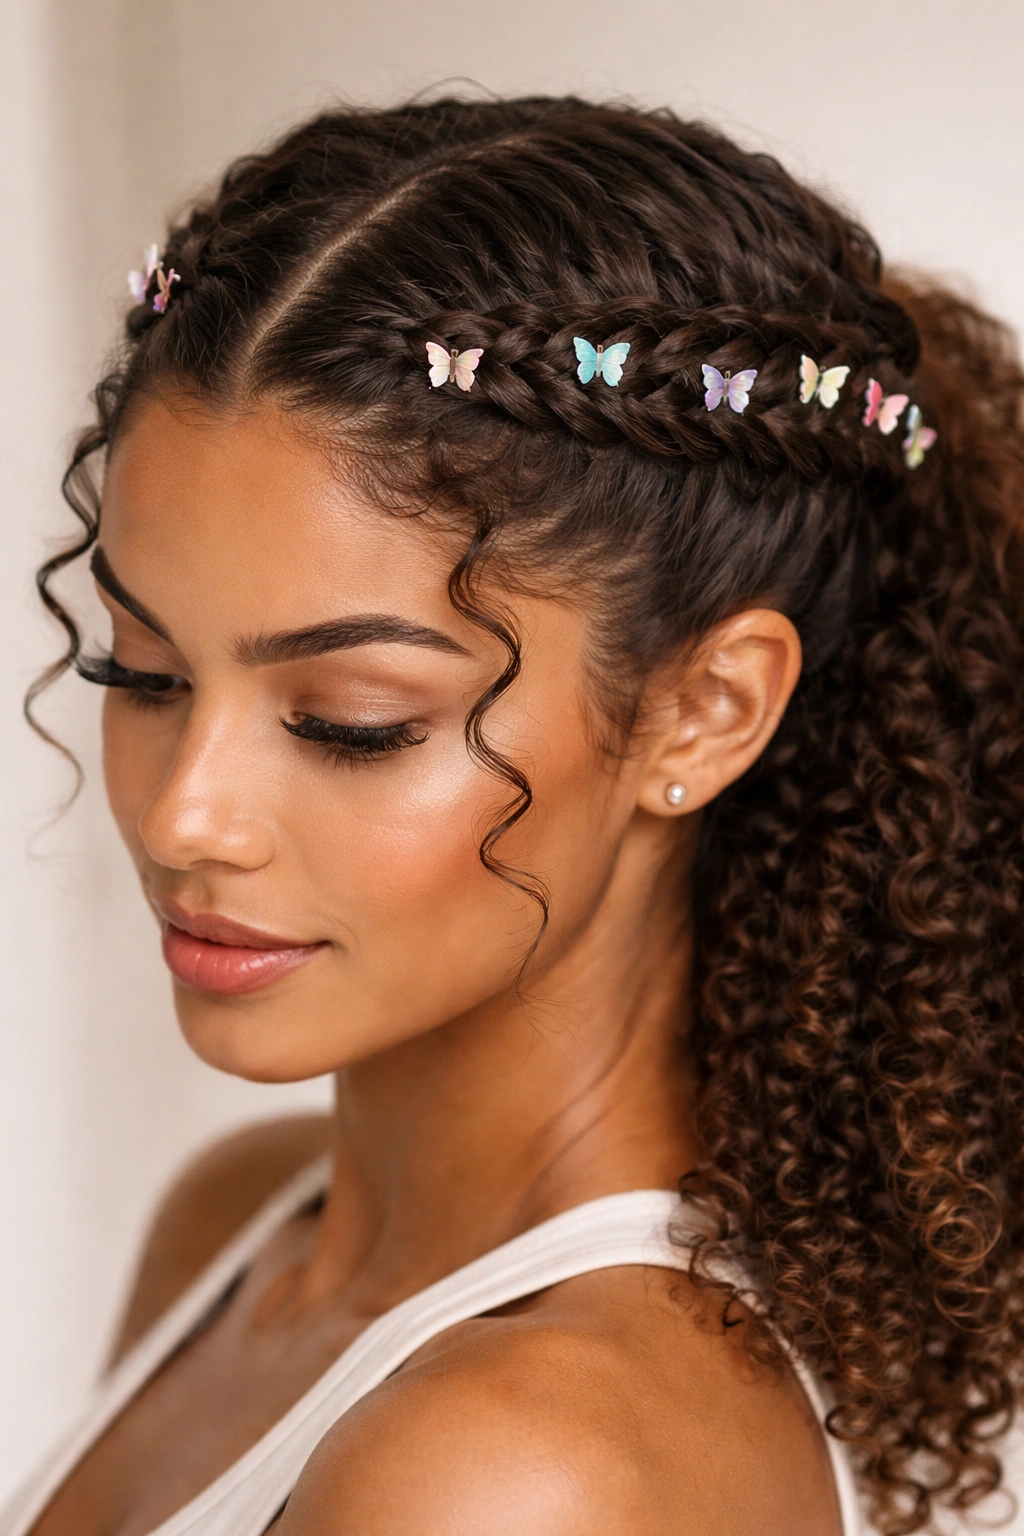
A braided crown — two braids that wrap around your head from temple to temple — holds curly hair with serious staying power while looking intentional and polished. The braids themselves anchor your hair at two points along your head, distributing tension evenly rather than concentrating it in one spot. For curly hair, this is huge because it prevents the stretching and reshaping that tight buns can cause.
The Curl-Friendly Mechanism
Braiding curls actually strengthens the hold compared to straight-hair braids. Curls have natural texture and grip to each other, so when you braid curly hair, the individual curl patterns interlock, creating internal friction that keeps the braid tight without needing to pull hard on the strands. You can achieve a rock-solid braid with curly hair using way less tension than you’d need with straight hair.
The butterfly clips — those colorful little metal clips with the butterfly wings — are the secret weapon most people overlook. They’re not just decorative. Two or three of them placed strategically along each braid create anchor points that prevent the braid from unraveling or loosening. They distribute the hold across the braid rather than relying on a single elastic band.
Creating a Braided Crown That Stays
Start with curls that are already in their natural pattern. Section your hair into two even parts down the middle of your head from forehead to nape. Take the first section and start a Dutch braid (braiding underneath instead of over the top) from one temple, working the braid across the back of your head toward the opposite ear. The Dutch braid sits slightly flatter against the head than a regular braid, which helps with the hold.
As you braid, keep consistent tension — don’t pull so hard that you’re straightening the curl, but don’t leave it loose either. Every few inches of braid, insert a butterfly clip under the braid to hold it in place. This prevents the braid from gradually working its way loose as you move and sweat. Repeat with the second section on the other side, mirroring the first braid.
Once both braids are complete, you can either leave the ends loose (let them curl naturally at the nape of your neck) or tie them together under a bun at the back of your head. If you secure them, use hair sticks or spiral clips rather than elastic, which will crease your curls.
The Staying Power Through Movement
This style holds through running, jumping, and dynamic sports because the tension is distributed across two anchor lines instead of concentrated in one spot. The braids themselves act as a structure that your curls curl around — even if one section starts to loosen, the overall architecture stays intact. The butterfly clips provide checkpoints that re-tighten the hold if any section starts to slip.
Sweat is actually less of an issue with braided styles because the individual curls are woven together rather than all pressed into one mass like a bun. Moisture distributes more evenly, and there’s less of the “heavy hair that slides down” effect you get with a slicked-back bun.
Worth knowing: Braids are easier to maintain during your workout than buns. If a bun starts to slip, you’re stuck with a droopy mess until you can redo it. With a braid, if one section loosens, you can tighten it right there by adjusting that section — it takes five seconds and you can do it with one hand.
3. Twisted Side Ponytail with Gel
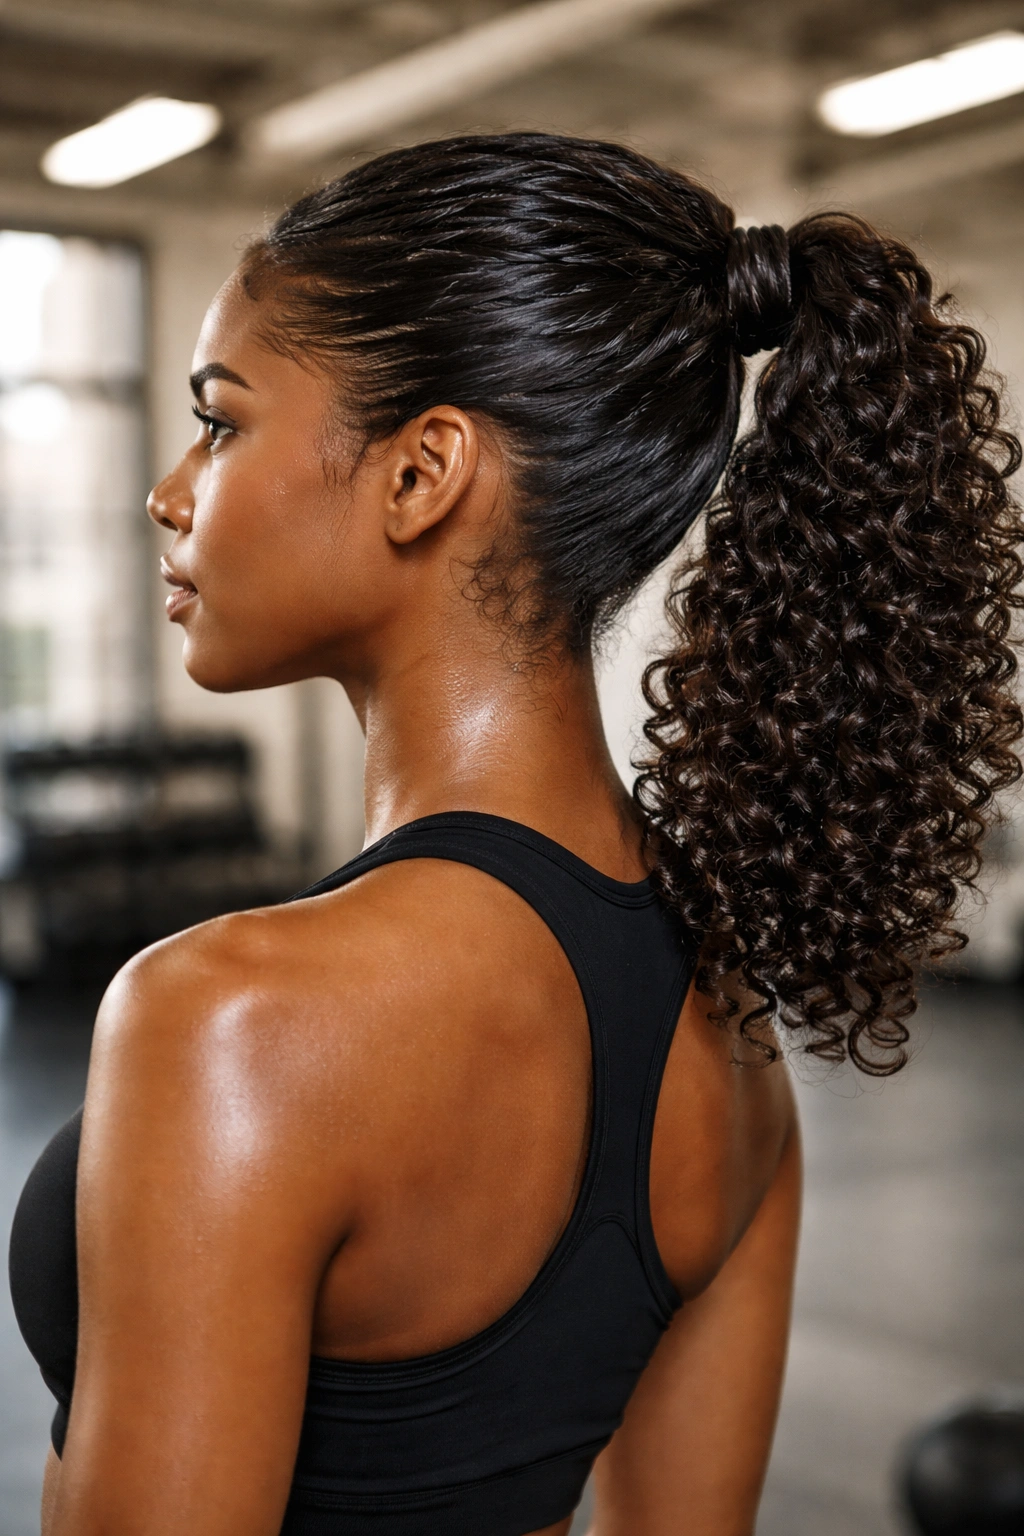
A twisted side ponytail is simpler to create than braids but holds just as well when you apply the technique correctly. The twist adds friction and structural integrity that a standard side ponytail completely lacks. For curly hair that needs to stay secure through cardio and movement, this is one of the most reliable quick options.
Why Twists Grip Better Than Straight Ponytails
When you twist curly hair, the curl pattern gets compressed, and the natural texture of each curl grips the curl next to it. Straight hair needs tension and product to stay twisted, but curly hair’s texture does some of the work for you. A twist in curly hair is naturally sturdier and holds better with less pulling, which means you can create a tight hold without the damage that tight straight-hair ponytails cause.
The side positioning matters too. A side ponytail sits lower and more to the back than a center ponytail, which moves your hair’s center of gravity and reduces the weight that’s pulling down on the elastic. This is why side ponytails slip less than center ones — the leverage is simply better. For curls, which are heavier than straight hair when wet with sweat, this positioning is crucial.
The Twist-and-Secure Technique
Section off a portion of your hair from one side of your head, roughly from the temple area, working back toward the ear. Apply a gel or lightweight mousse to this section, then twist it tightly as you gather more hair into the twist as you move back. Keep twisting until you’ve incorporated a section that represents about one-third to half of your total hair. Secure the twist at the side of your head with bobby pins — at least two or three, spread across the base of the twist.
Once the twist is pinned, take the remaining hair and gather it into a high side ponytail, incorporating the base of your twist. The twist becomes the anchor point that prevents the ponytail from sliding. Secure the ponytail with an elastic, then reinforce it with bobby pins or hair sticks inserted through the ponytail at multiple points. The pins should pierce through the base and anchor into the bobby pins already holding the twist, creating a connected structure.
A small amount of flexible-hold hairspray around the base of the ponytail and the twist adds the final lock-down. Focus on the edges and any flyaway pieces, not the entire ponytail.
Reality Check: How Long It Actually Holds
With this method, you’re looking at genuine hold for 45 minutes to an hour of serious activity before you notice any loosening at all. Many people get a full workout without needing to retighten it. If you’re doing lower-impact activities like yoga or Pilates, you can easily stretch this to 90 minutes of hold.
The twist also protects your curls better than a standard ponytail. Instead of all your hair pulling straight back in one bundle, the twist spreads tension across a graduated band of curls. When you take it down, your curls fall back into their pattern without the creased, straight-looking section you get from tight ponytails.
Quick fact: A twisted side ponytail also works beautifully for hair that’s 2-3 days old and has started to lose definition. The twist actually re-textures slightly loose curls, making them look fresher and more defined than they were before the workout.
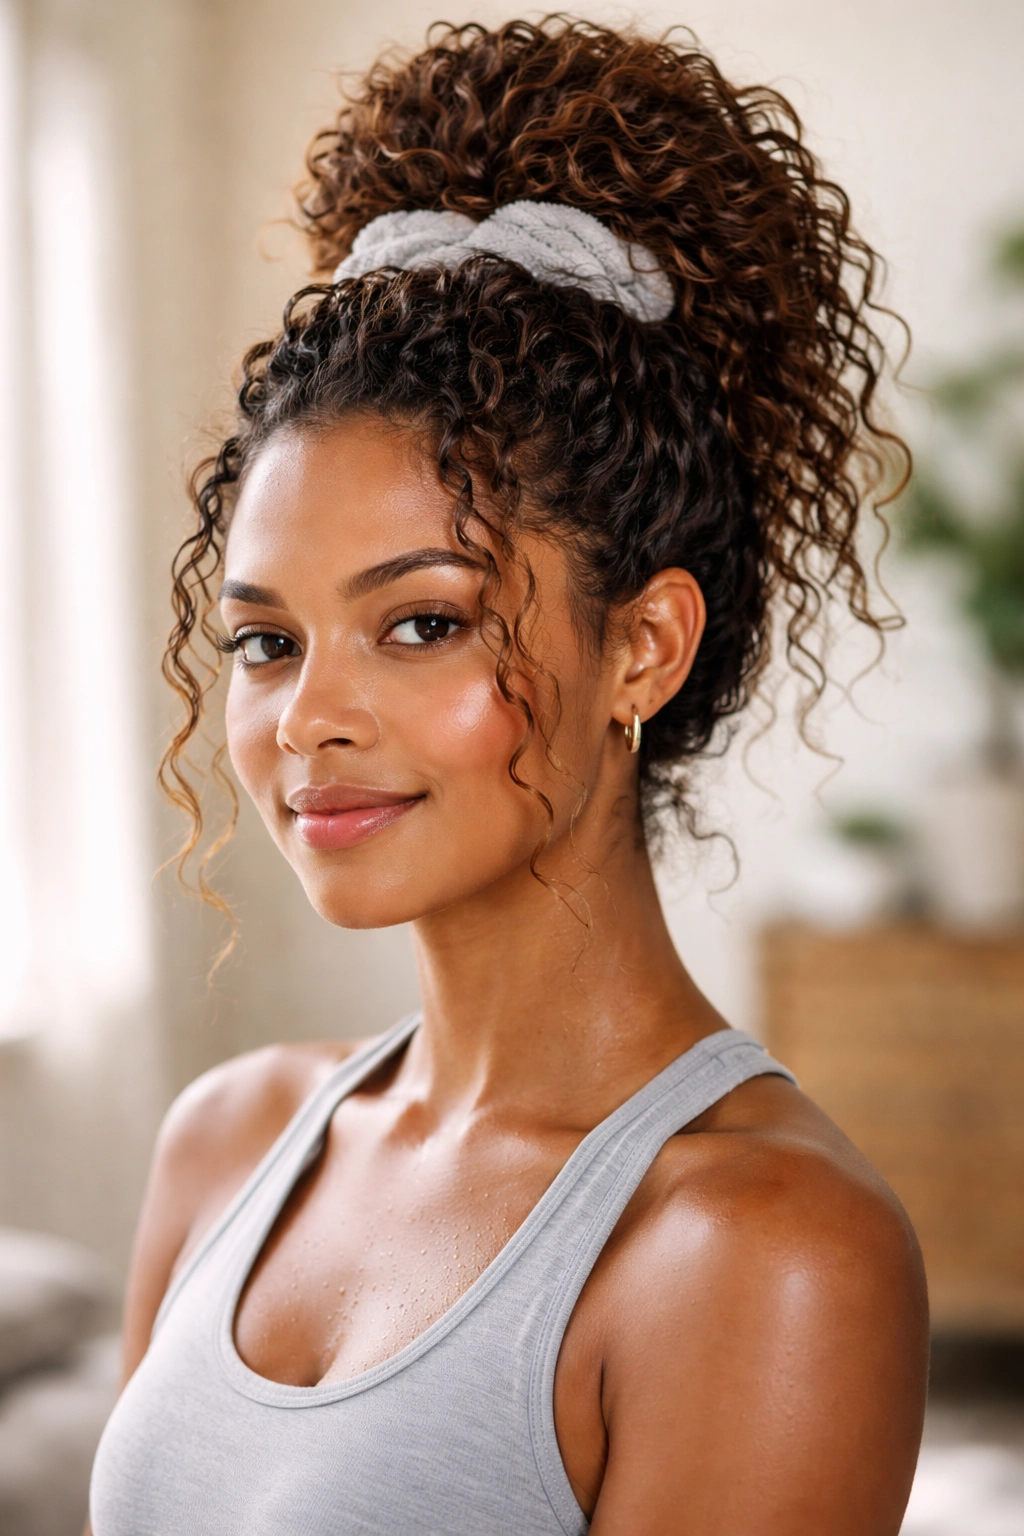
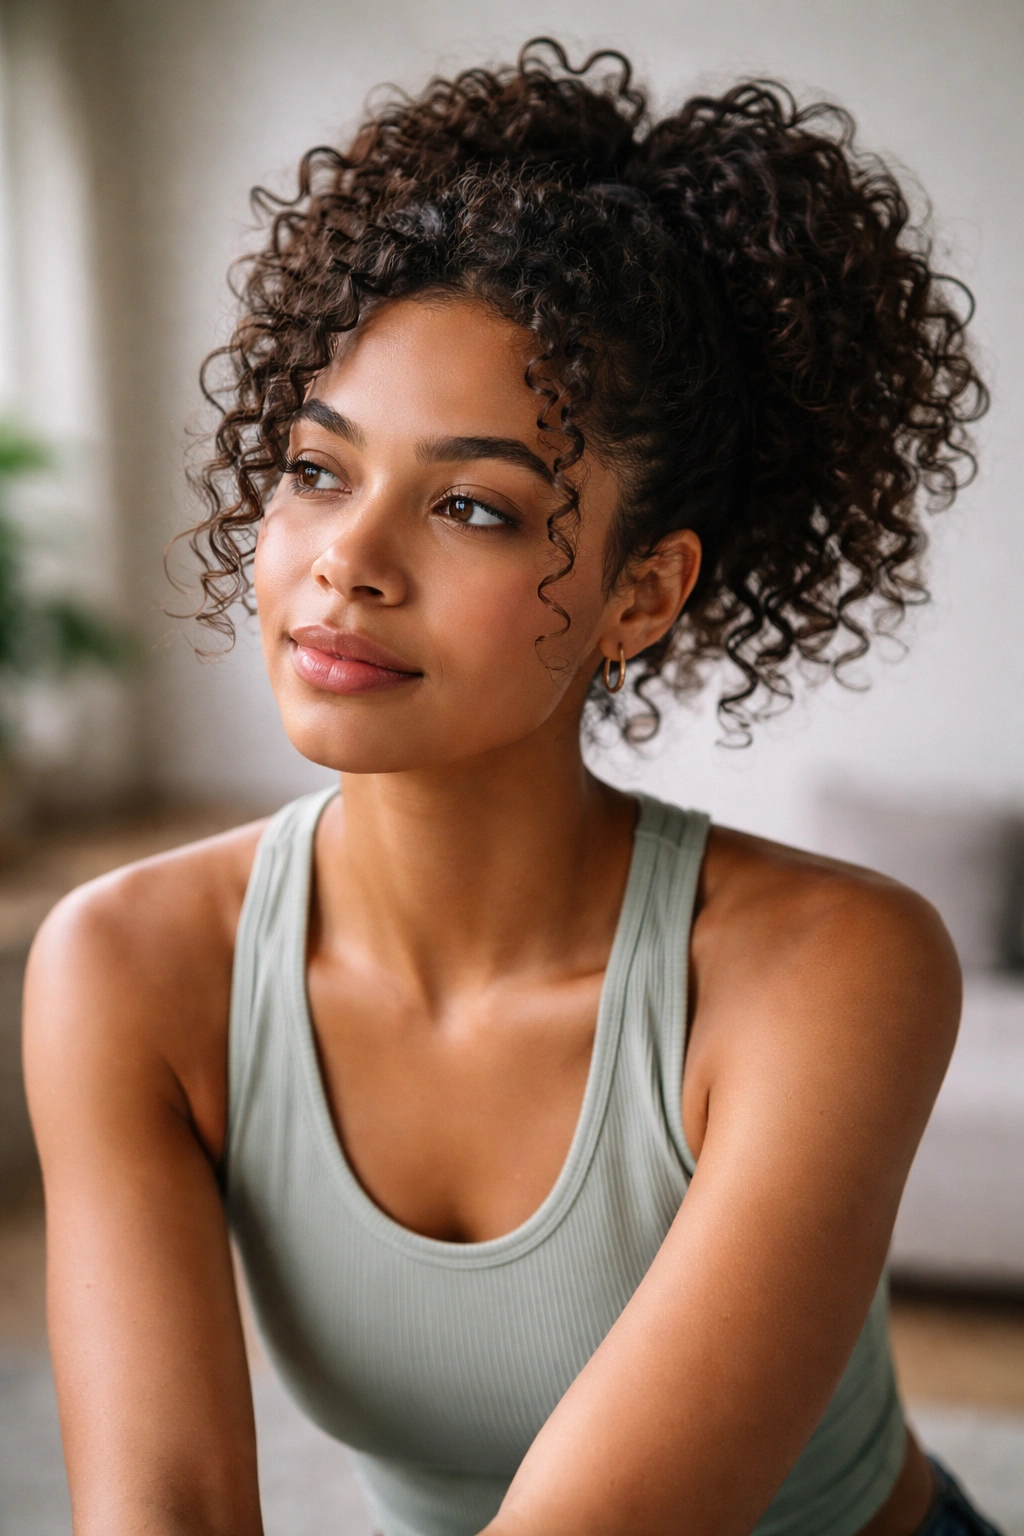
4. Pineapple Updo for High-Impact Sports
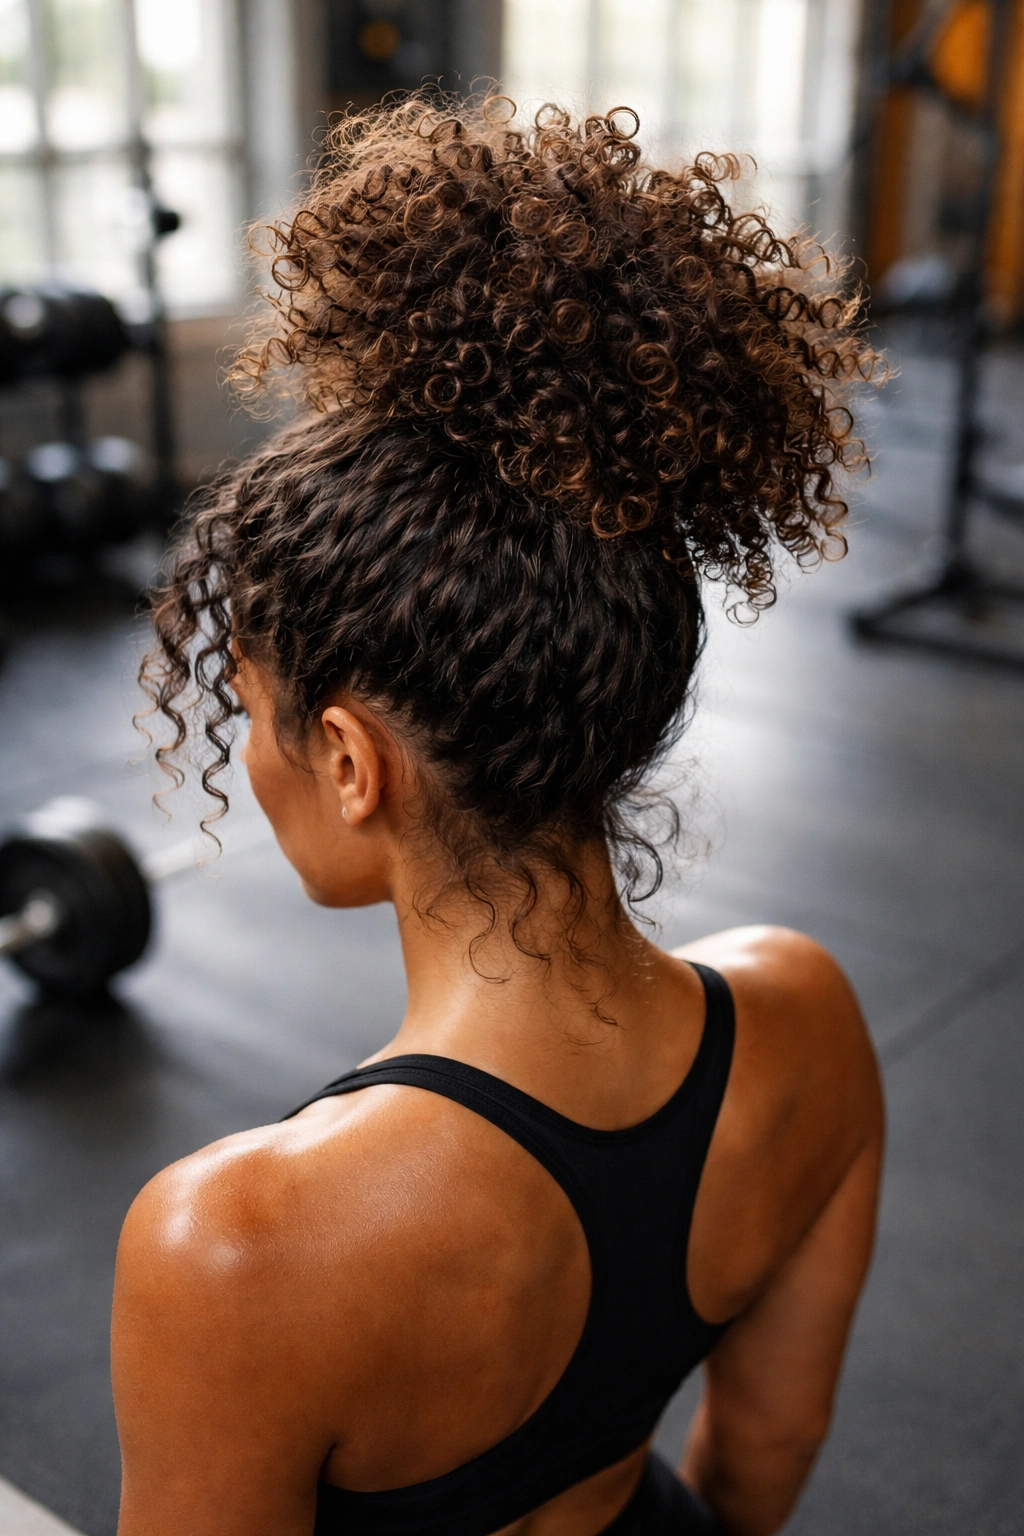
The pineapple method is usually reserved for sleeping, but adapted for active sports, it’s one of the most secure and curl-protective styles available. A pineapple updo gathers your entire curl pattern at the crown in a way that keeps curls bunched together rather than separated, which creates a tight, stable hold without needing extreme tension.
How the Pineapple Principle Works
The pineapple method works by grouping all your curls together at the top of your head in a loose, high ponytail. When done right, your curls bunch together like a pineapple top — hence the name. Because curly hair has volume and natural grip, this bunched-together position creates surprising stability without requiring you to pull tight and straighten your curls.
For high-impact sports specifically, the pineapple updo works better than most people realize because it centralizes your hair’s mass directly over the crown of your head. This is the most stable position for any load on your head — think of it like a weight-bearing column. A hair mass centered at the crown stays put through jumping, running, and lateral movement far better than side ponytails or braids that have their weight distributed off to one side.
Creating a Pineapple Updo That Holds Through Intense Activity
Start with hair that’s in its curl pattern — ideally curls that have been set with mousse or gel during your last wash. Using a wide-tooth comb or your fingers, gently gather all your hair at the crown of your head into a high ponytail position. The key word here is gently — you’re not pulling everything taut; you’re gathering it loosely so the curls bunch together but don’t stretch out.
Secure the ponytail with a silk or satin scrunchie rather than a standard elastic. The silk material reduces friction and prevents creasing in your curls. Insert the scrunchie, then gently tighten it just enough that the ponytail doesn’t move. You should be able to slip one finger under the scrunchie comfortably.
Now for the updo part: flip your ponytail upward and back, then loosely coil it or wrap it around its own base, creating a soft, textured bun. Don’t twist it tight — let your curls maintain their pattern as they coil. Secure this coil with 3-4 spiral bobby pins or hair sticks, placing them at different points around the coil to distribute the hold.
Add a wide headband, bouffant cap, or athletic headwrap around the base of the updo. This is what takes the hold from good to rock-solid. The headwrap adds downward pressure that locks the updo in place, making slip nearly impossible even during intense movement.
Why High-Impact Athletes Love This Style
Runners, CrossFit athletes, and basketball players report that once a pineapple updo is secured with a headwrap, it doesn’t move. Period. The combination of the centralized weight, the bundled curls creating internal friction, the spiral pin distribution, and the headwrap creates a multi-layered hold system that doesn’t rely on any single mechanism.
It’s also incredibly curl-protective. Because your curls stay bunched and never get straightened or tightly pulled, you can wear this style regularly without worrying about long-term damage to your curl pattern. After you take it down, your curls bounce back to their natural form immediately.
Pro tip: Apply a curl-defining gel before creating the pineapple if you’re concerned about frizz or curl definition during your workout. The gel sets the curl pattern so that even if a few individual curls get jostled during movement, they’ll still look intentional and defined rather than fuzzy.
5. Bantu Knots with Headband Protection
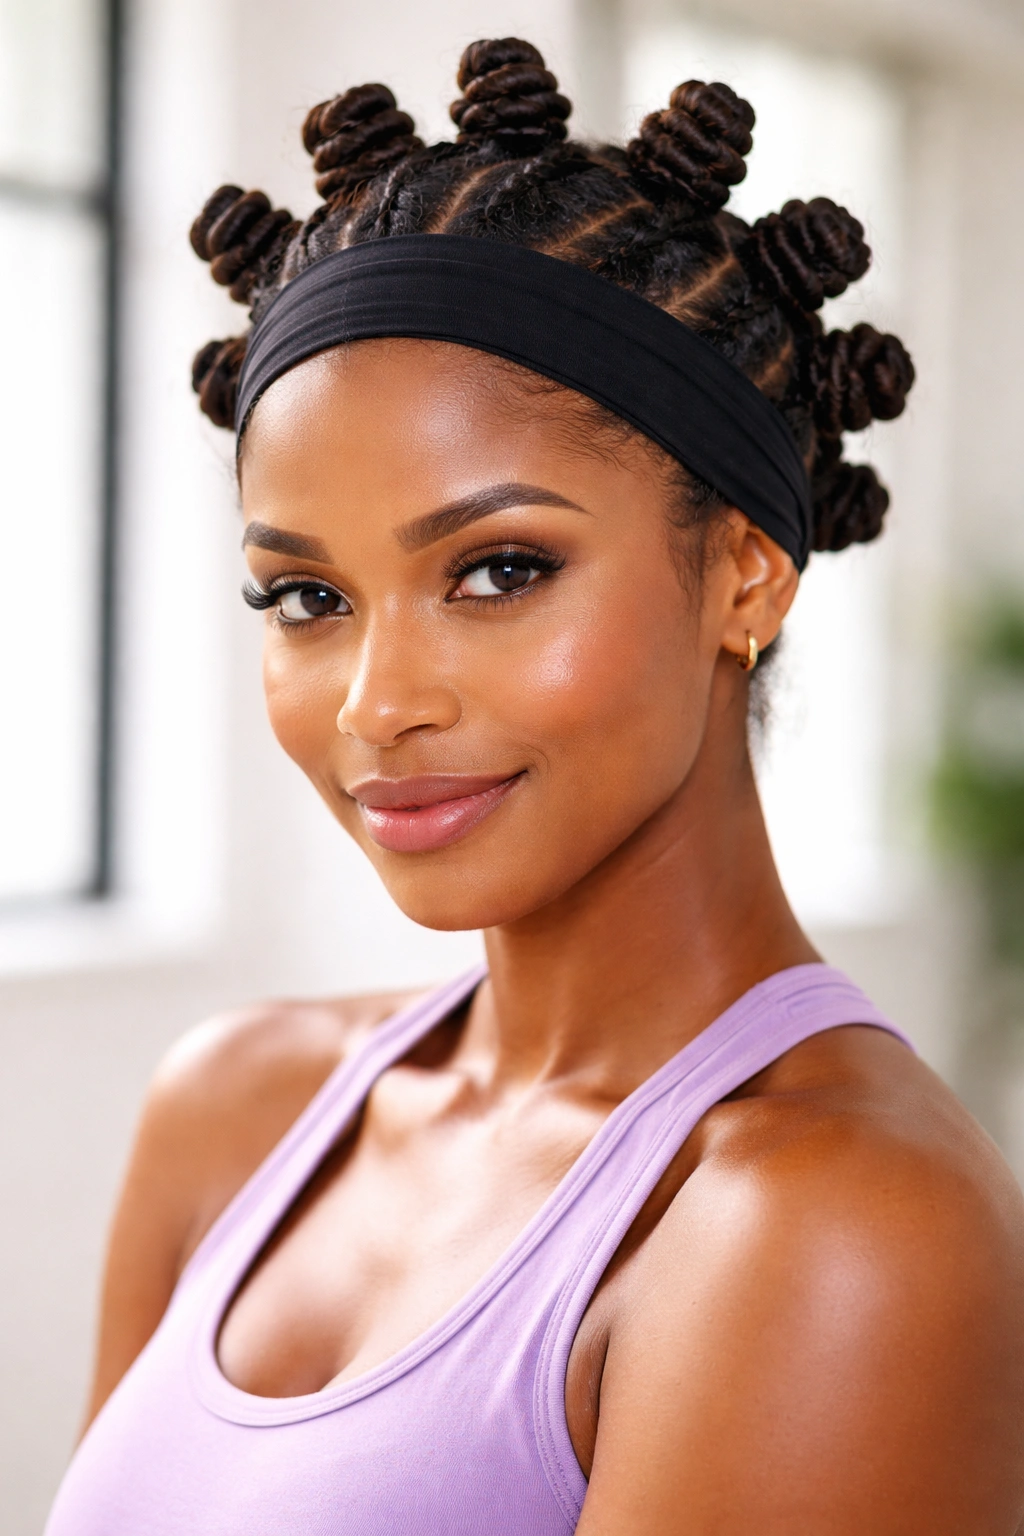
Bantu knots — small, coiled knots created by twisting sections of hair and wrapping them around themselves — create an astonishingly secure hold for curly hair while providing serious protective benefits. Each knot is essentially a self-contained anchor point, and when you secure multiple knots across your head with a headband, you’ve created a system with multiple redundancies.
The Bantu Knot Structure and Why It Works
A Bantu knot is created by taking a section of hair, twisting it tightly, then wrapping the twisted section around its own base to form a compact coil. Once pinned, the knot stays locked in place by the tension of the twist and the anchor point where it’s pinned to your scalp. For active sports, this is brilliant because each knot is independently secure — if one knot loosens slightly, the others are still holding, and your overall style doesn’t fail.
Bantu knots are also protective because the twisting and coiling process keeps tension off your actual curl strands. The tension is distributed across the bulk of the knot, not concentrated on individual hair fibers. This makes them one of the safest intense hairstyles for regular wear without damaging your curls.
Creating Bantu Knots That Hold Through Workouts
Section your hair into 8-12 sections, depending on your hair volume and how much time you have. Start with larger sections if you’re in a hurry — each section will become one knot. Apply a strong-hold mousse or lightweight gel to the first section, then twist it very tightly from root to tip. Once twisted, wrap the twisted section around its own base (like wrapping a phone cord around itself) until the entire section is coiled into a compact knot.
Pin the knot to your scalp with two bobby pins, securing it at the base where the twist originates. The pins should go through the coil and into your scalp, creating a rock-solid anchor. Repeat this process across your entire head, spacing the knots evenly.
Once all knots are in place and secured, wrap a wide athletic headband, bonnet, or scarf around your head, covering as many of the knots as possible. The headband creates outward pressure that locks the knots in place and prevents any loosening from movement or sweat.
The Durability Factor
Bantu knots stay secure through the entire duration of your workout without any loosening or restyling. They’re particularly excellent for swimming because the water doesn’t loosen them — the knot structure is so compact that water can’t penetrate it and cause slipping. Many people also use bantu knots for multi-day or week-long styles, and they hold just as well on day five as they do on day one.
The style also works beautifully for post-workout curl refresh. When you take down the bantu knots, your hair bounces back into curls with extra definition from having been coiled. Many athletes actually do bantu knots in the evening before a workout day, sleep with them, and then take them down in the morning for workout-ready curls that are already defined and set.
Worth knowing: Bantu knots take longer to create than a bun or ponytail — expect to spend 20-30 minutes on the full process. But the tradeoff is that they hold for 3-5 days, which means you can do them once and have workout-ready hair all week long. For people with a consistent exercise schedule, this is a game-changer.
6. Dutch Braids from Roots to Tips
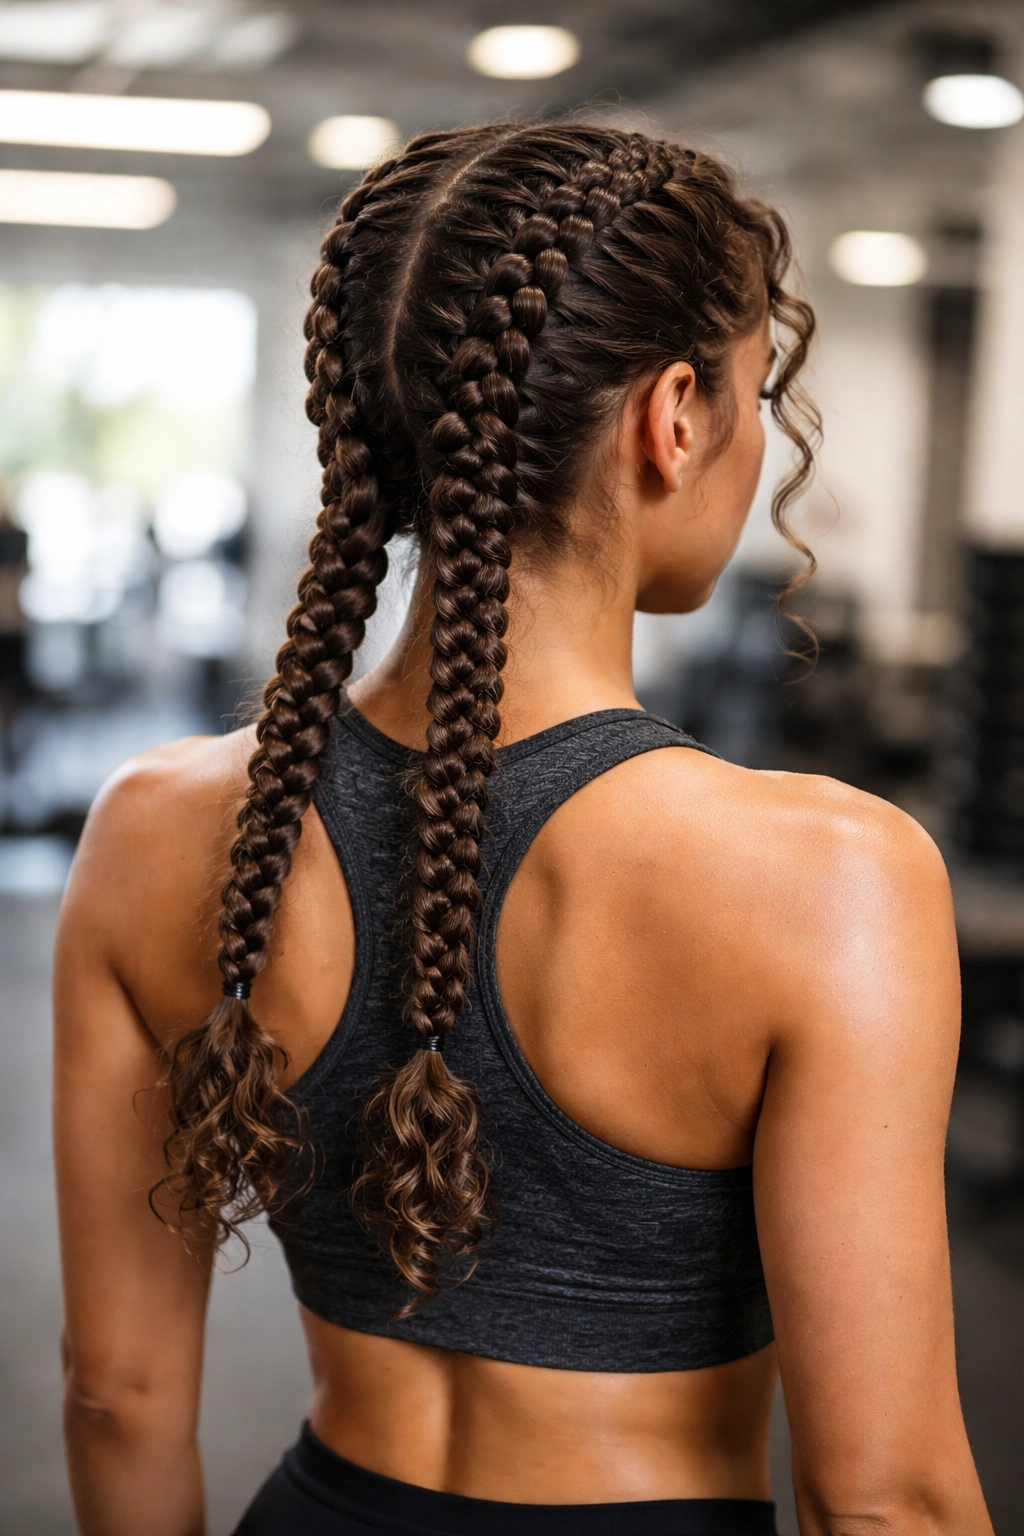
A Dutch braid (also called a reverse braid, where you braid under instead of over) is structurally stronger than a regular braid and holds curly hair with exceptional staying power. Running two Dutch braids from the roots all the way down to the tips creates a symmetrical, secure hold that’s perfect for any sport.
Why Dutch Braids Grip Curls Better
Dutch braids sit flatter against the scalp than regular braids, which means they create more surface contact between the braid and your head. This distributes the hold across a larger area rather than concentrating tension in one spot. For curly hair specifically, the underbraiding motion actually encourages the curls to grip each other, creating internal friction that helps the braid stay tight.
The Dutch braid’s structure also makes it resistant to loosening from sweat. A regular braid can gradually unravel as moisture breaks down the hold, but a Dutch braid’s flatter, more compressed structure resists this unraveling. The curls are woven more tightly together, making moisture less likely to compromise the hold.
Executing Dutch Braids That Hold Through High Movement
Start with curls that are already defined — apply a mousse or gel during the styling process for extra hold. Section your hair down the middle of your head, creating two equal halves. Starting at the temple on one side, begin a Dutch braid by taking a small section of hair and braiding underneath (the reverse of what you’d normally do).
As you braid, keep the tension firm but not extreme. With curly hair, you don’t need to pull hard to get a tight braid — the curl texture itself provides grip. Work the braid down the side of your head and all the way to the bottom of your hair, incorporating hair as you go. The goal is to braid all the way from root to tip so that every single strand is incorporated into the braid structure.
Secure the bottom of the first braid with a silk scrunchie or elastic, then repeat on the other side of your head. Once both braids are complete, you can leave them loose (two braids down the back of your head) or bring them together at the nape of your neck and secure them in a low ponytail, creating a kind of braid-wrapped base.
The Adaptability Factor
Dutch braids work for virtually any activity. For running, they provide stable, secure hold. For swimming, the braided structure prevents tangling and knotting — your curls stay protected and organized even while wet. For team sports with lots of directional movement, the two-braid structure distributes forces equally, preventing your hair from sliding one direction or another.
The style also scales beautifully with hair length. Even if you have short curly hair, two Dutch braids stay secure from root to tip. With longer hair, you get even more stability because there’s more hair to braid and the weight actually helps keep the braids taut.
Quick fact: Many competitive athletes who rely on reliable hairstyles choose Dutch braids because they can put them in wet or dry hair. Unlike some styles that require your hair to be in a specific state, Dutch braids work whether your curls are freshly washed and damp or a couple of days old and dry.
7. Twisted Half-Up Style with Bobby Pins

A twisted half-up style is simpler to create than a full bun or braids, but don’t let the simplicity fool you — when done correctly with the right pinning technique, it holds curly hair securely through moderate-to-intense activity. It’s an excellent middle-ground style for people who want something faster than braids but more secure than a simple ponytail.
The Half-Up Advantage for Curly Hair
The half-up approach divides your hair into two zones: a structured, pinned upper section that handles most of the hold work, and a loose lower section that remains in its natural curl pattern. This means you get the security of a tight style without committing your entire head of curls to compression. Your curl pattern doesn’t get straightened or creased because only half your hair is actively styled.
The twist is the key mechanism here. Twisting half of your hair creates tension and structure without requiring elastic bands that can slip or crease your curls. The twist compresses the curl fibers and creates friction, making the whole section stay locked in place once it’s pinned.
Building a Twisted Half-Up That Stays Secure
Section off the top half of your hair, from ear to ear, creating a clear line. Apply a medium-hold mousse or gel to this section as you gather it. Starting at one temple, twist the gathered hair tightly as you work back toward the crown. Keep twisting until you’ve got the entire top section condensed into one tight twist that runs from one ear across the back to the other ear.
Secure this twist at the back of your head with multiple bobby pins — at least three to four, distributed evenly along the twist. The bobby pins should pierce through the twist and anchor into your scalp, creating a solid hold. The more pins you use, the more redundancy you build into the system.
For extra security, use a small hair stick or spiral pin inserted through the twist perpendicular to the direction the twist is running. This adds a completely different type of hold mechanism — a pin that goes through the coil rather than under it — making slip virtually impossible.
Finish with a light hairspray on the twisted section and the edges of your lower hair. This sets everything in place without making your curls feel stiff or crunchy.
Why This Works Better Than You’d Expect
The half-up style distributes your hair’s weight more evenly than styles that gather all your hair at the crown. Half your hair is pinned and stable, and half is loose and hanging. This balances the forces on your head during movement and keeps everything from sliding backward or forward.
It’s also one of the fastest styles to create if you’re getting ready quickly. Once you’ve twisted and pinned the top section, you’re done. No braiding required, no wrapping, no multiple anchoring points to secure. Five minutes from start to finish for a hold that lasts 45 minutes to an hour.
The style also looks intentional enough for classes, sports, or even going out — it’s not just a utilitarian workout style. You can dress it up with decorative bobby pins or style the lower curls in a specific way that makes it feel polished.
Pro tip: Create this style with your hair slightly damp. Damp curls hold twists better than completely dry curls, and the moisture helps set the style so it stays locked longer.
8. The Braid-Out Base with Plopping
A braid-out base is a technique where you braid your hair while damp, sleep on it (or leave it for several hours), then take out the braids the next day. The result is pre-crimped, extra-textured curls that have built-in grip and hold. When you style this pre-set braid-out texture into a bun or ponytail, the hold becomes surprisingly durable.
Why Braid-Out Texture Grips Better
When you braid damp curls and let them dry in that braided structure, you’re essentially pre-setting them into a tighter, more textured form. Once you release the braids, your curls have enhanced definition and crimp texture from the braid impression. This textured, crimped hair grips itself more readily than smooth curls, making any hairstyle created from braid-out curls inherently more secure.
The technique is also incredibly curl-protective. Because you’re creating texture through braiding rather than through tension styling or heat, you’re not damaging your curls in the process — you’re actually enhancing them. This makes braid-outs an excellent choice if you exercise frequently and need styles that work well without compromising curl health.
Setting Up a Braid-Out for Sports
Start right after you wash and condition your curls. While your hair is still quite damp, apply a curl-setting mousse throughout. Section your hair into 4-6 large braids (or more if you want tighter crimp texture). Braid each section loosely — you want texture, not tight braids that will crease your hair. Use spiral clips or small hair sticks to secure the braid ends rather than elastics, which can crease your curls.
Go to bed with these braids in place, or wait at least 4-6 hours for your hair to dry completely. Once fully dry, carefully release the braids by removing the clips and gently unbraiding without pulling or combing. Your curls will have enhanced texture and definition from the braid impression.
Now style your braid-out curls into your sports hairstyle — a high bun, ponytail, or twisted updo. Because your curls already have built-in texture and enhanced grip, the final style holds with noticeably less effort. You don’t need as much gel or as many bobby pins because the curls are already in a more gripped state.
The Durability Advantage
A sports hairstyle built from braid-out texture holds longer than the same style created from smooth curls. You’re looking at an additional 15-30 minutes of secure hold compared to creating the same style from freshly washed curls. For many people, this is the difference between a hairstyle that lasts your full workout and one that starts loosening halfway through.
The style also bounces back better. When you take down a hairstyle made from braid-out curls, your curls still have the enhanced texture and definition from the braiding, so they look freshly styled rather than flat or stretched.
Worth knowing: Many athletes do braid-outs on rest days or days they’re not planning to exercise, then use those pre-textured curls for their workout hairstyles on active days. This is a perfectly legitimate strategy that requires almost no styling time on actual workout days.
9. Flat Twist Protective Style
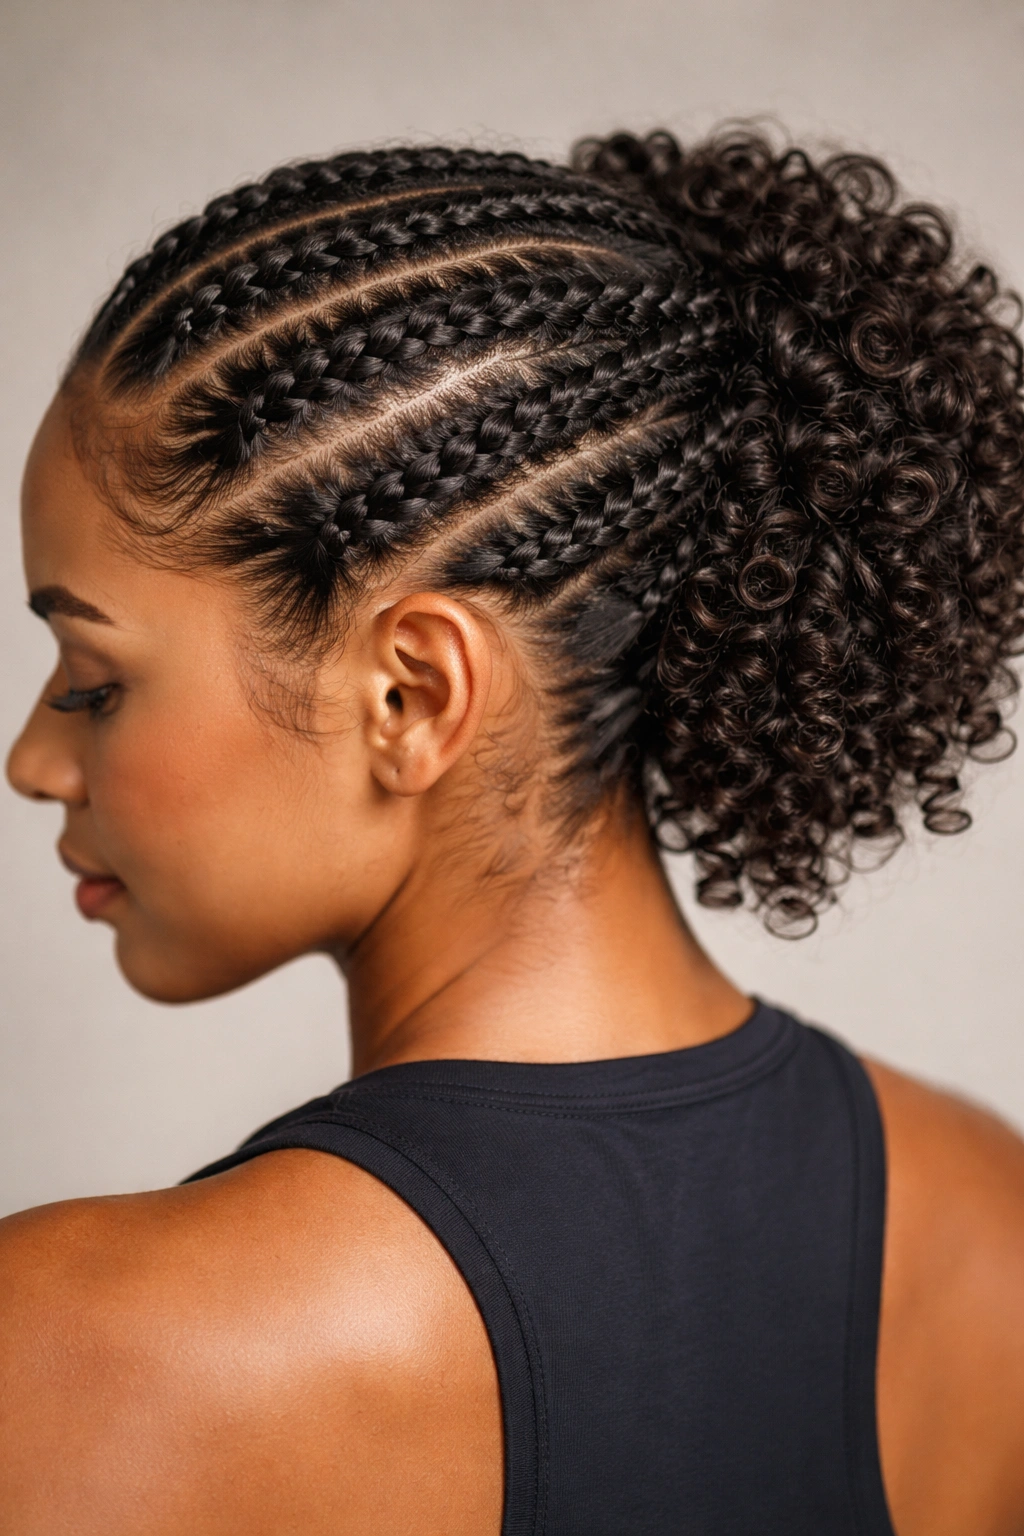
Flat twists are similar to cornrows but created with two-strand twists instead of three-strand braids. They run flat against your scalp, creating an incredibly secure hold while keeping tension off your actual curl fibers. For curly hair athletes who exercise multiple times a week, flat twists are one of the most sustainable, protective styles available.
The Mechanics of a Flat Twist
A flat twist is created by taking two sections of hair and twisting them around each other while simultaneously incorporating new hair from your scalp, much like you would with a cornrow. The result is a flat, rope-like braid that runs along your scalp. Because it’s only two strands instead of three, it’s easier to keep tight and flat, and it creates a streamlined shape that’s comfortable under hats or headbands.
Flat twists grip curly hair exceptionally well because you’re twisting curl pattern with curl pattern. The natural texture of your curls works in your favor — they grip each other as you twist, making the flat twist inherently tighter than it would be with straight hair.
Creating Flat Twists That Hold Through Intense Workouts
Section your hair into 6-8 parts (depending on your hair volume and how much hold you need). Start at your hairline with the first section. Take two small pieces of hair and twist them around each other tightly. As you twist, incorporate a thin slice of new hair from your scalp into one or both of the twisting strands, the way you would if you were creating a cornrow.
Keep the twists flat against your head by maintaining consistent, even tension. The twists should sit directly against your scalp, not puffy or rounded. Work the twist all the way down to the ends of that hair section, then secure it with a small elastic or hair stick.
Repeat this process with each section of your hair. Once all flat twists are complete, you can leave them loose (twists down the back of your head), gather them into a low ponytail, or use them as a base for additional styling like a bun or updo.
Apply a flexible-hold hairspray around the hairline and the twist edges. This tightens up any loose hair and sets the style so the twists don’t gradually unravel.
Why Flat Twists Last Through Anything
Flat twists are phenomenally durable because the hold mechanism is so redundant. Each twist has multiple anchor points along your scalp, plus the natural grip of twisted curls working together. You’d need significant pulling to actually loosen a well-done flat twist. This makes them perfect for swimmers, high-impact sports, and any activity with dynamic movement.
They also adapt beautifully to different hair types and thicknesses within the curly hair spectrum. Tight coils, loose waves, 3C curls, 4B curls — flat twists work for all of them because the mechanism relies on the natural texture of your hair, not on achieving a specific hair type.
Quick fact: Many people keep flat twists in for 2-3 weeks, using them as a multi-purpose protective style that works for both workouts and everyday wear. They’re not just a sports style — they’re also genuinely pretty and put-together looking.
10. Sectioned Ponytails with Moisture Lock
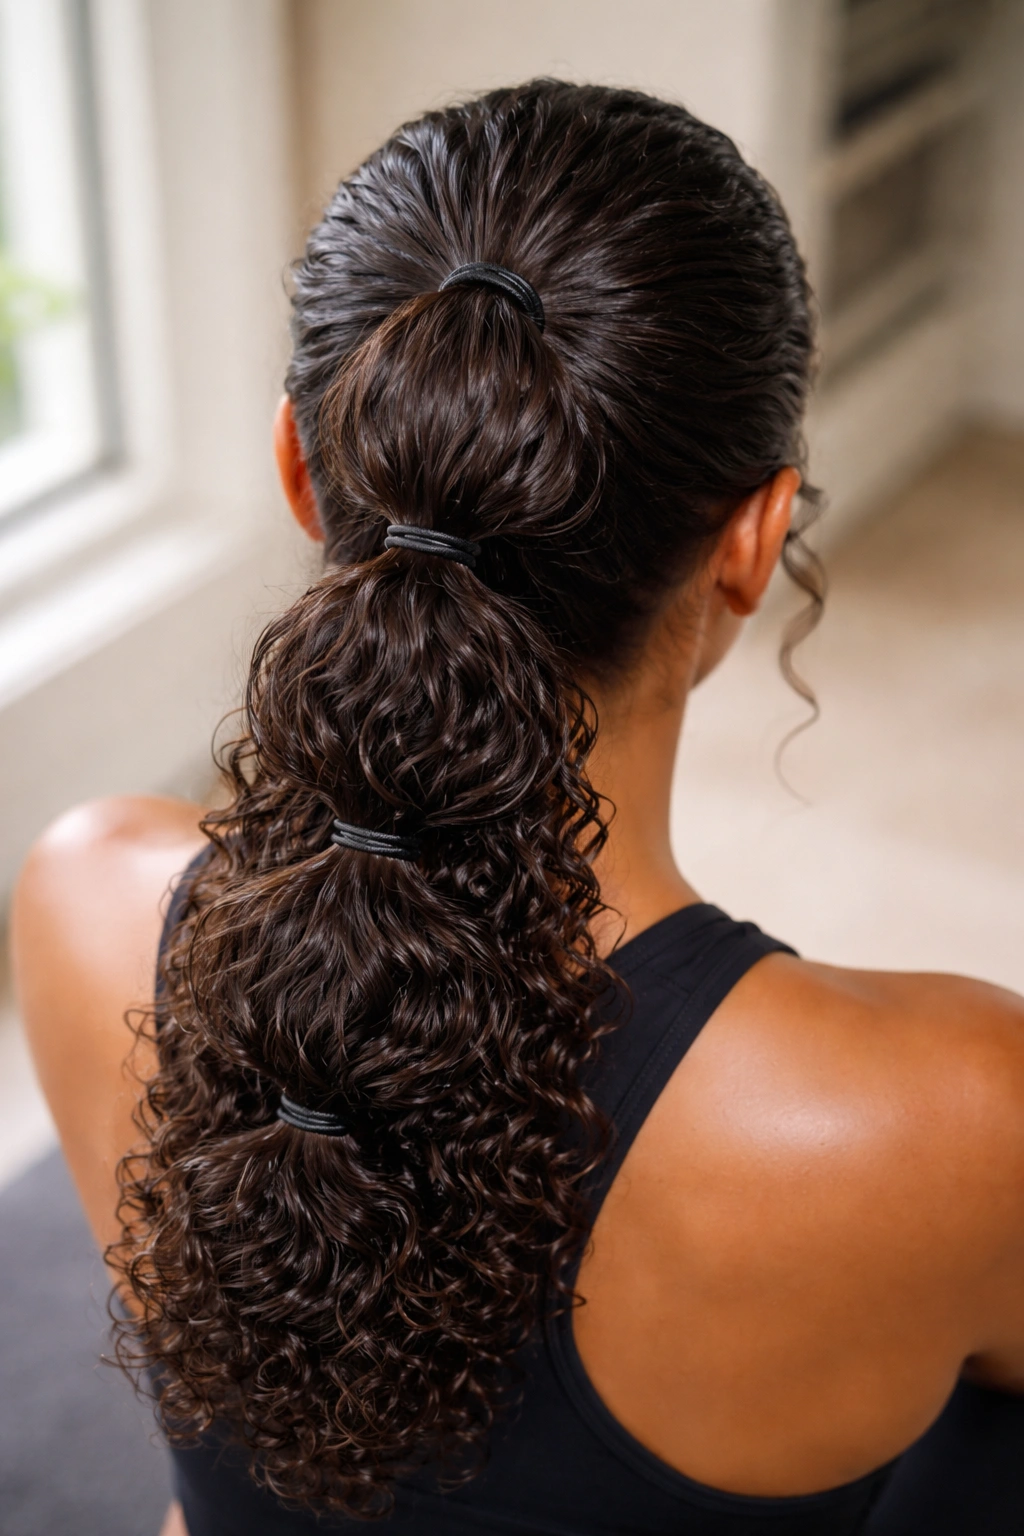
Instead of pulling all your hair into one ponytail, the sectioned ponytail approach creates 2-3 smaller ponytails positioned at different points on your head, then secures them together as a unified structure. This distributes your hair’s weight and the hold mechanism across multiple anchor points, making slip nearly impossible even with heavy sweat.
Why Sectioned Ponytails Stay Secure
The fundamental issue with a single high ponytail is that all your hair’s weight concentrates in one spot, and sweat at that single anchor point eventually causes slip. Sectioned ponytails solve this by distributing weight across multiple positions. You might have one ponytail at the crown, one at the back of your head, and one at the nape of your neck. Together, they create a structure that’s far more stable than a single ponytail could ever be.
For curly hair specifically, multiple ponytails also mean less tension on any single section of curls. Instead of pulling all your hair straight back with intense force, you’re distributing the gathering and hold across multiple gentle gathers.
Executing Sectioned Ponytails
Section your hair into three zones: crown, back, and nape. Create a ponytail at each position, securing each with a silk or satin scrunchie. Apply mousse or gel to each ponytail to enhance hold. Now, bring all three ponytails together and secure them as one unit using bobby pins or a hair stick inserted through all three bases simultaneously.
The bobby pins should go through all three ponytail bases, creating a unified anchor point that connects all three ponytails. This is what turns three separate ponytails into one cohesive, immobile structure. The individual scrunchies on each ponytail act as small anchors, and the bobby pins through all three bases act as the master anchor.
Add a light hairspray to the three ponytail bases where they join, solidifying the connection. You can also wrap a thin silk scarf around where the three ponytails meet, adding friction that prevents slip.
The Flexibility Within Structure
This style works beautifully because while it provides structure and hold, it doesn’t require your curls to be severely compressed. Each individual ponytail is relatively loose — the security comes from having three of them rather than one tight one. Your curls stay in closer to their natural form, which is easier on your hair and often looks better when you take it down.
It’s also extremely quick to adjust or refine during your workout if needed. If you notice one section starting to slip, you can simply retighten that specific ponytail without disturbing the others.
Pro tip: For extra hold, braid each individual ponytail before joining them together. Two braided ponytails that are then united as one create insane staying power while still being protective to your curls. This is an advanced move for people who really need serious durability.
Final Thoughts
The difference between a sports hairstyle that falls apart halfway through your workout and one that holds perfectly comes down to understanding how your specific curl pattern grips and holds together. Every hairstyle covered here works because it leverages the natural properties of curly hair — texture, grip, and friction — rather than fighting against them.
None of these styles require you to damage or straighten your curls to achieve security. In fact, many of them (like braid-outs and flat twists) actually improve your curl definition while holding them in place. You can work out consistently, keep your curls beautiful, and never sacrifice one for the other. The key is picking a style that matches your activity level, your hair thickness, and how much time you’re willing to spend styling. Start with one and practice it until you can create it perfectly. Then add another to your rotation. Within a couple of weeks, you’ll have several reliable styles that work for any workout scenario.