Looking for a hairstyle that gives you the best of both worlds? Half up half down styles are literally designed for curly hair — they keep your face framing curls visible while pulling back enough volume to actually let you see. The challenge isn’t figuring out that half up half down works for curls; it’s deciding which variation will make you feel most like yourself on any given day.
The truth is, curly hair gives you an advantage that straight-haired people don’t have. Your natural texture creates instant dimension and visual interest even when you’re working with a “simple” half up look. The key is understanding how to work with your curl pattern instead of fighting it, securing your hair in ways that won’t disrupt the curls you leave down, and knowing which techniques create that effortless-but-intentional vibe that actually takes some strategy to pull off.
These twelve styles range from quick five-minute solutions to more intricate looks for when you’ve got time. Some work better for tighter coils, others shine on looser waves, and plenty adapt beautifully across the entire curl spectrum. What they all share is the ability to look polished without making your hair feel trapped or uncomfortable — the kind of style where you can still move freely and feel like yourself.
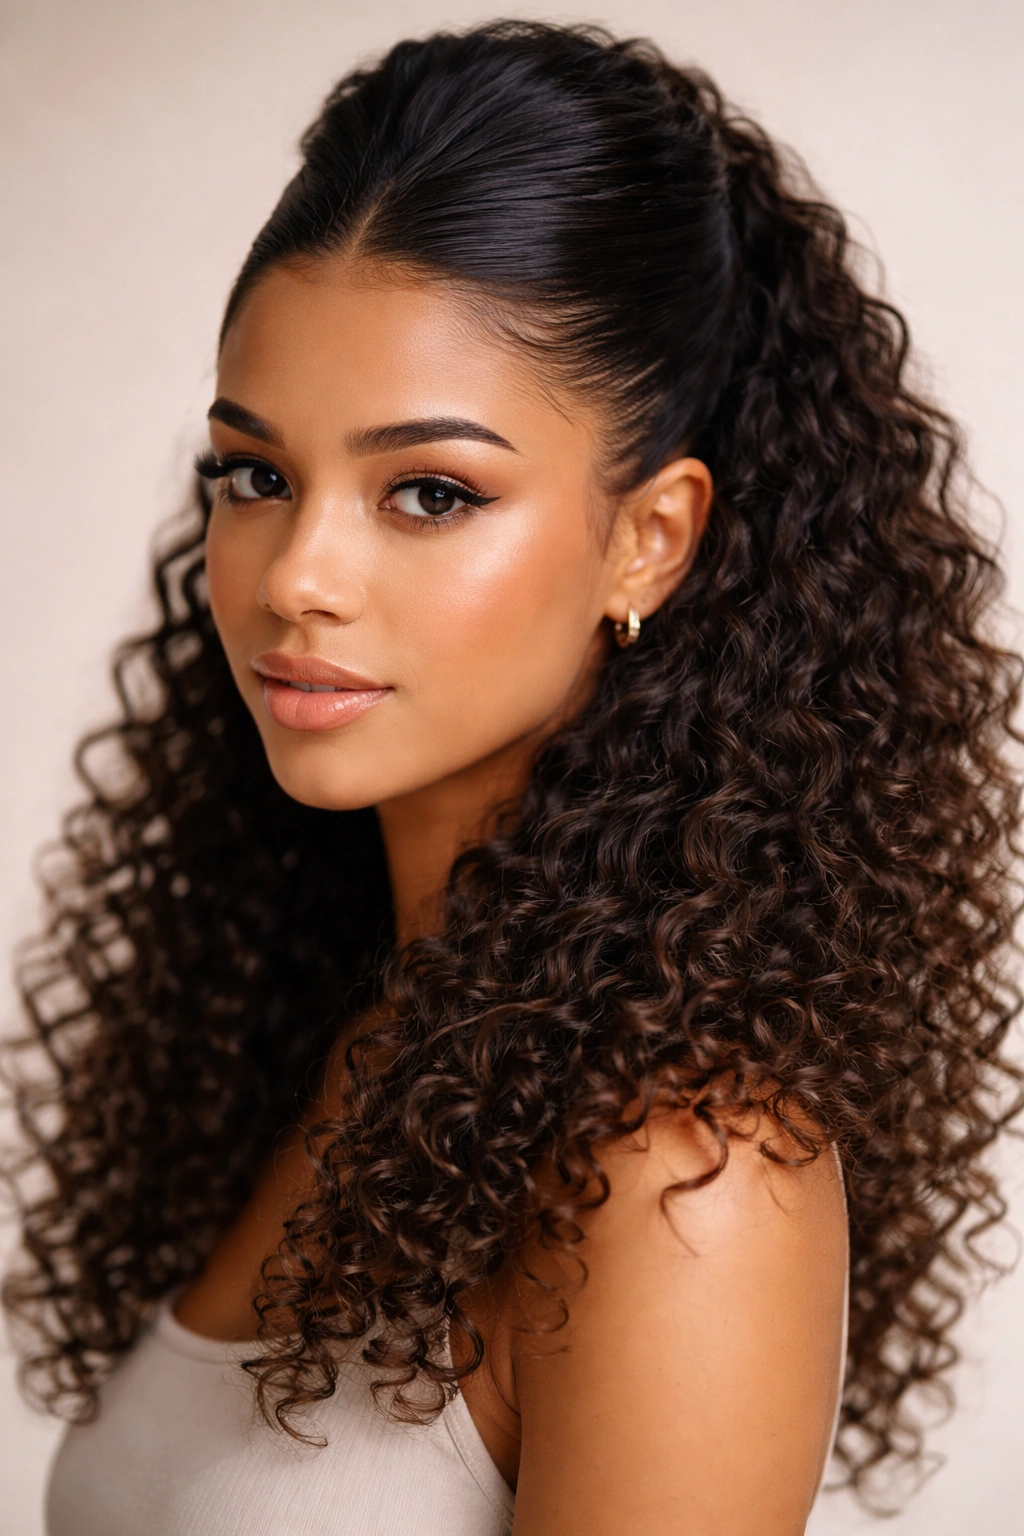
1. High Pony Half Up
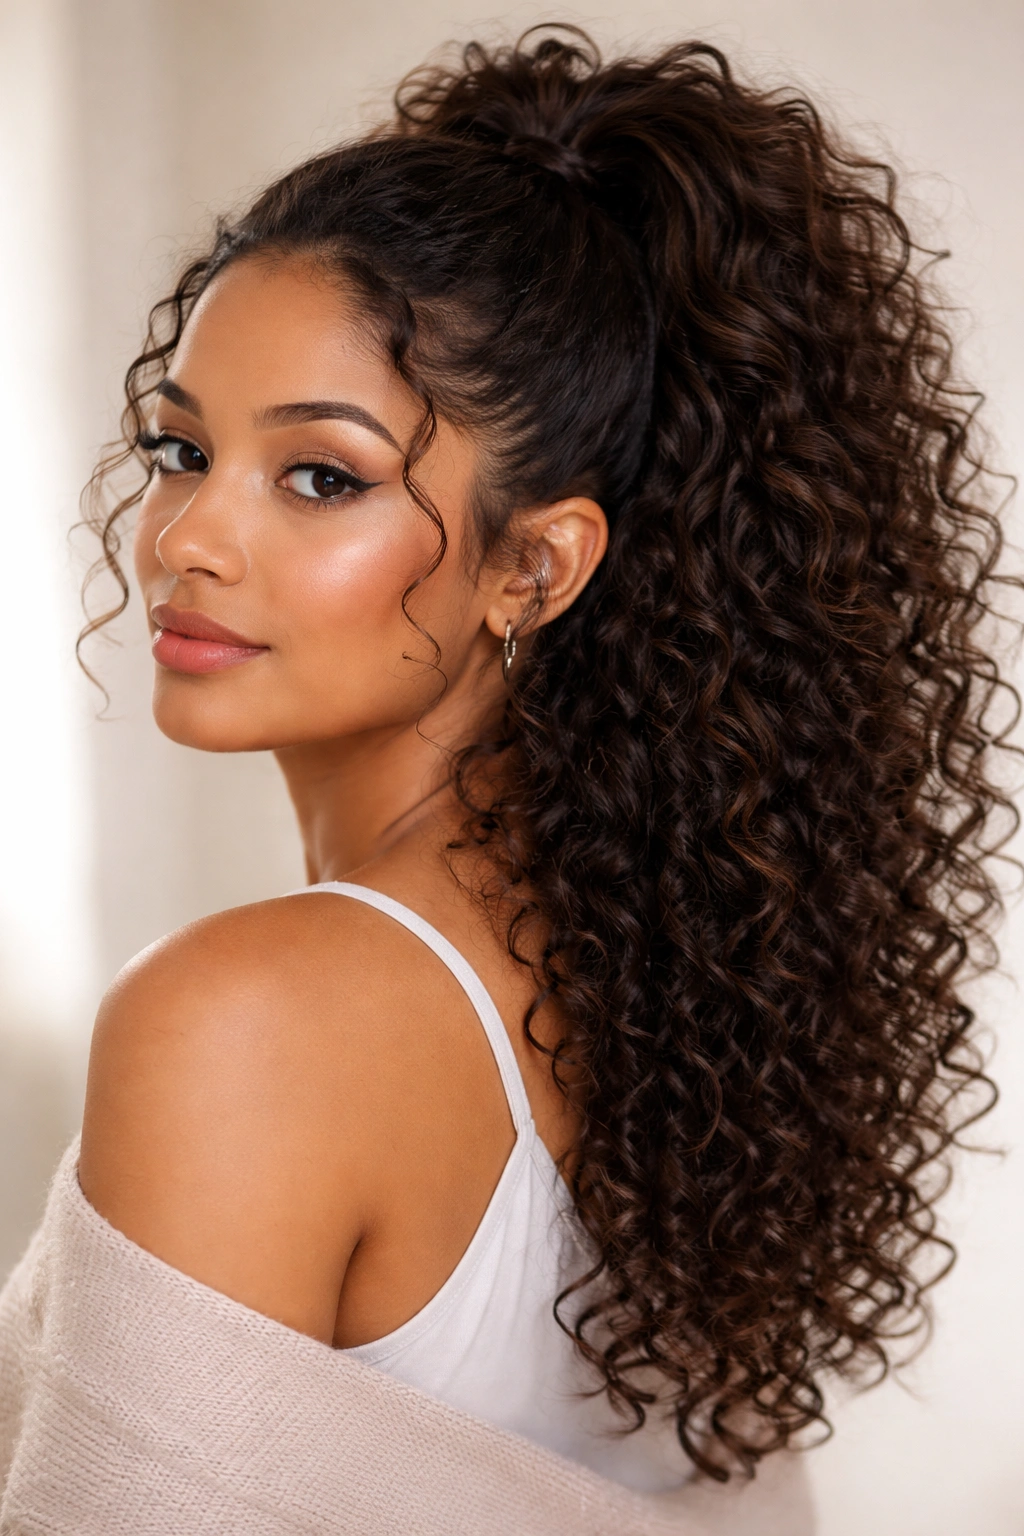
This is your go-to when you want to look put-together without the effort feeling obvious. You’re gathering the top section of your hair into a high ponytail, but stopping at mid-scalp so that all your lower curls cascade freely down your back. The trick with curly hair is understanding that “high” doesn’t mean the same place it does on straight hair — you’re working with height and volume, not just length.
Why This Works So Well for Curls
The high positioning keeps the style from looking droopy or flat, which matters when you’re working with textured hair that has natural volume anyway. Unlike sleek straight-haired high ponies that can look severe, a curly high pony half-up reads as effortlessly voluminous and bouncy. You’re using your curl’s natural lift to enhance the proportions of the style.
How to Create This Look
- Use a curl-friendly gathering method: instead of using a single elastic, do two passes with your elastic to gently secure without tugging
- Keep your fingers loose in the upper section as you’re gathering — you want to preserve curl pattern, not flatten anything
- Consider a textured elastic or claw clip instead of a traditional ponytail holder; they grip without causing breakage
- Leave a few face-framing pieces entirely loose, or take one tiny strand from the secured section and wrap it loosely around your elastic for that intentional texture
Pro tip: Don’t brush or comb the upper section if you can avoid it — finger-comb or use a wide-tooth comb just enough to gather the hair gently, then let the curls stack naturally as you secure them.
2. Twisted Half Bun
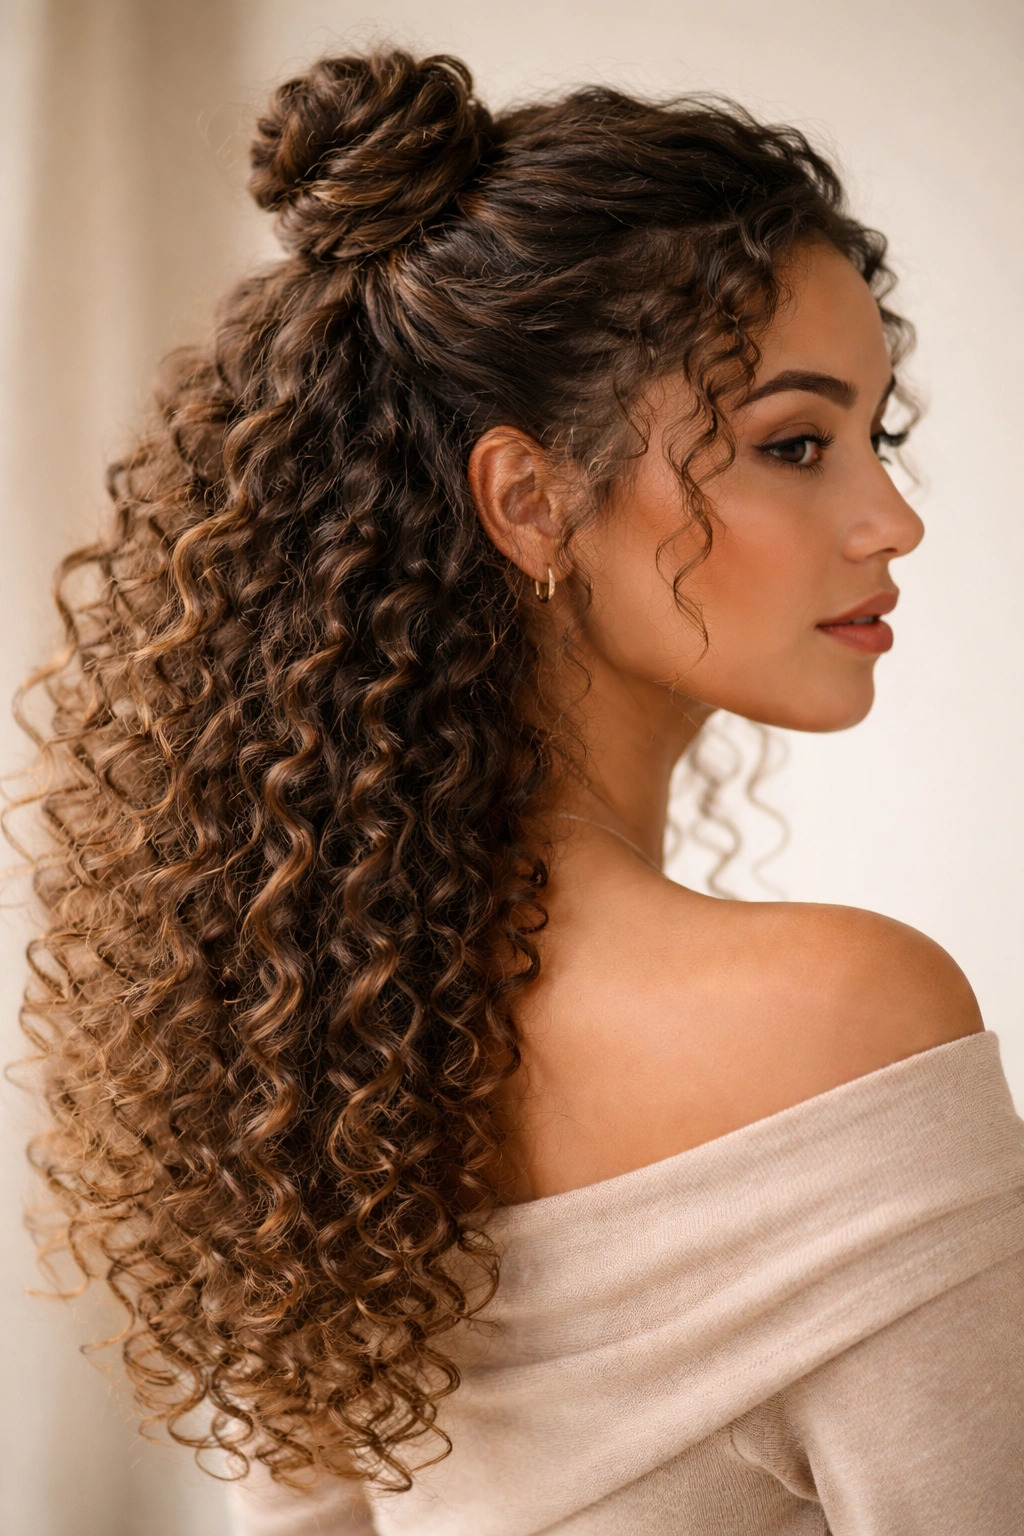
This version feels more intentional and polished than a casual ponytail, but it’s still achievable in about three minutes. You’re twisting the top section of your hair and looping it into a bun, leaving the lower half of your curls down. The twist creates visual interest and texture that photographs beautifully, and it actually feels lighter and less heavy than a traditional half-up ponytail.
The Real Advantage of a Twist Over a Straight Section
Twisting your hair before bunning it does something valuable: it naturally congregates your curl pattern into a more cohesive shape instead of creating a bulky, undefined mass at the back of your head. The spiraling of the twist works with curls instead of against them. You end up with a bun that has real shape and definition, not a vague poof.
Building the Twisted Half Bun
- Gather your top section as if you’re making a high half pony, but don’t secure it yet
- Twist the gathered section gently but firmly — about two full rotations
- Loop the twisted section over itself into a bun shape
- Secure with bobby pins inserted parallel to the twist direction (so they follow the spiral), which keeps the twist intact
- Use 3-4 bobby pins minimum; curly hair is heavier than straight, and you need stability
Worth knowing: If your twist feels too loose or your bun threatens to unravel, try twisting in the opposite direction of your natural curl pattern — you’ll get more grip and definition.
3. Braided Half Up
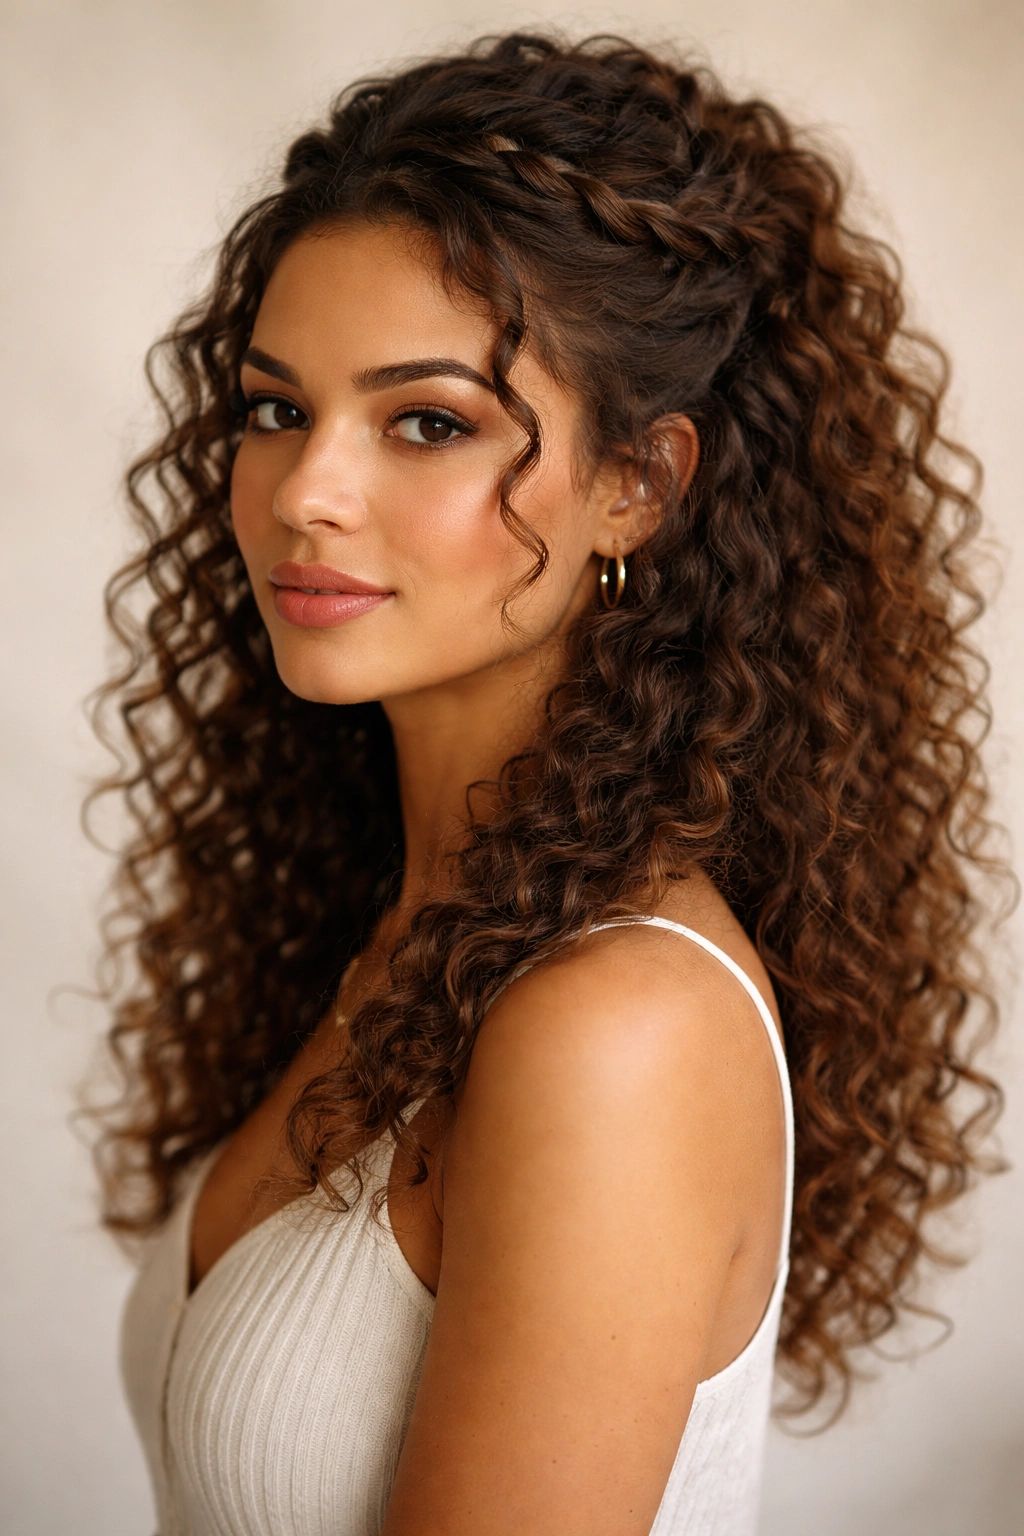
A braid running from one side of your head to the other changes the entire energy of a half-up style. It looks intentional, slightly romantic, and gives your face the framing that makes curly hair absolutely shine. The beauty of a braid in curly hair is that loose texture actually enhances it — you don’t need razor-straight sections to make it work.
Why Braids and Curls Were Made for Each Other
Braids in curly hair automatically look textured and organic because your curls poke through and around the braid structure in ways they simply don’t on straight hair. This means you don’t have to obsess over perfect tension or sleek sections — slightly imperfect actually reads as intentional and beautiful. Your natural texture is doing half the work for you.
The Braided Half-Up Process
- Gather your top section and decide whether you want a three-strand braid, a Dutch braid (inverted), or a fishtail variation
- Start the braid slightly off-center from your natural part, pulling it toward the back of your head
- Keep your braid tension loose — think of it as guiding rather than pulling
- Secure the end of your braid with a small elastic, then gently tug at the edges of the braid to loosen and expand it (this makes curly hair braids look full and textured)
- Pin the braid into place against your head using the bun method from style #2, or secure it where it ends and let it sit as a decorative anchor point
Pro tip: For an ultra-romantic version, weave a thin silk ribbon or delicate chain through your braid after you’ve loosed it up — the metallic or colorful element makes the whole look feel elevated.
4. Clip-Secured Half Up with Decorative Clasp
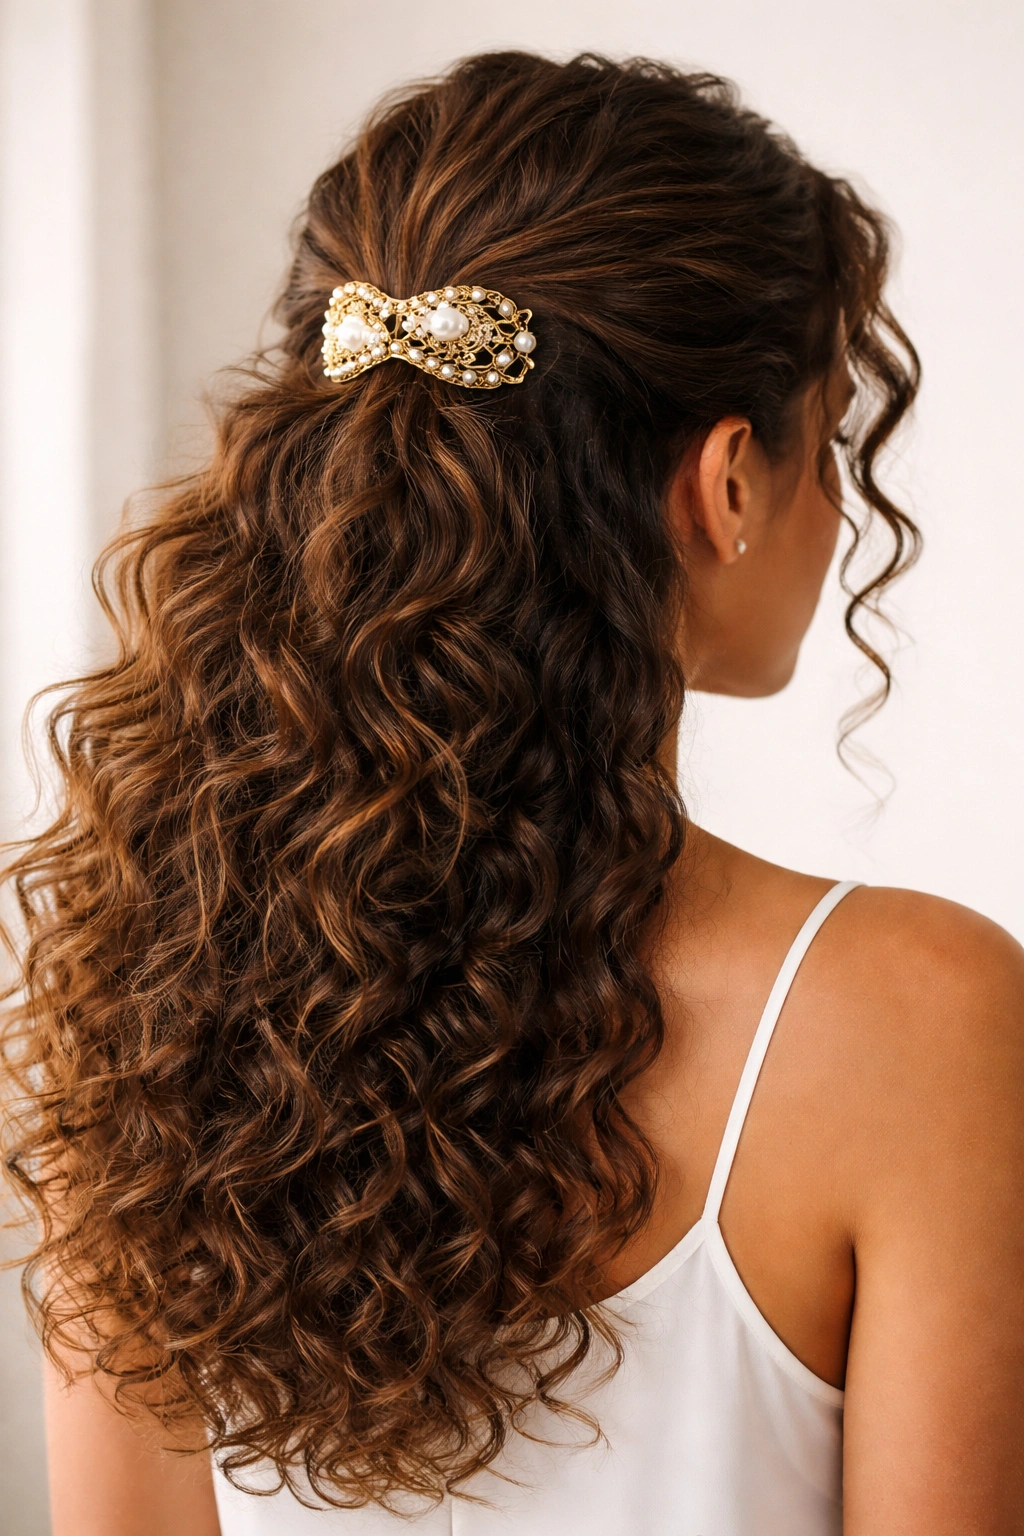
Sometimes the simplest solution is the best one. A claw clip or decorative hair clip eliminates the need for twisting, bunning, or elaborate securing — you’re just gathering your top section and fastening it. For curly hair, this is genuinely genius because clips don’t create the tension or stress on your curls that elastics can.
The Clip Advantage for Textured Hair
Clips are gentler on curl health because they don’t leave the same creasing or stretching that a tight elastic does. They also won’t leave you with that rubber-band indent on your hair when you take it down at the end of the day. Plus, they’re wildly photogenic — the right clip becomes a visual element of the style, not just a functional necessity.
Making the Clip Style Work
- Gather your top section loosely with your fingers or a wide-tooth comb
- Choose a clip that feels substantial enough to hold your hair weight without straining (thicker clips work better than flimsy ones for curly hair)
- Position the clip at the back of your gathered section, angling it slightly downward — this prevents it from popping open
- Leave your gathered hair slightly textured and undone-looking; clips actually look better when paired with a slightly loose, tousled upper section
- If your clip is slipping, try sectioning your gathered hair into two parts and clipping each separately for double security
Worth knowing: Tortoiseshell, metal, and pearl-finish clips look stunning in curly hair and instantly elevate the look from casual to intentional.
5. Sleek Half Up with Gel or Cream
This is your style when you want contrast — the structured top against the wild, full curls down. You’re creating a deliberately polished upper section (not the natural curls you’d normally wear loose) while letting everything else be textured chaos. It’s bold, modern, and surprisingly wearable if you know how to execute it properly.
Why You Don’t Want to Look Like Two Different Hairstyles
The risk here is your upper section looking so controlled that it feels disconnected from the free curls below. To avoid that, you’re not going for slicked exactly — you’re going for shaped. There’s a difference. Shaped means your curls are defined and sculpted but still visible as curls. Slicked means flattened and shiny, which reads as harsh against textured curls.
Achieving the Polished-Not-Plastic Look
- Apply a lightweight curl-defining cream or gel only to your top section, not your lower curls
- Use a boar-bristle brush or a paddle brush with short, directional strokes to shape your upper section against your head
- Smooth it toward your securing point (back of the head), but don’t flatten it — the goal is smooth shape, not smoothness
- Secure with a claw clip or tight elastic
- Take one tiny section from the secured area and wrap it around your securing clip to cover it and add texture
Pro tip: If your gel or cream looks too shiny on your upper section, lightly mist it with a matte finish hairspray, which cuts the shine without adding crunchiness.
6. Messy Half Bun with Maximum Face-Framing
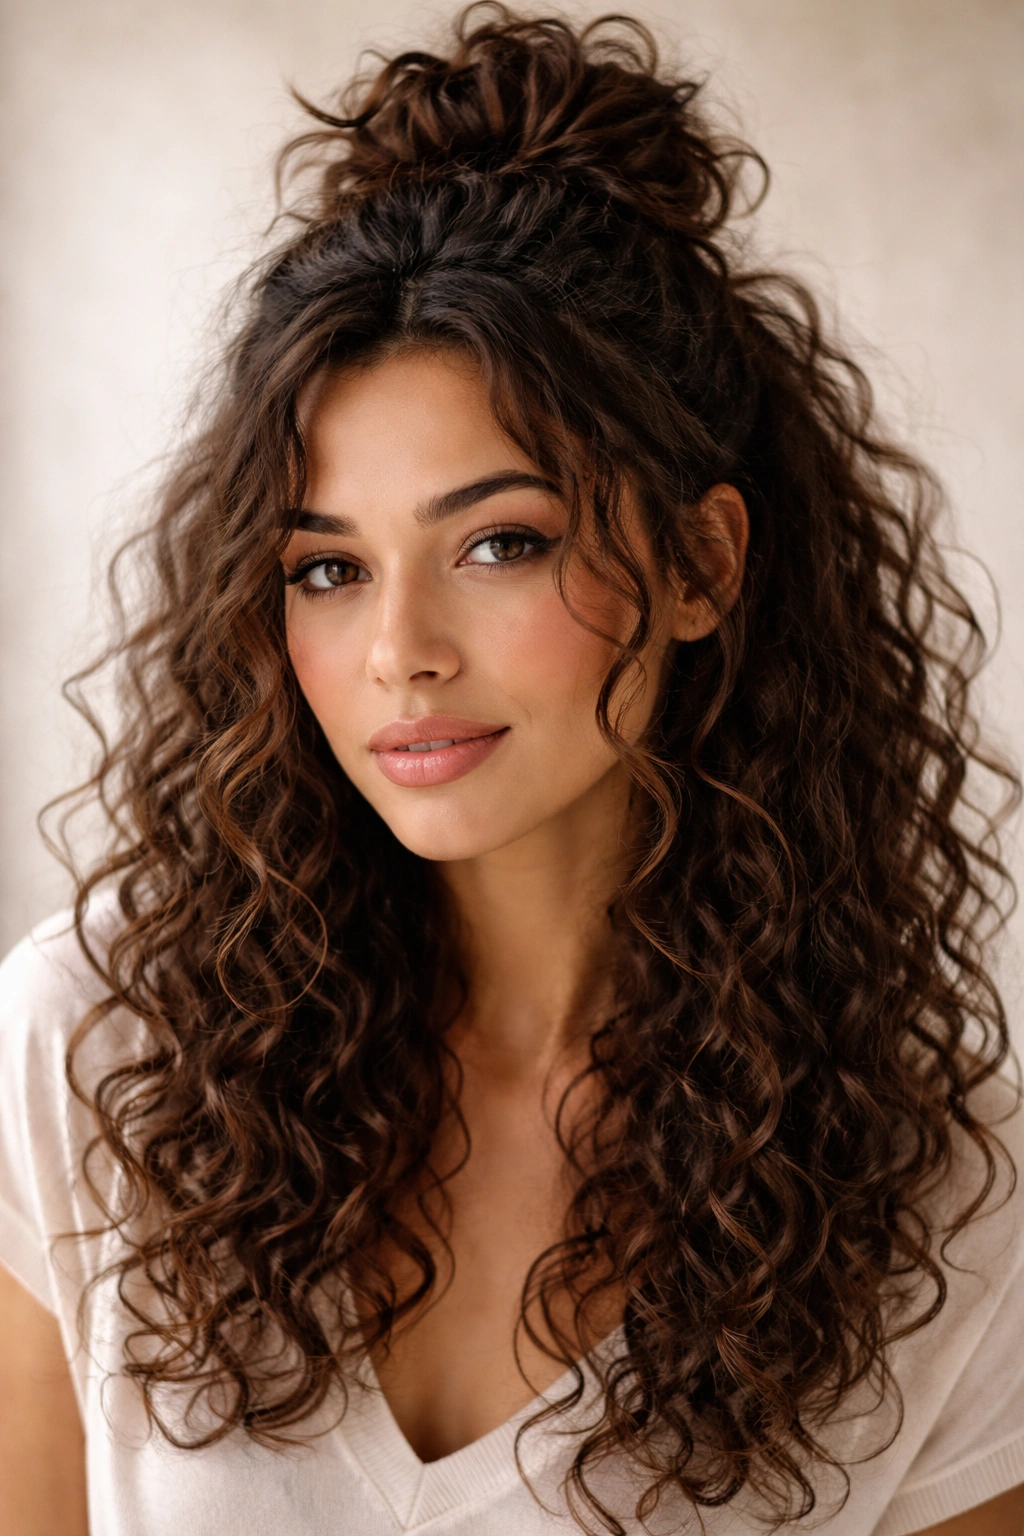
This is the ultimate “I’m not trying but I look amazing” style — except you are trying, just strategically. You’re creating a bun in the back but deliberately leaving multiple loose pieces around your face and temples. It’s about abundance and softness rather than precision.
The Messy Bun Philosophy for Curls
Curly hair is actually better at messy buns than straight hair because your natural texture creates the appearance of intentional looseness without your bun looking like a failure. Straight hair has to work hard to look deliberately undone; curly hair has to work hard not to look undone. Use this to your advantage.
Building the Perfectly Imperfect Bun
- Finger-comb your top section only, without trying to smooth anything — you want to preserve the curl pattern as much as possible
- Gather it into a very loose high ponytail using a soft elastic or scrunchie
- Don’t secure it tightly; you want gentle gathering, not compression
- Loop the ponytail into a bun and secure with bobby pins, but leave wisps and strays on purpose
- Before you finish, pull down at least 4-5 intentional strands from around your face and temples — these should fall in soft curls around your cheeks and neck
- Gently tug at your bun to loosen it further, creating peaks and valleys rather than a smooth dome
Pro tip: Use curling cream or a light wax on those face-framing pieces to encourage them to curl more dramatically and separate from each other.
7. Double Twisted Half Up
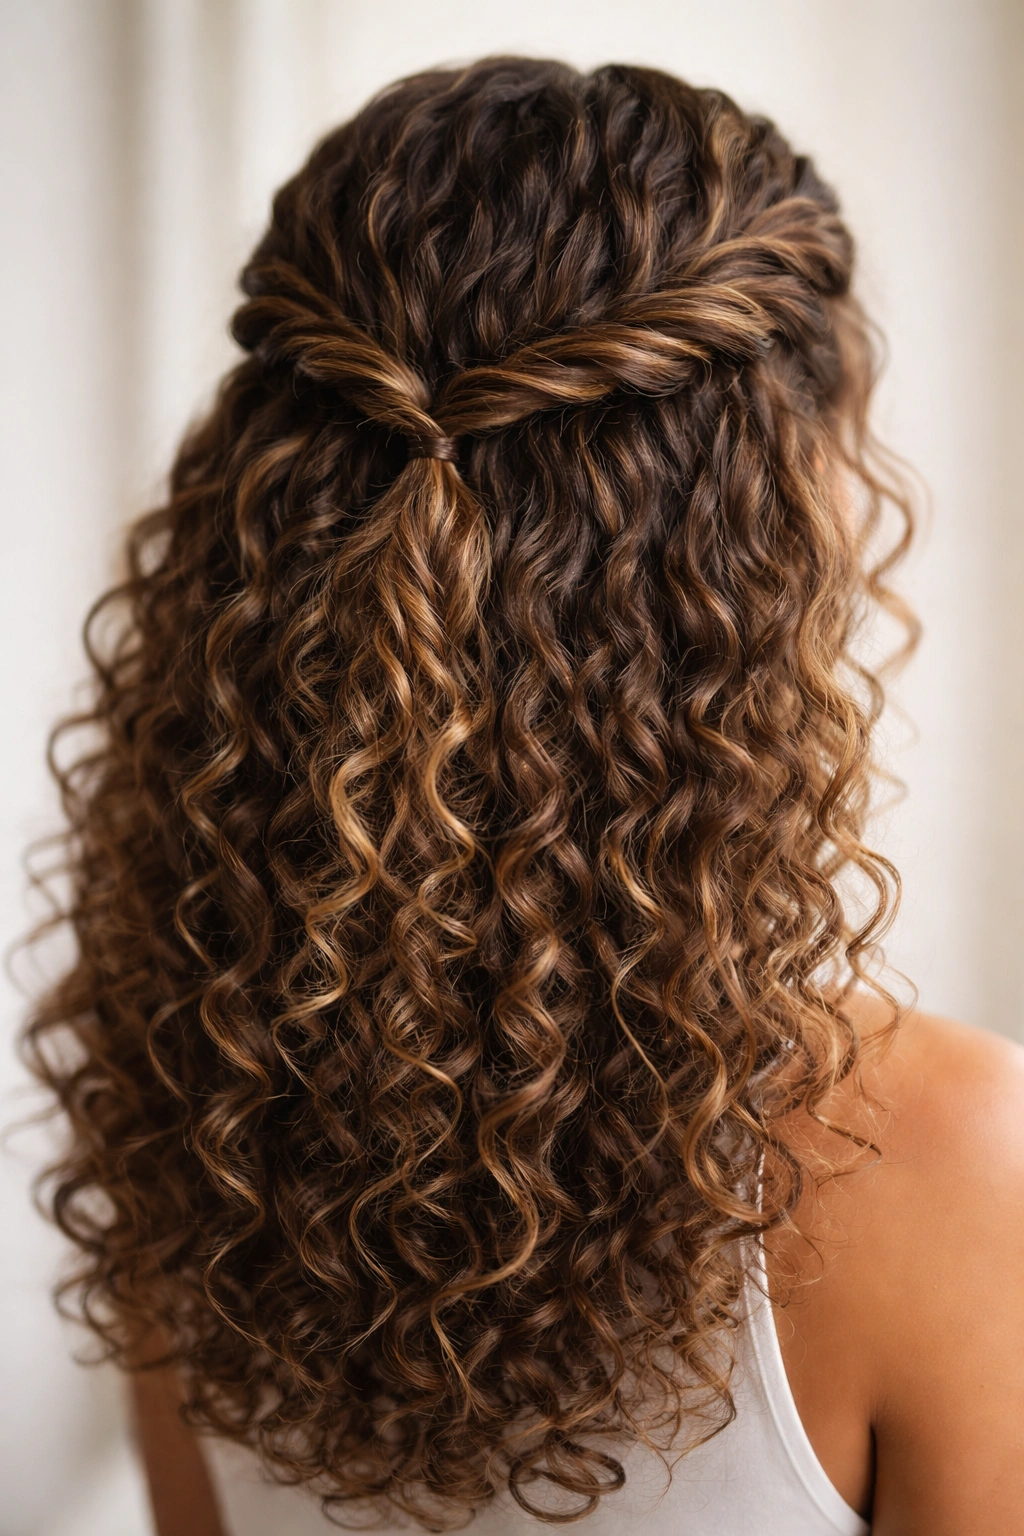
If you want something that looks more complex and intentional than a single twist but still takes only a few minutes, double twists are your secret weapon. You’re creating two separate twists from opposite sides of your head and securing them together at the back, which creates a braided-looking effect without the actual braidwork.
Why Two Twists Feel More Intentional Than One
A single twist can sometimes look like you just grabbed your hair randomly. Two twists from symmetrical starting points read as purposeful and designed. The visual interest created by the two spirals meeting at the back is genuinely striking in curly hair because you can see the texture of each twist clearly.
The Two-Twist Technique
- Take a small section from one side of your head (near your temple) and twist it gently but firmly toward the back of your head
- Simultaneously, take a matching section from the opposite side and twist it in the same direction, meeting the first twist at the center back
- Secure both twists together with bobby pins or a small elastic, creating a gathered point
- Gently loosen each twist by tugging at the edges, which expands them and shows off your curl texture
- If you want the look to be even more interesting, don’t secure the twists together — instead, pin them side-by-side in a parallel arrangement
Worth knowing: This style works beautifully as a base for additional styling — you could weave ribbon through the twists, add decorative pins, or even tuck small flowers into the secured section for a special occasion.
8. Half Up with Decorative Pins and Clips
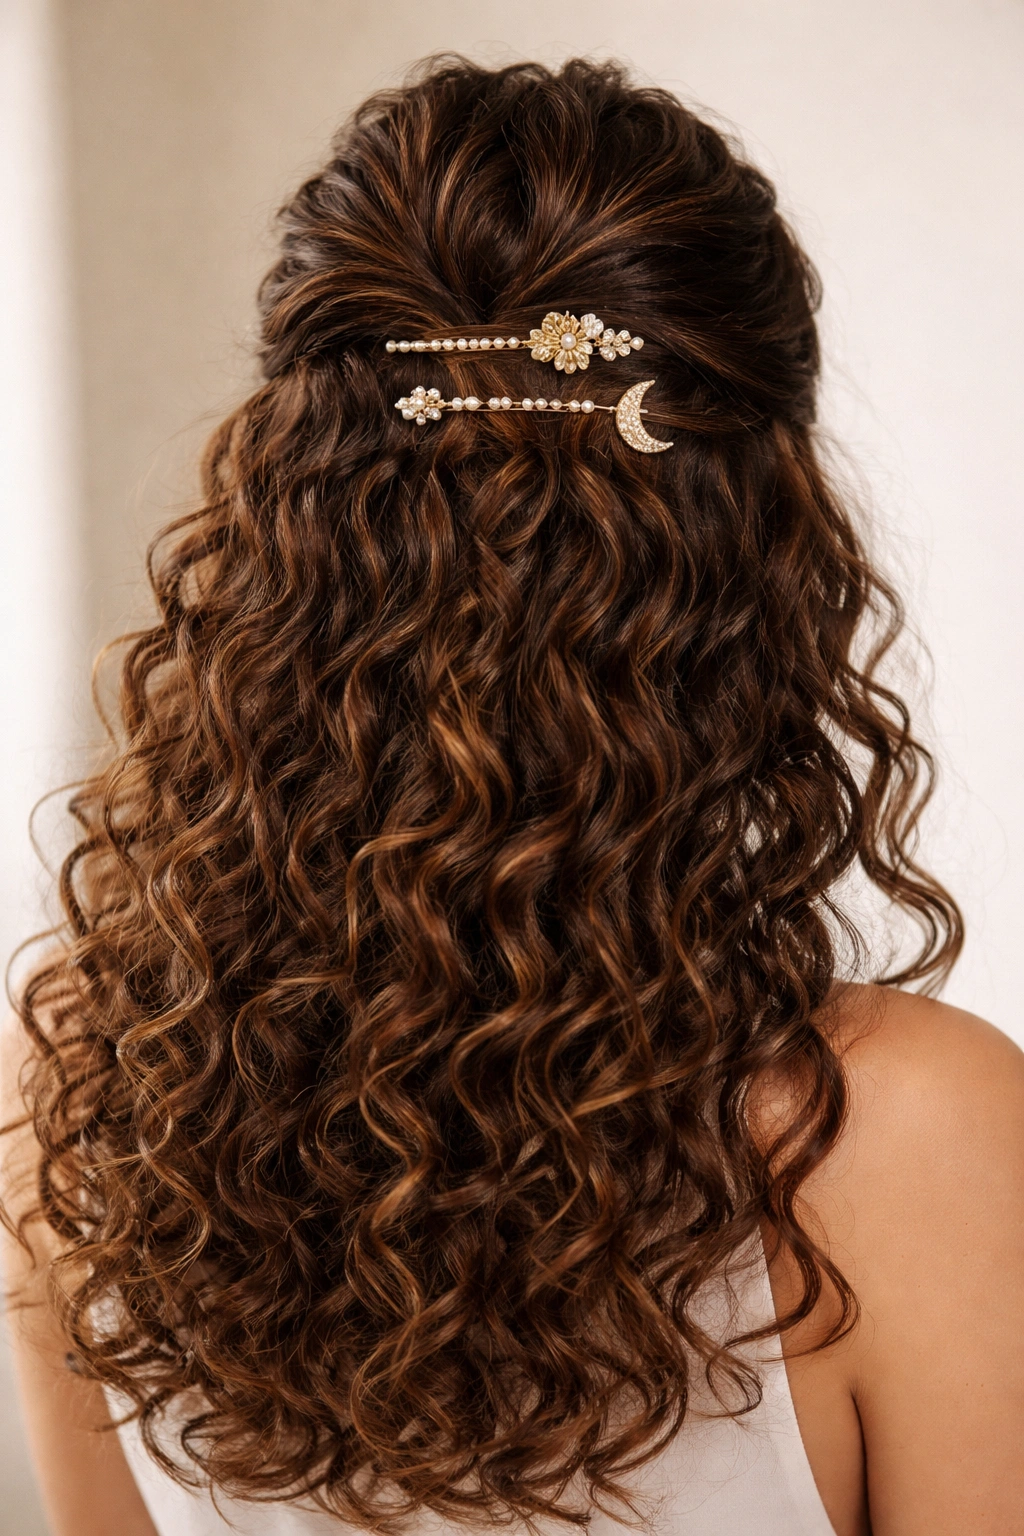
This is where you move beyond functional hair securing and into actual styling as art. You’re gathering your top section in a relatively simple way, but the visual magic comes from the pins, clips, and decorative elements you’re adding. Your curls are the canvas; your accessories are the brushstrokes.
Making Accessories Feel Intentional, Not Desperate
The difference between looking styled and looking cluttered comes down to intention and balance. You’re not throwing five random clips in hoping something works — you’re choosing coordinating pieces and placing them deliberately. Think about it like jewelry; you wouldn’t wear every ring you own on one hand.
Styling with Decorative Elements
- Gather your top section using whatever method feels secure (clip, twist, elastic)
- Choose 2-3 coordinating decorative elements (could be pearl clips, metal bobby pins, a silk ribbon, a delicate comb, or decorated elastics)
- Position them along the secured section in a balanced way — not all bunched in one spot, but distributed with intention
- Space them so there’s a visual rhythm; if you have three clips, they should be roughly equidistant from each other
- Make sure they’re actually securing your hair, not just sitting on top — they should earn their place functionally and aesthetically
- Consider a mixture of textures: perhaps a metal clip paired with a velvet elastic, or a pearl pin next to a woven claw clip
Pro tip: One statement piece often looks more sophisticated than multiple small pieces — if you’re going to add accessories, let one be genuinely interesting and let others be subtle.
9. Bubble Ponytail Half Style
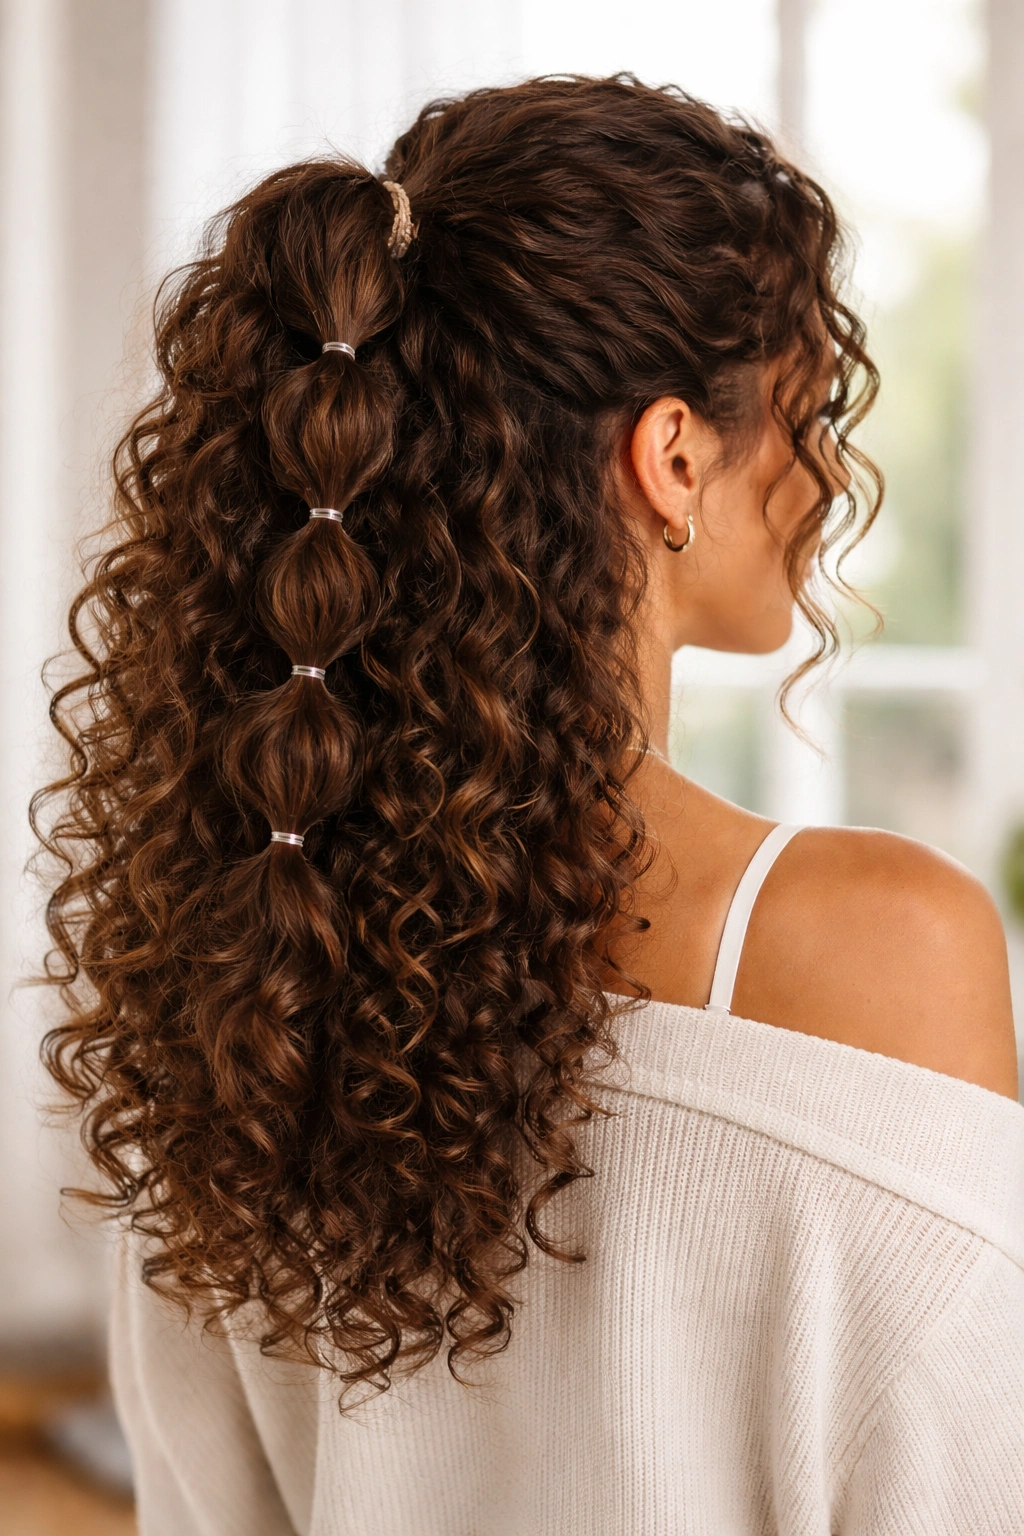
This is fun, youthful, and genuinely more complex-looking than it is to create. You’re making a half ponytail and then creating segmented “bubbles” down the length by securing it at intervals with small elastics. Each segment puffs out, creating a playful, dimensional look that works beautifully in curly hair.
Why Curly Hair Makes Bubbles Look Fuller
The natural volume and texture of curls means each bubble section automatically looks rounded and full, even with smaller elastics and less aggressive puffing than you’d need for straight hair. Your curls do most of the visual work without you having to tease or add texture artificially.
Creating the Bubble Effect
- Gather your top section into a half ponytail as you would for style #1
- Secure it with an elastic, but leave it slightly loose — this is intentional
- About 2-3 inches down from the first elastic, place a second elastic, gathering the ponytail into a segment
- Gently pull outward at the segment between the two elastics to create a puffy bubble, being careful not to pull your ponytail out of its shape
- Continue down the length, spacing your elastics about 2-3 inches apart
- Add a final elastic at the end to keep your curls from splaying out uncontrollably
- Adjust all your bubbles to be roughly equal in size and fullness
Worth knowing: Use elastics that match your hair color, or if you’re feeling playful, use contrasting colors that coordinate with your outfit — each elastic becomes a visual accent point.
10. Half Up Crown Braid

When you want something that feels special and slightly dressy but you’re working with your natural curls, a crown braid is genuinely magical. You’re creating a braid that sweeps across the back of your head like a crown, with your lower curls flowing free underneath. It’s romantic without being fussy.
The Crown Braid Formula for Curly Hair
A crown braid works by starting at one side, braiding across the back of your head, and ending at the opposite side — creating a half-moon shape. The fact that you’re working with curly hair means your braid doesn’t have to be perfectly tight or defined; the texture of your curls actually enhances the style.
Building Your Crown Braid
- Start with slightly damp or product-enhanced curls so they hold together slightly better
- Begin your braid at one temple, taking three sections and starting your braid
- As you braid, angle the braid toward the back of your head, picking up hair as you go (like a French braid technique, but curved)
- Braid all the way across to the opposite temple
- Secure the end of your braid with a small elastic that matches your hair color
- Gently tug at the edges of the completed braid to loosen it and expand it — this is crucial; a tight crown braid looks harsh, while a loose one looks romantic
- Use bobby pins to secure the braid against your head if it feels loose or likely to slip
Pro tip: For maximum romance, leave several pieces completely loose in front of your face — don’t gather them into the crown braid. These pieces frame your face and create softness that makes the whole look feel intentional rather than severe.
11. Scrunchy-Gathered Half Up with Texture

This is the easiest version in this entire list, which is exactly why you should master it. You’re literally gathering your top section and securing it with a scrunchie — the kind made from fabric rather than rubber — and that’s it. The whole appeal is that it looks effortlessly easy because it is effortlessly easy.
Why Scrunchies Win for Curly Hair
Scrunchies distribute pressure across a wider surface area than traditional elastics, which means less creasing and damage to your curl pattern. They also come in about a million colors and textures, so you can change your vibe by changing your scrunchie. Plus, they’re genuinely comfortable; you’re not dealing with that tight, compression-headache feeling that some elastics create.
The Minimal-Effort Perfect Half-Up
- Use your fingers to gather your top section loosely — no comb, no smoothing, just gather
- Position a fabric scrunchie at the base of your gathered section
- Loop it once or twice around your hair gathering, depending on your hair density and the scrunchie’s thickness
- The whole thing should feel soft and loose, not pulled tight
- You’re done — seriously
- The beauty is in the contrast between the soft, casual gathering and the wild, beautiful curls underneath
Worth knowing: If you feel like the scrunchie alone looks too simple, add one small decorative clip or a thin silk ribbon wrapped around the base of your gathering — instant elevation without extra effort.
12. Flat Twist Half Up
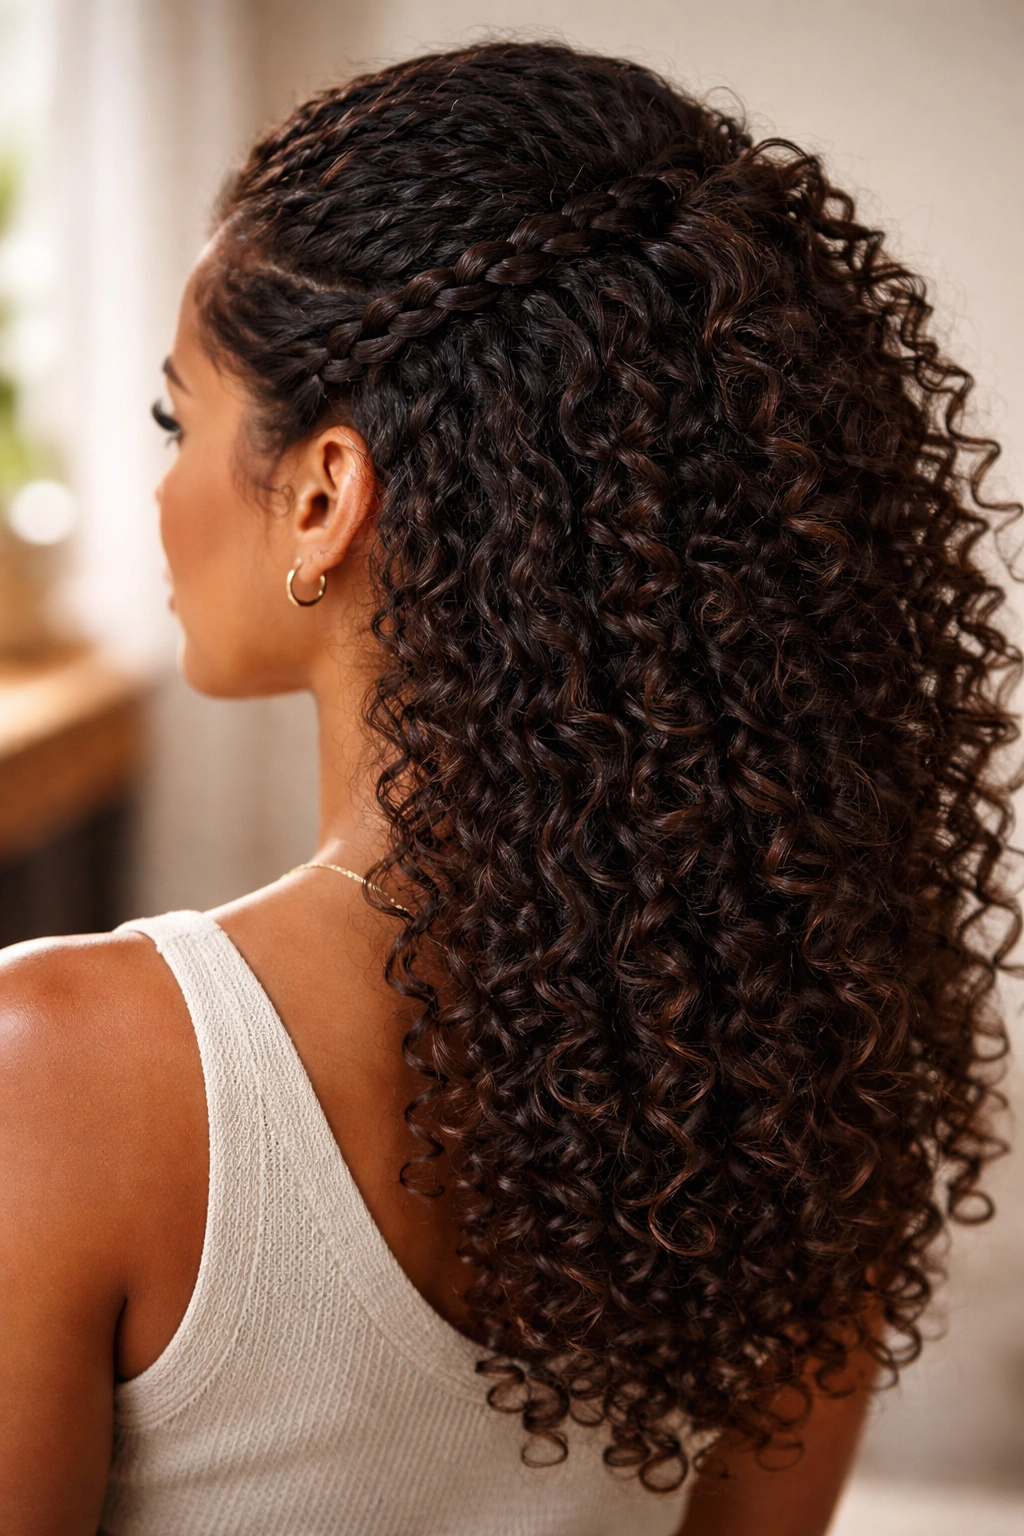
A flat twist sits somewhere between a regular twist and a braid in terms of visual complexity, but it’s actually one of the easiest textured options to execute once you understand the technique. You’re creating a twist that lies flat against your head (instead of spiraling off into space), which gives you a more integrated, intentional look.
What Makes a Flat Twist Different
A flat twist is created by taking two sections and twisting them over each other while simultaneously picking up small sections of hair adjacent to the twist — very similar to a French braid, but with only two strands instead of three. The result is a defined, textured line that looks intricate but is honestly quite manageable.
How to Execute a Flat Twist
- Start at one side of your head near your temple, taking two small sections
- Twist one section over the other, then pick up a thin piece of hair next to the original section on that same side
- Cross the new section over, then pick up a thin piece from the other side
- Continue this pattern (twist, pick up, twist, pick up) as you move toward the back of your head
- Your twist should create a flat, integrated line rather than a spiral
- Secure the end with a small elastic, and gently tug at the twist to loosen it slightly
- You can create a single flat twist down one side, or mirror it on both sides for a more symmetrical look
Pro tip: Flat twists are exceptionally forgiving with curly hair because your curl texture hides imperfect twisting — you can be slightly messy with your technique and it still looks intentional and beautiful.
Final Thoughts

The real magic of half up half down styling for curly hair isn’t that there’s one perfect way to do it — it’s that there are so many ways to do it that you can match your style to literally any occasion, hair texture, or time you have available. Some of these styles take three minutes when you’re rushing out the door; others give you something to work on when you’ve got thirty minutes and want to feel extra.
What matters most is remembering that your curls are an asset, not something to fight against. Every twist, every braid, every gathered section works better when you’re working with your natural texture rather than trying to force your curls into patterns they don’t naturally fall into. The styles that last longest and look best are the ones where you’ve honored your curl pattern instead of flattening it into submission.
Start with whichever style sounds easiest — probably the scrunchy version or the high pony — and build from there. Once you feel confident with those, experiment with the twists and braids. Your hands will remember these techniques faster than you expect, and before you know it, you’ll have a whole arsenal of half-up styles that work for different moods, different occasions, and different curl days. That’s when you know you’ve genuinely figured out how to style your hair instead of just managing it.