Curly weave ponytails have become a go-to protective style for anyone looking to switch up their look while keeping their natural hair tucked away safely. Whether you’re drawn to bold volume, sleek smoothness, or intricate texture, there’s a curly ponytail style that works for your aesthetic and lifestyle. The beauty of weave ponytails lies in their versatility—you can rock them casual for everyday wear, glam them up for special occasions, or experiment with different curl patterns and placement options to completely transform your vibe.
What makes curly weave ponytails stand out from straight or wavy styles is how they photograph, how they feel, and the energy they bring to any outfit. The movement, bounce, and dimension of curls add an element of drama and sophistication that shorter styles sometimes can’t match. Plus, they’re forgiving—the texture hides imperfections, the volume is inherently flattering to most face shapes, and they give you freedom to explore different colors and curl patterns without committing your natural hair to the same changes.
The key to nailing any curly weave ponytail is understanding how your chosen curl pattern interacts with your base, how to secure everything so it stays put, and which products and techniques will keep your edges smooth while letting those curls shine. Let’s break down eight distinct curly weave ponytail styles, each with its own technique, styling tips, and maintenance secrets.
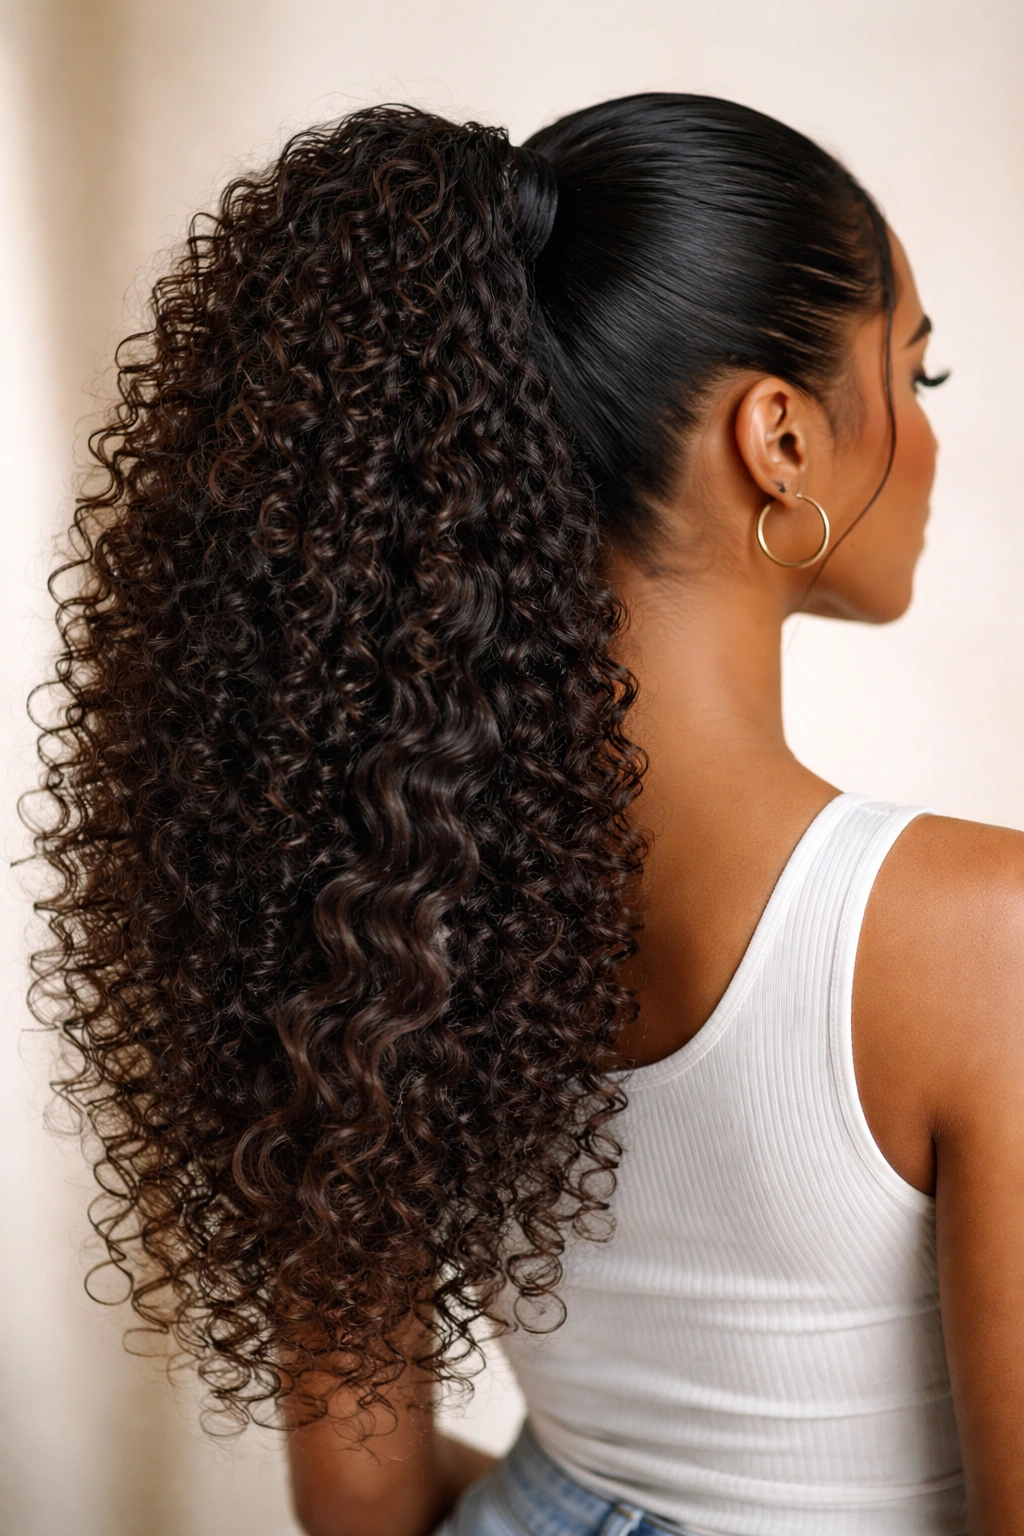
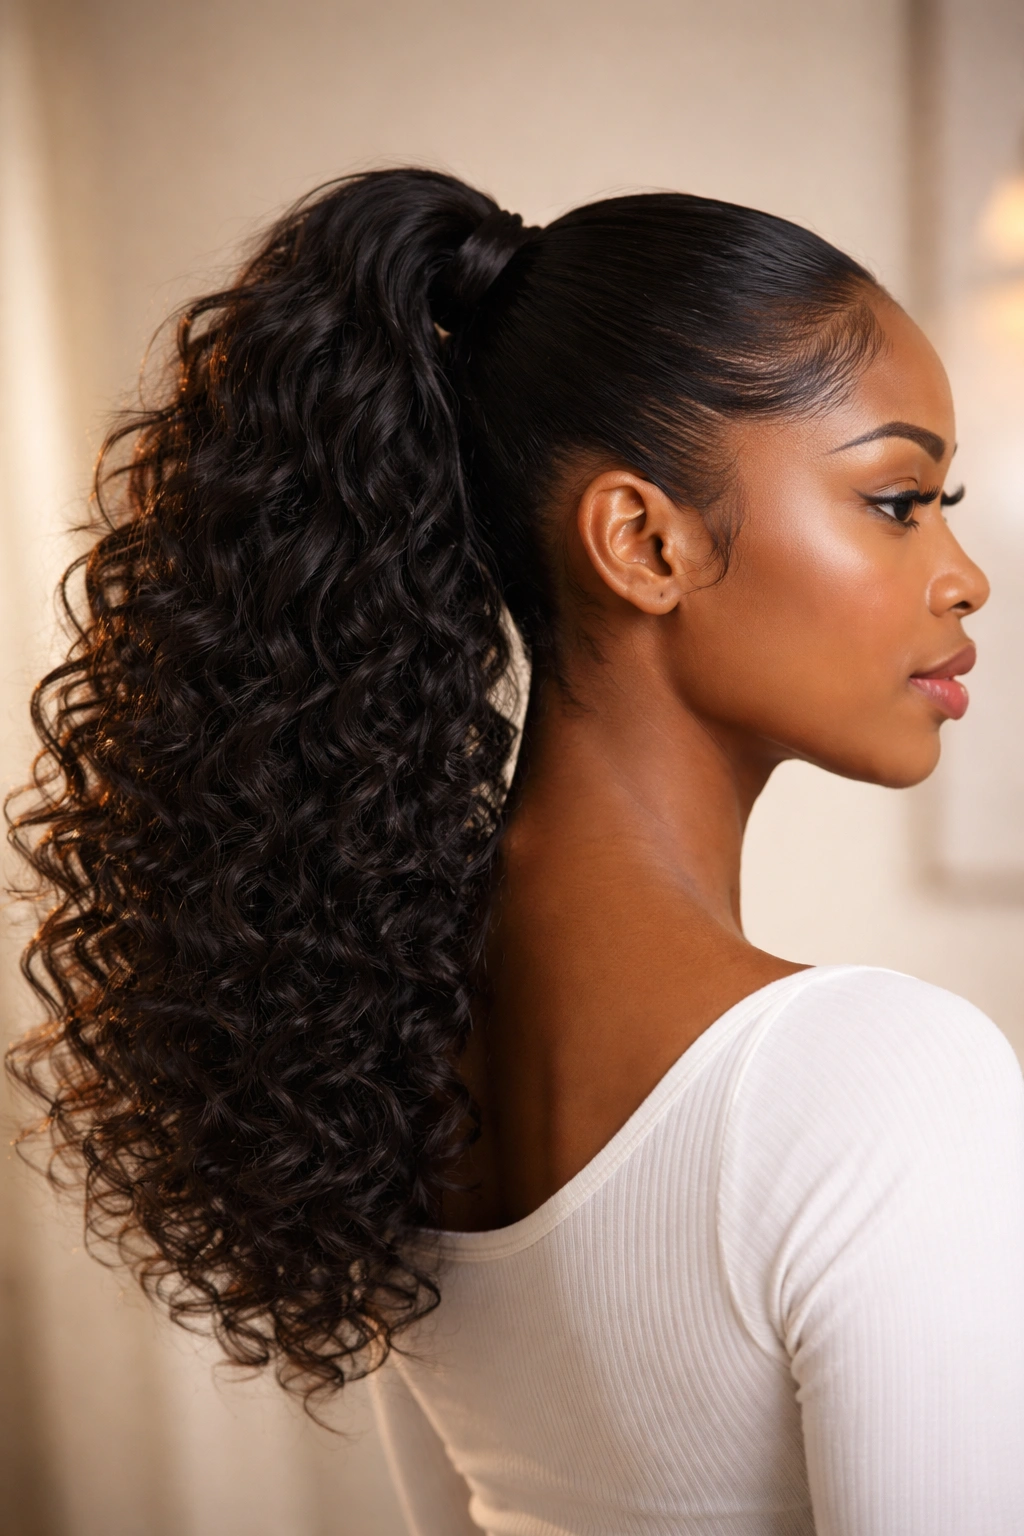
1. Classic High Curly Ponytail
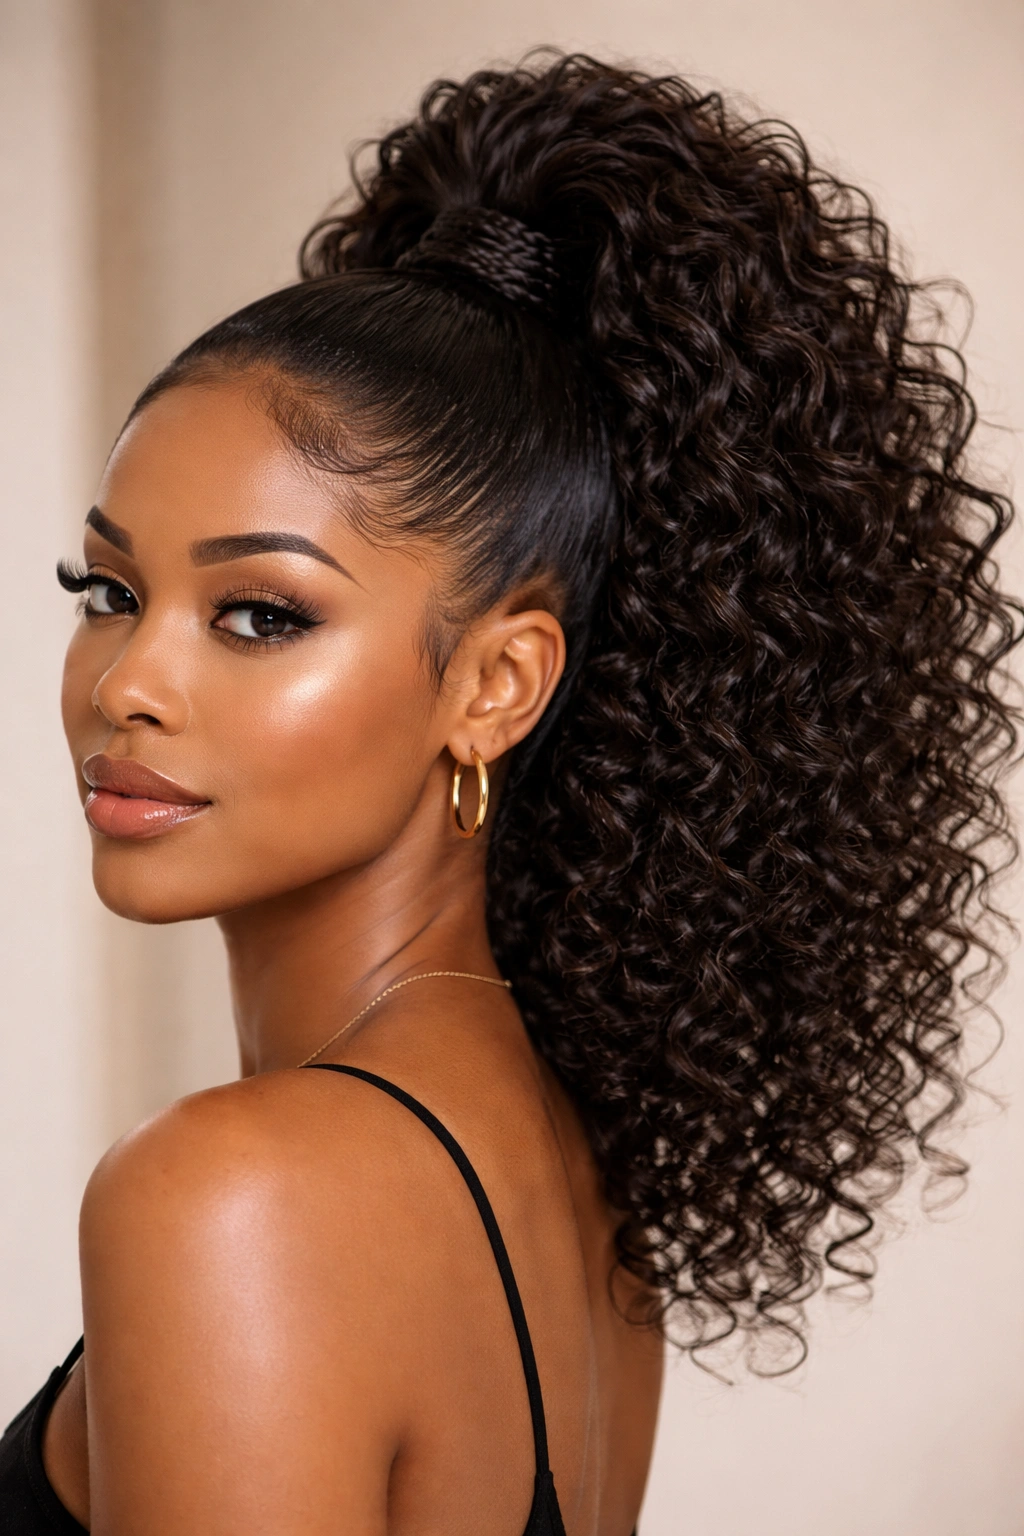
The high curly ponytail is the foundation style—sleek, straightforward, and endlessly wearable. This style keeps all your curls gathered at the crown, which creates an instant lift and elongates the face beautifully. The contrast between the smooth, tight base and the wild, free curls at the top is what gives this style its polish and impact.
The Technique and Installation
Start by braiding your natural hair into a very tight cornrow base, looping from your edges all the way to the crown area where you want the ponytail to sit. The tighter this base, the longer your style will last and the smoother your edges will look. Section your curly weave into a single thick bundle—you want volume but also control, so avoid using too many thin strands that will create a sparse look.
Secure the weave bundle tightly to your cornrowed base using a needle and thread, wrapping thread around the base several times to ensure zero slippage. Some stylists prefer using a ponytail holder threaded through the cornrows for extra security, then hiding that base under the first layer of curls.
Product and Styling Tips
Use a lightweight edge control that won’t weigh down your curls—look for products specifically labeled as non-flaking and non-sticky. Apply it generously to your hairline, temples, and the nape of your neck, smoothing with a soft brush or toothbrush for a polished finish. Smooth baby hairs individually rather than trying to control them all at once; this gives a more intentional, refined look.
Once your weave is installed, scrunch your curls upward with a lightweight curl refresher spray or a curl cream mixed with water. This activates the curl pattern and makes the texture pop. Avoid heavy oils at the crown—they’ll weigh down your ponytail and make it look less voluminous than it could be.
Longevity and Maintenance
A high ponytail can easily last 4-6 weeks with proper care. Sleep with a satin bonnet every single night to prevent frizz and preserve curl definition. Every 2-3 days, refresh your curls by misting them lightly with water and a curl-defining product, then scrunching from underneath to encourage lift.
Keep your edges moisturized but not greasy—use a lightweight daily edge moisturizer in the morning, and avoid heavy butters that sit on top of your skin and hair. If you notice curl definition fading after the first week or two, a quick session with a curling iron on low heat can re-activate the curls, though this should be an occasional refresh, not a daily routine.
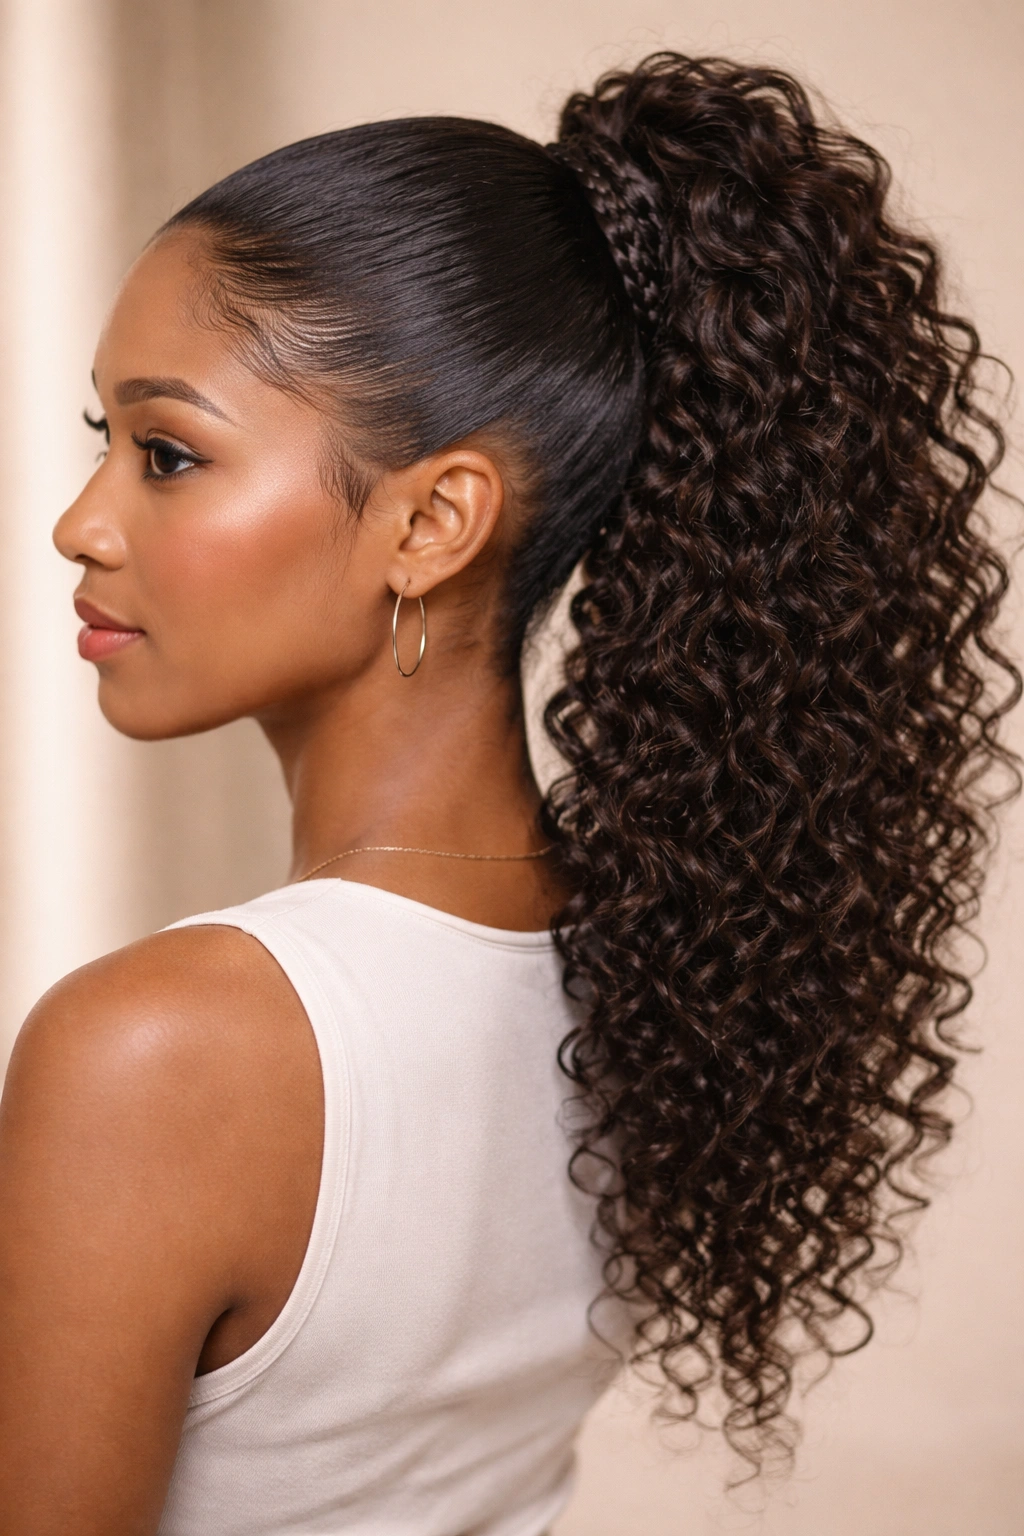
2. Sleek Curved Curly Ponytail
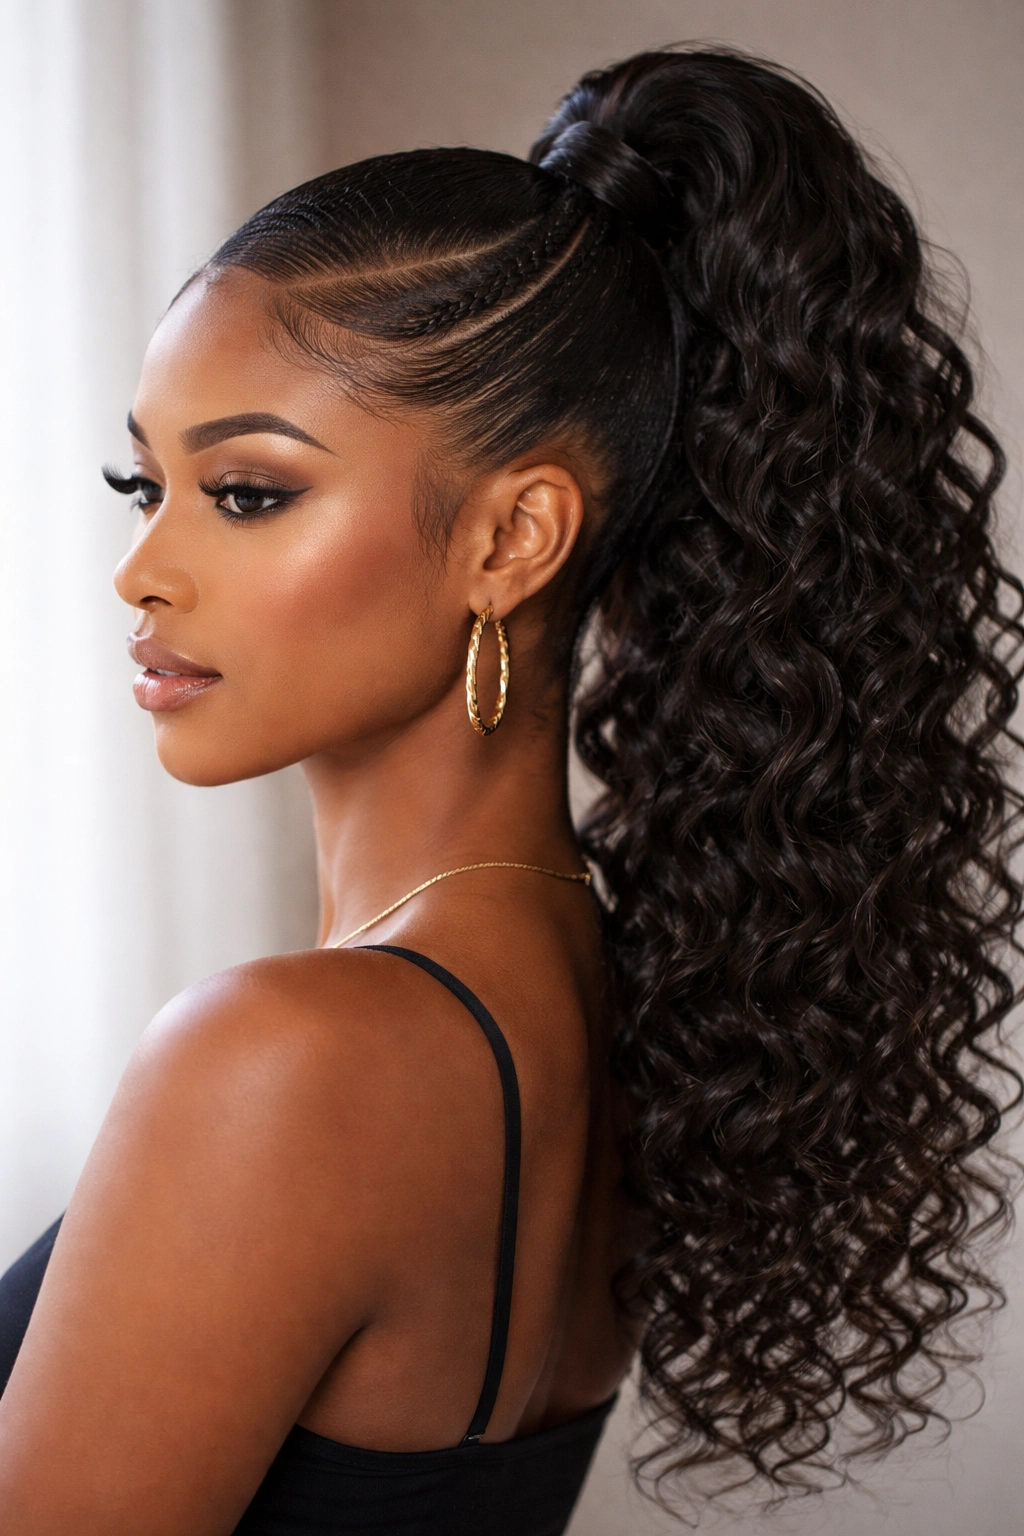
This style takes the high ponytail concept but adds a sophisticated curve—instead of pulling straight back, the ponytail curves slightly to one side or follows the natural contour of your head. This creates a more modern, fashion-forward look and adds visual interest without dramatically changing the basic structure.
Creating the Curved Effect
The trick here is in how you braid your base. Rather than braiding straight back in one line, create a slight curve to your cornrows from day one. If you’re pulling to the right, your braid should gently curve rightward as it travels to the crown. This guides where your ponytail will naturally sit once installed.
When you secure your curly weave bundle, position it slightly off-center to enhance that curve. The weave should feel like a natural extension of your cornrow direction, not fighting against your base. You want the visual flow to look intentional and elegant, not accidental.
Styling and Presentation
The curved ponytail benefits from being parted slightly deeper on one side—this asymmetry adds sophistication and makes the style read as more deliberate. Use a fine-tooth comb to create a clean, defined part line, then apply edge control to define that part sharply.
Distribute your curls so they don’t bunch all in one clump at the base. Gently separate and layer them, letting some curls fall in front of your shoulders slightly. This prevents the ponytail from looking too thick and blocky, instead creating a more flowing, dynamic shape.
When This Style Works Best
The sleek curved ponytail is perfect for dates, professional settings, or any situation where you want to look polished and intentional. It photographs beautifully from the side and works well with statement earrings or jewelry because the curve of the style doesn’t compete—it complements them.
Maintenance is identical to the classic high ponytail, but pay special attention to keeping your part line clean throughout the week. A quick touch-up with edge control and a fine comb every few days keeps this style looking fresh and sharp.
3. Voluminous Bubble Ponytail with Curls
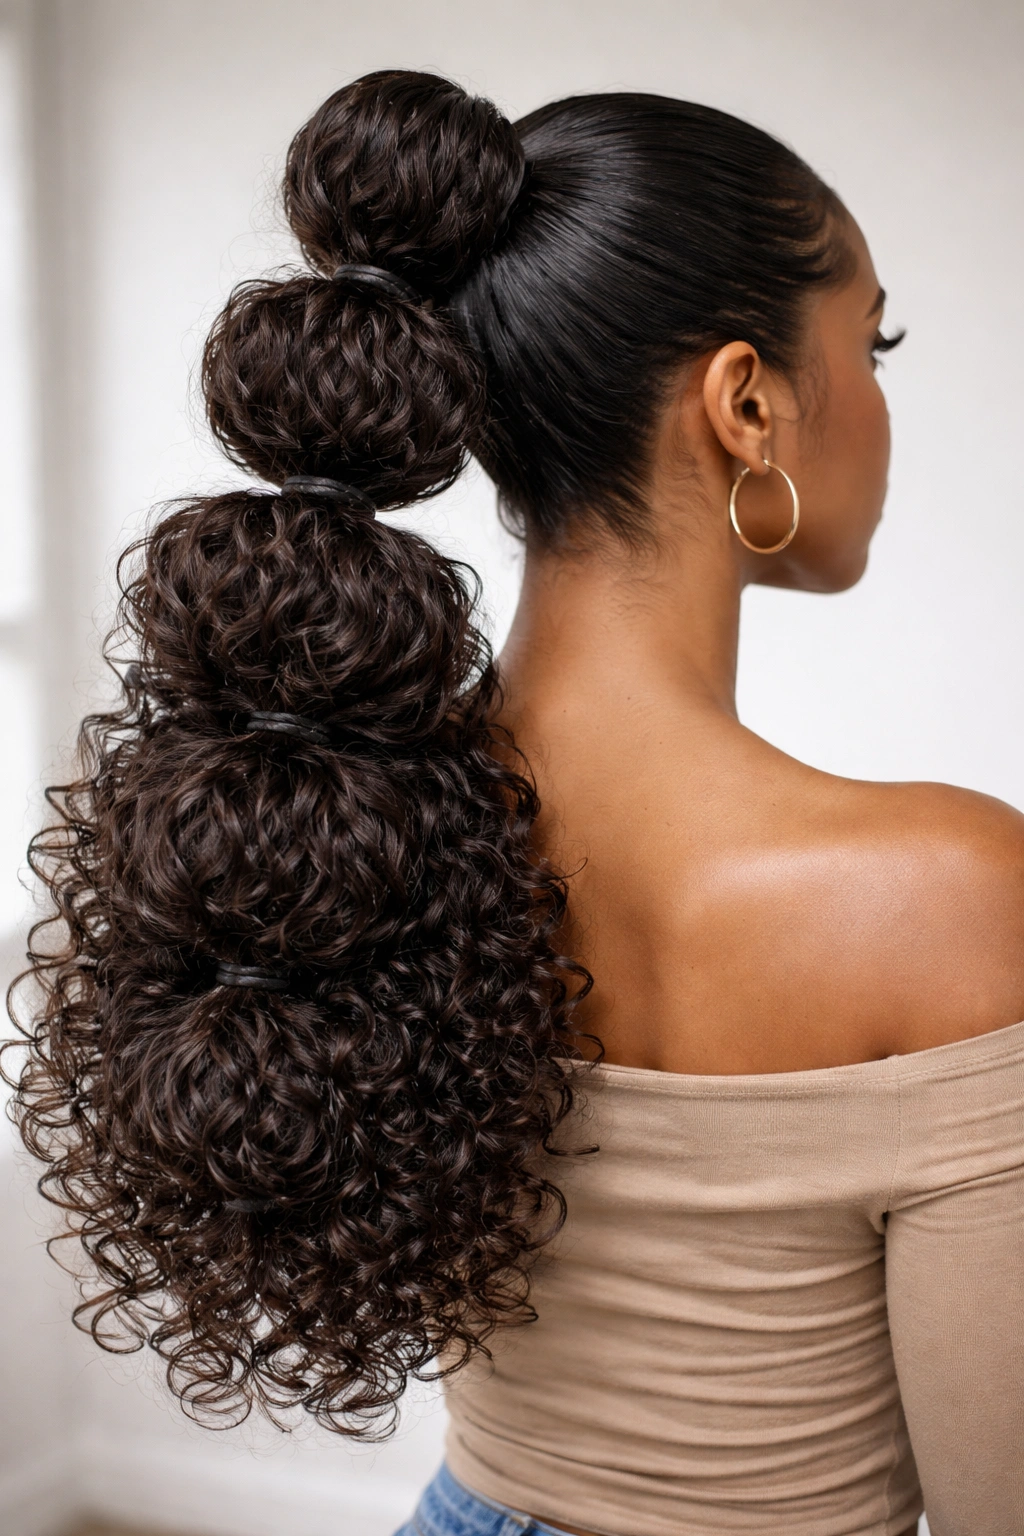
The bubble ponytail is a trendy take on traditional ponytails—instead of one solid mass of hair, you create distinct sections or “bubbles” with elastics, giving the illusion of multiple smaller ponytails stacked on top of each other. When done with curly weave, this creates an eye-catching, almost gravity-defying effect.
Building Your Bubble Sections
You need substantially more weave than a standard ponytail for this style to look full and impressive. Install your first bundle at the crown as normal, securing it very tightly. Then, approximately 2-3 inches below that first bundle, install a second section of weave in the same location, binding it directly beneath the first section.
Repeat this process 2-3 more times, working your way down the back of your head, always stacking each new bundle directly under the previous one. Each bubble should be clearly defined—not blended into the one above it. The spacing between bubbles is what creates that distinct visual separation.
Styling the Bubble Effect
Once all your bundles are installed, use large barrel curling iron or a wand to curl each bubble section independently. Work from the bottom bubble up, curling each section away from the face in the same direction. This creates cohesion across all the bubbles even though they’re technically separate.
The magic happens when you gently tease and fluff each bubble section upward. Use a soft brush to backcomb lightly at the base of each bubble, then smooth the top layer with your brush. This gives each bubble a rounded, voluminous shape. Tie a clear elastic around each bubble—the elastics should be tight enough to hold but loose enough that some hair escapes and obscures the actual elastic, maintaining that full, flowing look.
Maintenance and Longevity
Bubble ponytails require more frequent refreshing than standard ponytails because of the multiple sections. Every 2-3 days, you’ll want to re-curl and re-fluff each bubble to maintain definition. Sleep in a satin bonnet to protect all those curls, and be gentle when taking down and re-bundling each section.
This style can last 4-5 weeks, but expect to invest more styling time into keeping it looking intentional rather than matted or separated. The payoff is worth it—it’s genuinely one of the most striking curly ponytail styles.
4. Side-Swept Curly Ponytail
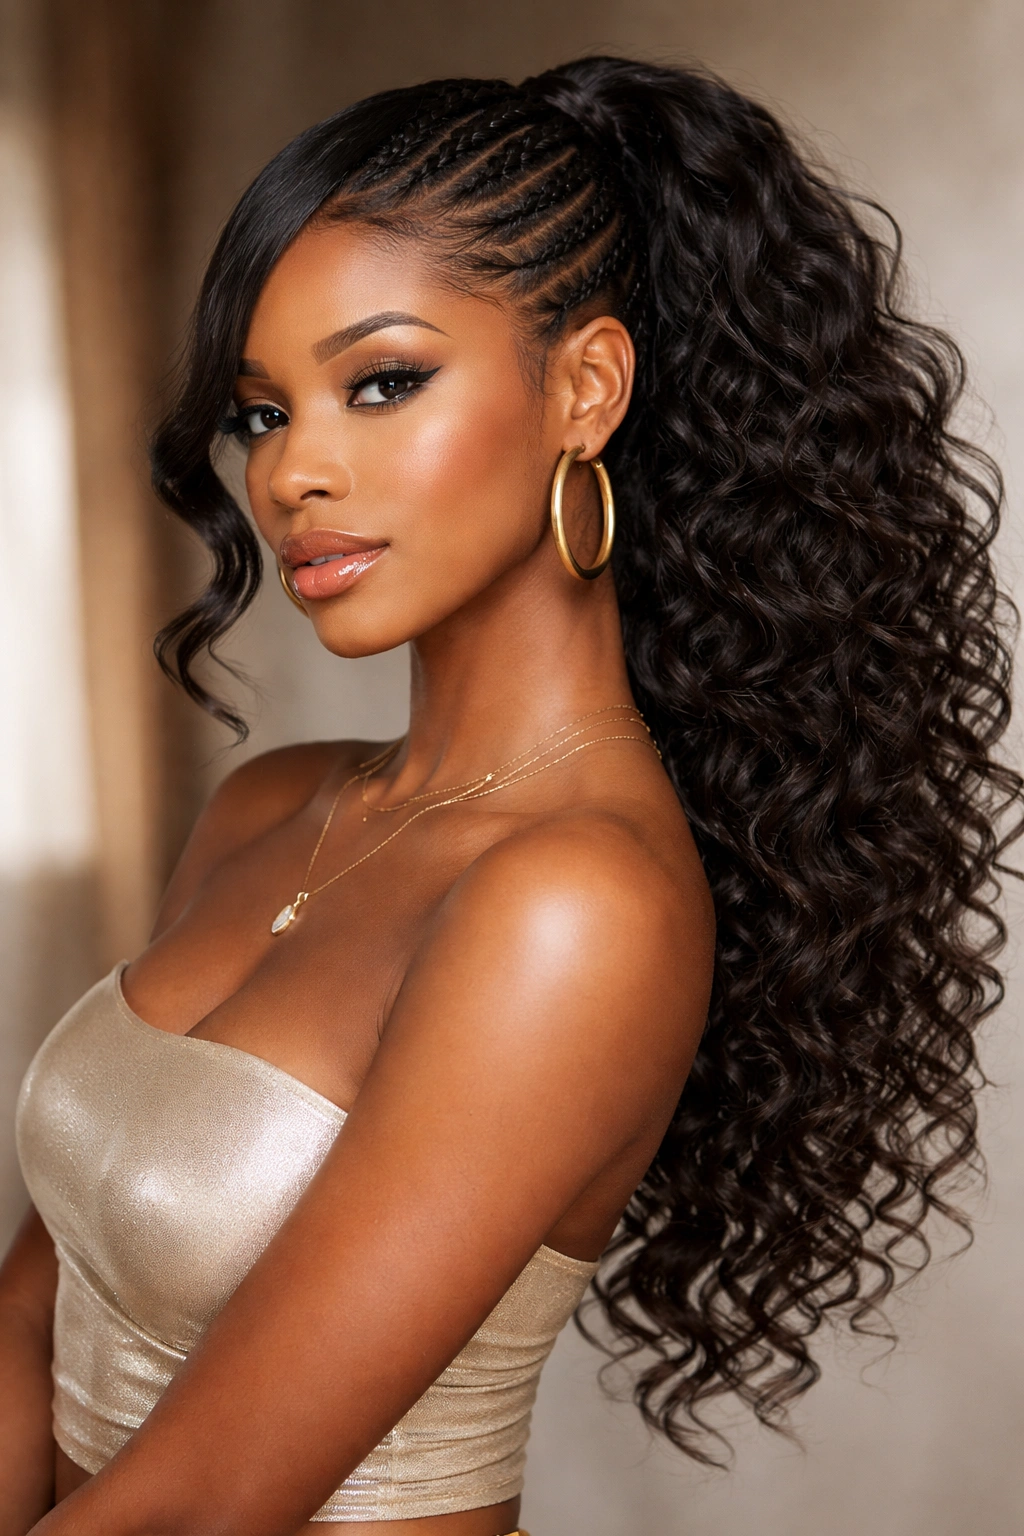
The side-swept ponytail pulls all your hair dramatically to one side, creating an asymmetrical, high-fashion silhouette. This style works particularly well with curly weave because the texture and movement of the curls create dimension when massed to one side, rather than looking flat or one-dimensional.
Cornrowing for a Dramatic Sweep
To achieve a true side-swept ponytail, your cornrow base needs to travel the entire length from one temple, across the top of your head, and anchor at the opposite side. Start your braids at your left temple (if you’re sweeping right), then braid diagonally across the crown toward the right side of your head, creating a swooping pattern that naturally guides your hair to that side.
Your braid lines don’t need to be super tight or perfectly parallel—in fact, slightly curved, flowing braid lines enhance the sweep effect. The base should feel like it’s gently directing your hair toward one side, not forcing it aggressively.
Positioning and Volume Distribution
When you secure your weave bundle, position it low and toward the side you’re sweeping toward. This is often at ear level or just below, creating that dramatic off-to-the-side look. Bundle everything tightly and securely, then allow the curls to fall naturally over the shoulder and across the collarbone.
Distribute your curls so there’s more volume at the tip and layers throughout. Avoid concentrating all your curls at the base—let them flow and spread so they create a larger visual footprint. You want the side sweep to feel graceful and intentional, not cramped or awkwardly positioned.
Styling for Maximum Impact
Use a lightweight curl-defining spray to enhance your curl pattern and make sure every ringlet is defined. Gently separate curls with your fingers rather than a brush—this prevents frizz and keeps each curl distinct. If you have any baby hairs on the opposite side of your head (the side without the ponytail), smooth them down with clear gel or a lightweight edge control so they create a clean, defined hairline.
The side-swept ponytail looks incredible with half-up styles underneath—you can wear additional waves or curls on the bottom half of your head, creating layers of texture and movement.
When to Wear This Style
This is a show-stopping style for events, celebrations, and any time you want to make a statement. It photographs beautifully from multiple angles and works well with formal or casual outfits depending on how you style your makeup and clothing.
5. Textured Low Ponytail with Weave Blending
This style is all about blending your natural texture with curly weave in a way that creates a seamless, sophisticated low ponytail. Instead of creating stark contrast between your laid edges and thick weave curls, this style integrates everything into one cohesive, textured ponytail.
Creating the Blended Base
Rather than slicking your hair tightly into cornrows, use a softer, more textured braiding approach. Create 2-3 thicker, slightly loose braids that follow the shape of your head, moving from your hairline toward the nape of your neck. These braids should have some texture themselves—not perfectly tight or smooth.
When you install your weave, use thinner bundles than you might typically use—the goal is to distribute the curly weave throughout your base rather than creating one or two massive bundles. Secure several smaller sections of curly weave at slightly different points along your braided base, allowing them to meld and integrate with each other.
Finishing the Textured Look
Once your weave is installed, gently loosen and separate strands to create a more blended appearance. You’re essentially teasing apart the installed bundles so they don’t read as distinct sections but rather as one textured mass. Use a wide-tooth comb to gently separate curls and encourage them to spread and blend.
The ponytail should sit at the nape of your neck or just below—this lower placement is what gives the style its sophisticated feel. Tie everything together with a cloth-wrapped elastic that matches your hair color, making the elastic virtually invisible against your curls.
Maintenance Strategy
This style benefits from daily or every-other-day light refreshing. Mist your curls with water and a curl-enhancing product, then gently massage and scrunch from underneath to encourage definition and blend. The textured base means this style can look good even when slightly frizzy or softened—imperfection is actually part of the aesthetic.
Keep this style for 3-4 weeks maximum. As your natural roots grow in and your weave begins to loosen slightly, the blended effect actually becomes more pronounced, which can work in your favor if you like a softer, more textured aesthetic.
6. Multi-Textured Curly Ponytail (Mixing Curl Patterns)
This advanced style combines multiple curl patterns—perhaps mixing tight coils, loose waves, and mid-range curls in one ponytail. The result is incredibly dynamic and visually interesting, creating depth and dimension that single-texture ponytails can’t achieve.
Selecting and Combining Weave Types
Before installation, lay out your different weave types and plan how you’ll distribute them. You might use tight curls around the crown area for definition, longer loose waves toward the bottom for flow, and medium coils in the middle for transition. The key is creating a gradient or intentional mix rather than a chaotic jumble.
Bundle each texture separately during installation, alternating between your different weave types as you work. Install your first section of tight curls, then your second section of waves, then your medium coils, and repeat this pattern. This ensures even distribution rather than clumping all one texture together.
Styling Multi-Textured Hair
The challenge with multiple textures is keeping them all defined and separated. Use different products for different sections—a heavier curl cream on your tightest coils to weigh them down slightly, a lighter mousse on your waves to keep them airy and flowing, and a medium-hold gel on your mid-range curls.
Style each texture section slightly differently. Scrunch your tight curls upward, twist your loose waves around your finger to enhance the wave pattern, and separate your medium curls with your hands rather than a comb. This intentional, varied styling approach makes the multi-texture effect look deliberate rather than accidental.
The Visual Impact
Multi-textured ponytails create incredible movement and visual interest. They photograph beautifully because every angle reveals different texture and dimension. The style feels fashion-forward and artistic, making it perfect for anyone who loves experimenting with texture and doesn’t mind standing out.
Maintenance requires attention to multiple texture types. You may need to refresh your tight curls with a curl cream, your waves with a wave-enhancing product, and your medium curls with a general curl refresher. This style works best if you’re willing to invest time into detailed maintenance every few days.
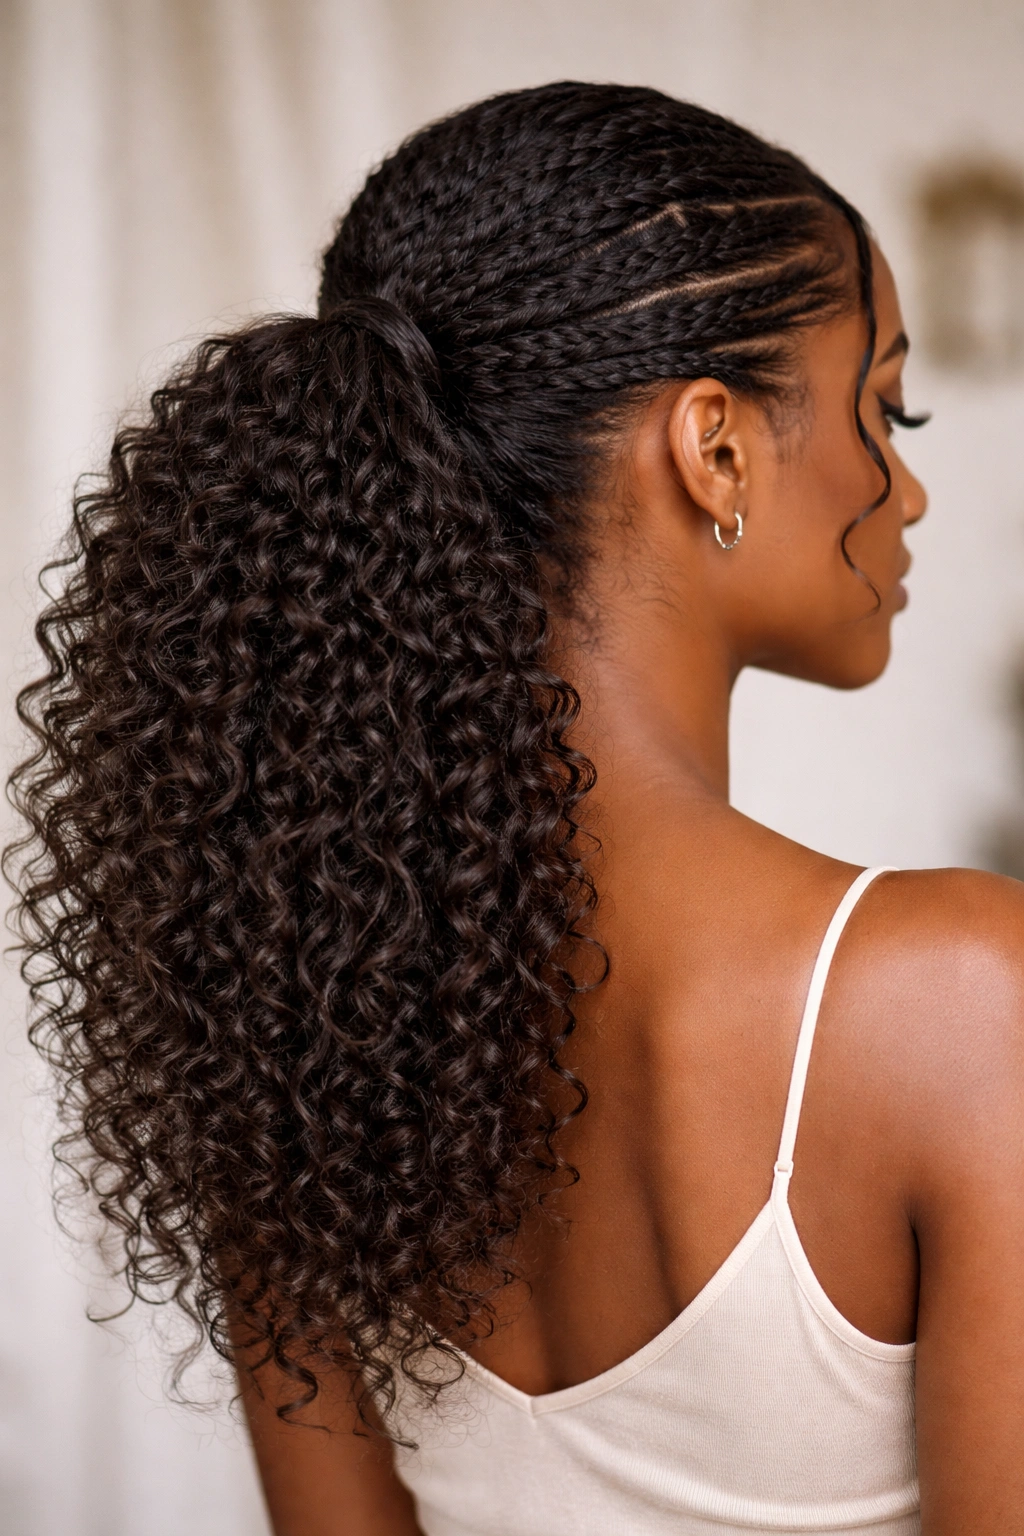
7. Curly Ponytail with Braided Wrap
This style adds intricate braided details around the base of your ponytail, creating a sophisticated, decorated look that feels elevated and intentional. The braids frame the ponytail and add visual interest while also serving a practical purpose—they help secure and define the base.
Creating the Braided Wrap
Install your curly weave ponytail as normal—either high or low, depending on your preference. Then, using smaller sections of braiding hair, create thin braids that wrap horizontally around the base of your ponytail, covering the elastic and installation point.
You can create one thick braided wrap or multiple thinner wraps stacked on top of each other. Some styles incorporate braids in complementary colors (like a metallic or contrasting color) to add visual pop. The wraps should be tight and secure so they don’t slip or loosen as you wear the style.
Design Options and Variations
The braided wrap can be simple and understated or elaborate and decorative. You might do a single wrap in your natural color for a classic, clean look, or you might do multiple wraps in different colors for a bold statement. Some people add small beads or cuffs to the braids for extra embellishment.
The placement of your braids matters too. You can wrap horizontally (going around your ponytail), vertically (going up and down), or diagonally for a different effect. Vertical wraps create visual elongation, while horizontal wraps create more visual separation and definition.
Practical Benefits
Beyond looking gorgeous, the braided wrap actually helps extend the life of your style. The braids help secure your weave bundle and take some of the tension off the installation, potentially preventing breakage. They also cover any visible installation points or elastics, making the style look more polished and professional.
This style works beautifully at all hair lengths and with any ponytail placement. It’s sophisticated enough for professional settings and fun enough for casual wear, depending on your choice of braiding hair colors and braid thickness.
8. Half-Up Curly Weave Ponytail

The half-up style splits the difference between a full ponytail and down hair—approximately half your hair pulls up while the other half remains loose and flowing. With curly weave, this creates incredible volume and movement while maintaining the ease and protective benefits of a gathered style.
Building Your Half-Up Base
You only need to braid the upper portion of your head—from ear to ear across the crown. Create cornrows or braids in this upper section while leaving the lower half of your head and nape area completely undone. This undone section can be your natural hair or additional weave curls left loose.
When installing your weave ponytail, only secure bundles to the upper braided section. Your ponytail sits at the crown or slightly higher, leaving the bottom half of your curly hair completely free to flow and move independently.
Styling the Two-Part Effect
For maximum impact, style the upper and lower sections slightly differently. Your gathered upper section should be polished—smooth edges, defined curl pattern, clear placement. Your loose lower section can be softer and more textured—you might use slightly different curl patterns, add waves, or create a more tousled look.
Create clear separation between your gathered top and loose bottom by using a strategic part line or by styling the gathered curls slightly differently (perhaps curlier and tighter) than the loose curls below (perhaps looser waves and more spread out).
When This Style Shines
The half-up weave ponytail is perfect when you want the benefits of a protective style without feeling fully tied up and off-face. It gives you movement and drama while keeping your edges and face frame clear. This style works beautifully for both casual everyday wear and more formal settings.
The practical advantage is that this style feels less heavy and burdensome than a full ponytail while still protecting your natural hair and giving you the freedom to experiment with color and texture. You can switch up your loose bottom curls every few weeks while keeping your protective style in place, essentially creating a new style without disturbing your installation.
Final Thoughts
Curly weave ponytails offer endless possibilities for expression, texture experimentation, and protective styling. Whether you prefer sleek and polished, voluminous and dramatic, or textured and blended, there’s a curly ponytail style that matches your personality and lifestyle. The styles in this guide range from classic and timeless to trendy and fashion-forward, so you can choose based on your current mood, the occasion, or simply what feels right for you.
The real key to rocking any curly weave ponytail is investing in quality weave, taking time with your installation and base work, and committing to maintenance throughout the life of your style. High-quality curly weave, properly secured to a well-braided base, will look fresh and fabulous for weeks. Pair that foundation with consistent refreshing of your curl pattern and careful attention to your edges, and you’ll have a style that turns heads every single day.
Start with whichever style resonates most with you—whether that’s the timeless classic high ponytail, the fashion-forward multi-textured look, or something in between. Experiment with different curl patterns, placement options, and styling techniques to find the exact version that makes you feel most confident and beautiful.