Curly hair deserves updos that actually work with your texture instead of fighting against it. The challenge most people face isn’t finding inspiration — it’s finding updos that don’t flatten those gorgeous curls, stay put without a ton of bobby pins, and genuinely look intentional rather than like your hair got away from you. Whether you’re managing a full mane of coils, bouncy waves, or textured ringlets, the right updo can take you from struggling with flyaways to having the kind of polished-yet-effortless look that gets compliments all day.
The beauty of curly updos is that they celebrate dimension and movement instead of demanding sleek perfection. A lot of updos designed for straight hair require you to smooth everything down and create severe tension, which is uncomfortable, can cause breakage, and honestly just doesn’t suit curly texture. But the updos that follow work because they’re built on the natural volume, bounce, and shape that curls already provide. They’re practical enough for work, school, or running errands, but still look put-together and stylish.
What makes these updos so appealing is that they work across different curl patterns and densities. You don’t need your curls to be perfectly uniform or camera-ready — in fact, the slightly undone quality is part of what makes them look so good. These are the kinds of hairstyles you can throw together in under ten minutes once you practice them a couple of times, and they hold up through your whole day without needing constant adjustments or a ton of product buildup.
1. Messy Bun with Face-Framing Pieces
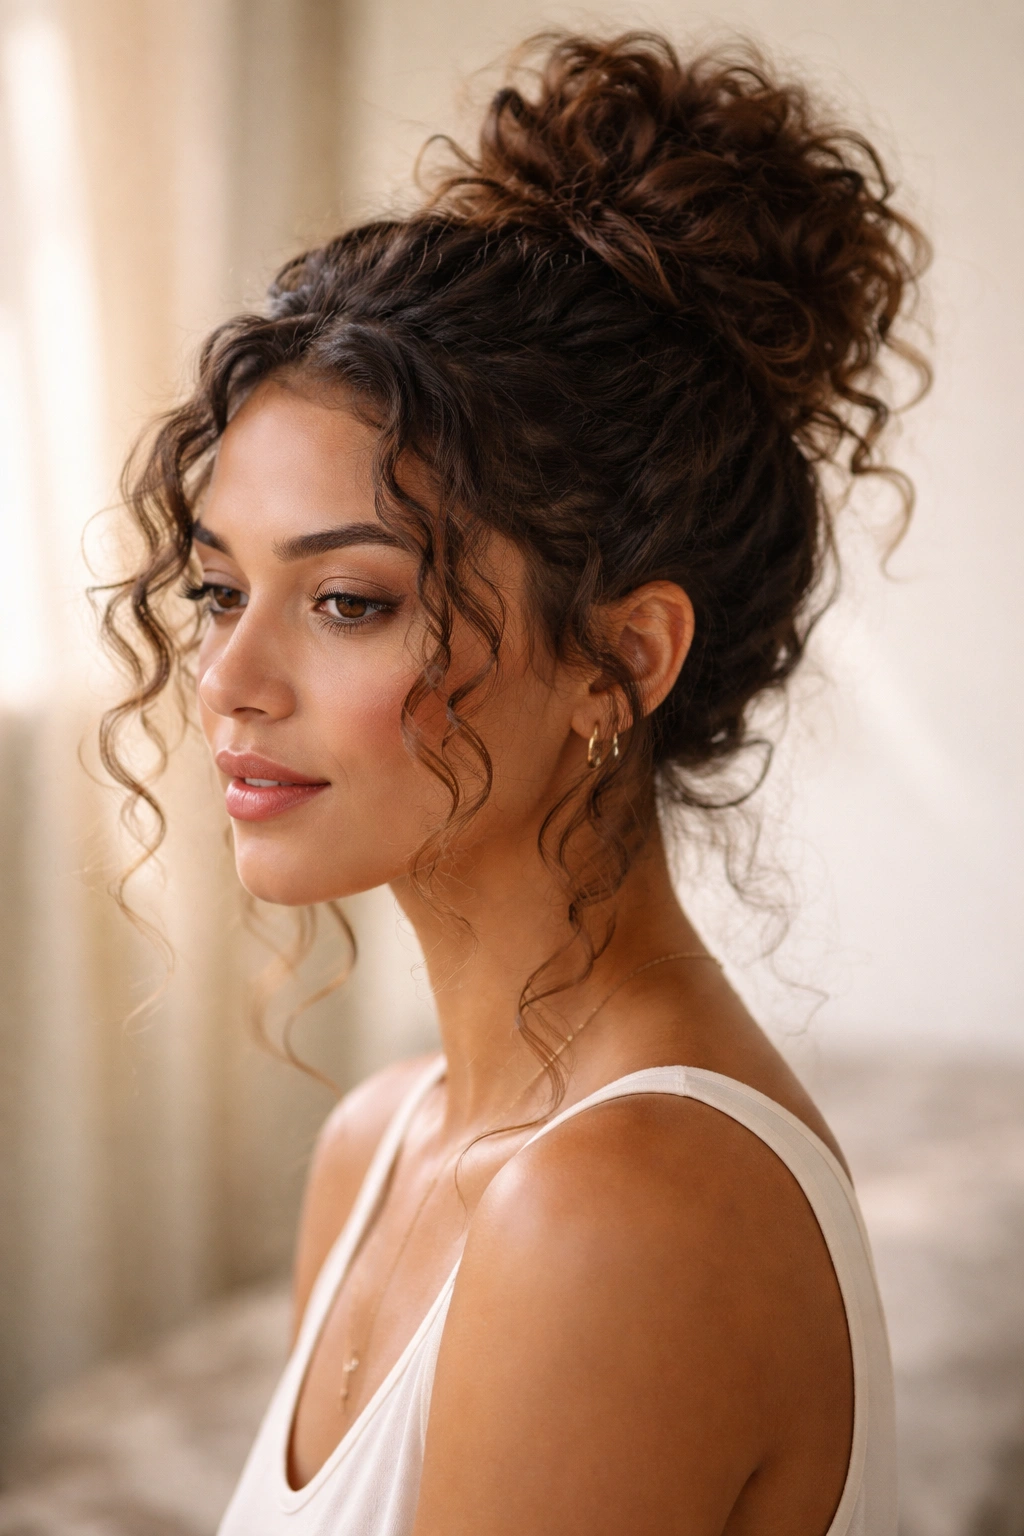
This is the everyday updo that actually earns its place in your regular rotation because it looks intentionally tousled rather than like you overslept. The whole point is to embrace the natural texture of your curls while pulling most of your hair up and away from your neck and face. The face-framing pieces add softness and make the style work whether you’re heading to the office or meeting friends for lunch.
Why This Works for Curly Hair
A messy bun on curly hair looks immediately more polished than on straight hair because your texture adds instant visual interest and shape. The slight imperfection of the bun actually plays into the style — you’re not fighting to make it perfectly smooth, you’re letting your curls do what they naturally do while keeping them contained. The face-framing layers prevent the style from feeling too severe, which matters because pulling curly hair straight back can sometimes look harsh if there’s nothing softening the face.
How to Create It
- Start with damp or dry curls — this works best on curls that have been set or refreshed within the last day or two, so they still have shape. If your curls feel a bit limp, a quick spritz with a curl-refreshing spray (or even water) and scrunching helps them bounce back.
- Gently flip your head upside down and gather hair into a high ponytail using a soft elastic or claw clip. Leave out a few face-framing pieces on each side — these don’t need to be perfectly placed; actually, imperfect looks better here.
- Wrap the ponytail loosely around the base and secure with bobby pins that match your hair color, tucking them under the curls so they’re hidden. Don’t pull it super tight; the bun should look like it has breathing room and volume.
- Gently pull out some of the curls to create an intentionally undone effect. You’re looking for visible texture, not a smooth dome.
- Finish with a flexible hold hairspray — something that’ll keep the style in place without making it crunchy or stiff.
Pro tip: Do this style when your curls are about 70% dry rather than completely soaked, because they’ll hold their shape better in the bun while still having that fresh-looking bounce.
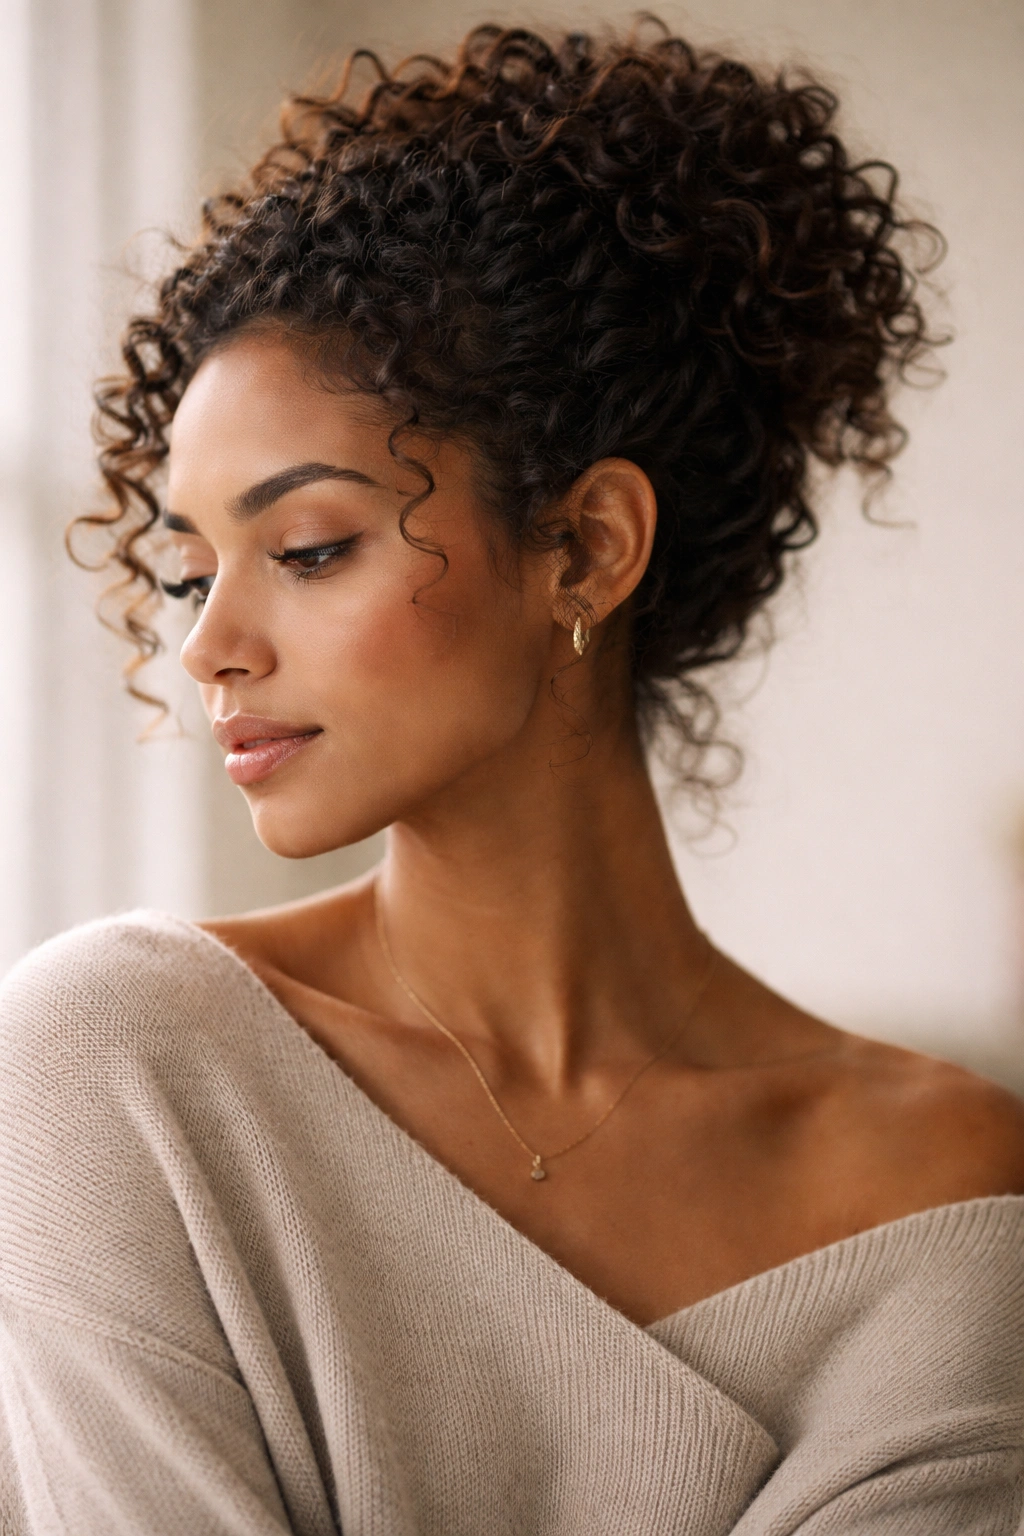
2. High Puff with Twisted Crown
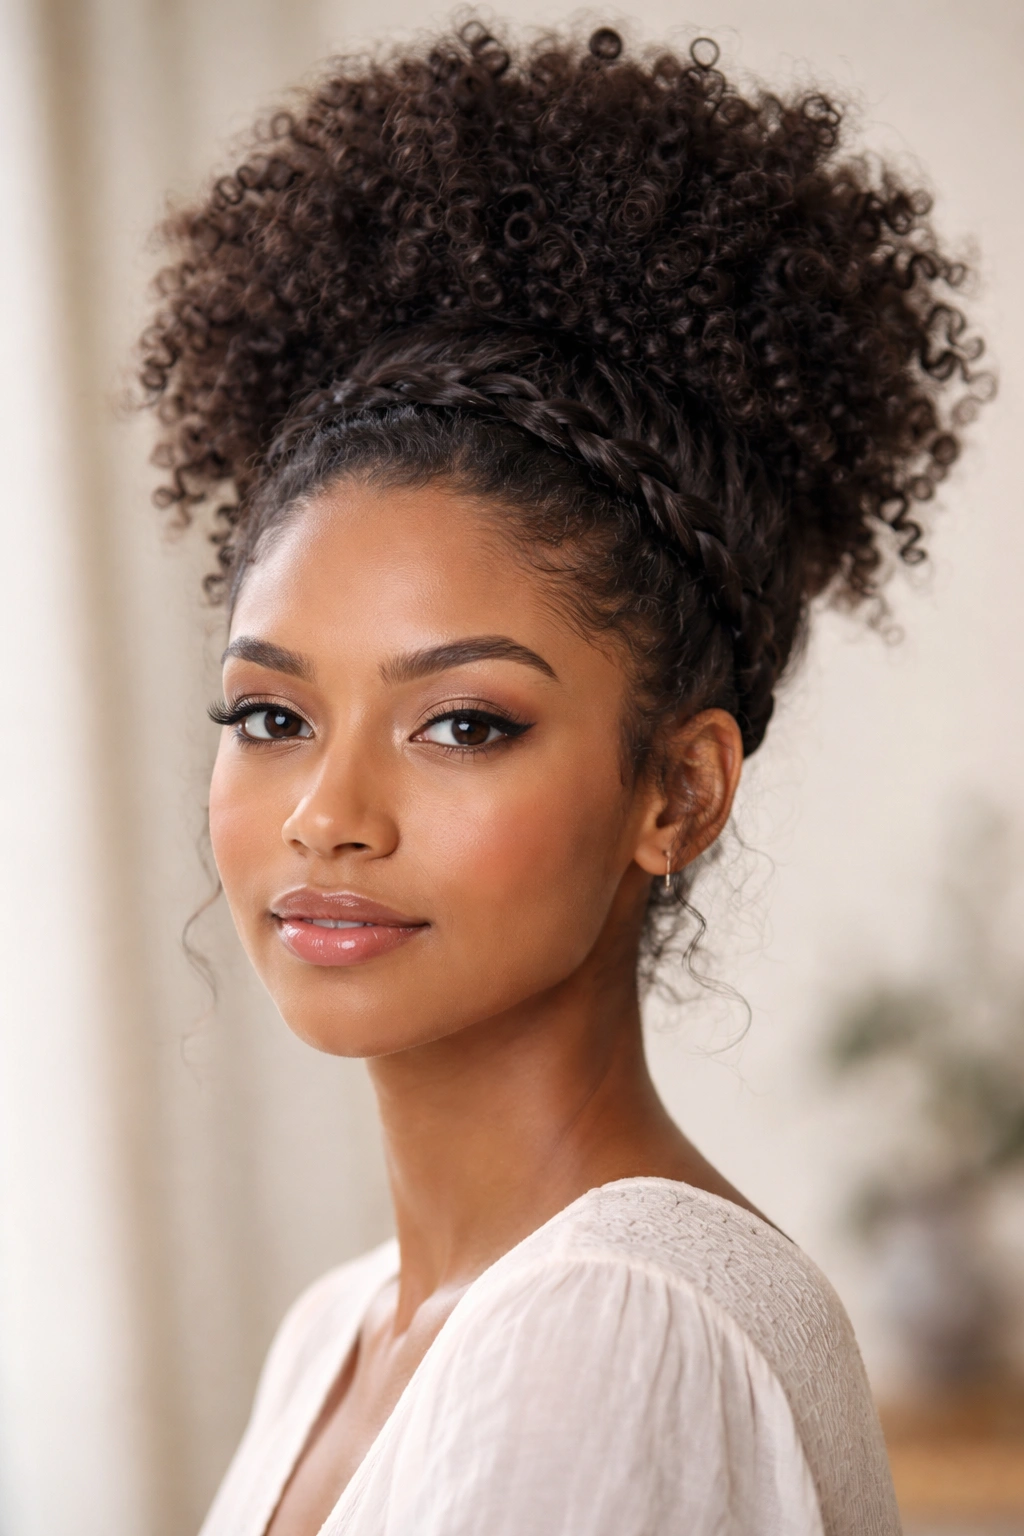
The high puff is fundamentally different from a ponytail because you’re creating a gathered bundle of curls at the top of your head that sits like a crown, and then adding a twisted detail around the base that anchors the whole look. It’s playful enough for casual days but polished enough that you can absolutely wear it to work or professional settings.
Why It’s Perfect for Your Curl Pattern
A high puff plays to one of the biggest advantages of curly hair: natural volume and height that straight-haired folks have to tease and blow-dry to achieve. Your curls are already doing the heavy lifting, so all you’re doing is directing that volume upward and creating a deliberate focal point. The twisted crown detail is what makes this feel intentional and styled rather than just a pulled-up ponytail.
How to Build This Look
- Section off the top half of your hair by creating an invisible horizontal line from ear to ear across the crown of your head. Clip the bottom half out of the way for now.
- Gather the top section into a high ponytail at the crown using a soft elastic. You want this positioned pretty high, basically where the highest point of your head is. Smooth it as much as feels natural without flattening the curls.
- Release the bottom section and take a small, thin piece from the side of your face. This is going to become your twisted crown.
- Twist that section tightly and wrap it around the base of your high puff, securing it with bobby pins as you go. The twist should look like a delicate crown or halo around the puff itself.
- Repeat on the other side with another thin section, meeting the first twist in the back. Pin everything securely.
- Gently fluff the puff by loosening the elastic just slightly so you have more volume and dimension, then secure with a medium-hold hairspray.
Worth knowing: If your curls are fine or on the thinner side, make sure the ponytail and puff are at the very crown of your head — this creates the most flattering proportions and makes even moderate-thickness hair look fuller.
3. Half-Up Half-Down with Spiral Curls
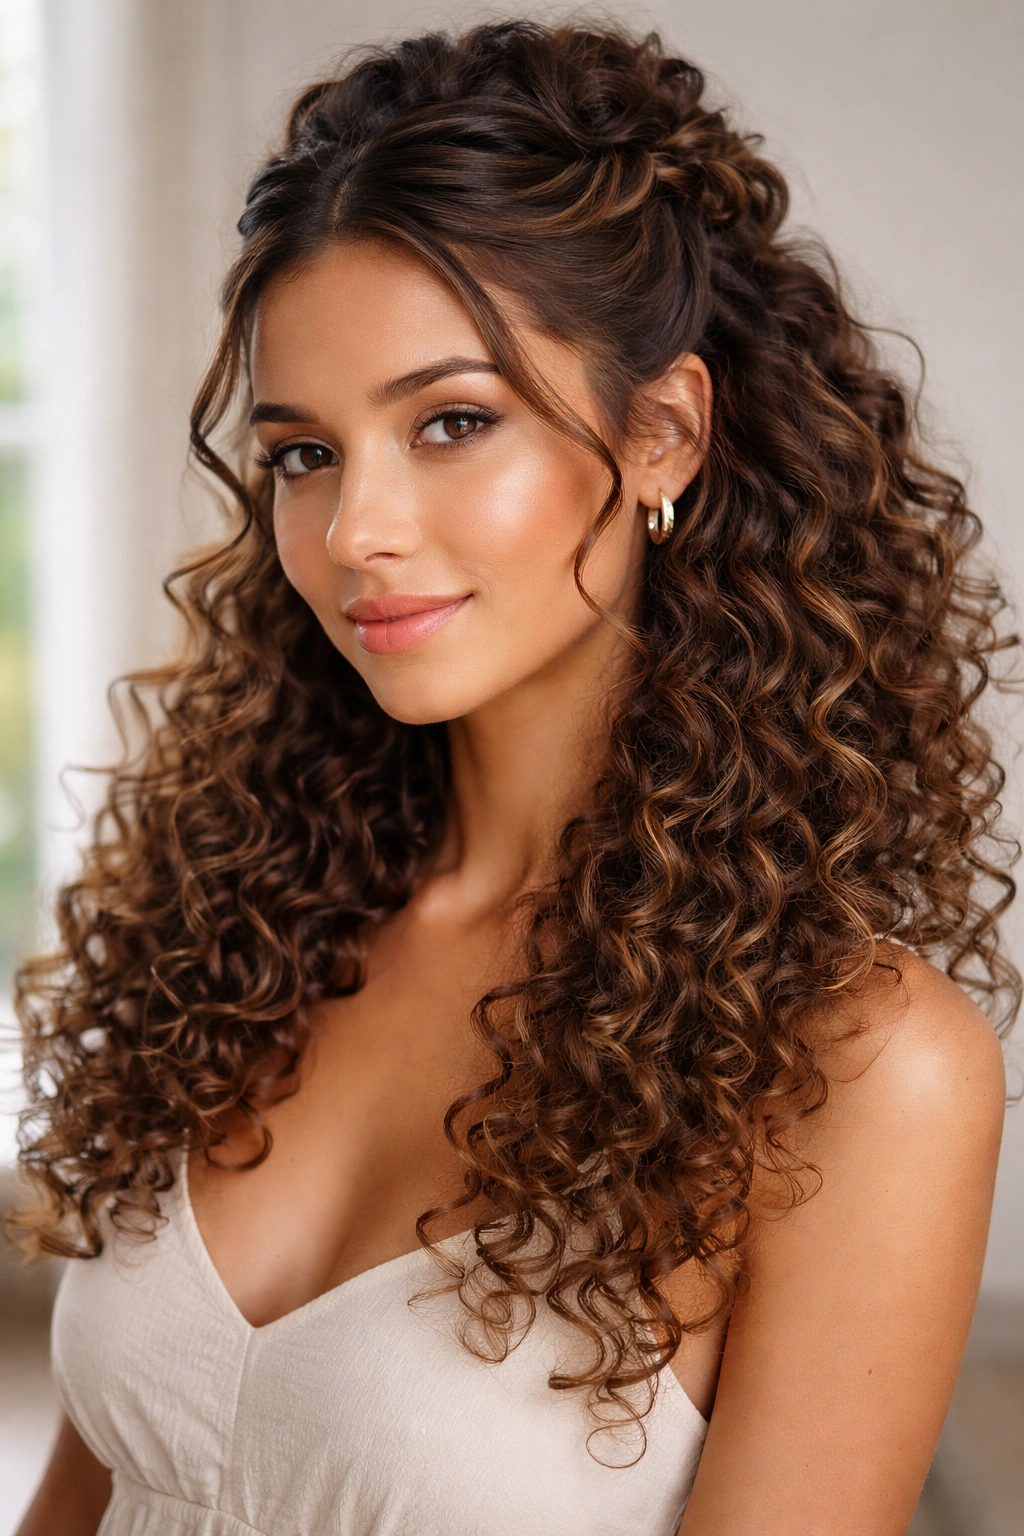
This style gives you the best of both worlds: your curls get to hang down and be seen, but your hair is still pulled back enough that it’s not falling in your face. The half-up section isn’t just a standard half-ponytail, though — it features curls that are twisted or spiraled in a way that adds movement and intentional detail to the crown area.
What Makes This Work
The half-up half-down structure works beautifully with curly hair because you’re not committing to fully pulling back all that texture, which means the curls maintain their natural shape and movement. Adding twisted or spiraled details to the half-up section makes it feel more intentional and styled, elevating it beyond a basic half-ponytail. This is genuinely one of the easiest updos to execute, which makes it perfect for those mornings when you want to look polished without spending 15 minutes on your hair.
Styling Steps
- Start with curls that have some shape and definition — either fresh curls or curls that you’ve refreshed with a spritz and quick scrunching session.
- Take a section of hair from each side of your head, starting roughly from your temple area. Each section should be about two inches wide. Leave the crown section and all the bottom curls down for now.
- Twist each side section loosely — you’re looking for a gentle spiral, not a tight rope braid. Let the curls inside the twist show themselves; they shouldn’t disappear into the twist.
- Bring both twisted sections to the back of your head and secure them together with a small clip, elastics, or bobby pins, creating a small gathered section at the crown back.
- Release the crown curls if you clipped them, and gently separate the twisted sections so they’re visible and dimensional rather than merged together.
- Finish with a curl-defining spray or a very light hairspray so the curls stay defined throughout your day but can still move naturally.
Quick tip: The tighter you twist, the more structured it looks; the looser you twist, the more effortless and undone it appears. Choose based on your mood and where you’re going that day.
4. Braided Ponytail Updo
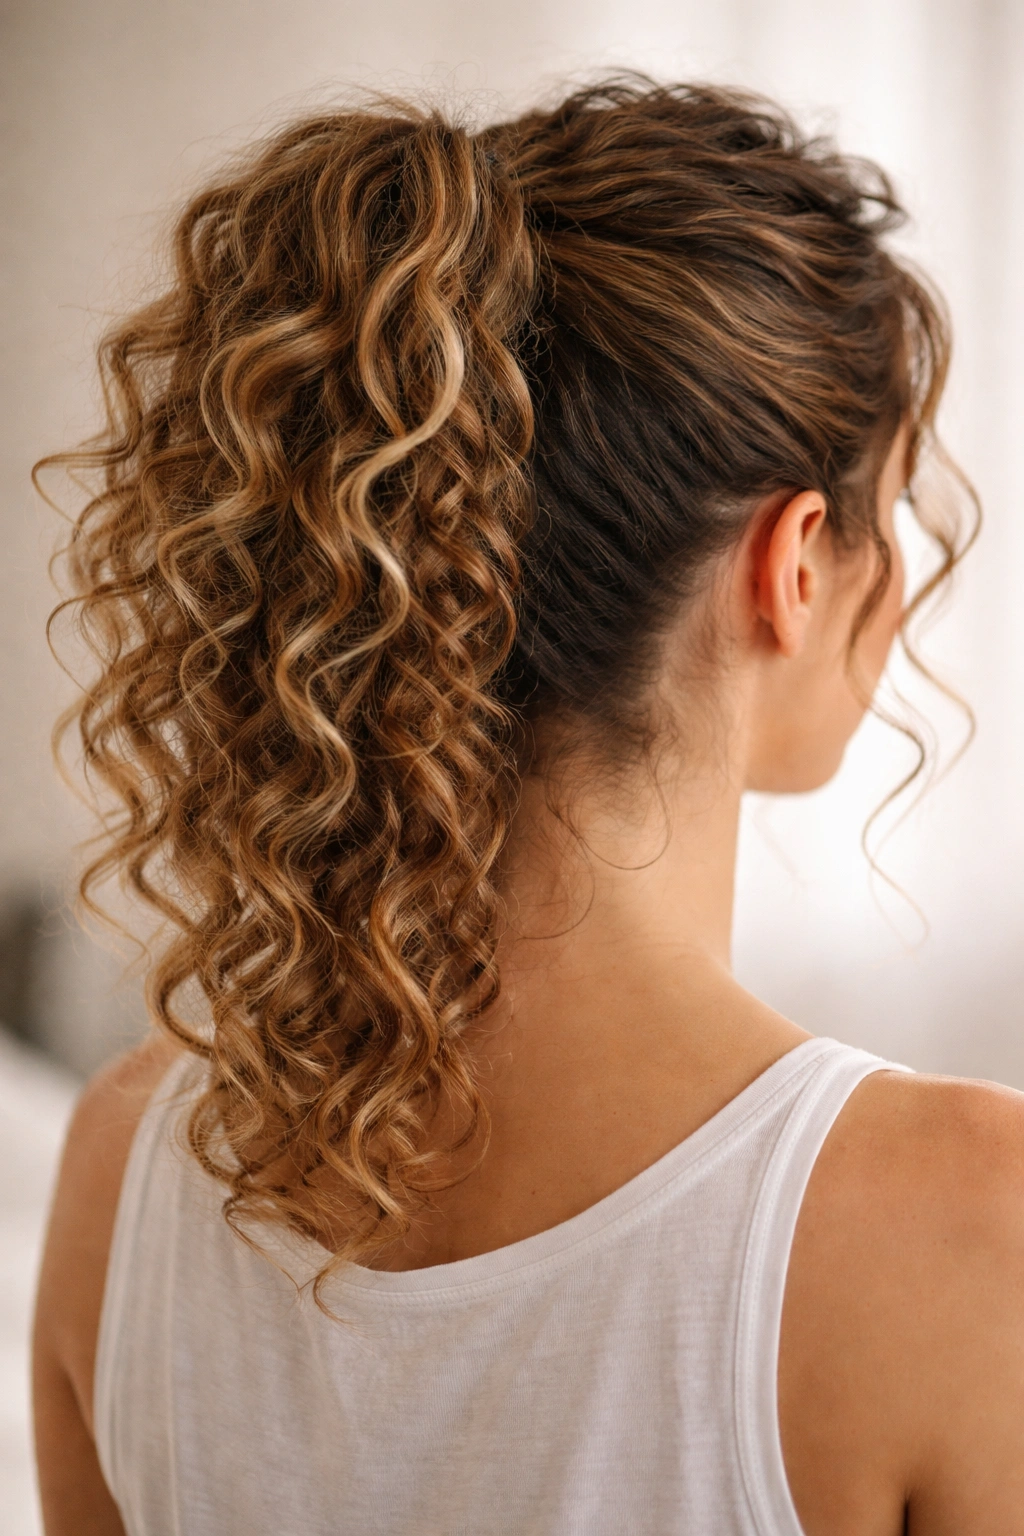
This updo takes everything you like about a ponytail — easy, functional, keeps hair off your neck — and elevates it by adding a braid detail that wraps around the base. It’s more interesting than a standard ponytail but honestly just as quick to create once you’ve practiced it a couple of times. The braid adds visual interest and makes the style feel intentional and put-together.
Why Braids Work on Curly Hair
Braiding curly hair is actually easier than braiding straight hair because the texture naturally grips and holds without requiring you to get everything perfect and smooth. Your curls add visual texture to the braid itself, making it look thicker and more dimensional. A braid on curly hair reads as intentional and styled without being formal or overdone, which is exactly the vibe you want for everyday wear.
The Steps to Create It
- Gather your hair into a high or mid-height ponytail depending on whether you want an elevated or more relaxed vibe. Use a soft elastic that won’t snag your curls. Leave a thin section unclipped — you’ll use this for your braid.
- Take that thin section and divide it into three smaller sections to create a three-strand braid. With curly hair, you don’t need to worry about everything being perfectly smooth; the curls will hold the braid together naturally.
- Braid loosely and gently — tight braids on curly hair can sometimes pull at the roots or flatten the curl pattern. A loose braid actually looks better and puts less stress on your hair.
- Once you’ve braided about three-quarters of the way down, wrap that braid around the base of your ponytail like a crown, securing it with bobby pins. Tuck the end of the braid underneath so it’s hidden.
- Gently loosen the braid slightly to make it look fuller and more textured, and pull out a few curls from your ponytail so it looks soft and dimensional rather than smooth.
- Secure with a flexible hold spray that keeps everything in place without creating crunchiness.
Pro tip: If your ponytail feels too smooth or slicked back, this braid style actually benefits from leaving in a few face-framing pieces or gently pulling down some curls around the temple area for a softer, less severe look.
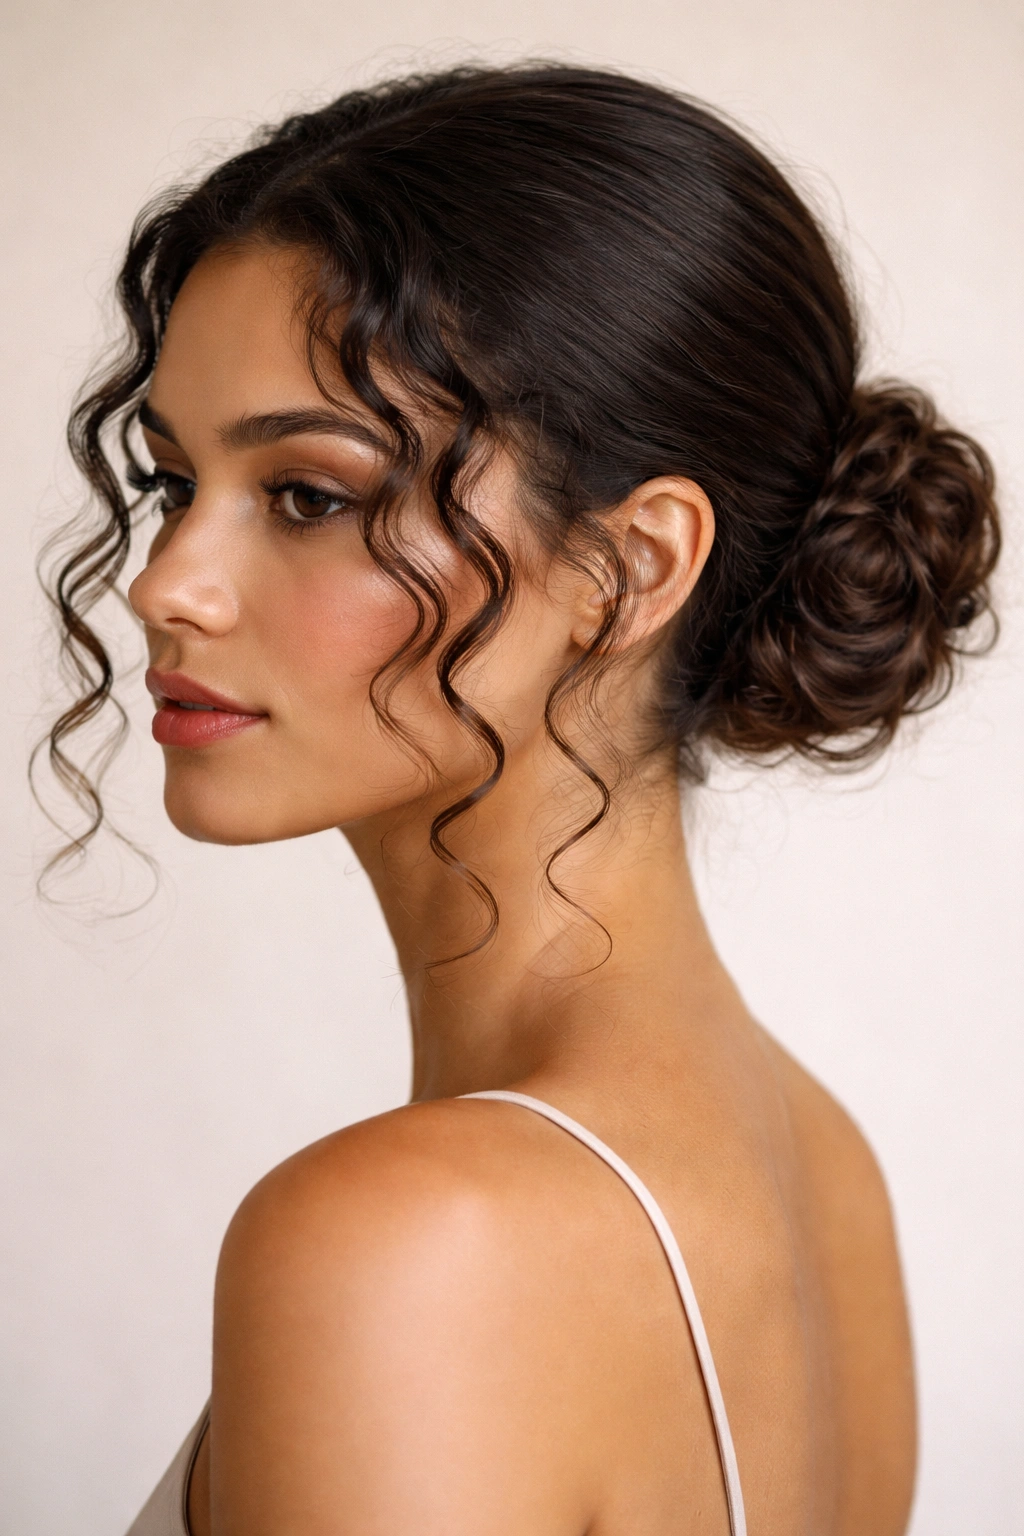
5. Twisted Side Bun
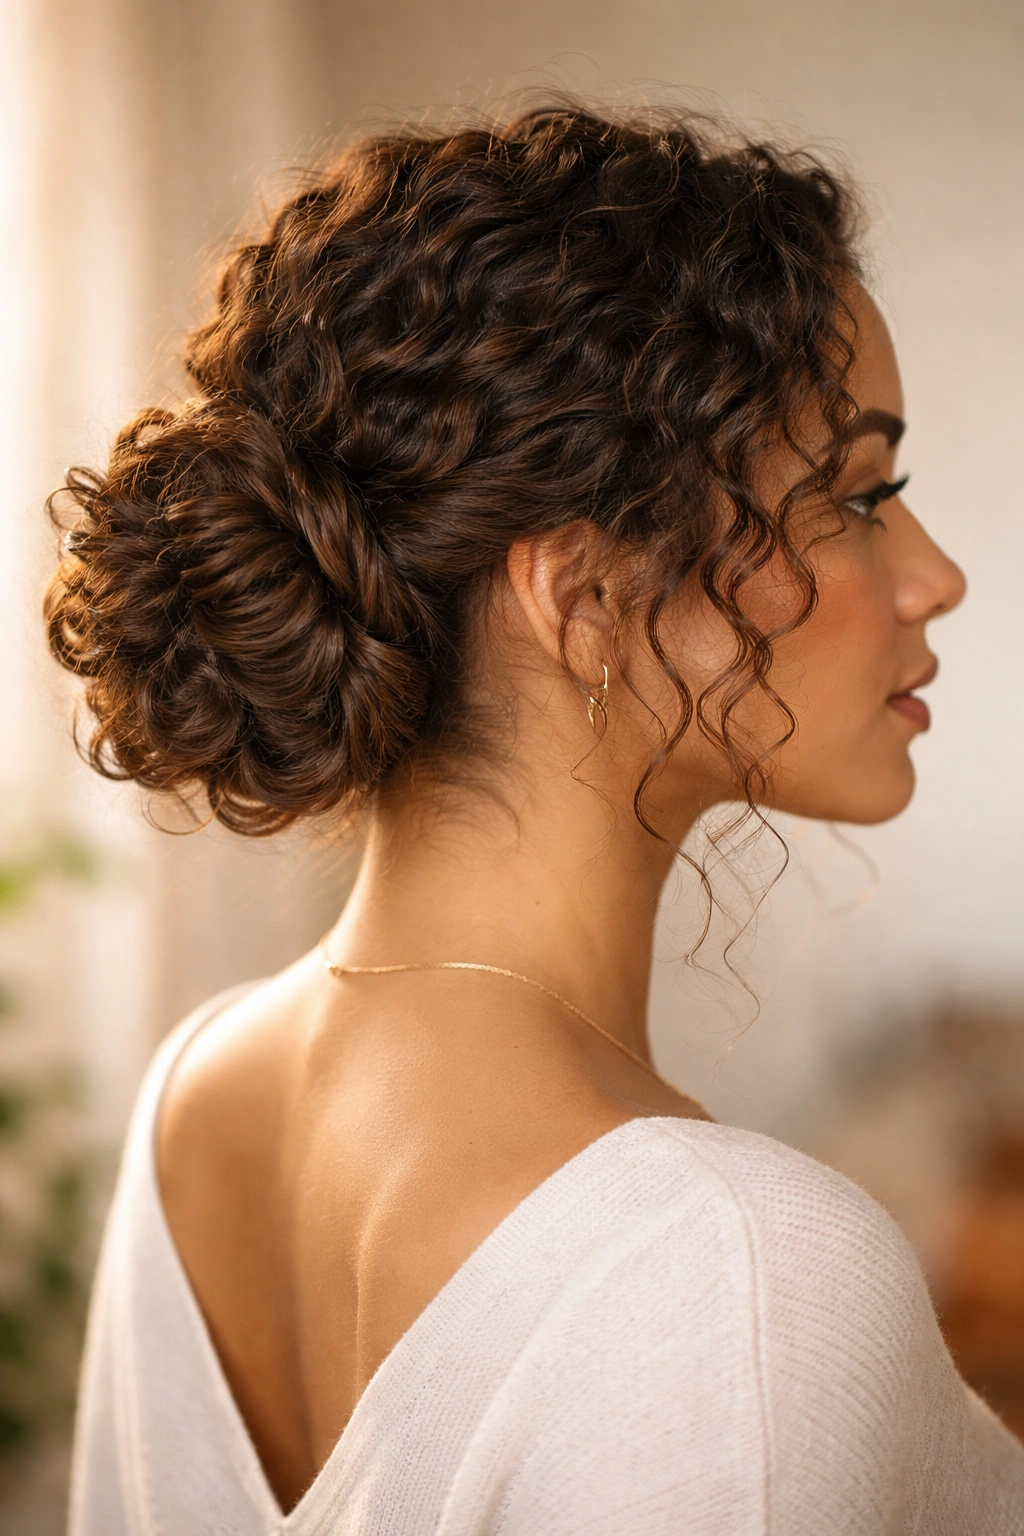
A side bun is the kind of updo that instantly reads as intentional and put-together, especially when you add a twisted detail that anchors the look. It’s romantic enough for going out but casual enough that it doesn’t feel overdressed for everyday wear. The side-positioned bun flatters most face shapes and creates an interesting asymmetrical silhouette.
Why This Style Elevates Your Curls
A side bun on curly hair looks inherently more textured and interesting than on straight hair because your curl pattern creates natural visual detail. Positioning the bun to the side rather than centered adds movement and makes the look feel less severe. The twist detail adds another layer of intentionality — this isn’t just your hair pulled to the side, it’s styled hair that’s been deliberately twisted and wrapped.
How to Build Your Side Bun
- Tilt your head slightly toward the side where you want your bun to sit — this helps you understand proportions. For most people, this should be roughly ear-level or slightly below, toward the back.
- Gather your hair to that side using a soft ponytail holder, creating a side ponytail. The positioning matters here: you want it slightly lower than a traditional high pony, but not so low that it feels droopy.
- Take the ponytail and gently twist it — not tightly, but a loose, relaxed spiral that shows off your curl texture rather than compressing it.
- Wrap the twisted ponytail around the base of where it’s anchored, creating a bun shape. Secure with bobby pins as you go, tucking them in so they’re hidden within the curls.
- Pull out a few pieces around the bun to create dimension and an intentionally undone effect. You can also release a gentle face-framing piece if you want softness around your face.
- Spritz with hairspray, but avoid spraying so heavily that you eliminate all the texture of the twist.
Worth knowing: If your curls are thick or very voluminous, this side bun style actually benefits from sitting slightly lower on your head — around mid-back rather than crown — because it distributes the weight better and looks more balanced with your proportions.
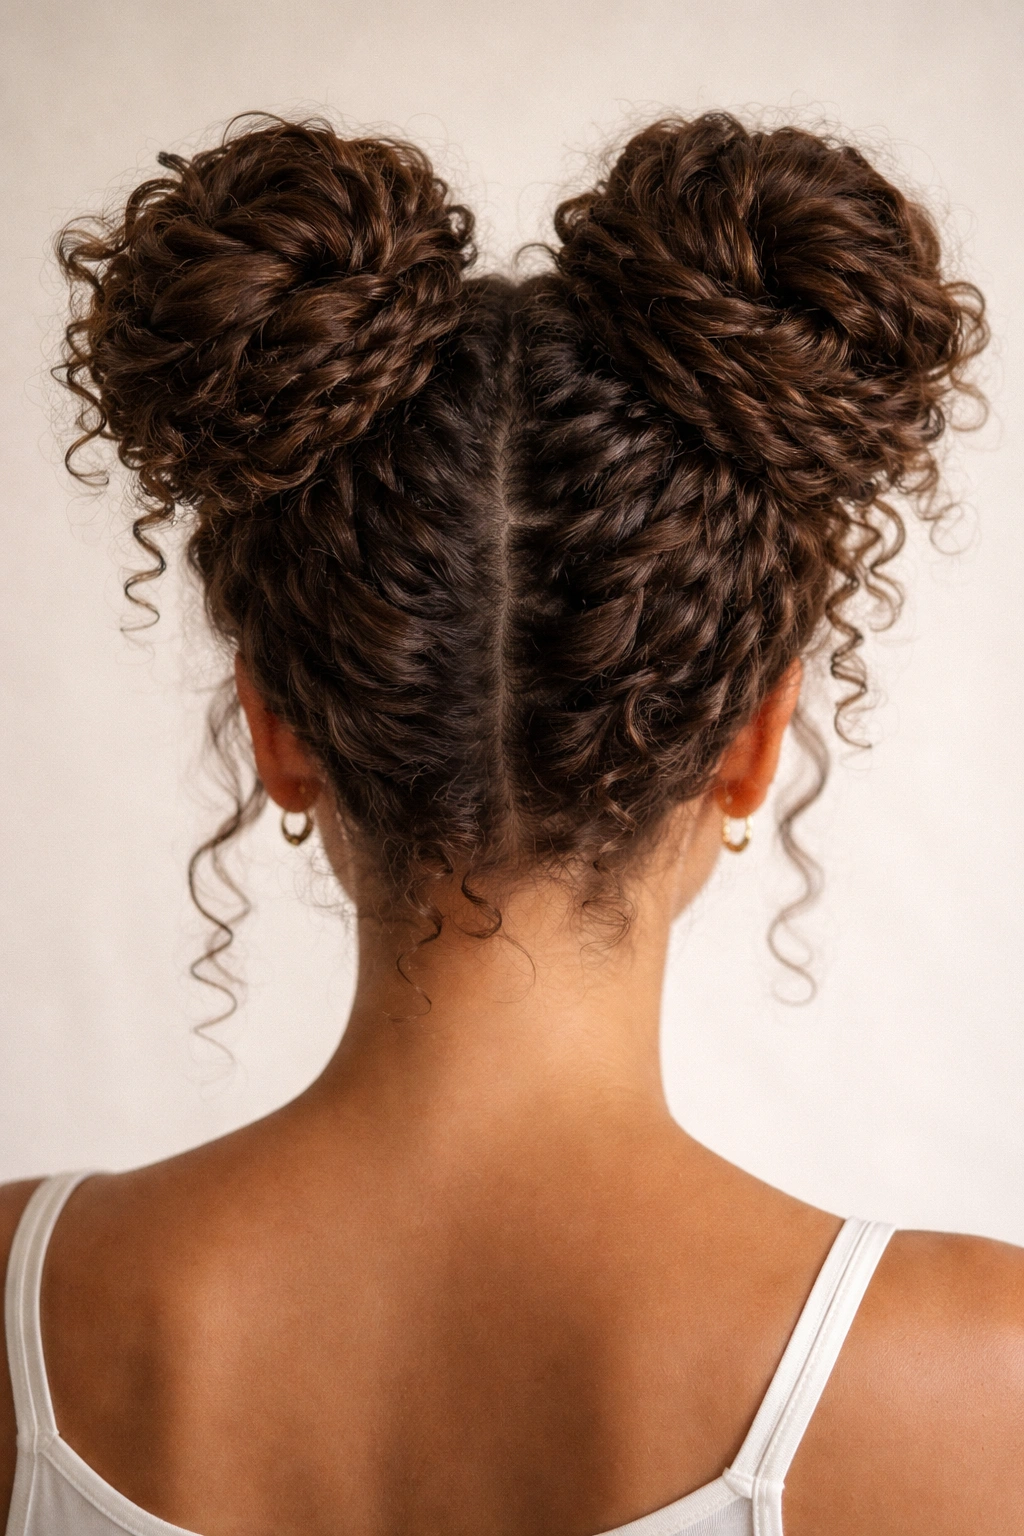
6. Space Buns for a Playful Look
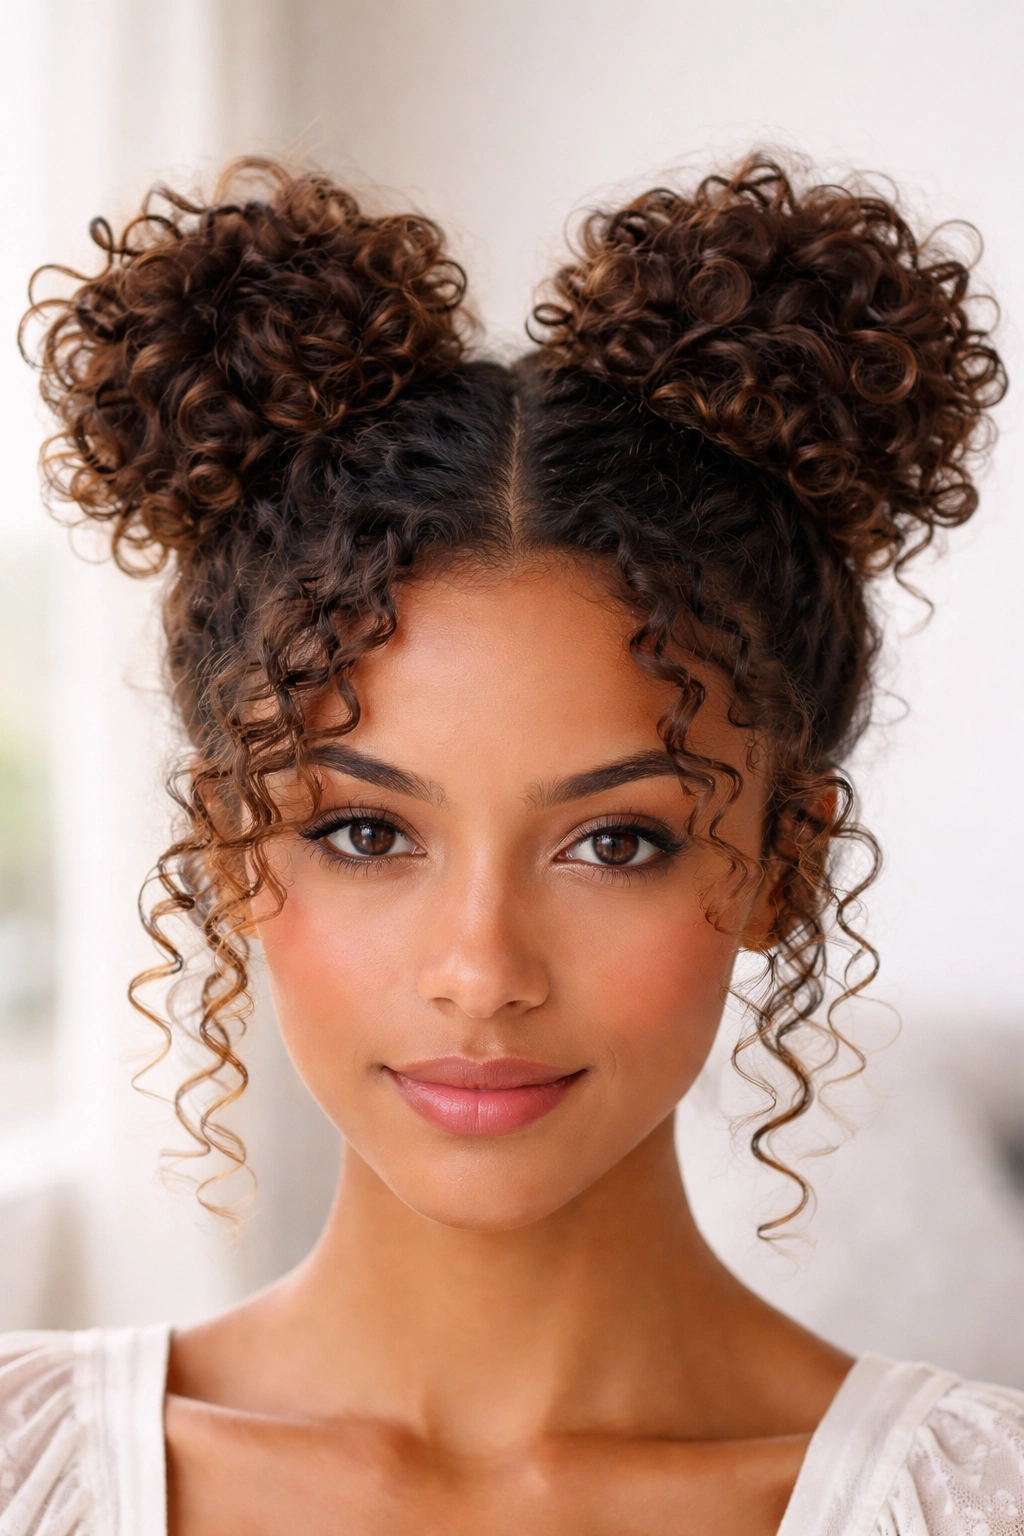
Space buns (sometimes called double buns or pigtail buns) are the ultimate fun, youthful updo that somehow works for both casual days and even as a playful work option depending on your workplace vibe. Having two buns instead of one creates an instant sense of fun and whimsy, and on curly hair, the texture makes these look polished rather than childish.
Why Curly Hair Makes These Look Sophisticated
This is where curly texture becomes a genuine advantage. Space buns on straight hair often read as deliberately cutesy or costume-like, but the same style on curly hair reads as playful and intentional in a more mature way. Your curls add dimension and sophistication to what could otherwise feel like a childish hairstyle. The key is styling them with a bit of intentionality — you’re not aiming for cartoon perfection, you’re aiming for cool and textured.
Steps to Create Polished Space Buns
- Create a center part that runs from your forehead to the back of your neck. Use a comb or your fingers — this doesn’t need to be geometrically perfect.
- Divide one half into a section that will become your first bun, roughly from the part line to your ear. Clip the other half of your hair out of the way.
- Gather this section into a ponytail at approximately temple-height or slightly higher, using a soft elastic. This positioning affects how the look reads — higher positioning looks younger and more playful, while slightly lower positioning reads as more sophisticated.
- Wrap the ponytail around the elastic to create a bun shape, securing with bobby pins. Don’t make it super tight; loose texture looks better here.
- Repeat on the other side, positioning your second bun to mirror the first one.
- Gently loosen both buns so they look fuller and show off your curl texture. Pull out any curls that want to escape — this actually adds to the intentional, styled quality.
- Consider adding small accessories like clip barrettes or tiny gold clips if you want to elevate the look, or leave them bare and natural depending on your vibe.
Pro tip: This is one of the few updo styles that actually looks better when it’s not perfectly symmetrical. If one bun ends up slightly looser or positioned a tiny bit differently than the other, that’s actually more interesting visually than if they were identical.
7. The Wrapped Curl Topknot
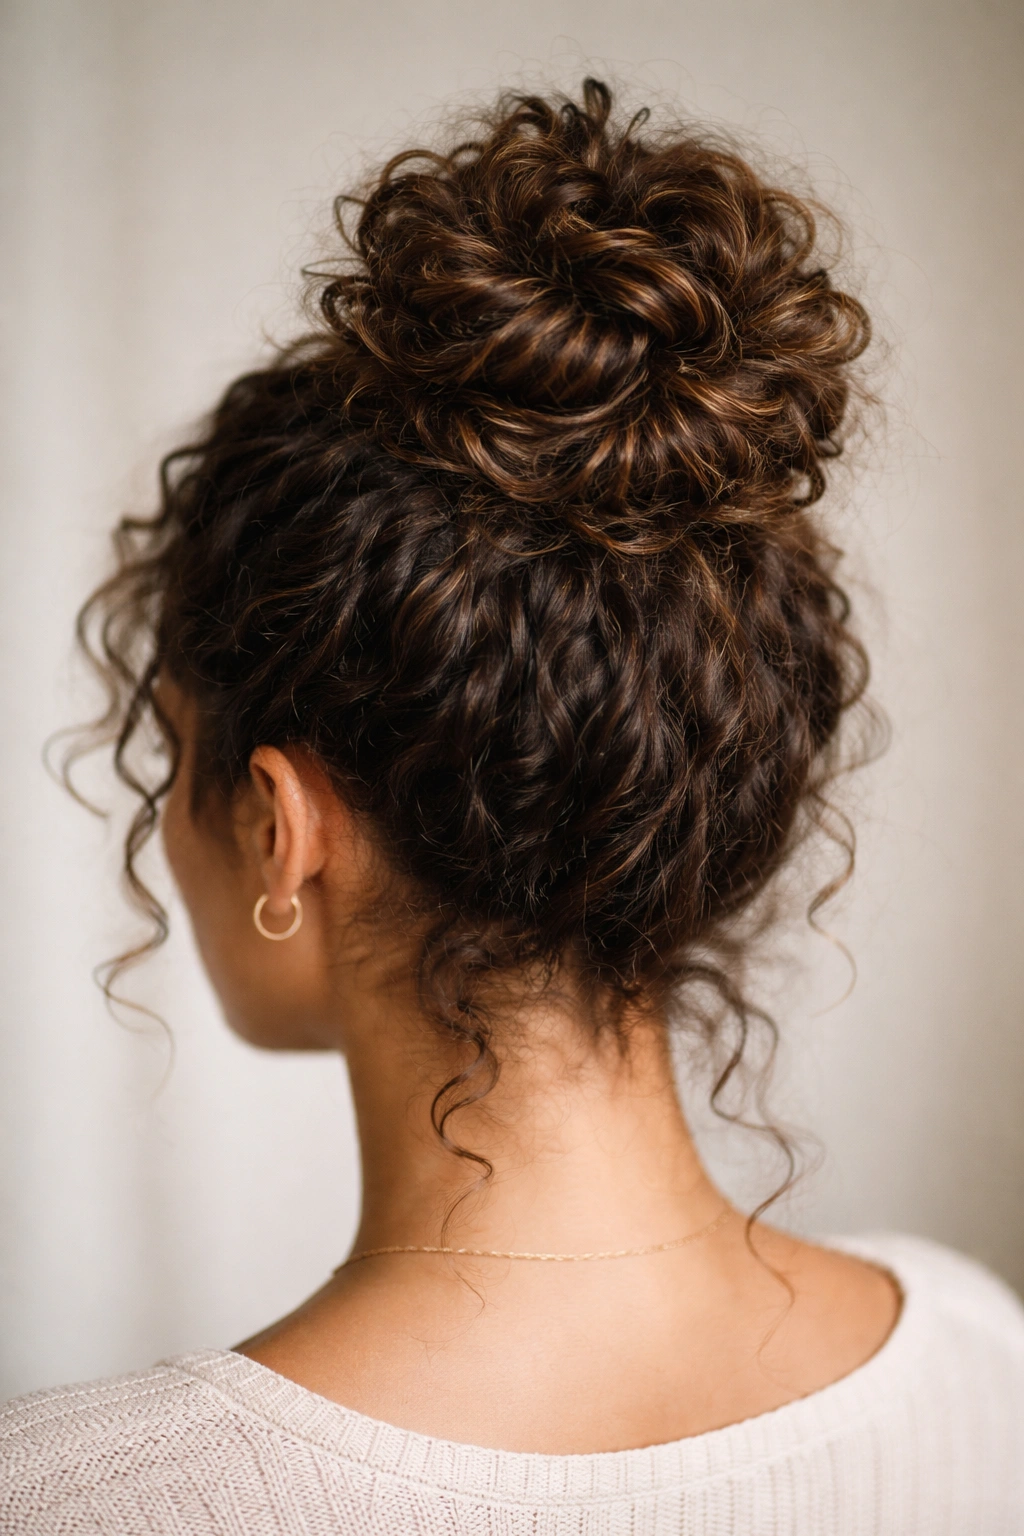
A topknot on curly hair is basically the most low-effort version of the messy bun — you’re gathering curls at the very top of your head and wrapping them into a loose, textured knot that celebrates your curl pattern rather than hiding it. This style works for literally every occasion from lazy Sunday mornings to creative workplace settings. It’s the definition of effortlessly polished.
What Makes This Different from Other Buns
Unlike a traditional bun where you wrap the ponytail around the elastic, the wrapped curl topknot is looser and more intentionally undone. You’re using the natural shape and texture of your curls to create visual interest rather than trying to create a smooth, compact shape. This actually makes it easier to achieve on curly hair because you’re not fighting your texture — you’re using it.
How to Build Your Topknot
- Flip your head upside down or just tilt it back slightly so you can see the very crown of your head clearly. This position makes it much easier to gather at the right spot.
- Gather curls from all around your crown into a very high ponytail using a soft elastic or hair clip. You want this positioned pretty much at the highest point of your head. Leave some pieces loose if some naturally want to escape — that’s part of the charm.
- Take the ponytail and gently twist or curl it around itself, creating a loose knot shape. You’re not aiming for neat and compact; you’re aiming for soft and dimensional.
- Secure the knot with several bobby pins inserted directly into the wrapped sections so they’re hidden within the curls. Use as many as you need — better to have it secure than to have it slipping throughout your day.
- Pull out pieces from the knot itself to create volume and show off your curl texture. Some pieces should look slightly messy; that’s the point.
- Finish with a flexible hold spray that keeps the style in place without making it crunchy.
Quick note: This topknot is especially flattering on people with longer faces because the height at the crown creates interesting proportions. If you have a rounder face, pulling out a couple of face-framing pieces softens the whole look.
8. Braided Halo with Loose Curls
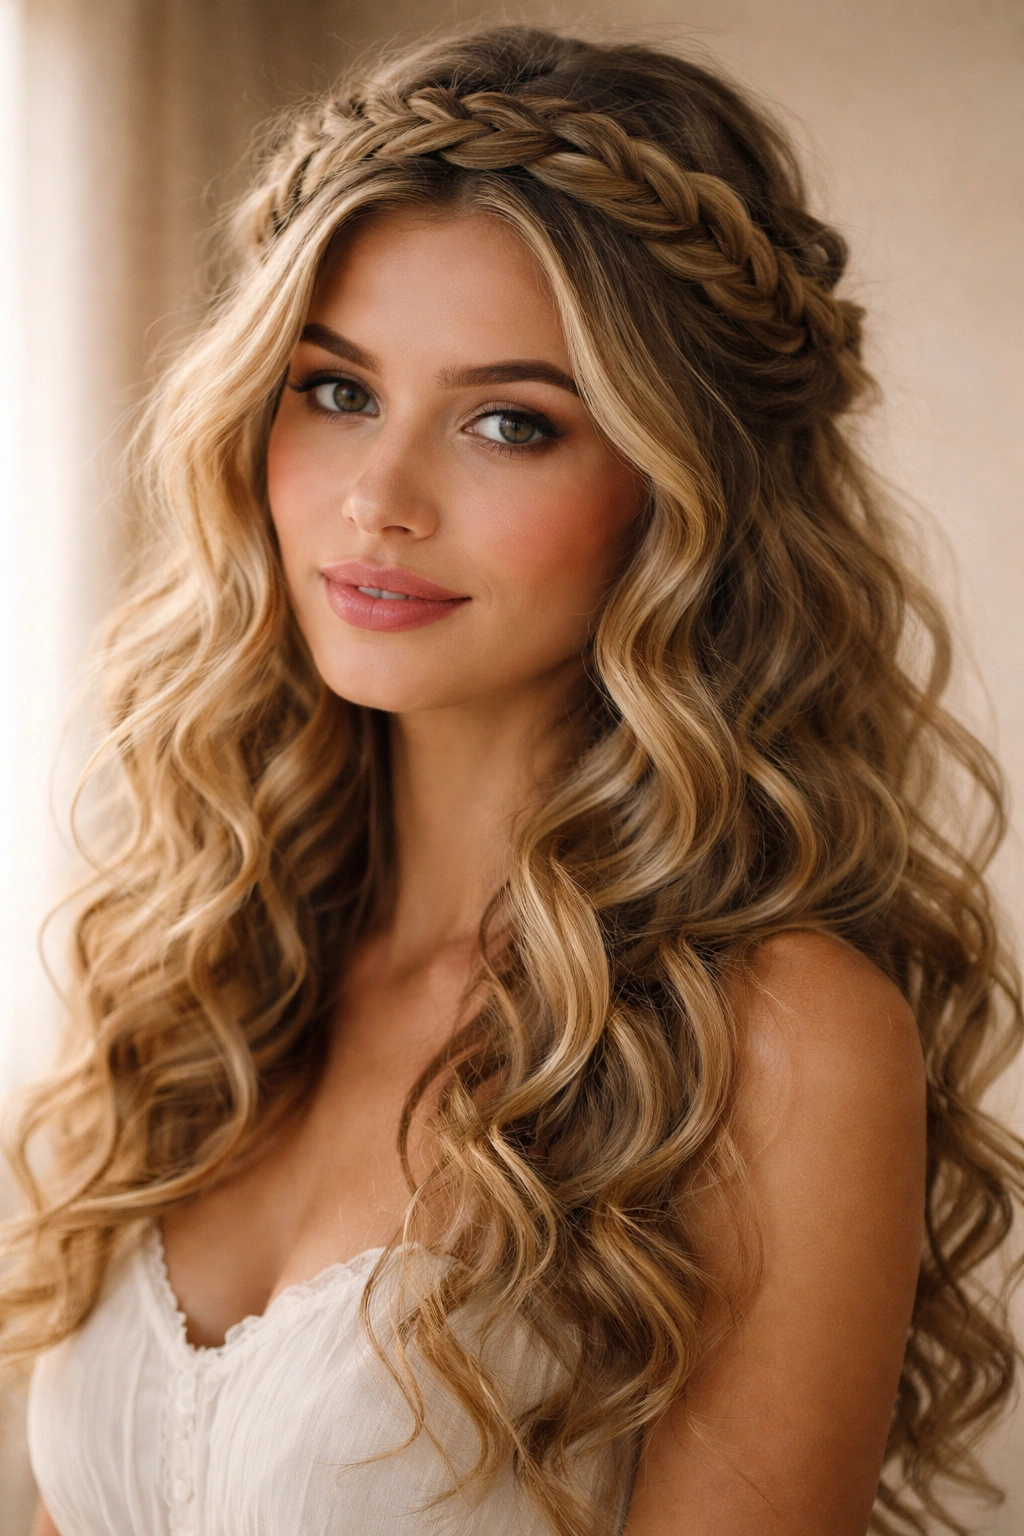
A braided halo is an updo where a braid (or series of braids) wraps around your head like a crown, while the rest of your hair hangs down in loose curls. It’s romantic and intentional-looking without being formal or fussy. The braided detail transforms what could be just “hair down” into something that reads as styled and special.
Why This Works on Curly Hair
Braids on curly hair naturally have more texture and visual interest than braids on straight hair, so even a simple braid looks dimensional and beautiful. The halo effect created by the braid framing your face is especially flattering because it draws attention upward while letting your curl length and texture be the main event. This is one of those updos that honestly looks like you spent way more time on it than you actually did.
Creating Your Halo Braid
- Start with one side of your head, taking a thin section of hair from right above your ear. This is going to become the first part of your braid.
- Start a three-strand braid with that section, but instead of braiding down, braid backward and upward, moving toward the back of your head. With curly hair, you don’t need everything perfectly smooth — the curls will grip and hold.
- As you braid, gradually incorporate more hair from above the braid line, adding sections as you move along. This creates a fuller, more substantial braid that looks intentional.
- Continue braiding all the way around the back of your head to the opposite side, creating a semi-circle or full circle depending on how dramatic you want it.
- Secure the end of the braid on the opposite side using bobby pins that match your hair color, tucking them completely out of sight within the curls.
- Leave all your hair down below the braid, letting your curls fall naturally. Gently pull out a few curls from within the braid itself so you can see the texture.
- Spritz lightly with hairspray, focusing more on the braid areas and less on the loose curls so they stay soft and moveable.
Worth knowing: If you have fine or medium-thickness hair, a Dutch braid (where you braid under rather than over) creates a braid that looks thicker and more substantial than a standard over-braid.
9. Sleek Low Bun with Curly Strands
This updo is a beautiful balance between sleek and textured. You’re smoothing your hair enough to create a low bun at the nape of your neck, but leaving some curls loose around your face and throughout your style so you still get that beautiful curl definition. It’s sophisticated enough for work or formal occasions but still celebrates your natural texture.
Why You Want Some Curls to Stay Out
Here’s the thing about fully slicking back curly hair into a super smooth bun: it can sometimes look a bit severe, and it forces you to work against your hair’s natural texture. By keeping some curls out — especially framing your face — you get the best of both worlds. The smoothed bun looks intentional and put-together, while the curls that frame your face add softness and movement. It’s actually a more flattering approach than trying to make everything stick-straight.
Building Your Polished Low Bun
- Start by sectioning out a generous face-framing piece on each side of your face. These pieces are going to stay down, so clip them to the side for now.
- Gather the rest of your hair into a low ponytail at the nape of your neck, roughly where your neck meets the base of your head. Use a soft elastic for comfort.
- If your ponytail section has a lot of curls, you can very gently smooth them using a light smoothing cream or serum, but don’t overdo it — you want to retain some of the curl pattern. This is optional and depends on how sleek you want the bun itself to be.
- Wrap the ponytail around the elastic to create a bun, securing it with bobby pins. The bun itself can be a bit more compact than some of the looser bun styles since you’ve already got loose curls framing your face.
- Release your face-framing pieces and let them fall naturally. You can gently encourage them to curl around your face if they’re not already spiraling naturally.
- Add any other loose pieces you want around your face or temples for softness. This style actually benefits from looking slightly undone around the face area.
- Finish with hairspray, using a medium hold that keeps the bun in place without making the face-framing curls feel stiff.
Pro tip: This look is particularly stunning if you use a hair stick, claw clip, or decorative barrette to anchor the bun instead of bobby pins. It looks more intentional and polished, and it’s actually sometimes easier to secure than you’d expect.
10. Twisted Double Bun
The twisted double bun is like the space buns’ more sophisticated cousin. Instead of two simple gathered buns, you’re creating two buns where the sections are twisted before they’re wrapped into bun shapes. This adds an extra layer of detail and intentionality that makes the whole look feel more styled and special.
What Makes Twists Better Than Simple Gathers
When you twist sections of curly hair before bunning them, you create a more defined line and shape. The twist shows off your curl pattern beautifully while also creating visual structure. It’s one of those details that doesn’t take any extra time but makes the overall style look significantly more polished and intentional.
How to Create Twisted Double Buns
- Create a center part from your forehead all the way to the back of your head. This doesn’t need to be perfectly straight, but it should be visible.
- Take one half of your hair and gather it into a section that will become your first bun. Position this roughly at temple-height or slightly higher.
- Before you secure the ponytail, twist the entire section gently. You’re creating a loose spiral, not a tight rope — the curls should still be visible within the twist.
- Secure the twisted section with a soft elastic, then wrap it around itself to create a twisted bun shape. Secure with bobby pins.
- Repeat on the other side, creating a mirror-image twisted section and bun. Try to position both buns at approximately the same height, but don’t worry if they’re slightly different — asymmetry is actually more interesting.
- Gently pull out curls from both buns to create softness and dimension. You want to see the curl texture, not just smooth wrapped sections.
- Use a flexible hold hairspray that keeps everything in place while still allowing movement and maintaining curl definition.
Worth knowing: This style looks incredibly cute with small accessories like gold clips, tiny butterfly barrettes, or even fabric-covered elastics in coordinating colors. The added detail elevates it from everyday casual to “I put thought into this.”
Final Thoughts
The real magic of updos for curly hair is that they work because of your texture, not in spite of it. Every single one of these styles celebrates your curl pattern, gives you the practical benefit of getting hair off your face and neck, and looks intentional without requiring perfect execution. Once you’ve practiced a couple of these a few times, you’ll be able to throw them together in under ten minutes, which means you’ve got instant options on mornings when you need something quick or when you want your hair out of the way but still looking polished.
The most important thing to remember is that these updos don’t need to be perfect. In fact, the slightly undone quality — the curls that escape, the pieces that frame your face, the texture that shows within the braids or buns — is exactly what makes them work so well on curly hair. You’re not fighting your texture or trying to force it into a shape that doesn’t suit it. You’re enhancing what you’ve already got, which is so much easier and produces so much better results.
Start by trying whichever style appeals to you most, practice it a couple of times, and then gradually work your way through the others as you get comfortable. Each one opens up new possibilities for different occasions and different moods. On days when you want to feel polished and intentional, you’ve got these updos ready to go. And honestly, that’s the best part — knowing you’ve got a whole arsenal of cute, curly-friendly styles that actually work.