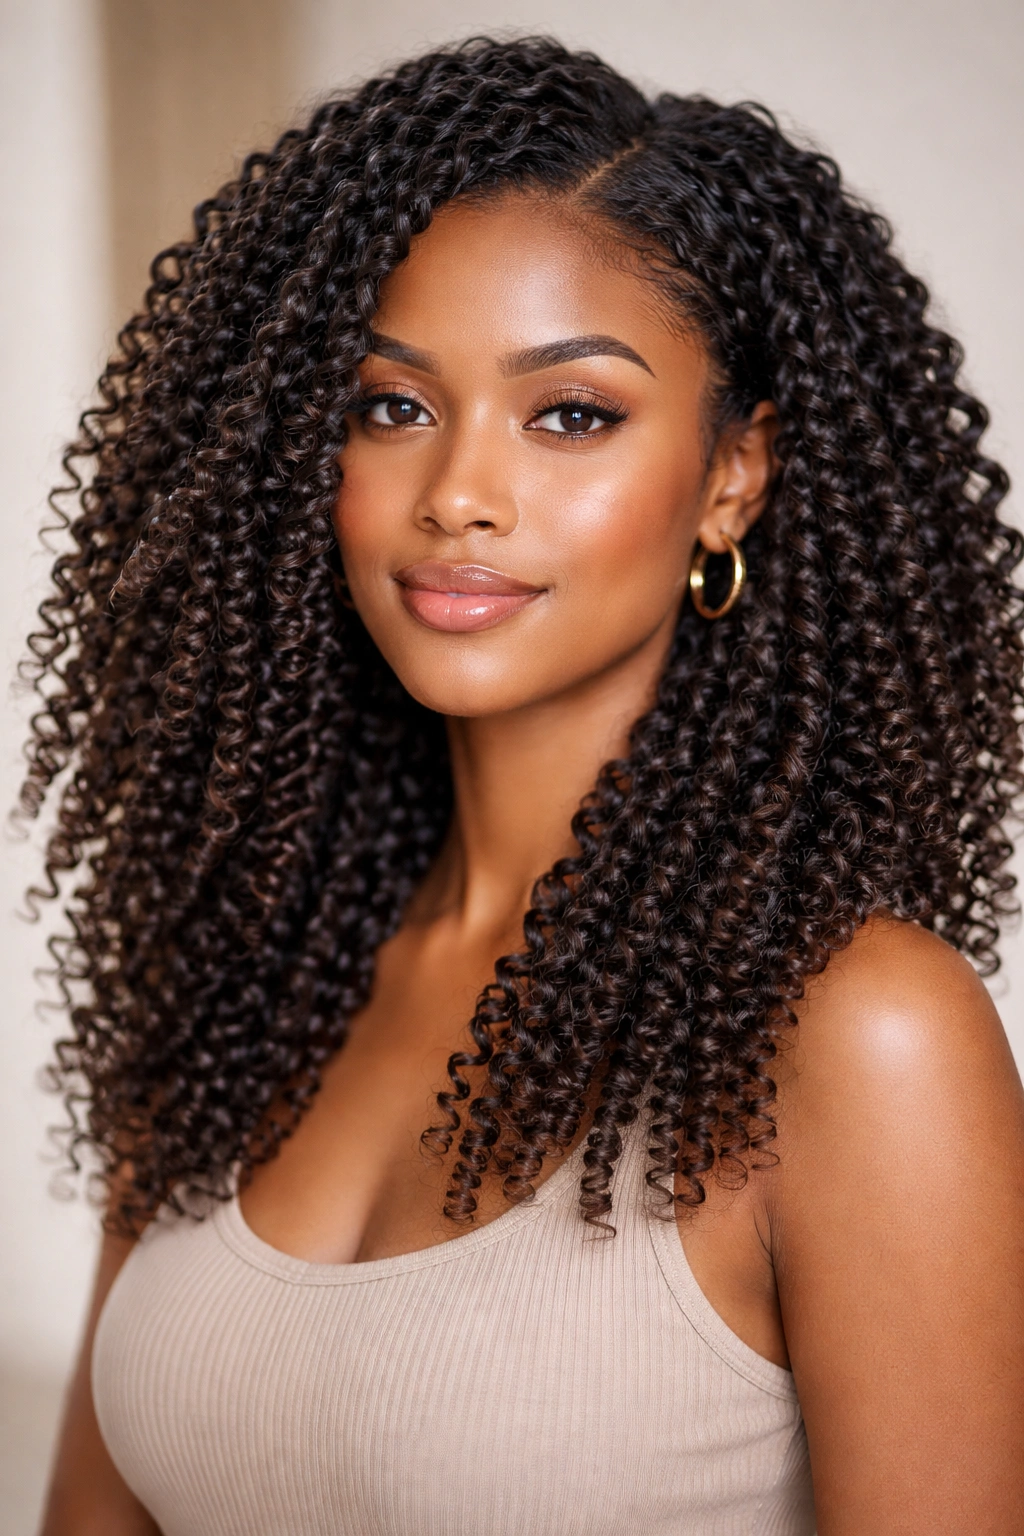
Natural curls are a powerful asset, but knowing how to style them goes way beyond just letting them dry and hoping for the best. The difference between a frizzy, undefined mess and a gorgeous, intentional-looking style often comes down to technique, product choice, and understanding what your specific curl pattern actually needs. Whether you’ve got tight coils, loose waves, or something in between, there’s absolutely a hairstyle that’ll make your natural texture shine—and honestly, some of the most beautiful styles work with your curl pattern instead of fighting against it.
The challenge is that natural curly hairstyles aren’t one-size-fits-all. What works beautifully for someone with 3C coils might not translate the same way for someone with 2B waves. That’s why this guide focuses on versatile styles that adapt across different curl types and textures. You’ll find options for low-maintenance everyday looks, styles that make a statement, and everything in between. The goal is to give you a real toolkit—not just pictures of styles you like, but the actual how-tos and the specific techniques that make each one work.
Better yet, most of these styles either require minimal heat styling or none at all, which means you’re protecting your curl health while looking absolutely incredible. Let’s walk through ten natural curly hairstyles that’ll let your texture do what it does best: turn heads.
1. The Wash-and-Go with Defined Curls
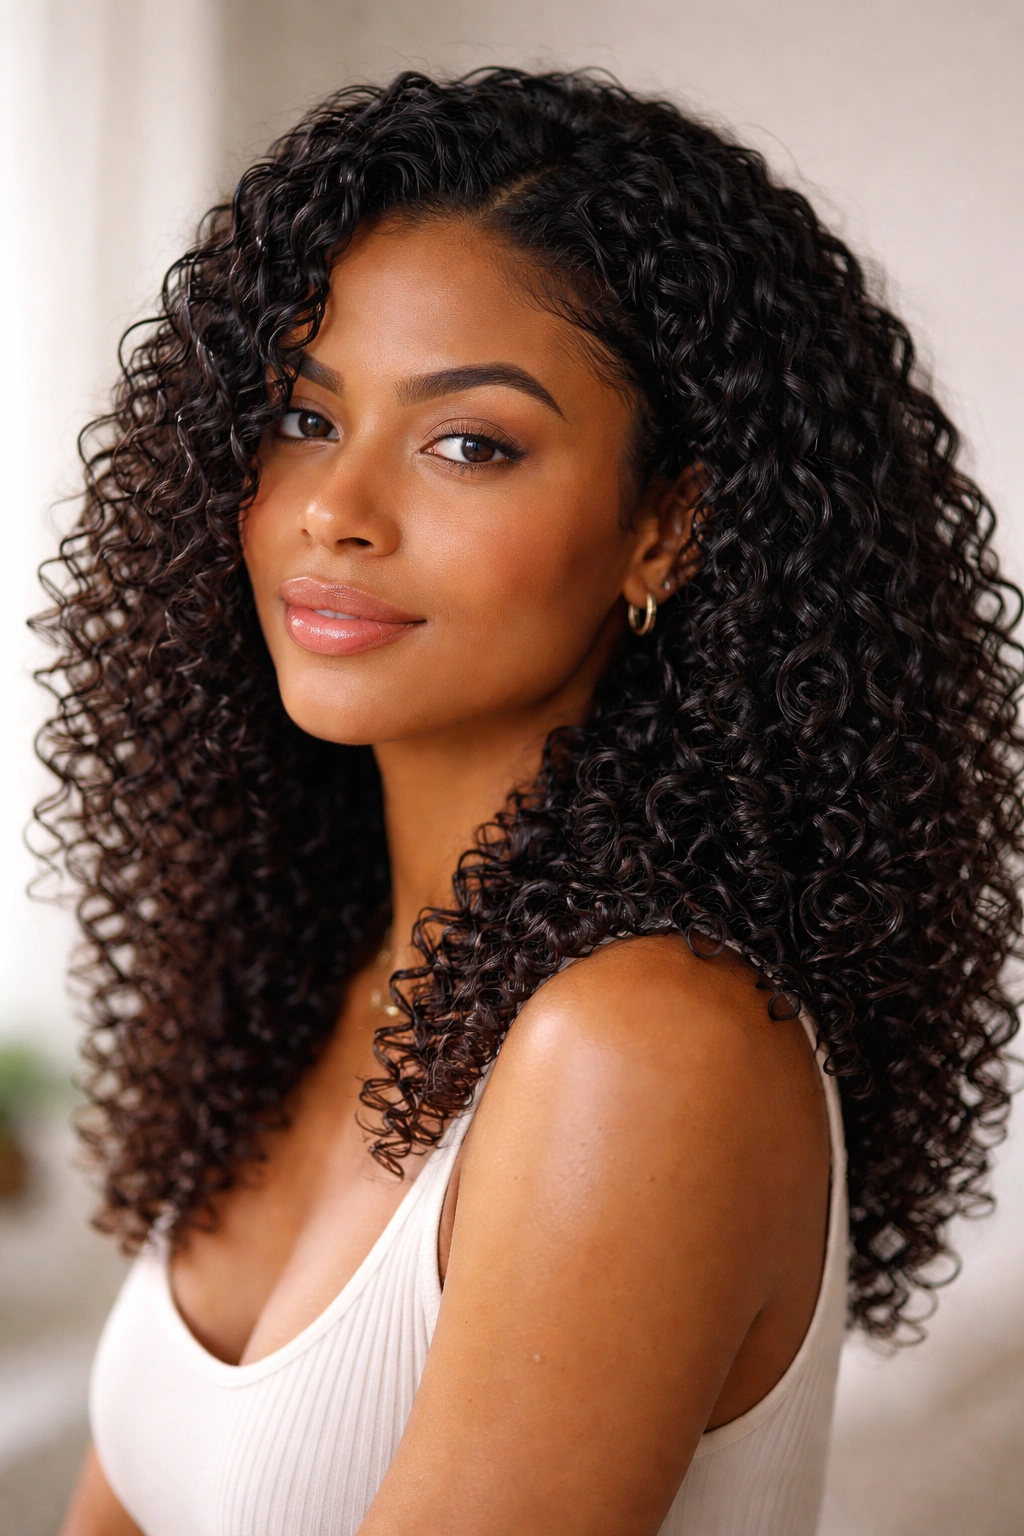
This is the holy grail for anyone who actually wants a quick-to-style morning. A true wash-and-go means you shampoo or co-wash, apply your styling products while your hair is still dripping wet, and let your curls air dry (or use a diffuser) into a defined, bouncy style with minimal intervention. The magic is in the timing and product layering.
Why It Works for Natural Curls
Your curls are literally most cooperative when they’re wet because water temporarily softens the protein structure of each strand. When you apply your products to soaking-wet hair and avoid touching your curls as they dry, you’re allowing the curl pattern to form without disruption. This method also means you’re not fighting against your hair’s natural inclination to coil—you’re enhancing it. The result is definition that looks effortless because it basically is.
How to Actually Execute It
Start with a clarifying shampoo or cowash depending on your curl type and how much product buildup you’ve got. While your hair is still soaking wet (and I mean dripping), apply a leave-in conditioner first, working it through from mid-length to ends. Follow immediately with your curl-defining cream or gel, using the praying hands method or scrunching it in sections. Flip your head and use your hands or a microfiber towel to gently encourage the curls to clump together. If you have the time, let it air dry. If you’re in a rush, use a diffuser on your blow dryer set to medium heat and low speed—literally just hold the diffuser under your curls and let them dry into the attachment without moving it around too much.
Pro tip: The first few hours of drying are crucial. Your curls are setting their shape during this time, so resist the urge to touch, flip, or fidget with your hair until it’s at least 50% dry.
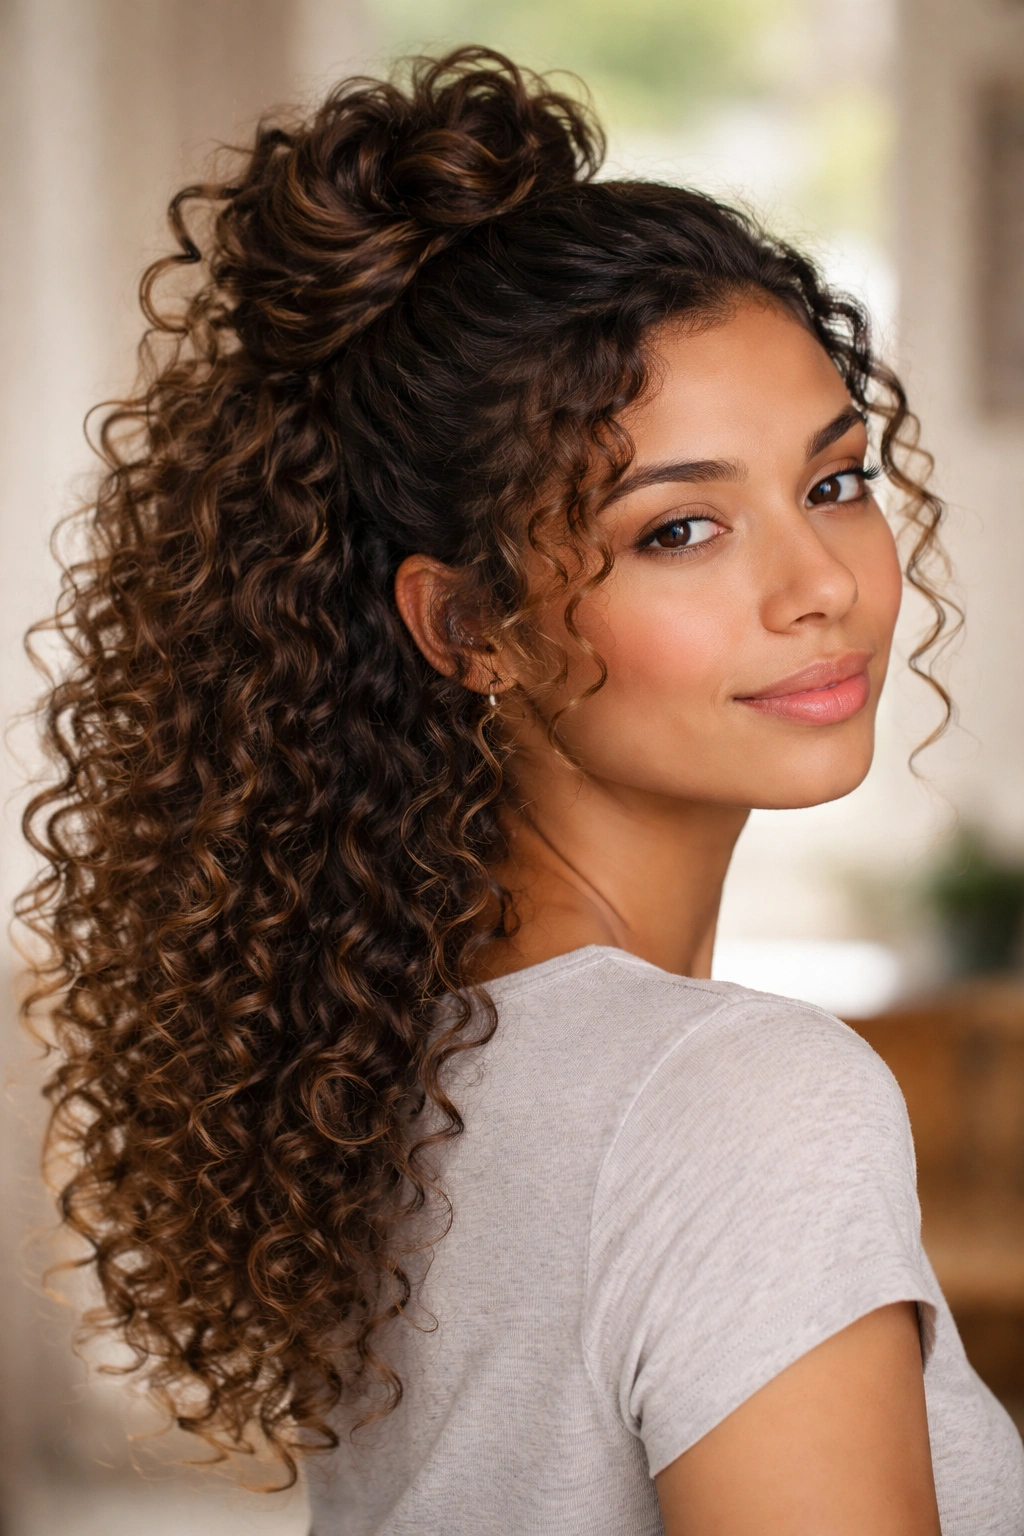
2. The Pineapple with High Curls
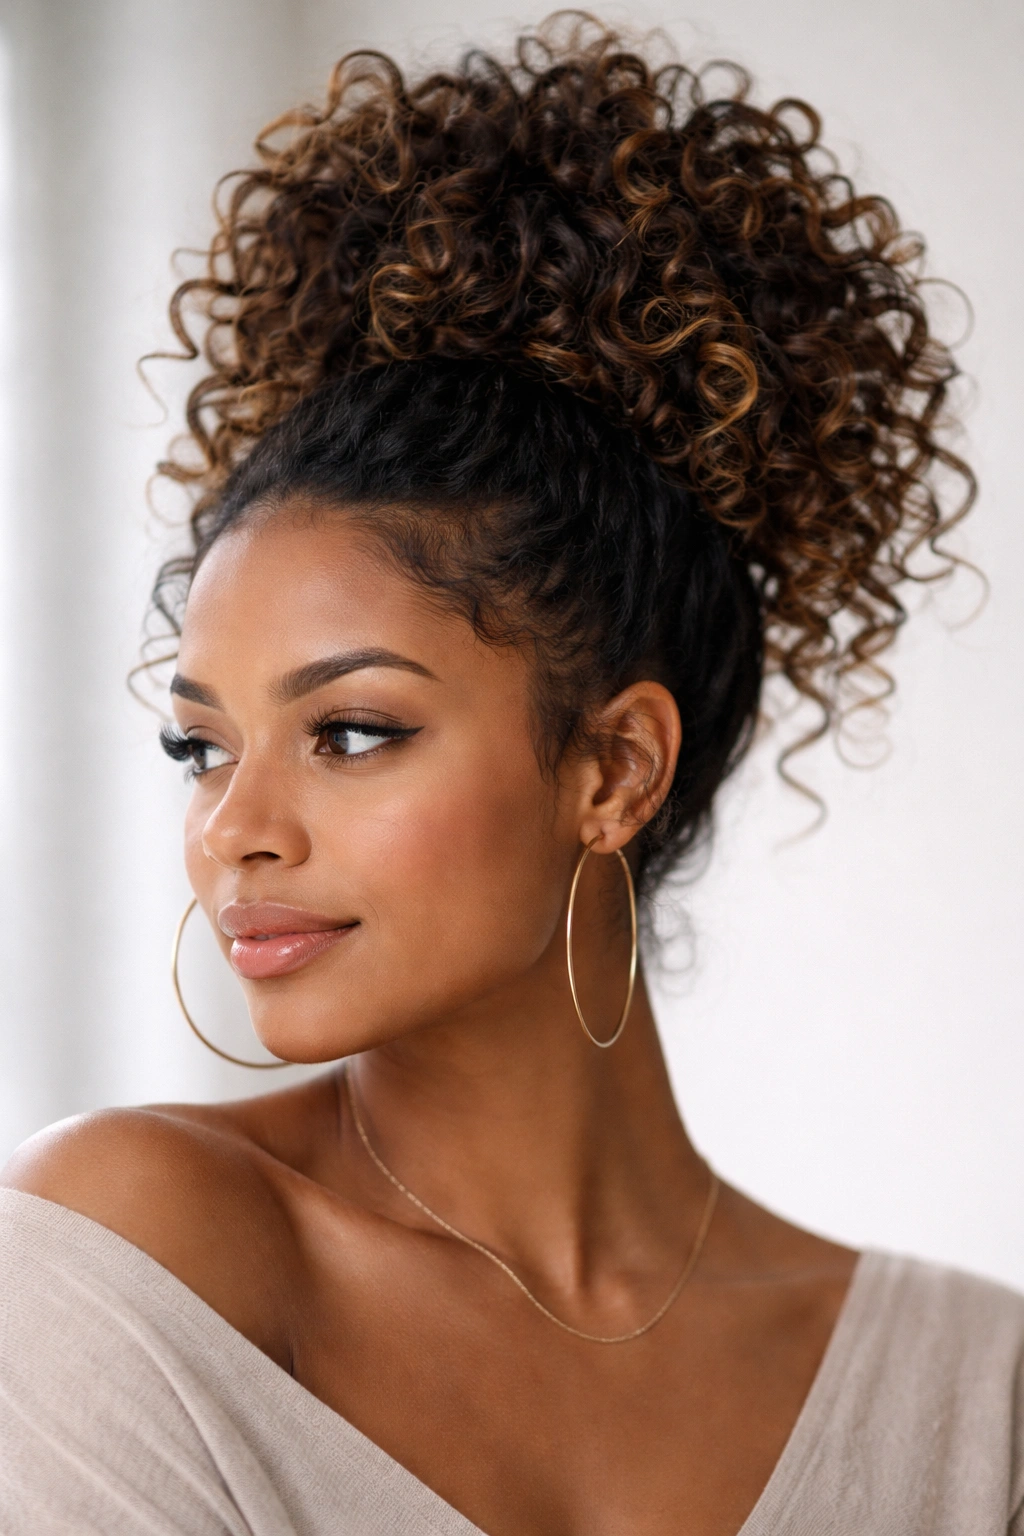
A pineapple isn’t just for sleeping (though it’s great for that too). When you gather your curls into a high, loose ponytail on top of your head, you’re creating a style that looks intentional, keeps curls off your face, and actually prevents the flattening that happens when you sleep on your curls. It’s one of the most practical styles for natural hair, and it looks genuinely cute.
Why It Works for Natural Curls
Curly hair gets flattened and frizzy when you sleep on it because the moisture gets disturbed and the curl pattern breaks. By gathering your curls up and away from your pillow, you’re protecting the structure you spent time creating. During the day, a pineapple works because it pulls your hair up without being a tight, pulling style that would create tension and breakage. The curls still have room to move and express themselves—they’re just gathered.
How to Actually Execute It
This is ridiculously simple, which is why it’s so good. Wait until your curls are about 80% dry (or do it right before bed if you’re using it for sleeping). Use a wide, smooth hair tie or a silk scrunchie—avoid anything that’ll snag or crimp your curls. Gather all your curls on top of your head in a loose high ponytail. The key word here is loose. You’re not making a tight, gym-class ponytail. You want enough room to slip a finger between the elastic and your hair. Let the curls sit loosely in the ponytail, with some face-framing pieces potentially falling out. When you release it a few hours later or the next morning, you’ve got soft, refreshed curls with zero frizz and defined texture.
Worth knowing: A silk or satin scrunchie makes a massive difference here. Cotton elastics create friction and can cause breakage, while silk glides smoothly without disturbing your curl pattern.
3. The Braided Crown with Loose Curls
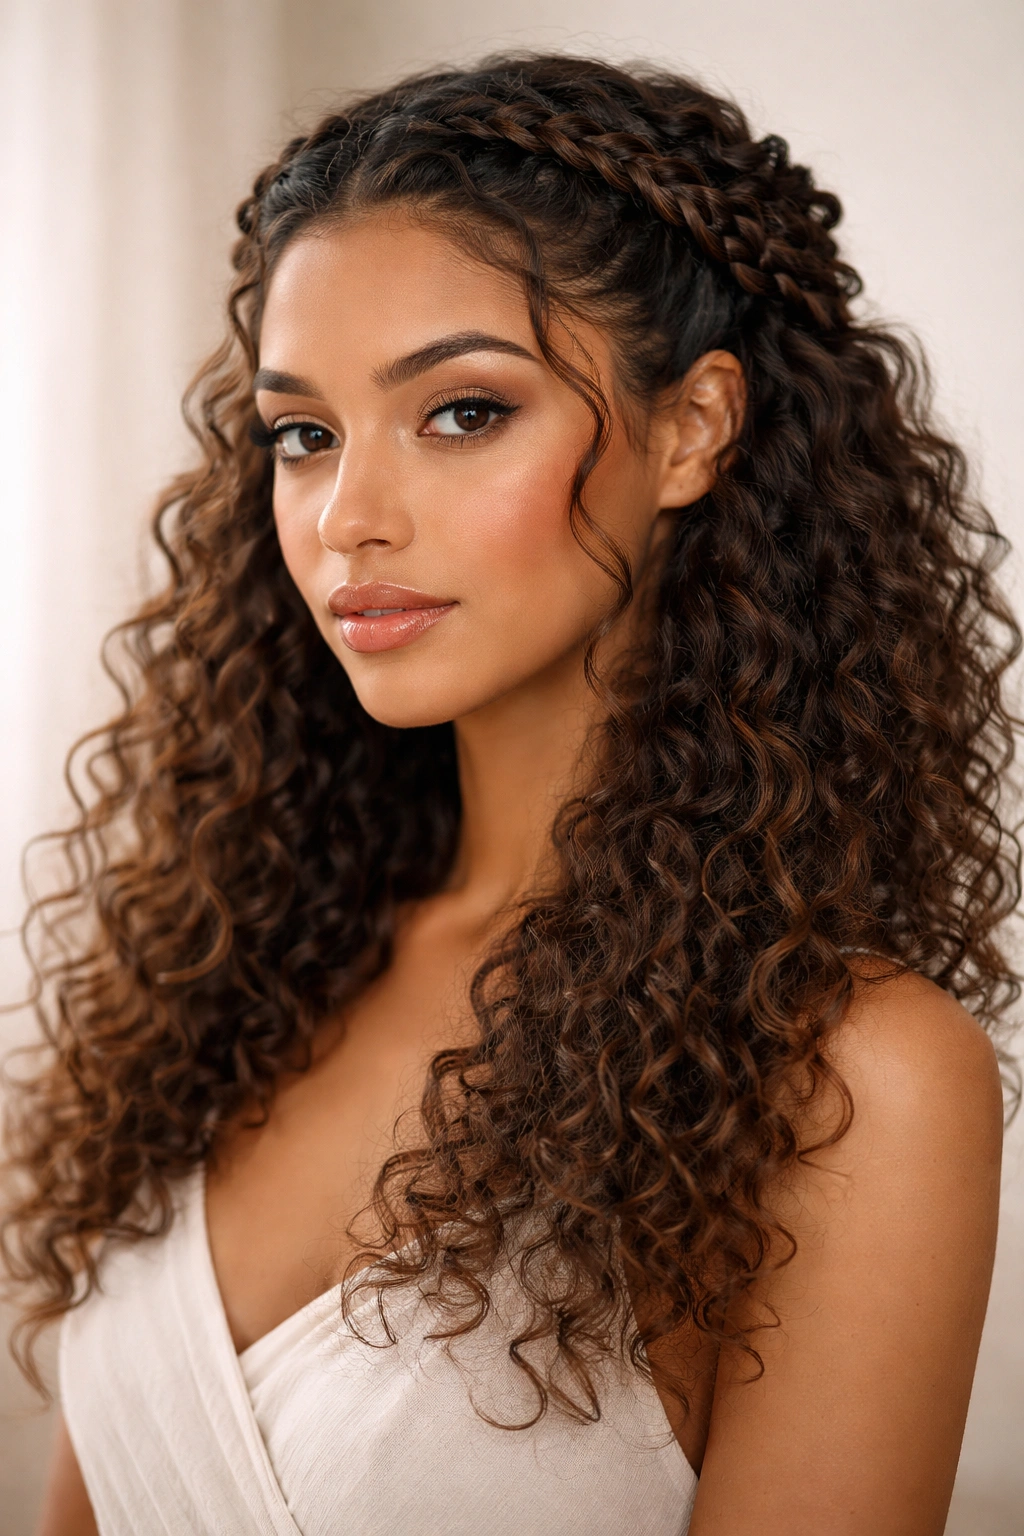
This style pulls some of your curls back and away from your face via a braid (or two), while the rest of your curls flow freely down your back. It’s romantic, it works with literally any curl pattern, and it’s fancy enough for an occasion but casual enough for everyday wear. The braid provides structure while your natural curls provide the beauty.
Why It Works for Natural Curls
A braided crown draws attention to your face while the braids prevent hair from falling into your eyes and mouth without requiring you to dry and straighten anything. The contrast between the structured braid and the loose, defined curls below it is visually stunning. Because you’re working with your natural texture instead of against it, the style looks intentional and polished rather than like you’re fighting to contain your hair.
How to Actually Execute It
Start with curls that are at least partially dry (or fully dry—this works either way). On one side of your head, take a section of hair from your temple and begin a Dutch braid (braid that sits on top of the hair rather than being woven under). Braid it back toward the back of your head. You can do a second braid on the other side to frame both sides of your face, or do just one. Secure both braids at the back with bobby pins that match your hair color, positioning them so they blend in. Leave the bulk of your curls down and loose. If you want, gently separate the strands of the braid with your fingers to make it look more relaxed and textured.
Pro tip: Do this style on day-two or day-three curls (curls that have been set for at least 24 hours). They’ll hold the braid better and look more defined than fresh wash-and-go curls.
4. The High Curly Bun
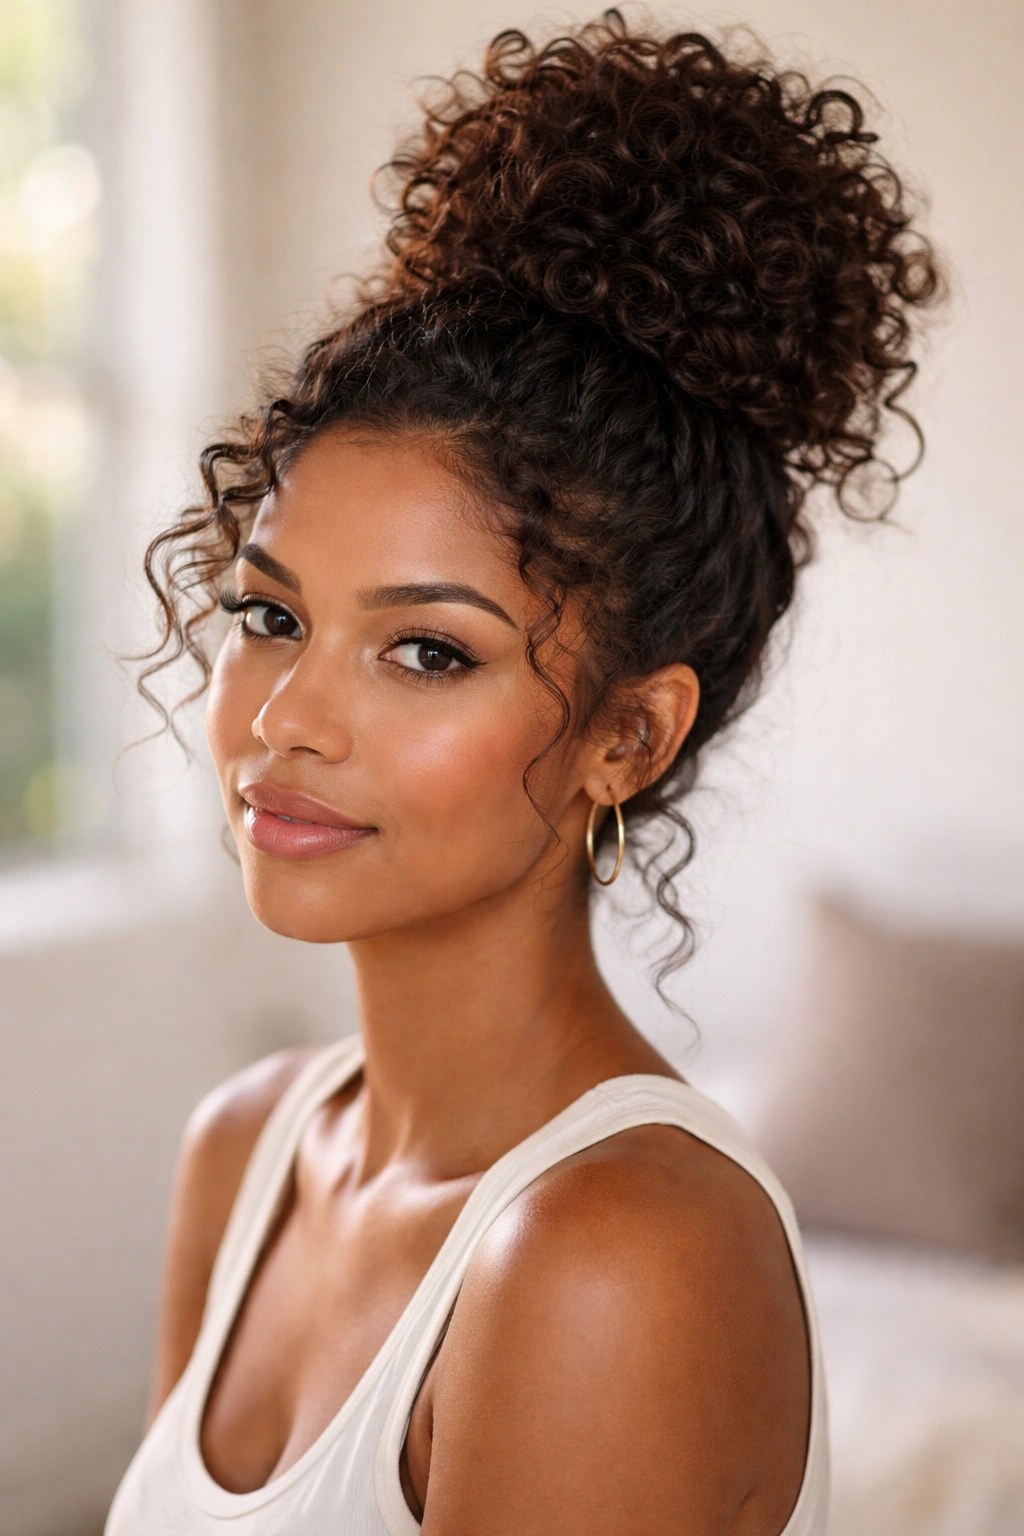
A bun isn’t just a practical updo—it’s a legitimate style choice that can be messy and undone-looking or sleek and polished, depending on how you approach it. A high curly bun gathers all your curls on top of your head, creating height and volume while keeping hair off your neck and face. It’s perfect for gym days, work, or when you want everything out of the way but still want to look put-together.
Why It Works for Natural Curls
Unlike straight hair, curly hair naturally creates volume and texture, so a bun made from curls has inherent fullness without any teasing or stuffing. The curls cling to themselves naturally, which means a curly bun holds together better and looks fuller than a bun made from straight hair. You get the practical benefits of an updo with actual visual interest because you can see the curl pattern and texture.
How to Actually Execute It
Blow dry your curls with a diffuser until they’re fully dry (this bun works best on completely dry hair). Create a high ponytail at the crown of your head, but don’t pull it as tight as you would with straight hair—your curls need some room to breathe. Twist the ponytail loosely or divide it into 2-3 sections and twist each section. Wrap the twisted sections around the base of the ponytail to form a bun, and secure with bobby pins. For a more relaxed, messier look, deliberately pull out some face-framing pieces and loosen the bun slightly so curls stick out in all directions. For a sleeker look, smooth any flyaways with a light styling gel around your hairline.
Worth knowing: Curly buns look best when they’re not too tight. A loose, slightly undone curly bun actually looks more intentional and stylish than a pulled-back, controlled one.
5. The Half-Up Curly Knot
This style takes about half of your curls and gathers them at the back crown of your head into a casual knot, leaving the bottom half to flow freely. It’s the perfect middle ground between having all your hair down and putting everything up. The style is easy enough for every day but special enough for photos or outings.
Why It Works for Natural Curls
A half-up style gives you face-framing while allowing the bulk of your length and curl pattern to stay visible and impressive. It also prevents your curls from sticking to your shoulders or getting caught in things, which is genuinely useful for texture that has moisture-seeking properties. The casual knot at the back adds visual interest without requiring you to straighten, blow-dry smooth, or do anything that disrupts your natural curl pattern.
How to Actually Execute It
With curls that are fully or mostly dry, take a section of hair from each temple (about the width of your temple to ear) and gather these two sections at the very back of your head, about 2-3 inches above where your curls naturally end. Tie them together loosely with a small elastic. With the ponytail you’ve created, divide it into two sections and twist each one around the other to create a loose knot. Secure this knot with bobby pins. Let the rest of your curls flow freely below the knot. Gently pull some face-framing pieces loose around your temples and ears for a softer, less structured look.
Pro tip: This style actually looks better when it’s slightly imperfect. Loose pieces and undone-looking strands are the point—they look effortless and romantic.
6. The Twist-Out Refresh
A twist-out is a style where you’ve divided damp hair into sections, twisted each section, let it set, and then unraveled the twists to create elongated, defined curls with beautiful wave patterns. You can do a fresh twist-out right after washing, or you can refresh an old twist-out a few days later by re-dampening it, re-twisting loosely, and letting it set again. It’s a game-changer for getting maximum definition.
Why It Works for Natural Curls
Twisting your hair actually encourages curl definition because you’re manually creating the shape you want while the hair is wet and receptive. When you untwist, you get curl patterns that are more pronounced than you’d get from just letting curls air dry naturally. The style also gives you elongated curls rather than super-tight coils, which creates a different visual texture. Twist-outs look incredibly intentional and polished because the definition is so clear.
How to Actually Execute It
After washing and conditioning, apply leave-in conditioner and a curl cream or gel to damp hair while it’s still soaking wet. Divide your hair into 4-8 sections (depending on thickness and desired size of curls—more sections mean smaller, tighter curls). Take one section and twist it from root to tip, making sure the product is worked in as you go. The twist should be somewhat loose and relaxed, not super tight. Repeat for all sections. You can air dry these twists or sit under a dryer, or even sleep on them and let them set overnight. Once fully dry, gently untwist each section by slowly unwinding the twist and letting the curl pattern spring up. You’ll be left with beautifully defined curls with a wave pattern throughout. Don’t touch them too much once untwisted—the less you manipulate them, the more they’ll clump and hold definition.
Worth knowing: Two-strand twists are the classic technique, but you can also do three-strand twists, or even flat twists close to the scalp for an updo with texture.
7. The Curly Side Part with Tucked Layers
A deep side part naturally showcases your curls because it creates asymmetry and height on one side of your head. When you tuck some of your curls behind your ear on the smaller side of the part, you get a style that’s both casual and intentional, letting face-framing curls fall while keeping some hair off your face for a balanced, polished look.
Why It Works for Natural Curls
Curly hair naturally wants to expand and take up space. When you put in a deep side part, you’re using this expansive tendency to your advantage—one side has full volume and movement, while the tucked side creates visual balance and frames your face. The style doesn’t require you to blow-dry smooth or straighten anything; you’re literally just repositioning curls that already exist.
How to Actually Execute It
With dry or nearly-dry curls, use a fine-tooth comb or your fingers to create a deep side part on one side of your head (starting from the middle of your hairline and going back). On the side with more hair, let your curls flow naturally with full volume. On the side with less hair, take a section of curls from the front and tuck it behind your ear, securing it with a bobby pin that matches your hair color. You can leave some face-framing pieces down in front of your ear for softness, or keep that side fully tucked for a more structured look. The key is letting the larger side show off your curl volume and definition while the tucked side keeps things balanced.
Pro tip: Use your fingers or a wide-tooth comb to gently separate curls on the fuller side so they look more defined and less like a solid mass of hair.
8. The Curly Bubble Ponytail
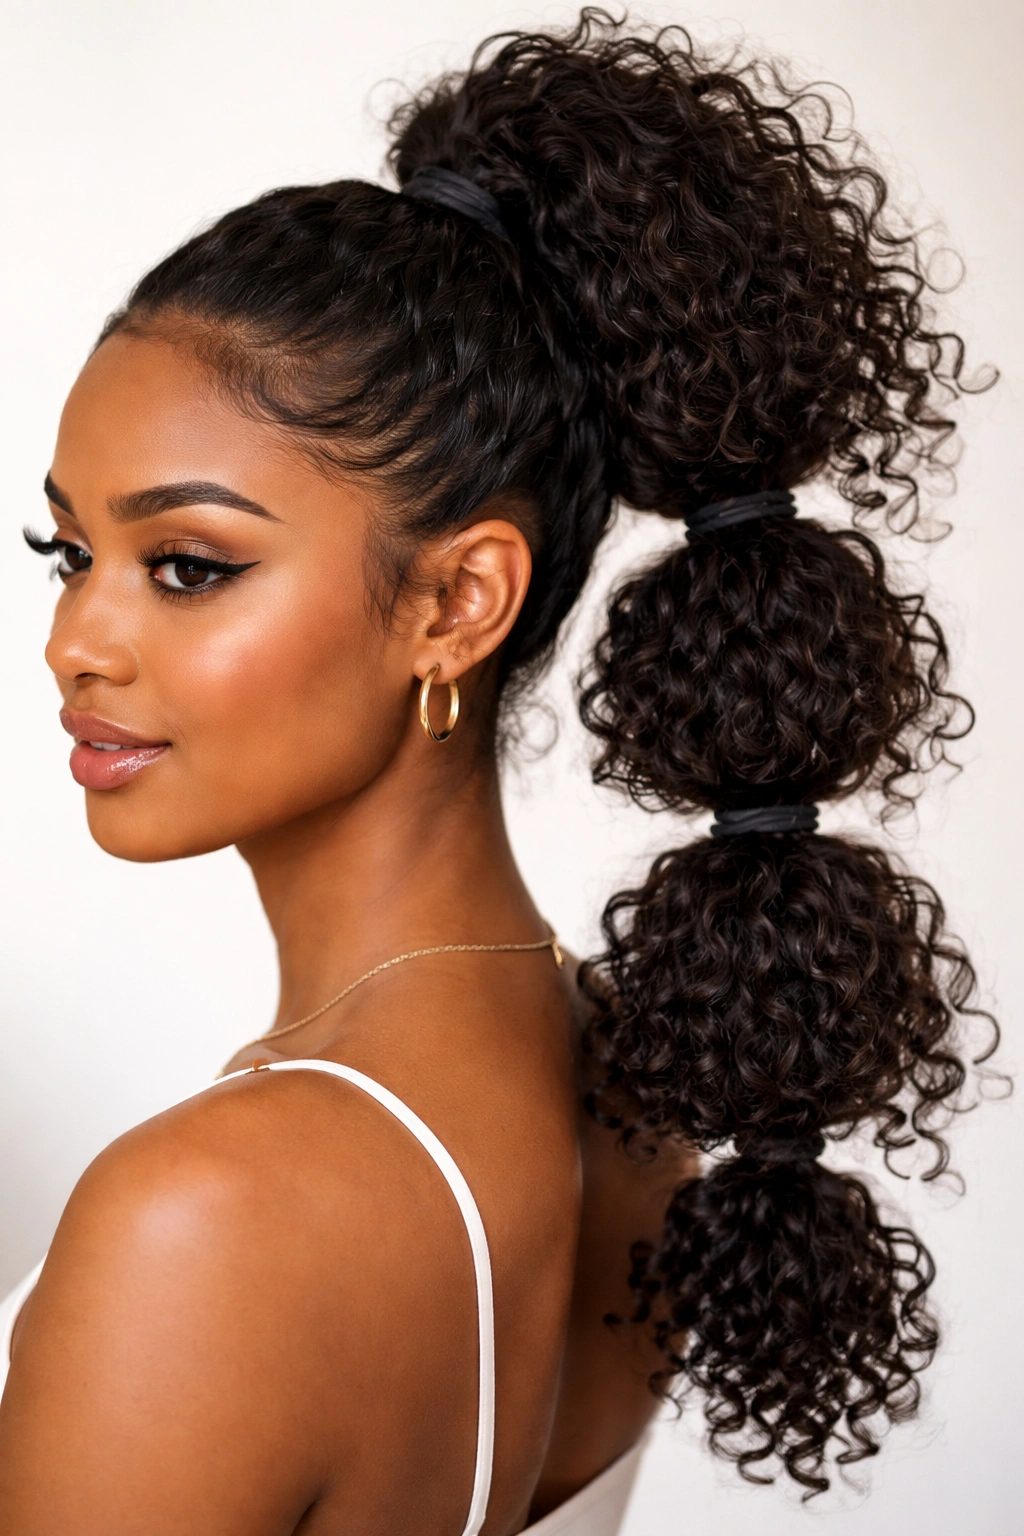
A bubble ponytail is a high ponytail that’s divided into 2-4 sections with elastics, creating “bubbles” of hair between each elastic. On curly hair, this creates a super fun, playful style with lots of texture and movement. Each bubble shows off your curl pattern differently, and the style reads as youthful and creative without being childish.
Why It Works for Natural Curls
Curly hair creates natural volume and texture, so each “bubble” in a bubble ponytail has inherent fullness and shape. You don’t need to backcomb or tease to create volume the way you would with straight hair. The multiple elastics break up the length of your ponytail visually, and the spacing between them lets curls expand and show their texture. The overall effect is playful and modern without requiring any heat styling or product beyond what you’d normally use.
How to Actually Execute It
Create a high ponytail at the crown of your head using a smooth elastic. Don’t pull it too tight—your curls need breathing room. About 2-3 inches down from the first elastic, add a second elastic around the ponytail, using the existing ponytail as a base. You can gently fluff out the hair between the two elastics to create a “bubble.” Repeat this process down the length of your ponytail, spacing elastics 2-3 inches apart. You’ll end up with 3-4 bubbles, depending on your hair length. Once all the elastics are in, gently pull at each bubble section to loosen it and make the curls expand and separate. The finished style should look playful and textured, with clear bubble sections.
Worth knowing: This style works best on curly hair that’s been set for at least 24 hours because older curls hold their shape better than freshly-set ones.
9. The Flexi-Rod Curls or Pin Curls Refresh
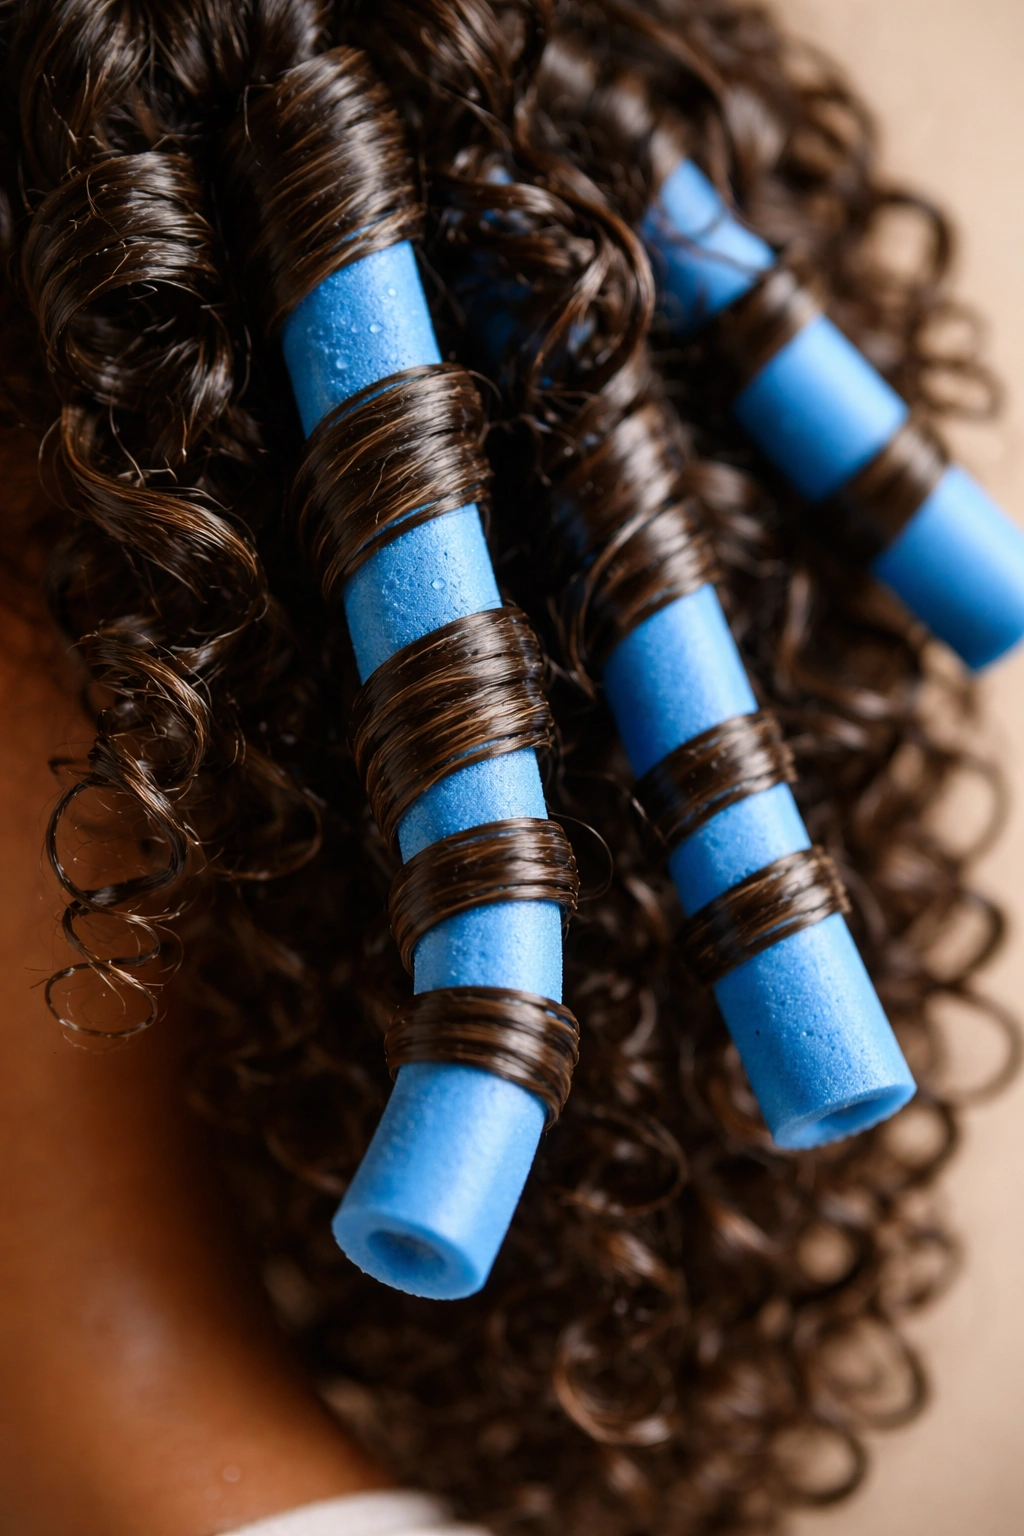
If you want bouncy, defined, uniform curls without the commitment of a full wash-and-set, you can use flexi-rods or pin curls on damp curls to redefine and refresh them. You dampen sections of your existing curls, wrap them around a flexi-rod or pin-curl them, let them dry, and release them for curls that look freshly set with tons of definition and bounce. It’s a heat-free way to completely refresh your curl definition between washes.
Why It Works for Natural Curls
Sometimes your curls lose definition or shape after a few days. Rather than washing your entire head, you can selectively dampen and re-set sections. Flexi-rods and pin curls work with your curl pattern to enhance and reshape your existing texture. You get uniform, bouncy curls without ever touching heat, which protects your hair health while giving you that freshly-styled look.
How to Actually Execute It
On day-two or day-three curls, take a section of damp (not soaking) hair and wrap it around a flexi-rod, rolling from the ends toward your roots. Secure the rod by bending the ends together. Repeat for as many sections as you want to refresh. You can leave these rods in for a few hours while they air dry, or sleep on them overnight. Once fully dry, gently unroll the rods and release the curls. You’ll have bouncy, defined, uniform curls with tons of shape. For a looser result, use larger rods. For tighter, bouncier curls, use smaller rods.
Pro tip: This works best if you apply a light curl cream or gel to each section before rolling it onto the rod. It helps define the curl pattern as it sets.
10. The Curly Ponytail with Defined Edges
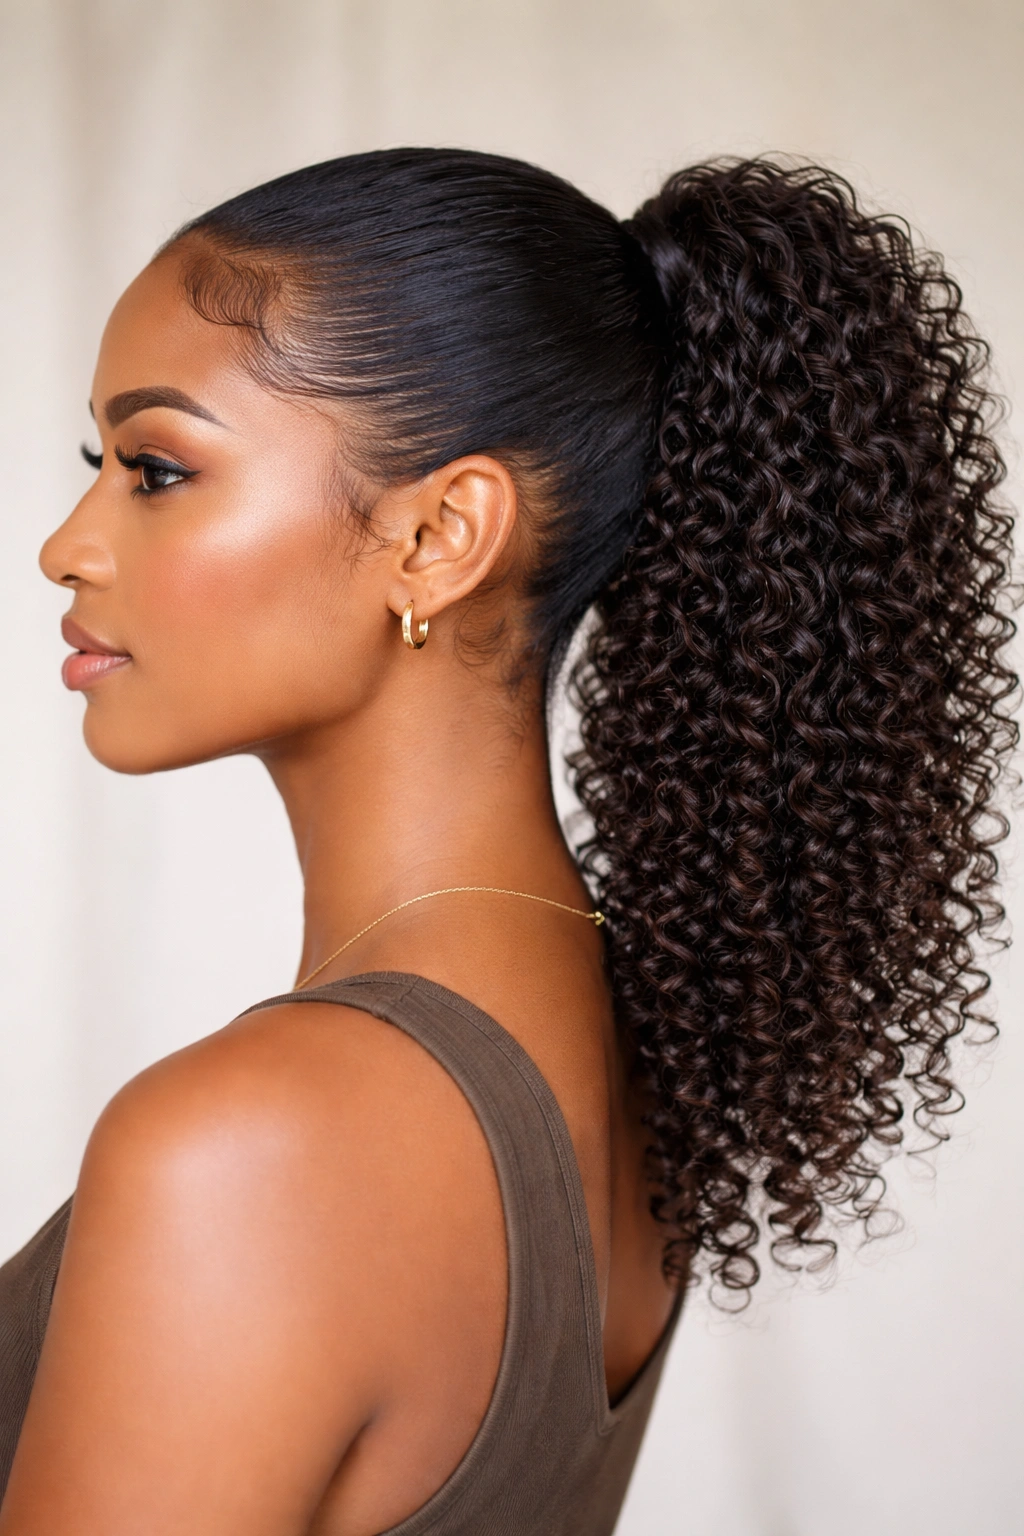
A simple, polished curly ponytail—either high or low—is an underrated style. The difference between a messy, undefined ponytail and a genuinely cute one is usually in the edges and the texture. A curly ponytail with smoothed edges (using a gel or edge control) and defined, separated curls within the ponytail reads as intentional and polished, perfect for work, events, or anywhere you want to look put-together without sacrificing your natural texture.
Why It Works for Natural Curls
A ponytail is practical, but adding definition and smoothing your edges elevates it from “throwing your hair up” to “styling your hair.” Your curls naturally have texture, so a ponytail made from defined, separated curls looks much more intentional than one where curls are clumped together. The smoothed edges create a frame around your face that looks polished and controlled without being rigid.
How to Actually Execute It
Start with dry or nearly-dry curls. Using your fingers or a fine-tooth comb, gently separate curls in your ponytail so they’re not clumped together but instead are clearly visible and defined. Gather your curls into a ponytail at whatever height you prefer—high, mid, or low—and secure with a smooth elastic. Use a light-hold gel or edge control around your hairline, smoothing any flyaways and baby hairs into a neat outline. Apply the same gel to the base of your ponytail where the elastic sits, smoothing everything into a clean, controlled look. The contrast between the smooth, polished edges and the textured, defined curls creates a style that looks effortlessly polished.
Worth knowing: This style is perfect for refreshing curls that have lost some definition. You can do this style on day-two or day-three curls and it’ll make them look freshly set.
Final Thoughts
Natural curly hairstyles don’t have to be complicated, and they definitely don’t require you to blow-dry your hair straight or spend hours with heat tools. The best curly styles work with your texture instead of fighting it—and honestly, that’s when your curls look their absolute best.
The common thread running through all of these styles is that they embrace your curl pattern rather than trying to tame it into submission. Whether you’re doing a simple wash-and-go, gathering your curls into a ponytail, or refreshing your definition with flexi-rods, you’re starting from a place of acceptance and working with what you naturally have. That’s when the magic happens.
Your specific curl pattern, hair density, and texture might mean you need to adjust any of these styles slightly to work for you—and that’s completely normal. Try each one a couple of times before deciding whether it works. Sometimes a style clicks immediately; sometimes you need to figure out the product combo or technique that makes it look the way you want. The point is that you’ve got options now. Pick the ones that resonate with you, practice them a few times, and then rock them with confidence. Your curls are already beautiful—these styles just help them shine.