



Two puffs are one of the most versatile and protective styling options for textured hair, and the beauty is that they work whether you’re rocking inches of growth or flowing, waist-length curls. Unlike styles that demand a certain minimum length or require constant manipulation, afro puffs adapt to whatever hair situation you’re working with right now. They’re practical for active days, polished enough for professional settings when styled intentionally, and honestly just feel good to wear — that secure, bouncy sensation of your curls gathered and held in place is hard to beat.
The real magic happens when you move beyond the basic two-puff arrangement and explore the variations that can completely shift how the style reads and performs. Swap the placement, add texture through braiding, play with height, or lean into sleekness, and you’ve got nine distinctly different looks that still give you that classic protective styling benefit. Short hair, shoulder-length hair, and longer lengths all have their own puff styling sweet spot, which is partly why this style has become such a reliable go-to across the natural hair community.
What makes two puffs so practical is that they require minimal styling time once you understand the core technique, the hold tends to last for several days when set properly, and they actually encourage you to keep your hands off your hair — which is exactly what your curls need. Whether you’re styling for a casual weekend or a full work week, there’s a two-puff arrangement in this guide that will work for you.
1. Classic High Puffs
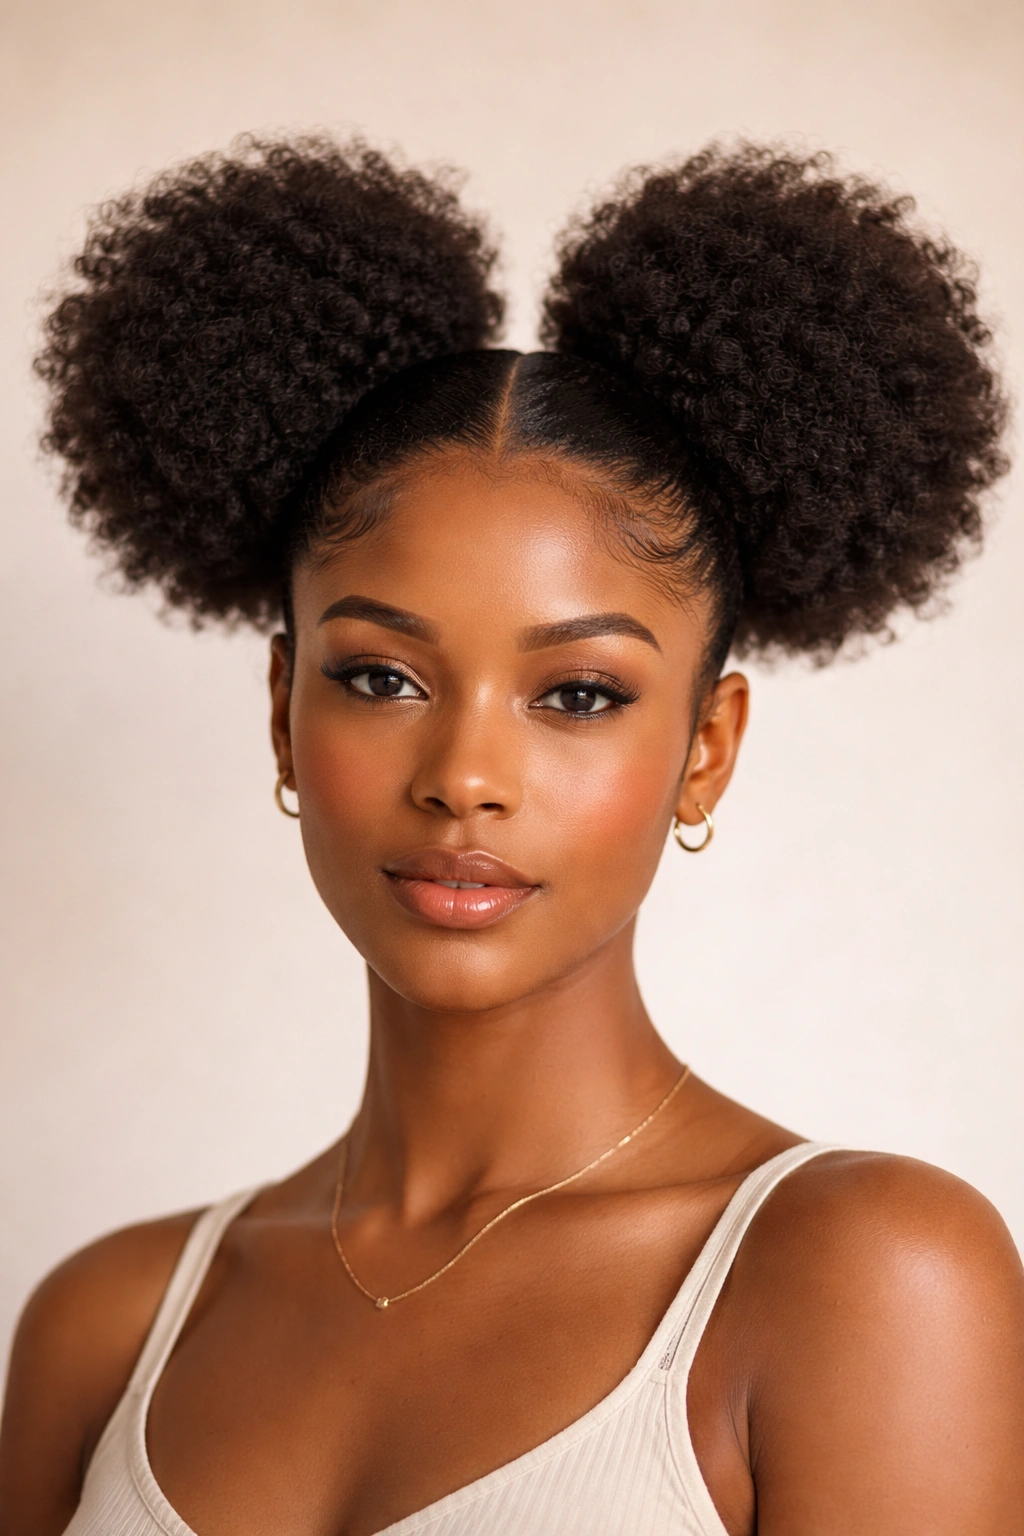
Classic high puffs sit directly on top of your head, centered, and they’re the style most people think of when someone mentions afro puffs. This placement works beautifully on short, textured hair where you want maximum volume and visibility, but don’t assume they’re only for shorter lengths — the same placement on mid-length or longer hair creates a totally different energy, trading the playfulness of shorter puffs for elegance and elongation.
Why This Style Is So Reliable
High puffs work because they use your hair’s natural volume to create height without requiring additional products or extensions. The placement inherently creates a balanced, symmetrical look that feels intentional and polished. This style also keeps all your hair off your face and neck, making it perfect for workouts, warm weather, or just days when you want zero hair touching your skin. The styling time is minimal — five to ten minutes max once you develop the muscle memory for smoothing your sections.
How to Create the Look
Start by deciding where your center part will go — down the middle of your scalp, straight back. Use a fine-tooth comb or rattail comb to create a clean part line from your forehead to the nape of your neck. Separate your hair into two equal sections. Take the first section and smooth it back toward the crown, gathering the hair as you go. Use your fingers or a fine-tooth comb to gather all of that section into one hand, then wrap it around itself into a secure coil or bun shape at the very top of your head. Secure with bobby pins pushed completely into the base of the puff, then do the same on the other side. The key detail that most people miss: the tighter you gather at the base, the longer your style will last. Loose puffs start drooping within a day, but a firmly secured base can hold for three to four days.
2. Side-by-Side Puffs
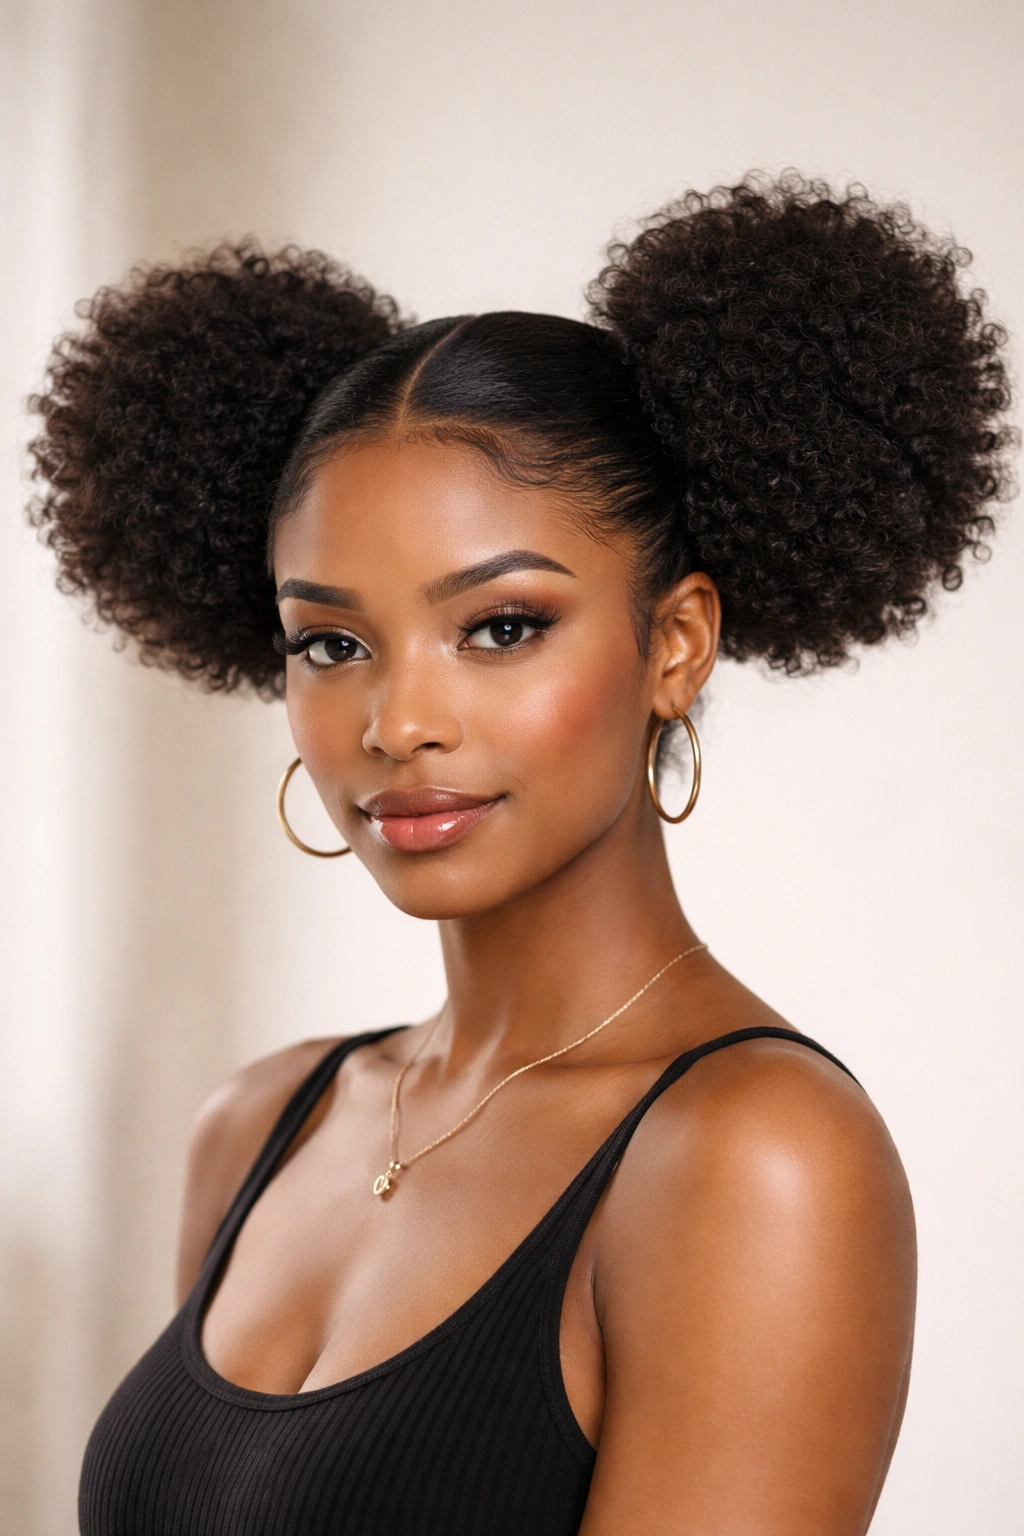
Instead of sitting on top of your head, side-by-side puffs position each puff on either side of your head at roughly ear level, creating a wider silhouette and a completely different aesthetic from high puffs. This placement is especially striking on textured hair because the natural width and volume of your curls really reads against the side placement, creating almost a crown-like or princess-like effect depending on your vibe and styling intentionality.
The Visual Impact of Lateral Placement
Side-by-side puffs work because they frame your face differently than high puffs and actually make the style feel more modern and fashion-forward to most eyes. The lateral placement also tends to be more comfortable for people who sleep on their sides, since the puffs sit away from where your head rests on the pillow. This positioning also works across more hair lengths than you might expect — even long hair can be gathered into side puffs, though the effect is different (more bohemian, less playful).
Creating Symmetrical Side Puffs
Make a clean center part straight down the middle of your scalp from forehead to nape. Take your comb and create a second part line on one side of your head, running from temple to ear, that designates where one puff will go. Do the same on the other side. You’ll now have a center strip of hair running down your head and two larger sections on either side — those side sections are your puffs. Smooth the first section toward the side of your head, gathering as you go, and secure it into a puff at ear level with bobby pins embedded firmly into the base. The puff should sit roughly over your ear, not in front of it. Repeat exactly on the other side. The center strip of hair can be left down for a softer look, braided, twisted, or styled separately depending on your aesthetic preference.
3. Space Buns With Puff Texture
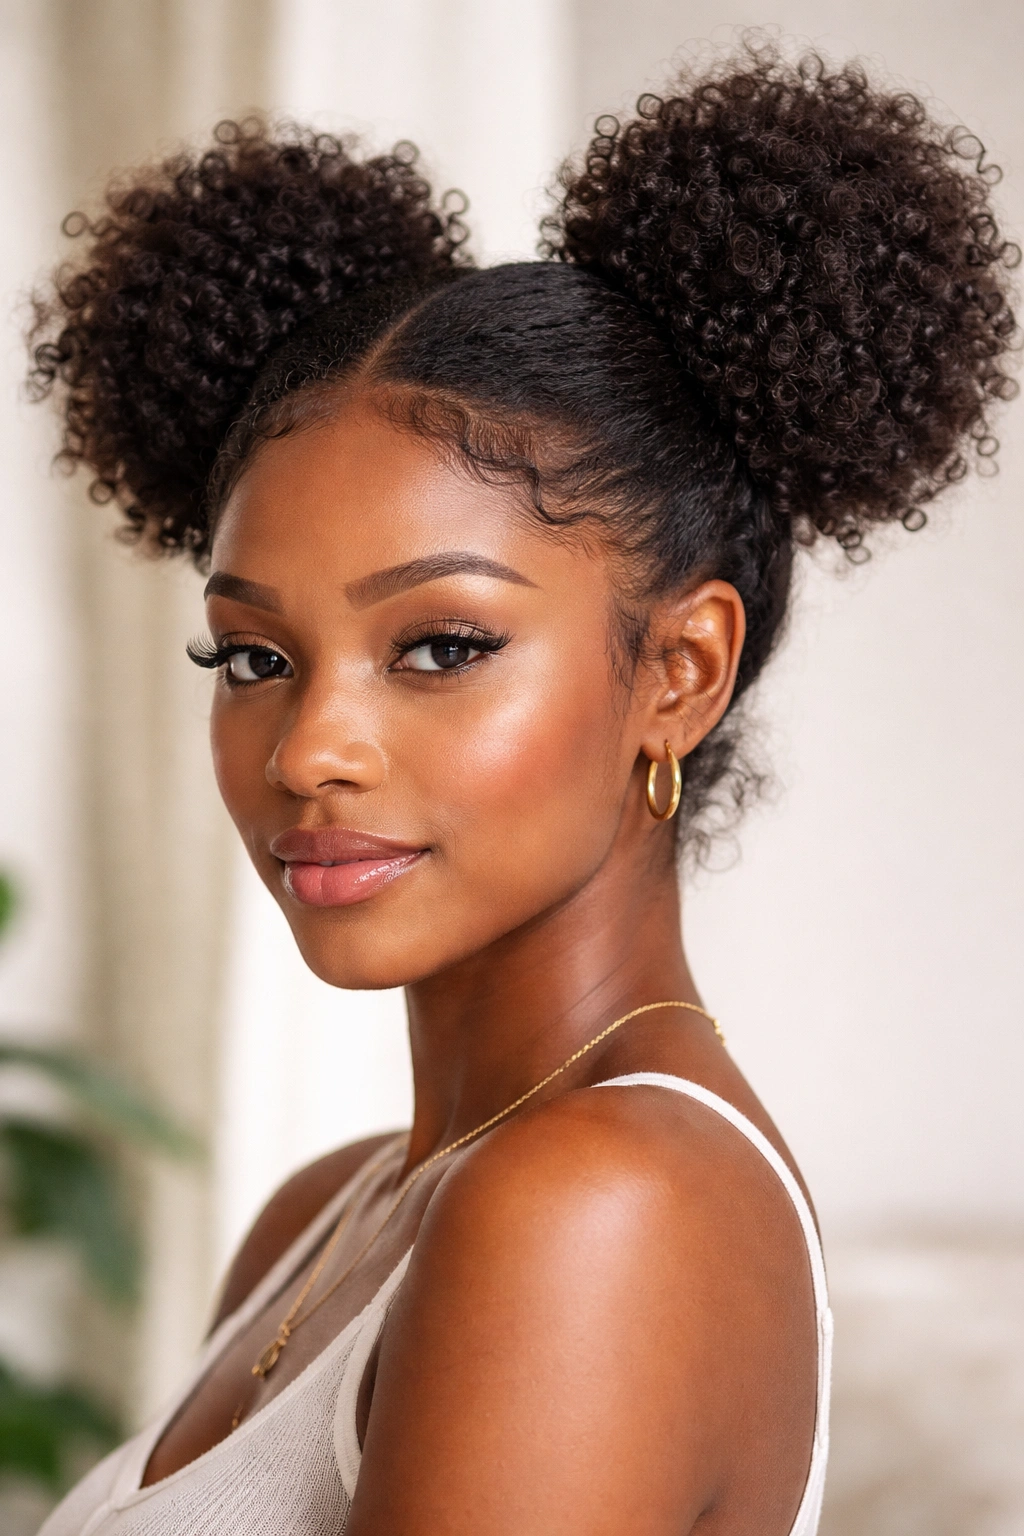
This style combines the visual interest of space buns (two buns positioned on either side of the head, toward the back) with the textured, voluminous look of afro puffs. Instead of slicking your buns completely smooth, you’re keeping them loose and textured, letting your curl pattern show and creating a style that reads as both playful and intentional. This works particularly well on hair that’s shoulder-length or longer, because the length gives you enough hair to create buns with real presence.
The Appeal of Textured Space Buns
Smooth space buns can read as costume-y or very young depending on how they’re executed, but textured, puffed-out space buns read as deliberately styled and fashion-conscious. The texture also means you can create the style more quickly — you don’t need to spend time smoothing and gelling your buns into perfection. Your natural curl pattern is part of the design here, not something to fight against. This is also a genuinely protective style, since your hair is off your neck, off your shoulders, and secured in a way that keeps it from rubbing on your clothes all day.
Positioning and Creating Texture
Divide your hair into two equal sections with a center part. Take the first section and pull it back toward the lower back of your head — not straight up like high puffs, but angled slightly downward. Gather the section and begin wrapping it into a bun shape, but don’t wrap it tightly. Wrap it only a few times around itself so there’s still plenty of textured curl visible on the outside of the bun, then secure with bobby pins. The bun should sit low on the back of that side of your head, roughly where your ear is if you drew a line straight back. Do the exact same thing on the other side. You can leave the front section of hair down, or you can smooth it back and secure it underneath or integrate it into one of the buns for a more polished look.
4. Braided Puff Base
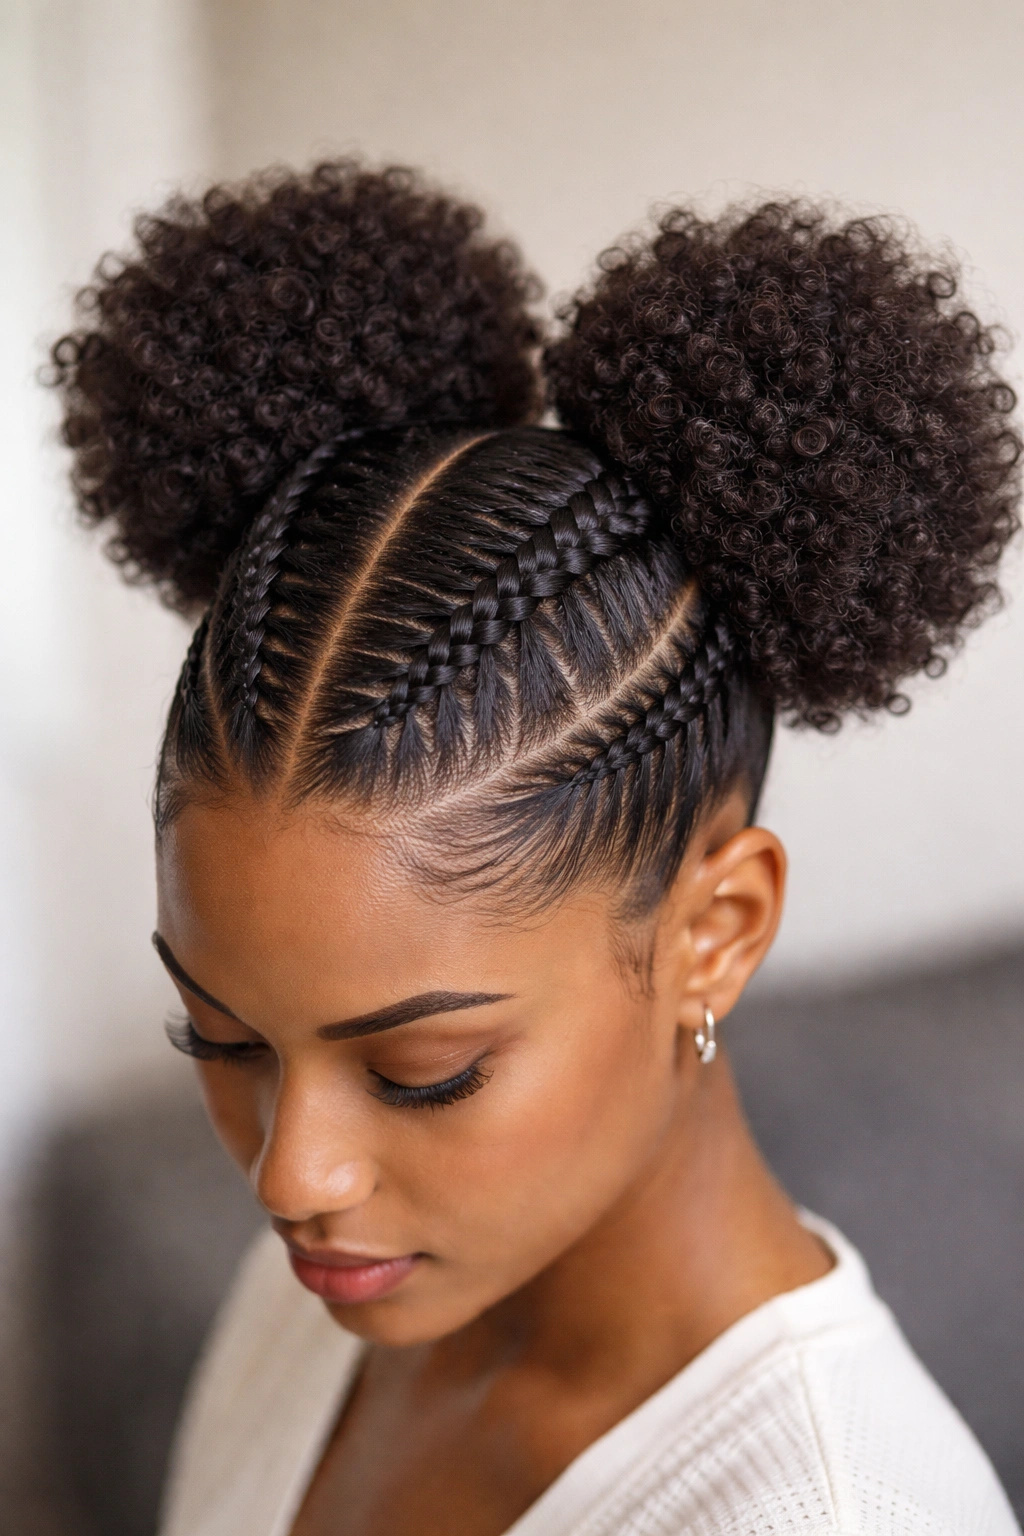
This style builds a puff on top of a foundation of braided hair, creating visual interest, texture variation, and a puff that holds significantly longer than a puff built directly from loose curls. The braid serves as an anchor and also adds a design element that reads as more intentional and styled than a simple puff. This technique works well across all hair lengths, though it’s especially effective on medium to longer hair where the braid has space to be visible and appreciated.
Why the Braid Makes a Difference
A braid base essentially creates a secure foundation that your puff sits on top of, making the whole style much more stable and durable. The braid itself adds visual complexity and shows that you’re intentional about your styling. It also means the puff can stay in place longer because it’s not relying solely on the grip of bobby pins holding loose curls — the braid distributes the weight and hold more effectively. This is genuinely one of the most long-lasting two-puff arrangements if you execute it correctly.
Building the Braided Foundation
Start with a clean center part down the middle of your head. On one side, begin a three-strand braid at the temple area, weaving the braid backward along the side of your head. You’re aiming to braid roughly along where your ear is, creating a line from temple to the back of your head. Once you reach the back section of hair, continue to the ends and secure the braid with a clear elastic. Now gather the remaining loose hair in that section (which should be all the hair at the back of your head plus the ends of the braid) into your hands and create a puff above where the braid ends, securing the puff firmly at its base with bobby pins. Repeat the entire process on the other side — temple braid, then puff above it.
5. Twisted Puff Style
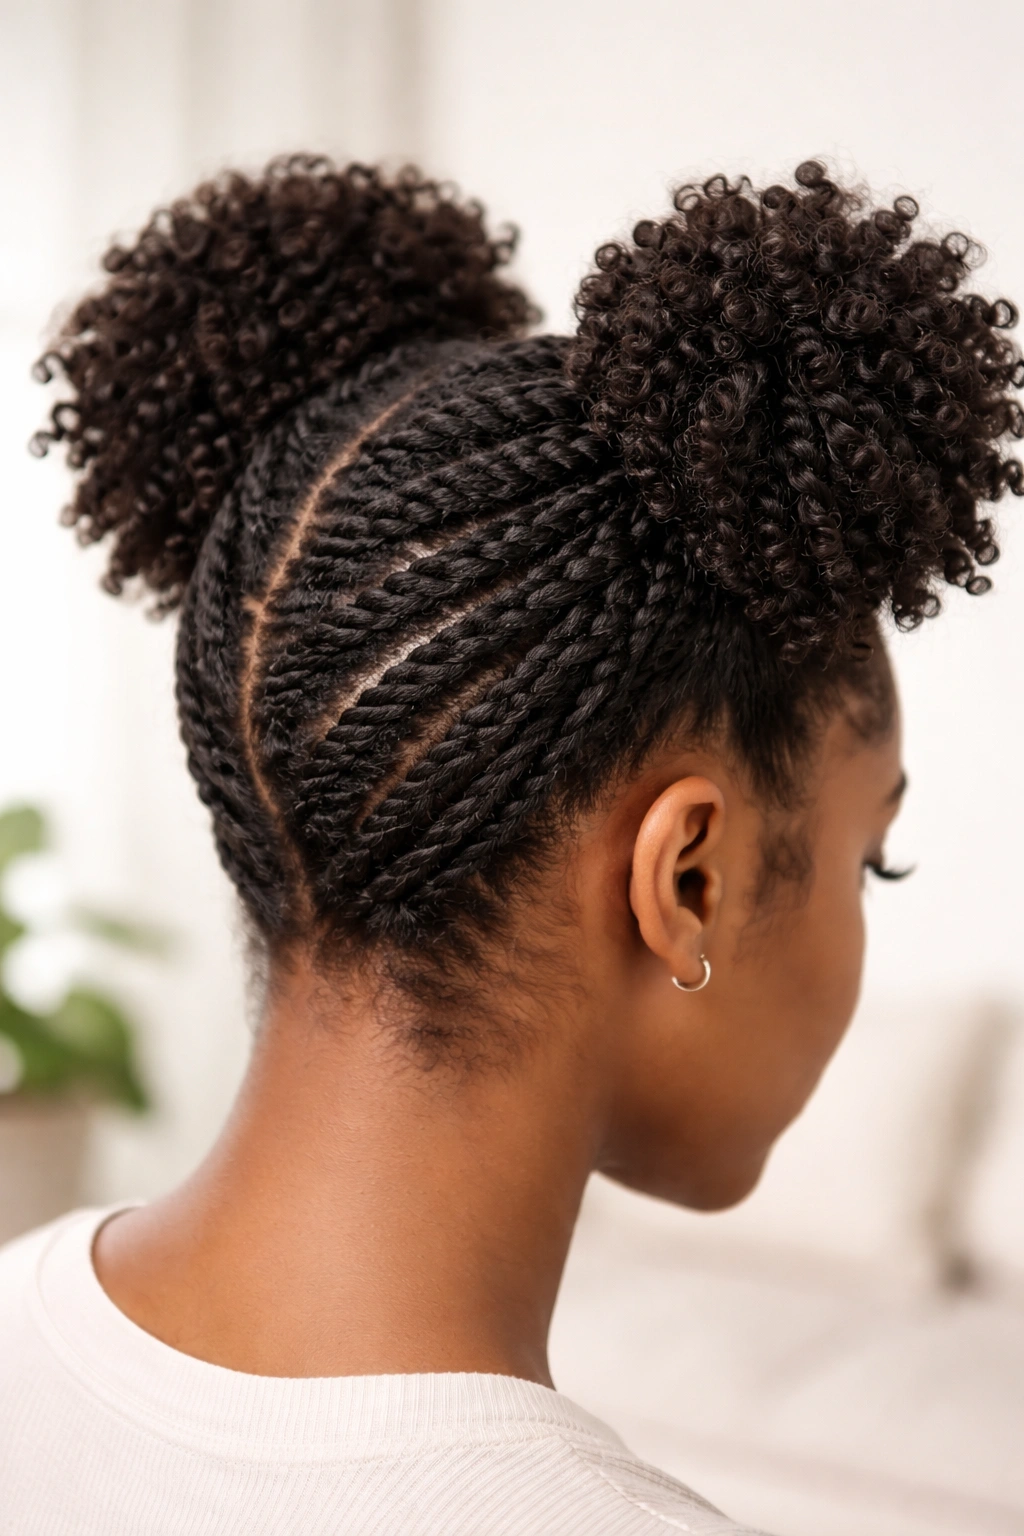
Instead of creating puffs from loose curls, you’re twisting sections of hair together before wrapping them into the puff shape. Two-strand twists are the foundation here, and they create a refined, intentional look that reads as more styled than untwisted puffs while still being protective and practical. The twists also add visual dimension and actually help your puffs hold their shape longer, since the twist creates a more compact, defined form.
The Refined Look of Twisted Texture
Twisted puffs feel dressier and more intentional than loose-curl puffs, which makes them perfect for professional settings, dates, or any time you want your styling to read as deliberate and high-effort (even though it doesn’t require more effort, just different technique). The twists also make your hair look thicker and more voluminous in the puff, since the twist compresses your curl pattern into a defined spiral. This style works beautifully on shorter hair and maintains its definition on longer lengths too.
Creating Two-Strand Twisted Puffs
After parting your hair down the center, take one section and divide it into two smaller subsections. Twist these two subsections around each other as tightly or loosely as you prefer — tighter twists will hold longer and create a neater appearance, while looser twists feel more relaxed. Continue the twist all the way down to the ends, then secure the end of the twist with a clear elastic. Now take this completed twist and wrap it around itself into a puff shape, coiling it from the bottom up until you’ve used the entire twist. Secure the base of the puff with multiple bobby pins, making sure they’re pushed firmly into the base so the puff doesn’t slip. Repeat on the other side. You can leave some loose curl visible at the top of each puff for a softer look, or compress the entire twist tightly into a neat, compact puff.
6. Half-Up Puff Arrangement
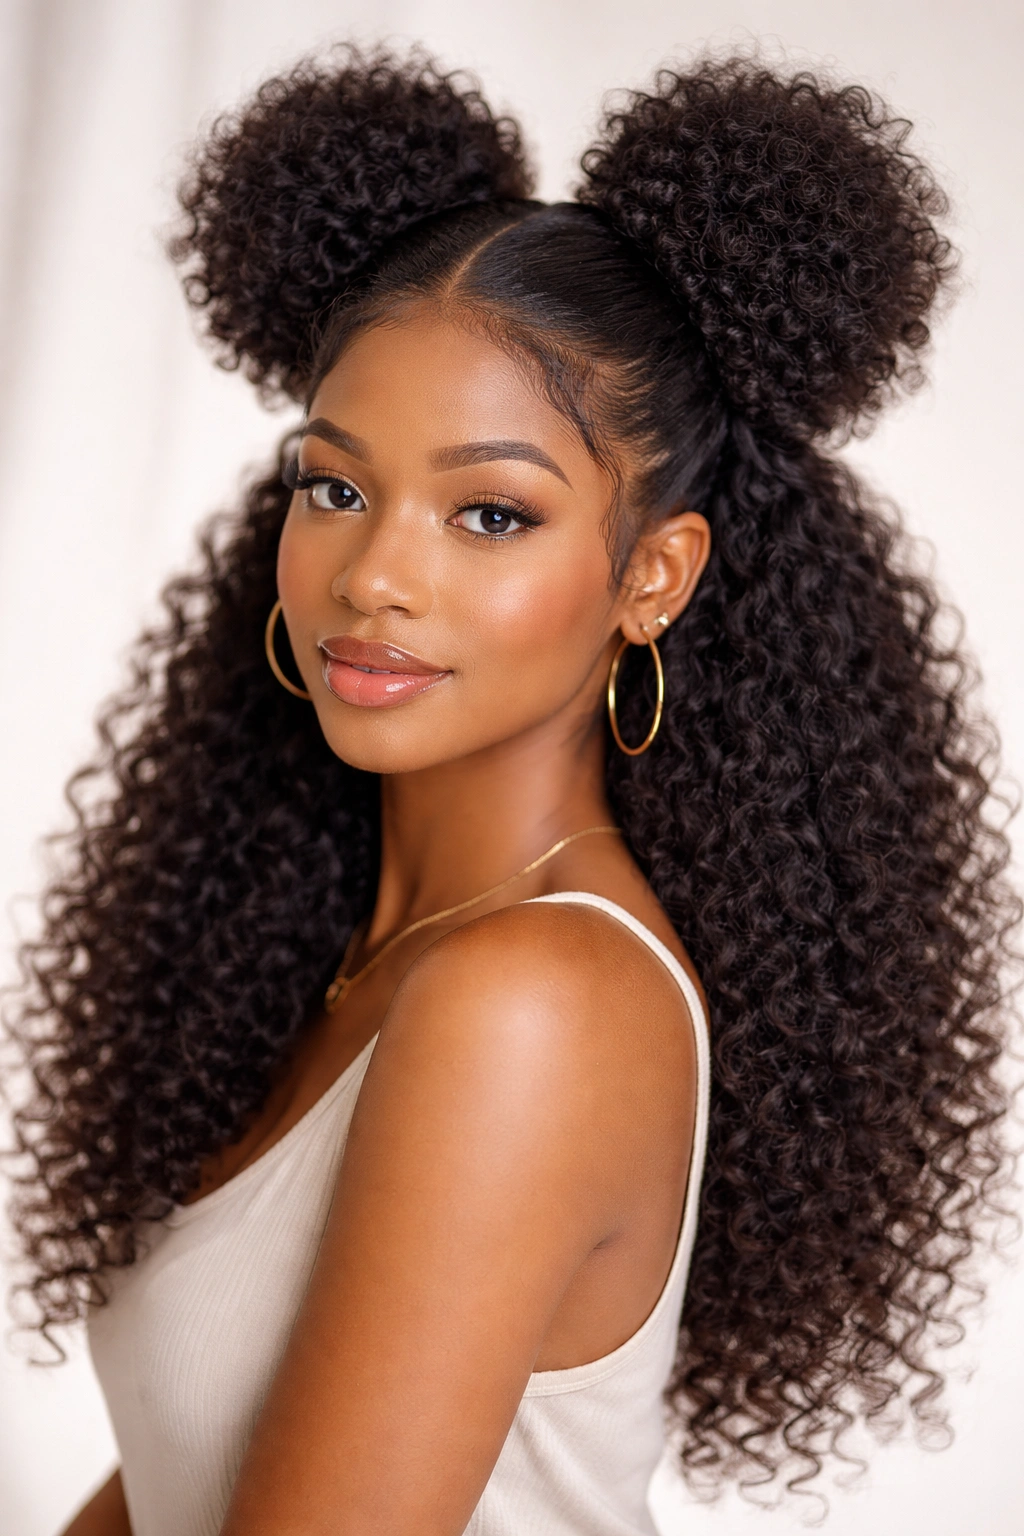
This style keeps part of your hair down while you create puffs from the upper section, offering a balance between the protective benefits of puffs and the freedom and movement of having your full length showing. It’s particularly flattering because it shows length while still securing the top section of your hair, and it works across all hair lengths but creates distinctly different effects depending on what you’re working with. On shorter hair, the half-up element becomes more subtle but still adds visual interest; on longer hair, it’s genuinely striking.
The Versatility of Partial Styling
Half-up puffs let you have your cake and eat it too — you get the protective, contained styling of puffs without the commitment of fully contained puffs. This arrangement is also excellent if you’re trying to keep hair off your face and neck while still showing movement and length. It’s a compromise style that works beautifully for people who like both styles but want to experience one outfit. You can also style the down portion however you want — it can stay in your natural curl pattern, be stretched, braided, twisted, or even straightened for contrast.
Sectioning and Securing the Half-Up Puff
Create a section of hair that spans from temple to temple across the back of your head at roughly the crown or slightly above. This top section is what you’ll create puffs from. Use a rattail comb to make a clean center part within this top section, dividing it into left and right halves. Create one puff on the left side and one on the right, securing each firmly at its base with bobby pins. The lower section of your hair stays completely down and unstyled (or styled however you prefer separately). You can enhance the visual separation by smoothing the top section slightly before puffing it, or by keeping it textured and loose — both approaches work depending on the vibe you’re going for.
7. Sleek Low Puffs
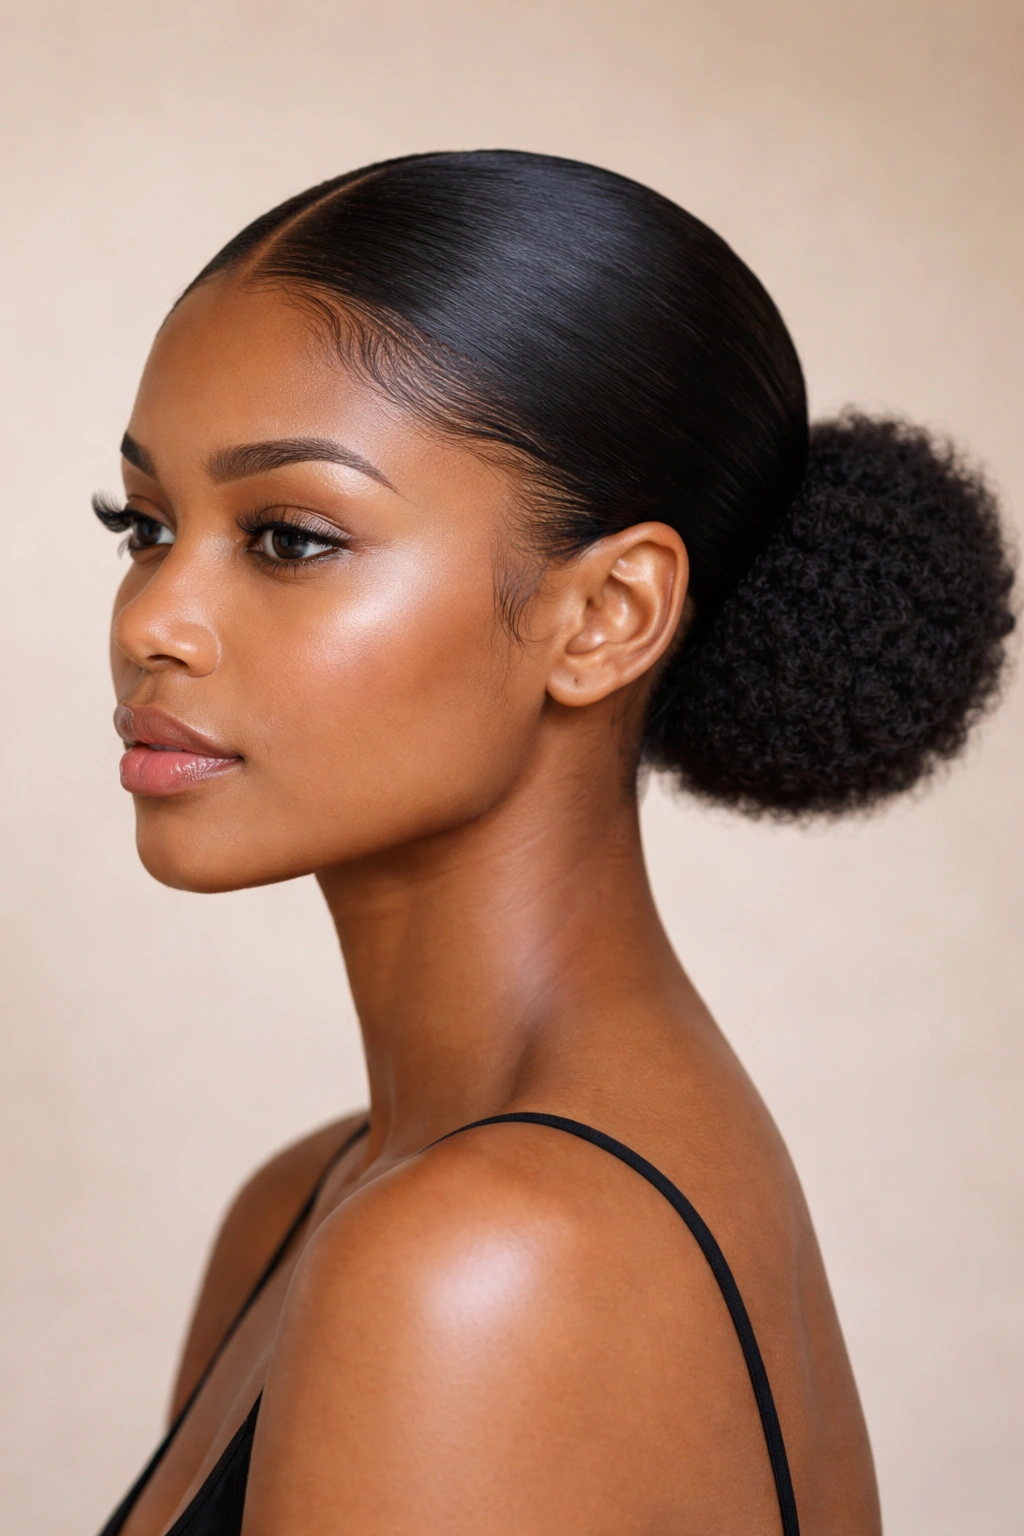
Sleek puffs sit lower on your head (toward the nape or lower crown area) and are smoothed tight rather than kept textured and voluminous. This creates a totally different aesthetic from the other puff styles — more sophisticated, more wearable in formal contexts, and paradoxically, longer-lasting because the tight smoothing reduces the amount of rubbing and friction your hair experiences. These work beautifully on all lengths and create an especially polished look on medium to longer hair.
Creating a Polished, Sleek Aesthetic
Sleek puffs read as dressy and intentional in a different way than twisted puffs — they’re minimalist, clean, and elegant. The tightness also means they stay in place significantly longer than looser puffs, making them an excellent choice if you want your style to maintain its integrity for three, four, or even five days. The sleekness also creates visual contrast if you’re doing any detailing in the puffs, like wrapping them with a contrasting hair color or adding a accessory.
Smoothing Technique for Sleek Puffs
Apply a smoothing cream or gel to your hair — use more product than you would for a loose puff, because you’re aiming for genuine smoothness here, not just definition. Create a clean center part down the middle of your head. Take the first section and use a fine-tooth comb to smooth every hair in that section back toward the lower back of your head. Gather the smoothed section firmly into your hands and secure it into a tight puff at the nape or lower crown area using multiple bobby pins embedded into the base. The puff itself should look compact and defined, without loose curls poking out the sides. Repeat on the other side. You can smooth baby hairs at your hairline for extra polish using edge control or a small comb.
8. Feed-In Braided Puffs
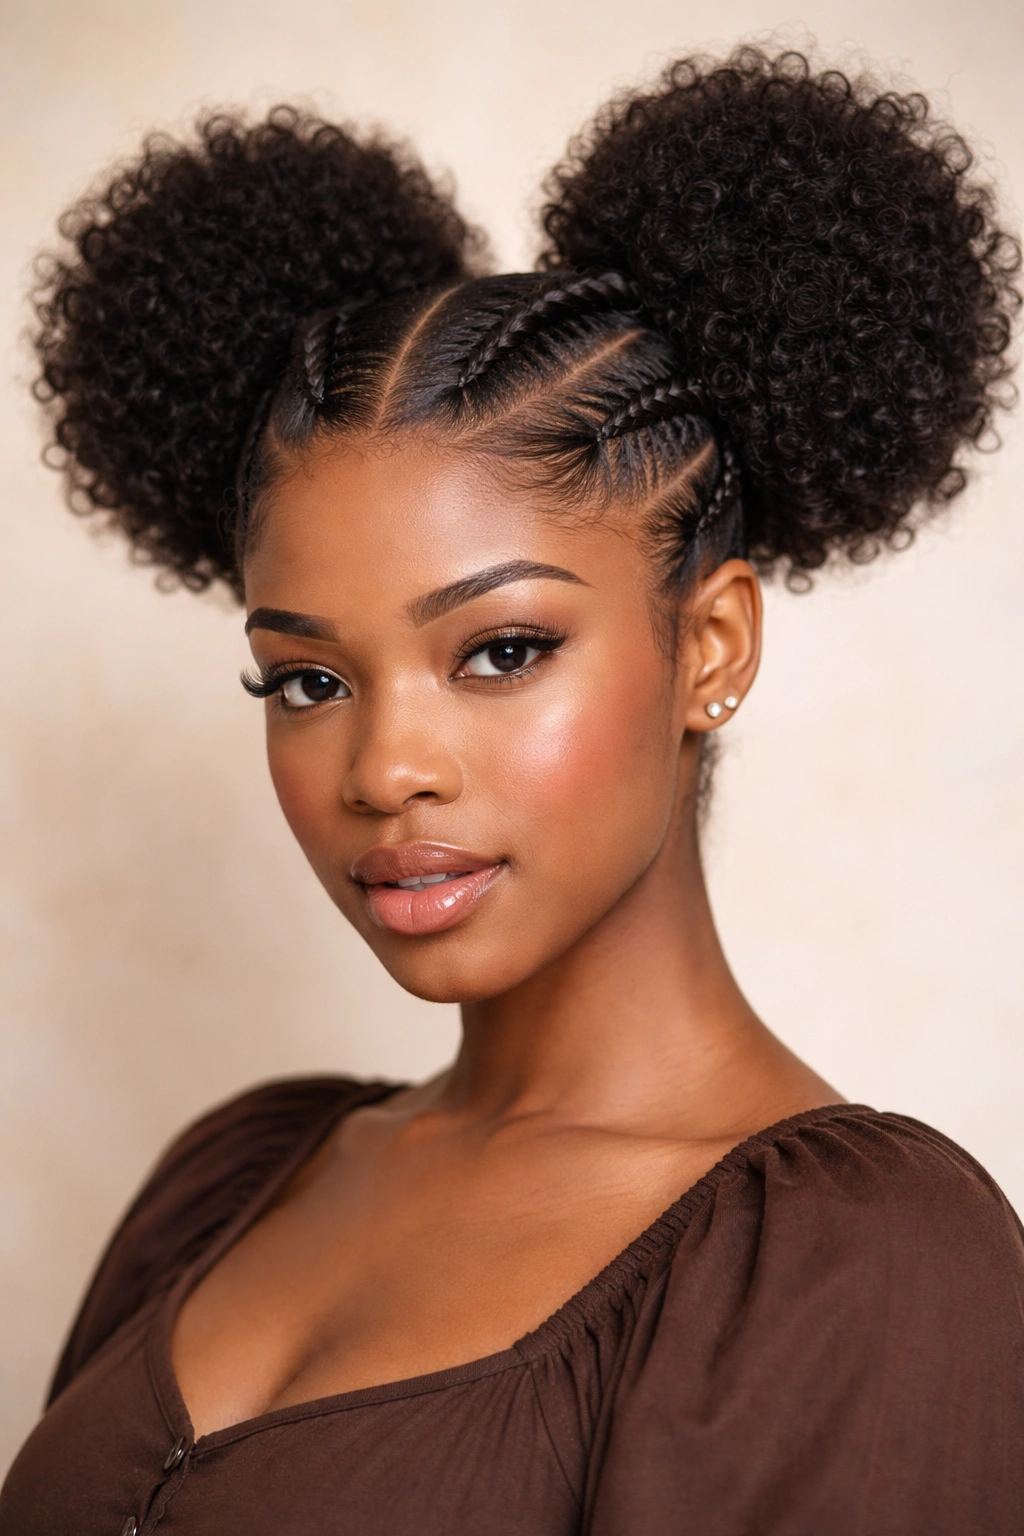
This style takes the braided-base concept further by actually feed-in braiding your own natural hair together with extensions or with gathered sections of your own hair, creating puffs that have added volume and a more elaborate braided appearance. This is a more advanced styling technique, but the result is genuinely striking — it reads as a pro stylist creation even though it’s entirely DIY. This style holds incredibly well and creates distinct visual interest that separates it from simpler puff styles.
The Impact of Added Volume
Feed-in braiding allows you to create fuller, more voluminous puffs than you could with your natural hair alone, and the braiding technique creates a refined, intentional look that reads as high-effort styling (even though, once you know the technique, it’s not dramatically harder than other styles). The added hair or extensions also mean the puffs can last longer because there’s more secure hair holding everything in place. This style is especially striking on shorter natural hair, where the contrast between your natural density and the added volume creates real impact.
The Feed-In Braiding Technique
This technique is best learned visually, but the concept is that you begin a three-strand braid by creating the first few strands from your own hair, then gradually incorporate new hair as you braid (either extension hair or additional sections of your own hair), building the braid thicker and thicker as you go. You’d start this braid at your temple, feed it along the side of your head to the back, then gather everything into a puff at the base. The key detail is that the feeding motion means your braid gets progressively thicker and fuller — you’re not starting with a thick braid, you’re building it thicker as you go. Once you reach the back section of your hair, secure the braid and gather everything into a puff. Repeat on the other side. YouTube tutorials and natural hair community resources have excellent visual guides for this specific technique.
9. Decorative Puff Style With Accessories
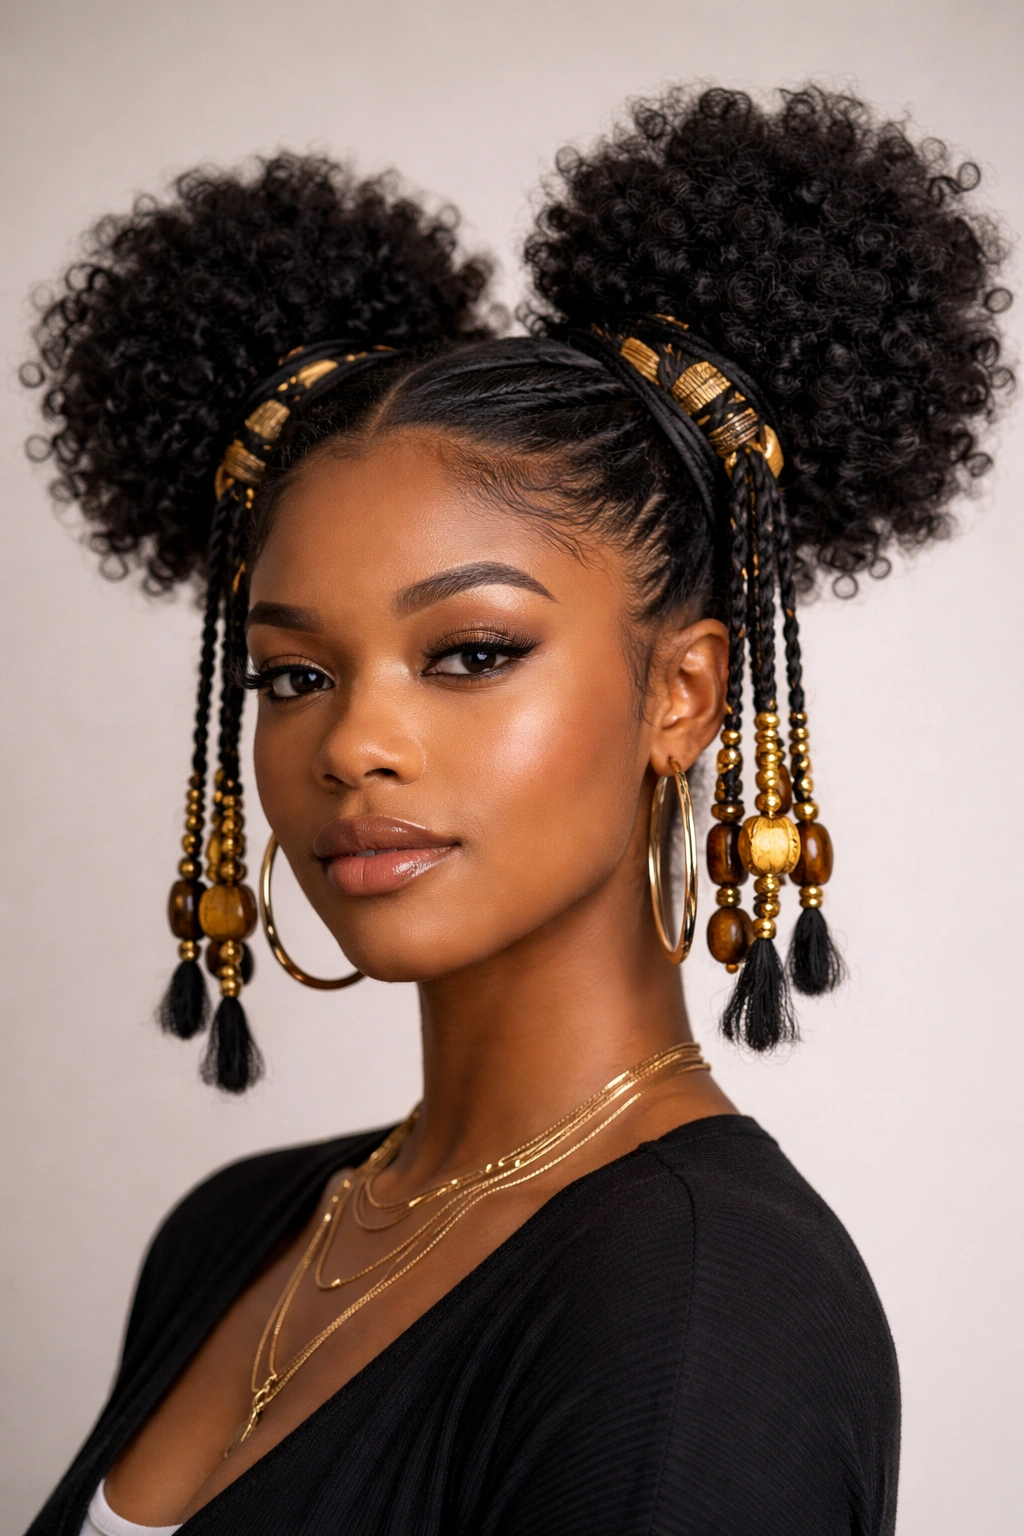
This final style involves creating puffs and then embellishing them with accessories — hair cuffs, rings, beads, or wrapping them with contrasting yarn or thread. The accessories transform the puffs from a simple protective style into an intentional fashion statement, and this is where your personality and creativity really get to shine. Every single hair type and length can work with this approach; the accessories are what make it special.
Personalizing Your Puffs Through Accessories
Puff accessories are genuinely practical as well as beautiful — hair rings and cuffs actually help secure the puff and keep it from unraveling, while decorative wrapping adds visual interest and keeps your ends protected. This is how you take a basic puff style and make it entirely your own. You can match accessories to your outfit, your mood, the occasion, or just whatever speaks to you on any given day. The same puff style looks completely different depending on what you wrap it with or what cuffs you choose.
Simple Accessory Techniques
Create your puffs using whichever method appeals to you — loose, twisted, braided, whatever. Once your puffs are secure, slide hair rings or cuffs around the base or up the sides of each puff. You can use metallic cuffs for glamorous days, colorful ones for playful styling, or minimal ones for professional contexts. Alternatively, wrap yarn, thread, or even fabric strips around the base and up the sides of each puff using a crochet hook (this is called yarn wrapping and the crochet hook makes it very manageable). You can do geometric patterns, solid colors, ombre effects — the possibilities are genuinely extensive. The wrapping also serves the practical purpose of keeping your hair ends tucked safely away, making this both a cute and a genuinely protective approach.
Tools and Products That Make Puff Styling Easier
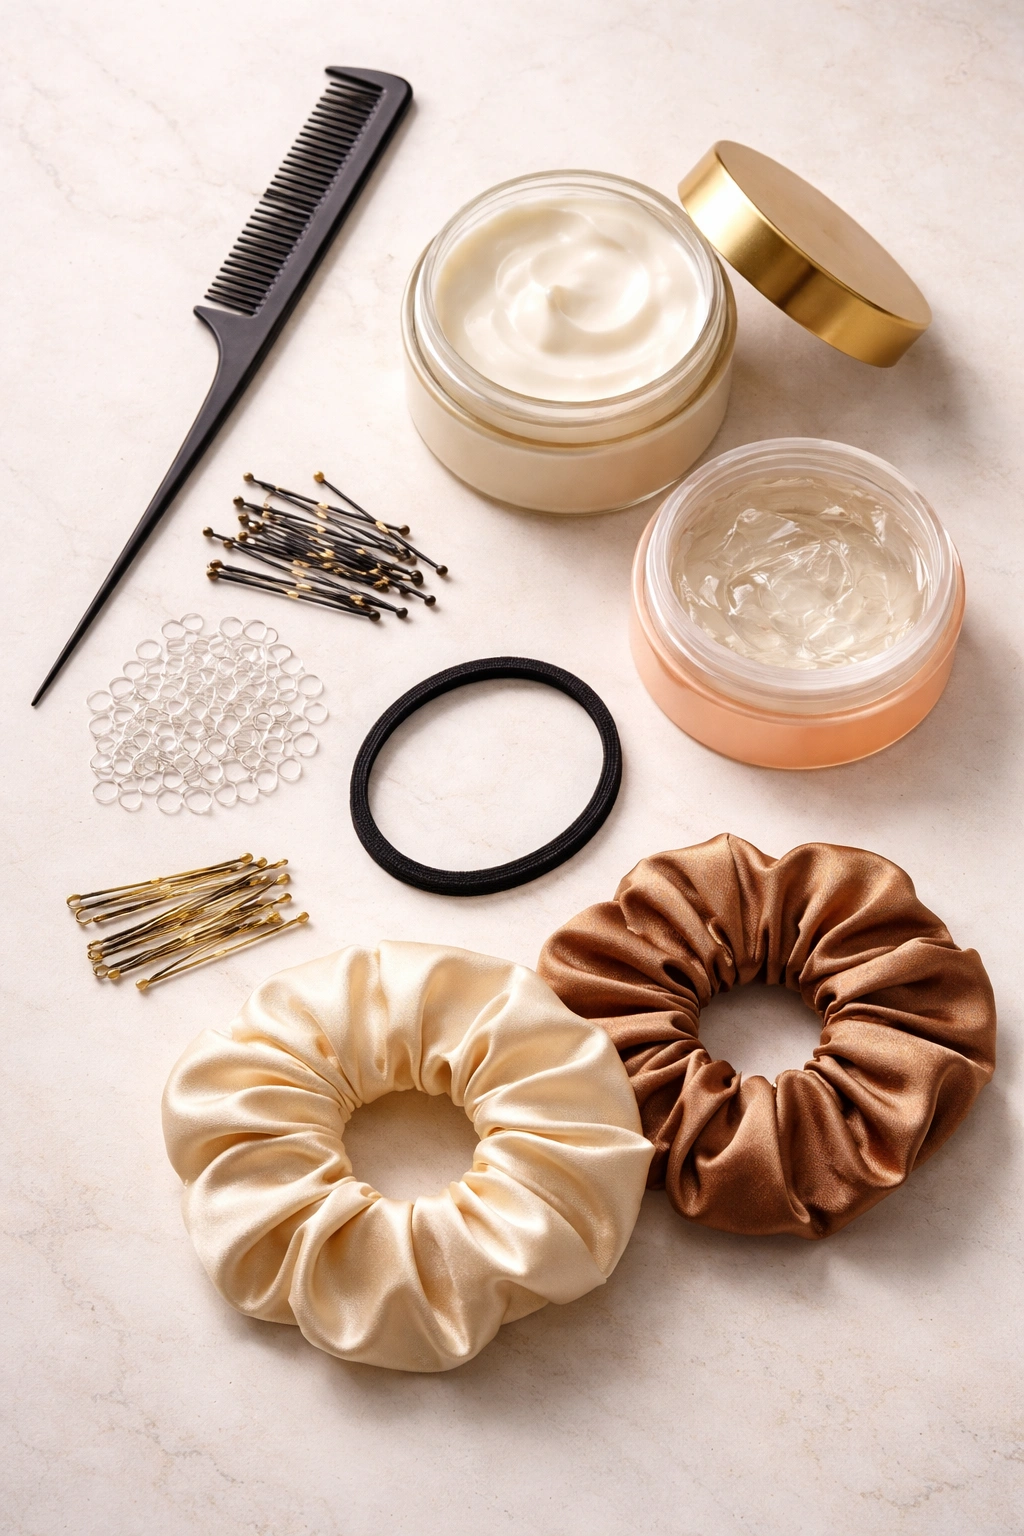
Getting your puffs right is 80 percent technique and 20 percent tools, but having the right tools genuinely does make everything smoother and faster. A fine-tooth comb is the foundation — this is what creates clean parts and smooths sections before puffing them. Don’t skip this; a fine-tooth comb creates crisp lines and controlled sections in a way that just fingers cannot replicate. You’ll also want smooth bobby pins in your hair color (they disappear better than shiny ones) and ideally, you want enough bobby pins that you can really secure each puff firmly — at minimum three to four pins per puff, more if your hair is thick or longer.
A lightweight smoothing cream, edge control, or gel helps keep flyaways down and creates definition, especially important for sleek puffs or any time you want crisp lines. You don’t need an expensive product here; many drugstore options work beautifully. Satin scrunchies or, better yet, clear elastics are ideal for securing the base of each section before you wrap it into a puff — they’re gentler on your hair than regular elastics. Some people love using a hair roller or even a small headband to create a rounded puff shape, but honestly, learning to use your hands to coil and shape the puff is a better long-term skill that works anywhere.
A spray bottle with water is honestly one of your best styling tools — lightly misting a section before smoothing it and puffing it makes the whole process easier and helps the style hold better. You’re not soaking the hair, just adding enough moisture to make it manageable. Finally, if you want your puffs to last multiple days, a sleep bonnet or satin pillowcase is genuinely important. You can style the most beautiful puffs, but they’ll be flattened and frizzed by morning unless you protect them while sleeping.
How to Adapt Puff Styles for Different Hair Lengths
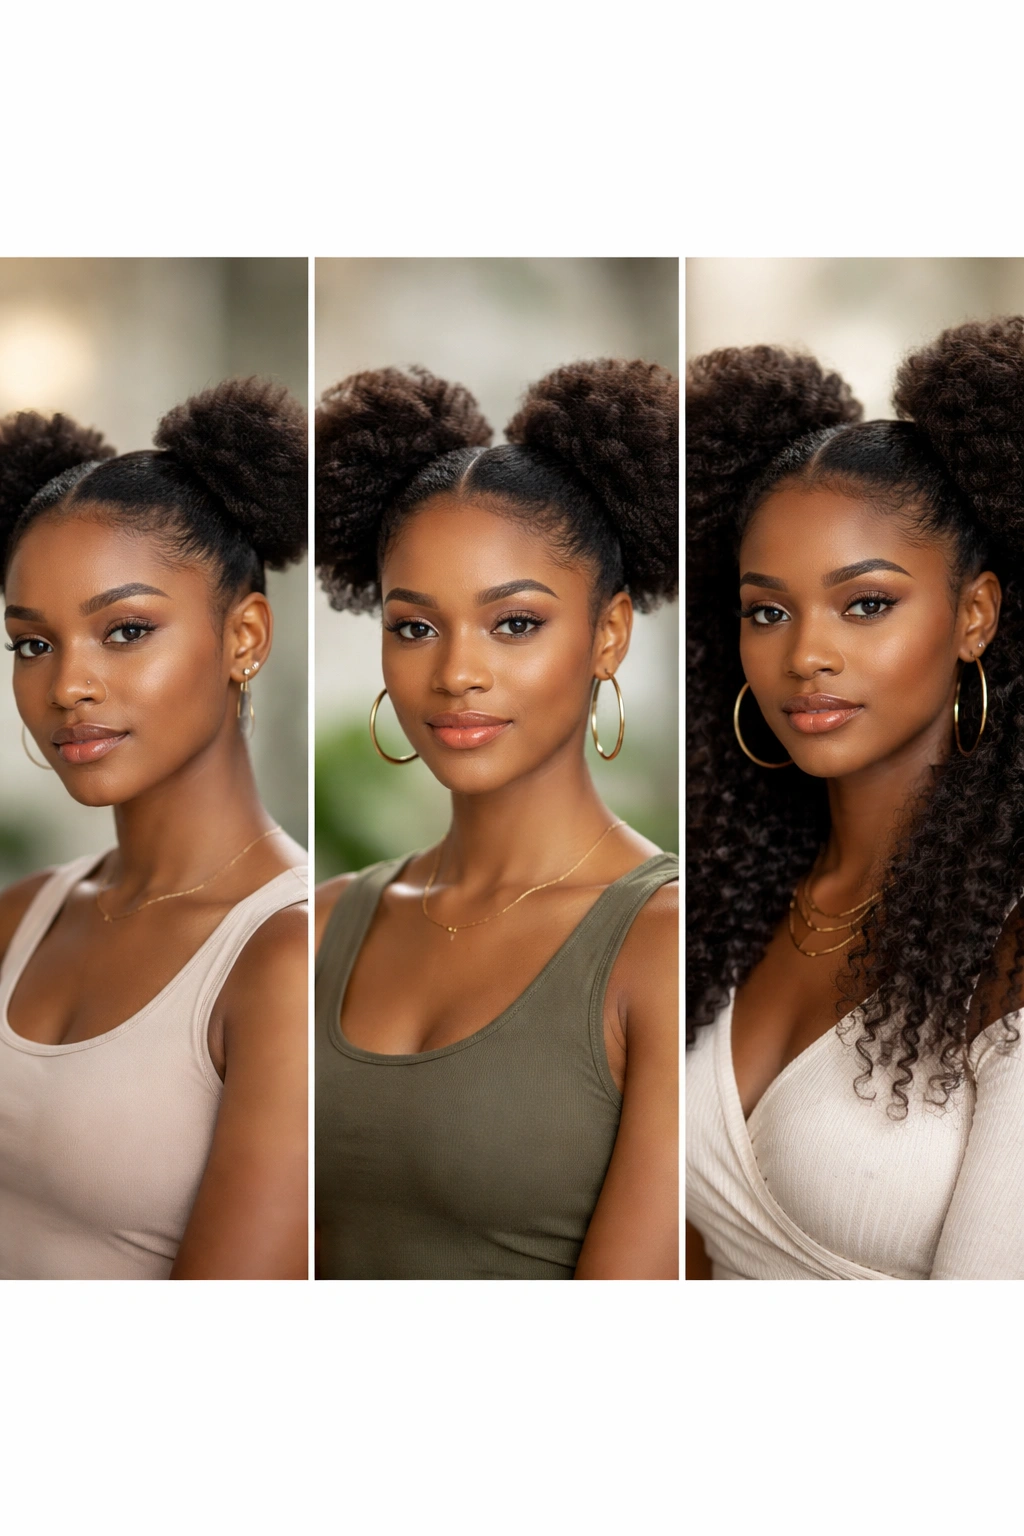
Short hair, roughly chin-length or shorter, creates naturally bouncy, voluminous puffs because that’s your hair’s default state. The challenge is that short puffs stay in place for less time simply because there’s less hair to work with, so you’ll want to use more bobby pins and consider tighter styling (like twists or braids as a base) to extend wear. High puffs and textured puffs are especially striking on short hair because the proportions read as intentionally bold. On short hair, you can create puffs in as little as five minutes once you know the technique.
Medium-length hair, roughly shoulder-length, gives you the most versatility — every single puff style in this guide works beautifully on medium length. You have enough hair for puffs to have real substance and presence, but not so much hair that the puffs become heavy or difficult to manage. You can achieve all the effects in this guide, from sleek to textured to braided to accessorized. Medium-length hair also tends to hold puffs for a solid three to four days with proper securing.
Longer hair requires slightly different considerations because the weight of your hair pulls down on the puff, and you need to secure puffs very firmly to prevent them from dropping or loosening. Higher placement (on top of your head or at the crown) works better than very low placement for longer hair because gravity doesn’t pull as aggressively. Longer hair also benefits enormously from braided or twisted bases because the structure provides better hold. That said, longer hair puffs are absolutely gorgeous — they can be larger and more voluminous, and they make a more dramatic statement. Give yourself slightly more time for styling with longer hair, and don’t skip the secure bobby pinning step.
Keeping Your Puffs Fresh for Three Days or Longer
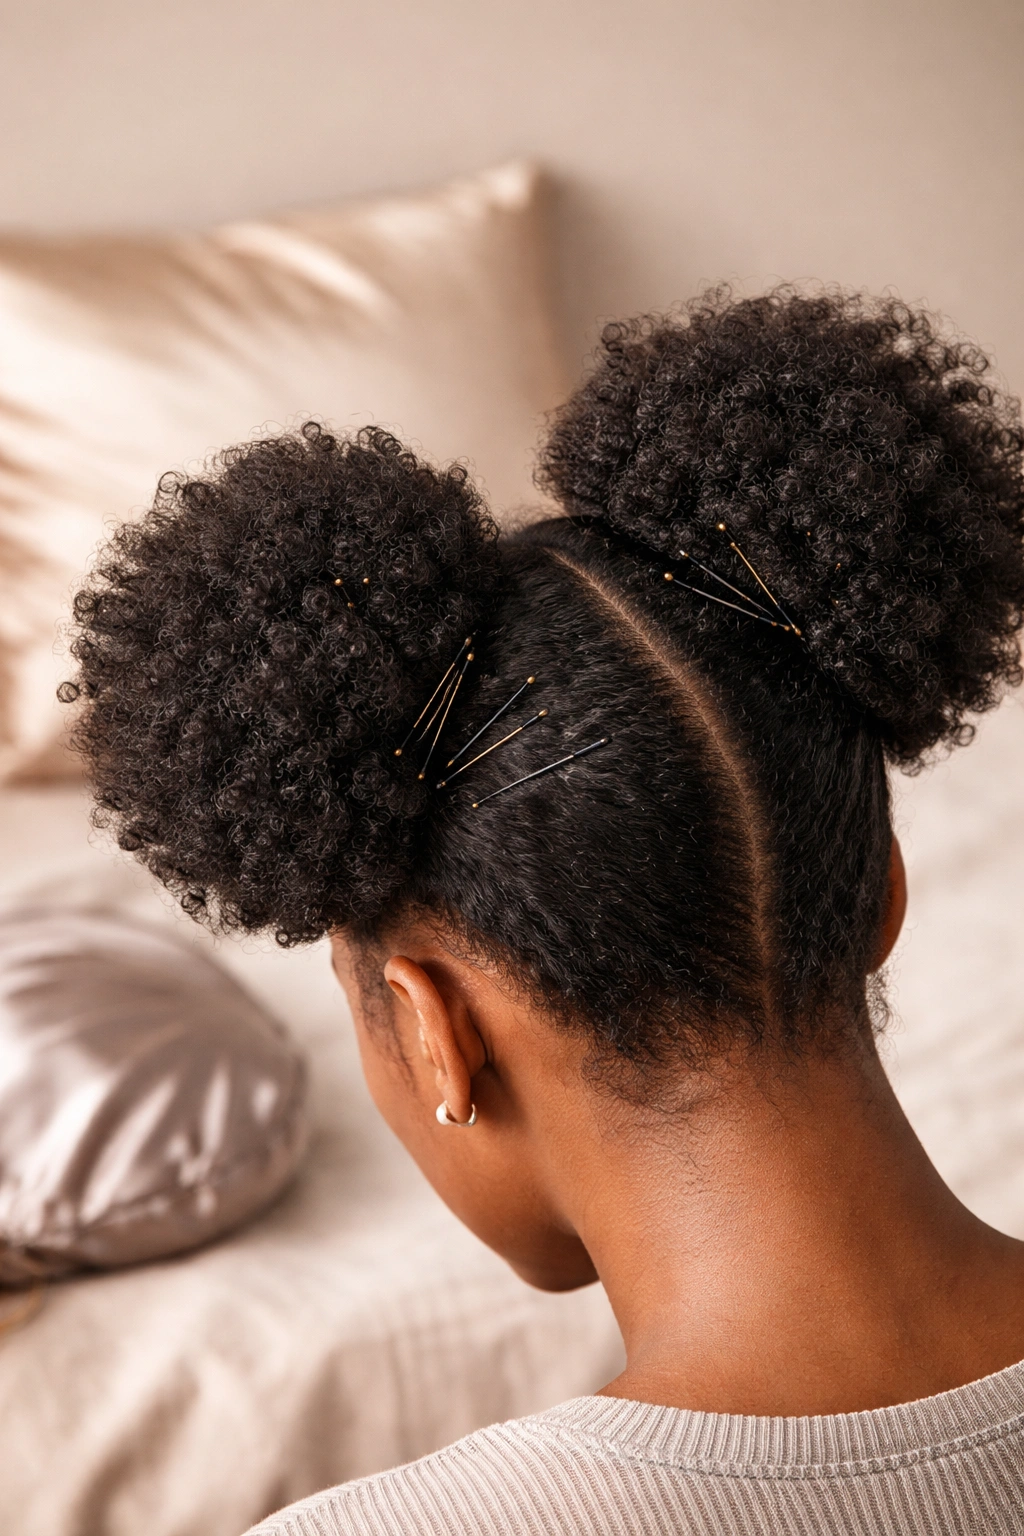
The real magic of puffs is that they’re genuinely protective and can last multiple days if you set them up correctly from the start. The foundation is that your puffs need to be secured tightly enough that they won’t slip or shift, but not so tight that you’re creating tension and pulling at your roots. You’re looking for secure, not painful. Bobby pins should be pushed completely into the base of the puff, not sitting on top of it. If you’re using three pins and your puff is still moving around, add a fourth — there’s no penalty for extra security.
At night, sleep on a satin or silk pillowcase, or use a sleep bonnet, specifically to prevent friction that breaks your curls and causes frizziness. Your puffs will stay fresher, smoother, and more defined when protected while sleeping. If your pillowcase isn’t satin (and most people’s isn’t), at minimum, tie a satin scarf over your puffs before bed — even ten minutes of protection helps. In the morning, you might notice a bit of flattening or frizziness, but a light mist of water and a quick finger-fluff usually restores them to nearly their original state. By day three or four, you’ll likely have more frizz and some loosening around the edges, but that’s when accessorizing becomes your best friend — add some rings or cuffs to tidy everything up, and the style feels intentionally textured rather than loosening.
If you’re trying to extend a puff style beyond four days, refreshing the edges is key. Use a small comb and a damp finger or a bit of edge control to re-smooth the front sections and the perimeter of each puff. You can also re-secure loose bobby pins or add new pins to areas that are starting to shift. Some people refresh their puffs every other day just by taking them down, misting with water, and re-securing them — this takes maybe ten minutes and significantly extends the style’s life.
Final Thoughts
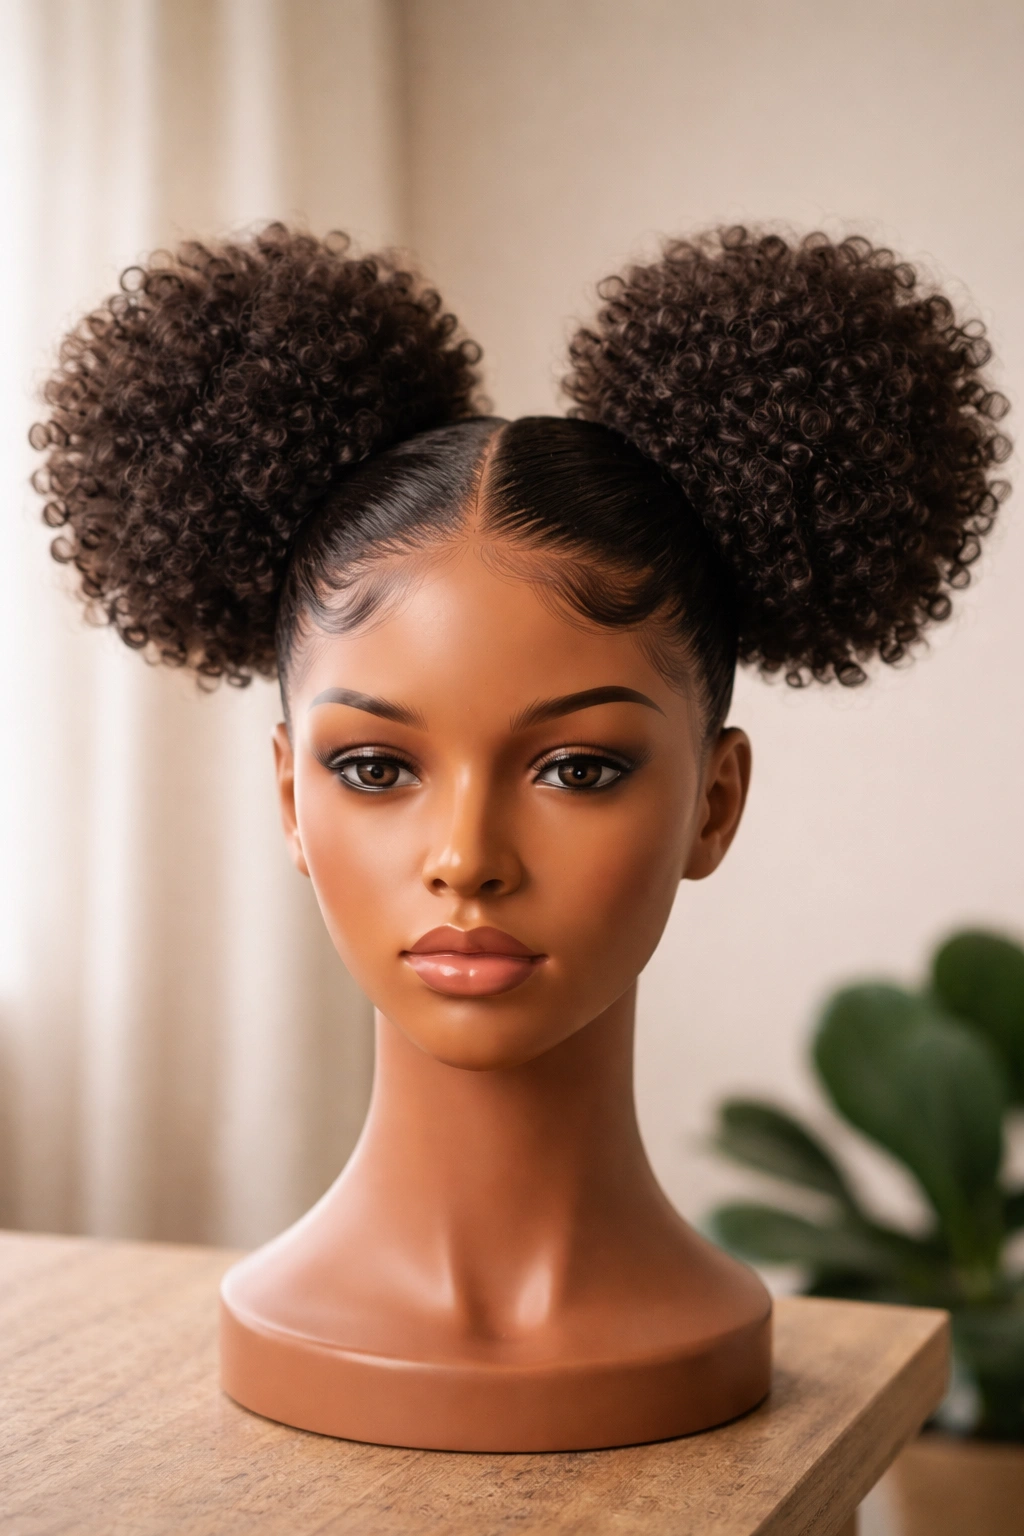
Two puffs are such a reliable protective style precisely because they offer this incredible range of variation — you can go from a quick five-minute style in the morning to an elaborate, decorated statement look depending on your mood, time, and circumstances. The core technique is genuinely simple (part, gather, secure), but the variations on that theme let you create nine completely different aesthetics using the same basic framework.
The other thing worth understanding about puffs is that they’re genuinely good for your hair health. This style keeps your ends protected, reduces the amount of daily manipulation your curls experience, and gives your hair a break from styling, heat, and constant tension. Protective styling isn’t about doing nothing; it’s about being intentional about how you style so your hair stays healthy long-term. Puffs let you look polished and styled while actually protecting your curl pattern.
Start with whichever style appeals to you most — if you love height and volume, high puffs are your baseline. If you prefer a more refined aesthetic, sleek puffs or braided puffs will feel more natural. Don’t assume you have to master all nine styles; focus on one or two that you actually want to wear regularly, get really good at those, and then branch out as you get comfortable. Your hair and your styling preferences are unique, so trust what actually looks good on you and what you genuinely want to wear, not just what works on someone else’s hair.
