



4C hair is naturally textured, incredibly versatile, and absolutely stunning when you know how to work with its unique curl pattern and moisture needs. The challenge isn’t that 4C hair is difficult — it’s that most mainstream styling advice ignores 4C textures entirely, leaving you with limited inspiration and plenty of frustration. The reality is that 4C hair thrives with the right techniques, protective strategies, and styles that celebrate its natural shrinkage and coil definition rather than fight against it.
What makes 4C hair distinct is its tightly coiled structure, tight coil pattern, and the way it naturally shrinks when wet. A strand that looks 6 inches long might be 16 inches when fully stretched, which means styling strategies need to account for this behavior. The good news? This texture is incredibly versatile once you understand how to style it, moisturize it, and keep it healthy. You’re not limited to one or two looks — there are dozens of gorgeous, wearable styles that work beautifully with 4C hair’s natural characteristics.
The styles in this guide range from low-maintenance, low-manipulation looks that protect your hair and let it rest, to more intricate styles that showcase your texture and creativity. Each one is designed specifically with 4C hair’s needs in mind — meaning moisture retention, minimal stress on delicate strands, and styles that allow your hair to thrive rather than just survive.
1. The Classic Fro
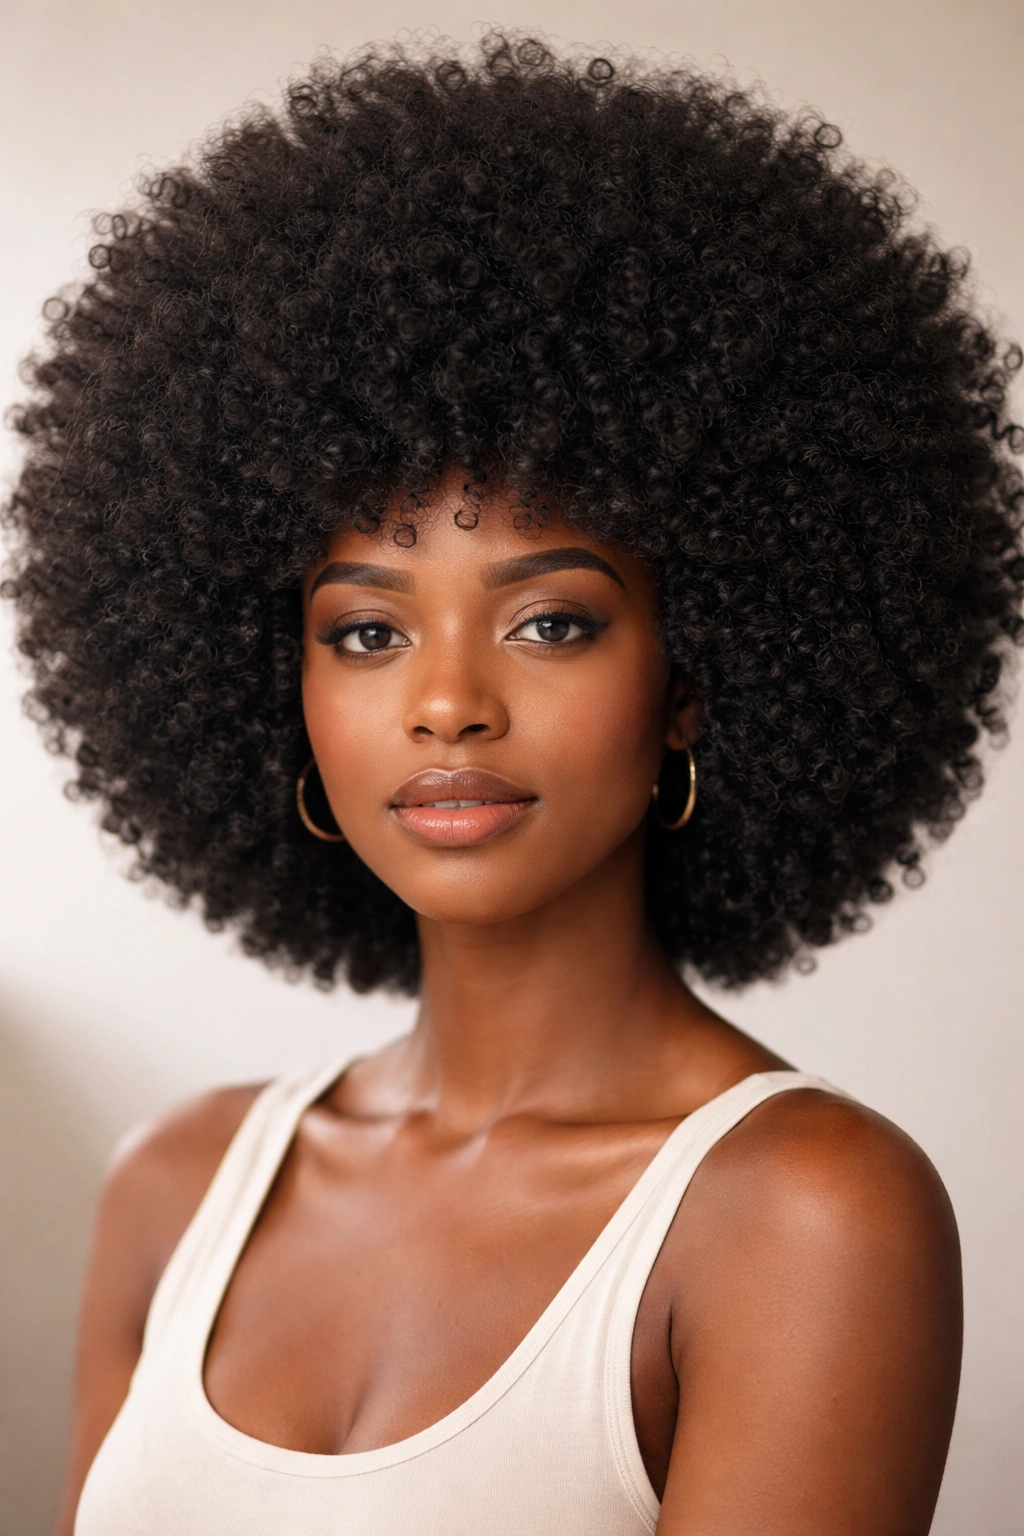
The classic afro is the ultimate celebration of your natural 4C texture, and it’s far more than just “doing nothing with your hair.” A well-maintained fro requires intentional styling, proper moisture, and technique — but the payoff is a gorgeous, voluminous look that’s completely effortless to wear once you nail the method.
With 4C hair, your fro will be beautifully textured and full of definition. The key is washing your hair in braids or twists to minimize tangling, then gently detangling with conditioner in your hair and a wide-tooth comb. Once your hair is clean and conditioned, you’ll apply your leave-in conditioner and styling cream while your hair is still soaking wet, then use a denman brush or your fingers to gently pick out your hair into the shape you want.
Getting Maximum Volume and Definition
The fluffier your fro looks, the more intentional your styling has to be. Start by applying products to soaking-wet hair — this is non-negotiable for 4C hair. Use a leave-in conditioner first, then layer a styling cream or gel that defines curls. A denman brush works wonders for creating separation and definition in your coils, but you can absolutely pick out your fro with your fingers if you prefer a more natural, less-defined texture.
Quick Fro Facts
- Styling time: 15–20 minutes for washing and styling; 5 minutes daily to refresh
- Best for: Busy mornings, confident naturals, anyone who wants a low-manipulation style
- Moisture needs: High — plan to deep condition weekly and refresh your fro with a spray bottle of water and light cream every 2–3 days
- Longevity: Lasts 5–7 days before needing a refresh; lasts 2–3 weeks before rewashing
Pro tip: Sleep on a silk or satin pillowcase to protect your fro’s definition overnight. A silk bonnet works too, but many people find it flattens the style by morning.
2. Twist Out
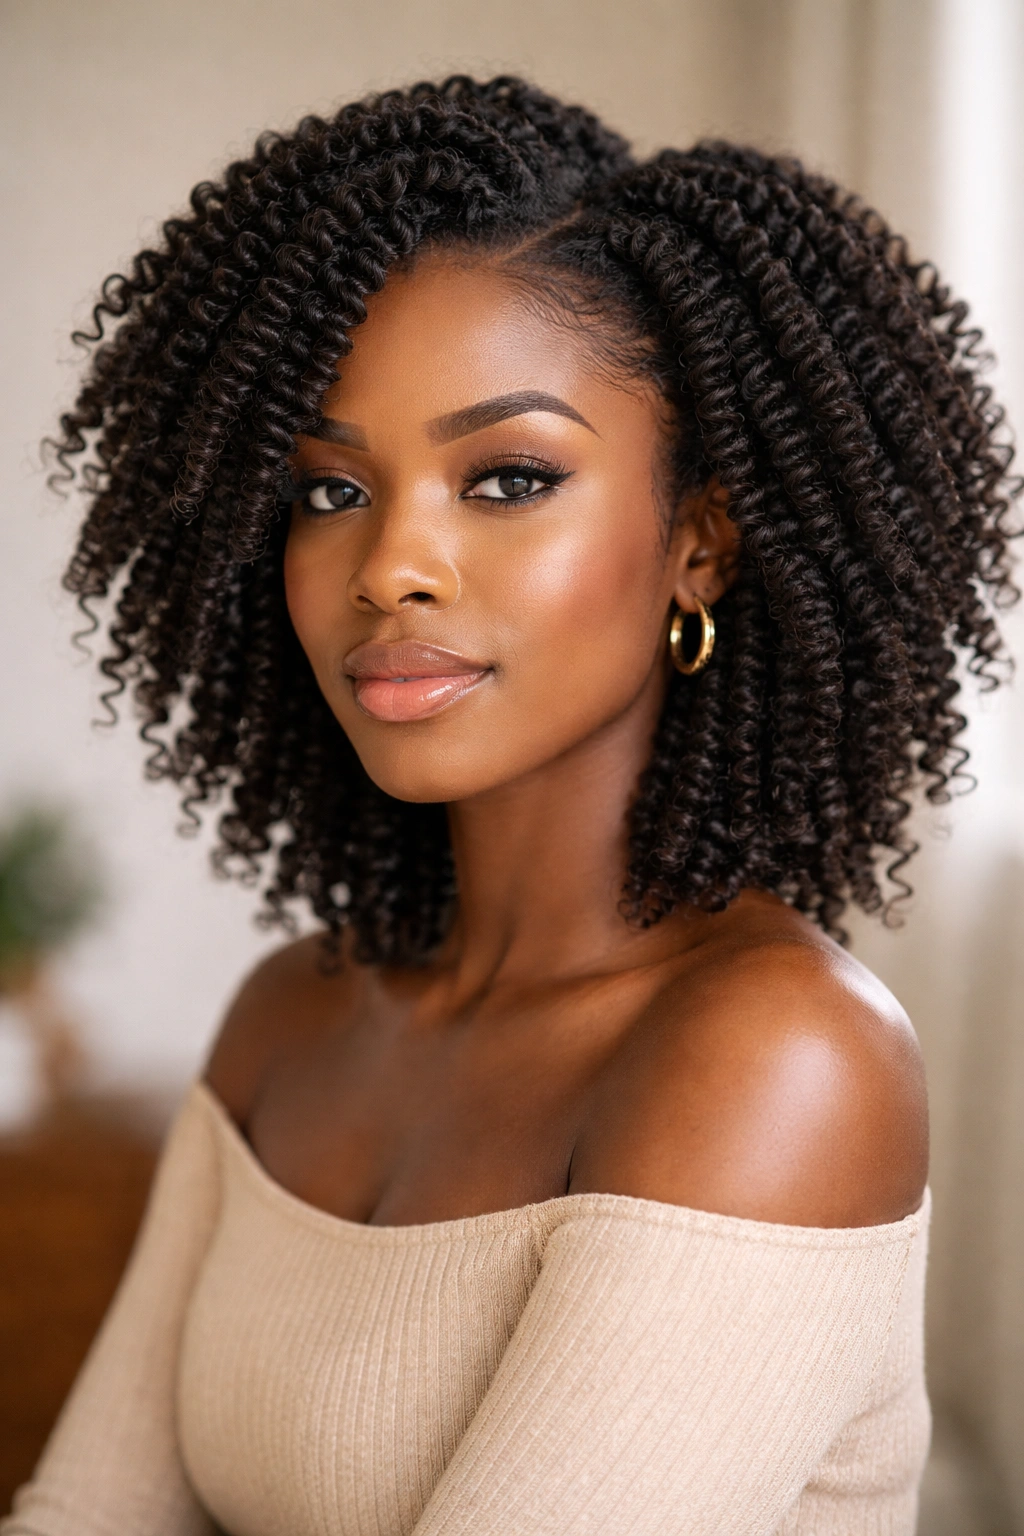
A twist out is a protective style that also gives you gorgeous definition and wave pattern through your coils. The beauty of a twist out is that it’s completely transformable — wear it one way fresh, then unbraid it a few days later for a softer, more voluminous version of the same style.
Two-strand twist outs work beautifully with 4C hair because they create controlled definition while protecting your ends and allowing for easy moisture application throughout the style. You’ll twist damp hair with a defining cream or gel, leave the twists in for 1–3 days while they set, then unbraid them carefully to reveal your coils with a gorgeous wave pattern throughout.
The Twist-Out Timeline
Patience is everything with a twist out. You can wear the twists themselves for 2–3 days (they look clean and intentional), then unbraid for another 3–5 days of beautifully defined waves. The longer you leave the twists in, the more set your coil pattern becomes, and the longer that definition lasts once you unbraid. Leave them in for 24 hours minimum; overnight isn’t enough time for the twists to fully set.
Essential Twist Out Steps
- Section and apply product: Divide clean, damp hair into 6–10 sections (more sections = tighter twists and finer definition; fewer sections = chunkier twists and bolder waves)
- Twist from root to end: Use a defining cream or light gel to keep each strand smooth and controlled as you twist
- Leave them to set: Sleep in the twists, or wait 24–48 hours for best results
- Unbraid with intention: Unbraid slowly and gently from the bottom up; rushing causes frizz and breaks your coil pattern
- Separate if desired: Pull apart the twists gently for more volume, or leave them connected for tighter coils
Worth knowing: Twist outs look best on day two or three after unbraiding, when the coils have relaxed slightly and the style feels fuller and more polished.
3. Defined Coils
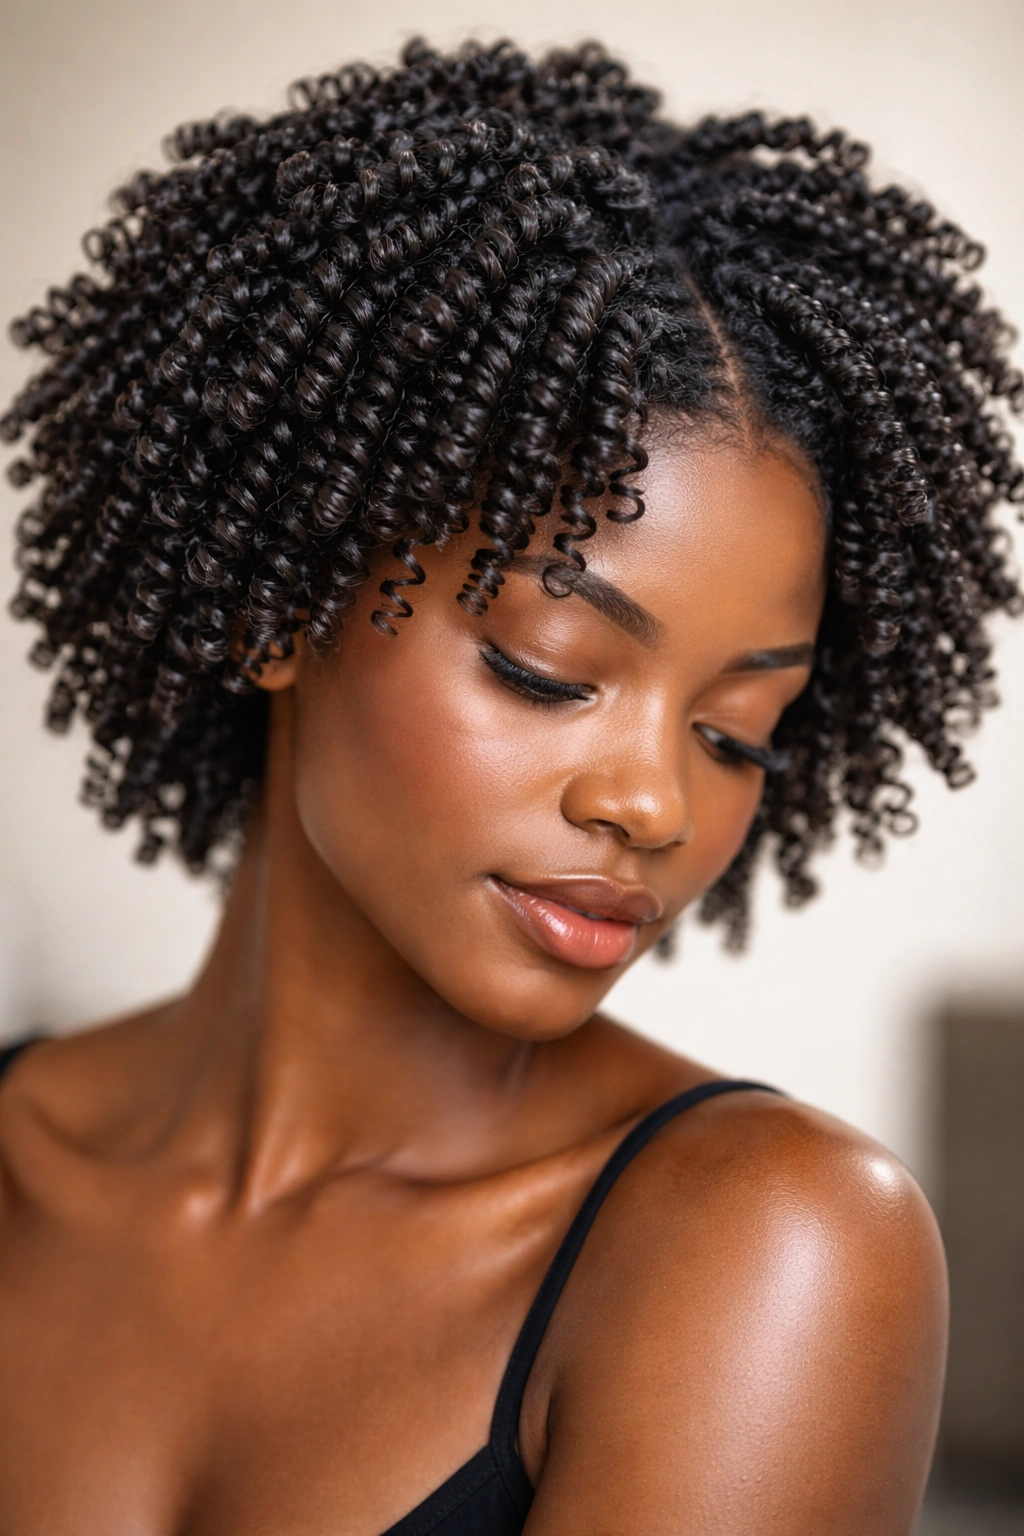
Defined coils celebrate every single coil in your 4C texture with crisp, bouncy curls that feel almost sculptural. This look is achieved through intentional application of a defining product — usually a curl-defining gel or mousse — to soaking-wet hair, then using a method like plopping or air-drying to set the definition.
The magic of defined coils is that you’re working with your hair’s natural coil pattern and enhancing it rather than altering it. Your 4C coils are there; they’re just waiting to be revealed with the right products and drying method. Most people think defined coils require heat styling or complicated techniques, but they don’t — good products and time are all you need.
Creating Crisp, Separated Coils
Start with clean, soaking-wet hair and apply your leave-in conditioner generously. While your hair is still dripping, apply your gel or mousse by scrunching it up into your curls from the ends upward — this method (called praying hands or scrunching) helps define each coil without disrupting your curl pattern. You can use a denman brush if you want tighter, more separated definition, or just use your hands for a more natural separation.
Product and Drying Essentials
- Best products for 4C coil definition: Curl-defining gels, lightweight mousse, or curl creams designed for kinky-textured hair
- Drying method: Air-dry completely (6–12 hours) or use a diffuser on low heat for 30–45 minutes to speed up the process
- Refresh timeline: These coils last beautifully for 4–6 days with minimal refresh needed
- Best refresh method: A spray bottle of water plus a light misting of gel or mousse on the days in between
Insider note: If your gel crunches or feels stiff when fully dry, you didn’t use enough leave-in conditioner underneath. The conditioner is what softens the gel and keeps your coils feeling bouncy rather than crunchy.
4. Two-Strand Twists
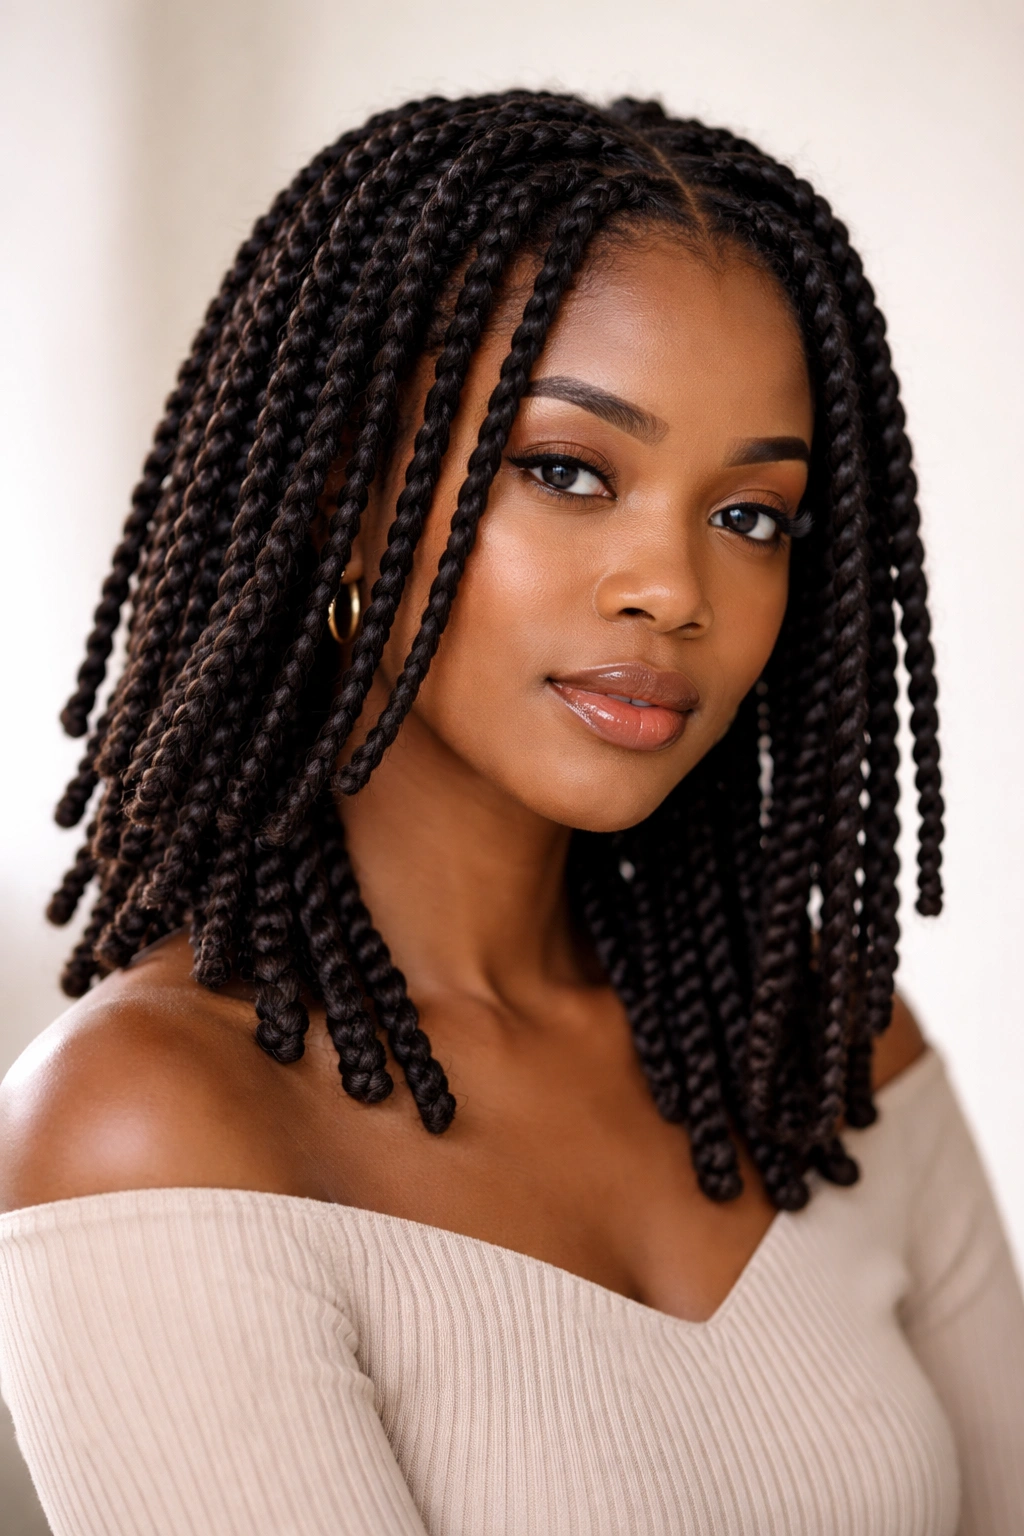
Two-strand twists are the workhorse of 4C hair styling — a protective style, a definition tool, and a gorgeous look all in one. Unlike twist outs, two-strand twists are meant to be worn as-is, not unbraided, so you’re getting a sleek, controlled look that showcases your texture in a polished way.
Two-strand twists work by taking two strands of hair and wrapping them around each other from root to end, creating a neat, rope-like braid. With 4C hair, the twists naturally compress and coil around themselves, which is exactly what you want. The result is a style that looks intentional and neat, protects your ends by keeping them tucked away, and allows you to apply moisture easily because you can saturate the twists themselves.
Getting Twists That Last
The thickness of your twists depends on how many sections you create. Smaller, thinner twists last longer (3–4 weeks) and offer a more delicate look; thicker twists last 2–3 weeks and make styling faster. Most people find that medium-thickness twists (created from maybe 12–20 sections total) strike the best balance between looking polished and being relatively quick to install.
Two-Strand Twist Techniques for 4C Hair
- Moisturize first: Apply leave-in conditioner to damp hair before you start twisting; this step is essential for hair health
- Section consistently: Divide hair into even sections so your twists look uniform
- Twist tightly at the roots: Use gentle tension to keep the twists from unraveling at the base
- Keep twists moisturized: Spray them lightly with water and refresh the ends with cream every 3–4 days
- Sleep protection: Wrap in a silk scarf or sleep on a silk pillowcase to keep the twists neat
Pro tip: Install your twists while your hair is damp but not soaking wet — this helps them hold their shape better and makes the process faster and easier.
5. Wash and Go
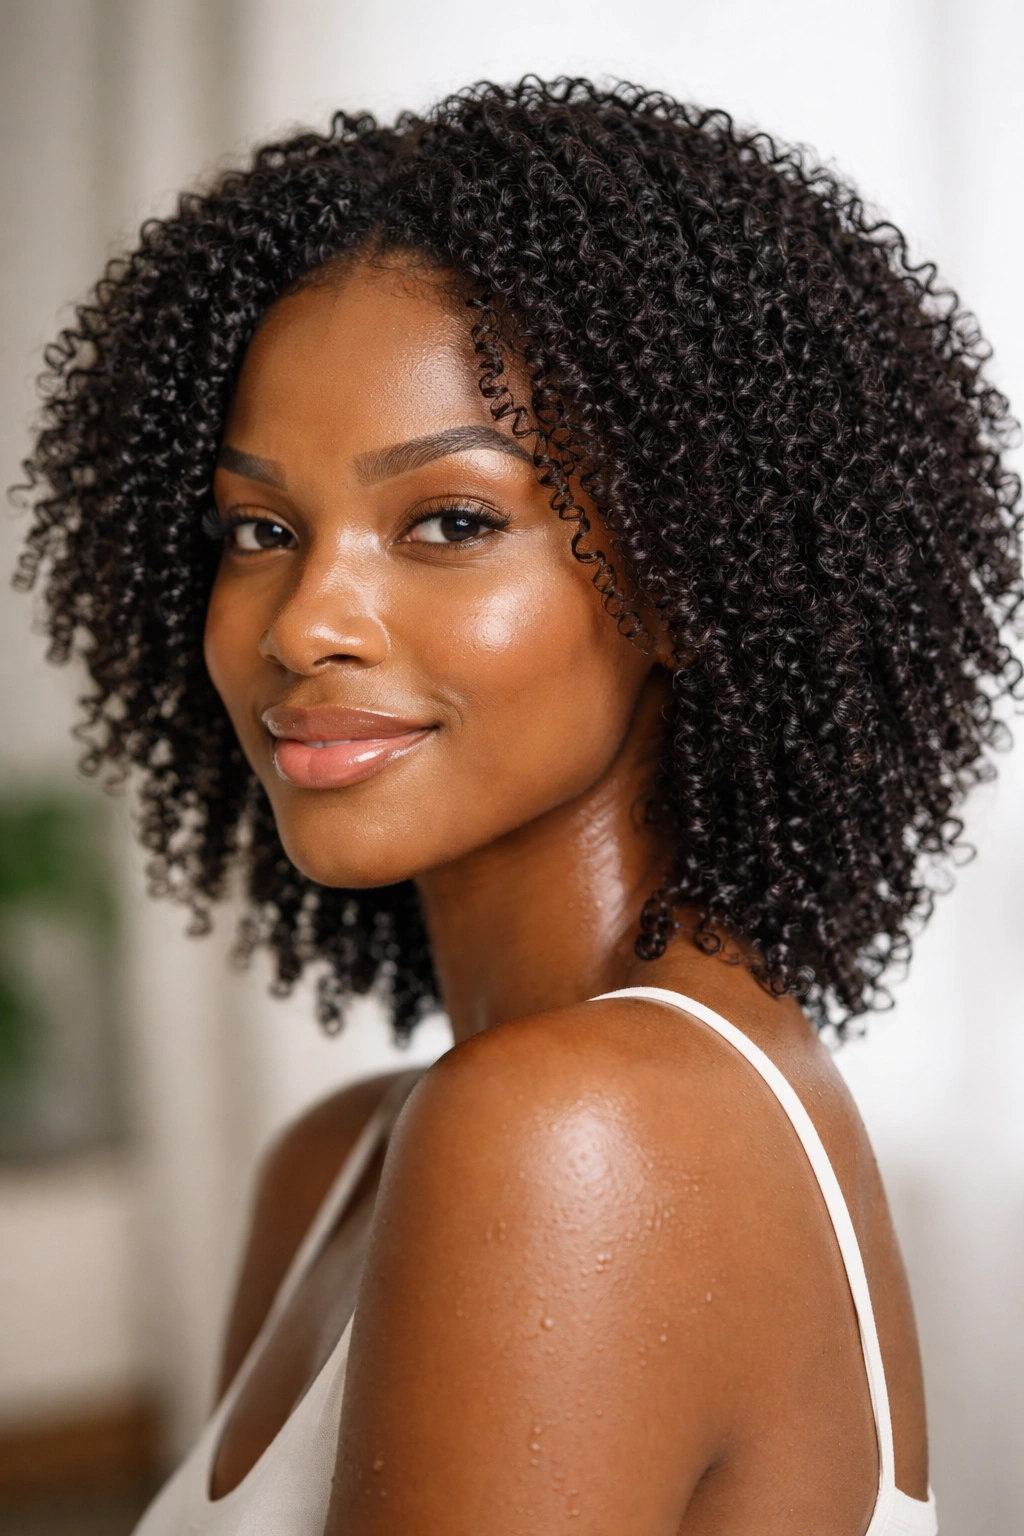
A wash and go is the holy grail of low-manipulation styling for 4C hair, though it requires the right products and technique to pull off successfully. The goal is to wash your hair, apply your styling products, and then let your natural coils air-dry into a gorgeous, defined style — no brushing, no combs, no added manipulation.
The key to a successful wash and go is using products that provide enough hold, moisture, and definition that your coils dry in the shape you want them to. Most people think a wash and go means just washing and letting your hair dry however it wants, but that’s not the full picture. A true wash and go is about using the right combination of leave-in conditioner and styling product so your coils set beautifully as they dry.
The Perfect Wash and Go Formula
Your product combination matters immensely. Start with a moisturizing shampoo or co-wash that doesn’t strip your hair, then apply a rich leave-in conditioner while your hair is soaking wet. Before your hair starts to dry, apply your styling product — this could be a curl-defining gel, a styling cream, or even a combination of both. Scrunch your hair gently to encourage coil formation, then let it air-dry completely.
Wash and Go Success Factors
- Product choice: Your styling product must have enough hold to keep coils defined but not so much that your hair feels stiff or crunchy
- Soaking wet application: Every single product goes on while your hair is still dripping wet; this is the difference between success and frizz
- Minimal touching: Once you’ve applied products, resist the urge to touch or manipulate your hair as it dries
- Complete drying: Air-dry for 8–12 hours, or use a diffuser for 45–60 minutes
- Refresh method: Spray with water lightly the next day if coils feel flat; add a tiny bit of product if needed
Worth knowing: Not everyone’s 4C hair does well with straight wash and goes at first. You might need to start with a wash and go that includes light twists or braids, then transition to no-braid wash and goes once you find your product sweet spot.
6. High Puffs and Multi-Puff Styles
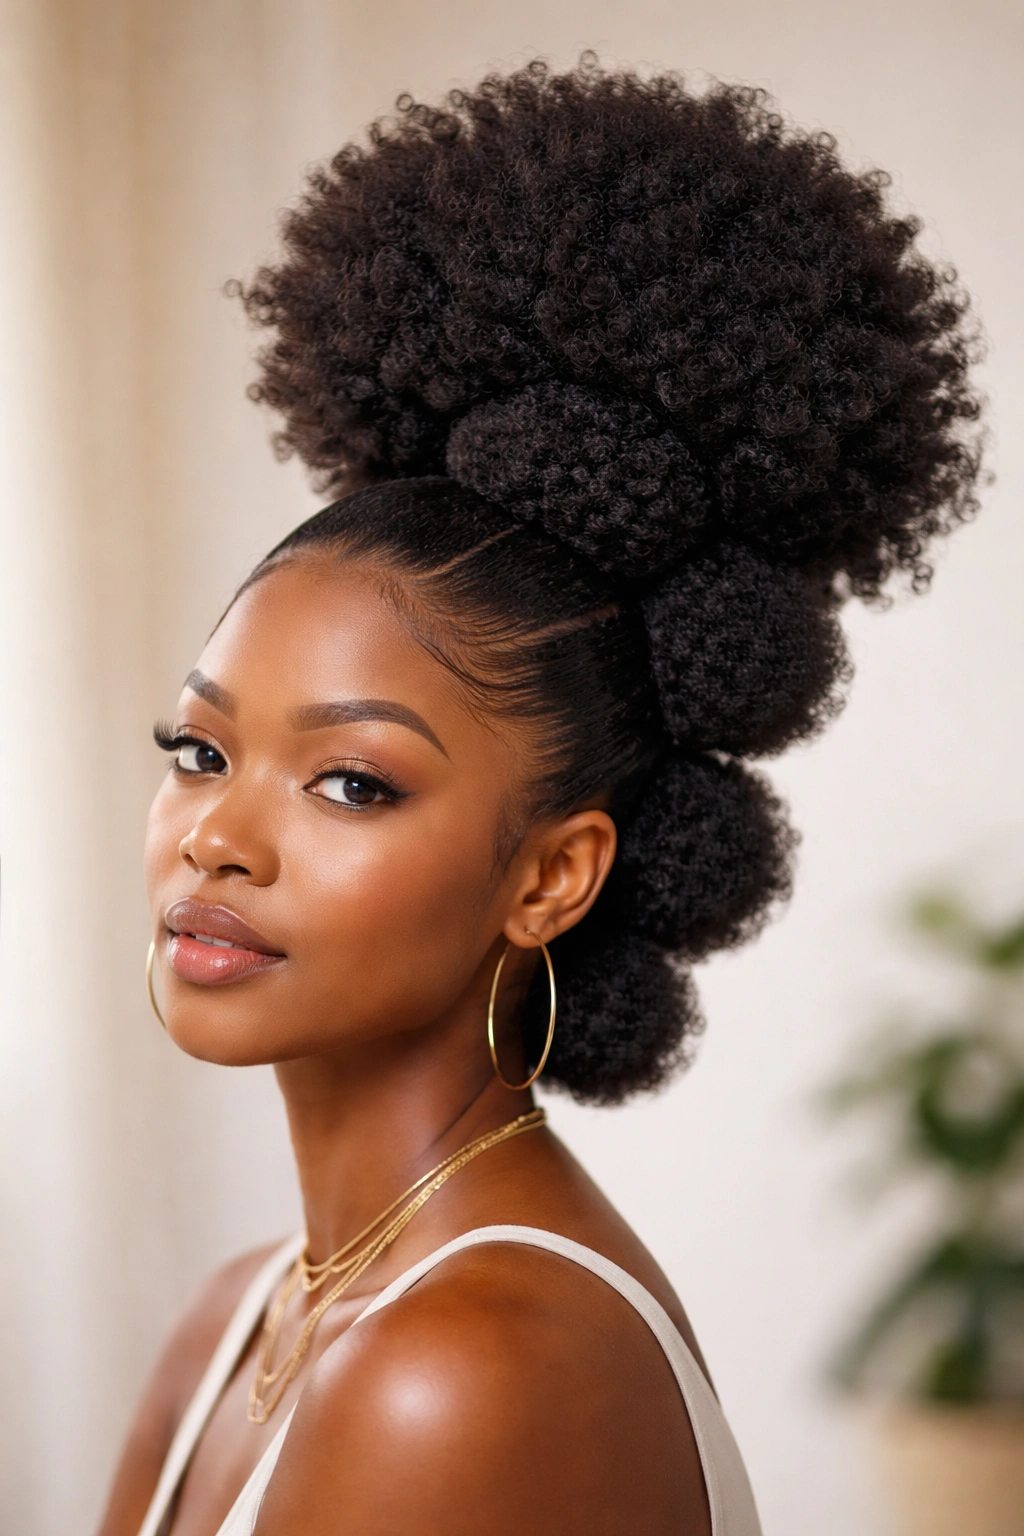
A high puff (or several multi-puffs) is an adorable, youthful-looking style that actually protects your ends and keeps your hair tucked away neatly. The puff is created by gathering your hair into a high ponytail, then fluffing it out so your 4C coils look voluminous and textured. It’s simple, fast, and looks polished — which makes it perfect for days when you want to look put-together without spending hours styling.
Puffs work beautifully on 4C hair because your natural texture creates volume naturally. Unlike looser-textured hair that might need teasing or fluffing, 4C hair creates a gorgeous, full puff with minimal effort. The key is using a soft hair tie or scarf to gather the puff so you’re not creating tension that causes breakage.
Creating a Picture-Perfect Puff
Start with day-old or second-day hair for the best results — it’ll be slightly less frizzy than freshly washed hair and will hold its shape better. Smooth a tiny bit of gel around your hairline if you want a sleek base, then gather your hair into a high ponytail at the crown of your head. Use a soft elastic or a silk scarf tied gently to hold the ponytail, then flip your head upside down and fluff the puff by separating and gently teasing your coils with your fingers.
Puff Styling Variations
- Single high puff: Gathered at the crown for a sleek, simple look
- Two side puffs: One on each side of your head for a fun, playful vibe
- Multiple mini puffs: Three or four smaller puffs scattered across your head for bold, creative style
- Puff with a swoop: Smooth baby hairs and edges around your hairline for a polished finish
- Puff with a braid: Create a braid or twist across the back of your head that flows into a puff at the top
Pro tip: Use a scarf instead of a hair tie to avoid creating a crease in your hair. Tie it gently enough that you could slip a finger underneath — too tight causes breakage and tension alopecia over time.
7. Bantu Knots
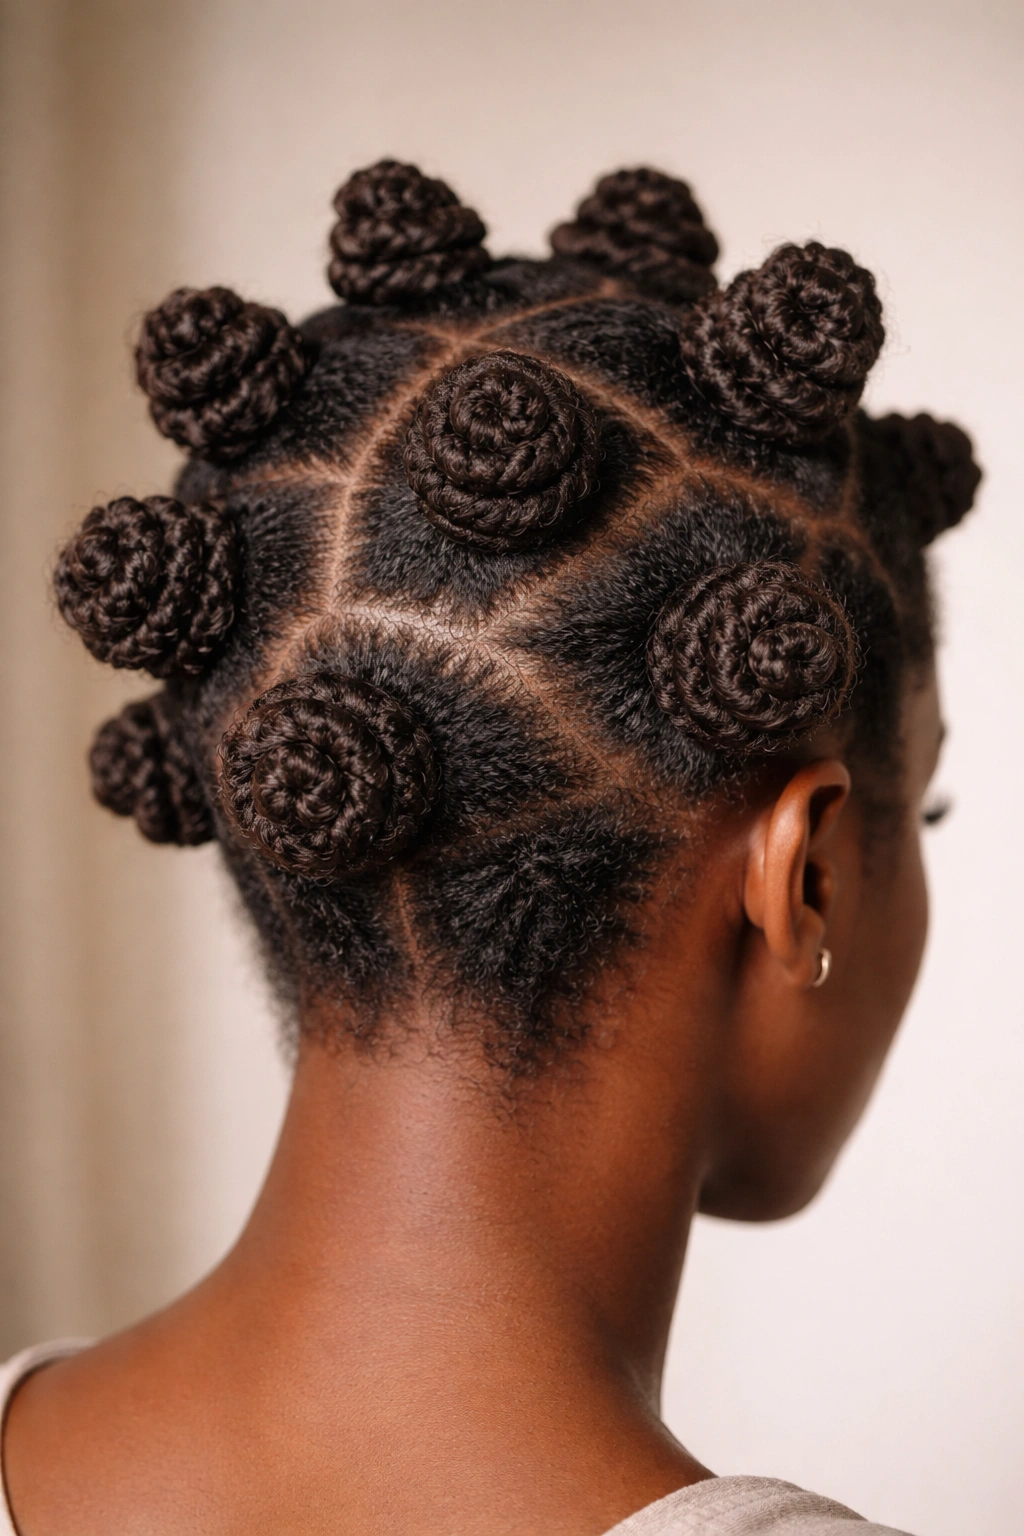
Bantu knots are a gorgeous protective style that celebrates your 4C hair’s natural texture and coil pattern. These small, spiral buns are created by twisting sections of hair tightly around themselves, then wrapping the twisted section into a knot. Bantu knots protect your ends, keep your hair moisturized, and look beautiful both as-is and when you unbraid them into a voluminous, textured style.
Bantu knots work especially well for 4C hair because your texture naturally creates the knot shape — you’re not fighting against your hair’s curl pattern, you’re working with it. The tightness and definition that Bantu knots create shows off your natural coils in the most elegant way.
Creating Bantu Knots Step-by-Step
Section your clean, damp hair into 8–12 sections (more sections create more knots and finer definition). Apply your leave-in conditioner and styling product to each section, then two-strand twist that section from root to end, keeping tension as you twist. Once you’ve twisted the entire section, wrap the twisted strand around itself to create a small bun or coil, then secure it with a bobby pin or hair clip if needed. Leave the knots in for 24–48 hours while they set.
Wearing Bantu Knots Two Ways
- As is: Wear the knots for 2–3 days as a complete style — they look neat, intentional, and protective
- Unbraided for texture: Unbraid the knots on day 3 or 4 to reveal beautifully defined, voluminous waves and coils that look gorgeous for another 3–5 days
Bantu Knot Care and Maintenance
- Moisturizing: Spray the knots lightly every 2–3 days with water and a light moisturizer
- Sleep protection: Wrap in a silk scarf or sleep on a silk pillowcase to keep knots neat and prevent frizz
- Longevity: Wear for 1–2 weeks total (3–4 days as knots, then 3–5 days unbraid)
- Unbraid technique: Unbraid from the bottom up very gently to avoid frizzing
Insider note: Bantu knots create slightly different texture than a twist out because of the tightness of the knot itself. If you want more defined, separated coils, try them. If you prefer looser waves, a twist out might be your better option.
8. Crochet Braids and Faux Locs
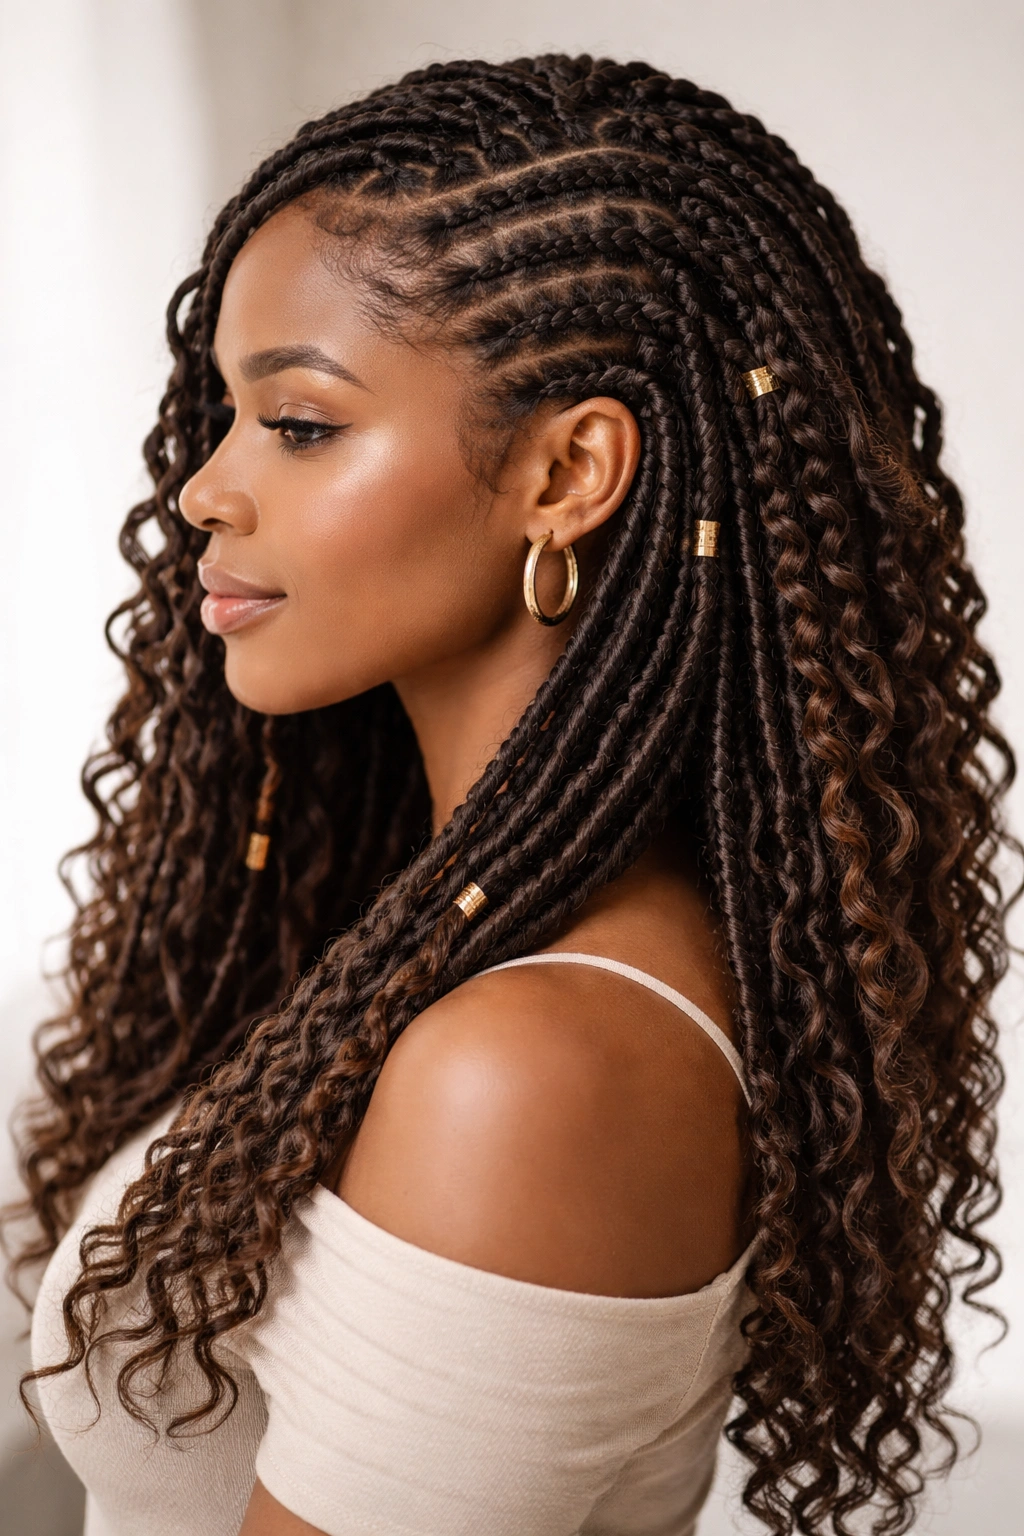
Crochet braids give you the protective-style benefits of braids with way less manipulation and tension on your hair. With crochet braids, a professional cornrows your hair into thin, neat rows, then crochets pre-made hair extensions into those rows. The result is a style that looks intentional and polished while protecting your natural hair underneath.
Faux locs are a similar concept — your natural hair is twisted or braided, then pre-made locs (usually made from synthetic hair) are crocheted or wrapped around your natural hair. Both styles protect your ends, allow your natural hair to rest and grow, and look absolutely beautiful on 4C hair. The key is finding a stylist who knows how to install these styles without creating excessive tension.
Why Crochet Styles Work for 4C Hair
Crochet braids and faux locs are gentler on your natural hair than traditional box braids because there’s less tension on your strands. The pre-made extensions do most of the visual work, so your natural hair is tucked away and protected without bearing the weight of the entire style. This means less breakage, less stress on your hairline, and healthier hair underneath.
Installation and Maintenance Essentials
- Installation: Cornrows should be tight enough to hold but not so tight you feel tension or discomfort; a stylist should never leave your hairline sore or tender
- Base care: Shampoo by gently running water through the braids; use dry shampoo between washes if needed
- Duration: Crochet styles last 4–8 weeks depending on how well you maintain them and how much new growth you have
- Takedown: Have a stylist remove them, or unravel carefully at home — never cut them out, as this risks damaging your natural hair
- Hair underneath: Your natural hair grows underneath while you’re wearing the style, which is part of the appeal
Pro tip: Ask your stylist to install the cornrows vertically (from your scalp down) rather than horizontally if you want the style to last longer and look better as your hair grows out.
9. Locs
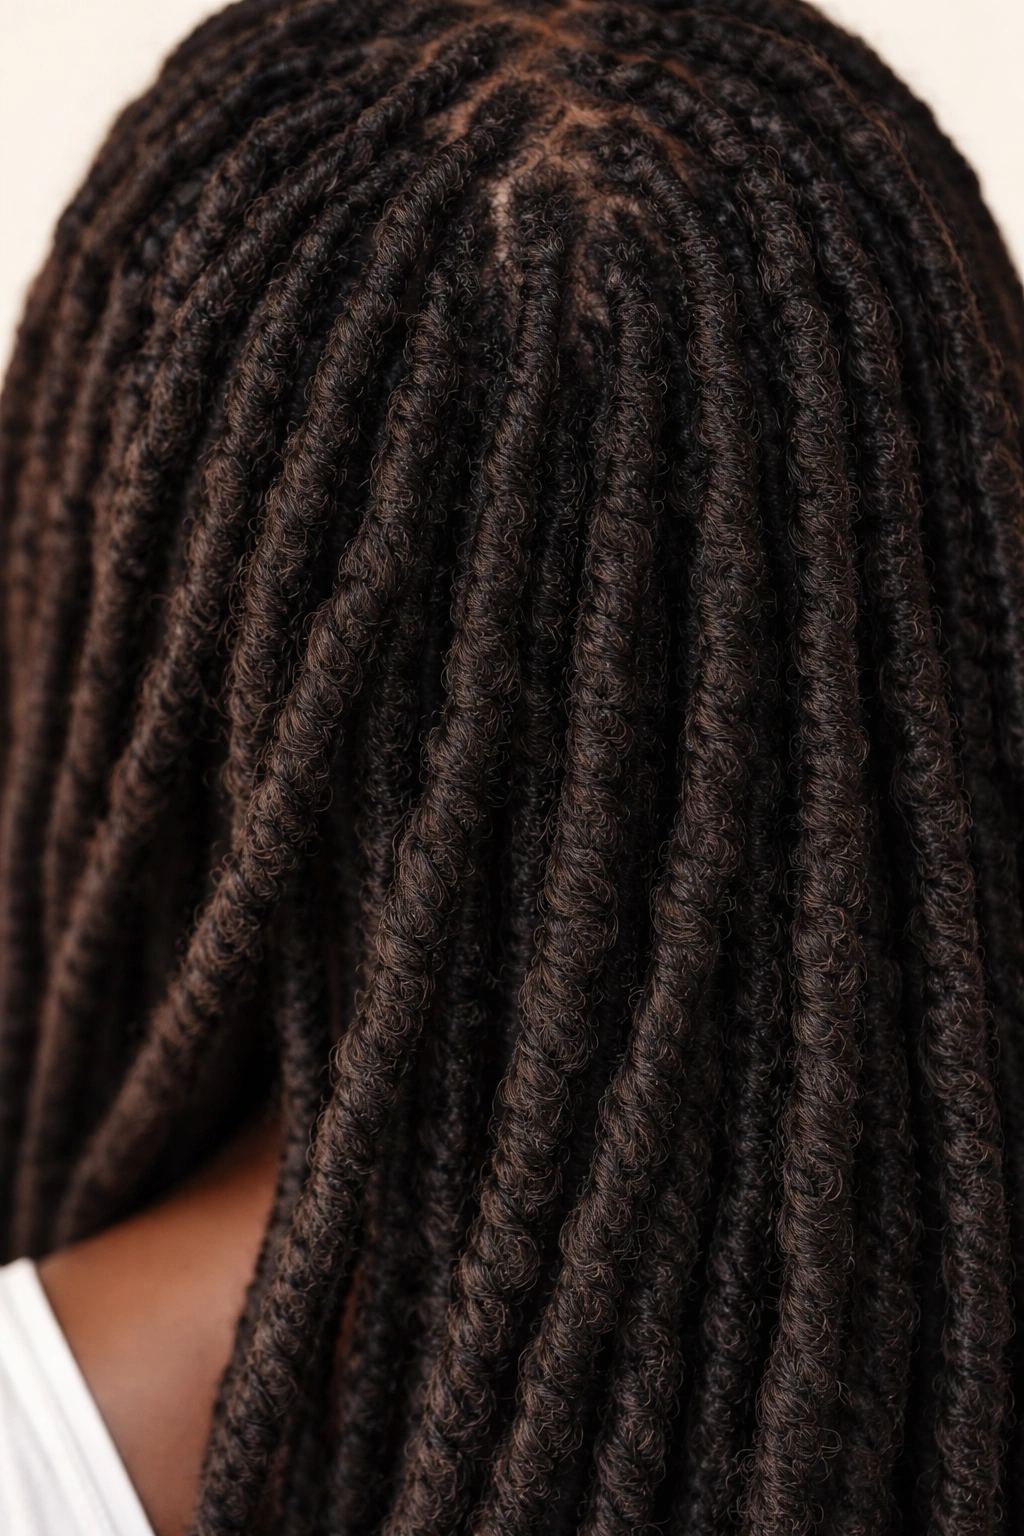
Locs are a long-term commitment, but they’re one of the most beautiful, low-maintenance protective styles available for 4C hair. Locs are created by systematically locking sections of hair so they form rope-like strands that grow continuously. With 4C hair, locs develop naturally and look gorgeous because your hair texture naturally locks and holds the coil pattern.
Starting locs requires patience — the first few months are about establishing the locs and keeping them neat as they form. Once your locs are mature (usually after 6 months to a year), they become incredibly low-maintenance. You wash them regularly, keep them moisturized, and let them grow. Many people find locs to be the most freeing hairstyle they’ve ever worn.
Starting Your Loc Journey
You have several options for starting locs: the comb coil method (using a comb to coil your hair), two-strand twists that lock over time, braids that lock, or the freeform method where you let your hair loc naturally without manipulation. With 4C hair, any of these methods works, though most people find that two-strand twists or braids are the most structured way to start and keep your new locs looking neat during the formation phase.
Locs at Different Stages
- Starter locs (0–3 months): Neat, organized, require regular maintenance to keep them separated and defined
- Baby locs (3–6 months): Coils begin to lock and hold their shape, less frequent retwisting needed
- Maturing locs (6–12 months): Hair locks completely, individual locs feel strong and formed, minimal styling needed
- Mature locs (12+ months): Completely locked, virtually no maintenance beyond regular washing and moisturizing
Locs Care and Maintenance
- Washing: Shampoo every 2–4 weeks with a residue-free shampoo; locs can take time to dry completely
- Moisturizing: Keep locs hydrated with a light oil or moisturizing spray to prevent dryness and maintain hair health
- Retwisting: Regular retwisting keeps new growth neat and locs separated during the formation phase; mature locs need retwisting far less frequently
- Dreading cream or gel: Many people use these to help locs lock faster and stay neat
Worth knowing: Locs are permanent until you cut them off or comb them out (which can damage hair), so only start locs if you’re genuinely committed to the style for at least a year or more.
10. Chunky Twists
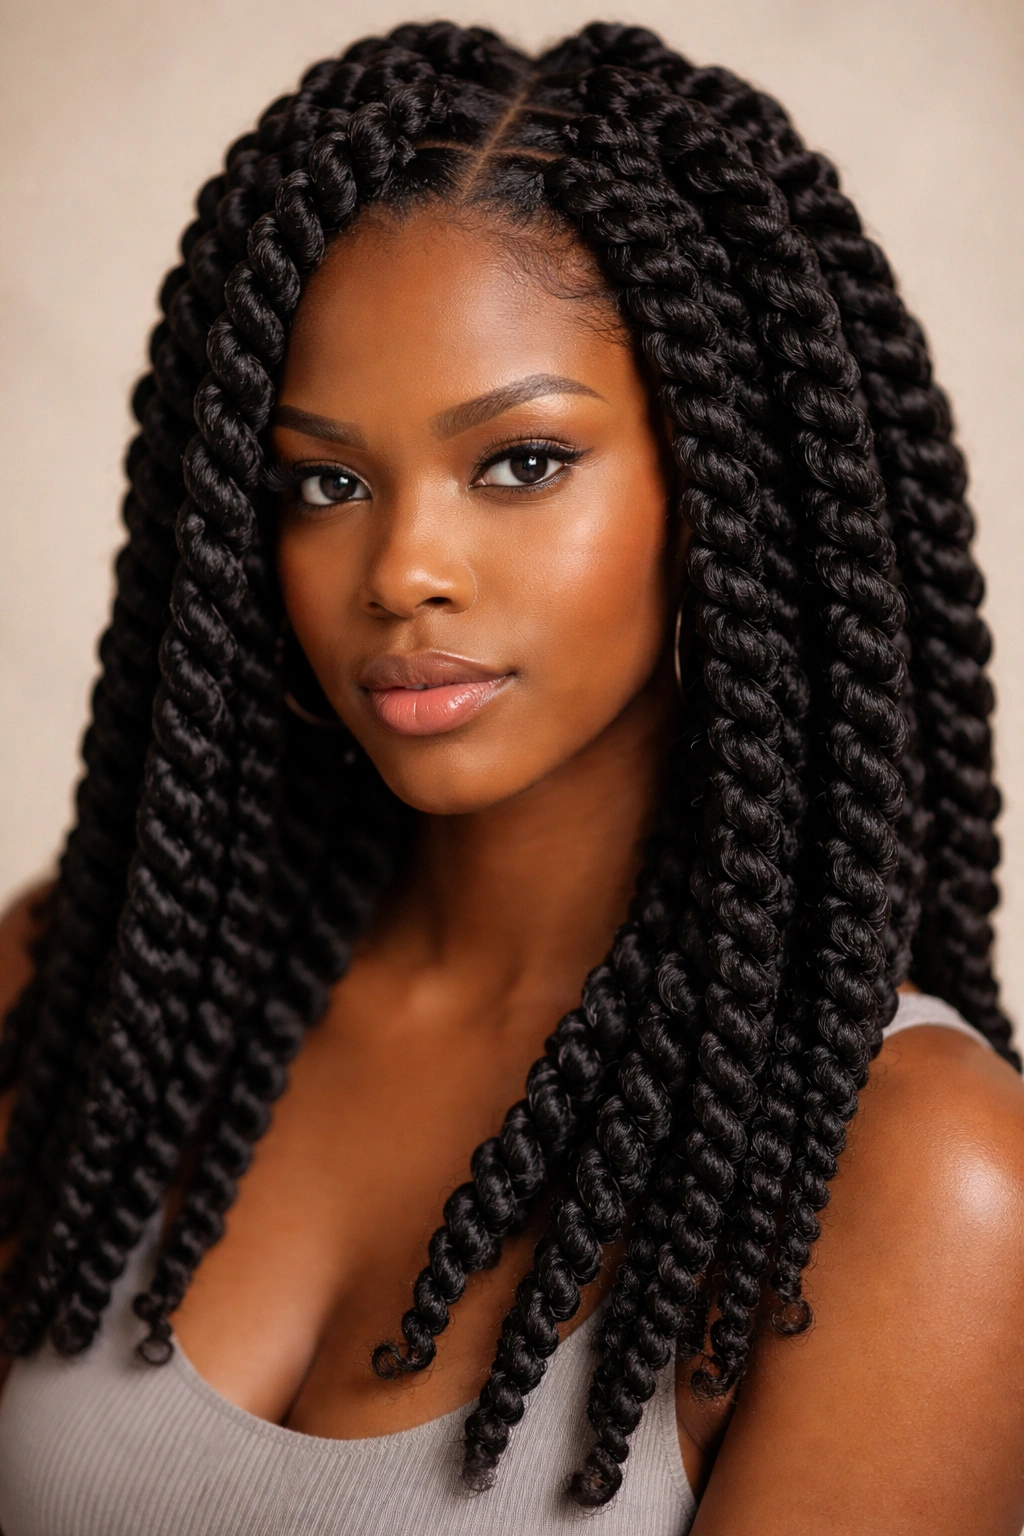
Chunky twists are thicker, bolder two-strand twists that cover your head quickly and create a striking visual effect. Because they’re thicker, chunky twists are faster to install than thin twists, last just as long, and create a more sculptural, artistic look. They also allow your scalp to breathe better between installations because there’s more space between twists.
With 4C hair, chunky twists show off your natural coil pattern beautifully. The twists compress and coil around themselves, creating these gorgeous, textured strands that look polished and intentional. Chunky twists are perfect if you love the protective-style benefits of twists but don’t want to spend 6 hours installing them.
Installation and Styling Chunky Twists
Divide your head into 6–10 sections instead of the 12–20 sections you’d use for medium twists. Apply your leave-in conditioner and styling product to damp hair in each section, then two-strand twist from root to end. Keep your tension firm at the roots so the twists hold their shape. The thicker your twists are, the faster they’ll installation go — but make sure your sections are still even so the style looks balanced.
Chunky Twist Variations
- Chunky twists with beads: Add wooden or metal beads to the ends for a bold, eye-catching detail
- Chunky twists pinned up: Twist your entire head, then pin the twists into a high bun or crown style for a completely different look
- Two-tone chunky twists: Twist with two different colors of pre-stretched hair for a bold, creative style
- Chunky twists with accessory: Add a headwrap or scarf to the top for a polished, intentional finish
Timeline and Maintenance
- Installation time: 2–3 hours instead of 5–7 hours for thinner twists
- Wear duration: 2–4 weeks depending on how well you maintain them
- Moisture: Spray with water and light cream every 3–4 days
- Styling options: Wear down, or pin up into various updos
Pro tip: Chunky twists look especially stunning when you use a subtle color with your natural hair — copper tones, deep reds, or rich browns create beautiful contrast without being overwhelming.
11. Twisted Crown or Halo Braid
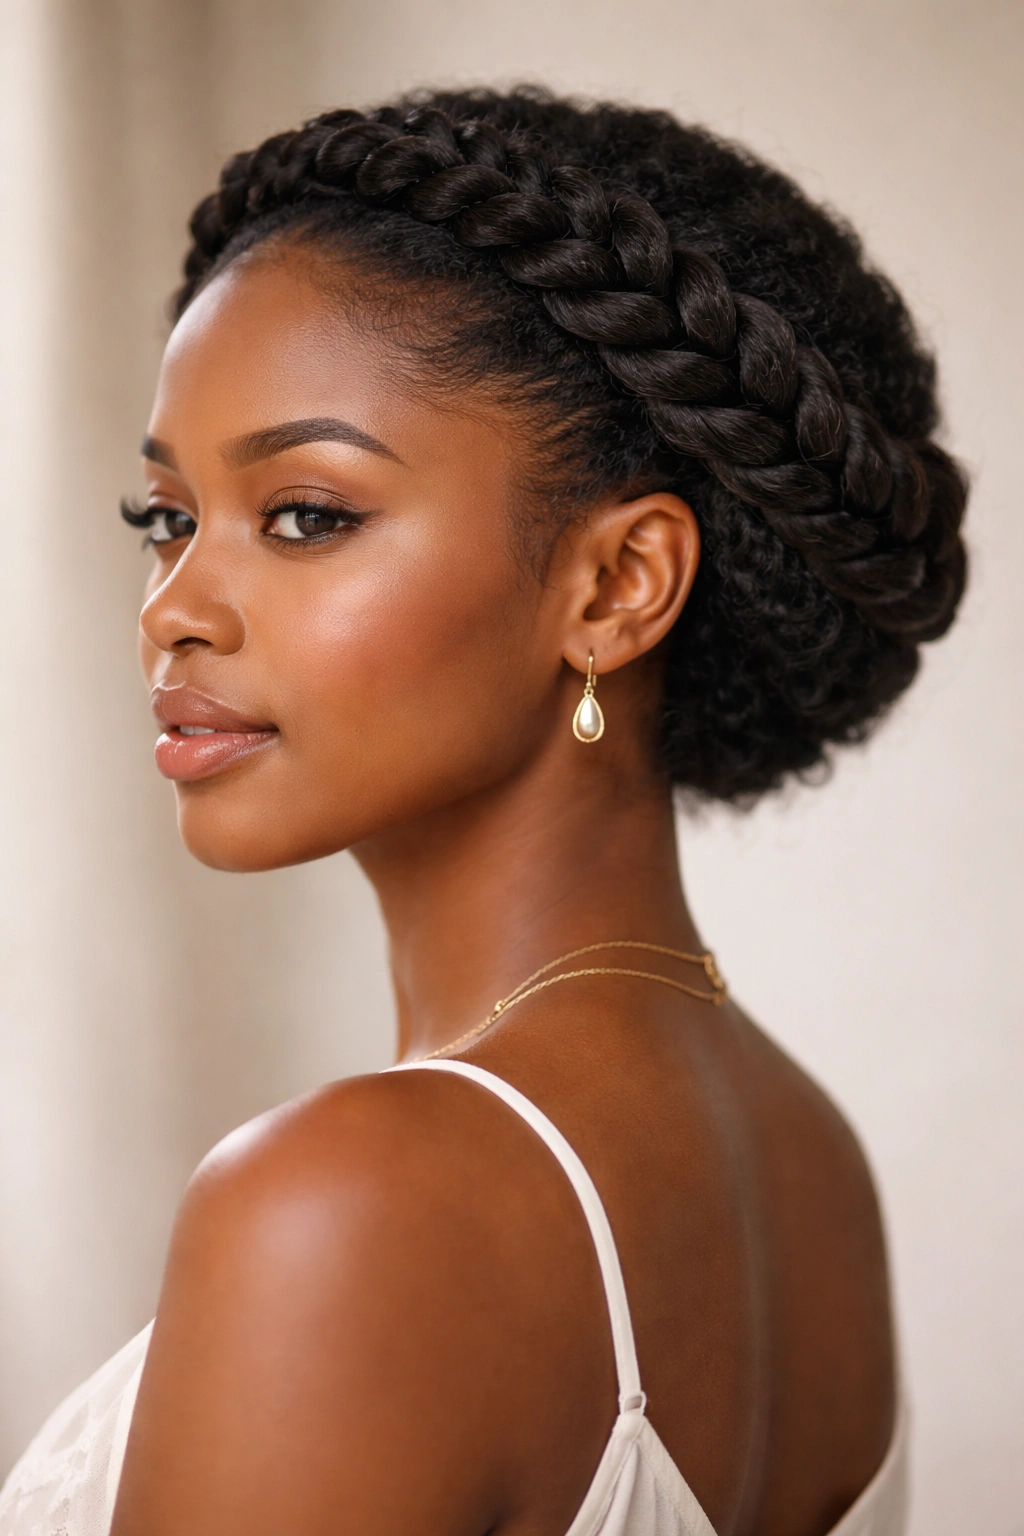
A twisted crown or halo braid is an elegant, romantic style that’s perfect for special occasions or when you want to look polished without spending hours on installation. This style involves creating twists around the perimeter of your head and pinning them into place to form a crown or halo effect. It’s stunningly beautiful on 4C hair because your coils create natural texture and depth.
This style works on freshly washed hair or on hair that’s a few days old. If your hair is a few days old, it’ll be slightly less frizzy and will hold the twisted crown shape better. The twists themselves protect your ends by tucking them away, and the style looks intentional and elegant without being overdone.
Creating a Twisted Crown
Start with a section of hair at one side of your head, near your temple. Create a two-strand twist that moves across your head toward the other side, tucking the twist in toward your scalp so it forms a crown effect. Once you’ve completed the twist across, pin the end of the twist underneath the other side so it’s hidden. Add a second layer of twists if you want more texture and detail, or stick with one twisted crown for a cleaner look.
Styling and Variations
- Single twisted crown: One twist that goes around your head like a crown
- Double twisted crown: Two twists that intersect or sit next to each other for more drama
- Twisted crown with a low bun: Complete the crown, then gather the rest of your hair into a bun at the nape of your neck
- Twisted crown with loose waves: Leave the back of your hair down and untwisted for a softer, more romantic look
Insider note: This style looks especially beautiful when you have two-toned hair or when you use different colored extensions for the twists — it creates depth and visual interest.
12. Wash-and-Wear Braid Out
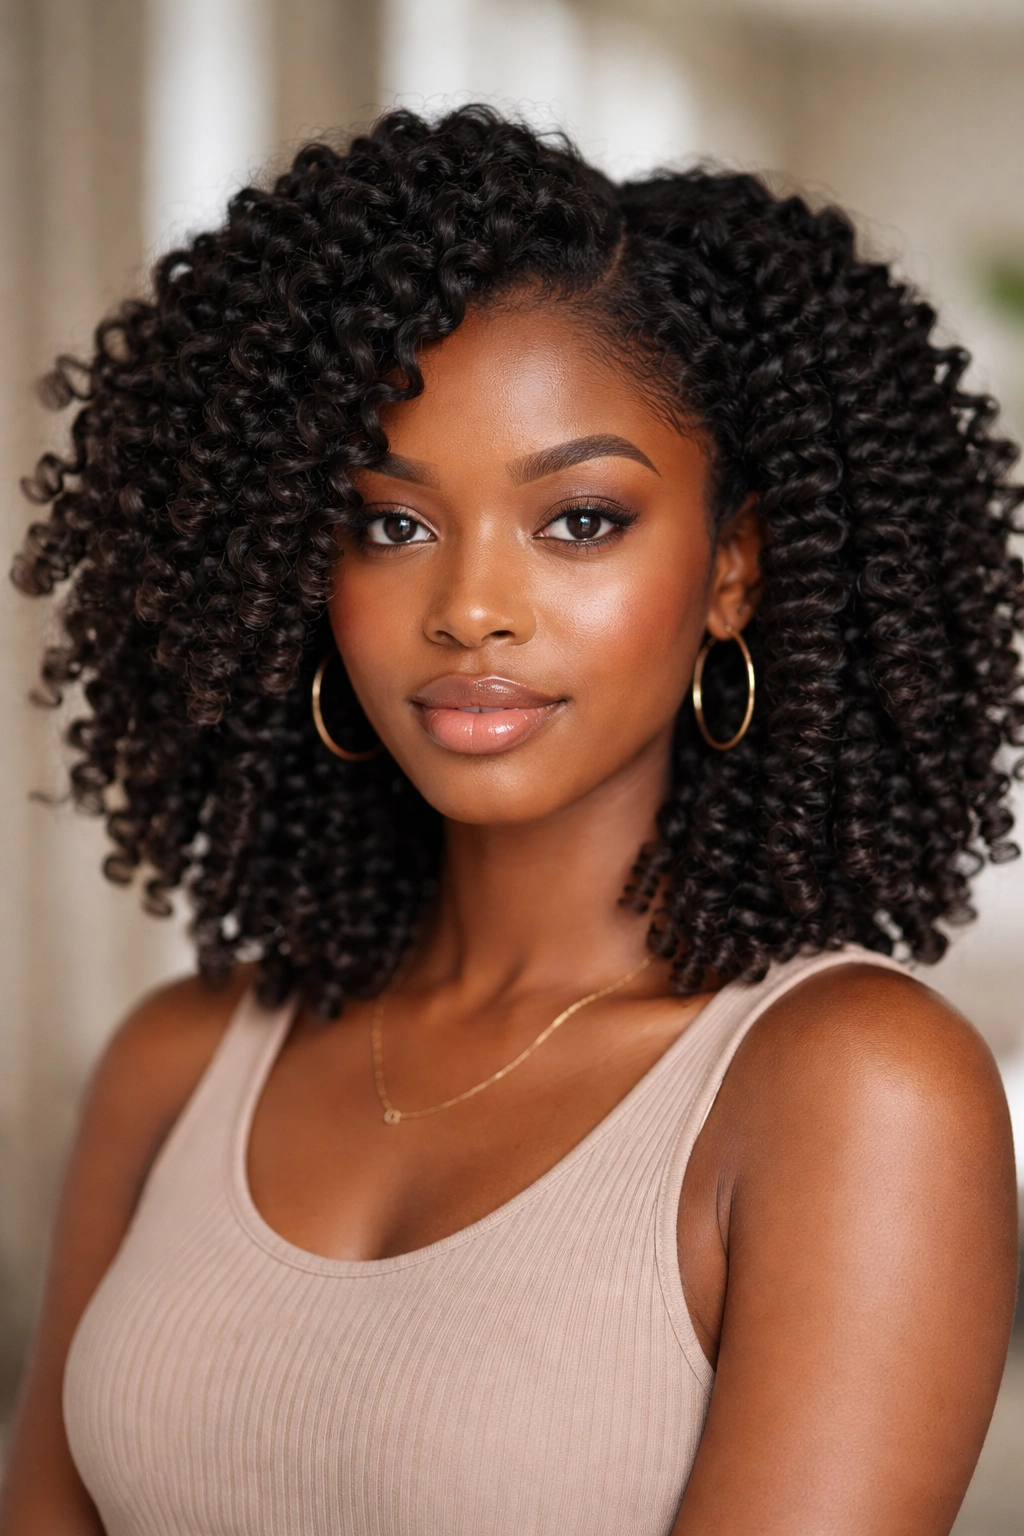
A braid out is similar to a twist out, but you’re using cornrows instead of two-strand twists, which creates a different, blockier wave pattern through your hair. Braid outs are perfect for 4C hair because cornrows protect your hair while it sets, and the resulting coil pattern is absolutely gorgeous — crisp, defined, and voluminous.
With 4C hair, braid outs create these beautiful, chunky waves and coils that last for days. You can wear the braids for 2–3 days, then unbraid for 4–5 days of gorgeous texture. The best part? Once you unbraid, your hair looks and feels fuller, and you get a completely different hairstyle without any additional styling required.
Creating a Braid Out
Create cornrows in the direction you want your waves to go — typically away from your face or in a simple pattern across your head. Use a moisturizing edge control and a defining product as you braid. Leave the braids in for at least 24 hours (48 is better) so they fully set, then unbraid slowly and gently from the bottom up. Your coils will be crisp and defined immediately after unbraiding; the style softens slightly over the next few days.
Braid Out Success Tips
- Moisture is key: Apply plenty of leave-in conditioner before you start braiding
- Section size matters: Thicker braids create blockier, bolder waves; thinner braids create tighter, more defined coils
- Letting it fully set: Rushing the process means frizz; 48 hours is ideal
- Unbraid carefully: Slow, gentle unbraiding prevents frizz and breakage
- Product choice: A curl-defining gel or mousse helps set your coil pattern as the braids dry
Wearing Your Braid Out
- Days 1–2: Wear the braids as a complete style — they look neat and polished
- Days 3–5: Unbraid for gorgeous, textured waves and coils that look full and voluminous
- Days 5–7: The style softens further; add some moisture and a light gel to refresh if desired
Pro tip: The tighter your braids are, the more defined and crisp your braid out will be. If you want looser, softer waves, use looser braids and looser tension as you braid.
Final Thoughts

4C hair is beautiful, versatile, and deserves styles that celebrate what makes it unique rather than try to change it. Every style in this guide works with your natural texture, protects your ends, and keeps your hair healthy while looking absolutely gorgeous. Whether you’re drawn to the simplicity of a wash and go, the elegance of a twisted crown, or the long-term commitment of locs, there’s a 4C hairstyle that matches your personality and lifestyle.
The most important thing to remember is that healthy 4C hair starts with consistent moisture, gentle handling, and styles that don’t create unnecessary tension. Each of these styles — whether it’s a quick puff or a more involved installation — allows your hair to stay hydrated, protected, and thriving. Experiment, find what works for your hair and your schedule, and don’t be afraid to switch things up. Your 4C hair deserves to be celebrated, and these styles are just the beginning of what’s possible.
