



The versatility of afro curly hair is genuinely one of its greatest strengths—and if you’ve been scrolling through endless styling options feeling overwhelmed by the possibilities, you’re not alone. The truth is that curly and coily hair textures have an incredible range of styling potential that straight hair simply doesn’t offer. Whether you’re looking for a low-maintenance everyday style that celebrates your natural curl pattern, a protective style that keeps your hair tucked away while it grows, or something bold and eye-catching for a special occasion, there’s a legitimate option for nearly every situation, mood, and lifestyle.
The key to finding styles that actually work for your hair is understanding what each technique does—how it shapes your curls, what level of styling effort it requires, how long it typically lasts, and which styles work best for different curl patterns and hair densities. A high-puff might look dramatically different on someone with fine, delicate curls versus someone with thick, densely coiled hair, and a style that takes 20 minutes to create for one person might take 90 minutes for another. That’s not a failure on your part—it’s just the reality of working with textured hair. Once you understand the mechanics of each style, you can confidently adapt them to suit your specific hair type, lifestyle, and the amount of time you’re willing to invest.
Let’s explore 14 of the most popular, wearable, and genuinely beautiful styling options for afro curly hair, along with exactly what you need to know to execute each one with confidence.
1. Twist-Outs
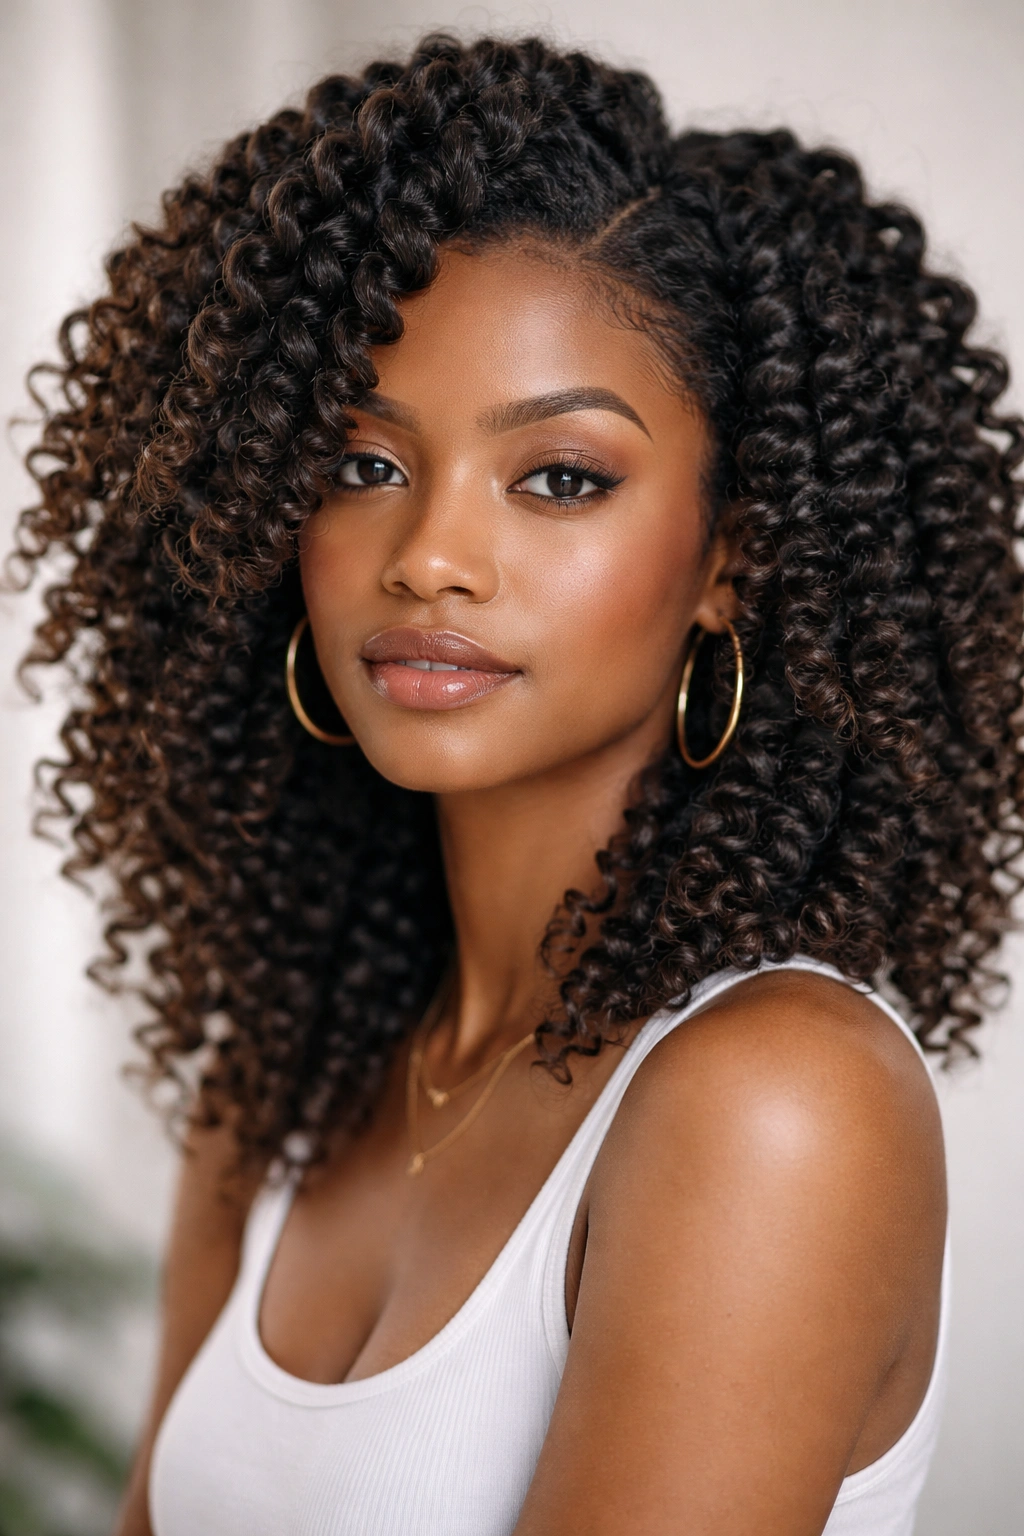
A twist-out is the art of creating defined waves and curls by sectioning damp hair, twisting each section, and then unraveling those twists once your hair has dried completely. The result is a gorgeous, voluminous style with a wavy or crimped texture that looks intentional and polished while still feeling natural. This style works beautifully on curly, coily, and densely textured hair, and the results vary depending on how tightly you twist, what products you use, and how you unravel each twist.
Why Twist-Outs Deliver Such Beautiful Definition
The mechanical action of twisting creates natural wave patterns that mimic a looser curl pattern while still respecting your hair’s actual texture. Unlike some styling methods that fight against your hair’s natural curl structure, twist-outs actually enhance it and work with your curl pattern rather than against it. When you twist two strands of hair together and allow them to dry in that twisted formation, the hair sets into that shape, which means the resulting wave pattern will hold beautifully even without additional heat styling.
Twist-Out Steps and Success Tips
- Section your hair into 4 to 8 sections depending on your hair density and the tightness of curl you want—more sections create more defined curls, while fewer sections create larger waves
- Apply a styling cream or mousse to each section before twisting to enhance definition and frizz control; gel works well if you like more hold, but lighter products create softer waves
- Twist each section by taking two strands and wrapping them around each other from root to tip—you can twist tightly for maximum definition or loosely for softer waves
- Allow your hair to dry completely before unraveling, which typically takes 6-12 hours depending on your hair thickness and whether you diffuse-dry or air-dry
- Unravel gently by loosening each twist slowly rather than unraveling it completely, which helps prevent frizz and maintains better curl definition
- Fluff and shape your waves once fully dry to add volume at the roots and create movement throughout your style
Pro tip: Twist-outs look even better on the second or third day when the definition has fully set, so plan this style for when you want it to last you through a few days of wear.
2. Bantu Knots
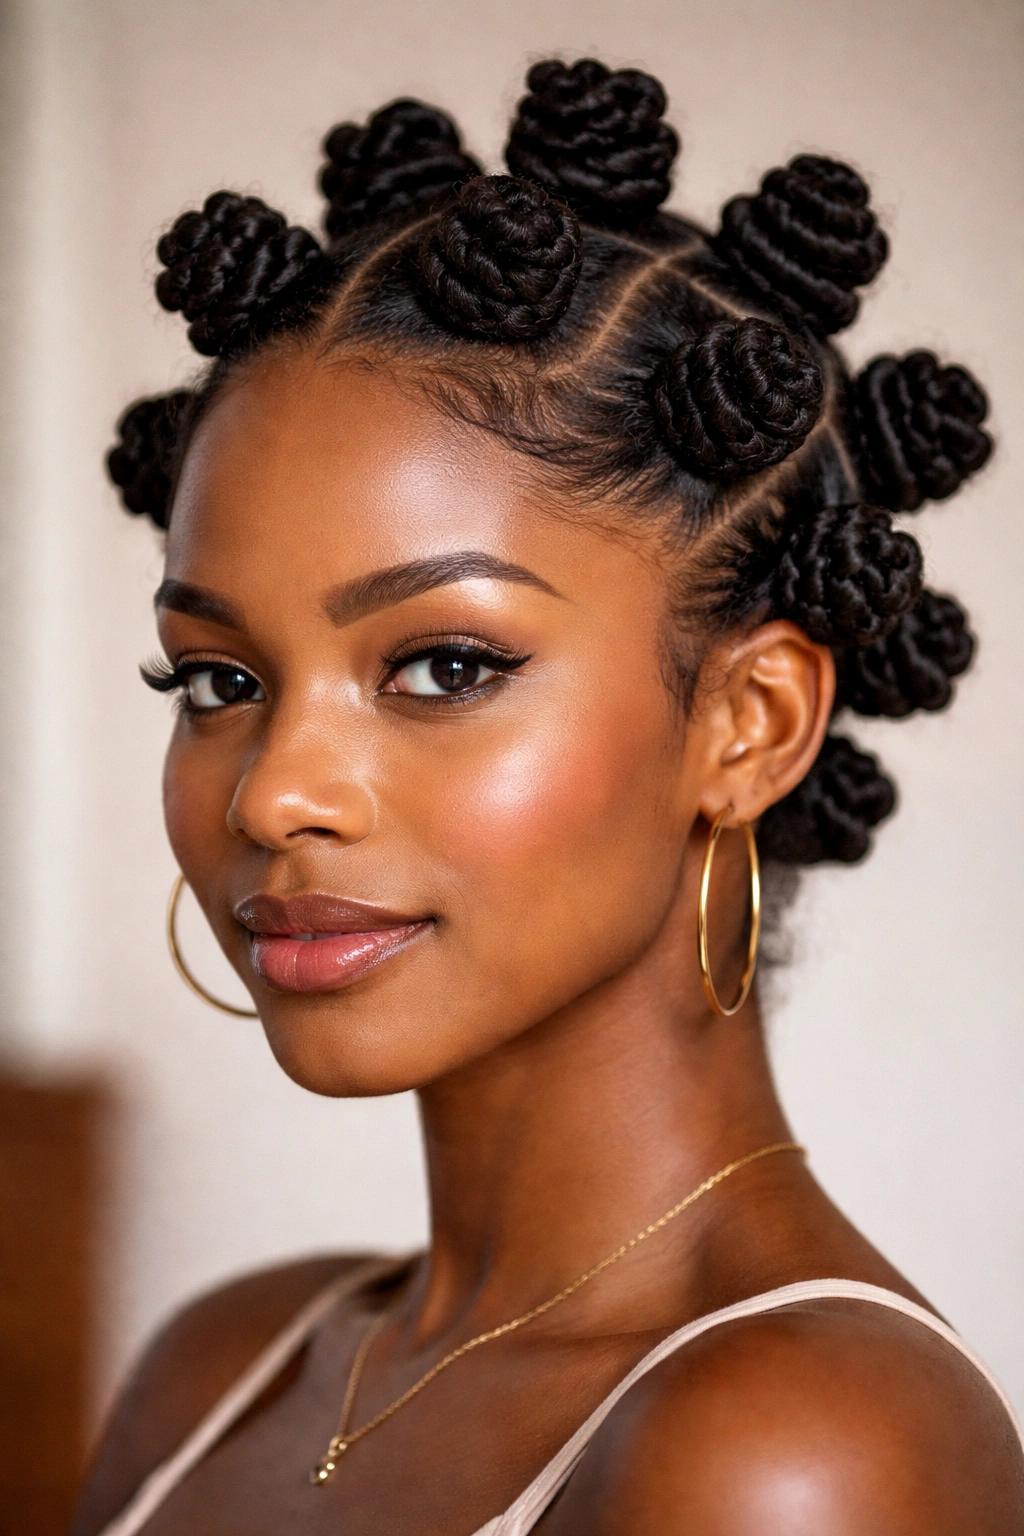
Bantu knots are a beautiful protective style that originated in Southern Africa and have become a beloved way to create texture, define curls, and protect hair from daily manipulation. Each knot is created by sectioning hair, twisting it, and then wrapping that twist around itself to form a coiled knot that sits close to the scalp. They’re stunning to wear as-is, but they’re also brilliant for creating bantu knot-outs—a textured style that you create by unraveling the knots once your hair is dry.
The Beauty of Bantu Knots for Curl Definition
Bantu knots are genuinely clever because they protect your ends while you sleep or go about your day, they create a stunning textured look immediately, and they set your curl pattern beautifully for wear-and-go styling. The protective element matters more than people often realize—your curl pattern stays intact because the knots keep each section contained and prevent the friction that normally causes frizz and undefined curls. This is especially valuable if you’re trying to maintain defined curls over multiple days without restyling.
Getting Bantu Knots Right
- Divide hair into 6 to 12 sections depending on how bold you want each knot to appear; larger sections create more visible, sculptural knots, while smaller sections create a more densely textured appearance
- Apply styling cream or gel to each section to enhance curl definition and keep the knots neat and polished throughout wear
- Twist each section from root to tip, then wrap the twist around itself like a cinnamon roll, securing the end by tucking it underneath or using a small bobby pin to hold it in place
- Dry your knots completely before undoing them—overnight is ideal, or use a diffuser attachment on your blow dryer to speed up the process
- Unravel each knot gently by loosening the twist slowly rather than unwinding it completely, which maintains maximum definition in your resulting texture
- Fluff your texture with your fingers once all knots are unraveled, scrunching gently to enhance volume and separation
Worth knowing: Bantu knots can last 7-10 days if you keep them moisturized and refresh them every few days, making them an excellent protective style option for people trying to stretch their styling time.
3. High-Puff
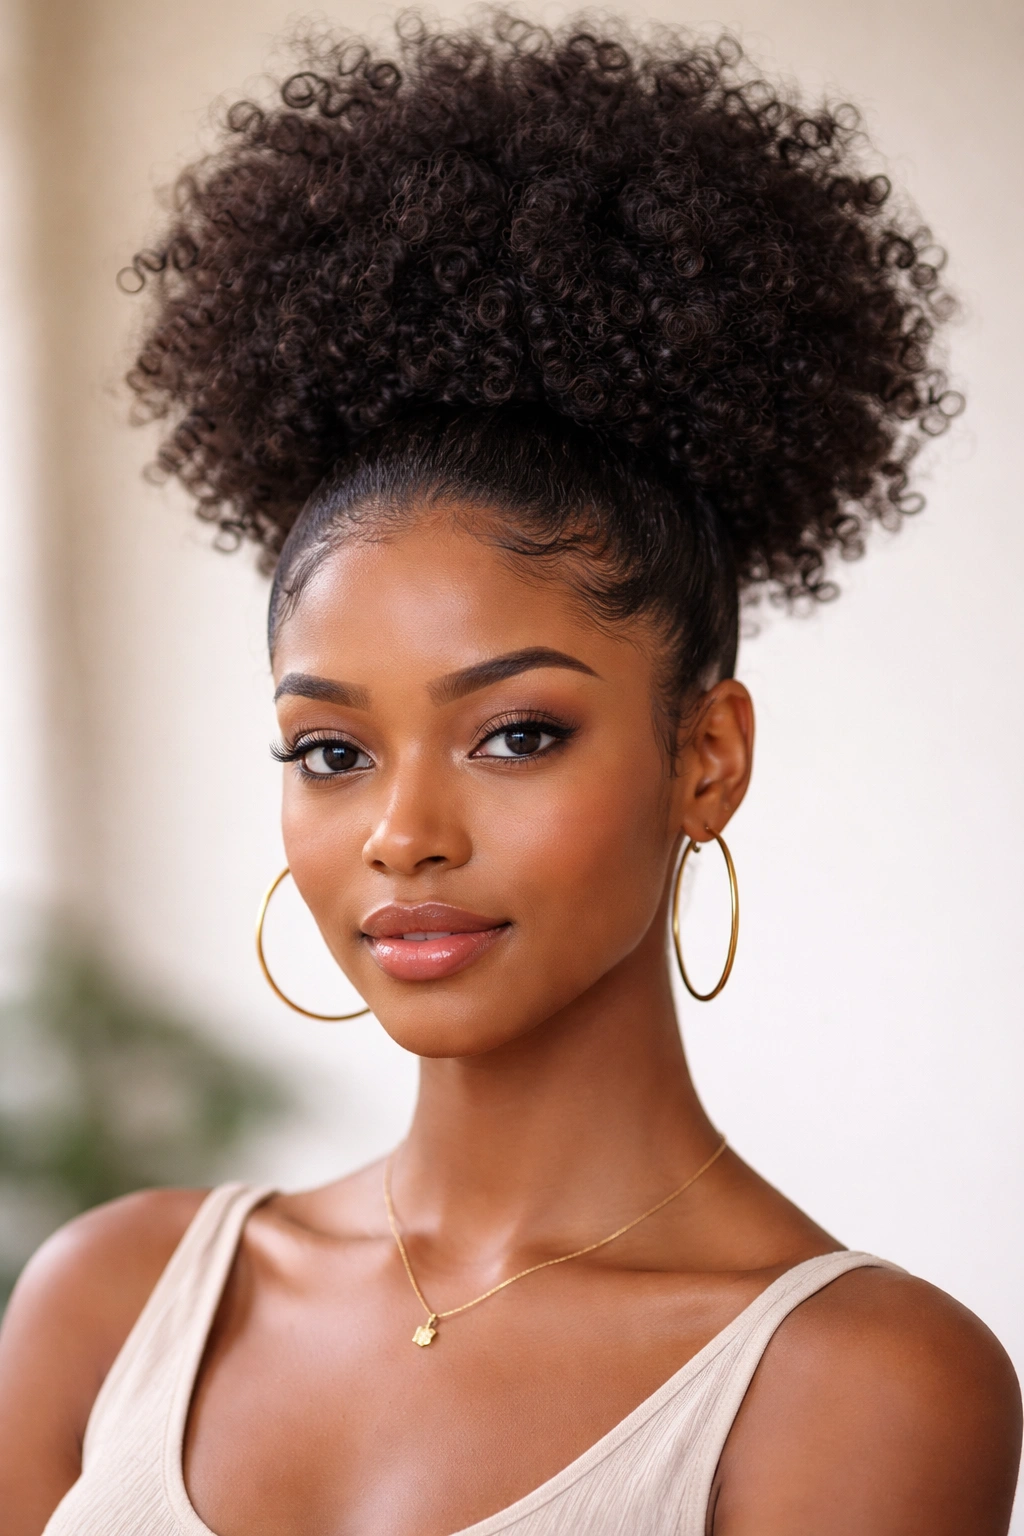
A high-puff is perhaps the most instantly gratifying hairstyle for afro curly hair—it’s a sleek or textured ponytail positioned high on the crown that celebrates your hair’s volume and natural beauty. The genius of a high-puff is its simplicity: you’re essentially gathering your hair into a ponytail, but the way you position it, the products you use, and whether you smooth it or keep it textured can completely change the vibe. It can look sporty and casual, polished and professional, or bold and editorial depending on your styling choices.
Why High-Puffs Are Effortlessly Chic
A high-puff works because it frames your face beautifully, shows off your natural curl texture or style, and takes maybe five minutes to create once you understand the basic technique. It’s one of the few styles that actually looks better when your hair has texture and volume—thinning your hair down defeats the entire purpose. The height of the ponytail matters tremendously for the overall look; positioning it higher on your crown creates a more youthful, bold energy, while placing it slightly lower gives a more refined feel.
High-Puff Styling Steps
- Determine your ponytail position by imagining a line from the top of your ears straight up—this is where a high-puff typically sits, though you can adjust based on your face shape and personal preference
- Brush your hair smoothly if you want a sleek, polished look, or leave it textured if you prefer a more relaxed vibe—both are equally valid
- Gather your hair into a ponytail using a covered elastic that won’t snag your curls; aim for gathering hair at your crown height rather than the very tippy-top to avoid putting excessive tension on your edges
- Smooth your edges with edge control or a light gel if you want definition, or leave them natural and wavy depending on your style preference
- Fluff your puff by gently separating the sections of hair within your ponytail to add volume and shape—don’t be shy about this step, as fluffing creates the dimensional, full look that makes a high-puff so striking
- Add optional accessories like a hair clip, scarf, or cuff if you want to dress it up
Pro tip: Creating a high-puff the day after you style your hair (rather than immediately after washing) gives you softer, more defined curls at the top, which photographs beautifully and looks more intentional.
4. Box Braids
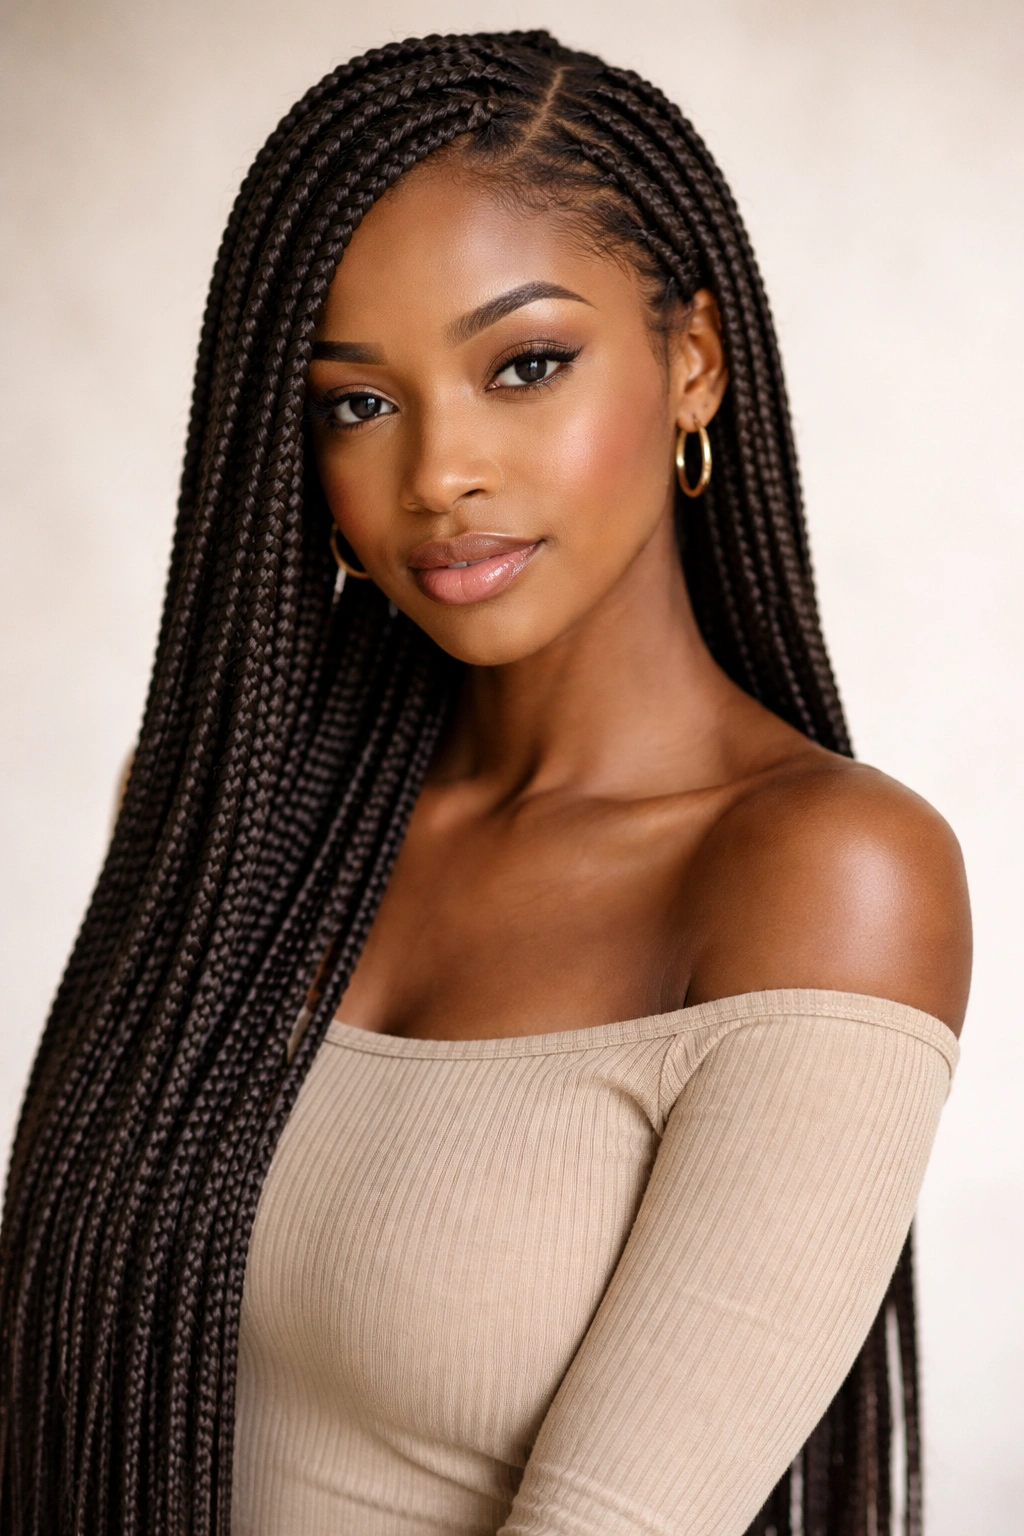
Box braids are a timeless protective style where your natural hair is divided into square sections and each section is braided together with synthetic hair extensions, creating long, neat braids that can last 4-8 weeks. They’re protective because your ends are tucked away and your natural hair isn’t experiencing daily manipulation or friction against fabric. Box braids work on most curl patterns, and they offer the freedom to style your braids in dozens of ways—from buns to ponytails to half-ups to sleek high ponytails.
The Protective Power of Box Braids
Box braids allow your natural hair to rest while you experiment with a completely different aesthetic, and that rest period is genuinely valuable for hair growth and health. Because your ends are braided in and protected, they’re not accumulating damage from daily styling, washing, and manipulation. The synthetic hair also keeps your natural curls separated and moisturized within each braid, reducing frizz and keeping your curl pattern intact underneath.
Installing and Maintaining Box Braids
- Start with clean, moisturized hair that’s been blow-dried smooth or braided down for a few hours beforehand to reduce installation time and create a smooth base
- Divide your hair into box-shaped sections using clips or string to mark off each section clearly—consistent sizing makes the braids look neater and ensures even tension throughout
- Add synthetic hair extensions at your roots before braiding (this is called feed-in braiding) and braid down each section tightly but not so tight that you’re causing pain or excessive tension on your edges
- Seal the ends of each braid by dipping the last inch into hot water (or using a lighter if you’re experienced with heat) to fuse the synthetic hair ends together and prevent unraveling
- Moisturize your braids regularly by misting them with water and light oil, focusing on your scalp and roots where your natural hair is growing out
- Wash your braids gently with a diluted shampoo every 2-3 weeks, using a spray bottle to avoid loosening them, and allow them to fully air-dry to prevent mildew
Worth knowing: Box braids look progressively better as they age slightly—around week 2-3 of wear is often when they look their absolute best, with a softer, more textured appearance and slightly loosened edges that feel less severe than freshly installed braids.
5. Wash-and-Go
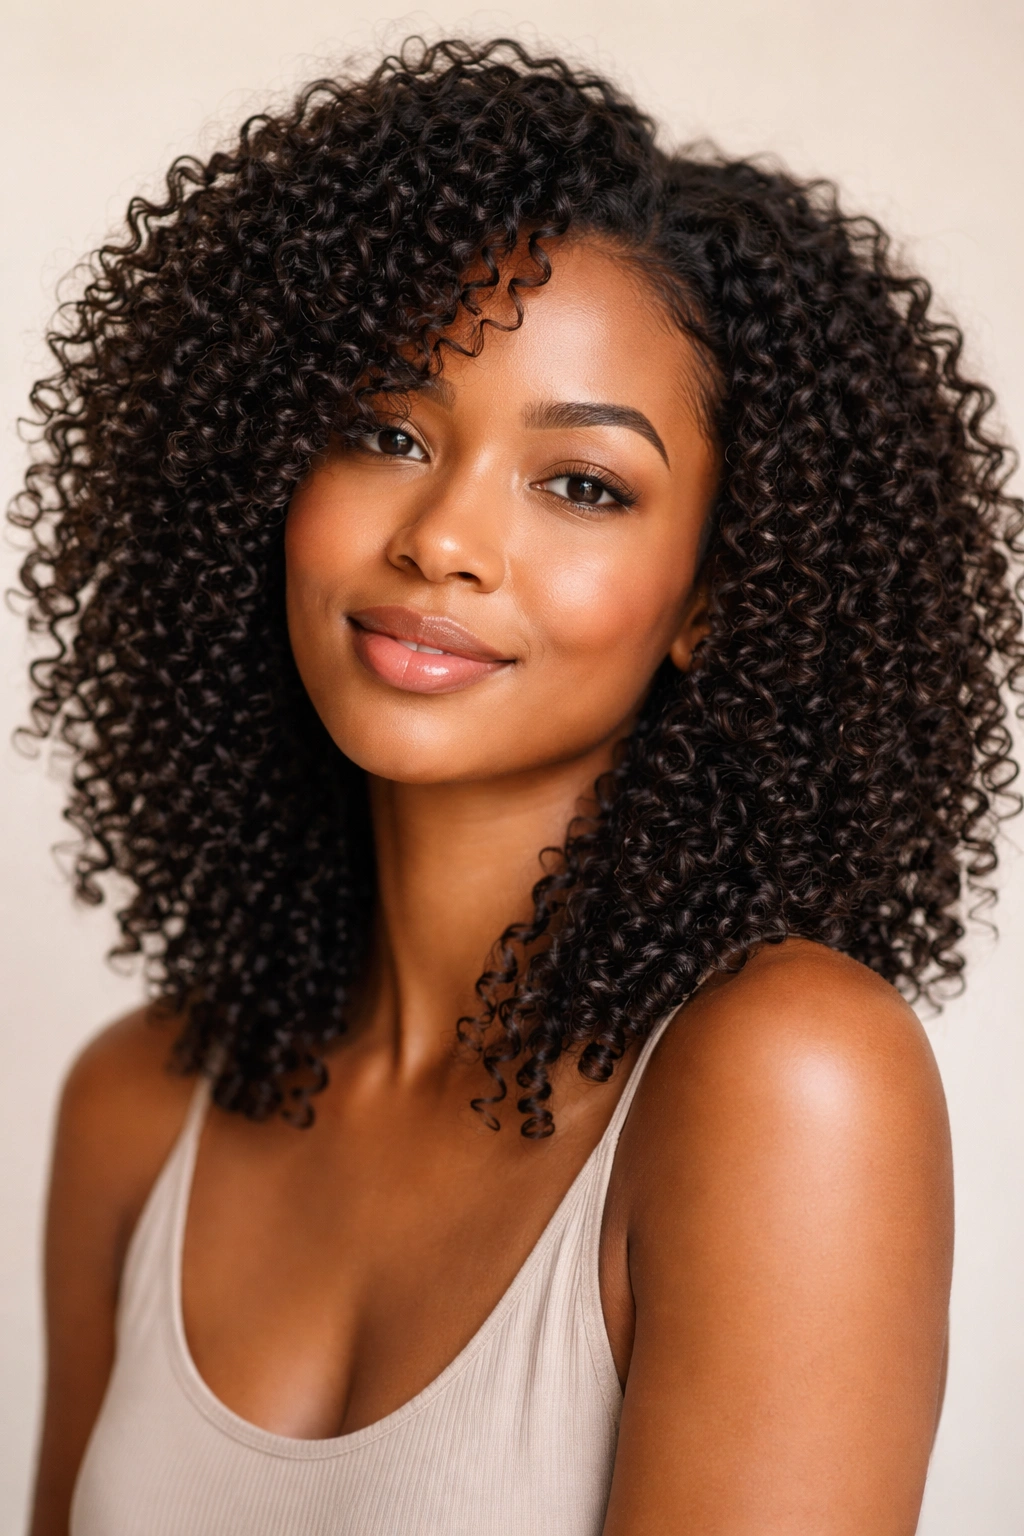
A wash-and-go is exactly what it sounds like: you wash your hair, apply styling products while your hair is still wet or damp, and allow it to air-dry or diffuse-dry without any additional manipulation or re-sectioning. The goal is to enhance your natural curl pattern and let your hair dry into its most beautiful, defined state without twisting, braiding, or other techniques that create a different texture. This style only works if your curl pattern is naturally defined and bouncy enough to hold shape, and success depends heavily on having the right products.
Why Wash-and-Gos Feel Revolutionary When They Work
When a wash-and-go actually works, it’s magic—you’re getting a genuinely beautiful, defined style with minimal effort, no heat, and complete respect for your hair’s natural texture. The catch is that wash-and-gos are finicky; they require the right balance of moisture and hold, the right products for your specific curl pattern, and often some trial and error to nail. Many people with tighter curl patterns find that wash-and-gos require more product and more drying time than they’re willing to invest, while others with looser curls find them effortless.
Wash-and-Go Product and Technique Tips
- Start with a clean scalp using clarifying shampoo or co-wash depending on your preference—a clean scalp makes a huge difference in how well products perform
- Apply leave-in conditioner to soaking wet hair, working it through from roots to ends and focusing on your mid-lengths and ends where hydration matters most
- Add a styling product (curl cream, gel, or mousse) while your hair is still very wet, scrunching upward to encourage curl formation and definition
- Optional: use a microfiber towel or cotton shirt to gently scrunch out excess water without roughing up your cuticles, which prevents frizz
- Allow your hair to air-dry or diffuse-dry without touching it or moving it around—every time you manipulate wet hair, you risk disrupting the curl pattern
- Avoid fluffing or reshaping until your hair is completely dry, at which point you can gently separate sections and add volume if needed
Pro tip: Wash-and-gos often look better on day two when the curls have fully relaxed into their final shape and softened slightly, so don’t judge your wash-and-go success on day one alone.
6. Finger Coils
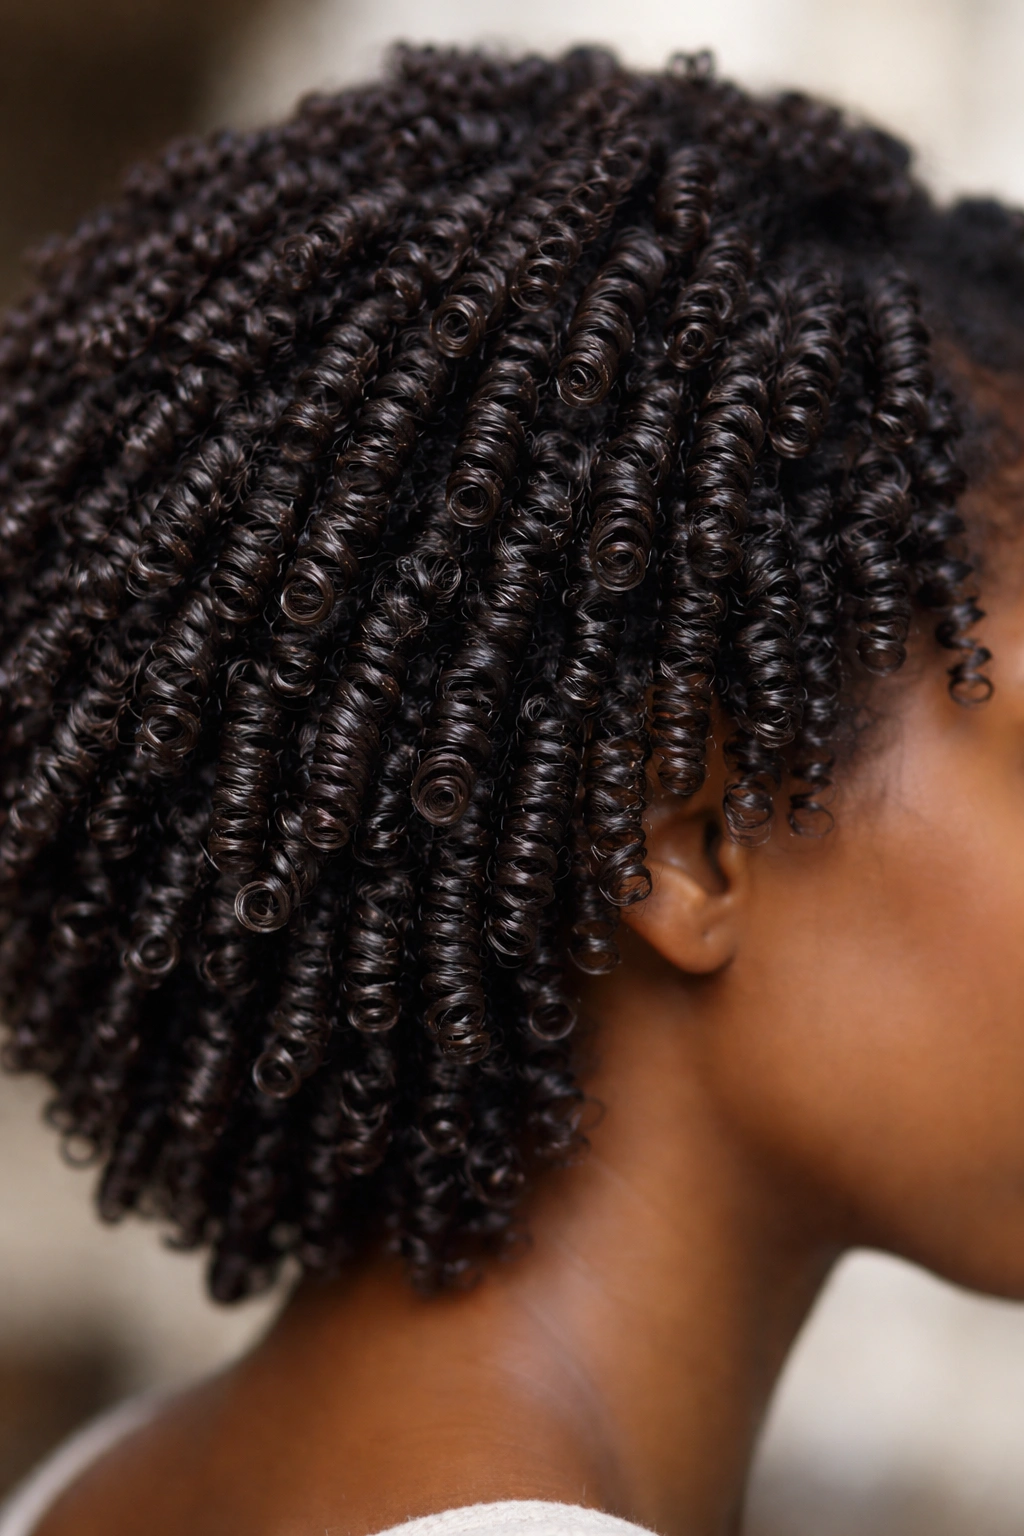
Finger coils are a stylish technique where you curl small sections of wet or damp hair around your finger, creating perfectly coiled ringlets that dry into defined, bouncy curls. Each coil is created individually by wrapping hair around your finger from root to tip, and when you release your finger, the hair holds that coiled shape as it dries. This style works beautifully on looser to medium curl patterns and creates a statement look that’s bold, intentional, and genuinely striking.
The Appeal of Finger Coils
Finger coils deliver a level of definition and control that’s hard to achieve with other methods—you’re literally shaping each curl by hand, which means you get exactly the size, tightness, and bounce you want. The styling work is meditative and hands-on, which some people love, while others find the time commitment prohibitive. The resulting style is undeniably beautiful though, with perfectly separated, shiny ringlets that catch light and show off your hair’s dimension.
Creating Finger Coils Step by Step
- Section your hair into 8 to 15 sections depending on how many coils you want and how defined you want them to be—more sections create more coils, while larger sections create fewer but chunkier coils
- Apply a styling gel or curl-defining cream to each section before coiling to enhance definition and provide hold throughout drying
- Take the first section and wrap it around your index or middle finger starting from the root, creating a tight coil that moves down the section to the tip
- Slide your finger out slowly while holding the coil in place with your other hand, allowing the hair to maintain its coiled shape as you release it
- Repeat for every section in your hair, working systematically to ensure even coverage and consistent coil size
- Allow your hair to dry completely before touching the coils, which typically takes 8-12 hours or can be accelerated using a diffuser attachment
- Gently separate your coils once they’re fully dry if you want a softer, more voluminous look, or leave them as-is for maximum definition
Worth knowing: Finger coils look the most defined on days one and two, then gradually soften and relax as you wear them, eventually merging into a beautiful, textured style that’s still stunning even after a week of wear.
7. Flat Twists
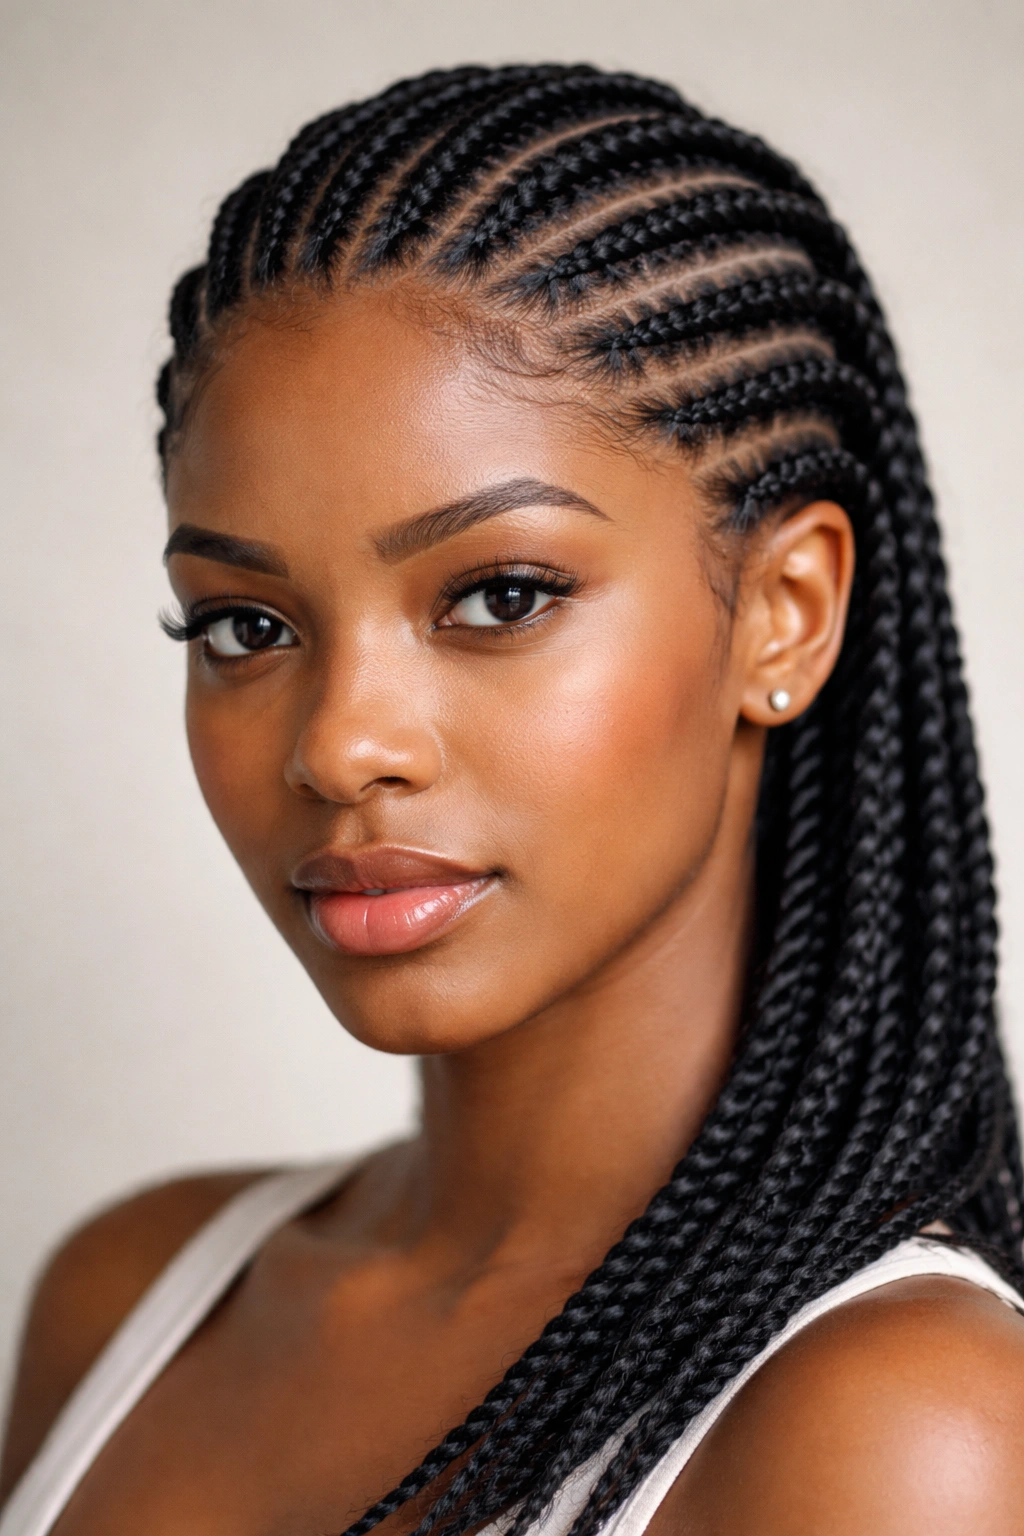
Flat twists are a sleek protective style where two strands of hair are twisted together while lying flat against your scalp, creating a braided-looking line that runs from your roots to your ends. Unlike traditional twists that hang loose, flat twists sit against your head, which makes them perfect for creating geometric patterns, updos, or a neat, pulled-together look. They’re protective, relatively quick to install compared to some other styles, and incredibly versatile in terms of styling options.
Why Flat Twists Are So Practical
Flat twists provide a beautiful visual effect while protecting your hair from daily friction and manipulation, and they’re one of the few protective styles that still feels fresh and polished enough for professional or formal settings. You can create stunning patterns with multiple flat twists, turn them into an updo, or simply leave them down for a modern, intentional look. The protection element means your ends stay tucked away and your natural curl pattern remains intact underneath each twist.
Flat Twist Installation Guide
- Section your hair into the number of twists you want—generally 2-4 for a simple look, or up to 8-10 if you want a more intricate pattern
- Apply a styling cream or light gel to your first section to enhance definition and keep the twists neat throughout wear
- Take two subsections from your first section and begin twisting them together while simultaneously moving both the twists and the new hair you’re adding upward, keeping them flat against your scalp as they progress
- Continue down each section to the ends, maintaining even tension so the twist sits neatly without becoming too tight
- Secure the end of each twist using a bobby pin or small elastic to prevent unraveling
- Optional: tuck the ends under or wrap them into a bun if you want a more finished, tucked-away look
- Maintain your twists by moisturizing your scalp regularly and refreshing them every 5-7 days if they start to loosen
Pro tip: Flat twists look sophisticated enough to wear to work, formal events, or anywhere you want a polished style, making them genuinely one of the most practical protective options for people who need professional-looking hair.
8. Locs
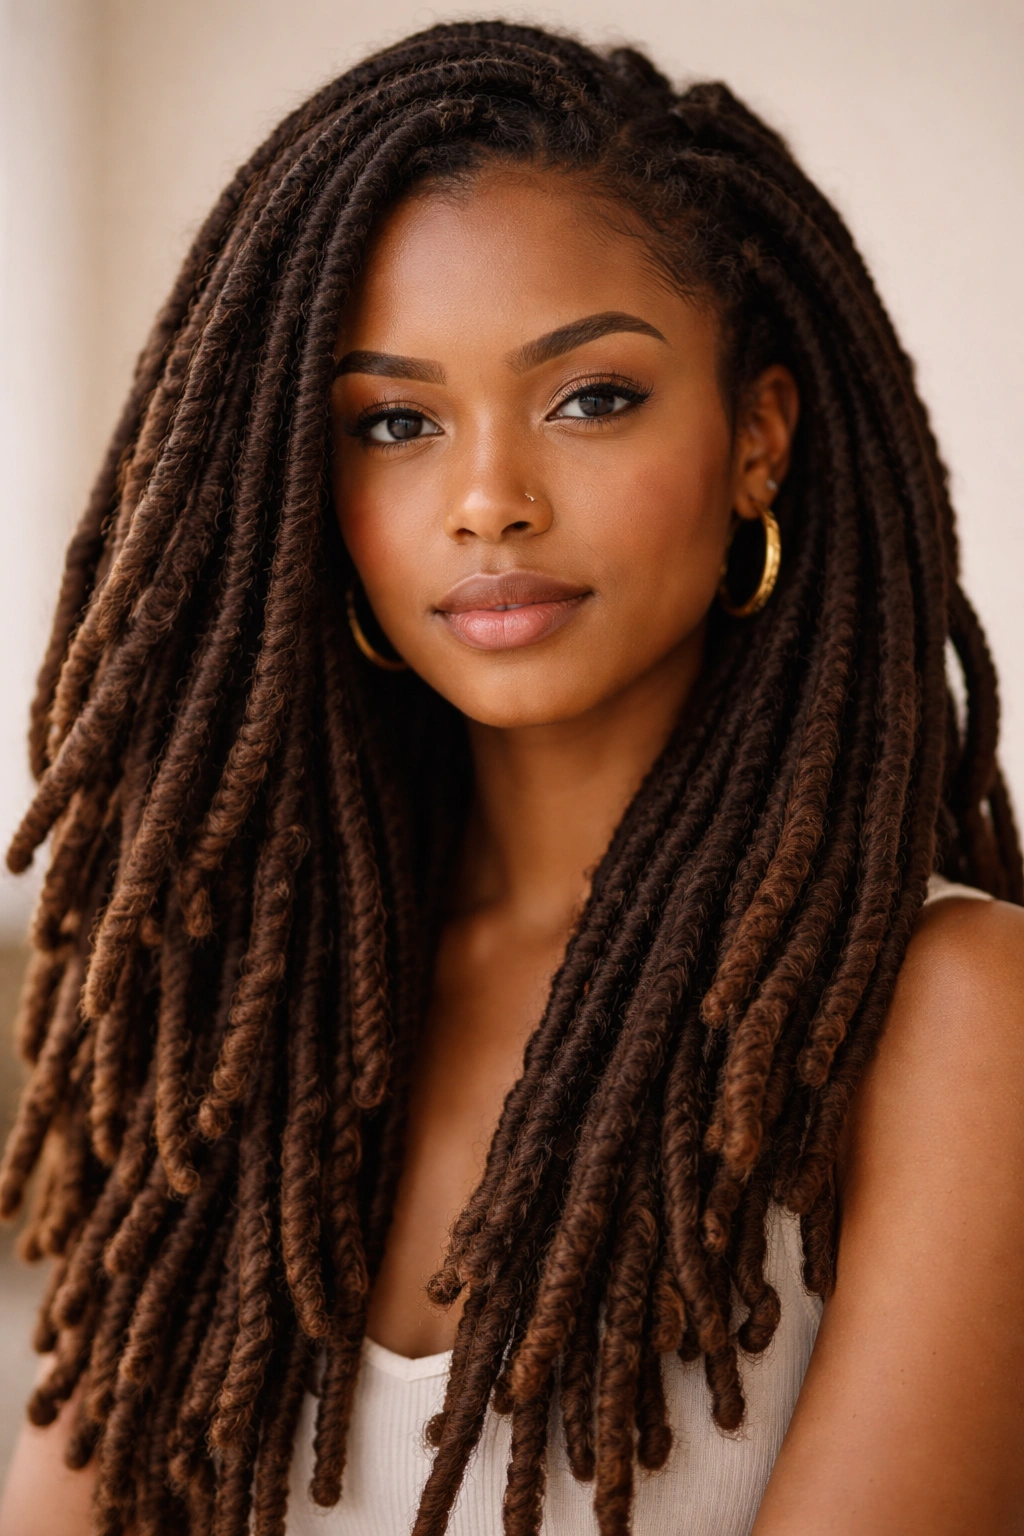
Locs (also called dreadlocks) are a long-term commitment where sections of hair are twisted, braided, or palm-rolled and then allowed to naturally mat and fuse together over time, creating permanent or semi-permanent strands. The locking process typically takes 6-12 months to complete, depending on your hair texture and maintenance practices, but once they’re mature, locs require minimal daily styling and offer incredible creative freedom in terms of styling options, colors, and accessories.
Understanding the Loc Journey
Locs aren’t an overnight style—they’re a transformation that requires patience, commitment, and a willingness to embrace your hair through different phases. During the first few months, your locs will look loose and somewhat undefined, which is the “baby loc” phase. Around month 3-6, they enter the “teenage phase” where they start locking more visibly but can still be unpredictable. By month 6-12, most locs are substantially locked and hold their shape much more consistently. The timeline varies dramatically based on your hair texture, with tighter curl patterns locking much faster than looser patterns.
Installing and Maintaining Locs
- Choose a method: Locs can be created using twist method, braiding, comb coils, or free-forming (which is letting your hair naturally mat without any particular method)
- Have them installed by a professional loc specialist who understands your specific hair texture and can advise you on realistic timelines and maintenance
- Maintain your locs using regular palm-rolling or twist-and-rip methods to keep them tidy and defined, typically every 2-4 weeks depending on your hair growth pattern
- Wash regularly using residue-free shampoo and allow your locs to fully air-dry or partially dry before styling to prevent moisture buildup and mildew
- Retwist as needed to maintain tightness at your roots, though many people intentionally let their roots become loose for a softer, more bohemian aesthetic
- Get creative with styling by creating locs updos, installing locs jewelry, incorporating color, or experimenting with the endless style possibilities locs offer
Worth knowing: Many people find that locs actually require less styling time and product investment than managing loose natural hair, despite the perception that they’re high-maintenance. Once mature, locs genuinely can be the ultimate low-effort, high-impact style.
9. Crochet Braids
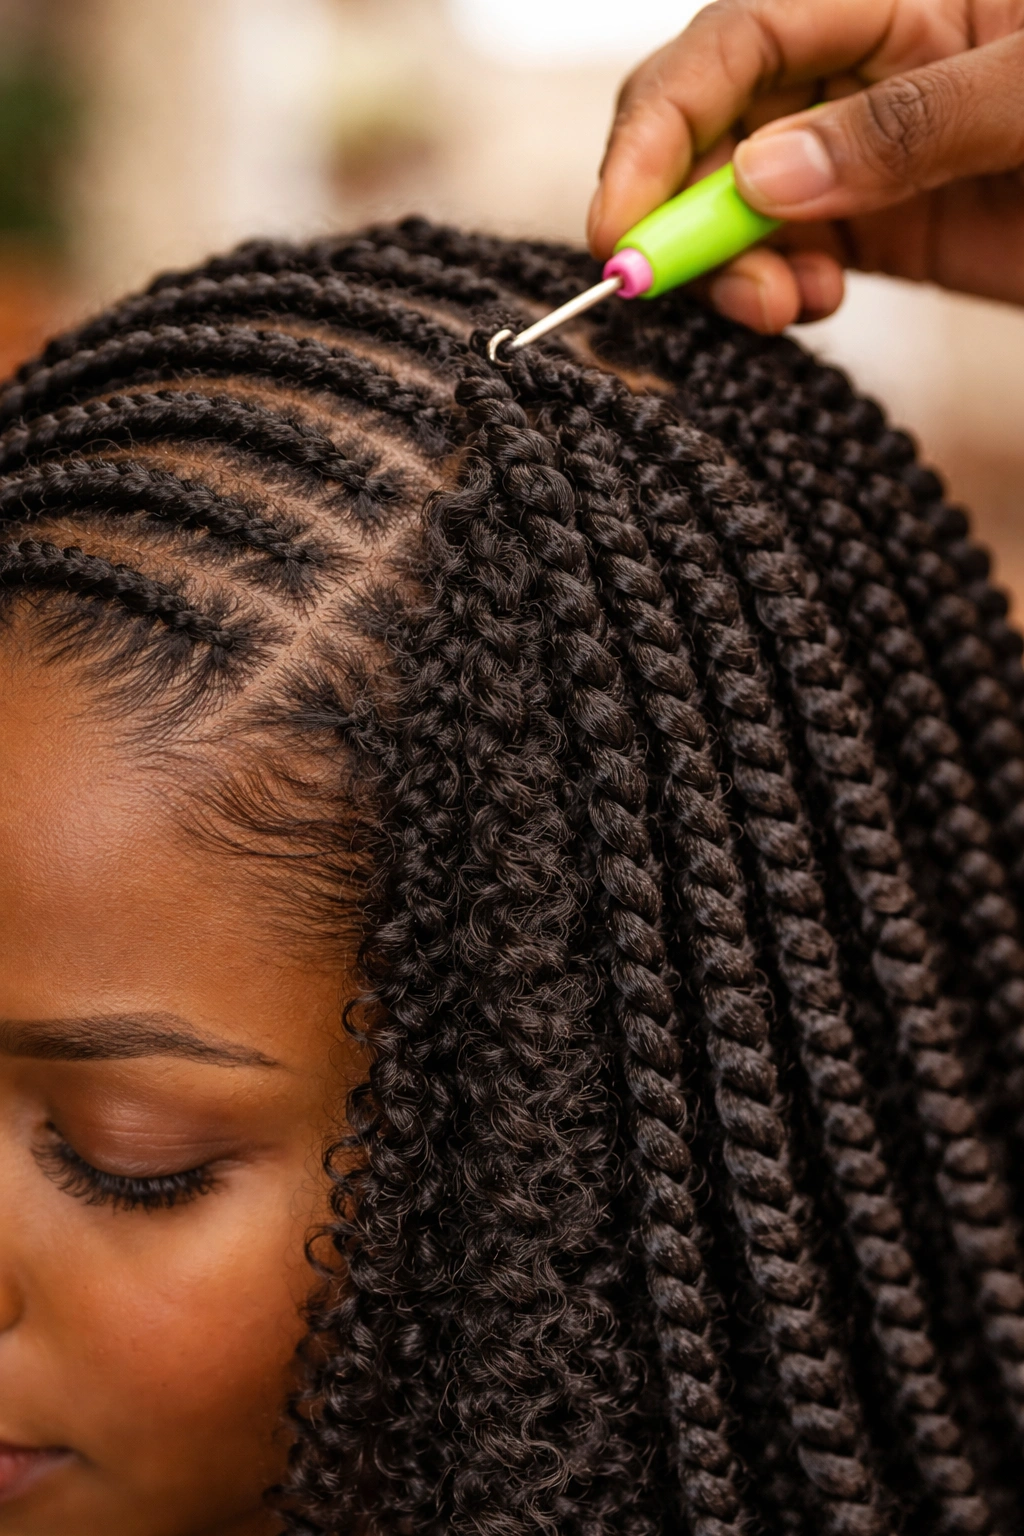
Crochet braids are a protective style where you install a cornrow base (either on your whole head or in specific areas), then use a crochet hook to pull loops of synthetic hair through the cornrows, creating the appearance of braids without braiding from the root. This method is faster than traditional braiding, uses less hair than box braids, and creates beautiful results that can mimic many different braid styles—from straight braids to wavy braids to curly braids depending on the texture of hair you choose.
Why Crochet Braids Are Increasingly Popular
Crochet braids are genuinely genius for protecting your hair while offering quick installation and incredible variety in styling options. Because you’re not braiding all the way down from the roots, installation is significantly faster than box braids while still offering the same protective benefits. You can choose from dozens of different hair textures and types, which means you can create completely different looks—from bone-straight sleek braids to gorgeous wavy braids to textured curly braids—all using the same crochet method.
The Crochet Braid Process
- Install cornrows (or a cornrow base) wherever you want crochet braids, keeping them tight but not so tight that you’re causing scalp pain or tension
- Choose your synthetic hair texture depending on the look you want—straight for sleek, wavy for beachy, curly for textured, coily for defined
- Use a crochet hook to pull loops of synthetic hair through each cornrow, creating the braided effect by pulling the loop through and then tightening it
- Work systematically through each cornrow, making sure your braids are even in size and tension throughout
- Seal the ends of your braids using hot water to fuse the ends and prevent unraveling
- Style your braids however you like—up in buns, down, half-up, wrapped, ponytailed, or countless other options
- Maintain your braids by keeping your scalp moisturized and washing gently every 2-3 weeks
Pro tip: Crochet braids typically last 4-6 weeks with good maintenance, and you can extend their life by refreshing the roots and re-tightening them at the 3-week mark if you want to keep them longer.
10. Perm Rods
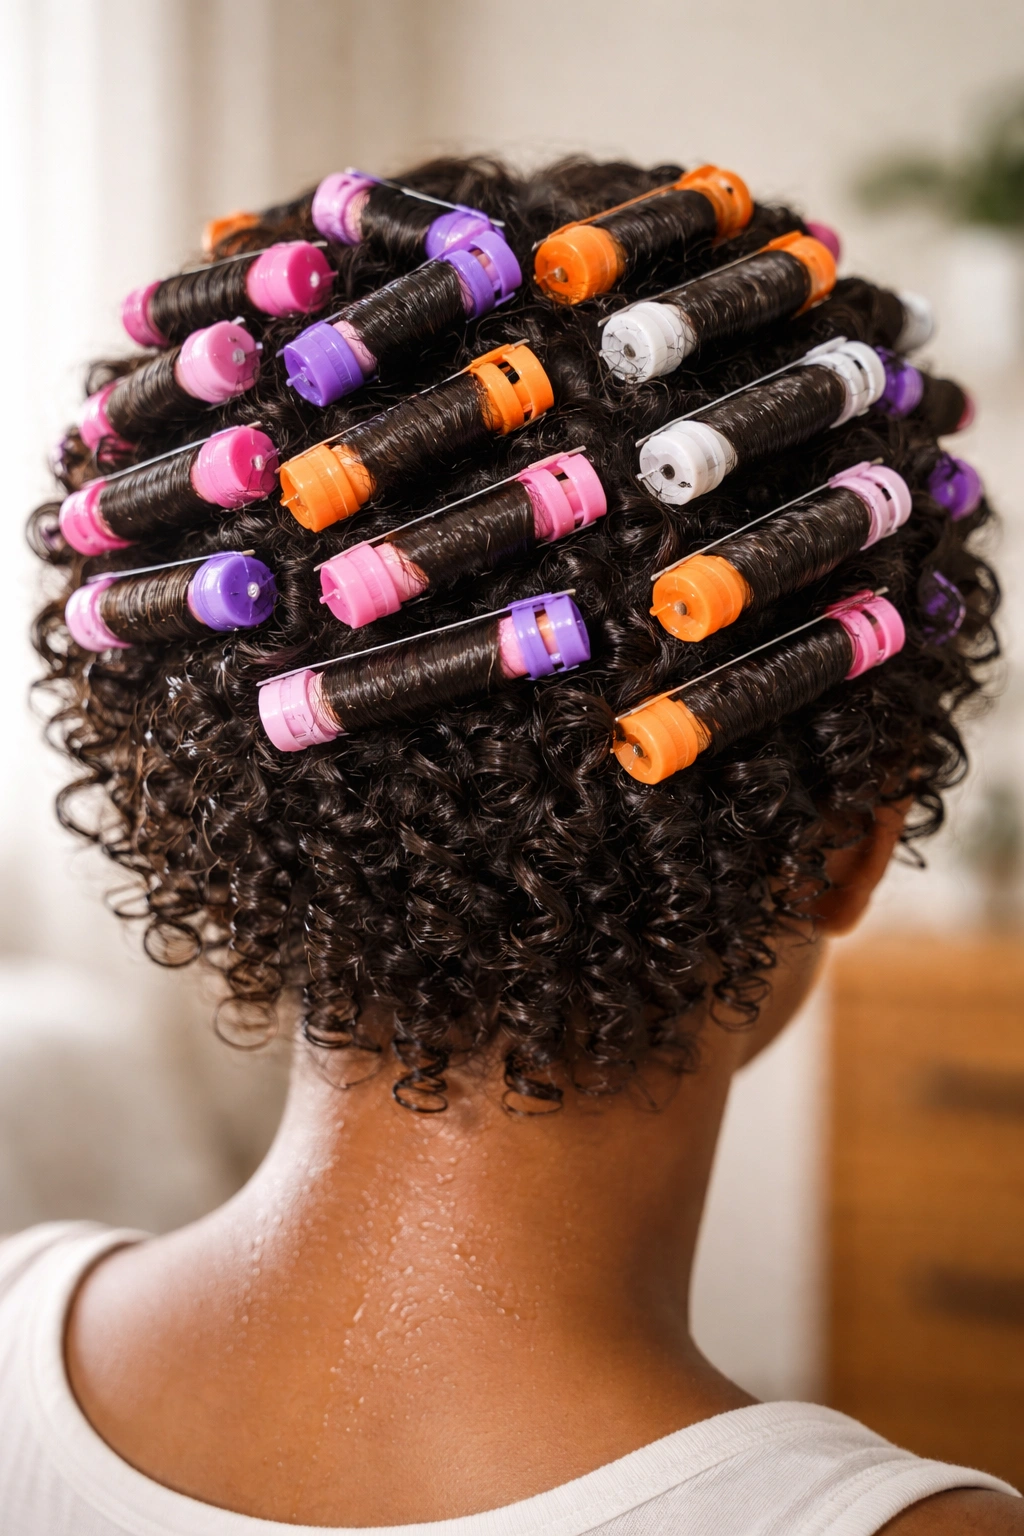
Perm rods (short for permanent rods) are cylindrical styling tools that you wrap sections of damp hair around to create perfectly uniform curls as your hair dries. Despite the name, they don’t permanently alter your hair texture—the curls are temporary and will relax as your hair gets wet or humid. Perm rods create consistent, defined curls of whatever size you choose depending on the rod diameter, and they’re especially useful for creating voluminous, bouncy styles on hair that might otherwise be harder to curl.
The Science of Setting Curls With Perm Rods
Perm rods work because hair naturally tends to hold the shape it dries in—by wrapping damp hair around a cylindrical shape and allowing it to dry, you’re essentially programming that curl shape into your hair temporarily. Smaller diameter rods create tighter curls, while larger diameter rods create looser waves. The result is uniform, clearly defined curls that you couldn’t achieve through other styling methods, especially if your natural curl pattern is tighter or less defined than the look you’re going for.
Installing and Drying Perm Rods
- Apply styling gel or curl cream to damp (not soaking wet) hair, working it through from roots to ends
- Divide your hair into sections roughly the same width as your perm rods to ensure consistent sizing and ease of rolling
- Wrap each section around a perm rod starting from the ends and rolling upward toward your scalp, keeping tension even throughout
- Secure each rod using the clips or fasteners that come with the rods, making sure they’re tight enough to hold but not so tight that they’re pulling your scalp
- Allow your hair to air-dry completely or use a hood dryer or diffuser to speed up the process—this typically takes 4-8 hours depending on your hair density
- Remove the rods carefully once your hair is fully dry by unclipping and gently unwinding each rod
- Gently separate your curls with your fingers rather than brushing to maintain definition and prevent frizz
Worth knowing: Perm rod curls last longer if you don’t wash your hair for at least 2-3 days after styling, so plan to install them on a day when you can leave them in for a few days before shampooing.
11. Braided Updo
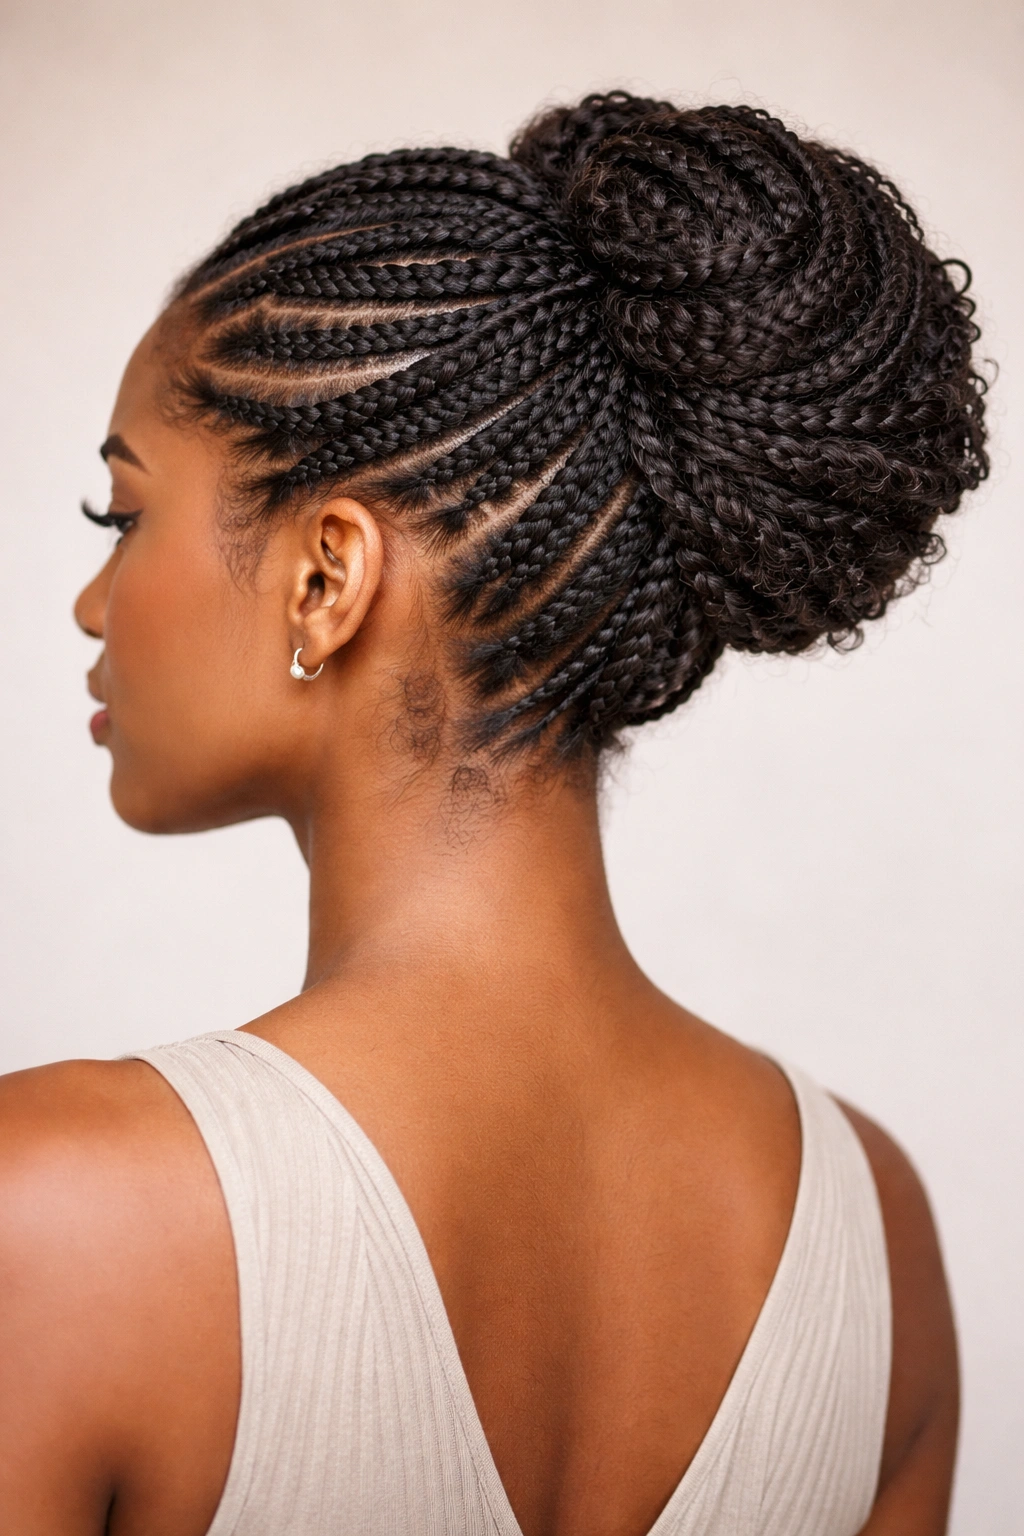
A braided updo combines braiding techniques with an updo styling to create a polished, elegant look that works for everything from everyday wear to formal events. You can create braided updos using multiple braiding techniques—flat twists, traditional braids, cornrows, or combinations—and arrange them into a bun, twisted shape, or geometric pattern pinned at the back of your head. The beauty of a braided updo is that it gets progressively more beautiful as your hair relaxes slightly over a day or two, and it’s genuinely protective because your ends are tucked away.
Creating a Stunning Braided Updo
The key to a beautiful braided updo is planning your braid placement and direction before you start, so you can visualize how they’ll look once you’ve pinned them up. You want braids that create movement and visual interest while still feeling polished and intentional. Many people find that braids running from their edges toward the back or center of their head, where you’ll pin them, creates the most flattering and intentional-looking effect.
Braided Updo Steps
- Section your hair into 3-5 braiding sections depending on how intricate you want your updo to be
- Create your braids—this might be traditional braids, flat twists, cornrows, or a combination depending on your design
- Direct each braid toward where your updo will sit, typically at the crown or the nape of your neck depending on your preference
- Gather all your braids at your chosen updo location and secure them together using bobby pins, a hair stick, or by tucking the ends into each other
- Shape your updo by twisting, folding, or arranging your gathered braids into your desired final shape
- Secure everything using multiple bobby pins to ensure your updo stays put through movement and activity
- Add finishing touches like edge control on your hairline, a decorative hair comb, or a scarf if you want to dress it up
Pro tip: Braided updos look better after a few hours of wear when the braids have relaxed slightly and the overall look feels less stiff and more organic.
12. Two-Strand Twists
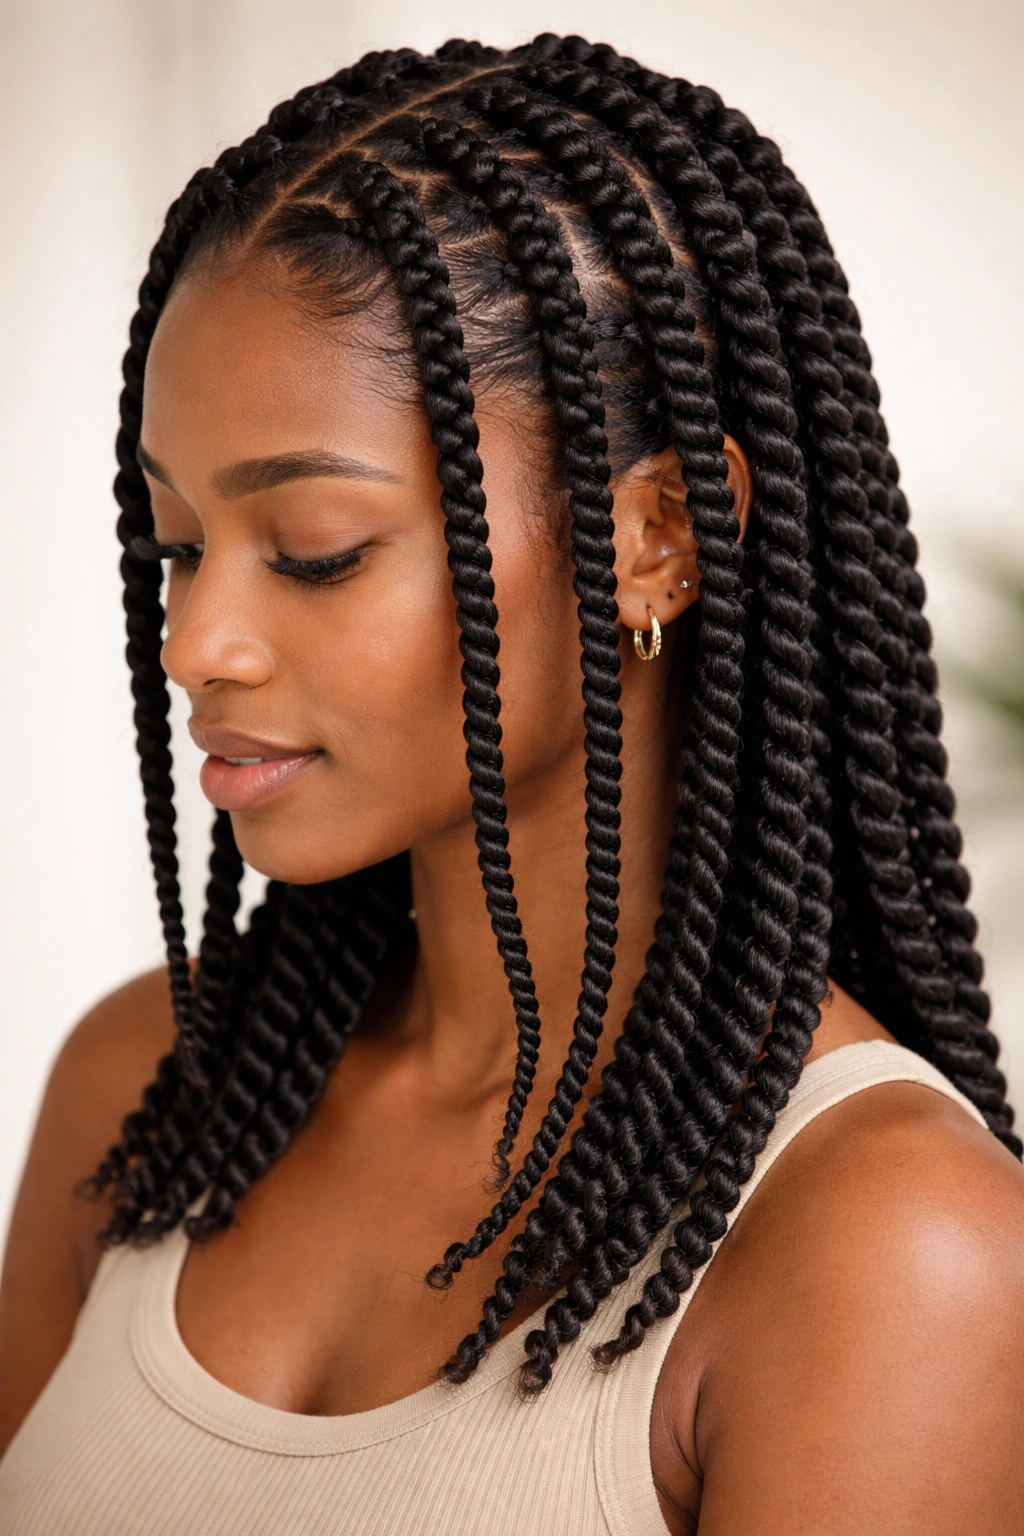
Two-strand twists are a classic, versatile style where two strands of hair are twisted together from root to tip, creating a neat, defined, rope-like texture. They’re one of the most fundamental techniques in natural hair styling and work beautifully on nearly every curl pattern. Two-strand twists are protective, relatively quick to install (compared to other protective styles), and can be worn down for volume or styled into updos, ponytails, or buns.
Why Two-Strand Twists Are Endlessly Useful
Two-strand twists are beloved because they’re genuinely protective while still looking intentional and stylish, they can be installed in 30 minutes to a couple of hours depending on your hair density and how tightly you twist, and they work on virtually any curl pattern. They also look progressively better as they age—freshly installed twists look neat and defined, while after a few days of wear, they relax and develop a softer, more organic appearance that’s equally beautiful.
Installing Two-Strand Twists
- Start with clean, moisturized hair that’s been blow-dried smooth or damp-dried to make twisting easier
- Section your hair into however many twists you want—typically 15-30 depending on your hair density and desired thickness of each twist
- Apply styling cream, gel, or twisting butter to each section to enhance definition and provide hold
- Take two subsections from your first section and twist them together tightly from root to tip, maintaining even tension throughout
- Secure each twist at the tip using a small elastic or by tucking the ends if you prefer not to use elastics
- Allow your twists to set overnight or for several hours before unraveling if you want a twisted-out texture, or leave them twisted for long-term wear
- Maintain your twists by moisturizing regularly and refreshing them every 1-2 weeks by re-twisting the roots
Worth knowing: Two-strand twists can last 2-4 weeks depending on how tightly you install them and how well you maintain your roots, making them an excellent option for people who want a protective style that lasts through multiple wash cycles.
13. Flexi-Rod Curls
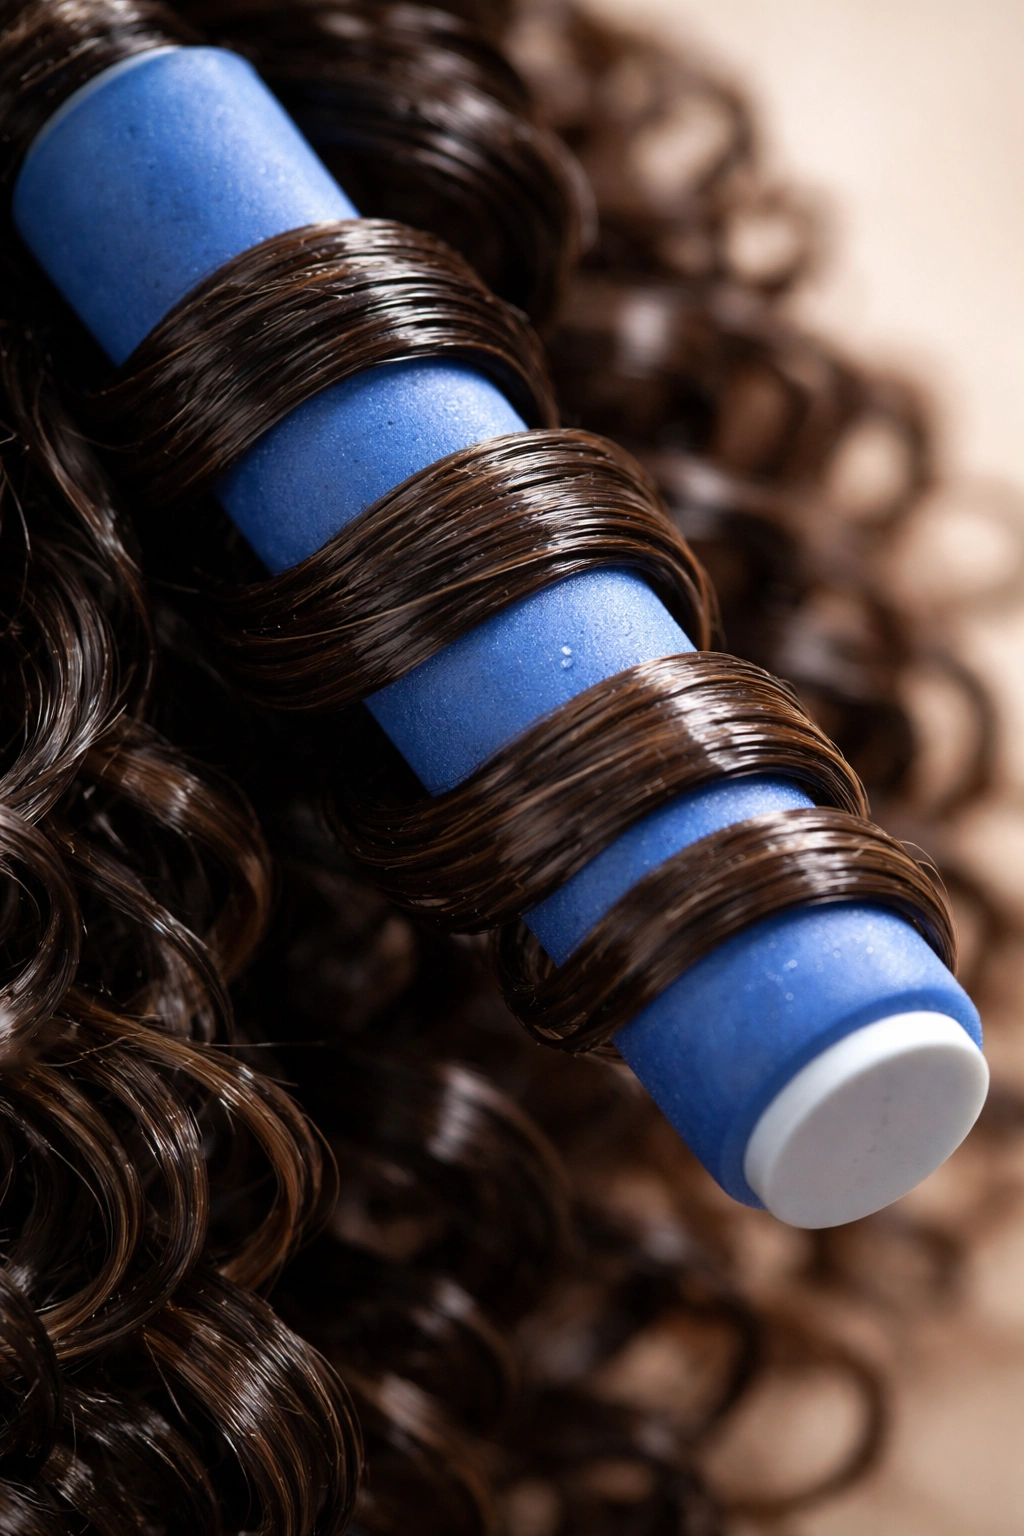
Flexi-rods are flexible, foam-covered cylindrical styling tools that work similarly to perm rods but are gentler on your hair and easier to install and remove because they bend and flex. You wrap damp hair around the rods, allow them to dry, and remove them to reveal perfectly formed curls. Flexi-rods are excellent for creating bouncy, voluminous curls and work beautifully on most curl patterns, though they’re especially useful if your natural curl pattern is looser than the curl shape you’re trying to achieve.
The Advantage of Flexi-Rods Over Perm Rods
Flexi-rods are genuinely more user-friendly than perm rods because they don’t have clips that pull your scalp, they’re much easier to remove without disturbing your curls, and they’re less likely to create the tension headaches that perm rods sometimes cause. The foam covering also provides a gentler surface than the hard plastic of perm rods, which reduces friction and frizz. Because they’re flexible, you can sleep on them more comfortably (though it’s still not ideal), and you can install them more quickly without fumbling with multiple pieces.
Flexi-Rod Installation and Care
- Apply styling gel or curl cream to damp hair, distributing it evenly through each section
- Divide your hair into sections roughly the same width as your rods to ensure consistent curl sizing
- Roll each section around a flexi-rod starting from the ends and working toward your scalp, maintaining even tension throughout
- Twist the ends of the flexi-rod together to secure it—this is what makes them so easy to use compared to rods with separate clips
- Allow your hair to dry completely, which typically takes 4-8 hours with air-drying or 1-2 hours with a hooded dryer
- Untwist the rod ends and carefully unroll each rod to reveal your curls
- Gently separate your curls with your fingers for more volume or leave them as-is for tight, defined ringlets
Pro tip: If you want to wear your flexi-rod curls for multiple days, sleeping on them or in a bonnet helps maintain their shape, and they’ll look progressively more natural and voluminous by day two and three of wear.
14. Crown Braid
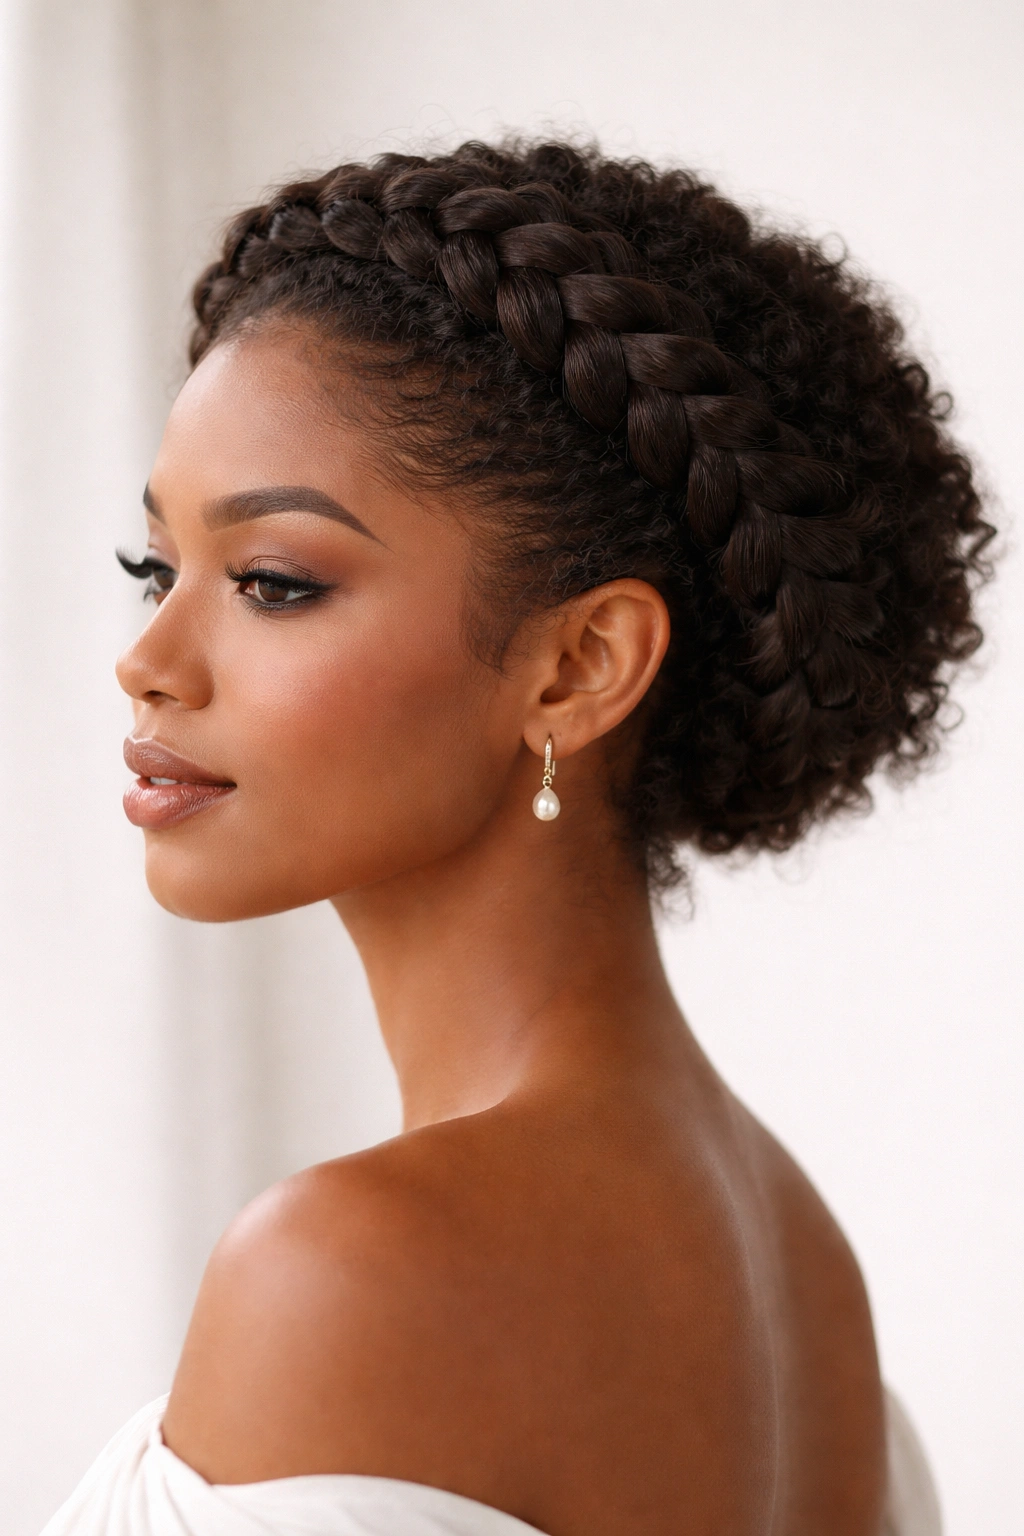
A crown braid is an elegant protective style where braids are installed around your head like a crown, starting near one ear, traveling around the back and sides of your head, and ending near the opposite ear. The result is a romantic, regal-looking style that shows off your face beautifully and protects your hair by keeping it braided and tucked away. Crown braids work especially well for special occasions like weddings or formal events, but they’re equally beautiful as an everyday protective style if you’re willing to invest the styling time.
The Elegance of Crown Braids
Crown braids are special because they create a genuinely stunning visual that frames your face beautifully while keeping your hair protected and neat. The style is appropriate for virtually any occasion—it feels bohemian and relaxed on a casual day but elegant and polished for formal settings. The braids sit at an angle that’s incredibly flattering for most face shapes, and the style naturally creates volume and dimension that photographs beautifully.
Creating a Crown Braid
- Plan your braid path by visualizing a line from one ear, across the crown of your head, to the opposite ear
- Section your hair into 2-4 braiding sections depending on how thick you want your crown braids to be
- Create your braids using traditional three-strand braiding or flat-twist technique, depending on your preference for the final look
- Direct your braids along your crown path, pinning as you go to ensure they stay in place and follow your planned line
- Pin the braids securely once you’ve created them all and arranged them to frame your face the way you want
- Tuck in any loose ends or allow them to flow loose depending on your aesthetic preference—both work beautifully
- Secure everything using bobby pins placed strategically underneath where they won’t be visible
- Add optional accessories like flowers, beads, or decorative pins to dress up the style for special occasions
Worth knowing: Crown braids typically last 3-5 days if you maintain them well, making them perfect for weekend events or special occasions when you want a style that’s simultaneously protective and genuinely impressive.
Final Thoughts
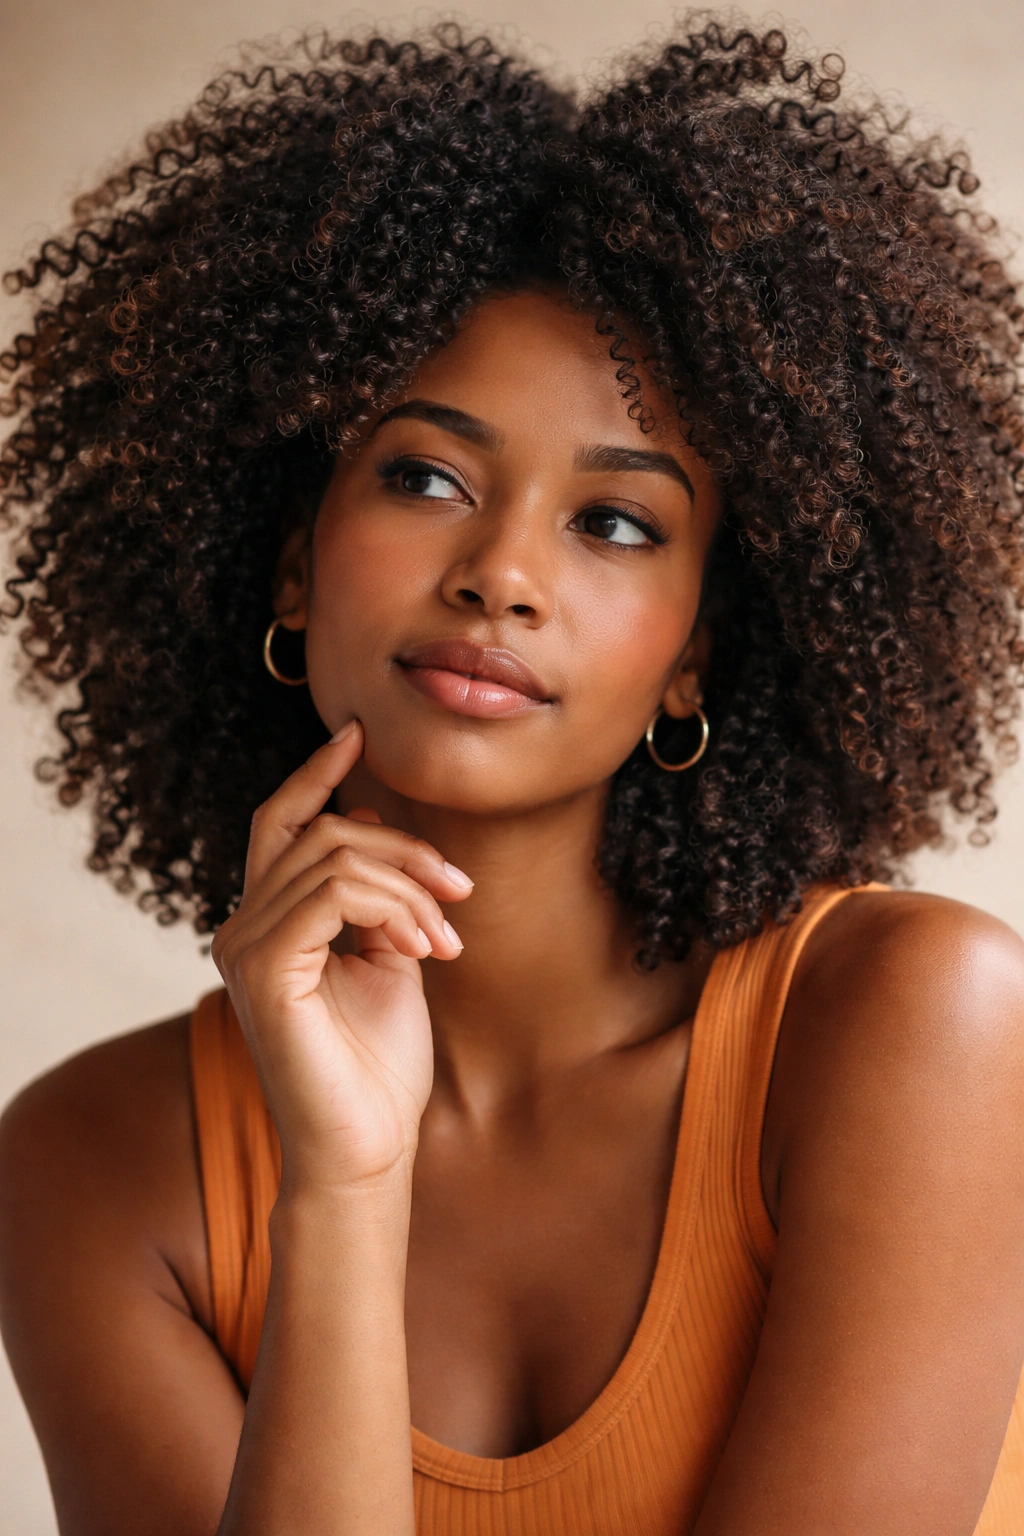
The variety available to you when you have afro curly hair is genuinely extraordinary—from protective long-term styles like locs and box braids that you can wear for weeks, to low-maintenance daily styles like wash-and-gos and high-puffs, to special occasion styles like crown braids and finger coils. The key to finding styles that actually work for your hair and your lifestyle is understanding what each technique does, how much time and product investment it requires, and whether it suits your specific curl pattern and hair density.
More importantly, remember that these styles aren’t meant to be perfect replicas of what you see on other people’s hair. Your twist-out will look different than someone else’s because of your unique curl pattern, hair density, porosity, and the way your specific hair responds to products. That’s not a failure—it’s just the beautiful reality of working with textured hair. Take the techniques and adapt them, experiment with products, and give yourself the grace to learn what works through trial and error rather than expecting immediate mastery.
The best style for your hair is the one that makes you feel confident and beautiful, that works within your lifestyle and styling commitment level, and that leaves your hair healthier and happier than when you started. All of these styles check those boxes in different ways, so the real invitation here is to pick a few that intrigue you and start exploring. Your best styling hack is the one you discover through your own experience, not the one someone else swears by.
