



Short afro hair is a canvas for bold, beautiful styling that celebrates your natural texture while offering incredible versatility. Whether you’re rocking a close-cropped cut or hair that extends a couple of inches from your scalp, the right hairstyle can transform your entire look — from polished and professional to creative and playful. The key is understanding which styles work best with your specific hair length, density, and lifestyle, then mastering the techniques that make them look intentional and stunning.
What makes styling short afro hair different from longer lengths is that every element becomes more visible. Your scalp, your part lines, your texture definition, and even the shape of your head play starring roles. This isn’t a limitation — it’s actually an advantage. You can create sharp geometric patterns, showcase your natural curl pattern in ways longer hair would hide, and achieve looks that feel fresh and fashion-forward with minimal effort once you know what you’re doing.
The hairstyles that follow range from everyday low-maintenance options to statement looks that demand attention. Some require minimal styling tools, while others let you play with gel, edge control, or decorative accessories. You’ll find protection styles that keep your hair healthy through the seasons, wash-and-go styles that celebrate your texture, and creative looks that blend your natural hair with extensions for added volume and length. The point is that short afro hair isn’t a limitation — it’s the perfect starting point for discovering which styles make you feel most like yourself.
1. The Classic Fade
A fade is the foundation of countless modern short afro hairstyles, characterized by hair that’s longer and fuller on top and progressively shorter as it moves toward the nape and sides. The beauty of a fade is that it works with your natural texture rather than against it, allowing your curls to stand out prominently on top while creating clean, geometric lines throughout. This style suits virtually every face shape and works equally well in professional and casual settings.
Why the Fade Remains a Top Choice
The fade’s popularity isn’t just about aesthetics — it’s deeply practical. Your curls have room to expand and show definition on top, while the shorter sides reduce bulk and create visual balance. A fade also requires minimal daily maintenance beyond occasional trimming every 3-4 weeks to keep the lines sharp. You can wear it as-is for texture, or apply a light gel to define your curl pattern further.
Variations to Try
- High fade: Sides cut very short (often clipped with 0 or 1 guard), creating maximum contrast with the longer top. Best for bold personalities and well-shaped heads.
- Skin fade: The shortest possible fade where clippers don’t touch your skin at all, visible scalp peeks through. Ultra-modern and sharp-looking.
- Low fade: Shorter transition happens only in the back and lower sides, leaving more length around the ears and temples. More subtle and versatile for work environments.
- Temp fade: Fade lines that extend up the back near the temples, creating defined angular shapes. Great for adding visual interest without committing to a full high fade.
Pro tip: The key to a fade that looks intentional is getting it cut by someone experienced with textured hair — they’ll know how to angle their clippers to work with your natural curl pattern rather than fighting it.
2. Defined Curls with a Clean Part
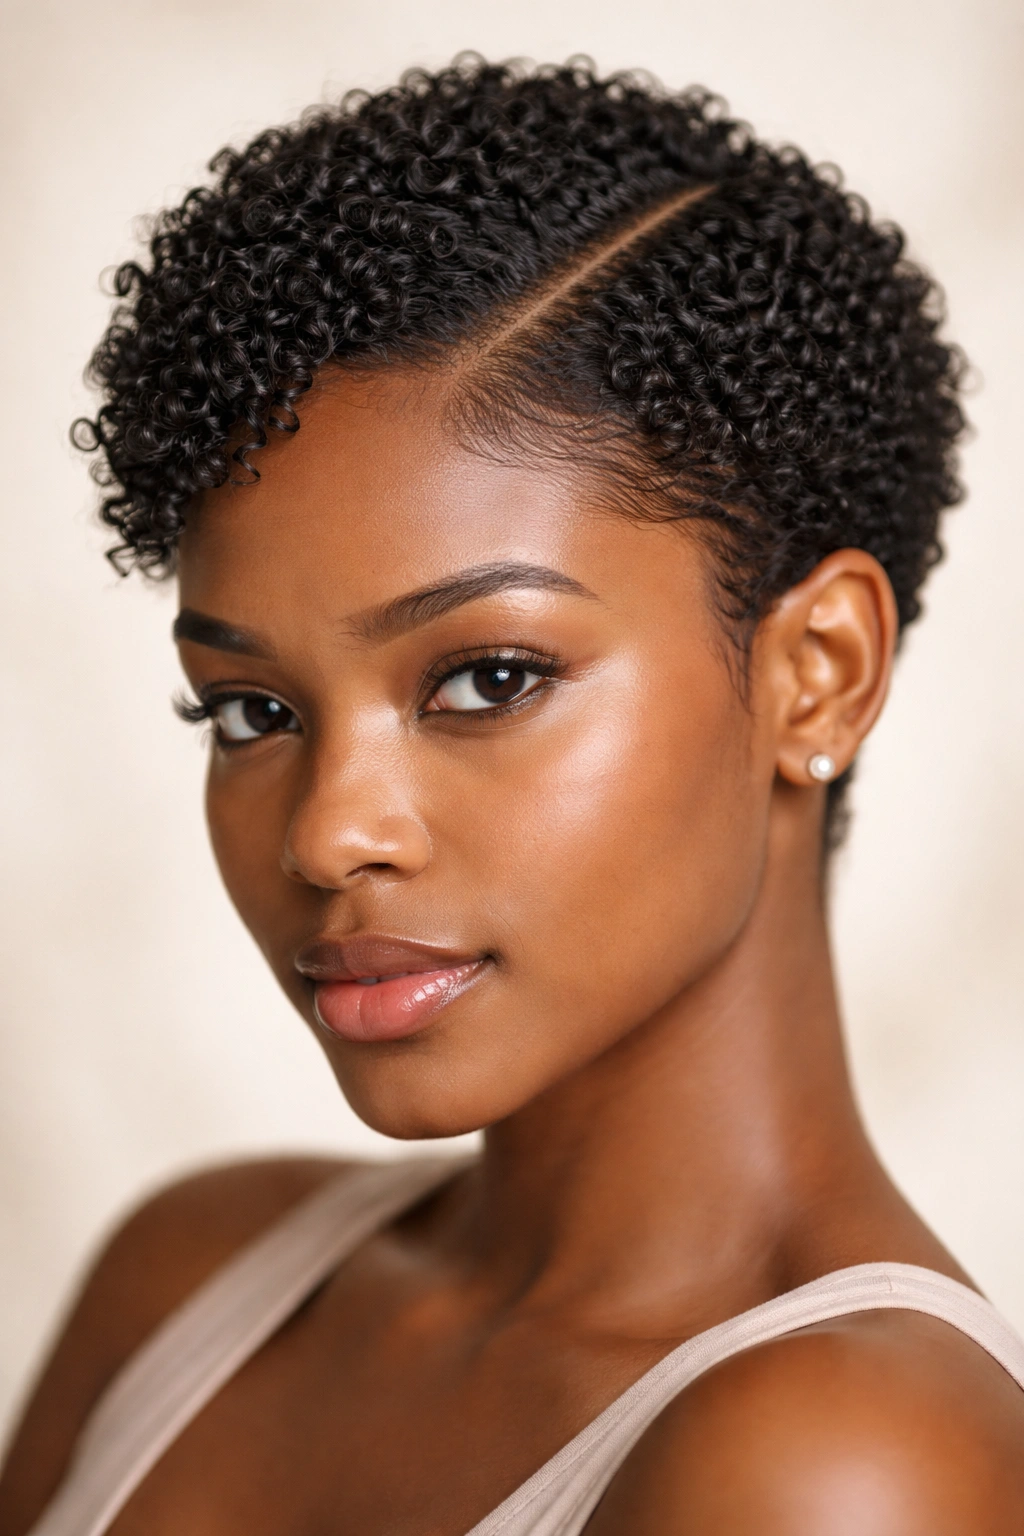
This style celebrates your natural curl pattern by using edge control, styling gel, or curl-defining cream to create ringlets and coils that pop with shine and dimension. A sharp, clean part running from your forehead to the back of your head adds structure and visual interest. This look works beautifully at any length and instantly feels put-together without requiring complicated techniques.
The Technique Behind Defined Curls
Defined curls begin with the right product — you need something with hold and moisture, not something that flakes or dries out your hair. Apply the product while your hair is still slightly damp from washing, then use a curl cream, gel, or butter to encourage each curl to coil tightly. A denman brush or fine-tooth comb helps separate curls and prevent them from clumping together. The part line should be crisp and clean, achieved by parting while the product is still wet and letting it dry in that position.
Essential Steps
- Wash your hair with a sulfate-free shampoo and condition generously
- While damp, apply curl cream or gel section by section
- Use a denman brush to define each curl, working in the direction your hair naturally wants to curl
- Part using a rat-tail comb held at a 90-degree angle for a straight, defined line
- Allow to dry fully or use a diffuser attachment on low heat for faster drying
- Refresh between washes with a light misting of water and product re-application
Worth knowing: This style photographs beautifully and shows off the unique pattern of your curls, but it does require product investment and regular maintenance between washes.
3. Twist-Out with Tapered Sides
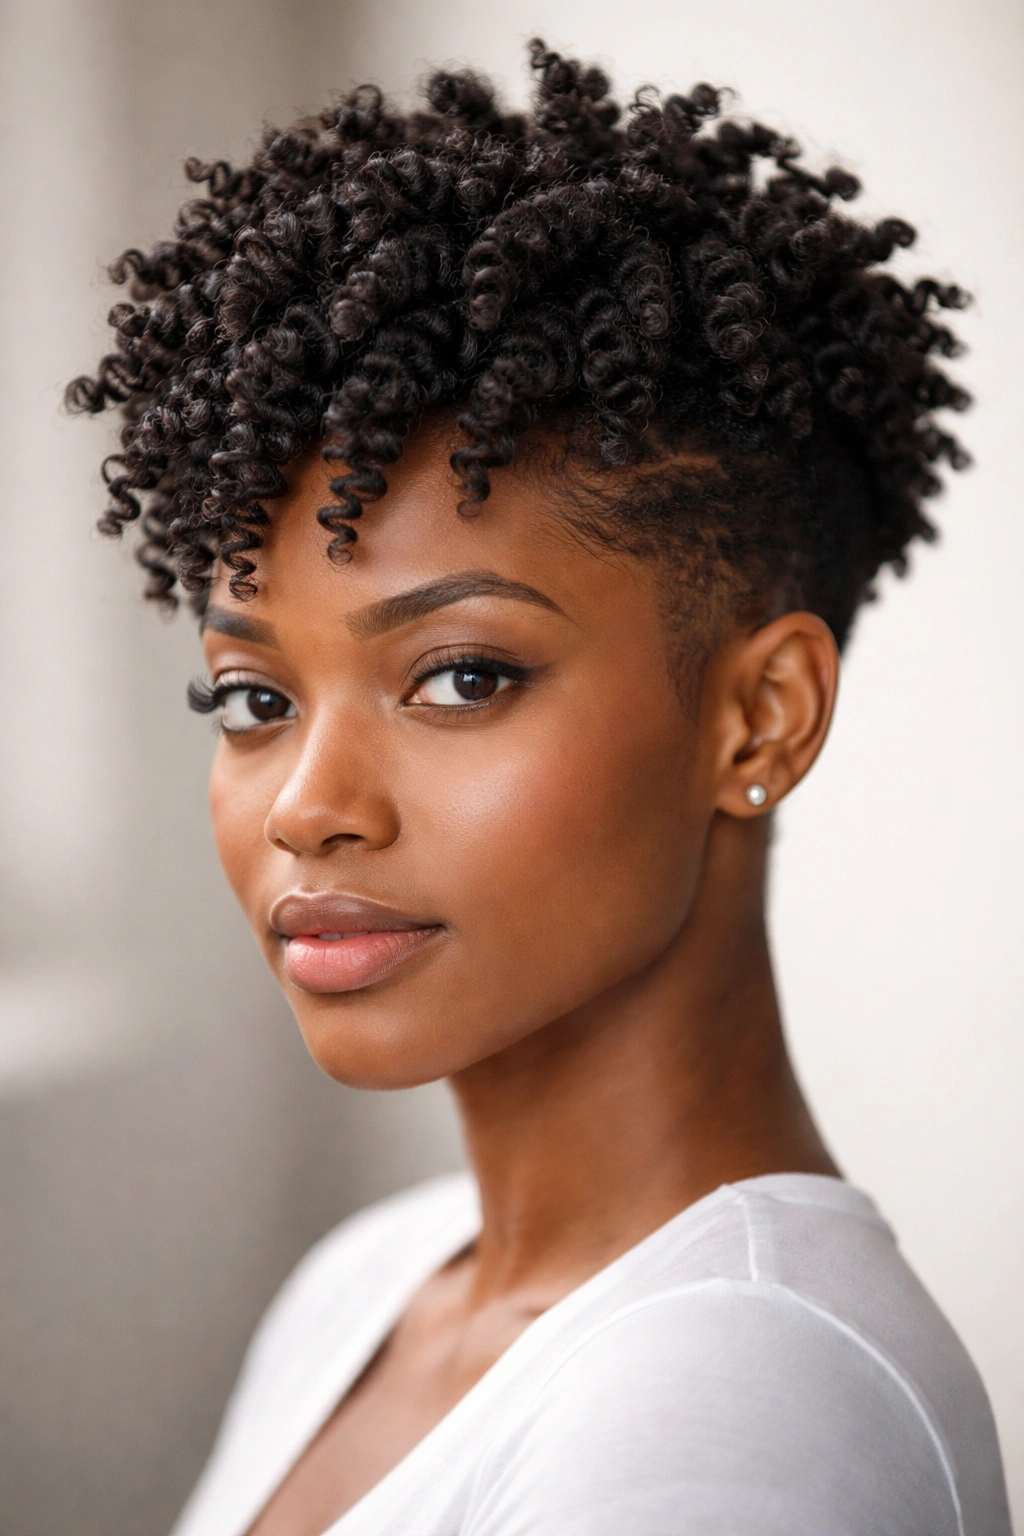
A twist-out involves twisting small sections of hair into spiral strands, allowing them to dry in that twisted formation, then unraveling the twists to create voluminous, textured curls. Pairing this with tapered or faded sides creates a look that’s textured on top and clean below — a perfect balance between bold and refined. This style offers incredible volume and definition without requiring heat.
How to Execute a Successful Twist-Out
Start with damp hair and apply a leave-in conditioner and styling cream or gel to every section. Divide your hair into manageable sections — for short afro hair, this typically means 8-12 twists depending on your density. Twist each section tightly from root to tip, making sure the twists are uniform in size for a cohesive final look. Allow the twists to dry completely, either naturally over 2-3 days or under a bonnet dryer for 4-6 hours. Once dry, gently unravel each twist and separate the curls with your fingers for maximum volume and definition.
Maintenance Tips
- Keep twists in for 3-5 days to allow them to fully set
- Sleep in a bonnet or on a silk pillowcase to prevent frizz
- Refresh with a light spritz of water and products between washes
- You can re-twist every 2-3 weeks to maintain the style without starting from scratch
- Expect the definition to be crisper on days 1-2 and looser as days pass — both look great
Pro tip: Twists hold better when your hair is at least 1.5 inches long, so make sure you’re in the right length zone for this style to work well.
4. Coils with Baby Hairs Slicked
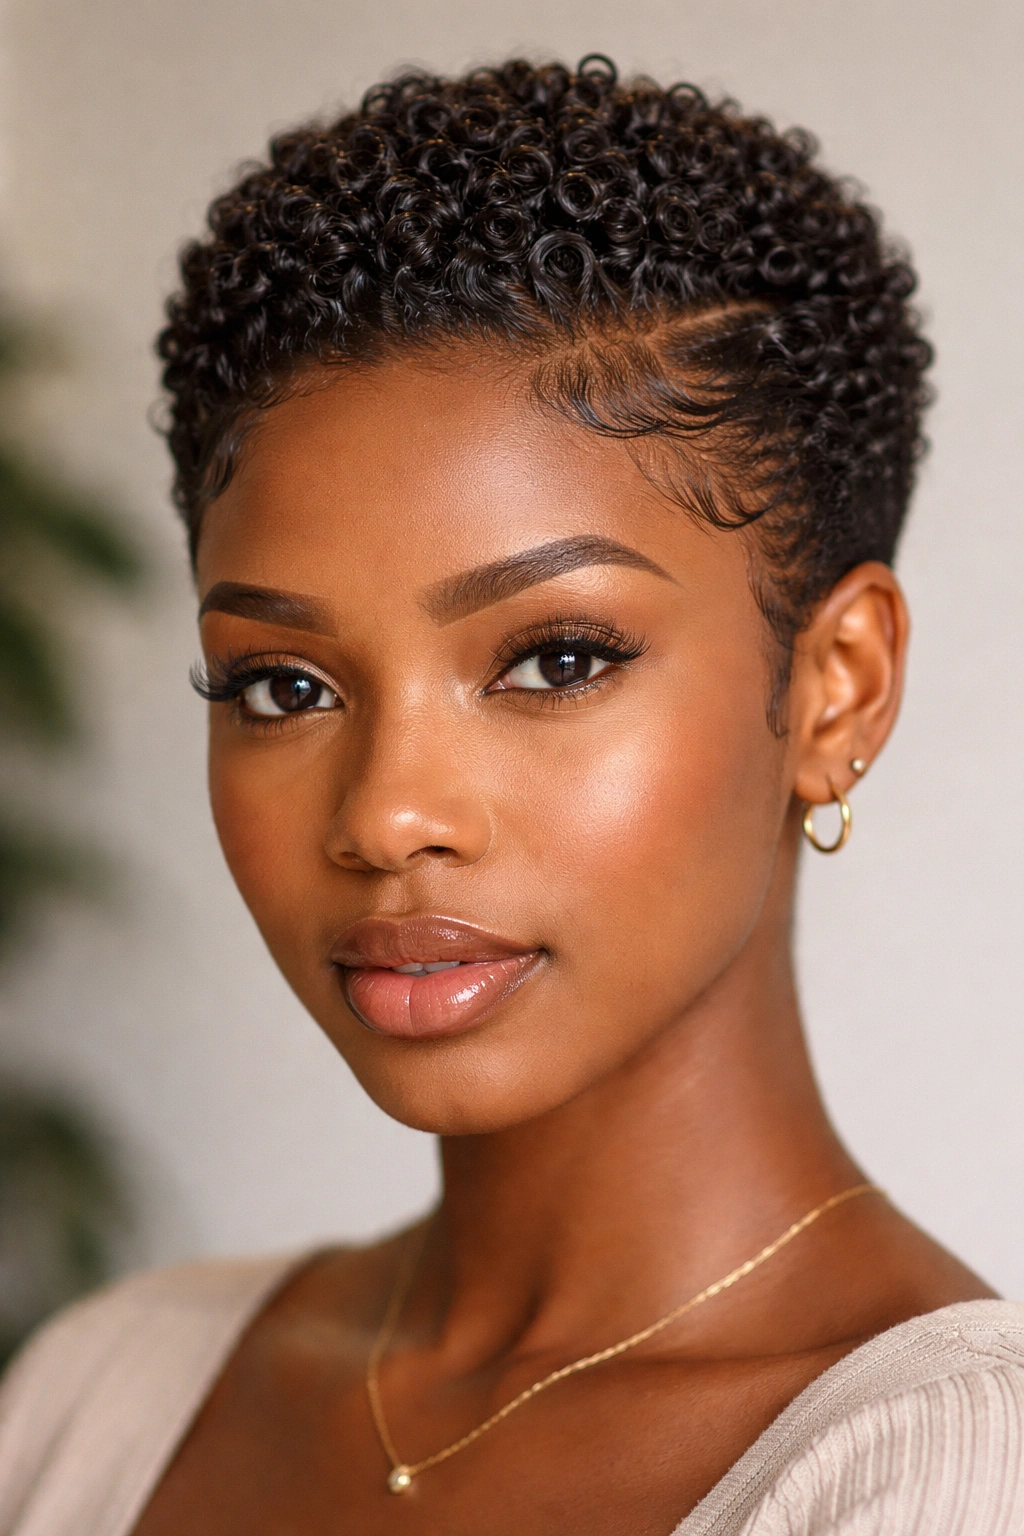
This style takes your natural coil pattern and elevates it by slicking down your baby hairs along your hairline with edge control, creating a polished frame around your face. Your coils sit on top with full definition and bounce, while the controlled edges give the entire look intentionality and refinement. It’s the perfect bridge between casual and professional.
Creating Defined Coils
Coils are different from regular curls — they’re tighter spirals that create a densely textured appearance. To define coils, you need adequate product and patience. Apply a rich curl cream or gel to damp hair section by section, smoothing the product through from root to tip. Use your fingers or a small denman brush to encourage hair into tight coil formations. The coils will be most defined if you allow them to dry completely without disturbing them.
Slicking Baby Hairs Properly
Use a gel with strong hold but not so much weight that it pulls your hair or feels stiff. Apply with a small brush or old toothbrush, smoothing hair in the direction you want it to lay — typically curved along your natural hairline. Smooth baby hairs behind your ears, along your temples, and across your forehead for a polished frame. The contrast between the defined coils and the sleek edges is what makes this style memorable.
Worth knowing: This look comes across as intentional and polished in professional settings while still celebrating your natural texture — it’s a favorite for job interviews, presentations, and important meetings.
5. Cornrows with a Fade
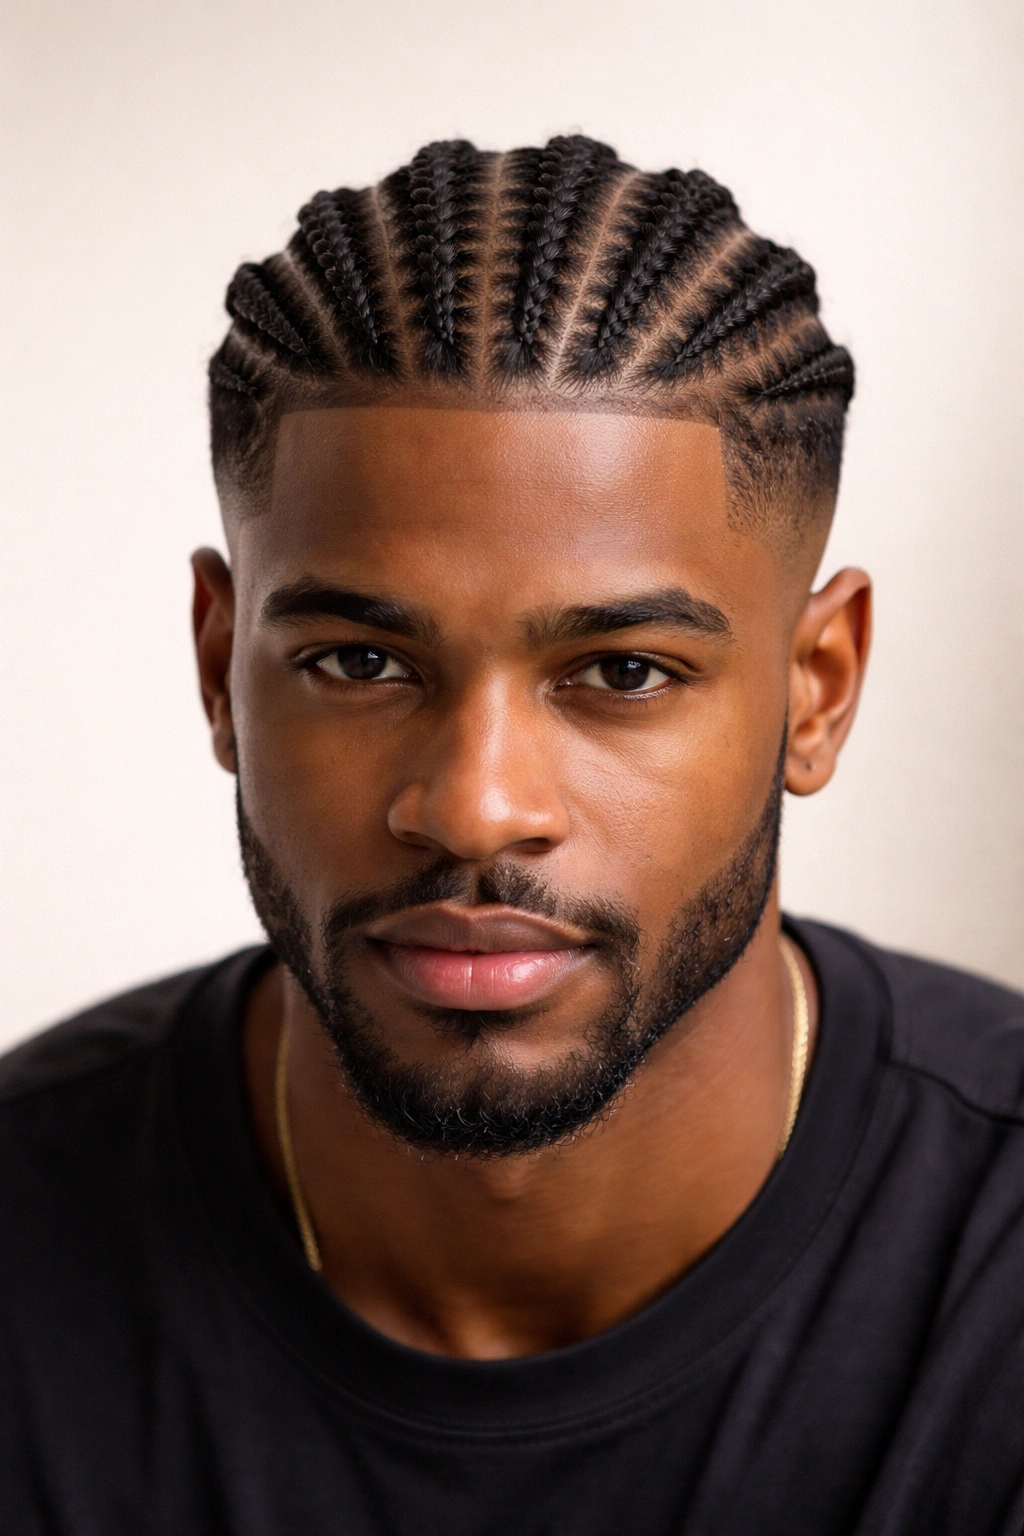
Cornrows are a classic protective style where hair is braided close to the scalp in straight, curved, or geometric lines. Combined with a fade on the sides and back, you get a style that’s protected, visually striking, and requires minimal daily styling. The cornrows can follow any pattern you prefer — straight rows, diagonal patterns, curved designs, or even elaborate geometric shapes.
Design Possibilities for Cornrows
- Straight back rows: Simple rows running from front to back, the classic and most versatile option
- Diagonal cornrows: Rows that run diagonally across your head, creating visual movement and interest
- Curved cornrows: Rows that follow curved paths, creating more artistic and personalized designs
- Geometric patterns: Multiple pattern types combined, such as rows that fan out or create circular shapes
- Reverse cornrows: Braided upward instead of downward, creating raised texture
Maintenance and Longevity
- Cornrows typically last 4-6 weeks before you need to redo them
- Moisturize your scalp regularly by applying oils or leave-in conditioner, parting the cornrows slightly to reach your scalp
- Sleep in a bonnet or on a silk pillowcase to maintain the style’s neatness
- Refresh the edges of your cornrows every 2-3 weeks using gel and a brush to keep them looking fresh
- Take your time unbraiding at the end — rushing can cause breakage
Pro tip: Cornrows work beautifully with decorative beads, cuffs, or shells woven throughout for added personality and visual flair.
6. Tapered Natural with Free-Form Texture
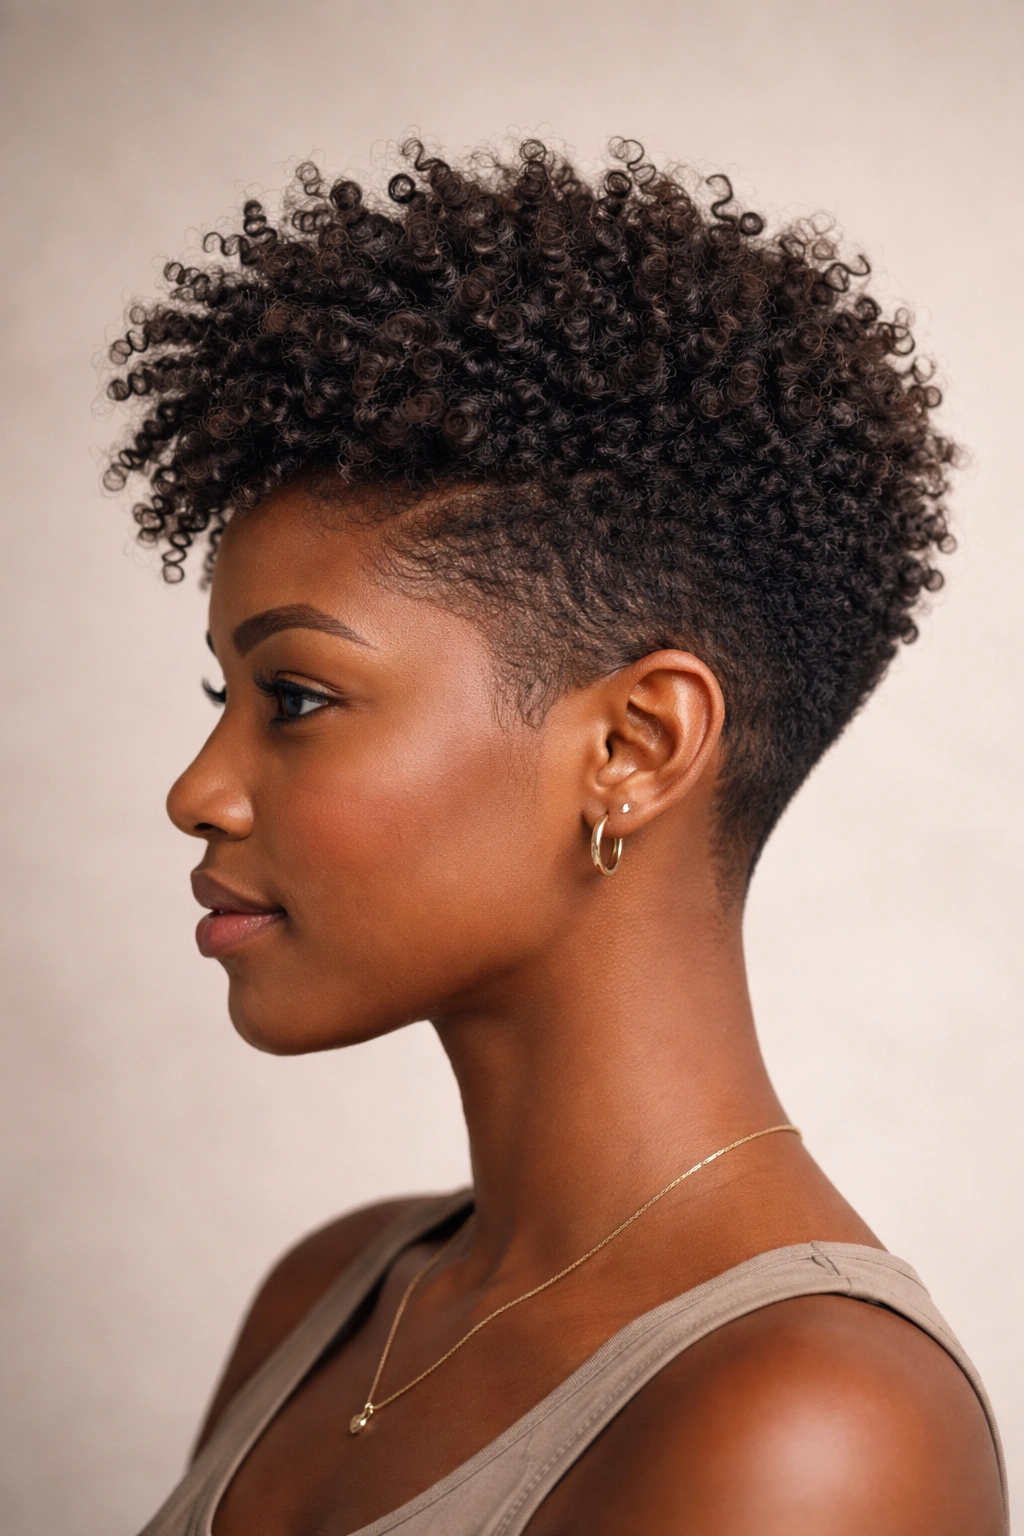
This style celebrates your hair exactly as it grows from your scalp — no twisting, braiding, or manipulation. Hair is cut tapered on the sides and back but left loose and natural on top, allowing your unique curl and coil pattern to express itself freely. This is as low-maintenance as short afro hairstyles get while still looking intentional and stylish.
The Beauty of Free-Form Texture
Free-form texture is uniquely yours — no two people’s hair coils in exactly the same way. By allowing your hair to grow and dry without constant manipulation, you’re celebrating the individuality of your natural pattern. This style requires minimal product, minimal time, and genuinely looks better the less you fuss with it. It’s perfect if you’re starting your natural hair journey or simply prefer a wash-and-go aesthetic.
Maintenance Approach
- Wash weekly or bi-weekly with sulfate-free shampoo and deep condition generously
- Apply leave-in conditioner to damp hair and allow it to air dry
- Consider a light refresher product on non-wash days, but many people skip products entirely
- Get trims every 6-8 weeks to maintain the tapered shape
- Your coils will feel tighter and crisper on wash day and gradually soften and relax as the week progresses
Worth knowing: This style means visible scalp texture, which some people love and others find takes adjustment. If you’re concerned, a lighter fade rather than a skin fade shows the natural texture while creating less visible scalp.
7. Faux Locs with a Fade
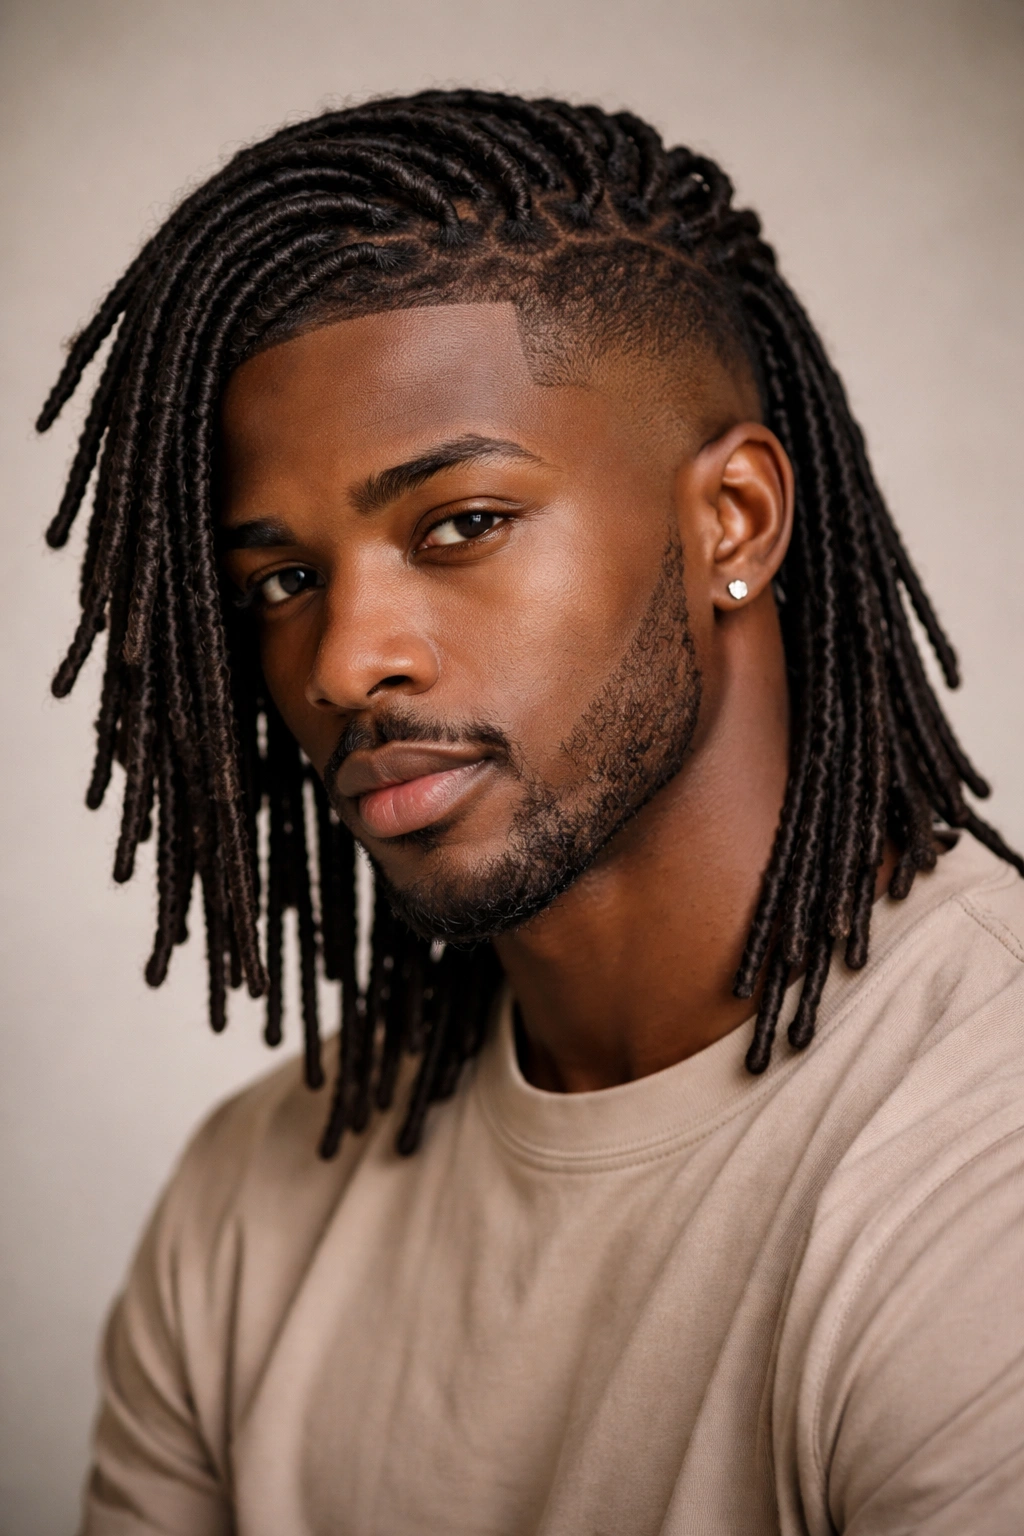
Faux locs (also called sister locs or loc extensions) are a protective style where synthetic hair is wrapped around your natural hair to create the appearance of locs without the long-term commitment. Combined with a fade on the sides, you get a dramatic, fashion-forward look that offers protection for your natural hair while allowing you to experiment with length and style. Faux locs typically use thinner, more refined wrapping than traditional locs.
Installation and Maintenance
Faux locs are installed by wrapping synthetic hair tightly around sections of your natural hair using various wrapping techniques. Installation takes 3-6 hours depending on your hair’s density and the number of locs you want. Once installed, they last 6-8 weeks before you need to take them down and let your natural hair rest. During this time, you’ll refresh the roots every 3-4 weeks by re-wrapping areas where new growth has loosened the style.
Care While Wearing Faux Locs
- Wash your scalp and locs every 1-2 weeks using a clarifying shampoo and focusing on your scalp
- Apply conditioner to the locs themselves while your hair is wet
- Sleep in a bonnet or with a silk headwrap to prevent friction and frizz
- Avoid pulling or twisting the locs too frequently to prevent breakage at the base
- Be gentle with your edges and hairline, as tight styling can contribute to tension alopecia
Pro tip: Faux locs photograph incredibly well and feel luxurious, making them perfect for special occasions or when you want a bold statement style.
8. Patterned Designs with Line-Ups
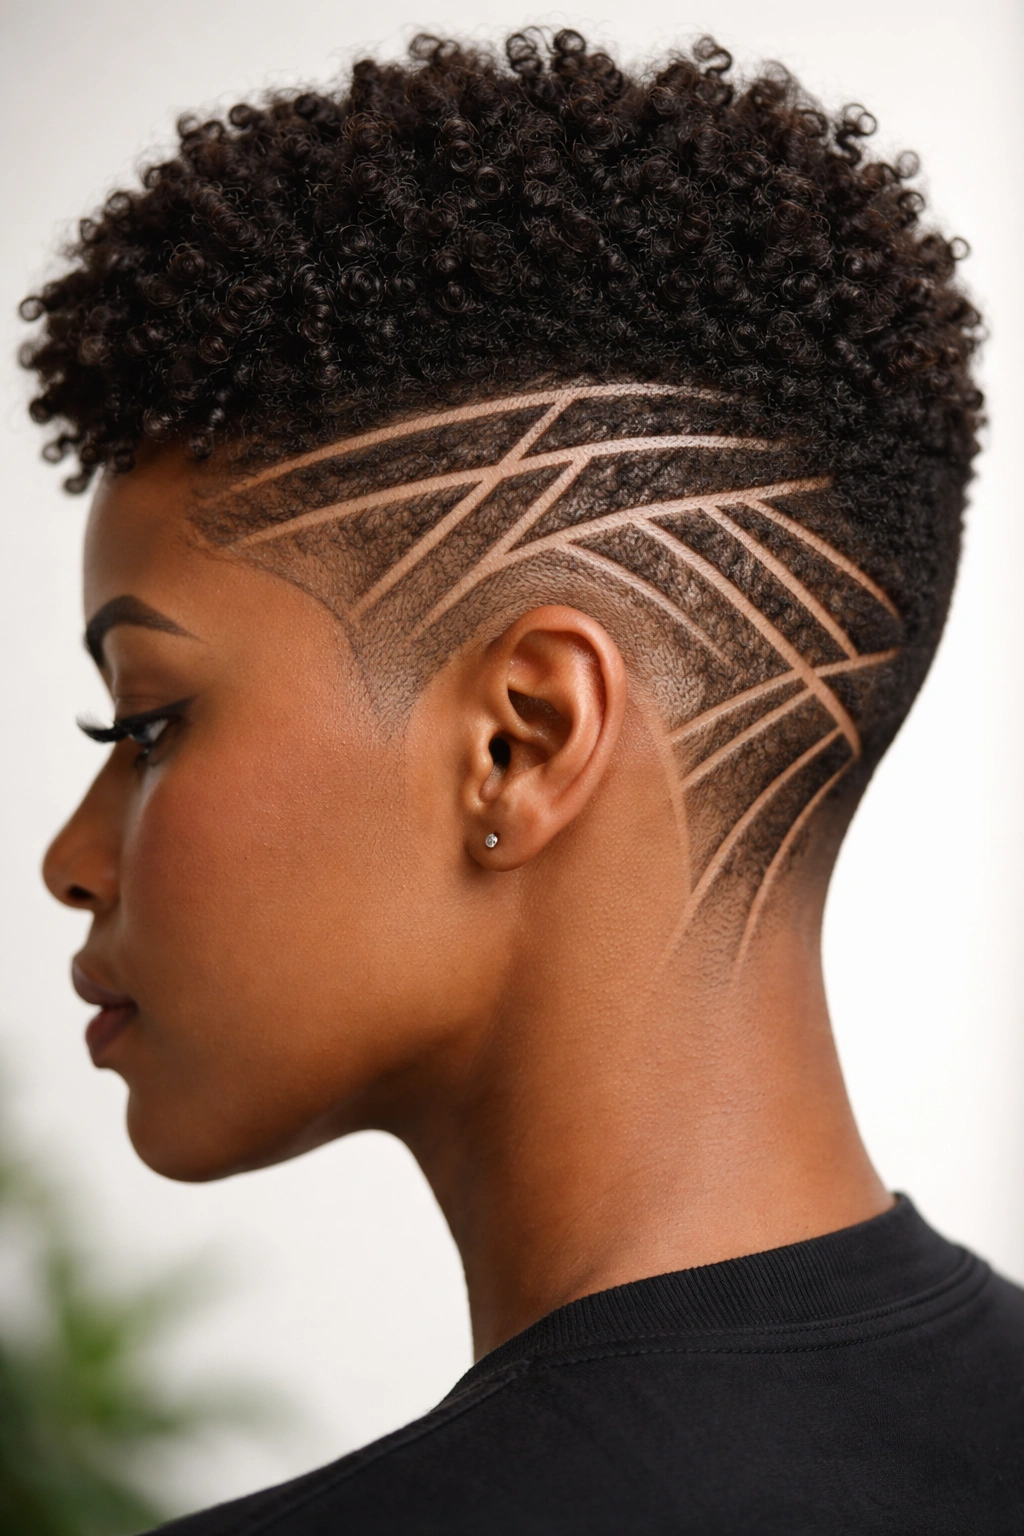
This style involves using clippers to create precise geometric patterns, lines, or designs into your hair. You might have crisp striped patterns, geometric shapes, or intricate designs carved into the sides or back of your head. The top remains longer to showcase your natural texture, while the designs create visual interest and showcase your personal style. This is a style that turns heads and makes a clear artistic statement.
Creating Sharp Line-Ups
A clean line-up along your edges is fundamental to this style. Line-ups are tight clipper lines that define the edges of your hairline, part lines, and design boundaries. They require precision and should be done by someone experienced with detailed clipper work. The designs themselves can be simple (straight lines, geometric shapes) or complex (custom patterns, personalized symbols, or artistic imagery). Your barber or stylist will use different clipper guards and techniques to create depth and dimension in the designs.
Design Inspiration
- Straight lines and stripes running through your fade
- Geometric shapes like triangles, diamonds, or hexagons
- Waves or curved patterns along the sides
- Custom designs reflecting your interests (symbols, words in cursive, patterns with personal meaning)
- Asymmetrical designs that create visual movement
Worth knowing: These designs are a form of artistic expression and require finding an artist experienced in clipper designs. It’s worth paying extra for quality work.
9. Two-Strand Twists with Defined Texture
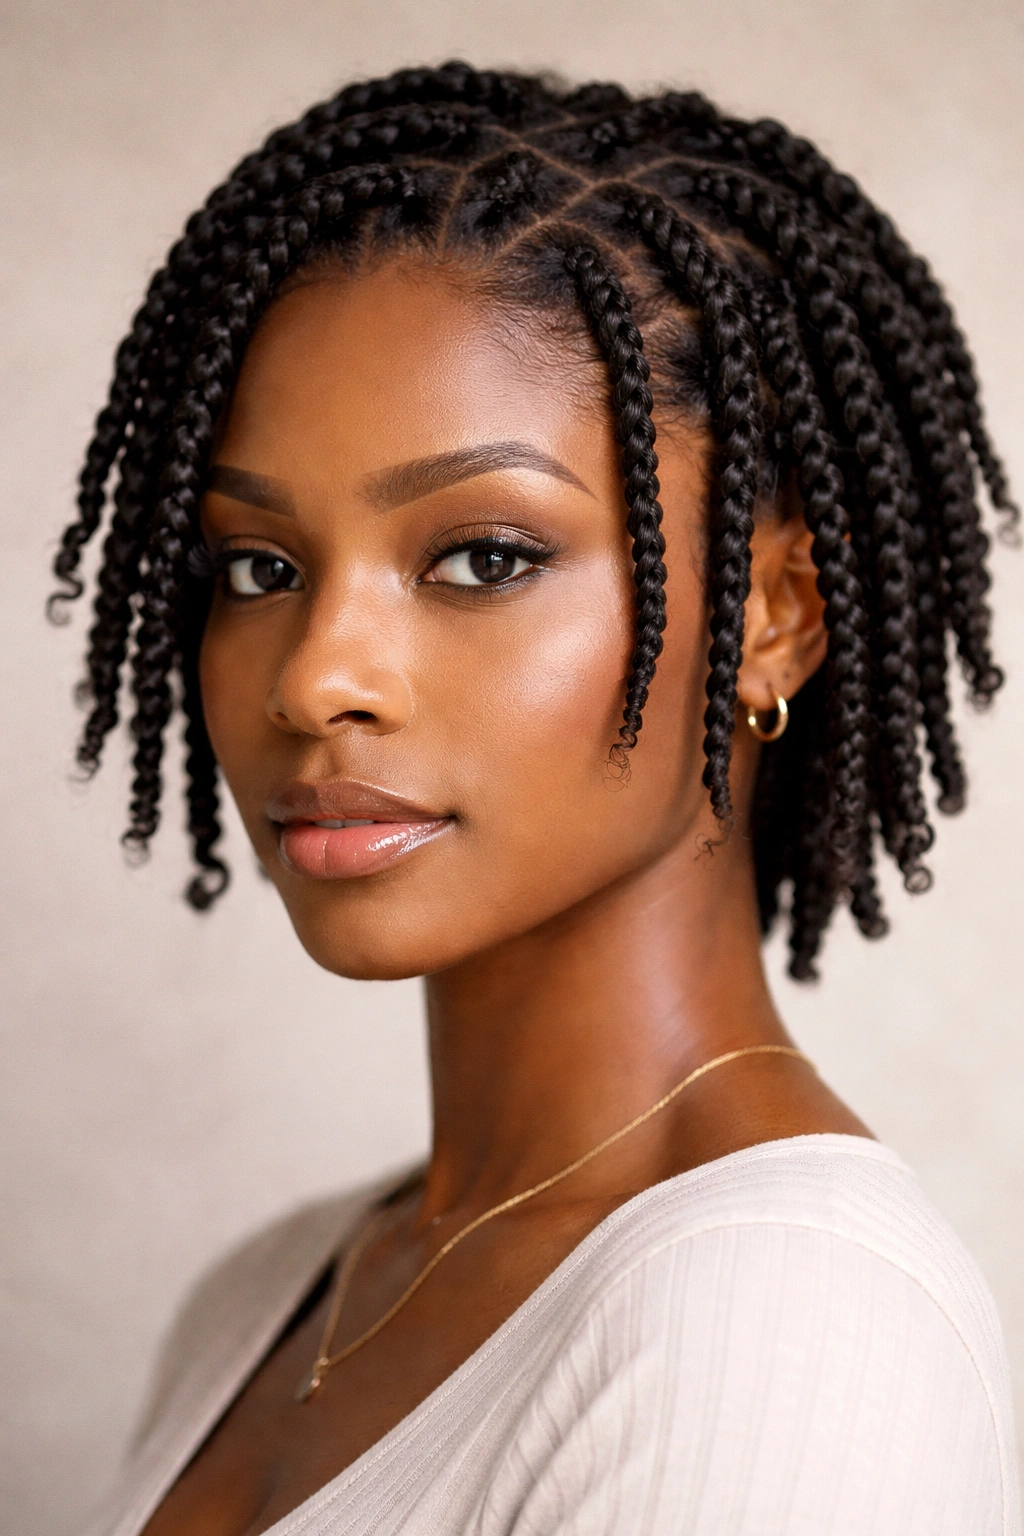
Two-strand twists use two strands of hair twisted around each other to create defined rope-like texture. Unlike the full twist-out style, two-strand twists can be left in place for weeks, worn down as a full protective style, or even styled up into buns or updos. They offer incredible protection, require minimal daily manipulation, and look beautiful at any length.
How to Install Two-Strand Twists
Start with freshly washed, damp hair and apply a leave-in conditioner, styling cream, and light gel. Divide your hair into sections — for short afro hair, create 20-40 twists depending on density and desired thickness. For each twist, take two strands, cross them over each other repeatedly, working from root to tip. Keep tension consistent for uniform-looking twists. Once complete, allow them to dry fully, either naturally or under a bonnet dryer. The twists will be tighter and more defined after drying completely.
Styling and Maintenance
- Two-strand twists last 3-6 weeks before needing to be redone
- Sleep in a bonnet to protect the twists and reduce frizz
- You can wet and reapply product to refresh them between washes
- Wear them down for maximum texture, or twist them into updos for a different look
- Moisturize your scalp regularly by applying oils directly to your scalp between twists
Pro tip: Two-strand twists are excellent for a transitional hairstyle if you’re moving toward locs — they create a similar aesthetic while being completely reversible.
10. Brush Coils with Sharp Edges
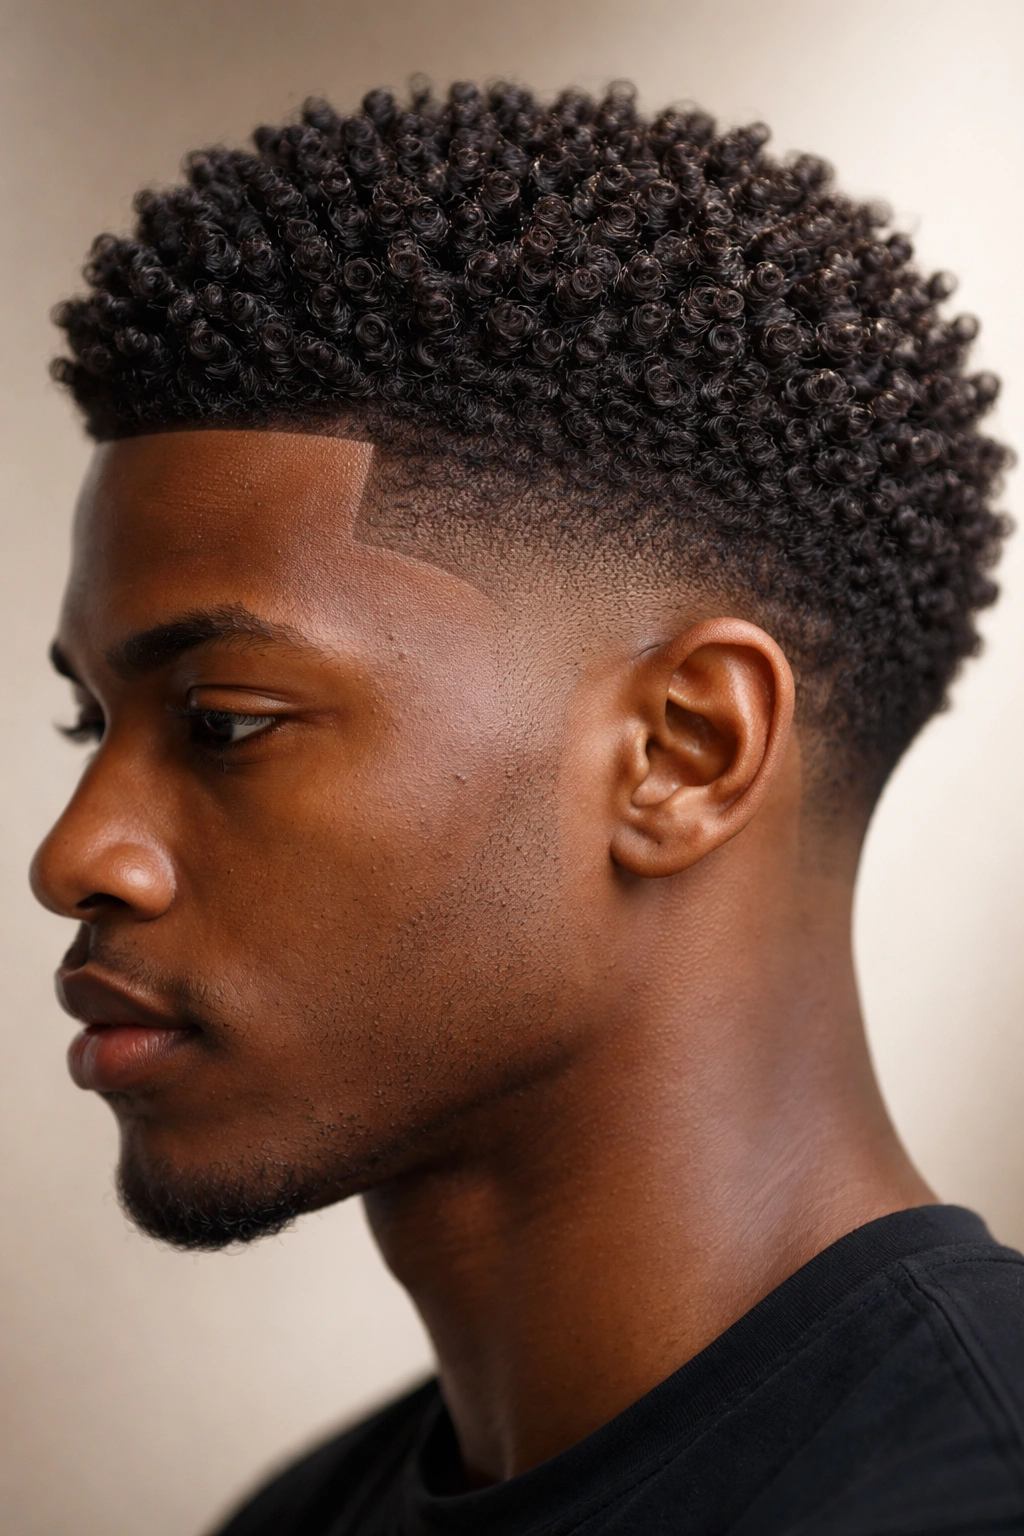
Brush coils are created by brushing your damp hair vigorously with a fine-tooth or soft-bristled brush, which encourages your natural coils to form tight spirals. This creates densely textured, voluminous hair that’s incredibly defined. When paired with sharp, controlled edges along your hairline, you get a look that feels both natural and intentionally styled.
The Brush Coil Technique
Begin with clean, damp hair and apply a rich curl cream or gel. Using a soft-bristled brush or denman brush, brush small sections of your hair against the direction of growth, then continue brushing in swirling motions to encourage coils to form. The more you brush, the tighter the coils will be. Once you’ve coiled your entire head, allow the hair to dry completely — this sets the coil formation. You can sleep in a bonnet and refresh in the morning, or apply light product to wake up the coils.
Daily and Weekly Maintenance
- Brush coils maintain their definition for 5-7 days before needing refreshing
- Refresh by misting with water and reapplying a light curl cream or gel
- Sleep in a bonnet to protect the coil structure
- On wash day, use a gentle shampoo and apply the brush coil technique again with fresh product
- Your coils will gradually loosen and relax as days pass — this transformation is part of the aesthetic
Worth knowing: Brush coils work best if you use the right products — lightweight gels and creams work better than heavy butters that can weigh down short hair.
11. Textured Taper with Decorative Accessories
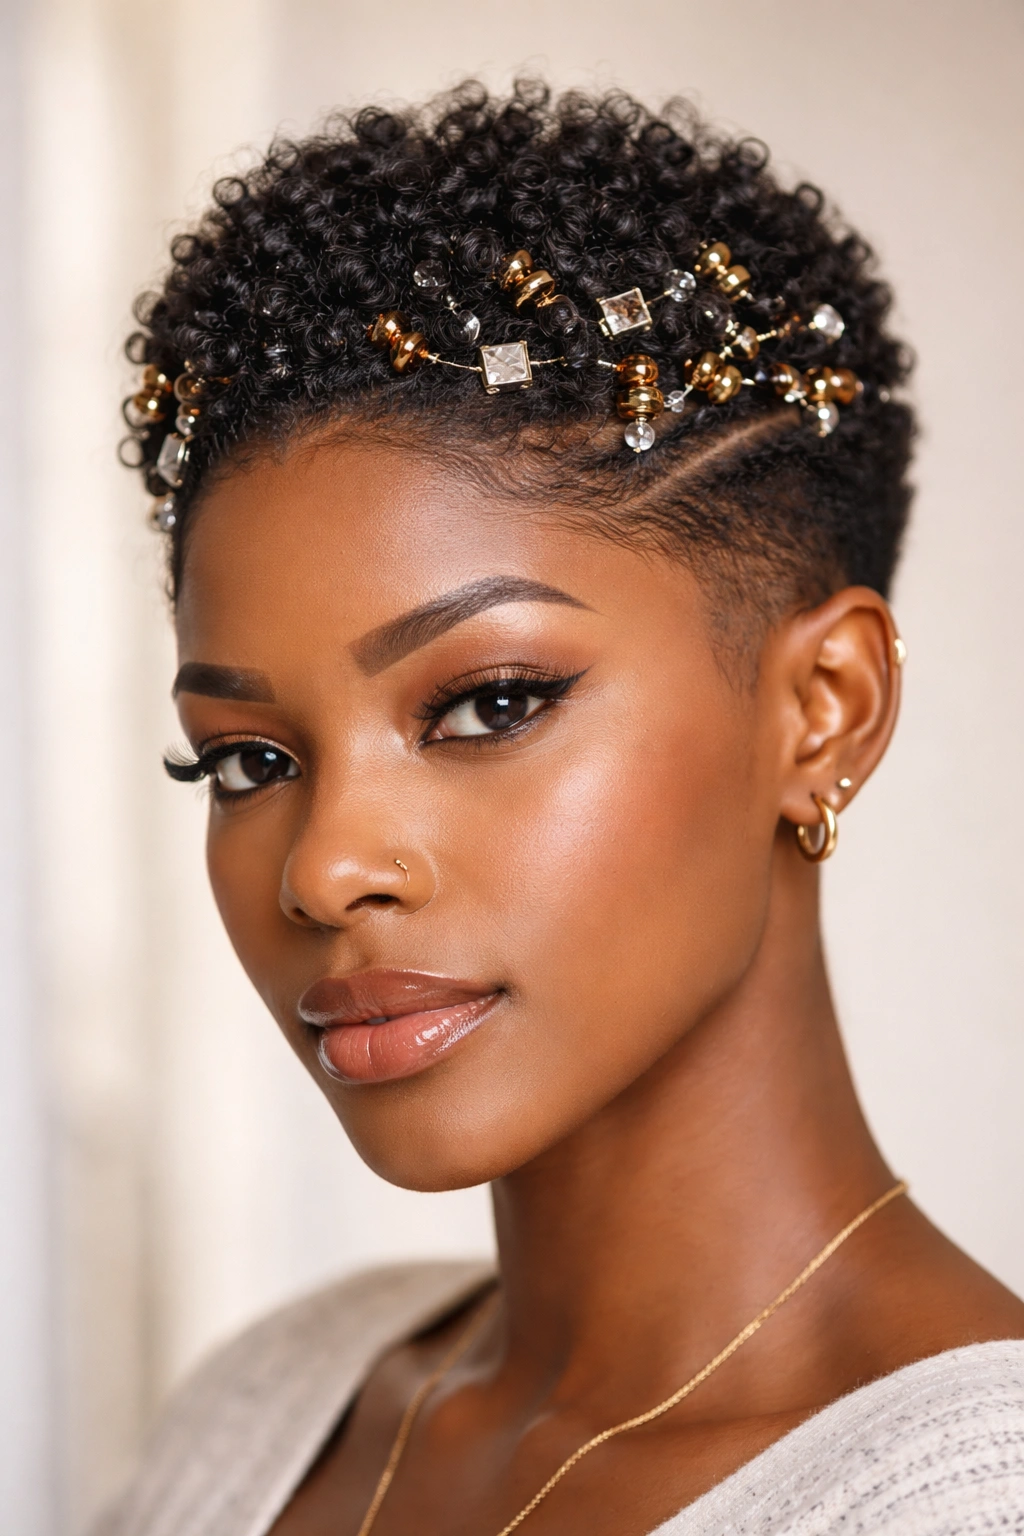
This style showcases your natural texture on top with a clean taper or fade on the sides, then elevates the look with decorative elements — beads, cuffs, rings, or hair clips woven throughout your hair. The accessories add dimension, personality, and visual interest without requiring complex braiding or styling techniques. This is perfect if you want to dress up your everyday style.
Choosing the Right Accessories
- Metal cuffs and rings: Slide onto sections of twisted or coiled hair for a sleek, modern look
- Beads: Brass, wooden, or decorative beads threaded onto braids or individual twists
- Hair clips and barrettes: Pearl, metallic, or jeweled clips placed throughout for a refined aesthetic
- Faux stones: Small glued-on gems or stones for a statement look
- Scarves and head wraps: Woven throughout textured hair for added color and dimension
Application and Care
- Accessories should be secure enough that they don’t slip easily during daily activity
- Beads and cuffs work best on twisted or braided sections where they have something to grip
- Hair clips should be positioned in sections of enough density to hold them securely
- These accessories can be worn for several weeks as long as your underlying style holds
- Remove accessories gently to avoid pulling or breaking your hair
Pro tip: Mixing metal finishes (gold and silver together) creates a modern, intentional aesthetic that feels less matchy-matchy.
12. Fade with Wave Pattern
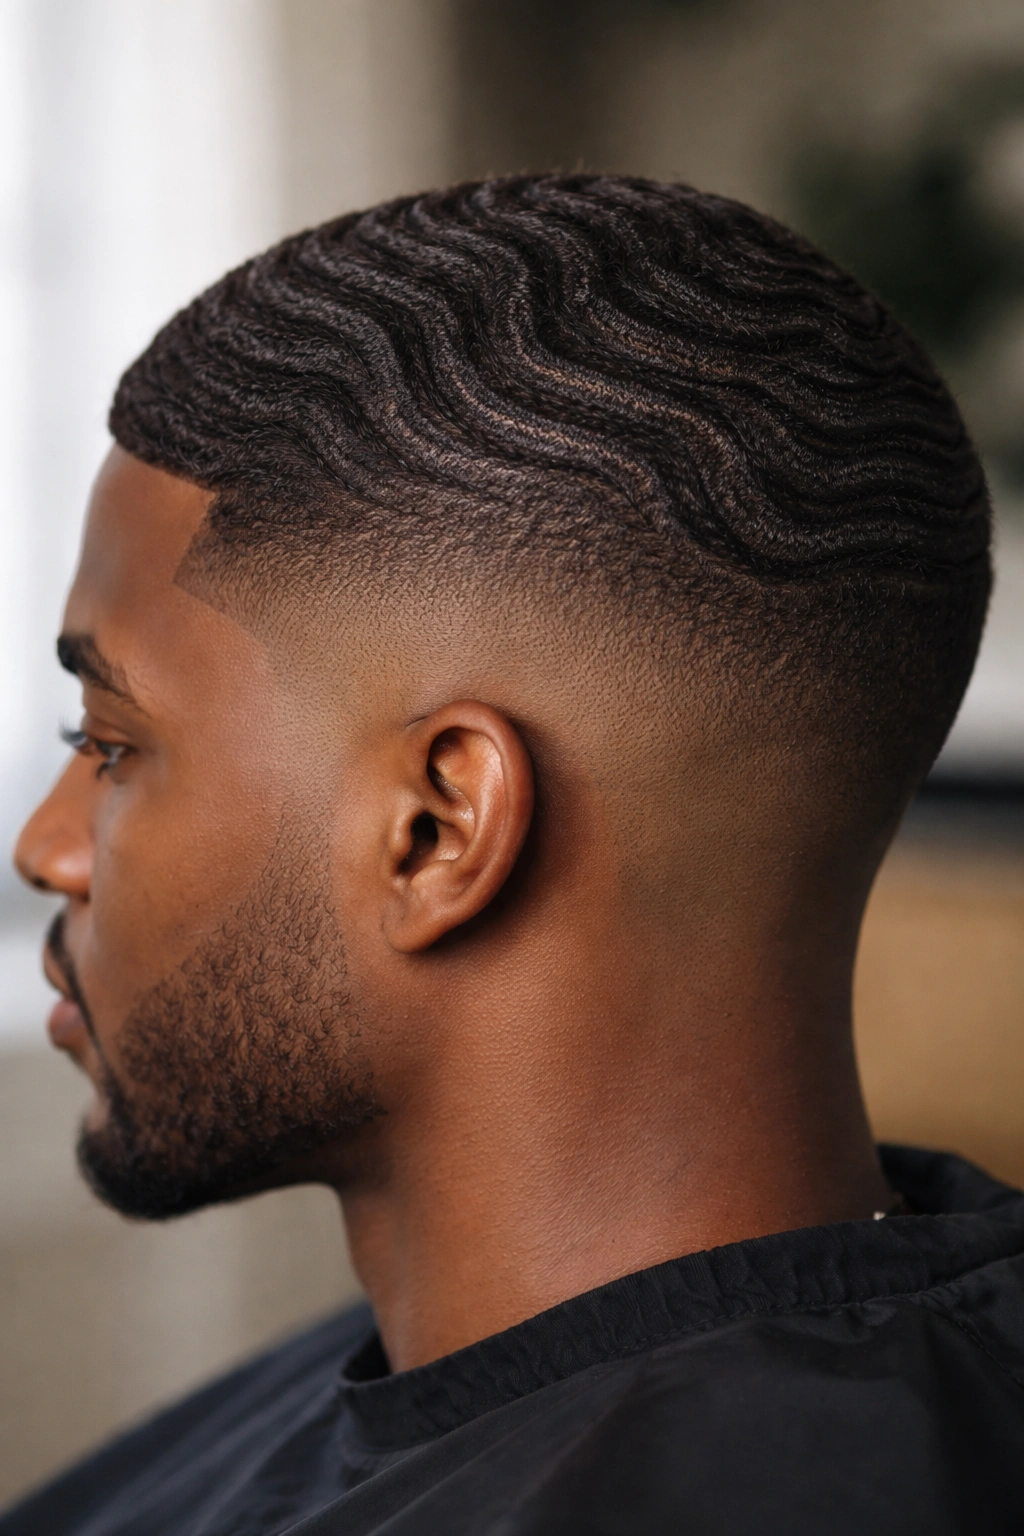
A wave pattern is created by using brushing techniques and product to encourage your hair into smooth S-curves or wave formations. Combined with a fade, this creates a style that’s visually striking and constantly evolving as the waves shift throughout the day. Waves work best with hair that has a natural coil or curl pattern that can be directed into wave formations.
Creating and Maintaining Waves
Begin with clean, damp hair and apply a wave cream or pomade designed to encourage wave patterns. Using a wave brush or soft-bristled brush, brush your hair in directional strokes to encourage waves to form. Brush in one direction on one side of your head and the opposite direction on the other side, creating symmetrical wave patterns. Once formed, allow your hair to dry or use a bonnet to set the waves. On non-wash days, refresh by applying light product and brushing in the same directional patterns.
Daily Wave Maintenance
- Waves are most defined on day 1-3 after washing and setting them
- Sleep in a wave cap or bonnet to prevent the pattern from shifting overnight
- Brush your waves each morning to maintain definition before they lose shape
- Use a light pomade or oil to keep waves moisturized without flattening them
- Reapply waves every 2-3 weeks depending on how quickly your hair relaxes
Worth knowing: Wave patterns show best under light and create a hypnotic, almost three-dimensional effect on camera. This style is particularly striking if you have dense, textured hair.
Final Thoughts
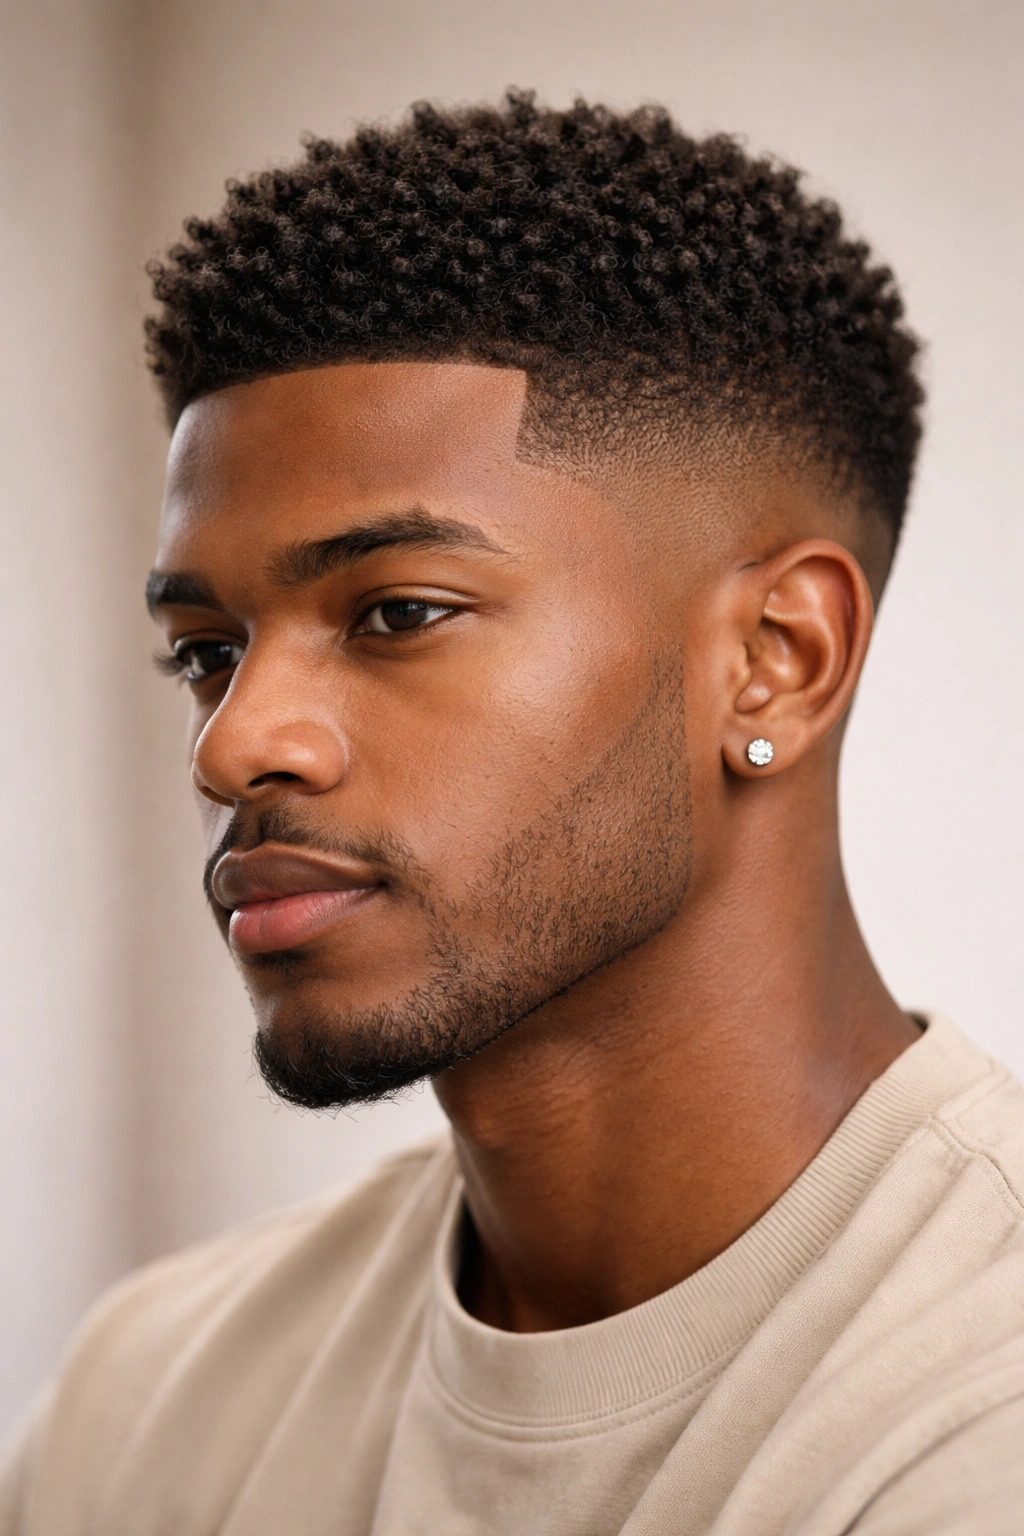
Short afro hair offers an incredible platform for expressing your personal style while keeping your hair healthy and manageable. The twelve styles covered here represent just a portion of what’s possible — each can be modified, combined, or adapted to suit your specific hair type, face shape, lifestyle, and preferences.
The most important thing to remember is that your hair is uniquely yours, and the best style is one that makes you feel confident and comfortable. Some of these styles require professional installation or detailed technical skill, while others are simple enough to execute at home with the right products and patience. Don’t hesitate to try different styles, experiment with accessories and products, and spend time figuring out what works with your hair’s natural texture rather than fighting against it.
Your short afro hair isn’t a limitation — it’s an advantage. It grows faster, requires less manipulation, demands less product, and allows your natural texture to shine in ways longer hair sometimes can’t. Take care of your hair’s health through regular deep conditioning, protective styling when needed, and avoiding unnecessary heat and tension. With the right style, you’ll discover that short afro hair is one of the most versatile, beautiful, and empowering ways to wear your hair.
