



A good messy bun isn’t actually about being messy — it’s about intentional texture paired with the right framing. When you add a side part to the equation, you’re creating an asymmetrical shape that draws focus to one side of the face while still giving you that effortless, undone vibe that works for literally any occasion. The side part acts as a visual anchor that makes the whole style feel more curated and deliberate, even when the bun itself is textured and loose.
The genius of combining messy buns with side parts is that it works across nearly every hair type, length, and styling skill level. Whether your hair is thick or fine, straight or naturally wavy, short enough for a smaller bun or long enough for a dramatic topknot, there’s a side-parted messy bun variation that’ll suit you. The side part also provides practical benefits — it keeps hair off one side of your face, balances the visual weight of a voluminous bun, and gives you the flexibility to style the shorter side differently from the longer side, creating more dimension and interest.
What makes these styles so versatile is that they work equally well for casual days at home, professional environments when you need your hair handled, date nights when you want an effortlessly put-together look, or workouts where you need complete security with a bit of style. The key is understanding how to build texture into your bun, position it strategically on your head, and use the side part to frame your face in a way that feels balanced and intentional. Let’s explore eight distinct ways to create a messy bun with a side part that elevates your everyday styling game.
1. The Textured Top Knot with Side Swept Layers
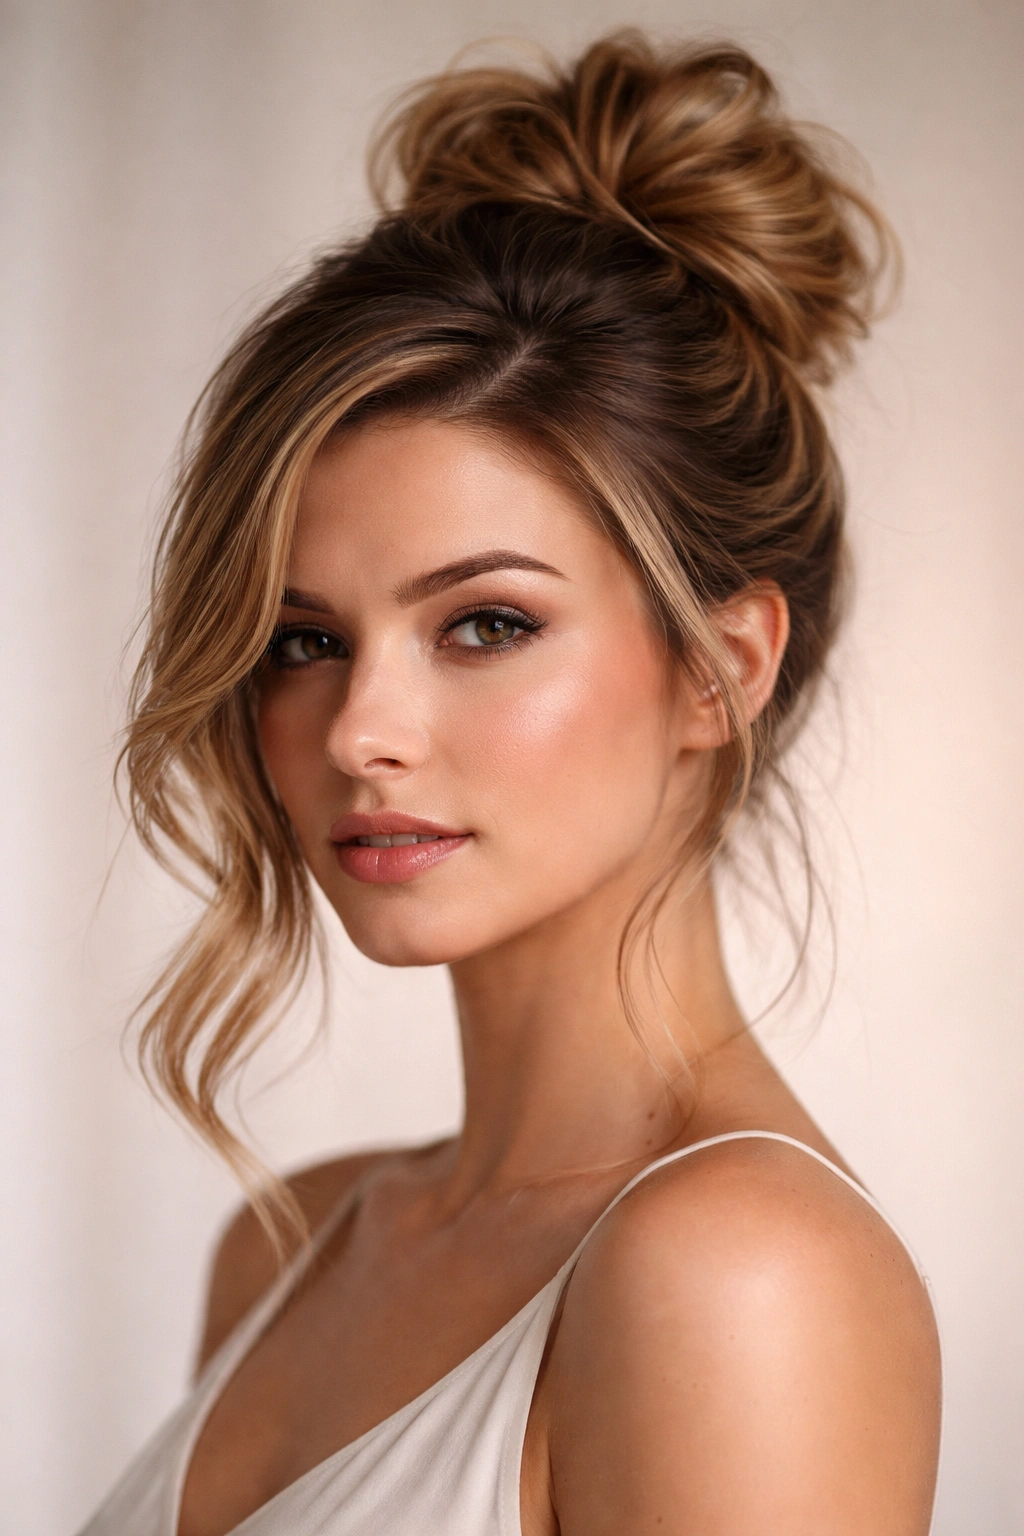
This is the high-visibility version of the messy bun — the one that sits at the very crown of your head and catches the light beautifully. The textured top knot with side swept layers works best when you have some length to work with (at least shoulder-length hair), and it demands that you create actual texture in your bun rather than just twisting your hair into submission. The side part is dramatic here, with one side noticeably shorter than the other, which creates a framing effect that makes your face look more sculpted and intentional.
How to Build the Texture
Start with hair that’s already been curled, waved, or textured — use a curling iron, wand, or even sleep waves to your advantage. The texture gives you grip and makes it significantly easier to tease your bun into a fuller, more interesting shape. Spray a light texturizing spray throughout your damp hair before blow-drying to add grit. Once your hair is dry and textured, create a deep side part by combing from one temple all the way to the nape of your neck. The deep part is what creates that swept-layer effect that makes this style feel intentional rather than accidental.
Creating the Top Knot Structure
Gather all your hair at the crown (not at the back of your head — crown placement is crucial here) and secure it loosely with an elastic. Don’t pull it tight. Instead, gently tease the hair within the elastic to create volume and separation, then use bobby pins to anchor stray sections. Leave a few face-framing pieces around your temples and one or two longer pieces on the shorter side of your part to enhance that swept effect. The result should look deliberately undone, with visible texture and separation in the bun itself, not sleek and polished.
Pro tip: Spritz your finished bun lightly with texture spray or dry shampoo to enhance separation and keep flyaways under control without making it look stiff.
2. The Romantic Twisted Side Part Bun
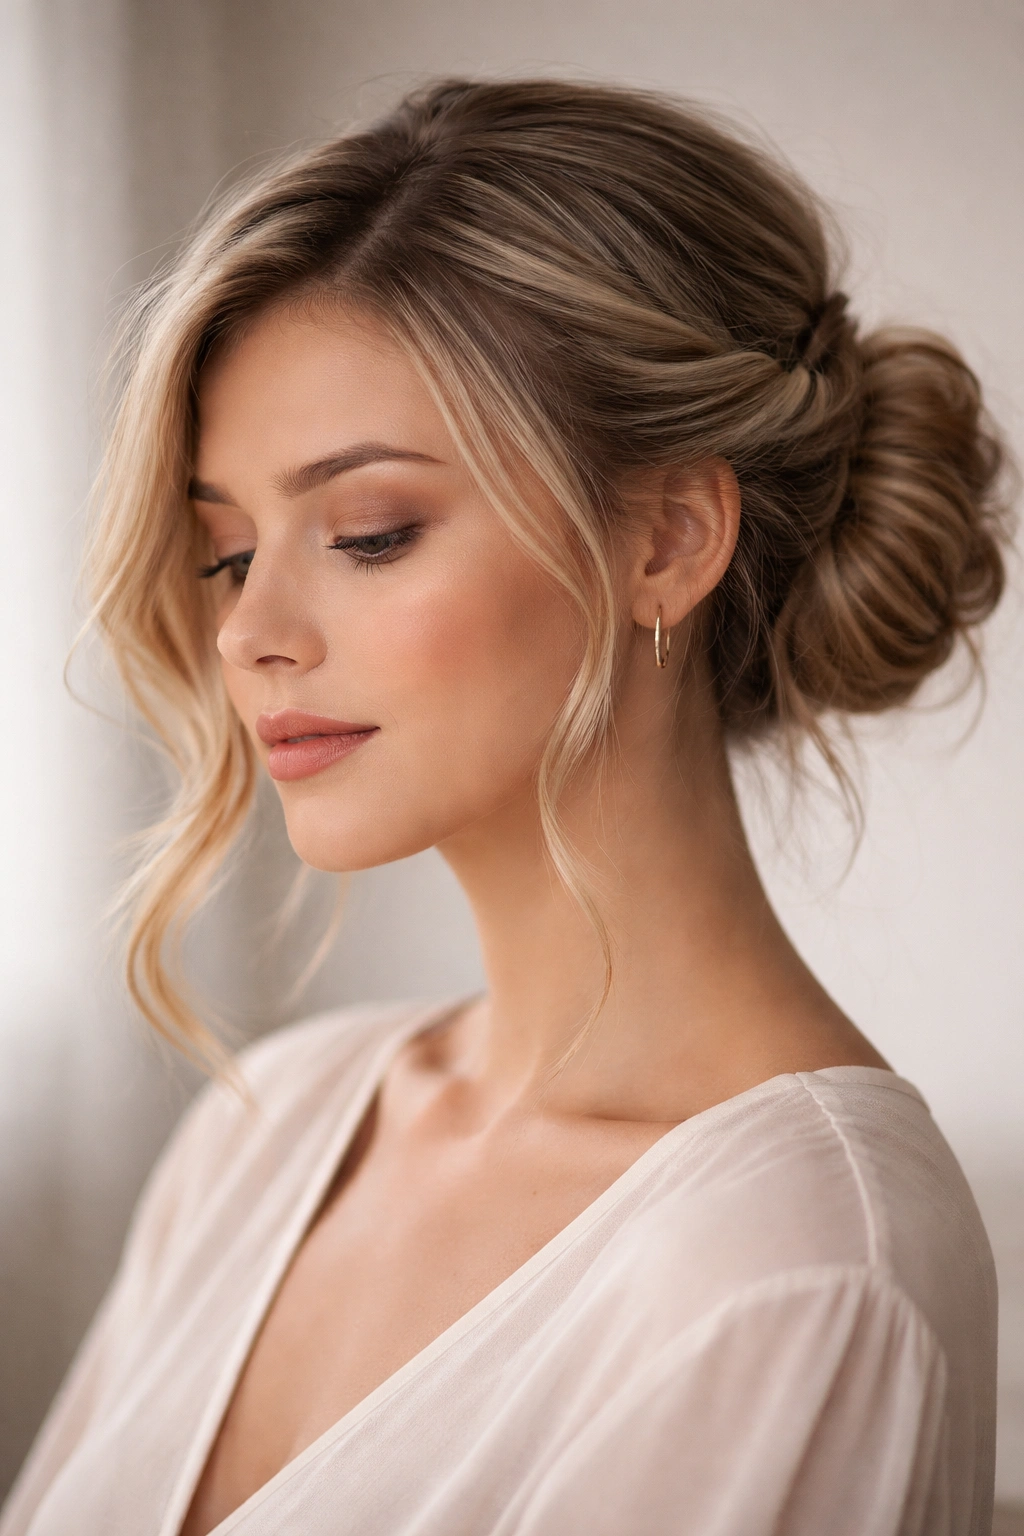
This style bridges the gap between polished and relaxed — it’s romantic enough for a date or special occasion, but still casual enough for everyday wear. The twisted side part bun involves creating multiple twists throughout your hair before gathering it into a bun, which gives you built-in texture and visual interest that feels way more intentional than a standard bun. The side part here is less dramatic than the top knot version; you’re aiming for a gentle asymmetry that softens your face rather than creating strong visual division.
The Twist Technique That Works
Begin with your side part, then take a section from near your hairline (on the fuller side of the part) and create a two-strand twist down toward the back of your head. Secure the end of that twist temporarily with a small clip. Repeat with a second section slightly behind the first, creating another twist. You can do 2-4 twists depending on your hair volume and how much texture you want. These twists serve as both decoration and an anchor system for your bun — they give you something substantial to wrap your remaining hair around rather than starting with a thin base.
Assembling the Bun
Gather all of your hair (including the twisted sections) into a low-to-medium bun position at the back of your head. As you’re creating your bun, gently unwind or loosen the twists slightly so they become part of the bun rather than distinct separate pieces. This creates a texture within the bun that’s visually interesting. Secure with bobby pins, then gently pull and tease sections of the bun to make it look fuller and less tight. Leave just a few delicate face-framing pieces on the longer side of your part.
Worth knowing: This style holds particularly well when you use a texturizing spray beforehand — it gives your hair grip without making it feel sticky or heavy.
3. The Undone Crown Braid Messy Bun
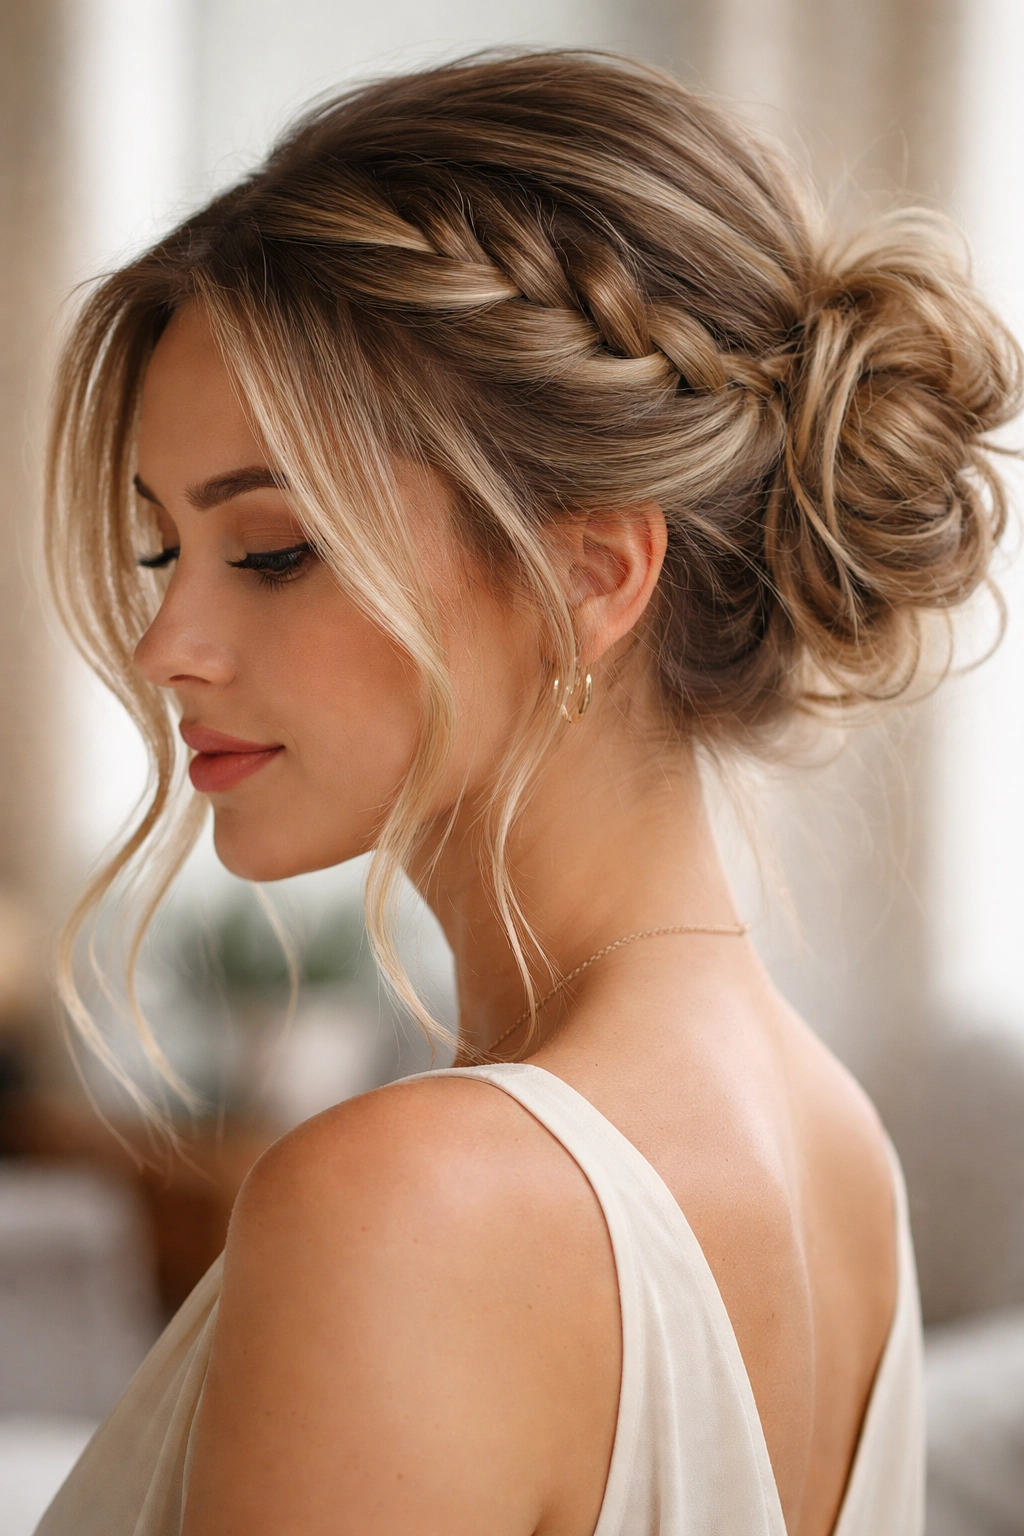
Crown braids are experiencing a surge in popularity because they genuinely make any bun look infinitely more sophisticated and interesting. When you combine a crown braid with a side part and a loosely textured bun, you’re creating a style that looks like you spent serious time on it while still maintaining that effortless, undone aesthetic. The side part works with the crown braid to create asymmetrical balance — one side of your head features the braid structure, while the other side remains simpler and more open.
Building Your Crown Braid
Create your side part first, then start your braid from the shorter side of the part, near your ear. Instead of a traditional three-strand braid, use a four-strand or fishtail technique for added texture and visual interest. As you braid, add hair gradually so the braid incorporates more sections as it moves across the back of your head. The braid should travel roughly along where a crown would sit — that’s why it’s called a crown braid. Don’t worry about making it perfectly neat; loose, slightly undone braids look far more modern and appealing.
Finishing with the Bun
Once your crown braid reaches the opposite side of your head, secure it loosely with a bobby pin, then gather all your remaining hair (including the braid) at the back of your head and form a low or medium bun. As you’re creating the bun, gently loosen the braid so it’s less defined and more blended with the surrounding hair. The braid should be visible enough that viewers can see the technique, but loose enough that it feels organic and undone. Finish with a few wispy face-framing pieces on the longer side of your part.
Real talk: The looseness of your braid is what makes this work. If you braid too tightly, it reads as formal and uptight. Loose, textured braids feel modern and intentional.
4. The Sleek-to-Messy Low Bun with Side Part
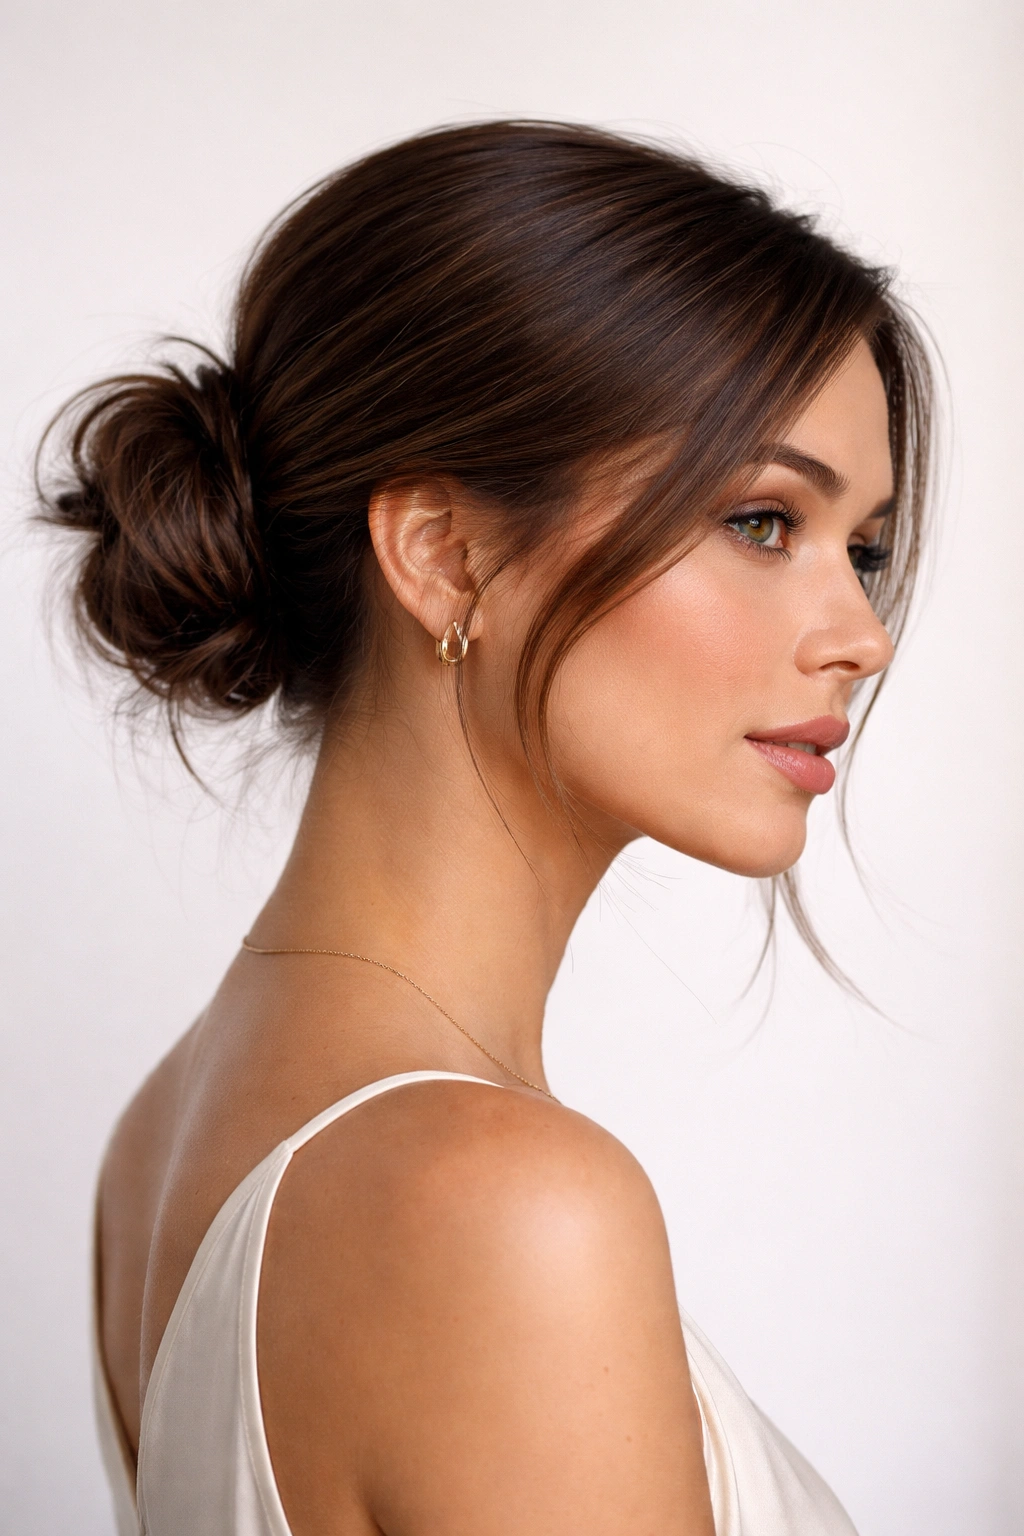
This style is the perfect bridge between office-appropriate and playfully undone. The concept is genius: you start with a sleek side part and smooth, polished hair, then gradually introduce texture and looseness as you move toward your bun. The front and sides of your head look intentional and put-together, while the bun itself is appropriately messy and textured. It’s the hairstyle equivalent of wearing a blazer with your favorite jeans — professional meets relaxed.
Creating the Sleek Foundation
Apply a smoothing serum or light hairspray to damp hair, then blow-dry with a paddle brush to create a smooth, polished base. Create a deep side part by using a fine-tooth comb to separate the sections cleanly. Smooth each side down with a straightener or by carefully blow-drying with the brush if you want to maintain some softness. The goal here is genuine smoothness on the sides — think glossy, almost glass-like hair on the top and sides, which creates a striking contrast with the messy bun that comes next.
Building the Textured Bun
Gather your hair into a low bun position at the nape of your neck, but don’t secure it tightly. Instead, create a loose base and then tease and separate the bun generously with your fingers and a teasing brush. Pull sections out and loosen them so the bun looks full, undone, and textured. The contrast between your sleek hairline and side part and this textured, voluminous bun is what makes the whole look sing. Pin strategically with bobby pins, then softly tease any remaining sections that feel too neat.
Pro tip: Use a fine-tooth comb to gently comb out the surface of your bun slightly, creating a more refined, intentional messy look rather than chaotic scrambled texture.
5. The Voluminous Stacked Messy Bun
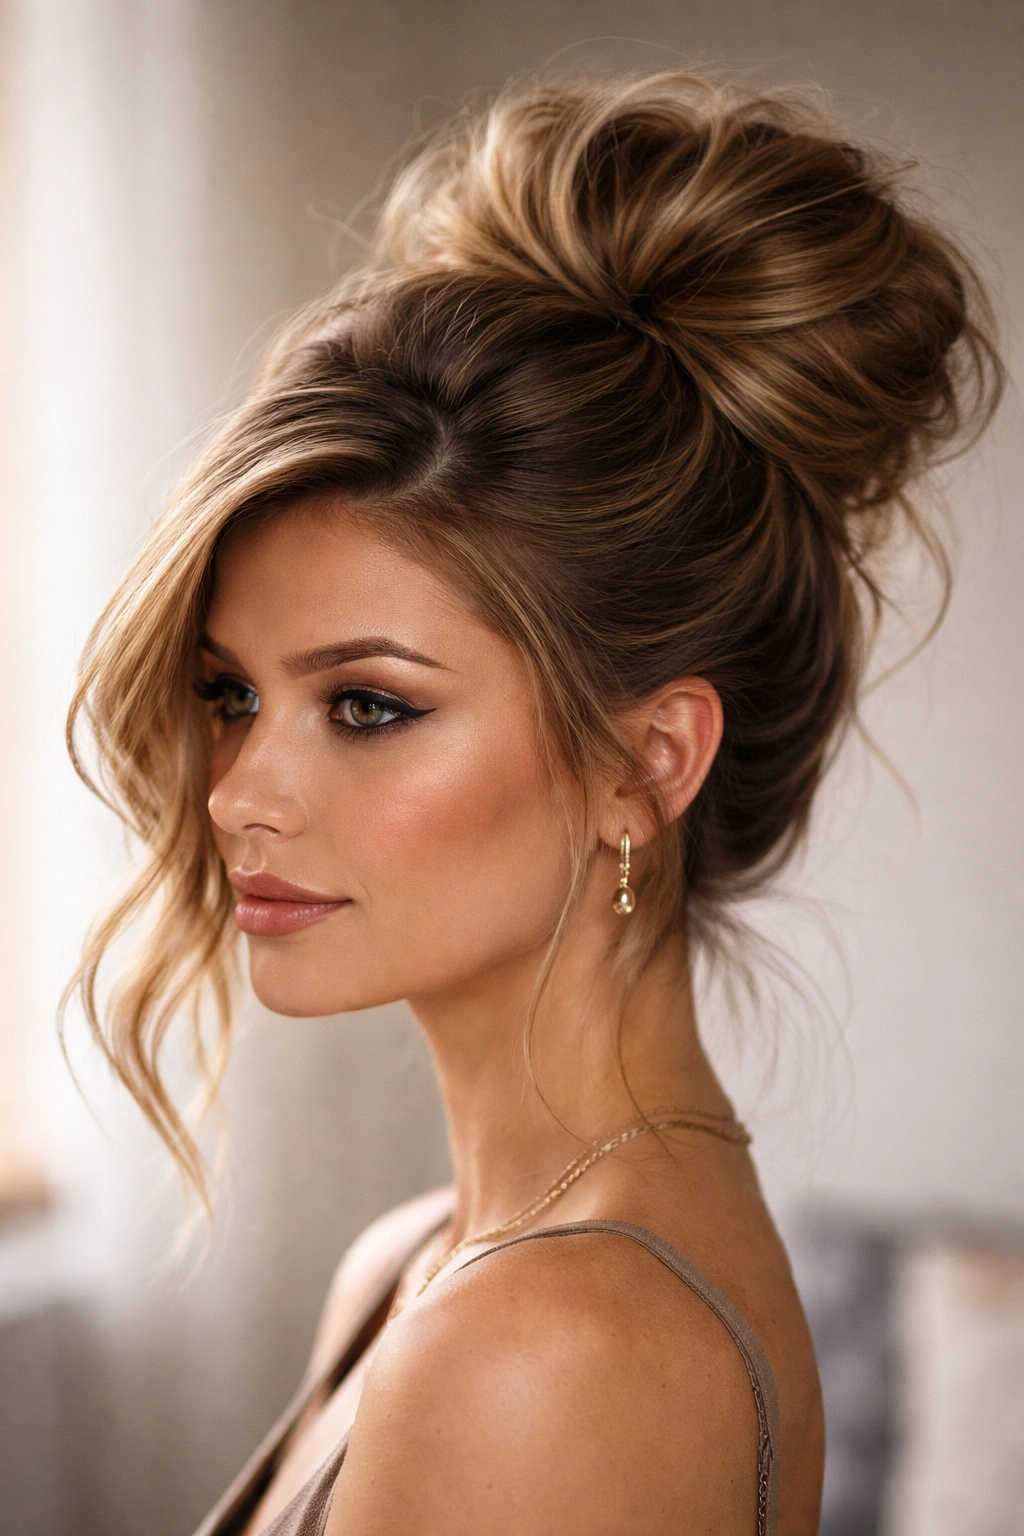
If you love the drama of a truly voluminous bun but want to keep it modern and undone-looking, the stacked messy bun with a side part is your answer. This style works beautifully on thick hair, but you can absolutely create volume on finer hair too by using strategic teasing and the right techniques. The side part here is moderate — not deeply asymmetrical, but definitely off-center enough to frame one side of your face while the bun sits high and proud at the crown.
The Backcombing Method for Maximum Volume
Start with textured or slightly damp hair for grip. Create your side part, then gather all your hair into a high ponytail at the crown — higher than you might normally go for a bun. Using a teasing brush or fine-tooth comb, backcomb the ponytail sections aggressively to create a substantial base. Work in layers: backcomb the bottom section, then the middle, then the top, building volume as you go. Don’t be timid here — the more you tease, the fuller your bun will be.
Stacking for Structure
Once you’ve teased your ponytail into a voluminous poof, begin wrapping sections around the elastic to form your bun. Rather than wrapping the hair into a single, tight disk, create two or three separate coils around the elastic, stacking them on top of each other. This stacking technique creates a bun that’s taller and more dimensional than a traditional single-wrapped bun. Pin each section as you go, using multiple bobby pins for security. Then, gently separate and loosen sections of the stacked bun with your fingers, creating that intentionally undone appearance.
Worth knowing: This style holds exceptionally well throughout the day, especially if you use a medium-hold hairspray before teasing and a light hairspray after assembly.
6. The Half-Up Messy Bun with Side Part Detail
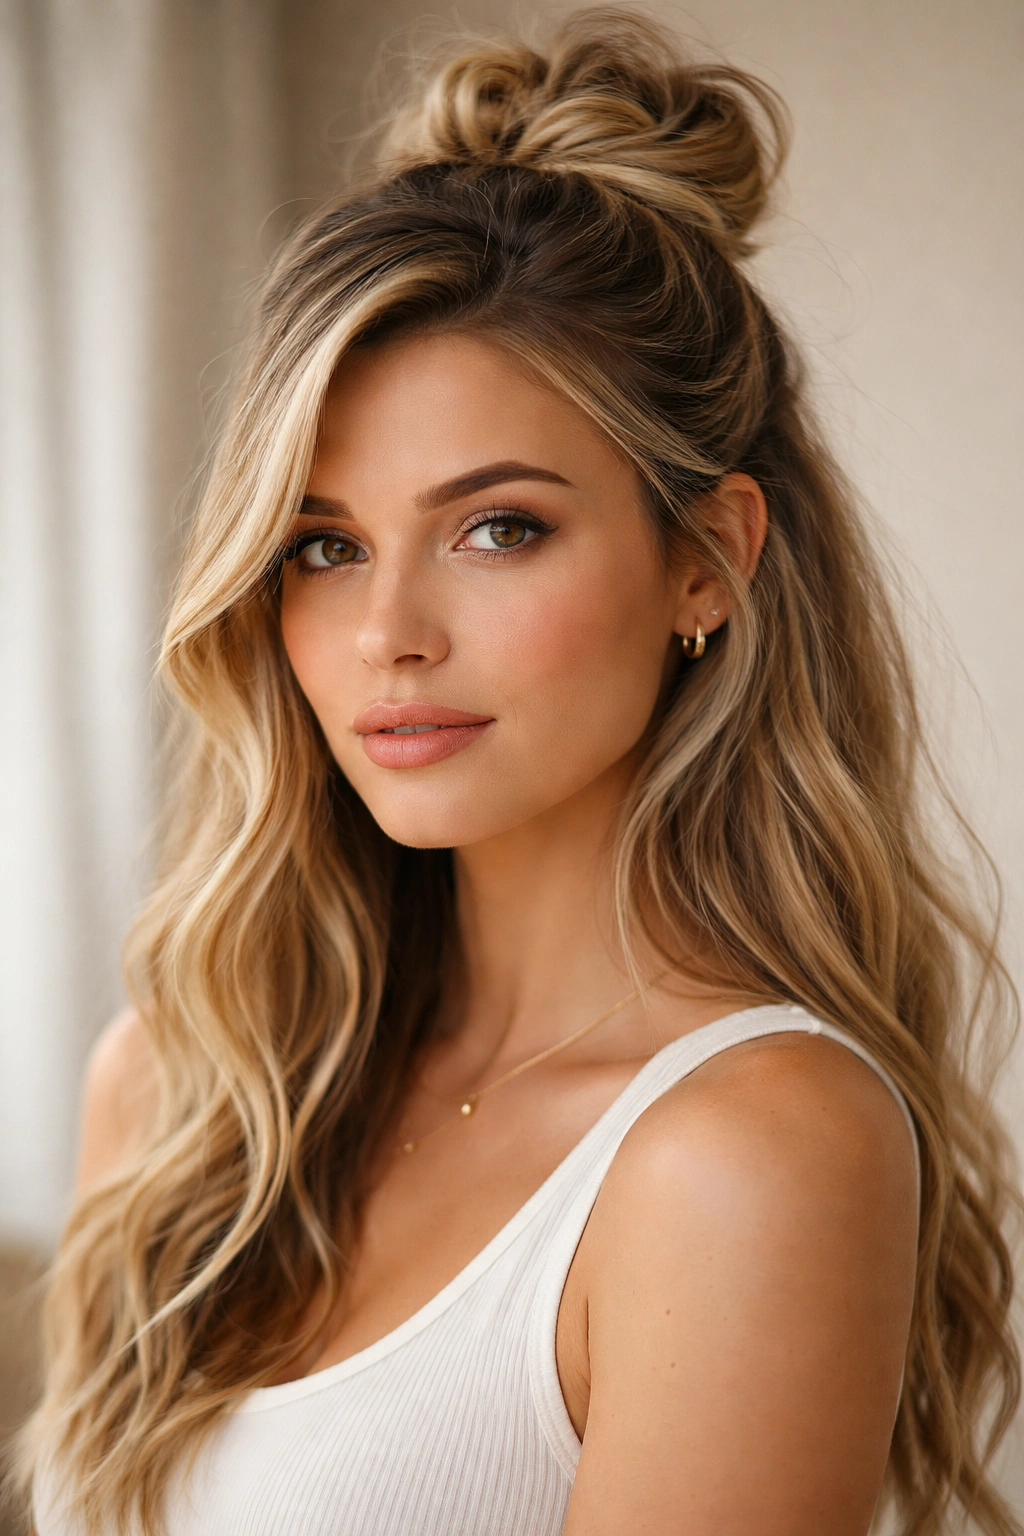
This is the style that gives you the best of both worlds: loose, flowing hair on the bottom with the security and polish of a bun on top. The side part here is particularly strategic — the top half of your hair (the part that goes into the bun) respects the side part, while the bottom half flows freely and incorporates both sides, creating interesting visual layering. This style works especially well if you have medium to long hair and want to show off length while still keeping hair off your face.
Sectioning for the Half-Up Structure
Create your side part, then clip away the bottom half of your hair (roughly everything below your ears) temporarily. The top half — what will become your bun — should include your part line and maintain that asymmetry. Take the top-half section and create a small ponytail at the back of your head, positioned higher than you would for a full bun. Tease this ponytail gently to create volume, then form a messy bun by wrapping sections around the elastic and pinning them loosely.
Adding Movement to the Bottom
Unclip the bottom section of your hair and let it fall freely. If you want to add texture and movement, curl the bottom sections with a barrel iron or wand, focusing the curls on the longer side of your part. The contrast between the textured bun on top and the flowing, potentially curled hair on the bottom creates a style that’s interesting from every angle. Leave a few face-framing pieces on the shorter side of your part to soften the overall look and emphasize the side part detail.
Pro tip: Use a light hairspray on the flowing bottom sections to keep them from looking limp by the end of the day, especially if you have finer hair.
7. The Tousled Wrapped Bun with Side-Parted Tendrils
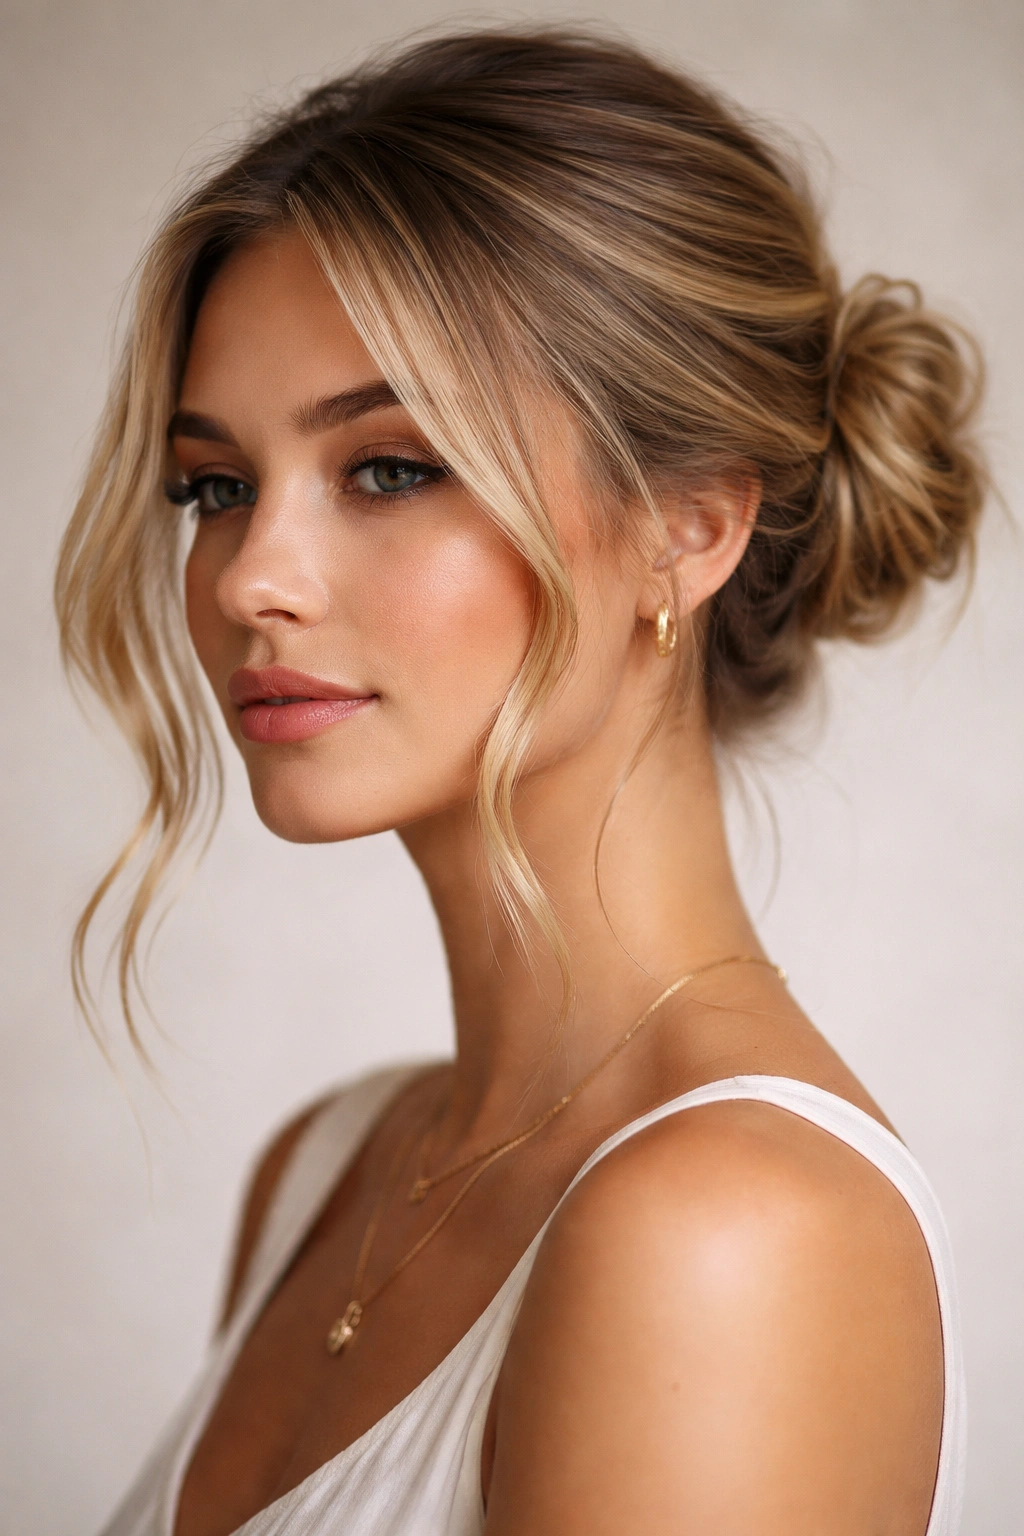
This style is pure sophistication wrapped in an undone package. The tousled wrapped bun involves creating a bun, then wrapping a section of hair around the base to conceal the elastic and add visual interest. The side-parted tendrils — small sections of hair left strategically loose — frame your face and enhance the intentional undone vibe. This is the style that makes people ask “did you do that yourself?” because it looks effortlessly polished.
Creating the Textured Base
Start with hair that has some texture or wave to it — use a curling iron, braiding method, or beach waves spray the night before. Rough-dry your hair rather than blow-drying it smooth; this gives you the tousled base you need. Create your side part, then gather your hair into a low-to-medium ponytail slightly off-center, keeping it loose and relaxed rather than pulling everything tightly. Gently separate and tease the ponytail to create volume before forming your bun.
The Wrapped Effect
Once your bun is formed and pinned, take a thin section of hair (about an inch wide) from one side of the ponytail base and wrap it around the bun, covering the elastic. Secure the wrapped section with a bobby pin tucked underneath. This wrapped effect makes the bun look far more finished and polished than a standard elastic. Leave several intentional face-framing pieces on both sides of your part, especially longer pieces on the fuller side. These tendrils should look naturally loosened rather than deliberately styled.
Real talk: The key to this style working is keeping the overall vibe relaxed and undone. If everything is too polished, it loses its charm.
8. The Bohemian Looped Messy Bun
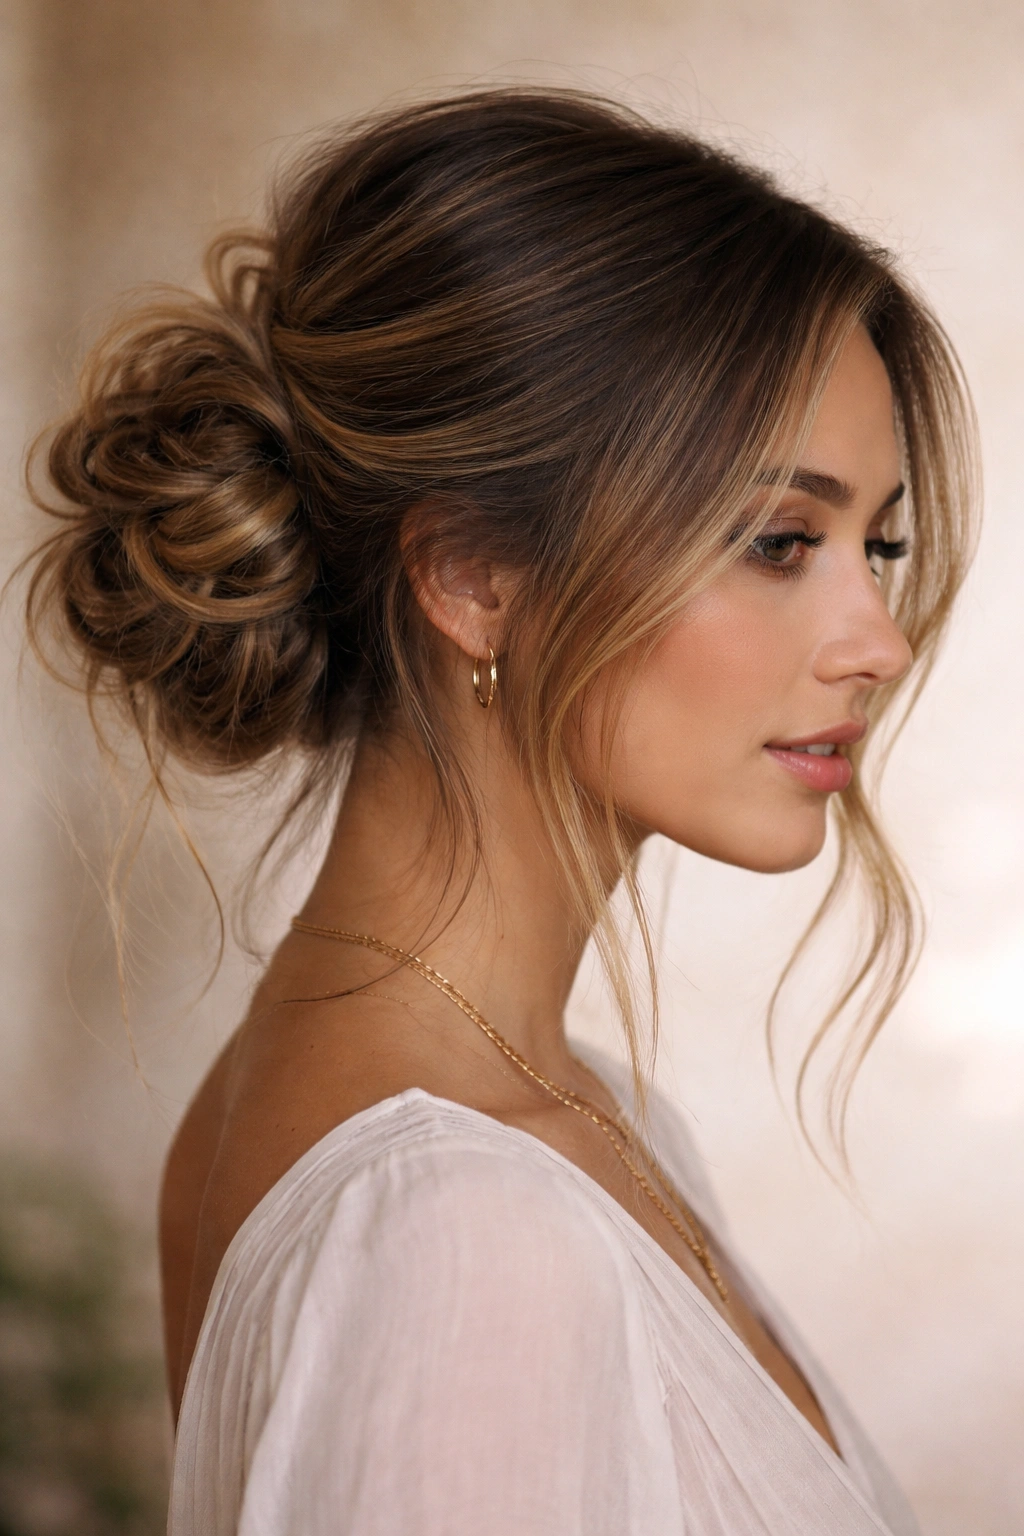
The looped bun — where you create partial loops with your hair rather than fully wrapping it all the way around — is having a major moment. When you add a side part and embrace the undone, bohemian aesthetic, you get a style that’s perfect for weekend adventures, coffee dates, or anywhere you want to look effortlessly put-together. This style celebrates texture and movement rather than trying to contain it, which is precisely why it feels so modern.
The Soft Loop Technique
Create a deep side part and gather your hair into a low to medium ponytail, positioned slightly off-center to respect your side part. Rather than wrapping your ponytail completely into a tight bun, divide it into 3-4 sections. Create the first section into a loose loop or coil around the elastic, securing it with a bobby pin but not anchoring it down. Create a second loop slightly overlapping the first, then a third and potentially a fourth, each one anchored individually. The result is a bun made of these stacked loops rather than wrapped sections, which creates tons of visible texture and movement.
Emphasizing the Bohemian Feel
Leave multiple pieces loose around your face and throughout your bun — don’t aim for a neat, controlled look. Gently pull sections of the loops to make them even more textured and undone-looking. Let pieces fall around your face, especially on the longer side of your part. If your hair is naturally wavy or curly, this style celebrates that texture beautifully. If your hair is straight, add wave or texture beforehand using a curling iron or braiding method. The bohemian vibe comes from embracing movement and slight imperfection rather than controlling every piece.
Worth knowing: This is the easiest messy bun style to adjust throughout the day — you can pull out more pieces or tighten loops without completely redoing your hair.
Final Thoughts
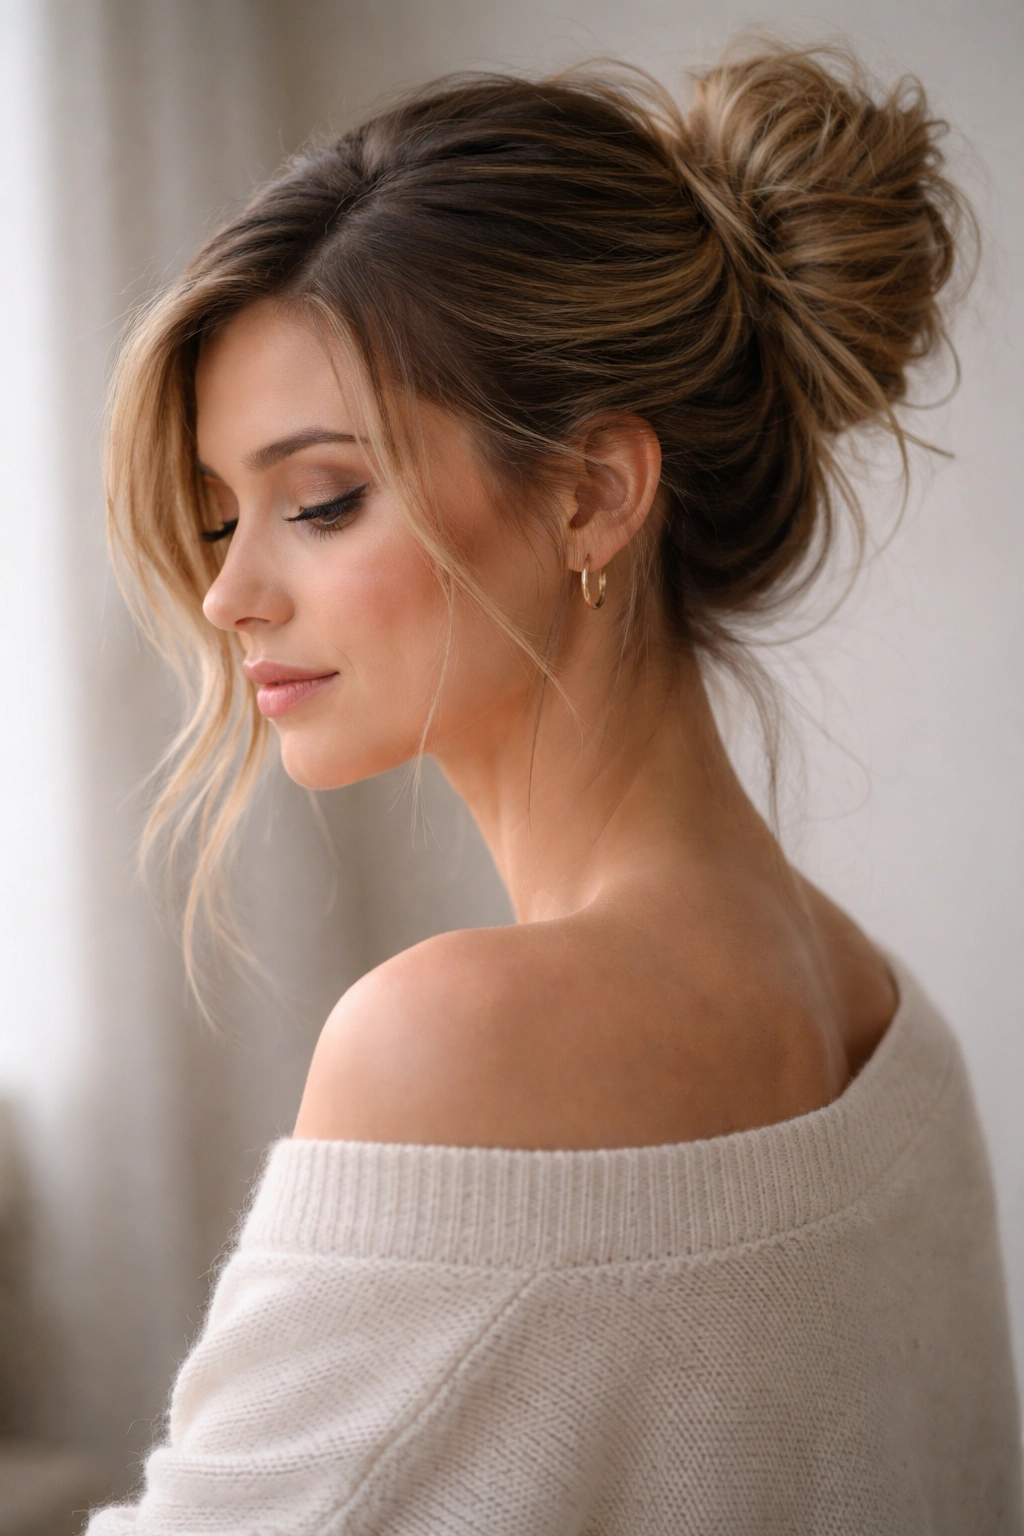
The magic of combining a messy bun with a side part is that you’re getting the best of structured styling (the intentional placement of your part) with the relaxed vibe of a textured, undone bun. These eight variations show just how much you can shift the overall mood of the style — from romantic and polished to bohemian and effortless to sleek and office-ready — all while working with the same basic technique. The key in every version is embracing texture, keeping your bun loose rather than tight, and using strategic face-framing pieces to enhance the side part rather than fighting against it.
The beauty of mastering these styles is that once you understand the fundamentals — how to build texture, where to position your bun, how to use your part as a design element — you can move fluidly between them depending on what your day demands. A style that looks perfectly casual on Saturday can feel intentional and polished on Monday just by adjusting your base texture and how loosely you construct your bun. These aren’t complicated techniques; they’re genuinely achievable with practice and the right approach to understanding how your specific hair works best.
