



Curly hair and the messy bun were made for each other. While some hairstyles require straight strands and sleek precision, the messy bun celebrates the texture, bounce, and natural movement that curls bring to the table. The best part? Curly hair actually makes achieving a genuine messy bun easier than you’d think — your curls do half the work by providing inherent volume and dimension without any fuss.
The challenge isn’t making a messy bun work with curls; it’s knowing which style will complement your specific curl pattern and look intentional rather than accidental. A high bun lands differently on coils than it does on straight hair. The way you twist, wrap, and secure matters more when you’ve got texture. And there’s a world of difference between a bun that highlights your curls’ natural beauty and one that just looks like you forgot to brush your hair.
This guide walks you through ten distinct messy bun styles designed specifically for curly hair — each with its own personality, difficulty level, and best-use scenario. Whether you’re reaching for a hairstyle to pull off casual Friday at work, create lift before a night out, or simply keep your curls off your neck on a humid day, you’ll find options here that work with your texture instead of fighting it. Most of these styles come together in under ten minutes once you know the technique, and all of them showcase exactly what makes curly hair so stunning: movement, personality, and dimension that straight hair has to work hard to achieve.
1. The Effortless High Curly Bun
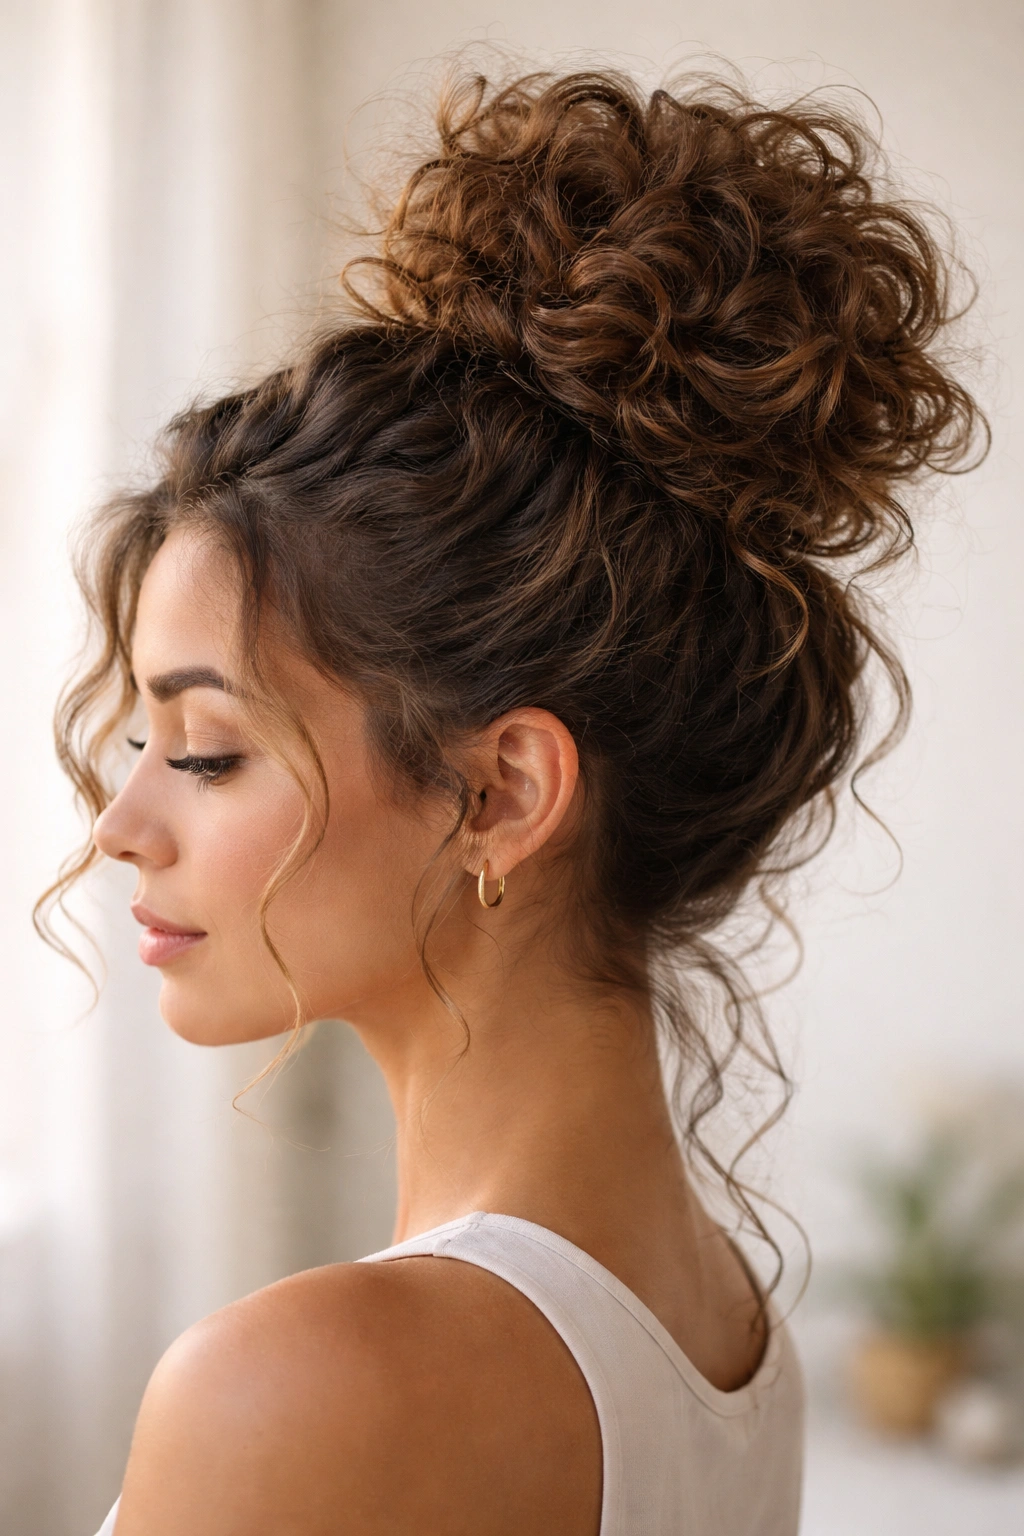
This is the gateway messy bun for curly hair — it requires minimal effort but looks intentional and polished. You’re essentially gathering your curls at the crown, twisting them loosely, and wrapping them into a soft knot that sits high on your head. The volume naturally creates itself because your curls have texture; you’re not fighting against your hair’s nature, you’re collaborating with it.
Why It Works Brilliantly for Curly Hair
Your curls’ natural springiness and body mean the bun stays secure without looking tight or severe. Unlike straight hair, which needs careful wrapping and strategic bobby pins to look messy, curly hair practically asks to be gathered into a relaxed knot. The texture fills out the shape automatically, creating that coveted “intentional mess” that looks effortless. This style also keeps curl definition intact because you’re not creating tension or crimping your strands in unnatural ways.
How to Create It in Five Minutes
- Flip your head upside down and gather curls toward your crown using your fingers, not a brush
- Flip back up and secure loosely with a hair tie, leaving a few face-framing pieces free
- Gently twist the ponytail once or twice, not tightly
- Wrap the twisted section around the base to form a loose coil, tucking the ends in
- Use two bobby pins crossed at the bottom of the bun for security
- Release one or two curls from the sides of the bun for texture
Pro tip: Don’t brush your curls before creating this bun — finger-combing preserves your curl pattern and actually makes the bun look more intentionally messy. Brush-created frizz looks accidental; curl texture looks styled.
2. The Twisted Low Bun
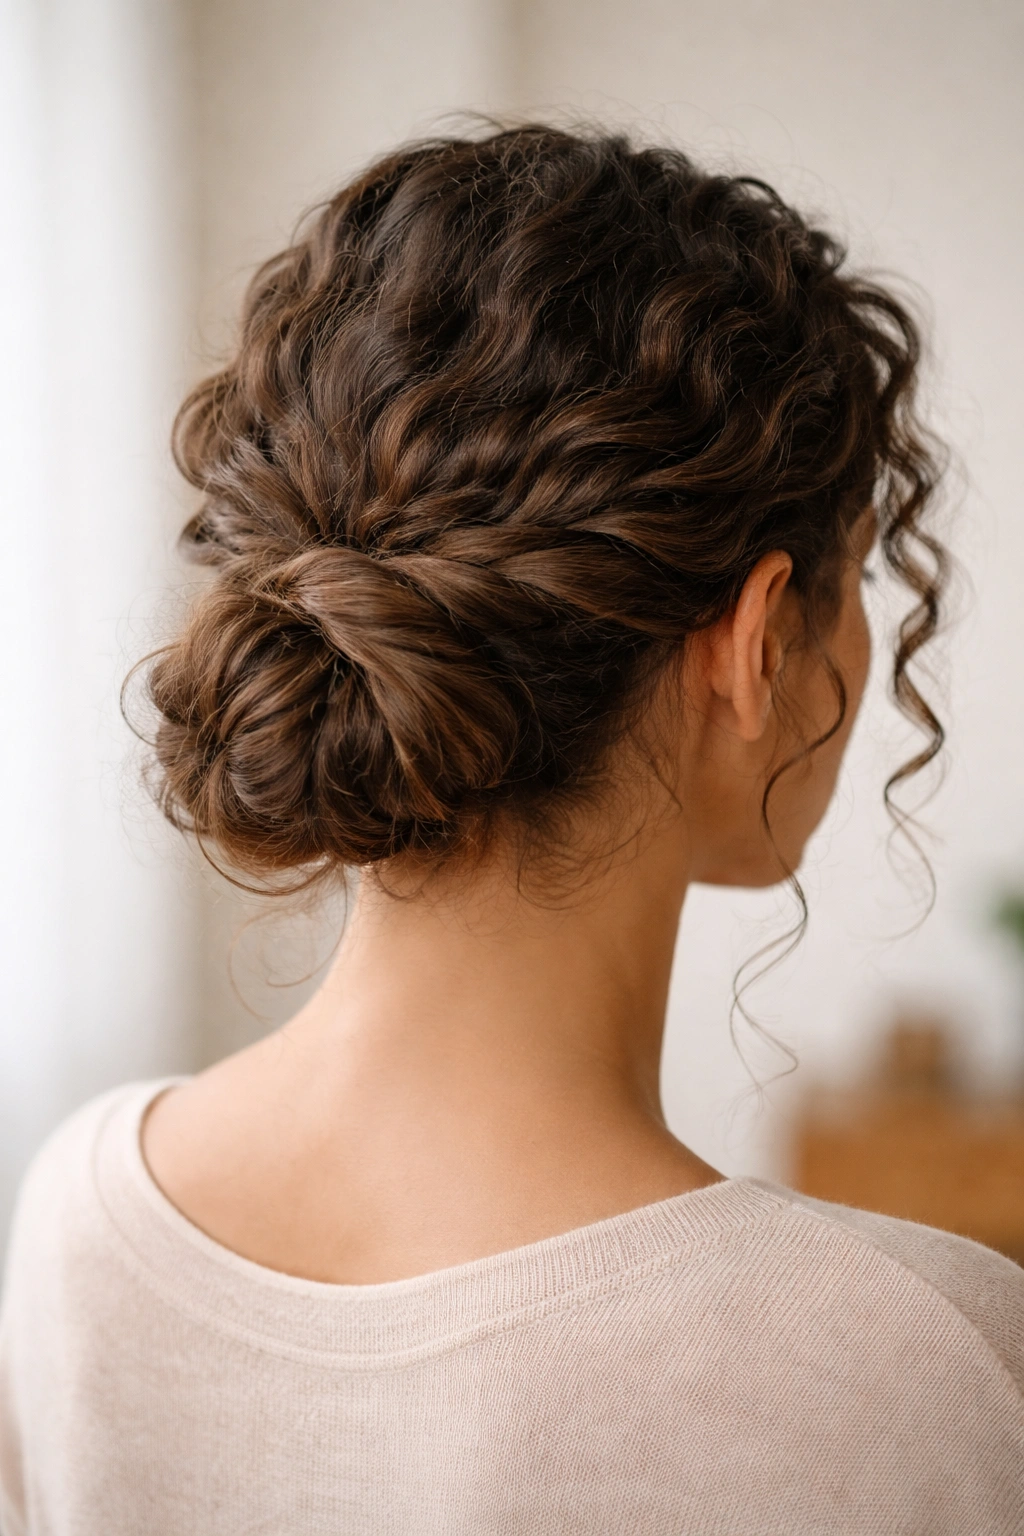
The twisted low bun sits at the nape of your neck and feels more refined than its high counterpart, making it perfect for days when you want curly-haired elegance. You’re creating defined twists on either side of your head and meeting them at the back, where they coil together into a soft low bun. It’s fancier than it sounds but still takes about seven minutes.
The Architecture That Makes This Different
This style works because you’re creating two distinct sections of twisted curl, which adds visual interest and holds better than a single gathered ponytail. The twists frame your face while pulling volume back, showing off your curl pattern on the sides. When you merge the twists into one bun, you’ve created natural texture variation — some of the bun is smooth twist, some is textured curl ends poking out. That’s the whole aesthetic.
The Twist-and-Merge Process
- Part your hair down the center from your crown to your nape
- Take one side and gently twist it from your temple toward the back, holding the twist with your fingers as you work
- Repeat on the opposite side, creating two parallel twists that meet at the lower back of your head
- Secure both twists at the nape with a small hair tie
- Flip the twisted sections slightly to create a loose knot, tucking the ends underneath
- Pin the bun base with two to three bobby pins, letting some twisted texture show
Worth knowing: Twists on curly hair look smoother and shinier than they would on straight hair because your curls catch the light differently. This style actually photographs beautifully.
3. The Braided Crown Bun
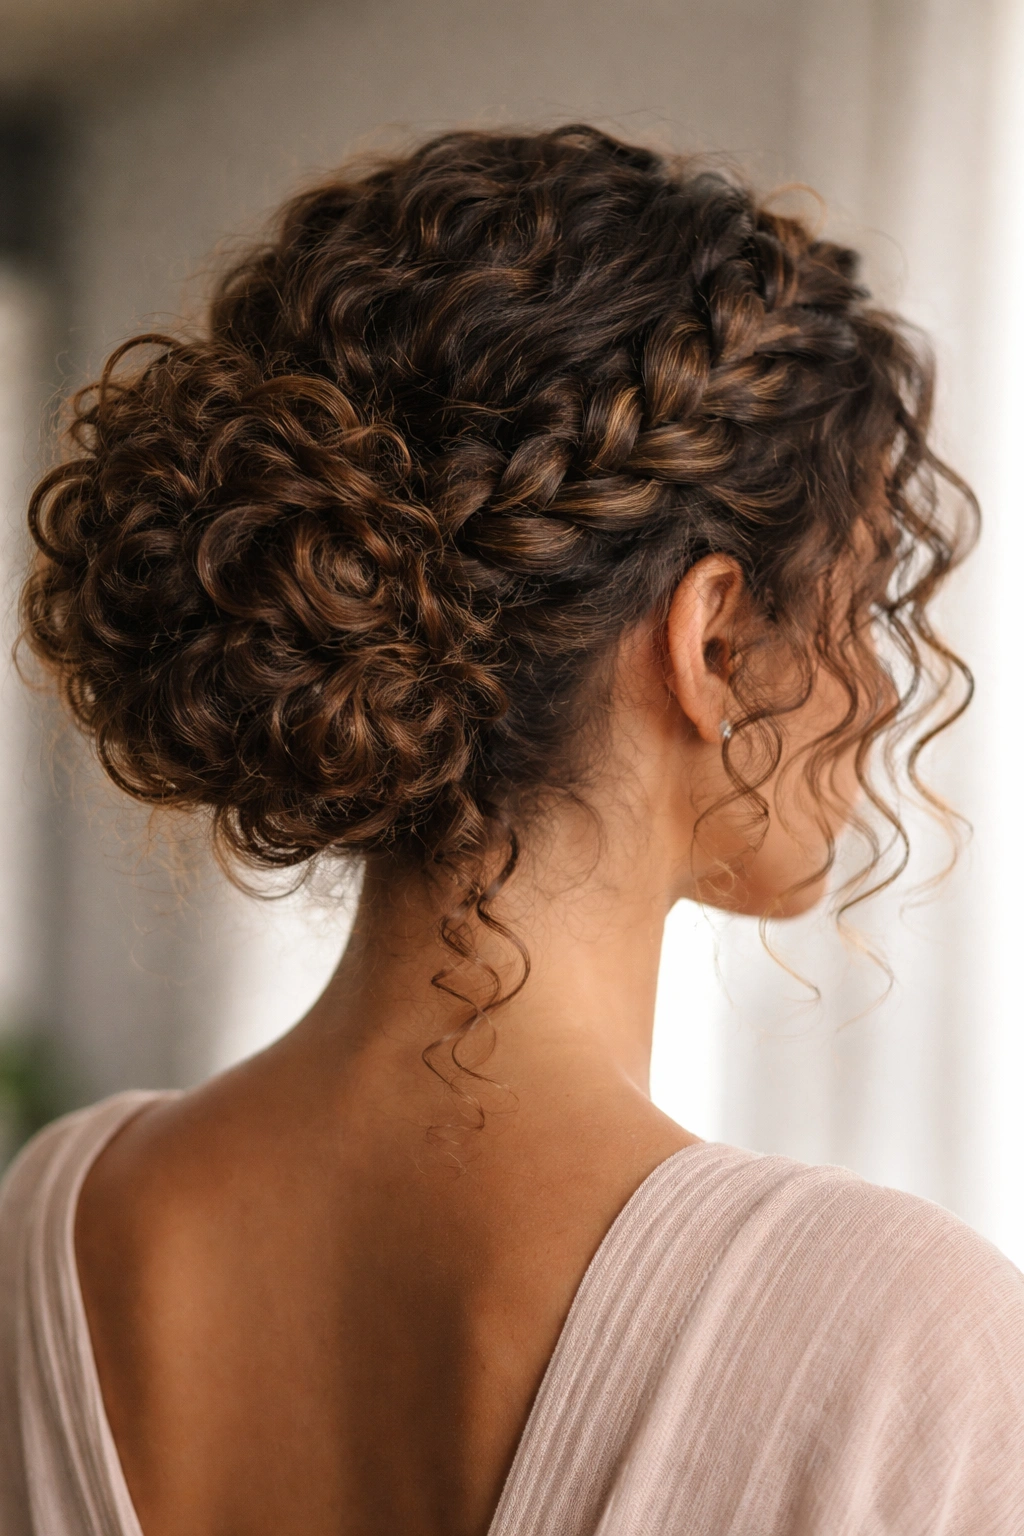
This style trades pure messiness for a braided crown that loops around the back of your head and finishes in a soft bun. It’s elevated enough for an event but still casual enough that you’re not announcing “I spent forty minutes on my hair.” Braids on curly hair have their own textured beauty — they’re chunkier and more dimensional than braids on straight strands.
Why Braiding Curly Hair Is an Underrated Superpower
Curly hair holds braids differently. Your curls grip each other naturally, so braids stay tighter and cleaner-looking without you having to pull each section aggressively. You get a braid that looks full and lived-in rather than tight and controlled. The dimensional texture of your curls means the braid itself becomes part of the visual interest, not just a smooth structural element.
Creating the Crown-Braid Finish
- Start with damp or lightly dampened curls (damp curls hold braids better than bone-dry ones)
- Take a section from one temple and begin a loose three-strand braid, moving diagonally back toward your crown
- Braid the section on the opposite side the same way, creating two braids that meet at the back center of your head
- Gather the loose ends of both braids along with any remaining hair into a low ponytail
- Twist the ponytail loosely and wrap it into a bun, tucking the braided ends inside
- Pin with three bobby pins and pull out a few face-framing curls from the braids for softness
Insider note: Slightly damp curls are your secret weapon for this style — they hold braids without frizz, but they’re not soaking wet. Let your curls air-dry about thirty percent before braiding for the best results.
4. The Piecey Half-Up Bun
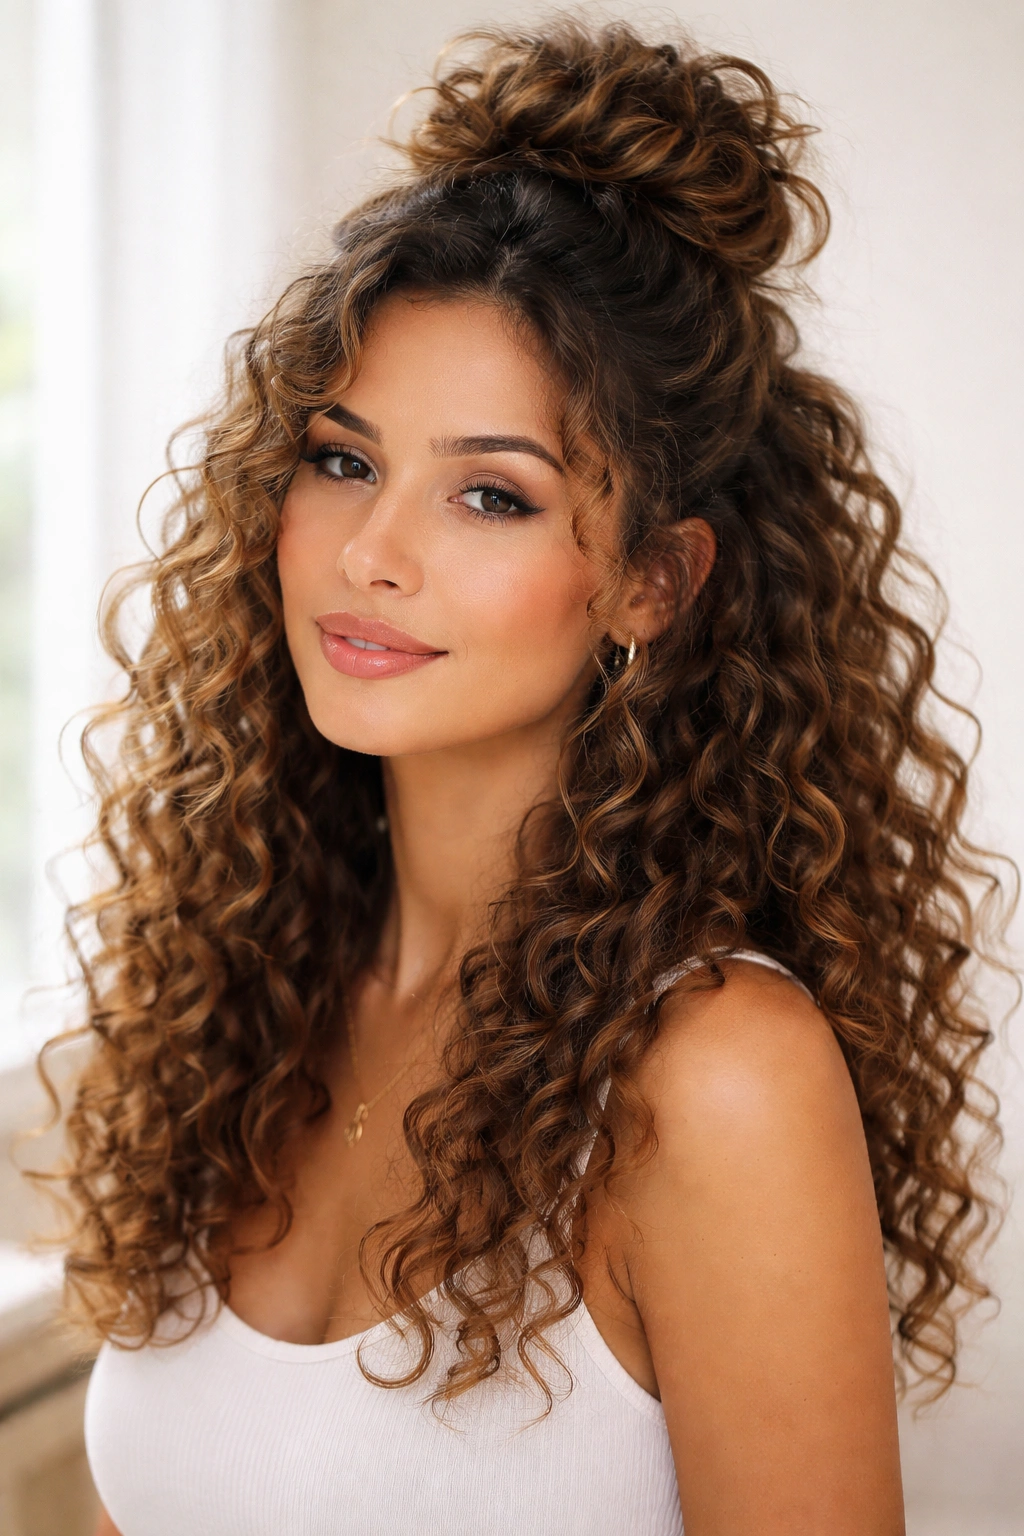
This is the style that splits the difference between wearing your curls down and putting them fully up. You’re securing roughly the top half of your curls into a soft bun at the crown while letting the bottom half fall free. It’s perfect for days when you want height and movement at the same time, and it shows off length beautifully.
The Specific Appeal for Textured Hair
Curly hair’s natural width and volume make this style work where it sometimes falls flat on straight hair. Your curls fill the space at the crown while still letting the full length of your hair shine through below. The result feels intentional and styled, not like you got halfway through putting your hair up and changed your mind. The bun creates a focal point while the loose curls below create flow.
Building the Half-Up Structure
- Flip your head forward to add instant volume at the crown
- Flip back up and take a section from just above each ear to the center crown
- Gather these sections into a small ponytail at the crown, using a thin hair tie
- Gently twist this ponytail and wrap it into a small bun, securing with two bobby pins
- Leave all the hair below the bun completely down — don’t flatten it
- Take a few curls from the bun’s edges and release them for a softer look
Real talk: The key to this style is using a very small hair tie for the top section. If you use a regular-sized tie, you’ll end up gathering too much hair and losing the half-up vibe. Tiny ties create that delicate upper bun while keeping the impact focused.
5. The Wrap-Around Statement Bun
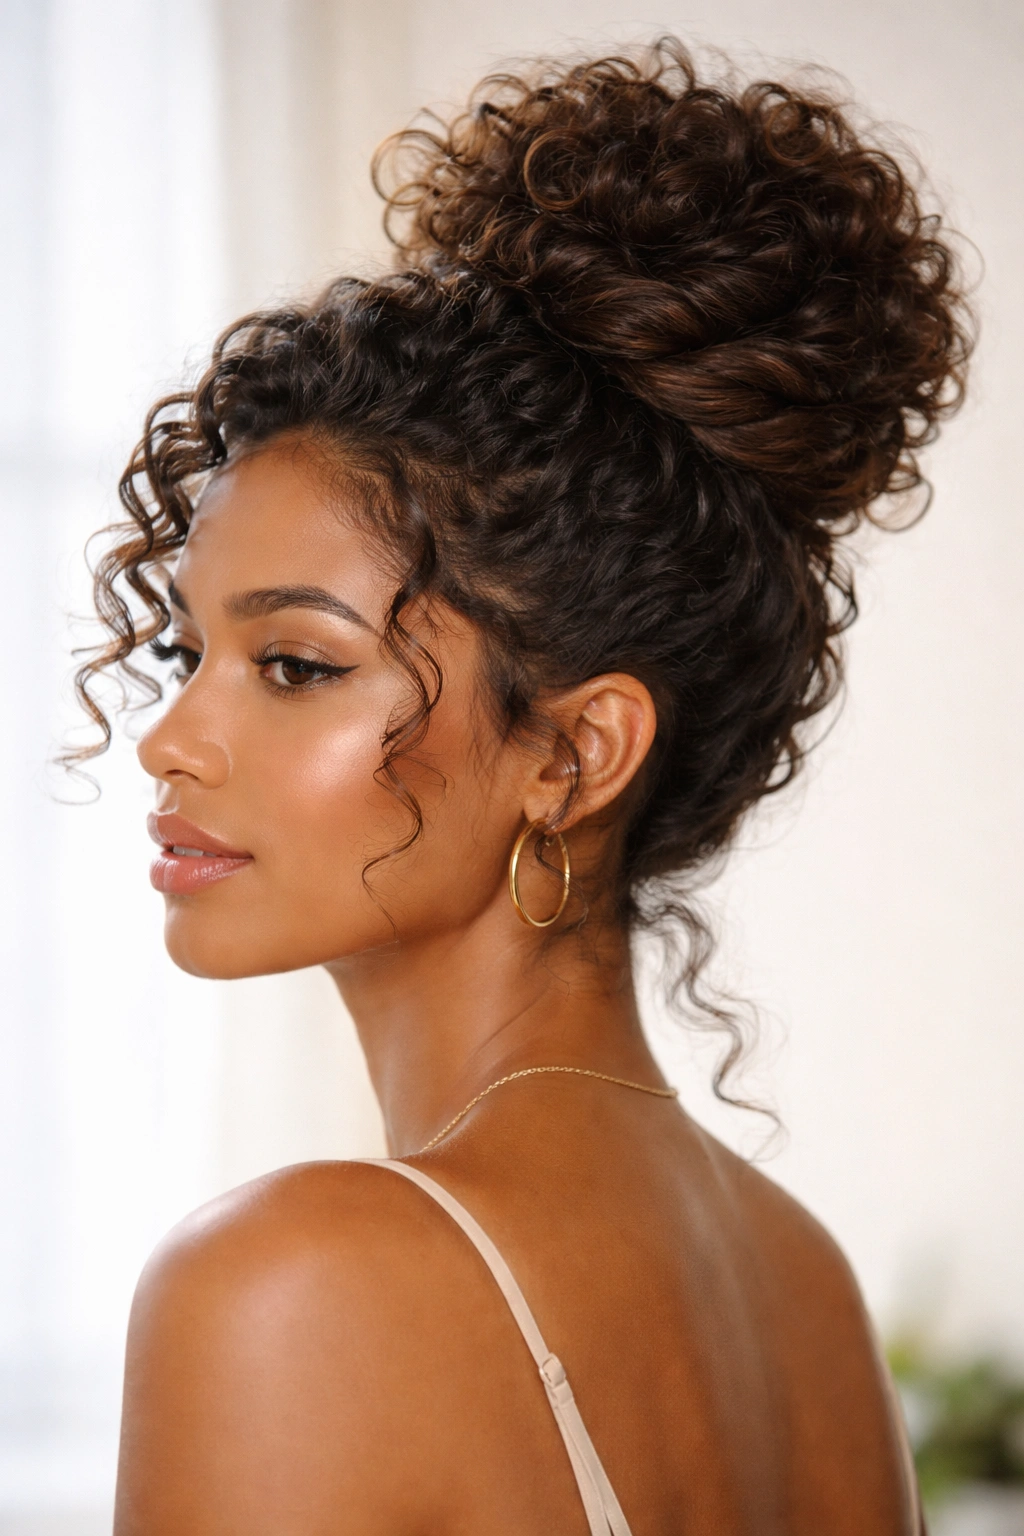
This is the show-off style — a structured bun where you’re deliberately wrapping a thick section of curl around itself to create visual impact. Instead of tucking everything neatly, you’re leaving the wraps visible, creating a sculptural, almost architectural bun. It’s more formal than other options but still celebrates your curls’ texture.
Why Wrapping Creates Dimension
When you wrap sections of curly hair around each other, you’re creating layers and depth that smooth hair can’t match. Each wrap shows off a slightly different angle of your curls. The wrapping also adds structural support — you’re not relying on bobby pins to hold everything in place; the wrapping does most of the work. And visually? A wrap-around curly bun looks intentional and polished in a way that feels almost sculptural.
The Wrapping Technique That Actually Holds
- Gather all your hair into a high ponytail, but don’t make it extremely tight
- Divide the ponytail into three roughly equal sections
- Take the first section and wrap it around the ponytail base, securing the end with a bobby pin tucked underneath
- Wrap the second section around the base in the opposite direction, overlapping slightly with the first wrap
- Wrap the third section and tuck it in, creating a multi-layered spiral effect
- Use one final bobby pin to secure any loose ends
- Gently pull the outer edges of the wraps to soften them and show off your curl texture
Pro tip: This style works best when you wrap in the morning before your curls fully set. Slightly damp or fresh-from-the-diffuser curls hold the wraps while still showing texture beautifully.
6. The Textured Top Knot
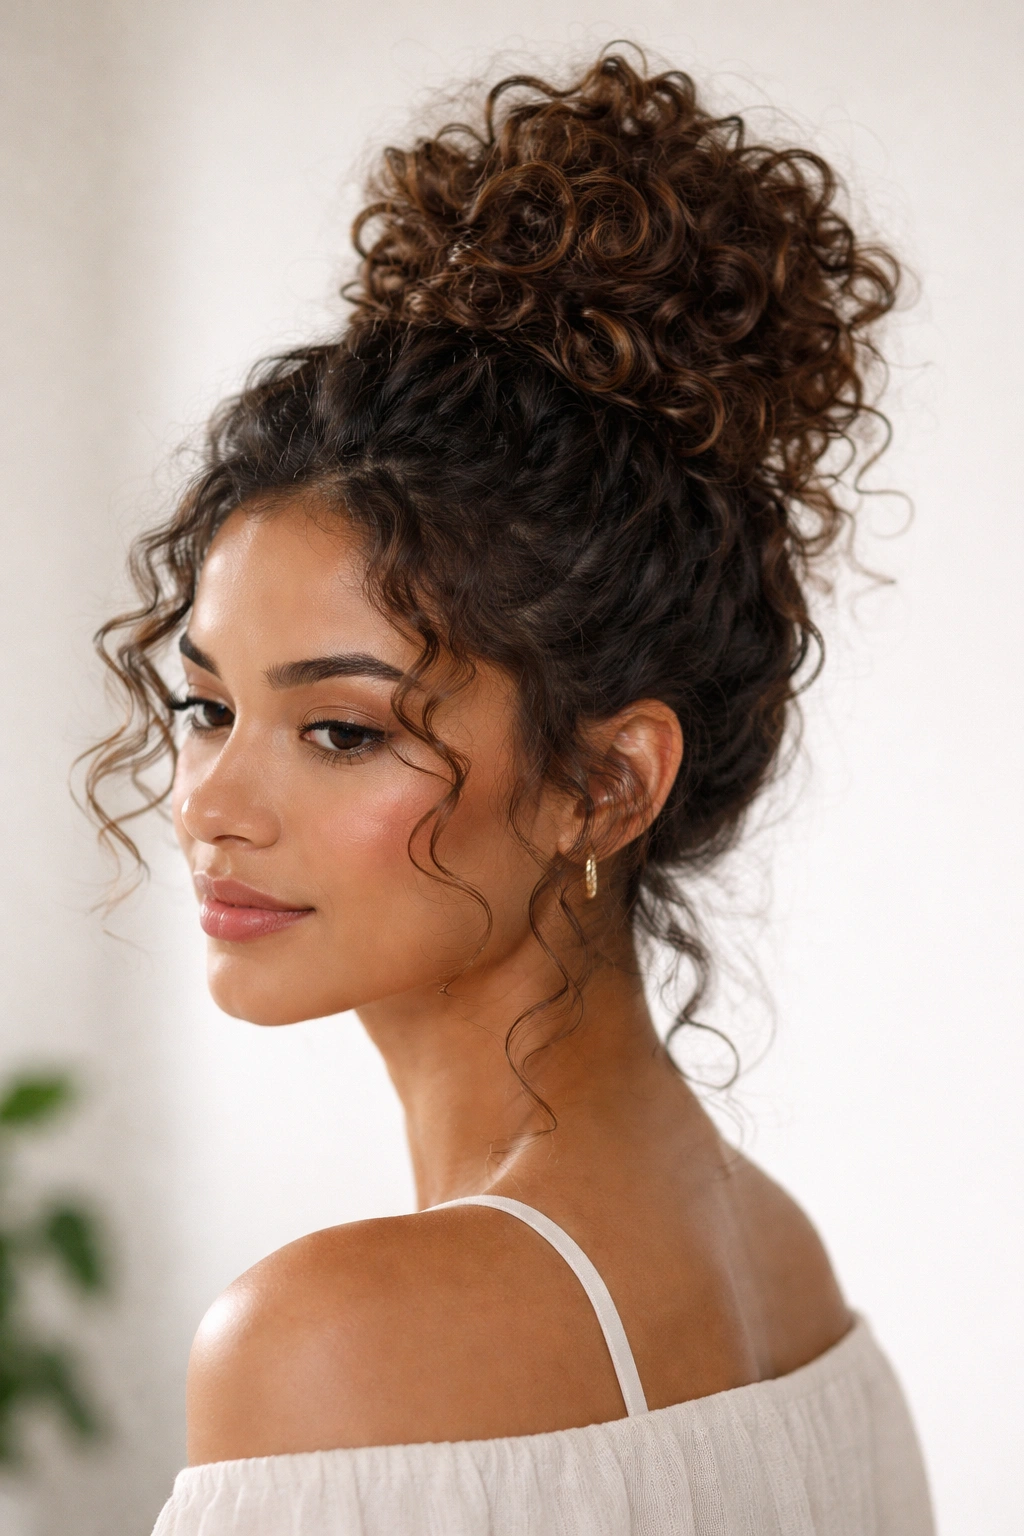
The top knot is fundamentally different on curly hair than on straight hair. Instead of a tight, sleek knot, you’re creating a soft, voluminous knot that sits right at the crown and celebrates your curl pattern. It’s the most casual option on this list but also the most striking because curly hair fills out a top knot in a way that creates instant visual interest.
The Top Knot’s Curly Hair Advantage
Your curls naturally create that coveted “textured, undone” vibe that straight-haired people have to artificially create. You’re not aiming for perfection; you’re aiming for personality. The height you get from a top knot makes curly hair look even more voluminous and lively. And because curls have dimension, a top knot doesn’t look like you just threw your hair up — it looks intentional and styled within seconds.
Quick Steps to the Perfect Top Knot
- Use a paddle brush or your fingers to gather hair at your very crown, creating a high ponytail
- Don’t make it extremely tight — slightly loose is the goal
- Twist the ponytail loosely, or don’t twist it at all
- Wrap it around the base into a soft, rounded knot
- Secure with two bobby pins crossed underneath
- Let pieces fall around your face and pull gently at the knot’s edges to create a lived-in look
- Mist very lightly with hairspray if you want it to last all day
Worth knowing: The best top knots on curly hair have a slightly chaotic, organic quality. Don’t try to make it perfect. Pull out a few curls, let the texture show, embrace the natural volume.
7. The Double Spiral Bun
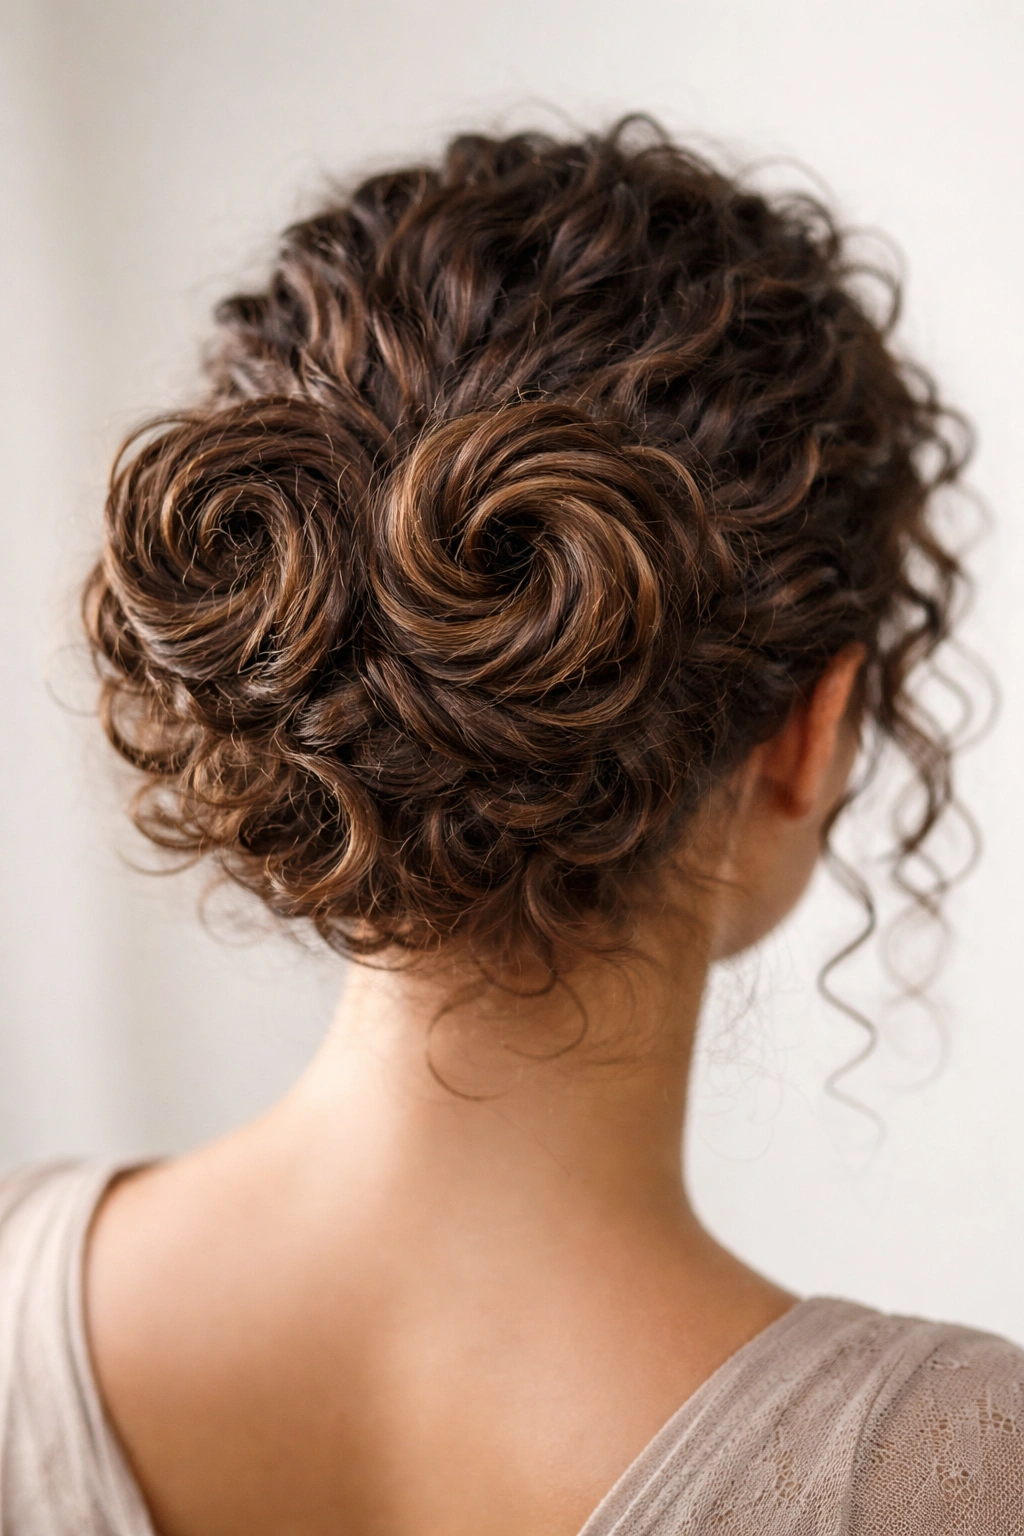
This style creates two distinct coiled sections at the back of your head that curve into each other, forming an almost infinity-symbol shape. It’s more complex than a standard bun but not overly complicated, and it looks genuinely unique. On curly hair, the double spiral has real visual impact because each spiral shows off your curl definition.
Why Two Spirals Instead of One
A single spiral bun can sometimes look severe on curly hair, but two spirals create balance and symmetry while keeping the overall look soft. You’re directing your hair’s natural movement in two different directions, which creates visual interest and makes the style feel more intentional. The double spiral also distributes the weight of your hair more evenly, so it’s actually more secure than it looks.
Creating the Symmetrical Spiral Effect
- Divide your hair down the center from your crown to your nape
- Take the left section and spiral it clockwise, moving toward the back of your head
- Take the right section and spiral it counterclockwise, also moving toward the back
- Meet both spirals at the lower back and secure them together with a hair tie
- Gently wrap the combined spiral ends around each other to form the double-spiral bun
- Pin the base with three bobby pins, allowing the spiral texture to be visible
- Release a few curls from the outer edges to soften the overall effect
Insider note: This style is one of the rare times when you actually benefit from blow-drying your curls straight first, then refreshing them after styling. The definition shows off the spiral shape more clearly. But if you’re a strictly air-dry person, it works beautifully with naturally curly texture too.
8. The Loose Romantic Bun
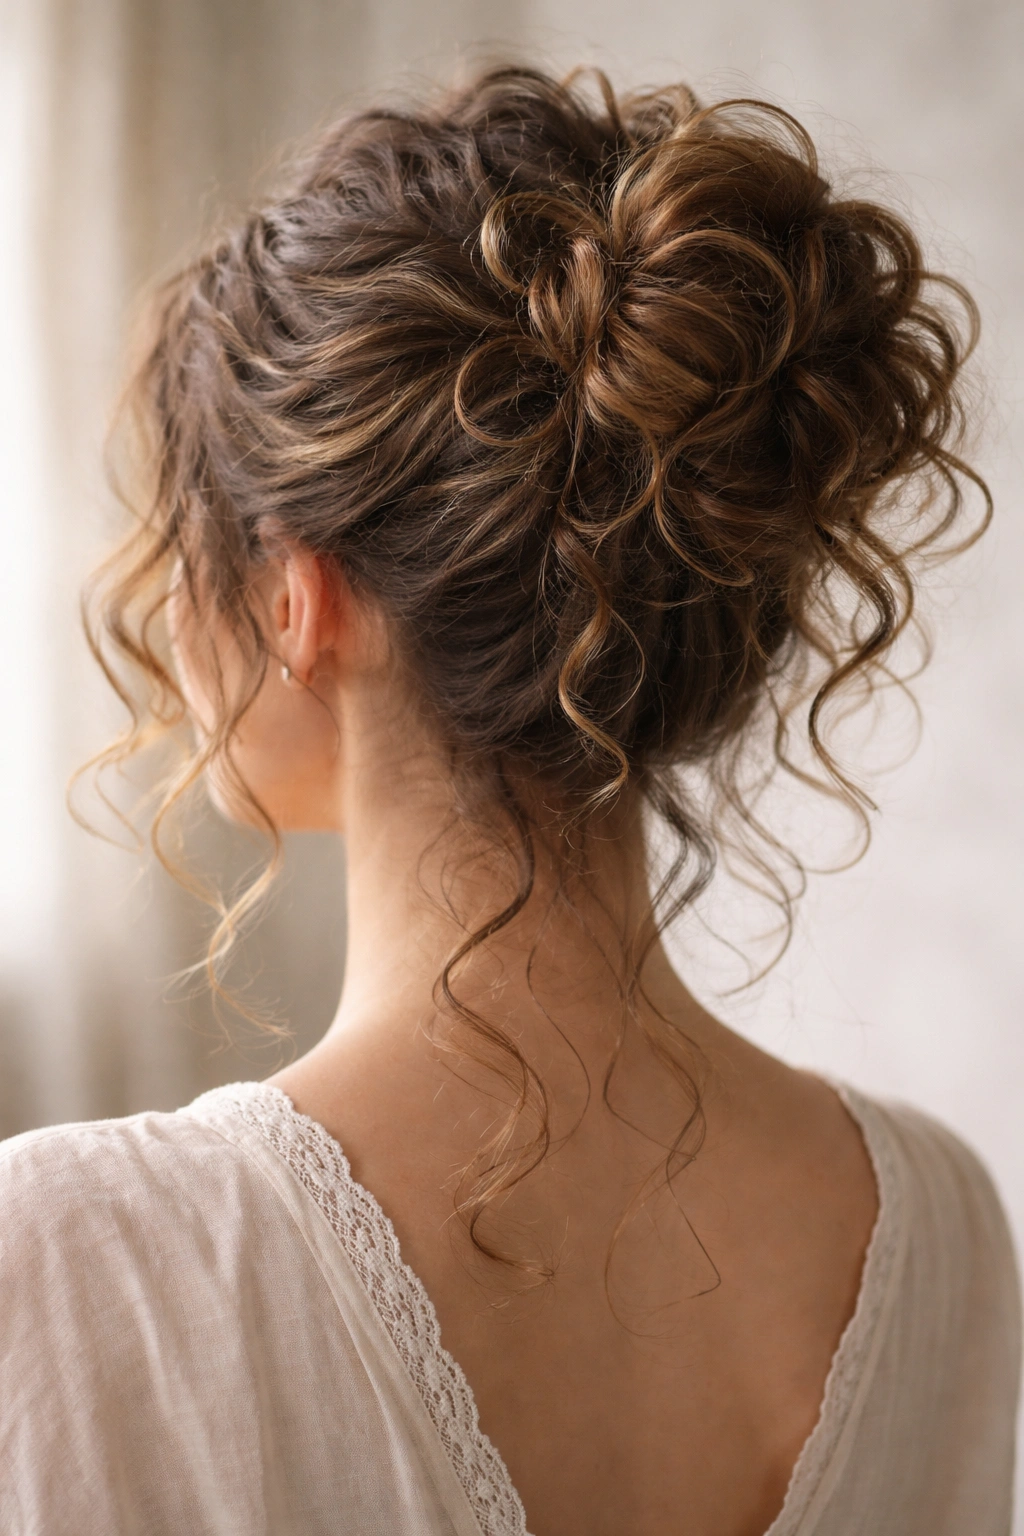
This is pure softness — you’re creating a bun that looks almost ethereal, with curls escaping intentionally from multiple spots and a general air of gentle abandonment. It’s wedding-appropriate but also works for regular days when you want your curls to feel less structured. On curly hair, this style feels naturally romantic because curls have inherent movement and life.
The Soft-First Approach to Styling
Instead of gathering everything tightly and then loosening it, you’re starting loose and staying loose throughout. This preserves your curls’ natural pattern and prevents the compressed, kinky texture that comes from pulling hair too tightly. The bun itself is more suggestion than structure — it’s a gathering point for your curls rather than a controlled shape. That’s what makes it so romantic and effortless-looking.
Building the Romantic Loose Bun
- Flip your head to one side and gather curls loosely with your fingers, not a brush
- Flip back up and secure with a soft hair tie (silk or satin if you have one) at the back center of your head
- Don’t wrap or twist — simply let the curls bunch naturally
- Gently spread the bunch of curls upward and outward to create a soft cloud shape
- Deliberately pull out two to three face-framing curls and two to three curls from the back of the bun
- Use three bobby pins to anchor the bun, but hide them completely underneath
- Mist lightly with a light-hold spray to preserve the texture without creating crunch
Real talk: This style shows off your curl pattern more than any other bun on this list because there’s less manipulation overall. If you have curls you’re proud of, this is the style to highlight them.
9. The Clipped Underneath Bun
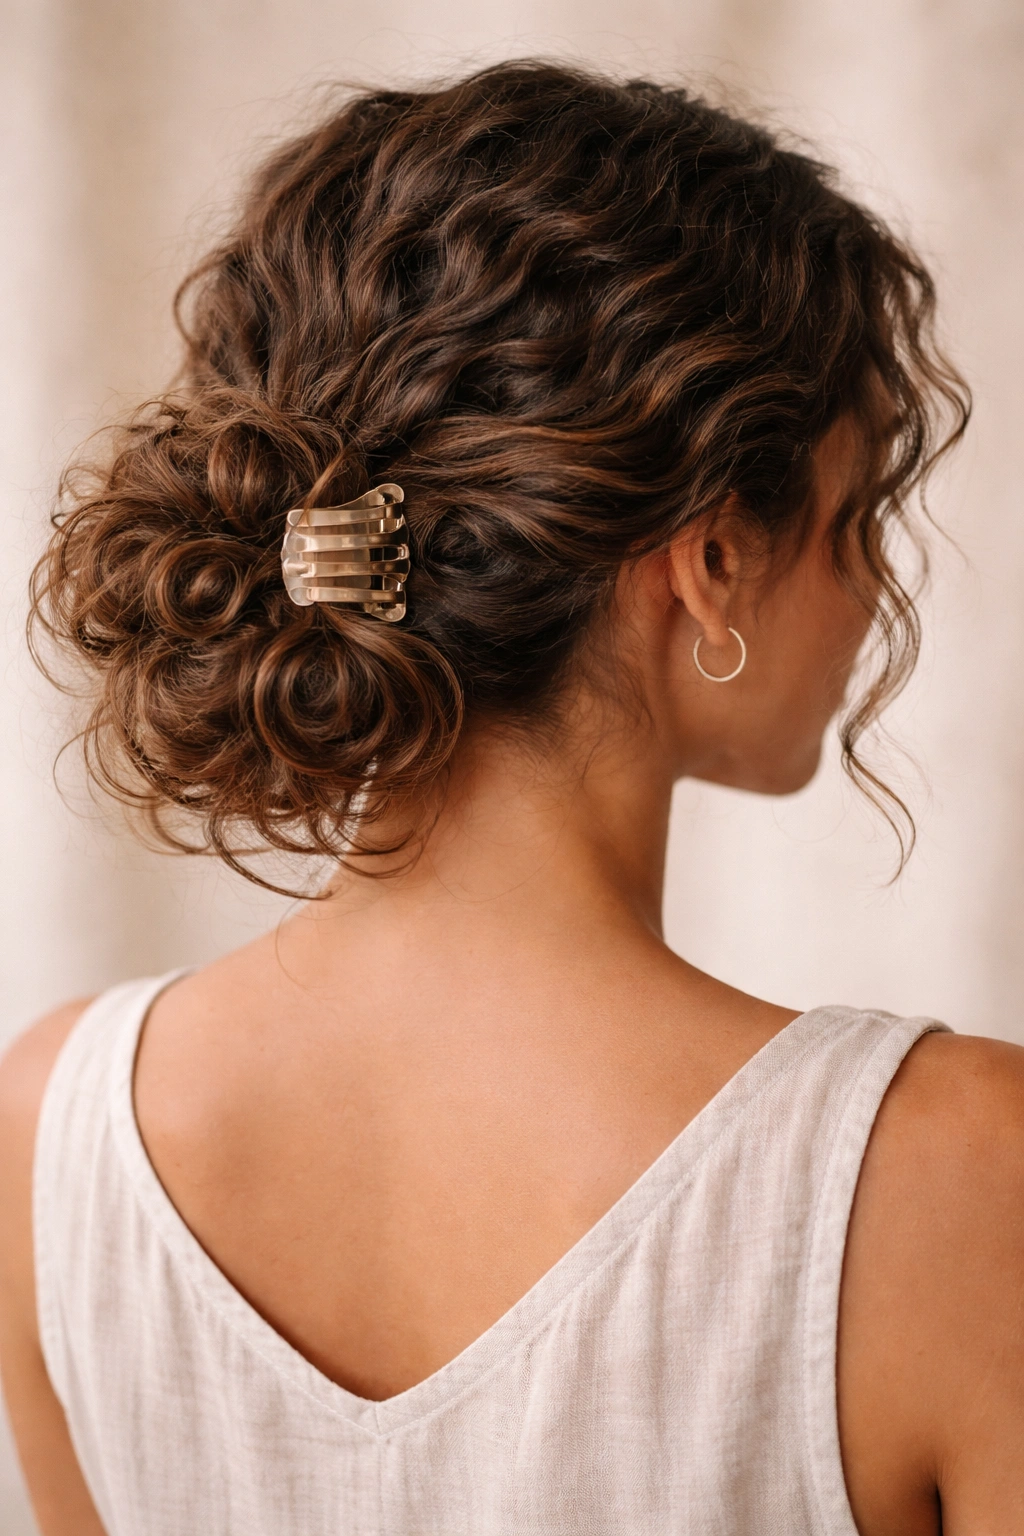
This modern style uses a claw clip or large hair clip to secure your curls instead of bobby pins. You’re gathering curls into a low ponytail, then clipping them up from underneath the gathering point, creating a bun that’s held by the clip. It’s surprisingly secure despite looking delicate, and it works beautifully with curly hair because clips grip texture better than bobby pins do.
Why Clips Outperform Pins for Curly Hair
Clips distribute the weight of your hair across a larger surface area than bobby pins, which means less stress on individual strands and less risk of breakage. Clips also create an interesting visual texture — you can see the sculptural shape of the clip through the curls, which adds modern style. And because curly hair has texture that grips clip teeth better than smooth hair does, the style stays secure all day without needing constant adjustments.
The Underneath-Clipping Technique
- Create a low ponytail at the nape of your neck using your fingers (not a brush)
- Keep the ponytail very loose — this is key to the style’s success
- Take the clip and position it horizontally underneath the ponytail gathering point
- Flip the ponytail up and open the clip, sliding the gathered curls inside
- Close the clip firmly, then arrange the curls above and around it
- Gently pull out face-framing sections and a few curls from inside the bun area
- Let the clip’s shape show — it’s meant to be visible and adds to the style’s modern vibe
Pro tip: Claw clips in tortoiseshell or coordinating colors work better for this style than clear clips. The clip becomes a design element, not something you’re trying to hide.
10. The Voluminous Pin-Curled Bun
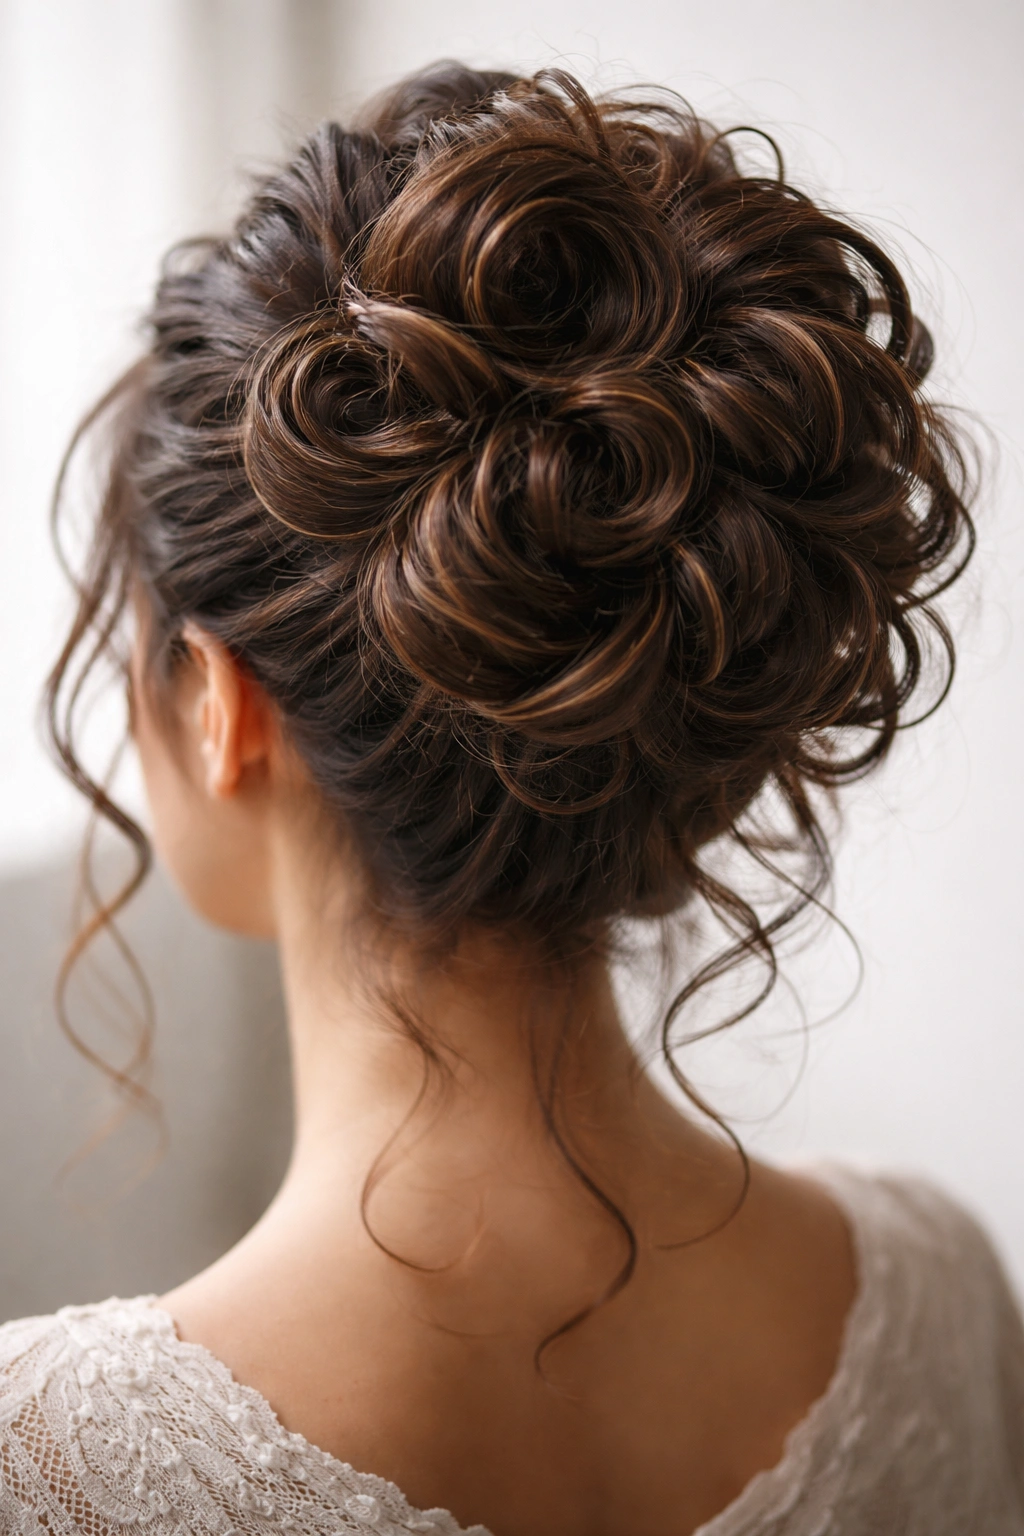
This style is for days when you want maximum volume and drama. You’re pin-curling sections of your hair around your finger before gathering them into a bun, which adds extra dimension and creates a bun that looks almost sculptural. It takes about fifteen minutes, so it’s not a rush-out-the-door style, but the result is absolutely stunning.
The Pin-Curl Advantage for Textured Hair
Pin-curling curly hair creates layers of texture within the bun itself. Instead of the bun being one unified shape, it’s made up of individual curl sections that show definition and movement. The curls hold the pin-curl shape because they already have natural texture, so you’re enhancing what’s already there rather than creating artificial curl. And when you release the pin curls into the bun, you get a volume that feels organic and natural, not structured or stiff.
Creating Pin Curls Into a Bun
- Divide your hair into six to eight sections, working from one side of your head to the other
- Take the first section and wrap it around your index finger in a loop, creating a coil
- Secure the coil against your head with a bobby pin while it’s still wrapped around your finger
- Gently slide your finger out, leaving the pin curl in place
- Repeat for all sections, creating a halo of pin curls around your head
- Let them set for five to ten minutes (or mist lightly with hairspray to help them hold)
- Gently unpin each curl, leaving the curl shape in place
- Gather all the curls at the back of your head into a soft bun and secure with bobby pins
Worth knowing: This style works best on hair that’s already slightly textured from recent waves or curls. Completely straight hair pin-curled doesn’t have the same natural hold, but curly hair cooperates beautifully because the curl pattern and pin-curl pattern work together.
Final Thoughts
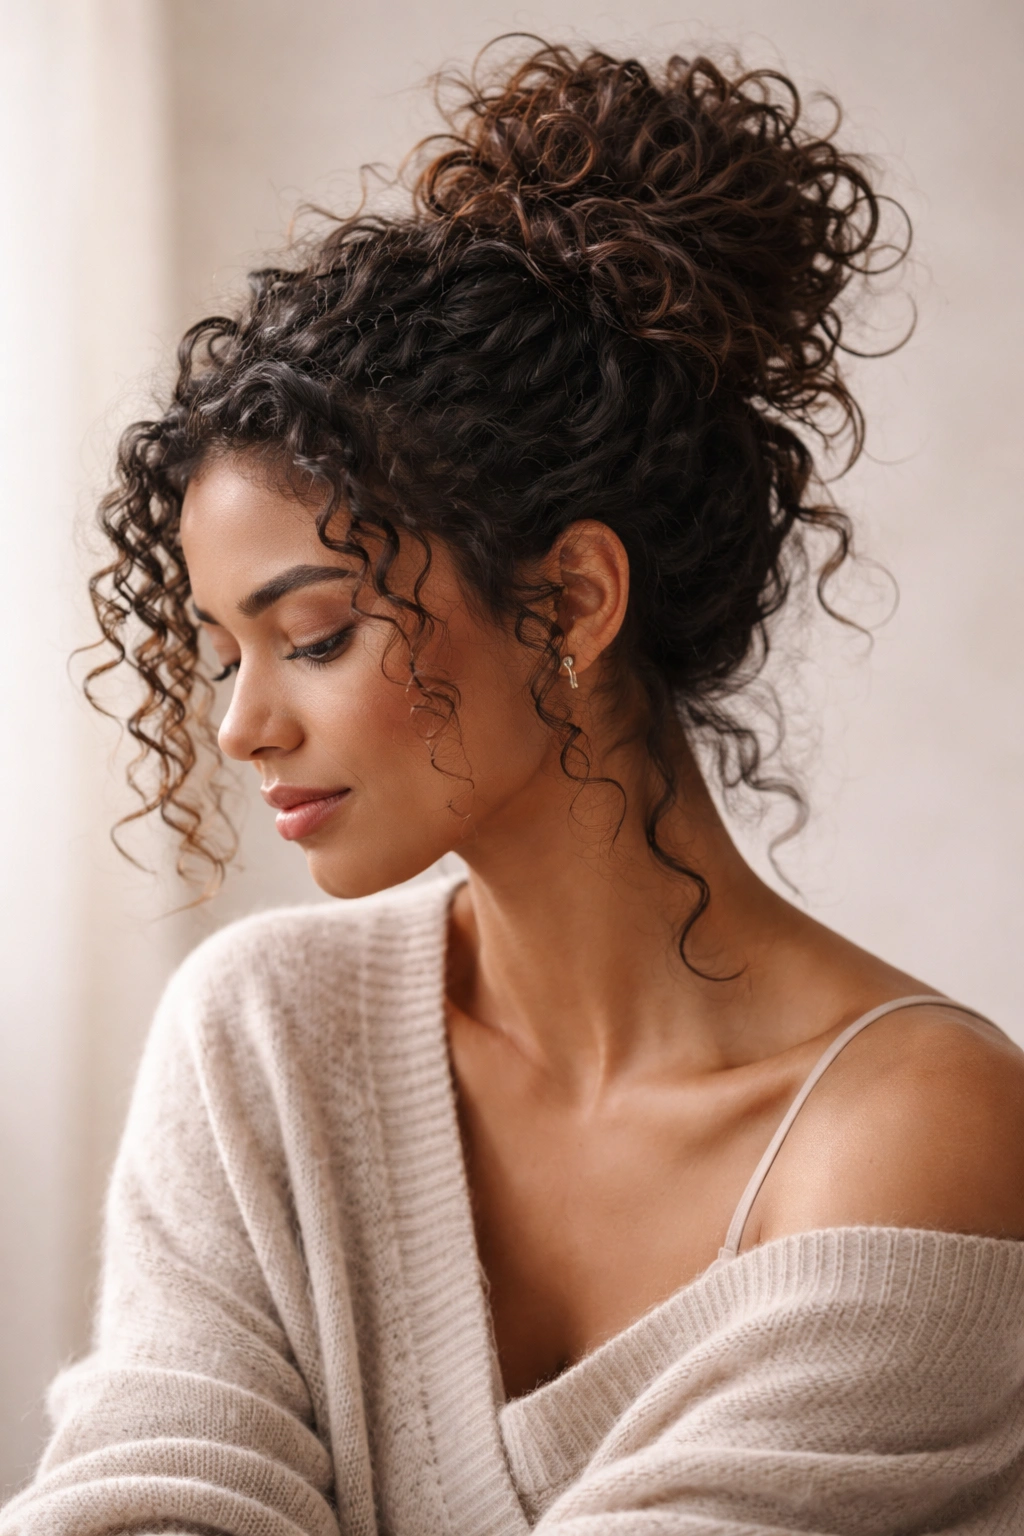
Messy buns on curly hair aren’t about fighting your natural texture — they’re about celebrating it. Every single one of these styles works because your hair has curl, bounce, and inherent dimension. The texture does half the work for you, which means you spend less time styling and more time enjoying your hair. The best style for any given day depends on what you’re doing, what kind of curl pattern you have, and whether you’re after polished, casual, or somewhere in between.
The real secret to a great messy bun on curly hair is understanding that “messy” on textured hair looks intentional in a way it might not on straight hair. You can pull out curls, let pieces escape, create texture variation, and it all reads as effortlessly styled rather than accidental. Start with whichever style speaks to you, then experiment with variations — tighter or looser bun bases, different heights, extra bobby pins or fewer, extra curls released or fewer. Your curls’ texture gives you room to play and improvise, which is one of their greatest assets.
