



A messy bun sounds like something you throw together in five minutes on a lazy Sunday, but the truth is that a properly executed messy bun for a dressy evening is a completely different animal. There’s an art to looking intentionally undone while still feeling polished enough for a special occasion—and the good news is that once you understand the fundamental techniques, you can adapt them in endless ways to match your outfit, your hair texture, and the vibe of your night.
The beauty of a messy bun for formal occasions is that it walks the perfect line between effortless and elegant. You get the sophistication of an updo, the ease of something that doesn’t require hours at a salon, and the flexibility to work with virtually any hair length or type. Whether you’re heading to a wedding, a night out with friends, a date, or an event where you want your hair out of your face but your style to whisper rather than shout, a messy bun is your secret weapon.
The key difference between a messy bun that looks sloppy and one that looks intentionally chic comes down to a few critical factors: the placement on your head, how you texture and tease your hair, which pieces you choose to leave out or pull loose, and whether you add any finishing touches like ribbons, pins, or accessories. In the next sections, we’ll break down ten distinct approaches to the messy bun, each one suited to a different dress code, hair length, or personal style preference. Some are romantic and soft; others are modern and architectural. Pick the one that resonates with you, and you’ll have a go-to style for every fancy occasion.
1. The Classic High Bun with Romantic Wisps
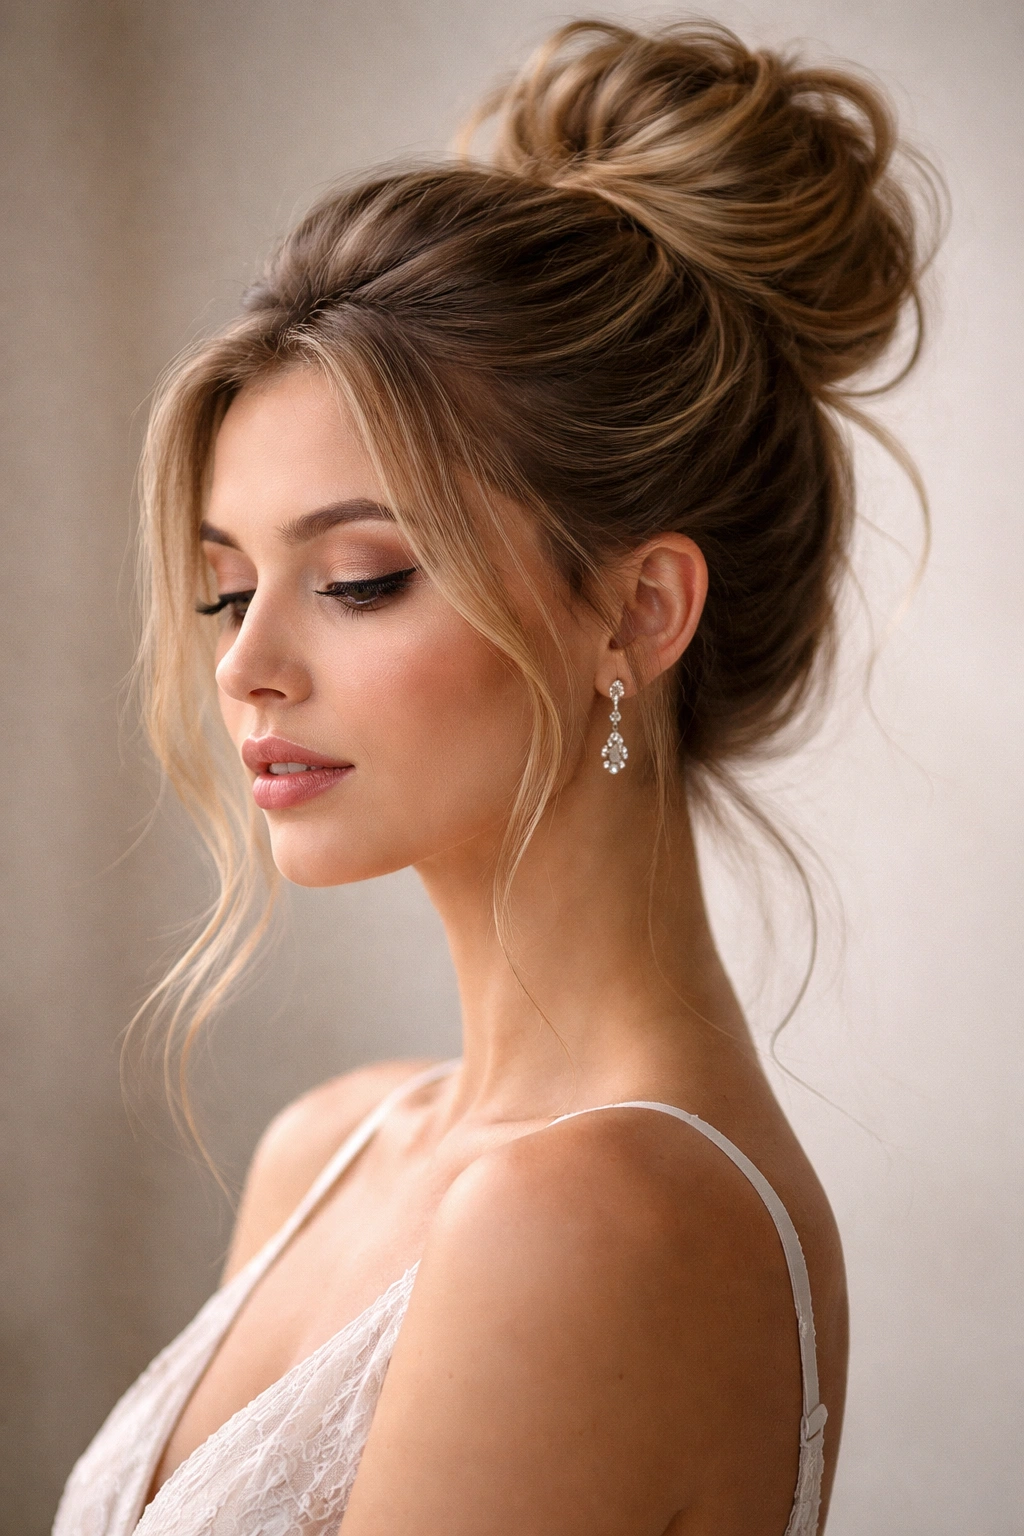
This is the messy bun that looks effortlessly elegant, with soft strands framing your face and a loosely gathered twist at the crown. It’s the version you see on red carpets and in engagement photos—undone enough to feel approachable, but structured enough to be unmistakably intentional.
The magic of this style is in the texture and placement. Start by blow-drying your hair with a volumizing mousse to create natural lift at the roots, then tease gently at the crown to build height. Gather your hair into a high ponytail, but don’t make it tight—you want it to sit slightly loose and romantic. Twist the ponytail loosely around itself to form a bun, then secure it with a few bobby pins rather than elastic, which gives you more control and a softer finished look.
Why It Works for Formal Events
The high placement catches light beautifully and elongates your neck, which is ideal if you’re wearing anything with a low neckline or dramatic back. It photographs incredibly well because your face is completely framed, and the soft wisps catch light in a way that feels genuinely romantic. The loose texture reads as deliberate rather than careless, which is crucial for dressier occasions.
How to Get the Technique Right
- Tease at the roots and crown before gathering into your ponytail to create that pillow-soft base
- Use a texturizing spray or dry shampoo on clean or second-day hair—it grips better than freshly washed hair
- Wrap one piece of hair around the base of the bun to hide the elastic or bobby pins, then tuck the end under and secure with a final pin
- Pull out 3-5 face-framing pieces after securing the bun, and gently curve them with a flat iron for a soft wave
Pro tip: If your bun feels too neat and controlled, you’re not done yet. Gently pull at the base of the bun from underneath to create that slightly undone, voluminous quality. Small intentional disruptions are what make this style read as deliberately messy rather than accidentally sloppy.
2. The Low Side Bun
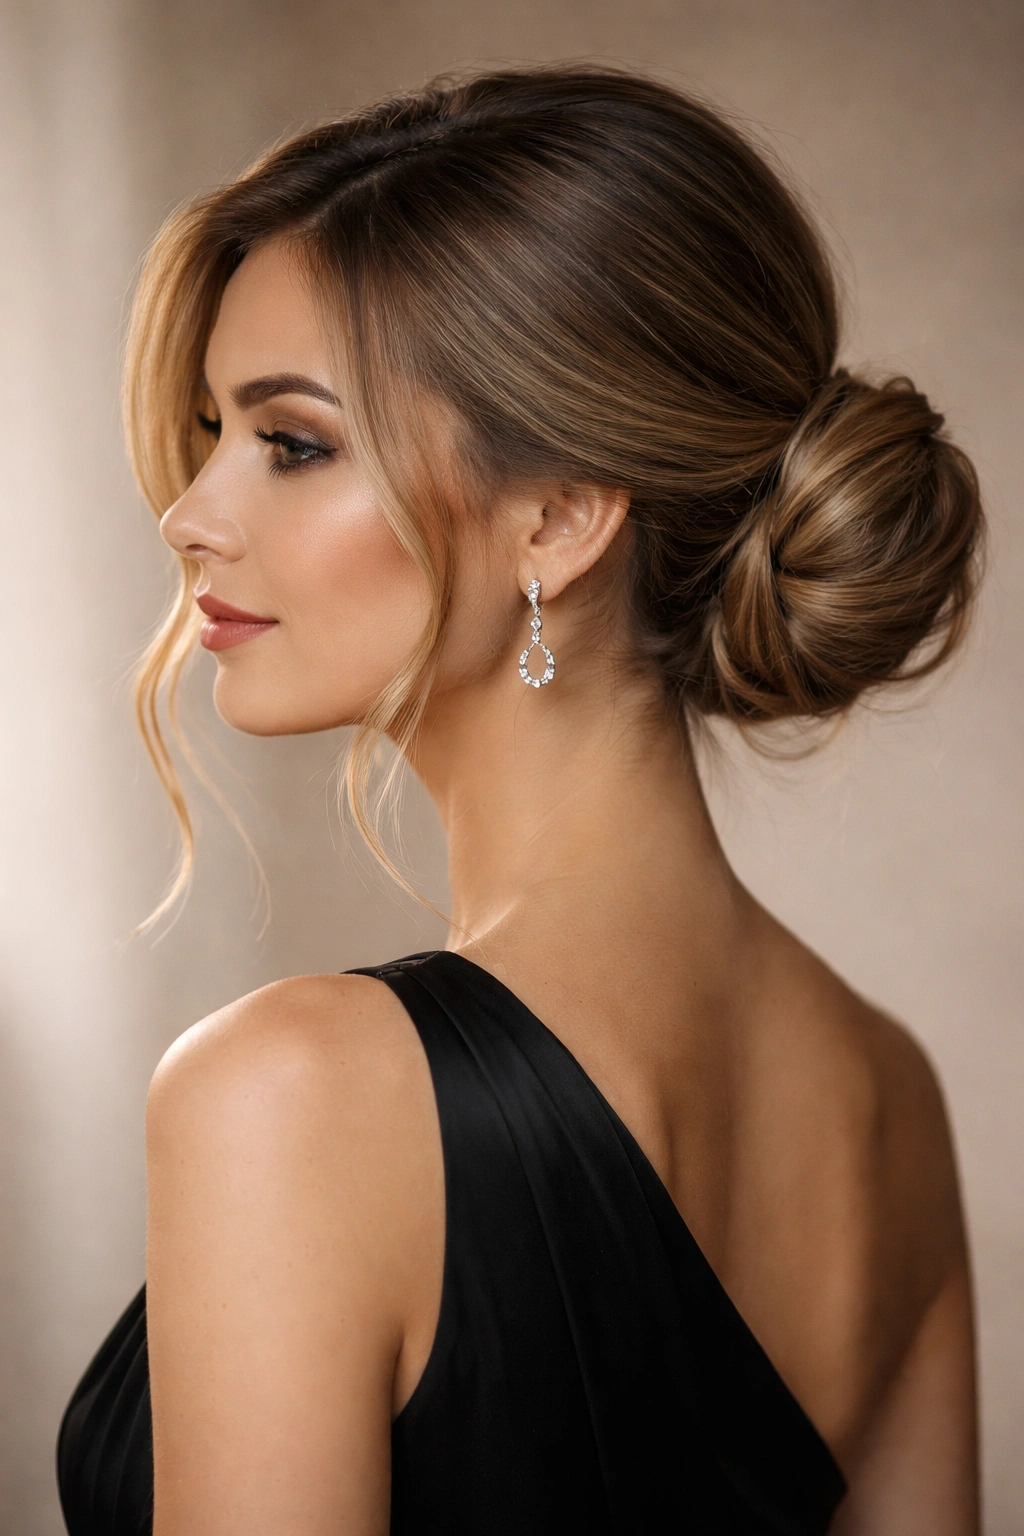
The low side bun skews more sophisticated and modern than its high-crown cousin, especially when you place it at the nape of your neck on one side. This placement is flattering for nearly every face shape and works beautifully with both casual and formal dresses.
Start with a side part, then gather all your hair to one side of your head—roughly at ear level or slightly lower. The key is creating a loose, slightly twisted base as you gather. Once you’ve secured the ponytail, twist the ends loosely around each other, coil that twist into a soft bun shape, and secure with bobby pins. Leave some face-framing pieces undone, especially along the jaw and one temple.
Why It Works for Dressy Events
A low side bun creates an asymmetrical silhouette that feels inherently more interesting and intentional than centered styles. It works particularly well if you’re wearing a sleek, minimalist dress because the bun becomes an architectural focal point on its own. The placement also ensures that your shoulders and collarbone—usually bare if you’re wearing something formal—remain visible and highlighted.
How to Nail the Placement and Texture
- Part your hair to whichever side you prefer, and make that part slightly deeper than center to exaggerate the asymmetry
- As you gather your hair to the side, twist it loosely rather than keeping it in a simple ponytail—this creates texture right from the start
- Leave at least 2-3 longer pieces around your face undone; they should reach your collarbone or shoulder
- Use bobby pins that match your hair color, and pin the bun from the inside so the pins stay hidden
Pro tip: A low side bun pairs beautifully with minimal jewelry on one side and a delicate statement earring on the other—it creates visual balance and draws attention to your face.
3. The Braided Bun
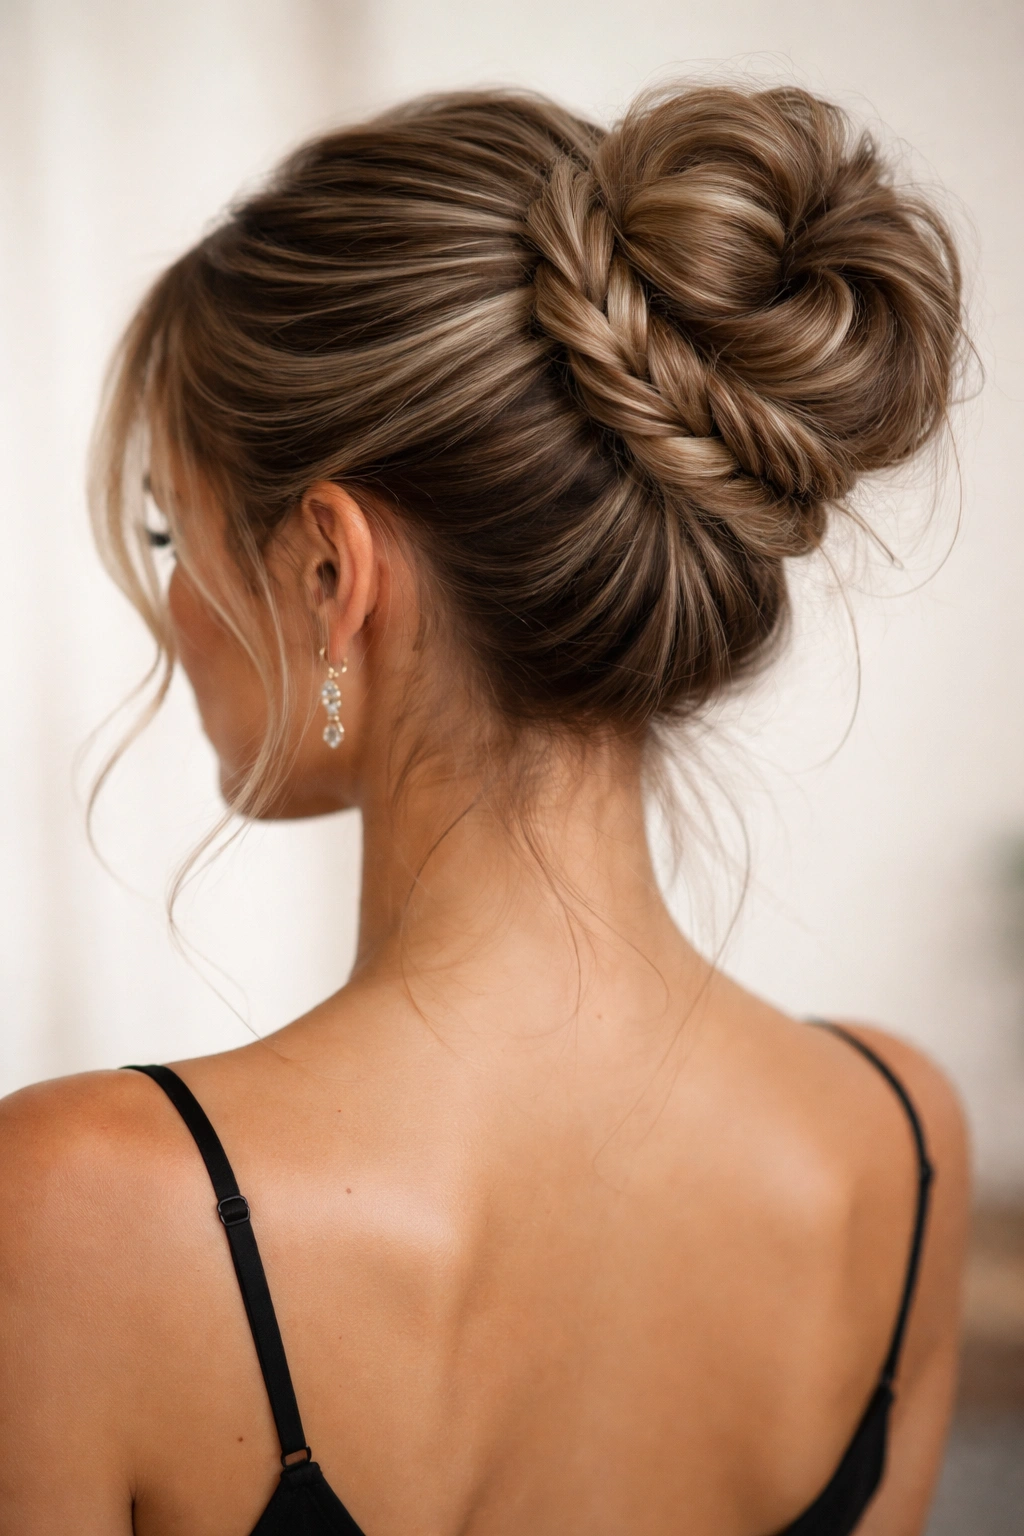
If you want to add genuine texture and visual interest to a messy bun, a braided base transforms it from simple to intricate. You don’t need to be a braiding expert; even a loose, imperfect braid actually enhances the deliberately undone aesthetic.
Gather your hair into a high ponytail and divide it into three sections. Loosely braid the three sections—and we really do mean loosely; you’re going for texture, not precision. Once you reach the ends, gently pull at the sections of the braid to widen it and create a fuller, softer appearance. Coil the entire braid around itself to form the bun base, and secure with bobby pins. Pull out a few face-framing pieces and you’re done.
Why It Works for Formal Nights Out
Braids add visual complexity that reads as more intentional and skillfully done than a simple twisted bun. The texture catches light differently and photographs beautifully, especially in photography with flash or outdoor lighting. If you’re attending an event where you want people to notice your hair but you don’t want anything too obvious or glitzy, a braided bun hits that perfect middle ground.
How to Execute the Braid Successfully
- Create the braid while your hair is still in the ponytail rather than trying to braid loose hair—it’s easier to control
- Make your braid deliberately loose; use only a gentle tension on each crossing of sections
- Pull the braid sections outward with your fingers to create width and softness before coiling it into a bun
- If you end up with shorter braid pieces, wrap them around the bun base to hide them
- Consider adding a delicate hair stick or decorative pin through the center of the bun for extra elegance
Insider note: If you’re nervous about your braiding skills, remember that imperfect braids are actually what you want here. A perfectly tight, symmetrical braid looks more formal and costume-like. The softer, slightly uneven braid is more romantic and effortlessly chic.
4. The Twisted Crown Bun
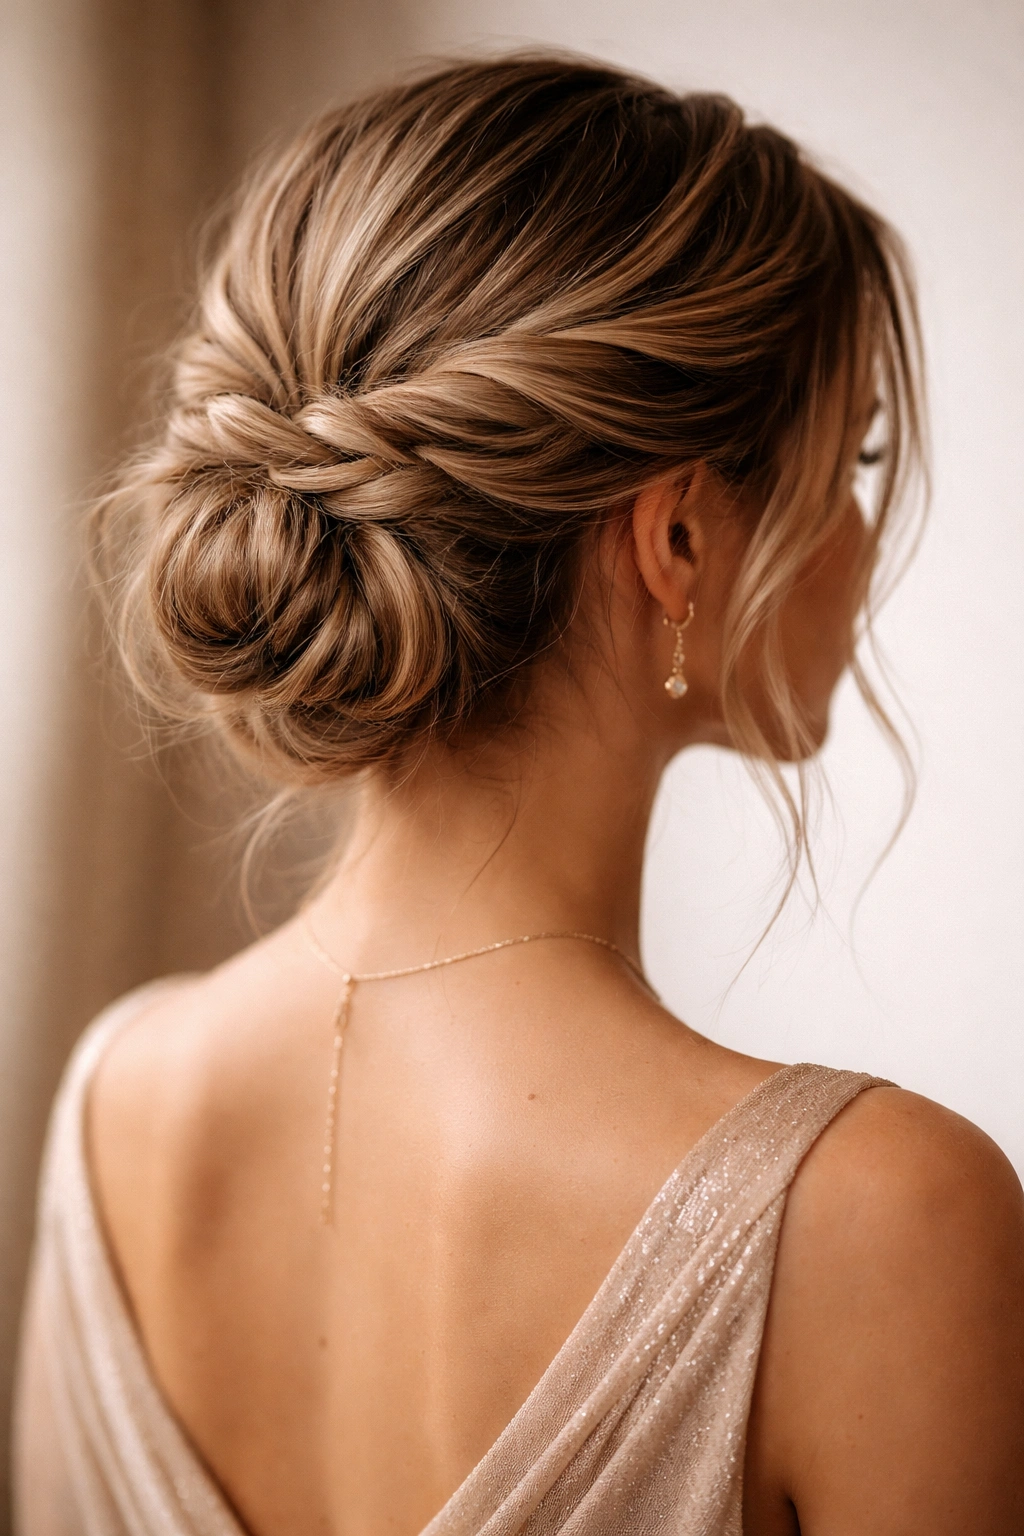
This version feels like a fusion between a halo braid and a messy bun, where you twist sections of hair around your head and then gather everything into a bun at the back. It’s more intricate than a simple bun, but still achievable in about five to ten minutes once you practice.
Take a section of hair from one side of your head near your temple and twist it loosely toward the back of your head, securing the end temporarily with a bobby pin. Repeat on the other side, and then gather all of your hair—including the twisted sections—into a low ponytail at the nape of your neck. Create a loose bun with the ponytail, remove the temporary pins, and let the twisted sections be part of the overall texture.
Why It Works for Elegant Occasions
The twisted crown creates a decorative frame around your head that feels intentional and polished, but the final messy bun keeps it from feeling stiff or overly formal. This style works beautifully if you’re wearing hair down or a backless dress because it draws the eye upward and adds visual interest from every angle. It’s also forgiving if your hair has texture or waves—it actually incorporates and celebrates that rather than trying to smooth it out.
How to Build the Crown Effect
- Start your twists at or slightly above your ears, and twist them loosely as you bring them toward the back
- Use bobby pins to secure the twisted sections temporarily, just enough to hold them in place while you work
- Gather all your hair—loose strands and twisted sections—into a single ponytail
- Rather than trying to incorporate the twists perfectly, let them be part of the overall bun texture
- Pull out 2-3 face-framing pieces from around your front hairline and gently wave them with a flat iron
Worth knowing: This style holds better if you use a texture spray or dry shampoo before starting, because smooth, slippery hair won’t hold the twists or bun as well. The grip matters more than you’d think.
5. The Multi-Section Volumetric Bun
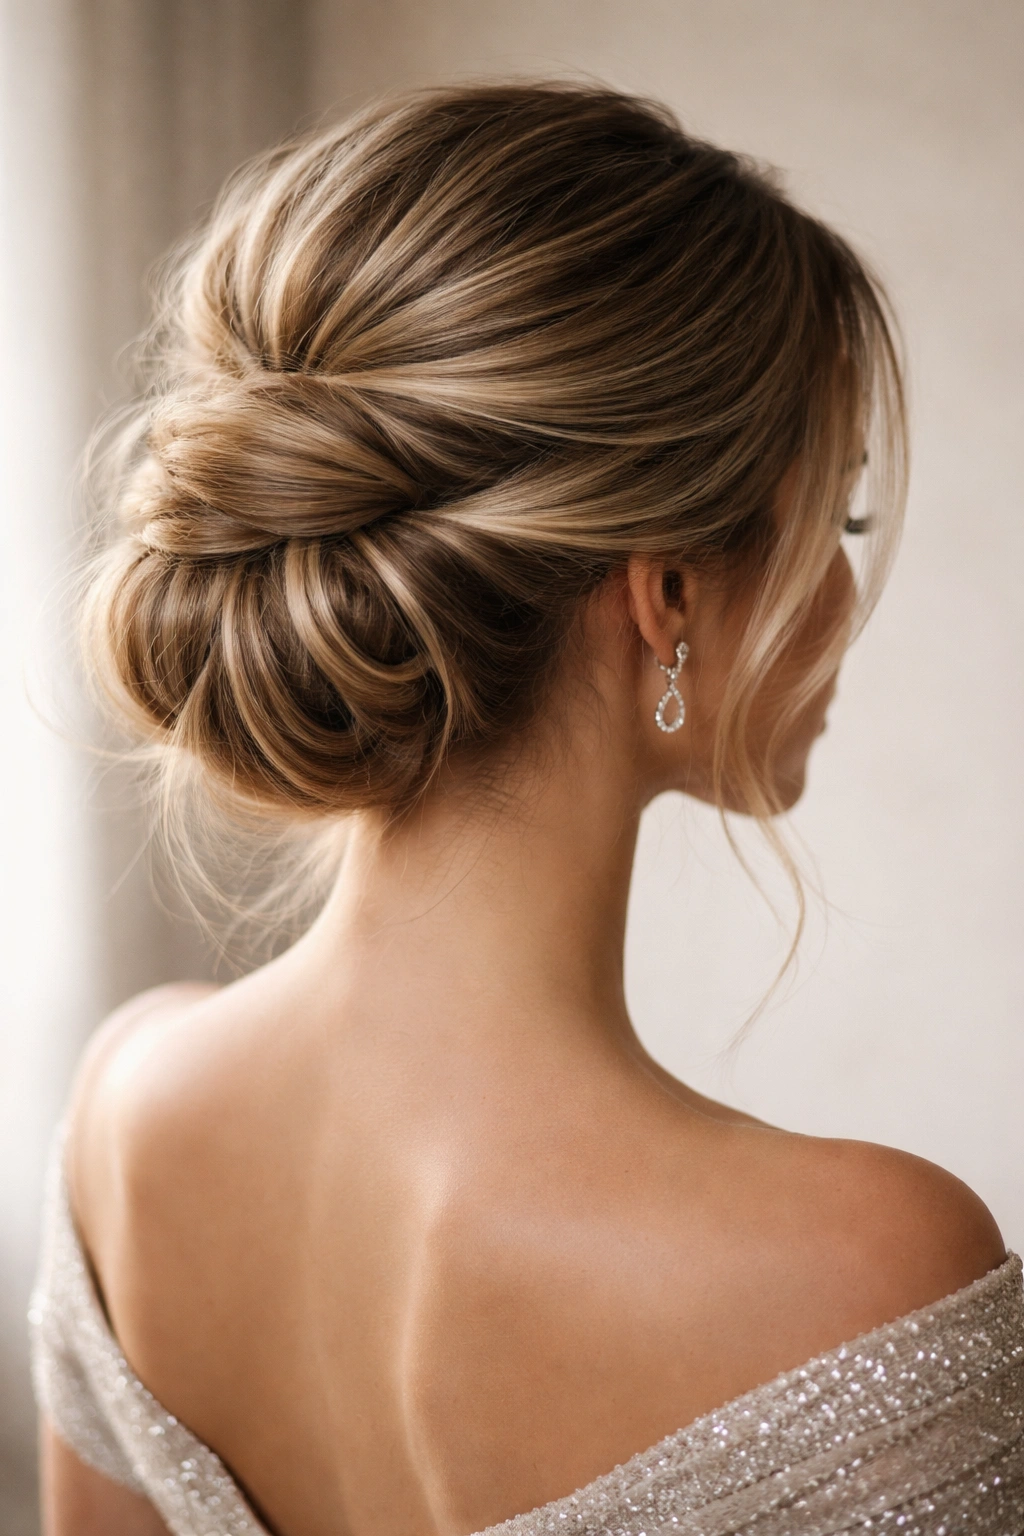
This version is structured more intentionally than a classic messy bun, with distinct sections that create visible dimension and architectural interest. It’s particularly striking if you have medium to thick hair.
Divide your hair into 3-4 horizontal sections from the crown down to the nape. Tease each section gently to create volume, and secure each one with a bobby pin or small clip. Then gather all the sections together into a low ponytail and create a bun from that base. As you coil the ponytail into a bun, you’ll see how the pre-teased sections naturally create different planes and textures within the bun itself.
Why It Works for Formal Settings
The multi-sectioned approach creates a bun that looks more architecturally interesting and polished than a simple single-ponytail bun. The visible texture and dimension make it feel like you spent actual time on your hair, which reads as more formal and intentional. This style also has better staying power than a simple bun because each section is anchored separately.
How to Section and Build Successfully
- Use clips or temporary bobby pins to keep each section separated as you work through the teasing process
- Don’t tease too aggressively—you want gentle volume, not a matted texture
- Gather all sections into a single ponytail low at the back of your head
- Create the bun from that ponytail, and let the sectioning create natural visual breaks within the bun shape
- Leave at least 2-3 pieces completely undone around your face and temples
Pro tip: If you’re worried about the bun feeling too structured or stiff, pull gently at it from underneath after you’ve secured it completely. This softens the appearance and restores that intentionally undone quality.
6. The Textured Undercut Bun with Hidden Shaved Design
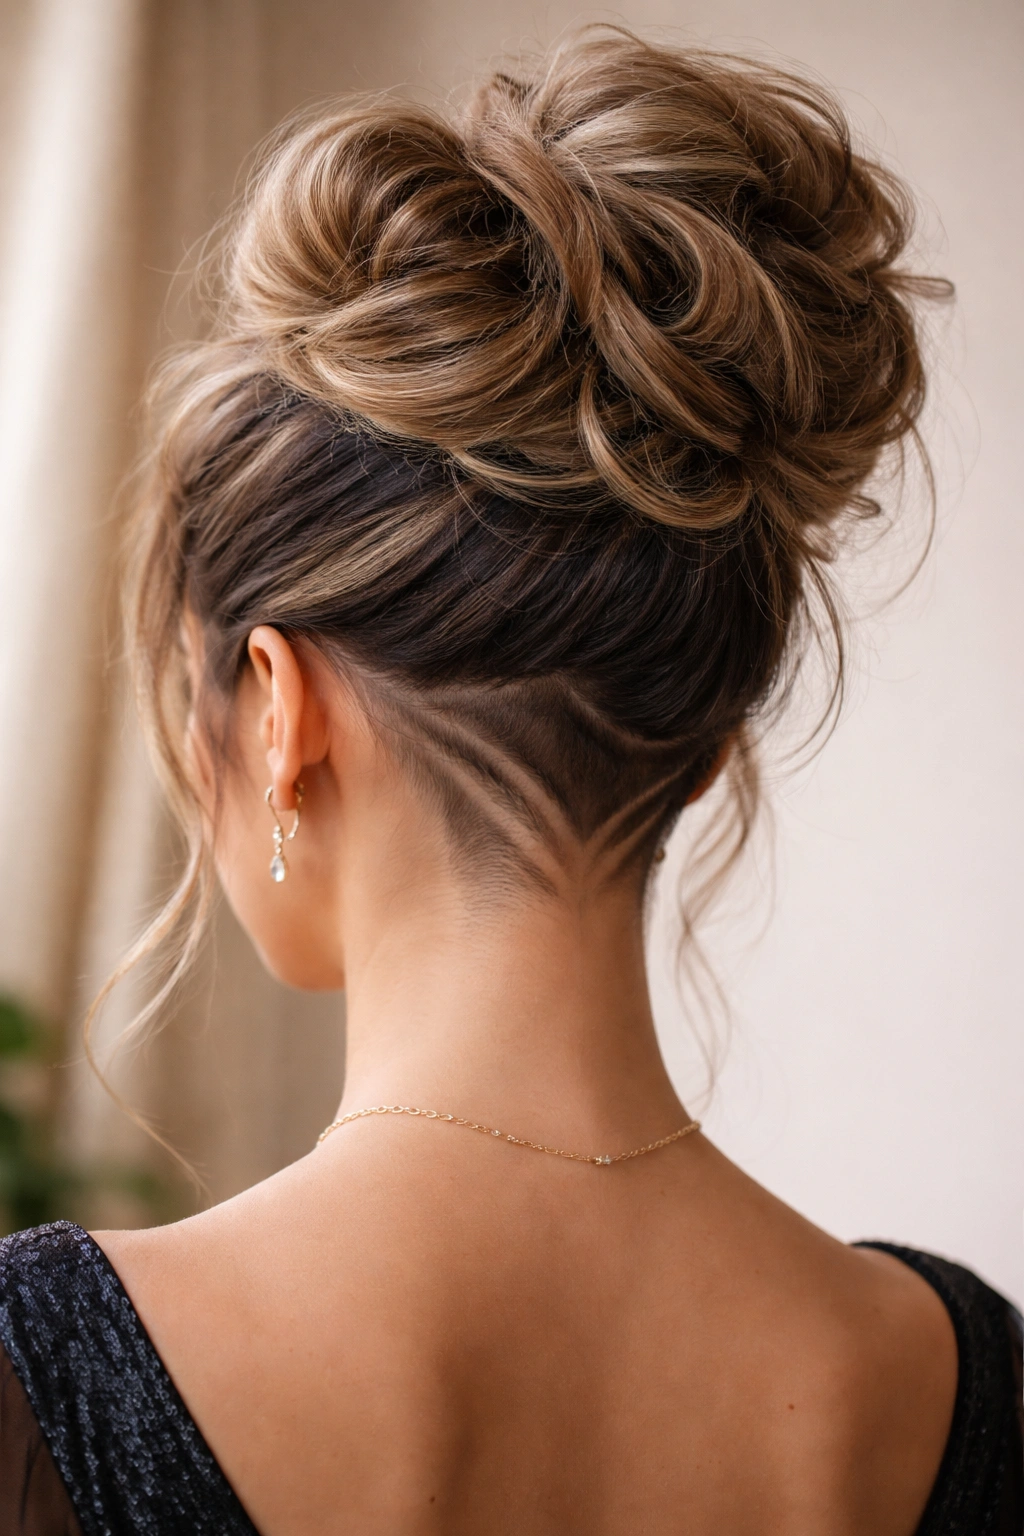
If you’re feeling bold and your hair is long enough, an undercut adds an unexpected edge to an otherwise romantic messy bun. You don’t need a full undercut—even a small, hidden section works beautifully.
Gather your hair into a bun as usual, but leave a small section at the nape of your neck completely undone. If you have an existing undercut, this section can be left visible as a design element. If not, just leaving the nape area with loose strands (rather than covering them with the bun) creates visual interest. The contrast between the gathered bun and the textured, loose strands at the base feels modern and intentional.
Why It Works for Fashion-Forward Formal Events
An undercut element adds personality and edge to a bun style without being so bold that it feels inappropriate for a dressier occasion. The undercut stays hidden when your hair is in the bun (unless you specifically want to show it), so you can switch up the look depending on the dress code. If you do want to showcase the design, a messy bun reveals just enough of it to feel intentional rather than accidental.
How to Style It Confidently
- If you don’t have an actual undercut, simply leave the hair at your nape loose and wavy rather than tucking it completely into the bun
- Create the bun in a way that sits just slightly above where the loose strands begin
- Use texture spray or curl cream on the loose strands to create separation and definition between the gathered bun and the loose hair
- Make sure the loose strands are long enough to create a visible effect—if they’re too short, they’ll just look messy rather than intentional
Insider note: Even a tiny undercut—just a small section at the nape, maybe 2-3 inches wide—creates a surprising amount of visual interest. You don’t need to commit to a full undercut to get this edgy-but-elegant effect.
7. The Elegant Bobby Pin Bun with Geometric Pattern
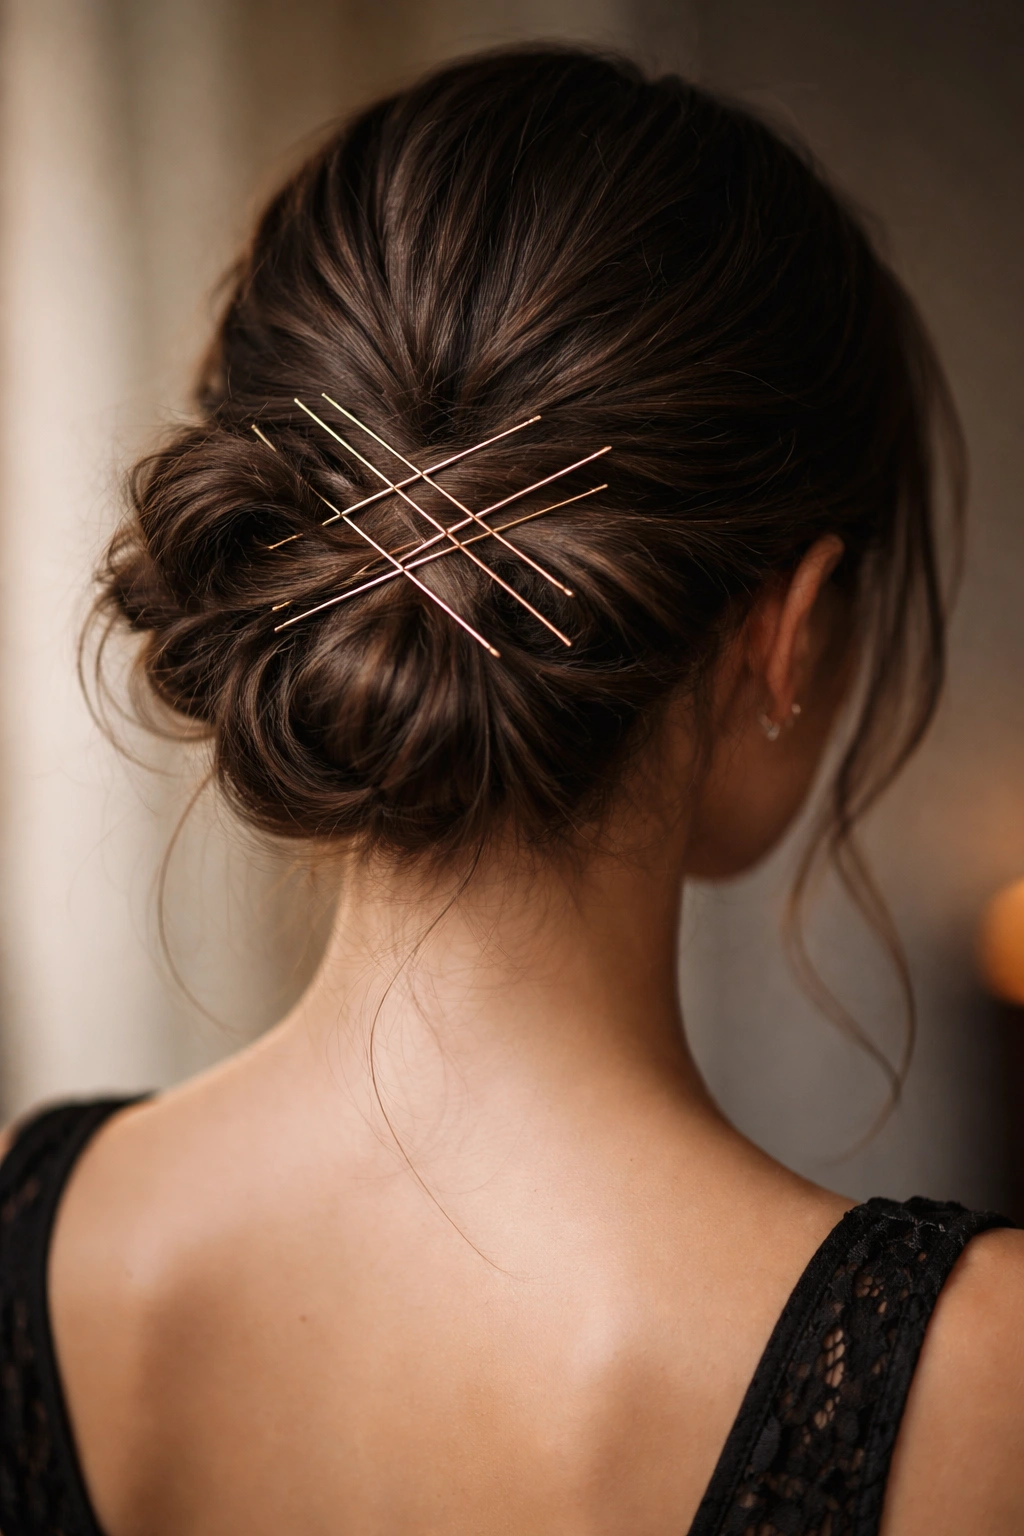
Instead of hiding your bobby pins, use them as a deliberate design element. This approach works particularly well if your pins match your hair color or if you use metallic pins that coordinate with your jewelry.
Gather your hair into a low bun at the nape of your neck, then use bobby pins to secure it with intentional placement. Rather than randomly scattering pins, create a geometric pattern—a diagonal line, an X shape, or a circular arrangement. Use pins that are visible (metallic, decorative, or contrasting with your hair color), and let them become part of the visual design rather than trying to hide them.
Why It Works for Sophisticated Occasions
The geometric pin placement elevates a simple messy bun into something that feels more intentional and designed. It’s a subtle way to add visual interest without needing a complex braiding technique or expensive accessories. The pins catch light beautifully and add dimension to the back of your head, which is especially important if you’re sitting down during the event (at a dinner table, for example) because the back of your head is what people see most.
How to Execute the Pin Pattern
- Start with your bun loosely formed, then decide on your pin pattern before securing everything
- Use 6-8 pins rather than the usual 3-4, spacing them intentionally according to your design
- Match your pins to your jewelry—if you’re wearing gold jewelry, use gold bobby pins; if you’re in silver, choose silver
- Consider decorative bobby pins with small beads, geometric shapes, or metallic finishes for extra impact
- Leave 2-3 wisps loose around your face and nape to soften the structured pin pattern
Worth knowing: This technique requires a bit more planning than a quick bun, but it’s genuinely quicker than creating an intricate braid. The visual payoff is substantial relative to the time investment.
8. The Half-Up, Half-Down Bun Hybrid
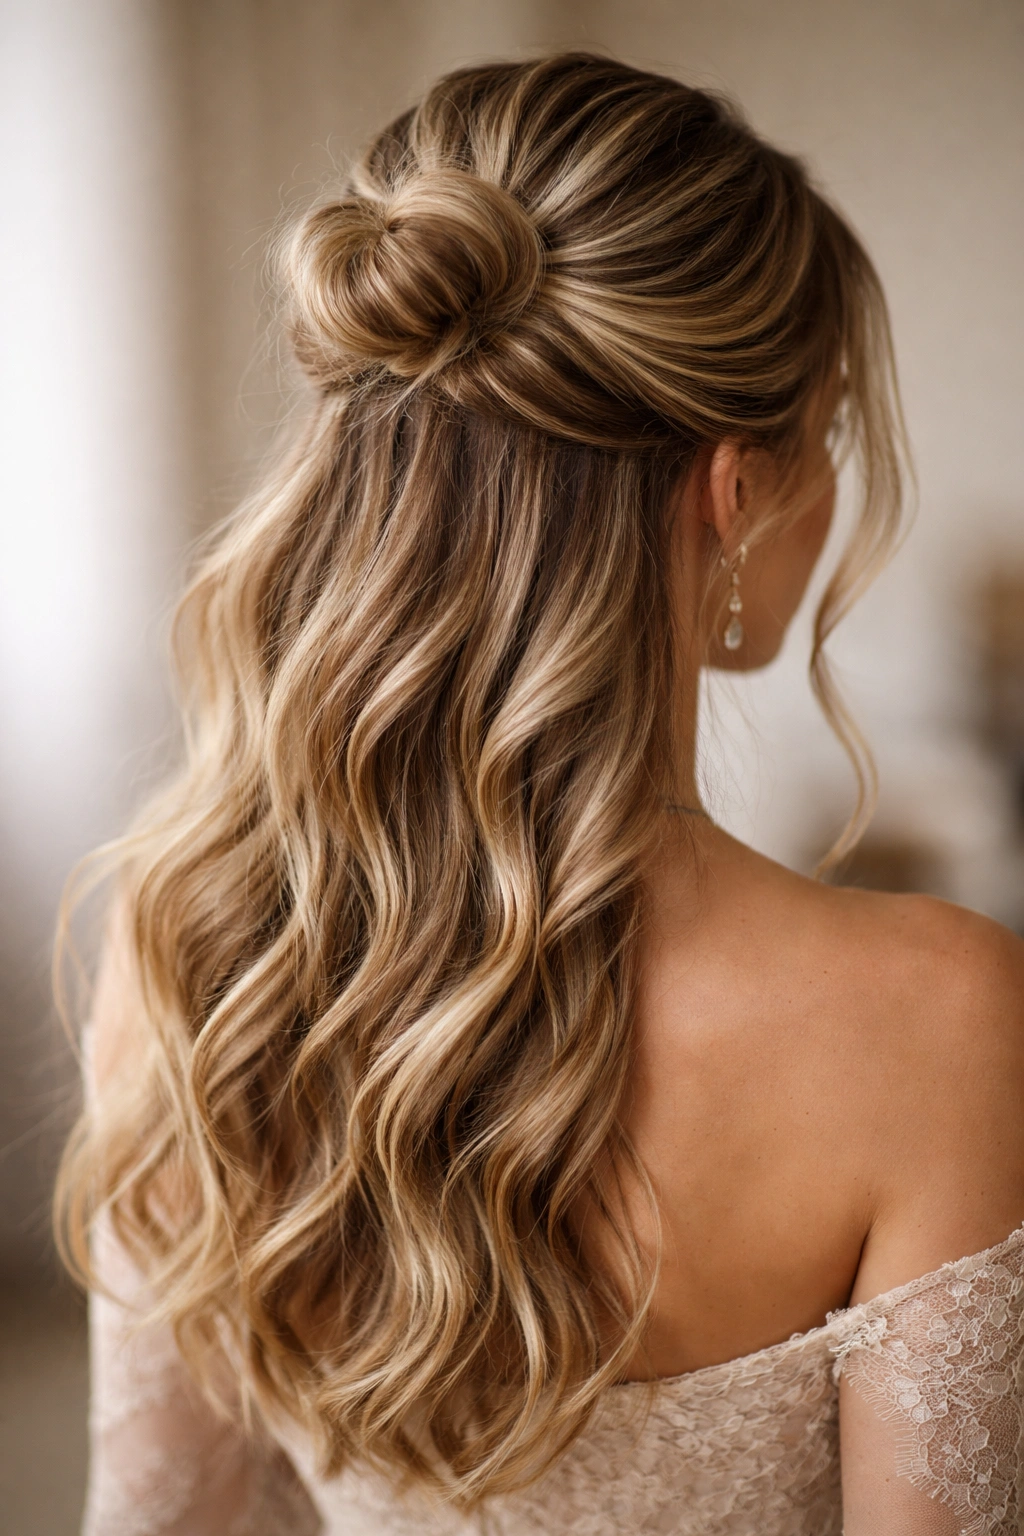
If you love the look of a bun but you’re not ready to fully commit to having all your hair up, the half-up hybrid gives you the best of both worlds. The top half of your hair is gathered into a loose bun at the crown, while the bottom half flows down your back.
Gather the top half of your hair (everything above ear level) into a high ponytail, then create a loose bun with that section. Leave the bottom half of your hair completely down, and use a styling product like a texturizing spray or curl cream to add waves or texture to the loose hair. You can tease the base of the bun slightly so it doesn’t look too neat against the volume of your loose hair.
Why It Works for Dressier Events
This style gives you the practical benefits of having hair off your face (which is helpful if you’re moving around a lot during an event) while maintaining the softness and movement of down hair. It feels less formal than a full updo but more polished than wearing your hair completely loose. The combination of the bun and the flowing hair creates a romantic, ethereal quality that’s perfect for formal occasions without feeling stiff.
How to Balance the Two Sections
- Make sure the ponytail for the bun isn’t too tight—it should feel soft and romantic, not structured
- Create the bun with just enough texture that it reads as intentionally messy, not too neat against the volume of your loose hair
- Add waves or texture to the loose hair so it coordinates with the texture of the bun
- Leave several face-framing pieces undone from both the bun and the loose hair
- Use bobby pins to secure any shorter pieces that might fall into your face as you move throughout the evening
Pro tip: If your loose hair is very straight, use a texturizing spray and a curling iron to add soft waves before gathering the top section into the bun. The texture will hold the style together visually and prevent it from looking like one polished section and one completely separate section.
9. The Faux Hawk Bun
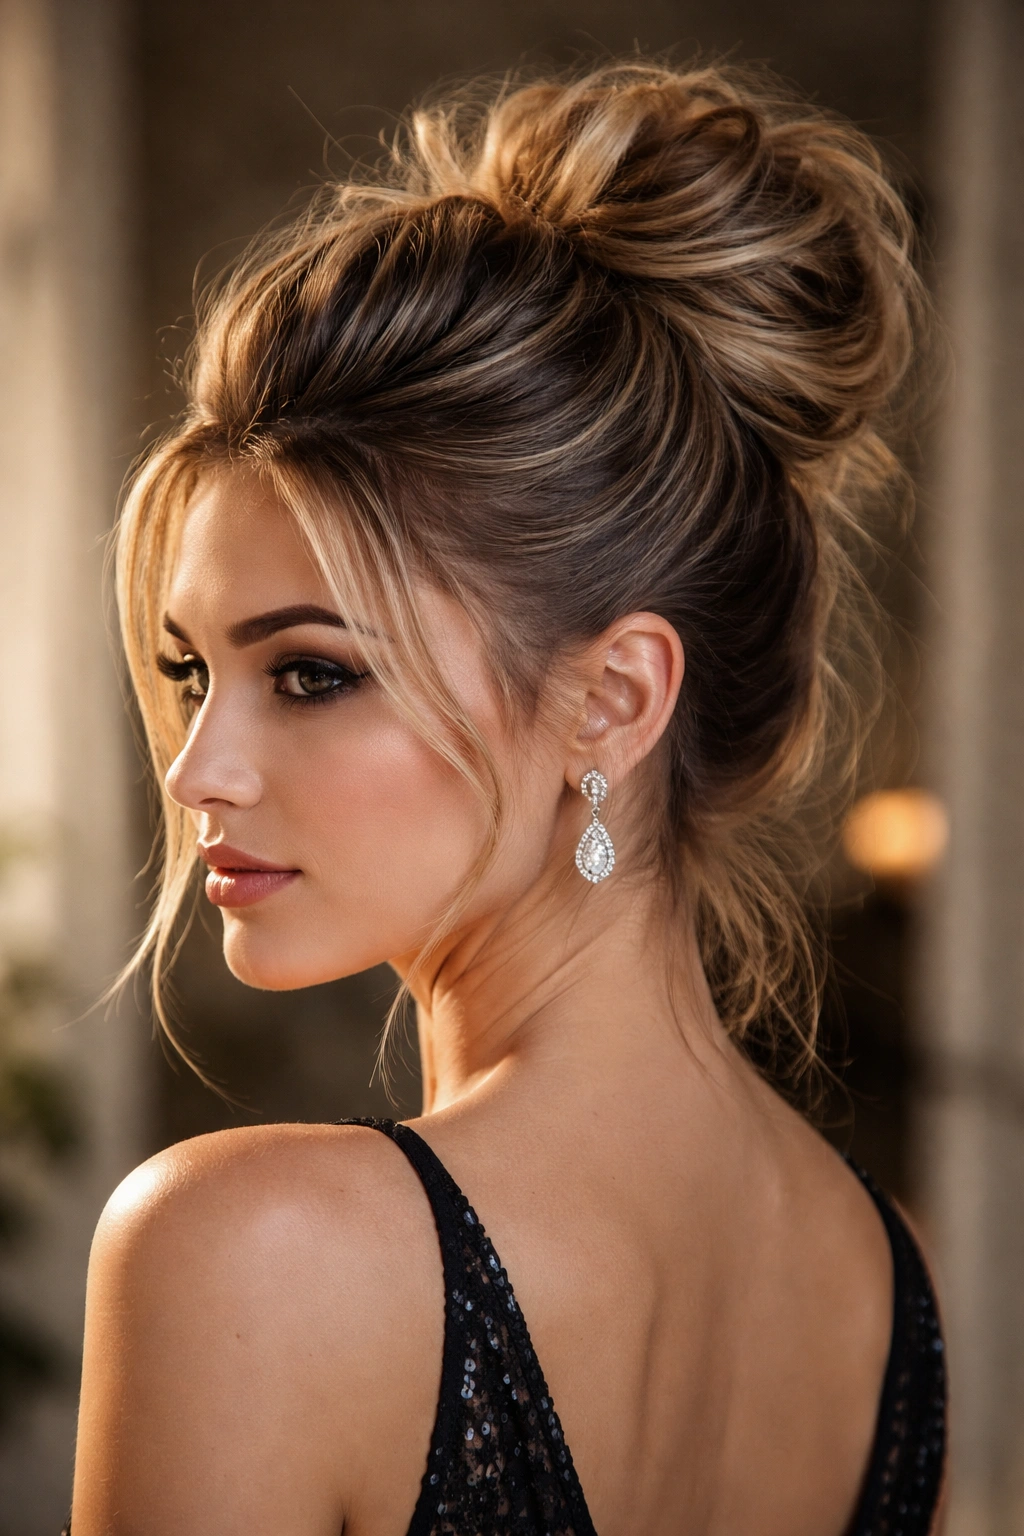
For a bolder, more editorial take on the messy bun, create a faux hawk effect by teasing a vertical strip of hair down the center of your head, then gathering everything into a bun at the crown or back of your head. The teased center section creates visible texture and dimension that reads as intentional and fashion-forward.
Start by creating a deep side part. Tease the hair along the center of your head from your forehead to the nape in a relatively narrow strip—maybe 2-3 inches wide. Once you’ve built that central texture, gather all of your hair into a high or mid-height ponytail (or bun) at either the crown or the back of your head. The teased center section becomes a textural element within the overall bun style.
Why It Works for Bold Formal Events
A faux hawk bun works brilliantly if you want your hairstyle to be a statement without being inappropriate for a formal setting. It’s edgy and modern without being extreme, and it works for any hair length as long as you have enough volume to create the teased effect. This style is particularly striking from behind or from the side, so it’s perfect if you’re wearing a backless dress or something where the back of your head is prominently visible.
How to Create the Teased Center Section
- Create a deep side part to define the shape you’re going for
- Tease only a narrow strip down the center of your head; you’re not creating a full hawk, just a textured line
- Use a fine-tooth teasing brush and tease gently but thoroughly to create lift and volume
- Smooth the surface slightly with a fine-tooth comb so it looks intentional rather than matted
- Gather all your hair into a ponytail or bun, letting the teased center strip remain as a visible textural element
- Leave some undone wisps around your face and neck to frame everything softly
Insider note: This style requires a bit more bobby pins and product than a basic bun, but the payoff is a hairstyle that genuinely turns heads. Secure everything well because the teased texture can be slightly less stable than a smooth bun.
10. The Wrapped Accessory Bun
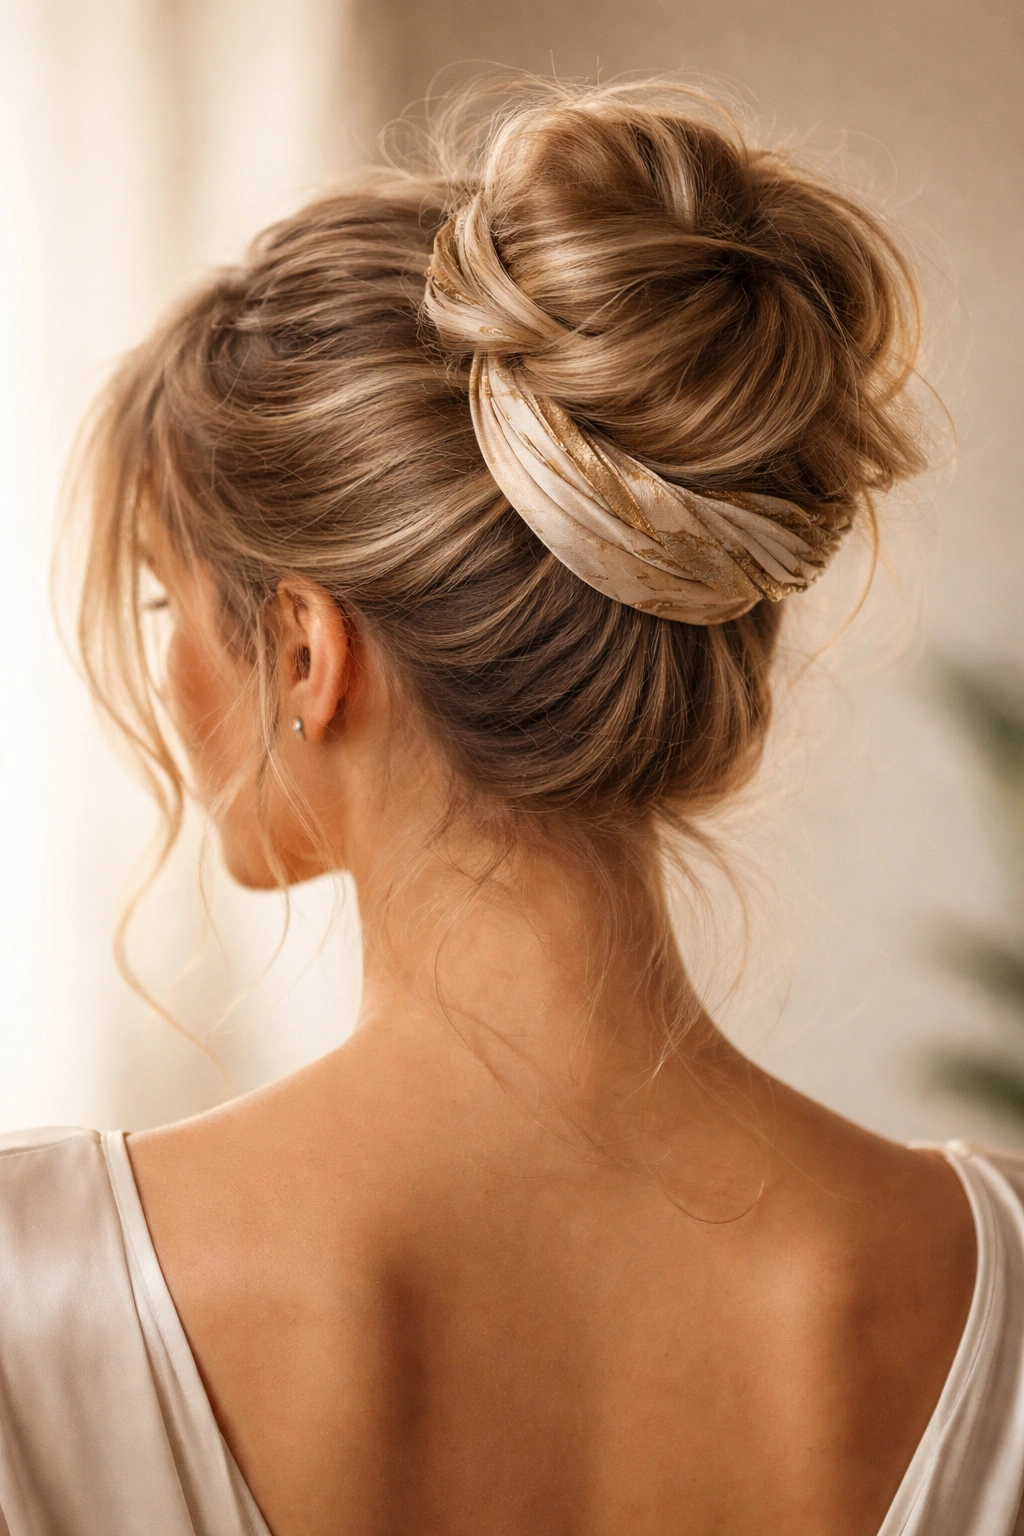
Take a basic messy bun and elevate it instantly by wrapping an accessory around the base. Velvet ribbon, a decorative hair cuff, a chain, or even a silk scarf adds luxury and polish with almost no additional effort.
Create your messy bun however you normally would—high, low, braided, twisted, whatever feels right to you. Once the bun is secured, wrap your chosen accessory around the base where the ponytail meets the bun. Secure the wrap with bobby pins if needed, and let it sit as a decorative band around the base. This single addition transforms a casual bun into something that feels intentionally styled and coordinated.
Why It Works for Any Formal Occasion
An accessory wrap signals that you’ve put thought and intention into your styling without requiring any additional technical skill. It’s a styling hack that works for hair of any texture, length, or thickness. The accessory can be chosen to coordinate with your dress, your jewelry, or your makeup, creating a cohesive overall look that feels genuinely polished.
How to Choose and Secure Your Accessory
- Velvet ribbon in jewel tones works beautifully for evening events and catches light beautifully
- A silk scarf in a coordinating color or pattern adds elegance and a bit of movement
- Decorative hair cuffs or metal bands create a more architectural, modern feel
- Wrap the accessory around the base of the bun snugly (but not so tight that it’s uncomfortable) and secure the ends with bobby pins tucked underneath
- Leave the ends of a ribbon or scarf loose and flowing down the back if you prefer, or tuck them in completely for a cleaner look
Pro tip: If you’re wearing a dress with a specific detail (a beaded bodice, a satin belt, a metallic trim), choose an accessory in a complementary shade or material. This coordination signals intentional styling and creates visual cohesion throughout your entire look.
Final Thoughts
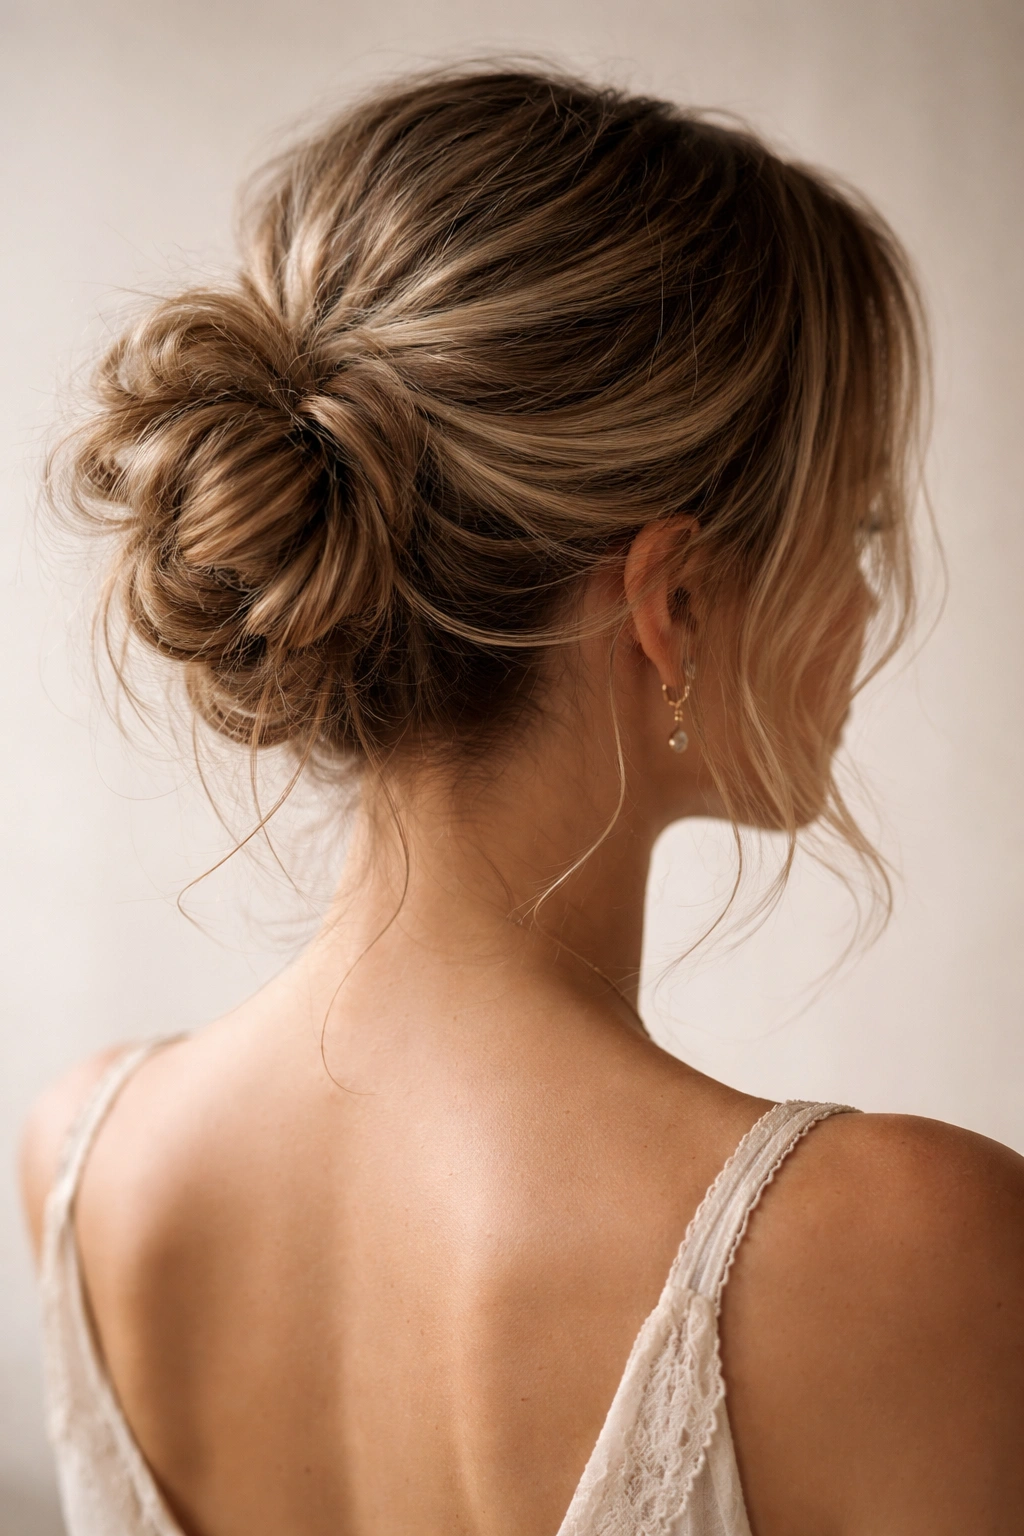
A messy bun for a dressy night out is actually deceptively simple once you understand the core principles: intentional texture beats perfectly smooth hair every single time, strategic placement matters more than technical perfection, and a few carefully chosen undone pieces transform a bun from casual to elegant. The versions above give you endless flexibility depending on your hair length, your hair texture, your dress code, and your personal style preferences.
The real secret to making any of these styles feel appropriate for a formal occasion is committing to the idea that intentionally undone is not the same as accidentally sloppy. Tease where you need volume. Choose your loose pieces deliberately. Use bobby pins or accessories in a way that reads as purposeful. The moment your messy bun looks like you actually meant for it to look that way, it automatically reads as more polished and formal.
Pick one style, practice it a few times before your event, and you’ll have a go-to hairstyle that works for virtually every formal occasion in your life. The best hairstyle is always the one that makes you feel confident and like yourself—and a perfectly executed messy bun does exactly that.
