



Layered hair and messy buns are a match made in heaven—but not every messy bun style plays nicely with choppy layers. When you’ve got texture and shorter pieces around your face, a sloppy bun can look genuinely undone rather than intentionally tousled. The trick is choosing a messy bun technique that actually showcases those layers instead of burying them or leaving wispy strands in all the wrong places.
The beauty of layered hair is that it naturally creates volume and movement, but that same texture means standard messy bun methods often don’t work the way they do on straight or minimally layered hair. A bun that looks effortlessly cool on blunt-cut hair might look chaotic or incomplete on layers. You need styles that embrace the texture, that use those shorter pieces intentionally, and that create visual interest through the shape and construction of the bun itself—not just piling everything on top of your head and hoping it looks intentional.
Whether your layers are subtle or dramatic, textured or sleek, there’s a messy bun style that’ll make you look like you planned it all along. Here are eight approaches that work beautifully with layered hair, each with its own vibe and technique. These aren’t generic bun tutorials—they’re specific styles built to work with what layered cuts do naturally.
1. The Twisted-Base Layered Bun
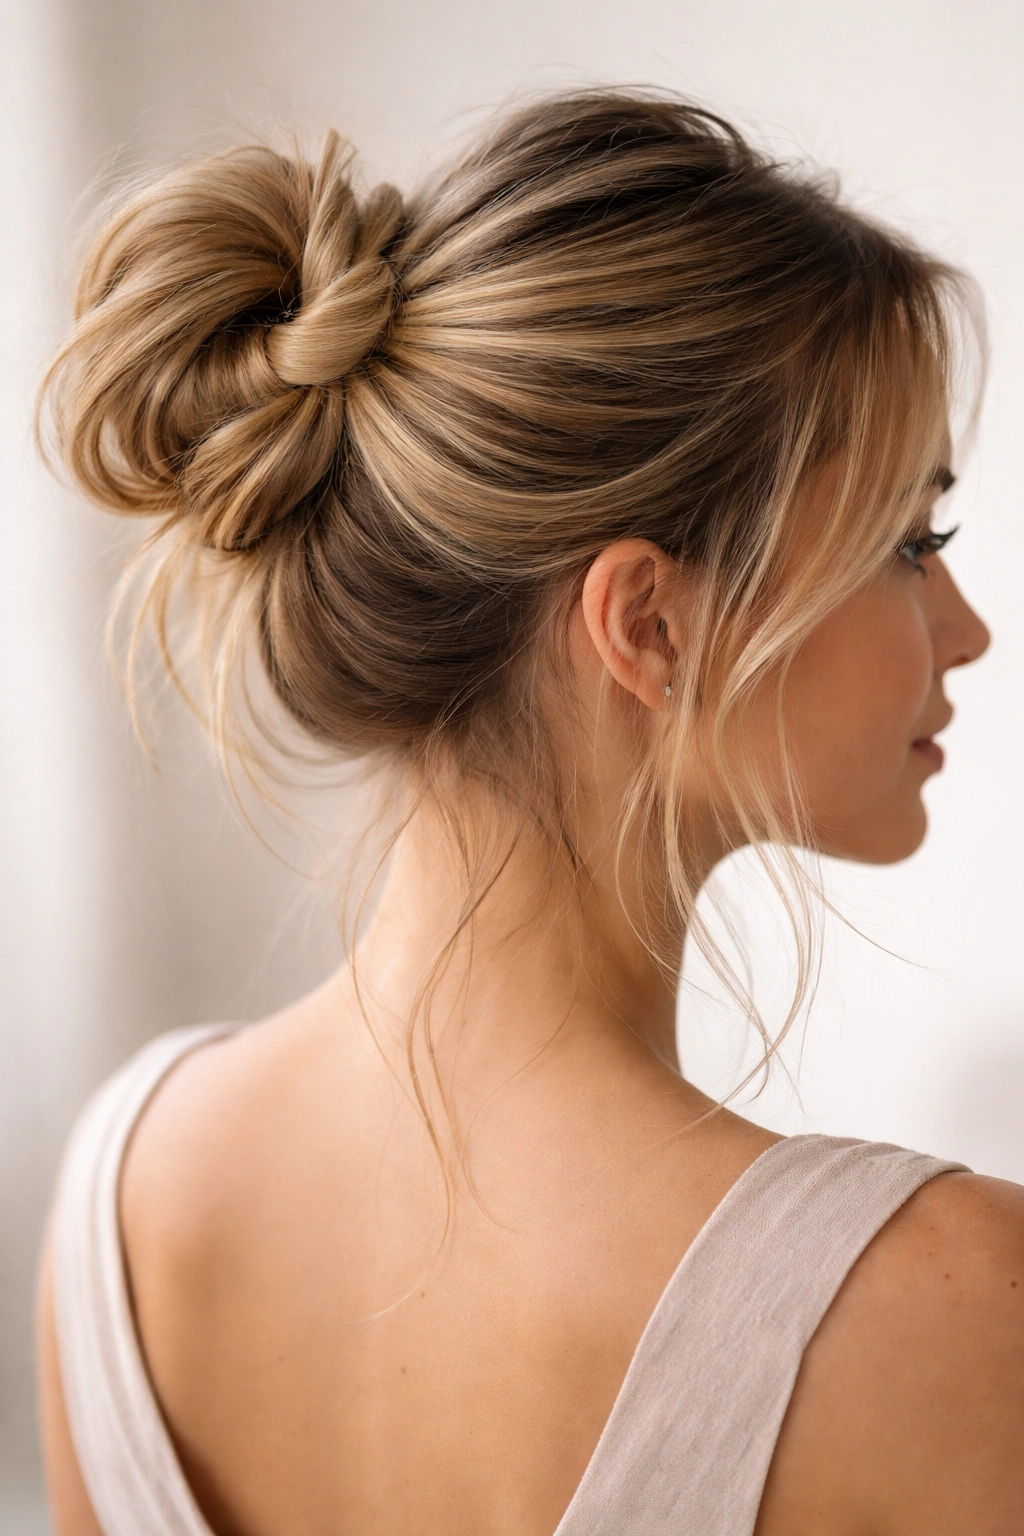
This is the move when you want a messy bun that actually looks polished enough for work or going out, while still feeling intentionally undone. Instead of just gathering your hair and twisting it once before wrapping it into a bun, you’re creating two separate twists that you then wrap together. This technique works gorgeously with layers because the twists catch and showcase the shorter pieces instead of smoothing them flat.
How to Build the Twist-Base Structure
Start by gathering your hair into a high ponytail at the crown—not too tight, just enough to hold. Divide the ponytail into two equal sections. Twist each section individually, turning each one away from your center part, so they spiral outward. This is where layers shine: those shorter pieces will naturally pop out of the twist and add dimension. Once both sections are twisted, cross them over each other to create an X shape, then wrap them together around the base of your ponytail to form the bun shape. The texture of layered hair means the wrapped twists create this naturally broken, piecy bun rather than a smooth knot.
Quick Tips for Layered Success
- Don’t pull too tight at the twist stage. Loose, relaxed twists look intentional and let layers breathe instead of flattening them against your scalp. You’re going for “casually chic,” not “pulled so tight my face is stretched.”
- Use a medium-hold texturizing spray before twisting to give the strands something to grip to. Layers on clean, product-free hair can feel slippery and won’t hold the twist shape as well.
- Pull a few shorter pieces from around your face after you’ve secured the bun. Those baby hairs and face-framing layers should be visible—they’re part of the style now.
- The bun itself should look intentionally messy, with some twisted pieces visible rather than everything wrapped neatly. A few loose ends is the whole point.
2. The Low Side-Swept Bun
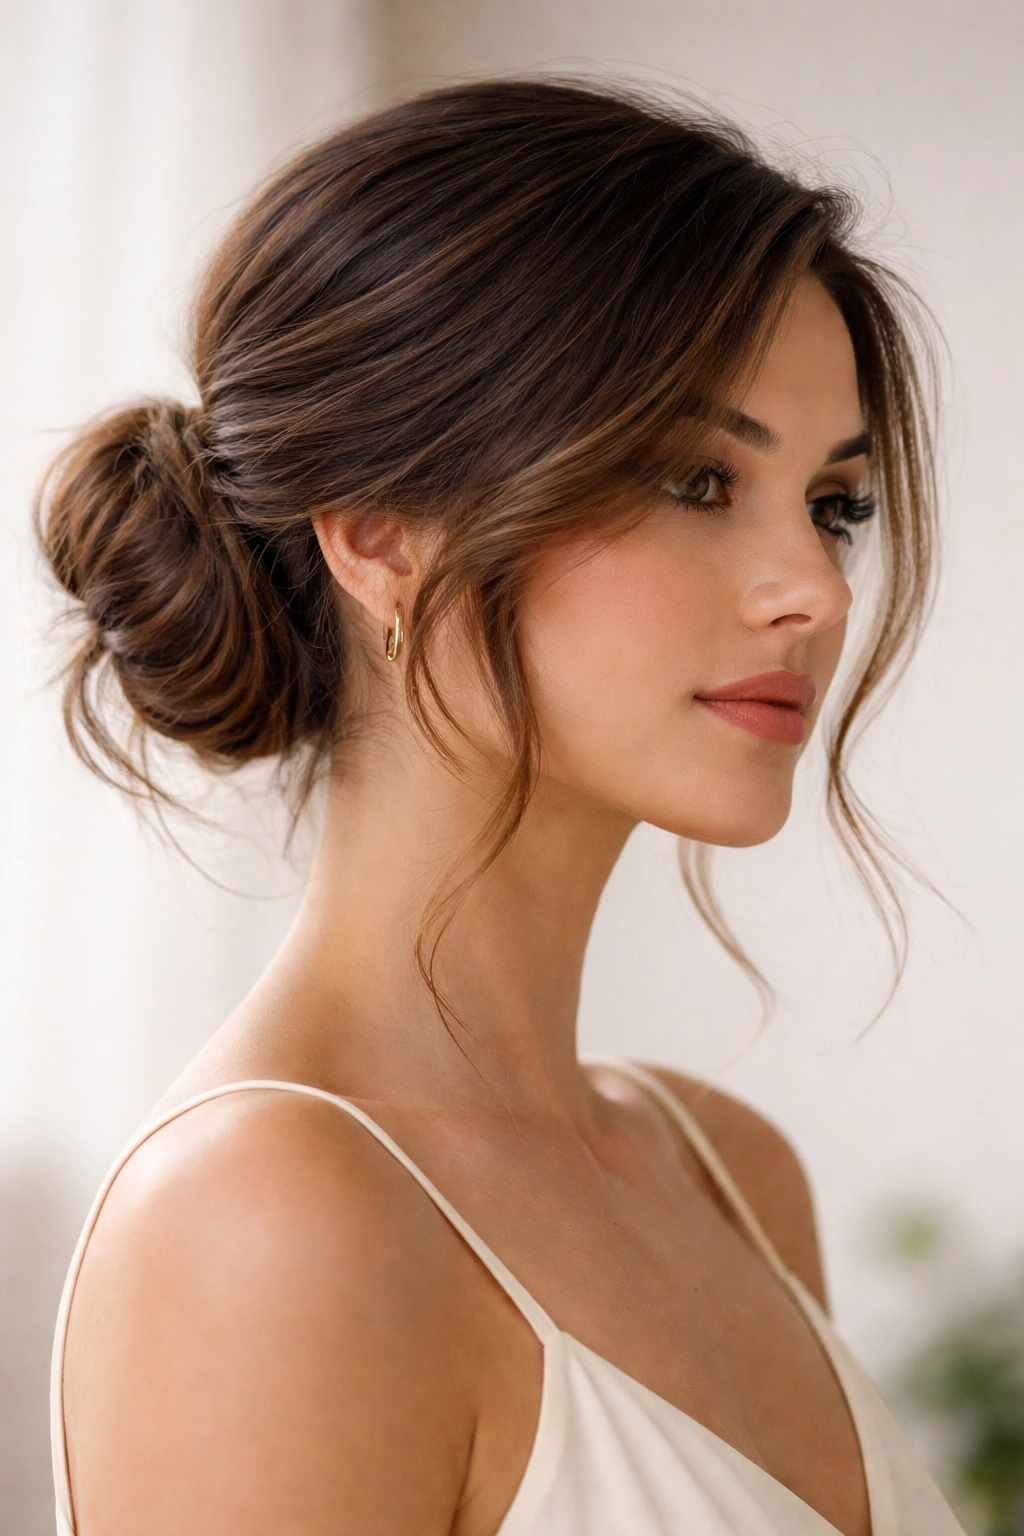
If your layers are dramatic around your face and shorter through the crown, a low side-swept bun is your friend. This style shifts the visual balance so those face-framing layers become the feature rather than a distraction. A side-swept bun is already softer and less formal than a centered one, which pairs perfectly with the natural softness that layers create. Your shorter pieces get room to frame your face while the rest of your hair forms a casual bun low and to the side.
Building the Side-Sweep Effect
Create a deep side part—really commit to it, pulling most of your hair to one side. Gather everything into a low ponytail at the nape of your neck, positioned toward whichever side you’re sweeping to. The shorter front layers and face-framing pieces won’t reach the ponytail band, and that’s exactly what you want. Twist or loop the ponytail loosely and secure it with bobby pins, leaving some texture and pieces undone. The asymmetry of having one side fully styled and the other side soft with short layers creates an intentionally unbalanced, editorial look.
Making It Work With Layers
- Backcomb the base section of your ponytail before twisting to add volume and texture. Layered hair actually holds texture beautifully, so a bit of teasing creates a fuller, more dimensional bun shape.
- Leave your front layers completely down. Don’t tuck them back. They should curve softly around your face and shoulders. This is what makes the style work with layers rather than against them.
- Use a light hairspray to piece out the bun after you’ve secured it. You want individual twisted pieces visible, not a solid blob. Layered hair naturally creates pieciness—enhance that quality rather than smoothing it down.
- The lower placement of the bun—down at your neck instead of at your crown—balances shorter layers beautifully and makes the style look intentional rather than like you just ran out of time.
3. The Braided-Halo Bun
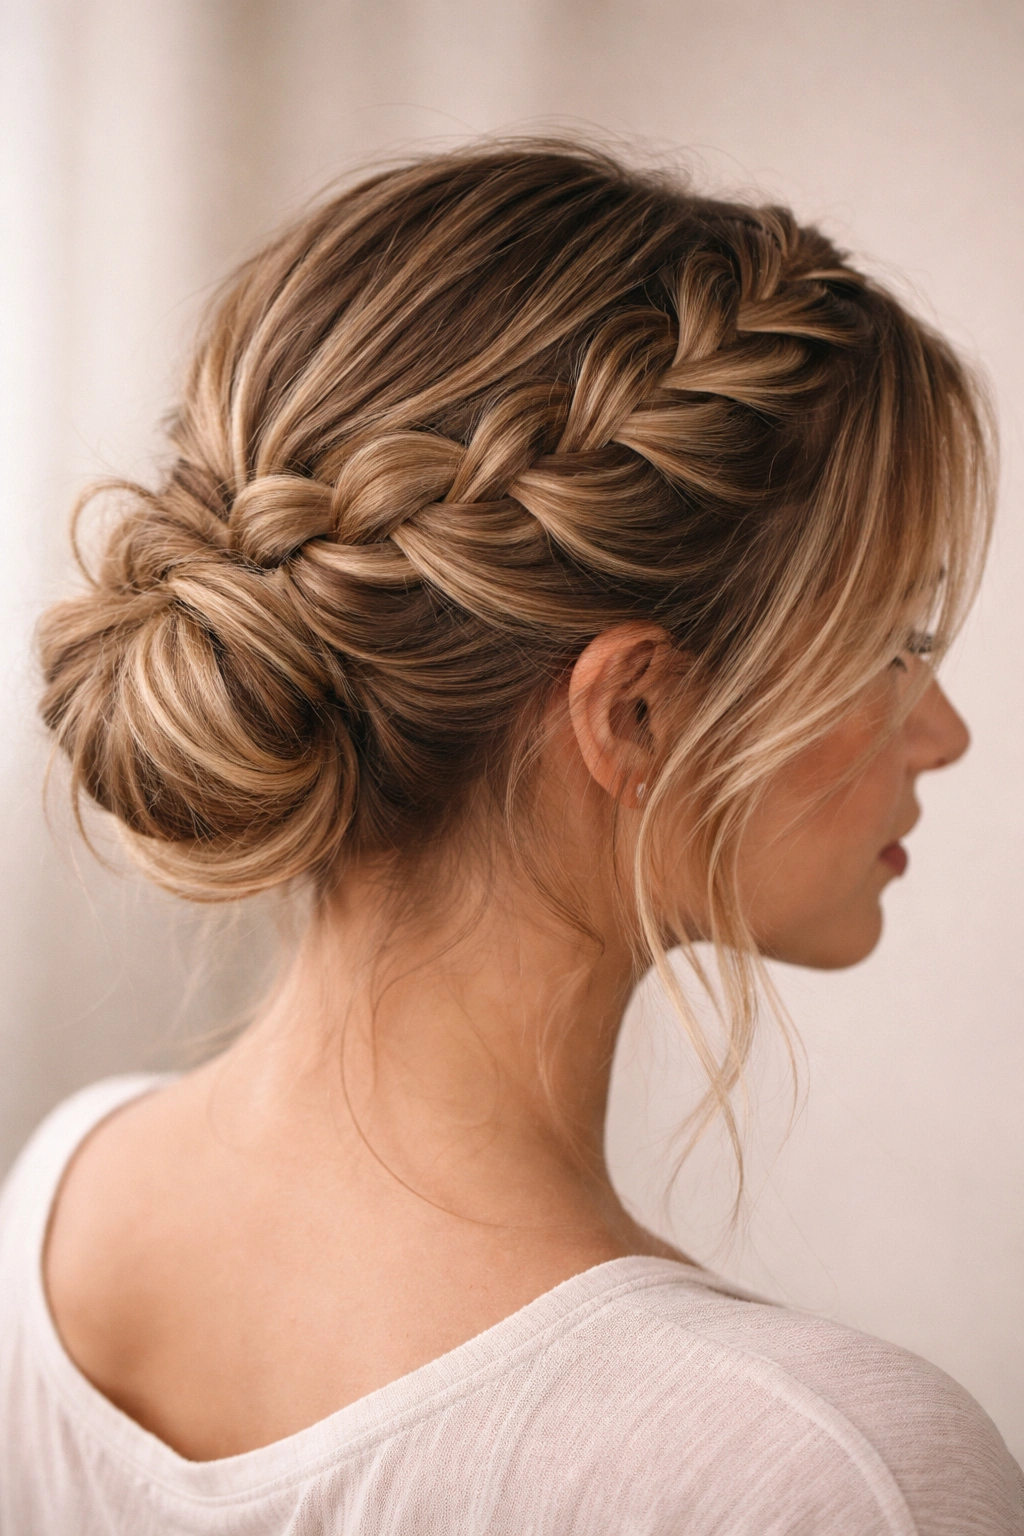
This style leverages braids to contain and frame shorter layers while creating a visually sophisticated bun. A Dutch or French braid looped around your crown acts like a halo, and your layers weave naturally into the braid rather than escaping. It’s more polished than a simple messy bun but still has that undone texture that makes layered hair look intentional. This works particularly well if your layers are medium-length and throughout your hair rather than super short and choppy.
Creating the Halo Braid Effect
Brush your hair back from your face, then start a Dutch braid (reverse French braid) at one temple, braiding up and around your head toward the opposite side. The braid should follow the natural contour of your scalp, going around like a crown. As you braid, incorporate shorter pieces and layers into the braid itself—don’t try to leave them out. The layered pieces add visual interest and texture to the braid. Once you’ve braided all the way around, gather everything together at the opposite side from where you started, creating a low ponytail. Twist or loosely bun this gathered section, tucking the end of the braid into the bun so it forms that halo effect.
Tips for Braid Integration With Layers
- Don’t braid too tightly, especially over your crown where hair is shortest. A loose braid showcases layers better and looks more effortlessly textured.
- Leave a few shorter pieces out of the braid intentionally. Tiny hairs around your temples and hairline don’t need to be corralled—let them soften the edges.
- Loosen and piece out the braid after you’ve secured everything. Gently pull sections of the braid slightly outward to add volume and texture. This is the move that transforms a neat braid into something with personality.
- If you have super short layers in front, this style still works—those baby hairs become part of the face-framing element that makes the whole look cohesive.
4. The Textured Wrap Bun
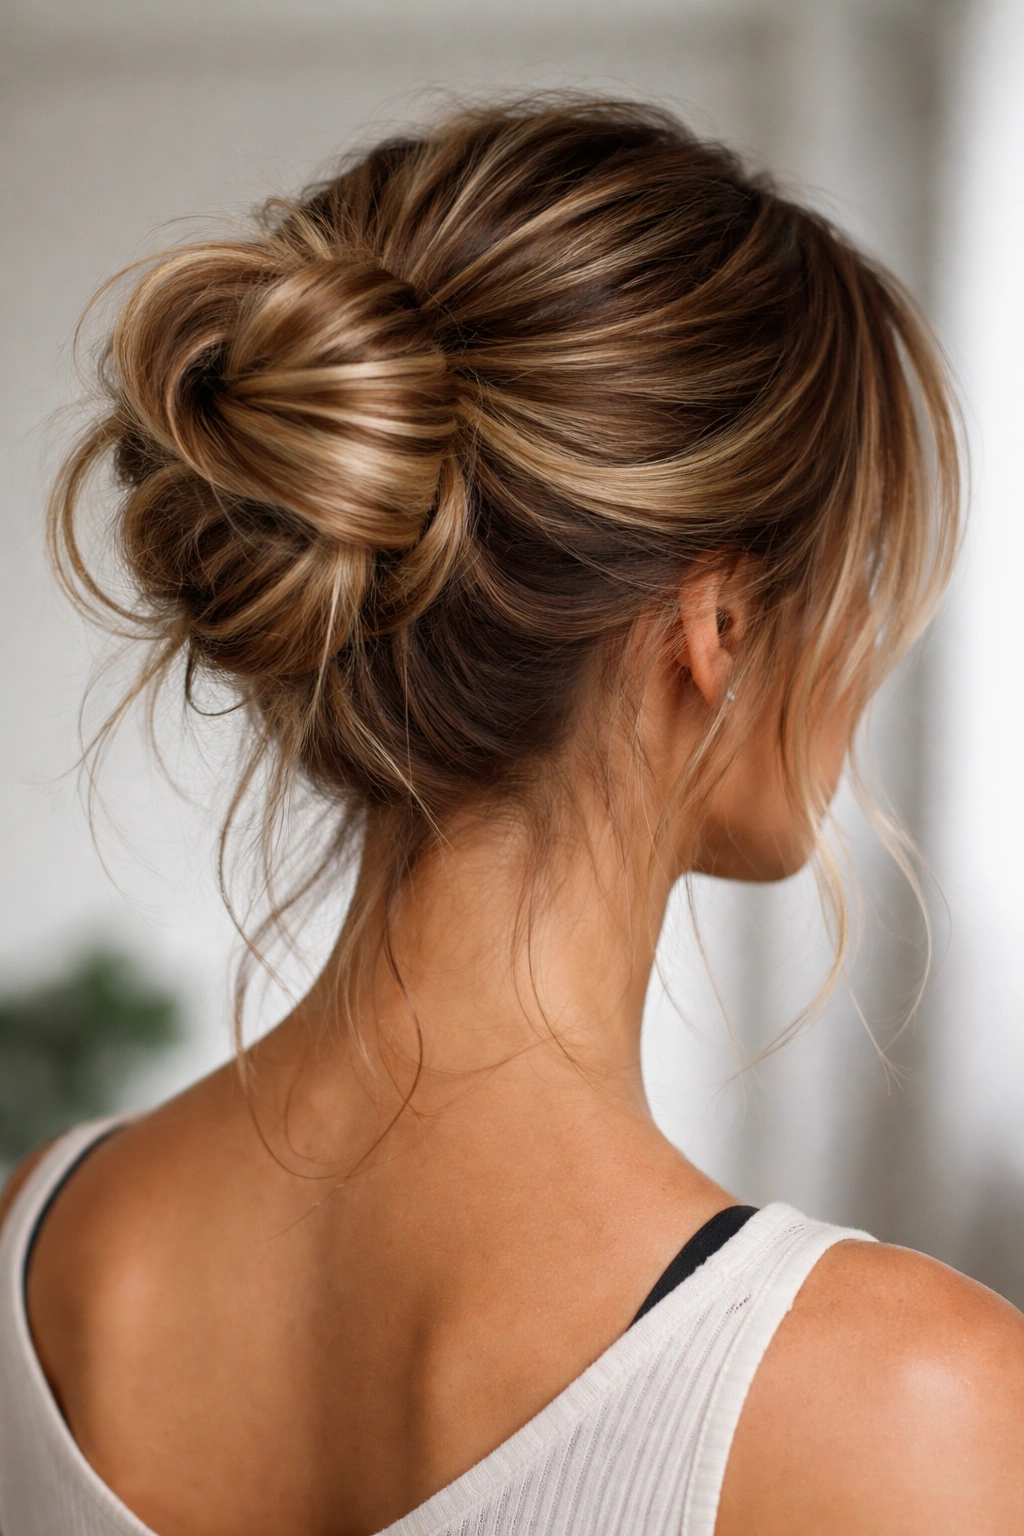
This is probably the most “intentionally messy” of all the styles—and it’s specifically designed for layered hair. Instead of one smooth wrap around the base of a ponytail, you’re creating multiple wraps using different sections of hair, which creates a broken, dimensional bun that’s basically impossible to get wrong. The texture of layered hair makes each wrap look deliberate rather than sloppy.
Building the Multi-Wrap Technique
Gather your hair into a high or mid-height ponytail depending on your vibe. Separate the ponytail into three or four chunky sections. Take the first section and wrap it tightly around the base of the ponytail, securing it with a bobby pin. Do the same with the second section, wrapping it around a slightly different angle so the wraps are visible and create a piecy look. Continue with remaining sections until you’ve used all your ponytail hair. Each wrap should overlap slightly with the previous one, but you want the wraps visible, not blended together into one cohesive bun.
Why Layers Make This Style Pop
- Layers automatically add texture, so even if your wraps aren’t perfectly smooth, the bun looks intentionally undone. Blunt hair might look messy in a bad way; layered hair looks editorial and cool.
- Different lengths create visual interest. As you wrap, shorter pieces naturally stick out at different angles, which is the whole aesthetic you’re going for. You’re not fighting against it—you’re working with it.
- Backcomb the ponytail section before wrapping to add volume. Layered hair already has lift, so a bit of texture makes the wrapped bun look fuller and more interesting.
- Leave a few wrap sections slightly looser than others to create movement and dimension in the bun shape. Perfection is the enemy here.
5. The Messy High Bun With Texture Spray
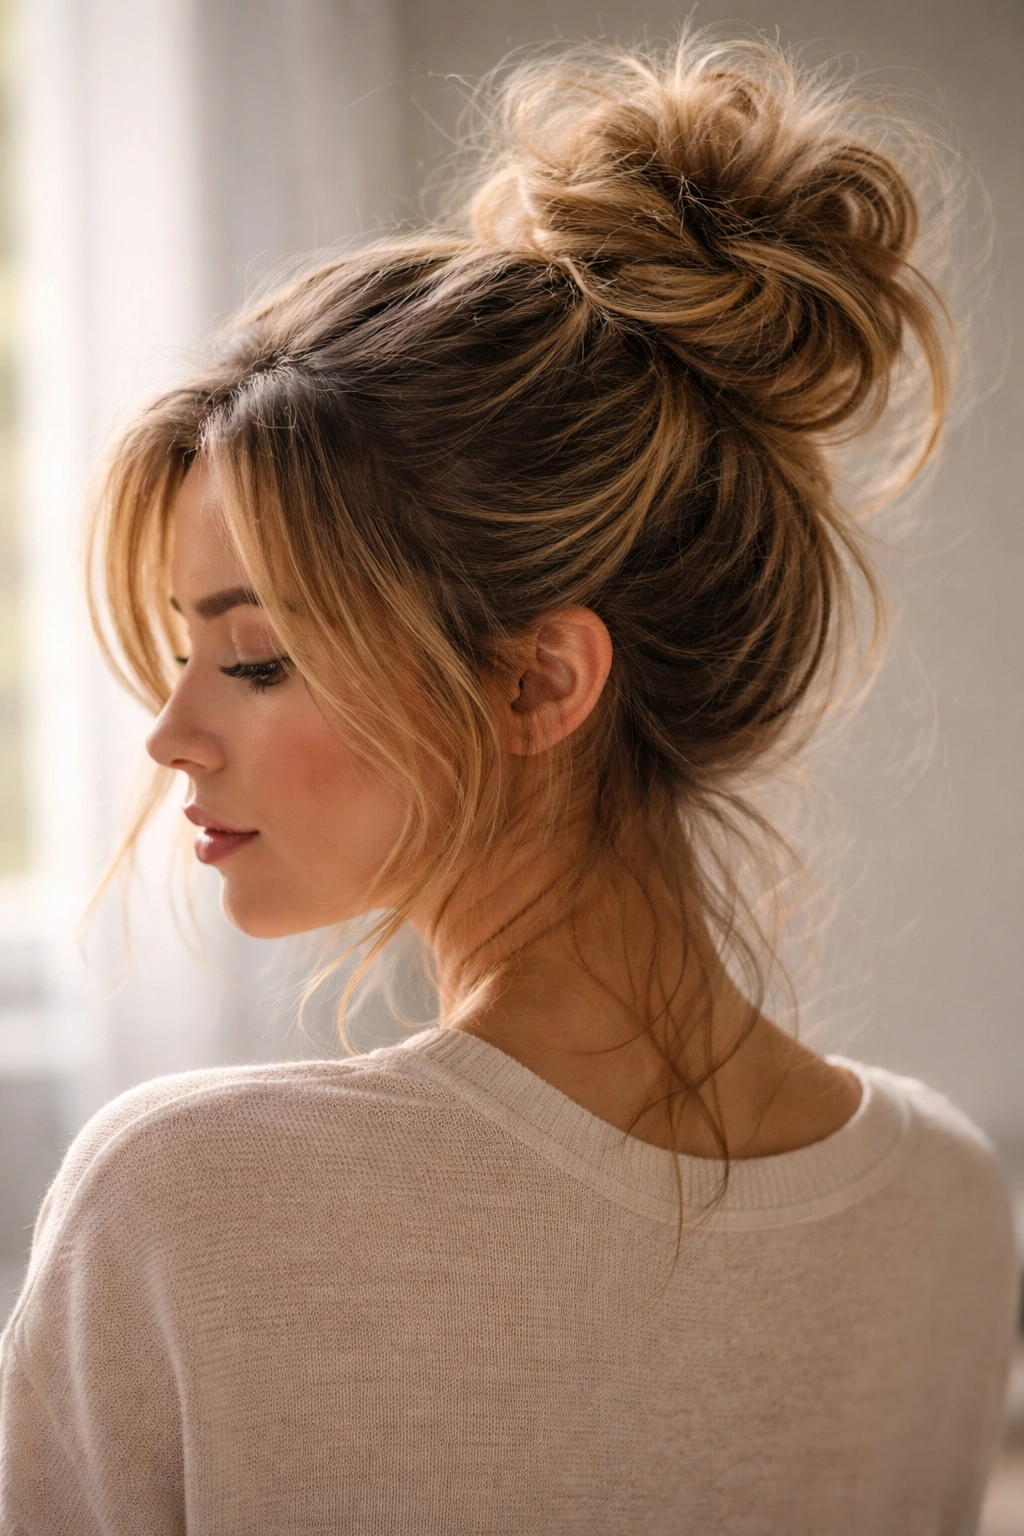
Sometimes the simplest approach is the best, especially if you’re working with layers that are naturally textured. This is basically a high bun, but with the technique and product choices specifically optimized for layered hair. A good texturizing spray, a loose gathering, and strategic pieces pulled out creates a bun that looks like you woke up that cool and just twisted your hair up. It’s the “I didn’t try” style, except you definitely did try a little.
The Texture Spray Foundation
The secret here is using a texturizing or sea-salt spray before you even pull your hair up. Work it through your mid-lengths and ends, scrunching as you apply. This gives each layer something to grip to and prevents everything from being slippery. Let it dry or partially dry—you want your hair to have some traction. Now gather everything into a high ponytail and twist loosely, wrapping it into a bun shape. The texture spray does most of the work holding everything in place, which means you can keep the bun loose and undone.
Styling for Maximum Layer Impact
- Pull your ponytail tight enough to hold, but not so tight that you’re creating tension. You’re going for “couldn’t be bothered to tie it neatly” not “my scalp hurts.”
- As soon as the bun is secured, pull out shorter pieces from around your face, your nape, and even from within the bun itself. Aim for a 60-40 ratio of bun to loose pieces for that perfect messy-but-intentional look.
- Rough up the bun texture by gently pushing pins into it rather than arranging it. Layers naturally create movement, so lean into that organic chaos.
- Finish with a light hairspray to hold everything without making it stiff or shiny. You want texture and movement to still be visible.
6. The Side-Wrap Bun With Center Part
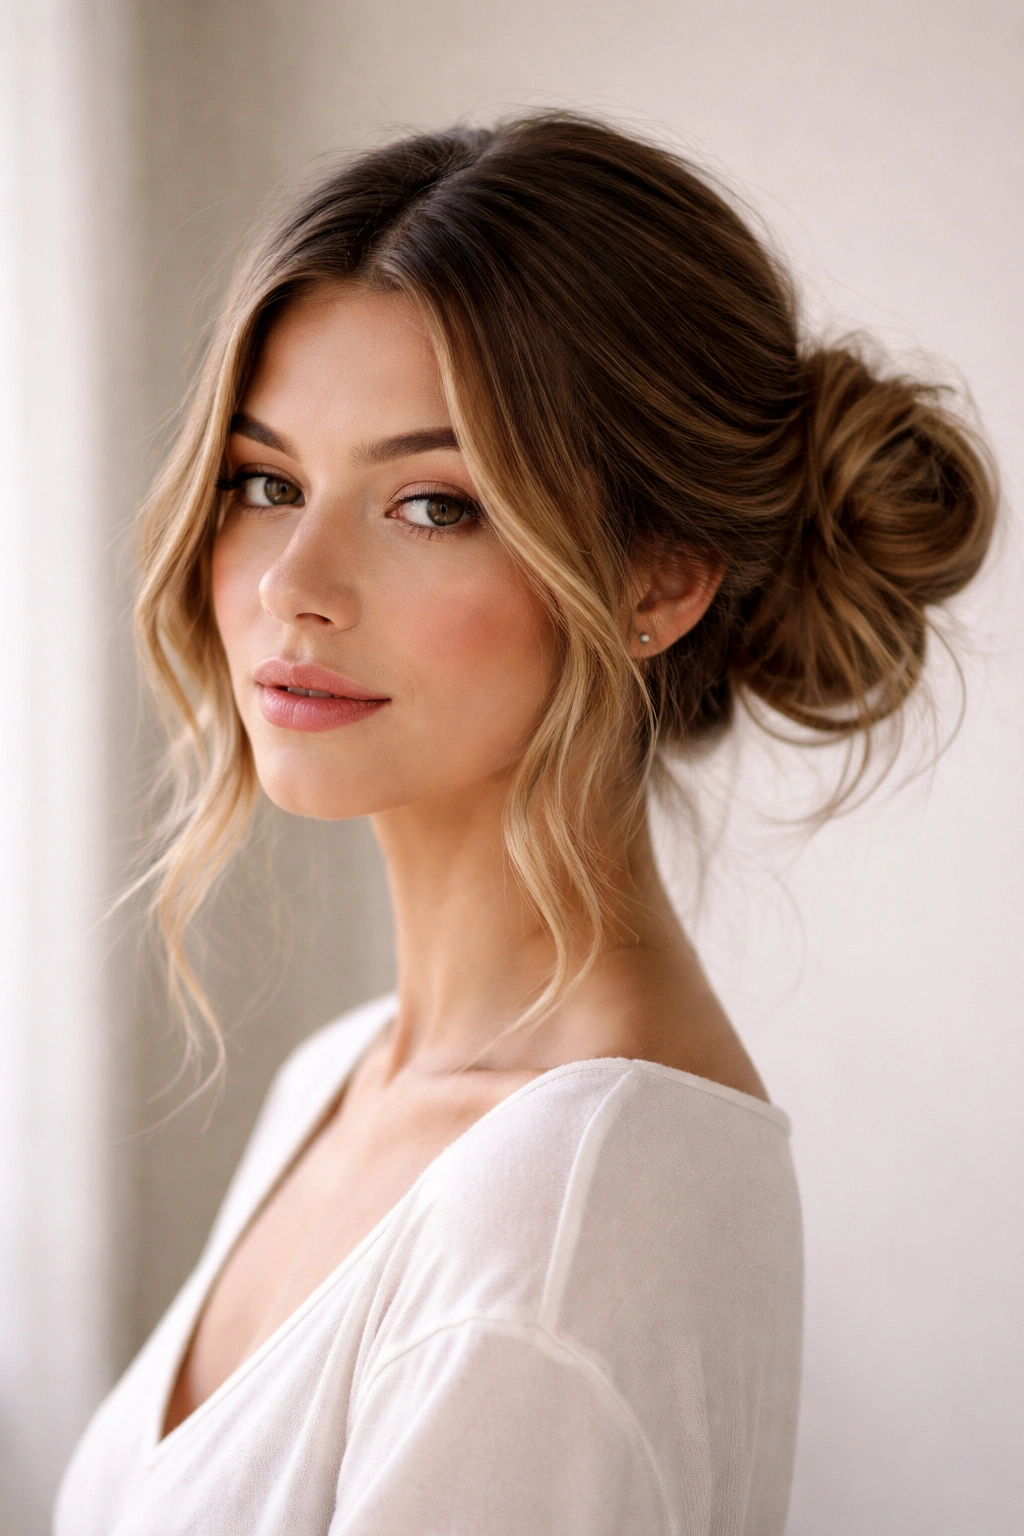
This style is all about creating visual balance when your layers are shorter at the sides and longer in the center. Instead of pulling everything straight back, you’re parting your hair down the middle and sweeping most of it to one side before creating the bun. This approach makes shorter side layers a feature rather than something that sticks out awkwardly. The center part naturally frames face-length layers beautifully while the gathered hair creates a bun off to one side.
Constructing the Off-Center Balance
Start with a center part that goes from your hairline to your nape. Run your fingers through to make sure the part is clean and visible. Now sweep most of your hair (maybe 70 percent) to one side, leaving a section on the other side flowing loosely. The unswepped side stays down, becoming part of your face-framing. The swept side gets gathered into a low ponytail and twisted into a bun. This creates an asymmetrical look that actually highlights layered texture rather than fighting it. The side with the bun is polished; the side with loose layers is soft and romantic.
Why This Works for Layers
- The center part elongates your face and becomes a focal point, so your layers are working together with your style rather than distracting from it.
- Shorter side layers stay completely visible, framing your face and creating softness. You’re not trying to gather them up and hide them.
- The bun placement off to one side creates visual interest and feels modern. Centered, symmetrical buns can sometimes make very short layers look chaotic; off-center balances that.
- Pull a few pieces from your swept side before securing the ponytail so they frame your face. You want the line between “styled” and “loose” to be intentional and visible.
7. The Stacked Bun With Layered Definition
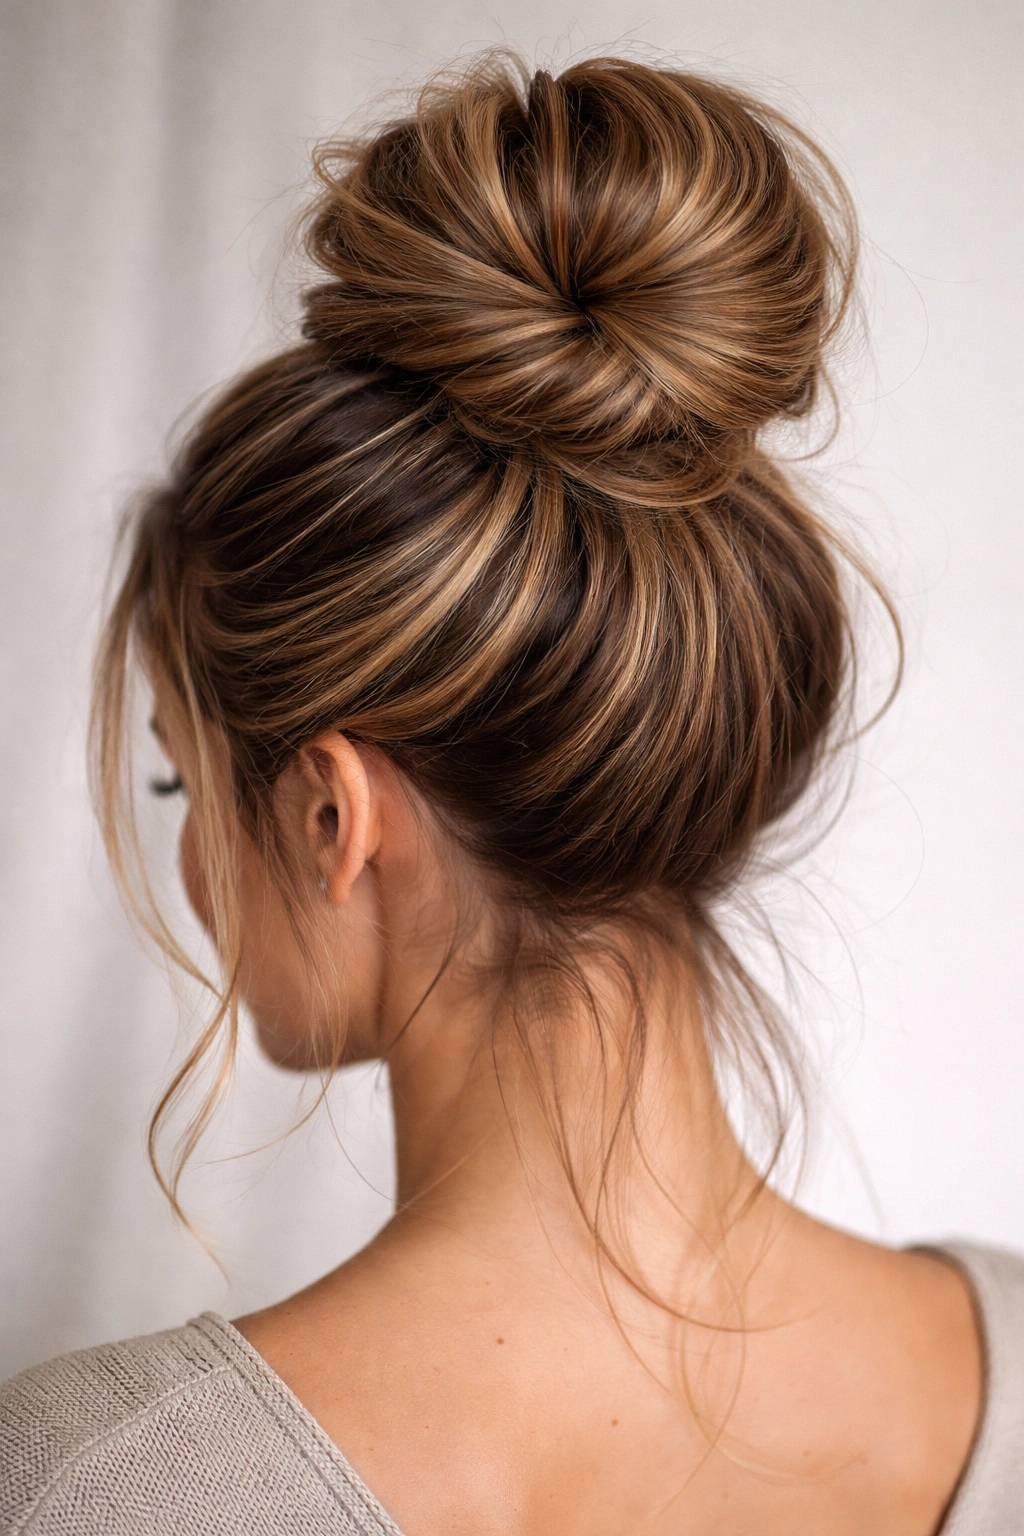
This is for when you want a bun that’s clearly voluminous and textured rather than just haphazardly piled hair. A stacked bun uses layers of twisted or looped hair stacked on top of each other to create height and dimension. It looks more intentional than a simple messy bun, but because you’re building it with visible layers and texture, it still has that undone quality. This works beautifully with medium-to-longer layers throughout your hair.
Building Stacked Height and Dimension
Gather your hair into a high ponytail and divide it into three sections from base to tip. Create a small twist or loop with the bottom section of the ponytail and secure it with a bobby pin right at the base. This creates your foundation. Take the middle section, create another twist or loop just above the first one, and secure it. Finally, twist or loop the top section and secure it just above that. What you’ve created is essentially three mini-buns stacked vertically, which creates the illusion of a much fuller, more dimensional bun than a simple twist would.
Maximizing the Layered Texture
- Don’t make each section too tight. Loose, relaxed twists allow layers to show and add the visual texture that makes this style interesting.
- Pull pieces out between the stacks. You want to see the definition between each twisted section—that’s what creates the sophisticated, piecy look.
- Backcomb each section slightly before twisting to add volume without making it look intentionally teased. You want subtle texture, not visible backcombing.
- Leave your bun intentionally undone with loose ends and pieces sticking out. The stacked structure is tight enough to read as intentional; the loose pieces make it look effortless.
8. The Curved-Pin Messy Bun
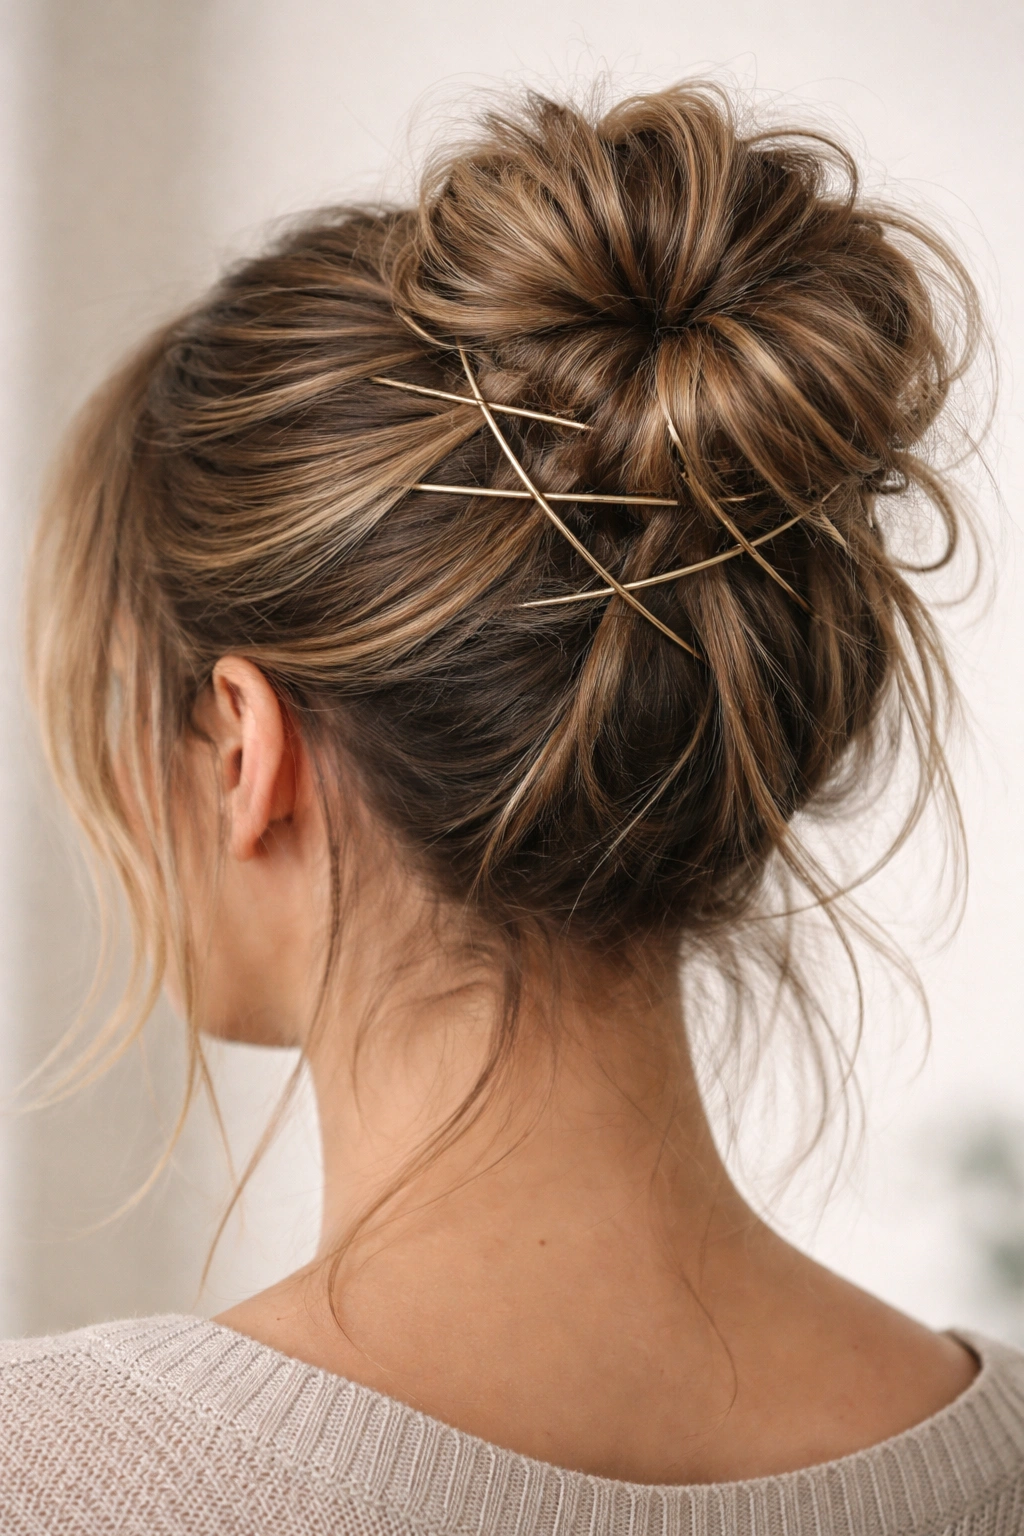
This final technique is all about how you secure the bun rather than how you gather it—and it’s a game-changer for layered hair. Instead of using one large elastic and bobby pins, you’re using curved bobby pins (sometimes called bobby pins or U-pins) to create an open, latticed structure that holds your bun while leaving it visibly textured and undone. Curved pins sit flat and create a pattern that actually becomes part of the aesthetic rather than disappearing into the bun.
The Strategic Pin Placement Method
Gather your hair into a ponytail—regular height, regular tightness. Instead of creating a tight twist or knot, loosely loop the ponytail and secure it with curved bobby pins placed in a grid or crosshatch pattern rather than all hidden underneath. The pins become visible from certain angles, creating a deliberately styled-yet-undone look. The curved shape of the pins means they don’t compress your bun flat like straight pins would. Your bun stays fluffy and textured. Shorter layers naturally pop out between the pins, creating even more dimension.
Working With the Pin Pattern
- Use contrasting pin colors if you have dark hair, or match them to your hair color if you prefer less visibility. Either way, the pins become part of the design rather than something to hide.
- Space your pins intentionally, creating a pattern rather than randomly scattering them. A grid, an X pattern, or a parallel pattern all look deliberately styled.
- Let your bun sit loosely in the curved pins. You’re not creating tension—the pins are supporting a naturally textured shape. This is ideal for layers because you’re not flattening anything.
- Pull pieces out after securing, but do it strategically. You want shorter layers visible through the gaps between pins, creating a layered, dimensional look that’s honestly just cool.
Final Thoughts
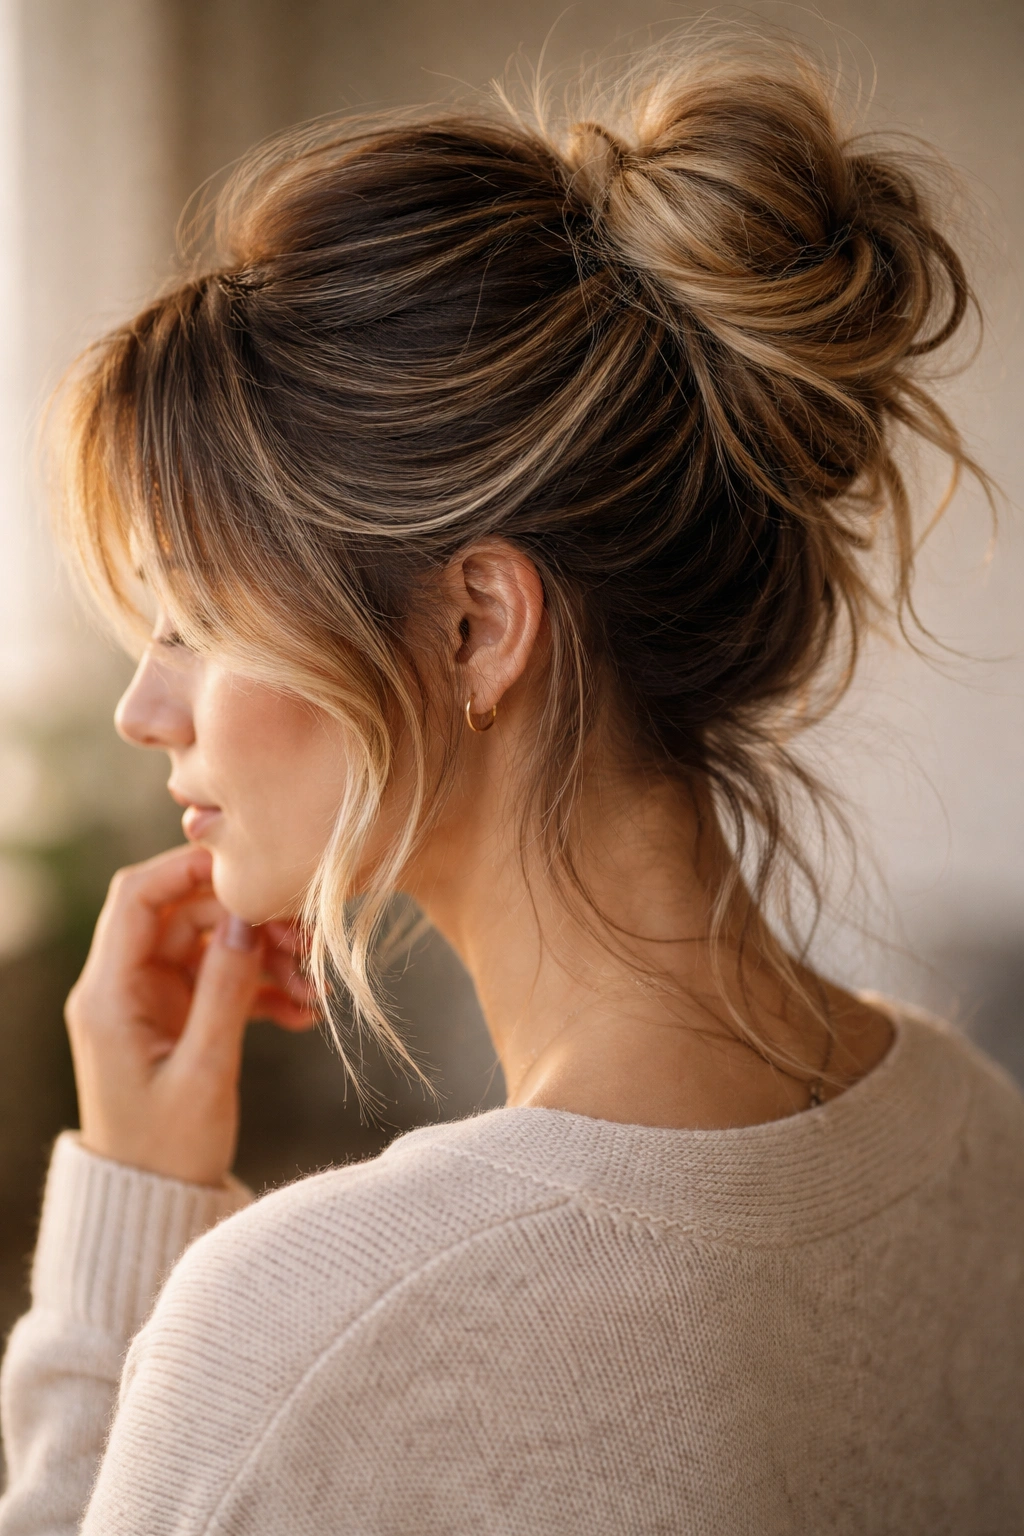
Layered hair and messy buns thrive together when you’re intentional about technique. These eight styles work because they’re built to showcase texture and movement rather than fighting against what layered cuts naturally do. Whether you’re going for a quick-twist bun or something more constructed like a braided halo or stacked style, the key is letting those layers be visible—not flattened, not hidden, but featured as part of the final look.
The beauty of these approaches is that they’re all forgiving. Layered hair is already textured and movement-prone, so a bun that might look undone or chaotic on straight hair looks intentionally cool on layers. Pick whichever style matches your day’s energy, your hair’s current texture, and the occasion. Messiness, when it’s layered and intentional, reads as confidence rather than rushing. That’s the whole appeal.
