



A messy bun with a scrunchie is the kind of hairstyle that looks effortlessly undone yet somehow manages to be put-together at exactly the same time. It’s that perfect balance between “I didn’t try at all” and “I clearly made an effort,” which is why this style has become a go-to for everyone from busy parents dropping kids off at school to people heading into the office or out for weekend plans. The thing that makes a scrunchie the secret weapon for messy bun styles is how it grips textured, tousled hair without creating that clamped, polished look that traditional elastics can give you. A scrunchie lets hair escape and breathe, keeps the overall vibe casual, and actually makes imperfection work in your favor rather than against it.
What’s also brilliant about scrunchie buns is the sheer variety of ways you can wear them. You’re not locked into one “messy bun” look—you can twist, wrap, layer, braid, and loop your hair in different ways depending on your hair texture, the occasion, and how much time you actually have. Some styles work better for thick, curly hair, while others shine on fine or straight hair. Some take literally two minutes, while others benefit from a little more intentional styling to really shine. The fact that scrunchies come in different fabrics—silk, velvet, cotton—also means you can customize the look and protect your hair at the same time.
The best part? You don’t need perfectly styled waves or freshly blow-dried hair to pull off these buns. In fact, slightly textured, second-day hair often looks better in a messy bun than freshly washed strands. That texture gives the scrunchie something to grip, prevents the bun from looking stringy or limp, and automatically contributes to the effortless aesthetic you’re going for.
Why Scrunchies Create the Perfect Messy Bun
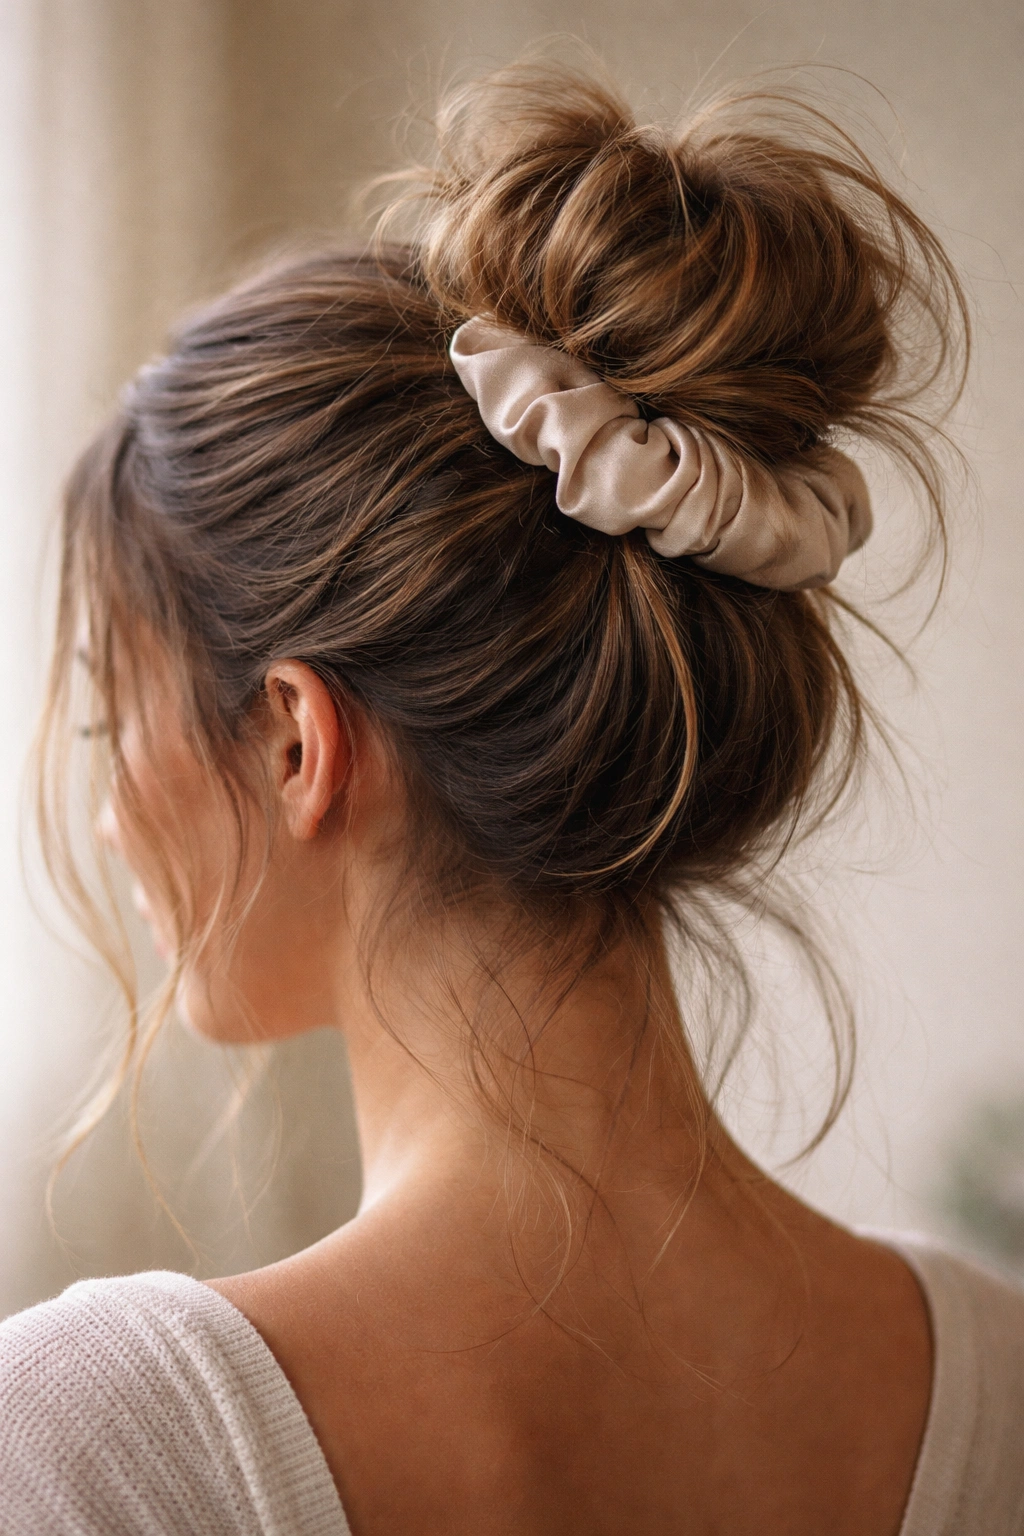
A scrunchie works differently than a traditional elastic band, and that difference is exactly why it’s become the favorite tool for messy bun styling. A traditional elastic pulls hair tightly and creates sharp, defined lines, which is perfect if you want a polished, gym-ready pony or a sleek bun. But a scrunchie—especially one made from soft, forgiving fabric—grips hair without that strangling tension, allowing strands to bunch, layer, and protrude naturally. It’s actually designed to let hair escape rather than contain it perfectly.
This is crucial for messy bun styling because you want pieces falling out, wisps around the face, and textured layers sticking up. A scrunchie makes that happen naturally rather than you having to tease and deliberately mess up your bun afterward. The fabric also distributes pressure across a wider area of hair, which means less breakage and less of that tight headache feeling you get from wearing your hair up all day. Your hair actually feels more comfortable while you get a style that looks intentionally undone rather than just unfinished.
The visual aesthetic matters too. A silk or velvet scrunchie adds a touch of sophistication even to a very casual, tousled bun, while a cotton or metallic one keeps things playful and casual. You’re choosing a style accessory that’s visible and part of the overall look, not hidden away like a transparent elastic or bobby pin.
1. The Twisted High Bun
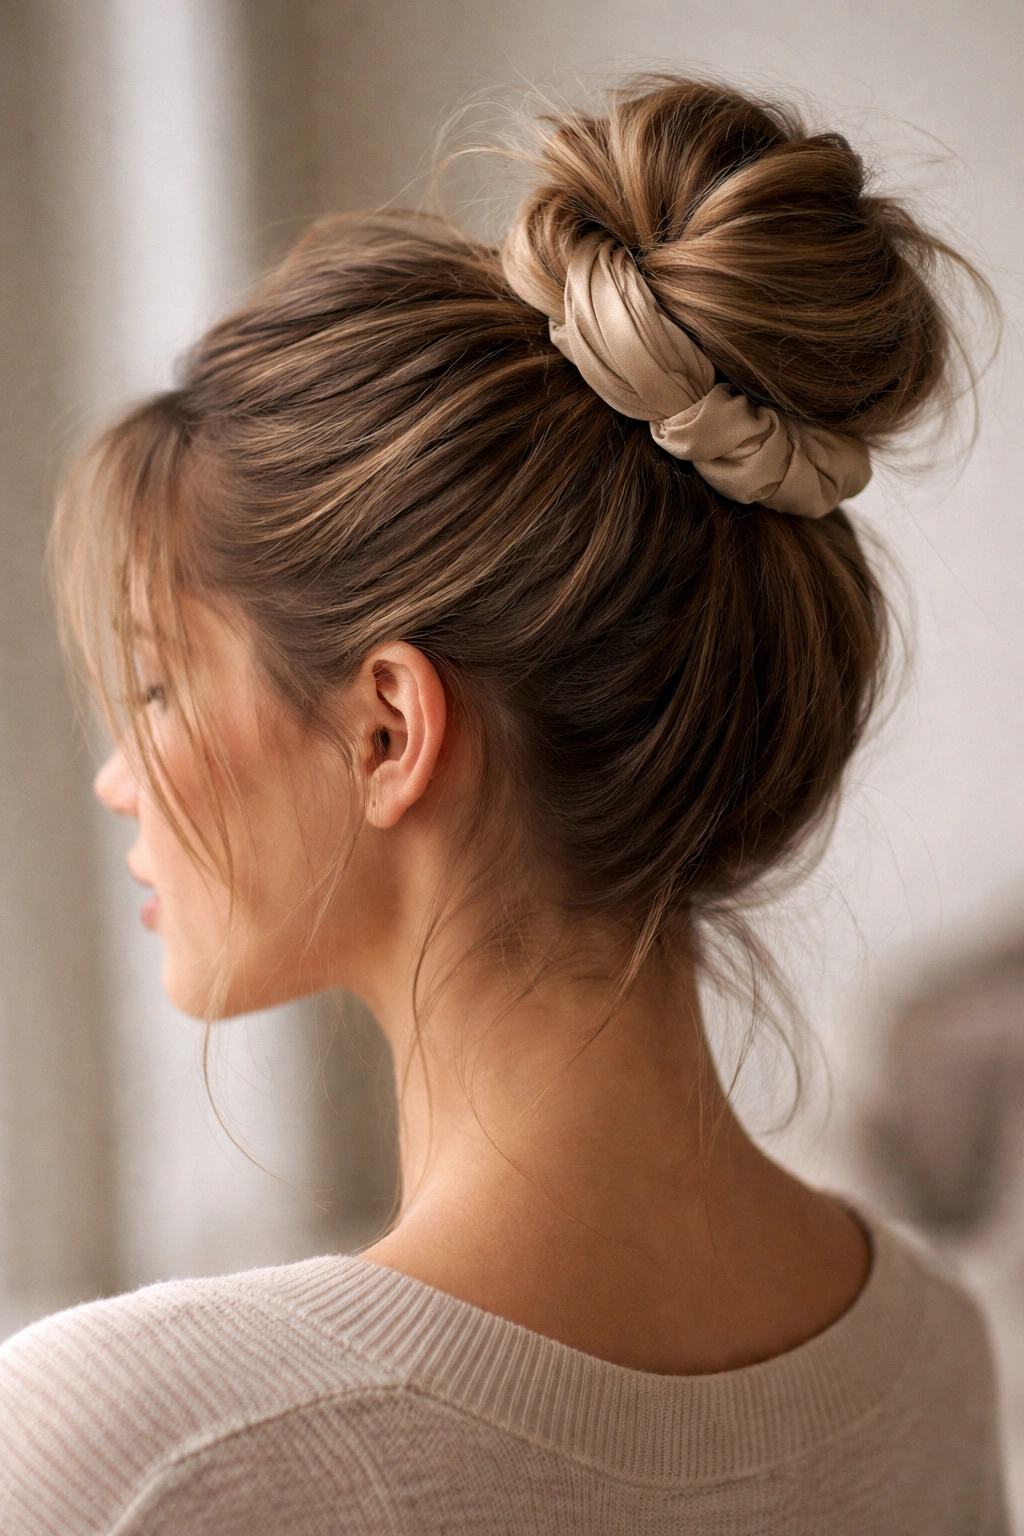
This is the most versatile scrunchie bun style because it works on literally any hair type and texture, and it’s equally appropriate whether you’re going for casual or slightly polished. The twisted high bun relies on movement and dimension, not sleekness, which is exactly what makes it a scrunchie favorite. Start by flipping your head forward or to the side and gathering your hair into a high ponytail—think crown of your head rather than the back of it. Once you’ve secured it with your scrunchie, gently twist the entire ponytail and wrap it around itself in a spiral, pinning it to create the bun shape. The key is not making it tight.
Why This Style Works on Every Hair Type
The twisted motion creates natural texture and volume regardless of your starting point. Even if your hair is completely straight, the act of twisting and wrapping adds dimension that reads as intentional messiness rather than limp strands. On curly or wavy hair, the twisting plays beautifully with your natural texture and creates almost a dimensional crown effect. The scrunchie sits at the base of the twist, fully visible, and becomes part of the design rather than something you’re trying to hide.
How to Get the Best Version
- Use a scrunchie in a contrasting color or fun texture (velvet, metallic, or even a patterned option) because it’ll be visible and worth showing off
- Don’t wrap the twist too tightly—you want wisps escaping around your face and the back of your neck
- Pull the bun slightly looser after you’ve pinned it; this softens the overall silhouette and makes it look more intentionally undone
- Tease or backcomb sections of the base of your ponytail before twisting if you have fine hair and want more grip and volume
- This style actually looks better on day-two or day-three hair when it has a bit of natural texture to grab onto
Pro tip: If your twist keeps unraveling or feels too delicate, try a “double twist” where you divide the ponytail into two sections, twist each one separately, then wrap both twists around each other before securing with the scrunchie.
2. The Textured Low Bun
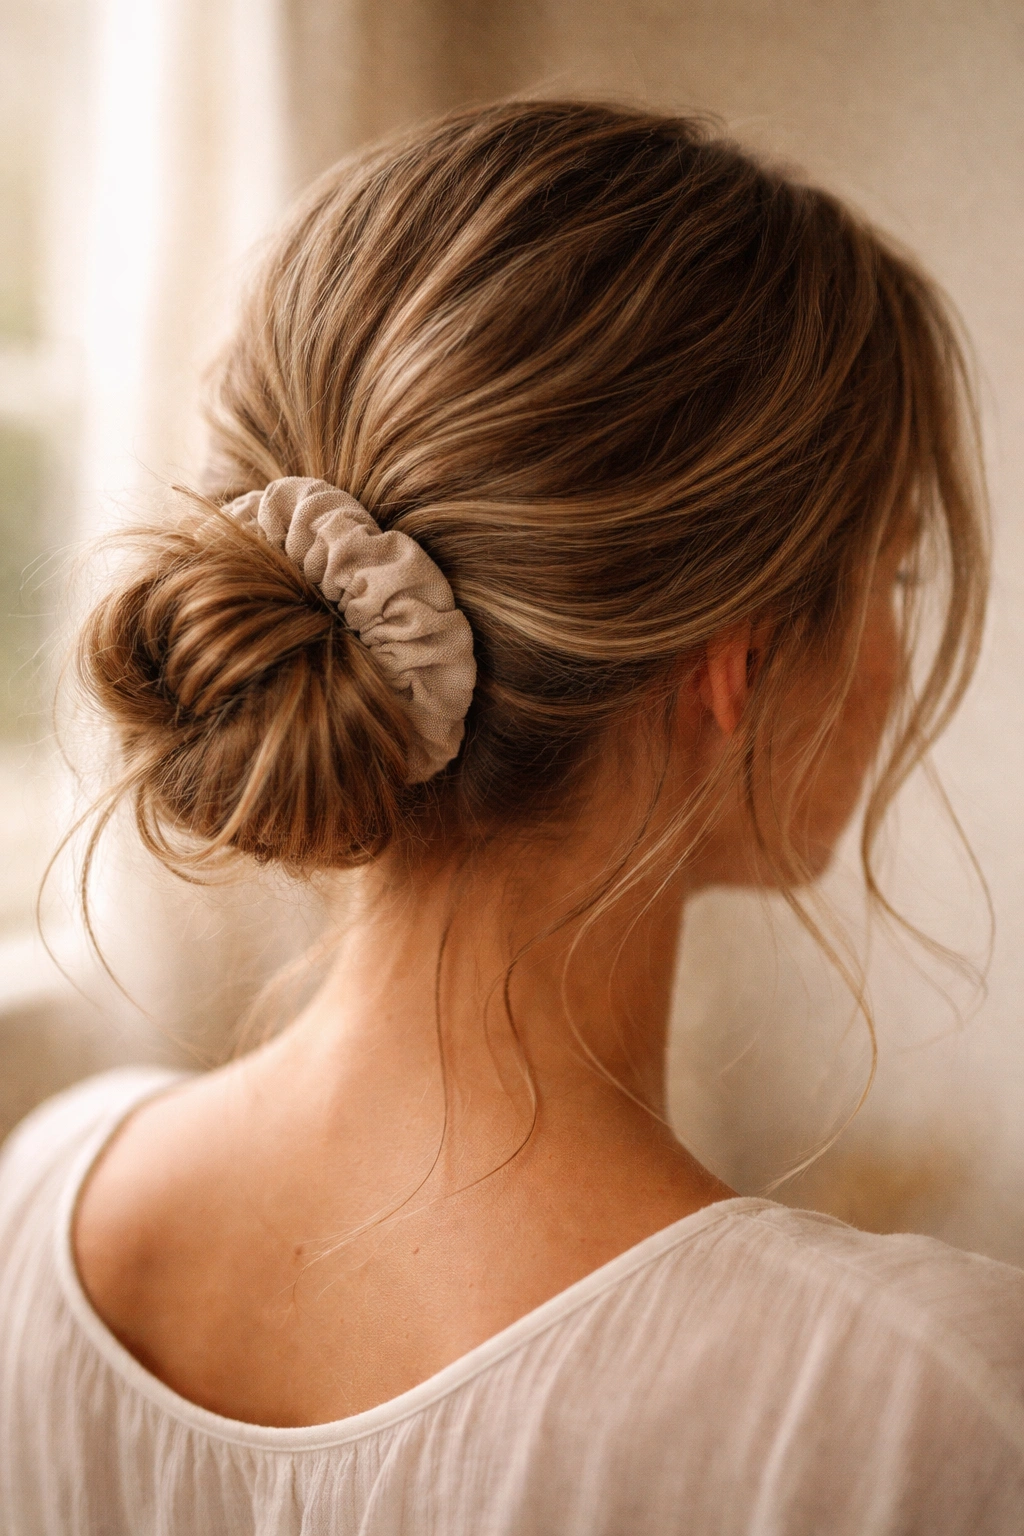
A low messy bun sits at the base of your neck or slightly off to one side, which gives it an almost romantic, sophisticated vibe compared to the casual high bun. This style is perfect if you’re heading somewhere slightly nicer than your couch but still want to feel comfortable and undone. The magic of the textured low bun lies in deliberately creating lumps, bumps, and visible layers that look artfully disheveled. You’re not smoothing everything down—you’re doing the opposite.
Start by gathering your hair into a low ponytail at the nape of your neck. Instead of twisting it straight, backcomb or tease the entire length of the ponytail to create texture and volume. Then loosely coil that textured ponytail around itself, leaving bits sticking out at different angles, and secure it with a scrunchie. The result should look like organized chaos—there’s clearly a bun structure, but it’s got personality and dimension.
What Makes Low Buns Look Effortlessly Elegant
Low placement automatically reads as more refined than a high bun, even when it’s messy. It’s the same reason a low pony often feels dressier than a high one. The scrunchie at the low placement, especially in a neutral or silk fabric, adds a touch of subtle luxury without being loud or costume-y. The textured interior (which you created by teasing) gives the bun substance and keeps it from looking thin or strained even though strands are escaping.
Styling Details That Elevate This Look
- Tease the entire ponytail before coiling it, not just small sections—this creates the full, dimensional texture you need
- Wrap the teased ponytail loosely, leaving 2-4 inches of the ends free to stick out from the bun naturally
- Pull a few face-framing pieces out before you finish the bun, curling them gently with a curling iron for softness
- Use a silk or velvet scrunchie in a rich color (burgundy, deep green, black) rather than a bright or metallic one—low buns read as more sophisticated with understated accessories
- Finish with a light hairspray (not heavy product) to set the structure without making it look stiff
This style genuinely looks better slightly undone, so resist the urge to smooth or perfect it.
3. The Double Wrap Bun
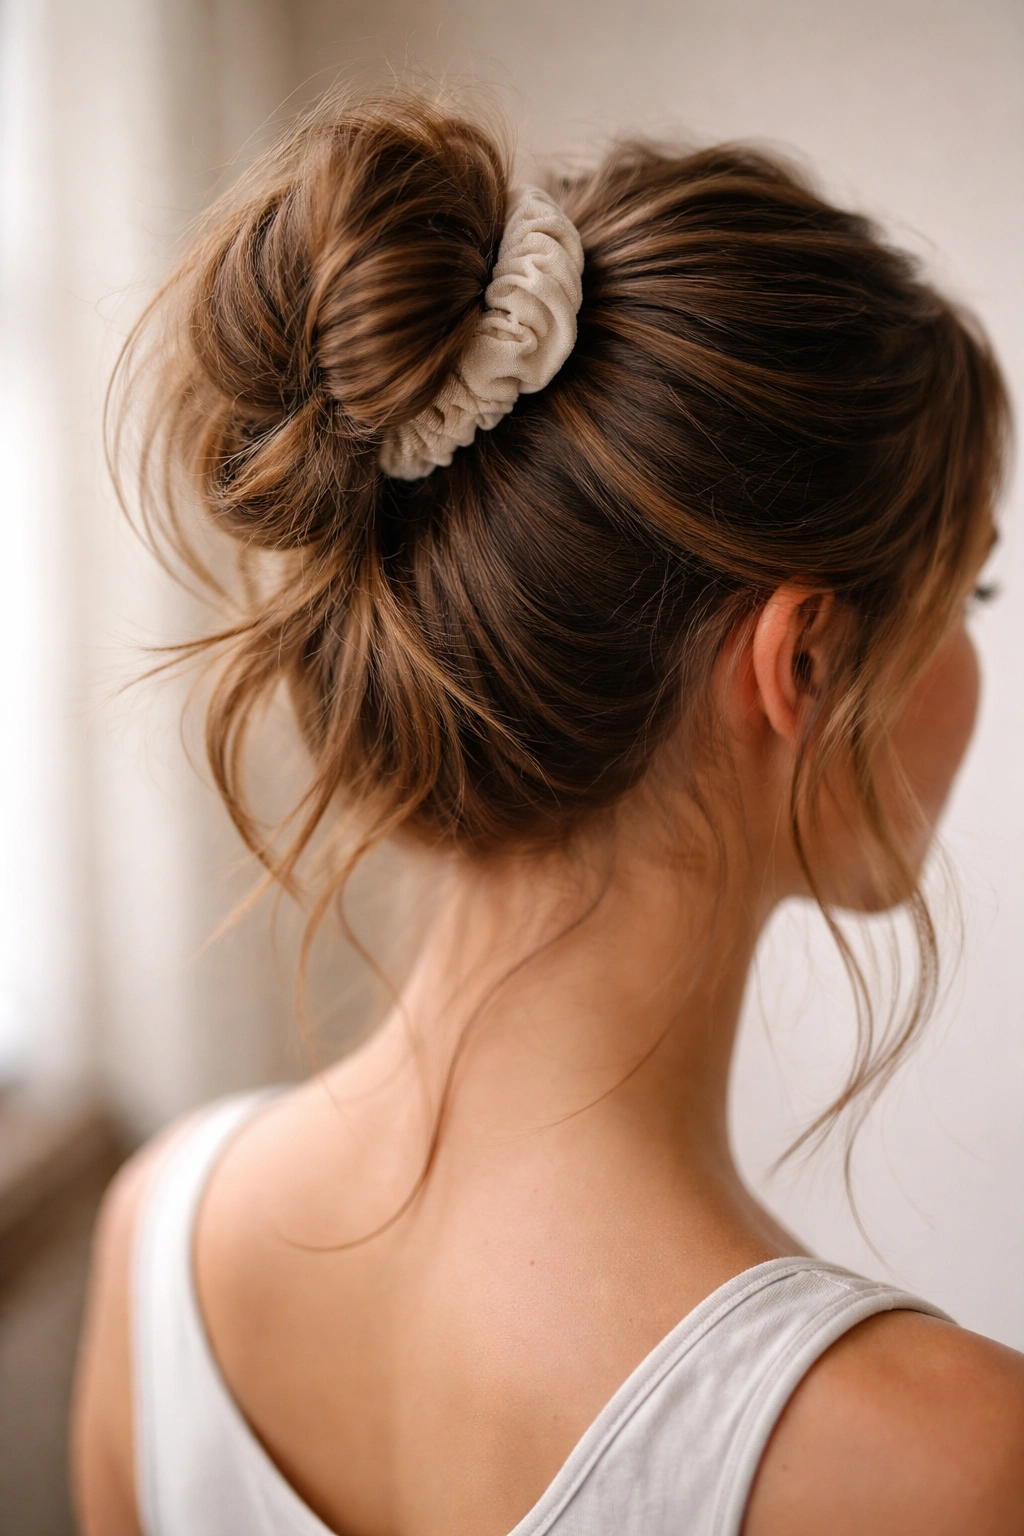
The double wrap bun is when you secure your ponytail with a scrunchie, then wrap sections of that ponytail around the base to create a thicker, more dimensional bun that almost looks like there are two buns stacked or layered together. It’s more involved than a simple twist, but it’s still totally doable and looks more complex and intentional than it actually is. This style works particularly well on medium to thick hair because it creates visible layers and depth that really showcase texture.
Start with a high ponytail. Divide the ponytail into two or three sections. Take the first section and wrap it around the base of the ponytail, pinning it with a bobby pin. Then take the next section and wrap it over and around the first wrapped section, creating layers. This makes the bun appear thicker and more structured, but because you’re leaving parts of each section loose and visible, it maintains that intentionally messy aesthetic. Finish with your scrunchie visible at the center or slightly off to one side.
Why Texture and Layer Reading Matters Here
The whole appeal of a double wrap bun is that it looks more purposeful than a single twist, but still casual. Each wrapped layer creates visible texture, and when you leave strand edges peeking out, the bun reads as artfully constructed rather than just “I threw my hair in a bun.” This style photographs beautifully because the dimension catches light differently, and the scrunchie becomes a focal point rather than trying to hide in the center.
Steps to Nail the Double Wrap Technique
- Start with a snug (not tight) high ponytail secured with your scrunchie
- Divide the ponytail into two even sections by gently pulling them apart
- Wrap one full section around the base of the ponytail, leaving the ends loose and slightly exposed, and pin with a bobby pin
- Wrap the second section over and around the first wrapped section in the opposite direction, leaving ends loose again
- Let wisps escape around the bun—don’t try to contain everything
- The scrunchie should be visible and can be right at the crown where the two wraps meet
Worth knowing: This style benefits from slightly damp hair or a light texture spray beforehand because it helps sections grip each other and stay in place longer without the bun feeling stiff.
4. The Undone Top Knot
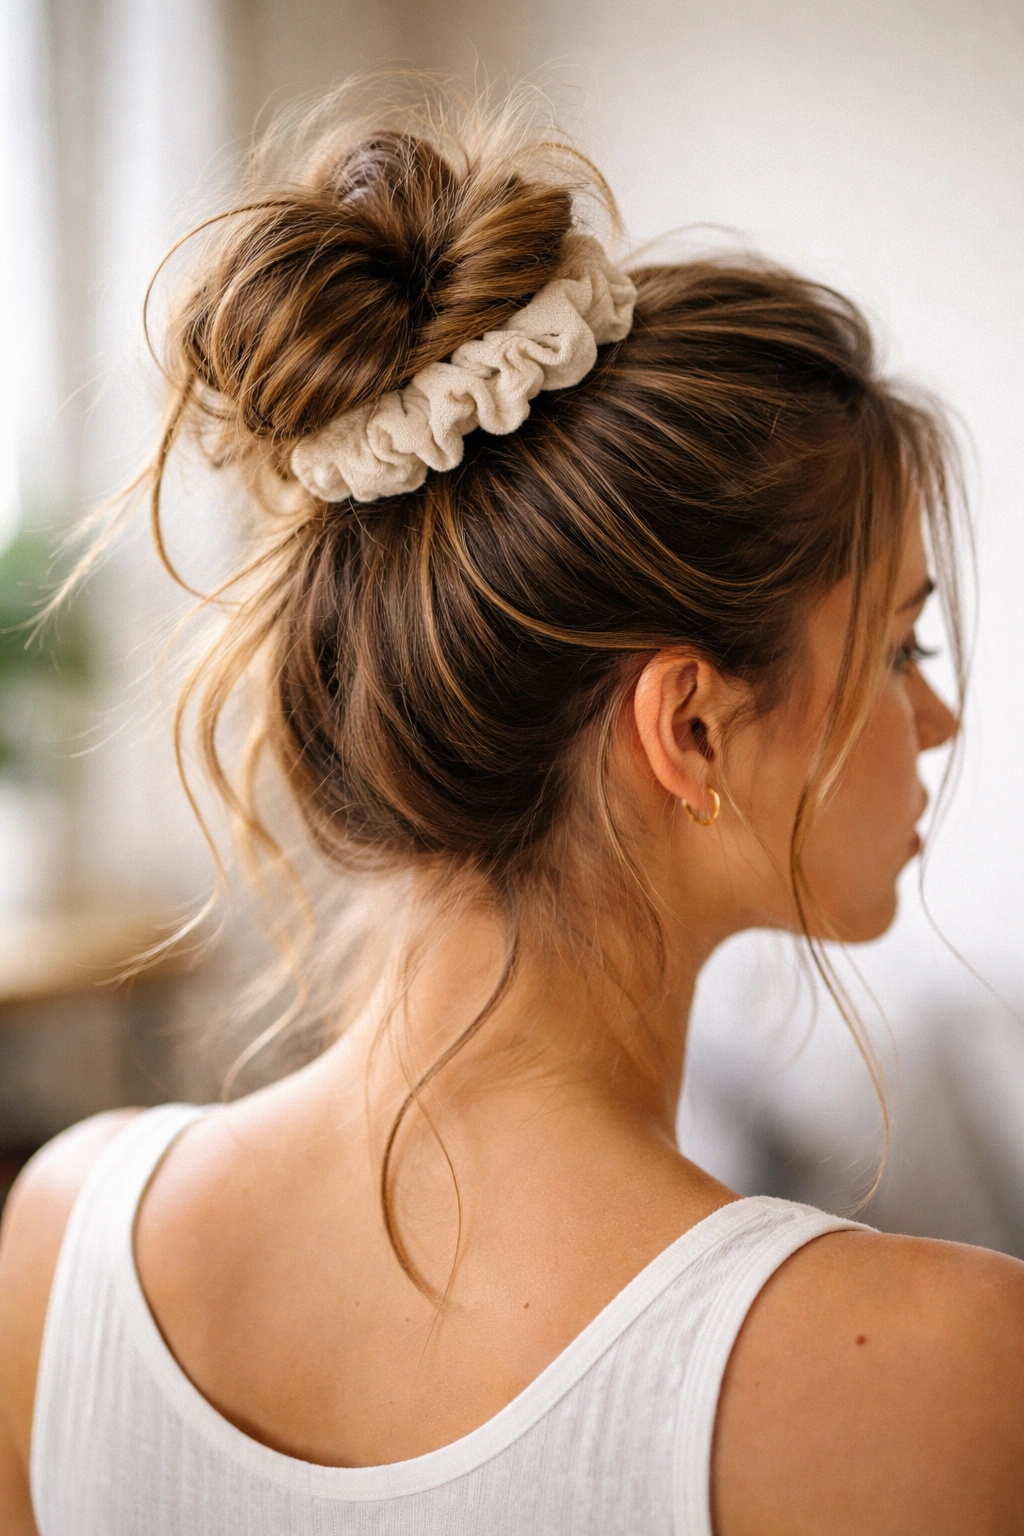
An undone top knot is essentially the most casual, “I literally just threw my hair up five seconds ago” version of a bun you can wear. It’s not twisted, wrapped, or particularly structured—it’s literally just a bunch of hair looped through a scrunchie at the very crown of your head, with everything left natural and loose. And somehow, that complete lack of effort is exactly what makes it look so effortlessly cool. This is the style you wear on days when you genuinely don’t have time to fuss but still want something that reads as intentional.
Gather your hair as high as possible on your head (think the actual top, not the back or side). Pull it through your scrunchie once, then instead of wrapping the ponytail around to create a traditional bun, just leave the ends loose and let them cascade or fold naturally against the scrunchie. You can tuck some of the length back through the scrunchie loop, or let it all flow down. The scrunchie itself is completely visible and is honestly the whole style.
The Art of Looking This Casual
The undone top knot walks a fine line between “effortless” and “actually messy,” and the secret is that you need to start with intentional texture. If your hair is completely straight and smooth, this style reads as unfinished rather than undone. If you start with second-day waves, texture spray, or a light wave from a curling iron, suddenly that loose, bunched-up top knot reads as deliberately cool rather than just sloppy. The scrunchie choice matters hugely here too—a fun, visible scrunchie in a color or texture that stands out makes the statement that this is intentional styling, not an accident.
Making Your Top Knot Look Intentionally Loose
- Start with textured hair (waves, slight curls, or texture spray applied to clean hair the day before)
- Gather high but not perfectly—let a few pieces escape around your face during the gathering process
- Pull your hair through the scrunchie at least once, but don’t re-wrap or twist anything
- Tuck the loose ends back through the loop in an asymmetrical way, or let them flow to one side
- Pull the section of hair that’s looped through the scrunchie slightly looser and fluffier
- Leave baby hairs and face-framing pieces completely alone; they’re part of the aesthetic here
This is genuinely one of those styles that looks better when you don’t overthink it.
5. The Braided Base Bun
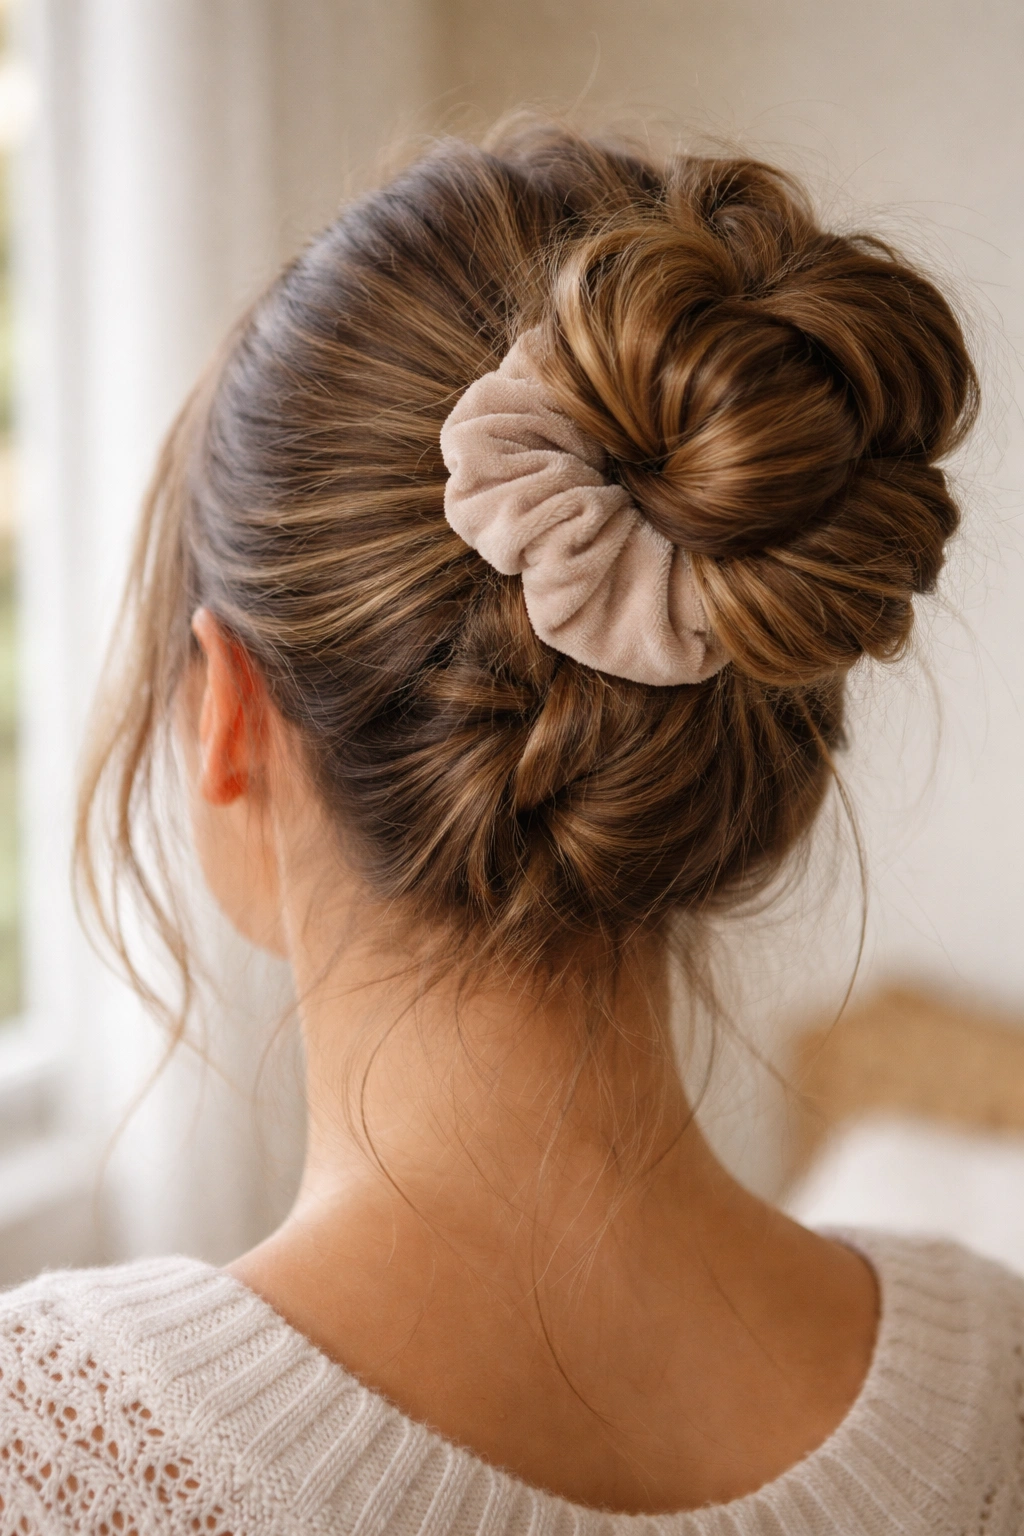
When you braid the base of your ponytail before gathering it into a bun, you create a built-in structure that looks intentional and dimensional without requiring tons of teasing or styling product. The braid adds visual interest, creates texture, and gives the scrunchie something more substantial to grip. This style works beautifully on hair that’s shoulder-length or longer and reads as more “I put thought into this” than some of the other options, even though it’s not significantly more complicated.
Create a high or mid-height ponytail first. Then, instead of immediately securing it with your scrunchie, take the length of that ponytail and braid it—a simple three-strand braid works perfectly, or you can do a looser, more textured braid if you want to add dimension. Once the braid is complete, coil that braid around itself to form the bun and secure everything with your scrunchie. Leave the braid slightly loose and textured rather than making it tight and neat, and let pieces escape from the braid as it wraps.
Why Braids Add Instant Visual Interest
A braid is inherently textured and dimensional, which means your bun automatically looks more complex and intentional than a smooth, twisted one. The braid structure is visible within the bun, and if you leave it loose enough, individual strands peek through and catch light, creating depth. On camera or in natural light, a braided-base bun reads as much more polished and put-together than simpler bun styles, even though you’re still using a scrunchie and maintaining that casual aesthetic.
Technique for a Braided Bun That Holds
- Secure your ponytail with the scrunchie first so you have both hands free to braid
- Create a loose, textured braid—don’t pull too tightly or you’ll lose the dimension
- As you braid, gently pull on the edges of each braid loop to make it wider and fluffier (this is called “pancaking” a braid)
- Once the braid is complete, loosely coil it around the ponytail base and pin it
- Leave 2-3 inches of the braid tail loose and cascading, or tuck it under and weave it through the coils
- Pull the whole bun slightly looser after you’ve pinned it; the braid should feel textured and relaxed
Pro tip: A french braid creates more structure than a simple three-strand braid, so if you want your braided bun to feel more defined and formal, start with a french braid pulled straight down from your ponytail.
6. The Side-Swept Bun
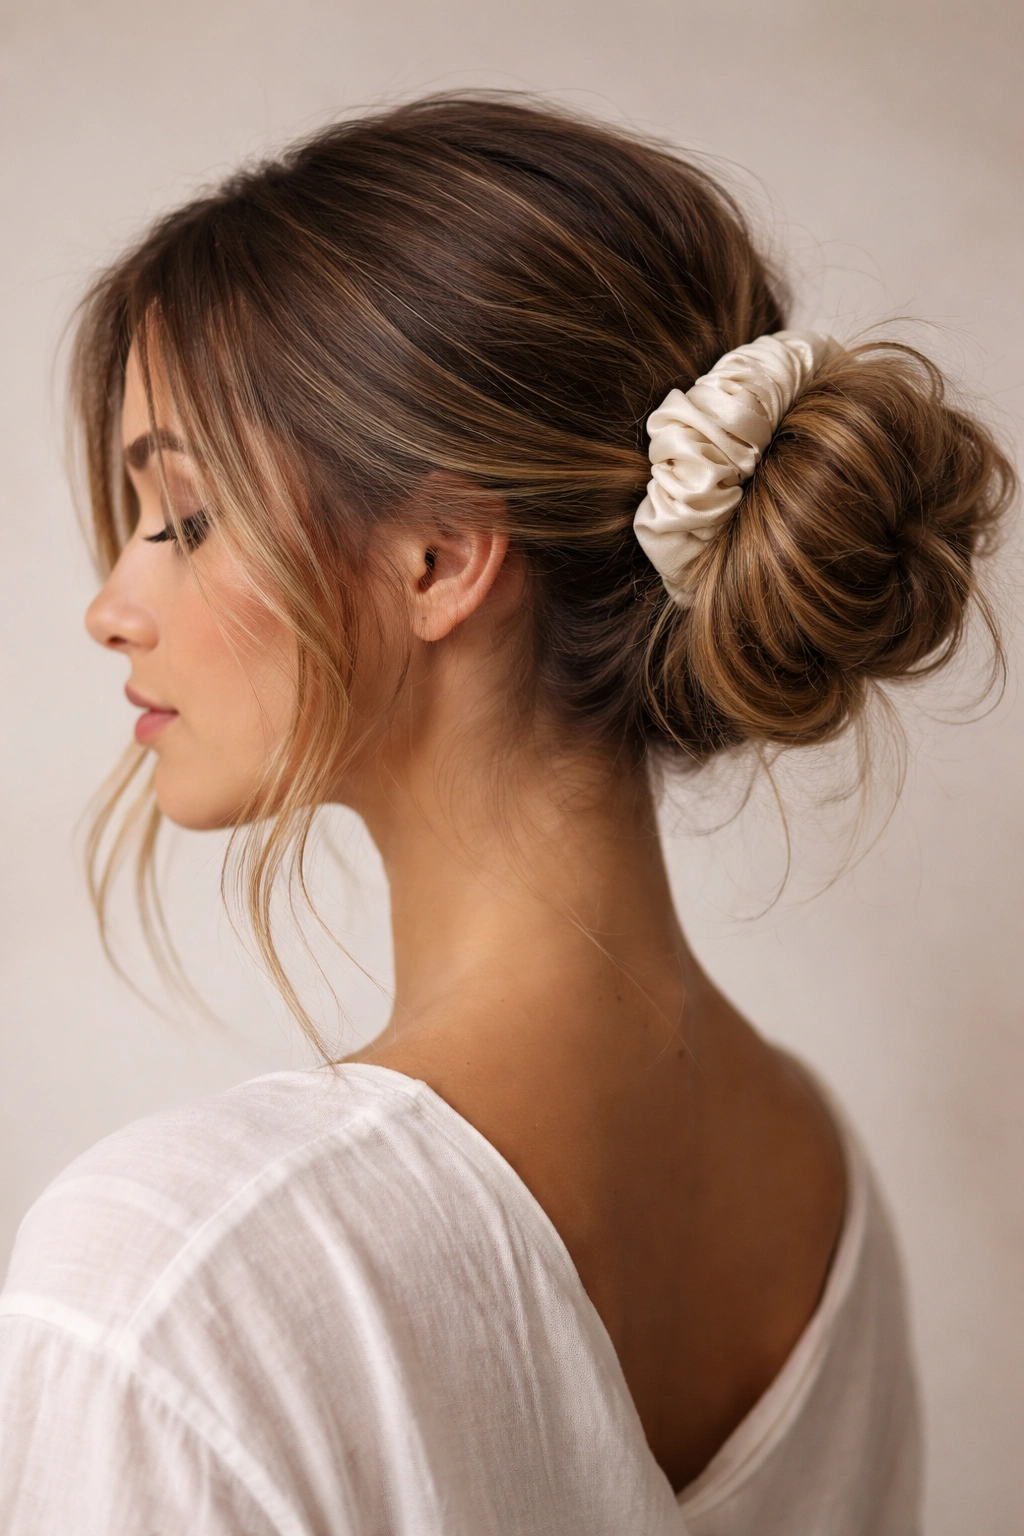
A side-swept bun gathers all your hair to one side rather than the back or crown, which automatically shifts the energy of the style from casual-cool to slightly more sophisticated and directional. It’s perfect for days when you want a bun but also want to expose one side of your neck or face in a flattering way. The scrunchie is visible and off-center, which gives the whole look an asymmetrical, fashion-forward vibe that reads as more intentional than a centered bun.
Brush all your hair to one side of your head and gather it into a ponytail positioned at that temple-to-nape level. The placement is key—you’re aiming for the side, not the back, so the bun sits more toward one shoulder. Once you’ve secured it with your scrunchie, twist or coil that side ponytail loosely and pin it, letting wisps escape. You can leave a few face-framing pieces out before creating the bun, or leave them naturally as they fall. The asymmetry is what makes this style special, so embrace it rather than trying to make it balanced.
How Side Placement Changes the Whole Aesthetic
A side-swept bun is automatically more interesting to look at than a centered one because your eye travels along the asymmetry. It exposes the other side of your neck, which can feel both casual and romantic depending on how you style the rest. The scrunchie, being off to the side, becomes more visible and prominent, so color choice really matters—a contrasting scrunchie adds to the intentional, fashion-forward vibe, while a matching one keeps things subtle.
Getting the Placement and Shape Right
- Part your hair deeply to one side before gathering it, or simply brush everything to one side with a paddle brush
- Gather into a ponytail at the side of your head, roughly at ear level or slightly lower depending on where you want the bun to sit
- Create a loose twist or coil with the ponytail, aiming for an asymmetrical shape rather than a perfectly round bun
- Pull the bun looser than you normally would—side buns read better slightly undone
- Let baby hairs and face-framing pieces fall naturally rather than pinning them back
- Consider a light texture spray on the side of your hair that’s exposed, just to add a bit of grip and dimension
The beauty of this style is that it genuinely looks better when it’s not perfectly symmetrical or centered.
7. The Criss-Cross Wrap Bun
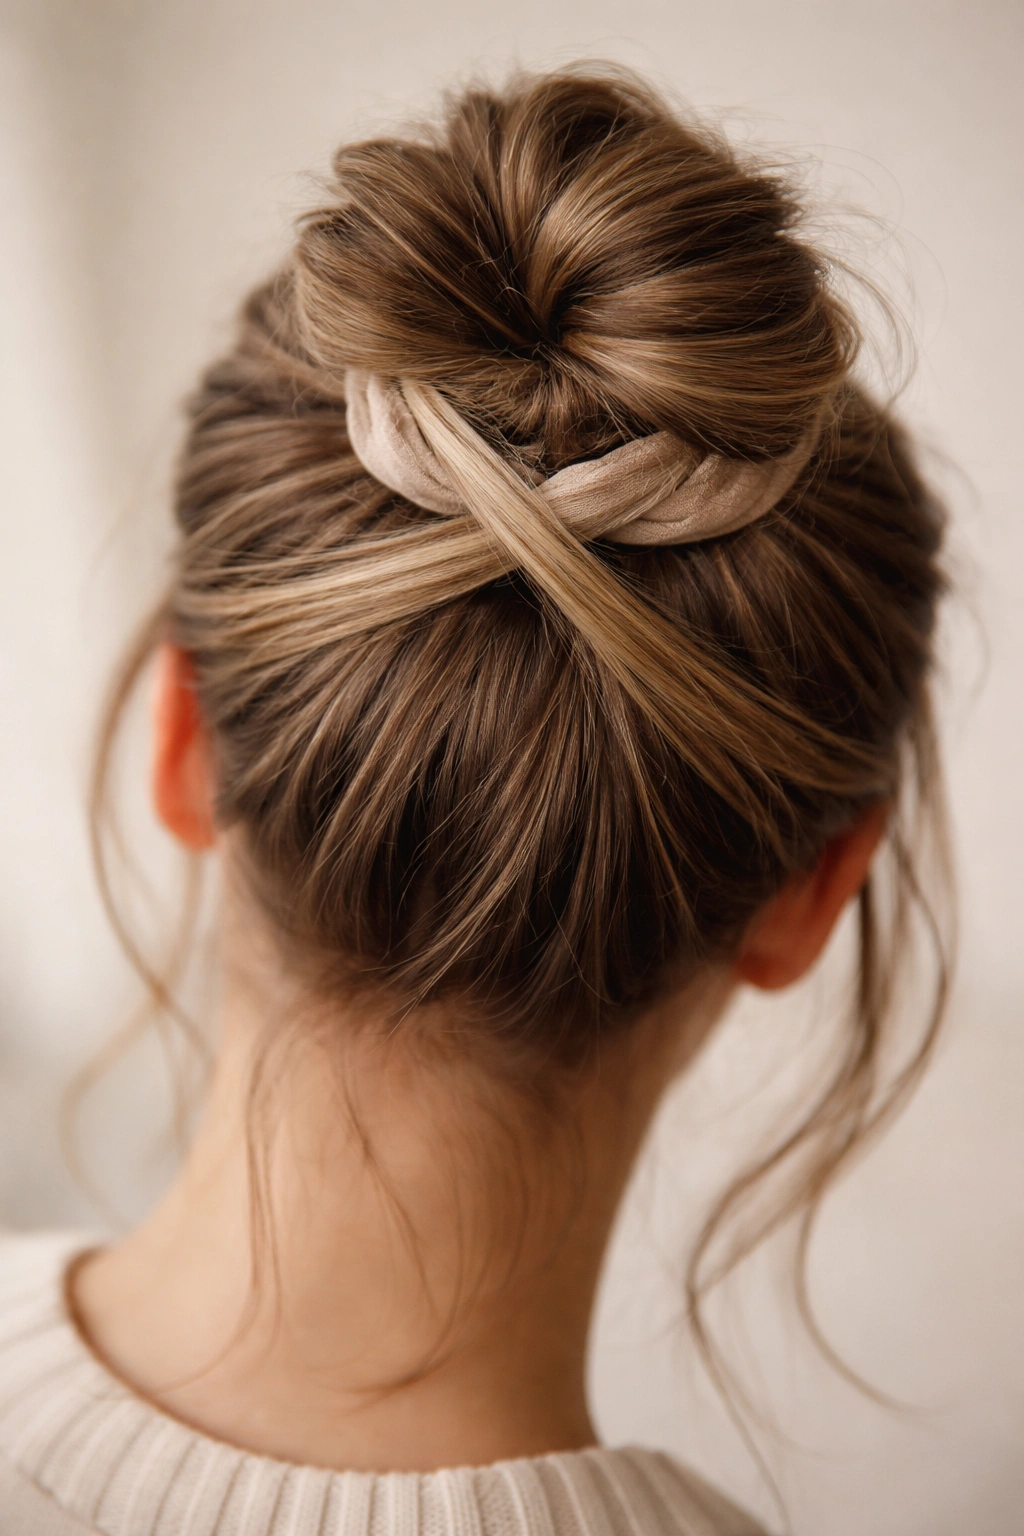
This is the style for days when you want something with visible structure and intentional detail but still want to maintain that effortless scrunchie aesthetic. Instead of a simple wrap or twist, you’re creating an X or crisscross pattern with sections of your ponytail as they wrap around the base. It sounds more complicated than it actually is, and the visual payoff is huge—it looks like you spent serious time styling when really you just layered a couple of wraps in opposite directions.
Start with a mid-to-high ponytail secured with your scrunchie. Divide the ponytail into two sections. Take the first section and wrap it around the base, creating a loop, and pin it. Then take the second section and wrap it over and around the first wrap in the opposite direction, creating that crisscross effect in the center of the bun. The two wraps essentially create an X when viewed from above or from certain angles, which adds visual interest and dimension that simpler styles don’t have.
Why Crisscross Pattern Reads as Intentional
The crisscross creates visible structure and pattern, which immediately signals that this is a styled look, not just a random bun. The geometric pattern is visually appealing, especially in photos, and the way the two wrapped sections overlap creates shadows and depth that make the bun look fuller and more dimensional. Because you’re leaving the wrapped sections slightly loose and letting wisps escape, you maintain the casual vibe while clearly having put thought into the structure.
How to Execute the Crisscross Wrap
- Secure a medium-height ponytail with your scrunchie
- Divide the ponytail into two equal sections by gently pulling them apart
- Take section one and wrap it clockwise around the base of the ponytail (imagine wrapping it around a clock face), pin it, and let the loose ends drape
- Take section two and wrap it counterclockwise over and around section one, creating the X in the center
- Let both wrapped sections be slightly loose and textured—tight wraps defeat the purpose
- The scrunchie should sit at the center of the X, fully visible and contributing to the design
- Pull the overall bun slightly looser once you’ve finished pinning everything
Insider note: This style is one of the few where you actually want the bun to feel slightly unstable or precarious, because that looseness and movement is what creates the undone aesthetic.
8. The Bubble Bun
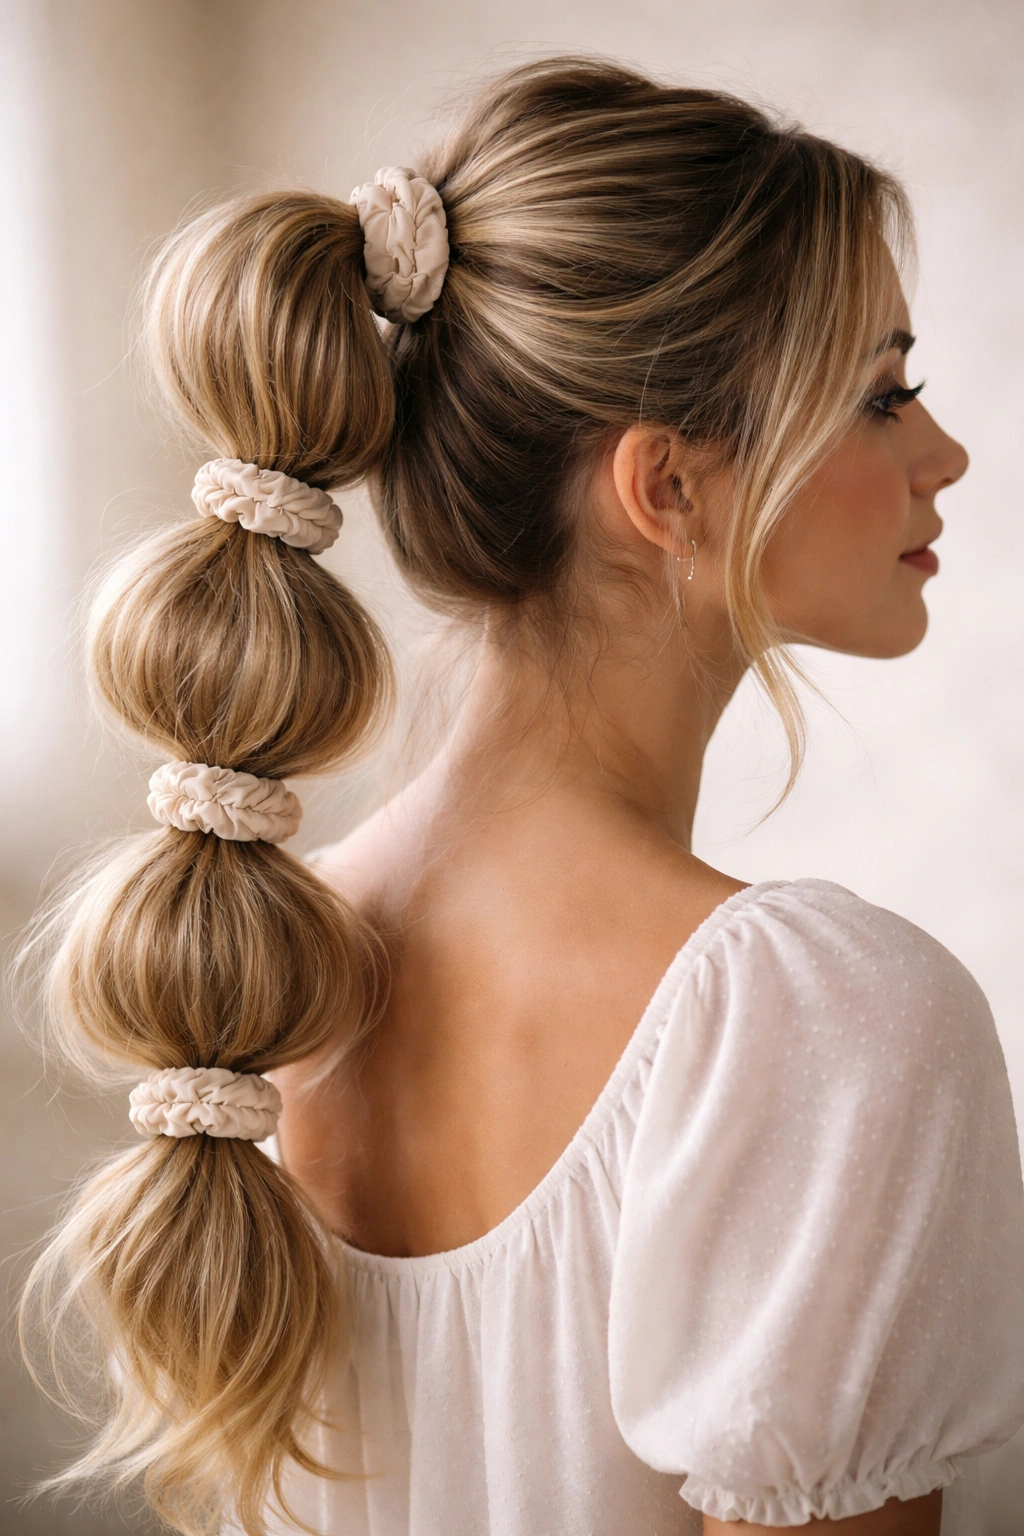
A bubble bun is technically not a single bun—it’s a ponytail that’s been divided into multiple sections with scrunchies, stacked on top of each other, creating a series of “bubbles” up the length of your hair. It’s playful, eye-catching, and honestly one of the most visually interesting ways to wear a scrunchie-secured updo. This style works best on medium to thick hair and is perfect when you want something that clearly reads as intentionally styled rather than effortlessly undone.
Create a high ponytail and secure it with your scrunchie. Then, about 2-3 inches down from that first scrunchie, wrap a second scrunchie around the ponytail, gathering the hair between the two scrunchies into a “bubble.” Pull that bubble slightly looser and fluffier. Repeat this process down the length of your ponytail, creating 3-5 bubbles depending on how long your hair is. Each bubble should be fluffy and textured, and you should gently tease or pancake each section to make it fuller and more dimensional. The result is a playful column of textured, stacked sections that’s completely on-trend and works whether your hair is wavy, straight, or curly.
Why Bubbles Transform a Simple Ponytail
A bubble bun instantly looks more creative and fashion-forward than a standard ponytail. It’s the kind of style that gets compliments and questions because it’s clearly intentional and shows that you put thought into your hair. The multiple scrunchies and bubbles also create natural texture and dimension, and the stacked visual is just inherently more interesting to look at than a single smooth ponytail. On social media or in everyday life, this style stands out in the best way.
Building Bubbles That Actually Hold and Look Full
- Start with a high, secure ponytail using your first scrunchie
- Measure about 2-3 inches down and wrap your second scrunchie around the ponytail at that point
- Gently backcomb or tease the section of hair between the first and second scrunchie to create texture and volume
- Pull and fluff that first bubble upward and outward, then very gently press down on the scrunchie below it to make the bubble pop upward
- Repeat the teasing, measuring, and fluffing process for each subsequent bubble
- The bubbles should be progressively slightly smaller as you move down the ponytail, which creates a natural tapered look
- Use scrunchies in matching colors or intentionally contrasting colors depending on the look you’re going for
- Finish with light hairspray to hold the teased texture without making it stiff
The beauty of bubble buns is that they can be as tight and structured or as loose and textured as you want—same silhouette, completely different vibe.
Final Thoughts
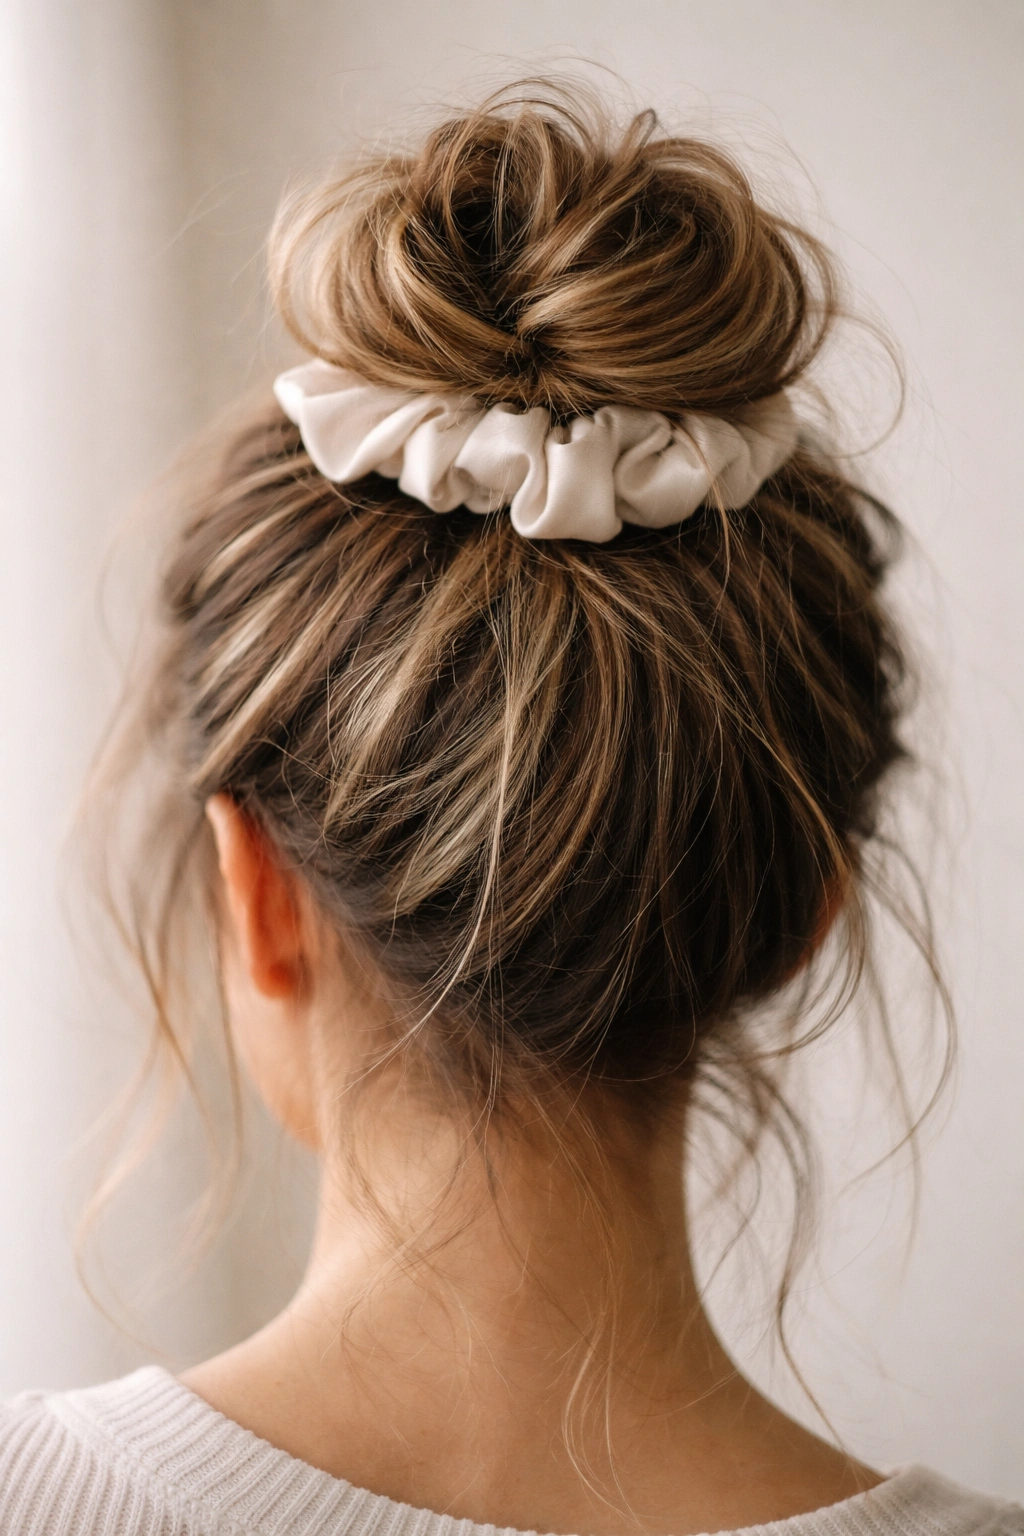
Mastering a few different scrunchie bun styles gives you options for every mood, hair type, and occasion. You’re never locked into one look—a twisted bun works when you want simplicity, a braided bun steps things up when you want visual interest, and a bubble bun is there for days when you want to make a statement. The scrunchie itself is your tool and your accessory, so don’t feel like you need to hide it or apologize for it being visible. Own it, choose scrunchies that match your style, and let the texture and movement do the work.
The secret to any of these styles looking polished rather than just genuinely messy is starting with the right hair texture—second-day waves, texture spray, or intentional teasing gives you dimension to work with. Your scrunchie needs something to grip, not smooth strands that slip and slide. And maybe most importantly, resist the urge to perfect these buns. The wisps, the loose pieces, the slightly imperfect symmetry—that’s what makes them work. A scrunchie bun is supposed to look like you made the style happen with confidence and ease, not like you spent an hour engineering perfection. Let your hair breathe, embrace the undone aesthetic, and enjoy having an updo that actually feels comfortable enough to wear all day.
