



Finding a hairstyle that looks effortlessly polished while actually staying in place through a full day of activity is genuinely harder than it sounds. Most messy buns start out adorable but slowly unravel by mid-afternoon, leaving you with a lopsided disaster instead of an intentionally undone vibe. The difference between a bun that holds and one that doesn’t comes down to technique, texture preparation, and understanding which styles have the structural integrity to withstand movement, humidity, and the general chaos of daily life.
The beauty of a truly solid messy bun style is that it solves multiple problems at once. It keeps hair off your neck and out of your face without requiring a fresh hair wash or expensive salon styling. It works for casual days at home, professional office environments (depending on the variation), gym sessions, and evening plans without needing adjustment. The best part? A well-executed messy bun actually looks better as the day goes on—a little more texture breaking through, a few more strands catching the light—rather than degrading into actual messiness.
What separates a messy bun that lasts all day from one that slowly collapses is usually a combination of factors: the base texture you’re starting with, how you secure it, where you place it on your head, and which variation you choose. Some styles hold through sheer physics and the weight of your hair, while others rely on texture products or strategic bobby pinning. The 10 styles below all deliver genuine staying power, and each one offers a distinctly different look depending on your hair type, the occasion, and how polished versus undone you want to feel.
1. The Classic Undone Bun
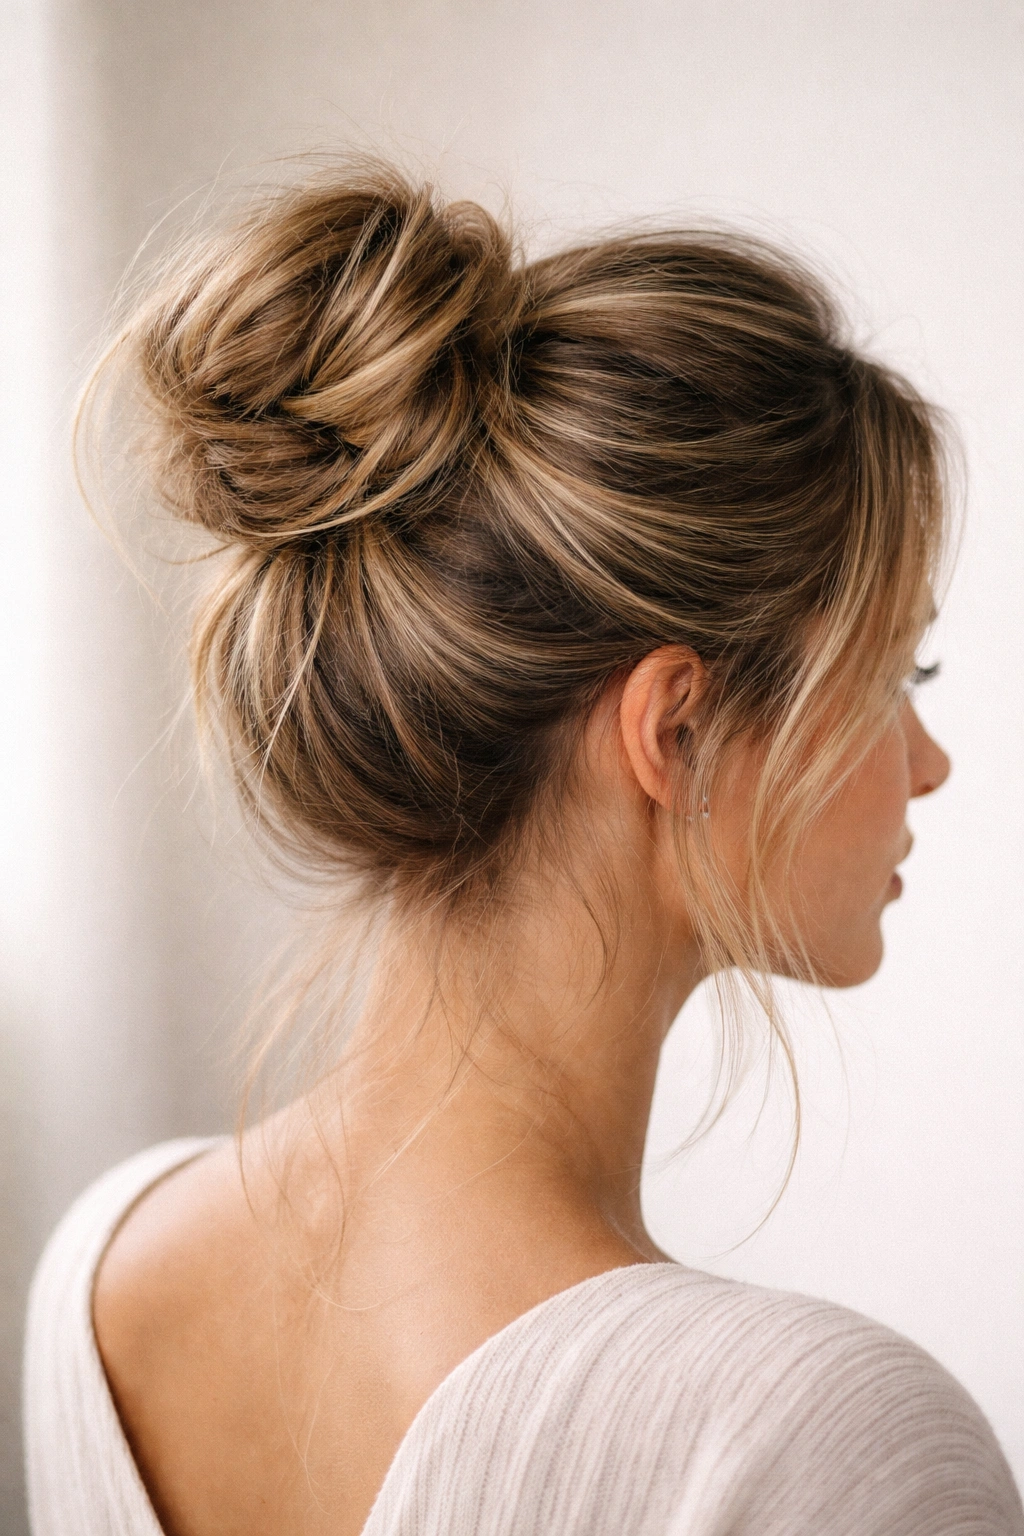
This is the foundation style that started the whole messy bun movement—the version that somehow looks like you rolled out of bed and twisted your hair up in three seconds, even though it’s actually strategically constructed to hold all day. The appeal is its versatility; it works with virtually any hair type and texture, and it’s equally at home in a corporate office or at a weekend farmers’ market.
Why It Stays Put All Day
The classic undone bun holds through a combination of tension and height. By placing the base of the bun at the crown rather than at the nape of the neck, you’re working with gravity instead of against it—the weight of your hair pulls downward, creating natural tension that keeps the bobby pins secure. The intentional looseness and wrapping technique (rather than twisting tightly) paradoxically makes the style more stable because the hair winds around itself multiple times, creating friction that resists slipping.
How to Create It
Start with slightly textured hair—either second-day hair, hair with dry shampoo applied, or damp hair that’s been blow-dried with texture. Flip your head upside down and gather hair at the crown using your fingers rather than a comb; this creates a looser base that’s less slippery than smooth, tightly-gathered hair. Gently twist the hair ball at the base, then wrap the remaining length around that twisted base in a loose spiral. Secure with bobby pins crisscrossed through the bun, tucking the ends in rather than leaving them neatly hidden—those loose pieces are what make it look intentionally undone. Pull a few face-framing pieces loose and slightly ruffle the bun with your fingers to increase volume and texture.
Best Hair Type and Length
This style works beautifully on shoulder-length hair and longer. Fine or thin hair benefits from texture spray or dry shampoo applied beforehand to increase grip and volume, while thick hair holds this style with zero effort. Curly or wavy hair is almost made for this style since the natural texture automatically creates the undone aesthetic.
Pro tip: If your bun feels too neat or compact, resist the urge to tighten it. Instead, gently pull small sections of hair out from the sides and back of the bun to create the appearance of volume and softness. This makes it look more intentional and prevents it from becoming an actual mess.
2. The Braided Wrap Bun
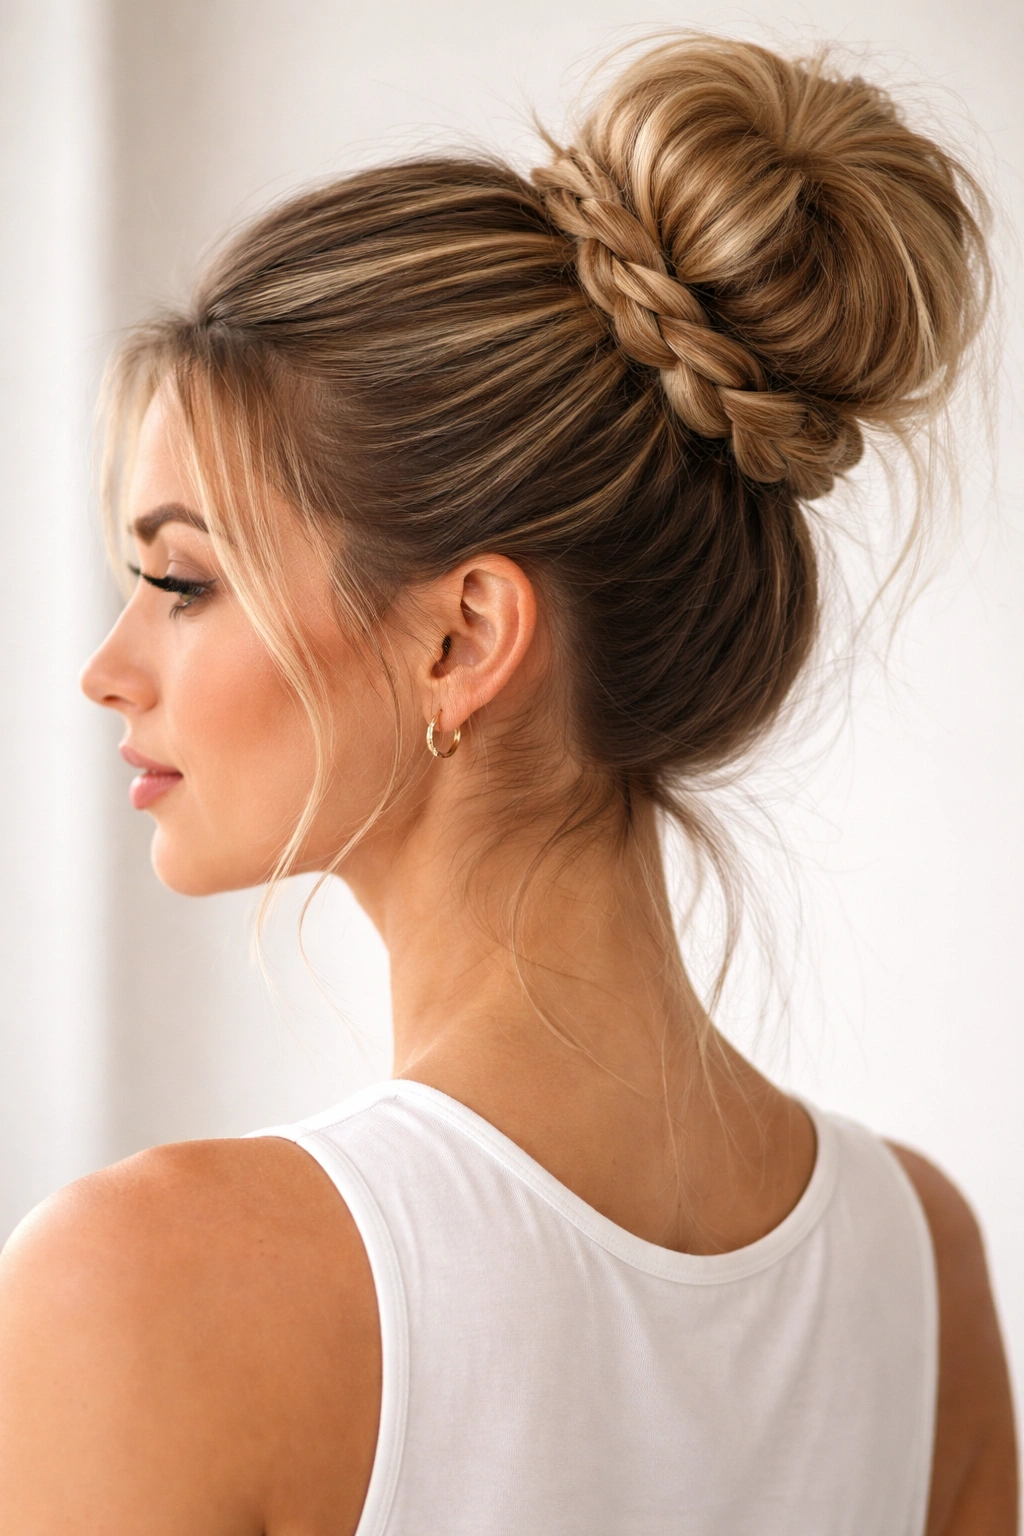
When you weave a braid through the base of your bun, you’re adding serious structural reinforcement that keeps everything locked in place. This variation looks polished enough for professional settings or events but maintains that relaxed, intentional messiness that makes messy buns so appealing. The braid acts as a anchor, preventing the bun from sliding backward or loosening throughout the day.
Why It Stays Put All Day
A braid wrapped around the base of the bun creates multiple layers of friction and mechanical interlocking that simple bobby pins alone can’t match. The braid pulls tightly against the bobby pins and the base of the twisted hair, and the individual strands of the braid weave through the bun structure, distributing the weight more evenly. This means your hairstyle can handle more movement, more head-turning, more activity without any slipping or shifting.
How to Create It
Gather your hair into a high ponytail and secure it loosely with an elastic. Take a small section of hair from the ponytail and braid it—a simple three-strand braid is perfect—or use a section of the ponytail to create a twist instead of a full braid, which is faster and equally effective. Wrap this braid around the base of the ponytail, tucking the end underneath and securing it with bobby pins. Now take the remaining ponytail hair, gently twist it, and wrap it around the braid base, securing everything with additional bobby pins. Pull out a few face-framing pieces and loosen the bun slightly for that effortless vibe.
Best Hair Type and Length
This style requires at least shoulder-length hair to gather enough hair for a substantial braid. Medium to thick hair holds this beautifully, and wavy or textured hair shows off the braid definition better than perfectly straight hair. If your hair is fine or thin, apply texture spray before starting to increase grip and volume.
Worth knowing: You can braid your hair with a contrasting hair accessory—a thin ribbon, yarn, or decorative cord woven through the braid—to instantly elevate the style from casual to special-occasion worthy.
3. The Half-Up Messy Bun
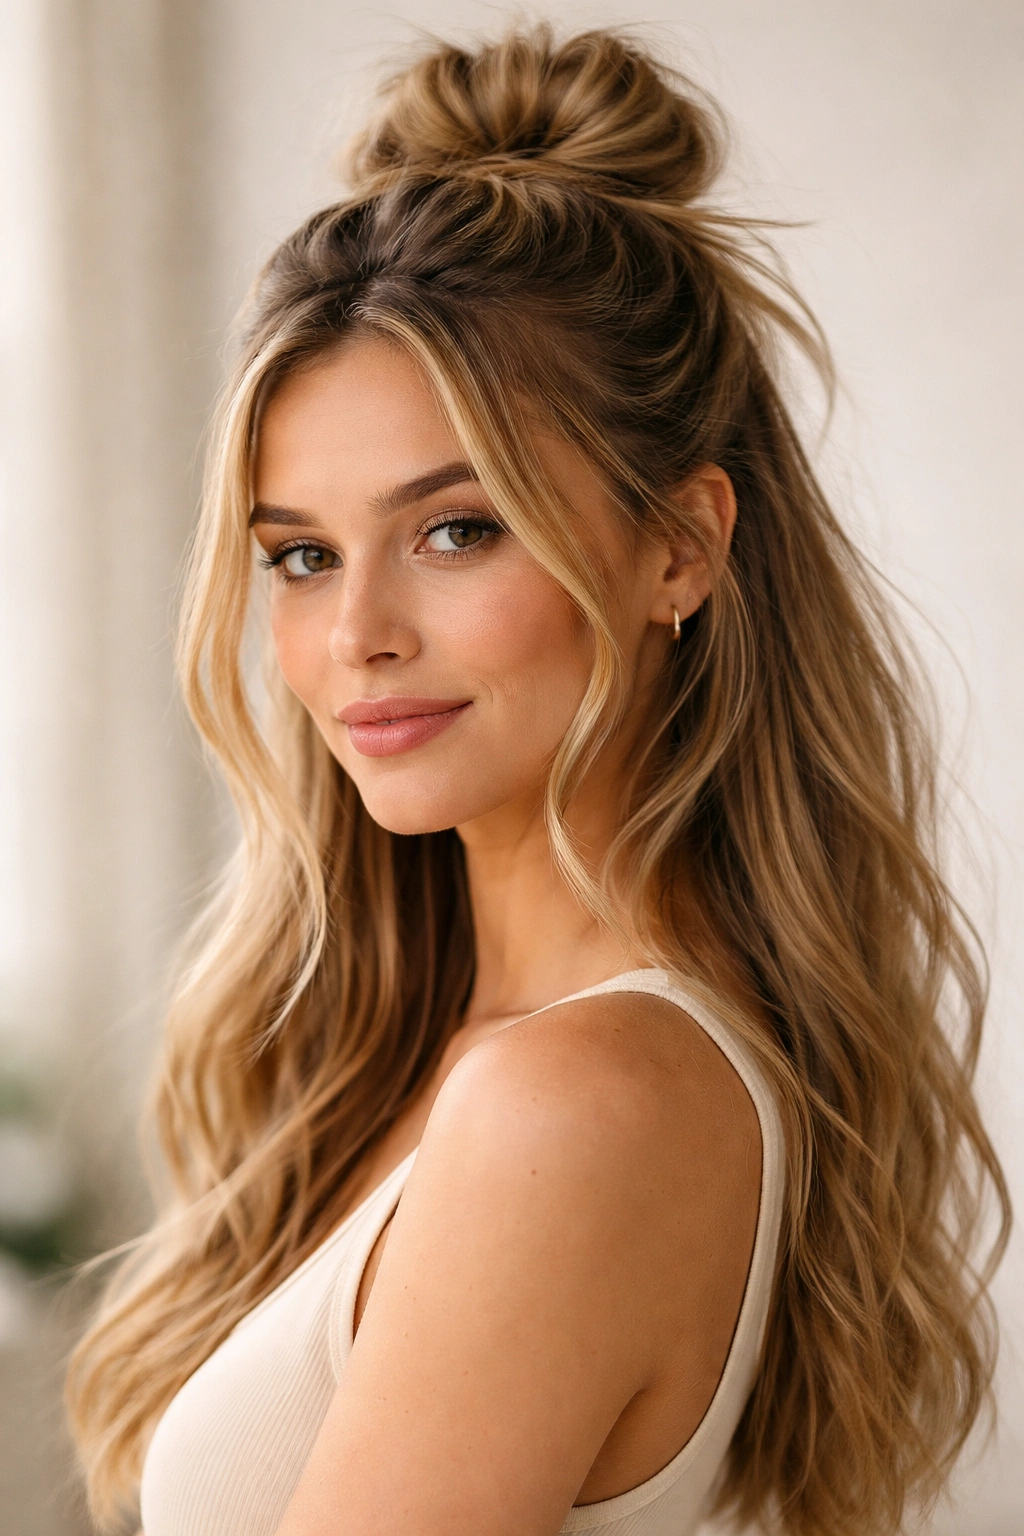
This is the perfect middle ground for people who want the polished look of a bun without the commitment of pulling all their hair up. The lower half of your hair flows free while the top half is twisted and bunned, creating a style that’s both intentional and relaxed. It works beautifully on longer hair and gives you the option to let loose pieces frame your face without disrupting the overall structure.
Why It Stays Put All Day
Because you’re only securing half your hair, there’s less weight pulling down on the bobby pins, which actually makes it more stable rather than less. The lower half of your hair adds visual fullness and balance while the upper bun stays perfectly anchored at the crown. The style is inherently less formal-looking because of the released lower section, so even if a few pieces work loose throughout the day, it actually enhances the intentional messiness rather than making it look sloppy.
How to Create It
Gather the top half of your hair—from roughly ear to ear across the top of your head—into a high section at the crown. Secure this with a clear elastic or a bobby pin to keep it separate while you work. Gently twist this upper section and wrap it around itself to form a small bun, securing with bobby pins tucked underneath and through the bun. Leave the lower half of your hair completely down, or add light waves if you want to dress it up. Pull a few pieces from the half-up section loose around your face for a softer frame. The key is keeping the bun positioned high enough that it doesn’t interfere with the waves or movement of your lower hair.
Best Hair Type and Length
This style is best on hair that’s at least mid-back length so the released lower half has enough length to look intentional rather than choppy. It works on all hair types and textures, though wavy or curly hair looks particularly polished with this style since the waves in the lower section add movement and dimension.
Insider note: If you want the half-up section to last longer without needing to re-do it mid-day, use a small amount of texture spray on the gathered section before twisting. This increases grip and prevents the smaller amount of hair from slipping as easily.
4. The Twisted Double Bun
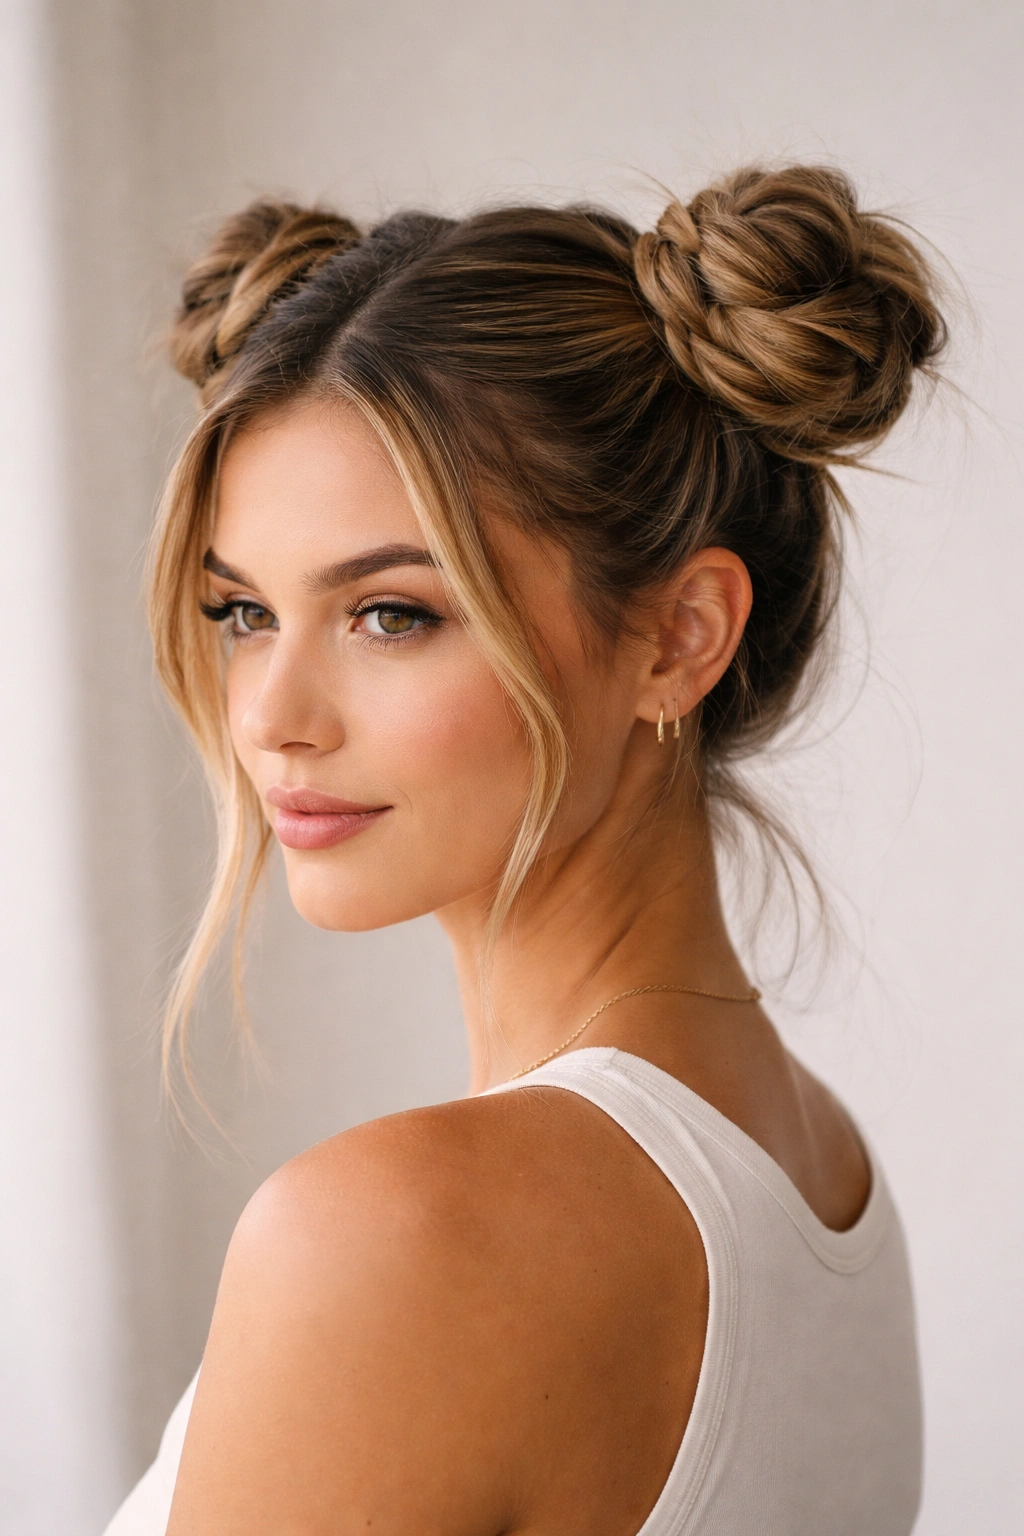
This playful style gives you two small, intentionally messy buns positioned symmetrically on either side of your head. It’s younger and more casual than a single bun, but it’s still constructed to hold all day. Because each bun is smaller and the weight is distributed across two points, the style has remarkable staying power and actually gets more interesting-looking as the day goes on.
Why It Stays Put All Day
Two smaller buns are actually more stable than one large bun because you’re using two separate anchor points on your head rather than relying on a single base. The weight of your hair is distributed across both sides of your scalp, which means each individual bobby pin is holding less weight. The smaller bun size also means the hair wraps around itself more times in a tighter area, creating more friction and making slipping nearly impossible.
How to Create It
Divide your hair down the middle from your forehead to the nape of your neck using a comb or your fingers. Create a side part if desired, or a straight center part for symmetry. Gather one half of your hair into a ponytail on one side of your head—at about ear level or slightly higher depending on the look you want. Gently twist this ponytail and wrap it around itself to form a small, loose bun. Secure with bobby pins and then repeat on the opposite side. Leave a few pieces loose around your face on each side, and ruffle both buns slightly with your fingers to add texture and volume. These buns work best when they’re intentionally imperfect and slightly different sizes.
Best Hair Type and Length
This style works on shoulder-length hair and longer, though it looks best on mid-back length or longer where you have enough hair to create two substantial buns. Thicker hair creates fuller buns, but fine hair can absolutely do this style with texture spray applied beforehand. Curly or wavy hair naturally looks great with this playful style.
Pro tip: Secure each bun with at least four to five bobby pins crisscrossed through the base and wrapped through the twisted section. The more anchor points you create, the longer the style holds without any adjustment needed.
5. The Sleek Low Bun with Loose Strands
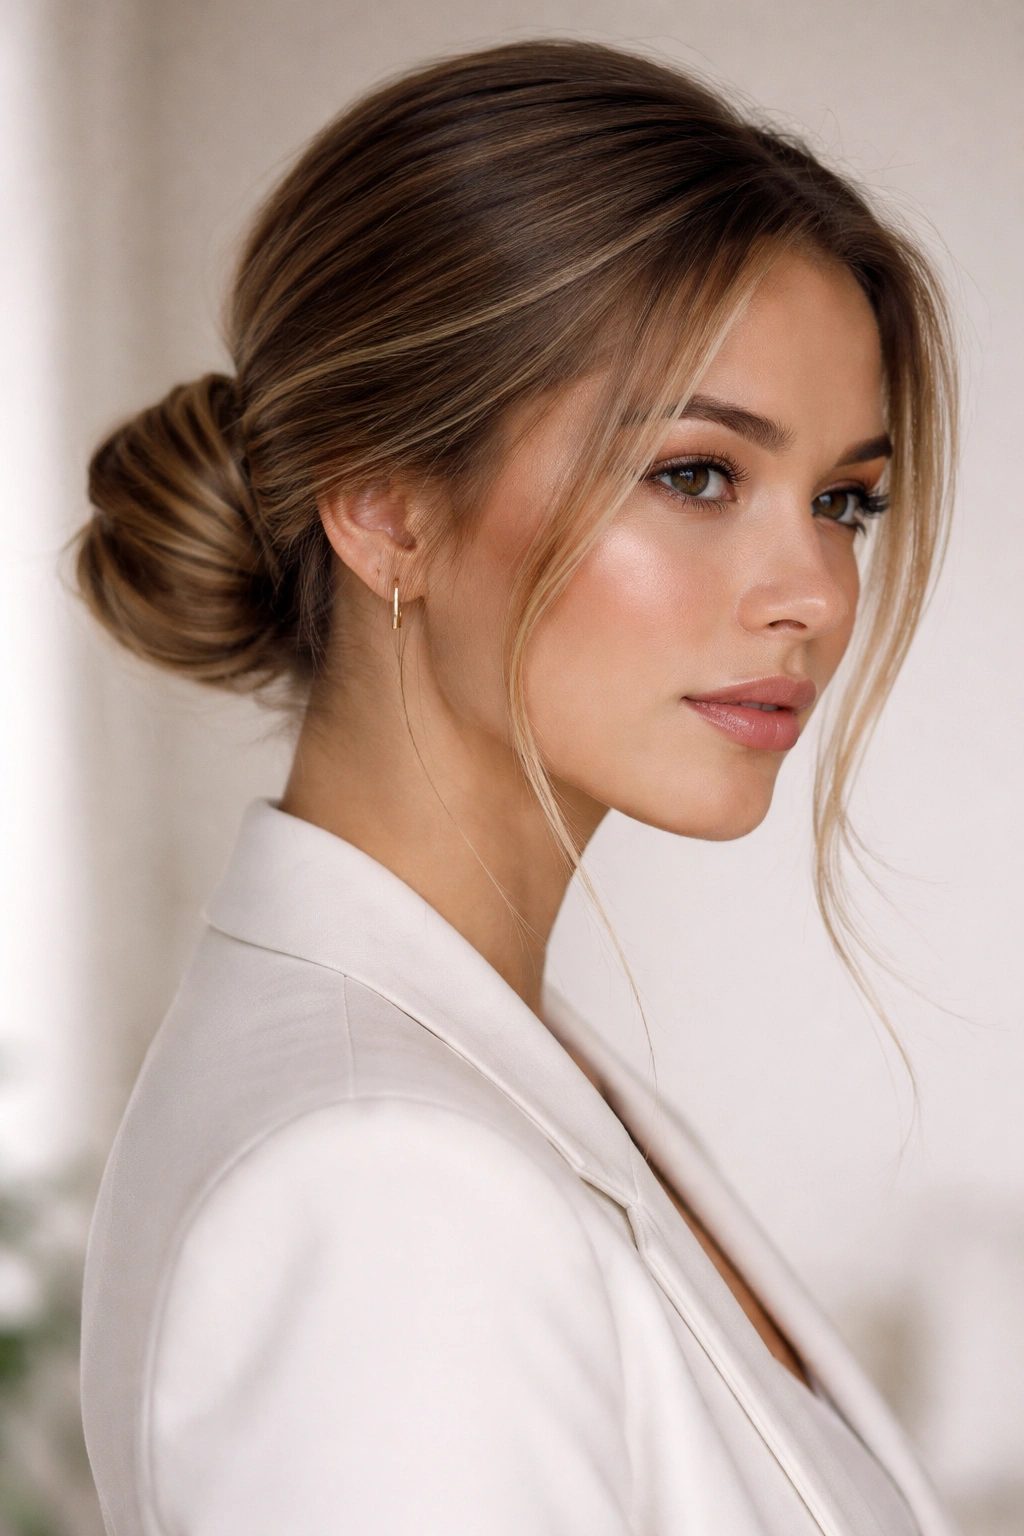
This variation is the sophisticated older sibling of the classic messy bun. Instead of a high, playful bun, you’re positioning it lower at the nape of your neck, and instead of pulling everything into looseness, you’re creating defined structure with intentional pieces left loose around the face and sides. This is the messy bun that works in professional environments and formal settings while still maintaining that effortless aesthetic.
Why It Stays Put All Day
A low bun at the nape of the neck is naturally more secure because the base sits against the back of your head, and gravity works in your favor by pulling hair downward into the base rather than away from it. The lower positioning means less movement and less stress on the bobby pins throughout the day. By leaving specific pieces loose rather than letting random strands escape, you’re controlling where the “messiness” happens, which actually makes the style more stable overall.
How to Create It
Gather your hair into a low ponytail at the nape of your neck, slightly off-center if you prefer an asymmetrical look. Before securing the ponytail, pull out two to three sections of hair from the front and sides—these will be your face-framing pieces. Secure the ponytail with an elastic, then gently twist the ponytail and wrap it around itself to form a bun at the base. Use bobby pins to secure everything, tucking the ends in neatly. The key to this style is that the loose strands are intentional and defined, not accidental—they should frame your face and neck in a way that feels purposeful. You can even wrap one of the loose strands around the base of the bun like a headband for added polish.
Best Hair Type and Length
This works beautifully on shoulder-length hair and any length beyond. Straight to wavy hair shows off the intentional loose pieces best, though curly hair can absolutely do this style. For finer hair, use a texture spray to increase grip and make the bun feel fuller.
Worth knowing: This style looks particularly polished if you smooth the hair going into the low ponytail with a brush or smoothing cream, creating a sleek contrast between the smooth gathered section and the gently loosened face-framing pieces.
6. The Textured High Bun with Wispy Tendrils
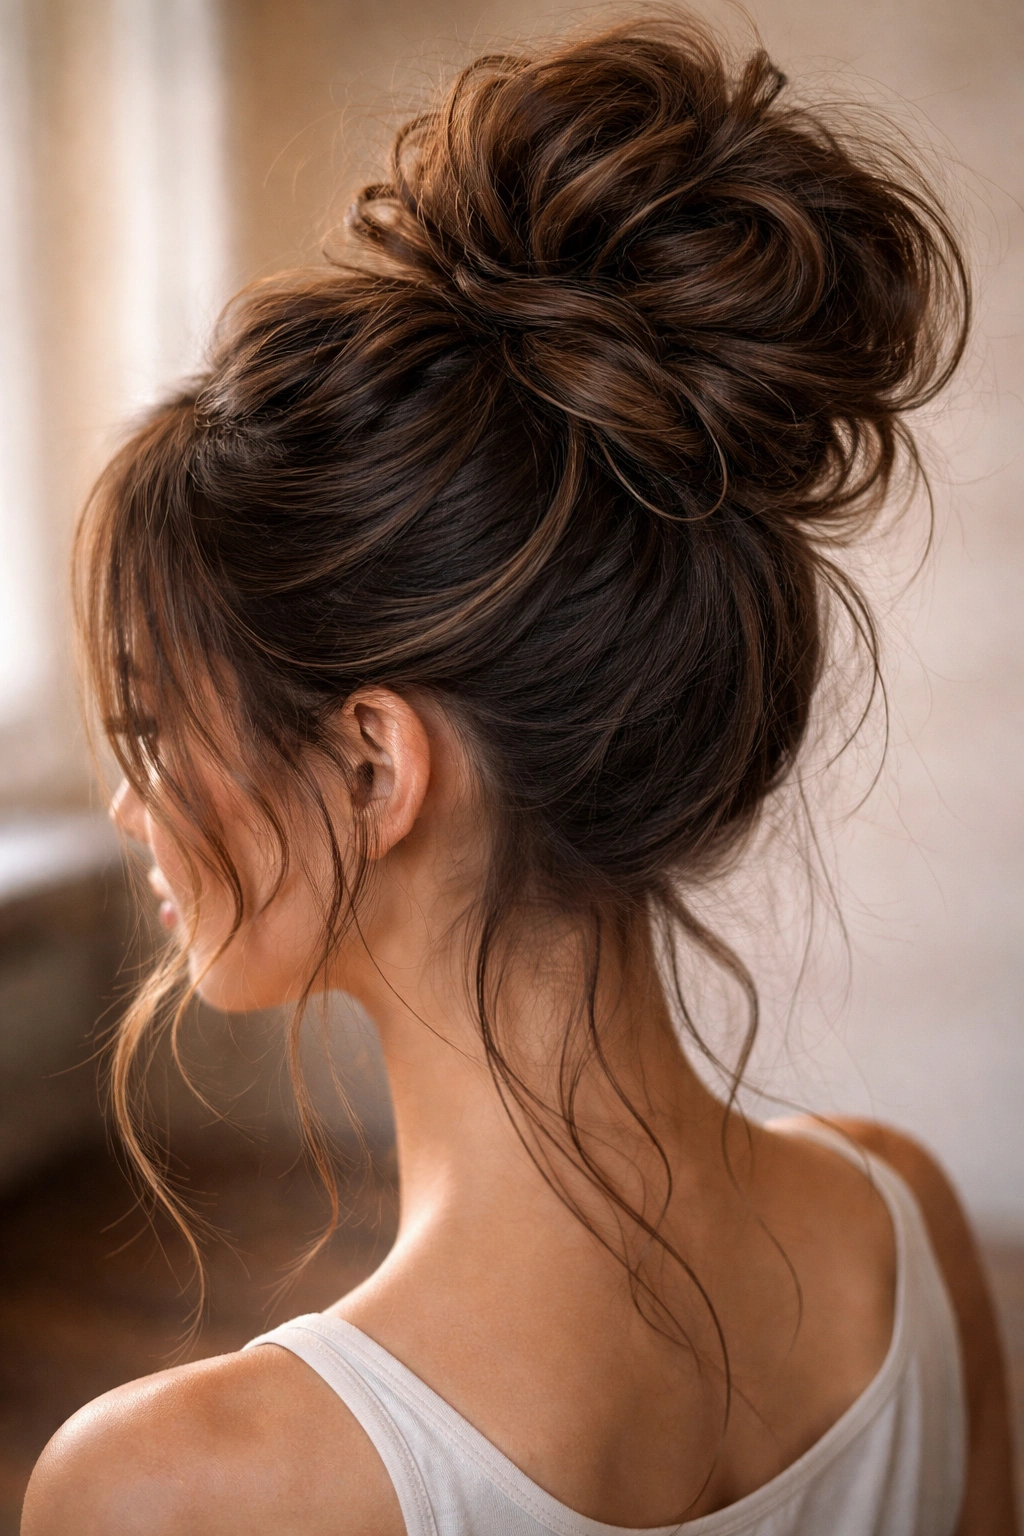
This style prioritizes texture and volume from the start, creating a bun that looks full, interesting, and completely intentional in its messiness. By using waves, curls, or texture spray before gathering your hair, you’re building extra grip and visual interest right into the foundation. The wispy tendrils around your hairline and face are part of the design from the beginning, not accidental strays.
Why It Stays Put All Day
Textured hair has more friction than smooth hair, which means bobby pins have something to grip. When you start with texture—either from curls, waves, or texture spray—you’re already increasing the holding power before you even gather your hair. The volume created by texture also makes the bun appear fuller and more substantial, which ironically makes it more stable. Additionally, textured hair is more forgiving; small pieces shifting slightly don’t make the style look sloppy because texture looks intentionally undone by nature.
How to Create It
If your hair is straight, apply texture spray or dry shampoo throughout, or create waves using a curling iron or braiding method. If your hair is naturally wavy or curly, you’re already set. Gather the textured hair at the crown into a high ponytail, but don’t smooth it—let the texture remain visible and untamed. Twist the ponytail gently and wrap it around the base. Don’t worry about making it neat; the texture should look intentionally wild. Secure with bobby pins and then gently tease and separate sections of the bun with your fingers to increase volume. Leave wispy tendrils around your hairline intentionally; these are a feature of the style, not a flaw.
Best Hair Type and Length
This style works on all hair types but looks particularly stunning on wavy, curly, or thick hair that naturally holds texture well. Fine hair can definitely do this with texture spray applied generously. Shoulder-length hair and longer works best; the more hair you have, the more volume you can create in the bun.
Pro tip: Apply texture spray or dry shampoo the night before you plan to wear this style. The product has more time to distribute through your hair and build grip, and your hair settles into waves overnight, creating an even better textured base.
7. The Side Sweep Messy Bun
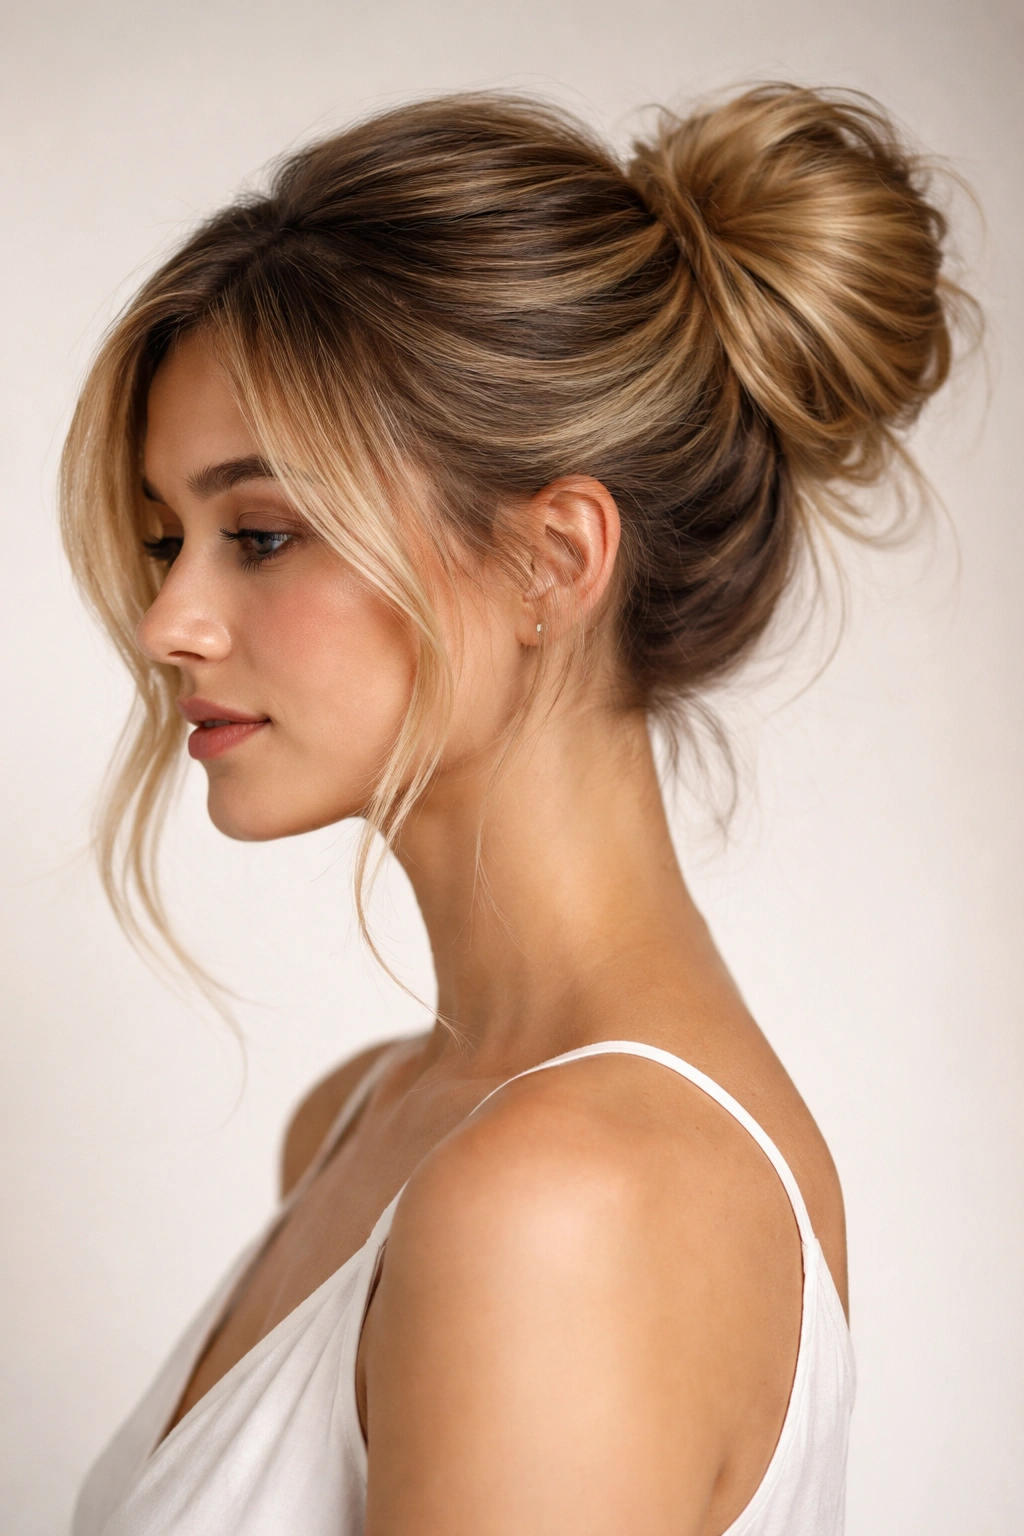
Instead of positioning your bun at the center crown or nape of your neck, sweep all your hair to one side and create the bun there. This asymmetrical style is visually more interesting than a centered bun and has the added bonus of staying secure because the weight and positioning naturally anchor it to one side of your head. It’s polished enough for events but casual enough for everyday wear.
Why It Stays Put All Day
When you sweep hair to one side, you’re creating a natural anchor point on that side of your head. The weight of the bun pulls in one direction against your head, creating tension that resists slipping. The asymmetry also means the bun stays more interesting visually as the day goes on—it doesn’t develop the same tired, flattened look that a centered bun might. Because the bun sits to the side rather than straight back, there’s less wind resistance and movement during daily activity.
How to Create It
Brush or finger-comb all your hair to one side, creating a deep side part. Gather all the hair on the side you’ve swept it to into a high or mid-height ponytail (depending on how dramatic you want the sweep to be). Don’t worry about smoothing it completely; a little texture in the gathered section is fine. Twist the ponytail and wrap it around itself to form a bun. Secure with bobby pins, then pull out a few pieces from the opposite side of your face to frame it. You can leave a larger section loose on the un-bunned side if you want more drama, or keep it all pulled back for a sleeker look. The key is that the bun should feel intentionally positioned, not accidentally lopsided.
Best Hair Type and Length
This style works best on shoulder-length hair and longer, where you have enough length to create a dramatic side sweep. It’s beautiful on all hair types and textures. Fine hair might benefit from texture spray to increase the fullness appearance, while thick and curly hair naturally creates volume in the swept bun.
Worth knowing: This style pairs beautifully with one decorative bobby pin or hair stick placed through the bun at an angle—it adds polish and can actually help hold the style more securely throughout the day.
8. The Crown Braid Bun
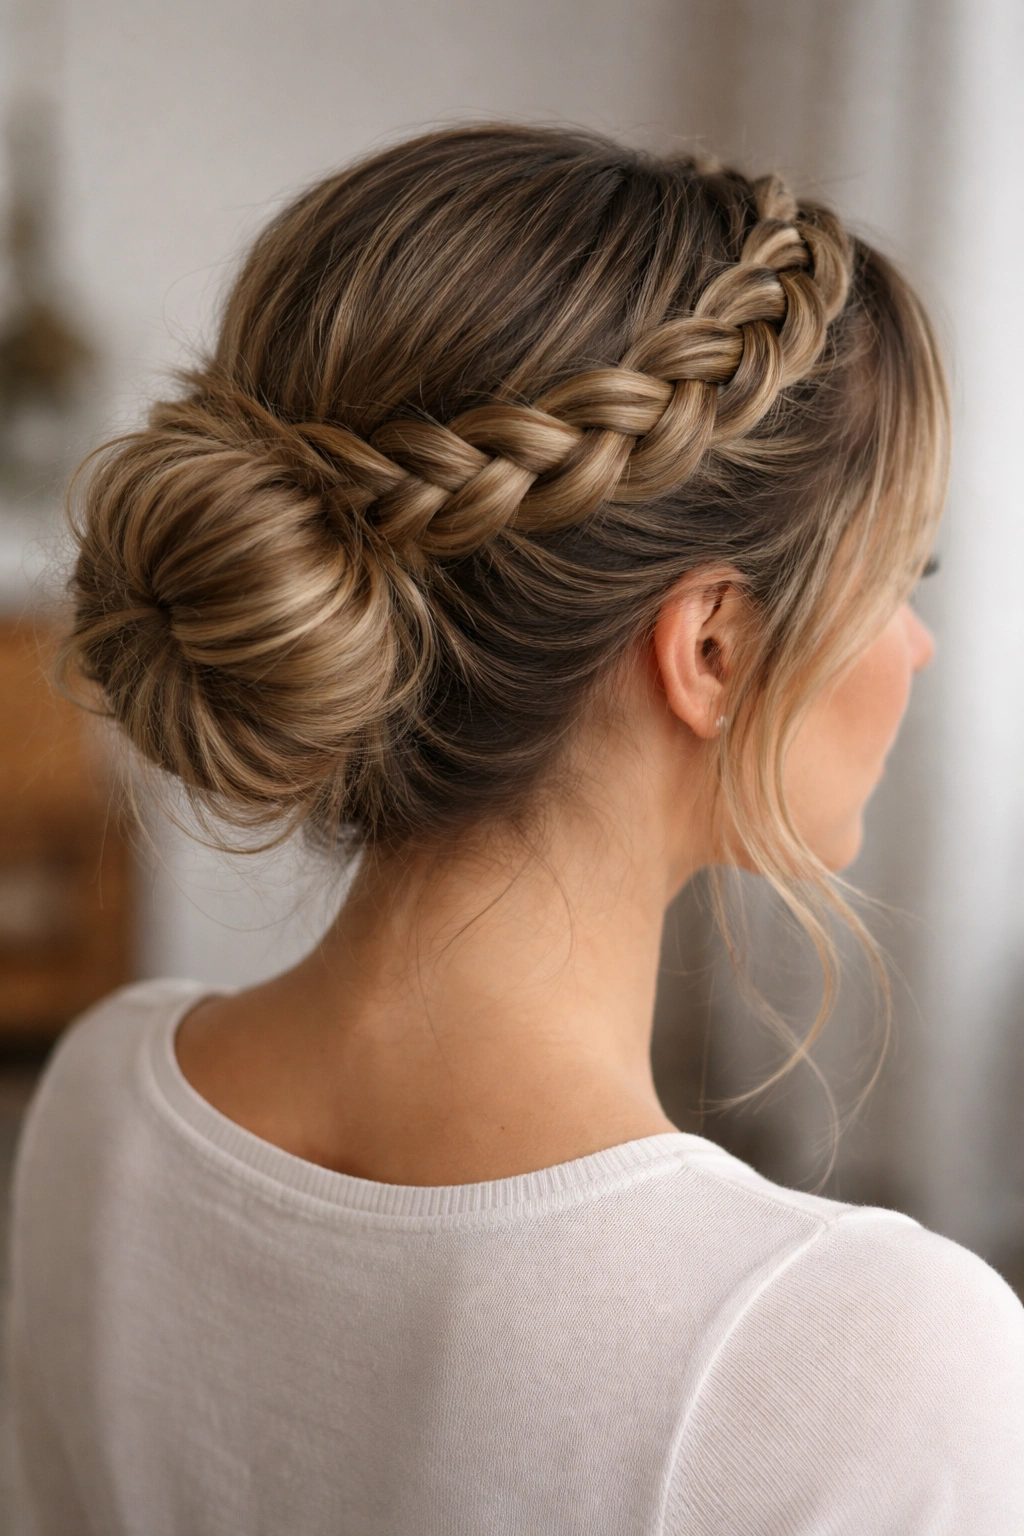
This style starts with a braid that wraps around your crown like a halo, and then you gather the remaining hair into a bun at the back. The crown braid serves both an aesthetic and functional purpose: it looks gorgeous and it also reinforces the structure of the entire style, making it exceptionally stable. This is the messy bun for when you want to look like you actually tried, even though it’s still incredibly easy to create.
Why It Stays Put All Day
A crown braid locks hair in place from the front and sides of your head, which are the areas where hair naturally wants to slip and come loose. By securing hair in a braid all the way around your head, you’re eliminating the most common failure points. The remaining hair is then gathered and bunned at the back, secured with bobby pins anchored by the braid structure. It’s like having extra insurance—even if some bobby pins loosen, the braid is still holding the style together.
How to Create It
Start with textured or slightly damp hair. Take a section of hair from one side of your head at ear level and begin a Dutch braid (reverse braid where you braid under instead of over) that wraps around the back of your head toward the opposite ear. As you braid, incorporate small sections of hair from the sides and back of your head, working the braid around your crown. Secure the end of the braid with a bobby pin on the opposite side where you started. Now gather all the remaining hair into a low or mid-height ponytail at the back of your head and create a bun, securing it with bobby pins. Pull out a few pieces around your face to soften the look. The crown braid creates the structure while the bun at the back provides fullness and interest.
Best Hair Type and Length
This style requires mid-back length hair or longer to have enough hair for both the crown braid and a substantial back bun. It works on all hair types, though wavy or curly hair shows off the braid definition beautifully. Fine hair can do this with texture spray to help the braid hold its shape.
Pro tip: Use a thin hair tie or elastic that matches your hair color to secure the braid end; this makes it nearly invisible. If you want the braid to be more visible as part of the design, use a contrasting hair tie or even a delicate ornament.
9. The Bouffant Messy Bun
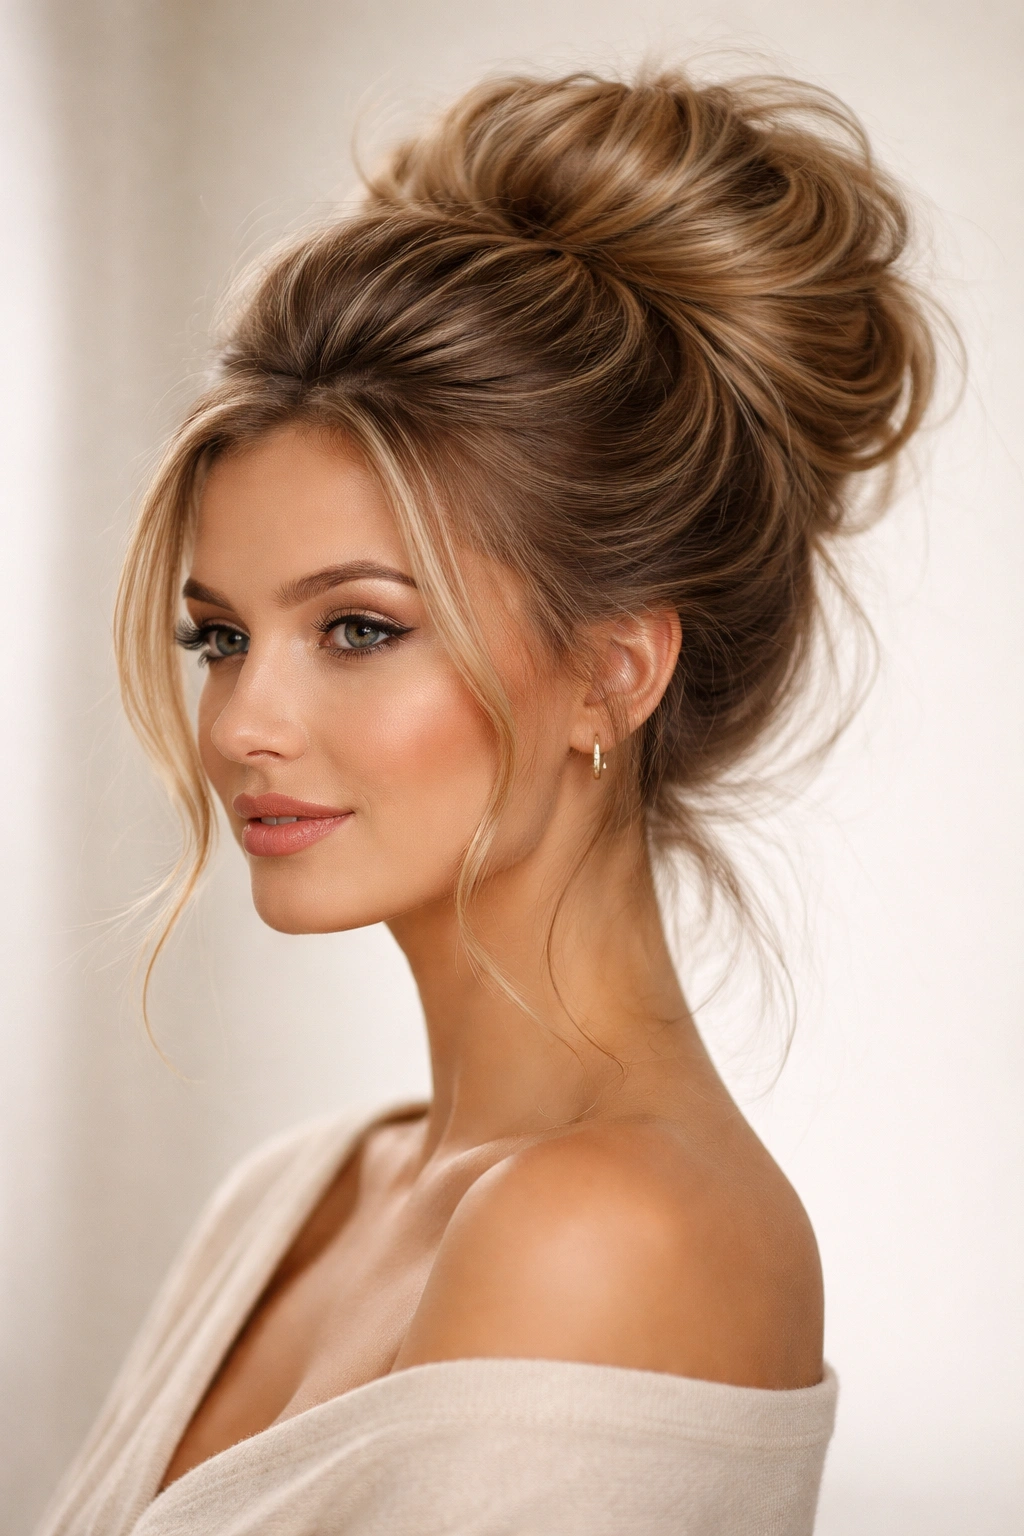
This style prioritizes height and volume above all else. You’re creating visible lift and pouf at the crown before creating the bun, which gives you a dramatic, statement-making style that works for special occasions or just days when you want to feel extra polished. The bouffant technique—where you gently tease and smooth hair in sections—creates structure that keeps everything locked in place.
Why It Stays Put All Day
Teasing or backcombing creates texture and grip throughout your hair, which exponentially increases how securely bobby pins can hold your style. When you create a bouffant, you’re intentionally roughing up the hair structure to create friction and hold. The height you build sits naturally at the crown of your head, which is a secure positioning point. The extra volume means the bun is substantial and heavy enough that it doesn’t easily shift or loosen—the weight actually works in your favor by creating downward tension that keeps everything anchored.
How to Create It
Start with clean or second-day hair. Section off the top layer of hair at your crown. Using a fine-tooth comb or teasing brush, gently backcomb this section to create volume and texture. Smooth the outer layer gently with your comb so it looks polished on the outside but still has the teased texture underneath. Gather all your hair into a high ponytail at the crown. Twist the ponytail and wrap it around the teased base, creating a full, voluminous bun. The teased section becomes the foundation that your bun wraps around. Secure everything with bobby pins. Pull out a few pieces for framing, and don’t smooth the bun completely—let the texture show through for that intentionally undone look.
Best Hair Type and Length
This style is most dramatic on shoulder-length hair and longer. Thicker hair creates more natural volume, but fine hair can absolutely do this with texture spray applied first and careful teasing. The bouffant technique works on all hair types and actually helps fine hair look fuller and more substantial.
Worth knowing: If teasing your hair feels too damaging, you can achieve a similar effect by blow-drying your hair with your head flipped upside down, then gathering it at the crown while it’s still slightly warm—this creates volume without the teasing.
10. The Wrap-Around Twisted Bun
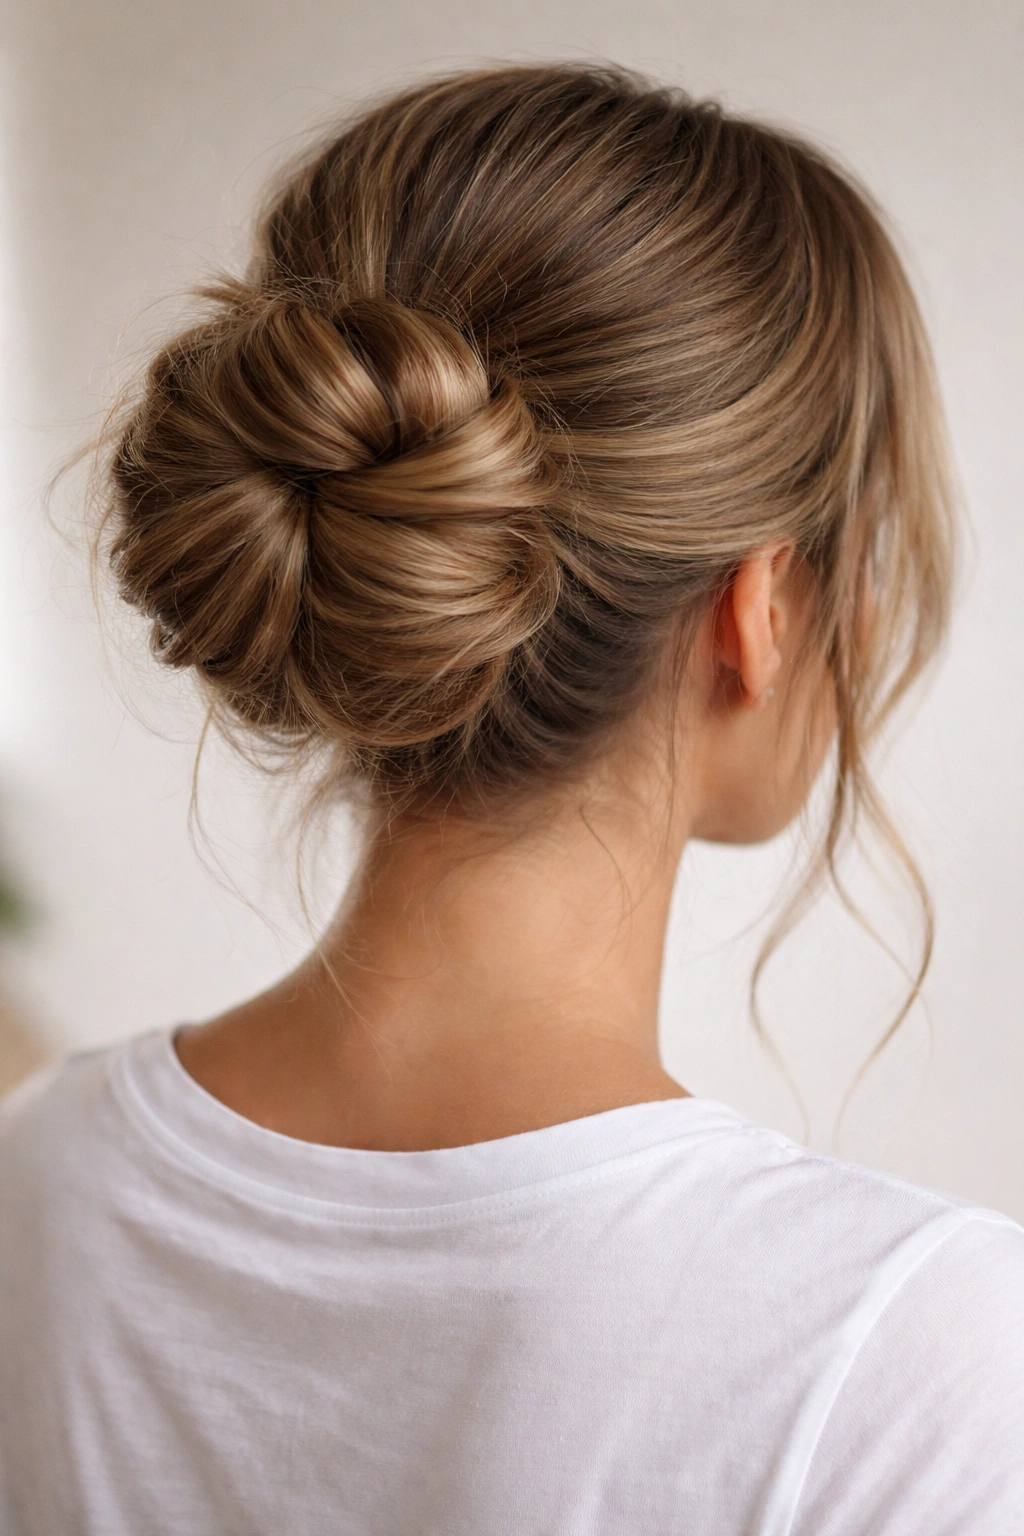
This final variation uses a simple but effective technique: you create a twisted ponytail and then wrap sections of it around the base multiple times before securing. This creates a bun that’s fuller and more structured than a simple single-wrap twist, and the multiple layers of wrapping mean multiple anchor points for bobby pins. The result is a bun that genuinely lasts all day with minimal risk of loosening.
Why It Stays Put All Day
By wrapping your twisted hair around the base multiple times rather than just once, you’re creating several layers of security. Each wrap adds more bobby pins and more anchor points. The hair crosses over itself multiple times, creating internal friction. The compact structure means less hair is hanging freely at the end—most of it is already wrapped and secured, reducing the risk of the whole thing unraveling if one section loosens.
How to Create It
Gather your hair into a high or mid-height ponytail and secure it with an elastic. Divide the ponytail into two sections and gently twist them together (or simply twist the whole ponytail as one section—both work). Begin wrapping this twisted section around the base of the ponytail, creating tight, neat wraps rather than a loose, casual wrap. Make 2-3 complete circles around the base, tucking the end underneath and securing everything with bobby pins placed through both the wraps and the base ponytail. The multiple wraps create a bun that looks fuller and more intentional. You can leave a few pieces loose or keep everything pulled back depending on the occasion.
Best Hair Type and Length
This style works beautifully on shoulder-length hair and longer. Thick hair naturally creates a full, substantial bun with this technique, but fine hair can do it too—use texture spray beforehand to increase volume. The wrap-around technique is particularly good for fine hair because the multiple wraps make the bun appear fuller than a single-wrap bun.
Pro tip: If your ponytail elastic is visible, hide it by wrapping a small section of hair around the base of the ponytail before you start twisting. This creates a polished look and the wrapped hair also helps secure the elastic, preventing it from slipping down throughout the day.
Final Thoughts
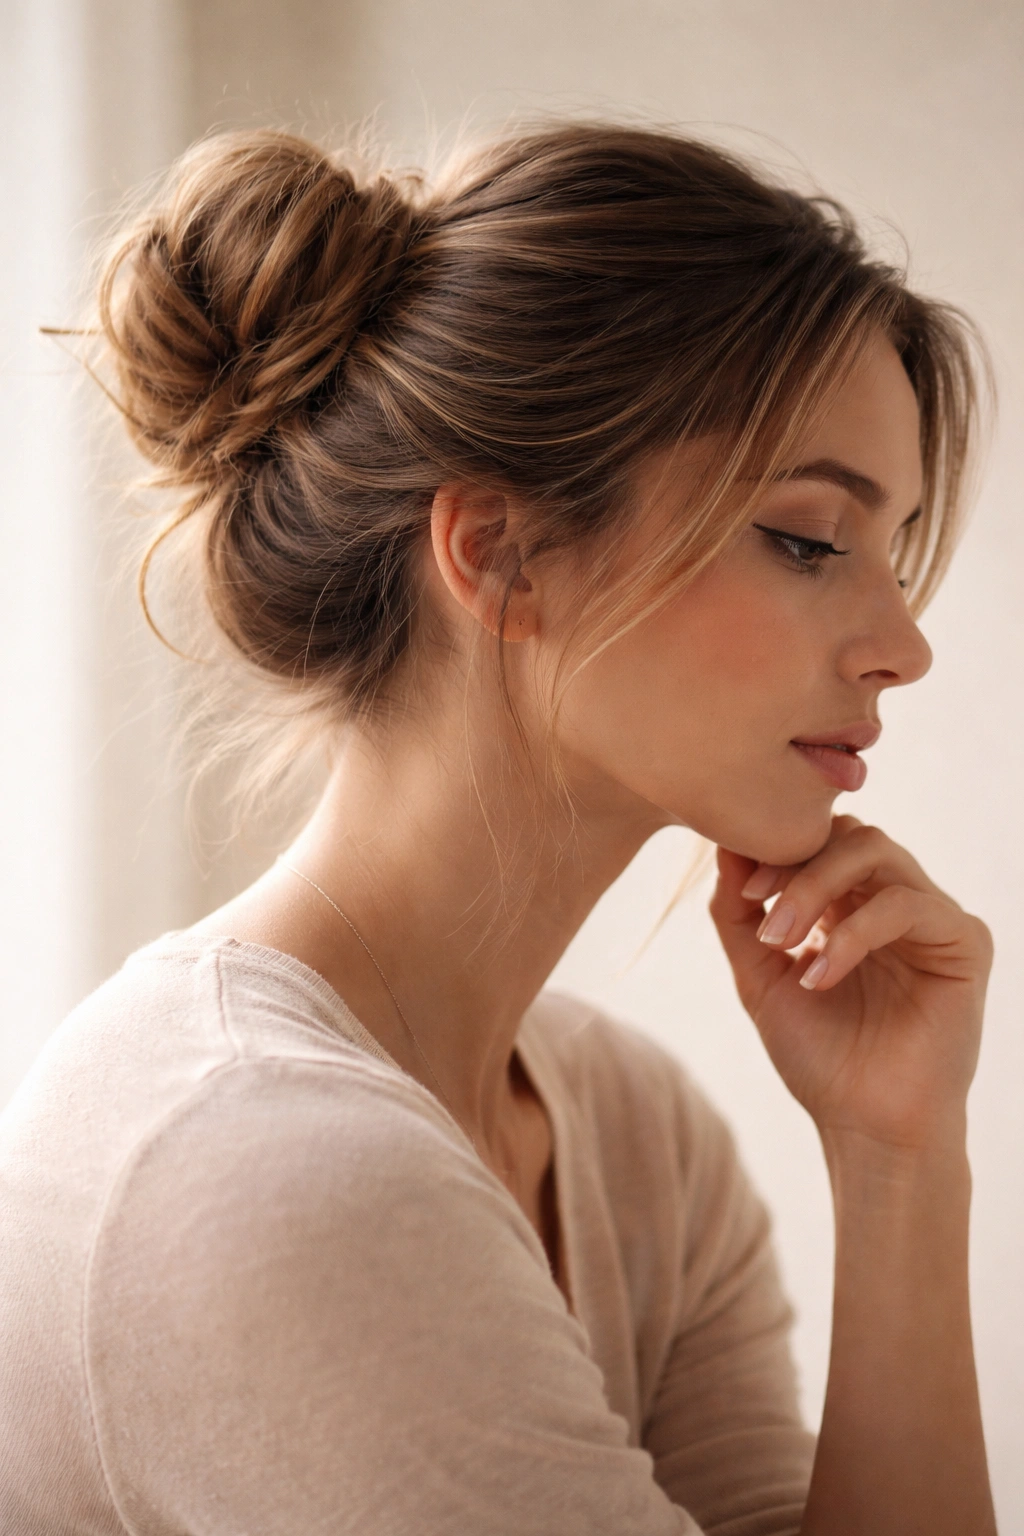
The real secret to a messy bun that holds all day isn’t any single technique—it’s preparation and intentionality. Starting with textured hair (whether that’s natural texture or added via spray or waves), positioning your bun at a secure point on your head (usually the crown or nape), using multiple bobby pins anchored strategically, and leaving loose pieces that are deliberate rather than accidental all combine to keep your style intact from morning through evening.
The best messy bun style for you depends on your hair length, thickness, natural texture, and the occasion. Experiment with a few of these variations to discover which one feels easiest to create and looks best on your hair type. You might find that different styles work better on different days depending on whether your hair is freshly washed or textured, or whether you want to dress up or keep things casual. Once you find your go-to style, you’ll have a reliable option that looks polished, requires minimal maintenance throughout the day, and gives you one less thing to worry about.
