



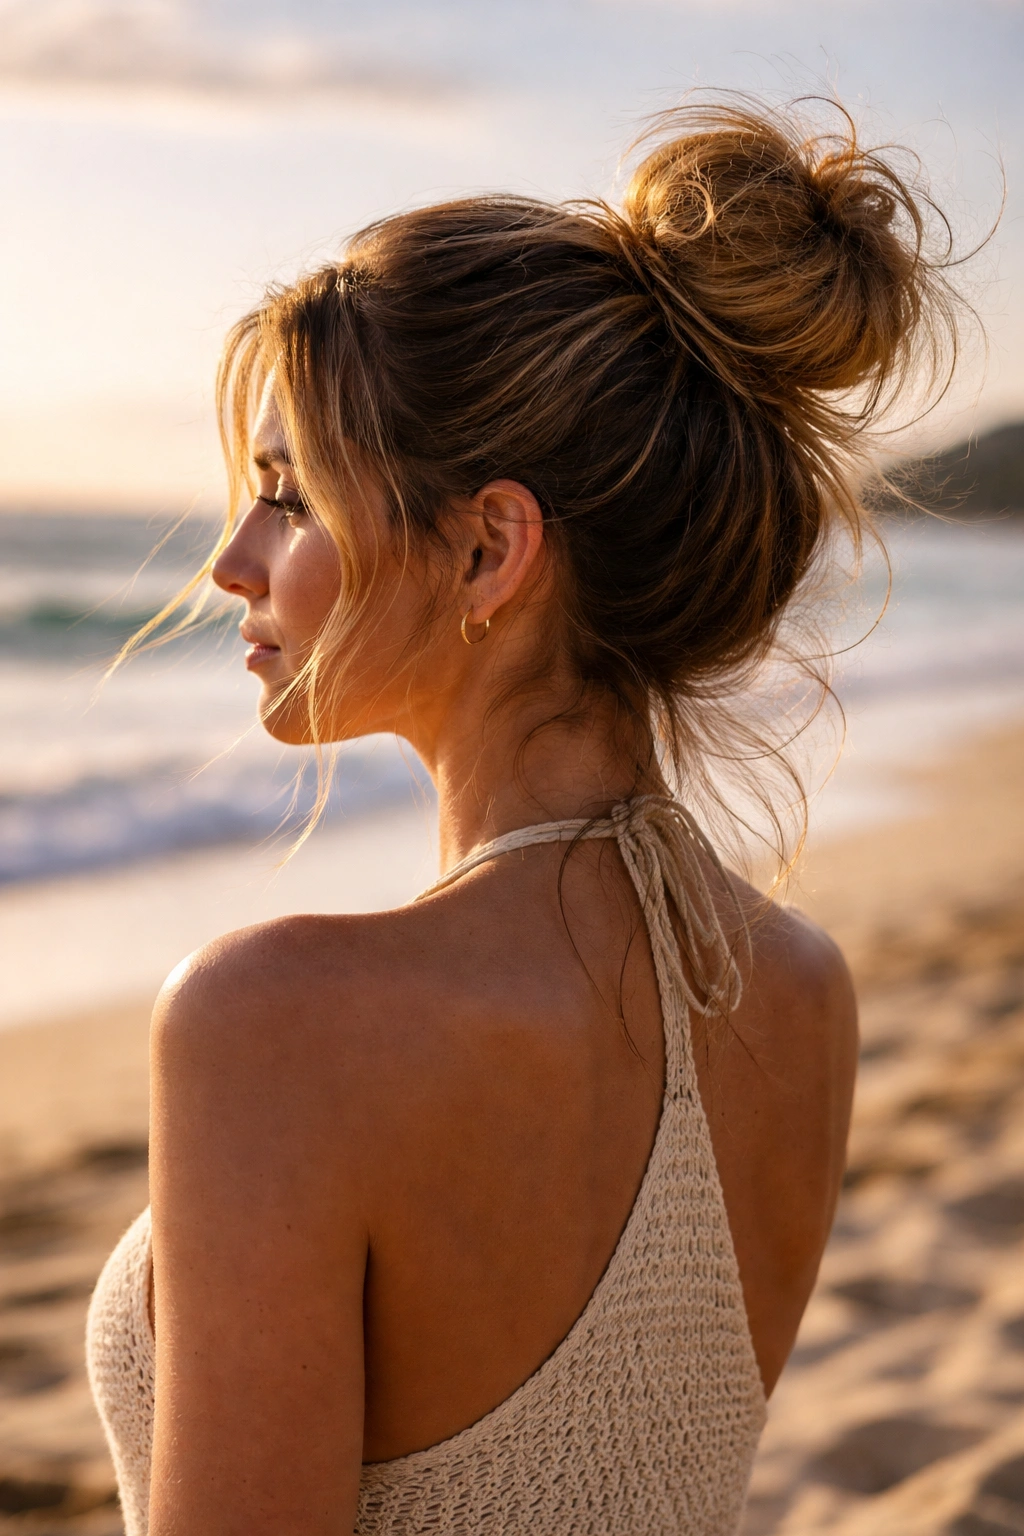
There’s a reason messy buns are practically a beach uniform. They’re functional (your hair stays out of your face while you swim), effortlessly cool (that undone, wind-tousled vibe is actually the aesthetic), and somehow flattering even when you’re makeup-free and sandy. But not all messy buns are created equal—some are better suited to a casual beach day, others work better for dinner by the water, and a few can actually handle a full day of ocean waves, sun, and salt spray without completely falling apart.
The trick to finding your perfect beach bun is understanding that “messy” doesn’t mean sloppy or negligent. The best beach buns balance structure with relaxation, holding everything in place while looking like you just casually threw your hair up without thinking. Whether you’re dealing with fine, straight hair that won’t hold texture, thick curls that need containment, or something in between, there’s a bun style that’ll work for your hair type and beach day agenda.
What makes a bun truly beach-ready comes down to a few practical factors: it needs to withstand moisture and salt water without unraveling into a complete disaster, it should look intentional even as strands fall loose, and it has to feel comfortable when you’re lying on sand and wet hair is pressing against your neck. The styles below are all tested for real beach conditions—not just styled for a photo shoot and immediately shaken out.
1. The Classic Textured Bun
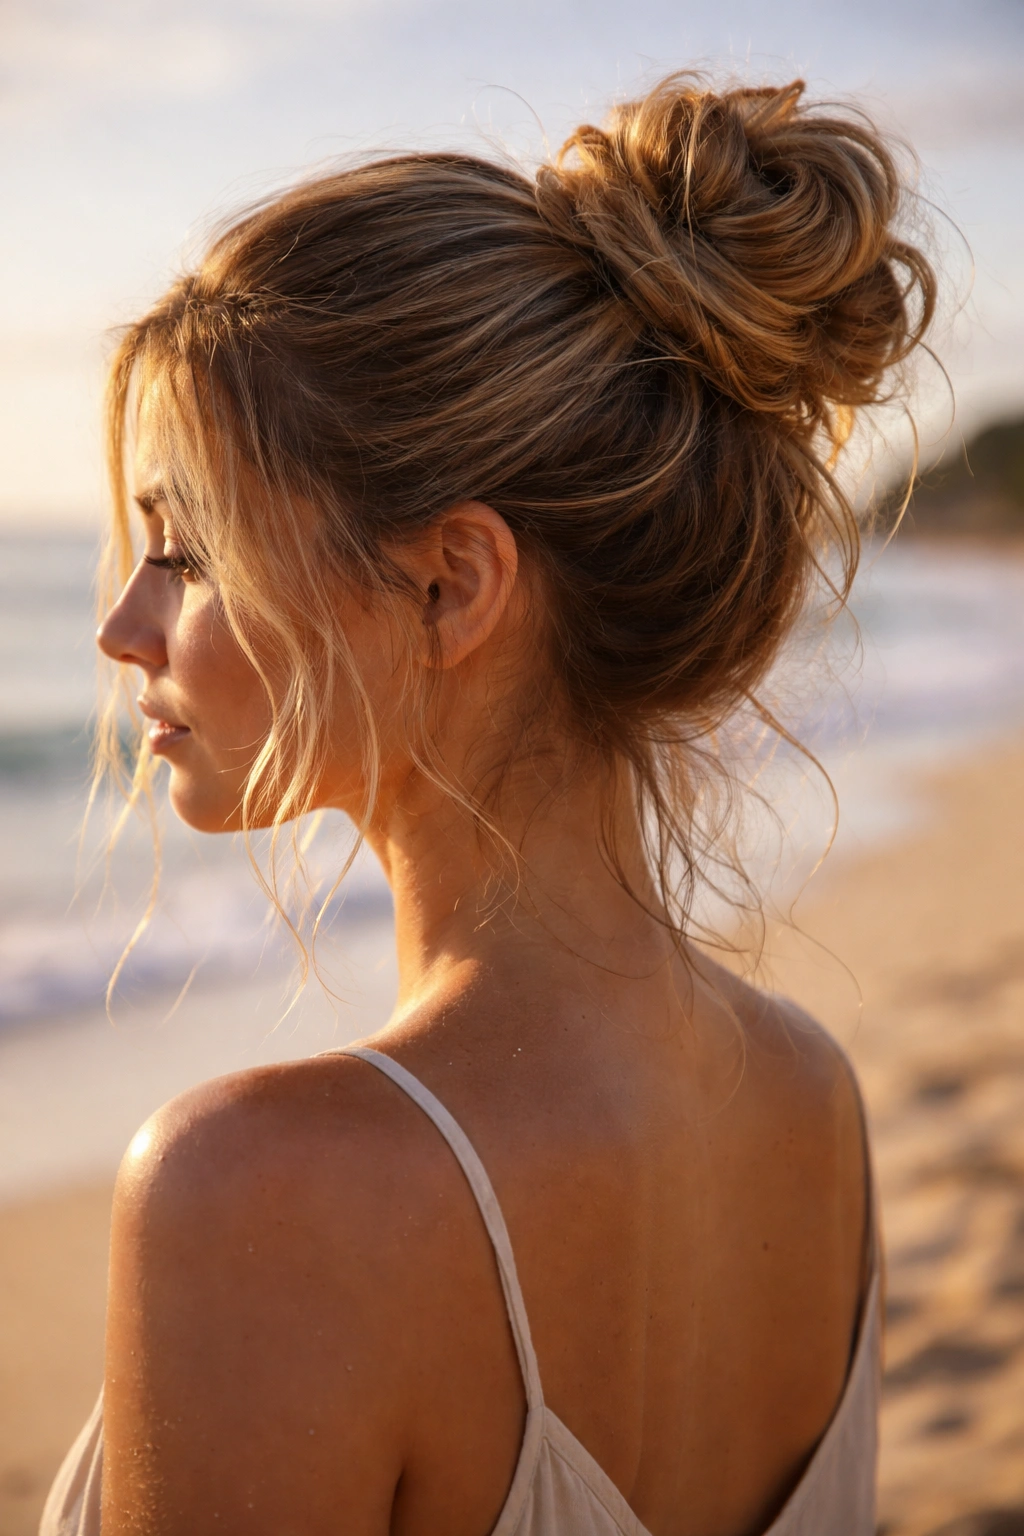
This is the foundation of every great beach bun, and it’s the one you’ll return to again and again because it works in almost every situation. The key is creating actual texture in your hair before you even attempt the bun—whether that’s from ocean water, dry shampoo, salt spray, or a texturizing product. Without texture, hair slides around and refuses to stay put; with it, everything grips and holds naturally.
Why It’s Perfect for the Beach
The textured version of a messy bun doesn’t rely on tightness to stay in place, which means it won’t give you a headache after eight hours of wear. Instead, the texture creates friction that holds your strands together without effort, and as pieces gradually work loose throughout the day (which they will), they look intentionally undone rather than neglected. It’s also forgiving—the more it falls apart slightly, the better it looks, which takes the pressure off having perfect hair at the beach.
How to Create That Essential Texture
The most reliable way to get texture is salt spray, which mimics ocean water and gives your hair grip even before you jump in the waves. If you don’t have salt spray, a texturizing spray or dry shampoo works just as well—apply it to damp hair and work it through with your fingers, focusing on the mid-lengths and ends rather than the roots. You can also braid your hair loosely the night before and sleep on it, then release the braids in the morning for instant waves and texture that’ll hold a bun all day.
Quick How-To Steps
- Apply your texture product to damp or air-dried hair 15-20 minutes before styling
- Flip your head upside down and gather hair at the nape of your neck or crown (depending on where you want the bun)
- Twist the section loosely as you bring it upward, letting pieces fall out naturally
- Wrap the twisted section around itself to form a bun shape, using bobby pins to secure any sections that won’t stay
- Pull a few face-framing pieces out intentionally before you finish
- Mist lightly with hairspray to set it, but not so much that it looks stiff or polished
Pro tip: Don’t wash your hair the morning of a beach day if you can help it. Second-day or third-day hair has more natural oils and texture, which makes any bun hold better and look intentionally undone rather than freshly styled.
2. The Tousled High Ponytail Bun
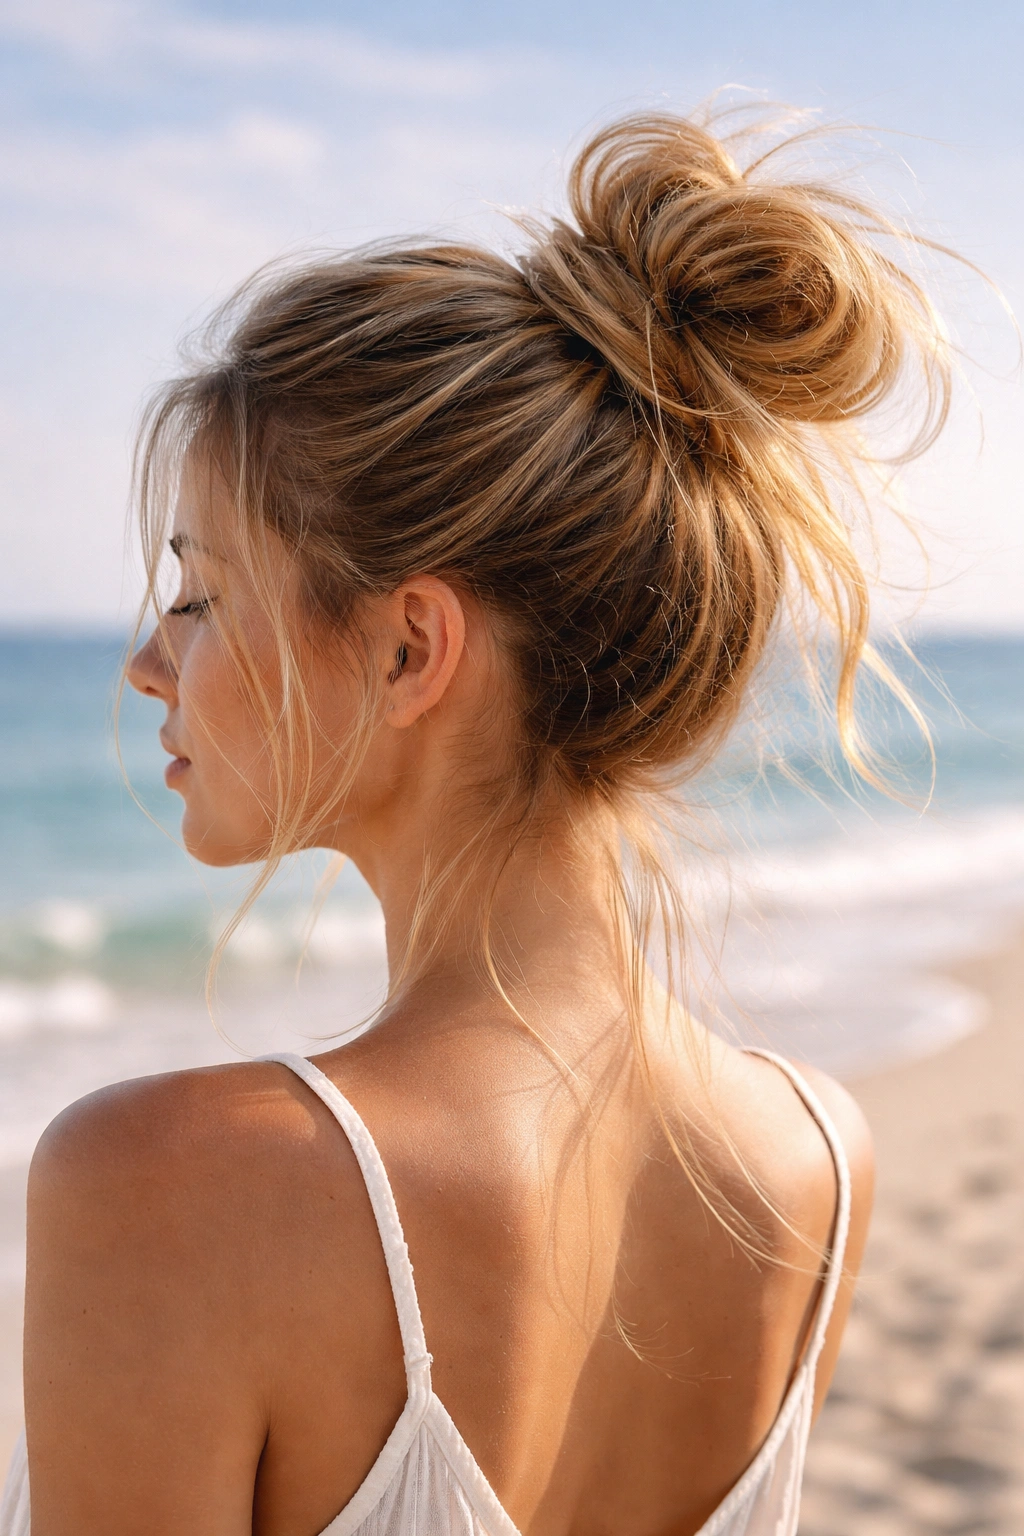
This version sits up on the crown of your head and has an airy, almost cloud-like quality that photographs beautifully and keeps even the longest, thickest hair off your neck and shoulders. It’s higher than a traditional bun, which means it catches more breeze and dries faster, and the height gives the illusion of lifted, voluminous hair even if your hair feels flat or weighed down by water and humidity.
Why It Works at the Beach
The high placement naturally prevents wet hair from sticking to your neck, shoulders, and back—something that becomes genuinely uncomfortable after hours of being damp. It also has built-in airflow, meaning your hair dries significantly faster than it would if it were wrapped down at the back of your head. Because the ponytail base is secured high and tight, even a very tousled, loose-looking bun stays exactly where you put it, which is important when you’re swimming or lying in the sand.
The Difference Between This and a Regular High Bun
A high ponytail bun keeps the ponytail elastic visible at the base, then twists or wraps the ponytail loosely around itself without trying to hide the foundation. This creates a more modern, undone look than a traditional ballerina-style bun, and it’s significantly easier to do because you’re not fighting to hide every strand. The looseness is the whole point—you want it to look like you gathered your hair up and barely secured it.
Step-by-Step Guide
- Flip your head upside down and use a boar bristle brush to smooth hair toward your crown
- Flip back up and gather everything into a high ponytail at the crown, securing it with an elastic
- Divide the ponytail into 2-3 sections and gently tease each section at the base with a fine-tooth comb
- Starting at the base of the ponytail, loosely wrap sections around the elastic, pinning each as you go
- Leave the ends of your hair slightly loose and wispy rather than tucking everything in tightly
- Pull the ponytail elastic slightly looser so the whole thing relaxes and looks less constructed
Worth knowing: This style works best on hair that’s at least shoulder-length. Shorter hair can do a high bun, but the tousled, airy effect is harder to achieve.
3. The Braided Wrap Bun
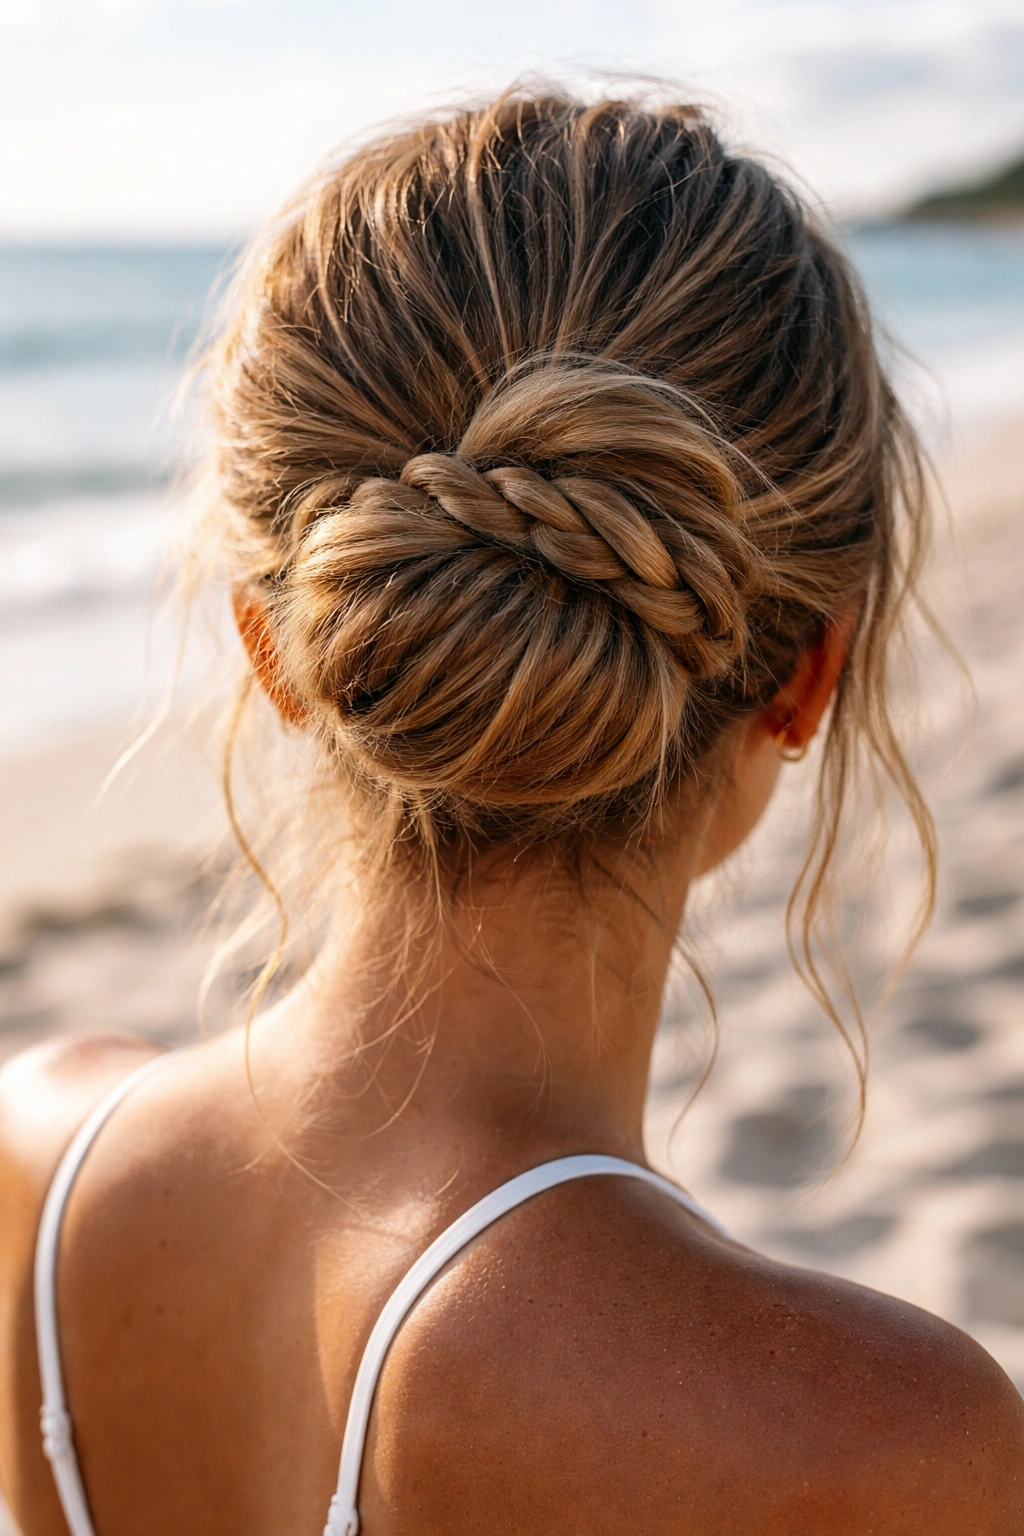
Instead of just twisting your hair around itself, you create a loose braid from your gathered ponytail and wrap that braid around the base to form the bun. This gives you significantly more structural integrity—braids hold together better than twists when they get wet and are manipulated by ocean waves or pool water.
Why Braids Outperform Twists at the Beach
Braids have three strands of hair interlocking, which means even if the bun loosens throughout the day, the braid itself stays intact and continues holding its shape. A simple twist, by contrast, can unravel if it gets tugged or soaked, leaving you with a saggy half-bun by afternoon. The braid also catches light differently and creates visible texture that reads as intentionally styled rather than accidentally messy—a crucial distinction when you’re trying to look put-together at a beach restaurant or seaside bar later.
How to Braid Without It Looking Too Polished
The key is loose braiding—you want the braid to be loose enough that strands puff out slightly between the weaves, creating that tousled effect. Don’t pull the sections taut as you braid; instead, loosen each section gently as you move down the braid. After you’ve braided, go back and gently pull at sections to make it even fuller and less uniform.
The Full Styling Process
- Spray damp hair with salt spray or texturizing product and let it dry slightly
- Gather hair into a high or mid-height ponytail and secure with an elastic
- Braid the ponytail loosely from base to end, then gently pull at sections to loosen the braid
- Wrap the braid around the ponytail base like you’re forming a bun, tucking the end under and pinning
- Let a few wisps fall loose around your face and at the nape of your neck
- Spritz with flexible-hold hairspray rather than heavy-hold, so the bun can move slightly without looking stiff
Insider note: If you’re planning to actually swim and submerge your head, a braided bun is your safest bet. The interlocking strands hold even when completely soaked, whereas other bun styles might need a quick re-pin after you get out of the water.
4. The Twisted Side Knot
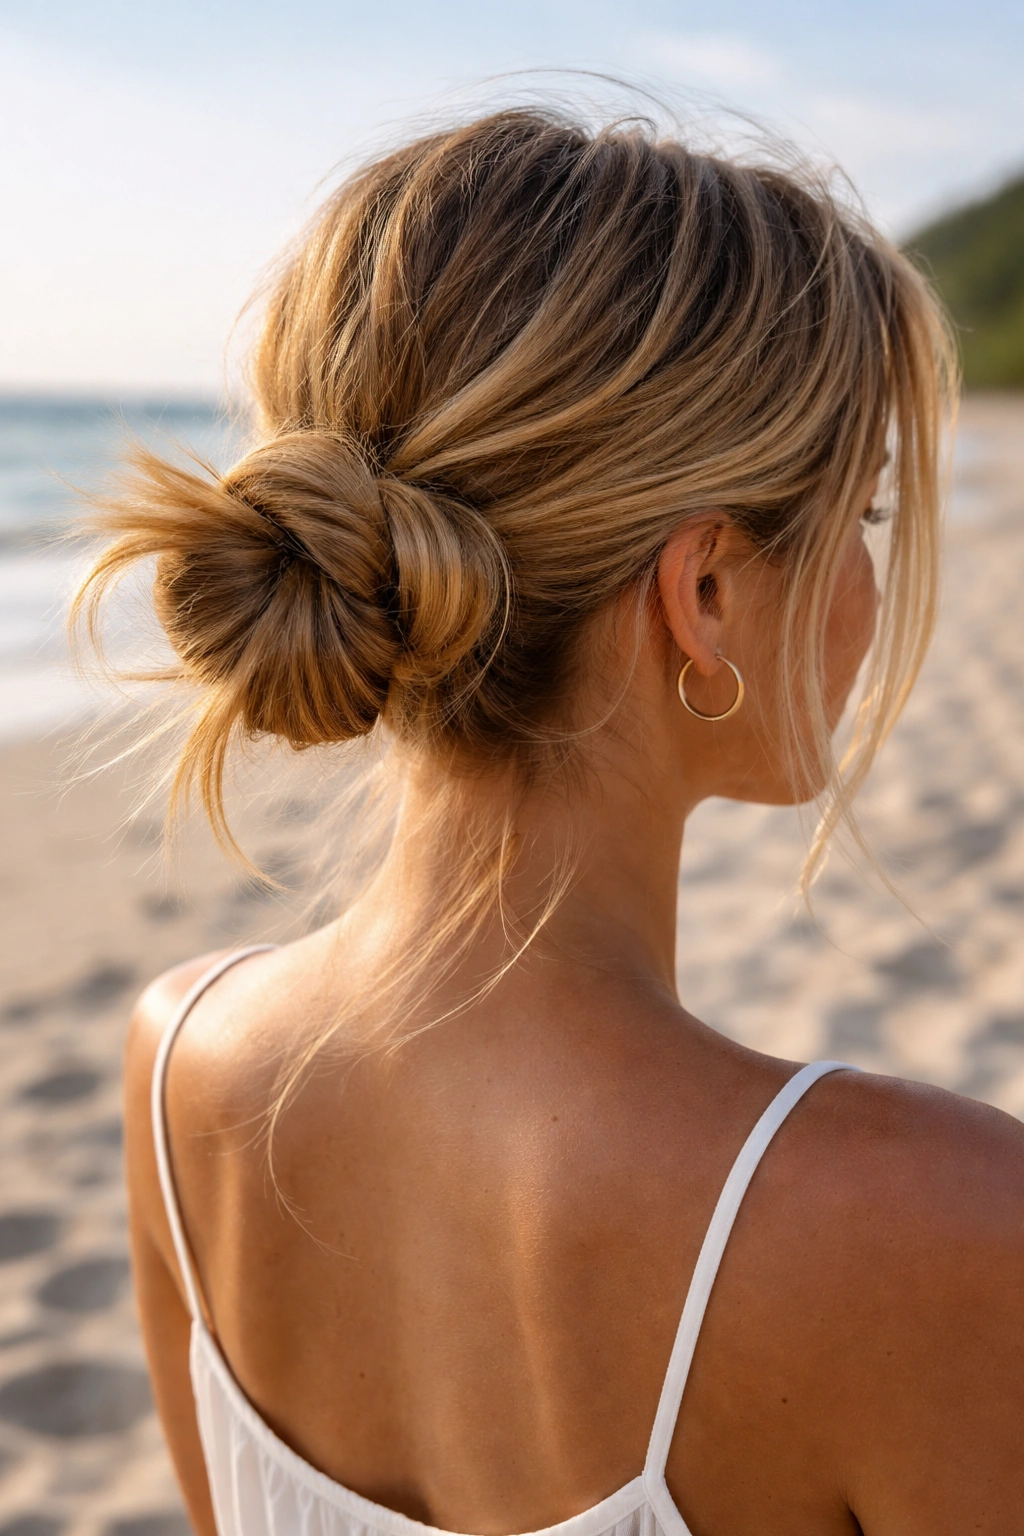
This is a bun that sits off to one side of your head, formed by twisting hair and tying it into a loose knot rather than wrapping it into a bun shape. It’s more playful and asymmetrical than a centered bun, it works on shorter hair, and it has a distinctly beach-casual vibe that feels right when you’re living in a swimsuit.
Why Side Knots Own the Beach Aesthetic
There’s something inherently beachy about an off-center, asymmetrical style—it looks effortless and carefree in a way that centered buns can’t quite match. The side knot also exposes one side of your face and neck completely, which means less hair sticking to your skin and more even sun exposure if that matters to you. It’s also one of the quickest buns to style, which makes it perfect for those mornings when you’re heading straight from your room to the beach with minimal time.
How Knotting Differs From Wrapping
Instead of wrapping hair around a central point, you’re taking your gathered ponytail, twisting it, and literally tying it into an overhand knot (like you’re tying a basic knot in a rope). The ends of the hair stick out from the knot, and you secure the whole thing with bobby pins. This creates a slightly puffier, less structured look than a traditional wrap-style bun, and it’s surprisingly secure once it’s pinned.
Complete Styling Instructions
- Gather hair to one side at about ear level, creating a side ponytail
- Twist the ponytail loosely while bringing it slightly upward
- Tie the twisted section into a loose overhand knot, leaving the ends loose below the knot
- Pin the knot in place, threading bobby pins through the twists and under the knot itself
- Pull pieces out around your face and at the nape of your neck to soften the look
- Let the remaining hair hang loosely below the knot for a romantic, undone finish
Pro tip: If your side knot keeps loosening, use bobby pins with a slight texture or grip rather than smooth pins—they hold much better in damp, textured hair.
5. The Wet Look Sleek Bun
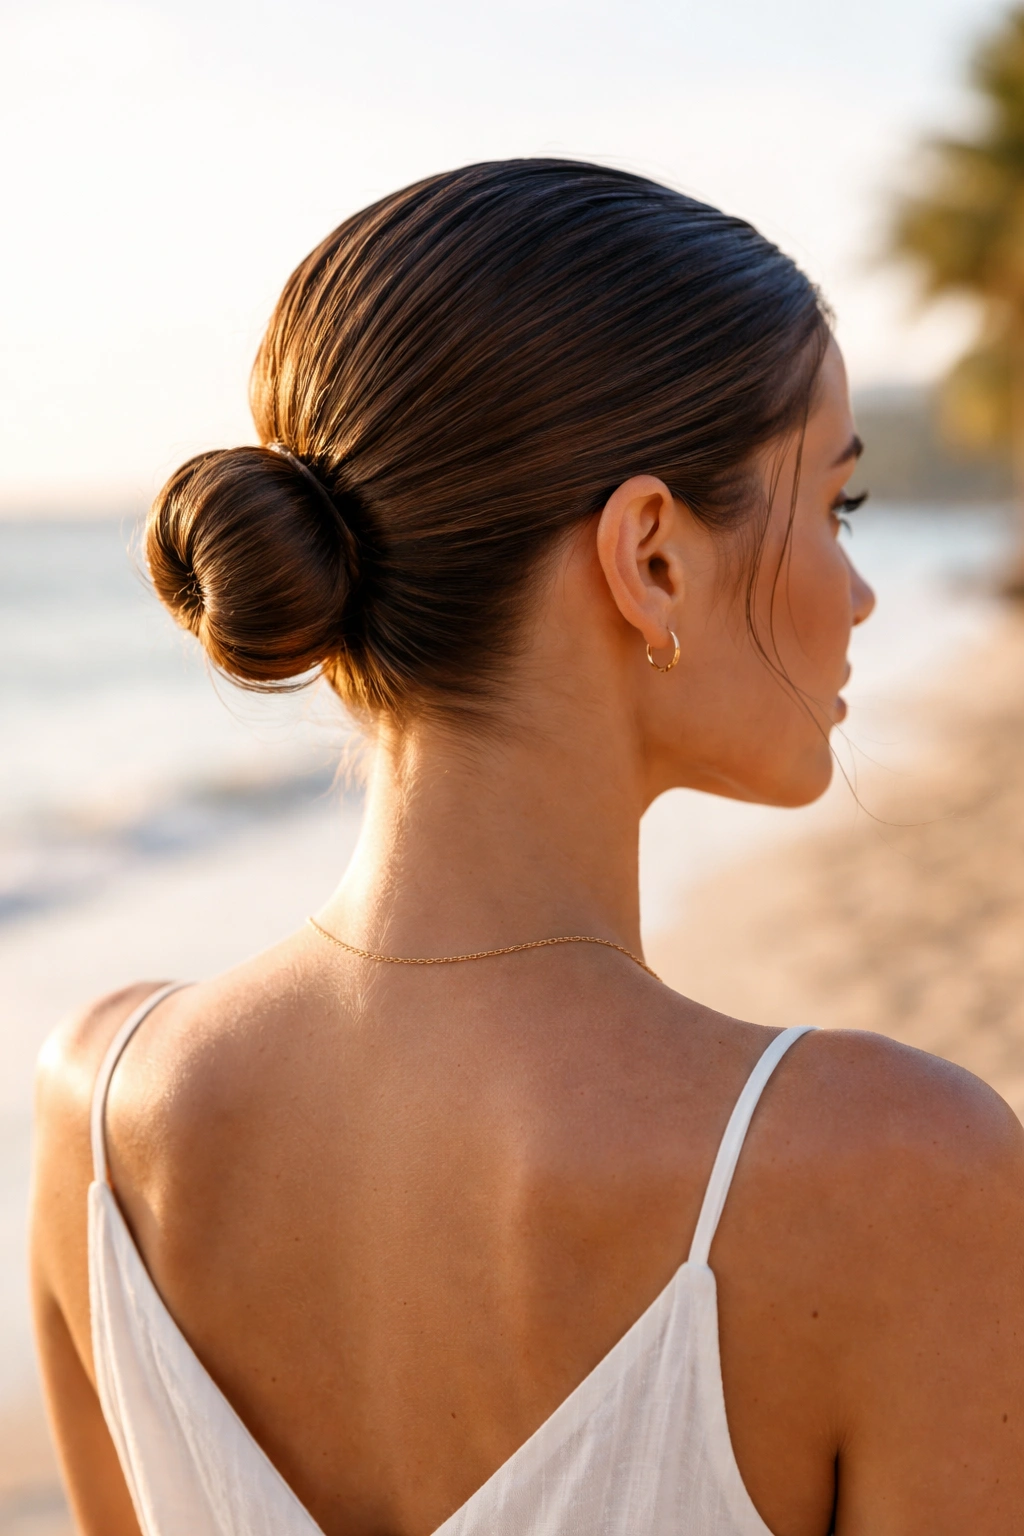
This is the style to choose when you want something that actually looks intentional and polished, not just thrown-together. It’s formed by slicking hair back with a gel or cream product, creating a smooth base for a low, tight bun that sits at the nape of your neck. It looks especially striking on darker hair and photographs beautifully, but it works on all hair types.
When to Choose the Sleek Bun Over a Messy One
While the messy bun is perfect for a full day of beach lounging, swimming, and casual hangouts, the sleek bun is your choice for beach dinners, sunset walks, or any time you want to look genuinely styled rather than effortlessly undone. It’s also more comfortable if you have very long, thick hair—slicking it back means your hair takes up less space and sits closer to your head, which is a relief on a hot day.
Creating the Sleek Base Without the Shine
You want hair to look wet and smooth, but not shiny or oily. Use a smoothing gel designed for slicked-back styles (not a shiny gel) or a leave-in conditioner mixed with a tiny bit of styling cream. Apply to damp hair and brush smoothly with a fine-tooth comb, working from your hairline straight back. Any bumps or fly-aways will be visible, so take time with this step—smoothness is the whole point.
Step-by-Step Sleek Bun Technique
- Apply smoothing gel or cream to damp hair, working it through with your fingers
- Brush hair straight back from your hairline using a fine-tooth comb, creating a smooth surface
- Gather all hair at the nape of your neck into a tight, low ponytail
- Twist the ponytail tightly and wrap it around the base to form a compact bun
- Pin very securely—this bun needs to stay put since all the structure comes from tightness, not texture
- Smooth any fly-aways with a fine comb and a tiny dab of gel
- Optional: add a delicate bobby pin or hair stick across the top of the bun for decoration and extra hold
Worth knowing: The sleek bun sits much lower than a messy bun and requires tighter elastics and more pins. It’s not ideal for all-day beach swimming because the tightness can cause headaches after several hours, but for an evening or a few hours, it’s stunning.
6. The Double Mini Bun
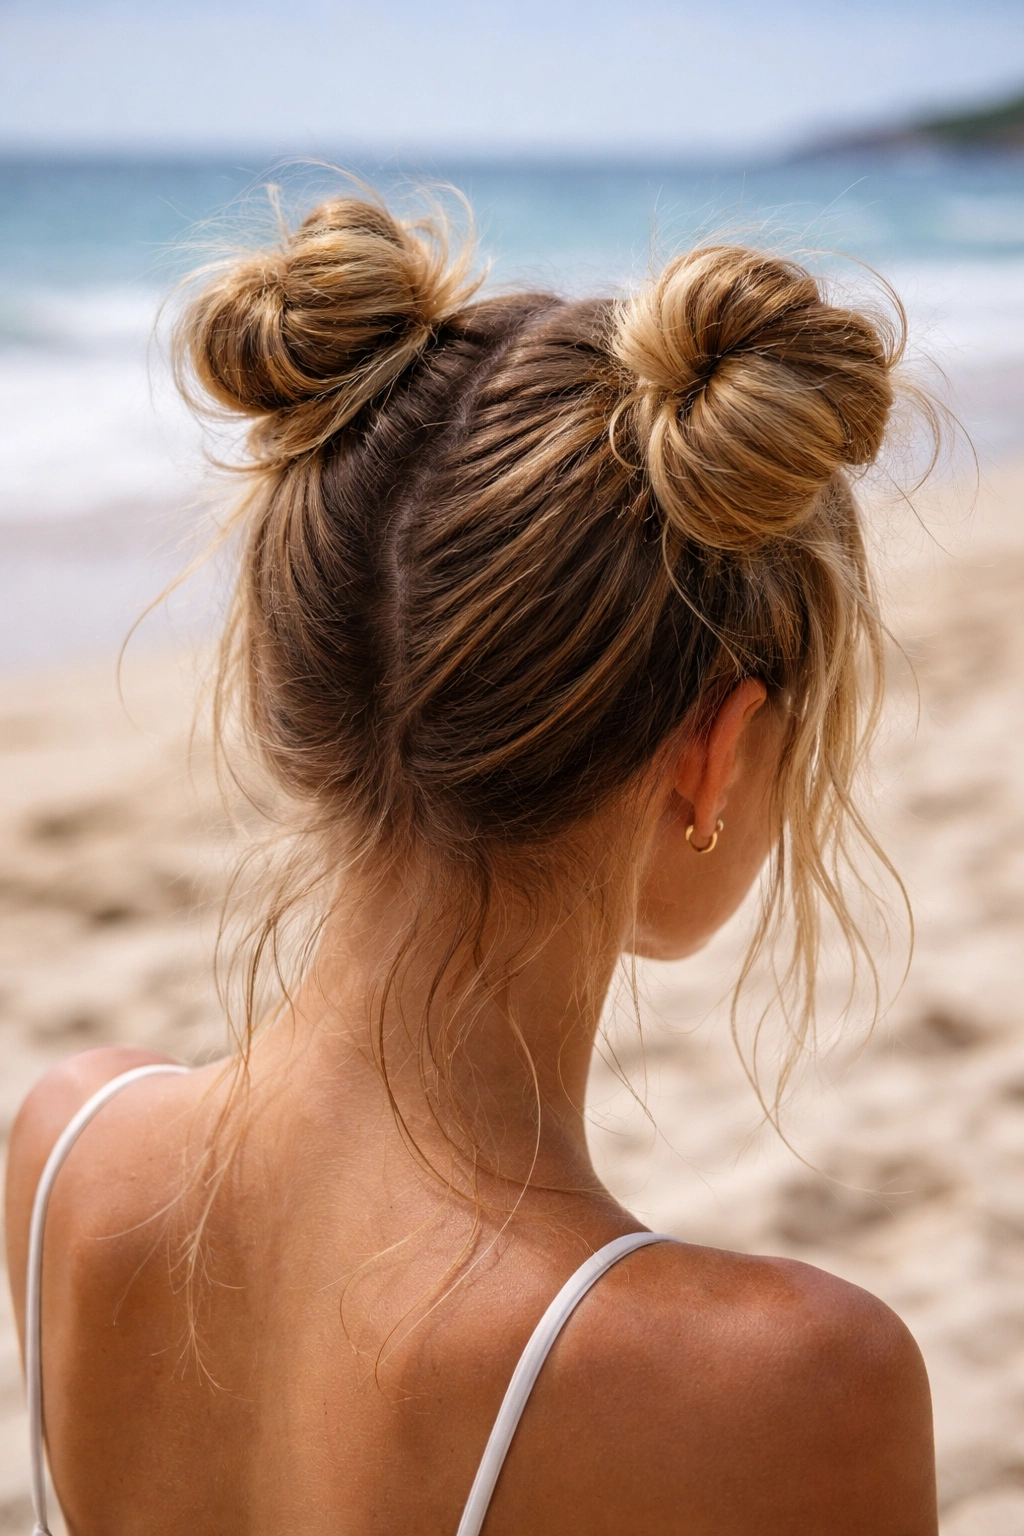
Split your hair in half and create two small buns, one on each side of your head. It’s playful and distinctly beach-casual, it distributes weight evenly so there’s minimal strain on your head, and honestly, it’s just fun and a little bit unexpected, which makes it a conversation starter.
Why Double Buns Make Sense at the Beach
Two smaller buns dry faster than one large bun, they distribute the weight of wet hair evenly across your head rather than putting all the pressure in one spot, and they’re stable enough to handle swimming and movement. They also look intentional in a way that’s different from single-bun styles—you’re clearly making a styling choice rather than just pulling your hair up.
Best Hair Types and Lengths for Double Buns
This style works beautifully on thick, curly, or textured hair because the texture naturally creates a full, voluminous bun shape even when the individual buns are relatively small. On straight, fine hair, double buns can look a bit thin unless you create texture first. The style works on hair shoulder-length and longer; if you have shorter hair, you might not have enough length to create two distinct buns.
How to Create Balanced Double Buns
- Create a center part from your hairline to the nape of your neck
- Gather one half into a high side ponytail and secure with an elastic
- Repeat on the other side, making sure both ponytails are at the same height
- Tease or backcomb each ponytail gently at the base to create texture
- Twist each ponytail and wrap it around its elastic to form a bun
- Pin each bun securely, then let a few pieces fall loose around your face
- Make sure both buns are roughly the same size so you don’t look lopsided
Pro tip: Double buns look best when they’re slightly loose and a little bit piecey rather than tight and perfect. Let them be a little chaotic—it suits the style.
7. The Undone Crown Braid Bun
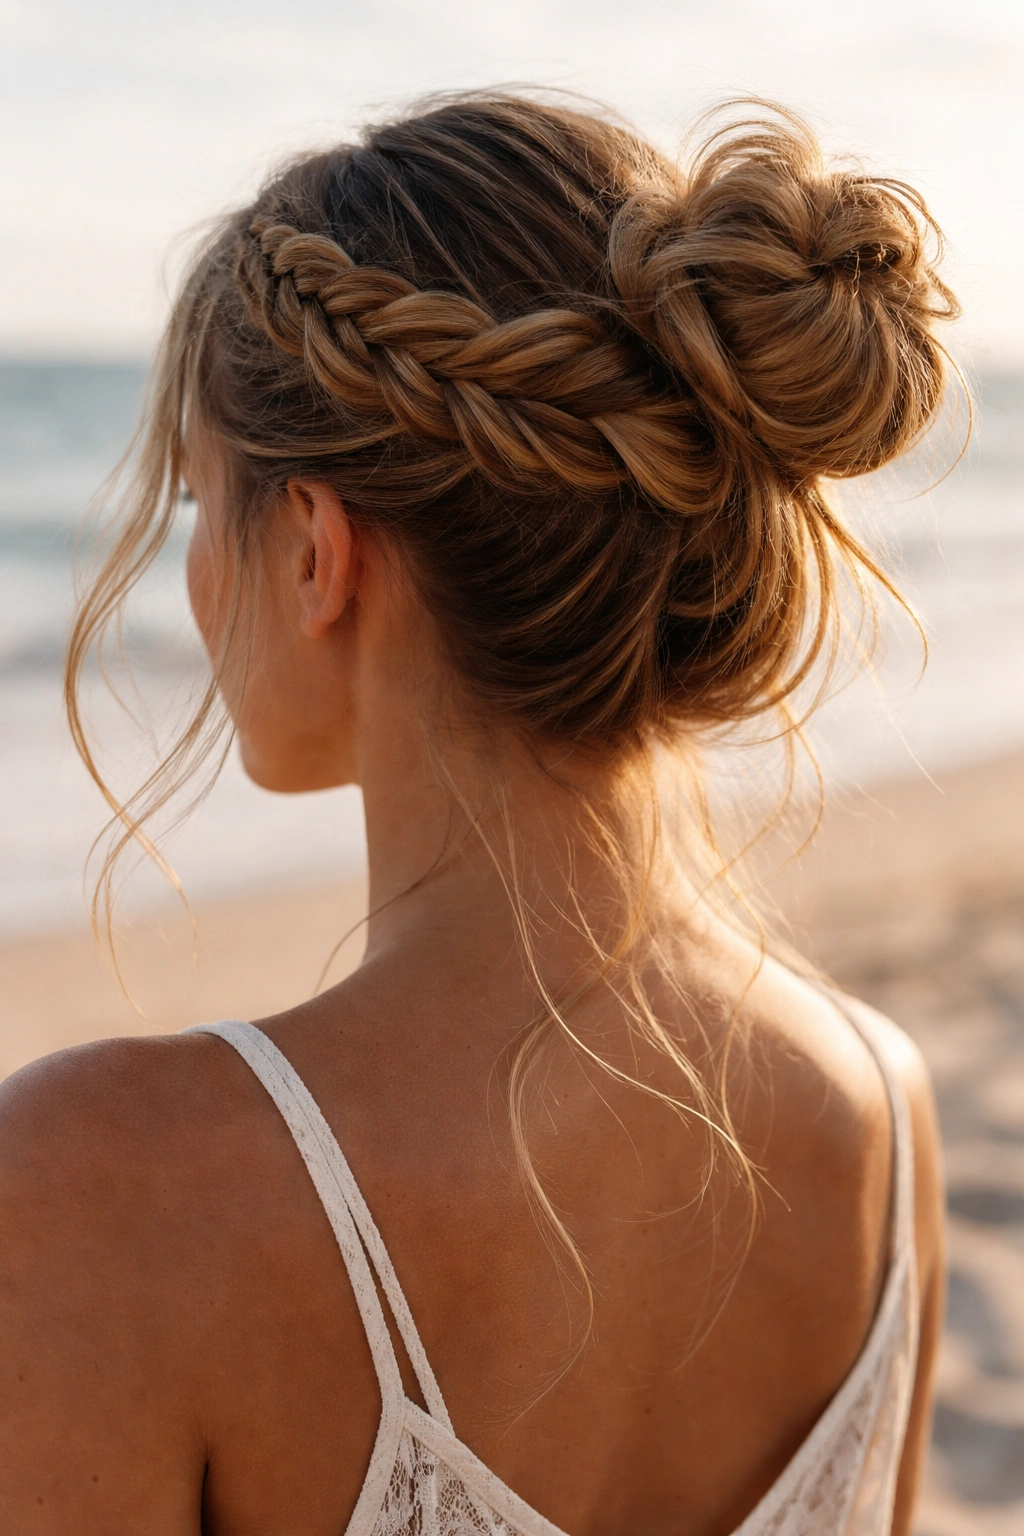
Create a halo braid around your head (a braid that starts at one ear, winds around the back of your head, and ends at the other ear), then gather your remaining hair and form a bun at the crown or back of your head. The braid wraps around the bun like a crown, creating depth and visual interest while keeping hair securely in place.
The Visual Impact of a Braid-Wrapped Bun
This style looks intentional and romantic without being fussy or overly formal—it’s special enough for a nice beach dinner but casual enough for a regular beach day. The braid adds an element of structure that makes the whole style hold better, especially when wet, and the crown effect is genuinely flattering, even when you’re makeup-free and sun-flushed from the beach.
How a Crown Braid Actually Works
A crown braid (also called a halo braid) is a Dutch braid that starts at one side of your head near your ear, travels across the back of your head, and ends at your other ear. You’re basically creating a complete braid that frames your head like a crown. Once that braid is in place, you gather your remaining hair underneath and form a bun at the base where the braid ends.
Complete Crown Braid Bun Instructions
- Create a side part slightly off-center on one side of your head
- Start a Dutch braid at the temple area on one side, incorporating hair as you work toward the back
- Continue the braid all the way across the back of your head to the opposite side
- Finish the braid at your other temple and secure the end with a small elastic
- Gather all your remaining hair (everything not caught in the braid) at the nape of your neck
- Form this gathered hair into a bun and pin it securely
- Tuck the end of your crown braid into or around the base of the bun
- Gently loosen the braid sections slightly so it looks relaxed and romantic
Insider note: This style requires a bit of practice, but it’s absolutely worth learning. Once you can do it smoothly, you’ll have a signature beach look that looks way more complicated than it actually is.
8. The Low Messy Chignon
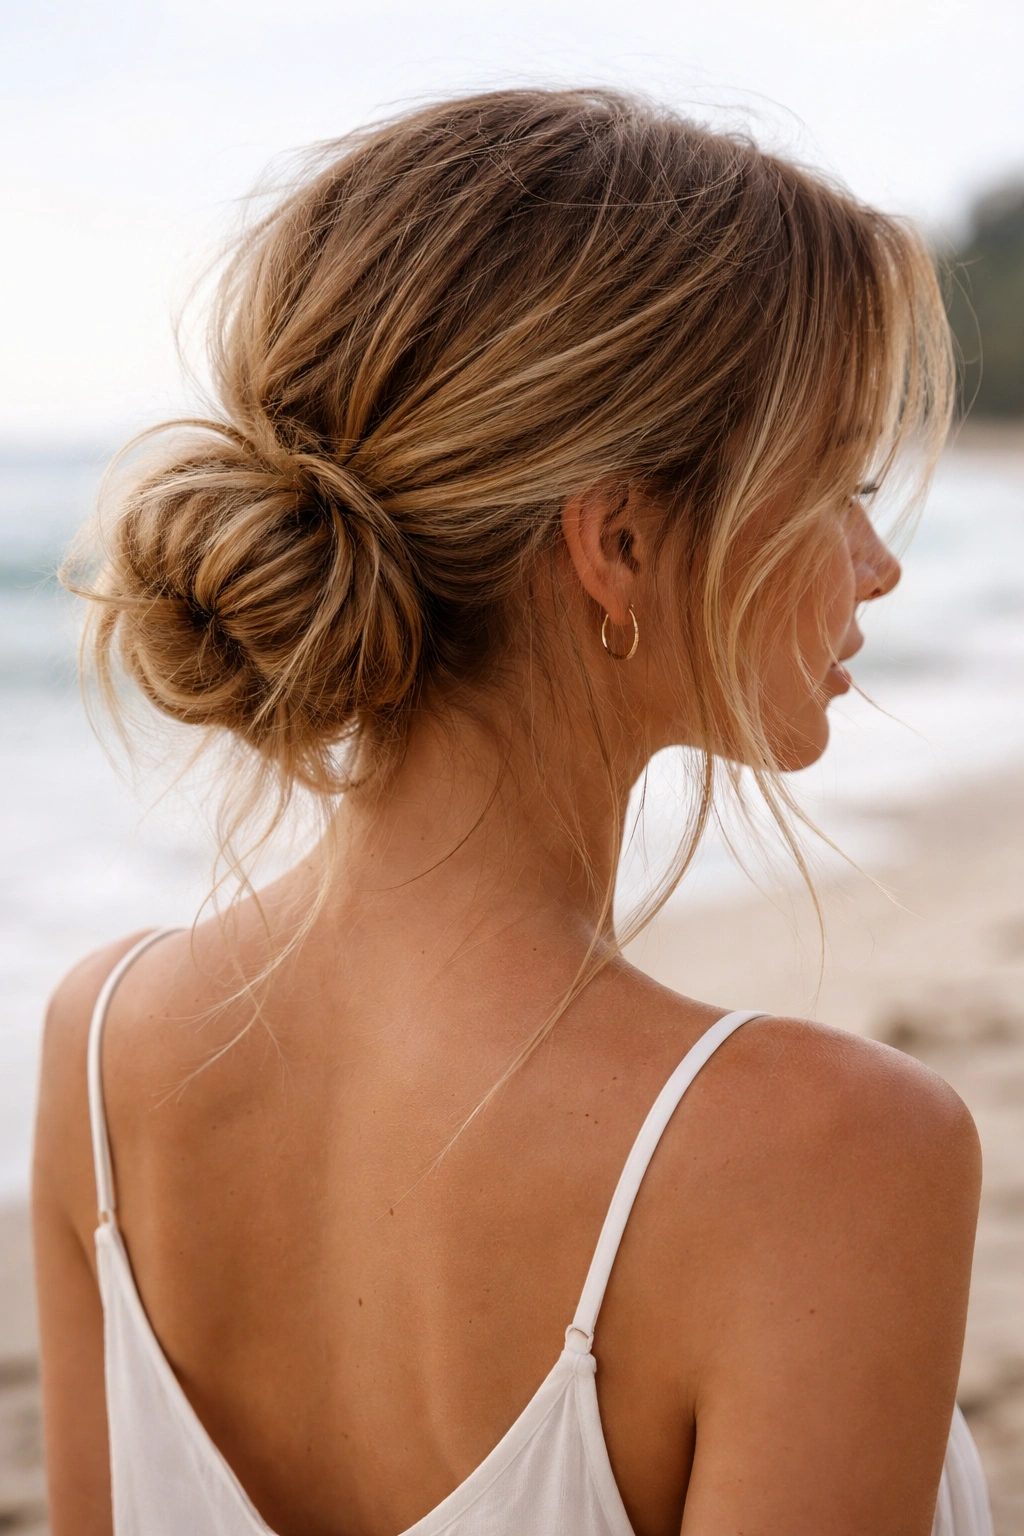
A chignon is a classical low bun, but this version is intentionally relaxed and loose, with pieces falling around your face and neck. It sits at the base of your skull rather than high on your head, making it comfortable for long wear and creating an elegant, slightly vintage vibe that’s perfect for beach dinners or casual weddings held by the water.
Why the Low Bun Feels Different From High Buns
A low bun creates a different silhouette—it elongates your neck and creates space around your face, giving you a more open, airy appearance than a high bun. It’s also more comfortable for very long hair because the weight is distributed lower and you’re not pulling hair up toward the crown. The low placement also allows more pieces to fall naturally around your face, which gives you that tousled, romantic look without having to work very hard.
The Difference Between a Chignon and Other Low Buns
A chignon is specifically loose, relaxed, and often has pieces falling intentionally around the face and nape. It’s the opposite of a tight, formal low bun. You want this style to look soft and undone, which means less pinning and more strategic loosening. It’s very French, very beach-appropriate, and surprisingly easy once you understand that the goal is controlled looseness, not perfection.
Step-by-Step Low Messy Chignon
- Apply texture spray or salt spray to damp hair and let it dry slightly until hair feels textured but not wet
- Flip your head forward and gather hair at the nape of your neck, letting some pieces escape naturally around your face
- Secure the gathered hair with an elastic, but don’t pull too tightly
- Twist the ponytail loosely and wrap it around the elastic base to form a low bun shape
- Pin the bun securely but don’t worry about hiding all the pins—some visible pins add to the aesthetic
- Pull a few face-framing pieces out deliberately, leaving them soft and slightly wavy
- Let wispy pieces fall around the nape of your neck rather than tucking everything in
- Very lightly mist with hairspray just to set it, not to stiffen it
Worth knowing: This style actually improves slightly as the day goes on and pieces gradually work loose. Unlike some buns that start perfect and fall apart, the low chignon starts loose and becomes more relaxed, which works in your favor.
Final Thoughts
The best beach bun for you depends on your hair type, how long you plan to wear it, and what you’re doing while you’re wearing it. If you’re spending a full day swimming and lounging, texture-based messy buns (the classic textured bun or the braided wrap) will save you repeatedly having to re-pin and re-style. If you’re heading out for an evening and want to look intentionally styled, the sleek bun or the crown braid bun make an impact. For pure comfort and a relaxed vibe, the double mini bun or the low chignon are hard to beat.
The real skill isn’t perfecting one bun style—it’s knowing when to use each one and being willing to let your bun evolve slightly throughout the day. The most beautiful beach buns aren’t the ones that stay exactly perfect from morning to evening. They’re the ones that start intentionally styled and gradually relax into something even better. Once you embrace that loosening process instead of fighting it, you’ll stop worrying about your hair holding up at the beach and actually enjoy the fact that no matter what happens, you’re going to end up looking effortlessly, naturally beautiful.
