



Thick, medium-length hair is a genuine gift when it comes to styling versatility. You’ve got enough length to work with multiple styling techniques, and your hair has the density to hold a bun beautifully without looking sparse or droopy. But here’s the reality: not every messy bun tutorial out there actually works for your specific hair type. Many guides assume either long, silky hair that’s easy to tame or very short hair that requires minimal bobby pins. Thick, medium hair lives in its own category—thick enough that some buns become too heavy and pull at your roots, yet not quite long enough for the ultra-romantic, heavily textured buns you see on longer hair.
The good news? There are messy bun styles specifically suited to your hair’s natural volume and length. These aren’t one-size-fits-all tutorials—they’re techniques that work with your hair’s weight and texture, not against it. The styles I’m breaking down here range from sleek-meets-undone to completely chaotic-in-the-best-way, and each one plays to the strengths of medium hair with real density behind it.
What makes a messy bun work for thick, medium hair is understanding how to distribute the weight so it doesn’t create tension headaches, how to create the illusion of texture when your hair naturally has plenty of it, and how to finish a look that feels intentionally undone rather than hastily thrown together. Let’s walk through eight variations you can master and rotate based on your mood, your schedule, and what kind of day you’re having.
1. The Twisted Wrap Bun
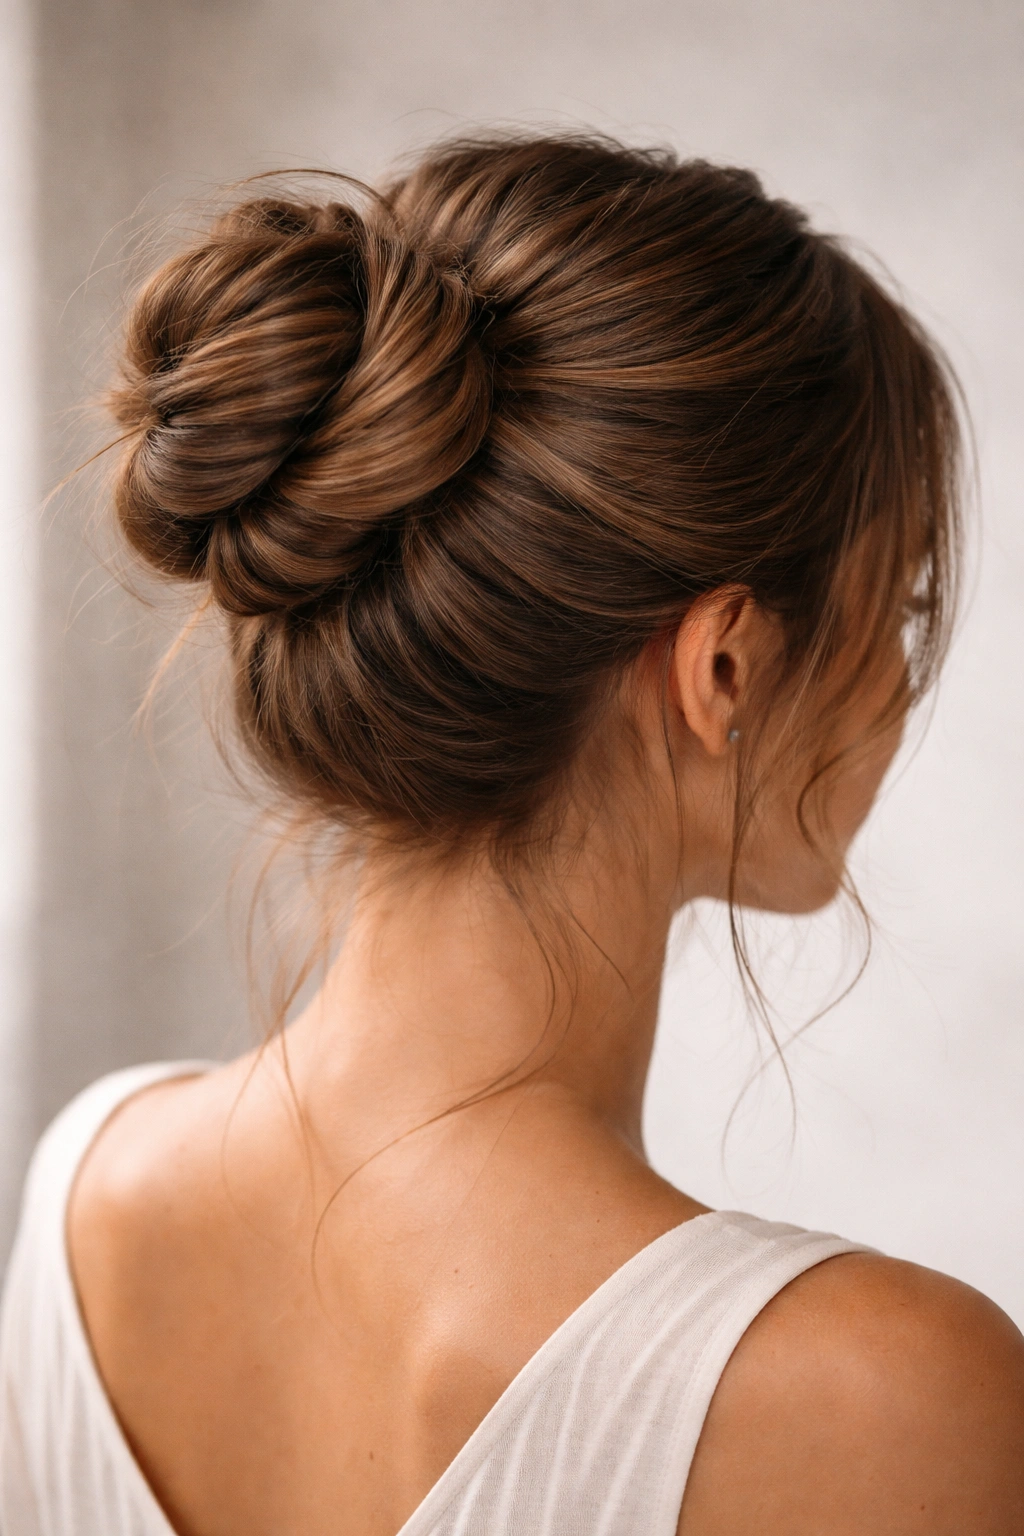
This style starts with two sections of hair twisted separately, then wrapped around each other at the crown before being looped into a bun. For thick, medium hair, the twisted-wrap approach actually distributes volume more evenly than traditional ponytail-based buns, which means less strain on your hairline and a more balanced look overall. The twists add visual interest and texture that reads as intentionally messy rather than actually messy.
Why This Works for Thick Medium Hair
Twisting your hair before wrapping it around itself naturally tightens the hair slightly, which means your thick hair stays more manageable and doesn’t feel heavy at the base. The wrapped construction means the weight is distributed across multiple pressure points rather than pulling from one single ponytail holder position. This style also works beautifully on hair that’s been left to dry naturally or air-dried with some texture—you’re not fighting your hair’s natural wave pattern; you’re working with it.
How to Create It Step-by-Step
- Brush your hair straight back or slightly to one side, depending on your face shape and preference
- Divide your hair into two equal sections down the middle of your head from crown to nape
- Twist the left section tightly from root to end, keeping tension consistent as you work
- Twist the right section the same way, matching the tightness of the left side
- Wrap the two twists around each other in a spiral, starting at the crown and working downward
- Coil the twisted spiral up into a bun shape and secure with bobby pins inserted horizontally through the center of the bun
- Gently pull some pieces forward at the face and loosen the twists slightly for that undone feel
- Finish with texturizing spray or light hairspray to set everything without adding stiffness
Pro Styling Tip
Do this style on second-day hair or after using a texture spray—fresh, squeaky-clean hair can be slippery and harder to twist tightly. If your twists keep unraveling as you’re wrapping them, you might not have enough texture; in that case, try the style after a dry shampoo pass or overnight braids.
2. The High Textured Knot Bun
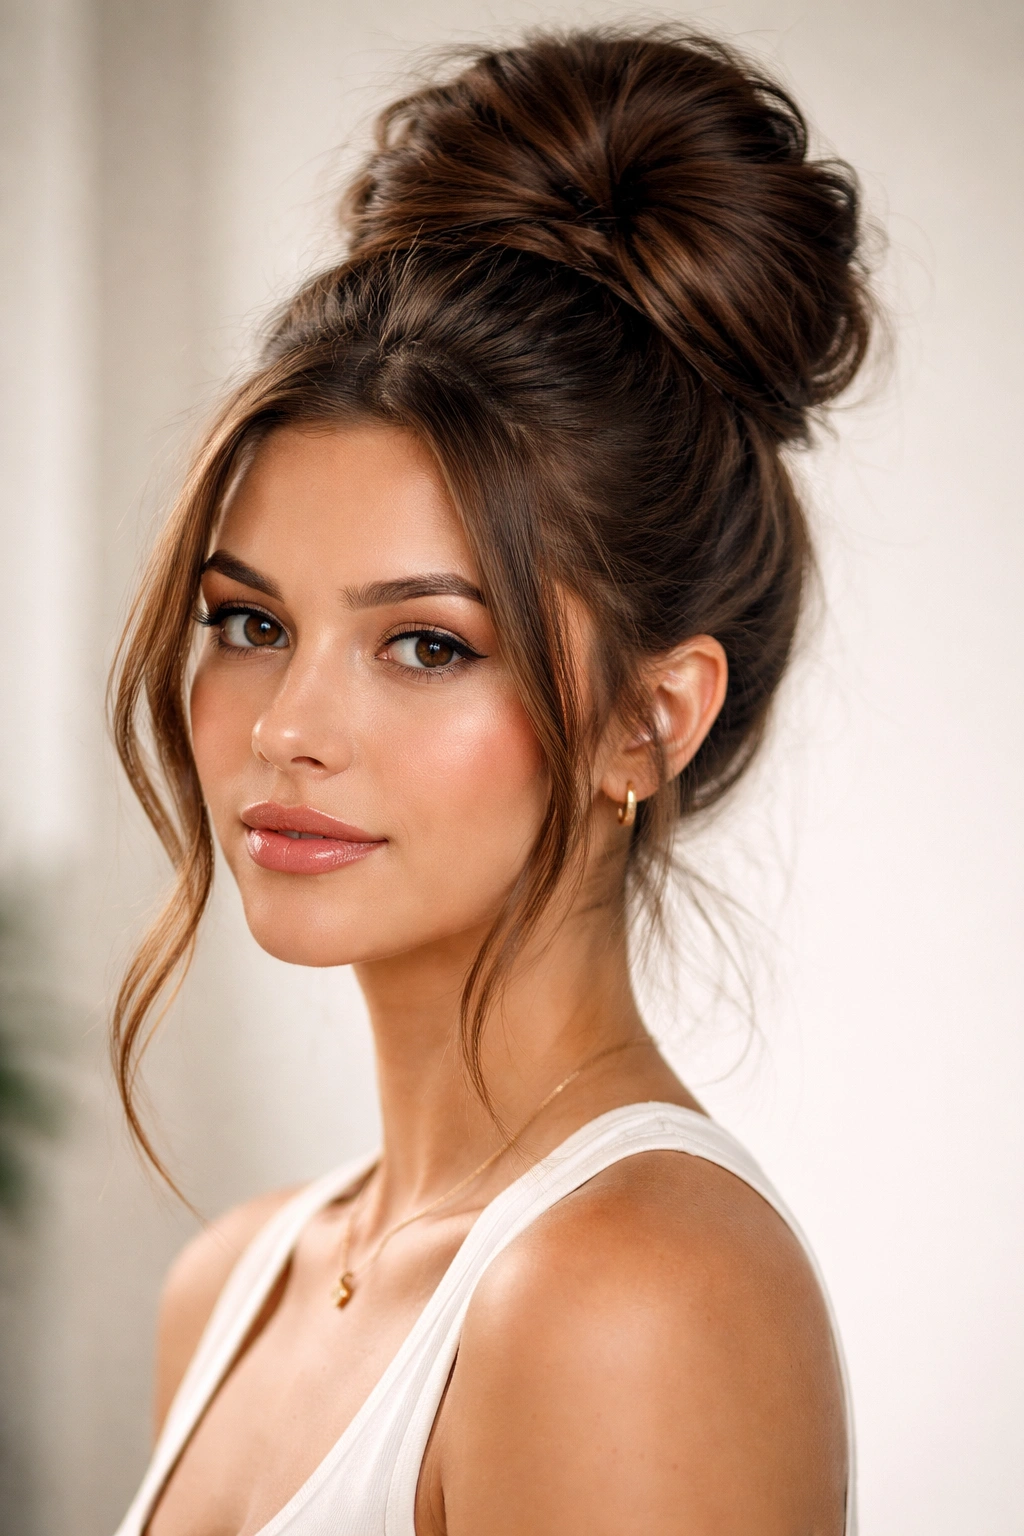
This approach involves creating a high ponytail, then splitting it in half, crossing the sections over each other to form a knot, and pinning the result into a bun. The knot adds visual complexity and works beautifully with thick hair because the natural density prevents the knot from looking thin or pathetic. Your thick hair fills out the shape immediately, which is why this style looks so much more sophisticated on you than on people with finer hair textures.
Why This Works for Thick Medium Hair
The knot formation naturally incorporates all your hair into a cohesive structure rather than trying to arrange it into a circular shape, which can sometimes look too neat (and therefore less “messy”). The knotted base also means you have more control over which pieces fall out—you can strategically loosen specific sections instead of hoping strands cooperate. Thick hair holds the knot shape throughout the day without looking deflated by evening.
How to Create It Step-by-Step
- Gather your hair into a high ponytail at the crown, using an elastic that matches your hair color
- Divide the ponytail into two equal sections
- Cross the left section over the right, then bring the right section over the left (one full knot)
- Cross again to form a second knot, keeping the knots relatively tight
- Stop when you’ve used most of your ponytail length, leaving enough hair to tuck into the knot structure
- Coil the remaining tail and tuck it underneath or through the knots and secure with bobby pins
- Gently tug at the knots to loosen and fluff them—this is where the “messy” element comes in
- Pull small pieces around the face and at the nape for that undone framings effect
- Spritz with flexible hold hairspray so the knots stay defined but don’t feel stiff
Pro Styling Tip
If your knots feel too tight or formal-looking, use a fine-tooth comb to gently brush out the knot surface—this breaks up the perfect line and adds instant texture. The goal is a knot that looks a bit rumpled from the start.
3. The Side Scoop Bun
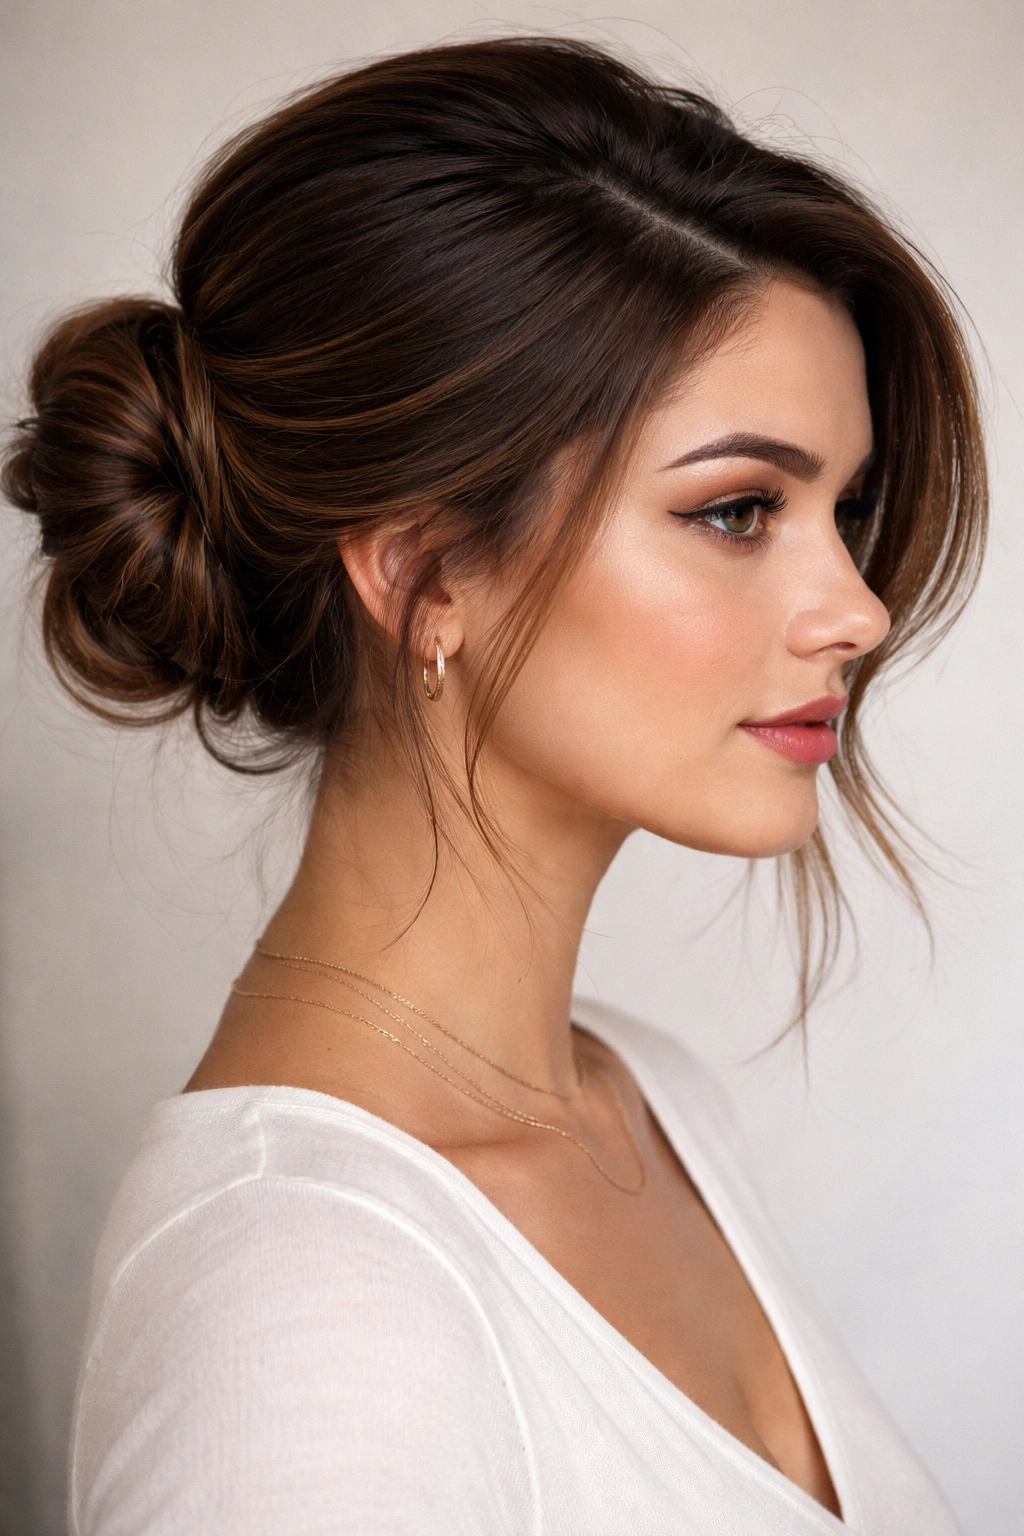
This style involves gathering your hair from a deep side part, scooping it up toward the back and side of your head, and anchoring it into a low-to-mid height bun. The deep side part immediately adds asymmetry and visual interest, and your thick hair gives the bun presence without looking overdone. This style works especially well for people whose faces look better with one side slightly more exposed, since the side scoop naturally accommodates that.
Why This Works for Thick Medium Hair
The side positioning means the bun isn’t sitting directly at the back of your crown, where it can feel heavy or pull too much. Instead, it sits more toward your mid-back, and the weight is supported by the side-parted structure of the front section. Thick hair actually looks better slightly off-center because the asymmetry prevents the style from looking like a simple, utilitarian bun and elevates it into something more intentional.
How to Create It Step-by-Step
- Create a deep side part, pulling most of your hair to one side (whichever side you prefer)
- Use a fine-tooth comb to smooth the smaller side section against your head
- Gather the larger side section and scoop it up toward the side-back of your head, keeping some texture and not pulling too tight
- Secure with an elastic, leaving about 2 inches of the scoop loose for texture
- Divide the ponytail into 2-3 sections and twist each one separately
- Wrap the twists around the base of the ponytail to form the bun shape and secure with bobby pins
- Leave the smaller side-parted section slightly textured (don’t smooth it flat against your head)
- Pull wisps from around your face and from the nape for softness
- Lock everything with a light-hold hairspray that allows some movement
Pro Styling Tip
Th deeper your side part, the more dramatic and intentional the style will look. If you’re worried about the side section looking too flat, use a texture spray on it before creating the part—this gives you grip without adding shine or stiffness.
4. The Crisscross Crown Bun
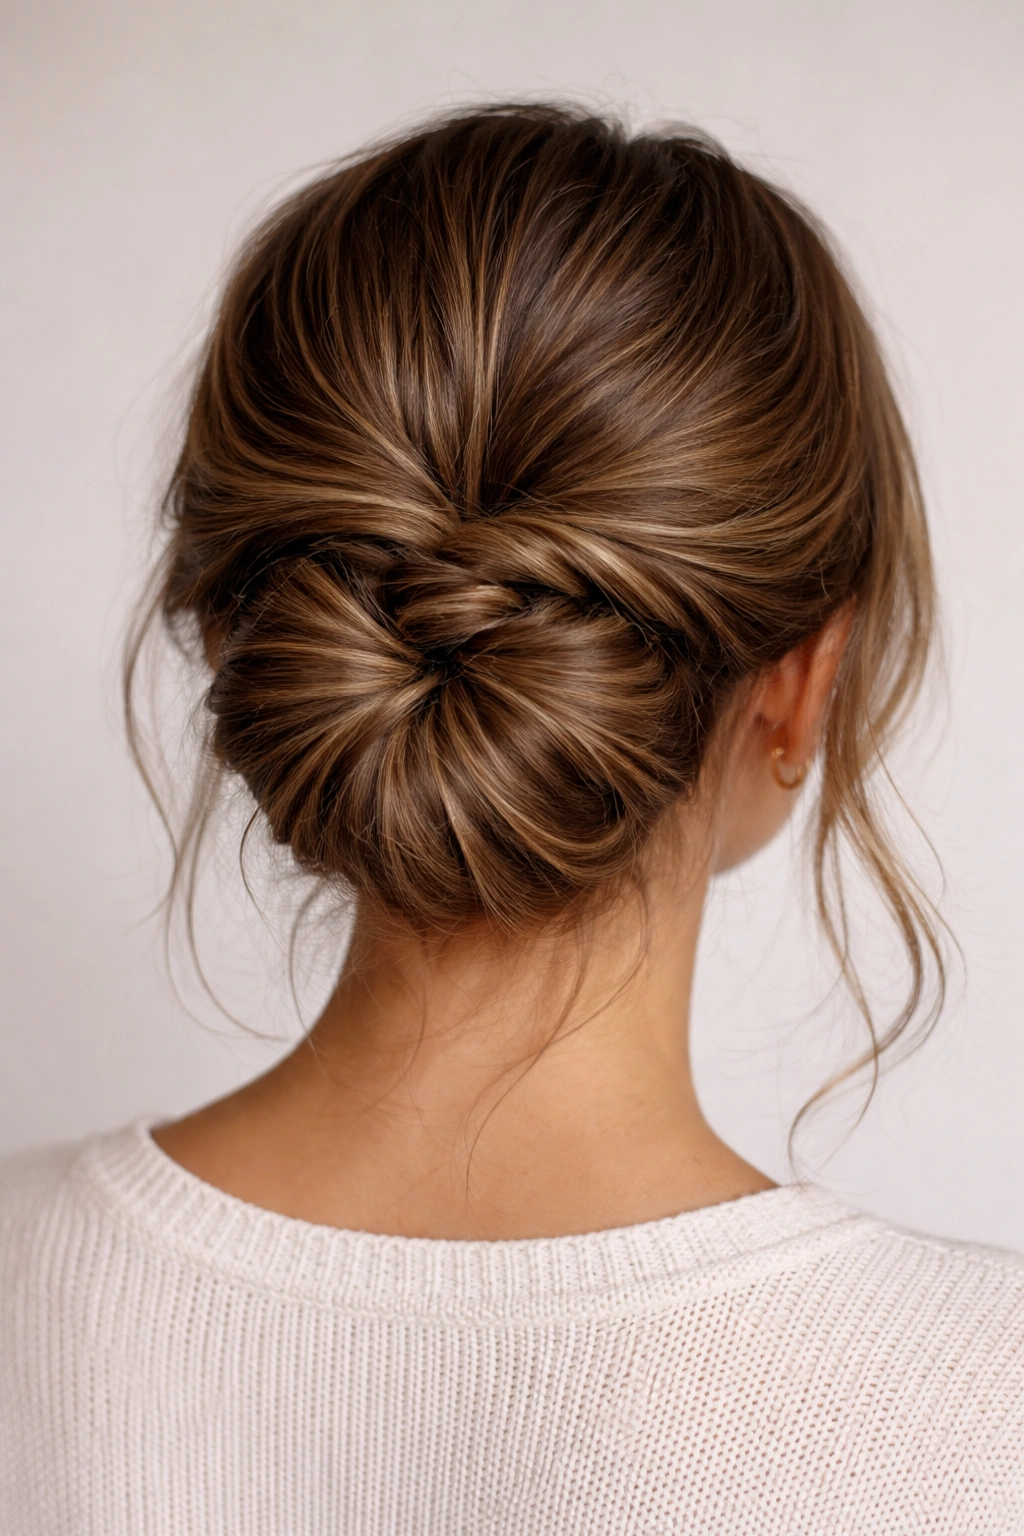
This style involves creating two low pigtails, then crisscrossing them at the back of your head and coiling them into a bun. It’s more playful and intricate than it sounds, and your thick hair makes the multiple sections look full and intentional rather than thin and stringy. The crisscross element appeals to people who like a bit of visual movement even when their hair is up.
Why This Works for Thick Medium Hair
Two lower ponytails are easier to manage and distribute weight more evenly than one high ponytail, and crisscrossing them creates texture and dimension automatically. Your thick hair fills out each section without looking anemic or requiring tons of backcombing. The style has built-in visual interest from the crisscross pattern, so it reads as “intentionally styled” even when the final bun is deliberately undone.
How to Create It Step-by-Step
- Create a center part from your forehead to the nape of your neck
- Divide your hair at the back center, creating two sections for low pigtails
- Secure each pigtail with a matching elastic at roughly ear level, slightly toward the back
- Take the left pigtail and bring it across to the right side of the back of your head
- Take the right pigtail and bring it across to the left side, crossing over the left pigtail
- Let them crisscross once or twice, then gather both sections together and secure with a single elastic
- Divide the gathered hair into 2-3 sections and twist each one loosely
- Coil the twisted sections into a bun and secure with bobby pins
- Gently tug at the crisscross sections to loosen them and create texture
- Pull some pieces out around the face and release a few wisps at the nape
- Use a texture spray or flexible-hold hairspray for a polished-messy finish
Pro Styling Tip
This style is forgiving because any small imperfections in the crisscross actually read as intentional texture. If the pigtails don’t cross perfectly symmetrically, it only adds to the undone aesthetic.
5. The Low Braided Wrap Bun
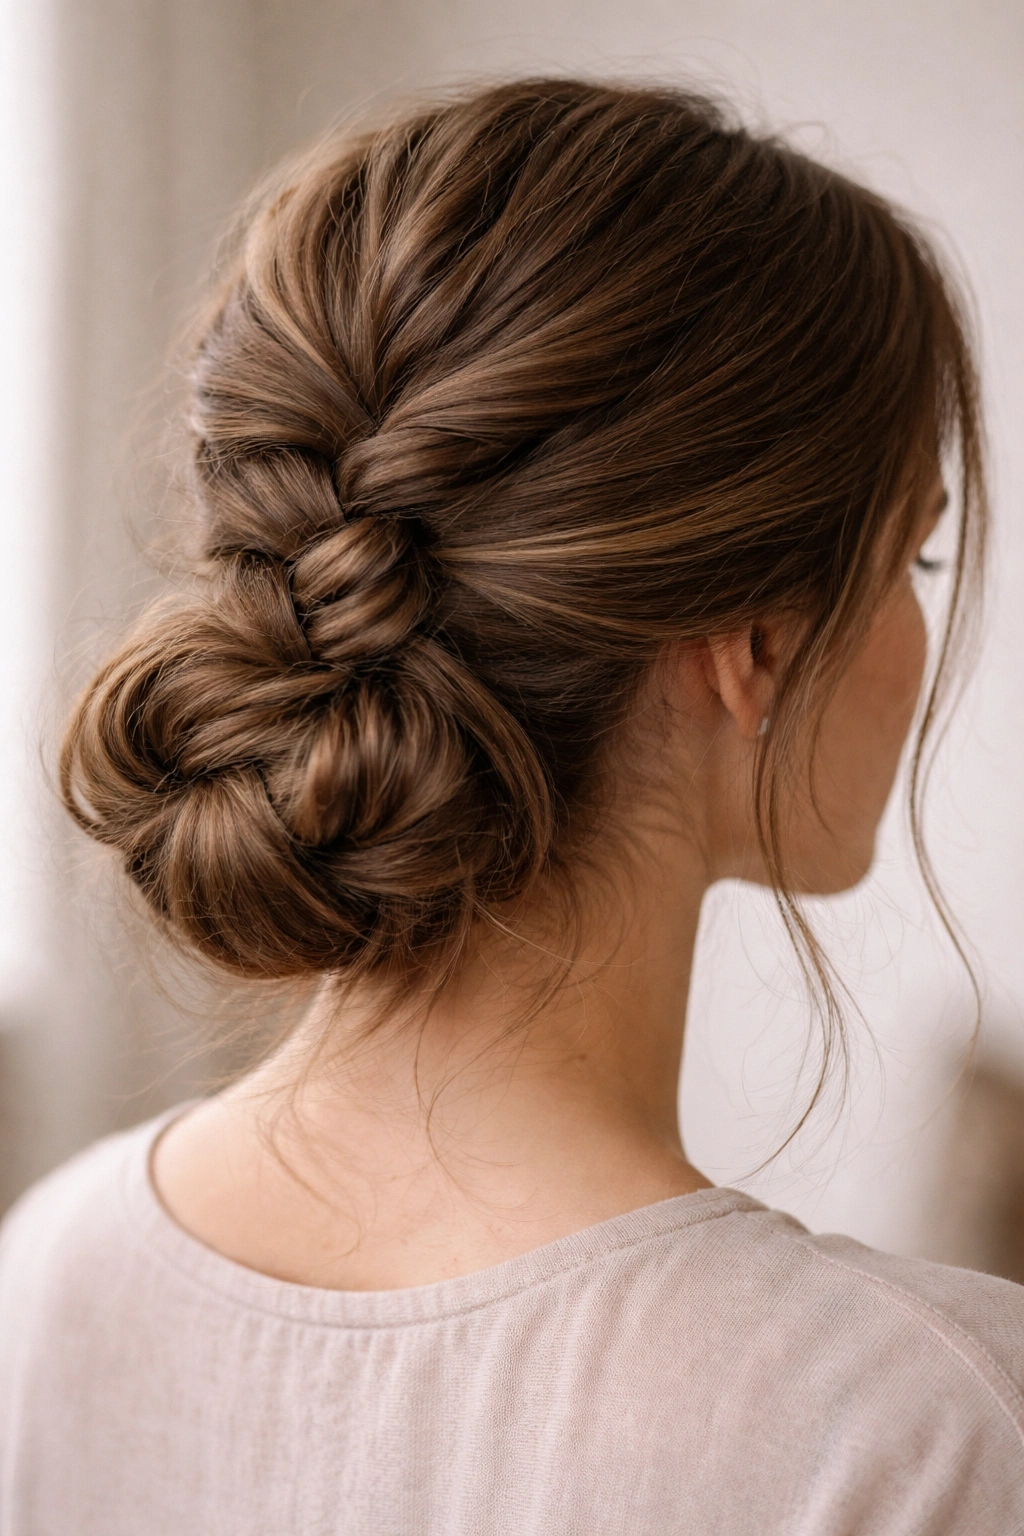
Start by creating a single braid down the back or side of your head, then coil and pin that braid into a low bun. The braid does all the heavy lifting in terms of structure, while the coiled braid creates natural texture in the final bun. This style is particularly beautiful on people with thick hair because the braid itself has visual presence and the bun that follows is automatically textured.
Why This Works for Thick Medium Hair
A braid is one of the easiest ways to tame thick hair and make it look intentionally styled. When you wrap the braid into a bun, you’re not fighting to create texture or dimension—the braid weave provides that automatically. Thick hair also means your braid has real substance, so the final bun doesn’t look skinny or sparse. This style takes a bit longer than throwing your hair into a ponytail bun, but it holds beautifully and looks more deliberate.
How to Create It Step-by-Step
- Brush your hair smooth and create either a center part or a deep side part, depending on your preference
- Section off a portion of hair at the crown or side, depending on whether you want a crown braid or side braid
- Divide the section into three strands and begin braiding, adding hair to each strand as you work down toward the nape
- Braid all the way to the end, keeping tension consistent throughout
- Wrap the finished braid around itself into a bun shape, starting at the base of the braid
- Pin the bun in place with bobby pins inserted horizontally through the braid weave so they disappear
- Gently loosen the braid strands by pulling them slightly outward to add volume and texture
- Release a few pieces around your face for a softer look
- Tug gently at the bun itself to create a slightly undone appearance
- Finish with a light hairspray that won’t make the braid feel stiff or crunchy
Pro Styling Tip
If you want maximum texture in the final bun, loosely braid rather than tightly, and loosen the braid strands generously before coiling it. The looser your initial braid, the more textured and voluminous your final bun will be.
6. The Doubled-Section Swoop Bun
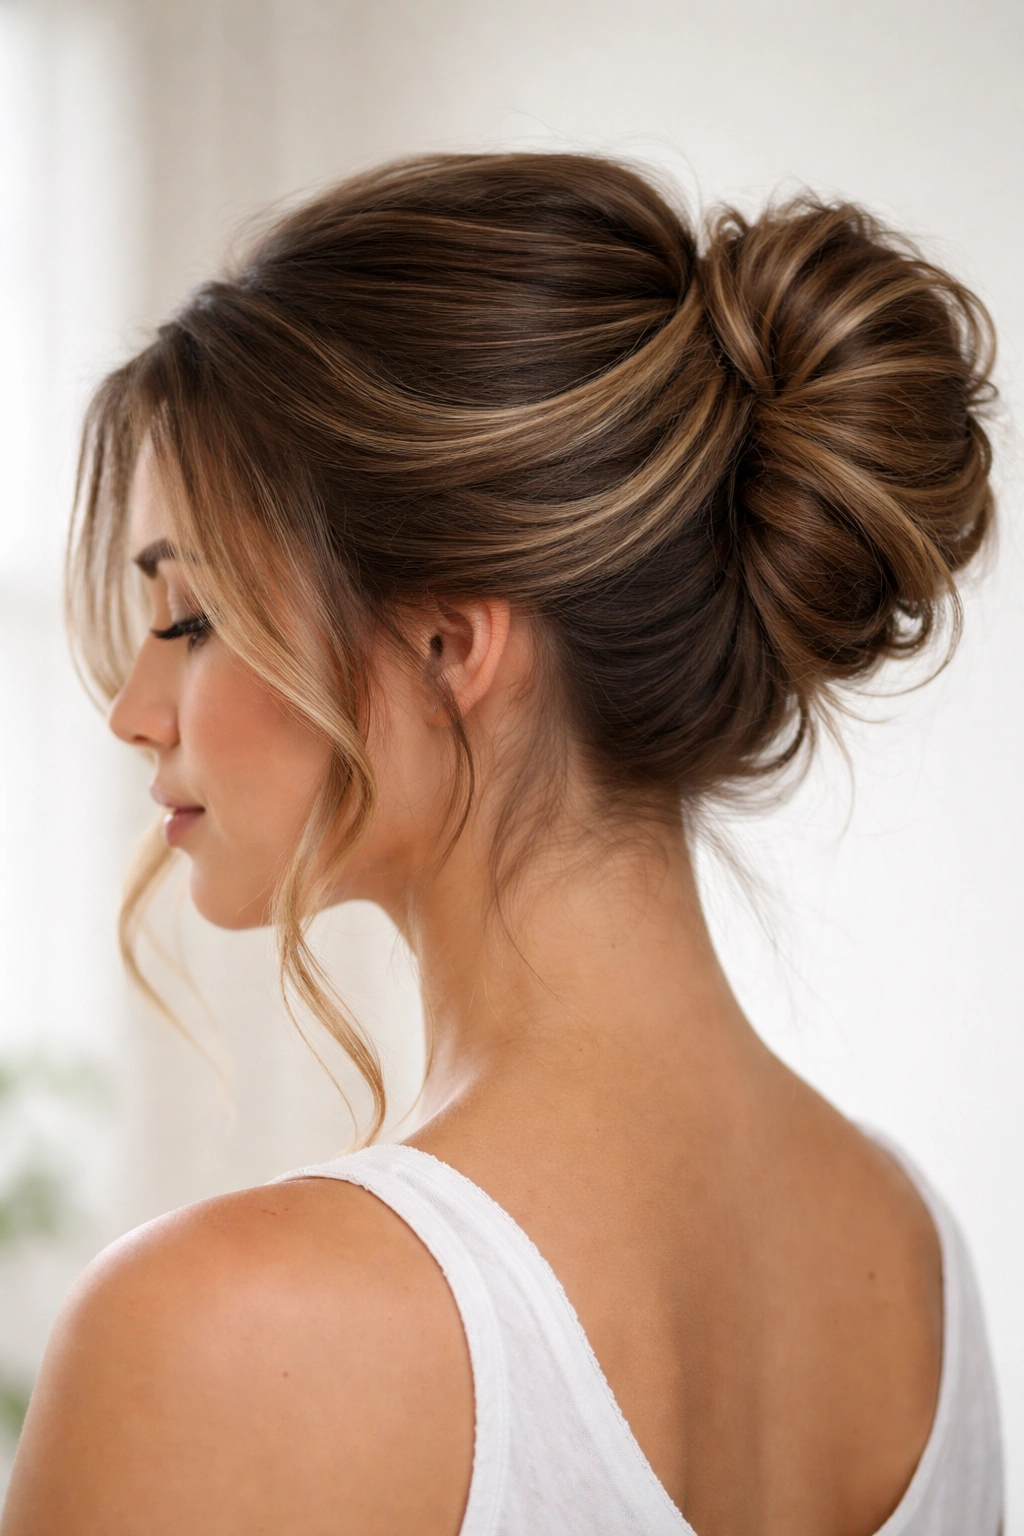
This style involves creating two sections of hair, swooping each one toward the back and sides, then gathering and pinning them into a bun. The swooping motion creates movement and visual softness, and your thick hair actually benefits from the doubled-section approach because it prevents one massive bulk at the base. Instead, you get two balanced swoop shapes that together form a fuller, more sophisticated bun.
Why This Works for Thick Medium Hair
Two swoops are easier to control and style than one massive bun, especially when your hair is thick and naturally wants to bulk up. The swooping motion pulls sections up and back at different angles, which creates height and dimension at the crown. Thick hair holds the swoop shape beautifully without needing excessive product or pins.
How to Create It Step-by-Step
- Create a deep side part or a center part, depending on which direction suits your face best
- Section off the first portion of hair from one side of the part
- Pull that section up and back in a swooping motion, twisting it slightly as you bring it toward the back of your head
- Secure that swoop at roughly mid-back with a bobby pin
- Section off the hair from the other side of the part
- Swoosh that section up and back as well, twisting it slightly and positioning it slightly higher or lower than the first swoop
- Cross or align the two swoops so they sit together gracefully at the back center of your head
- Gather both swoops together with an elastic
- Twist or braid the gathered section and coil it into a small bun, pinning as you go
- Gently loosen the swoops to create wave-like texture
- Pull a few pieces forward at the face and a few at the nape
- Set with flexible-hold hairspray so the swoops maintain their shape without feeling rigid
Pro Styling Tip
Practice the swooping motion a few times before pinning—the key is bringing the section up and back in one smooth motion rather than jerky movements. A texture spray applied before you start makes the swooping easier because your hair has more grip.
7. The Nested Loops Bun
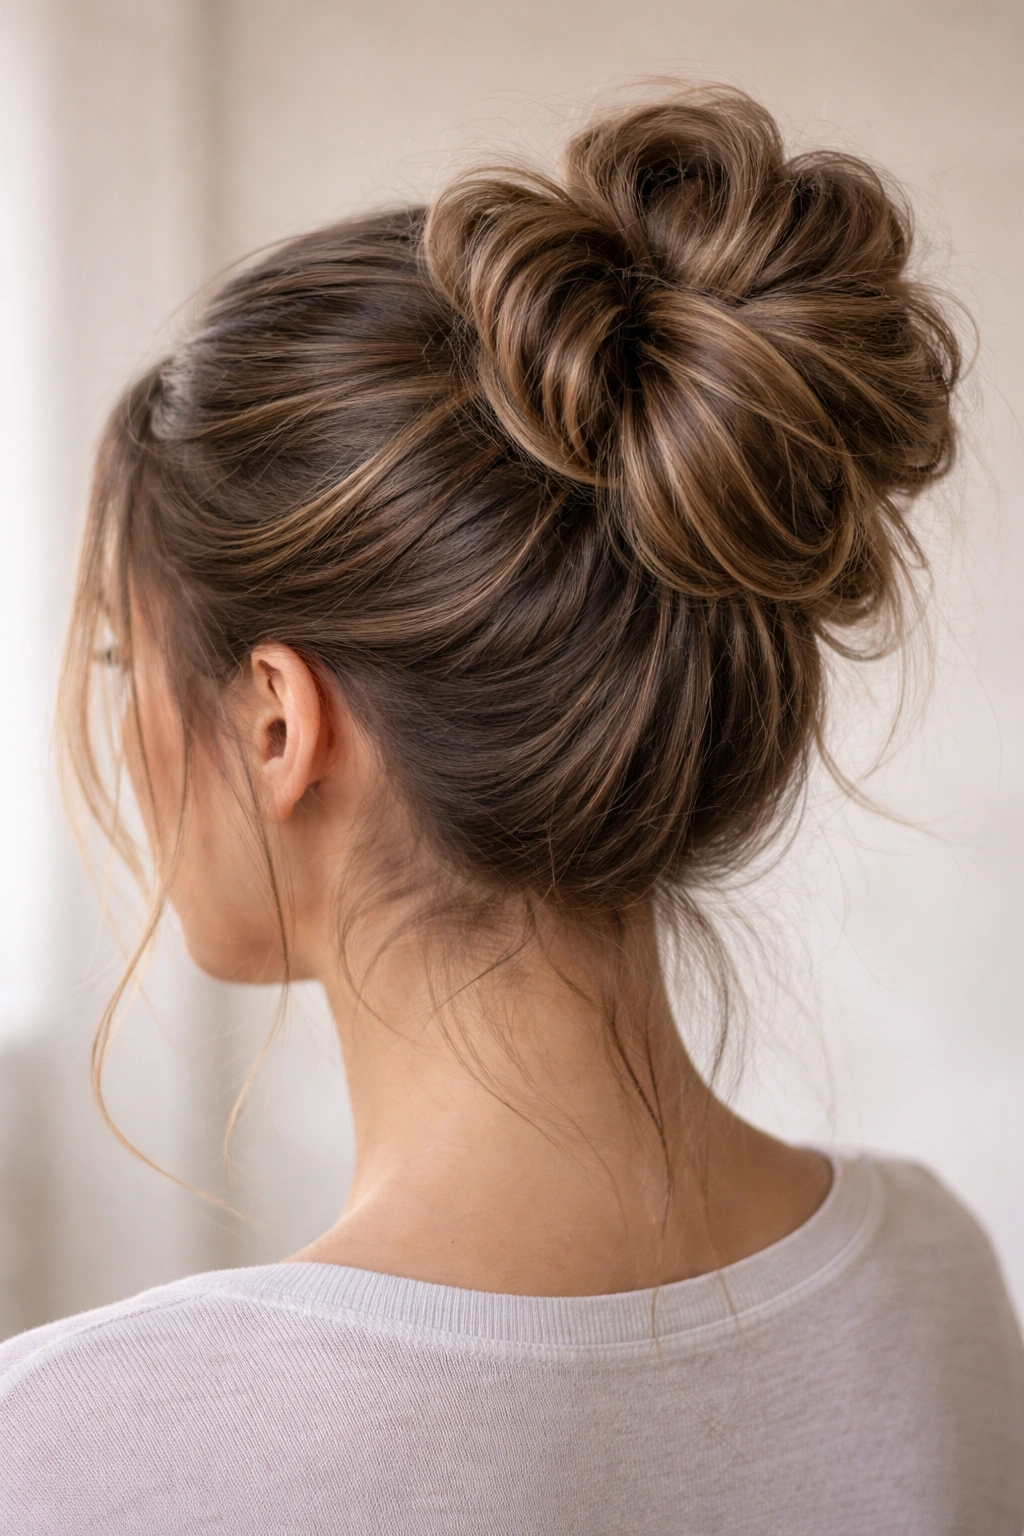
This technique involves creating a high or mid-height ponytail, then dividing it into 3-4 sections and looping each section back through the base of the ponytail to create a nested, textured effect. It sounds complicated but it’s actually quite intuitive, and your thick hair means each loop has real presence and fullness. The nested effect automatically reads as textured and intentionally undone.
Why This Works for Thick Medium Hair
Nested loops are a great option for thick hair because they embrace the volume rather than trying to tame it. Each loop you create adds visual interest and dimension, and your hair’s natural thickness means the loops don’t look thin or wispy. This style works beautifully on straight hair, wavy hair, and curly hair alike, making it a versatile option year-round.
How to Create It Step-by-Step
- Create a high or mid-height ponytail and secure with an elastic
- Divide the ponytail into 3-4 roughly equal sections
- Take the first section and create a loop by doubling it back through the center of the ponytail base, securing the end of the loop with a bobby pin
- Repeat with the second section, creating another loop that sits next to or overlaps the first
- Continue with the remaining sections until all sections are looped and pinned
- Gently pull on the loops to loosen and fluff them, creating a fuller, more textured appearance
- Allow some small pieces to fall around your face and neck for softness
- Lightly tease any sections that look too sleek or neat
- Finish with texturizing spray or a light-hold hairspray that won’t flatten the loops
Pro Styling Tip
If you want a more romantic, fuller look, create 4-5 smaller loops instead of 3 large ones. If you prefer a sleeker, more structured look, stick to 3 larger loops. Either way, loosen them generously—the loosening step is where the magic happens.
8. The Textured Base Bubble Bun
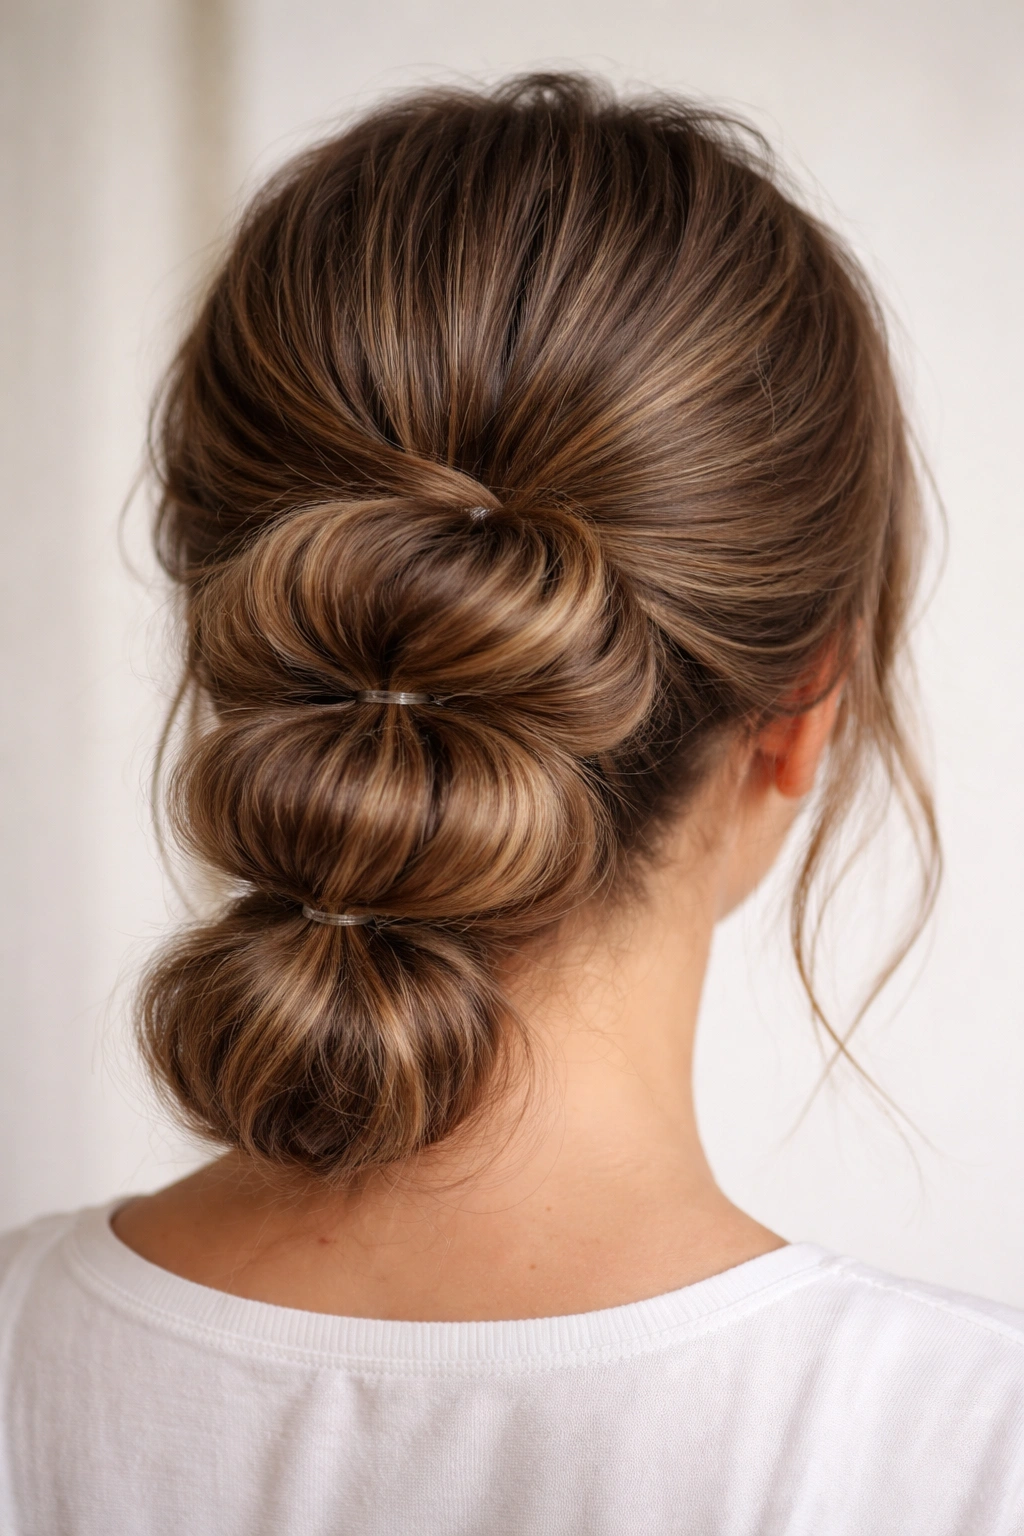
This style involves creating a low ponytail, then dividing it into 3-4 sections with elastics placed an inch or so apart, then gently pulling each section out to create bubble shapes, and finally coiling the entire bubbled ponytail into a bun. It’s a bit more involved than some other styles, but the result is incredibly textured and voluminous, which plays beautifully to thick hair’s natural strengths.
Why This Works for Thick Medium Hair
Bubble buns are usually done on long hair to show off multiple bubbles, but a shortened version works beautifully on medium-length thick hair. Your hair has enough weight and density to fill out each bubble shape without looking anemic. The bubbled texture means your bun automatically looks intentionally undone without requiring excessive teasing or backcombing. Each bubble adds visual interest and height.
How to Create It Step-by-Step
- Gather your hair into a low ponytail at the nape and secure with an elastic
- Place a second elastic approximately 1 to 1.5 inches down from the base elastic
- Gently pull the hair between the two elastics outward and upward to create a puffy bubble shape
- Place a third elastic another 1 to 1.5 inches down and repeat the pulling motion
- If you have enough length, add a fourth elastic and create one more bubble
- Take the remaining ponytail tail and coil it into a small bun shape
- Tuck the coiled bun up underneath or into the center of the bubbled section and secure with bobby pins
- Gently pull on each bubble to loosen and fluff it for maximum texture
- Release some pieces around your face and a small section at the nape for softness
- Use a texture spray or flexible-hold hairspray to set everything without making it feel stiff
Pro Styling Tip
The tension of your initial ponytail matters—if it’s too tight, the bubbles look harsh and uncomfortable; if it’s too loose, they won’t hold their shape. Aim for a ponytail that’s snug but not so tight that it pulls on your hairline. Also, the pulling motion should be gentle and even; if you yank at the bubbles too hard, they’ll deflate throughout the day.
Final Thoughts
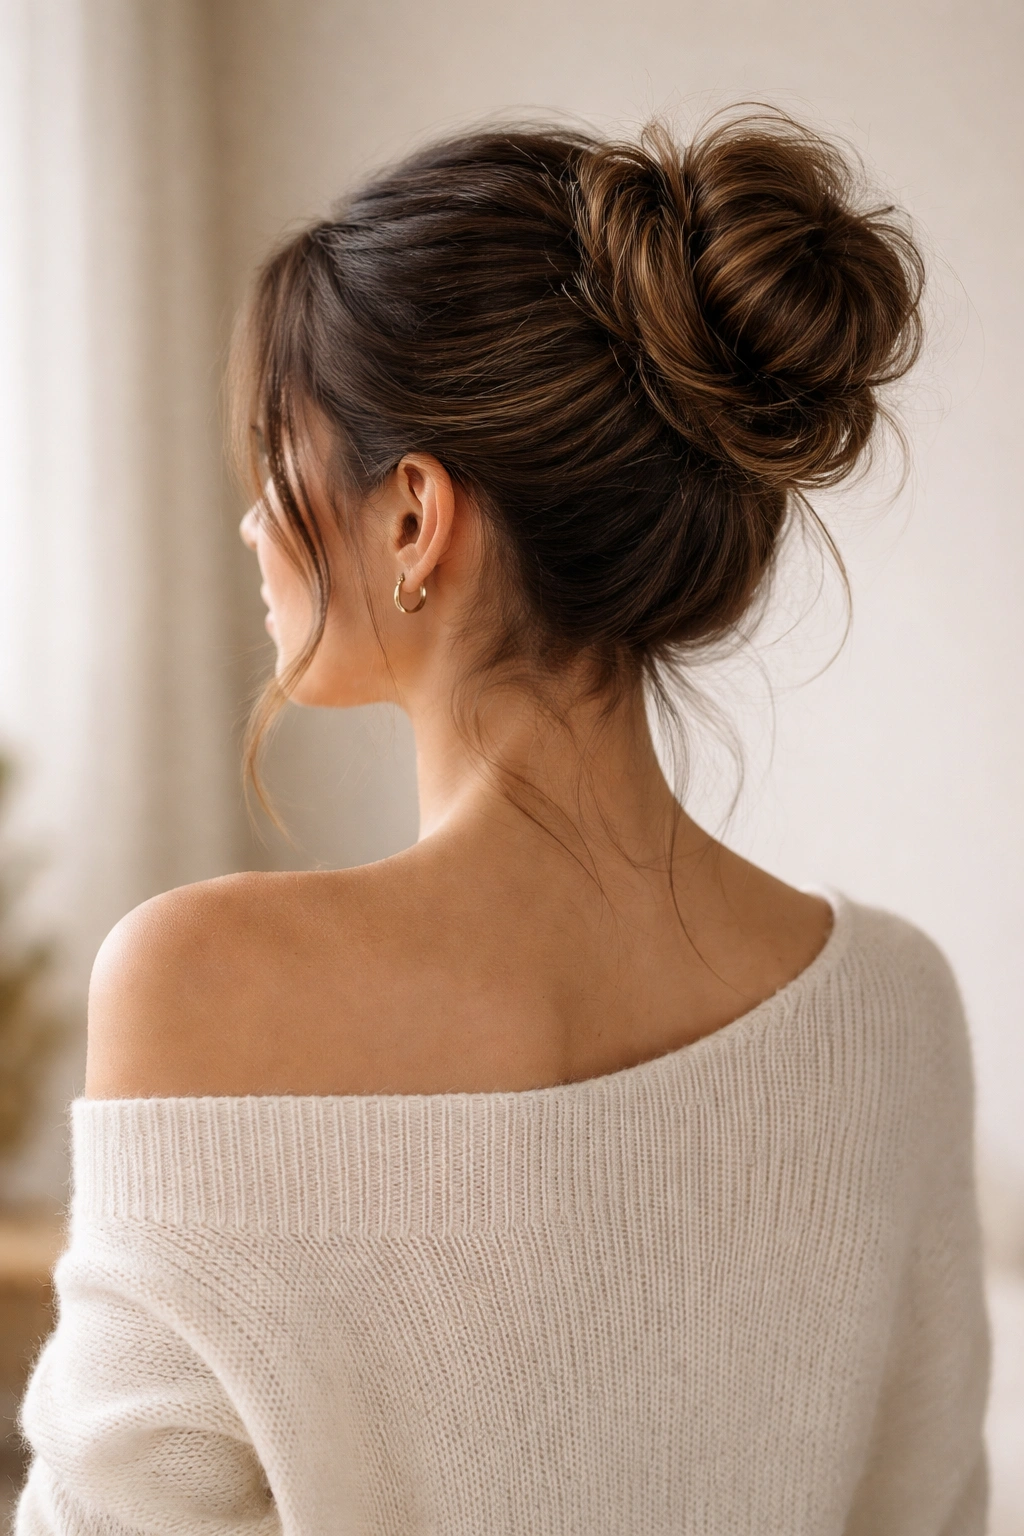
The beauty of styling thick, medium-length hair is that you have enough density to pull off complex textures and enough length to experiment with varied techniques. None of these eight styles requires specialist tools or impossible skills—they’re all variations on the same basic principle of taking that beautiful thick hair you’ve got, giving it some structure, and then deliberately undoing that structure just enough to look effortlessly put-together.
The key to success with any of these styles is understanding that your hair’s weight and volume are assets, not obstacles. Instead of fighting your thickness, use it. Let the weight distribute across multiple pressure points. Embrace the natural texture you have rather than trying to smooth everything into submission. And always, always loosen whatever structure you’ve created—that final step where you gently pull sections and create intentional messiness is what transforms these from neat, practical styles into genuinely beautiful ones.
Pick one style this week and practice it a few times to get the technique in your muscle memory. Then cycle through the others as your mood and schedule allow. You’ll likely find two or three that become your go-to styles, and that’s perfectly okay. The goal isn’t to use every single variation constantly—it’s to have options that actually work for your specific hair type and texture.
