



A low messy bun strikes the perfect balance for weddings—elegant enough for formal occasions, yet relaxed enough to feel modern and effortlessly polished. Unlike traditional updos that can feel stiff or overly formal, low messy buns work beautifully across different wedding styles, from intimate garden ceremonies to grand ballroom receptions. They’re flattering on nearly every face shape, work with various hair textures, and allow wisps and movement that make you look intentional rather than overly done. The beauty of this style is that it photographs gorgeously from every angle while holding up throughout an entire day of celebration.
The key to nailing a low messy bun for a wedding isn’t about making it look sloppy—it’s about creating that “I woke up like this but better” vibe through intentional texture, strategic placement, and thoughtful finishing details. Whether you’re the bride wanting something that feels romantic and undone, a bridesmaid coordinating with the wedding aesthetic, or a guest wanting polished elegance without looking overdressed, a low messy bun adapts to fit your needs. These ten styles range from ultra-romantic with cascading tendrils to sleek and sophisticated with minimal flyaways, giving you plenty of options to match your personal style and the wedding’s overall vibe.
1. The Romantic Cascading Messy Bun
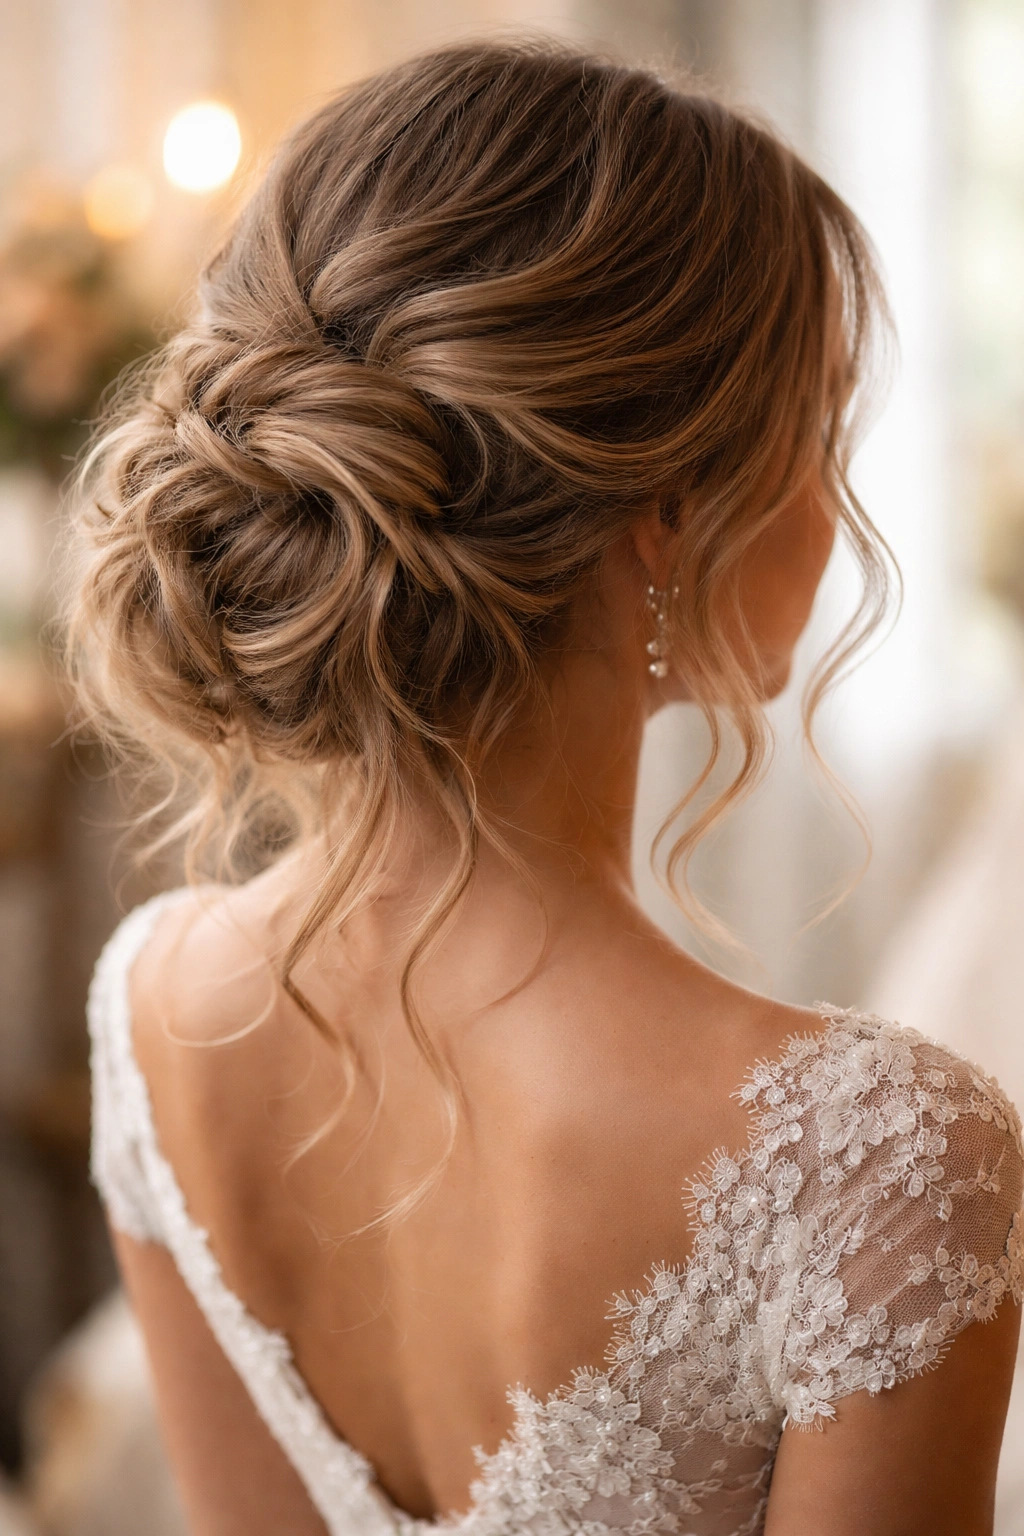
This is the style that screams “effortless bride” or “I coordinated with the bride’s vision” without actually requiring you to be either. You’ll start with loosely curled or wavy hair, gather it low at the nape of your neck, and secure it while intentionally leaving several longer pieces to fall softly around your face and neck. The cascading element comes from those deliberate tendrils—they should frame your cheekbones and brush your collarbone, creating an undeniably romantic silhouette.
Why It Works for Weddings
This style beautifully balances formality with softness. The structured bun at the back reads as polished and intentional, while those soft curls falling around your face add a romantic element that photographs beautifully. It works especially well if you’re wearing a strapless or sweetheart neckline because the soft waves draw attention to your collarbone and shoulders rather than competing with them.
How to Create the Look
- Curl your hair in loose waves using a 1.5-inch curling iron or by braiding damp hair overnight
- Apply texturizing spray or dry shampoo to add grip and prevent the bun from slipping
- Flip your head upside down and gather hair loosely at the nape of your neck
- Twist the gathered section loosely and wrap it around itself, securing with bobby pins
- Leave 5-7 face-framing pieces unpin ned before twisting, letting them fall naturally
- Gently pull and tousle the secured bun to add volume and texture
- Use a fine-mist hairspray to hold everything in place without looking stiff
Pro tip: If you’re concerned about flyaways or pieces falling out during the ceremony, consider getting your hair professionally styled the morning of—a skilled stylist can create this look with precision and use proper products to ensure it lasts through dancing and celebrating.
2. The Sleek Low Bun with Geometric Accessories
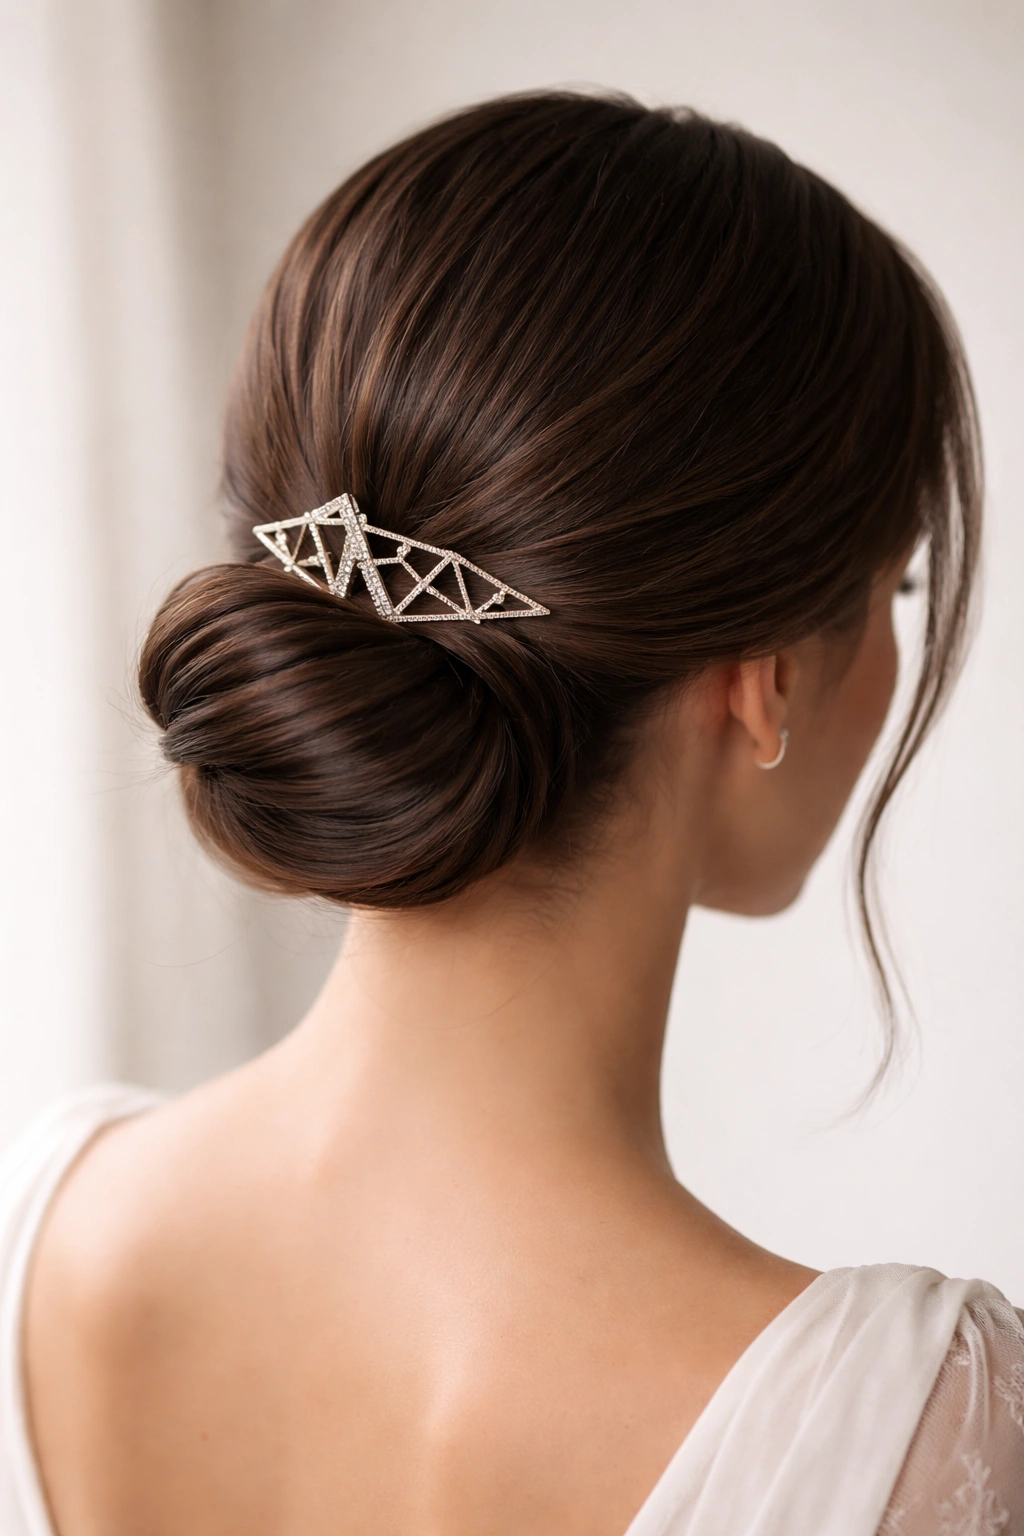
This style is pure wedding-guest sophistication. You’re going for a clean, polished bun positioned at the very base of your skull, but here’s where it gets interesting—a geometric hair comb, pearl-studded clip, or minimalist metal barrette transforms it from ordinary to memorable. The bun itself is smooth and refined, without the tousled texture of other styles, which makes the accessory the real statement piece.
What Makes It Wedding-Appropriate
The sleekness of this style reads as intentionally polished and formal—it’s the kind of look that works beautifully in black-tie settings, church ceremonies, or any wedding where you want to look impeccably put-together. The right accessory adds personality and sparkle without requiring you to add flowers, ribbons, or other embellishments. It photographs beautifully because the clean lines are flattering and the accessory catches light in candid shots.
Creating a Polished Finish
- Apply smoothing serum or anti-frizz cream to damp hair before blow-drying
- Blow-dry your hair straight or with a very subtle wave for maximum sleekness
- Brush your hair back firmly but not so tight it causes headaches
- Gather hair low and secure tightly with a clear elastic or small hair tie
- Twist the gathered section and wrap it around the elastic, pinning the ends securely
- Smooth any flyaways with a fine-tooth comb and lightweight hairspray
- Clip your geometric or decorative piece just above or slightly overlapping the elastic
Worth knowing: The quality of your hair accessory matters here. A cheap clip will slip throughout the day, but an investment piece in gold, silver, or a tortoiseshell finish will stay put and look luxe in photos.
3. The Textured Low Bun with Braided Details
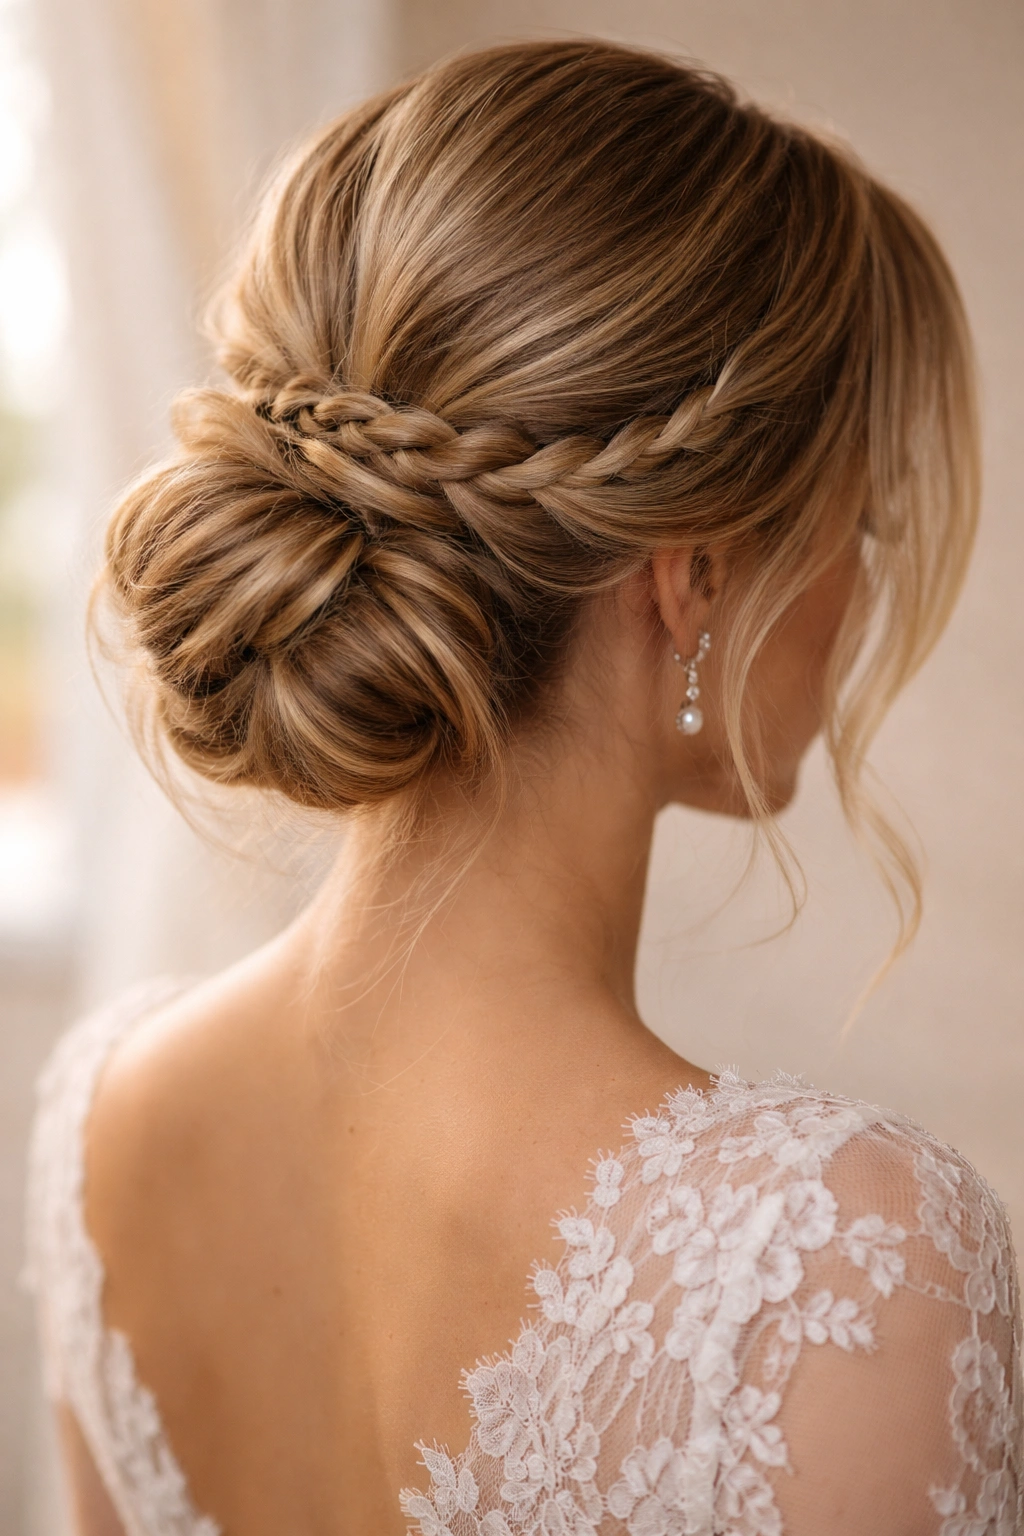
This style combines structure with texture—you’re incorporating a thin braid or two into the bun itself, which adds visual interest and makes the style feel more intentional than a simple twist. The braid can wrap around the base of the bun, weave through the center, or even be incorporated as part of the twisted section before wrapping. It’s the kind of detail that looks complicated but is actually quite achievable with a bit of practice.
Why Braids Elevate the Look
Braids signal intentionality and artistry in a way that simple twists don’t. They add texture and movement to the hair, which is especially important if you’re wearing a simple, minimalist dress and want your hair to carry some of the visual interest. Braids also photograph incredibly well—they’re dimensional and catch light beautifully, making them perfect for wedding photography.
Step-by-Step Braided Bun
- Create a clean center part if you’re doing two small side braids
- Braid one section of hair from the temple area (about 1-2 inches wide) straight back toward the nape
- Secure the end of the braid temporarily with a small elastic
- Repeat on the other side if you’re doing two braids
- Gather all your hair at the nape, including the braid ends
- Twist the gathered section loosely and wrap it into a bun, pinning securely
- Position the braids so they wrap around or through the bun for maximum visual impact
- Gently pull the braids slightly to add texture and softness
Insider note: If Dutch braids (inside-out braids) are in your skill set, they photograph even more dramatically than regular three-strand braids because they sit on top of the hair rather than within it.
4. The Twisted Double-Loop Low Bun
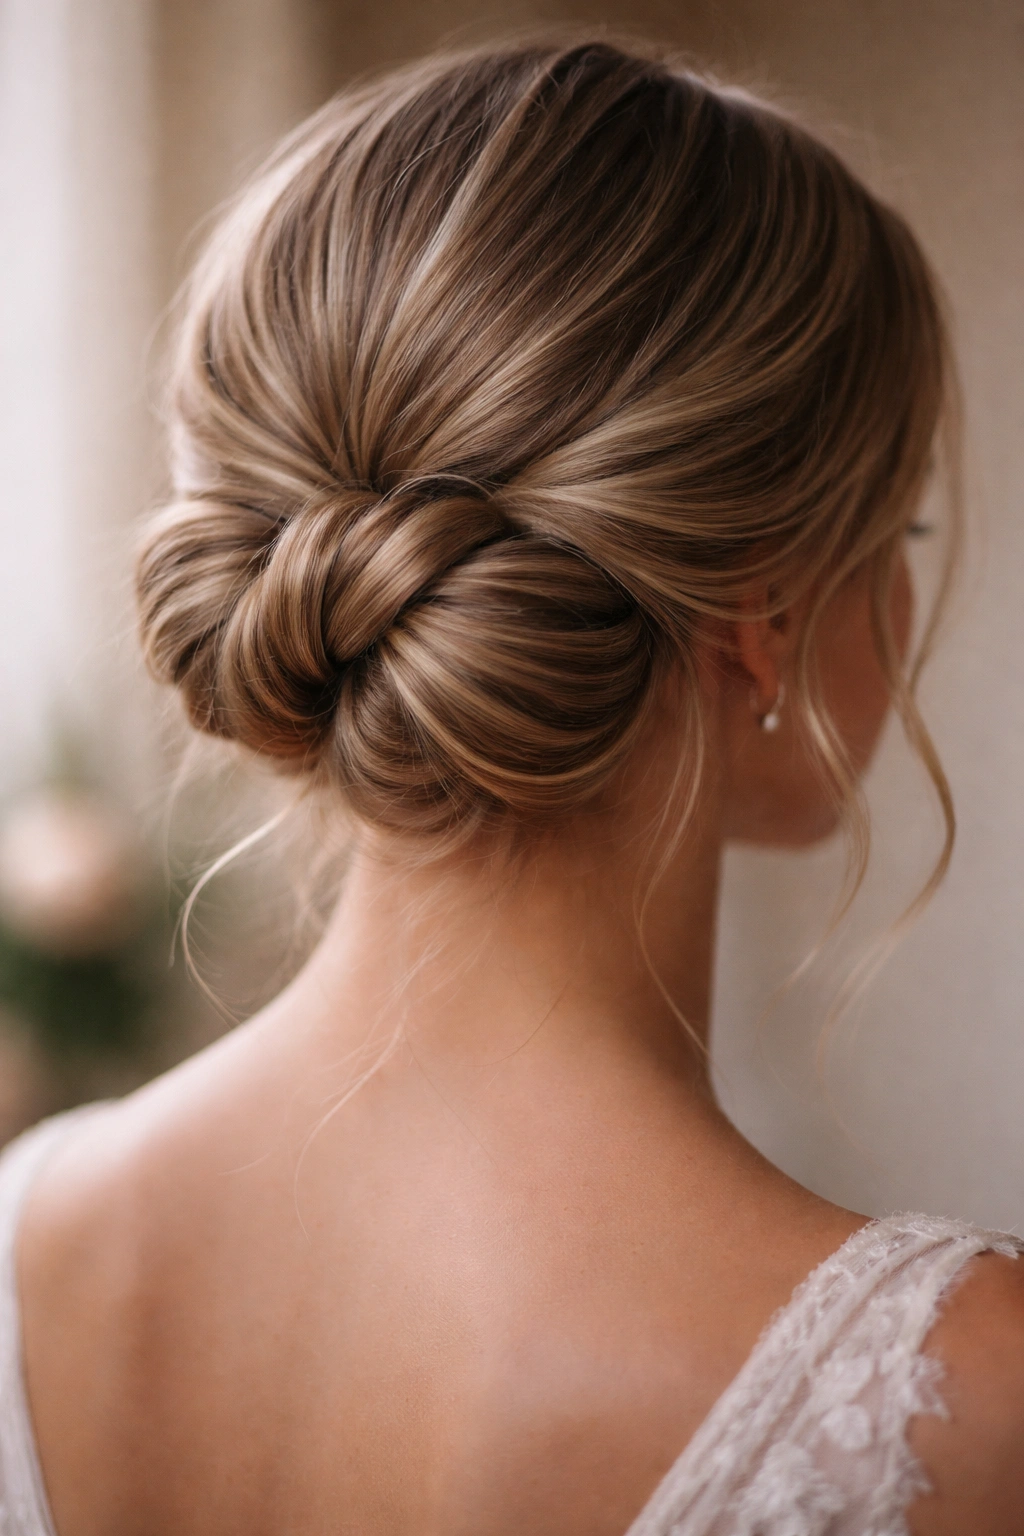
This style creates more volume and visual interest than a standard bun because you’re essentially creating two small loops or knots within the bun structure. It looks intricate and complex, but it’s actually quite simple once you understand the technique. The result is a fuller, more dimensional bun that sits at your low ponytail point and reads as deliberately styled rather than rushed.
Creating the Double-Loop Effect
This style works because you’re not wrapping all the hair around one central point—you’re creating movement and shape by twisting sections separately before securing them together. This approach naturally creates more volume and makes the bun look fuller and more interesting from every angle.
How to Build This Bun
- Gather your hair into a low ponytail and secure with a clear elastic
- Divide the ponytail into two equal sections
- Twist one section tightly, then loop it and pin it to create a knot shape
- Twist the second section and create a second loop, pinning it alongside the first
- The two loops should overlap slightly, creating a figure-eight or double-loop visual
- Use bobby pins to secure both loops firmly and ensure they stay in place
- Gently pull and tousle the loops to add volume and a soft, undone quality
- Finish with hairspray to set everything in place
Pro tip: This bun works beautifully with hair that’s slightly damp or has been texturized with dry shampoo or waves—the texture makes the twists hold better and look fuller naturally.
5. The Romantic Low Bun with Floral Crown or Wreath
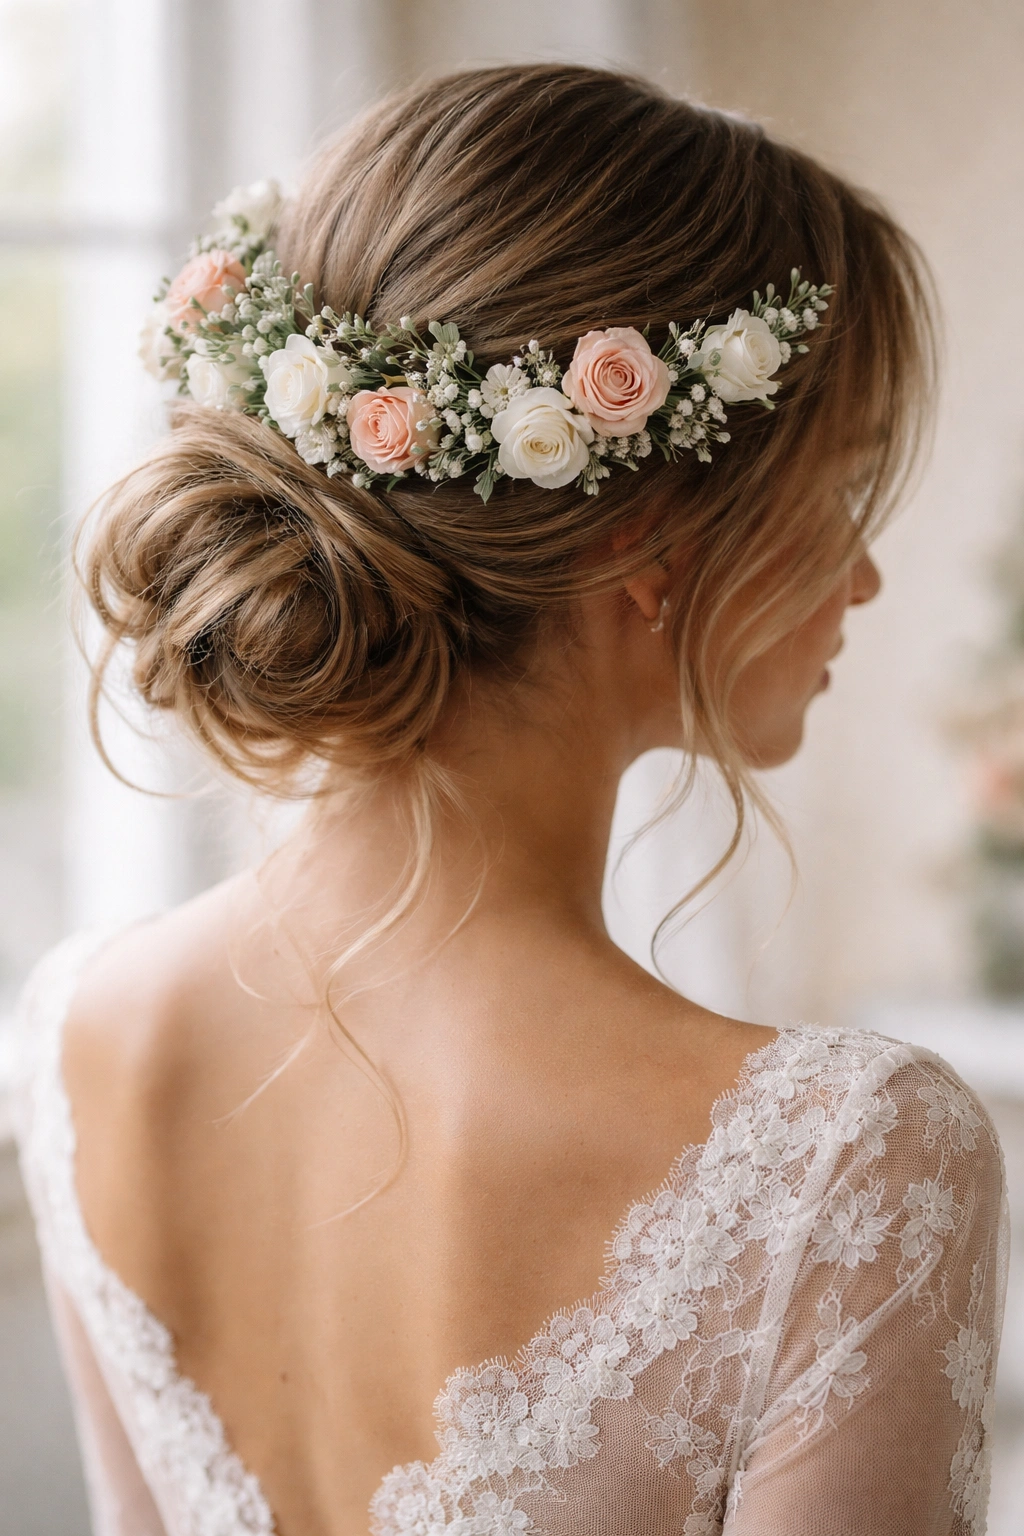
When you pair a soft, loosely constructed low bun with a floral crown, hair wreath, or even a delicate flower comb, you create something that feels bridal without being overdone. The flowers add color, texture, and a romantic element that’s especially perfect for garden weddings, outdoor ceremonies, or any wedding with a soft, romantic aesthetic. The low bun placement ensures the flowers have plenty of space to shine.
Making Flowers Work with Your Bun
Fresh or silk flowers need to be positioned where they’ll be supported by the hair structure—typically where the bun meets your head or woven slightly into the bun itself. The key is ensuring the weight is distributed so nothing pulls or shifts throughout the day. A well-constructed low bun provides the perfect foundation for flower arrangements because the gathered hair creates multiple pinning points.
Bun and Flower Coordination
- Create a soft, slightly undone low bun using the cascading method described earlier
- Have a floral crown or wreath ready—fresh flowers should be arranged the morning of the wedding
- Position the floral element so it wraps around the back of your head, resting partially on the bun
- Use bobby pins to secure the floral piece directly into the bun and hair
- Ensure the weight of the flowers is balanced so nothing pulls your hair uncomfortably
- Let a few wisps of hair fall loose around the flowers for a romantic effect
- Use floral-safe hairspray that won’t damage delicate petals
Worth knowing: Fresh flowers wilt throughout the day, so if you’re doing fresh florals, have them arranged as close to the ceremony time as possible—even an hour or two can make a difference in how crisp they look in photos.
6. The Minimalist Low Bun with Metallic Accents
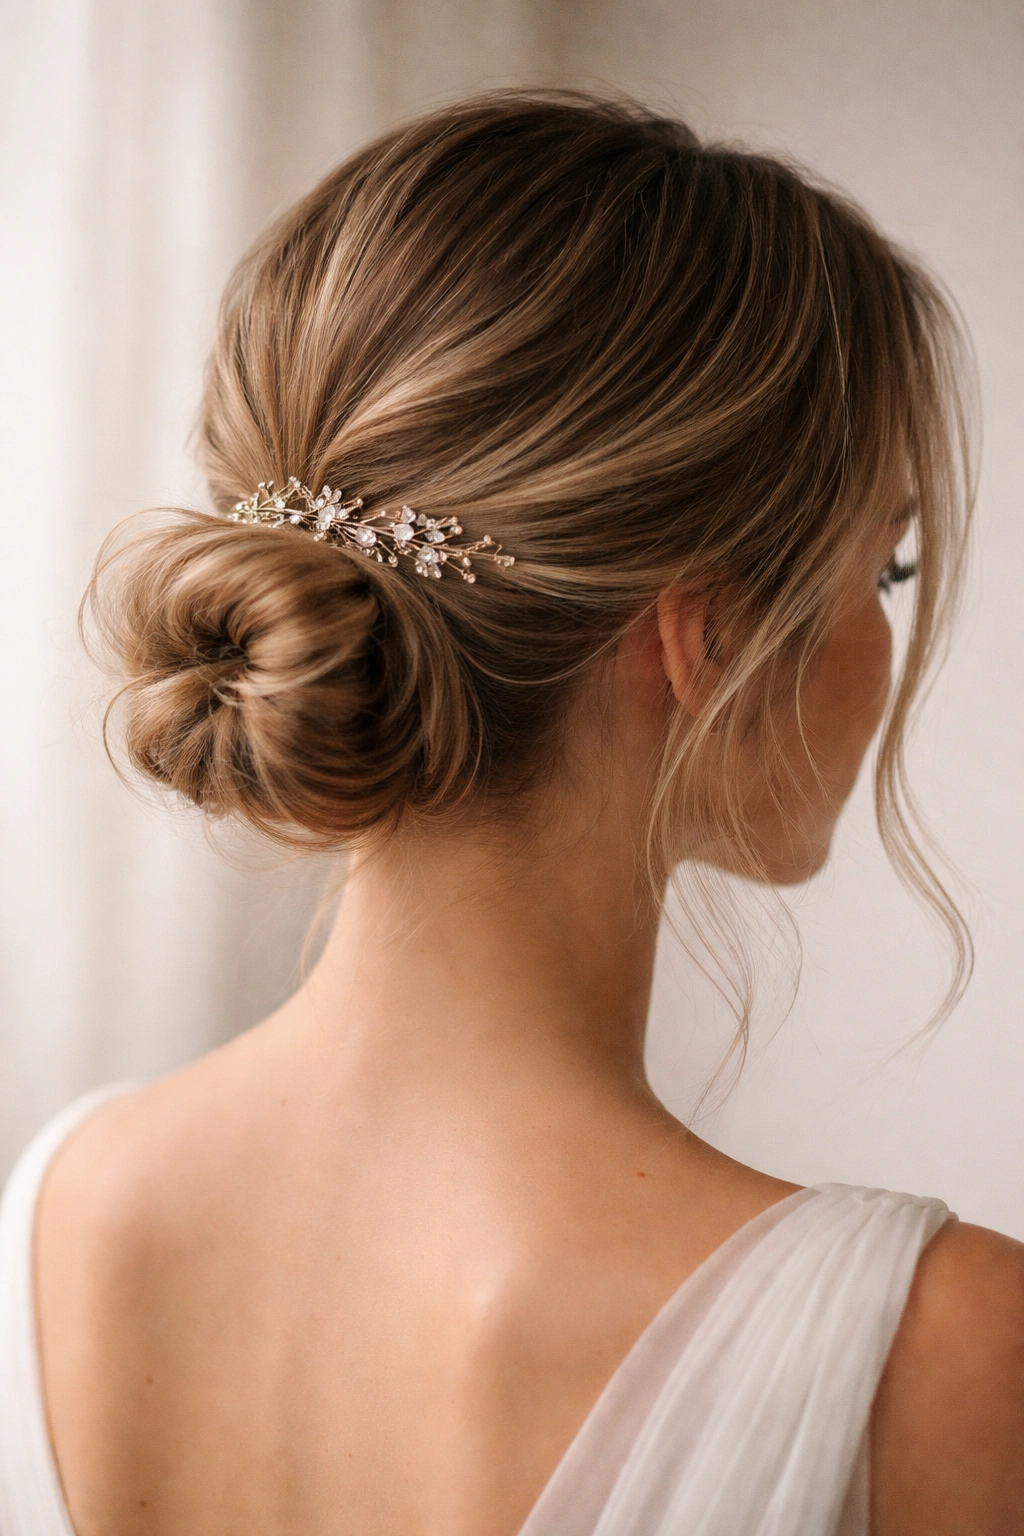
This is the style for the bride or guest who wants elegance without fuss. You’re creating a very simple, almost stark low bun, then adding visual interest through metallic elements—a sleek gold or silver hair comb, delicate hair pins, or even temporary metallic hair tattoos near the bun. The simplicity of the bun becomes a canvas for the metallic accents to shine.
Why Minimalism Works for Weddings
A minimalist approach photographs incredibly well because there’s no visual clutter competing for attention. Metallic accents catch light beautifully in photos, which means your hair will look luminous and polished in every shot. This style is especially flattering if you’re wearing jewelry or a detailed gown—the simple bun ensures your entire look feels cohesive rather than competing with itself.
Creating a Clean, Simple Bun
- Apply smoothing cream to damp hair and blow-dry straight
- Brush hair back into a low ponytail at the nape of your neck
- Secure tightly with a clear elastic or matching hair tie
- Wrap a small section of hair around the elastic to hide it
- Twist the remaining ponytail loosely and wrap it around the base, pinning securely
- Keep the bun compact and neat—resist the urge to tousle or pull it
- Position one or more metallic accessories where they’ll catch light
- Use a light hairspray to keep everything in place without visible product buildup
Pro tip: Temporary metallic tattoos designed for hair are a fun, unexpected detail that reads as intentional rather than accidental. Position them near the bun where they’ll be visible in side-view and back-view photos.
7. The Romantic Low Bun with Tulle or Ribbon
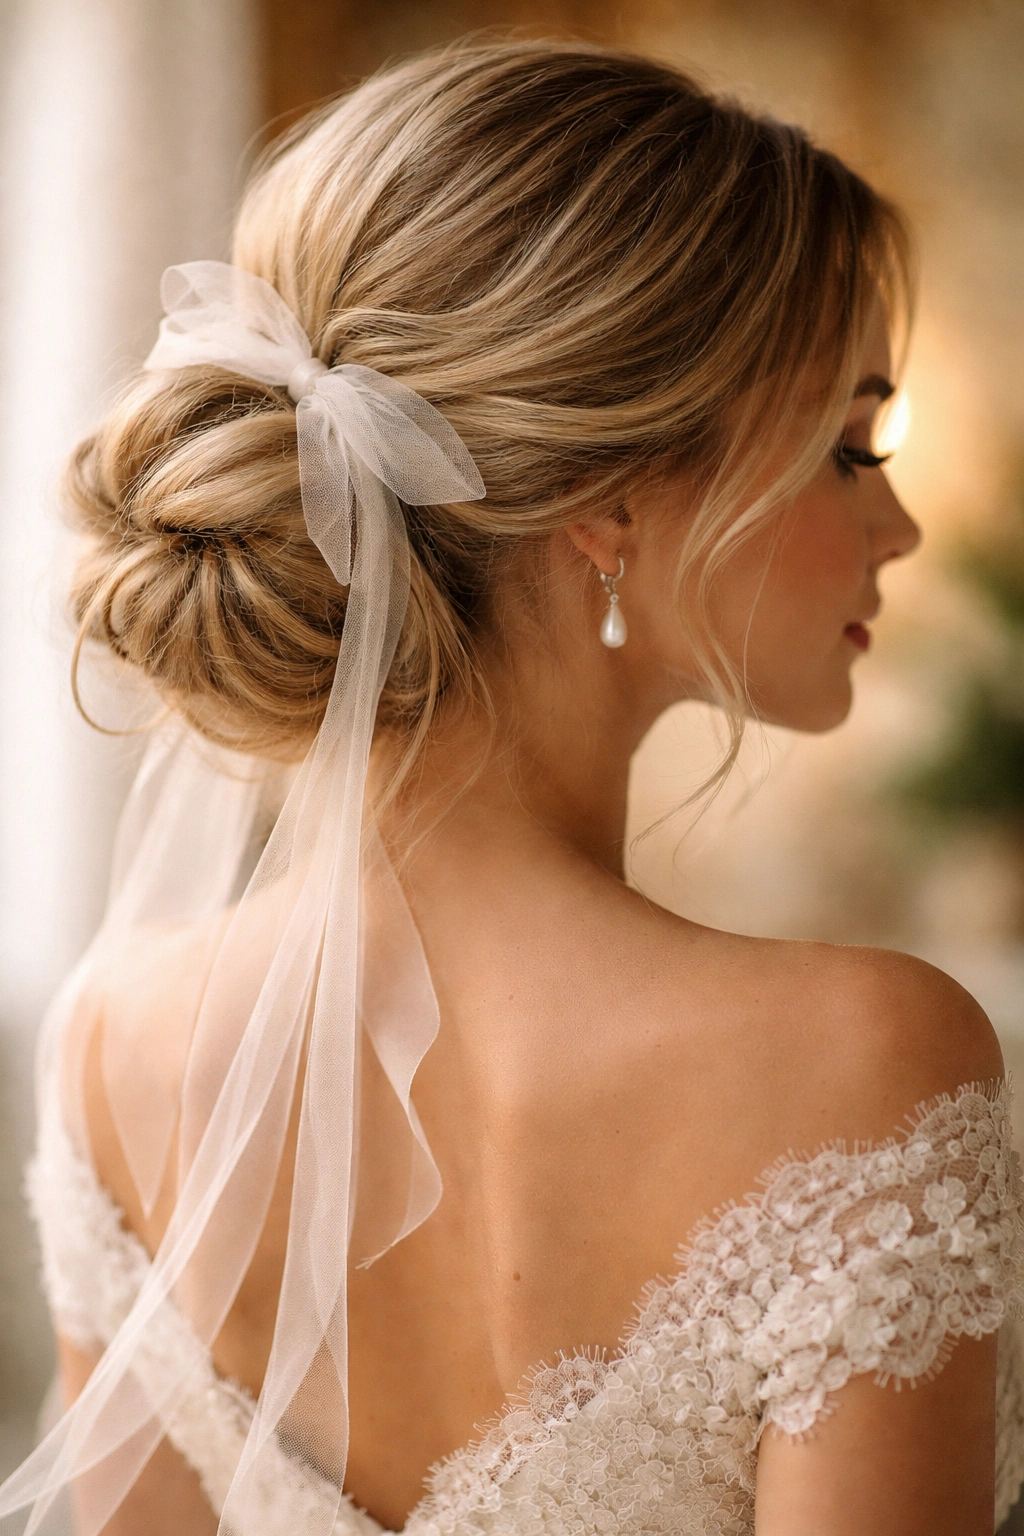
This style takes a soft, romantic low bun and adds a whisper of tulle, silk ribbon, or delicate fabric woven through or around it. The fabric adds a whimsical, fairy-tale quality that’s perfect for romantic or vintage-inspired weddings. The key is choosing a fabric and color that either matches your dress or complements the overall wedding palette—typically whites, ivories, blushes, or metallics work best.
Incorporating Fabric Into Your Bun
Tulle and ribbon aren’t just decorative—they actually help structure the bun and make it feel more intentional. A piece of tulle wrapped loosely through a low bun creates volume and movement, while a silk ribbon woven through adds an old-world romance that photographs beautifully. The fabric also camouflages bobby pins, creating a more polished overall appearance.
Styling with Tulle or Ribbon
- Create a soft, slightly loose low bun using your preferred twisting method
- Cut a 12-18 inch piece of tulle, ribbon, or delicate fabric
- Weave the tulle through sections of the bun, letting it drape and flow naturally
- Secure the ends of the tulle under bobby pins so it stays in place
- Alternatively, wrap the tulle loosely around the base of the bun like a collar
- Use tulle in coordinating colors if you want subtle sophistication, or choose a contrasting color for drama
- Arrange any loose wisps of hair around the tulle for a romantic effect
- Finish with a light hairspray to hold everything in place
Insider note: Tulle moves beautifully in candid shots and video footage—it creates this lovely flowing, fairy-tale quality that simple hair alone can’t achieve.
8. The Sleek Low Bun with Sharp Graphic Lines
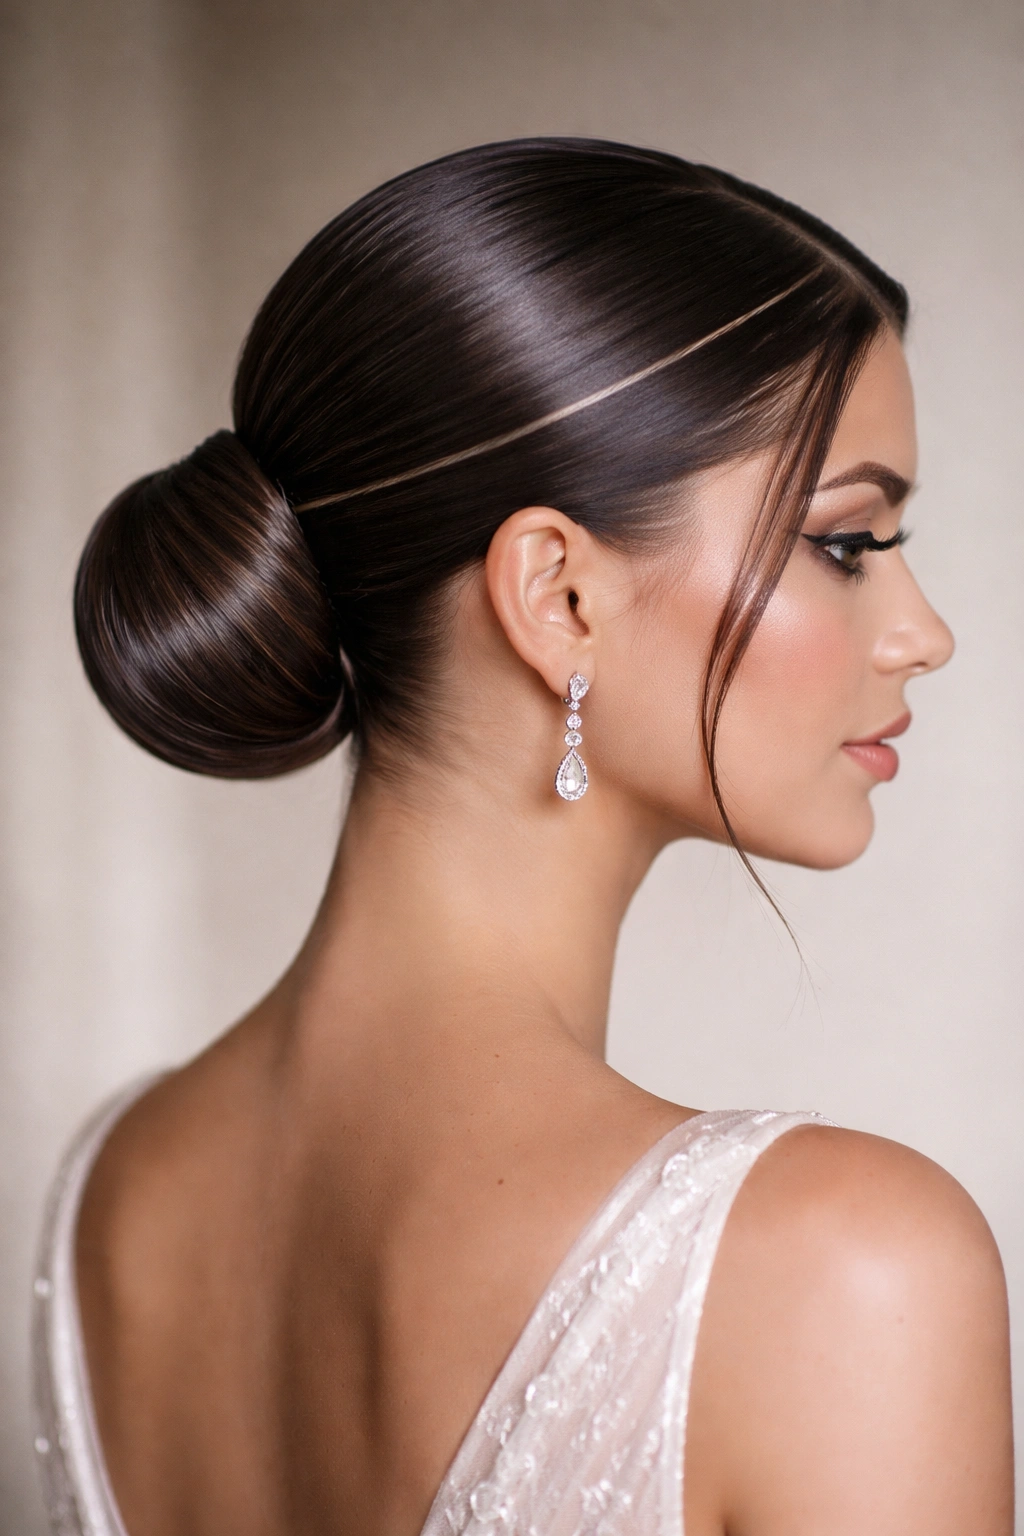
This style is geometric and modern—you’re creating a perfectly smooth, compact bun, then using sharp lines (created with a hair pen or contrasting part) to frame it. You might do a deep side part that creates a strong line, a center part with defined sections, or even a small shaved section (if that’s your style) positioned near the bun for maximum visual impact. It’s a style that works beautifully for modern, fashion-forward weddings.
Making Geometric Lines Work
Sharp lines require extremely sleek, product-enhanced hair. This isn’t the style if you’re aiming for a soft, romantic vibe—it’s bold, intentional, and unmistakably stylish. The lines draw attention to the bun and create a visual focal point that’s especially striking in profile shots and candid photography.
Creating Sharp Definition
- Apply a strong-hold smoothing product to damp hair
- Blow-dry your hair completely smooth using a paddle brush
- Create your desired part line using a rattail comb and a light hairspray to set it
- If desired, use a semi-permanent hair pen or temporary color to define the part line further
- Brush hair into a very smooth, tight low ponytail
- Twist the ponytail and wrap it into a compact, neat bun at the nape
- Ensure every hair is smooth and in place—this style has no room for flyaways
- Use a medium-to-strong hold hairspray to keep everything locked in place
- Allow the hairspray to dry fully before moving around or touching your hair
Worth knowing: This style requires touch-ups throughout the day if you’re dancing or moving around a lot. Bring bobby pins and a mini hairspray bottle so you can quickly secure any pieces that shift.
9. The Low Bun with Face-Framing Curtain Bangs
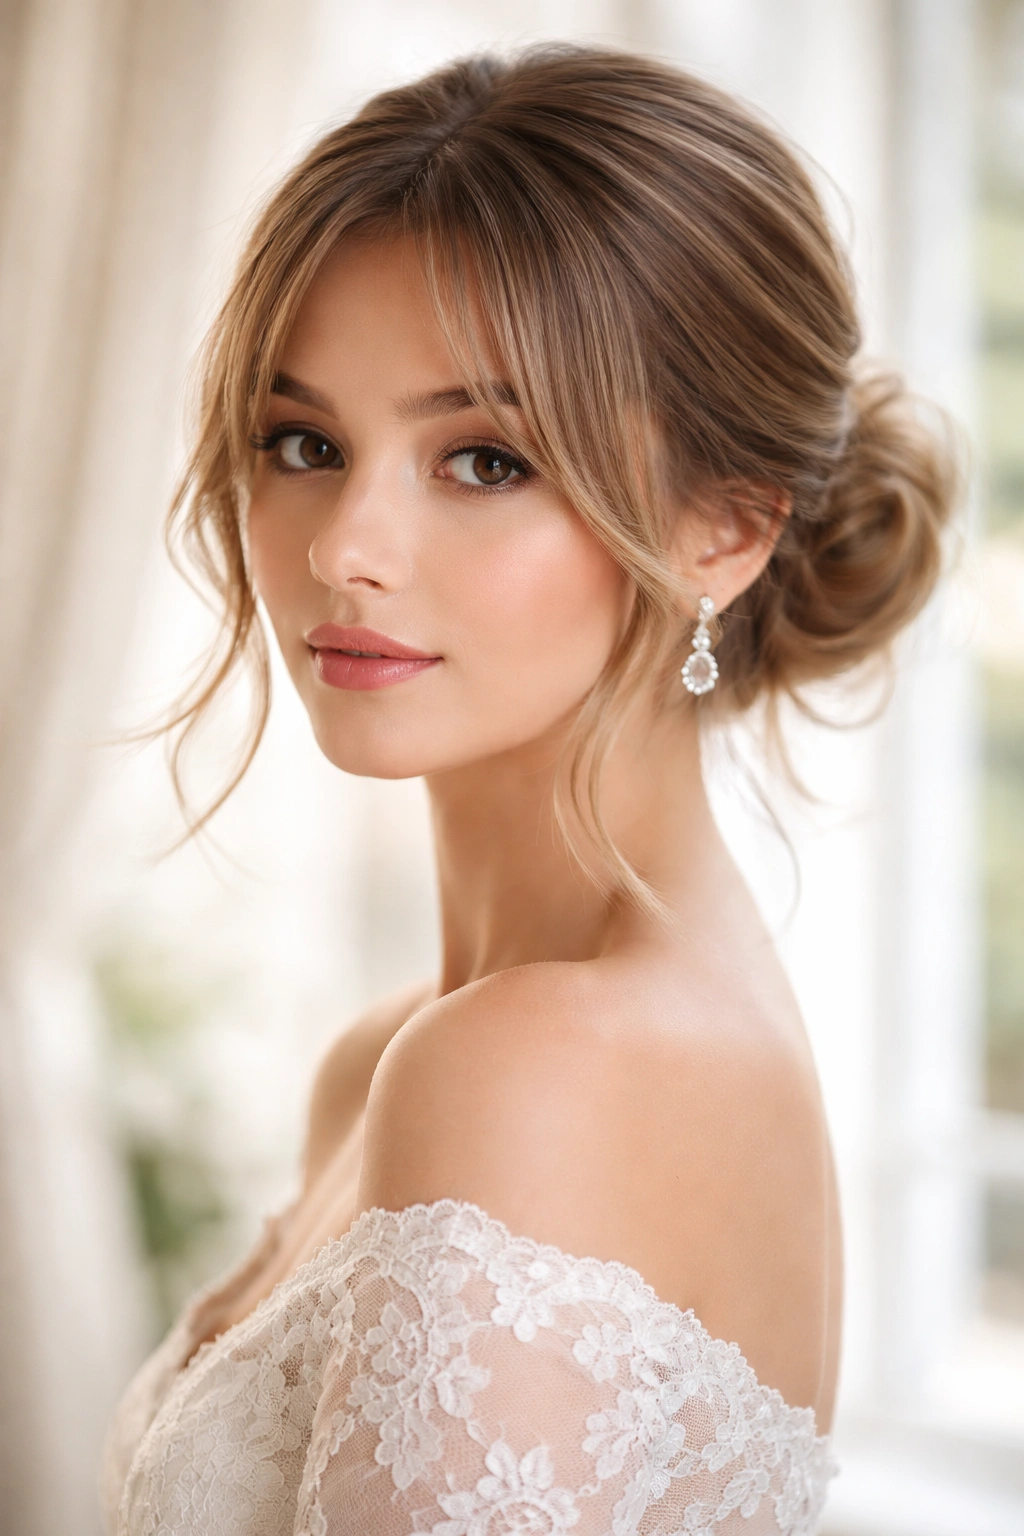
This style combines a tidy low bun with longer, curtain-style pieces that frame your face with soft movement. Unlike the cascading style where pieces fall freely, curtain bangs are cut at a specific length and sit closer to your face, creating a more intentional frame. This works beautifully if you have a face shape you want to soften or if you simply love the romantic detail of having hair frame your features throughout the event.
Why Curtain Bangs Enhance a Low Bun
Curtain bangs add softness and movement without the undone quality of longer cascading pieces. They’re flattering on nearly every face shape because they can be customized to where they hit your face. When styled with a low bun, they create a balanced, intentional look that photographs beautifully from the front while the bun provides polish from the back.
Styling Curtain Bangs with a Low Bun
- If you don’t have natural curtain bangs, create the effect by setting aside two 1-2 inch sections from near your temples
- Gather the remaining hair into a low ponytail and secure with a clear elastic
- Twist and wrap the ponytail into a bun as usual, pinning securely
- Curl the face-framing pieces away from your face using a 1.5-inch curling iron
- Gently brush through the curls to create soft waves that frame your cheekbones
- Position the framing pieces so they fall naturally on either side of your face
- Use bobby pins to secure the pieces behind your ears if needed
- Finish with hairspray to hold the shape without making the curls stiff
Pro tip: The longer your curtain bangs, the more movement they’ll have throughout the day. If they’re too short, they’ll curve back toward your face rather than framing it beautifully.
10. The Textured Low Bun with Volume on Top
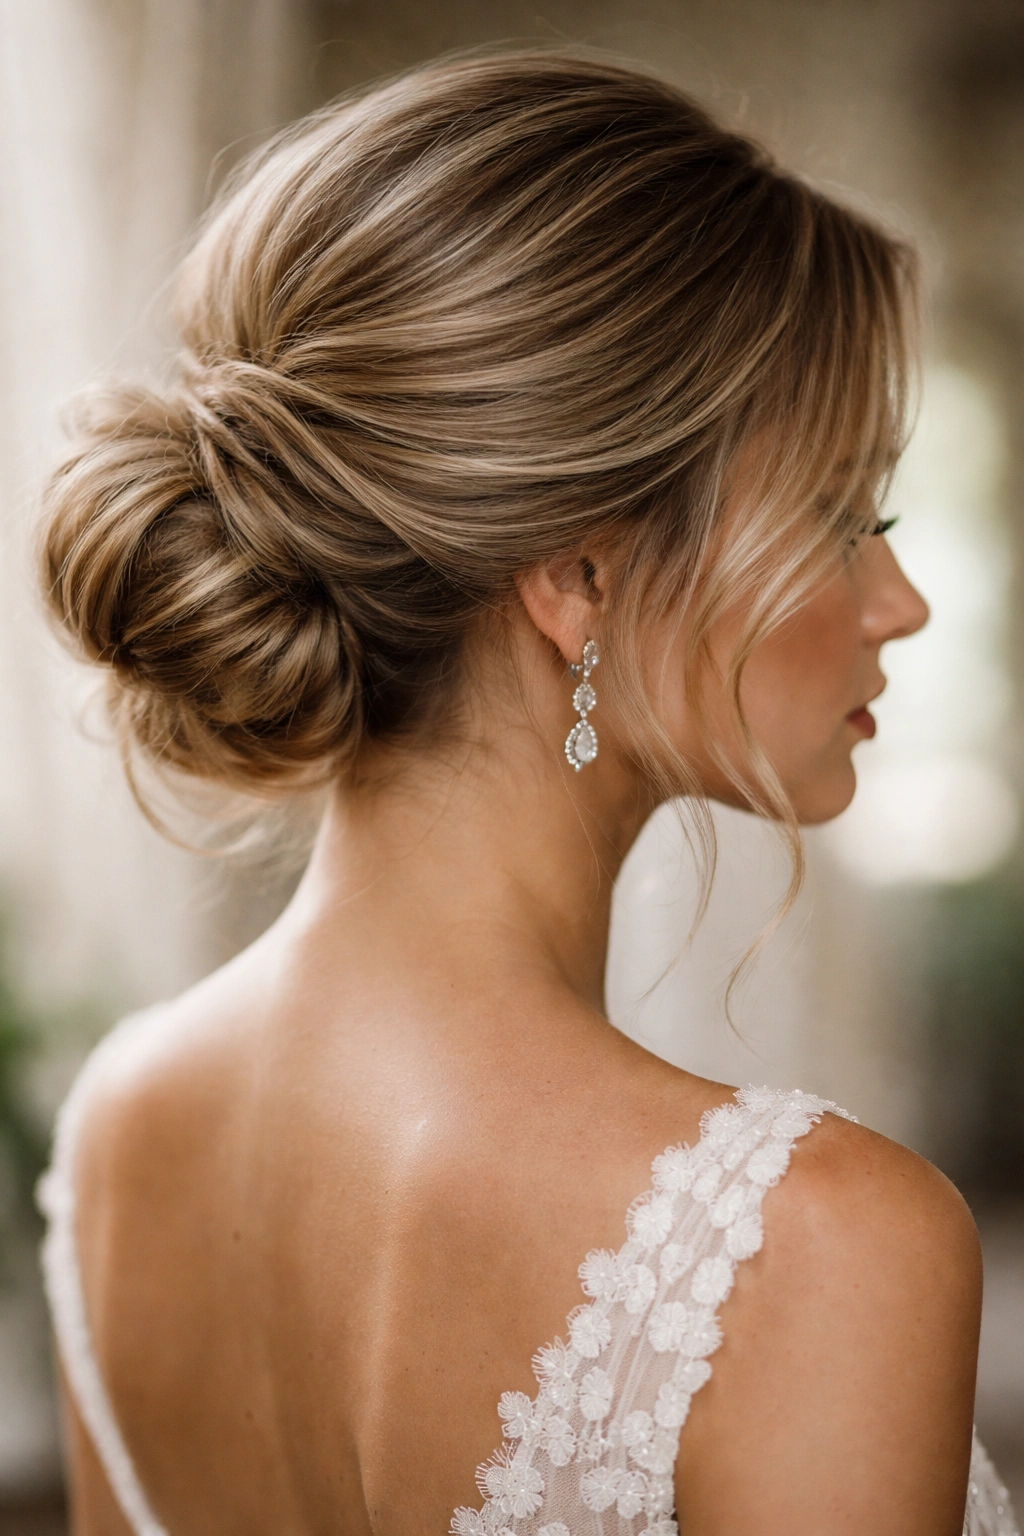
This final style creates the illusion of height and volume by teasing the crown area before gathering hair into a low bun. You’re essentially creating a soft pouf or lift at the crown, then letting everything flow down into a bun at the nape. This works beautifully for adding visual interest, creating the appearance of thicker hair, or simply creating a more dramatic, styled look without going full formal updo.
Building Volume at the Crown
The key to this style is creating volume that looks intentional rather than accidental. You’re backcombing or teasing specific sections at the crown, then smoothing the top layer so you see the volume underneath without the messiness of a true tease showing. This creates a polished, dimensional look that photographs beautifully from every angle.
Creating Crown Volume
- Blow-dry your hair with your head flipped upside down to build natural volume
- Section off the crown area (from your part to your crown, about 3-4 inches wide)
- Backcomb this section gently at the roots using a fine-tooth comb
- Smooth the top layer of this section so the volume sits underneath but looks neat
- Gather all your hair into a low ponytail at the nape, incorporating the teased crown section
- Secure with a clear elastic, ensuring the volume at the crown isn’t pulled too tight
- Twist and wrap the ponytail into a bun, pinning securely
- Gently pull small sections of the bun to create texture and softness
- Use a light hairspray to set everything without flattening the crown volume
Insider note: If you’re uncomfortable teasing your own hair, ask your stylist to create this effect using a volumizing mousse at the roots instead—it gives you the same visual effect without the commitment of backcombing.
Final Thoughts
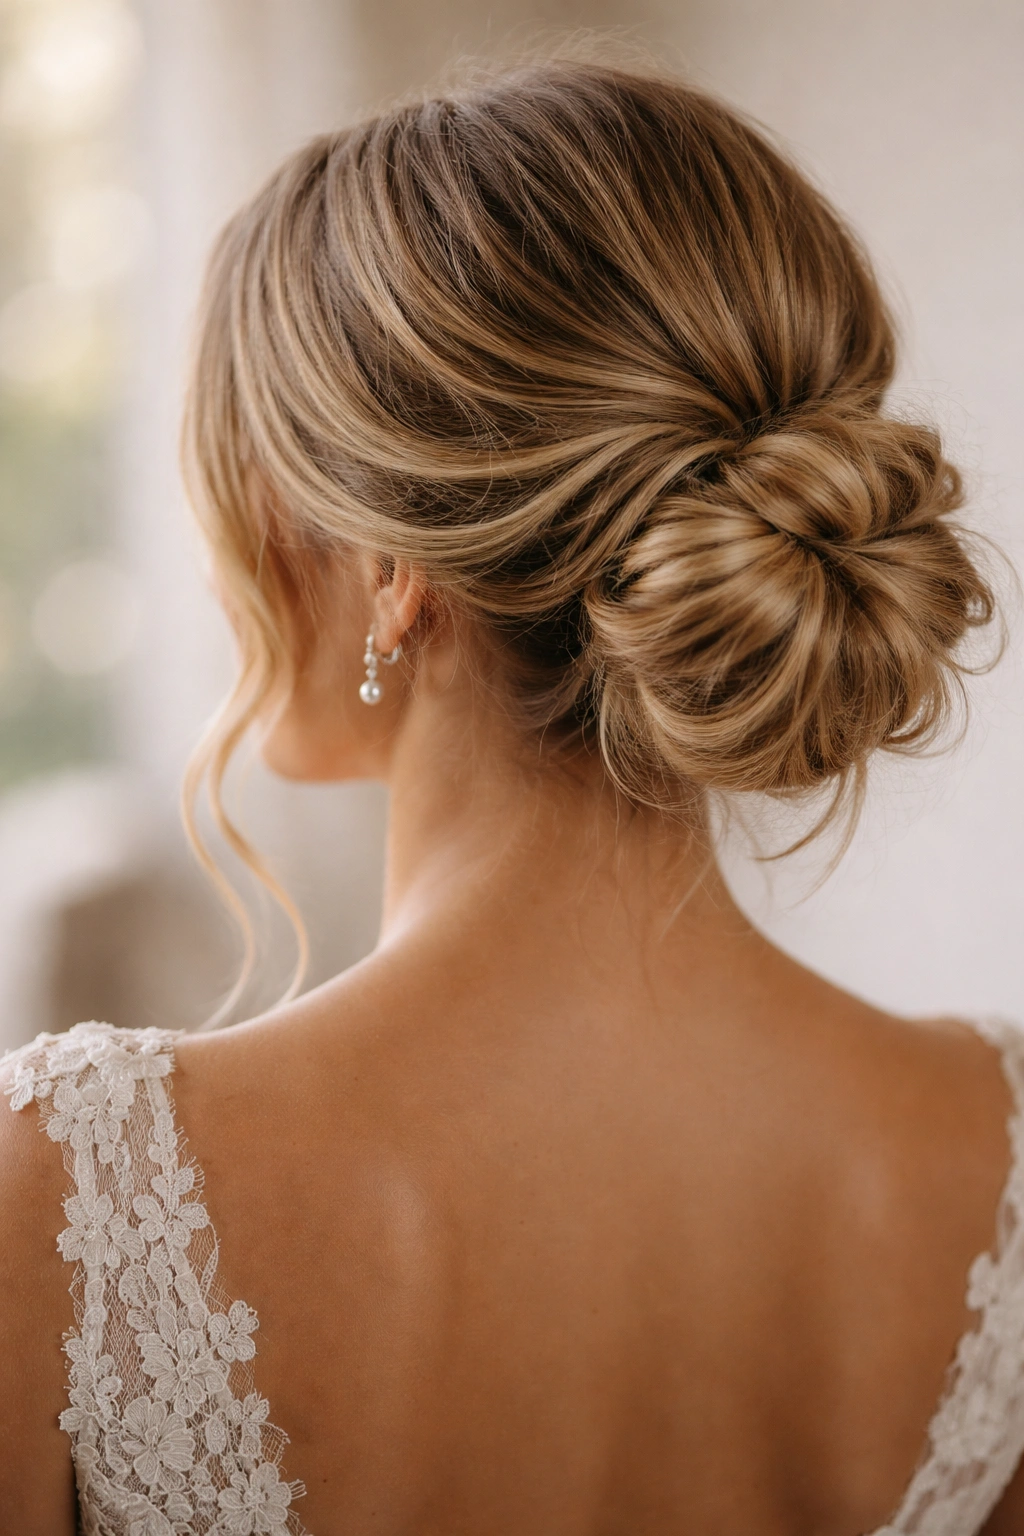
A low messy bun is the perfect intersection of elegance and wearability for weddings. Whether you choose the soft romanticism of cascading waves and florals or the sharp sophistication of a sleek, accessorized style, you’re selecting a look that works across dress codes, wedding styles, and personal aesthetics. The beauty of these ten variations is that they’re all fundamentally the same foundational style—a low ponytail twisted and wrapped into a bun—but the details, accessories, and finishing touches transform them into completely different looks.
The secret to making any low messy bun work for a wedding is choosing a version that aligns with your personal style and the wedding’s vibe. A bride at a garden ceremony might lean toward the romantic cascading style with flowers, while a guest at a black-tie reception might prefer the sleek, geometric approach. Whichever style you choose, invest time in practice before the wedding—even thirty minutes the week before will make a tremendous difference in your confidence and the finished result. Your hair will look polished and intentional, photograph beautifully from every angle, and hold up throughout an entire day of celebrating.
