



Thick hair is both a blessing and a styling challenge. You’ve got the volume that most people pay good money to create, but that same density can make certain hairstyles tricky to execute—especially buns. A messy bun should look effortlessly undone, not like you’re wrestling with a rope of rope. When you’re working with thick, heavy hair, the traditional bun techniques that work on finer textures can fall flat, slip out halfway through the day, or create an unflattering bulge at the crown. The good news is that thick hair actually has massive potential for creating textured, visually interesting messy buns that hold beautifully without requiring a warehouse of bobby pins and styling products.
The right messy bun style does more than just get your hair off your neck—it becomes a statement. For long, thick hair, this means choosing techniques that work with your hair’s natural weight and texture instead of fighting against it. You’ll find that some styles leverage your thickness as an advantage, creating that coveted tousled, romantic look that thin-haired people have to fake with products and extensions. Other styles focus on managing the bulk intelligently, breaking up density with braids or twists that distribute weight evenly and prevent that tight, heavy feeling at your scalp.
Whether you’re dealing with naturally wavy thick hair, straight dense strands, or thick curls, these eight messy bun styles give you real variety for different occasions, hair types, and moods. Each one solves a specific problem that thick-haired people face—slipping, heaviness, the need for texture—and each has been refined for how thick hair actually behaves. Let’s walk through the techniques that will become your go-to styling weapons.
1. The Classic Tousled Bun
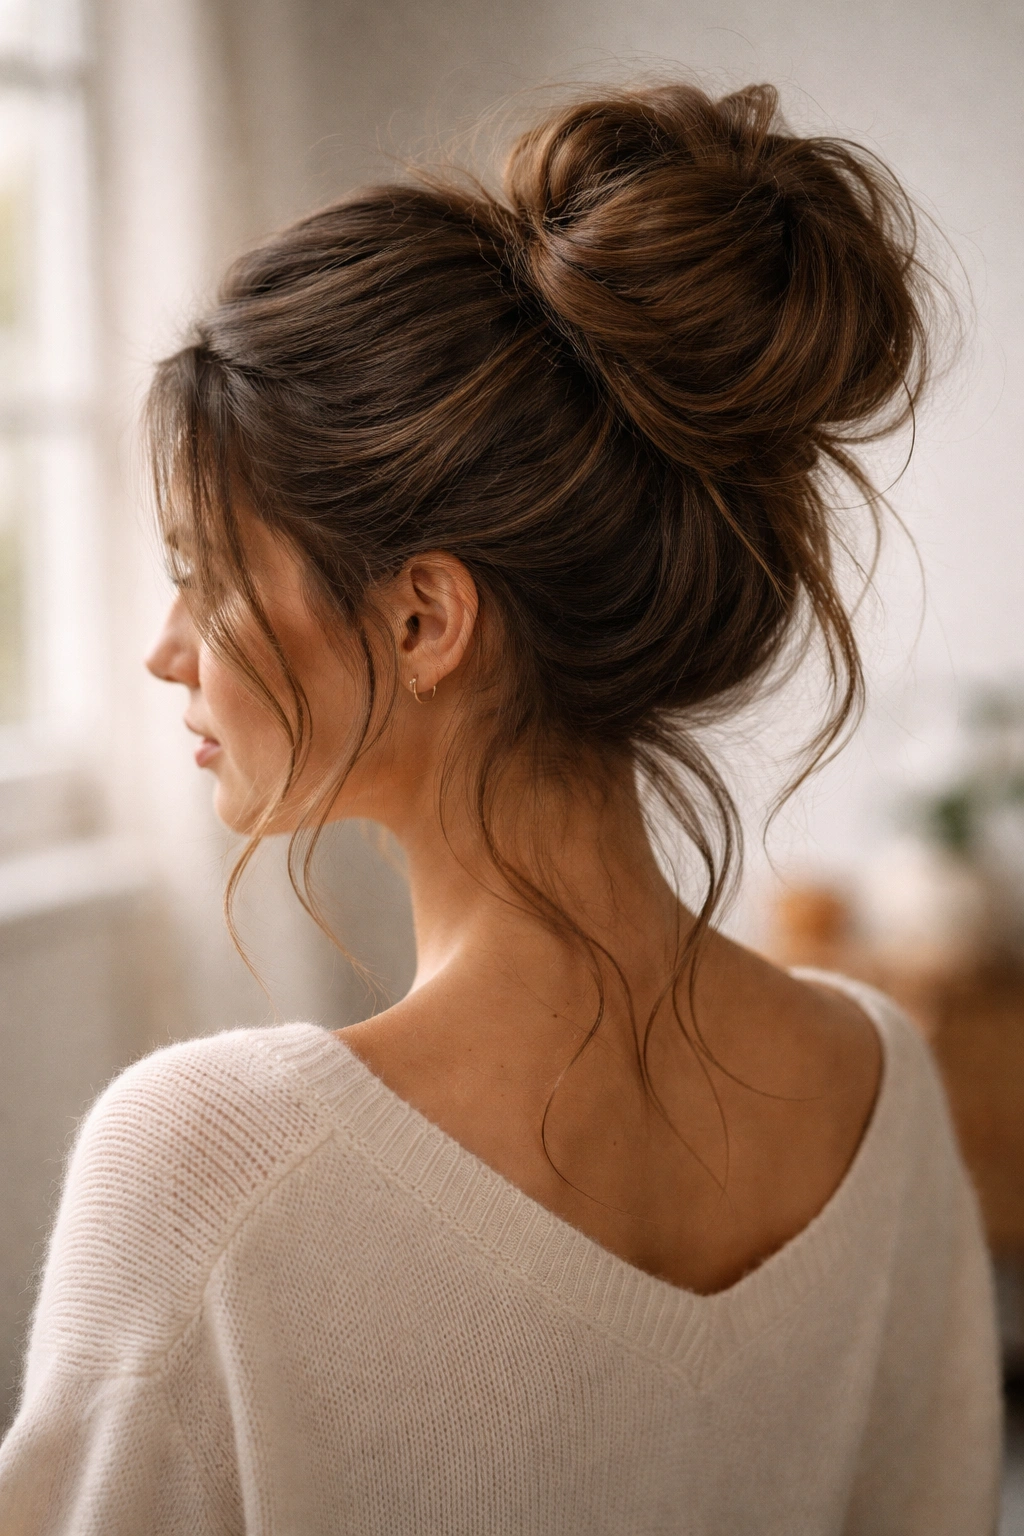
This is the foundational messy bun, and it works beautifully on thick hair once you understand the key technique: you’re not trying to make it smooth—you’re intentionally building in texture and loose pieces. Start with hair that has some grit to it (day-old hair or texture spray applied the night before works perfectly). Flip your head upside down and gather hair into a high ponytail at the crown, but don’t make it tight—loose and slightly off-center is where the magic happens. Twist the ponytail loosely as you wrap it around the base, letting sections fall out naturally as you coil. Secure with bobby pins that match your hair color, tucking them in strategically rather than creating one tight anchor point.
Why This Works for Thick Hair
The looseness is actually the key to success with dense hair. When you pull too tight, you create tension that thick hair resists, leading to either a painful scalp or a bun that collapses under its own weight. By keeping the gathering and twisting intentionally loose, you distribute the weight across multiple bobby pins and let the texture do the heavy lifting. Thick hair naturally has more surface area and movement, so a true messy approach looks intentional and polished rather than sloppy.
How to Perfect It
- Use at least 4-5 bobby pins positioned at different angles around the base rather than clustering them in one spot—this distributes the weight of thick hair evenly
- Leave 3-4 face-framing pieces deliberately undone before you even start the bun process, securing them with a tiny spritz of hairspray
- After twisting the ponytail around the base, gently tease the finished bun with a fine-tooth comb or texturizing brush to increase surface area and create intentional imperfection
- Mist with a flexible hold hairspray (not a stiff one) so the bun holds shape while still allowing movement
Pro tip: Thick hair holds better when you skip the bun holder or doughnut-shaped accessories and go with good old bobby pins and texture instead. Those accessories were designed for finer hair and often slide right off thick strands.
2. The Braided Wrap Bun
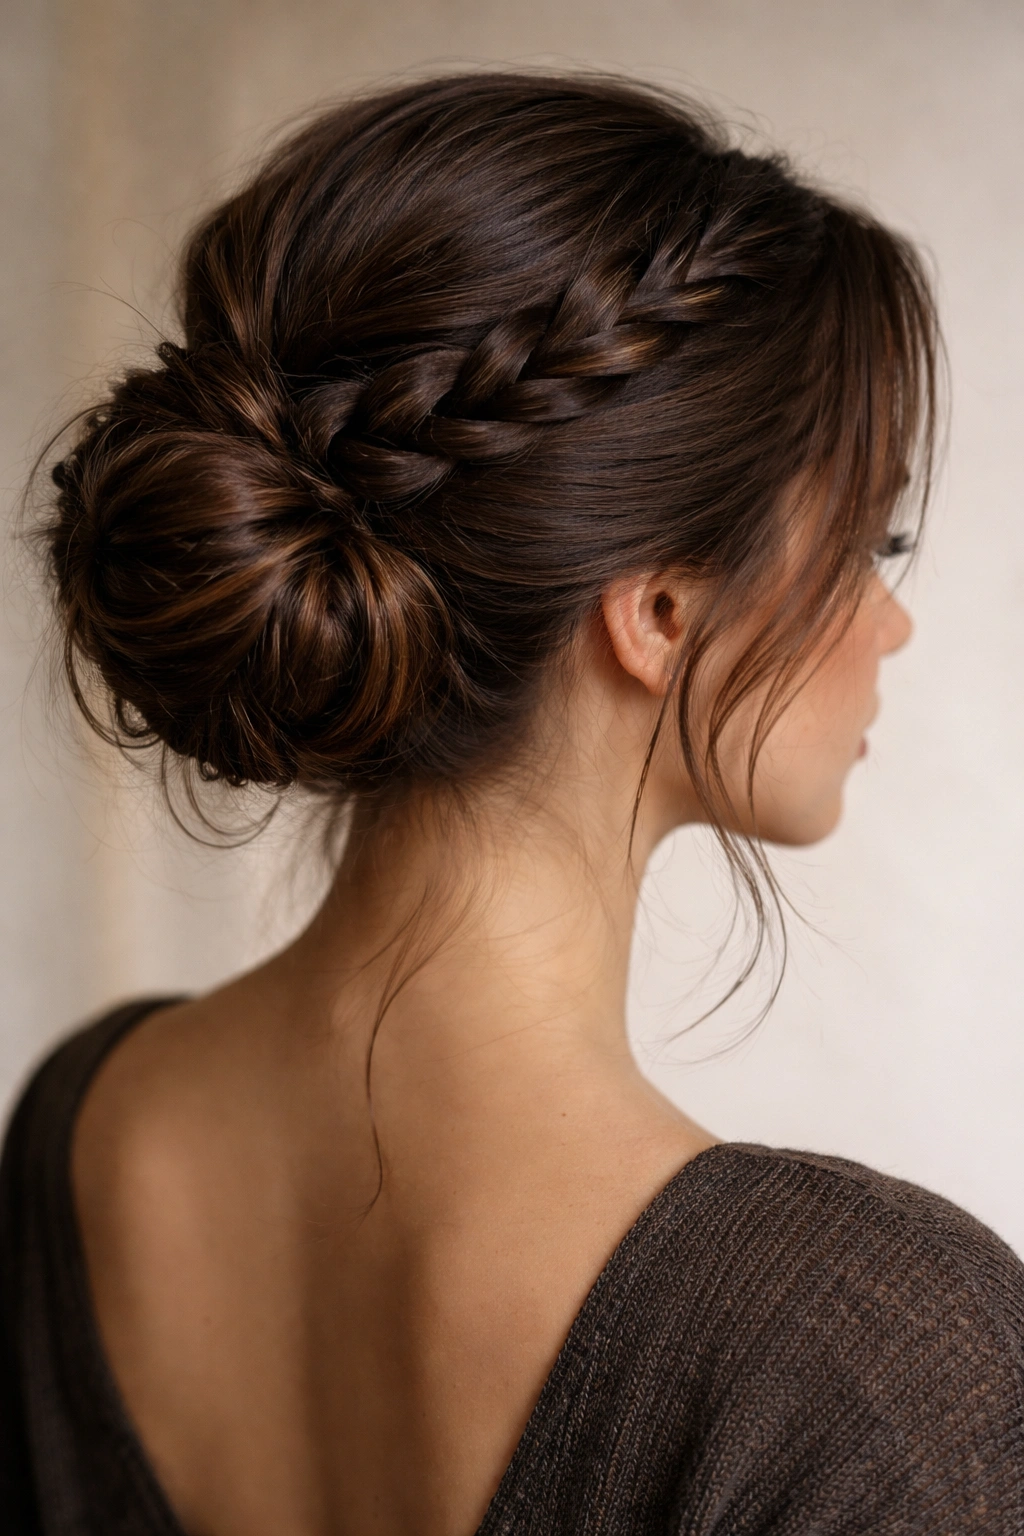
For thick hair, braiding a section before bun construction is a game-changer—it transforms dense bulk into a visual design element while simultaneously anchoring the whole structure. Start by creating a side part and braiding one section from your temple back toward the crown (a Dutch braid or standard three-strand braid both work, though Dutch braid sits higher on the surface). Once you reach the back of your head, gather all your hair—including the braided section—into a low ponytail. Twist the ponytail into a coil, wrap it around the base, and secure. The braid becomes the focal point, and your thick hair fills in the volume around it naturally.
Why This Works for Thick Hair
A braid compresses and organizes thickness in a way that pure twisting can’t achieve alone. It gives structure to the base of your style, which thick hair needs to prevent drooping as the day goes on. The visual contrast between the defined braid and the textured, loose bun creates visual interest that makes the style feel intentional and designed, not just thrown together.
Step-by-Step Technique
- Braid tightly enough that it holds throughout the day, but not so tight that you create tension headaches—thick hair can handle tension better than fine hair, but painful is never the goal
- Position your braid off-center or at an angle rather than straight down the middle for a more interesting, less formal look
- After securing the bun, gently pull the loops of the braid slightly to widen them and increase texture—this works especially well on thick hair because the density supports the widening without looking sparse
- Let a few pieces escape around your face and neck intentionally; these should be either part of your original braid or separate sections you laid out before creating the bun
Worth knowing: This style holds brilliantly through a full day of activity. The braid acts as an internal structure that prevents the bun from spinning or shifting, which is exactly what thick hair needs.
3. The Twisted Knot Bun
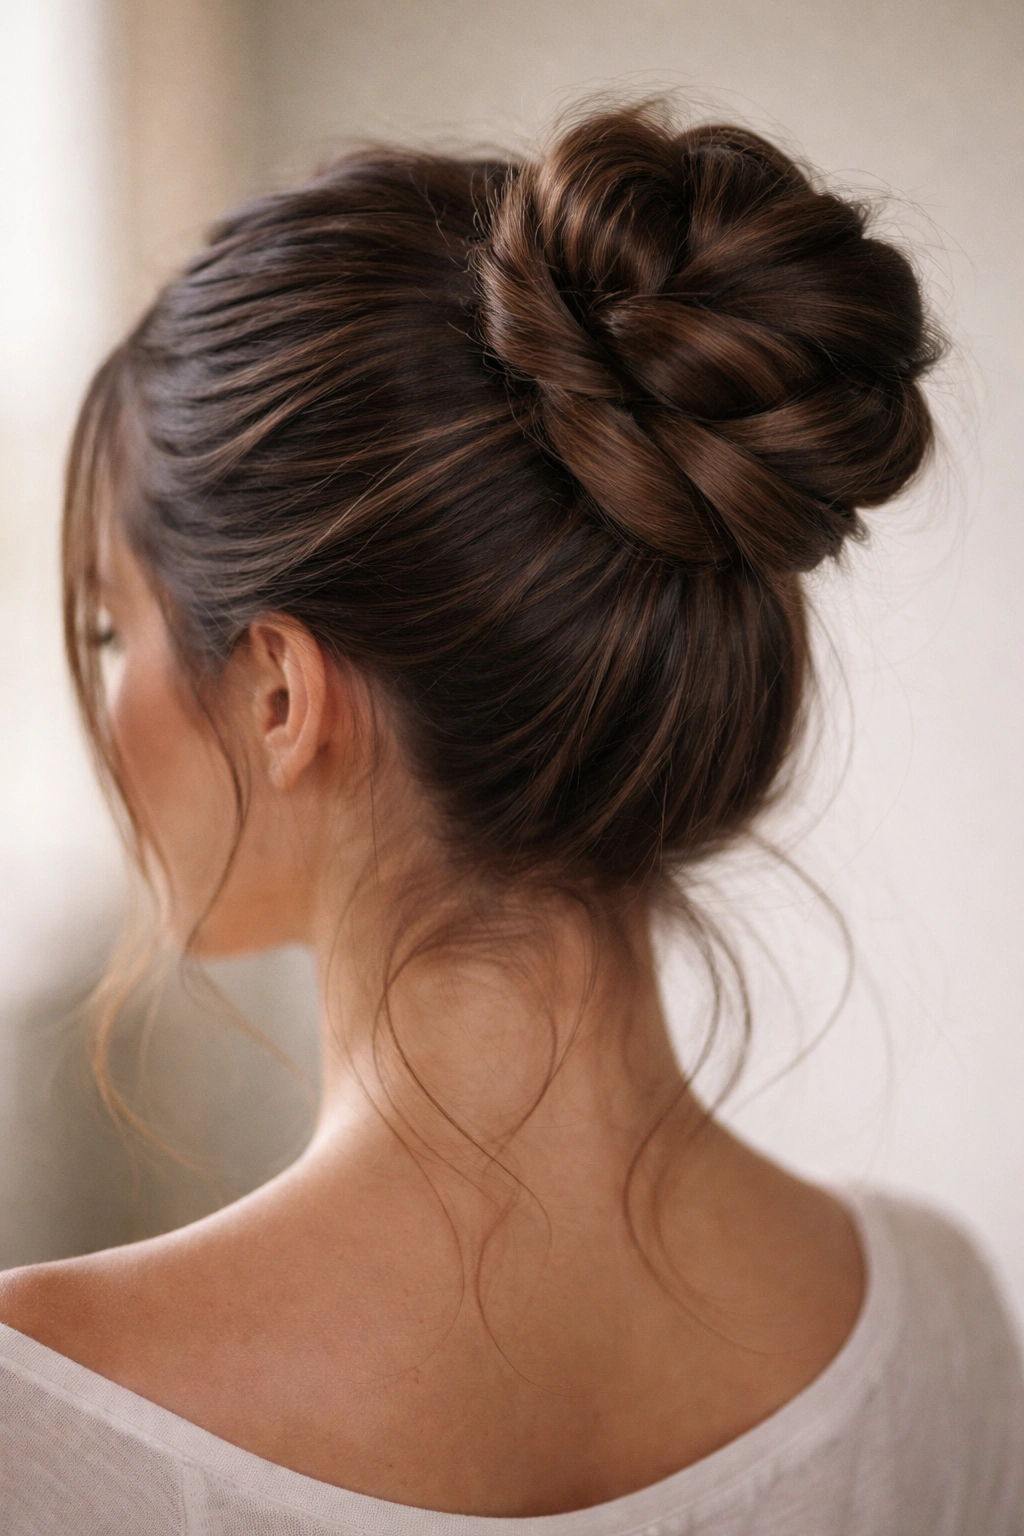
Instead of a simple twist, create two sections and twist them around each other, then coil that double-twist into a bun. Divide a high ponytail into two even sections. Twist each section tightly (in the same direction), then wrap the two twisted sections around each other in a spiral. Coil this double-twisted rope around the base of the ponytail and secure with bobby pins. The result is a bun with visible dimension and texture that thick hair fills beautifully—you get that luxe, “I woke up like this” texture without actually needing to be naturally textured.
Why This Works for Thick Hair
The knot structure creates multiple anchor points and divides your thick hair into manageable sections that are easier to secure. Instead of one thick, heavy ponytail to manage, you’re working with two thinner twisted sections, which is far more forgiving. The interlocking spirals also create visual depth that makes thick hair look intentionally styled rather than just gathered.
Assembly Instructions
- Make sure both twisted sections are twisted tightly before you begin wrapping them around each other—loose sections will unravel throughout the day, and thick hair’s weight will accelerate this
- As you wrap the two twisted sections around each other, maintain tension and keep the spiral tight and consistent—this is the spine of your whole style
- Wrap the finished double-twist around the base at least 1.5 times to create a full, rounded bun shape
- Secure with 5-6 bobby pins fanned around the base, ensuring each pin goes through multiple layers of the twisted rope
Insider note: This style looks incredible with a small face-framing braid incorporated into one of the two twisted sections. It adds complexity and looks far more intentional.
4. The Double Bun Look
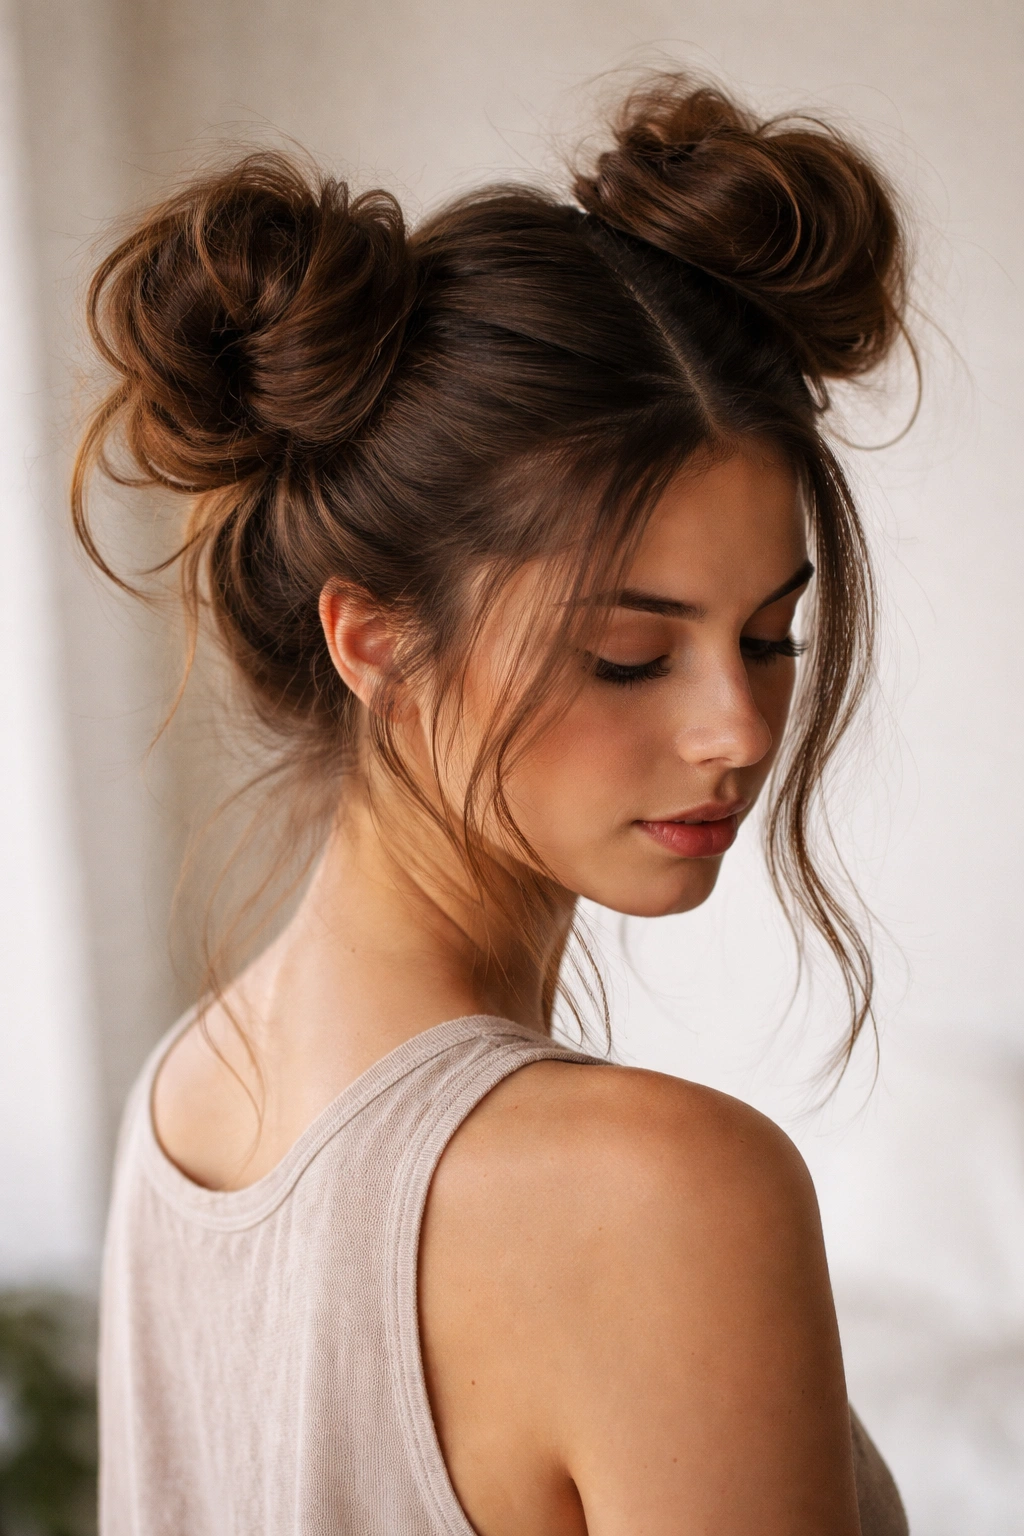
Two smaller buns distributed across the back of your head solve the heaviness problem that can come with one large bun on thick hair. Create a middle part from your hairline to the nape of your neck. Gather one half into a ponytail on one side of the back of your head (not directly behind the ear, but slightly more toward the center), and twist it into a small, textured bun. Repeat on the other side. The two buns together create the volume of one large bun, but the weight is distributed, making the style feel lighter and preventing that tight, pulled sensation at your scalp.
Why This Works for Thick Hair
Weight distribution is everything for thick hair. One concentrated bun can feel heavy and uncomfortable, and it often slides or shifts because it’s an unbalanced load on your scalp. Two smaller buns spread the weight evenly across the back of your head, which is both more comfortable and more stable. The double-bun approach also looks inherently more playful and modern, and it works especially well if your hair is thick enough that even distributing it still creates two visually substantial buns.
How to Execute It
- Don’t make the mistake of creating one bun too high and one too low—they should be at roughly the same height for balance, typically about 2-3 inches from the center part
- Each individual bun should be slightly tousled and loose, not compact—the goal is softness, not two tight knots
- Use 3-4 bobby pins per bun, positioned to follow the natural curve of each coil
- Leave several longer pieces loose around your face and lower neck; these create a softening effect that prevents the double-bun look from reading as overly casual or youthful
Quick fact: This style is excellent for thick curly hair because the two smaller buns allow individual curls to remain defined and bouncy rather than getting compressed into one dense mass.
5. The Textured High Bun
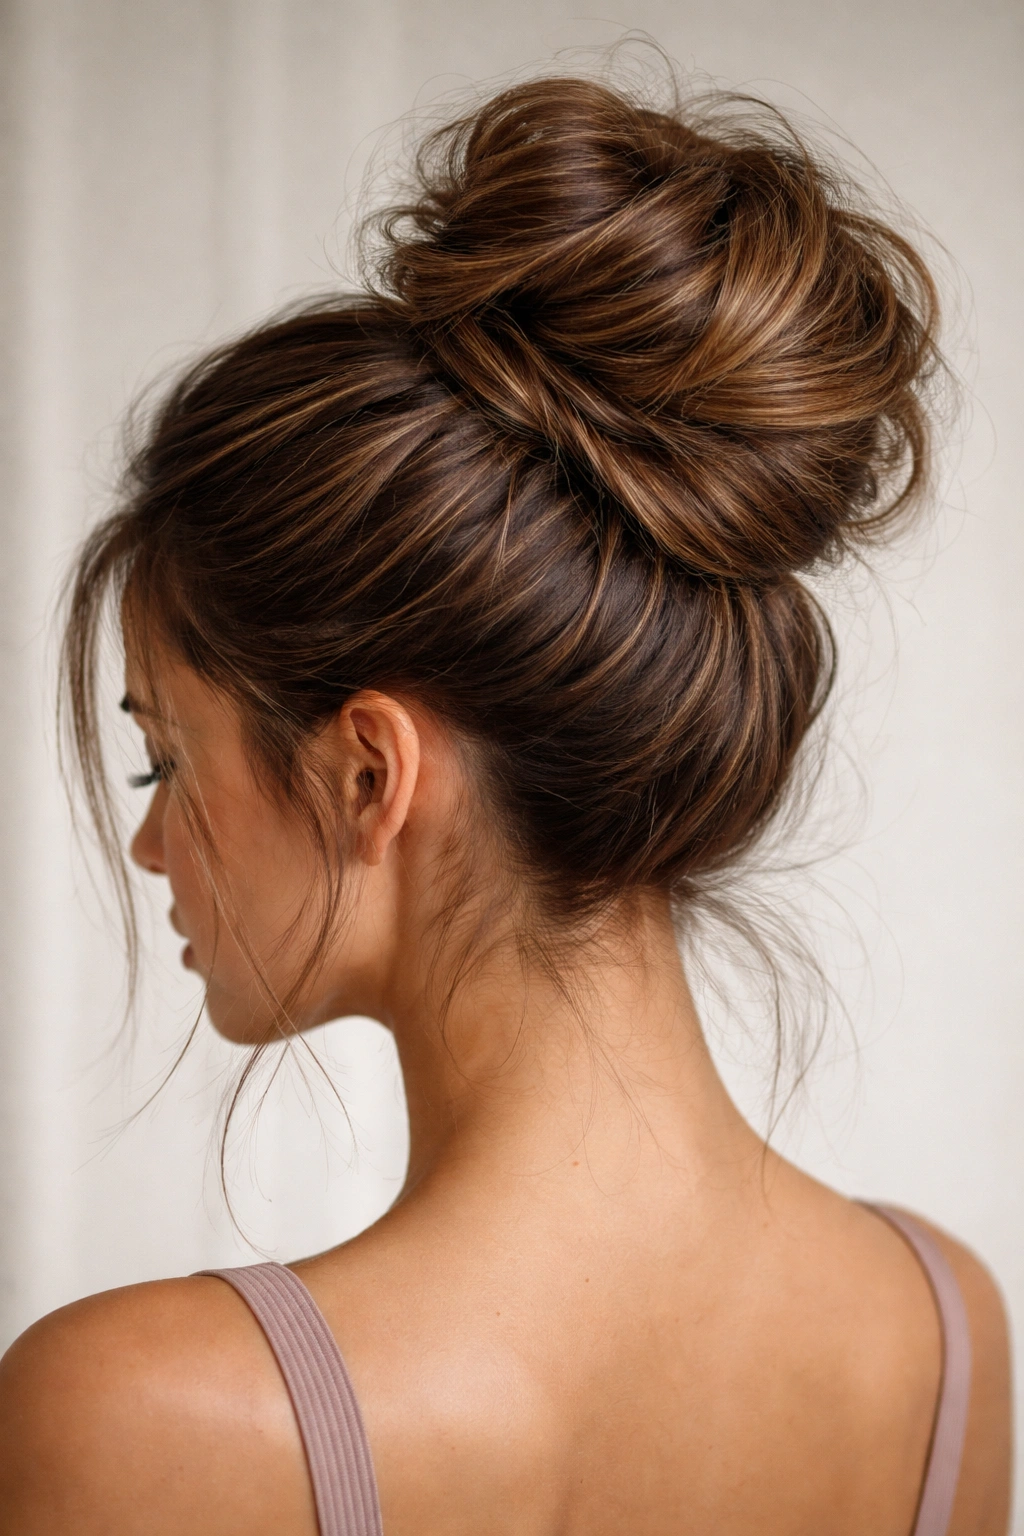
This style deliberately maximizes the texture already present in thick hair by teasing the bun structure before securing it. Gather hair into a high ponytail at the very crown. Before coiling, tease the entire length of the ponytail with a fine-tooth comb or texturizing brush—work section by section, backcomb gently but thoroughly. Then gently smooth the outer layer (just the surface) with your comb to create an intentional, controlled texture rather than obvious backcombing. Coil the teased ponytail into a bun shape and secure. The result is a bun with incredible visual depth and dimension.
Why This Works for Thick Hair
Thick hair sometimes looks flat or heavy when you simply twist it, but teasing adds lift, volume, and visual interest without adding any actual bulk. The texture makes the bun appear more stylized and intentional, transforming a simple twisted knot into a statement. The high placement combined with the textured volume creates an elegant, polished look that works for both casual and dressy occasions.
Technique Breakdown
- Tease in small sections, about 1-2 inches wide, working from the mid-length of the ponytail toward the ends—don’t tease right at the base where you’re going to coil, or you’ll lose control
- Use a texturizing brush rather than a metal teasing brush if your hair is prone to frizz or damage; it’s gentler and still creates plenty of texture
- Smooth only the absolute outer layer of hair to create a finished look while keeping all that internal texture intact
- Coil the teased ponytail slowly and deliberately, letting the texture show rather than trying to smooth it down as you go
Pro tip: Finish with a light texturizing spray rather than a heavy hairspray. Heavy product weighs down the texture you just created and makes thick hair look stiff.
6. The Low Side Bun
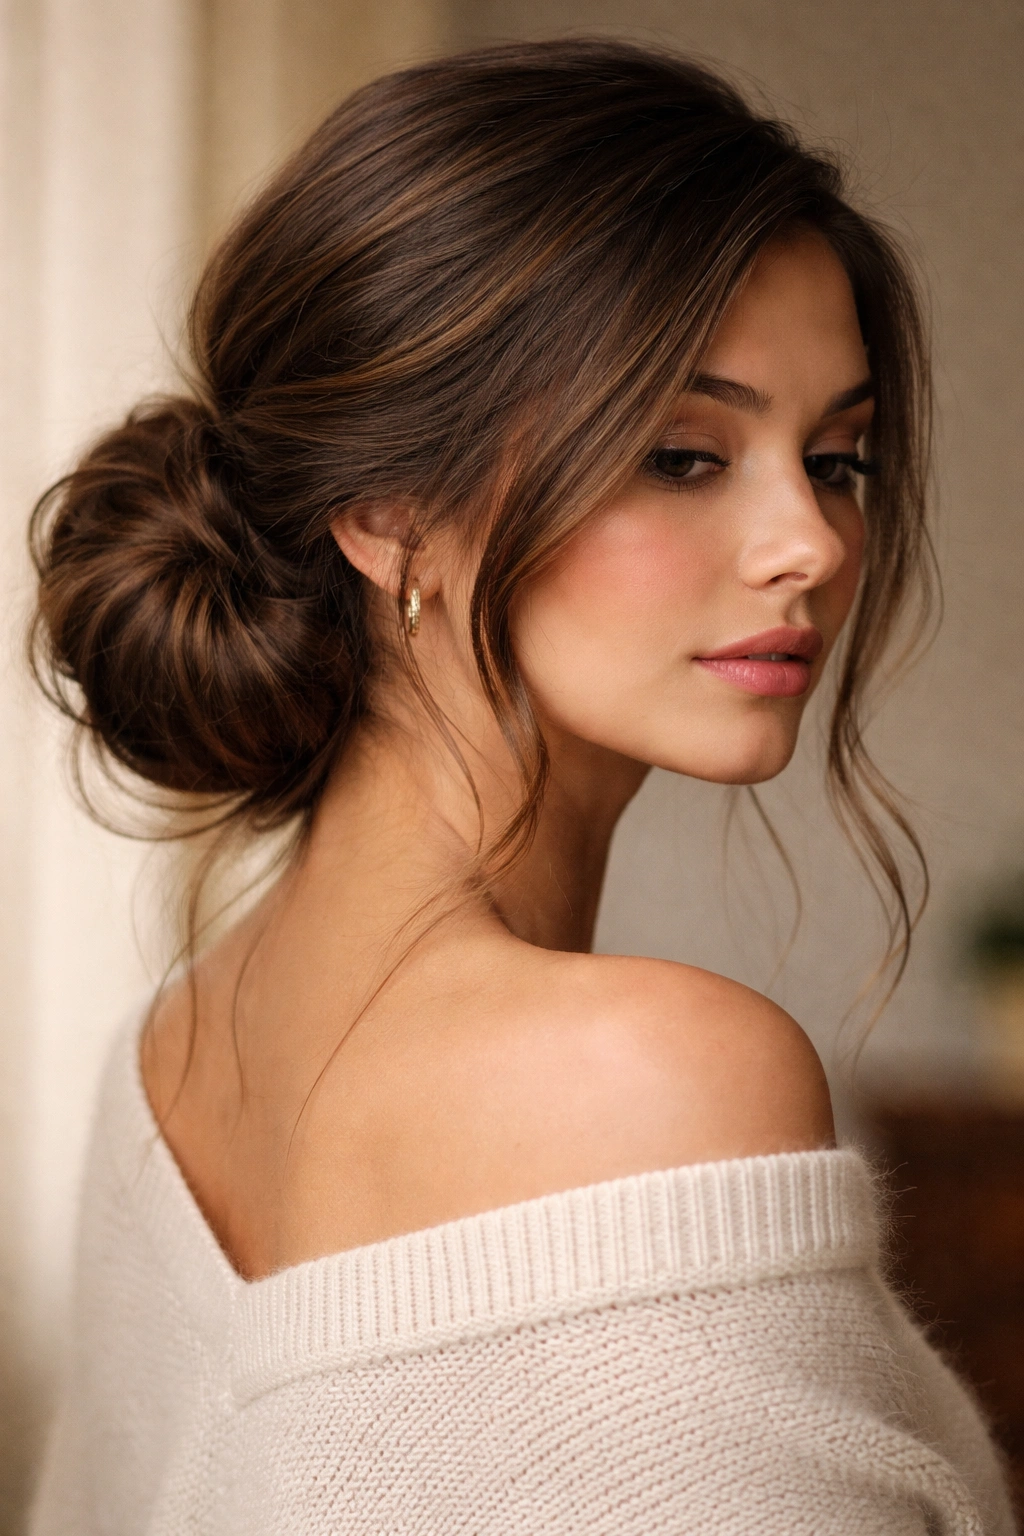
Sometimes the best solution for thick hair is to move it to the side and lower on your head, reducing the stress on your scalp and creating a romantic, over-the-shoulder silhouette. Create a deep side part and gather all your hair toward the nape of your neck on one side—not directly at the nape, but about 2 inches above it and slightly toward the back. Twist loosely and coil into a bun that sits over your shoulder blade area. Leave the side with less hair slightly wispy and textured, creating asymmetrical softness.
Why This Works for Thick Hair
Moving weight lower and to the side distributes it away from your crown and temples, which is where thick hair most often creates discomfort or tension headaches. The lower position is also more forgiving—gravity helps keep the bun in place rather than fighting against it. The side placement naturally creates space for face-framing pieces, which adds femininity and draws attention to your face rather than emphasizing the bulk of the bun.
Assembly Steps
- Create your side part first, and make sure it’s dramatic—a subtle side part gets lost with thick hair, while a deep part creates clear intention
- As you gather the hair for the bun, keep it slightly loose and relaxed; tight gathering at the side can create an unflattering pull on the face and temples
- Position the bun low enough that it sits between your shoulder blades when your hair falls naturally—this is usually 3-4 inches below your ear level
- Secure with bobby pins that follow the curve of your bun, and consider using bobby pins with a slight curve to them (they’re sold as “curved bobby pins”) for better grip on thick hair
Worth knowing: This style photographs beautifully and works for everything from casual weekends to formal events. The over-the-shoulder element feels intentional and elegant.
7. The Twisted Crown Bun
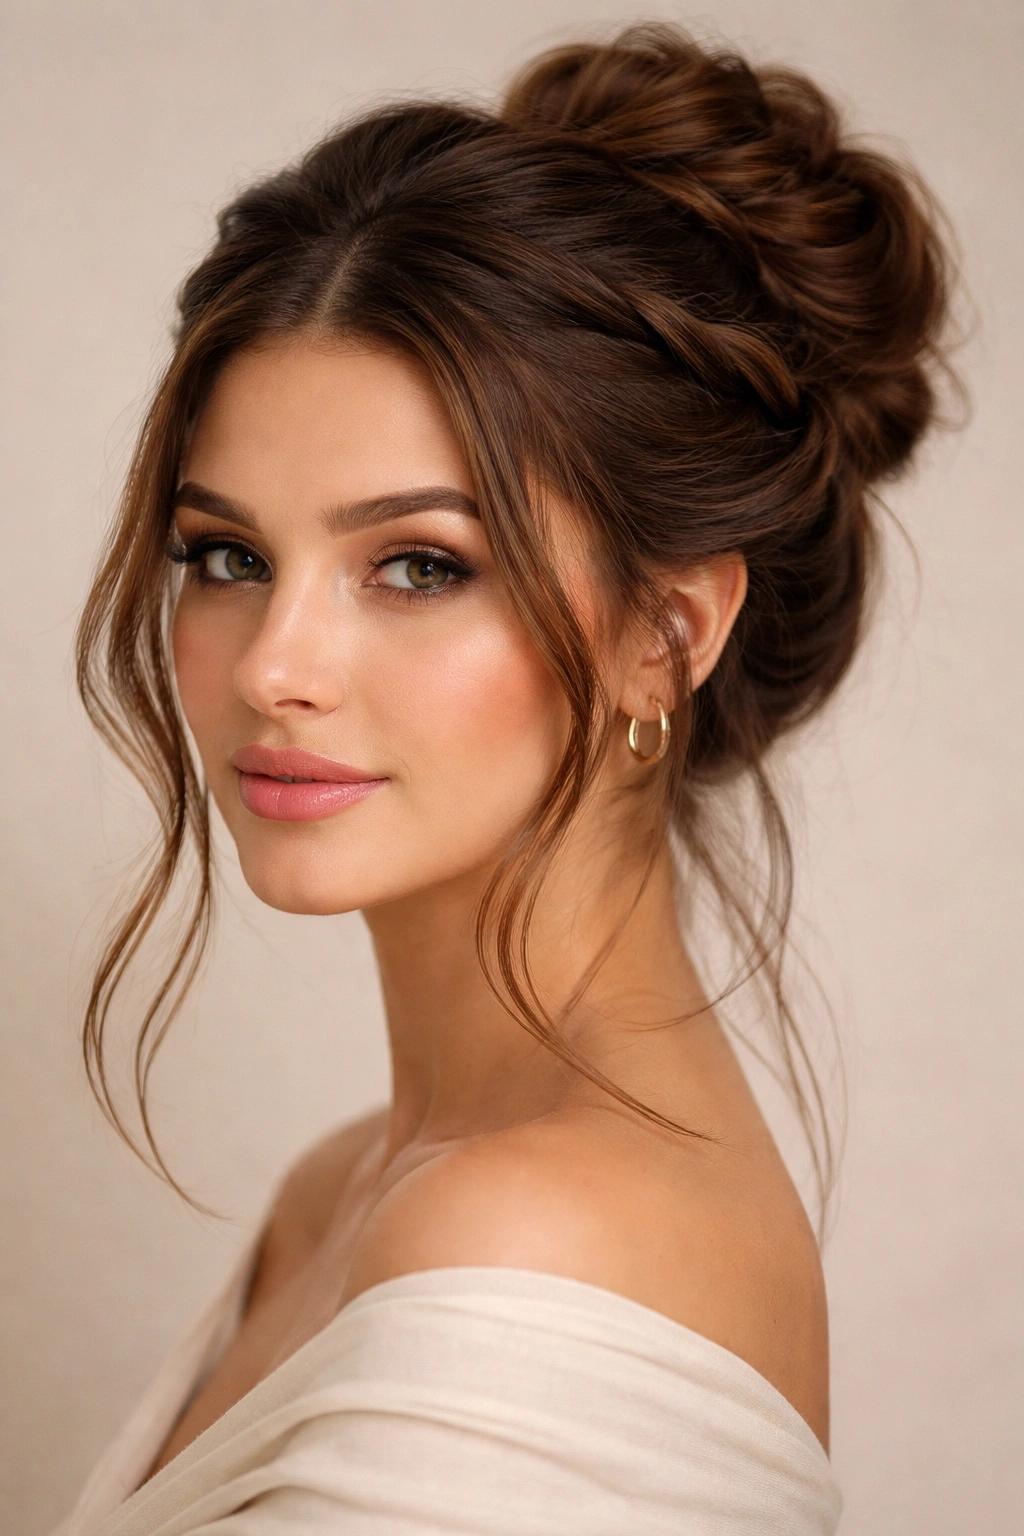
Create a halo effect by twisting two sections around your head before securing them into a bun at the back. Start by creating a center part from your forehead to the nape of your neck. Take a 2-inch section from your hairline on one side and twist it back toward your ear, then continue the twist all the way around to the back of your head, following the curve of your skull. Repeat on the other side. When both twists meet at the back, gather all your hair—including the twisted sections—and coil into a bun. The twists form a frame for your face, and the back bun captures everything into one cohesive style.
Why This Works for Thick Hair
The twisted sections distribute your hair’s density from the front and sides to the back, creating a balanced, elegant look. The twists also serve as structural anchors for the back bun, making the entire style much more stable. Thick hair holds these twists beautifully and maintains definition throughout the day because of the natural grip thick strands provide to each other.
Step-by-Step Guidance
- Don’t make the twists too tight—you want them to feel relaxed and to show texture along the way, which thick hair does naturally
- As you twist toward the back, add hair to each twist gradually using the “French braid” method, incorporating small sections as you go—this creates a fuller, more integrated crown
- When the twists meet at the back, they should merge naturally into the ponytail section without any obvious seams
- Tease the finished back bun slightly to create contrast with the smooth twists and increase overall texture and dimension
Insider note: This style works incredibly well with half-up, half-down styling. You can leave the back section down instead of putting it into a bun for a softer, more romantic version.
8. The Bubble Bun
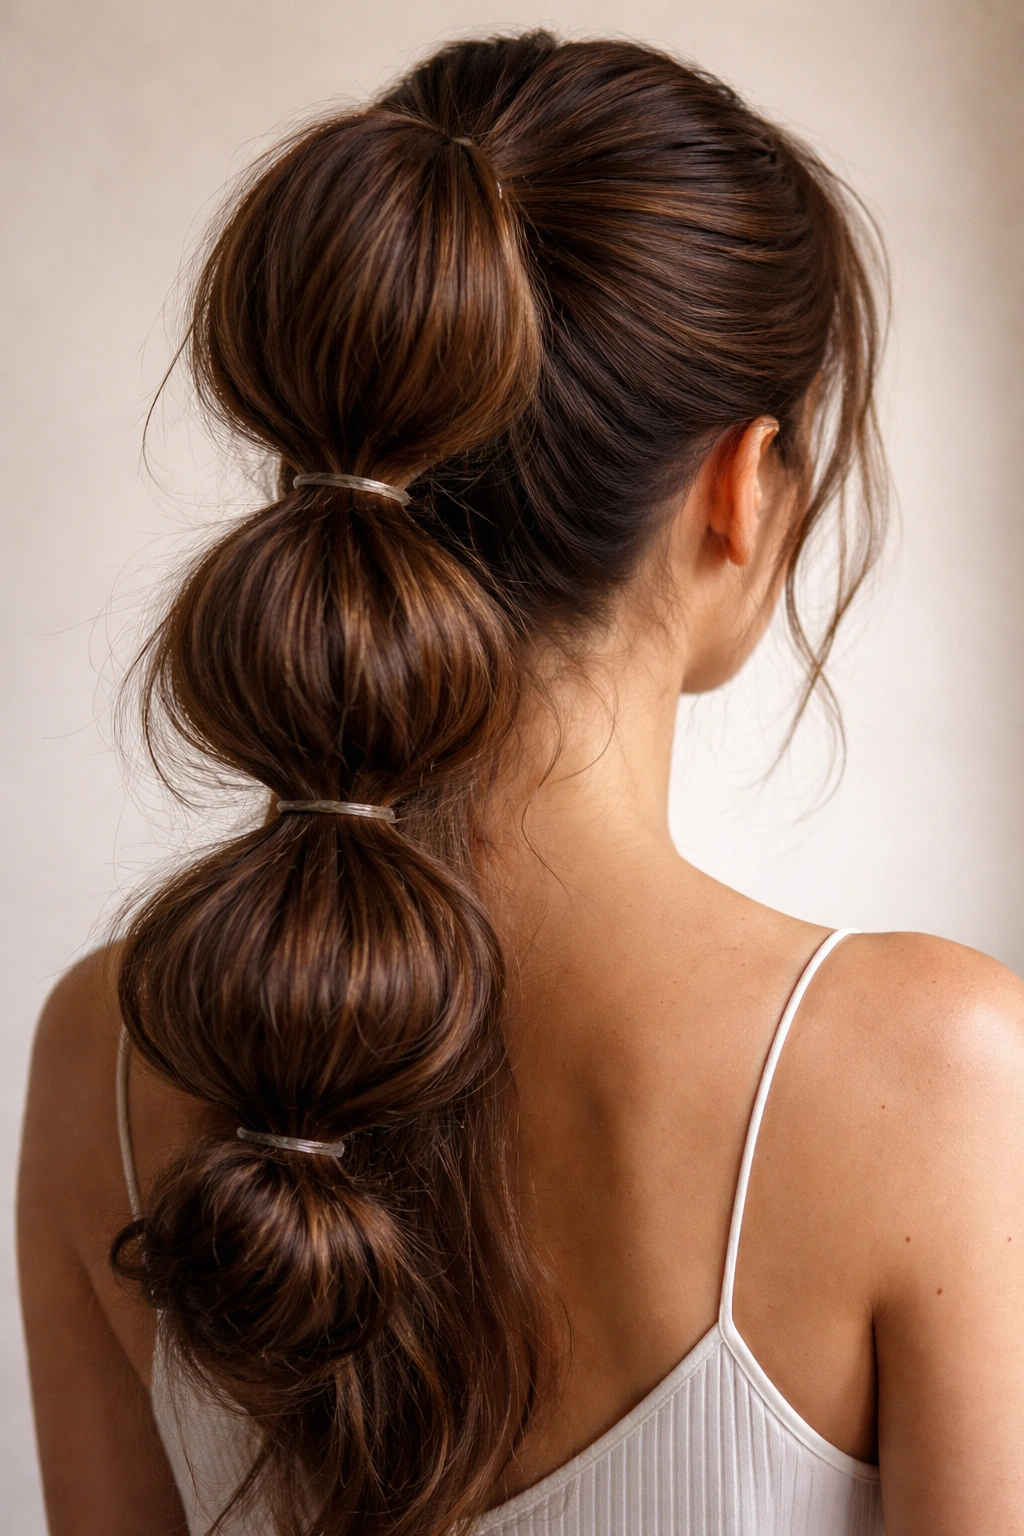
A bubble bun breaks your thick hair into defined sections stacked vertically, creating height and visual interest while managing bulk. Create a high ponytail, but leave a 1-2 inch section at the very top unsecured temporarily. Secure the lower section of the ponytail with an elastic. Then take the top loose section and create the first bubble by gently pulling and fluffing it above the elastic. Insert bobby pins from underneath to prop it up. Take a second elastic and secure another section just below, fluff that section to create a second bubble, and repeat with 3-4 bubbles total, working down the length of your ponytail. The final section becomes a small bun at the very bottom.
Why This Works for Thick Hair
The bubble bun’s genius is that it breaks your thick hair into segments, preventing one heavy mass from forming. Each bubble is individually supported and shaped, so weight never concentrates in one spot. The vertical stacking also creates the illusion of height and makes thick hair look intentionally styled rather than heavy. The defined sections mean the style holds beautifully throughout an active day.
Execution Details
- Make sure your ponytail is secured tightly at the base—this is the anchor point for the entire structure, and with thick hair, you need a solid foundation
- After securing each elastic, twist or loosely braid that segment before creating the bubble—this adds texture and prevents the section from looking too smooth or compressed
- Use bobby pins that match your hair color, and position them so they’re hidden underneath each bubble where they won’t show from the front or sides
- The bubbles should be progressively slightly smaller as you move down the ponytail, creating a tapered shape that looks intentional
Quick fact: This style holds so well that it’s genuinely a good choice for swimming or intense workouts, which is rare for bun styles. The distributed structure and individual bubble supports mean it stays in place even with movement and moisture.
Managing Thick Hair in Any Bun Style
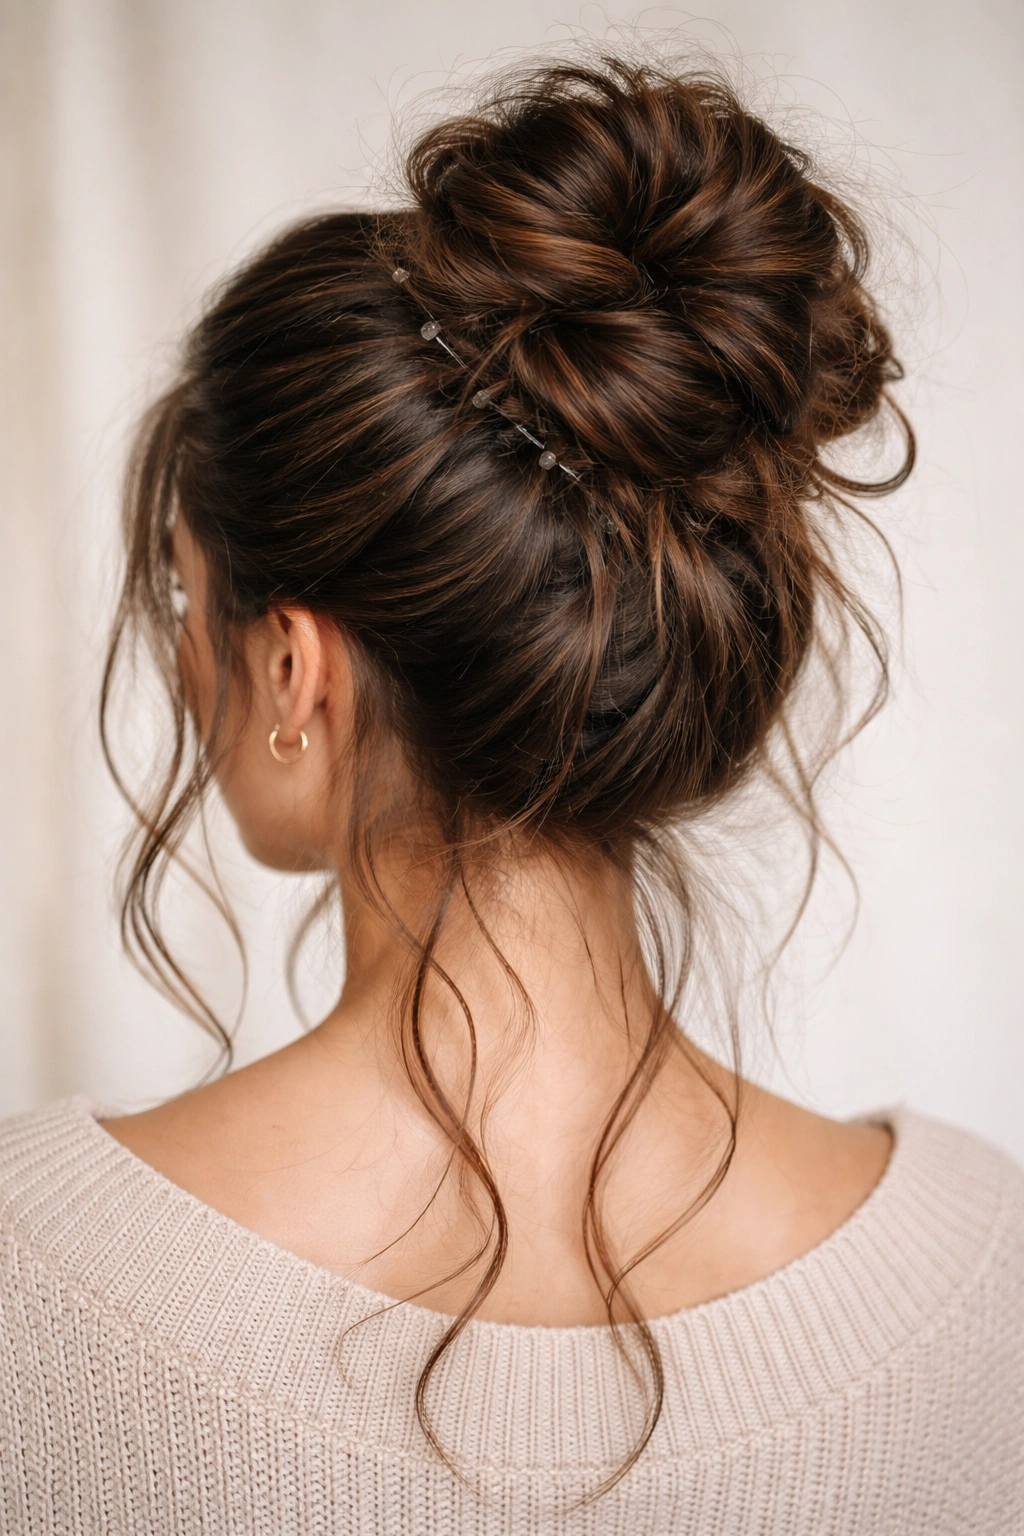
Regardless of which messy bun style you choose, thick hair has specific needs that make the difference between a bun that looks beautiful and feels comfortable all day versus one that frustrates you by noon. The weight of thick hair requires thoughtful distribution—never concentrate all of it in one point. You’ll notice that all eight styles above use multiple anchor points and distributed securing rather than one super-tight gathering. This isn’t just aesthetics; it’s practical necessity with dense hair.
Texture is your ally with thick hair. The slight messiness and imperfection that makes a bun look intentional happens almost automatically when you’re working with thick strands. You don’t need to spray and tease to death; you actually want to embrace the natural texture and work with it. Thick hair typically holds a bun beautifully throughout the day without constant adjustment, provided you’ve secured it properly and distributed the weight intelligently.
Product choice matters, but less than you’d think. Thick hair doesn’t need heavy-hold products to keep a bun in place—you need good bobby pins, proper distribution, and techniques that account for density. A light texturizing spray or a flexible-hold hairspray will serve you better than a stiff formula. Heavy products weigh down thick hair and can make your bun look greasy or compressed by midday, which defeats the purpose of that intentional messiness you’re going for.
Final Thoughts
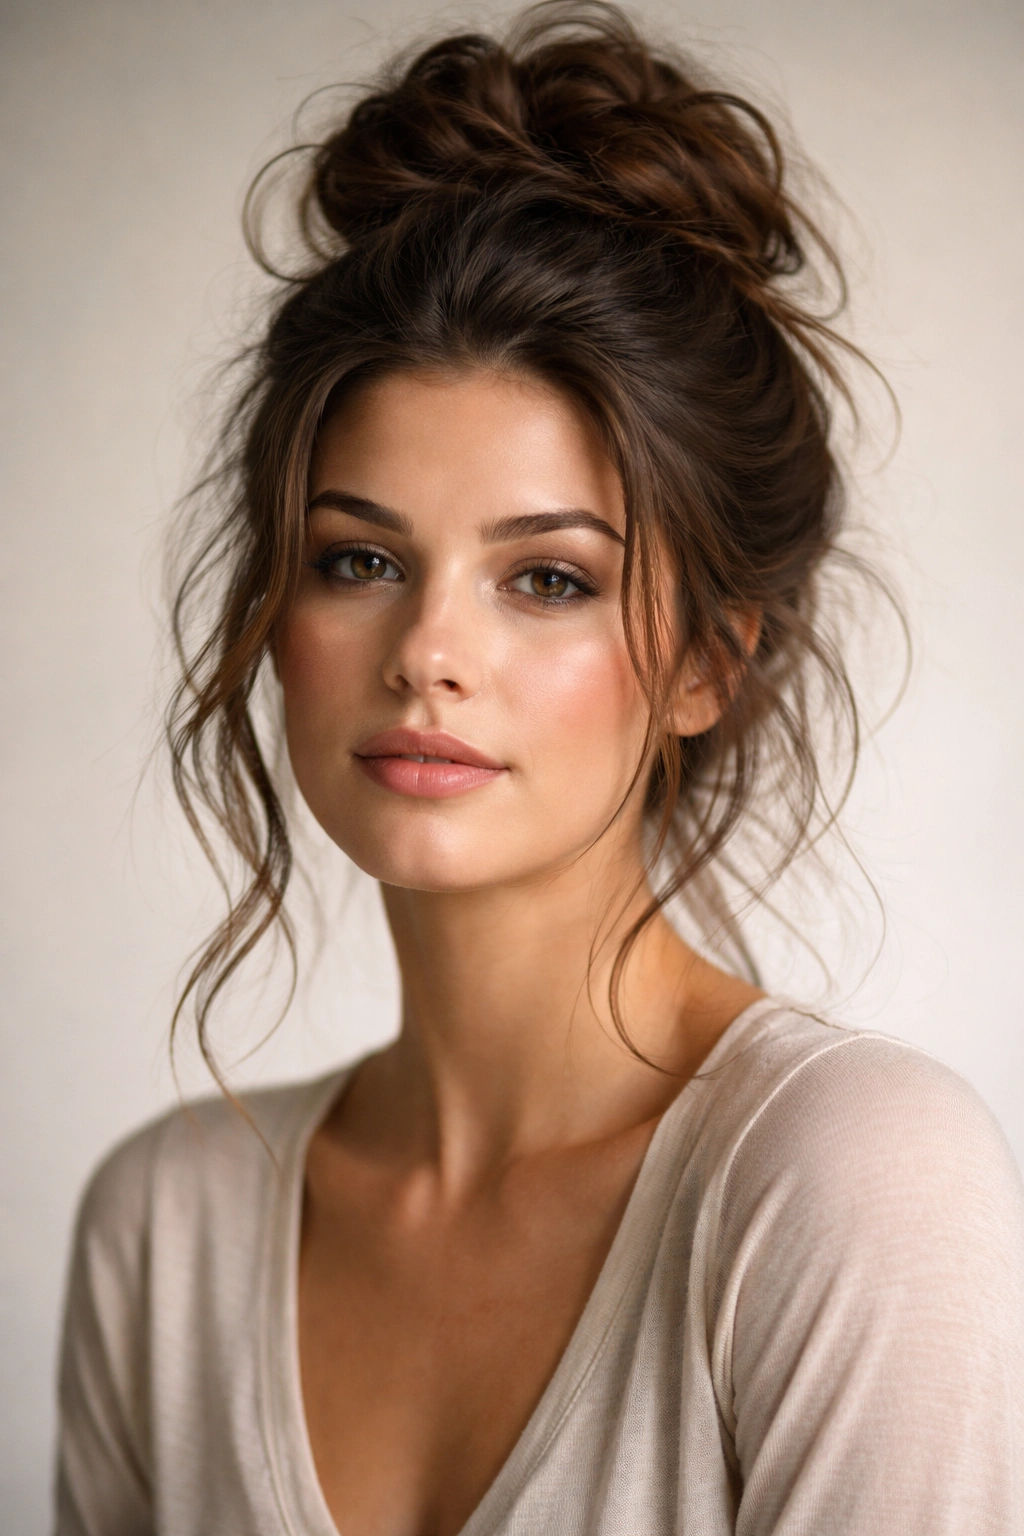
Thick hair is genuinely easier to work with for messy buns than finer textures, once you understand how to leverage its weight and density rather than fight it. The eight styles above give you genuine variety—from romantic low side buns to playful double buns to elegantly textured crowns. Each one solves a specific problem that thick-haired people encounter: heaviness, slipping, tension at the scalp, or the need for texture and visual interest.
The secret to making any of these styles work is embracing the messiness intentionally. A true messy bun isn’t lazy; it’s a deliberate style choice that requires technique, the right bobby pins, and an understanding of how your specific hair behaves. With thick hair, this becomes easier because your density naturally supports the loose, textured look without requiring an arsenal of products.
Experiment across the styles and find which ones feel most comfortable and make you feel most confident. Your thick hair is an asset—it gives you options that other hair types don’t have, and these eight styles prove it.
