



There’s something beautifully effortless about a messy bun—it’s the hairstyle that says you have your life together even when you’re running out the door with five minutes to spare. But when you add a middle part to the mix, you unlock a whole new dimension of styling possibilities. A middle part creates natural symmetry and balance, making even the messiest, most chaotic bun look intentional and thoughtfully put together.
The magic of combining a messy bun with a middle part is that it works across virtually every hair texture, length, and face shape. Whether you’re dealing with fine, straight hair or thick, curly waves, there’s a middle-part messy bun style waiting for you. The middle part elongates your face, makes your features feel more balanced, and gives you that enviable “I woke up like this” vibe without actually having to wake up looking flawless.
What makes these styles so practical is that they bridge the gap between polished and casual. You can wear them to run errands on a Saturday, throw them on for a casual workday, or style them up slightly for a low-key social gathering. They’re also genuinely protective for your hair—keeping the length gathered at the crown reduces daily breakage and friction, while still allowing your hair to breathe and your scalp to stay healthy. The best part? Once you understand the mechanics of the middle part and how to secure a messy bun properly, you can customize these styles endlessly based on your mood and what you have on hand.
1. The Textured Crown Messy Bun
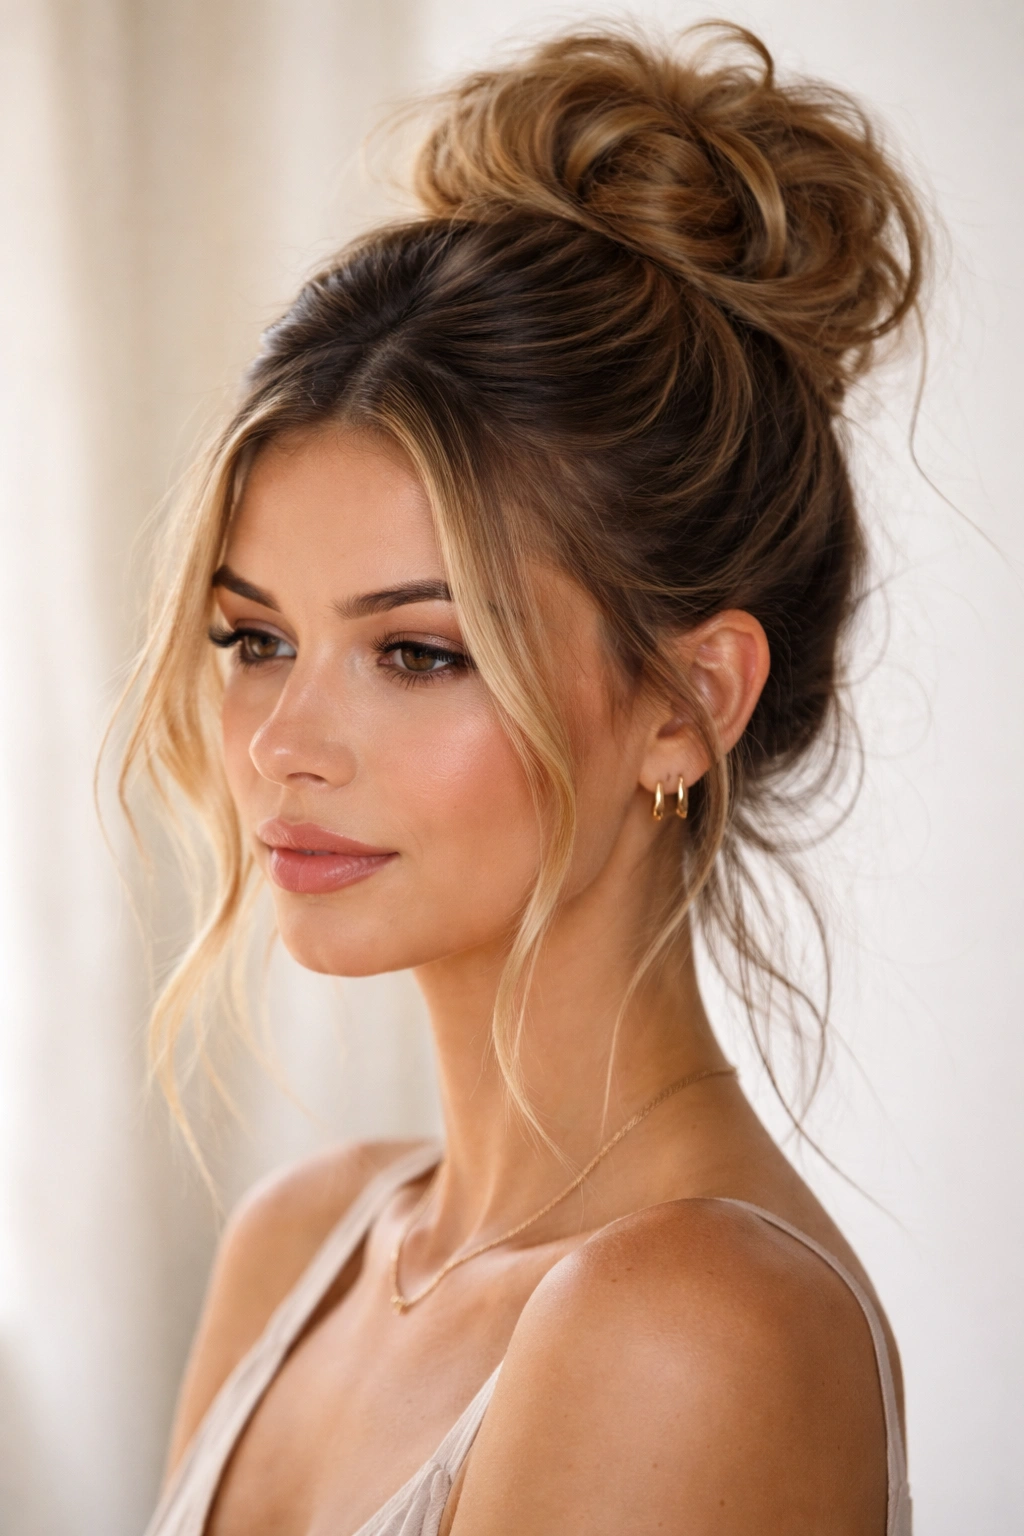
This is the style that reads as effortlessly chic without requiring you to actually do that much work. The foundation is a clean middle part paired with a bun positioned at the crown of your head, but here’s where it gets interesting—instead of pulling your hair smoothly back, you’re intentionally leaving texture and dimension throughout. The result is a bun that looks like you spent actual time on it when really you’re just working with what your hair naturally wants to do.
How to Create the Texture
Start with hair that has some natural wave or texture to it—if your hair is stick-straight, use a curling iron or braiding method the night before to create loose waves. Brush out those waves gently so they break up into pieces rather than sitting as defined ringlets. The goal is soft, undefined texture that moves and shifts when you touch it. Apply a texturizing spray to your mid-lengths and ends before you begin securing the bun; this gives you grip and helps the messiness read as intentional rather than just unkempt.
Securing It Properly
Divide your hair down the middle with a fine-toothed comb, making sure the part runs from your hairline straight back to the nape of your neck. Gather all your hair at the crown—we’re talking roughly the top third of your head—and secure it loosely with a hair tie. Don’t pull too tight; that crisp, pulled-back look works against the textured vibe you’re going for. Once the base is secured, take individual sections from the bun and gently twist or wrap them around the base, anchoring with bobby pins. The key is leaving some sections intentionally loose and slightly undone.
Final Touches That Matter
Pull out a few face-framing pieces before you declare it finished. These soften the severity of the middle part and create dimension that makes the whole look feel warmer and less stark. Use bobby pins in a color that matches your hair—dark pins disappear into dark hair and copper pins blend into warmer tones. A light spritz of flexible hold hairspray locks everything in place without making it crunchy or heavy.
Pro tip: This style actually looks better on day-two or day-three hair. If your hair is freshly washed, it’s too slippery and won’t hold texture as well. Skip the conditioner the day before if you want extra grip.
2. The Twisted Side Wrap Bun
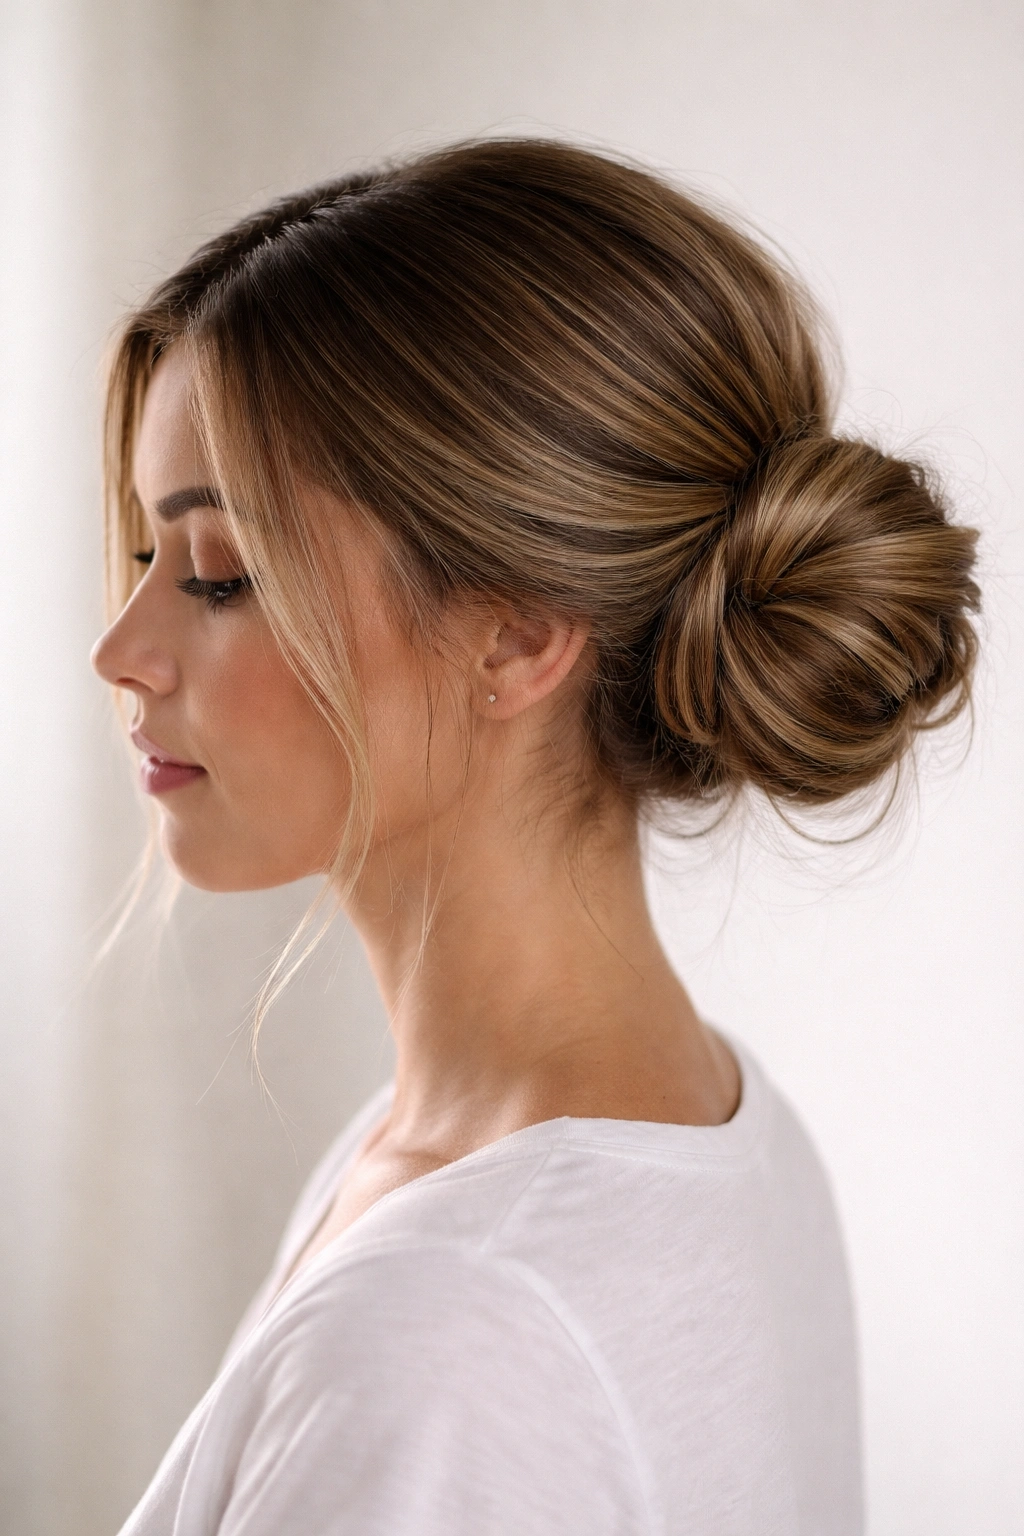
If you love the idea of a middle part but want something with more visual interest than a center-positioned bun, the twisted side wrap is your answer. This style keeps the middle part prominent and balanced while positioning the bun slightly to one side, creating an unexpected asymmetry that feels modern and intentional. The twisted wraps around the base add dimension and a handmade quality that looks genuinely put-together.
Creating the Middle Part
Your middle part is the anchor point for this entire style, so it needs to be intentional. Use a rattail comb or the pointy end of a fine-tooth comb to section your hair dead center from your hairline to your neck. If your hair doesn’t naturally want to sit in a middle part, mist the roots lightly with water and use a fine-tooth comb to train the part. You want this part to look clean and deliberate, not accidental.
The Gathering and Initial Securing
Flip your head upside down and gather all your hair at the nape of your neck as if you’re making a low ponytail. This backwards approach gives you better control and lets you see what you’re doing more clearly. Once you’ve got everything gathered, flip back upright and adjust the position—you want the base of your bun to sit slightly off-center, maybe an inch toward one side. Secure with a sturdy elastic.
The Twisted Wrap Technique
This is what elevates the whole look. Divide the gathered ponytail into two or three sections. Take one section and twist it tightly, then wrap it around the base of the ponytail, securing the end with a bobby pin. Repeat with each section, wrapping them in slightly different directions—some clockwise, some counterclockwise—so the overall effect looks organic rather than geometric. Leave some of the ponytail slightly loose before you start wrapping; this gives you texture at the crown that prevents the bun from looking overly neat.
Worth knowing: The twist wraps work best when your hair has a bit of natural oil or texture to it. If your hair is slippery, rough it up slightly with a texture spray before twisting.
3. The Deliberately Undone Top Knot
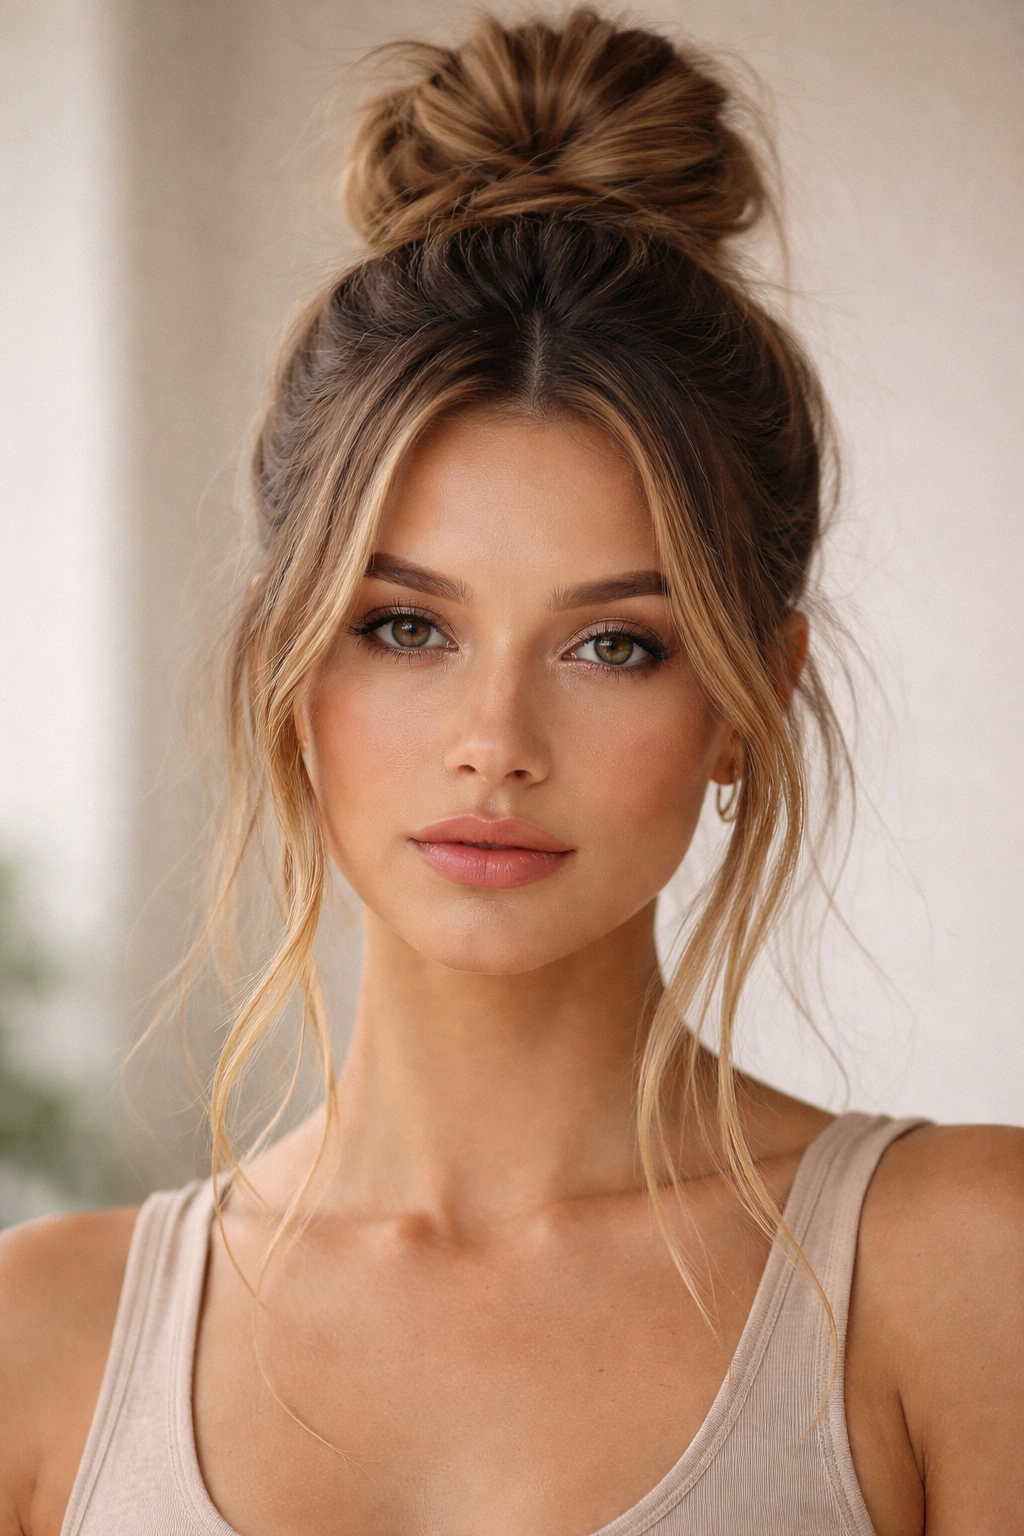
This is the style for days when you want everyone to know you didn’t try, even though you kind of did. The deliberately undone top knot with a middle part strikes that perfect balance—it’s casual enough for the gym or a coffee run, but deliberate enough that it doesn’t look like you just grabbed your hair in frustration. The middle part adds a note of polish that transforms “I didn’t do my hair” into “I have excellent hair texture and I’m confident about it.”
The Middle Part Setup
Make your middle part first, before you do anything else. This ensures that as you gather your hair, the part stays visible and balanced. You don’t want the part to shift or disappear as you work with the rest of your hair. Pin the front sections on either side of the part very loosely with small bobby pins or clips just to keep them out of your way while you work with the back.
Gathering at the Crown
Bring all your hair to the very top of your head—higher than you think looks normal. The crown positioning is what makes this feel like a deliberate style choice rather than a careless ponytail. Use a loose elastic; this is non-negotiable. A tight elastic makes everything look too controlled and defeats the whole purpose of the undone aesthetic. Wrap the elastic once, maybe twice, but leave enough slack that the ponytail sits in a loose loop.
Creating the Undone Effect
Now comes the artful part: making it look like you didn’t try. Take the loop of hair and twist it loosely around its base, then tuck the ends in and secure with bobby pins. But here’s the key—don’t tuck everything in neatly. Leave wisps, flyaways, and pieces escaping around the base and crown. Pull out face-framing pieces deliberately. Gently tease the bun slightly with a fine-tooth comb to break up any sleekness. You want this to look like your hair is having its own little party up there at your crown.
The Final Inspection
Step back and look at your bun. It should read as messy, yes, but not in a way that makes you look like you just woke up or had a bad day. There’s a difference between “effortlessly textured” and “actually kind of messy,” and the line is thin. If something feels too neat, pull a piece out. If something looks too chaotic, smooth one tiny section slightly. This is the balance.
Insider note: A tiny spritz of sea salt spray just before you do the final tousling adds texture and makes the undone look last much longer than it would with dry, slippery hair.
4. The Two-Tone Split Bun
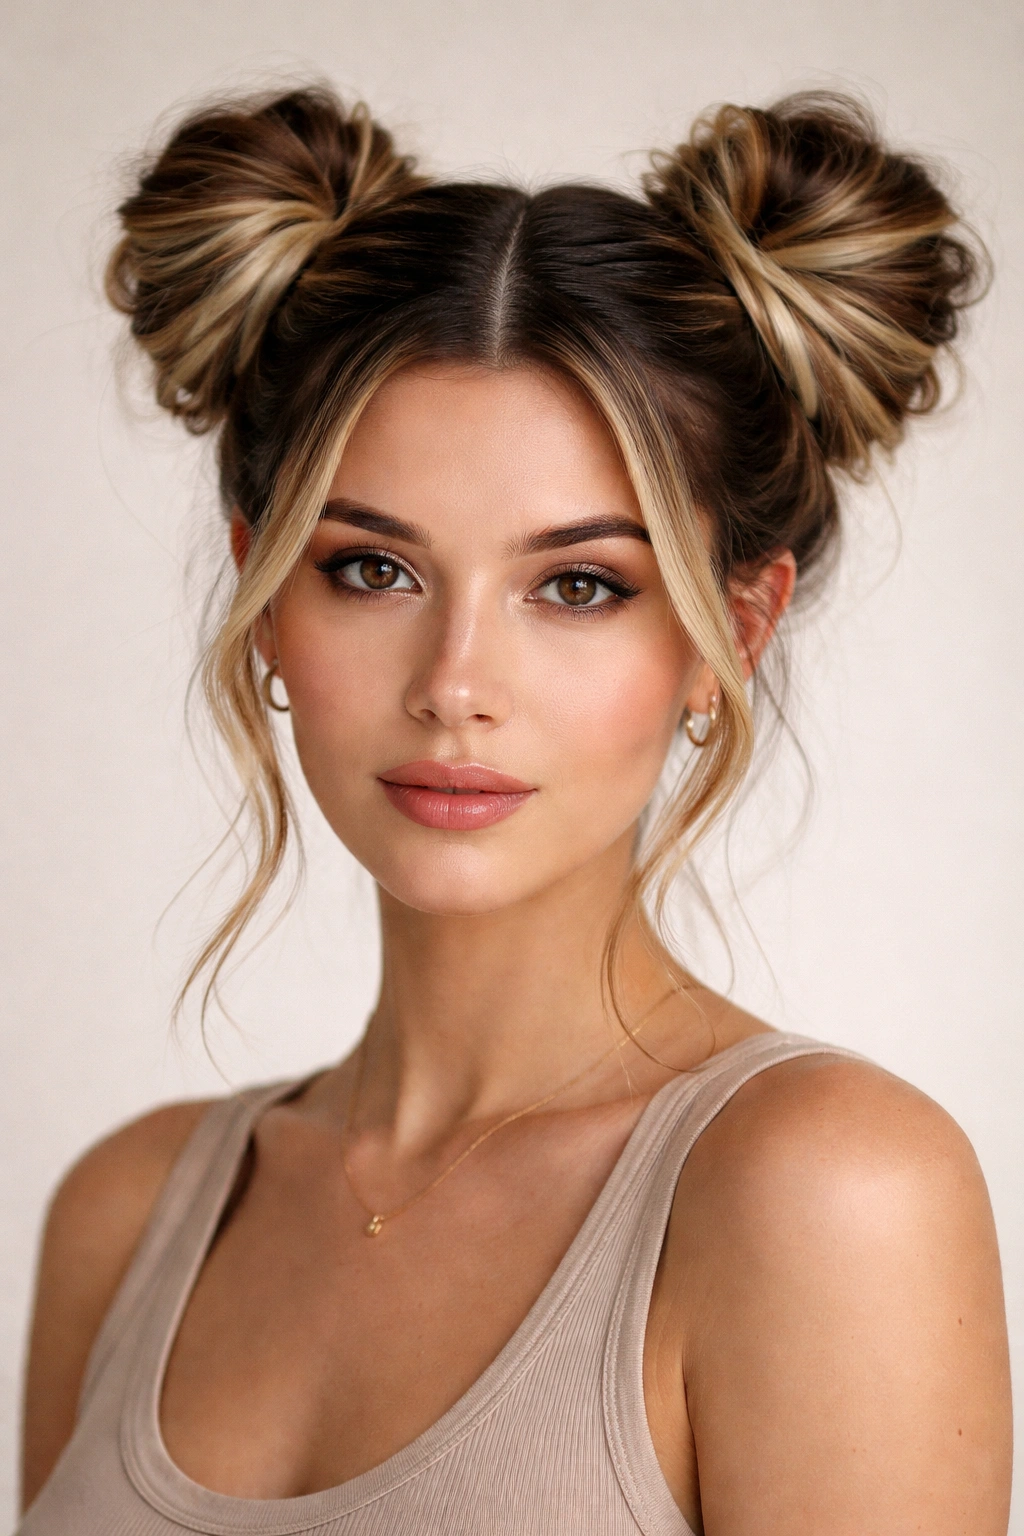
For anyone who’s ever wanted to try the two-bun look but felt like it would make them look too young or too playful, the two-tone split bun offers the visual interest of dual buns while the middle part keeps everything feeling mature and deliberate. This style works especially well if you have natural or dyed highlights, balayage, or dimensional color—the two buns let those tones show differently on each side.
Perfecting the Middle Part
This style lives and dies by its middle part, so make this count. Your part needs to run straight down the back of your head, not slightly off to one side. Use a fine comb and take your time. The symmetry of having two identical buns on either side of a perfect middle part is what makes this look intentional rather than accidental.
Dividing Your Hair into Two Sections
Once your middle part is set, divide all your hair into two equal sections. Each section should include hair from the front hairline all the way to the back of your neck. Using clips to separate and keep organized is honestly necessary here—trying to hold two separate sections while working is a recipe for frustration. Clip one section up and out of the way while you work on the first bun.
Creating Each Individual Bun
With one section of hair freed, gather it at the crown on that side of your head. The positioning should mirror the opposite side—if one bun is on the top-left of your crown, the other should be on the top-right, equidistant from the center part. Secure with an elastic. Here’s where you can get creative: make one bun tighter and more defined while leaving the other slightly looser and more textured. Or make them identical twins. The choice is yours, but consistency on both sides usually reads as more intentional than mismatched buns.
Securing Both Buns
Twist or wrap each bun’s tail around its base and pin. Leave some texture and pieces escaping—two tight, perfect buns looks a bit severe. Pull out a few face-framing pieces on each side to soften the overall look. The key to this style not reading as “pigtails for adults” is making sure the buns are positioned at the crown (higher than pigtails would be) and ensuring they have enough texture and softness that they read as intentional, sophisticated messiness.
Pro tip: This style is absolutely gorgeous when you have color dimension. If your color is all one tone, consider which sections might catch the light differently. Buns positioned at the crown will show color at slightly different angles depending on how you’ve twisted the hair.
5. The Sleek Base with Chaotic Crown
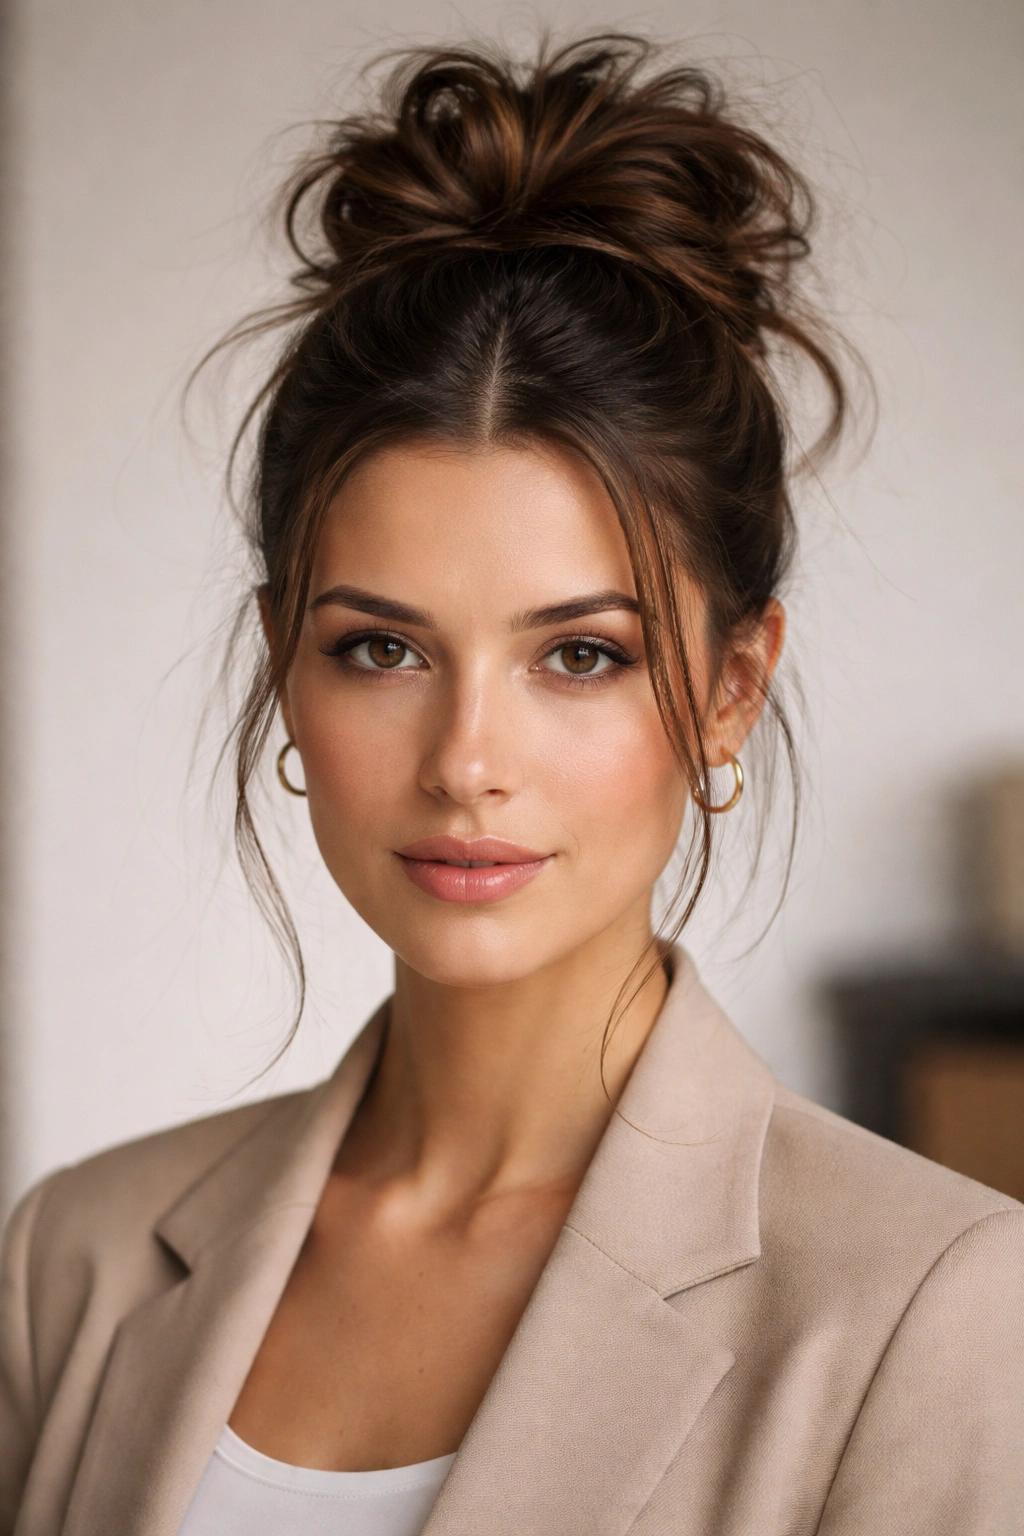
This style gives you the best of both worlds: a polished, intentional appearance from the front, paired with a crown that’s gloriously, chaotically textured. The middle part keeps everything feeling balanced and modern, while the sleek base ensures the overall look doesn’t tip into “actually kind of messy” territory. It’s the hairstyle equivalent of business casual.
Creating the Sleek Foundation
Start by making a pristine middle part—this is your anchor. Smooth the front sections completely flat against your head using a fine-tooth comb and a light hold hairspray. You’re looking for smooth, shiny, intentionally groomed sections that frame your face. These smooth sections create visual contrast with what’s happening at the crown, which amplifies the textured effect you’re building.
Gathering the Back Section
The back section—everything behind your ears—gets gathered at the crown, but the key here is gathering smoothly. Use a fine comb to smooth it as you gather, pulling it straight back without creating any bumps or loose pieces as you work. This smooth gathering creates the polished base that everything else sits on top of.
Building Texture at the Crown
Once the back section is secured in a low, smooth ponytail at the crown, that’s where the chaos begins. Tease the ponytail gently at the base with a fine-tooth comb to create volume and texture. Take sections of the ponytail and twist them loosely, wrapping around the base in slightly different directions. Leave some sections untwisted, just loosely wrapped. Pull some strands completely out and let them fall naturally. The goal is a crown that looks like your hair is doing its own thing while the sleek front keeps everything grounded.
Securing Without Looking Overdone
Use bobby pins to anchor the twisted and wrapped sections, but don’t overpin. Seventeen bobby pins all visible looks stiff and overdone. Use just enough that your bun won’t shift, and hide the pins in texture and shadow rather than spreading them across visible surfaces.
Worth knowing: This style genuinely benefits from day-two or day-three hair. Freshly washed hair doesn’t grip and hold texture the way slightly-lived-in hair does.
6. The Wrap-Around Braided Bun
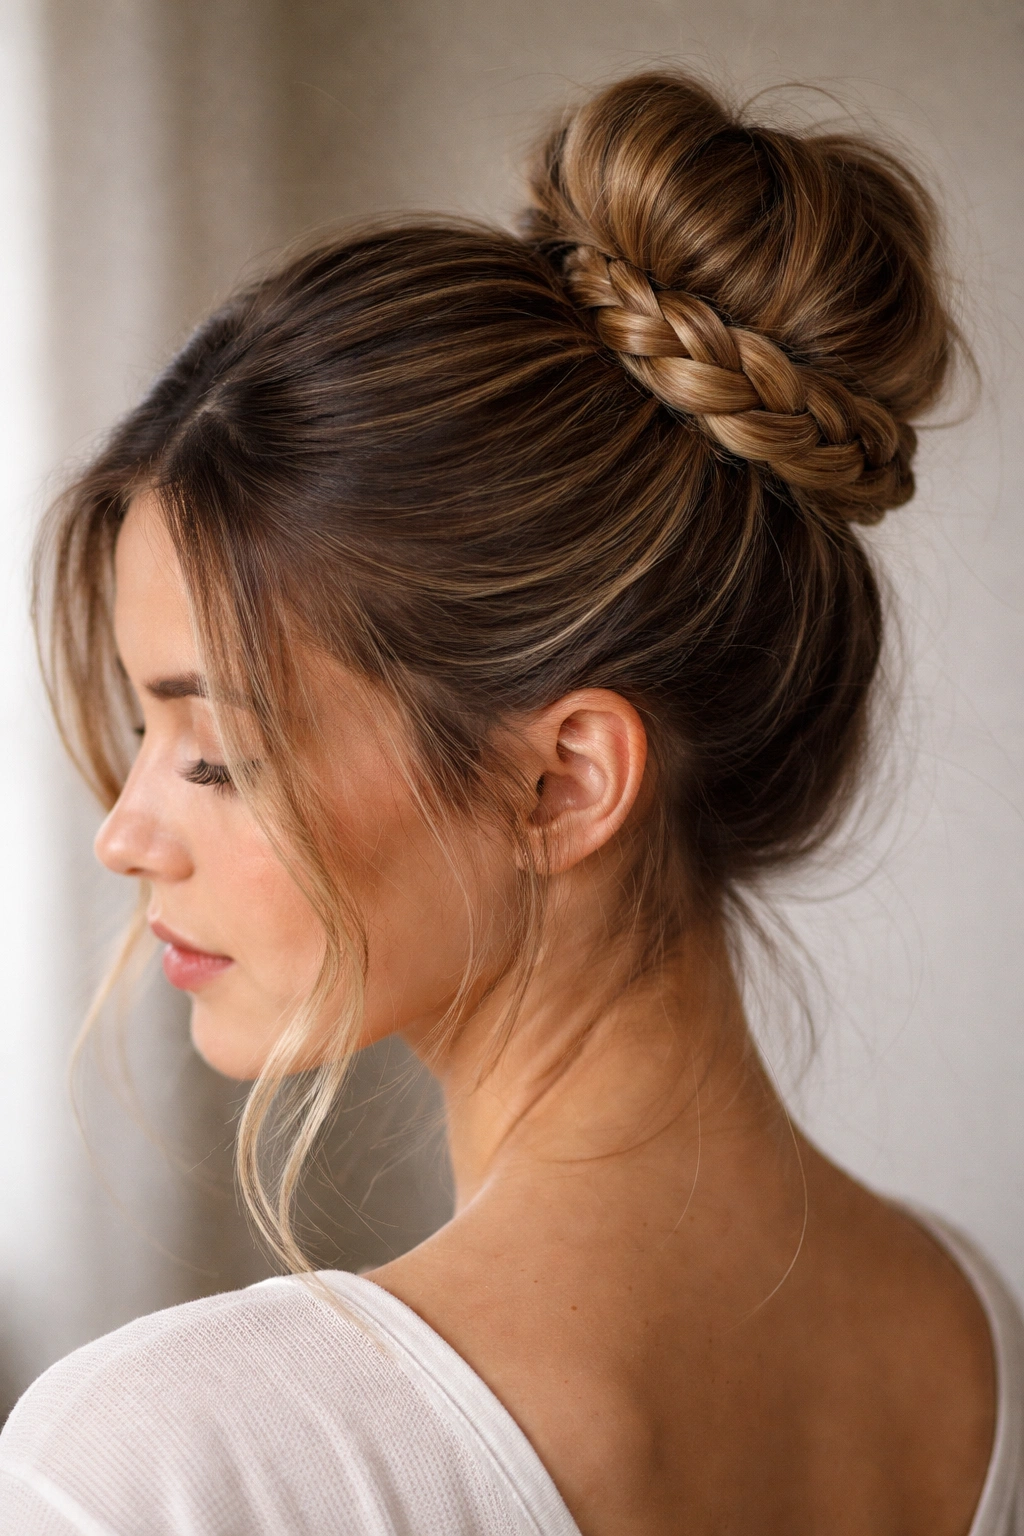
If you have any braiding skills at all, this style elevates a basic messy bun into something that looks genuinely impressive without actually being that complicated. The middle part provides balance and symmetry, while the braided wrap adds visual interest and a handmade quality that feels special. This is the style that makes people ask “how did you do that?” even though it’s surprisingly simple.
Starting with Your Middle Part
Create your middle part first, as always, making sure it’s clean and defined. You’ll want this part to remain visible throughout the style, so it should be intentional and distinct from the beginning.
Creating the Base Bun
Gather all your hair at the crown into a loose ponytail or top knot. Don’t secure it yet—just hold it in place with your hands while you assess the positioning. You want the base positioned high enough that it’s clearly a deliberate crown bun, not a low ponytail. Once you’ve got the positioning right, secure it with an elastic.
The Braiding Component
This is where the magic happens. Separate a section of the ponytail—maybe a quarter of it—and braid it. A simple three-strand braid works beautifully here; you don’t need anything fancy. The braid can be loose and slightly undone, which actually adds to the overall aesthetic. Once your braid is complete, wrap it around the base of the bun, securing the end with bobby pins. You can do one braid, or if you’re feeling it, multiple braids wrapped in different directions around the bun for more visual impact.
Finishing with Texture
Take the remaining ponytail sections and twist or wrap them around the base as well, alternating between braided and twisted sections. Leave some texture and pieces escaping—this keeps the bun from looking too structured. Pull out a few face-framing pieces and tease them slightly for softness.
Pro tip: French braids or Dutch braids (braids that sit on top of the hair rather than integrated into it) work especially well here because they’re more visible and add more visual interest than traditional three-strand braids.
7. The Half-Up Messy Bun Hybrid
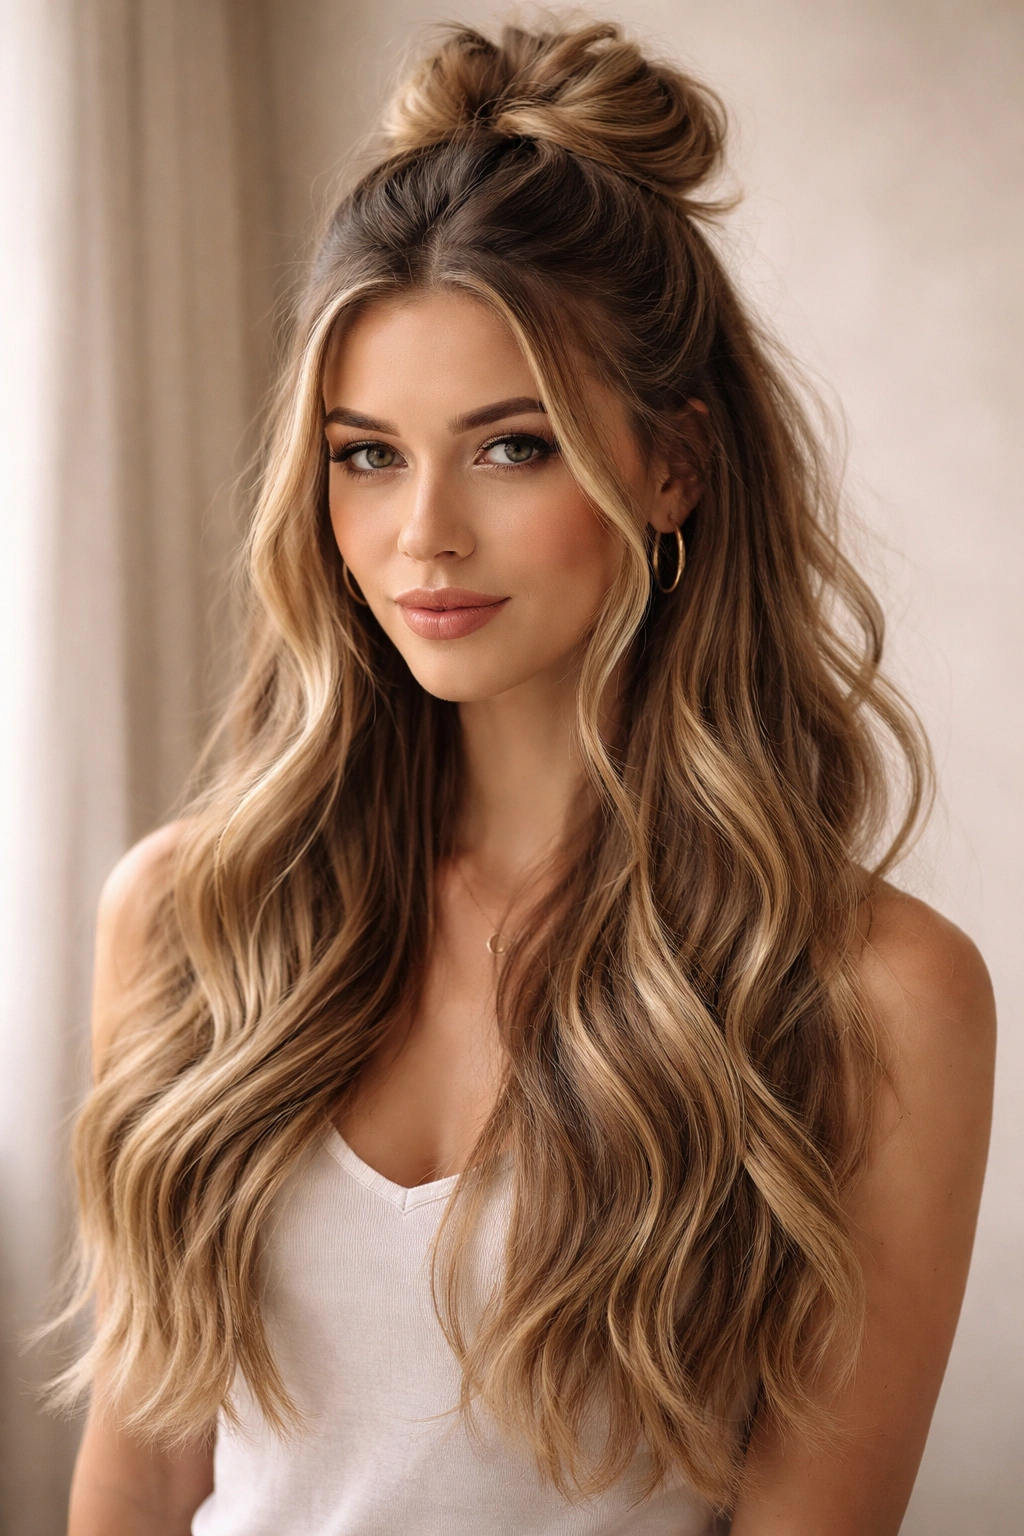
This style is for anyone who loves the look of a full messy bun but wants to show off more of their length and texture. The half-up approach with a middle part gives you versatility—your hair isn’t all gathered at the crown, so you get volume and movement throughout. It’s especially stunning if you have beautiful length, layers, or dimensional color that you want to showcase.
Establishing Your Middle Part
Begin with your middle part, making it clean and intentional. For this style, the part is even more important because it’s visible throughout—it’s not hidden under a full bun, so it needs to be your statement.
Sectioning for the Half-Up Style
Divide your hair into three sections: the top portion (roughly from your crown to your ears on each side), and the bottom portion (everything below your ears). Clip the bottom section out of the way. You’re going to work only with the top section to create your half-up bun.
Creating the Bun from the Upper Section
Gather just the top section at your crown and secure it with an elastic. This is where you make it messy—don’t pull it tight. Leave texture, pull out pieces, twist sections of the ponytail around the base. You want this bun to look effortlessly undone because the contrast with the long, flowing hair below it will make the whole style feel intentional.
Releasing and Finishing the Lower Section
Unclip your lower section and gently brush or comb it. For this style, you want those bottom sections to fall smoothly and show off your length. You can leave it completely straight, add soft waves, or curl the ends slightly—whatever suits your hair texture and the overall vibe you’re going for. The key is that the lower section should look intentionally styled, not just abandoned. It’s the counterbalance to the messy bun above.
Final Integration
The magic is in how the half-up bun and the full-length lower section work together. Step back and check that the bun looks intentionally messy (not just sloppy) and that your lower section looks intentionally styled (not just neglected). Pull out a few face-framing pieces from both sections if needed. This creates a cohesive look that reads as “I styled this thoughtfully.”
Worth knowing: This style works best with hair that’s at least shoulder-length. Shorter hair doesn’t have enough length in the bottom section to create that nice contrast.
8. The Gravity-Defying Topknot
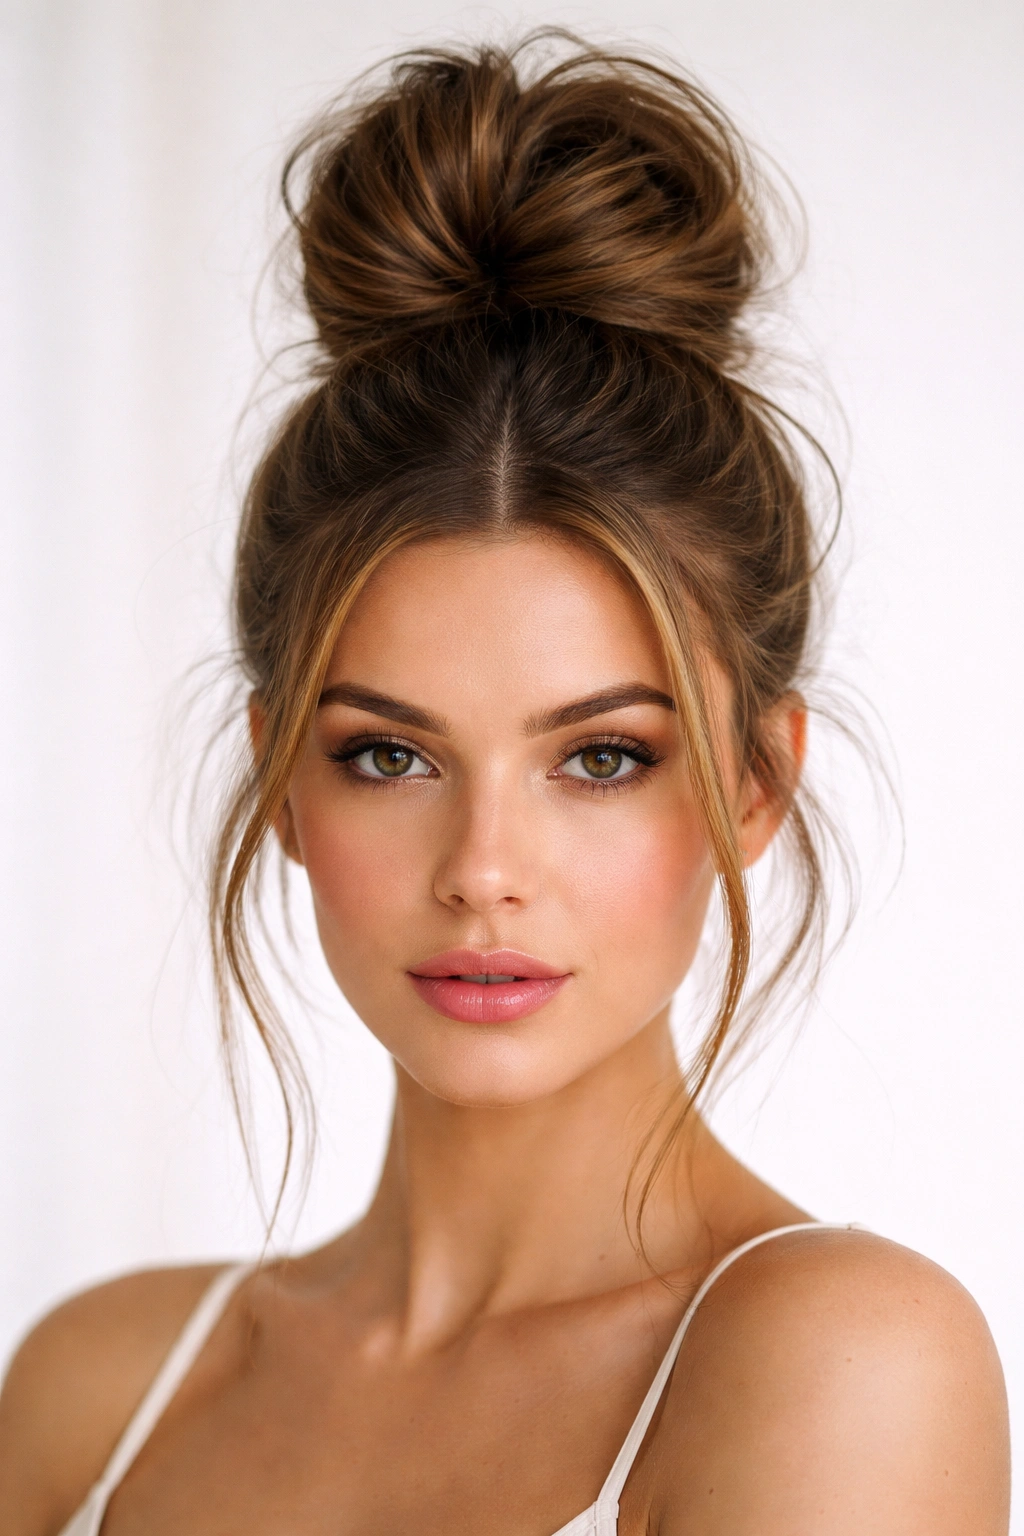
If a regular crown bun feels too predictable, push the positioning even higher—all the way to the very top of your head. This creates a statement style that’s modern, confident, and a bit unexpected. Combined with a middle part, it reads as fashion-forward without being trendy or gimmicky. This is the style that makes a casual outfit suddenly feel put-together.
Perfecting the Middle Part
Make your middle part with intention and precision. This style is bold enough that it demands a middle part that’s equally bold and deliberate. You’re not hiding anything here—you’re creating balance and symmetry that makes the high positioning feel intentional.
Positioning at the Absolute Crown
Flip your head forward and gather all your hair at the very top of your head—higher than you think looks normal. The positioning should be almost directly above your forehead and nose. This high positioning is what prevents the style from reading as a regular bun that just migrated upward. It’s a statement. Secure with a loose elastic; tension here makes everything look too controlled.
Creating Strategic Texture
A topknot positioned this high can read as either chic or slightly severe, depending on texture. Create intentional messiness by teasing the gathered hair slightly before twisting it around itself. Leave pieces untwisted and slightly loose. Pull out face-framing pieces deliberately. The texture prevents the high positioning from feeling stark.
Securing and Softening
Wrap your bun around itself and secure with bobby pins. Layer in some wisps and flyaways intentionally. A flexible-hold hairspray keeps everything in place without making it crunchy. The final result should feel like a deliberate style choice, not a desperate attempt to get your hair off your face.
Consider Your Face Shape
One note: this high positioning works beautifully for most face shapes, but it can sometimes emphasize a longer face or a broader forehead. If you have concerns about this, pull out some longer face-framing pieces to soften the overall proportions. The point is to feel confident in how you look, so adjust based on what feels right for you.
Insider note: This style looks absolutely stunning with the right earrings or hair accessories. Since your hair is fully off your face and your ears are exposed, dangly earrings or a delicate hair clip at the base of the bun can elevate the whole look.
Key Takeaways
The magic of pairing a middle part with a messy bun is that it gives you endless customization options while keeping everything grounded and intentional. The middle part acts as an anchor—it creates balance and symmetry that prevents even the messiest bun from reading as careless. Each of these eight styles works with different hair textures, lengths, and styling skill levels, so there’s genuinely something here for everyone.
The real skill isn’t in creating perfection; it’s in understanding how messiness should look intentional rather than accidental. This means knowing when to leave wisps and when to smooth sections, when to tease for texture and when to let your hair’s natural wave do the work. It means using the right products—texture spray, flexible-hold hairspray, and the right bobby pins—so your style holds without looking stiff.
Most importantly, experiment freely. These styles are forgiving because messiness is literally built into the aesthetic. Try different positioning for your bun, different ways of wrapping and twisting, different levels of texture. Your hair will tell you what works best, and once you figure it out, you’ll have go-to styles that take five minutes but look like you actually tried.
