



Messy buns have a reputation for being effortless, but the truth is far more nuanced—especially for women navigating the texture changes, density shifts, and styling preferences that come with age. After 50, hair often becomes finer or thinner at the crown, making traditional tight buns look too sleek or even draw unnecessary attention to areas where volume has naturally decreased. The good news? A well-chosen messy bun style doesn’t just work beautifully with mature hair—it actively flatters by adding dimension, softness, and movement where you want it most.
What makes a messy bun work for women over 50 is understanding the difference between “messy” (which suggests careless) and “intentionally undone” (which reads as polished, modern, and age-appropriate). The right style adds height at the crown to create the illusion of fuller hair, incorporates subtle texture and layers so flyaways become a feature rather than a flaw, and frames the face with softness instead of pulling everything back with severity. This isn’t about looking younger—it’s about looking current, confident, and genuinely yourself.
The 10 styles that follow are specifically designed with mature hair in mind. Each one addresses the real challenges of styling hair over 50: how to create volume without relying on tight tension, how to work with grayer or wavier texture, how to style around thinning areas, and how to achieve a look that feels intentional rather than rushed. Whether you have thick hair that finally has the body to support a true messy bun or fine hair that needs strategic placement, you’ll find a style here that works with your hair, not against it.
1. The Crown-Lifted Messy Bun
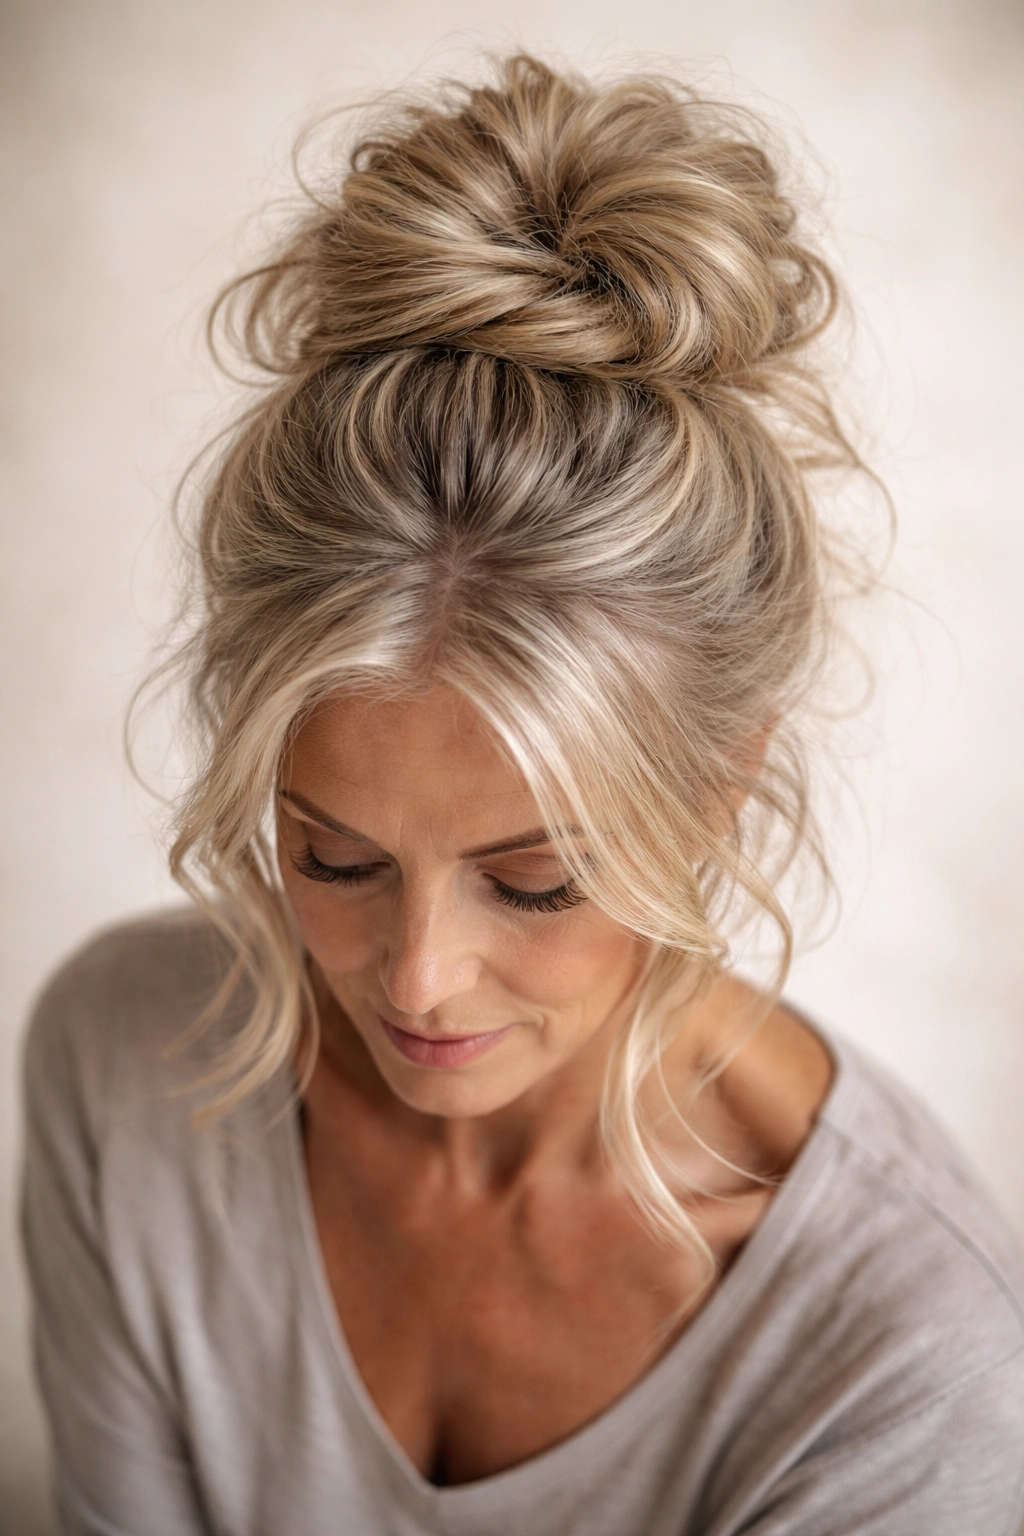
This is the workhorse style for women over 50, and for good reason. The crown-lifted messy bun places the bulk of your hair high on the head—think the very top of your crown—which immediately creates the visual impression of density and fullness. This works whether you have genuinely thick hair or finer texture that benefits from strategic placement.
How to Create This Look
Flip your head upside down and gather your hair at the crown point while inverted, securing it loosely with an elastic. The inversion creates natural texture and ensures that hair sits where it visually matters most—at the top of your head where it reads as fullness. Once you’ve secured the base, flip upright and gently pull at sections of the bun to create loose, intentional texture. Don’t aim for a perfect, sculptural knot; instead, tease out sections so the bun has visible dimension and soft, undone edges.
Why It Works for Mature Hair
The key advantage here is that tension sits at the crown rather than pulling from the front hairline. For women concerned with hairline definition or density around the face, this placement is forgiving. The height of the bun also works with natural changes in face shape and bone structure over time, creating balance without requiring heavy contouring or other tricks. The texture and looseness minimize the appearance of thinning areas while actually emphasizing the hair you do have.
Styling Tips to Master It
- Use a texturizing spray or dry shampoo on dry hair before creating the bun—this gives limp or slippery hair something to grip and hold the style longer
- Don’t secure the elastic too tightly; gentle hold keeps the style from looking severe and reduces tension on your hairline
- Leave 2-3 face-framing pieces loose before creating the bun; these soften your face and add movement without requiring pins
- Tease gently at the base of the bun once it’s secured to create lift and volume; you’re not building a beehive, just creating soft irregularity
2. The Twisted Low Bun with Wrapped Strands
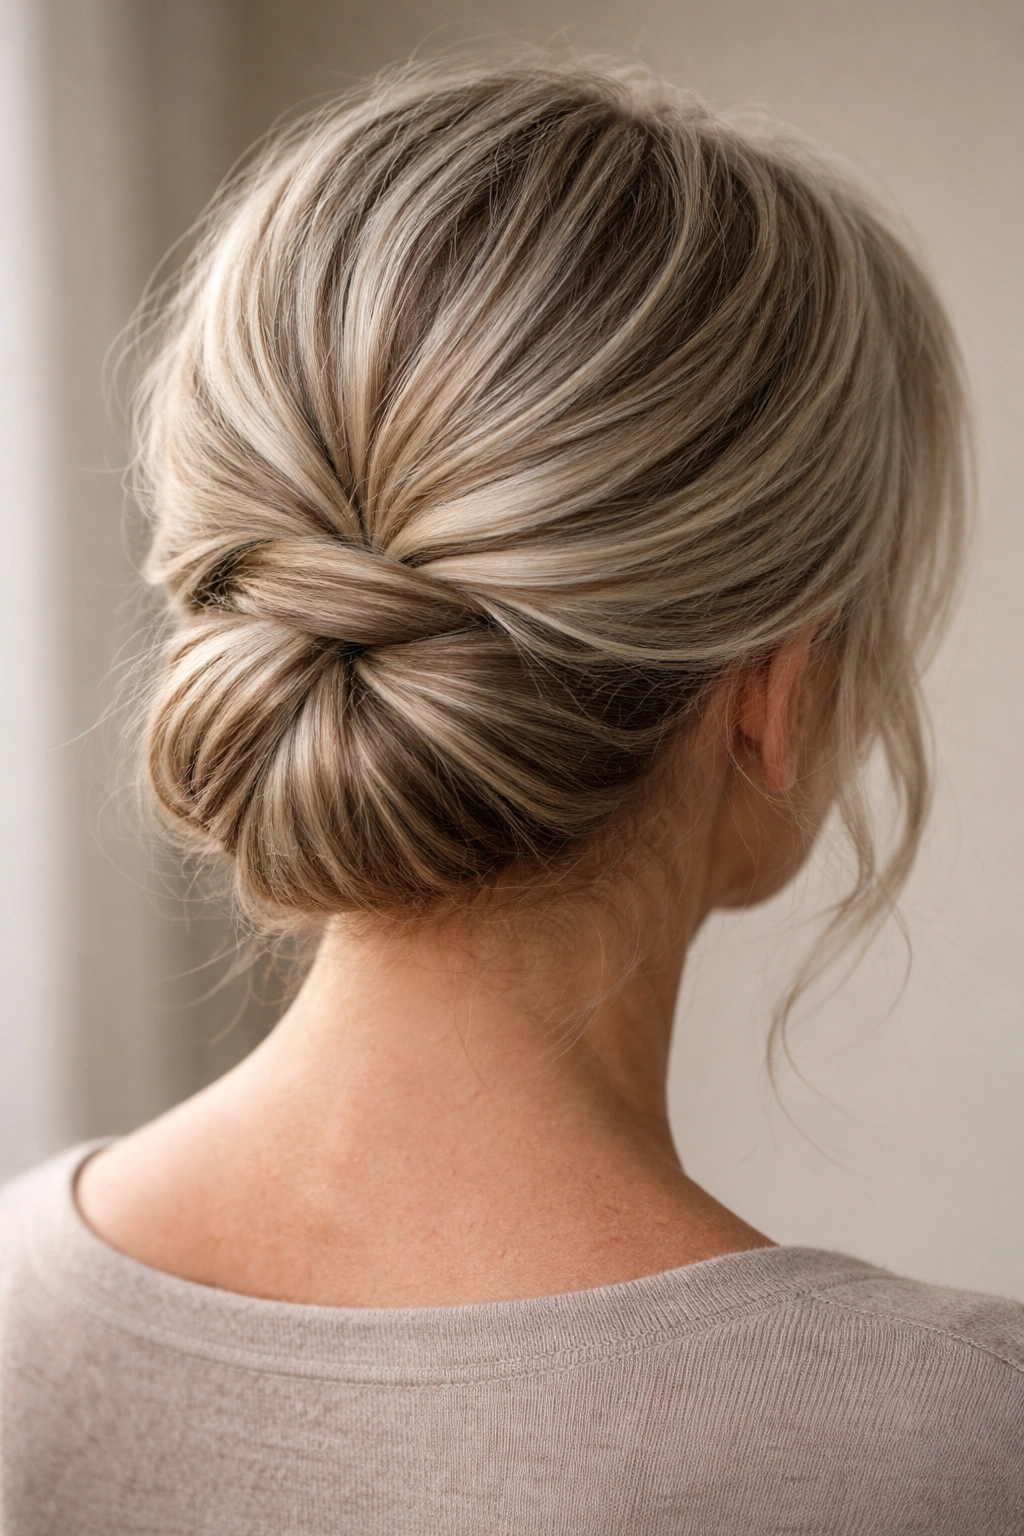
If high buns feel unfamiliar or you prefer the traditional placement of a low bun, this twisted version gives you all the softness of messy styling with the balance of lower placement. Two thick twists wrap around a loose low ponytail before securing, creating texture and visual interest that a simple gathered bun cannot achieve.
Building the Look Step by Step
Create a low ponytail at the nape of your neck, securing it loosely. Divide the ponytail into two equal sections. Twist one section tightly, then wrap it around the base of the ponytail and secure with bobby pins. Repeat with the second section, wrapping it around in the opposite direction to create a crisscross or nested effect. Gently pull at the wrapped twists and the bun itself to create soft, feathered edges rather than keeping everything tight and controlled.
Why Twists Flatter Mature Features
Twists are deeply forgiving because they create instant texture and visual weight distribution. Even if your ponytail itself feels thin, the twisting action creates the illusion of fuller, denser hair. The wrapped-around effect adds dimension and makes the overall style read as intentionally styled rather than simply gathered hair. For women with graying hair, twists also showcase texture beautifully—the way light plays across twisted sections often highlights lighter or silver strands in flattering ways.
Making It Work with Fine or Thinning Hair
- Create your low ponytail slightly off-center (slightly toward one side rather than dead center at the nape); this helps fine hair look fuller by distributing strands unevenly
- Use a light touch when securing the base ponytail; you want it loose enough that gentle pulling creates dramatic texture without actually unraveling
- If your hair is very fine, create one thick twist rather than two thinner ones; a single bold twist reads as more intentional and hides thinness better than two thin twists
- Pin strategically so that the wrapped twist covers any visible elastic or thin sections of the ponytail
3. The Braided Halo with Center Knot
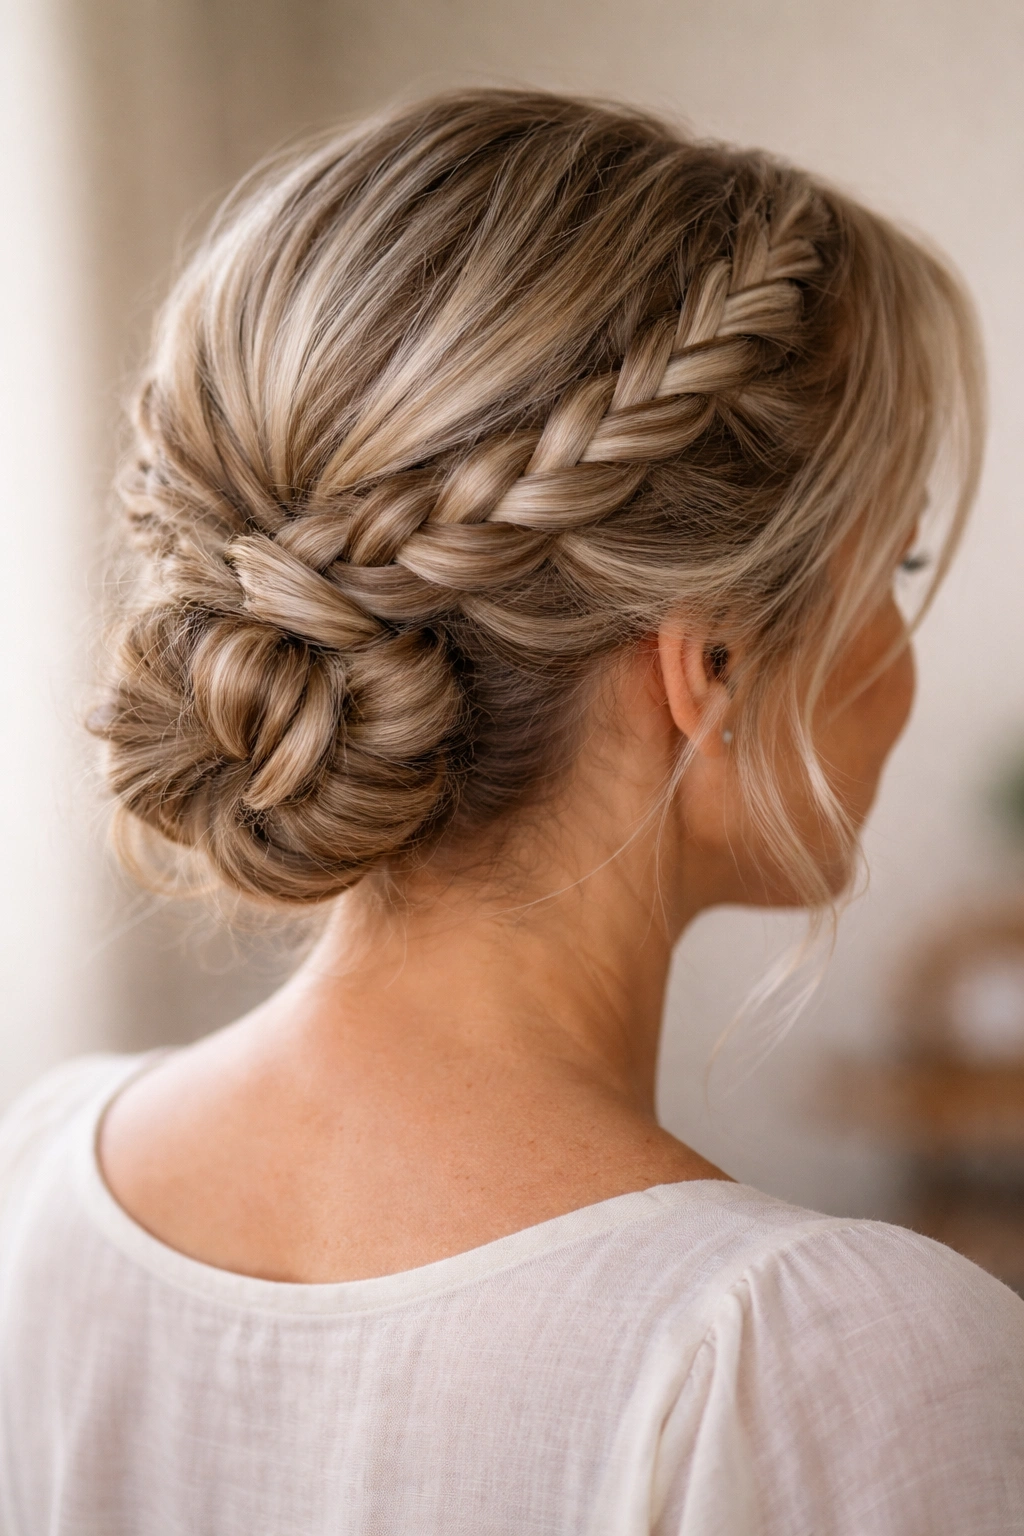
This style is surprisingly simple to execute but reads as far more complex and intentional than a basic messy bun. A single long braid wraps around the back of the head like a crown, then the remaining length ties into a soft knot at the back. It’s elegant enough for events but approachable enough for everyday wear.
Creating the Halo Effect
Part your hair slightly off-center and braid a section from one temple back toward the nape of your neck, following the natural curve of your head. Aim to include just enough hair that the braid sits as a visible “frame” without incorporating every strand. Once you reach the nape, loosely gather all remaining hair (braided and unbraided) into a soft knot or twisted bun at the back of your head. Leave the knot intentionally loose and rough; tuck the braid end into the knot to secure it without additional pins if possible.
Why Braids Look Sophisticated on Mature Hair
A braid creates instant texture and visual interest that makes even fine or thinning hair appear fuller and more substantial. Braiding also allows you to incorporate any shade variation in your hair (grays, highlights, darker roots) into a design element rather than hiding it. The halo effect frames your face softly without requiring tight pulling, so it’s exceptionally comfortable to wear and doesn’t create tension on the hairline—a genuine concern for many women managing fine or thinning hair over 50.
Variations and Customization
- Double braid version: Create two thinner braids, one from each temple, and wrap both around the back for a fuller halo effect
- Dutch braid option: Use a Dutch (reverse) braid instead of a standard three-strand braid to create more pronounced texture and visual weight
- Leave more face-framing strands loose at the temples; this softens the overall look and adds movement around the face
- Use a slightly damp texture spray before braiding to make hair grip better and prevent slipping
4. The Textured Topknot with Undone Sides
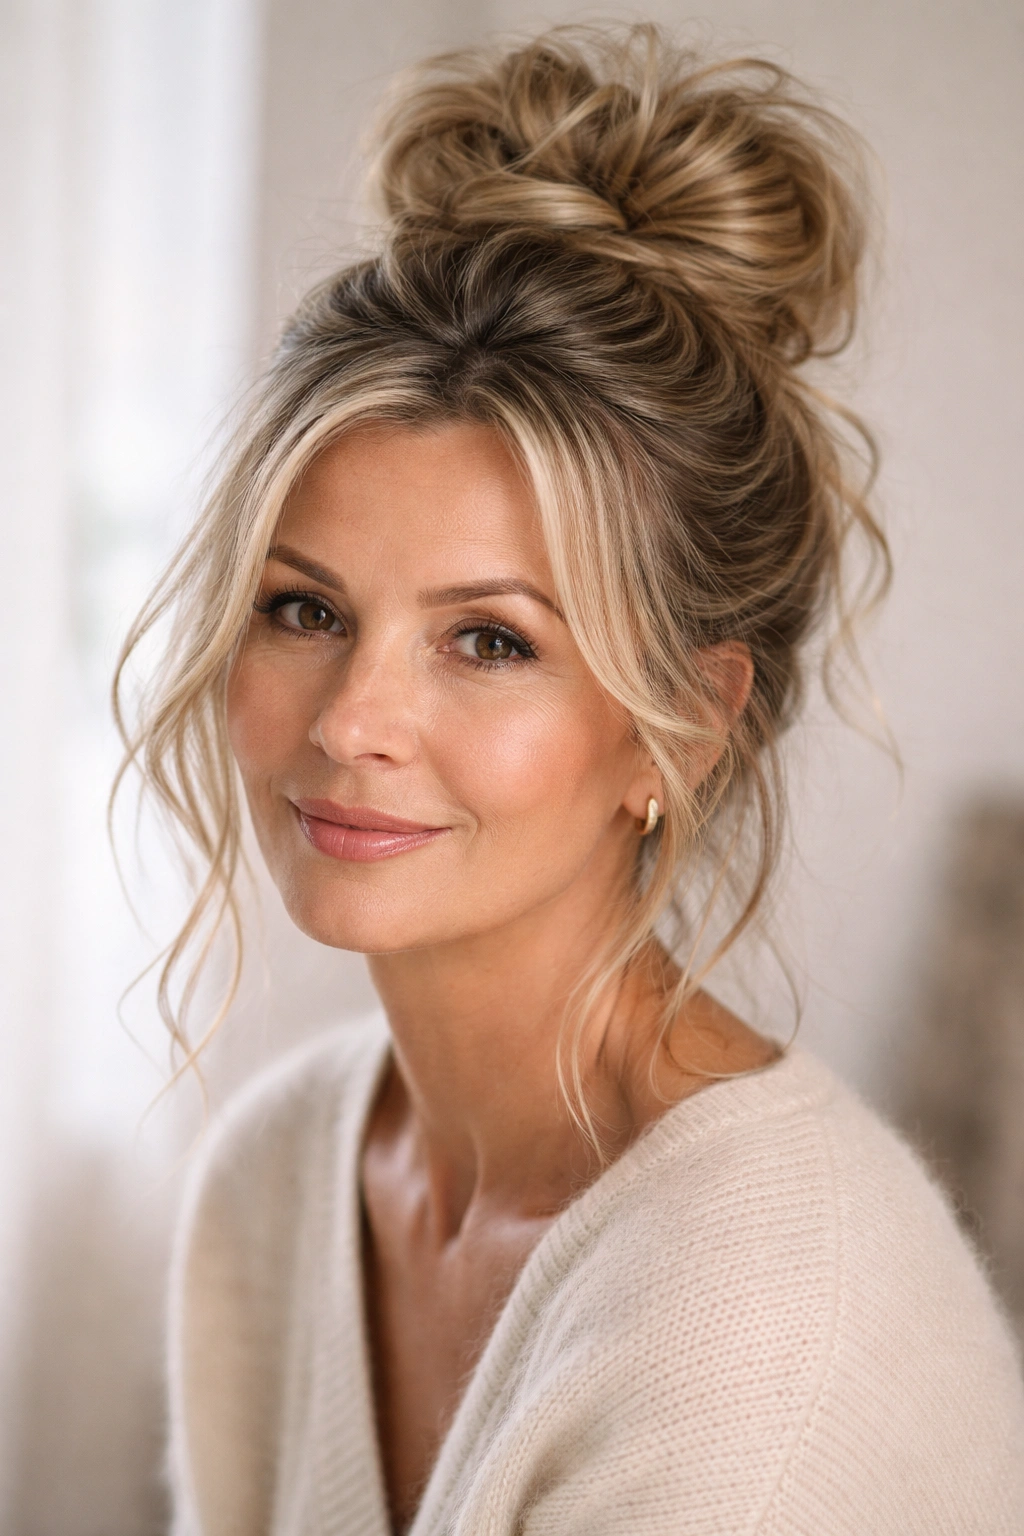
This style sits somewhere between a high bun and a true topknot—it’s placed at the crown (not directly at the very top of the head like a topknot would be) and incorporates loose, textured sections that frame the face and soften the overall effect. It works beautifully as a transition from more severe styles to something softer and more contemporary.
How to Execute the Textured Topknot
Tease hair gently at the crown for subtle lift and body. Gather most of your hair into a high ponytail at the crown, but leave 2-3 face-framing sections loose around your temples and cheekbones. Secure the high ponytail loosely and create a soft bun rather than a tight knot. The remaining loose sections should wave or spiral gently—a natural texture or light wave is perfect; you don’t need to add curls unless you want to. Once secured, gently pull at sections of the bun and the loose frame pieces to create soft, feathered edges.
The Strategic Advantage of Loose Framing
Loose pieces around the face do more than add softness—they actually minimize the appearance of thinning at the hairline or crown by drawing the eye to movement and texture instead of density. The looseness also means you’re not creating any tension on vulnerable areas, which is particularly important if you’ve noticed any recession or thinning at your hairline over the years. For many women over 50, this style hits that sweet spot between “pulled together” and “comfortable.”
Perfecting the Undone Side Pieces
- Don’t make the loose pieces too thick or heavy; thin pieces of hair frame a face better than chunky sections
- Let the loose pieces dry naturally or add a slight wave with a curling iron for movement; completely straight pieces look too intentional, defeating the “undone” aesthetic
- Use bobby pins that match your hair color to secure the bun; if you’re using brown bobby pins in blonde hair, try to hide them within the texture rather than leaving them visible
- Refresh loose pieces throughout the day; they’re meant to look intentionally undone, not actually undone, so make sure they’re positioned where you want them
5. The Low Pony with Cascading Wrap
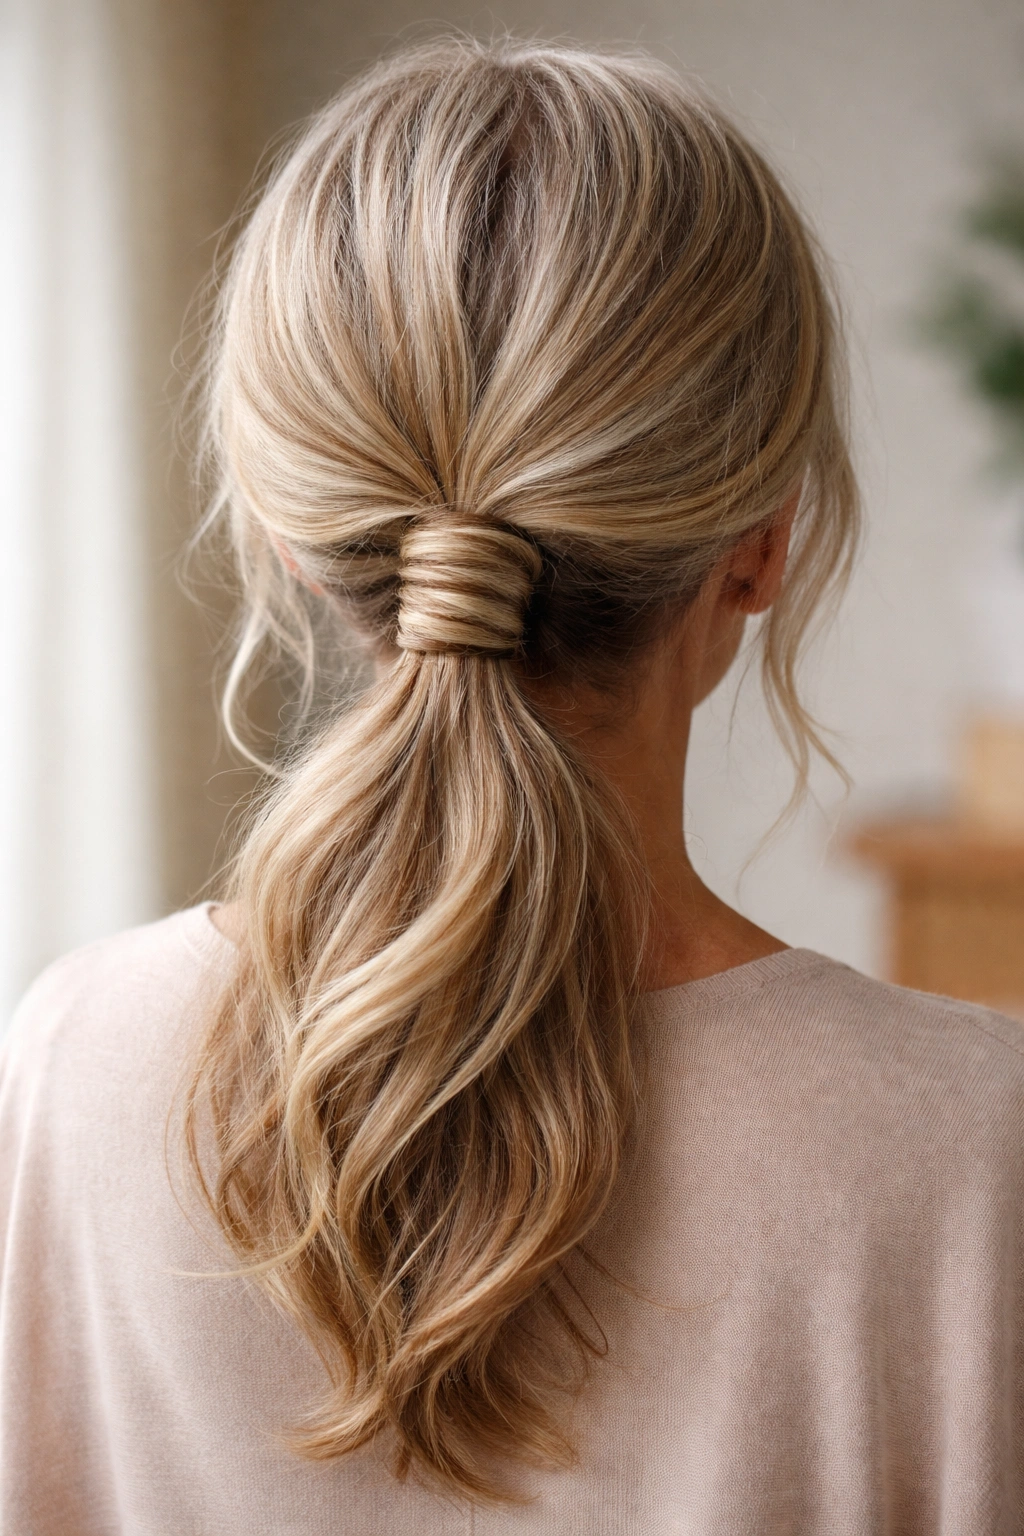
This style starts as a low ponytail but transforms into something more visually interesting through a cascading wrap technique. A section of hair from the ponytail wraps around the elastic base multiple times, with each wrap left slightly loose so sections “cascade” down the back of the ponytail. It’s romantic and sophisticated without feeling overly fussy.
Building the Cascading Wrap
Create a low, loose ponytail at the nape of your neck. Divide the ponytail into three sections. Take one section and wrap it around the base of the ponytail where the elastic sits, securing the end with a bobby pin. Rather than wrapping it tightly, leave it slightly loose so it sits as a visible band. Take the second section and wrap it around just below the first wrap, again leaving it loose and visible. Repeat with the third section. The result should look like three distinct horizontal bands of hair wrapping down the back of the low ponytail.
Why Cascading Wraps Flatter Thinning Hair
If your hair density is concentrated more at the ends than at the crown, this style works beautifully because it puts visual emphasis on the body and length of your hair rather than on the top section. The wraps add texture and visual interest without requiring the kind of tight gathering that makes thin hair look stringy. The horizontal lines created by the wraps also can help balance face shape for women who’ve experienced natural changes in bone structure and face shape over time.
Adapting for Different Hair Textures
- If you have very fine hair, use just two wraps instead of three; too many layers can look cluttered
- For grayer hair, the wraps actually showcase dimension beautifully, so don’t feel you need to hide them
- If the wraps feel loose and keep slipping, use slightly smaller bobby pins (the kind marketed for thin or fine hair) and secure more carefully
- Add a light wave or spiral to the ponytail section itself before wrapping; this creates more visual fullness and texture
6. The Side-Swept Messy Bun
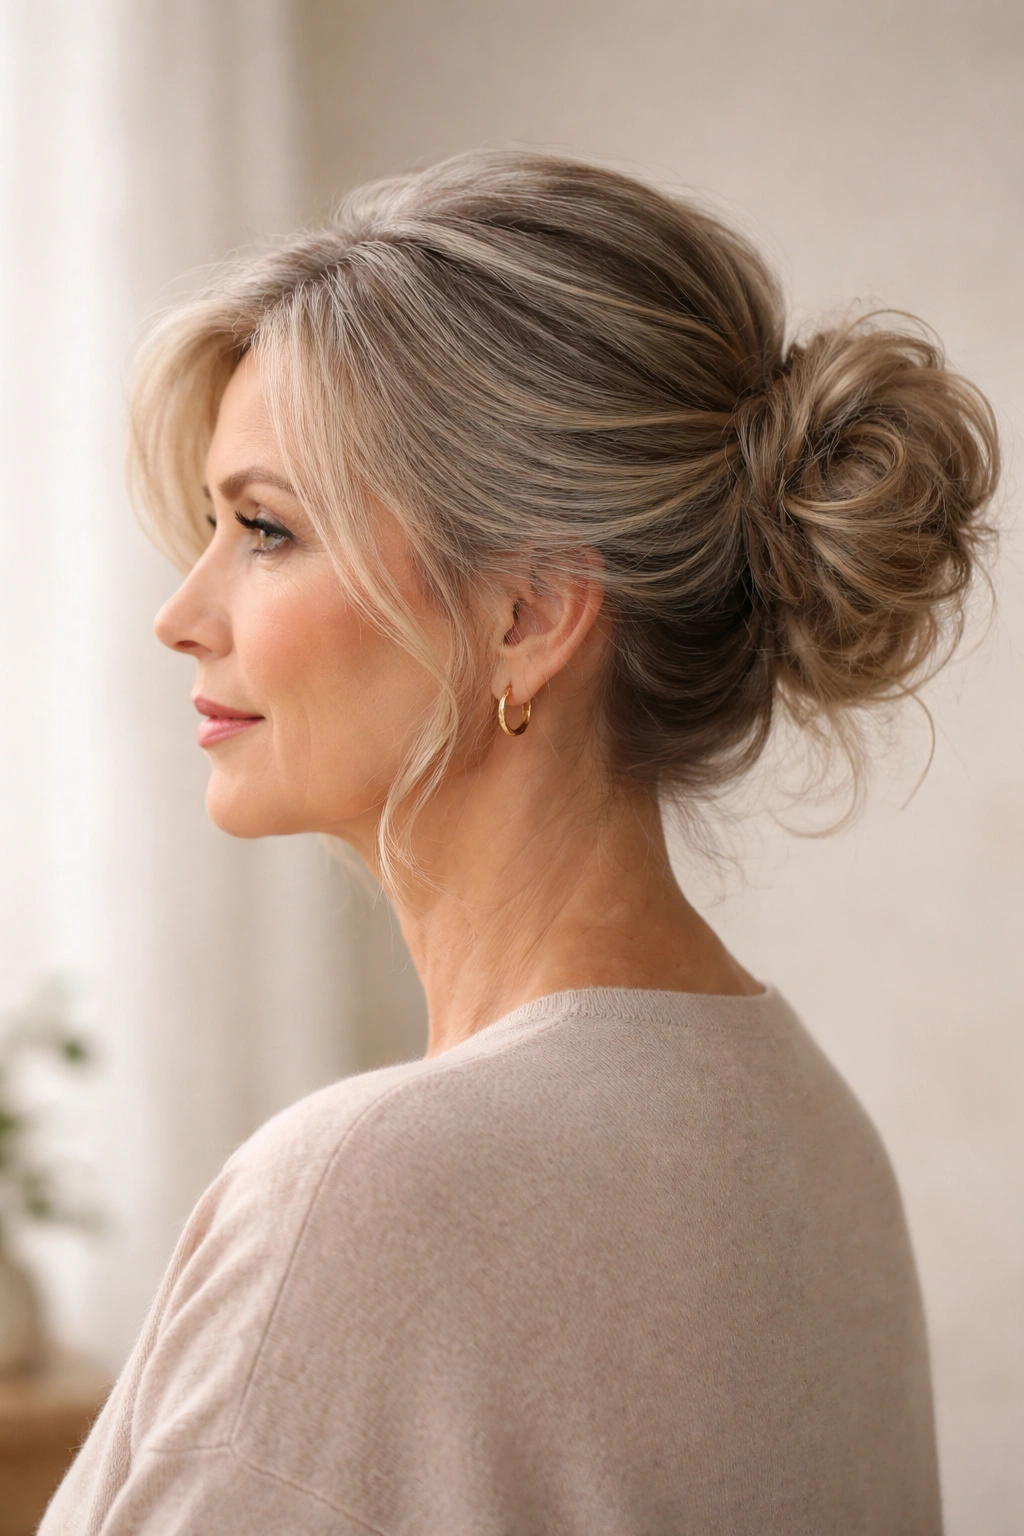
A side-swept bun gathers most of your hair to one side of the head rather than placing it at center-back or the crown. This placement is remarkably flattering for women over 50 because it asymmetry naturally flatters mature faces and can minimize the appearance of any asymmetry in hair density or thinning that occurs on one side more than the other.
Creating the Off-Center Gather
Rather than creating a center ponytail, gather your hair significantly to one side—imagine creating a ponytail that would sit just behind your ear on that favored side, not at the nape of your neck. Secure loosely. Create a soft bun with the gathered section, but don’t aim for a neat ball shape; instead, let it be lumpy and irregular. Leave several strands completely loose on the opposite side of your head; these should wave gently or curl softly, creating a distinct visual contrast between the side with the bun and the side with loose, flowing strands.
The Asymmetrical Advantage
Asymmetry is a secret weapon for flattering mature faces. A bun placed dead center at the back can sometimes emphasize symmetrical features in ways that read as aging, while an off-center bun introduces movement and visual interest that draws the eye in more flattering directions. If you’ve experienced any hair loss or thinning on one side of your part, placing the bun on the fuller side and letting hair fall loosely on the thinner side can actually balance your overall look and make thinning less noticeable.
Styling the Asymmetrical Frame
- Don’t create this style with perfect symmetry; that defeats the purpose of asymmetry as a flattering tool
- Let the loose side pieces be longer and more voluminous than would be typical; this creates the contrast and visual interest that makes the style work
- Add a slight wave or texture to the loose side if your hair is naturally straight; movement reads as intentional rather than simply leaving hair down
- Consider adding a subtle clip, comb, or decorative pin on the side with the bun for visual interest; this also anchors the asymmetry as an intentional style choice
7. The Bubble Bun with Soft Centers
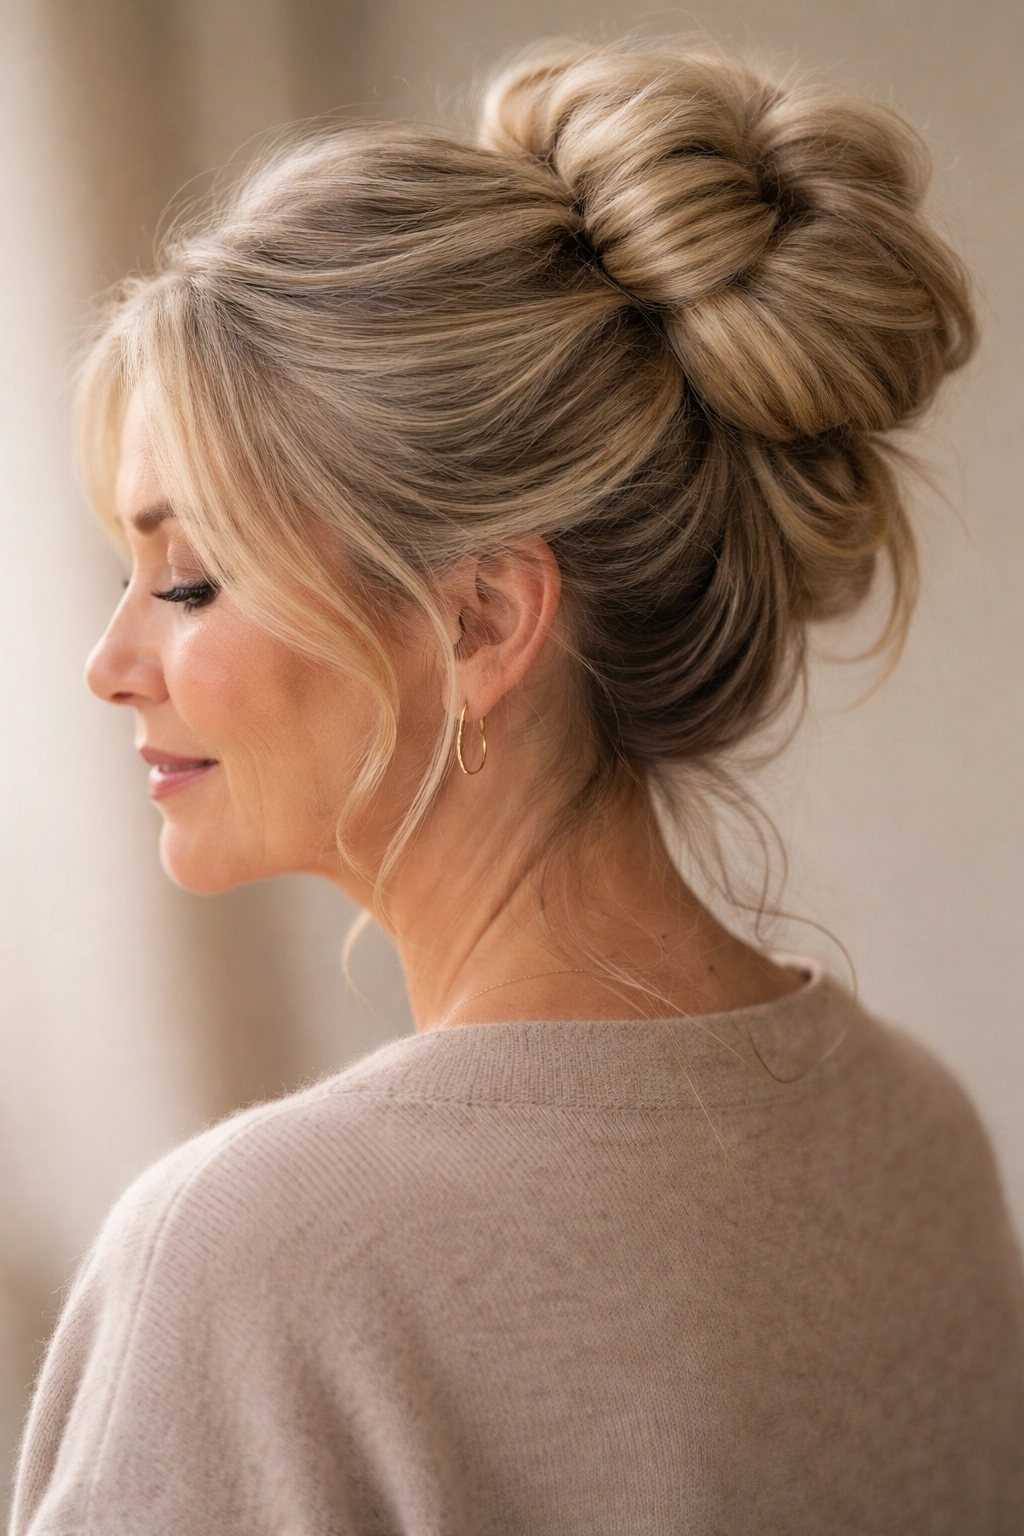
A bubble bun uses multiple elastics to create distinct sections that stack visually, creating height and fullness. For women over 50 with finer hair, using soft or fabric-covered elastics and leaving plenty of loose texture within each bubble creates a style that looks full without requiring hair thickness you might not have. This is also a style that works especially well with shorter hair that doesn’t have much length to gather.
Building the Bubble Bun Section by Section
Create a high ponytail and secure it loosely. Place a second elastic about two inches down from the first, gathering the ponytail in a line. Gently pull at the section between the first and second elastic to create a “bubble” of loose, textured hair. Repeat: place a third elastic two inches below the second, create a bubble, and continue down the length of your ponytail. Depending on your hair length, you might create three to five bubbles. Once all bubbles are in place, gently pull at each section to maximize texture and create that intentionally undone appearance.
Why Bubbles Work for Mature Hair
The multiple elastics distribute your hair across several sections, which makes even fine hair appear fuller because the eye reads each bubble as a distinct unit of hair rather than one thin section. The bubbles also create height and visual volume without relying on density at the crown. Additionally, the texture within each bubble is inherently forgiving; perfect smoothness would highlight any thinning, but intentional mess and texture actually conceal it.
Customizing for Your Hair Length and Density
- If you have very fine or thinning hair, create bubbles with slightly more distance between elastics; fewer, larger bubbles look fuller than many small ones
- Use fabric-covered elastics in a color matching your hair; these are gentler on fine hair and less visible
- Pull at the bubbles generously; more texture makes the style look intentional and full rather than just separated
- For shorter hair, you might only create two or three bubbles; that’s perfectly fine and often looks more balanced than many small bubbles
8. The Twisted Crown Bun
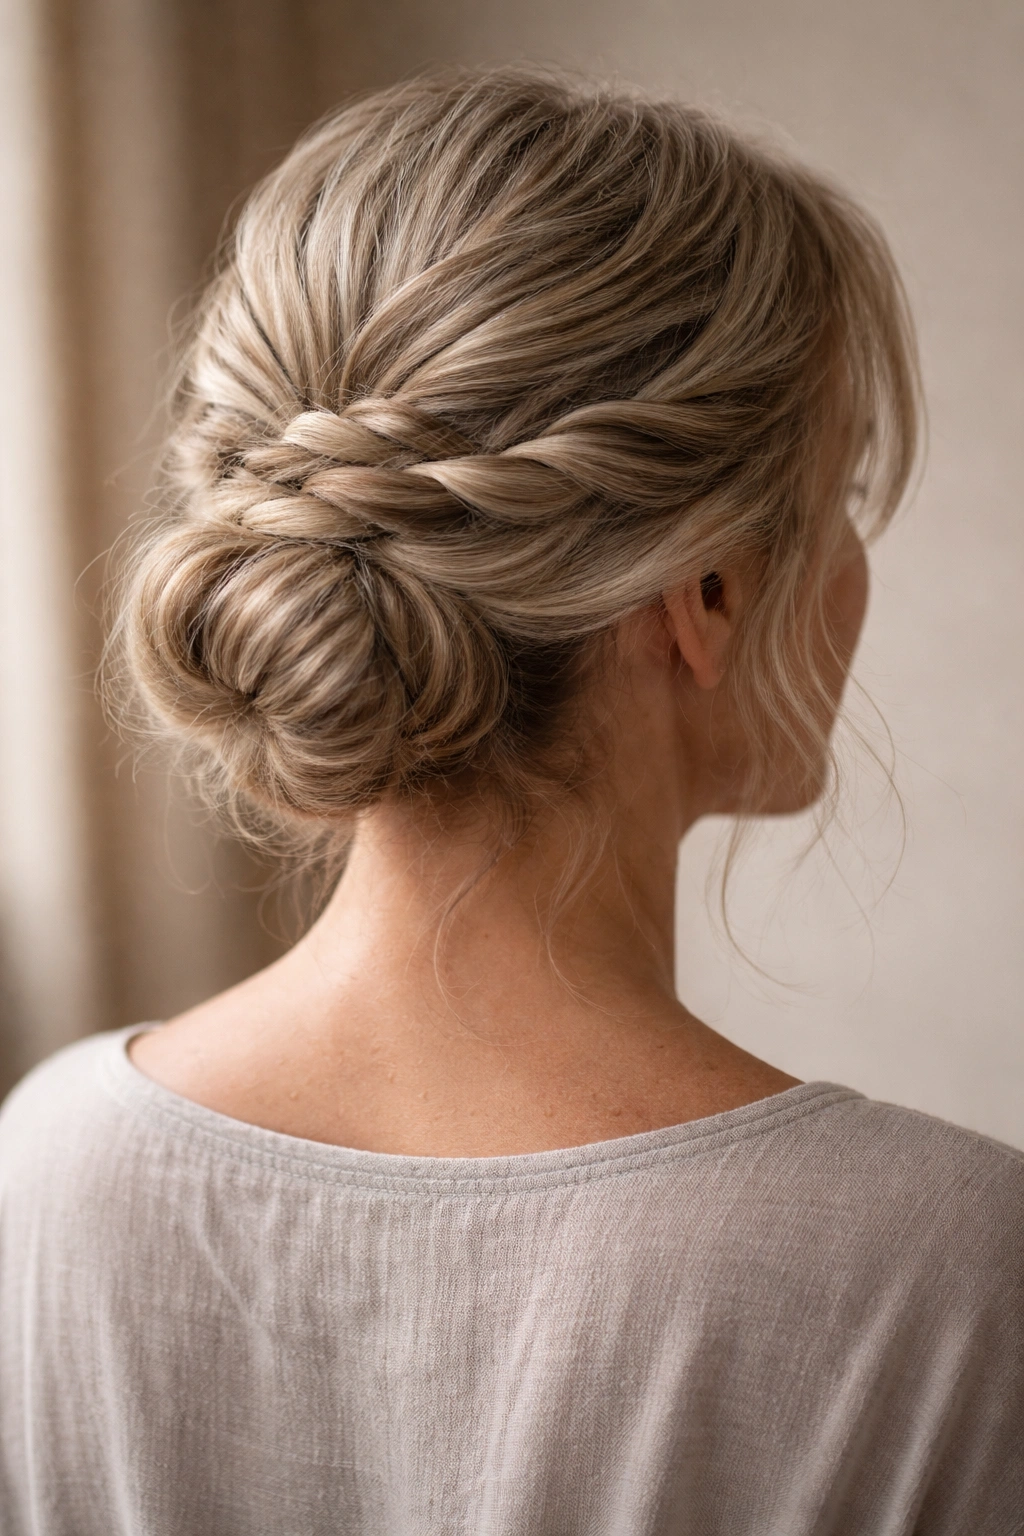
This style is essentially a crown of twists that circle the head and secure into a soft bun at the back. It’s more intricate-looking than it actually is to execute, making it perfect for days when you want to look like you’ve put genuine effort into your appearance without the style actually taking much time.
Creating the Twisted Crown Effect
Create a deep side part and begin twisting a section of hair from one temple back toward the nape of your neck, following the natural curve of your head just as you would with a halo braid. Secure the twist at the nape with a bobby pin. Create a second twist starting from the other temple, twisting back and securing it next to the first twist. You should now have two twists forming a crown around the back of your head. Gather any remaining hair into a soft bun at the nape and tuck the loose ends of both twists into the bun, securing everything with bobby pins. Gently pull at the bun and the twists to create texture and softness.
Why Twisted Crowns Enhance Mature Features
Twists create instant visual texture and dimension, which is enormously flattering for mature hair because it adds visual weight where you want it (around the crown and face) without requiring density you might not have. The twists also frame the face beautifully, especially if you have any graying hair or dimension in your color; twists showcase these variations gorgeously. The crown placement also naturally lifts the face and draws attention upward rather than to jawline changes or other features that shift over time.
Adjusting for Hair Texture and Density
- If creating two full twists feels like too much, create just one thick twist and wrap it around the back of your head; still stunning and slightly easier to execute
- For very fine hair, loose twists work better than tight ones; the looseness creates the illusion of more volume
- If your twists keep loosening as you create them, slightly damp hair grips better and holds the twist shape while you’re working
- Twist in a slightly diagonal direction rather than perfectly straight back; this creates more interesting visual texture and angles
9. The Half-Up Messy Knot
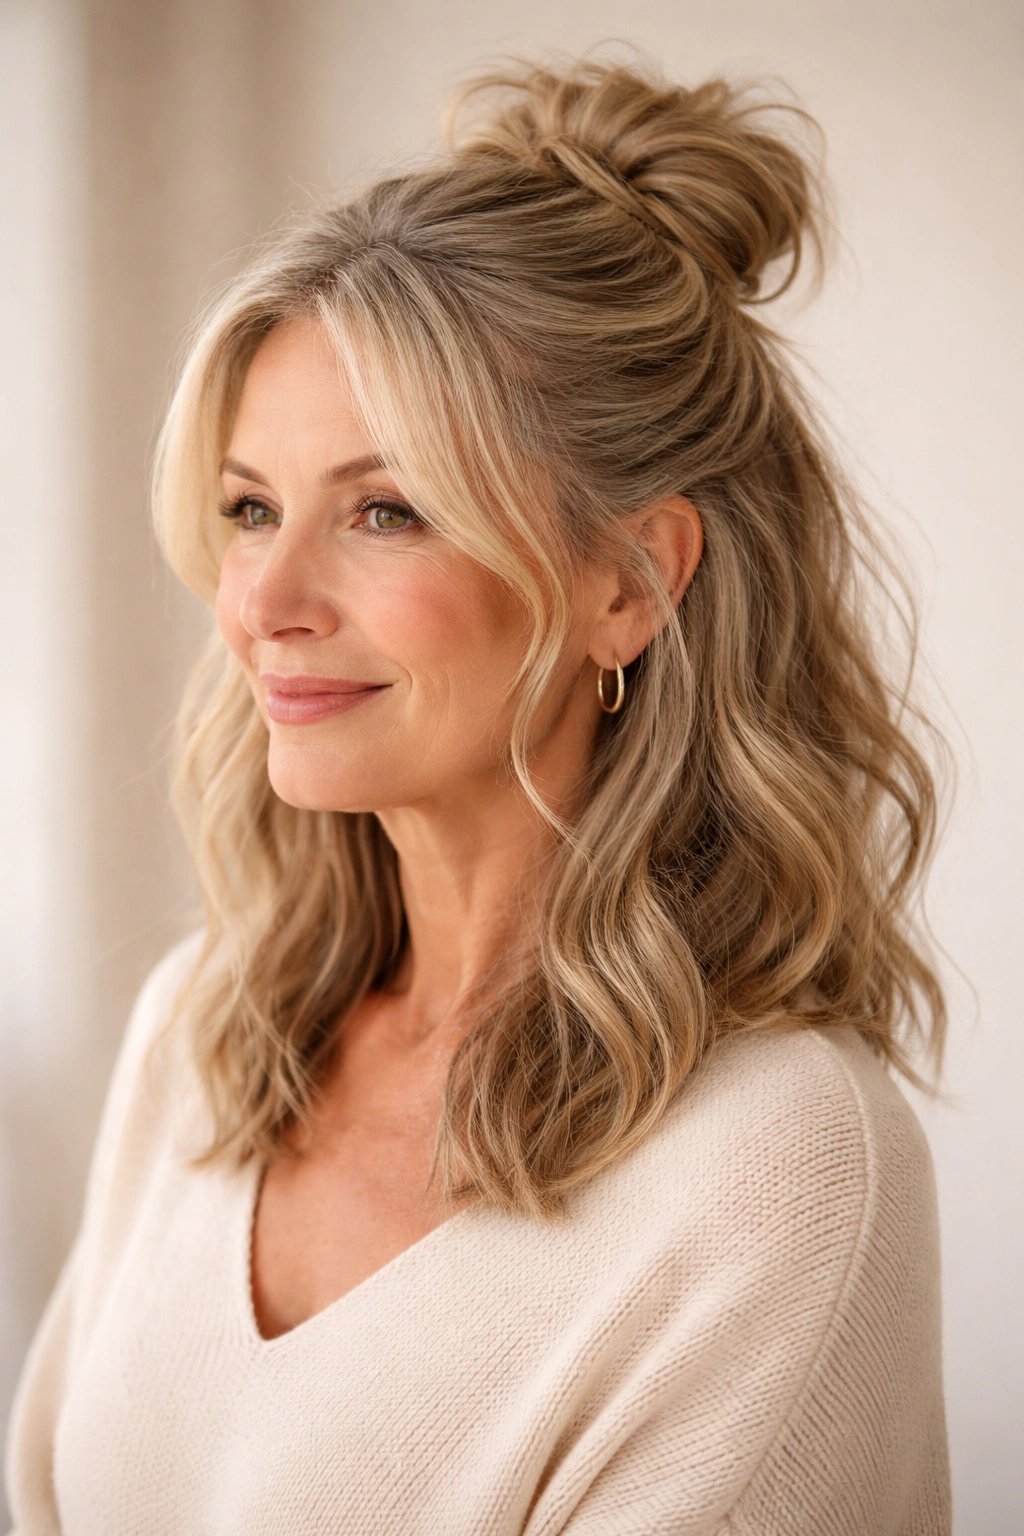
This style is genuinely simple but reads as intentional and put-together. Approximately the top half of your hair gathers into a soft knot at the crown, leaving the bottom half down in loose waves or natural texture. It’s perfect for days when you want to look styled without actually having styled hair extensively, and it works beautifully even if your hair is thinning or fine.
Executing the Half-Up Effect
Identify where the top half of your hair naturally divides; this usually sits roughly at ear level or slightly above. Gather the top section loosely and secure with an elastic at the crown. Create a soft knot or twist with this gathered section, securing it with bobby pins. Leave the bottom half of your hair completely down, in whatever state of texture or wave is natural for your hair. Gently pull at the half-up knot to create loose, feathered edges, and leave a few face-framing pieces loose around your temples and cheekbones.
Why Half-Up Works Across Hair Types
The genius of the half-up knot is that it works whether you have thick hair or thin hair, straight texture or curly, long locks or shorter cuts. The style creates visual interest and intentionality without relying on specific hair qualities. It also doesn’t create tension on your entire hairline the way a full bun or ponytail does; only the top half experiences any gathering, which means no pulling on vulnerable areas. For women managing any hairline concerns or density changes, this is a genuinely comfortable and flattering option.
Styling Variations
- Add subtle waves or curls to the down section for more movement and visual fullness; even women with naturally straight hair can use a curling iron or texture spray to add this dimension
- Create the half-up with a slight twist instead of a knot; a twisted version reads as slightly more polished
- Leave more face-framing strands loose around your face for a softer, more romantic appearance
- If your hair is very fine, use a smaller elastic and a lighter touch; overtightening will make fine hair look stringy rather than full
10. The Textured Dutch Braid Bun
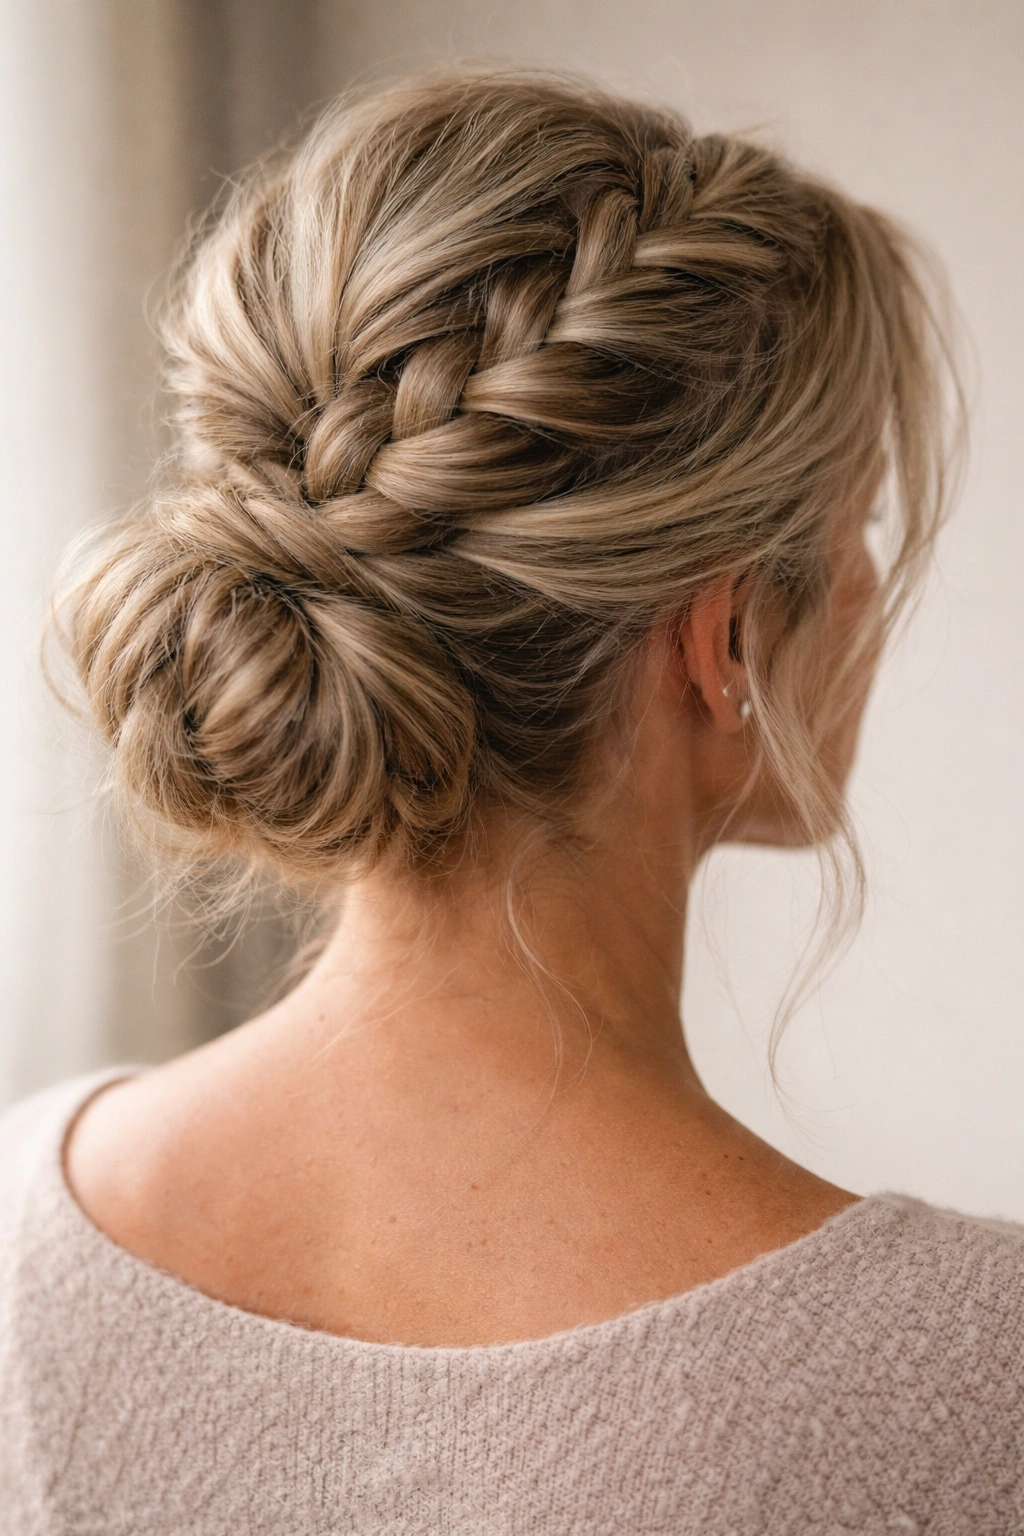
A Dutch braid (reverse three-strand braid that sits on top of the head rather than underneath) creates dramatically more visible texture than a standard braid, making it perfect for creating the illusion of fullness in fine or thinning hair. Instead of leaving the braid loose like a halo, gather the braid into a bun at the back of the head for a polished, intentional style that’s also surprisingly textured.
Building the Dutch Braid Bun
Dutch braid a section of hair from your crown down toward the nape of your neck. Rather than braiding all your hair, create a visible braid that incorporates the top and back sections while leaving some hair completely loose on the sides. Once you reach the nape, gather the braided section and any remaining loose hair into a soft bun and secure with bobby pins. Pull gently at the Dutch braid to open it up and create more texture and visual width. The bun itself should also be intentionally undone, with visible loose pieces and irregular shape.
Why Dutch Braids Transform Fine Hair
A Dutch braid creates the optical illusion of more volume because the braid sits prominently on top of the head and the reverse braiding technique makes the braid appear thicker and more textured than a regular braid. For women with fine or thinning hair, this is genuinely transformative—a Dutch braid can make thin hair appear substantially fuller. The visible braid also adds an element of intentional styling that reads as more polished than a simple gathered bun, even though both styles might take the same amount of time.
Perfecting Your Dutch Braid Technique
- Start your Dutch braid with a generous section of hair; a thin braid will look thin no matter how much you open it up with texture
- Dutch braiding takes practice; if your first attempt is sloppy, that’s actually perfect for the messy bun aesthetic—intentional looseness is the goal
- Pull aggressively at the braid once it’s complete; you want it noticeably textured and puffy, not neat and contained
- If Dutch braiding feels too fussy, ask a stylist to show you the technique once in person; seeing it executed is often clearer than following written instructions
Final Thoughts
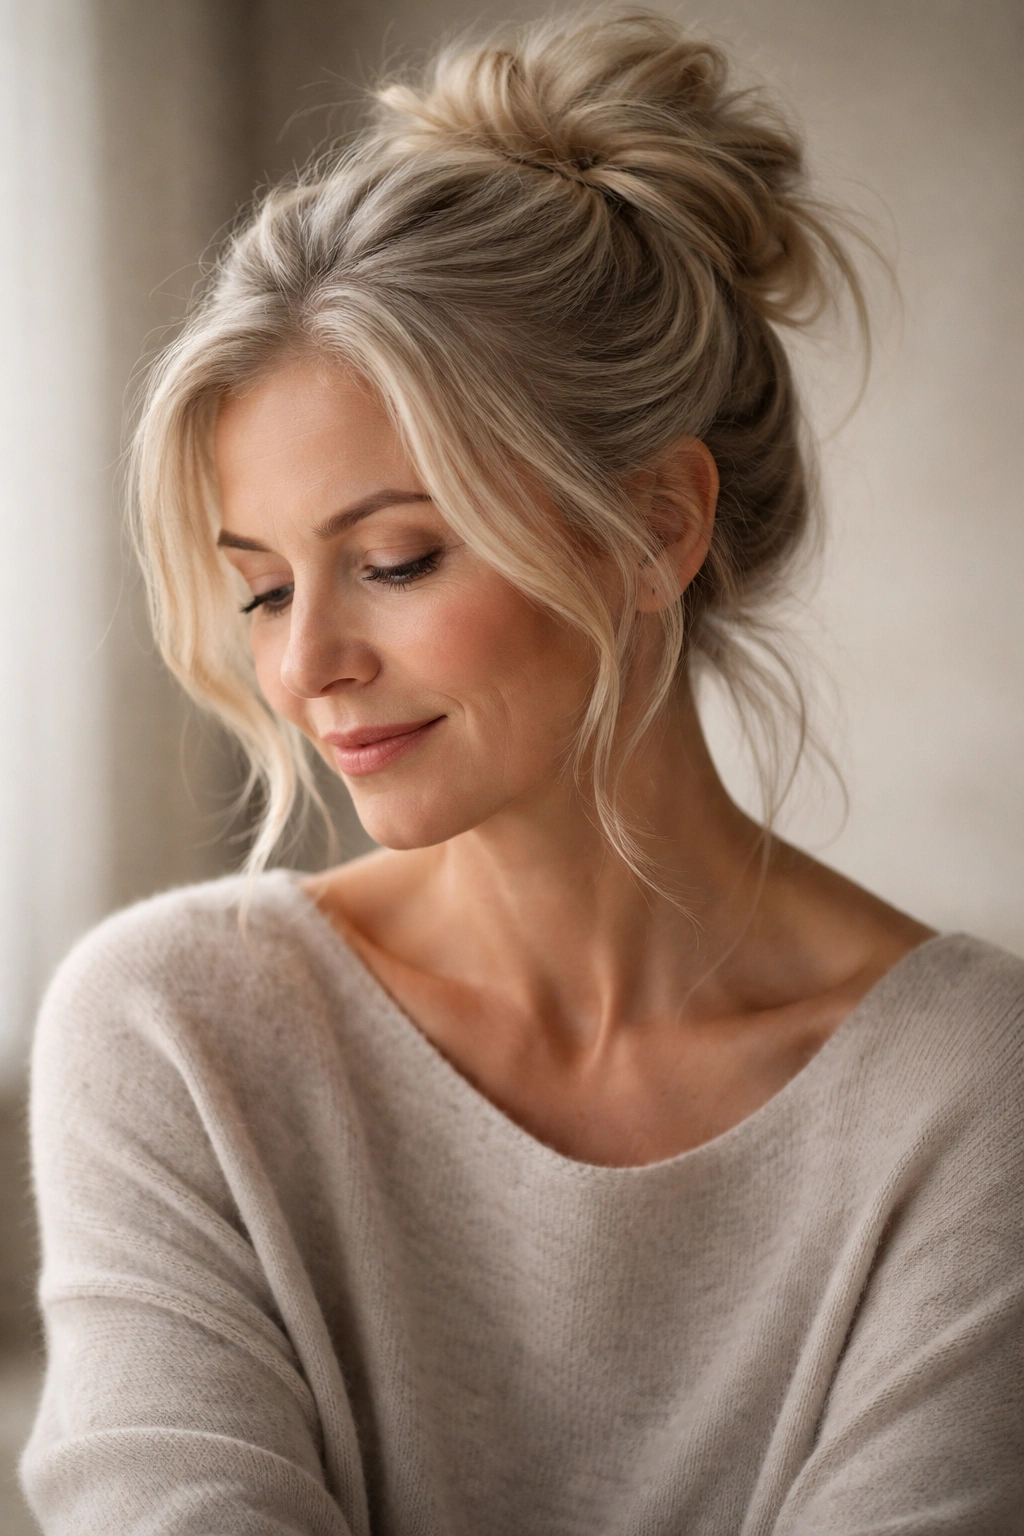
The best messy bun style for you isn’t determined by age, but by your hair texture, density, face shape, and the kind of appearance you want to project on any given day. What all 10 of these styles share is a commitment to intentional softness—to the idea that “messy” doesn’t mean careless, but rather thoughtfully undone. The asymmetry, the texture, the loose pieces, and the strategic placement all work together to create styles that flatter rather than age you.
The key to success with any of these styles is understanding that your hair over 50 is not your hair at 25, and that’s genuinely fine. In many cases, it’s better. The changes in texture, density, and natural color variation that come with aging can actually be assets if you work with them rather than against them. A twist or braid showcases dimension in gray hair beautifully. Intentional texture makes fine hair appear fuller. Asymmetrical placement balances the natural changes in your face and features over time. Start with whichever style resonates most with you, practice it a few times to find your personal rhythm, and remember that the slightly imperfect execution is exactly what makes these styles work.
