



Short hair can absolutely pull off messy buns — and honestly, some of the most effortless, modern versions look even better on shorter lengths than they do on long hair. The key is understanding that “messy” on short hair doesn’t mean piling everything on top of your head in a chaotic tower. Instead, it’s about creating texture, showing off the cut, and using what you have strategically to build something that looks intentionally undone rather than actually undone.
If you’ve ever thought short hair was too short for bun styles, you’re about to discover a whole category of looks that actually work better at shoulder-length or shorter. These messy buns range from barely-there twists to more structured half-ups, and they all share the same advantage: they let your face breathe, they highlight your features, and they keep hair off your neck without requiring the volume or length that longer buns demand. Whether you’re dealing with a pixie cut that’s grown out a bit, a choppy lob, a textured bob, or something in between, there’s a messy bun version that’ll suit you.
What makes these styles so versatile is that they work whether your hair is naturally straight, wavy, curly, or textured. They’re equally at home at a casual coffee run, a weekend brunch, or even a dressed-up evening when you style them the right way. Best of all, these aren’t fussy styles that fall apart after an hour — they’re designed to loosen and shift slightly as you wear them, which is exactly where that “messy” appeal comes in. Let’s walk through ten distinct approaches to mastering the messy bun on short hair.
1. Classic Tousled Messy Bun
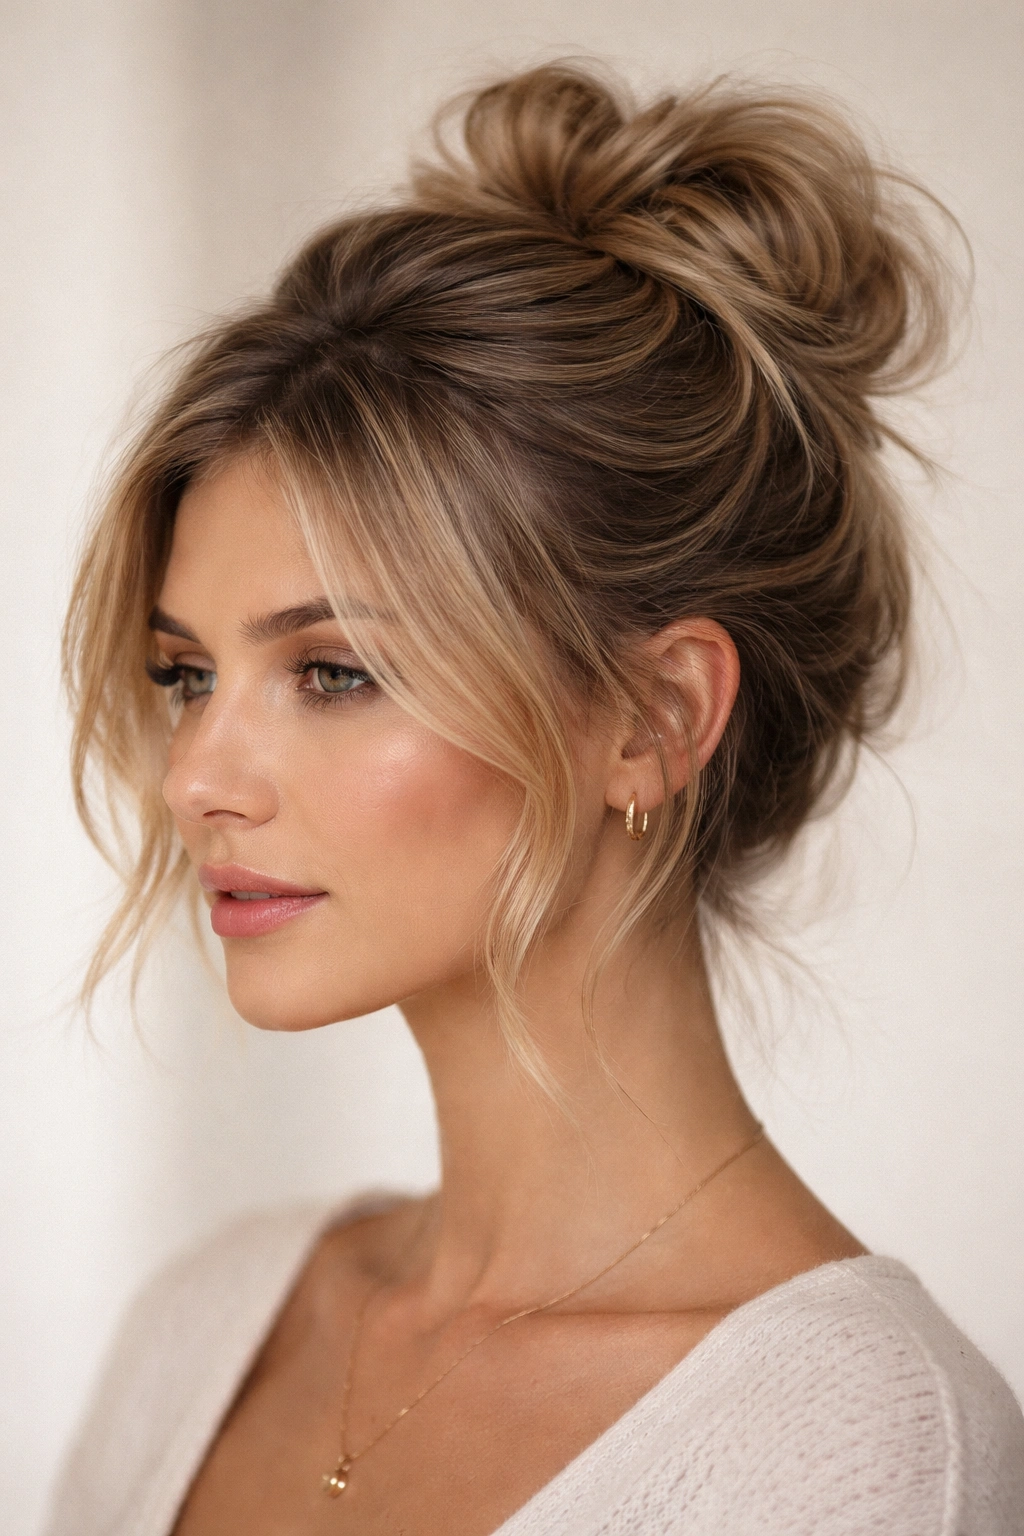
This is the foundation style — the one that made messy buns famous in the first place, now adapted for shorter hair. It’s about taking hair that’s roughly shoulder-length or slightly shorter, backcombing or texturizing it lightly, gathering it loosely at the crown or just slightly off-center, and securing it with a few bobby pins and an elastic that’s deliberately left slightly loose. The whole point is that pieces fall out around your face naturally, and the bun itself isn’t perfectly round or tight.
Why It Works on Short Hair
The magic of this style on short lengths is that you don’t need thickness or volume from length — instead, you’re creating dimension through texture and a relaxed gathering point. Your shorter layers actually work for you here because they fall naturally around your face and neck, making the style look fresher and less dumpy than it might on very long hair.
How to Build This Style
- Start with hair that’s been lightly texturized — if you have naturally straight hair, use a curling iron or wand to create loose waves beforehand, or backcomb the crown section lightly for grip
- Use your fingers to gather hair loosely at the crown, pulling gently rather than sleekly — you want strands to catch as you go, not a tight sculptured gather
- Secure with a clear or matching elastic, leaving the elastic slightly loose rather than cranking it tight
- Gently tease the gathered section outward with your fingers to create a soft, pillowed shape
- Pull out a few strategic face-framing pieces and pin any pieces that fall too far forward with bobby pins hidden underneath
- Finish with a light texture spray if needed to keep everything in place without the crunch of heavy product
Pro tip: The best version of this style often happens on second-day hair — your natural texture and oils make everything grip better and look less obviously styled.
2. Textured Twisted Knot Bun
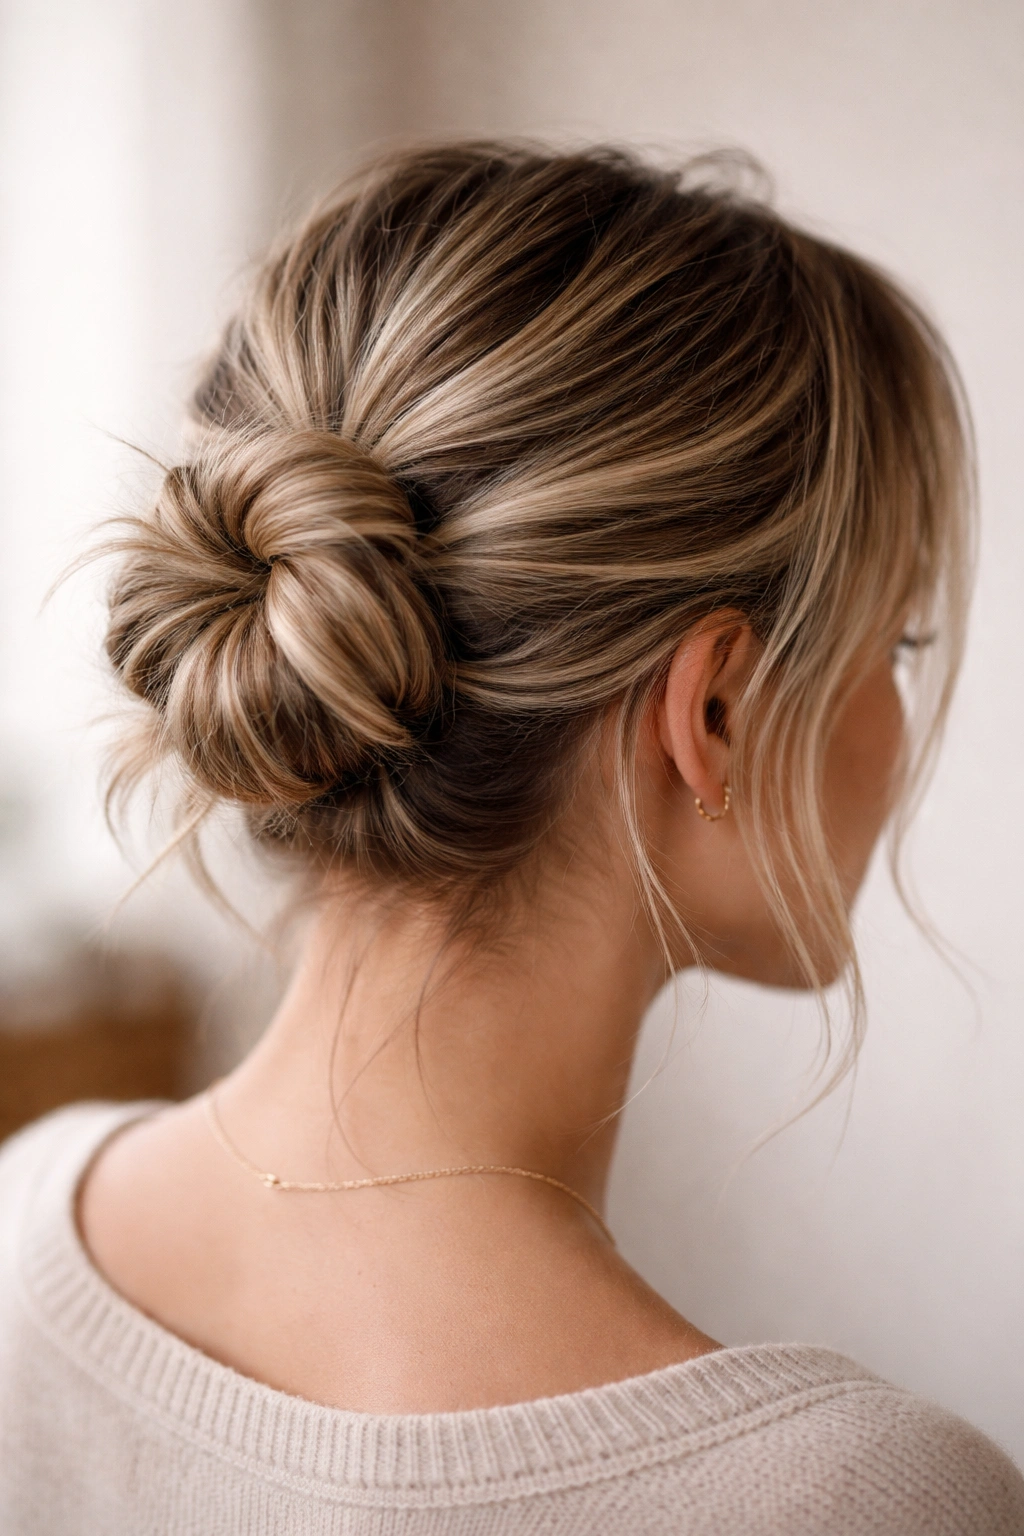
Instead of gathering hair into a bundle, this version uses two or three sections of hair twisted together and wrapped around a center point, creating a knot-like bun that’s inherently more interesting visually. It’s slightly more intentional than the classic tousled version, but still totally messy-looking once you’re done.
What Makes the Twist So Effective
Twisting creates natural texture and visual interest even on smooth hair, which is exactly what short lengths need. Because you’re working with defined sections rather than one big bundle, the bun sits more securely even if your hair is delicate or fine, and it looks fuller and more dimensional than a traditional gathered bun.
Step-by-Step Technique
- Separate hair into two or three vertical sections at the crown — for shorter hair, usually two is enough
- Twist each section firmly from root to tip, then wrap them around each other, creating a braided-knot effect
- Tuck the ends underneath and secure with bobby pins, leaving some pieces deliberately loose
- Pull the bun gently outward at the base to create volume and softness
- Let shorter pieces fall around your face and hairline naturally — these strands are essential to the style
Worth knowing: This works especially well on textured or wavy hair because the twist enhances what’s already there, while on straight hair it creates the contrast you’re aiming for.
3. Half-Up Messy Bun
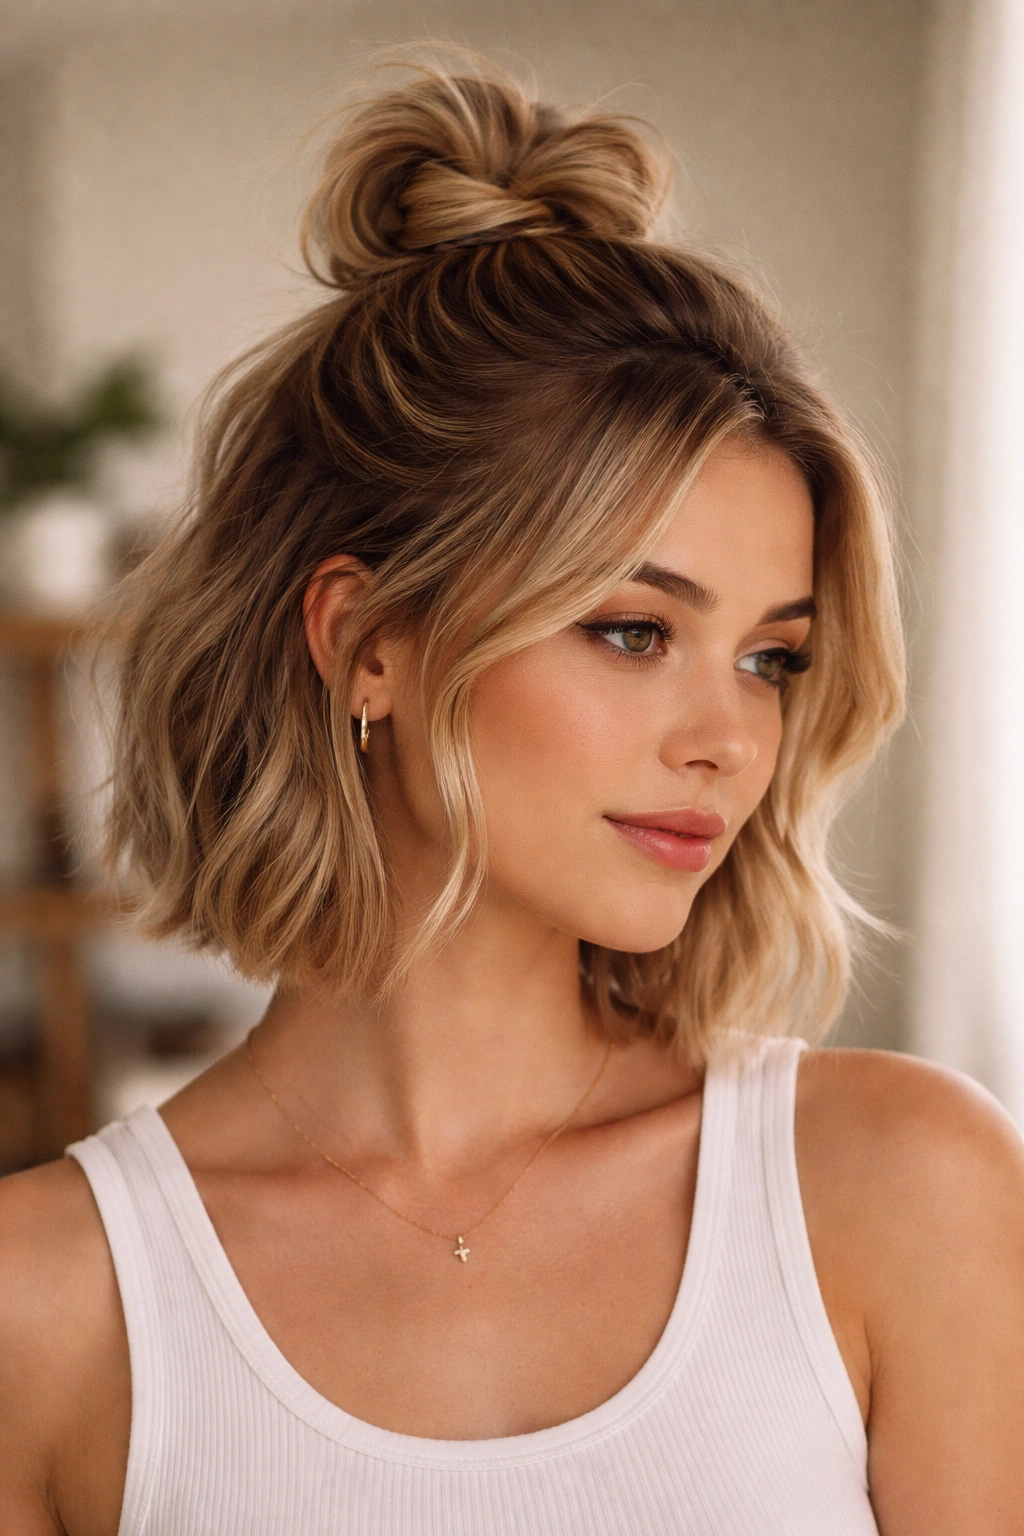
A half-up, half-down messy bun is actually easier on short hair than on long hair because you’re only corralling a smaller amount of hair. Take roughly the top half or upper third of your hair, texturize it, twist or backcomb it lightly, and secure it into a small, loose bun at the crown, leaving the bottom half down.
Why This Flatters Short Hair
This style gives you the best of both worlds — you get the ease and neatness of a bun, but you also show off your cut and keep hair moving around your face and shoulders. On short hair, this isn’t a halfway measure; it’s a complete, polished look that reads as intentional and modern rather than like you didn’t quite finish styling.
Building the Half-Up Version
- Determine where the natural halfway point of your head is — typically around ear level or slightly above
- Gather the upper section loosely, creating a light backcomb or wave texture first for grip
- Twist gently or backcomb the gathered section, then roll it into a small, soft bun shape
- Secure with bobby pins and a clear elastic, leaving pieces loose
- Gently pull the bun apart to create shape and softness
- Let the bottom section fall naturally, enhancing any wave or texture you have in that lower section
- Pull out face-framing pieces from the top section and from the hairline for softness
Quick facts about this style:
- Works great on textured bobs, lobs, and longer pixies that have grown out
- Looks fresher with slightly imperfect placement — slightly off-center is better than dead center
- You can dress this up or down depending on how you finish it and what accessories you use
- Takes about three to five minutes once you know the motion
4. Low-Slung Messy Bun
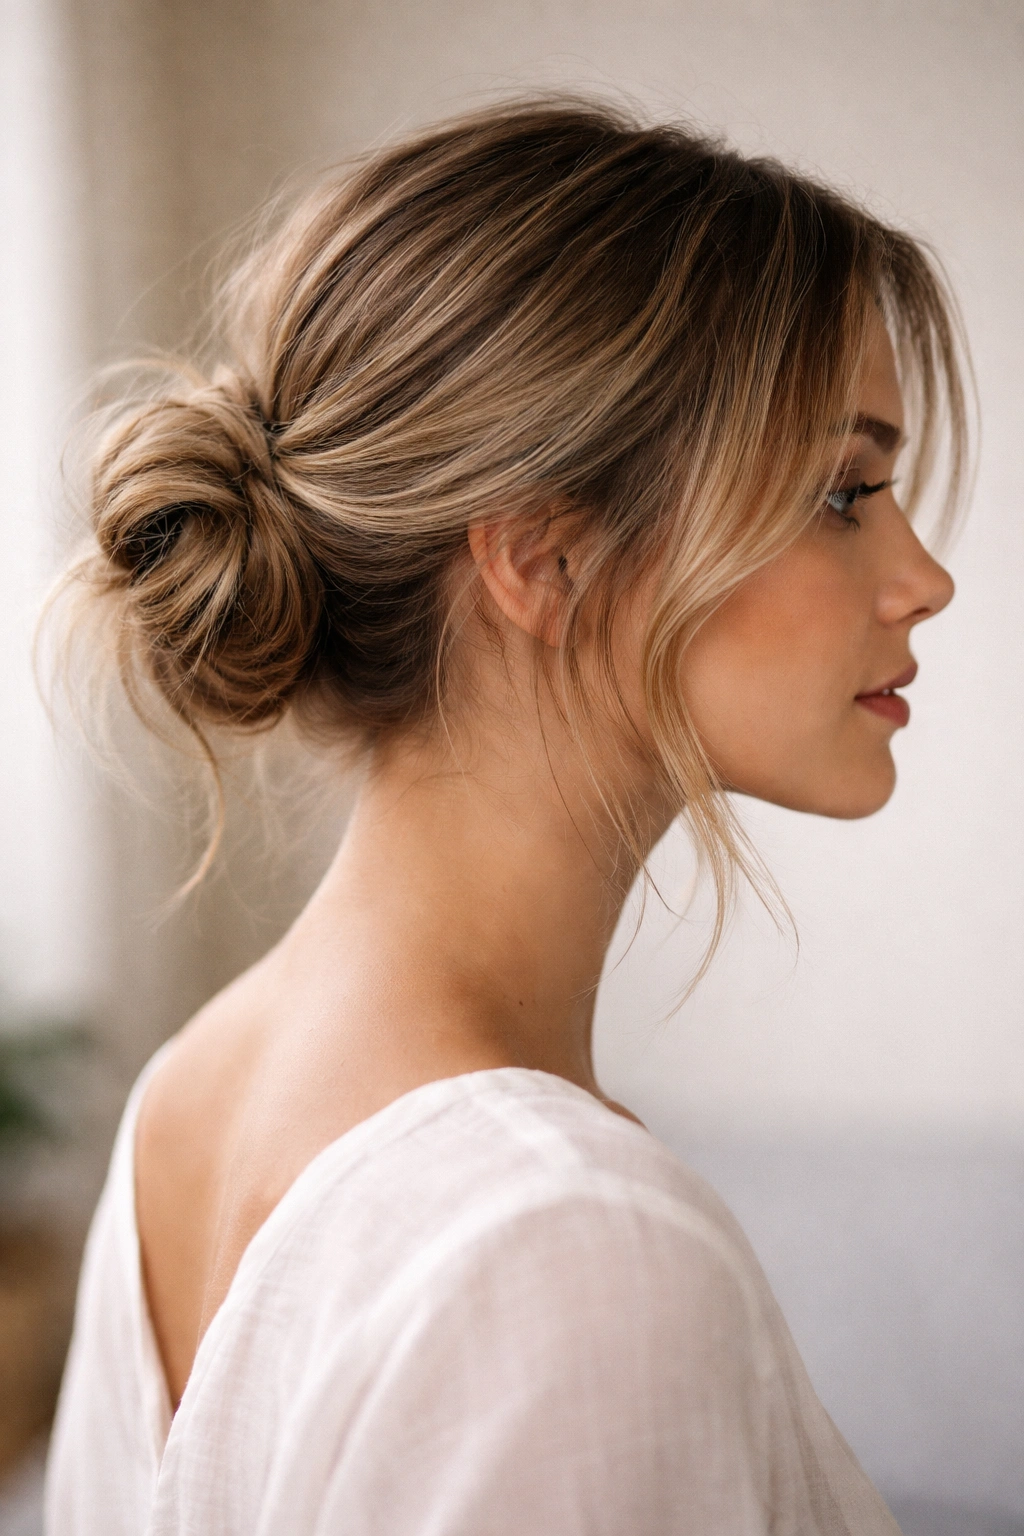
Rather than piling everything at the crown, a low messy bun sits at the nape of your neck or just slightly above it, creating a completely different silhouette and vibe. This version is a bit more polished than the crown versions and works beautifully when you want something that looks effortless but still intentional.
The Appeal of a Low Placement
On short hair, a low bun doesn’t look droopy or tired — it looks modern and neat in a way that actually flatters the proportions of a shorter cut. Your face stays fully visible, you get the polished benefit of an updo without the fussiness, and it photographs beautifully from multiple angles.
How to Create a Low-Slung Messy Bun
- Run your fingers through your hair and flip your head forward slightly to create texture and movement
- Use your fingers to gather hair loosely at the nape of your neck or an inch or two above it — this is lower than you might instinctively try at first
- Secure loosely with a clear elastic, then twist or gently backcomb the gathered section
- Create the bun shape by tucking the twisted section and securing it with bobby pins underneath, where they won’t show
- Pull the bun gently outward to create softness and volume
- Leave pieces around your face and neck deliberately loose — this is crucial to the style
- Smooth your hairline slightly with a little pomade or smoothing gel if you want a polished contrast
Insider note: A low bun works especially well if your hair has any natural texture or wave, because you can create the bun shape more easily without it looking chunky.
5. Spiky Crown Messy Bun
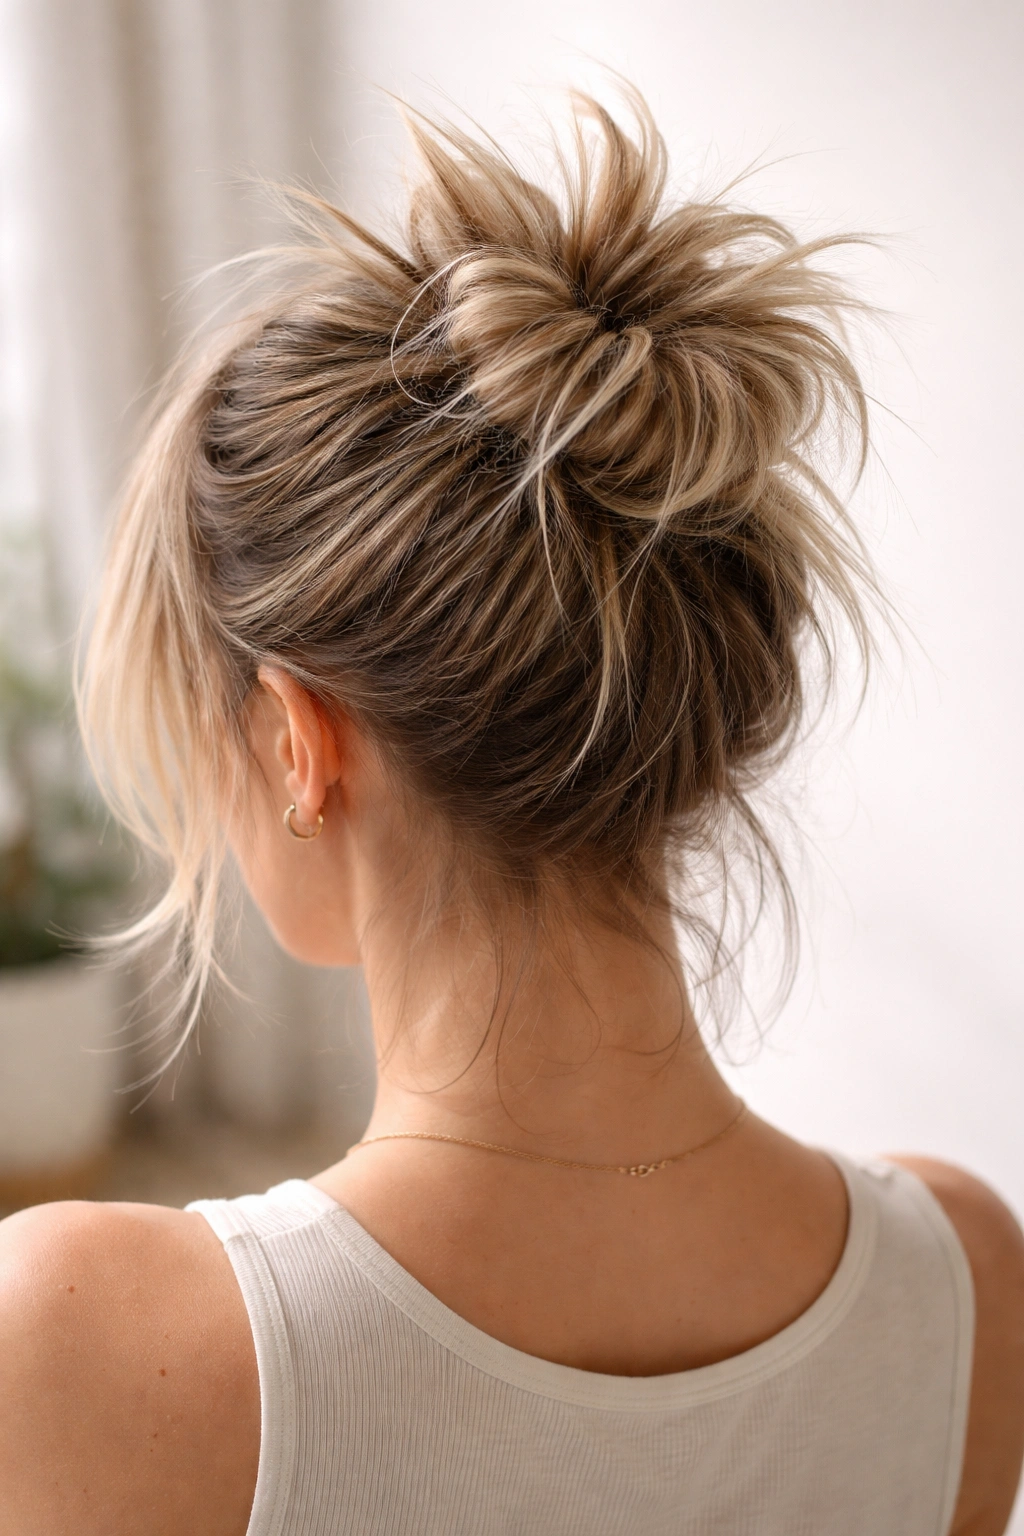
This is a more sculptural, statement-making version where you intentionally stick pieces up and out from the bun, creating height and drama at the crown. It’s still messy, but it’s also a bit more styled and requires slightly more intention than the softer versions.
When This Works Best
The spiky crown look works beautifully if you have a bit of length (at least chin-length), some texture or wave, and you want a bun that reads as intentionally edgy rather than accidentally undone. It’s a great move for piecier cuts where you naturally have lots of shorter layers.
Building the Spiky Crown Style
- Backcomb your crown section aggressively — not gently, but really tease it to create body and grip
- Gather the rest of your hair loosely and create your bun at the crown
- Secure the bun with bobby pins, leaving the backcomb-textured crown section deliberately voluminous above and around it
- Use bobby pins and a light texture spray to coax certain pieces of the crown section upward and outward
- Pull forward face-framing pieces and smooth them slightly for contrast against the textured crown
Quick facts:
- This is the most “styled” version and takes slightly longer than the others
- Works best when you’re willing to use a light texturizing spray to hold everything in place
- Pairs beautifully with heavier eye makeup or bold lipstick because the hair doesn’t fight for attention
- More evening-appropriate than casual, though you can definitely wear it casually too
6. Sleek-to-Messy Contrast Bun
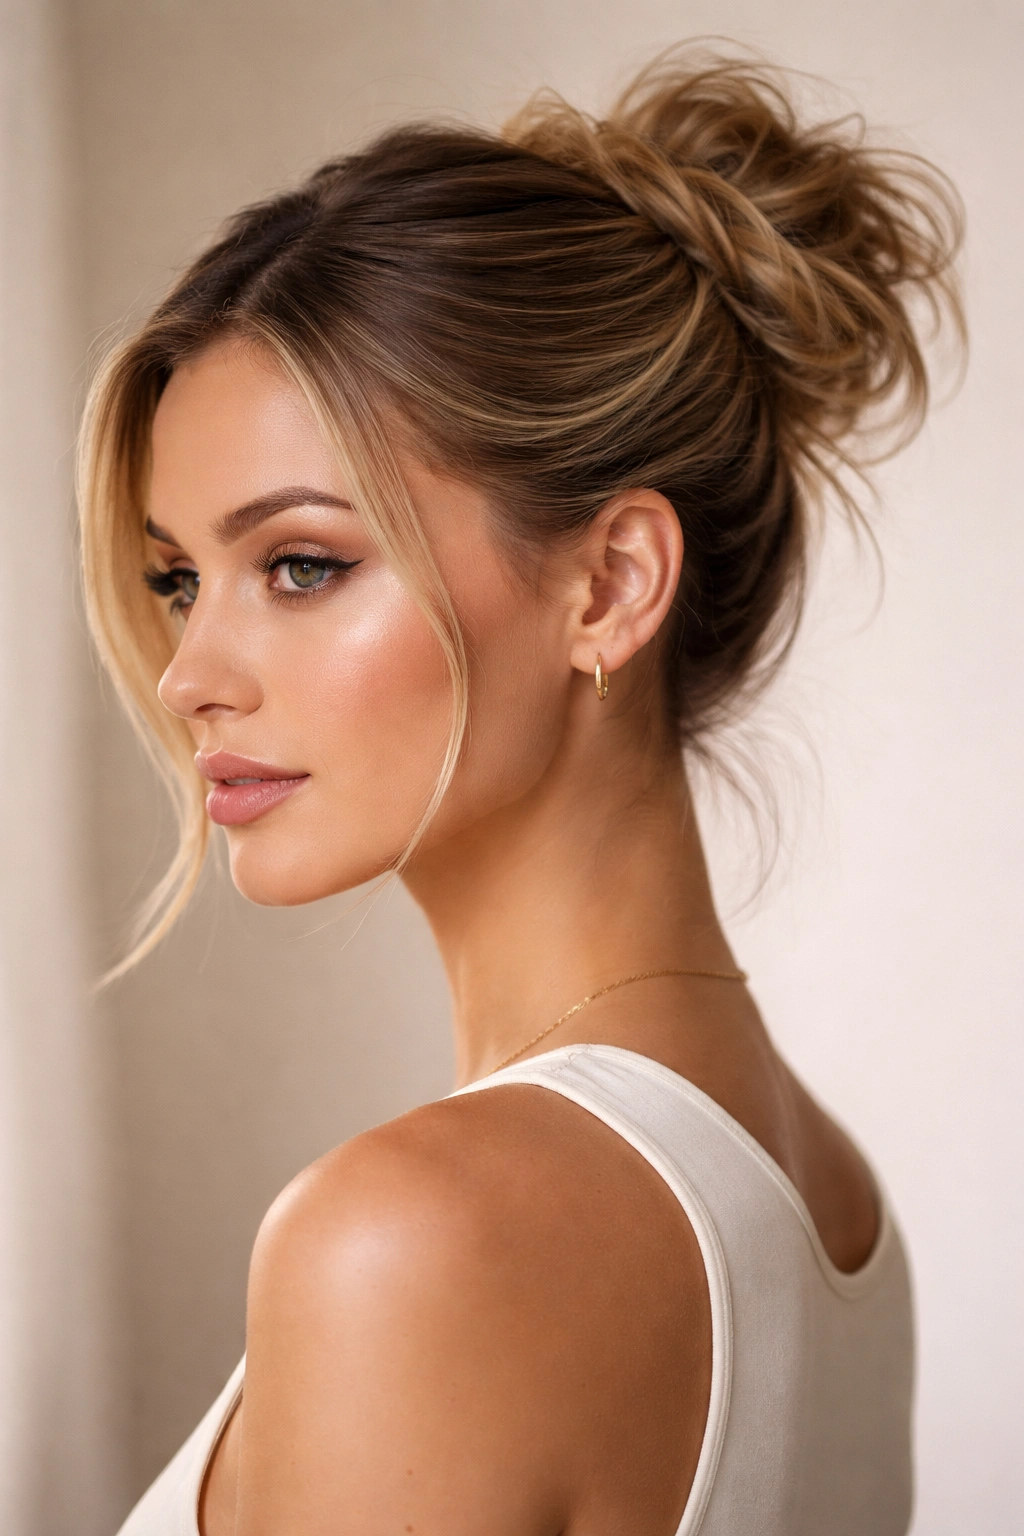
This version uses a strong contrast: smooth, sleek-combed hair from the hairline down to about ear level, then a deliberately messy, textured, undone bun at the crown. The opposition between the two looks creates visual interest and feels modern and intentional.
Why Contrast Works So Well
On short hair especially, a contrast like this keeps the style from looking completely tousled or undone — the sleek base grounds it and makes the messy bun read as a choice rather than negligence. It’s also deeply flattering because the sleek sections frame your face and pull it forward visually.
Creating the Contrast
- Use a smoothing serum or gel to sleek down your front sections and around your hairline completely — make this part look polished and intentional
- Secure the sleek sections by tucking them back with bobby pins that sit under the smoothed hair, invisible from the front
- Gather the back and crown section, which you’ve left untouched, into a deliberately messy, textured bun
- Create the bun shape without overthinking it — the randomness is the point
- Leave face-framing pieces down, allowing them to break up the sleekness slightly
- The contrast between the smooth temple area and the messy crown is the whole style
Pro tip: This look works beautifully if you blow-dry your front sections smooth and let your natural texture do its thing in the back — you’re not fighting your hair, just directing which parts are sleek and which are textured.
7. Braided Wrap Messy Bun
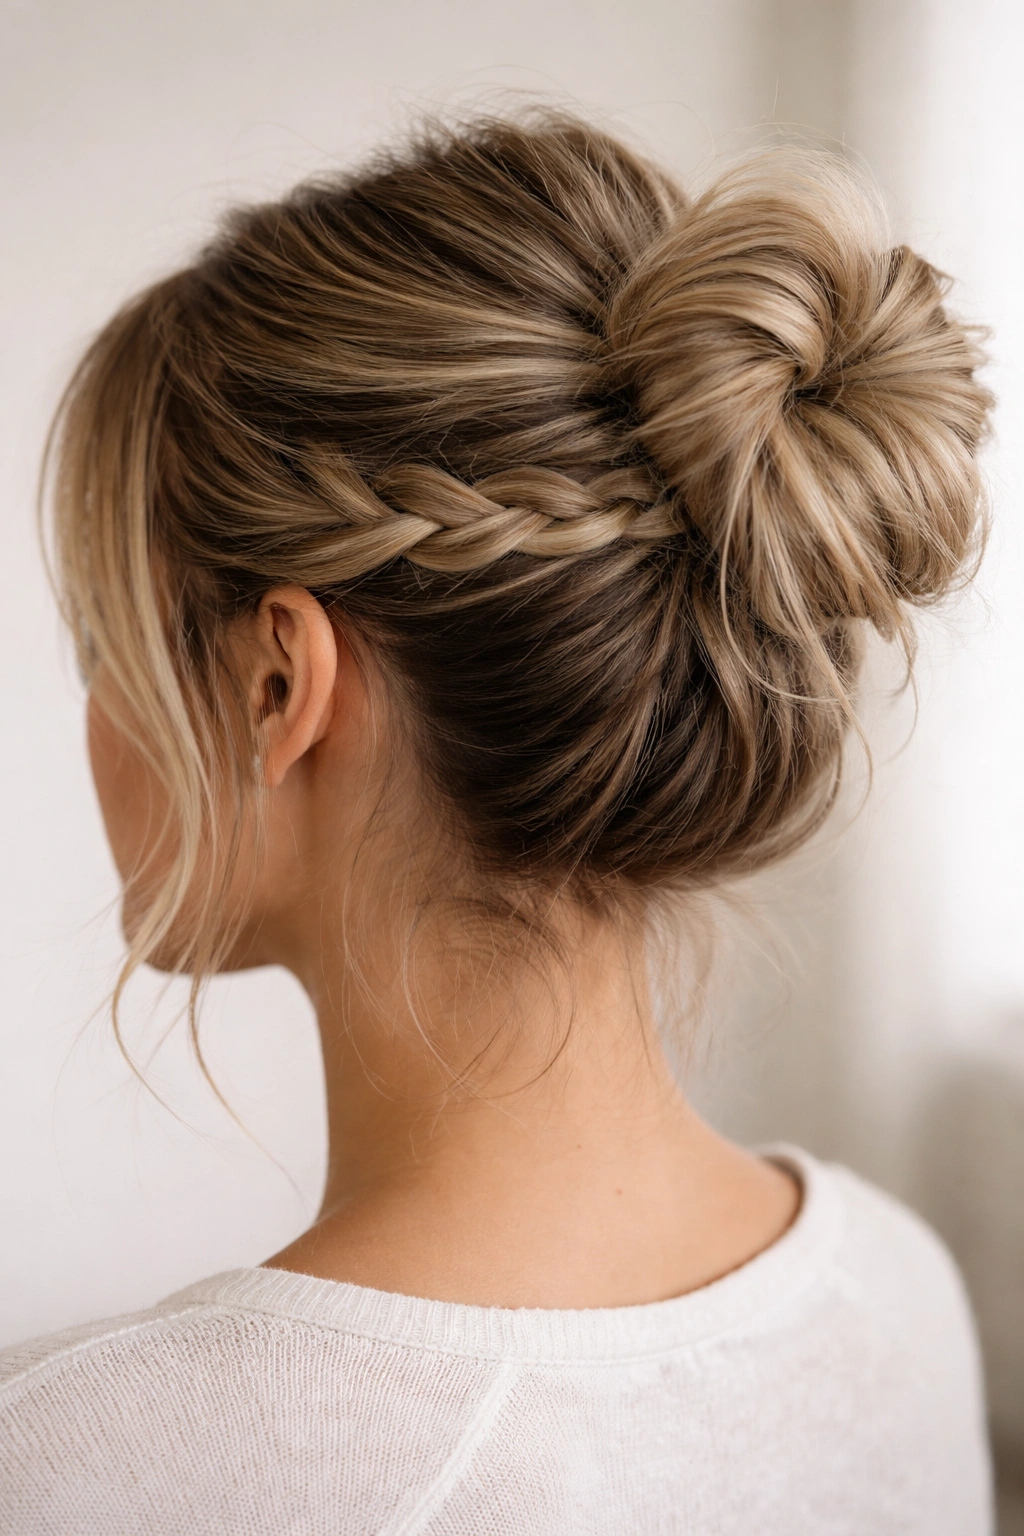
Start with a regular messy bun, then take a small section of hair from underneath or from the side, braid it (just a simple three-strand braid), and wrap it around the base of the bun like a ribbon, securing the end underneath with a bobby pin. This adds detail and visual interest without requiring significant skill.
What the Braid Does for the Bun
The braid adds polish and intention to what might otherwise read as a casual gathered bun. It’s a simple way to elevate the style from “didn’t do anything” to “did something easy” — and that perception shift is huge. The braid also provides a subtle decorative element that draws the eye and adds texture variation.
Building the Braided Version
- Create your base messy bun exactly as you would any other — gather loosely at the crown, secure, and tease gently for softness
- Identify a small section of hair at the nape of your neck or from one side — it should be about the width of a marker
- Braid this section simply (just three-strand braid, nothing complex) down a few inches
- Wrap the braid around the base of the bun and secure the end with a bobby pin tucked underneath the bun where it won’t show
- Gently pull the braid and the bun outward to create shape
- This is now polished enough to wear to work or a casual dinner, but still reads as effortless
Quick facts:
- The braid doesn’t need to be perfect — loose, imperfect braids look better here than tight, precise ones
- You can braid anywhere from one to three sections if you want more detail, but one is usually enough
- This works on any hair type and length, as long as you have enough hair to gather at the crown
8. Side-Swept Messy Bun
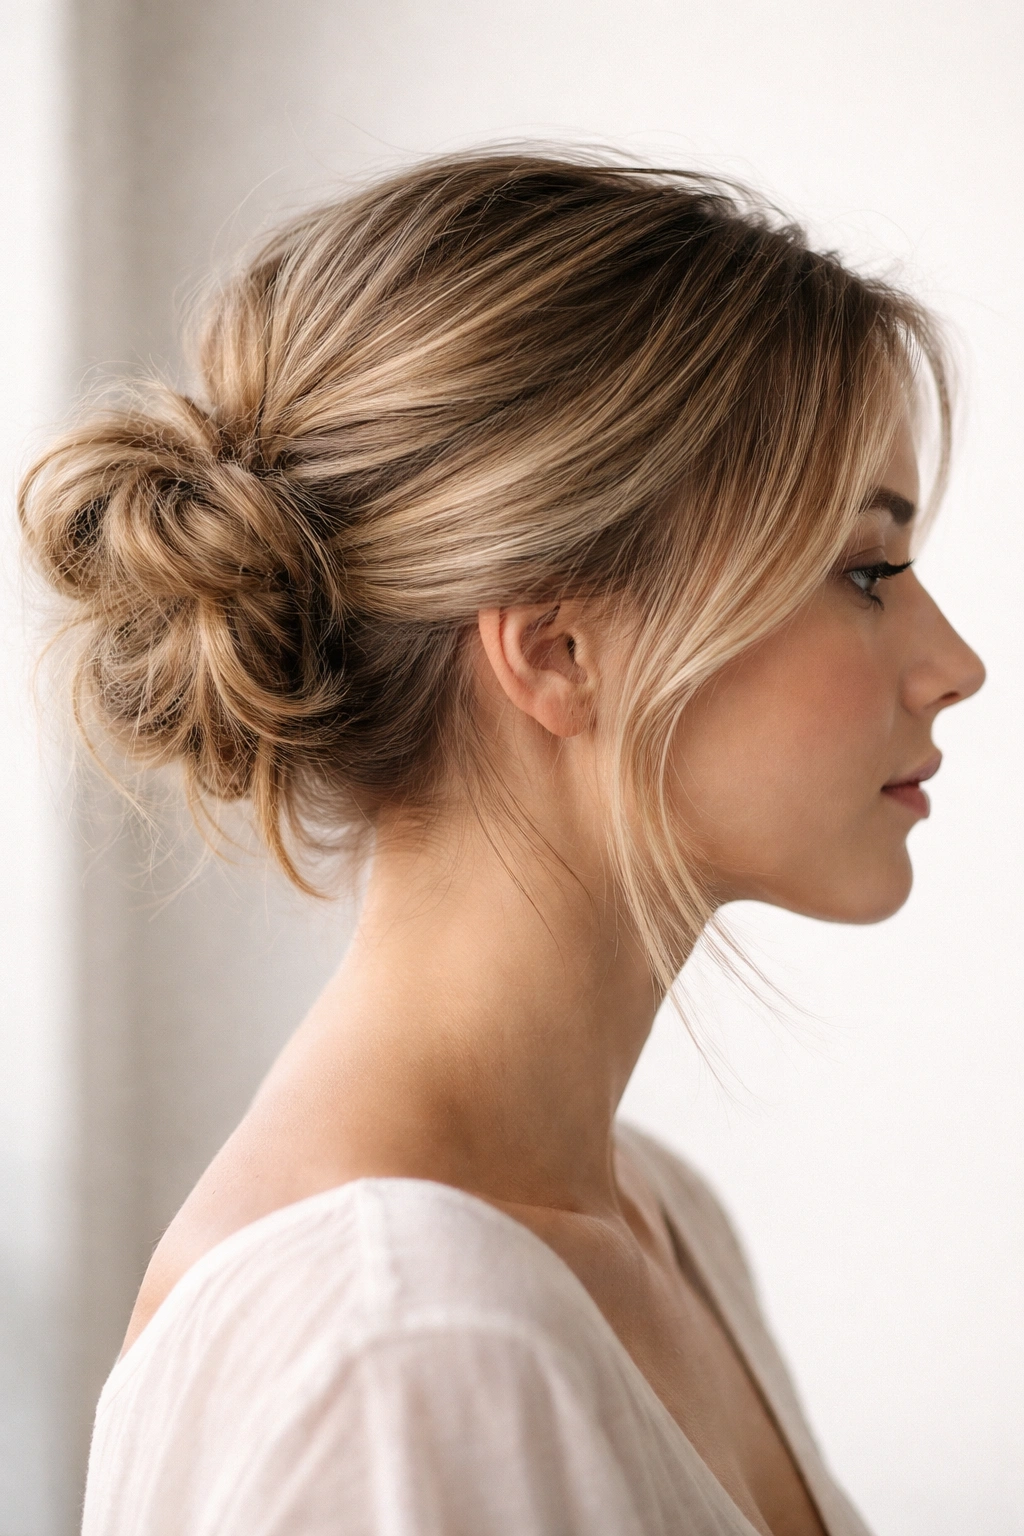
Instead of centering your bun at the crown or nape, sweep all your hair to one side, create a small, soft bun on that side of your head, and let the other side of your face stay completely open and bare. This is inherently more glamorous and romantic than center-placed buns, and it works beautifully on shorter hair.
The Flattering Geometry of Side-Swept
A side-swept bun elongates your face and creates an asymmetrical silhouette that photographs well and feels modern and intentional. It’s also easier to achieve on shorter hair because you don’t need enormous volume — the placement does the heavy lifting visually.
How to Create a Side-Swept Bun
- Flip your head to the side you want to sweep toward, or use your fingers to direct all hair toward that side
- Gather hair loosely in your hand on that side, roughly at the level where a regular crown bun would sit, but positioned far to the side
- Create a soft, textured bun on that side by securing with an elastic and bobby pins
- Gently pull the bun apart to create softness and volume
- Pull a few pieces down to frame your face
- On the opposite side, smooth any flyaways and leave your entire side profile visible — this empty space is part of the style
- If you like, you can create a small braid or twist on that open side as a decorative element, or leave it completely clean
Worth knowing: This style looks especially beautiful if you have any waves or texture to work with, but it works on straight hair too — just add some texture via a curling iron or texturizing product first.
9. Double Mini Messy Buns
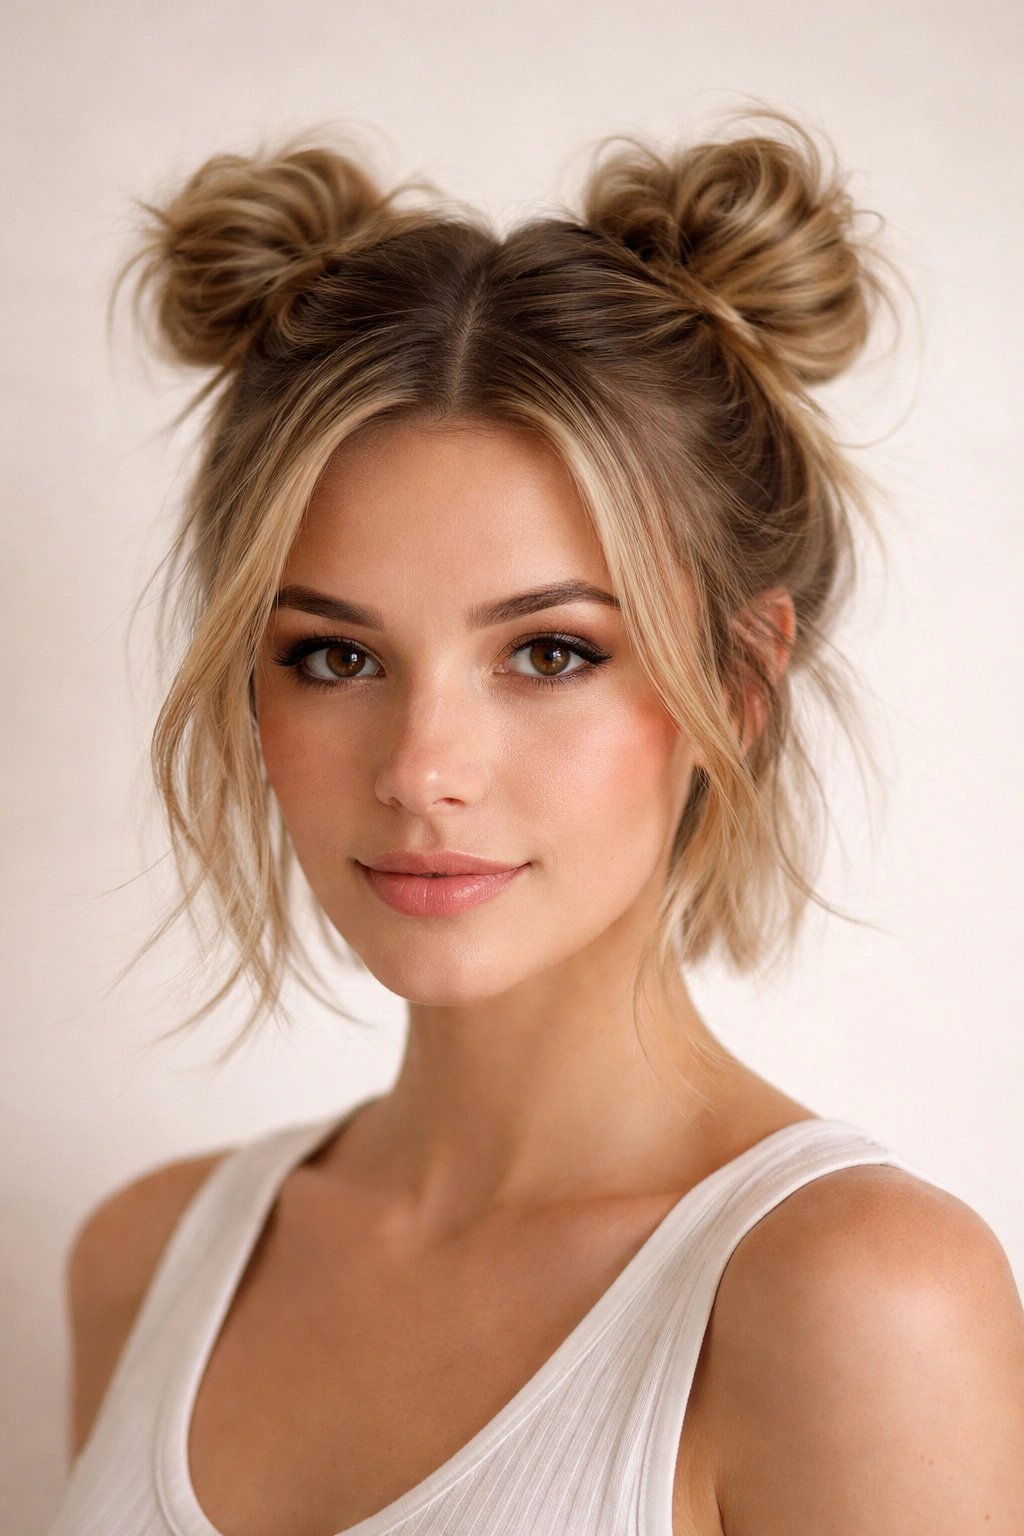
If you’re working with particularly short hair, two small buns placed symmetrically on either side of your crown or high on your head can be just as modern and intentional as a single large bun. This is actually more secure on very short hair because each tiny bun sits on less hair and requires less balancing.
Why Two Works on Short Hair
Two small buns don’t read as juvenile on a styled adult — they read as a deliberate choice and a nod to playful, modern style. Because each bun is tiny, you don’t need volume or length; you just need enough hair to create two small, textured sections. The style is inherently balanced and feels complete even with very short hair.
Creating the Double Bun Look
- Divide your hair down the middle from your forehead to the back of your head — not perfectly, but roughly down the middle
- Gather each side loosely at the crown or slightly off-center, creating two separate bundles
- Secure each with its own small elastic
- Twist or gently backcomb each small bundle, then tuck it into a tiny bun shape and secure with bobby pins
- Leave pieces loose around your face and temples — this is what keeps it from looking childish
- Pull each bun gently outward to create softness
- The asymmetry and the loose pieces are what make this feel intentional and grown-up
Quick facts:
- This works best on hair that’s roughly ear-length or slightly longer
- Adding a small hair clip or decorative bobby pin to each bun elevates the style
- The pieces that fall around your face are absolutely critical — don’t over-secure everything
- This is a great way to style short hair on hot days because it gets everything off your neck and face
10. Tousled Top Knot
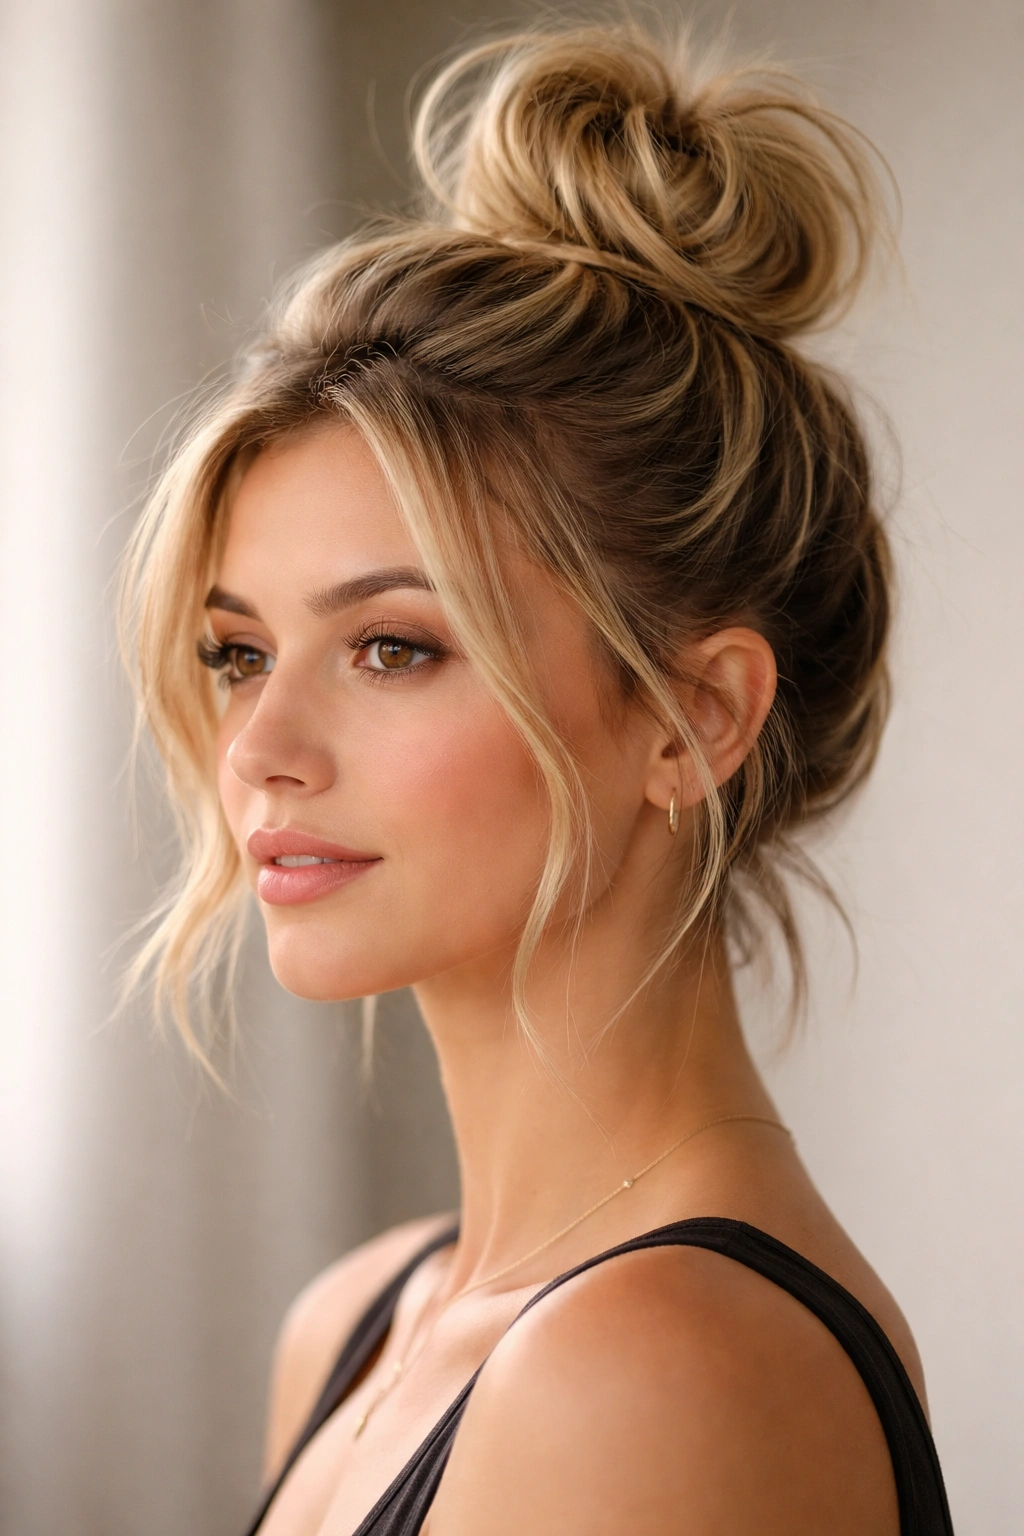
A top knot on short hair is a bit different than on long hair — it sits higher, uses less hair, and requires you to be intentional about creating height at the crown rather than relying on the weight of length to create that updo effect. But when executed right, it’s an incredibly chic, modern look that works for everything from casual to dressed-up.
The Appeal of the High Placement
A top knot high on your head creates an instant sense of height and elegance without requiring long hair. On short hair, it actually has a cleaner, more modern line than a traditional bun, and it showcases your face and bone structure beautifully. It also feels current and intentional rather than like you’re trying to style hair longer than you actually have.
Building Your Top Knot
- Backcomb your entire crown area firmly to create height and grip — this is essential for getting the knot to sit securely high on your head
- Gather hair toward the very top of your head, almost where a ponytail would sit but even higher
- Secure with a small elastic, then twist the gathered section gently
- Wrap the twist around itself to create a compact knot at the crown and secure with bobby pins
- Pull gently outward to create a soft, pillowed shape — don’t let it sit as a tight, tiny sphere
- Leave face-framing pieces deliberately loose, and let some short pieces fall around your temples and nape
- The knot should look intentional but soft, not sculptural or perfectly round
Pro tip: Using a texturizing spray before you backcomb makes the whole process easier and keeps everything in place longer. Apply the spray, let it dry completely, then backcomb.
Styling Tips for Short Hair Messy Buns
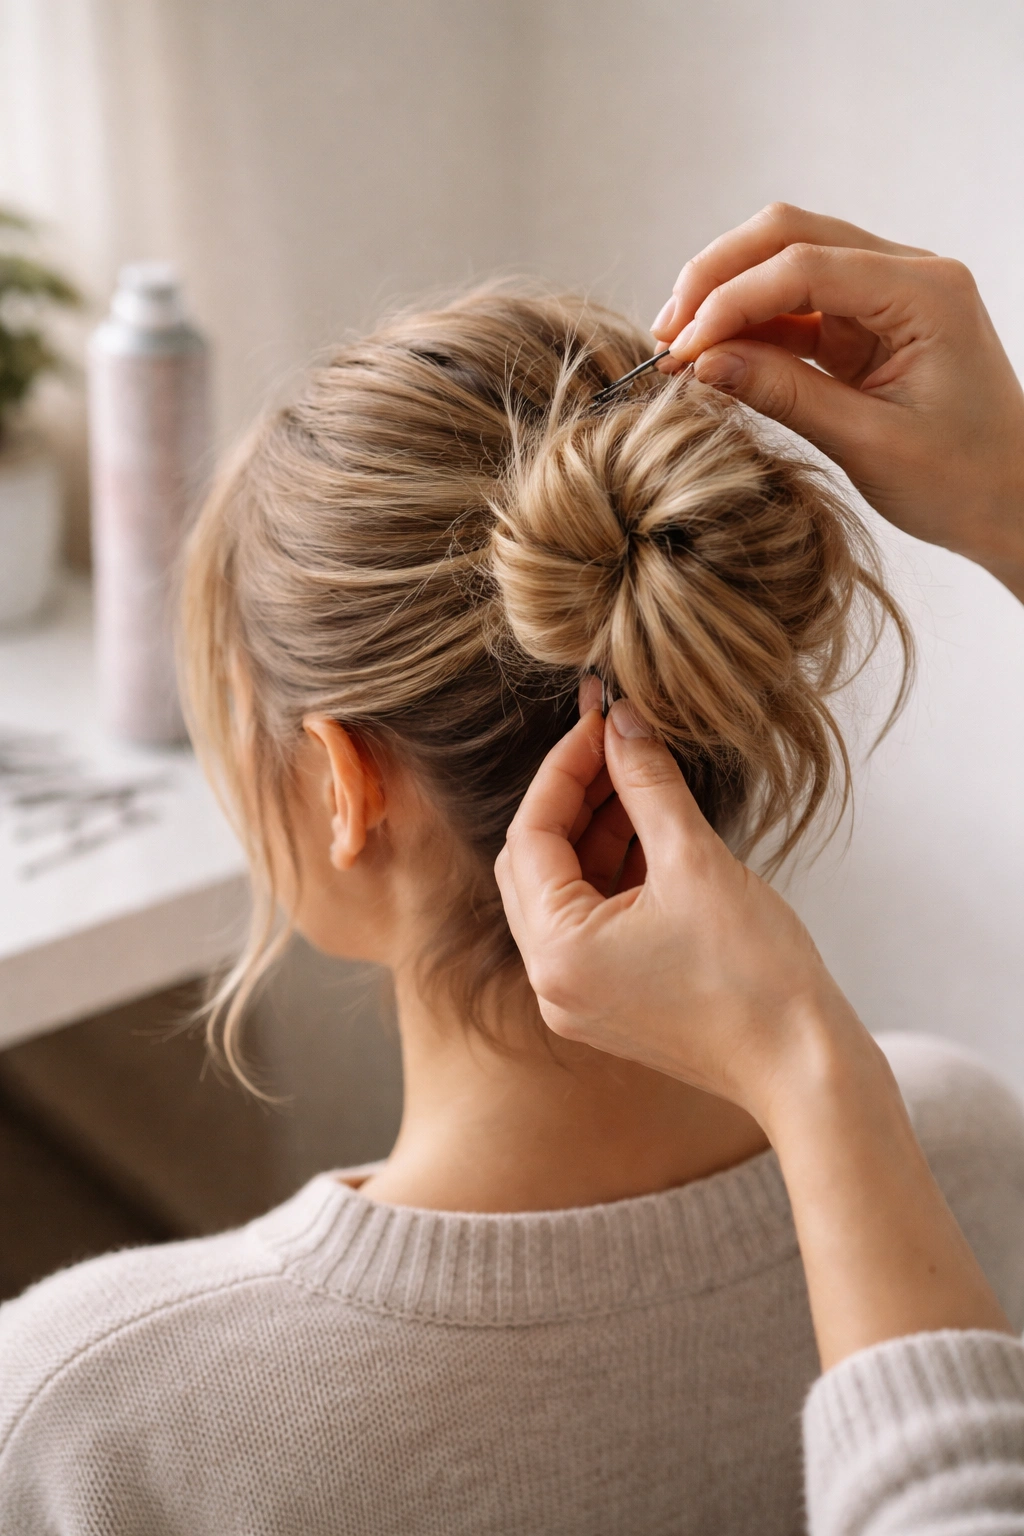
Short hair requires a slightly different approach than longer hair when you’re creating messy buns, mostly because you’re working with less volume and need to create dimension through texture and thoughtful placement rather than through sheer length.
Preparation Makes Everything Easier
Your bun will hold better and look better if you’ve created texture beforehand. If you have naturally wavy or curly hair, that’s your starting point — embrace it. If you have straight hair, spend three to five minutes with a curling iron or wand creating loose waves or texture through your crown and back sections before you try to create your bun. This texture provides grip for bobby pins, makes your bun look fuller than it actually is, and ensures that loose pieces fall naturally rather than stiffly.
A light texturizing spray or dry shampoo applied before you style (not after) makes everything easier. It provides grip without weighing hair down, and it helps bobby pins stay exactly where you put them. Texture spray is especially helpful if you have fine or slippery hair that normally defeats bobby pins.
Bobby Pins Are Your Secret Weapon
On short hair, one elastic holding your bun simply won’t cut it — you need bobby pins. Use at least four to six bobby pins per bun, placing them underneath the bun where they won’t show, pushing them through the elastic and into the hair underneath. Match your bobby pins to your hair color so they disappear. The goal is a bun that looks like it’s barely holding together but actually sits securely for hours.
Loose Pieces Are Non-Negotiable
The difference between a messy bun that looks intentionally undone and one that looks like you didn’t actually style your hair is the presence of deliberate loose pieces. Pull out at least two to four pieces from around your face, temples, and nape before you finish styling. These pieces should frame your face and create softness. They’re not optional extras — they’re part of the style itself.
Final Thoughts
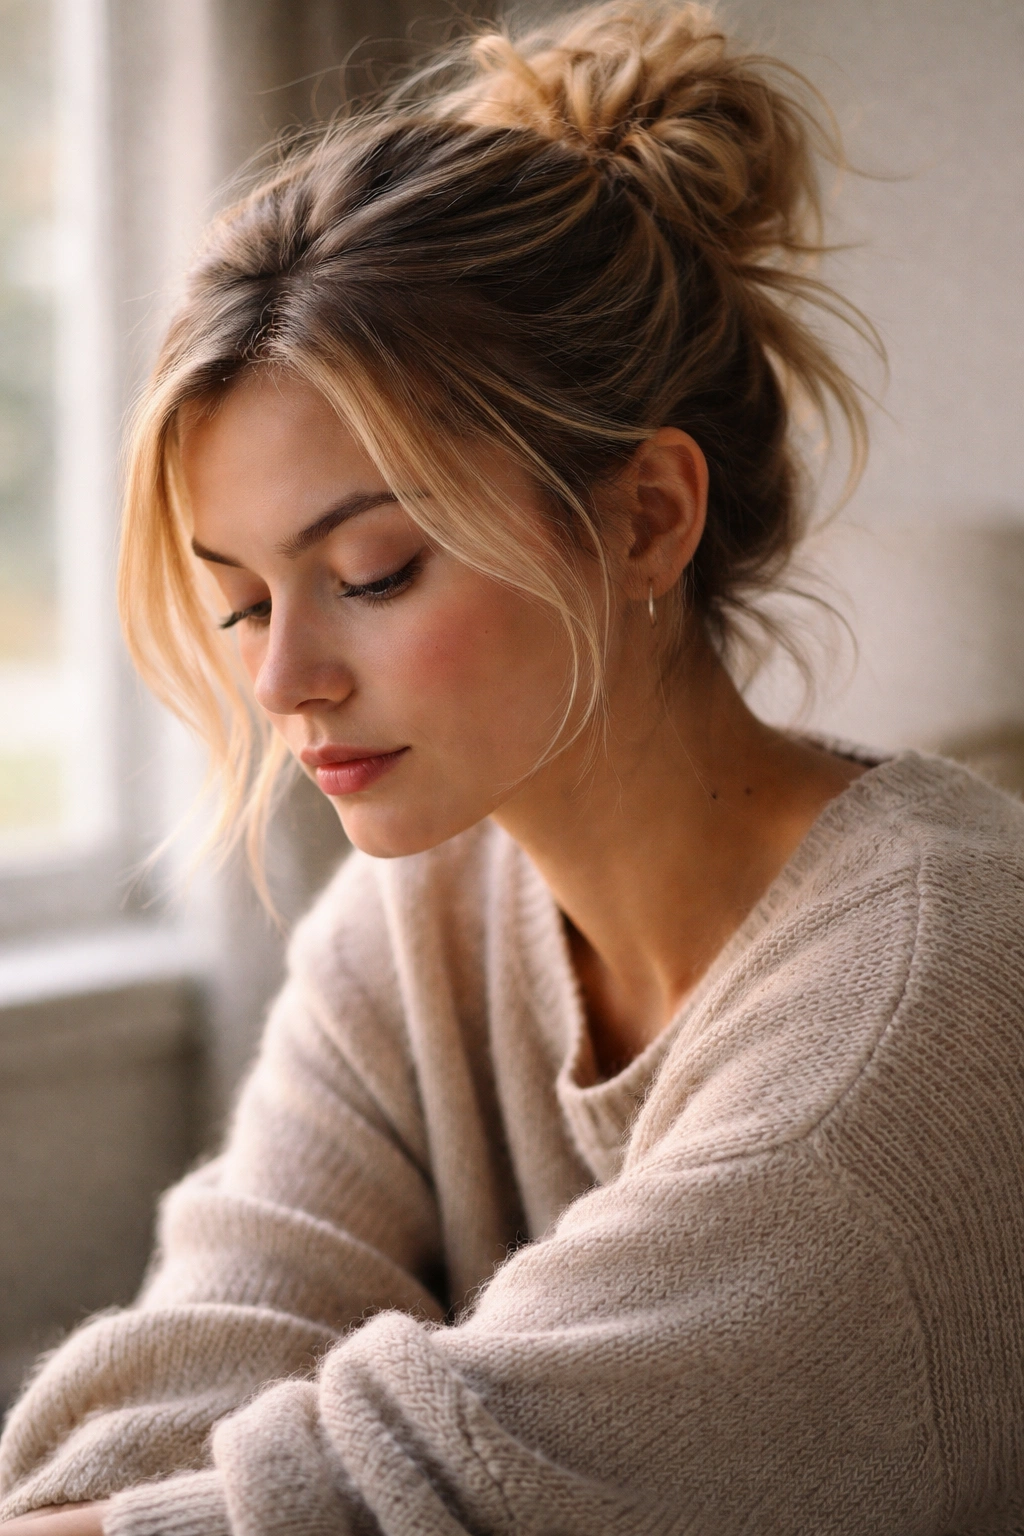
Messy buns on short hair are less about having enough length and more about understanding placement, texture, and the power of strategic loose pieces. Whether you go for a classic tousled crown bun, a polished side-swept version, or something with more structure like a braided wrap or spiky crown, the key is creating intentionality through texture and leaving pieces loose enough that your face and features stay front and center.
The beauty of these styles is that they work on virtually any hair type and any short-to-medium hair length, from a grown-out pixie to a choppy lob. They’re genuinely quick to create once you understand the motion, they hold up throughout the day without requiring constant adjustment, and they look effortlessly put-together in a way that’s deeply satisfying. Start with whichever version appeals to you most, practice it a few times, and then experiment with the others — you’ll quickly find which messy bun style works best with your hair type, face shape, and personal style.
