



The messy bun has become a wardrobe staple for people with medium-length hair, and for good reason. It’s the perfect hairstyle for days when you want to look effortlessly put-together without spending an hour at the mirror, yet it somehow manages to feel intentional and stylish rather than lazy. What makes the messy bun so appealing is its versatility — there’s genuinely no single “correct” way to do it, which means you can adapt it to match your hair texture, face shape, and the vibe you’re going for on any given day.
If you’ve been wearing the same basic messy bun on repeat, you’re missing out on the incredible range of variations available to you. With medium-length hair, you sit in that sweet spot where your hair is long enough to create substantial texture and volume, but short enough that you can actually manage it without an entire arsenal of bobby pins and styling products. The styles that follow aren’t complicated or time-consuming — most can be thrown together in under five minutes once you know the fundamental technique. Some lean polished and sophisticated, while others embrace the intentionally undone aesthetic that makes this style so inherently flattering.
Each variation offers something different: some work better for thicker hair, others are perfect if your hair tends toward the finer side, and a few are specifically designed to flatter particular face shapes. You’ll also notice that different messy bun styles suit different occasions and outfits, so having a handful of techniques in your styling toolkit means you’re prepared for everything from casual weekday errands to dinners out with friends. Let’s explore ten distinct ways to create a messy bun with medium-length hair that actually looks intentional, stays secure throughout the day, and flatters your features.
1. The Classic High Messy Bun
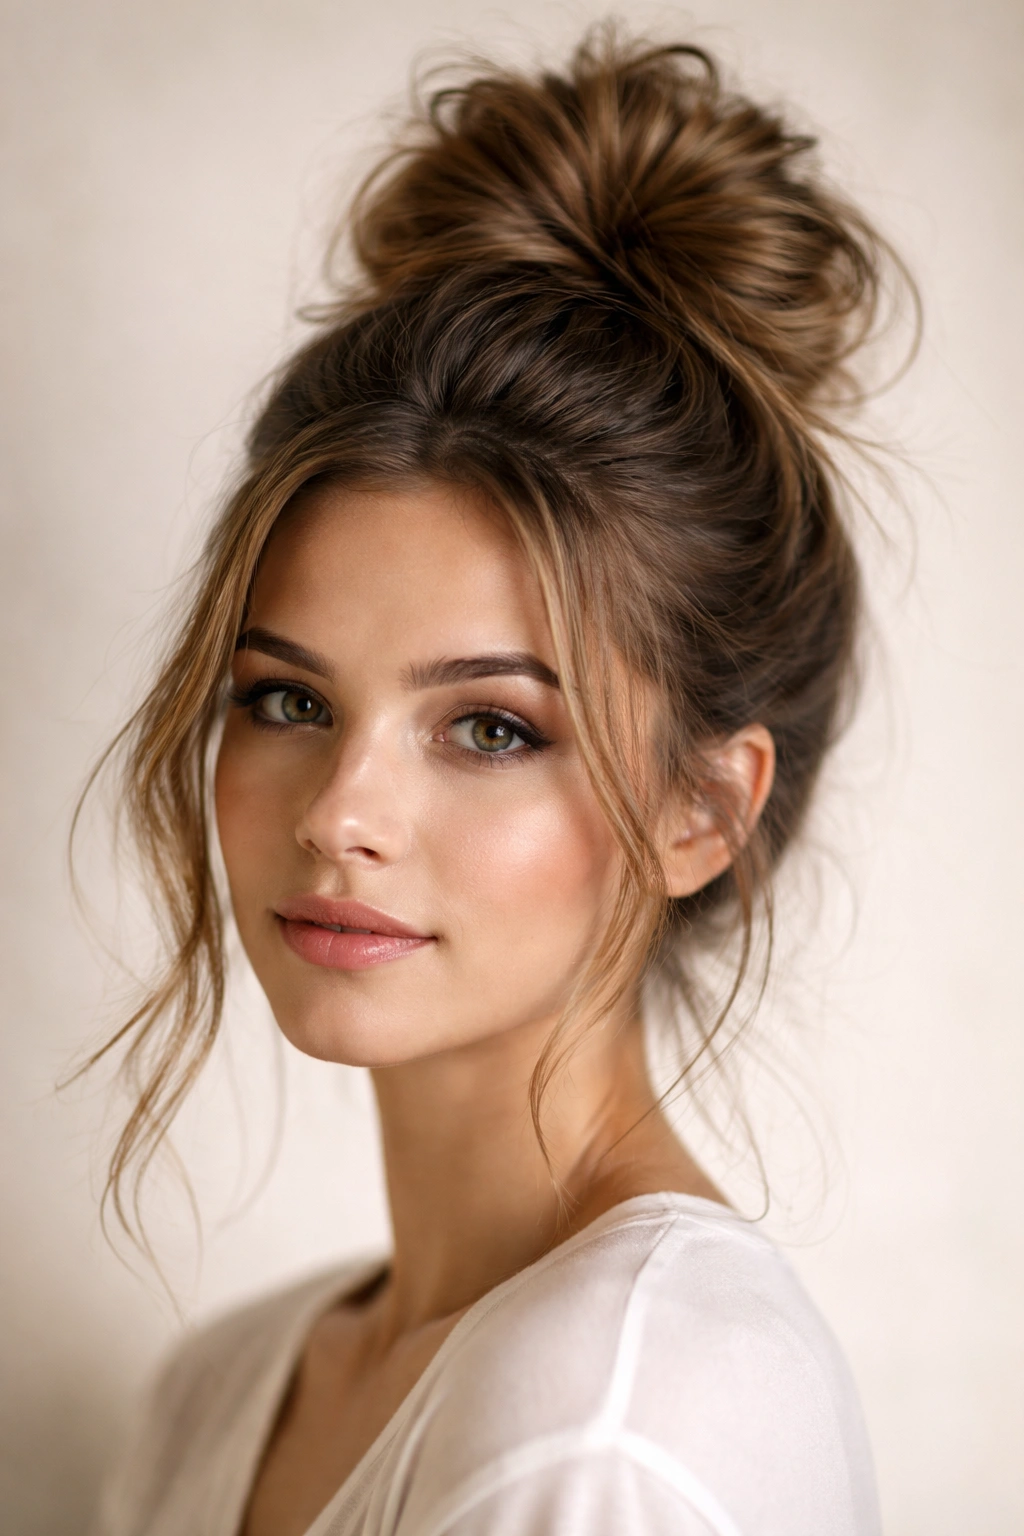
This is the foundational messy bun — the one you’ve probably attempted before if you’ve ever had a hair tie in your hand. The high messy bun sits near the crown of your head, which makes it incredibly flattering for most face shapes because it opens up your face and draws attention to your eyes. What separates a truly great high messy bun from a “just threw my hair up” situation is the deliberate messiness: you want texture and movement, not just all your hair crammed into a tight elastic.
How to Create the Perfect High Messy Bun
Start with hair that has some texture to it — if you have completely straight hair, a quick method to add grip is to tease gently at the roots before gathering your hair up. This gives the elastic something to hold onto and prevents that slippery feeling that causes messy buns to fall throughout the day. Gather your hair into a high ponytail at the crown of your head, positioning it slightly back rather than directly on top; this positioning is more flattering and less likely to pull at your hairline.
- Twist your ponytail two to three times around itself while holding it loosely so the twists aren’t tight or structured
- Wrap the twisted ponytail around the base to form a loose coil, securing it with bobby pins inserted horizontally through the bun rather than vertically (horizontal pins stay put better)
- Gently pull and tease sections of the bun outward to create dimension and that intentional messiness — don’t worry about loose pieces; they’re actually your goal here
- Secure flyaways with a light-hold hairspray applied to a brush, brushing it through the bun gently for a polished finish without stiffness
- Add a second elastic around the base of the bun for security if your hair tends to be slippery or if you’re going to be active throughout the day
Pro tip: If your bun feels too tight or structured, loosen the initial ponytail elastic by pulling it down slightly, then reposition the bun lower. A lower high bun is actually more flattering anyway and feels less severe on your face.
2. The Twisted Low Messy Bun
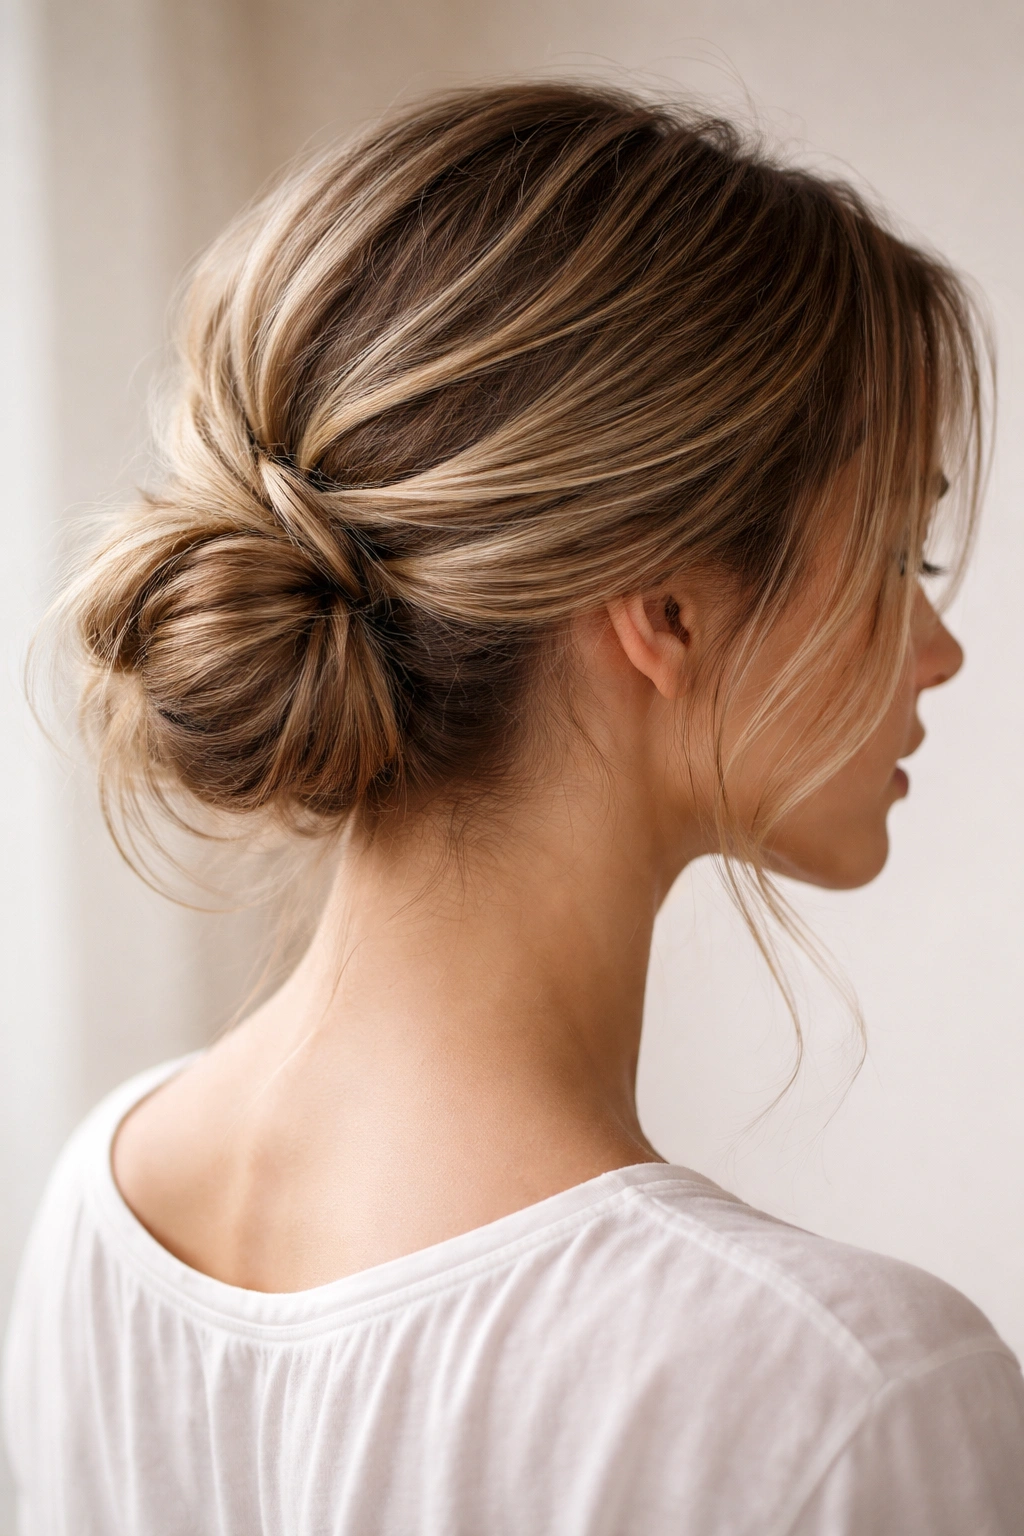
This version moves the bun down toward the nape of your neck, creating an entirely different silhouette that’s slightly more formal-looking than the high messy bun while still maintaining that relaxed, undone vibe. The twisted low messy bun works beautifully with both casual and dressy outfits, which is why it’s become such a go-to for people who need a hairstyle that can transition from office to evening without looking like they just woke up.
Why This Style Elongates Your Neck
Positioning the bun lower on your head naturally elongates your neck and collarbone area, which is why this style is particularly flattering if you prefer to show off your shoulders and neck. The twist incorporated into the bun adds a subtle sophistication that reads as more intentional than a simple gathered bun, even though it takes just seconds longer to execute. Medium-length hair is ideal for this style because the bun sits in that perfect zone where it looks substantial but not heavy.
- Create a low ponytail by gathering hair at the nape of your neck with your head tilted slightly forward
- Divide the ponytail into two even sections and twist each section independently toward the right
- Wrap the twisted sections around each other in a rope pattern, pinning as you go with bobby pins matching your hair color
- Create volume by gently pulling at sections of the twist to loosen it and add texture
- Smooth the front pieces around your face with a tiny bit of smoothing serum for a polished frame
Worth knowing: This bun style looks especially stunning if you leave a few face-framing pieces down. Taking two or three small sections from near your temples before creating the ponytail and leaving them loose creates a softer, more romantic aesthetic that feels less corporate and more intentionally styled.
3. The Wrapped Messy Bun With Face-Framing Pieces
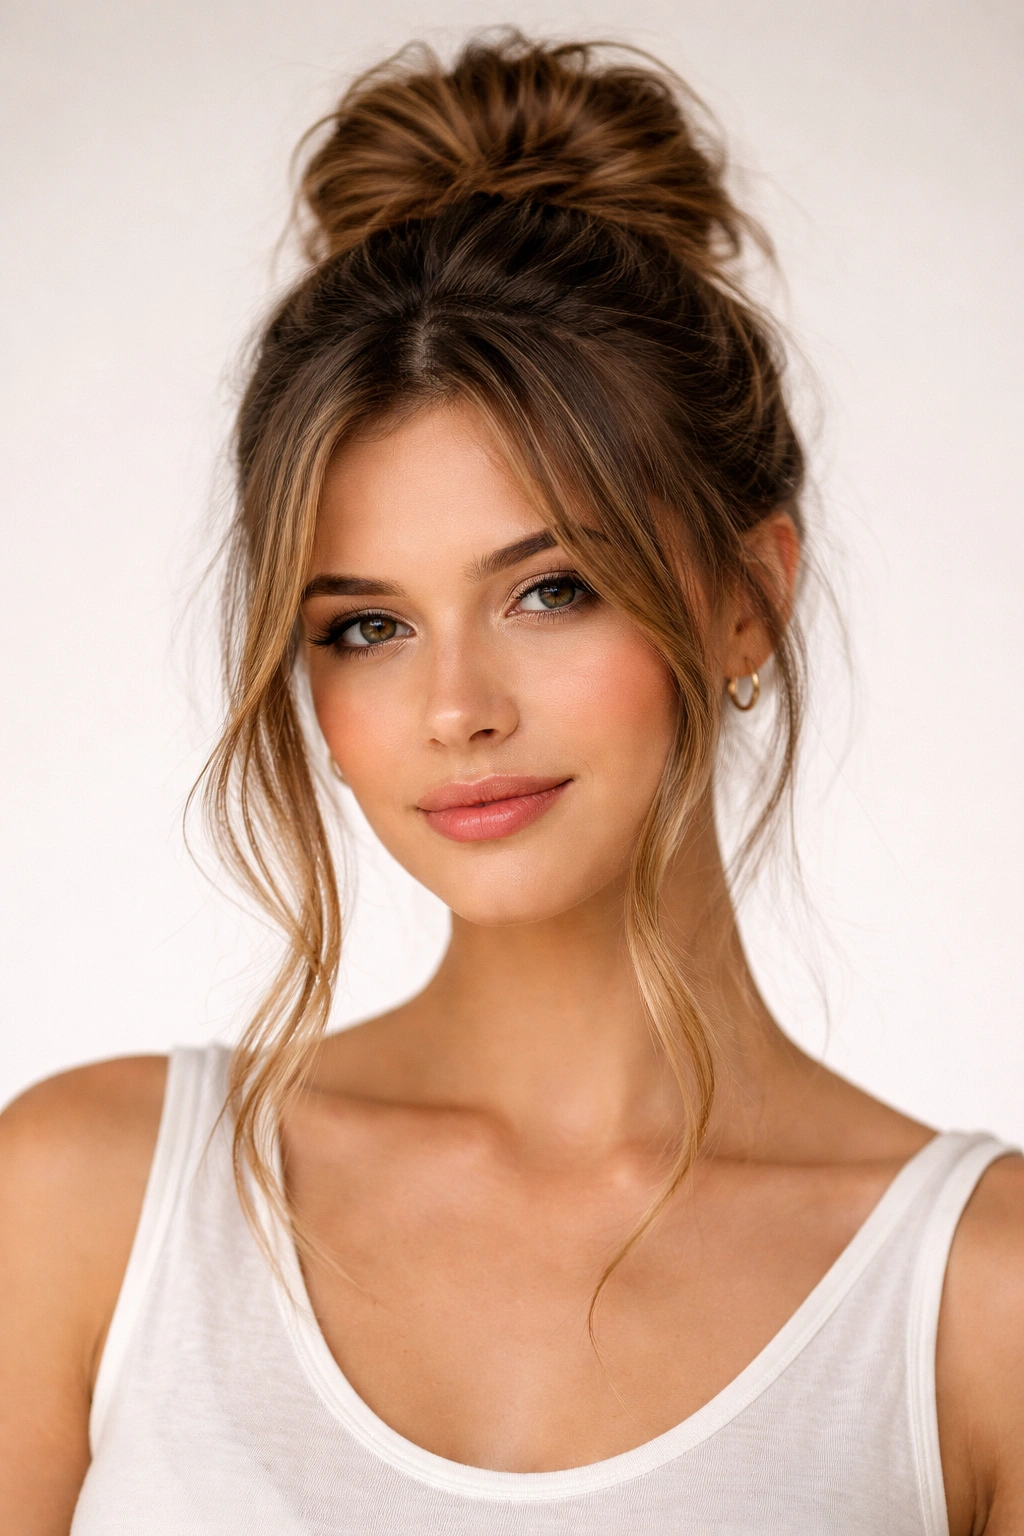
This style intentionally incorporates loose pieces around your face from the start, creating a softer, more romantic version of the messy bun that feels effortlessly beautiful. It’s particularly flattering if you have a longer face shape or prominent cheekbones that benefit from those face-framing pieces breaking them up. The wrapped technique ensures your bun stays secure while the loose pieces move freely, creating visual interest.
The Romantic Appeal of Strategic Loose Pieces
Face-framing pieces serve multiple purposes beyond just looking pretty — they actually soften your overall appearance and create movement that makes the style feel fresher and less severe. When you leave pieces out intentionally rather than having them escape haphazardly throughout the day, the whole look feels more curated and deliberate. This distinction between “planned loose pieces” and “my bun fell apart” is what separates this from just a regular messy bun where some hair came loose.
- Section out two thin pieces from each side of your face, pulling them back toward the crown rather than pulling them straight down
- Create your ponytail with the remaining hair, gathering it high and toward the back of your head
- Wrap the ponytail two to three times around itself, holding each wrap loosely to maintain texture
- Pin the wrapped bun at the base, securing it fully before releasing the face-framing pieces
- Curl or wave the loose pieces with a curling iron for added dimension (this is optional but adds visual polish)
Pro tip: Use bobby pins to tuck the face-framing pieces slightly behind your ears once or twice throughout the day; this keeps them from falling completely into your face while maintaining that soft, intentional placement.
4. The Braided Messy Bun
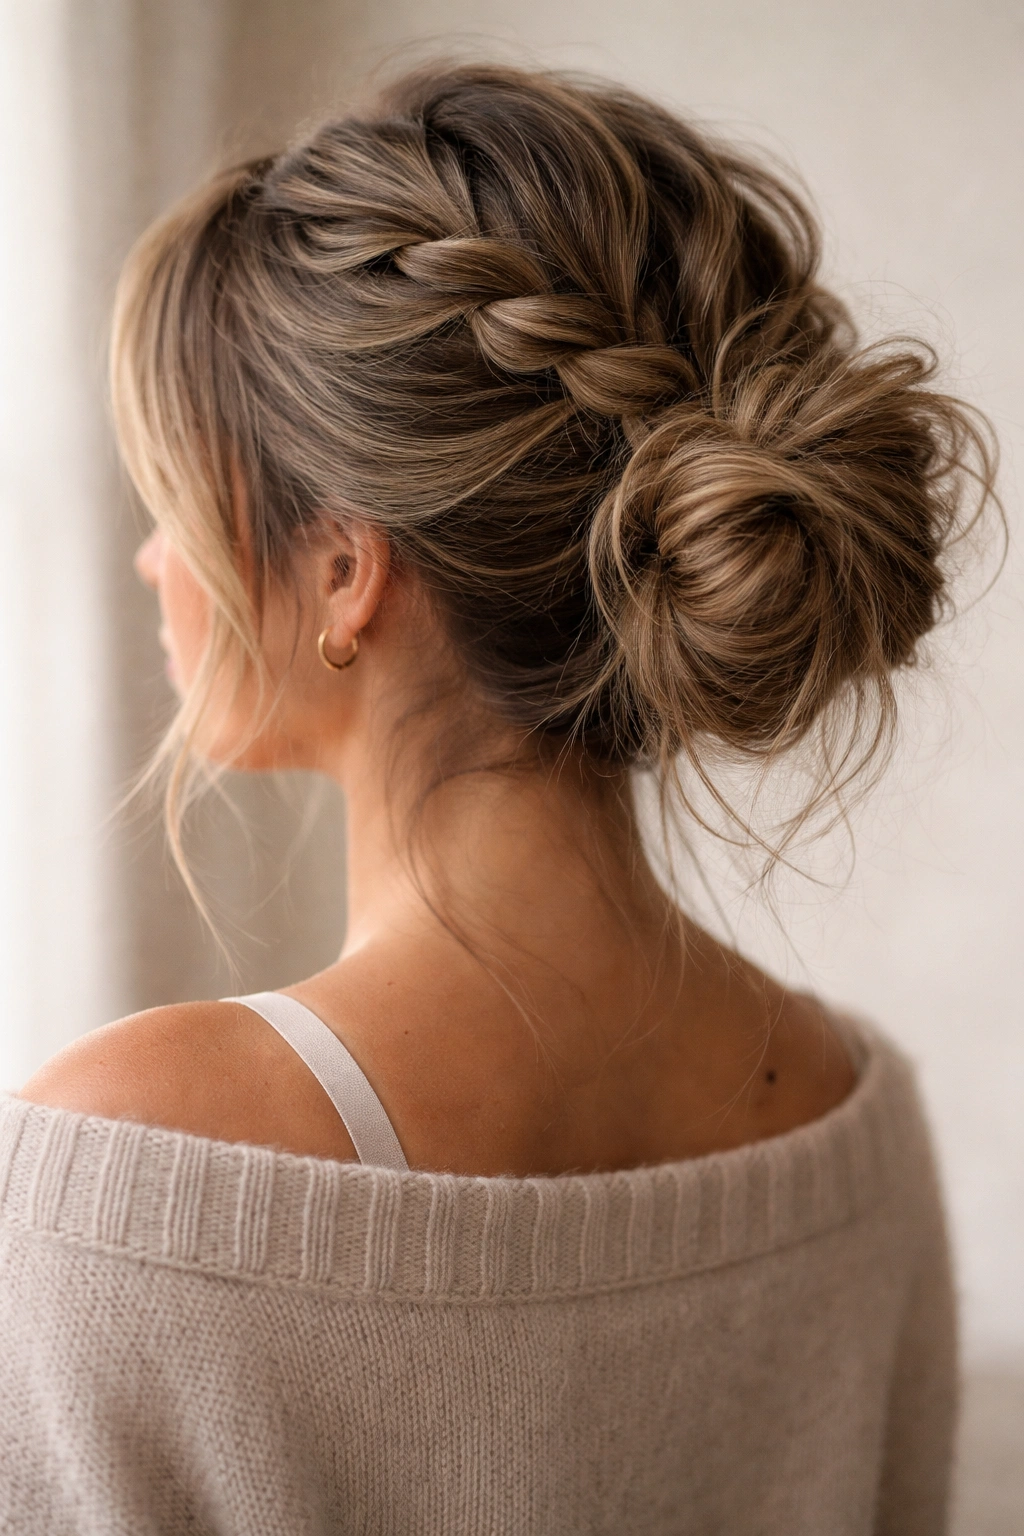
Incorporating a braid into your messy bun adds texture and visual interest that elevates it beyond the basic version. A braided messy bun reads as more intentional and styled than a simple twisted bun, making it perfect for situations where you want to look like you actually spent time on your hair but still want that relaxed, undone vibe. The braid also provides better grip for the elastic, meaning your bun is likely to stay in place longer throughout the day.
Why Braids Add Grip and Visual Texture
A braid naturally grips your hair better than a simple twist because the interlocking sections create friction and hold. This means your messy bun is significantly less likely to slip or loosen as you move throughout the day, which is especially important if you have finer hair or hair that tends toward the slippery side. The visual texture of a braid also photographs beautifully and reads as more deliberate than an unstructured twist, without requiring any additional styling time.
- Create a Dutch or French braid starting from the crown and moving toward the back of your head (Dutch braids work better for messy buns as they sit slightly raised)
- Stop braiding when you reach the nape of your neck, leaving the remaining hair loose for the bun
- Gather all the hair including the end of the braid into a ponytail elastic
- Twist or coil the ponytail around itself, weaving in the braid naturally as part of the bun structure
- Pull and tease the bun gently to create messiness while maintaining the braid’s visibility throughout
- Secure with bobby pins inserted through both the braid and the loose strands for maximum hold
Worth knowing: If braiding feels intimidating, you can also create a simple three-strand braid rather than attempting a more complex Dutch or French braid. The messier the final bun, the less visible any mistakes in your braid technique will be, so don’t worry about achieving perfection.
5. The Half-Up Messy Bun Ponytail Hybrid
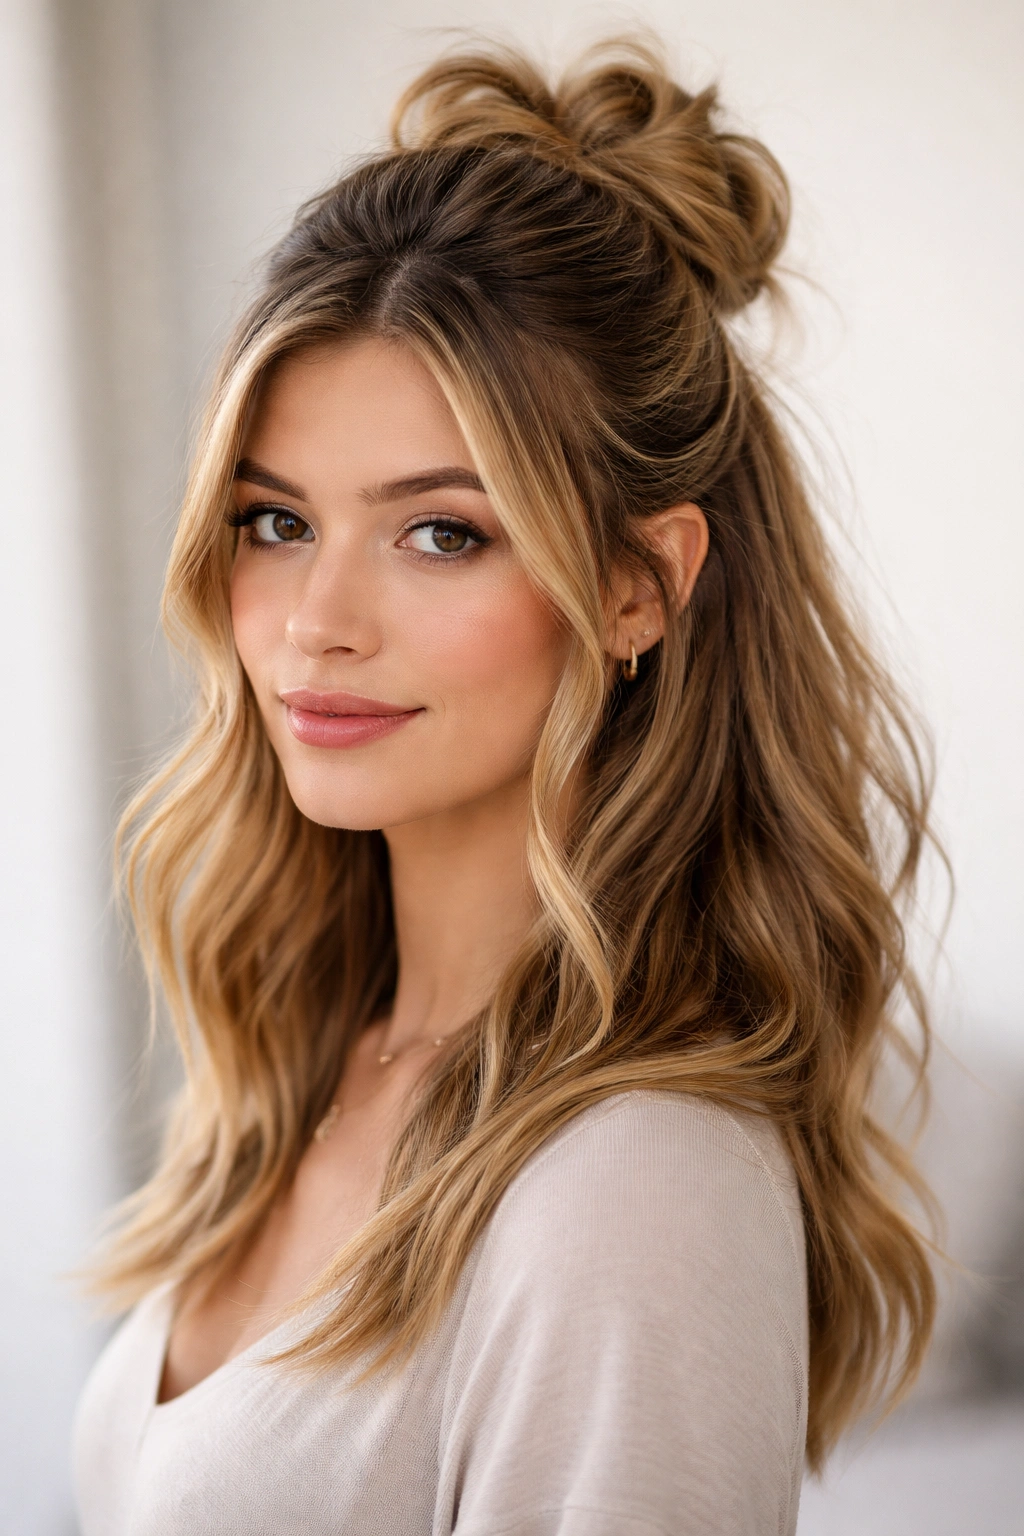
This style sits somewhere between a full bun and a traditional half-up style, creating visual interest through layering and a softer overall aesthetic. You’re essentially creating a bun using only the top half of your hair, leaving the bottom half to flow freely. This hybrid approach works particularly well with medium-length hair because you have enough length to create a visually interesting bun while still having substantial hair down to frame your face and shoulders.
The Versatility of Half-Up Styling
The beauty of this style is that it addresses multiple hair concerns simultaneously: if your hair feels heavy when fully down, pinning the top portion up provides relief and prevents that heavy feeling. If you feel like you want your hair fully up but want to maintain a softer aesthetic, this hybrid approach gives you both. It’s also incredibly practical because you’re not fully committing to the bun — if you decide you want your hair down later in the day, you can easily remove the pins and let everything down.
- Section your hair at ear level, clipping the bottom half out of the way temporarily
- Tease the top section gently at the crown to add grip and texture
- Gather the top section into a high ponytail, positioned slightly back from the very top of your head
- Create a loose bun from this top ponytail by twisting it and wrapping it around itself
- Release the bottom section and leave it completely down for contrast with the bun above
- Gently pull at the bun to create messiness while smoothing the underneath sections for a polished appearance
Pro tip: This style is absolutely stunning if you curl or wave the bottom half with a curling iron before pinning the top section up. The curls add movement and texture that makes the overall look feel more intentional and polished.
6. The Textured Messy Bun With Waves
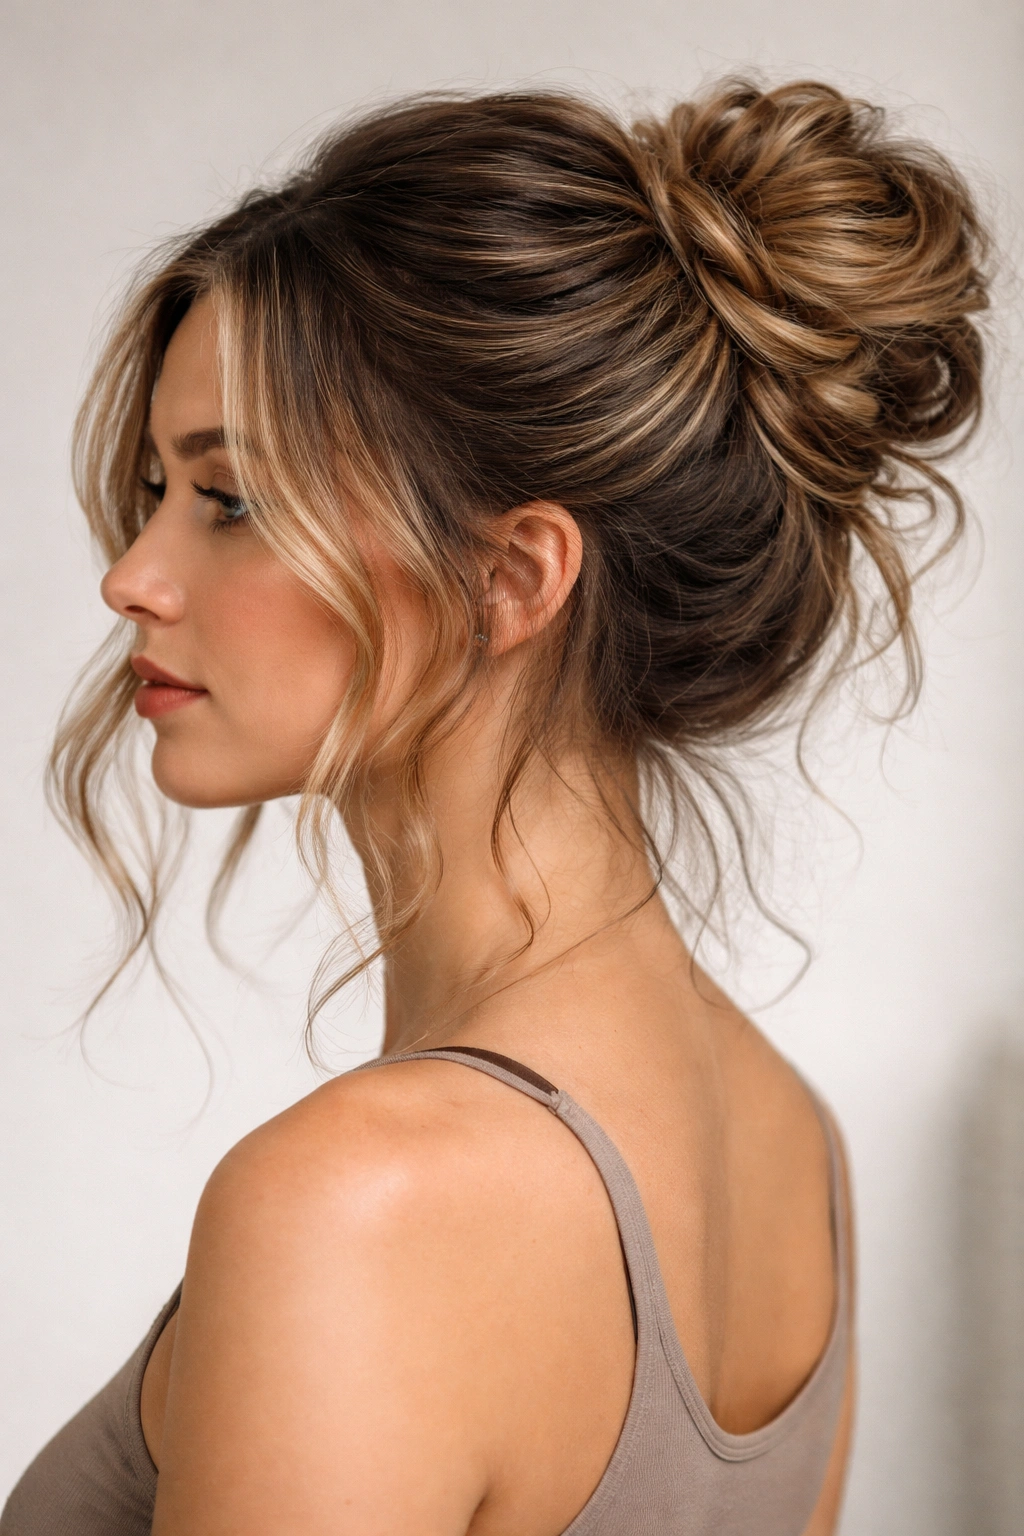
If you have wavy or naturally textured hair, leaning into that texture rather than fighting it creates a gorgeous, effortless-looking messy bun that seems to take no effort at all. This version involves prepping your hair with wave-enhancing products and techniques before gathering it into a bun, which creates a bun with incredible dimension and visual interest. The texture does most of the work for you, which is why this style is so appealing — it looks like you spent ages styling when you actually just used your hair’s natural tendencies.
Enhancing Your Hair’s Natural Texture
Working with your hair’s natural texture rather than against it always results in a better-looking final style that requires less maintenance and product. If your hair is naturally wavy or curly, embrace that rather than trying to smooth it into a sleek bun. The messiness of the bun actually highlights your texture beautifully rather than competing with it. This approach is also far easier to maintain throughout the day because you’re not fighting against your hair’s natural inclinations.
- Apply a wave-enhancing spray or mousse to damp hair, working it through from roots to ends
- Blow-dry your hair using a diffuser attachment to enhance your natural wave pattern
- Allow your waves to cool completely before gathering your hair (this sets them in place)
- Create a high or low ponytail depending on your preference, using a scrunchie or elastic that matches your hair color
- Twist the ponytail loosely around itself, pinning it as you go
- Distribute the waves throughout the bun by gently pulling and teasing sections, making sure the texture is visible throughout
Worth knowing: If you don’t have naturally textured hair, you can absolutely create this look by wave-setting your hair the night before or by using a curling iron to create waves before gathering your hair into a bun. The additional step takes maybe ten minutes total, and the result is absolutely worth it.
7. The Sleek-to-Messy Transition Bun
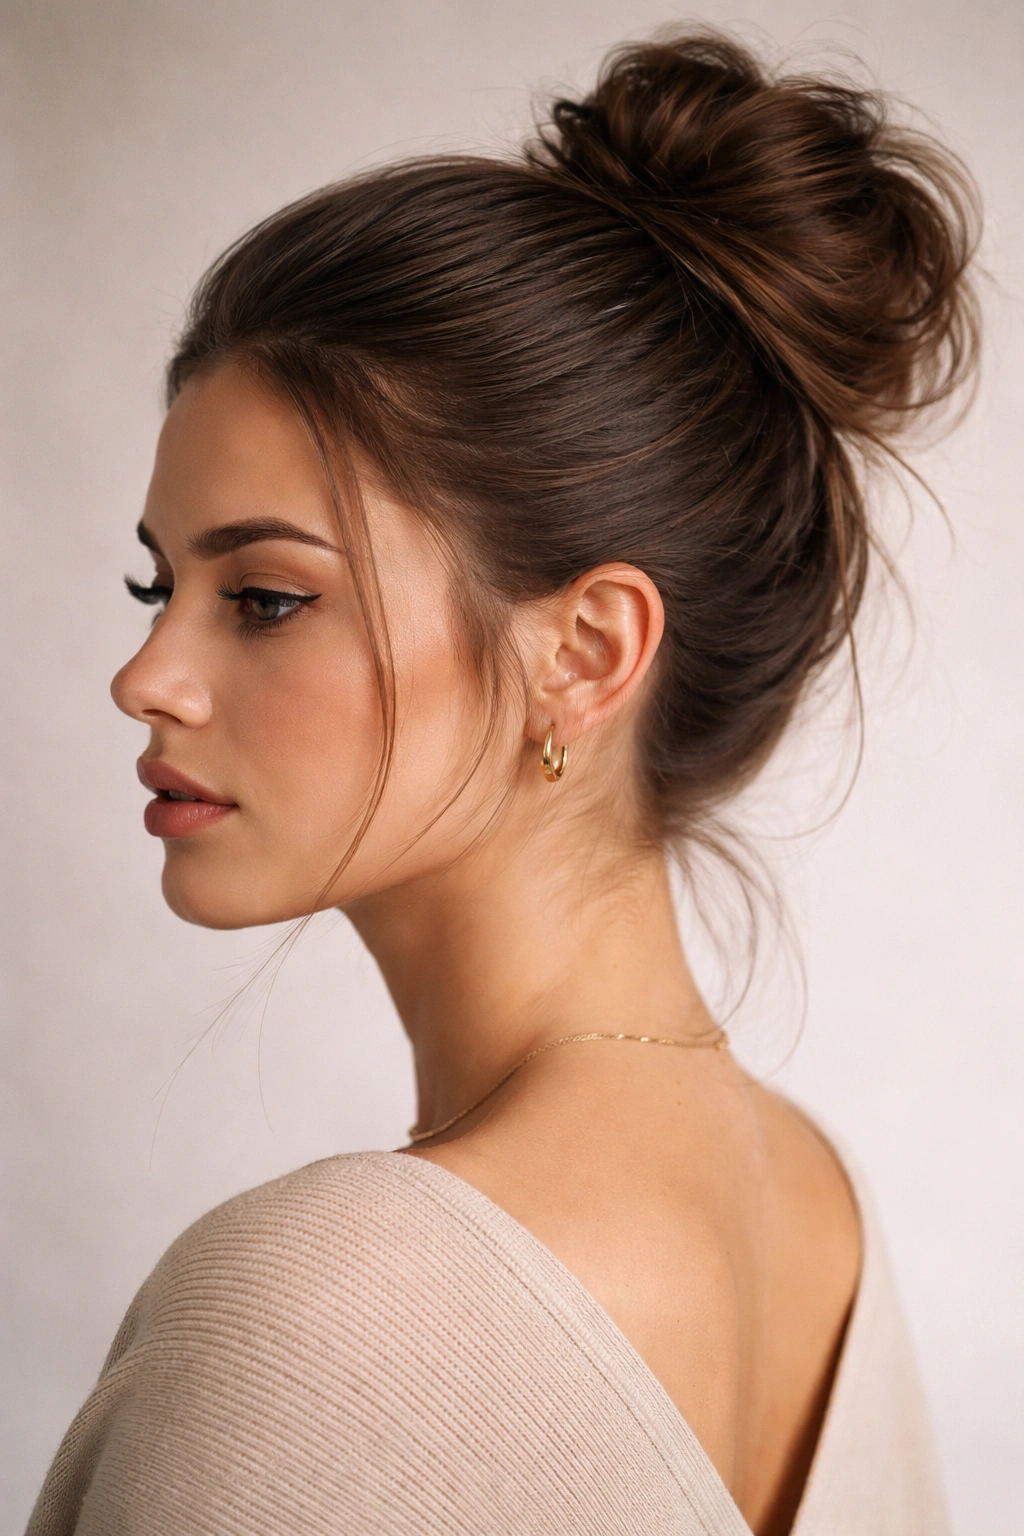
This sophisticated style creates visual contrast by combining a sleek, smoothed front section with a deliberately messy, textured bun at the back. It’s perfect for situations where you want to look polished and put-together while still maintaining that relaxed, undone vibe in the back. The sleek-to-messy transition bun is particularly flattering for rectangular or long face shapes because the smooth front creates a clean frame while the messy texture adds visual width.
Creating Intentional Contrast in Your Style
The contrast between smooth and messy is what makes this style so visually interesting and sophisticated. Rather than choosing one aesthetic or the other, you’re combining both in a way that feels intentional and modern. This hybrid approach also solves the problem many people have with messy buns looking too casual — the sleek front section grounds the style and makes it appropriate for professional or dressier situations.
- Smooth your front sections with a smoothing serum and brush, using a flat iron if necessary for extra sleekness
- Gather your hair into a ponytail at the crown, making sure the front stays smooth while pulling the back section slightly
- Create a very loose, textured bun from your ponytail using the twisting method
- Pin the bun thoroughly so it stays in place despite being loosely constructed
- Gently pull and tease the bun sections to maximize messiness, being careful not to disturb the smooth front
- Apply a light-hold hairspray to the smooth sections to ensure they remain smooth throughout the day
Pro tip: If you have bangs or face-framing pieces, keep those sleek as well. The sleek front section should extend from the sides of your face through to your temples, creating a framing effect that grounds the messy bun.
8. The Crown Bun With Braided Accent
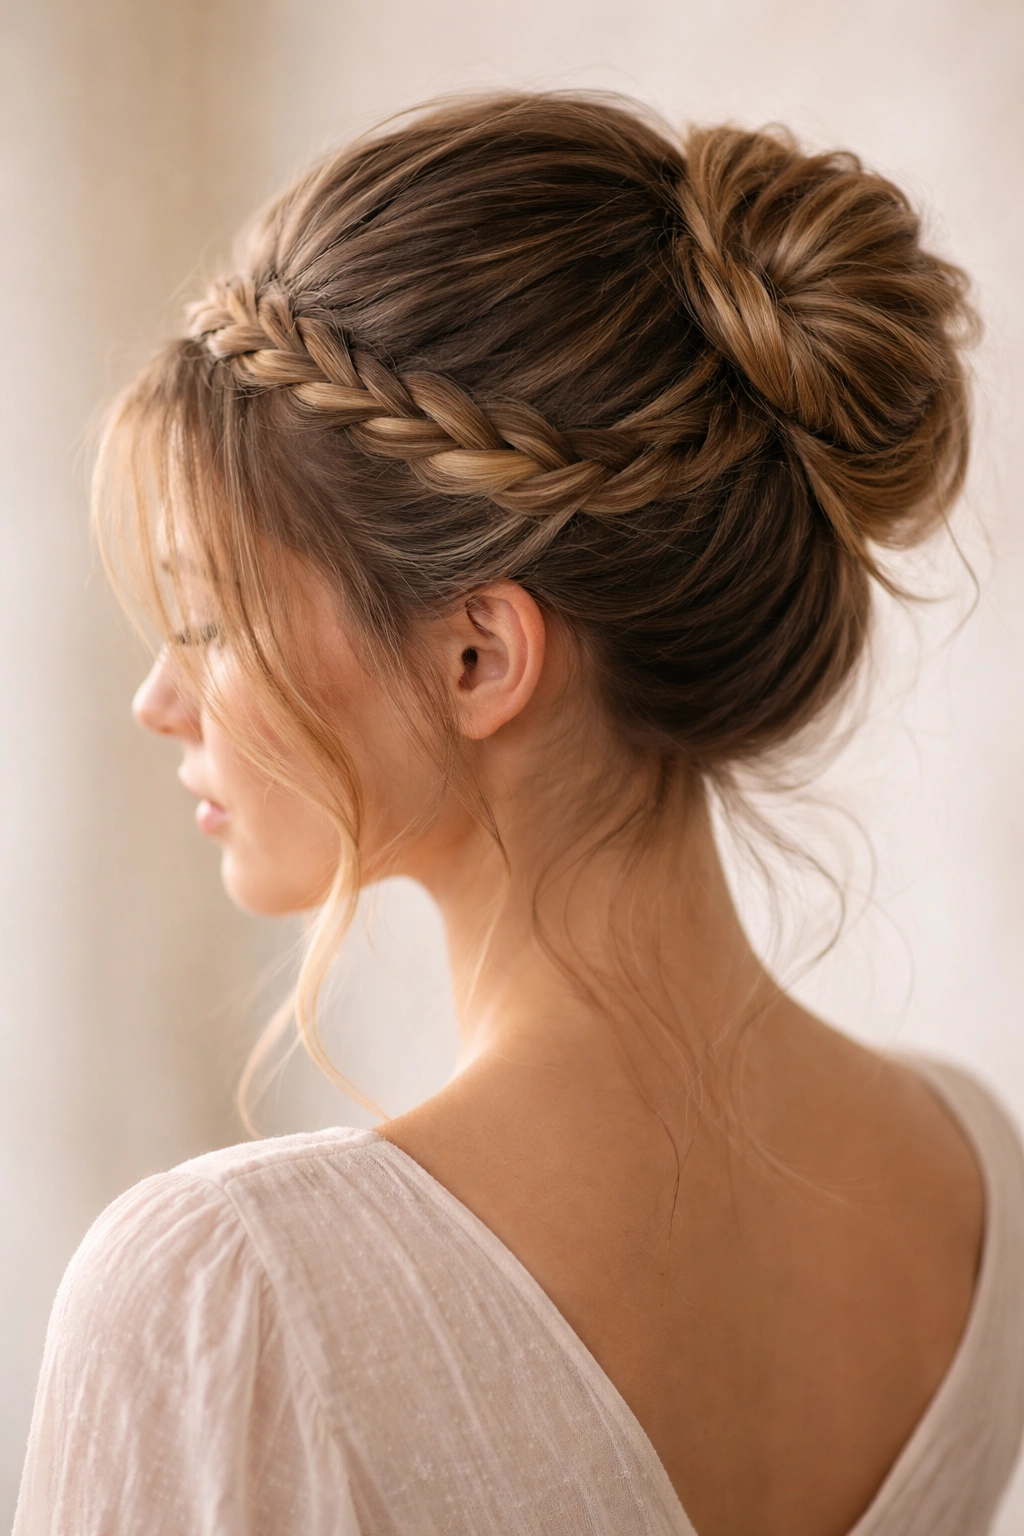
This romantic, slightly more formal messy bun style features a braided section that wraps around the crown of your head before the main bun is secured. It reads as more intentionally styled than a basic messy bun and works beautifully for special occasions, dates, or anytime you want to elevate your look beyond casual. The braided accent adds visual interest and sophistication without requiring significantly more time or styling skill than a basic messy bun.
Adding Elegance Through Strategic Braiding
Placing a braid around the crown of your head creates a halo effect that’s inherently flattering and romantic. This technique works because it draws the eye upward and around your face rather than letting it settle in one spot. The braid also creates structure that helps your bun stay in place throughout the day, even if you’re moving around or being active. For medium-length hair, this style achieves the perfect balance of looking special without feeling overdone or costume-like.
- Tease your hair gently at the crown for texture and grip
- Take a thin section of hair from one side of your head at the temple
- Braid this section toward the back of your head, gradually adding small pieces as you braid (this creates a Dutch or French braid effect around the crown)
- Stop braiding when you reach the opposite side of your head
- Gather all remaining hair including the end of the braid into a high ponytail
- Create a loose, textured bun by twisting the ponytail and wrapping it around itself
- Pin thoroughly and gently pull the bun into a messy, textured shape
Worth knowing: If you find traditional braiding tricky, you can create a faux braid effect by twisting a thin section of hair around the crown instead. Twists look similar to braids from a distance and are often easier to execute, especially if you’re doing this in front of a mirror.
9. The Thick, Voluminous Messy Bun
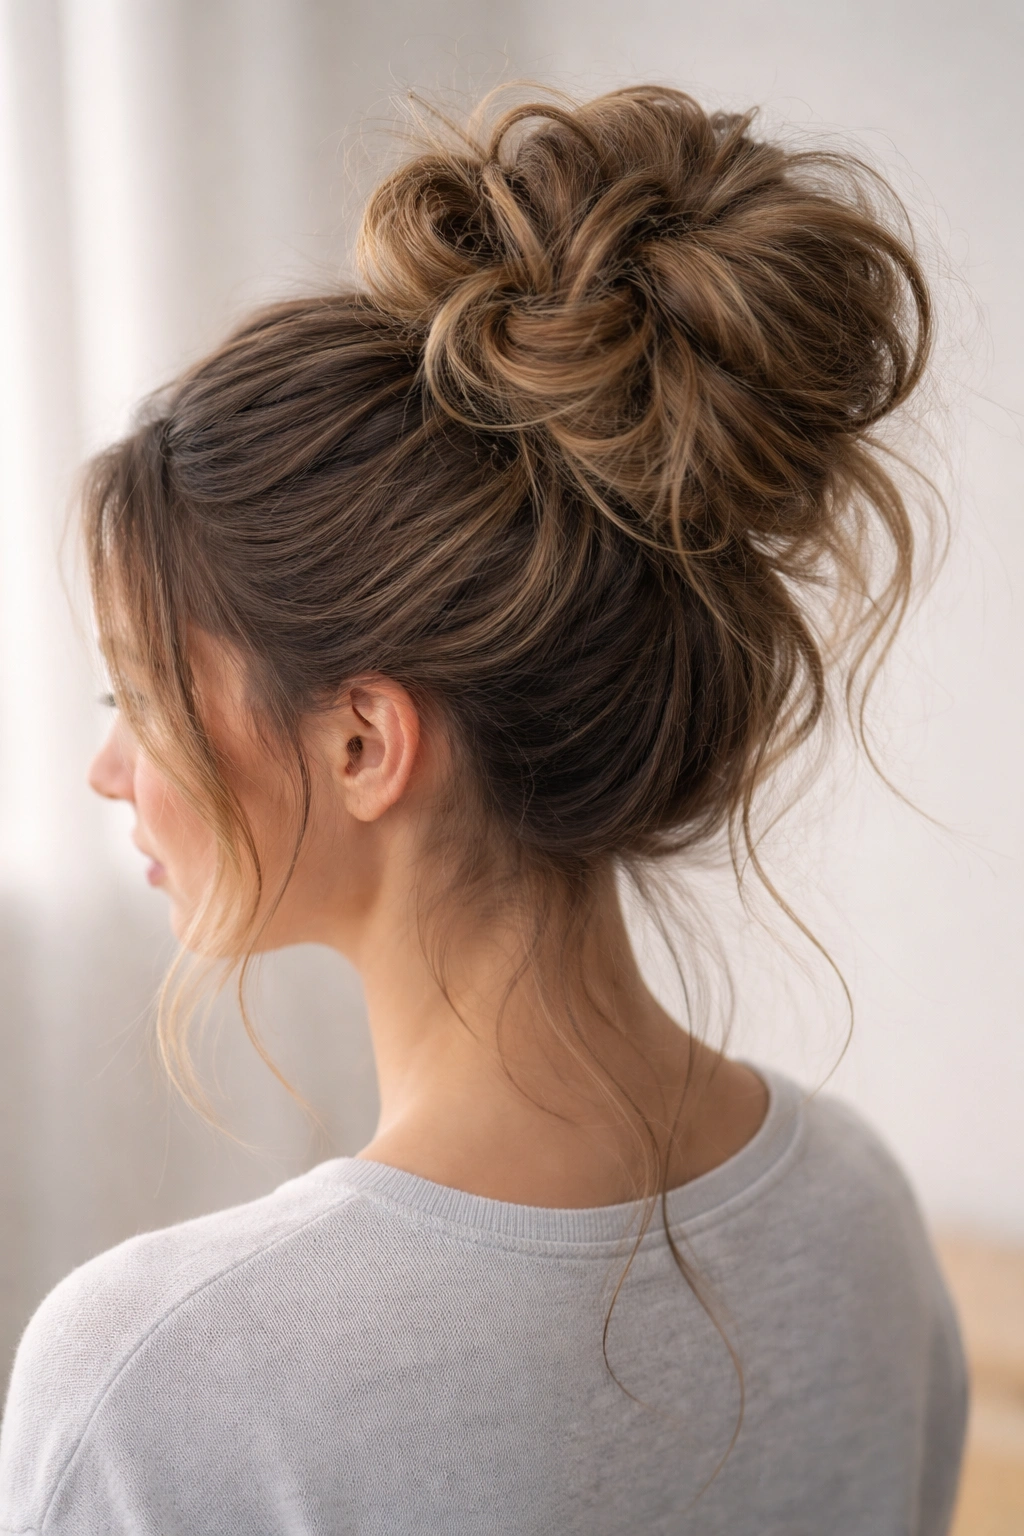
If you have thick hair, creating a messy bun that’s visibly thick and voluminous is actually your superpower. This style celebrates your hair’s density by creating a bun that’s substantially sized and visibly full. The key is not fighting against the thickness by trying to create a tight, controlled bun, but rather working with it by creating a large, deliberately messy bun that showcases the volume your thick hair naturally provides.
Working With Thick Hair’s Natural Advantages
Thick hair can sometimes feel heavy or burdensome, but when you’re creating a messy bun, thickness is an absolute advantage. Your bun will automatically look fuller and more interesting than someone with finer hair could achieve, even with the same technique. Rather than trying to smooth everything into a polished style, embrace the volume and deliberately create a larger, more textured bun that celebrates what your hair naturally does.
- Create a high ponytail using a thick elastic or doubled-up elastic to handle the hair weight
- Divide the ponytail into three or four sections rather than twisting it as a single unit
- Twist each section independently, then wrap these individual twists around each other to create a multi-dimensional bun
- Pin each section separately rather than trying to secure the entire bun with just one or two pins
- Deliberately pull and tease each section of the bun to create visible texture and volume
- Use bobby pins liberally — more pins mean better hold and less worry about the heavy bun slipping throughout the day
Pro tip: If you’re creating a messy bun with particularly thick hair, consider using a large claw clip instead of traditional bobby pins. Claw clips provide excellent hold for thick, heavy hair and create that trendy aesthetic of the bun being secured by a clip rather than hidden pins.
10. The Tousled Overnight Bun
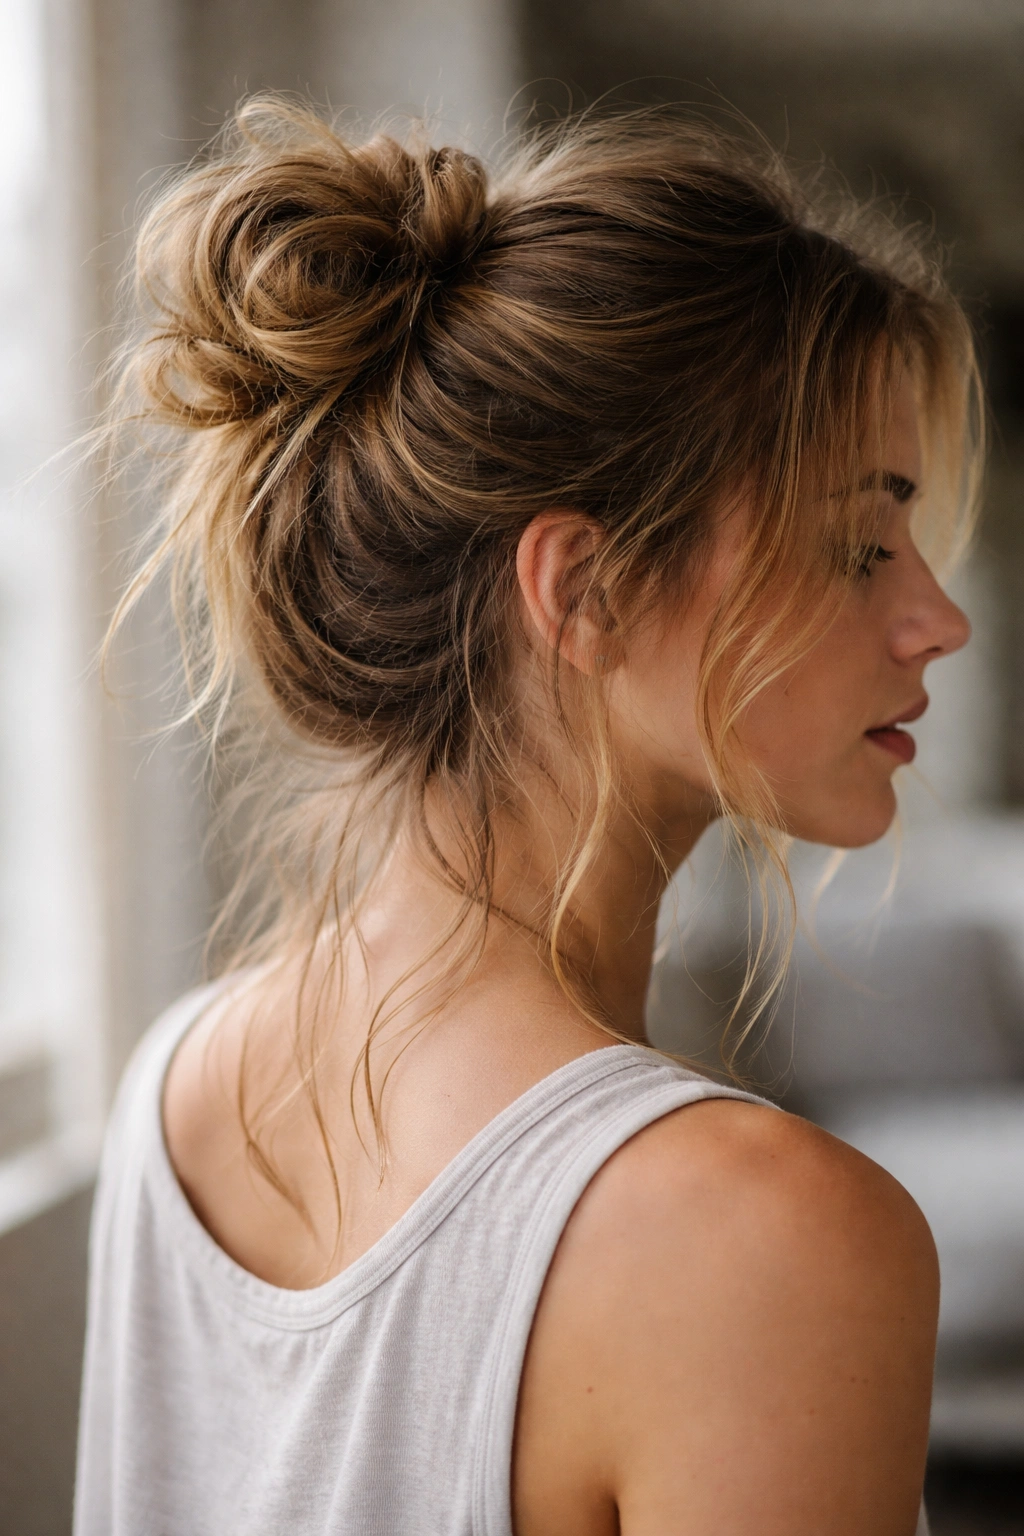
This relaxed, deliberately undone style is perfect for days when you literally just woke up and want to throw your hair into a bun without any real styling. The tousled overnight bun skips the teasing and smoothing steps of other messy bun versions, embracing the natural texture and slight bedhead that gives it its charm. It’s appropriate for casual days but reads as intentionally styled rather than genuinely unkempt because of the way it’s gathered and pinned.
The Appeal of Intentional Undone Style
There’s a genuine art to making something look effortless when it’s actually intentionally styled, and the tousled overnight bun nails this aesthetic. This style works because messy hair is extremely forgiving — the slight tangles and texture variations that might look unkempt if your hair were down become charming character in a bun. You’re essentially leaning into the natural imperfections of hair that hasn’t been perfectly styled, which paradoxically makes the whole look feel more sophisticated and modern than an overly polished bun would.
- Gather your hair into a ponytail while it’s still slightly damp from sleep or a shower
- Don’t tease or add texture — let your hair’s natural state speak for itself
- Twist the ponytail once or twice, very loosely, without worrying about creating a neat twist
- Wrap the twisted ponytail around the base in a loose coil
- Pin minimally with just two or three bobby pins, letting some of the bun remain slightly loose and moveable
- Leave some pieces loose around your face and temples intentionally, not worrying about tucking everything in neatly
Worth knowing: This style actually looks better when you don’t fuss with it too much. The less you worry about perfection and the more you embrace the natural messiness, the better this style looks. If you find yourself constantly adjusting and perfecting, you’re probably working against the intentional undone aesthetic.
Final Thoughts
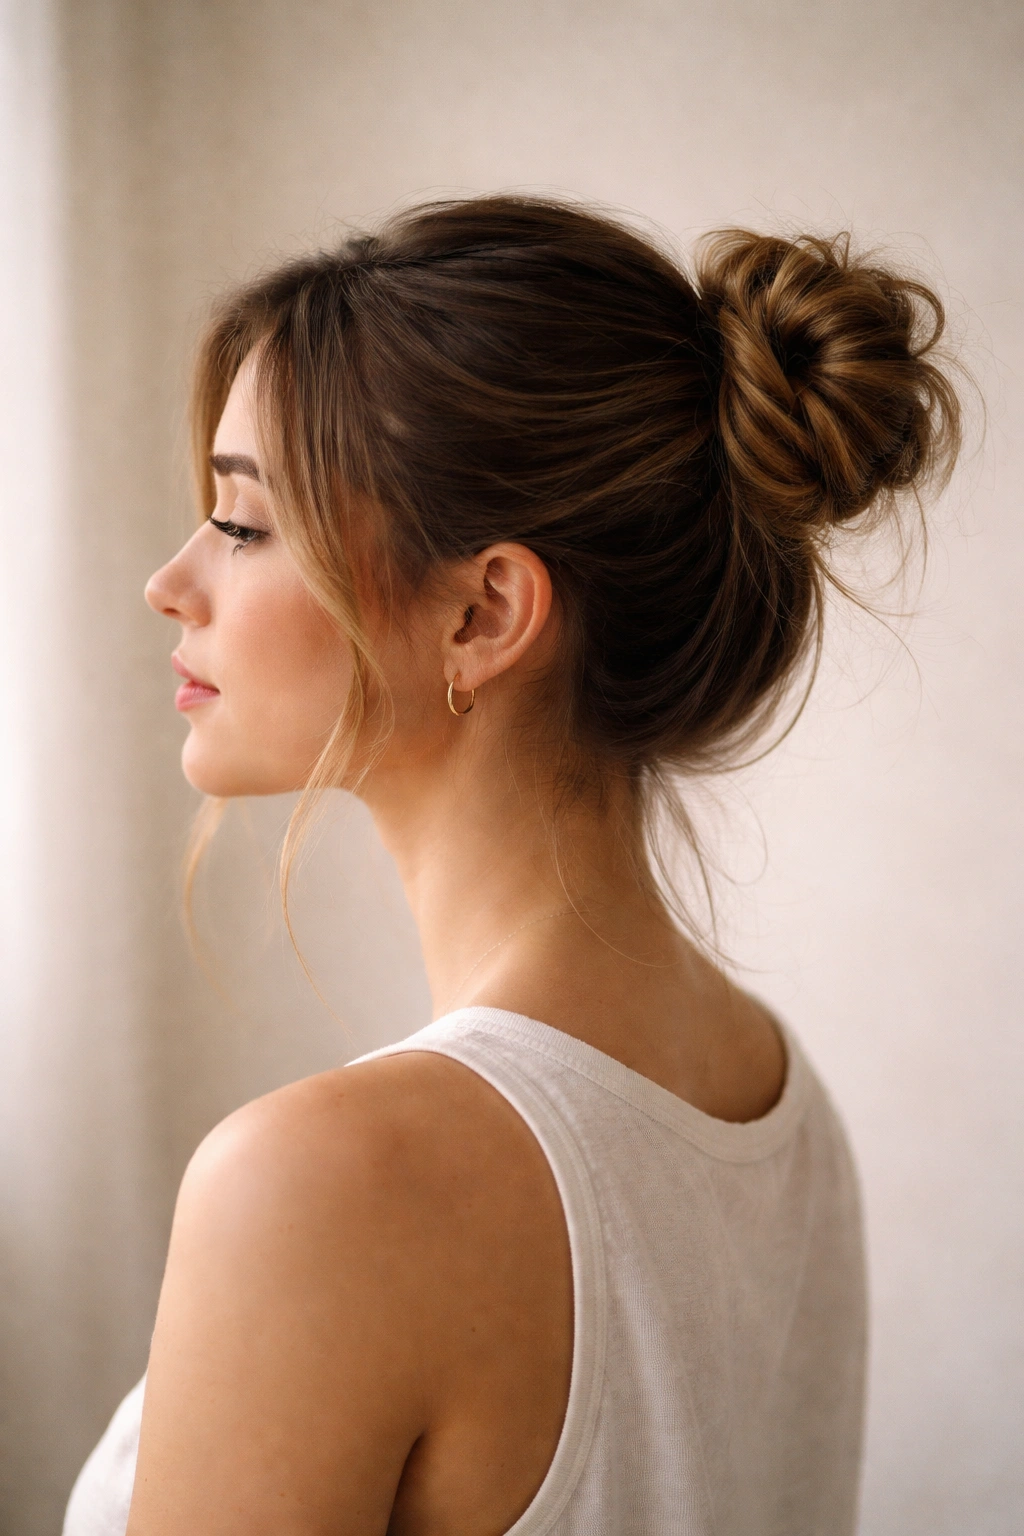
The beauty of exploring different messy bun styles is realizing how versatile this single hairstyle can actually be. Medium-length hair sits in that perfect length for experimentation — long enough to create substantial buns with real texture and movement, but short enough that you can manage everything without getting overwhelmed by sheer volume. You now have ten distinct techniques to choose from depending on your hair type, the impression you want to make, and the amount of time and effort you want to invest on any given day.
The most important thing to remember is that the “messiness” in a messy bun should feel intentional rather than accidental. This distinction is what separates a messy bun that looks charmingly undone from one that looks like you literally just threw your hair up without thought. Spend a few moments pulling gentle sections outward, positioning pieces around your face, and making sure your bobby pins are actually securing the bun rather than just stabbed randomly into your hair. These small details transform a quick bun into a style that looks like you genuinely cared about how you presented yourself.
Once you’ve practiced one or two of these styles a few times, you’ll find they become genuinely quick to execute — most can be done in under five minutes once you know the basic technique and how your specific hair responds to the method. Start with whichever style resonates most with you, practice it until it feels natural, and then branch out to others. Before long, you’ll have a entire arsenal of messy bun options that you can call on depending on your mood, your outfit, and how much effort you’re willing to invest that day.
