



Curly hair is powerful, beautiful, and honestly, it can be a lot to manage—especially when you’re balancing style with practicality. A messy bun is the answer you’ve been looking for: it’s protective, low-maintenance, and somehow looks effortlessly put-together even on days when you’re running on minimal sleep. But here’s the thing—not all messy buns are created equal when you’re working with the texture, volume, and versatility of curly hair. The techniques that work for straight or wavy hair often leave curls looking limp, flattened, or just plain frustrated. What you need are styles specifically designed to honor your curl pattern, showcase your natural texture, and actually stay in place without requiring a bottle of gel and a prayer.
The beauty of a messy bun with curly hair is that the looseness and texture become your asset, not something to fight against. Your curls naturally create dimension, movement, and visual interest that make these styles look intentional and polished rather than lazy. Whether you’re heading to the gym, the office, a casual date, or just a day at home, there’s a curly messy bun style that fits your mood and your schedule. The right technique makes all the difference—knowing how to work with your curl pattern, where to position the bun, and how to secure it without disturbing your coils will transform your whole approach to styling.
Let me walk you through eight proven messy bun styles that actually work for curly hair. Each one plays with your texture differently, so you can find the styles that feel most natural for your curl pattern and personal style.
1. High-Volume Crown Bun
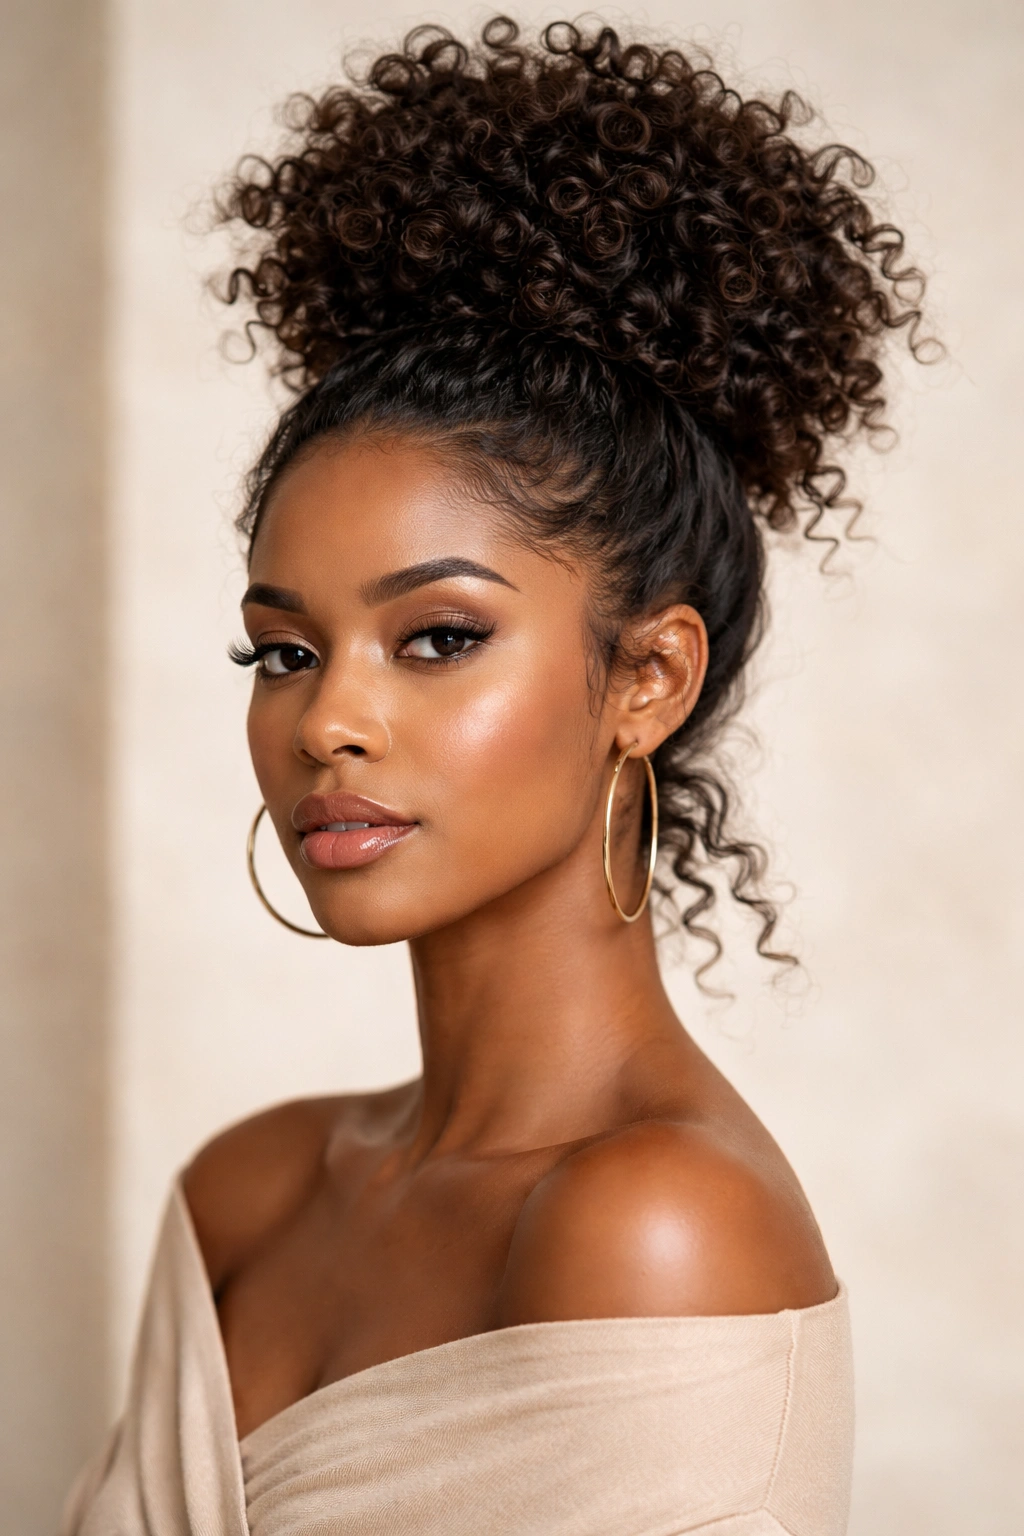
This is the messy bun that makes a statement. A high-volume crown bun sits at the very top of your head and uses the fullness of your curls to create serious height and presence. It’s the kind of bun that photographs beautifully and turns heads when you walk into a room—but it’s also surprisingly practical because all that height keeps hair off your neck and face while still looking intentional.
The magic here is in how you gather your hair. Instead of gathering it into a tight, neat ponytail at the crown, you’re creating a more relaxed, expansive gather that lets your curls maintain their volume and bounce. Start by flipping your head upside down and letting your curls fall toward the floor—this creates natural separation and prevents the “helmet head” effect you get from gathering hair while your head is upright. Once you’ve gathered, twist or coil the ponytail loosely around itself and pin it in place, leaving several smaller coils loose around the base.
Why This Style Works for Curly Hair
A high-volume crown bun celebrates curl height and texture rather than fighting against it. Your curls naturally want to go up and out, and this style works with that instinct instead of against it. The loose twist method keeps your coils from getting compressed, which means your curl pattern stays defined throughout the day. Many women find this style actually helps their curls bounce back even fuller after it’s been down, because the gentle gathering and twisting doesn’t put stress on the hair shaft.
How to Create the Look
- Use your fingers or a wide-tooth comb to gather curls into a high ponytail, starting at the crown area
- Don’t pull too tight—leave room for volume and texture to show
- Twist the ponytail loosely, then wrap it around the base of the ponytail
- Secure with bobby pins inserted horizontally into the coils
- Pull a few face-framing pieces and smaller curls loose around the bun for softness
- Gently fluff the bun with your fingers to increase volume
Pro tip: If your crown area feels flat, try a volumizing mousse or lightweight foam at the roots before styling—this gives you a fuller foundation to work with and makes the high bun feel even more substantial.
2. Low Textured Wrap Bun
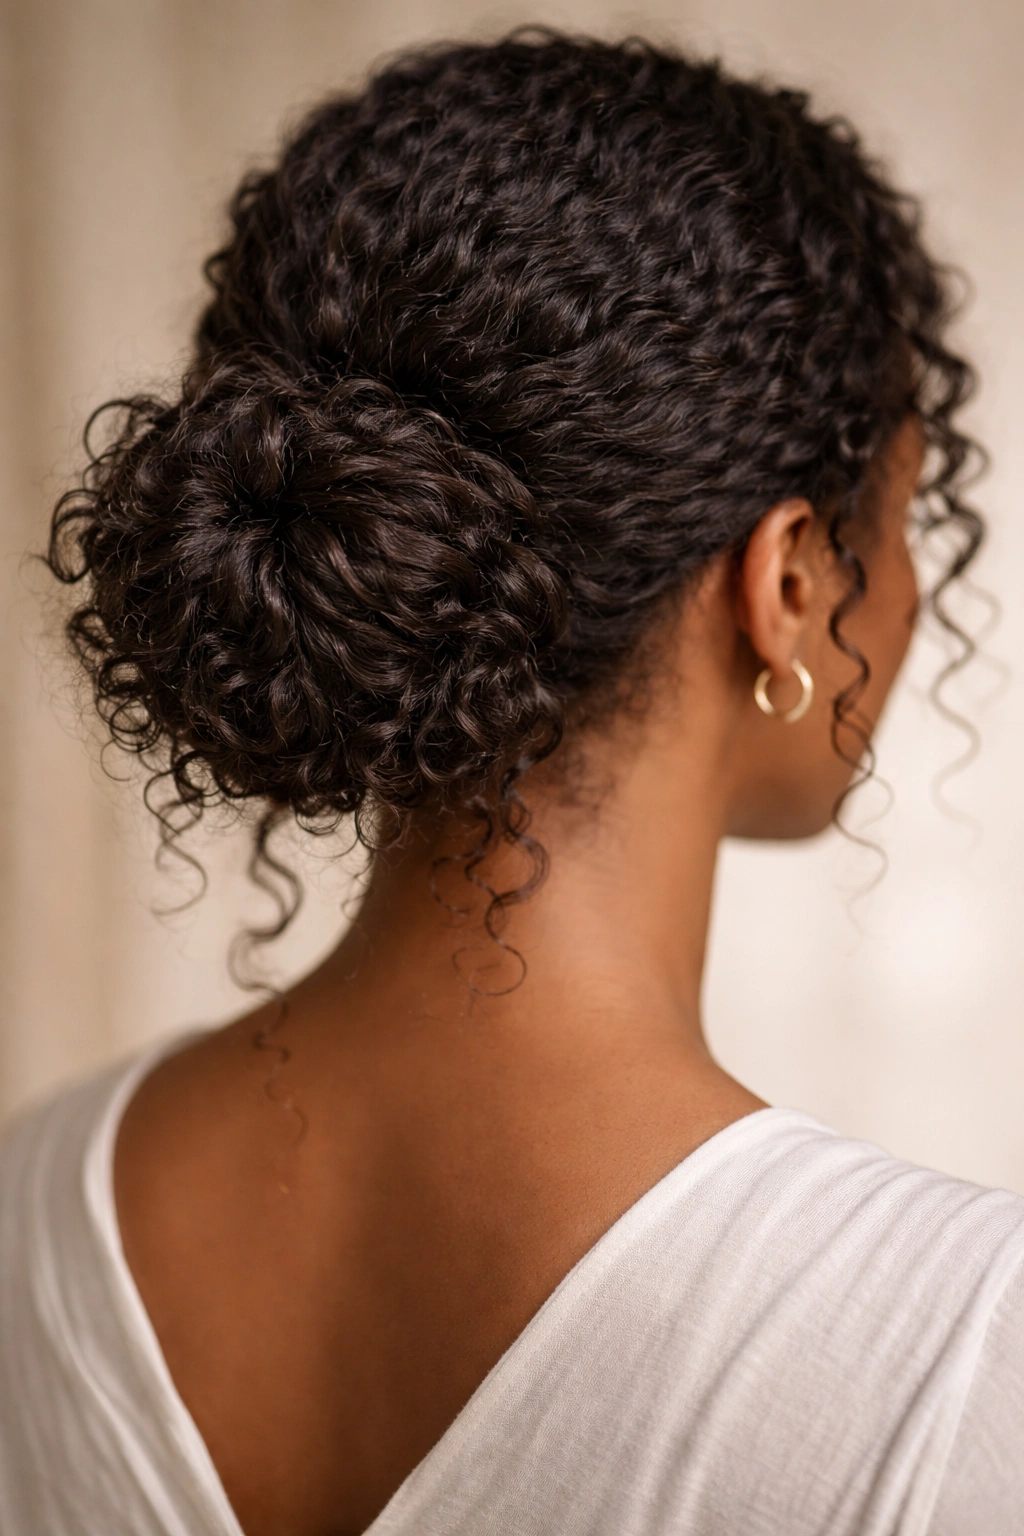
A low textured wrap bun sits at the nape of your neck and has that relaxed, bohemian feel—like you just twisted your curls up without thinking too hard about it. This style is perfect when you want your bun to look completely undone, more texture-forward than sculptural. The “wrap” comes from coiling sections of your ponytail around the base rather than twisting the entire ponytail as one unit.
What makes this different from other low buns is the emphasis on showing off individual curl coils and texture. You’re not trying to create a smooth, polished mound—you’re deliberately letting strands and coils come loose and overlap, creating visual interest and movement. This is genuinely low-effort to achieve once you understand the technique, and it’s one of the most forgiving styles if your curls aren’t cooperating.
Why This Style Works for Curly Hair
The wrap method celebrates the individuality of your curls. By coiling different sections of the ponytail separately instead of twisting everything together, you’re preserving the natural pattern and bounce of each curl. This style also naturally accommodates different curl densities—thicker, tighter curls and looser waves all look beautiful together because the variation is part of the design. It’s genuinely versatile for different curl types because there’s no expectation of uniformity.
How to Create the Look
- Gather hair into a low ponytail at the nape of your neck
- Divide the ponytail into 3-4 sections
- Take one section and wrap it loosely around the base of the ponytail, securing with pins
- Repeat with each section, wrapping in slightly different directions
- Leave ends loose and let them fall where they naturally want to
- Gently separate and fluff each coil with your fingers
Worth knowing: This style improves over the first few hours as your curls settle and the coils start to interlock naturally. Don’t judge it immediately after styling—give it 30 minutes to an hour to fully develop its texture.
3. Space Buns with Coils
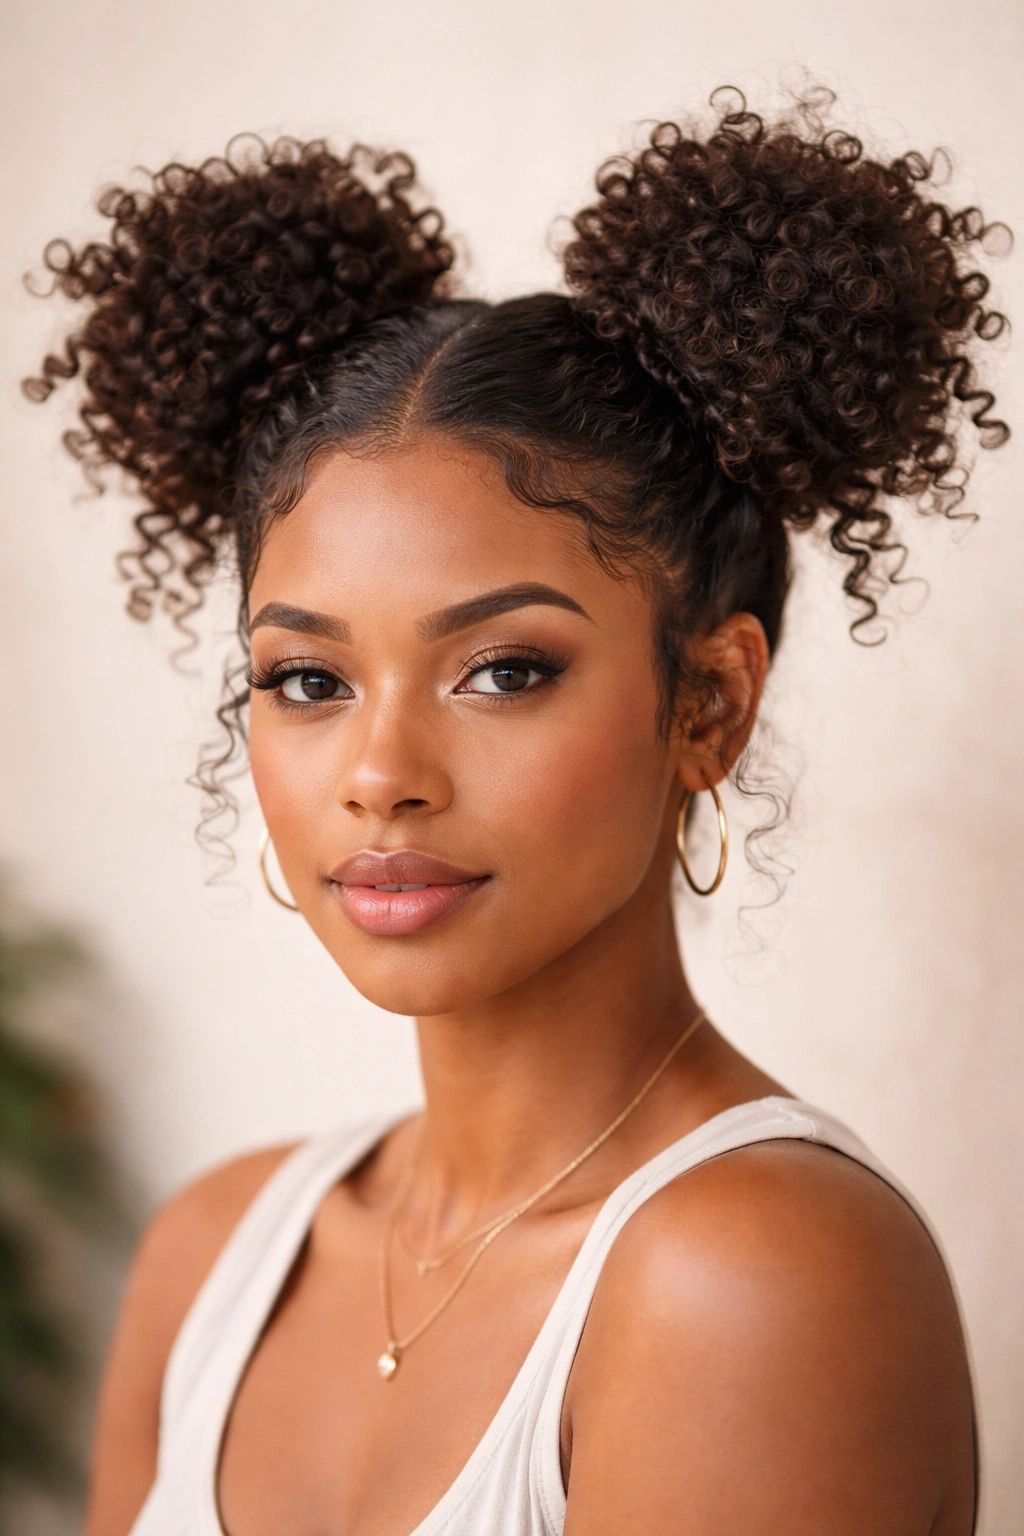
Space buns—two buns, one on each side of your head—aren’t just for kids and festival fashion. When you style them with respect to your curl pattern, space buns become a playful, youthful, completely on-trend messy bun option that works for adults too. These buns can be positioned higher (more fun and fashion-forward) or lower (more casual and everyday), and they’re genuinely practical for keeping curls completely off your face while still looking intentional.
The key to making space buns work with curly hair is embracing their natural volume and letting the coils stick out slightly rather than trying to smooth them down into neat, contained balls. The messiness is the whole point—these buns should have personality, dimension, and that “I didn’t try too hard” energy that curly girls do so well.
Why This Style Works for Curly Hair
Space buns distribute the weight of your hair across two smaller buns instead of concentrating everything in one spot, which means less tension on any single section of your scalp. This is especially good if you’re wearing your hair up frequently—the distributed weight keeps any one area from experiencing cumulative stress. Your curls also stay bouncier because each section gets more air circulation than they would in a single bun. Plus, there’s something undeniably fun about this look—it’s youthful, it photographs well, and it genuinely makes people smile.
How to Create the Look
- Create a center part from your forehead to the nape of your neck
- Gather one side into a ponytail at ear level
- Twist the ponytail loosely and wrap it around the base
- Secure with bobby pins, leaving loose coils around the edges
- Repeat on the other side
- Pull a few face-framing curls down to soften the look
- Fluff and separate the coils to maximize volume
Insider note: Small claw clips work beautifully for securing space buns if you want to avoid bobby pins entirely—they grip curly hair better and create a more visible, intentional look.
4. Twisted-Up Bun
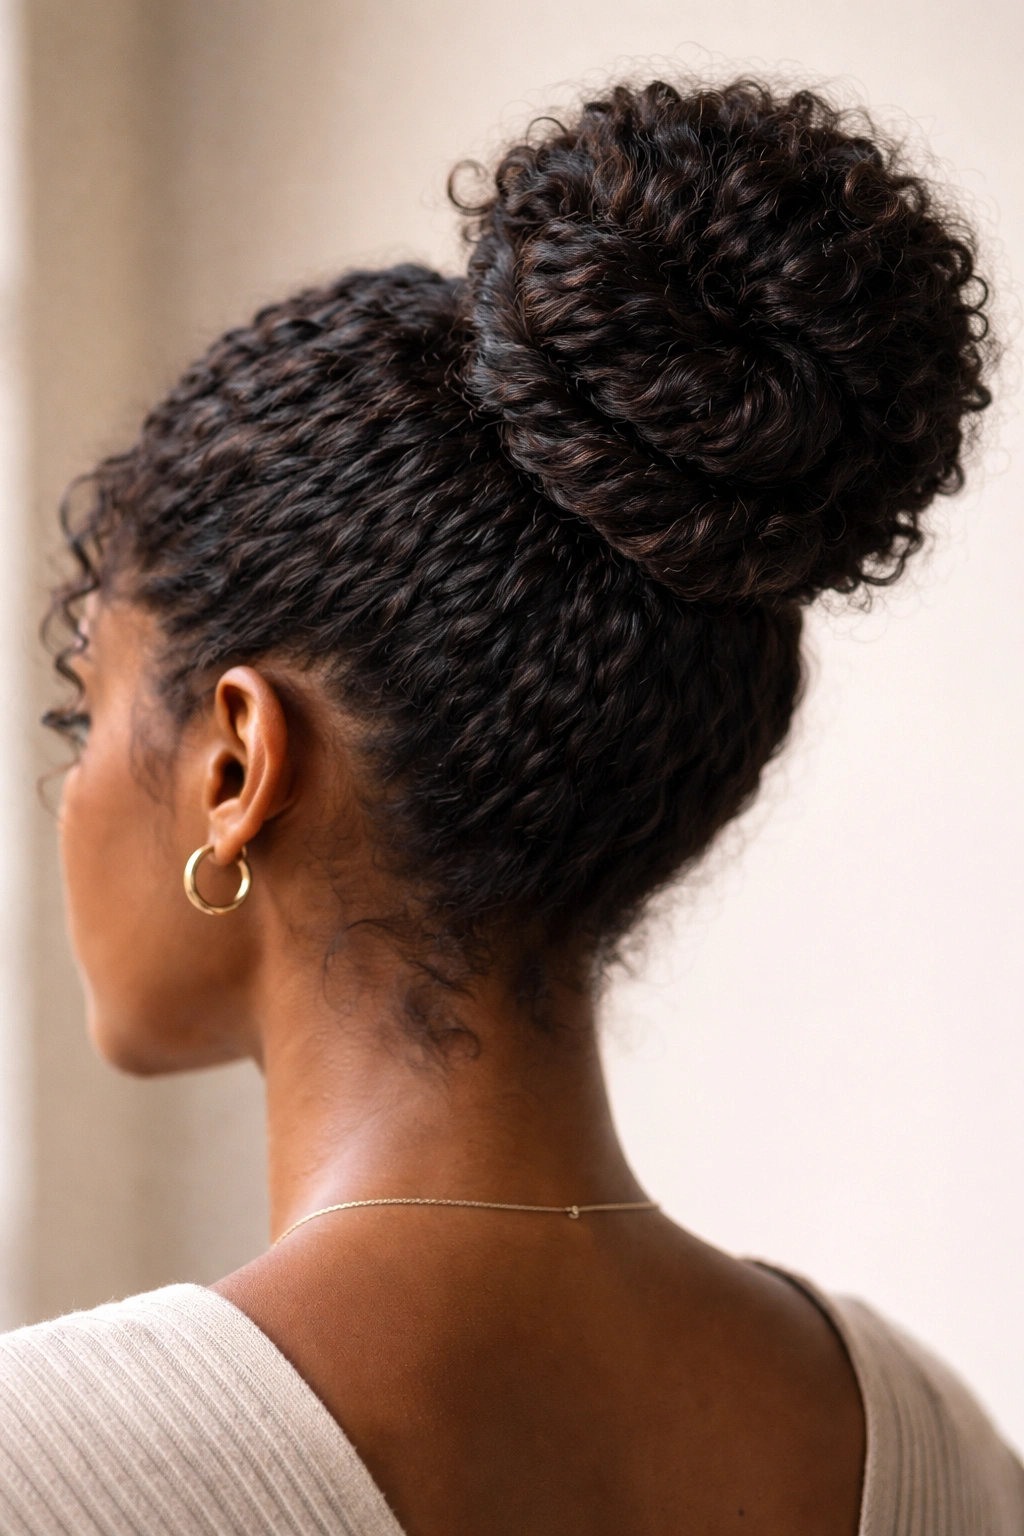
A twisted-up bun is where you take a full ponytail and create a rope-like effect by twisting the entire section as tightly or loosely as you want, then coil that twisted rope around the base of the ponytail. The twist method is different from wrapping because it creates a more defined, sculptural look while still honoring your curl pattern. This style bridges the gap between “completely undone” and “polished professional”—it looks intentional and put-together without feeling stiff or overly formal.
The twist creates visual texture and definition. As the twisted rope coils around the base, it creates lines and shadows that make the bun feel more three-dimensional and interesting than a simple gathered ponytail would be. This is the perfect style when you want to look like you made an effort without spending thirty minutes on your hair.
Why This Style Works for Curly Hair
Twisting your curls together actually enhances their definition. The tension of the twist brings out the individual coil pattern, making your curls look more defined and structured than they might look loose. Since you’re working with the natural texture rather than fighting it, the curl pattern holds the twist beautifully without needing heavy products or heat styling. The twist method also prevents frizz because you’re not repeatedly handling and separating individual strands—you’re working with the hair as a unified section.
How to Create the Look
- Gather hair into a ponytail at your desired height (crown, middle-back, or low)
- Divide the ponytail into two thick sections
- Twist the two sections around each other, creating a rope effect
- Coil the twisted rope around the base of the ponytail
- Secure with bobby pins tucked into the coils
- Gently pull a few loose pieces around the face
- Use your fingers to separate and fluff the twisted coils slightly
Pro tip: If your hair is on the drier side, lightly mist the ponytail with water or a light curl refresher spray before twisting—this gives you better grip and creates a more defined twist that holds throughout the day.
5. Chunky Braided Bun
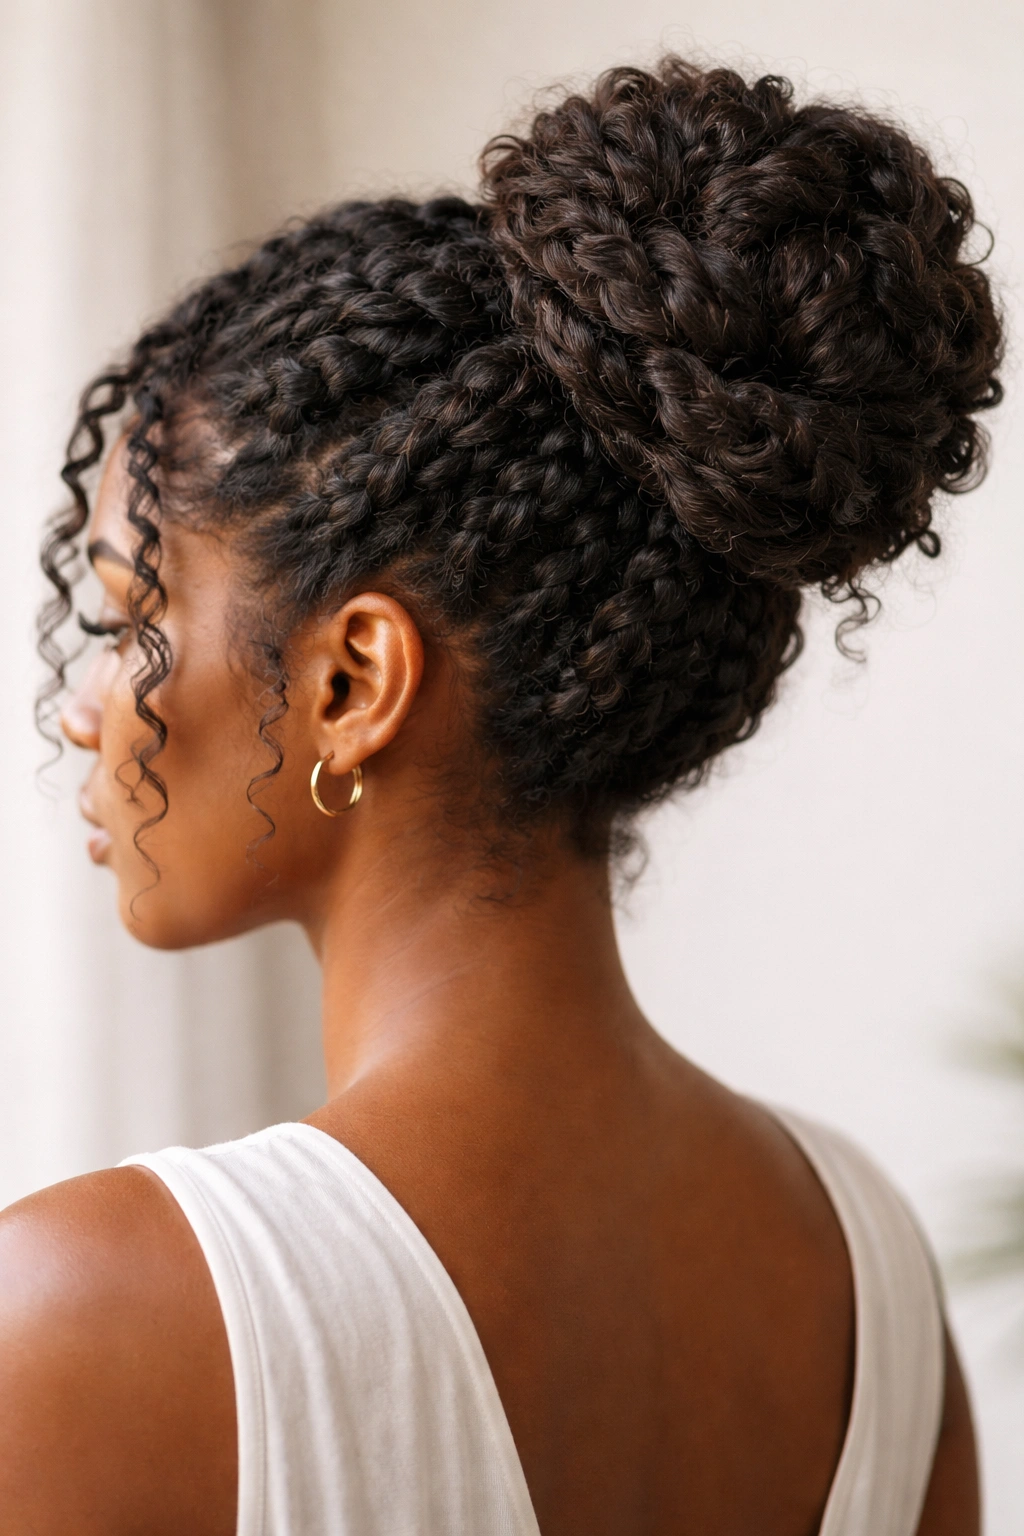
A chunky braided bun combines the security of a braid with the softness and texture of curly hair. Instead of creating a traditional three-strand braid (which can compress curls too much), you’re working with thick, chunky sections to braid loosely, then coiling that braid around the base. This style is more protective than some of the other options because braiding actually strengthens the structure and security of the updo—it’s not going anywhere, even if you’re active or outdoors in humidity.
The chunky braiding method respects your curl pattern because you’re working with larger sections rather than dividing your hair into small, tight segments. Your curls remain defined and visible throughout the braid, and the final look is both beautiful and incredibly practical. This is a style you can wear for a full day of work, a workout, travel, or anywhere else where you need your hair completely secured.
Why This Style Works for Curly Hair
Braiding curly hair can seem intimidating because you’re worried about it looking messy or falling apart. But chunky braiding actually works beautifully with curls because the texture provides natural grip—the coils interlock as you braid, making the braid hold together without needing to be pulled tight. The larger sections mean your individual curl pattern remains visible and beautiful. Braided buns also age gracefully—even after a full day, the braid structure keeps everything in place, and you don’t get the flattened, weird texture you sometimes get with regular buns by evening.
How to Create the Look
- Gather hair into a ponytail at your desired height
- Divide the ponytail into three thick, chunky sections
- Create a loose three-strand braid, working carefully to keep sections chunky
- Coil the braid around the base of the ponytail
- Secure with bobby pins inserted into the braided coils
- Gently pull and separate the braid sections to make the texture more prominent
- Leave face-framing pieces loose if desired
Worth knowing: You don’t need to braid tightly. In fact, a loose braid with curly hair looks better and holds just as well because your curl texture provides the grip. Tight braiding can actually flatten your curls and make the final bun look more severe than you want.
6. Side-Swept Romantic Bun
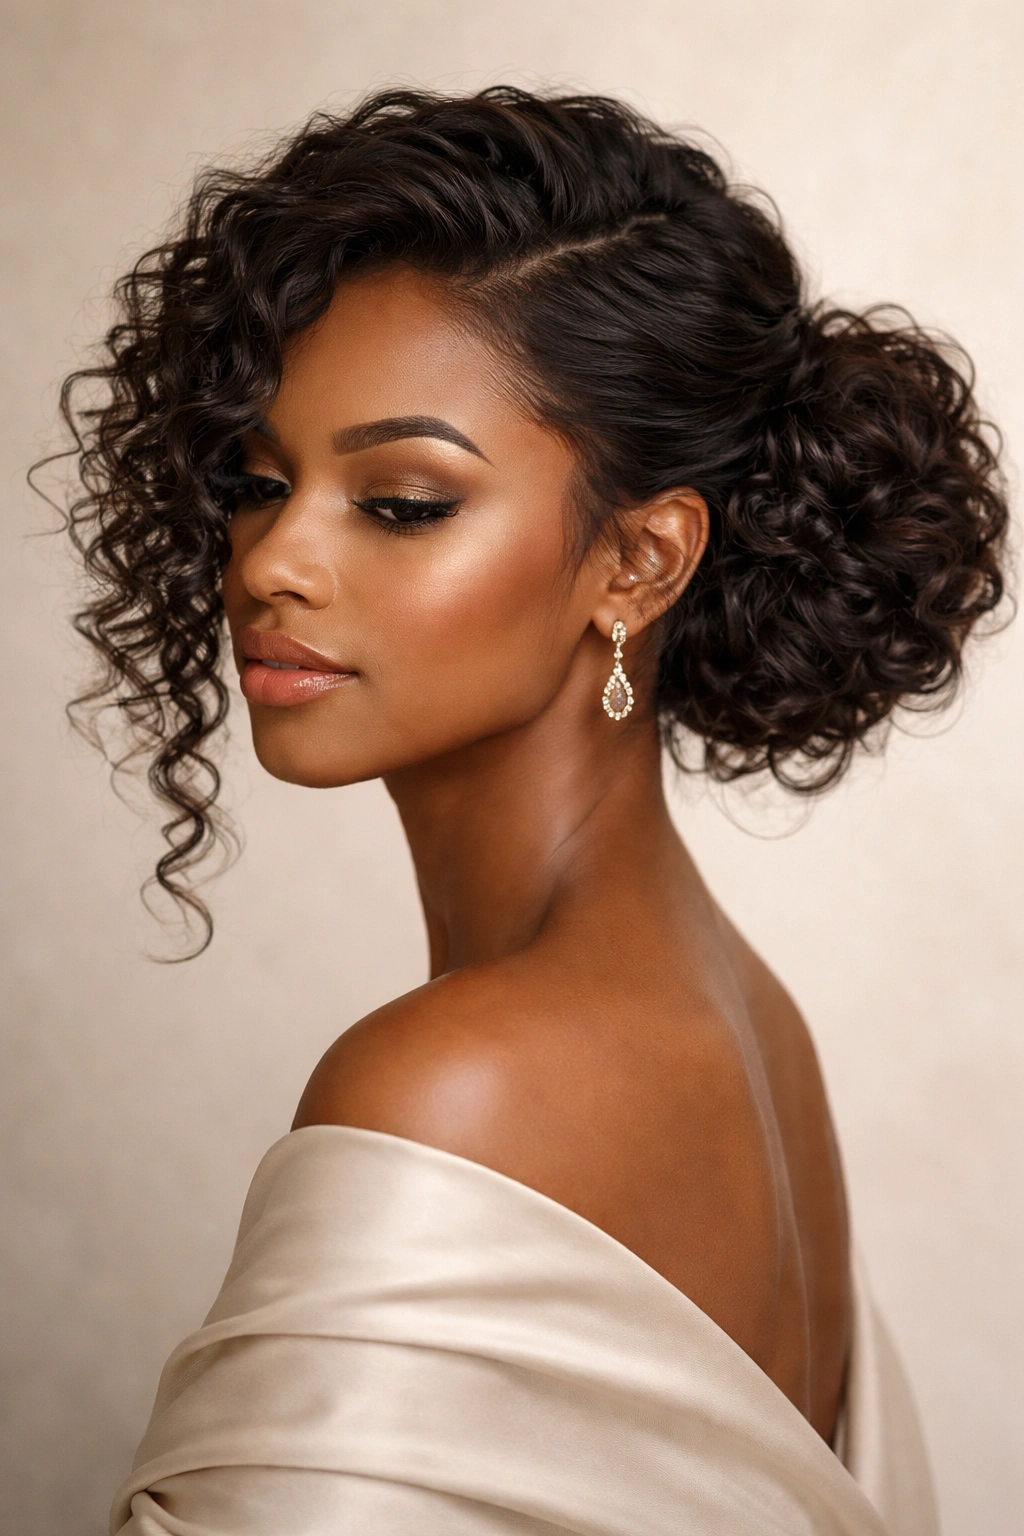
A side-swept romantic bun tips to one side, creating an asymmetrical, effortlessly elegant look. This is the style that photographs beautifully, that makes you feel confident and put-together, and that happens to be incredibly practical for everyday wear. By sweeping your curls to one side before gathering them into a bun, you create a softer silhouette and show off more of your curl definition than you would with a centered bun.
The beauty of this style is that it works with longer curls or shorter curls, tighter coils or looser waves. The side sweep is what creates the elegance—not the texture or length of your hair. This is a bun style that feels special without requiring any special products or complicated techniques.
Why This Style Works for Curly Hair
Side-sweeping your curls naturally frames your face and creates softness around your features. Your curls cascade over one shoulder, which means they stay visible and beautifully displayed rather than hidden behind your head. The asymmetry of the style is actually flattering for most face shapes—it breaks up the roundness of a full bun and creates visual interest. Curly hair already has volume and movement, so a side-swept arrangement channels that beautifully and makes you look intentional and elegant without effort.
How to Create the Look
- Use your fingers or a wide-tooth comb to gather hair to one side
- Gather into a ponytail positioned slightly to the back and one side of your head
- Twist the ponytail loosely and coil around the base
- Secure with bobby pins
- Leave the side-sweep in place by gently arranging curls over your shoulder
- Pull a few shorter pieces loose around your face for softness
- Fluff the bun gently with your fingers
Pro tip: The key to maintaining the side-sweep throughout the day is not spraying it heavily with hairspray. Instead, use a light curl-setting spray that holds without making your hair stiff or crunchy. This keeps the movement and softness while maintaining the shape.
7. Sleek Baby Hair Bun
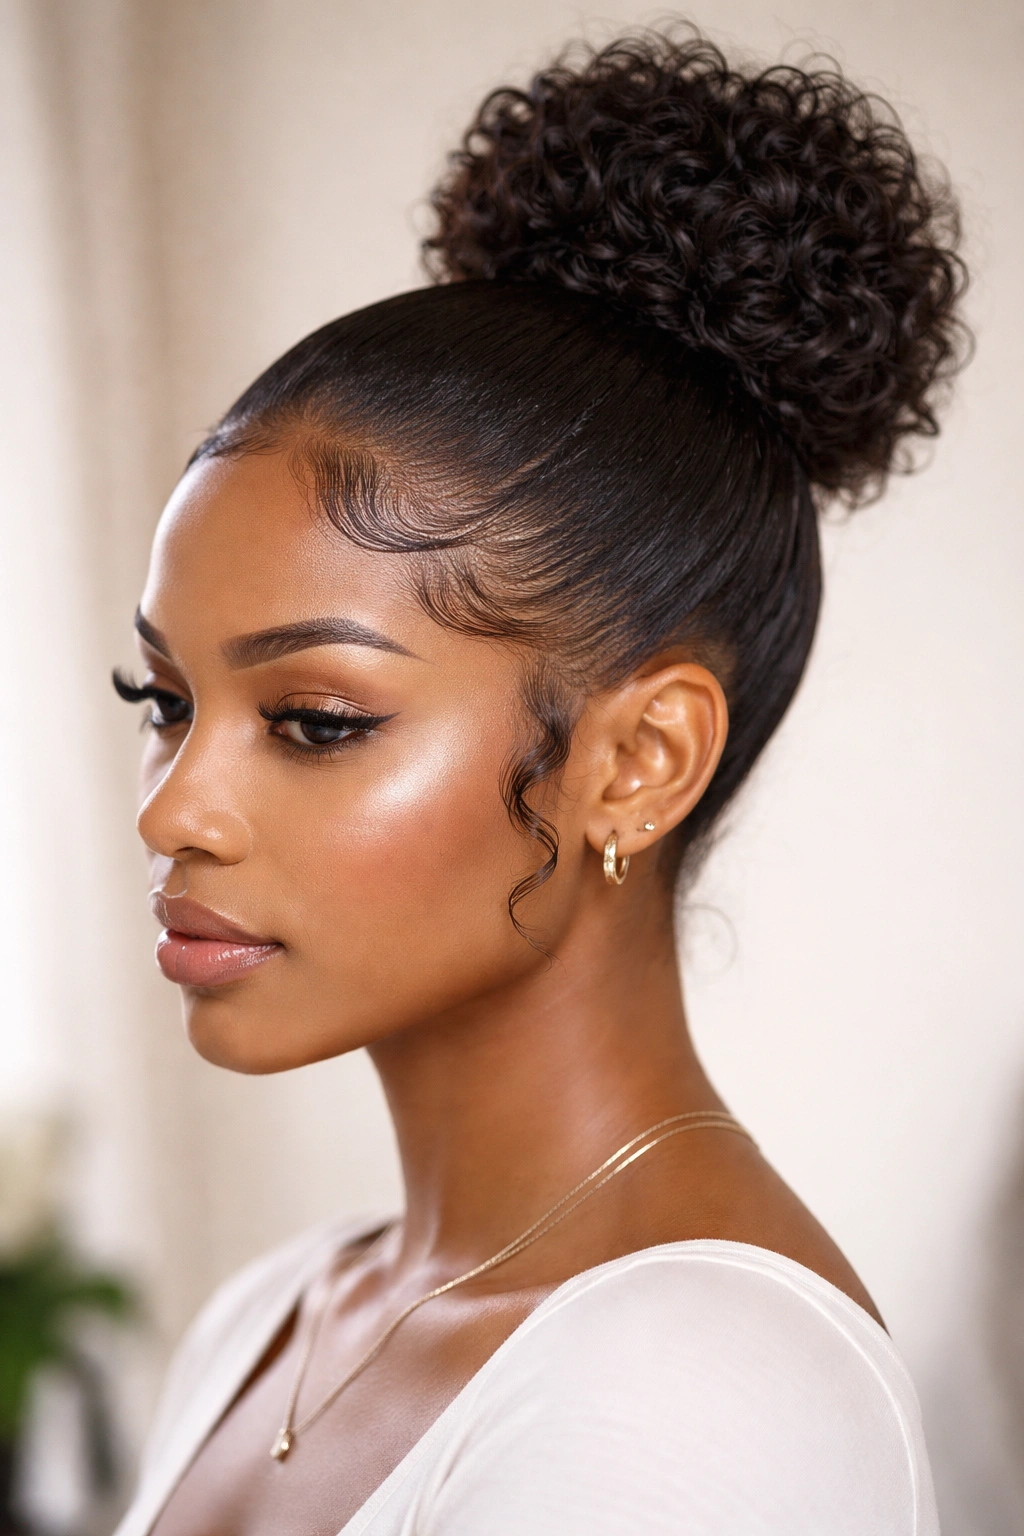
A sleek baby hair bun focuses on one specific element: gel or edge control applied to the hairline and parted area to create defined, smooth “baby hairs” and edges that frame your face. The bun itself can be high, low, or middle—what makes this style distinctive is the contrast between the sleek, controlled hairline and the soft, textured curls in the bun. This is a polished, intentional look that works for professional settings, special events, or anytime you want to look extra put-together.
Don’t let the name fool you—this isn’t a style just for very young women. Sleek baby hair buns are sophisticated, and they’re especially beautiful on women with deeper skin tones because the contrast between the sleek edges and the curly bun is visually striking. This is a style that celebrates both control and texture simultaneously.
Why This Style Works for Curly Hair
The sleek edge control actually enhances the beauty of your curls by creating a defined frame around your face. Instead of hair looking messy or unkempt at the hairline, you’re deliberately styling that area to be neat and intentional—which makes the rest of the bun look more polished by comparison. The contrast between sleek and textured is what makes this style visually interesting. You’re not trying to make your whole head sleek (which would go against your natural curl pattern)—you’re celebrating the texture where it naturally wants to be textured and controlling just the areas that benefit from definition.
How to Create the Look
- Apply edge control or gel to your hairline, parting area, and temple sections
- Use a small brush or the applicator to smooth these areas down
- Create a clean part if desired—straight down the middle or to one side
- Gather your remaining curls into a ponytail at your desired height
- Twist and coil into a bun, securing with pins
- The sleek hairline will frame the bun beautifully
- Add a hair accessory (clip, comb, or scarf tie) if desired
Worth knowing: Not all edge controls are created equal. Look for products that are specifically formulated for curly hair and that won’t dry out your edges or cause breakage. A lightweight gel or beeswax-based product usually works better than heavy pomades that can weigh down delicate hairline hair.
8. Puff-on-Top Bun
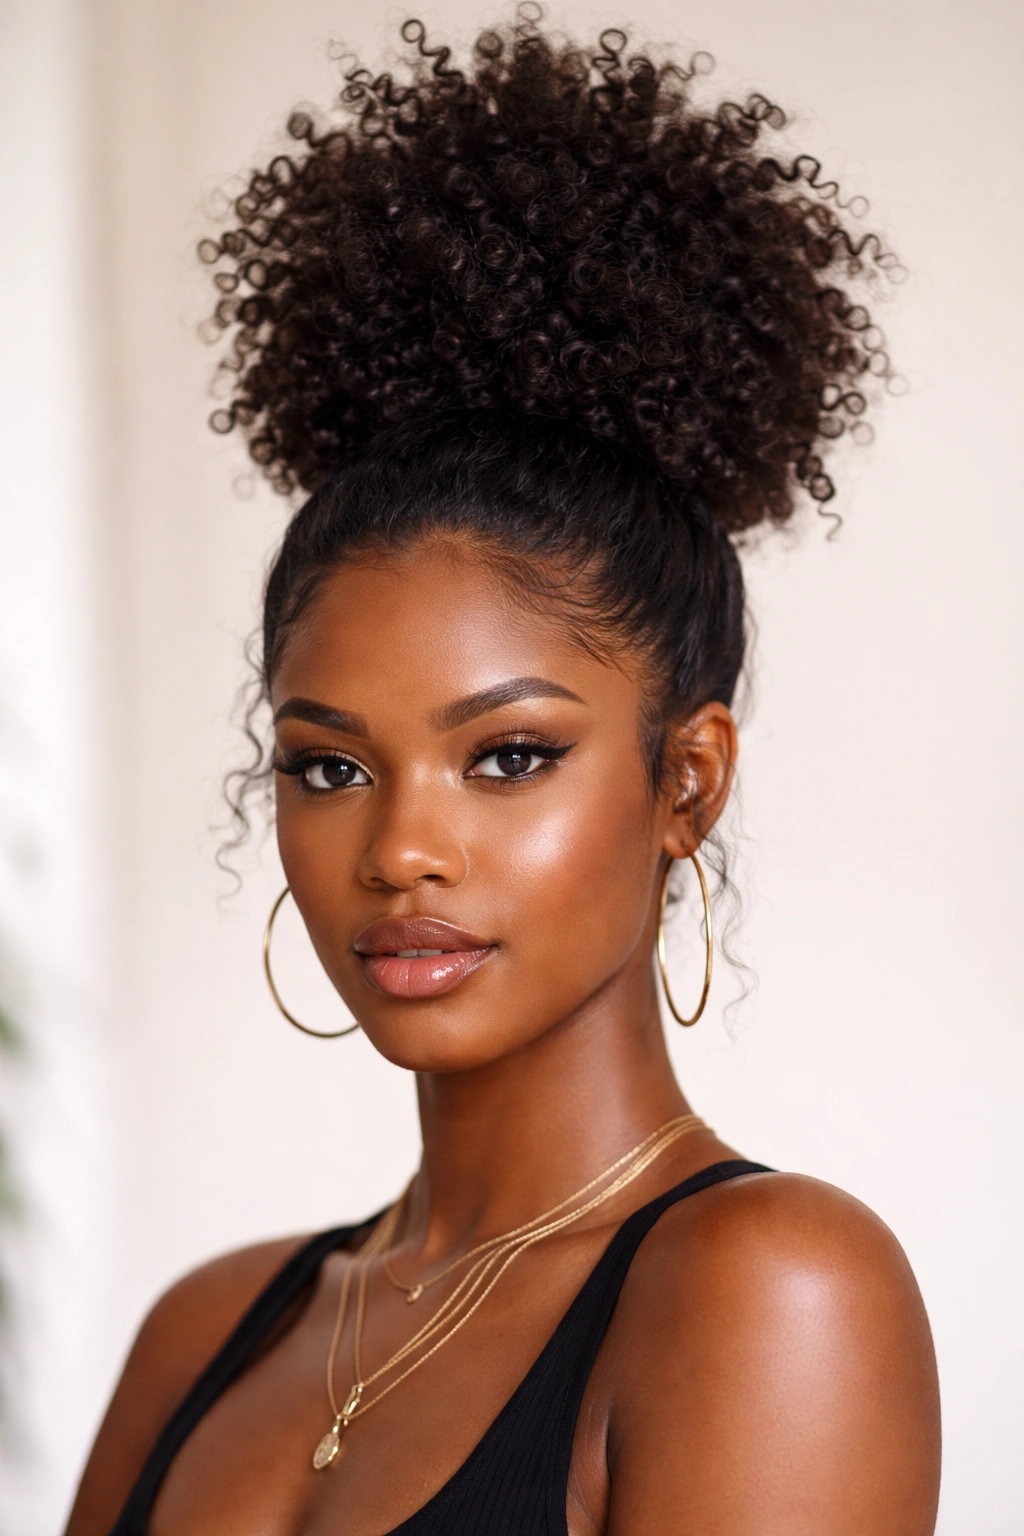
A puff-on-top bun is essentially a high bun that sits directly on top of your head, but instead of gathering all your hair into the bun, you’re leaving a voluminous puff of curls on top and tucking the rest underneath or to the sides. This style is incredibly striking—it’s bold, it’s youthful, and it’s absolutely gorgeous on curly hair. The visual impact comes from the height and volume of the puff contrasting with the neat gathering underneath.
This style is perfect if you love the idea of showing off your curl height and volume but still want the practicality of having most of your hair up and off your face. It’s playful enough for casual everyday wear but can also feel special and fashion-forward enough for going out. The puff-on-top bun has become increasingly popular because it celebrates natural texture in a way that feels both effortless and intentional.
Why This Style Works for Curly Hair
Your curls naturally create height and volume—a puff-on-top bun is designed to showcase exactly that. Instead of trying to contain your curls, this style celebrates them. The puff itself doesn’t need to be perfect or symmetrical; in fact, the more textured and organic it looks, the better. You’re working with your hair’s natural instincts instead of fighting them. This style is also surprisingly practical—the puff keeps hair off your face while the gathered portions underneath keep the bulk of your hair secured and out of the way. You get the visual impact of showing off your curls without the inconvenience of having all that hair loose around your face.
How to Create the Look
- Gather a section of hair from your crown into a high ponytail, but don’t make it too tight
- Leave the rest of your curls loose around and underneath this gathered section
- Create the puff by gently fluffing the crown section upward and outward
- Twist or coil the gathered ponytail and tuck it underneath or to the side
- Secure the gathered portion with bobby pins
- Arrange the loose curls around the base of the puff
- You can leave them completely down or gather them into a lower bun as well
Pro tip: The puff looks best when it’s not perfectly symmetrical. Let your curls fall naturally and fluff with your fingers rather than trying to create a perfectly round, smooth shape. The texture and slight irregularity are what make this style beautiful.
Final Thoughts
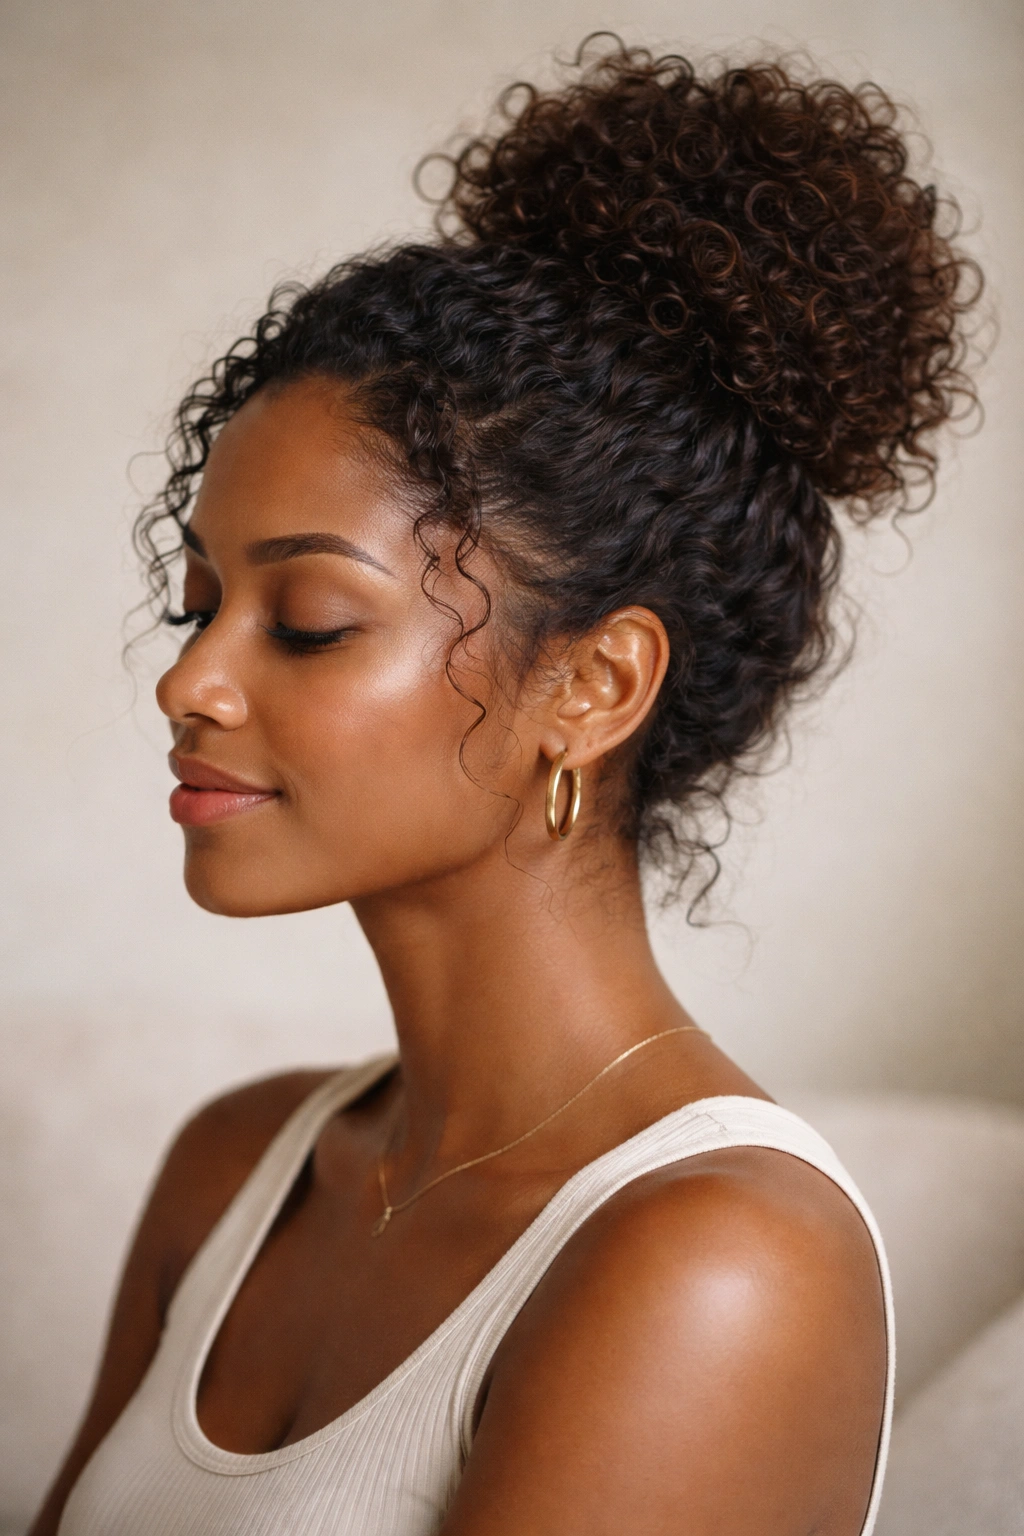
The right messy bun style is a game-changer for curly hair. It turns what could be a bad hair day into an intentional, put-together look. It makes mornings faster, protects your curls from daily manipulation, and honestly, it just feels good to have your hair secured and styled in a way that celebrates rather than fights your natural texture.
The eight styles here each bring something different to the table—some are more romantic, some are more playful, some are more polished, and some are more effortlessly undone. The beautiful part is that you don’t have to pick just one. Rotate through different styles depending on your mood, your schedule, and what your curls are doing on any given day. Over time, you’ll figure out which styles feel most natural for your specific curl pattern and which ones make you feel most confident and beautiful.
The most important thing is that your messy bun works with your curls, not against them. Stop trying to smooth, tighten, and compress your texture into styles designed for straight hair. Instead, embrace the volume, definition, and movement that curly hair naturally has. That’s where the real beauty is—and that’s where these styles shine.
