



A claw clip is arguably the most versatile styling tool in your hair arsenal, and when it comes to creating effortlessly chic messy buns, it’s practically a game-changer. These palm-sized clips grip hair without the harsh tension of traditional elastics, meaning you can achieve that sought-after undone texture while keeping everything securely in place throughout the day. The beauty of styling with a claw clip is that it actually encourages the messy, tousled look you’re going for—the grip itself creates natural volume and prevents that overly polished, too-tight-and-stiff appearance that many people try to avoid with buns.
What makes claw clips particularly great for messy bun styling is their ability to hold substantial amounts of hair while still allowing individual pieces to fall freely around your face and at the nape of your neck. Unlike traditional hair ties that cinch everything into a uniform shape, claw clips accommodate the natural texture and movement of your hair, giving you more room to customize your look with loose tendrils, face-framing pieces, and artfully undone sections. Whether your hair is straight, wavy, curly, or coily, a claw clip adapts to your hair’s natural movement instead of forcing it into submission.
The styling possibilities with claw clips extend far beyond a simple topknot. You can create everything from romantic, loose low buns that whisper elegance to high, energetic updos that showcase your hair’s texture. The clip itself becomes a subtle fashion element—you can choose from tortoiseshell, metallics, pastels, or bold colors to complement your outfit or add an unexpected accent to your hairstyle. What’s more, claw clips work beautifully on all hair lengths and densities, from delicate, fine hair to thick, voluminous locks.
How Claw Clips Elevate Your Messy Bun Game
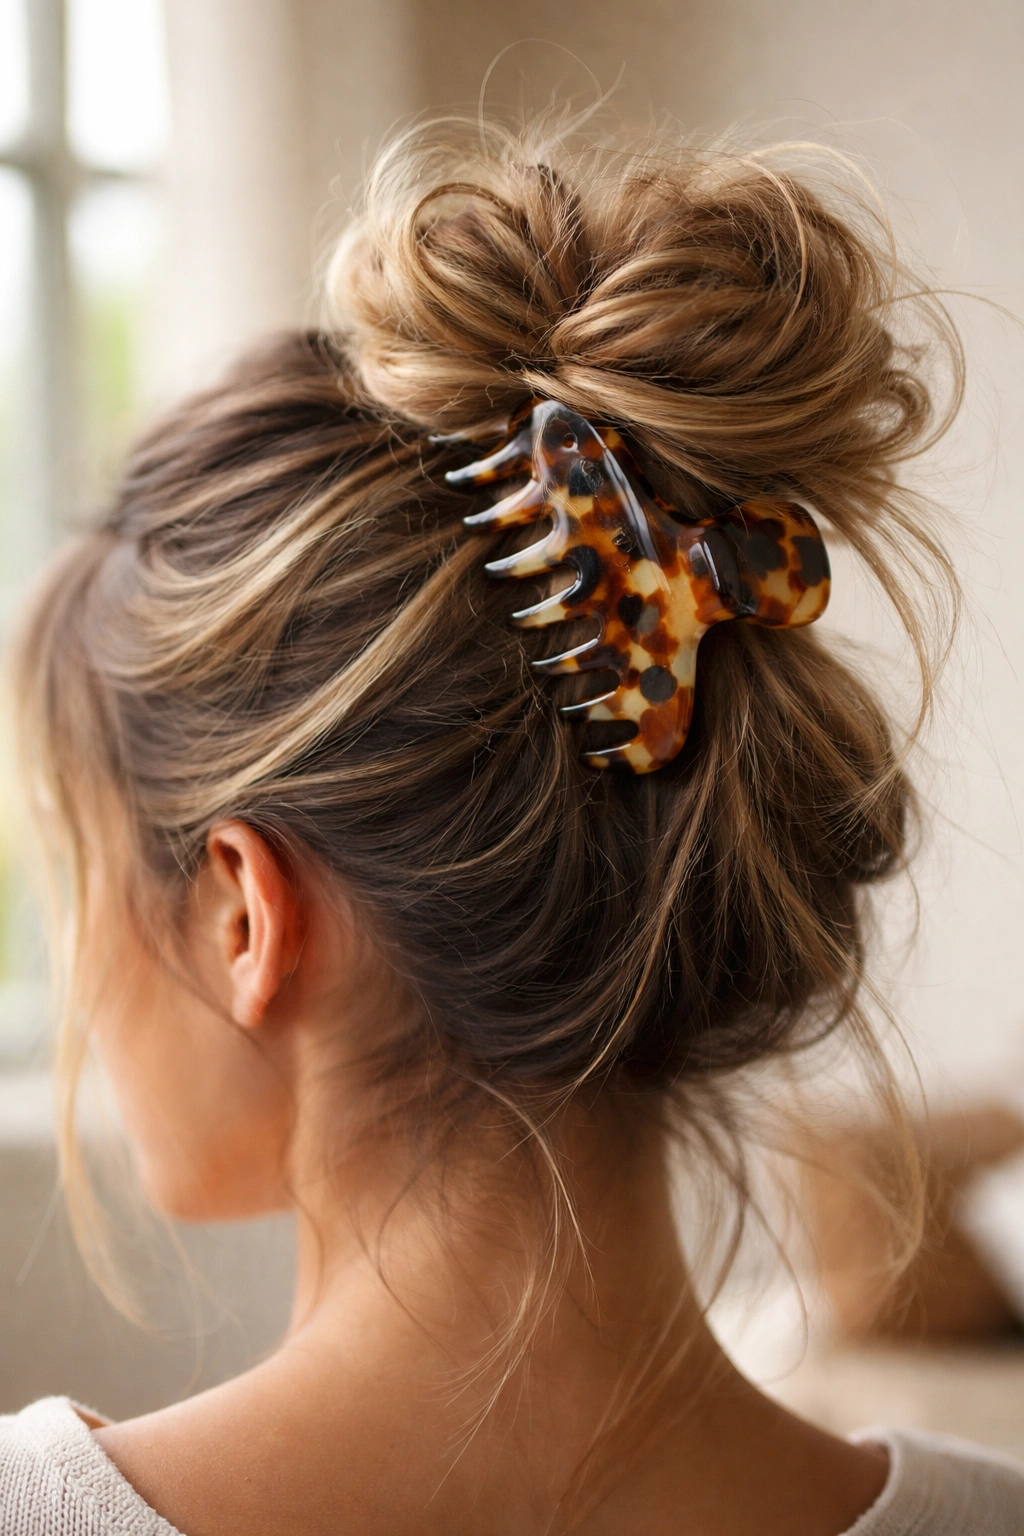
Before diving into specific styles, it’s worth understanding exactly why claw clips have become the go-to tool for modern, textured updos. Traditional elastic bands distribute pressure across a single point, which can create tension headaches and leave creases in your hair when you take them down. Claw clips, by contrast, distribute their grip across the length of the jaws, holding hair securely while creating a more relaxed, natural appearance that actually looks intentionally undone rather than hastily thrown together.
The size and shape of a claw clip also matter for messy bun success. Larger clips (around 2.5 to 3 inches) work best for full, voluminous buns or for holding thicker sections of hair. Smaller clips can work for delicate buns or as secondary styling tools to anchor flyaways and shorter pieces. The curve of the claw naturally creates a slight lift and twist in your hair even before you finish styling, which gives you a head start on achieving that textured, dimensional look that defines a good messy bun.
One often-overlooked advantage is how claw clips actually encourage the messy aesthetic you’re aiming for. Because the clip grips hair along its full length rather than crushing everything into a tight band, individual pieces naturally separate and create that coveted “I woke up like this” texture. You’re not fighting against the tool—you’re working with your hair’s natural tendency to fall in slightly different directions, which is precisely what makes a messy bun visually interesting.
1. The Twisted High Bun
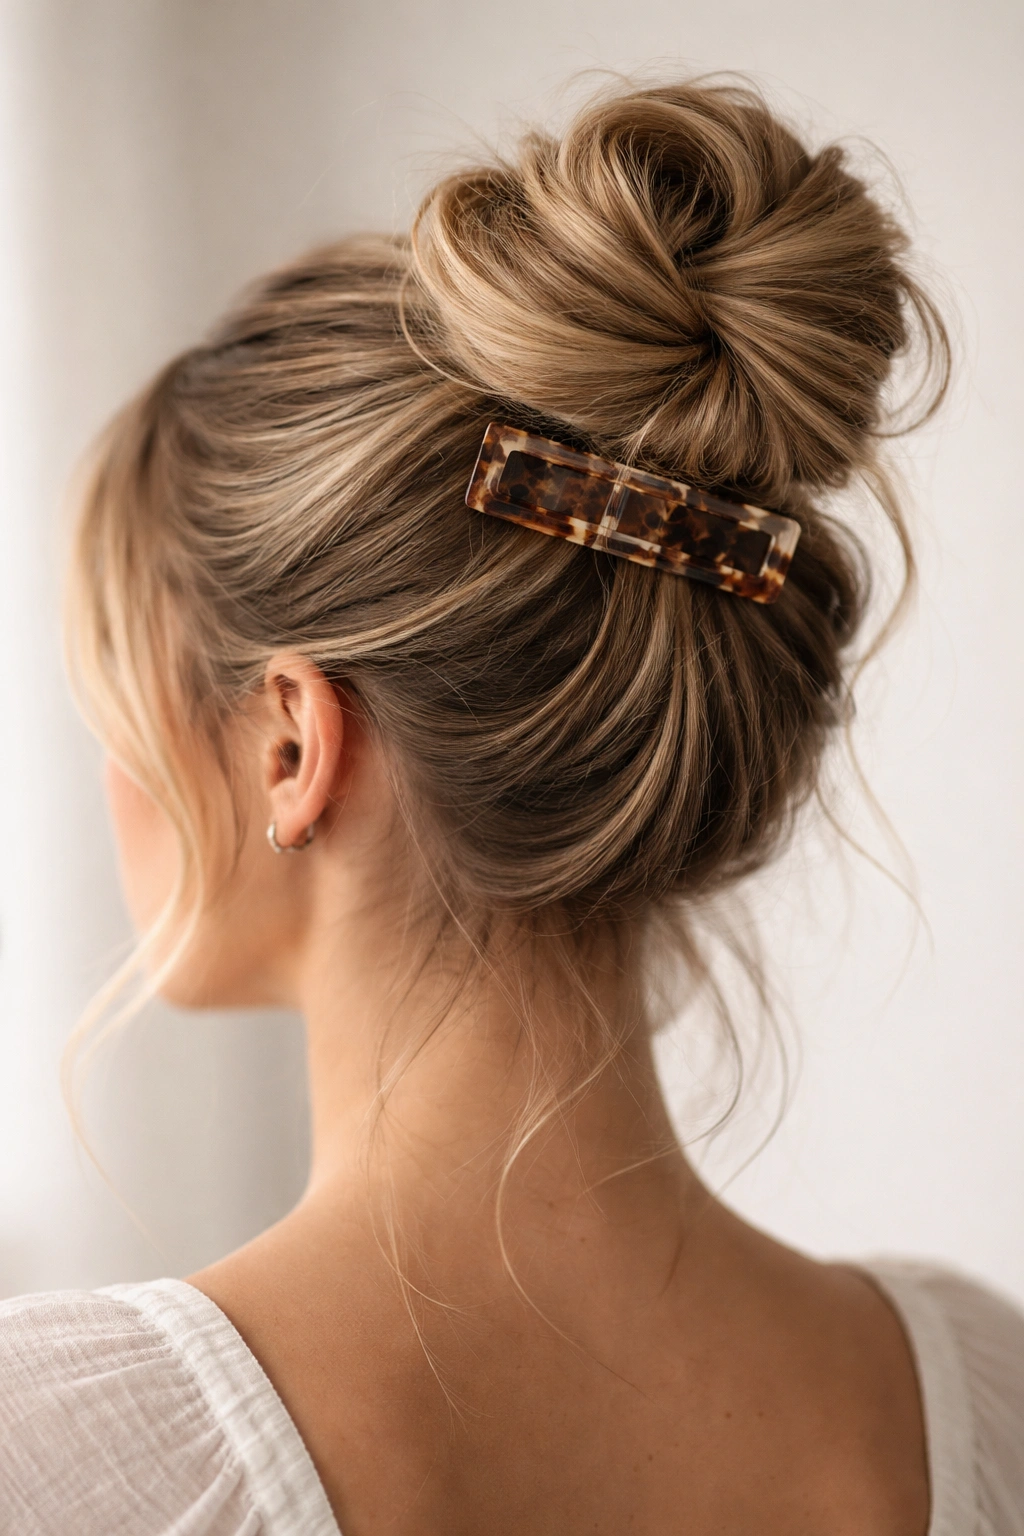
This is the go-to messy bun when you want impact and visual movement without effort. Start by gathering your hair toward the crown of your head, then twist the gathered section loosely around itself to create a soft, coiled shape. Secure the twist with your claw clip, positioning it horizontally through the center of the bun so it anchors the twist without flattening it. The key is in the looseness of the twist—you’re not creating a tight spiral, but rather a relaxed coil that allows pieces to escape naturally and create dimension.
How to Create the Twisted Look
Flip your head upside down and rough up your hair at the roots to add natural texture and volume. Flip back up, run your fingers through once for smoothness, then gather everything toward the top of your head. Starting at the base of your gathered hair, twist the entire section loosely, letting it wrap around itself as you go. Don’t make the twist tight—you want it loose enough that strands twist in slightly different directions and some pieces naturally fall out as you go. Once you’ve twisted all the way to the end, gently pull on the twisted coil to loosen it slightly and create a more relaxed, textured appearance.
Styling Tips and Tricks
Pull out a few face-framing pieces before securing the clip for a softer, more intentional look. You can also gently tug on sections of the twisted coil after clipping to make it appear even more undone and voluminous. If you have shorter pieces that won’t stay in the twist, that’s actually perfect—pin them separately with bobby pins hidden inside the twisted coil for a completely effortless finish. This style works beautifully on day-two or day-three hair when your natural texture is more pronounced.
Pro tip: Mist the twisted bun lightly with texture spray before releasing it from your hands. This creates a subtle hold that prevents pieces from falling out unexpectedly while still maintaining that natural, undone appearance.
2. The Textured Low Knot
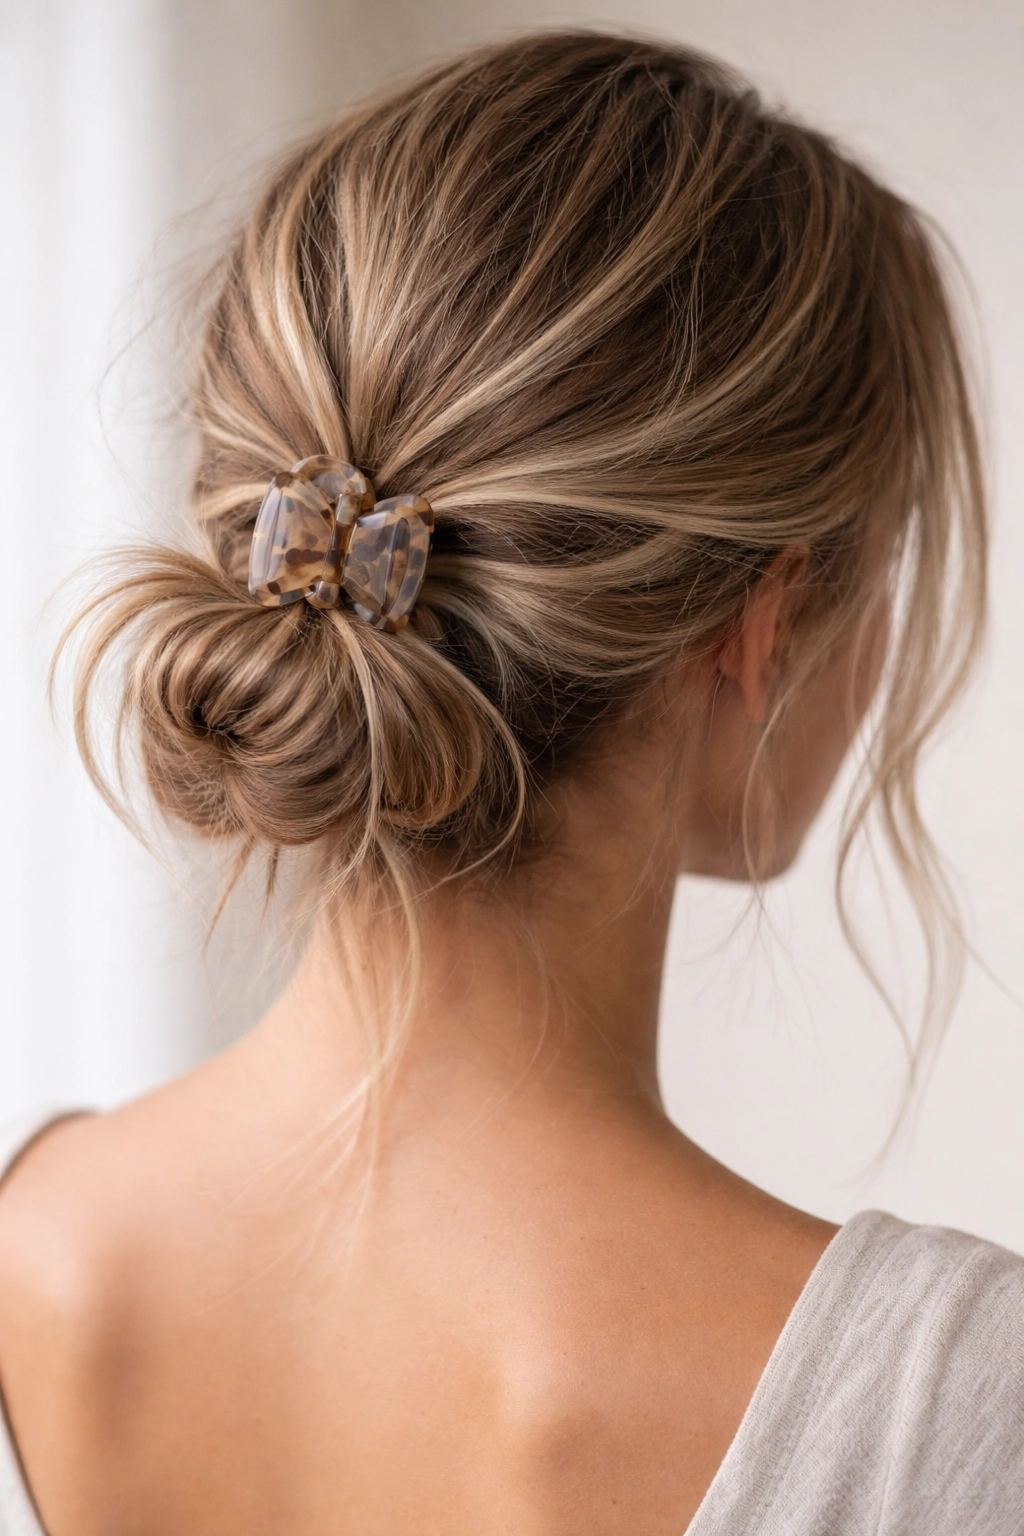
The low messy bun is endlessly elegant and works for everything from casual weekend looks to more polished occasions. This version emphasizes texture and dimension rather than height, creating a sophisticated style that sits just at the base of your skull. Start by creating a loose knot with your hair at the back of your head rather than twisting it—this creates a more spontaneous, unstructured appearance than a twist and plays beautifully with natural texture.
Creating Natural Texture First
Before you start gathering your hair, tousle it with your fingers or use a texturizing spray to create movement and dimension. You want your hair to have some grit so it holds its shape once knotted and clipped. If your hair is freshly washed and slippery, adding texture is essential for a messy bun that actually looks intentional rather than just sloppy. Sprays with salt or matte finish work best—they add grip without making hair look wet or weighed down.
The Knot Technique
Gather all your hair at the nape of your neck, separating it into two equal sections. Cross one section over the other, then cross them again to create a loose, double-crossing knot (like you’re tying a basic knot, but with all your hair rather than two separate pieces). Don’t pull tight—you want the knot to sit loose and relaxed, with plenty of texture visible. Position your claw clip vertically through the center of the knot to anchor it while still allowing pieces to fall freely around it.
Perfecting the Undone Look
Once clipped, gently pull on small sections around the bun to loosen it further and create a more voluminous appearance. Pull out at least two or three longer pieces to frame your face—these should be uneven lengths and texture for maximum softness. The goal is to make the bun look like something you created naturally while half-awake, not something you labored over for twenty minutes.
Worth knowing: This style actually improves throughout the day as gravity works with the clip to create even more texture. By evening, your low knot becomes even more undone and artfully messy—just the way you want it.
3. The Half-Up Messy Bun
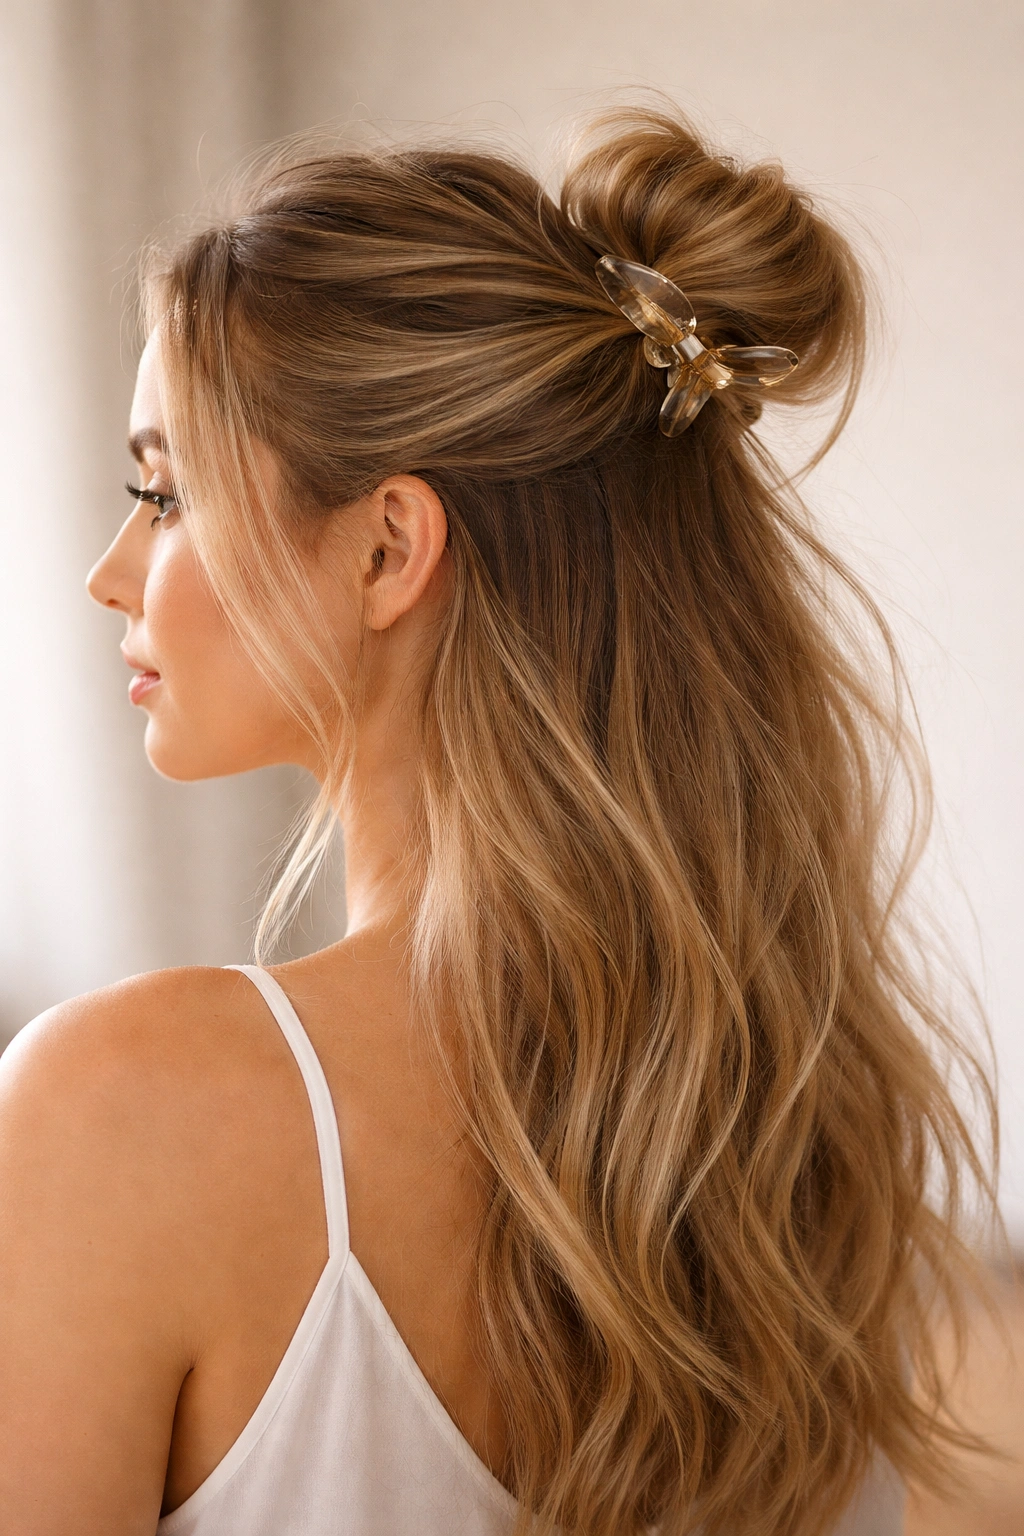
This hybrid style sits somewhere between an up-do and down-do, offering the best of both worlds—you get the elevated, polished feeling of an updo with the softness and movement of hair down. Take the top half of your hair (imagine a line from temple to temple across the crown) and gather it loosely. Create a small twisted section or knot with just this top portion, then secure it with your claw clip. The bottom half of your hair falls freely down your back, creating a balanced, romantic silhouette.
Sectioning for Success
Section your hair by imagining a line from the top of one ear to the top of the other ear, going through the crown. Everything above this line gets gathered and styled; everything below stays down. This creates a clean separation that looks intentional rather than random. You can make this line straight across the back for a more geometric look, or slightly curved for something softer. The way you section determines the final personality of your style.
Creating Dimension with Layers
Before gathering the top section, tousle just that portion of your hair to add texture. You can also gently backcomb the section you’re about to gather for extra grip and a more undone appearance. Once gathered, twist or knot this section loosely—the looser, the better. Secure with your claw clip positioned horizontally or slightly angled for visual interest. Leave multiple pieces falling out from the bun, especially longer pieces that frame your face.
Styling the Bottom Half
Don’t just leave the lower half of your hair hanging straight. Create some waves or curls in this section with a curling iron or let your natural texture show through. The contrast between the textured bun and the styled bottom half creates visual dimension and prevents the style from looking like you simply ran out of time while getting ready.
Insider note: This style looks especially stunning when you leave the very front sections of hair completely down and unstyled. They frame your face naturally and create softness without any additional work.
4. The Braided Messy Bun
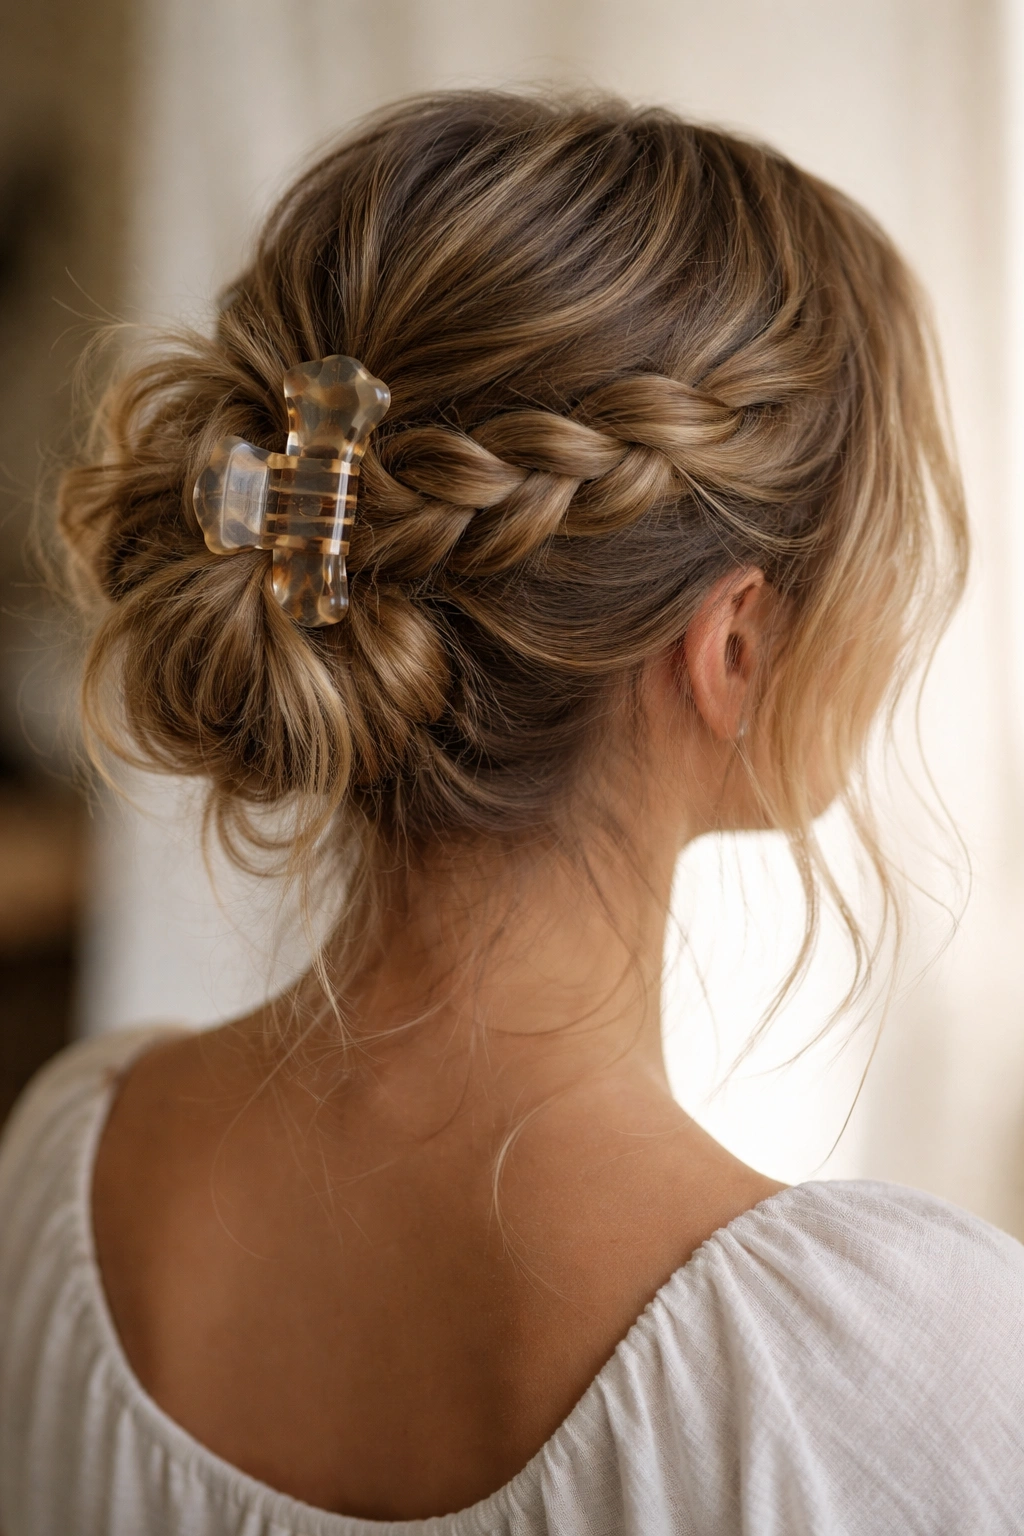
Adding a braid to your messy bun introduces a whole new dimension of visual interest and texture. You can either create the braid as part of the gathered section before clipping, or braid a section of your hair first and then wrap it around itself to form the bun. The braid adds structure to what would otherwise be pure chaos, while still maintaining that undone aesthetic because the braid itself will be loose and textured.
The Wrap-Around Braid Method
Create a loose three-strand braid using a section of your hair (you don’t need to braid all of it—just enough to create visual interest). Once you’ve braided down several inches, stop and gather all your remaining hair into this braided section. Wrap the braid around the gathered hair like a crown, positioning it so it circles the base of your future bun. Use bobby pins to secure the wrapped braid in place, then gather any additional loose hair into the center and secure everything with your claw clip.
Loosening the Braid for Texture
After securing everything with the claw clip, gently pull on the sections of the braid to loosen it and make it appear more relaxed and undone. A tight, neat braid looks too polished for a messy bun—you want the braid to look like it’s barely holding on. Pull out pieces all around the bun to create an artistic, textured appearance. Small wisps and flyaways actually add to the charm of this style rather than detracting from it.
Variations on the Theme
You can create this style with a Dutch braid (where you braid under instead of over) for a different texture, or use a fishtail braid for something more delicate and intricate. You can also create two thinner braids instead of one thick one and wrap them both around your bun for added visual complexity. The beauty of this approach is that it’s endlessly customizable depending on what braid style appeals to you.
Pro tip: Don’t braid all the way to the end of your hair. Leave the last 2-3 inches unbraided so you have loose hair to gather and tuck into the bun. This creates a fuller, more three-dimensional final result.
5. The Voluminous Crown Bun
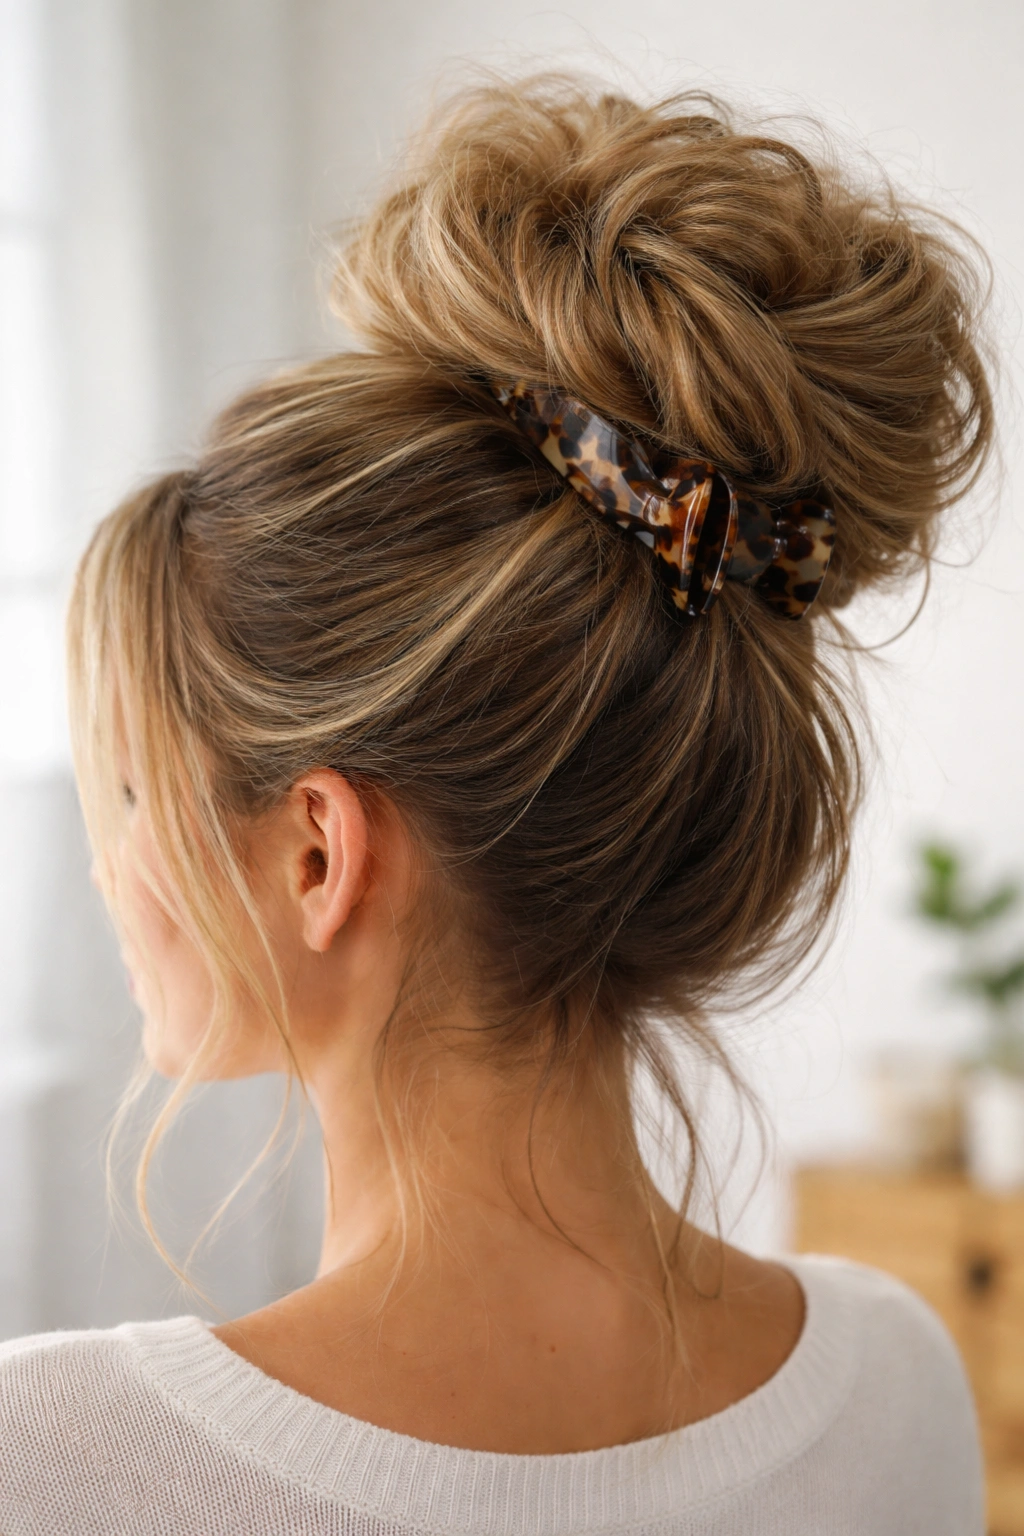
When you want maximum drama and presence, the voluminous crown bun delivers. This style sits high on your head and is deliberately puffy and textured, making it perfect for situations where you want your hair to make a statement. The trick to voluminous buns is teasing or backcombing the section you’re gathering before you twist or knot it, then loosening it intentionally after clipping to create a soft, cloud-like appearance rather than a tightly compressed shape.
Backcombing for Bulk
Gather your hair toward the crown of your head, then use a fine-tooth comb or teasing brush to backcomb the gathered section thoroughly. Work in layers—tease the underneath first, then work your way to the outer layers. Don’t worry about making it look neat at this stage; you’re building texture and grip. Once you’ve backcombed thoroughly, gently smooth the outer layer with your comb so the teased hair underneath creates dimension without looking matted.
The Twist and Tease Technique
Twist your backcombed, gathered hair around itself loosely, allowing the texture to create natural separation and movement. Don’t twist tightly—let the twisted coil be loose and relaxed, with pieces naturally falling out as you go. The backcombed texture beneath the smooth outer layer creates incredible dimension and makes the bun appear much fuller than it actually is.
Strategic Clip Placement
Position your claw clip through the center of the twisted bun, making sure it grips securely without flattening the volume you’ve created. You may need to hold the bun up gently while positioning the clip to prevent it from compressing. Once clipped, gently tug on sections of the twisted coil to loosen it further and create that signature puffy, cloud-like appearance.
Finishing for Maximum Impact
Pull out several pieces around the perimeter of the bun—these should be of varying lengths and texture to create visual softness. You can also pull out a few smaller pieces from within the bun structure itself to create an intentionally disheveled look. The more you pull and tease, the bigger and more voluminous the bun becomes.
Worth knowing: This style actually works better with thicker or longer hair, as shorter or finer hair can sometimes look sparse when styled this way. If you have finer hair, you can add clip-in extensions or hair pieces to create the fullness before backcombing.
6. The Sleek-to-Messy Contrast Bun
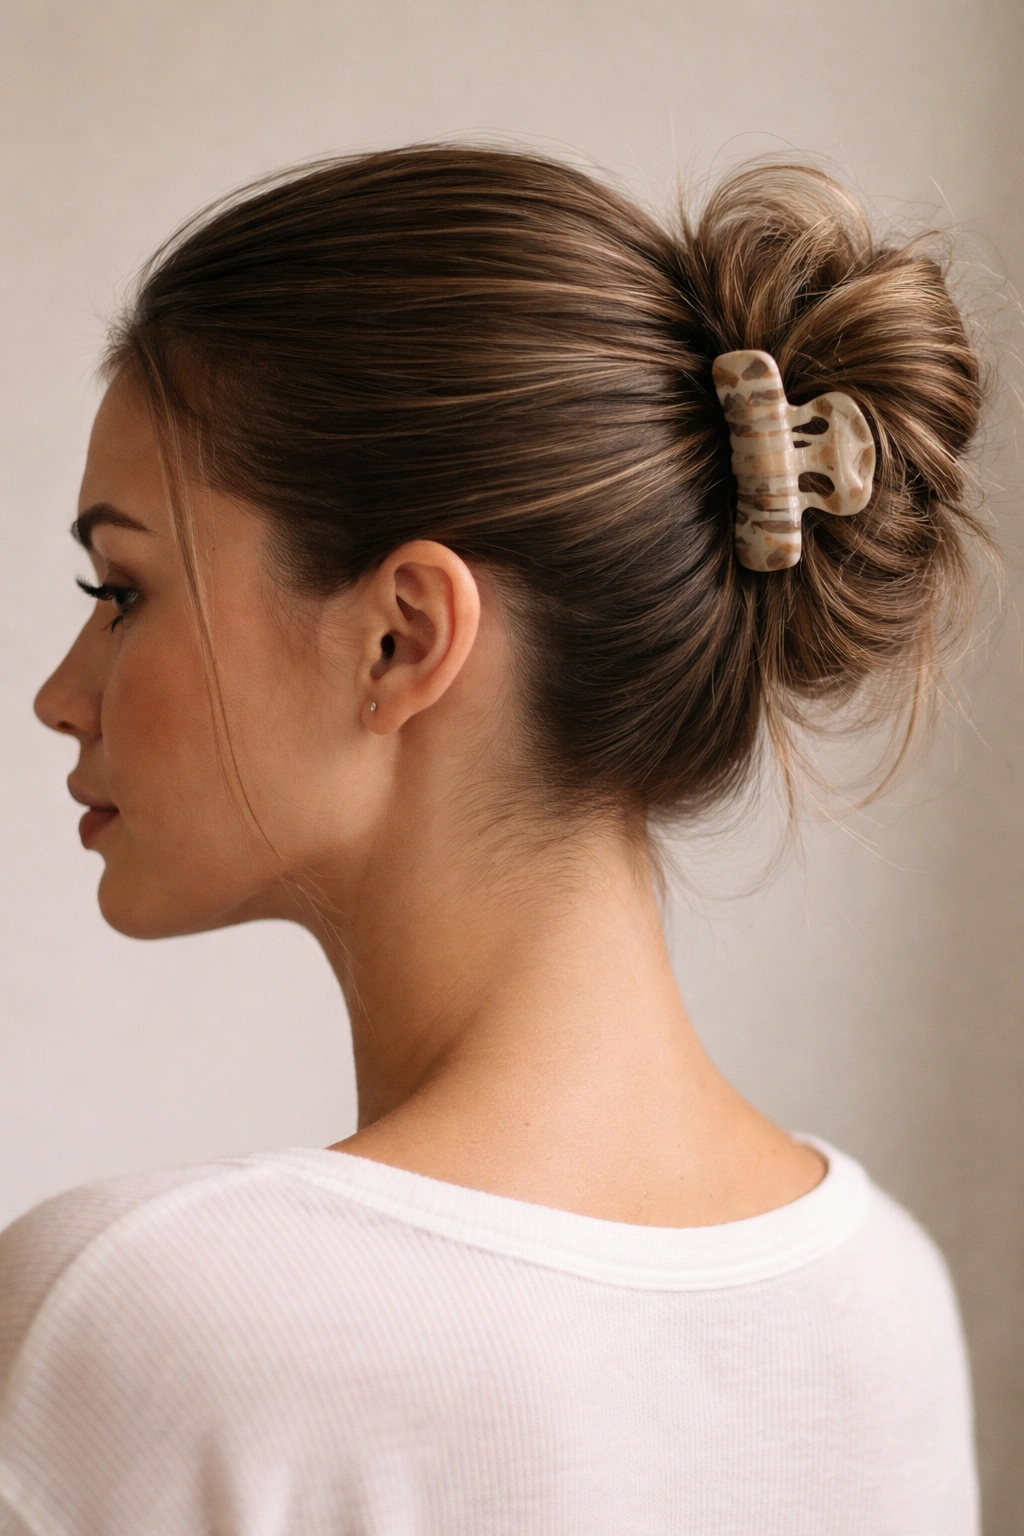
This style plays with contrast—combining a smooth, sleek section with a deliberately messy bun section to create visual interest and balance. You start by smoothing back the front and sides of your hair with gel or a smoothing cream, creating clean lines and a polished appearance. Then the back and crown sections gather into a textured, loose bun that provides a stunning counterpoint to the sleekness. This style works beautifully for situations where you want polish and personality in one look.
Creating the Sleek Base
Use a fine-tooth comb and smoothing cream or lightweight gel to brush the front and sides of your hair straight back toward where your bun will sit. Make the lines clean and precise—this sleekness is essential for the contrast to work visually. You can create a deep side part, a center part, or just smooth everything straight back depending on your preference. The sleek section should look intentional and controlled, almost severe in comparison to the messy bun that follows.
Gathering for the Messy Portion
At the point where you stop smoothing (usually around the crown and back of your head), gather the remaining hair. This gathered section should be deliberately textured and messy, not sleek at all. The transition from sleek to messy is what makes this style work—it needs to be a noticeable shift. Create a loose twist or knot with this gathered section, allowing pieces to escape naturally.
Balancing the Contrast
The sleek section should be smooth enough that you can see the clean scalp and hairline, emphasizing the contrast with the messy, textured bun. Secure the bun with your claw clip positioned horizontally. Pull out face-framing pieces from the messy section, leaving the sleek sections intact. The overall effect should feel intentional, not like you started styling and forgot to finish the front.
Pro tip: A small amount of edge control product or smoothing serum applied to your hairline in the sleek sections prevents flyaways and maintains that polished appearance throughout the day.
7. The Undone Topknot
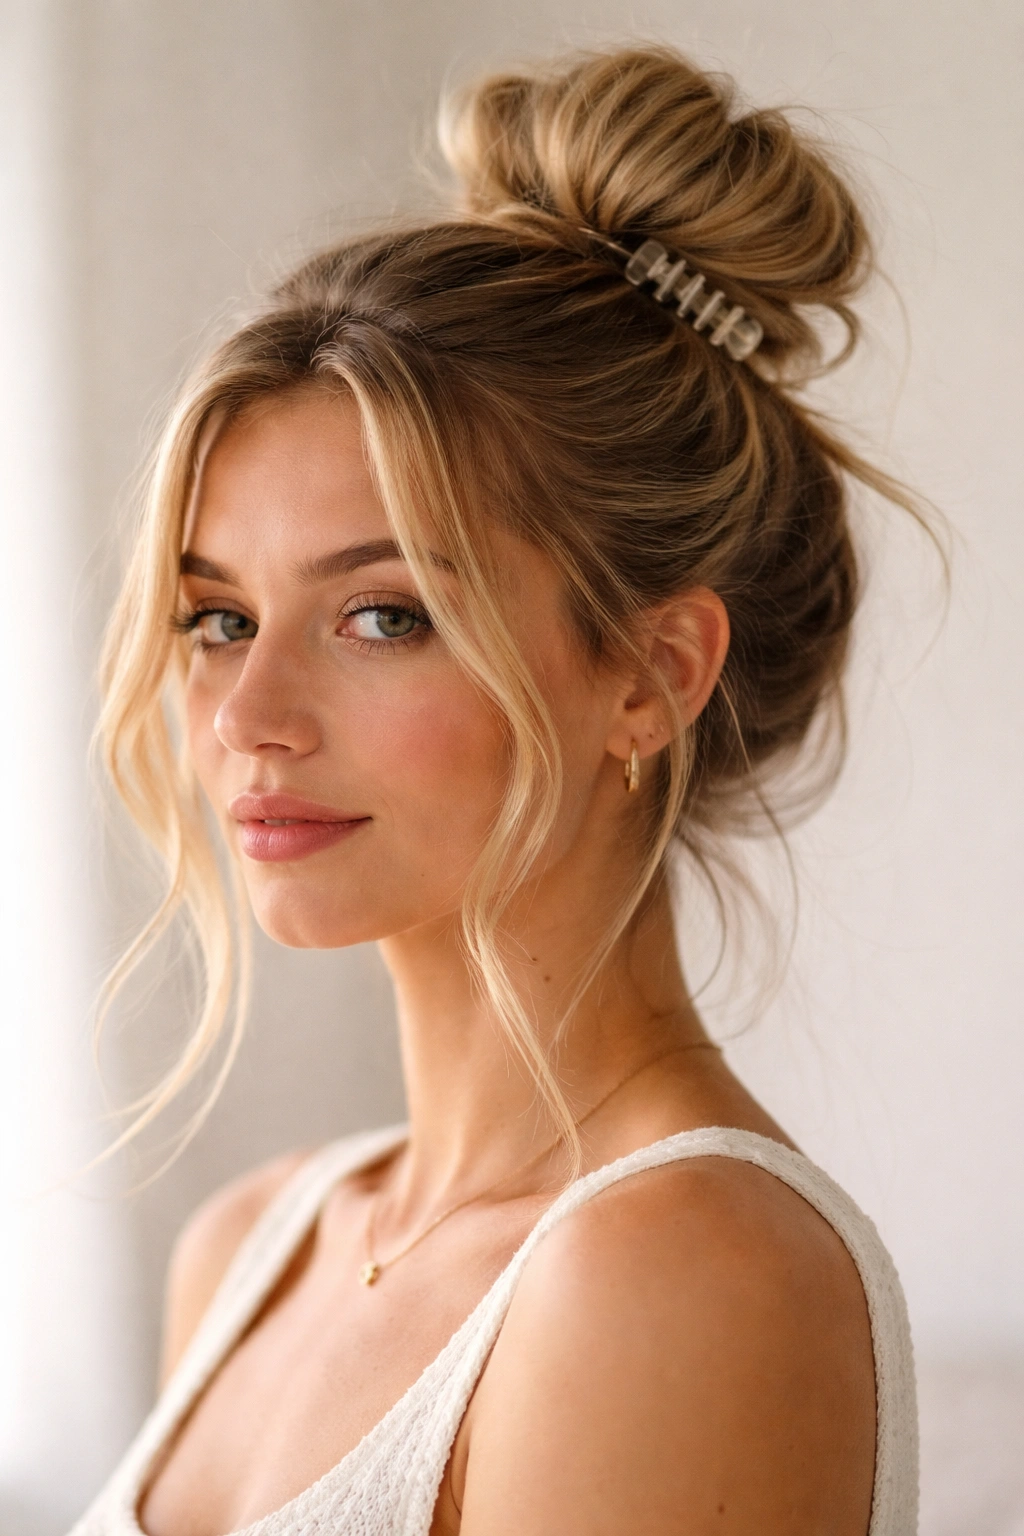
The topknot is a classic, and when done with a claw clip, it becomes a textured, modern take on a traditional style. This version emphasizes the undone, slightly-fallen-out quality that makes contemporary style feel fresh rather than perfectly groomed. The bun sits at the very crown of your head and is deliberately loose and relaxed, with pieces falling around your face and neck. It’s the kind of bun that actually looks better slightly messy than if you tried to tighten it up.
The Gathering Technique
Rather than brushing your hair tightly back into a ponytail, loosely gather it toward the crown using just your fingers. Run your fingers through your hair, gathering sections as you go, but don’t create a tight, pulled-back appearance. You want to maintain movement and softness at the hairline and around your face from the very beginning. Some pieces should escape this gathering naturally—don’t force everything into submission.
Creating the Loose Knot
Once gathered, create a simple knot by crossing the gathered section over itself a few times, allowing it to naturally coil and wrap around. Don’t pull this tight—the knot should look loose and relaxed, like you literally just knotted your hair to get it out of your face. Secure this knot with your claw clip positioned through the center, gripping securely but not flattening the knot.
The Art of Letting Pieces Fall
The success of this style depends on how many pieces you let fall and how you arrange them. Pull out at least three or four longer pieces to frame your face, leaving them mostly straight or gently waved. Let shorter pieces fall around your neck and temples. Some pieces should be intentionally asymmetrical—not all the same length or texture. This asymmetry is what prevents the style from looking too constructed or deliberate.
Texture and Movement
If your hair is naturally straight, add some light waves or texture to the pieces falling around your face and neck. This creates visual movement and prevents the style from looking too stark. You can use a curling iron, a salt spray, or just work with your hair’s natural texture. The undone topknot shouldn’t look perfectly groomed—it should look like you might take it down and redo it at any moment.
Insider note: This style looks even better on slightly damp hair or hair with a light salt spray applied. The texture helps strands stay separated and creates that genuinely undone appearance without requiring multiple styling products.
8. The Side-Swept Messy Bun
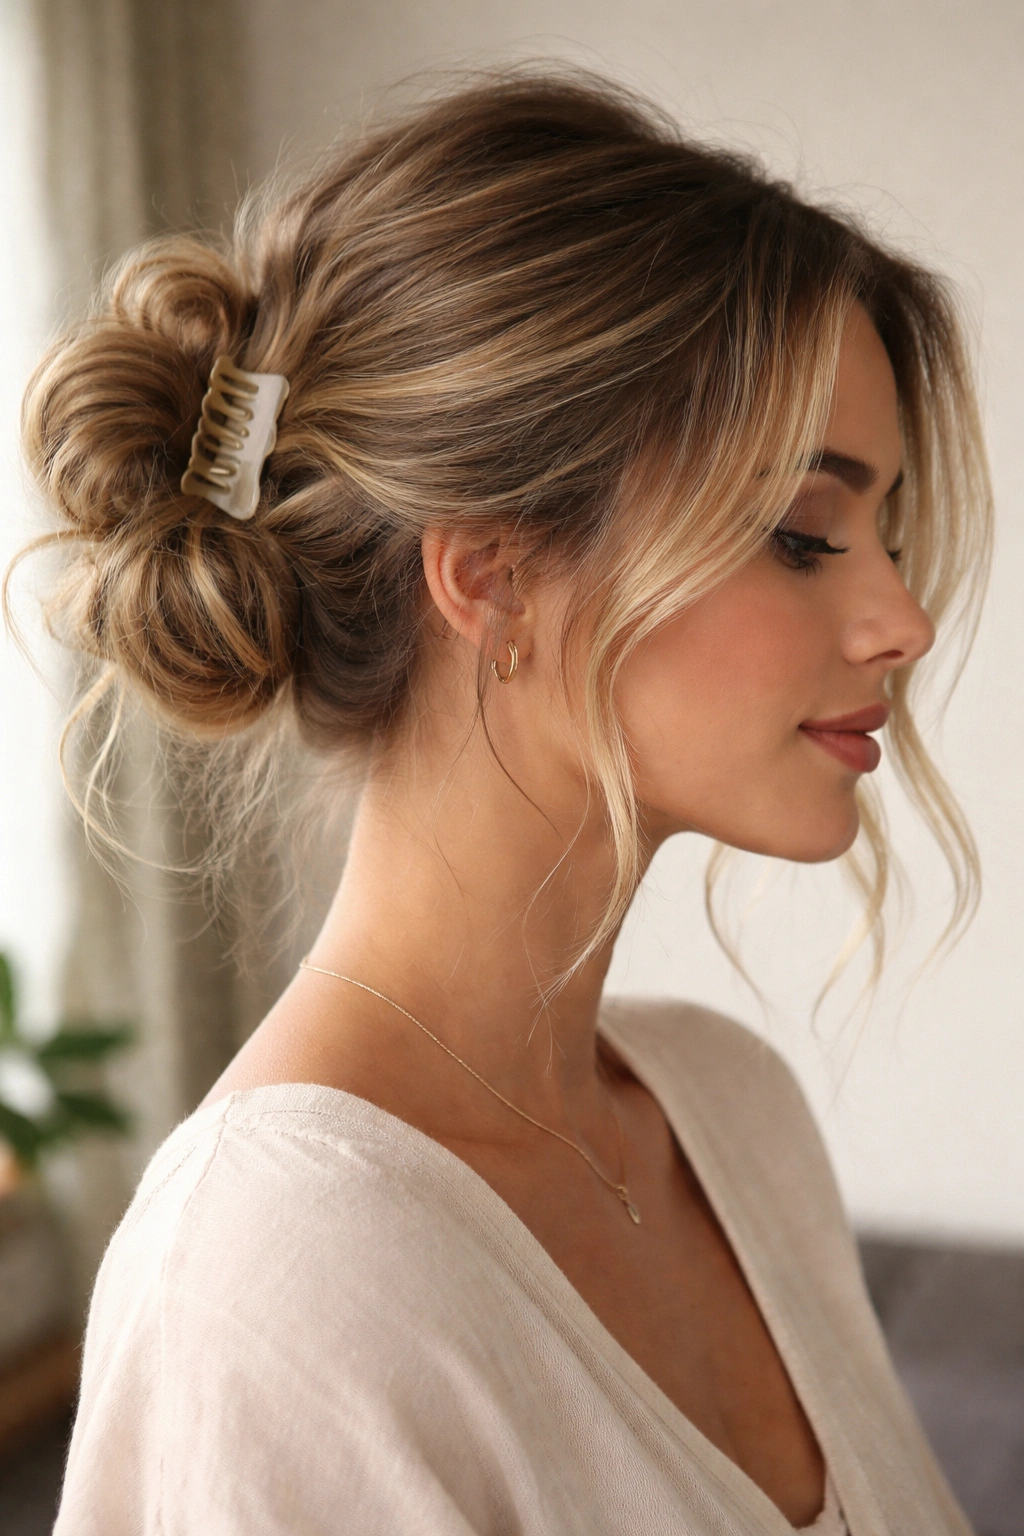
Position the entire bun to one side of your head rather than centering it, creating an asymmetrical, romantic silhouette. This style works beautifully with face-framing pieces and creates an elegant, deliberately styled appearance that still maintains the messy, textured aesthetic. The side-swept bun has a slightly more polished feel than some other messy bun variations, making it perfect for occasions where you want to look put-together while maintaining that effortless vibe.
Gathering to One Side
Rather than gathering your hair at the crown or the nape, gather it to the side—either the left or right depending on which way your hair naturally falls or which side you prefer. Brush or run your fingers through your hair, directing everything toward your chosen side. The gathering point should be somewhere between ear-level and the back of your head, depending on how dramatic you want the sweep to be. You can create more of a dramatic sweep by gathering lower, or a subtler sweep by gathering higher.
Creating the Textured Knot
Once gathered to the side, twist or knot the gathered hair loosely, allowing it to coil and wrap around itself. The key is maintaining texture and looseness rather than creating a tight structure. The twisted or knotted section should sit at an angle rather than straight, emphasizing the swept nature of the style. Secure with your claw clip positioned to anchor the knot while maintaining its relaxed appearance.
The Art of Face-Framing
This style absolutely requires strategic face-framing pieces to balance the asymmetry of having all your hair on one side. Pull out at least two longer pieces from the opposite side of your face to create balance and softness. These pieces should be noticeably separated and textured, not perfectly smooth. You can gently wave these face-framing pieces to create additional movement and romance.
Creating Visual Interest with Angles
The side-swept bun is all about angles and asymmetry creating visual interest. Your part (if you create one) should work with the asymmetry rather than fighting against it. If you sweep to the right, a deep part on the left side amplifies the effect. The pieces falling around your face and neck should also be strategically asymmetrical—longer on one side, shorter and wispy on the other.
Pro tip: This style photographs beautifully if you turn your head slightly toward the side with the bun, showing off the shape and texture. The angle of your head in relation to the bun placement creates a flattering, intentional appearance.
Final Thoughts
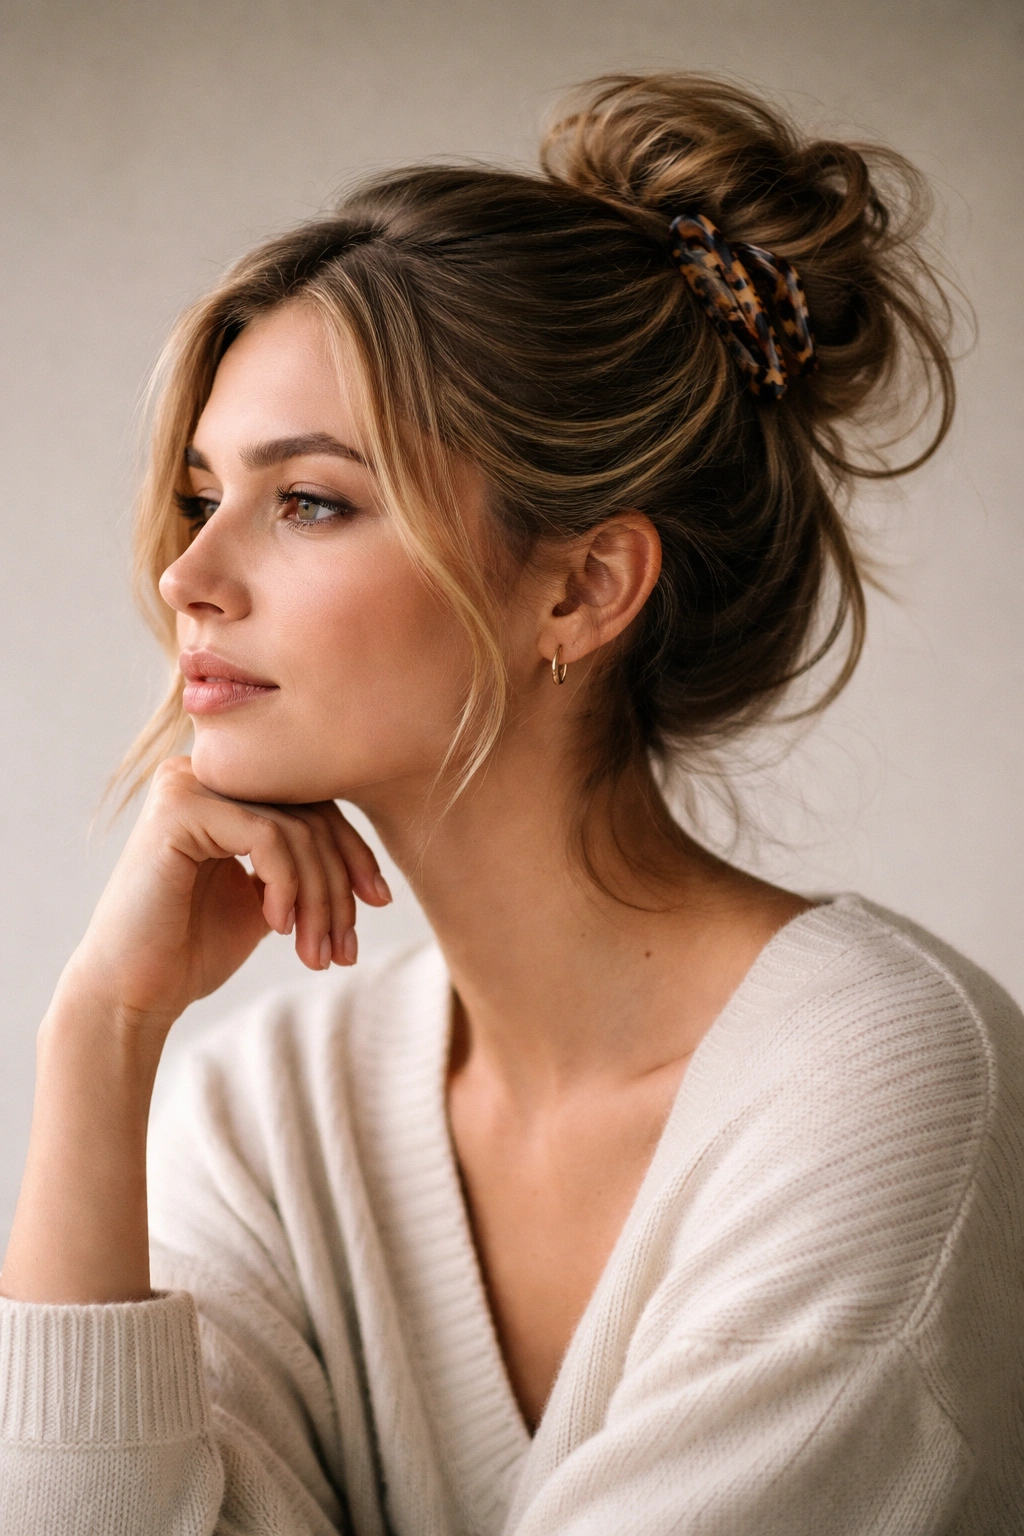
The magic of styling messy buns with claw clips is that they celebrate imperfection and natural texture rather than fighting against it. Each of these eight variations shows how a single tool can create dramatically different results depending on how you approach gathering, twisting, knotting, and clipping your hair. The beauty lies not in precision or perfection, but in the intentional looseness and the way you play with layers, asymmetry, and texture.
What makes these styles work is understanding that “messy” doesn’t mean careless or poorly executed—it means thoughtfully undone. You’re making deliberate choices about which pieces to release, how much texture to emphasize, and where to position your clip for maximum visual impact. A truly successful messy bun is one where someone looking at you thinks you woke up with incredible hair, not that you spent an hour frantically trying to fix your hair situation.
The versatility of claw clips means you can move between these styles depending on your mood, the occasion, or how much time you have to style your hair. Some days you might want the drama of a voluminous crown bun; other days, the elegance of a side-swept style feels exactly right. The wonderful part is that all of these options are genuinely achievable without professional styling skills, expensive tools, or hours of your time. A claw clip, your hands, and an understanding of how texture and positioning work together is all you actually need.
