



There’s something liberating about throwing your hair up into a messy bun. You can go from feeling like you’ve just rolled out of bed to looking intentionally cool and put-together in literally two minutes—sometimes even less if your hair cooperates. The best part? A good messy bun works whether you have fine, delicate hair or thick, coarse locks. It flatters round faces, long faces, oval faces, and everything in between. The key is finding the right style for your hair type, face shape, and lifestyle.
The messy bun has become a wardrobe staple not because it’s lazy (though it certainly can be) but because it’s genuinely versatile. You can wear one to the gym, to run errands, to brunch, or even to casual work settings. It works with casual clothes, business casual, and even some semi-formal situations depending on how you execute it. The challenge most people face isn’t whether they can wear a messy bun—it’s figuring out which messy bun actually looks good on them and how to recreate the look consistently.
This isn’t about complicated techniques or requiring four different texturizing products. The styles below range from what you can do with wet hair in under sixty seconds to slightly more intentional versions that take maybe five minutes from start to finish. Some work better on certain hair types and textures, but each one has variations that can be adapted to what you’re working with. Whether your hair is stick-straight, naturally wavy, tightly coiled, or somewhere in between, you’ll find at least a few messy bun styles in this collection that genuinely suit you—and actually look as good as the ones you see in photos.
1. Classic High Messy Bun
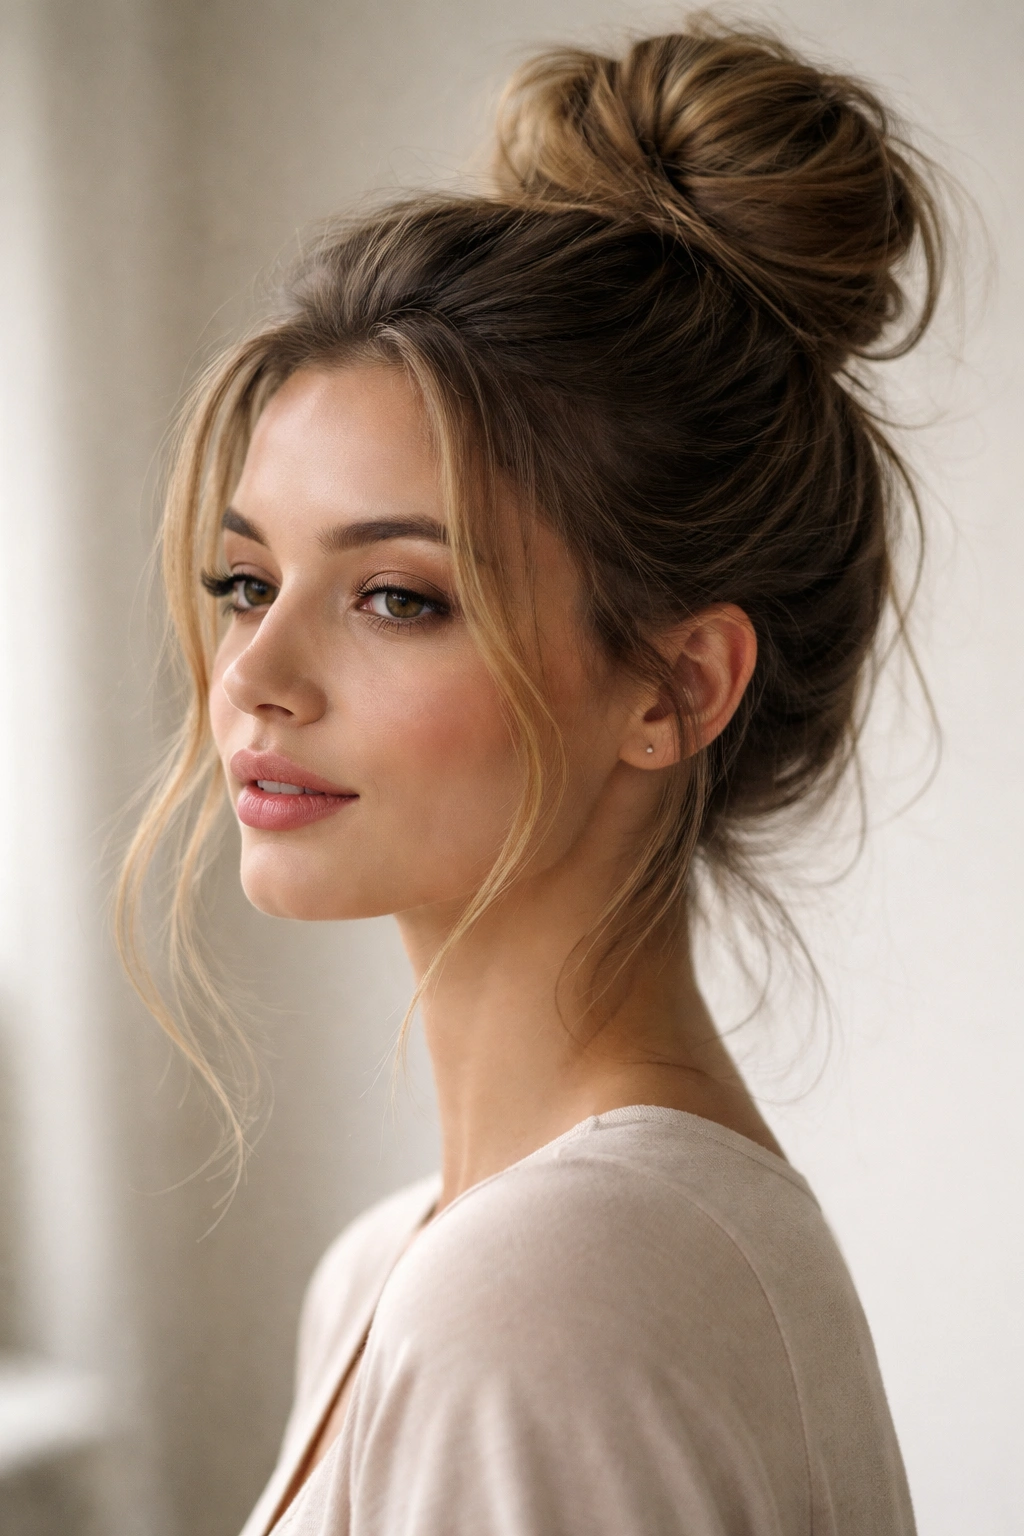
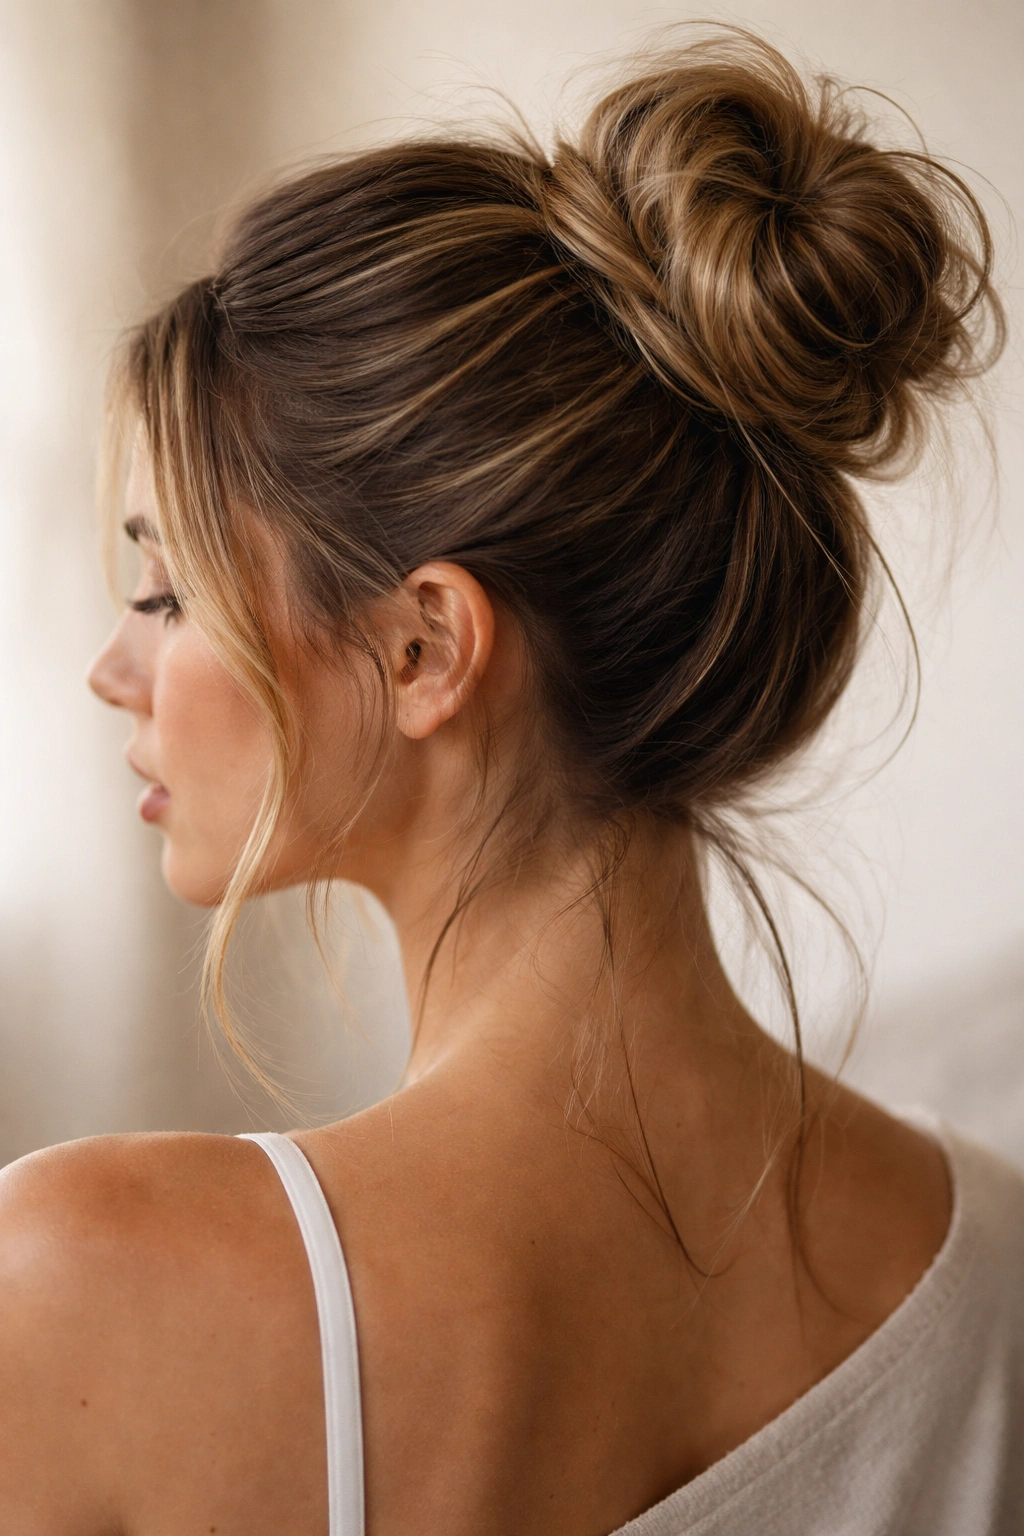
The classic high messy bun sits at the crown of your head and is probably the most universally flattering messy bun style you can create. It elongates the face, adds height without requiring volume elsewhere, and works on virtually every hair type and length from shoulder-length to very long. The reason this style has lasted through fashion cycles is simple: it actually looks polished despite being chaotic, and it photographs well from nearly every angle.
Why It Works for Everyone
A high messy bun creates the illusion of a lifted face and a longer neck, which is why it’s so flattering on most face shapes. It draws the eye upward and frames your features without being restrictive or pulling hair uncomfortably tight. Unlike sleek buns that require perfect smoothness, the intentional messiness of this style actually looks better the more effortless it appears—which means imperfections are features, not flaws.
How to Create the Classic High Messy Bun
Start with hair that’s been brushed or combed through but isn’t perfectly neat—second-day hair or hair with some texture is actually ideal. Flip your head forward and gather all your hair at the crown of your head as if you’re making a high ponytail, then secure it loosely with an elastic band. Don’t pull it too tight; you want the base to feel secure but not uncomfortably taut. Once the ponytail is in place, gently twist it or loop it around the base and secure the twisted section with bobby pins, tucking the ends beneath the bun rather than leaving them poking out. Now comes the important part: use your fingers and a few bobby pins to pull out small sections and create that lived-in, undone texture. Pull gently from underneath to create dimension, then secure any loose pieces with bobby pins as needed.
Styling Tips and What to Know
The secret to this style looking intentionally messy rather than actually messy is strategic pin placement. You want just enough bobby pins to keep the bun secure while looking like it barely took any effort. If you have very fine or slippery hair, try using a texture spray or dry shampoo before creating the bun—this gives your hair grip and makes the whole thing hold better throughout the day. For curly or coily hair, you might skip the brushing step entirely and just gather your curls as they are, which creates beautiful natural texture right away.
2. Low Messy Bun
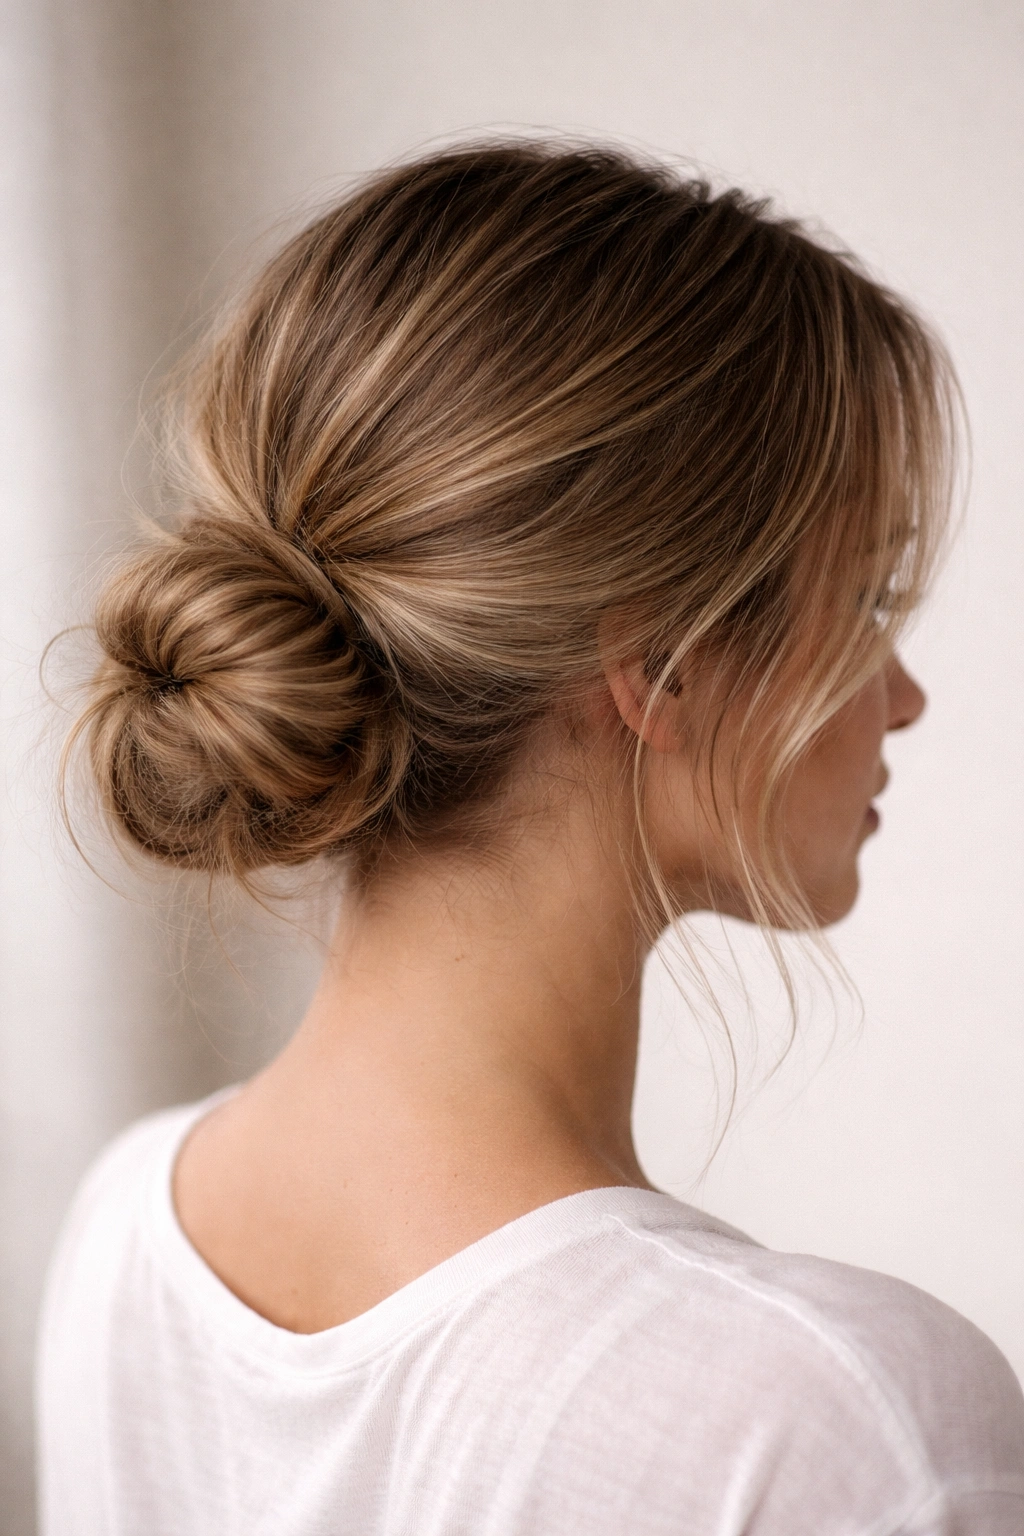
The low messy bun sits at the nape of your neck and offers a more refined, slightly dressier take on the messy bun trend. It works especially well if you have a longer face or want something that feels a bit more polished than a high bun. This style is office-appropriate, date-night appropriate, and generally reads as more intentional without requiring significantly more effort to create.
Why It Suits Different Hair Types
A low messy bun is incredibly forgiving because gravity helps hold everything in place. It’s harder for hair to slip out or come loose throughout the day compared to a high bun, which is especially helpful if you have fine, slippery hair. The lower placement also means you can create more volume and texture without the bun feeling too heavy on your head or making your neck look shorter. It’s one of the best options if you want the ease of a messy bun but need something that lasts through a full workday or event.
Creating the Low Messy Bun Step by Step
Flip your head forward and gather your hair at the nape of your neck—imagine you’re making a low ponytail you’d wear to a formal event. Secure it with an elastic, but again, not too tightly. Twist the ponytail or loop it and pin it to the base, securing it with bobby pins. The twist or loop should sit against your head rather than sticking out away from it. Pull out small sections with your fingers to create texture, then go through and add bobby pins to secure the loose pieces. A few strands left out around the face are welcome here and actually add to the polished-but-undone effect.
Tips for Making It Last All Day
Use bobby pins that match your hair color for an invisible hold. If you’re worried about slipping, apply a tiny bit of texturizing powder or dry shampoo before creating the bun—it gives your hair something to grip onto. Make sure you’re pinning from underneath the bun, securing it to the hair underneath rather than relying solely on the elastic to hold everything.
3. Messy Bun with Bangs
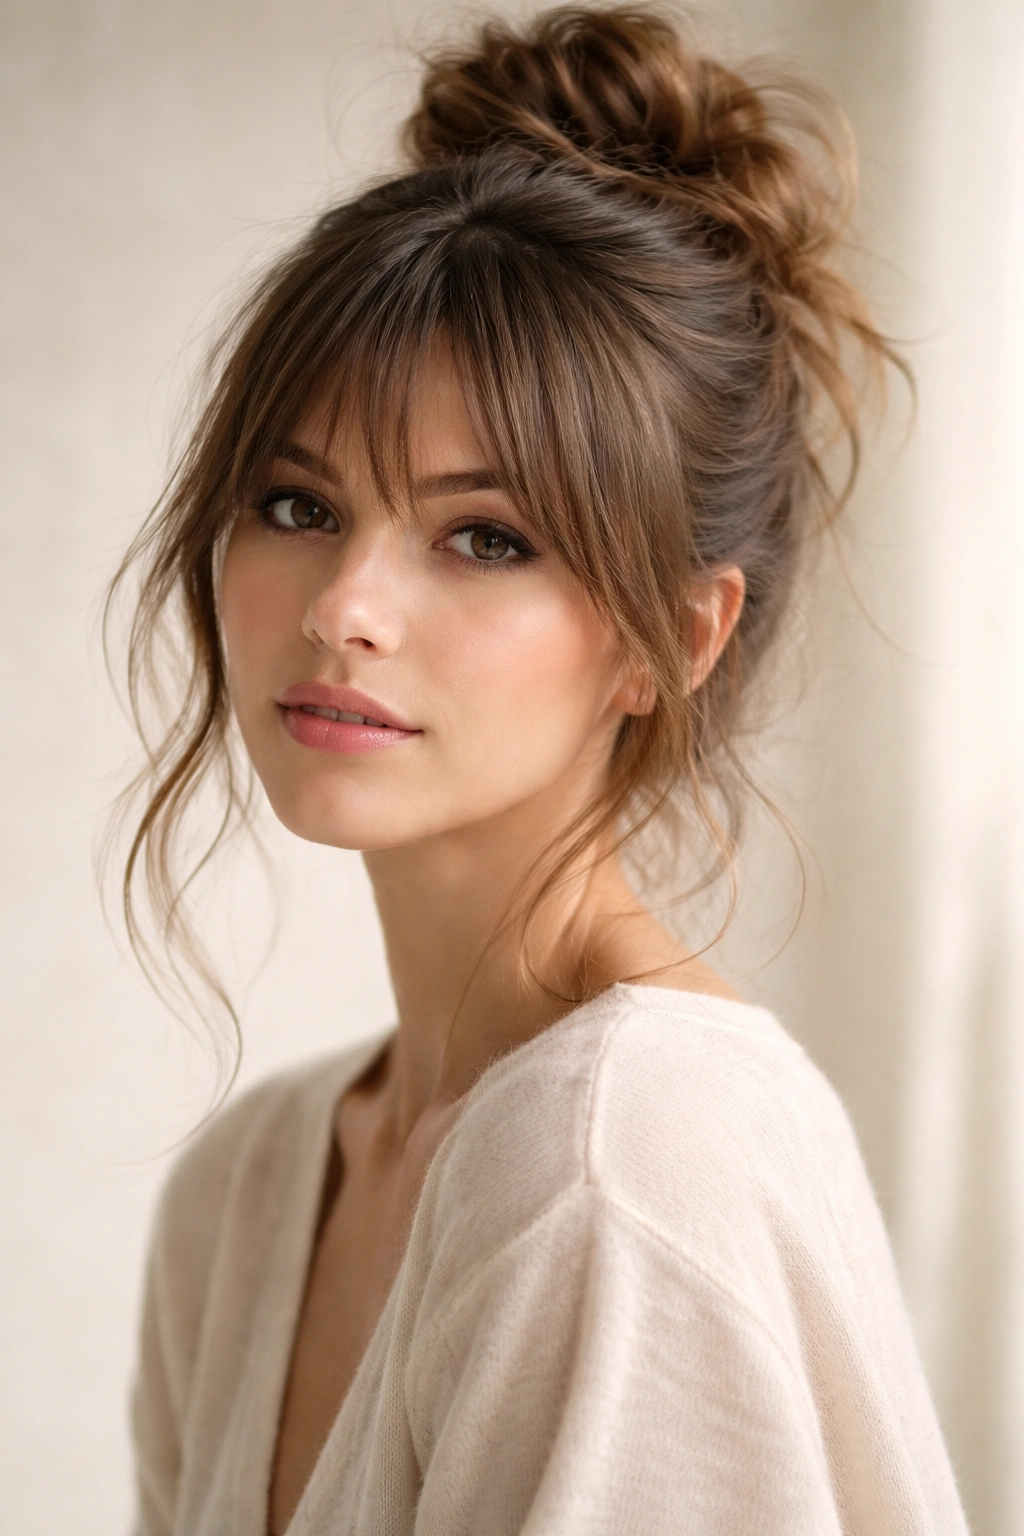
If you have bangs or are thinking about getting them, a messy bun with bangs creates a chic, intentional look that feels very current and stylish. The bangs frame your face while the bun keeps everything else controlled and off your face—it’s an excellent option if you find full messy buns make your face feel too bare or if you want that sweet spot between “hair down” and “hair fully up.”
Why Bangs Change the Game
Bangs completely transform how a messy bun photographs and how it makes you feel. They add a layer of interest, draw attention to your eyes, and create a face-flattering frame without you needing to style your hair in a more complicated way. Even if your bun is imperfectly messy, bangs give you a polished focal point that reads as intentional. This is also one of the only messy bun styles where some people intentionally keep the back slightly less messy than usual, creating more contrast with the deliberately piece-y bangs in front.
How to Build This Look
Your bangs stay down and frame your face exactly as you’d normally style them. For the rest of your hair, gather everything back into a high or mid-height messy bun using the same technique as the classic version. The bangs remain separate and create a sophisticated border around your face. If your bangs are longer or side-swept, they interact beautifully with the height of the bun behind them.
What to Know About Styling
This look works best with bangs that are cut intentionally—blunt, wispy, or side-swept all work, but they should be actually styled as bangs rather than just longer pieces of hair. You can style your bangs however you normally would: blow-dried straight, curled slightly, textured with product, or left to fall naturally. The bun behind is your canvas for that undone, textured aesthetic, so don’t hold back on pulling out pieces and creating movement there.
4. Side Messy Bun
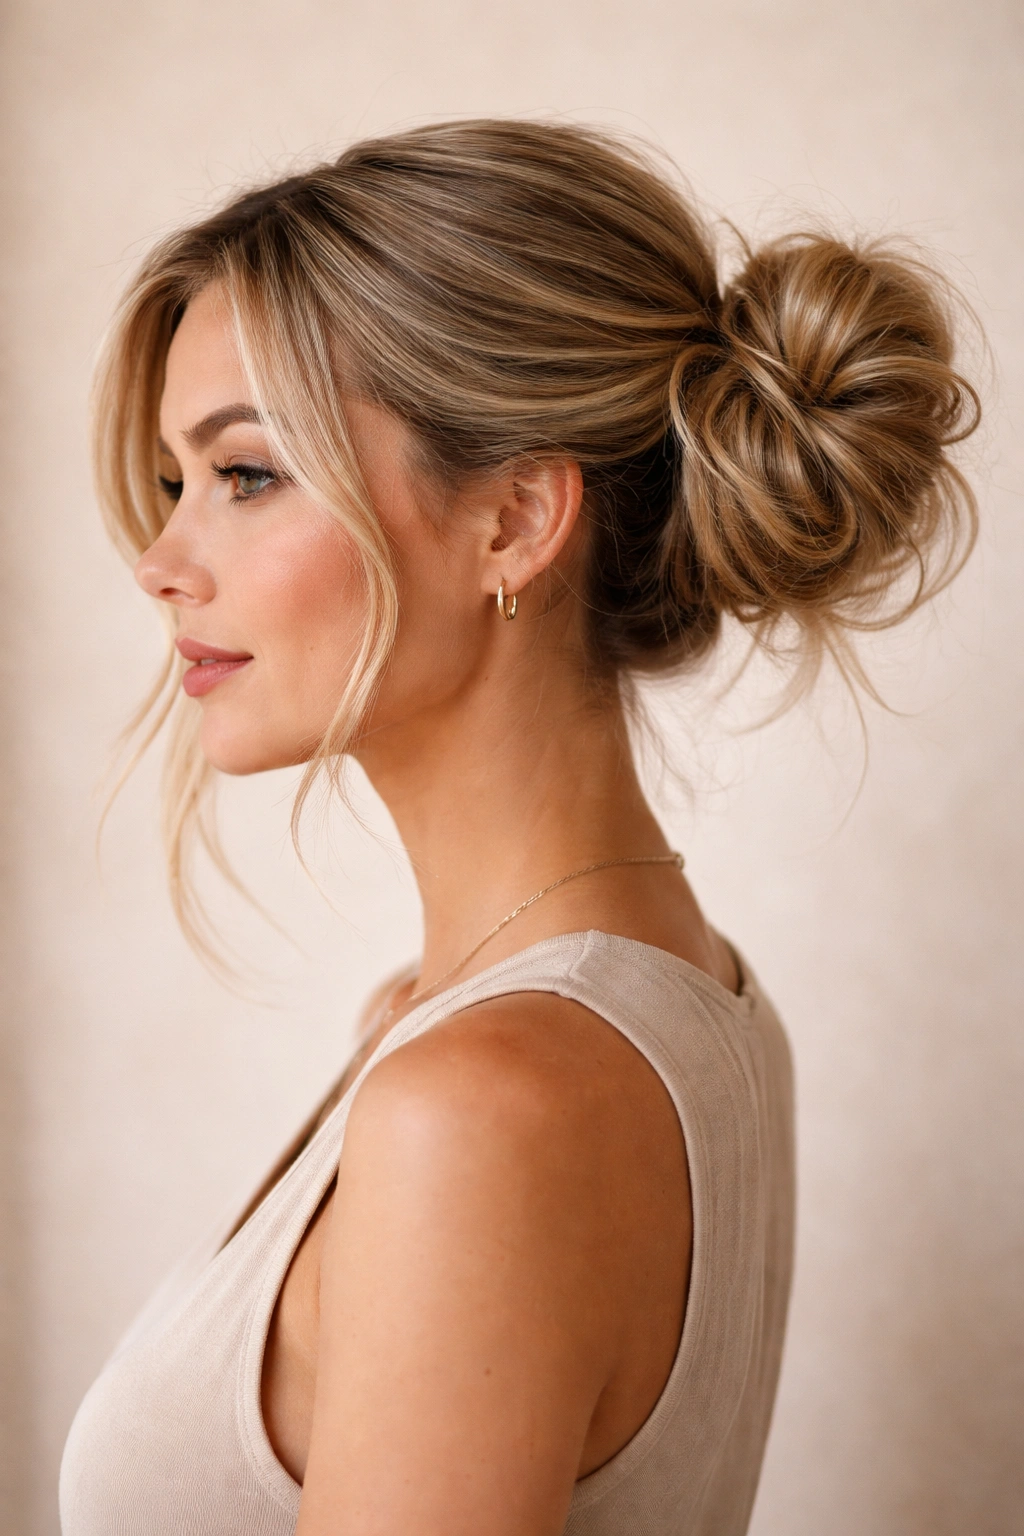
A side messy bun sits off to one side of your head rather than at the crown or center back. It’s playful, slightly more fashion-forward than a center bun, and genuinely flattering on people who feel like center-positioned hair makes their face feel too exposed. It also tends to look intentionally styled rather than rushed, which makes it great for times when you want the ease of a messy bun but the polish of something that looks planned.
Why This Style Feels Different
By shifting the bun to the side, you create asymmetry that feels more modern and intentional. It also means the opposite side of your face gets more definition and framing, which is flattering if you want to highlight one side of your face or if you just prefer the look of an asymmetrical style. This bun also tends to feel less “hair emergency” and more “I meant to do this,” which is partly psychology but also just the visual reality of off-center placement.
Creating a Side Messy Bun
Flip your head to one side and gather all your hair toward one side of your head, as if you’re making a side ponytail. Secure it with an elastic, then twist or loop it and pin it in place at the side of your head. You can make it positioned more toward your ear or more toward the back of your head—both work beautifully. Once you’ve secured the base, pull out sections to create that messy texture, and secure with bobby pins as needed. One or two face-framing pieces on the other side of your head complete the look.
Styling Notes for Longevity
The side position actually makes this bun slightly more secure than a crown bun because it’s positioned where it’s less likely to get knocked or bumped. Make sure your elastic is tight enough to hold securely, since there’s nothing else (like the crown of your head) helping gravity do the work. You can also do this style with a slightly tighter base than you might for a high bun and still maintain the undone aesthetic once you’ve fluffed out the texturized sections.
5. Messy Top Knot
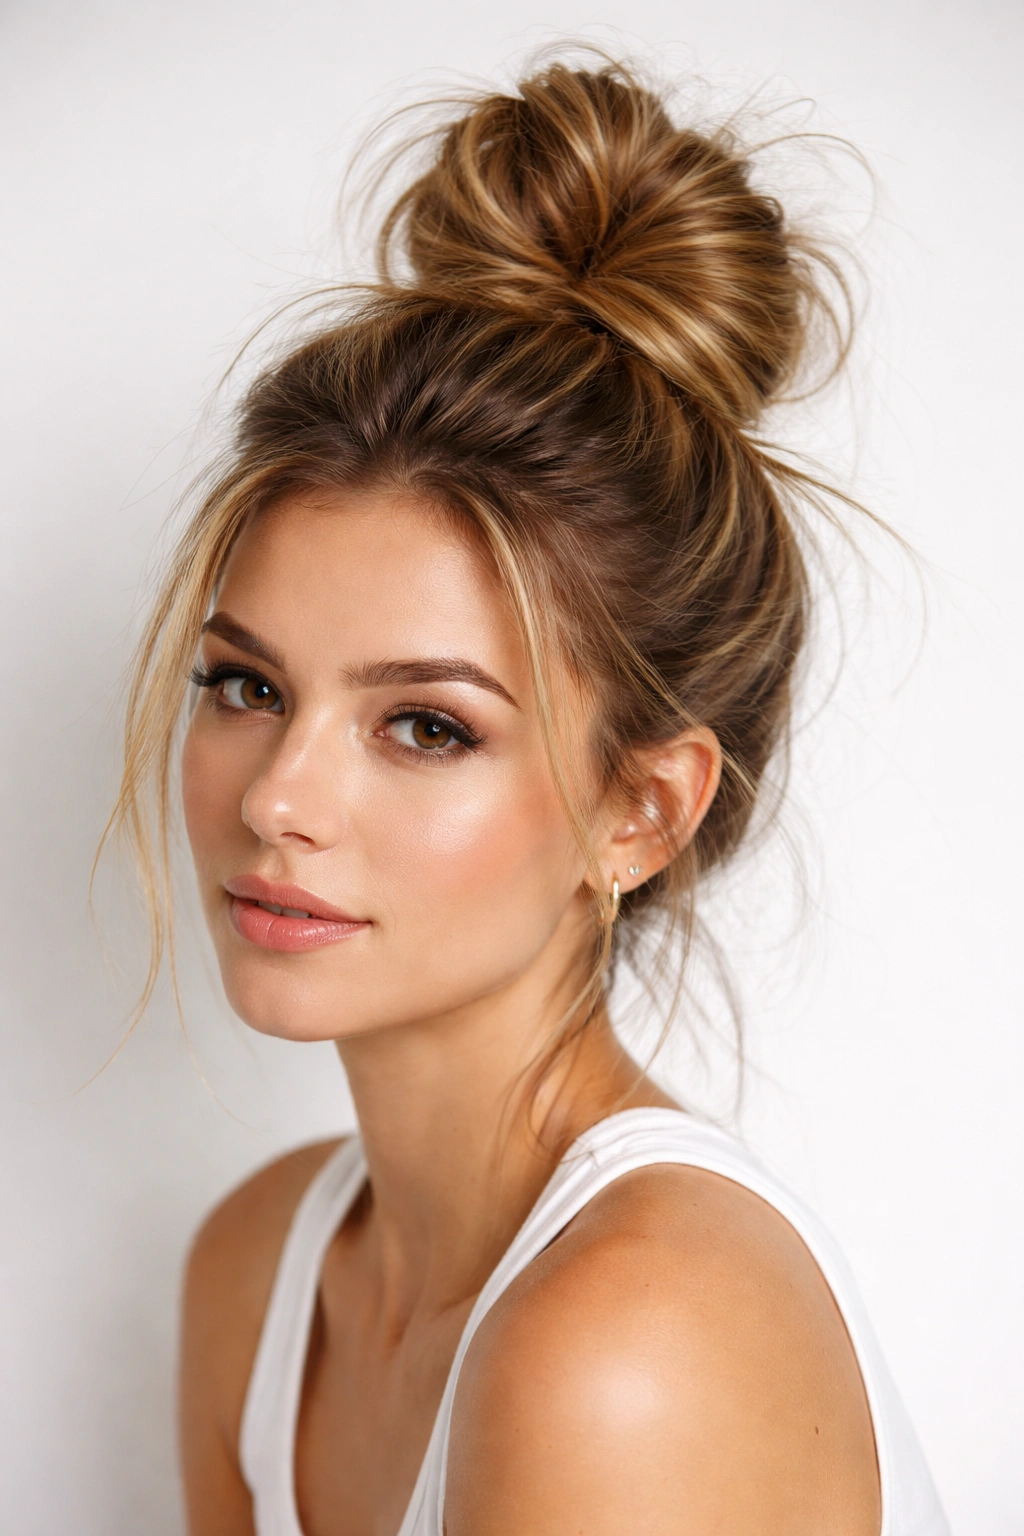
A messy top knot is even higher and tighter than a classic high messy bun—it sits at the very crown of your head and often has a slightly perkier, more deliberately styled appearance. Think of it as the messy bun’s cooler, more fashion-conscious cousin. It’s excellent if you want something that feels intentionally styled rather than like you’re just trying to get your hair out of the way.
Why It’s Flattering
A top knot at the very crown of your head creates a focal point and draws all the attention upward, which elongates the face and neck. It makes you look taller and can be incredibly flattering on people with rounder face shapes. The high placement also means you’re not putting any weight on the back of your head or neck, which is comfortable for all-day wear. The key difference between a top knot and a high bun is positioning—a true top knot sits higher, almost as if it’s balanced on top of your head rather than gathered at the crown.
How to Create a Messy Top Knot
Pull your hair straight up to the very top of your head—higher than you would for a regular high ponytail. You want the base to sit almost on the crown or even slightly forward of it. Secure with an elastic band and twist the hair or wrap it around the base, pinning it securely. This style can handle a slightly tighter base than other messy buns because the high placement feels less severe. Once it’s secure, pull out sections to create texture, but keep the overall shape more compact and defined than you would for a looser messy bun.
Styling Considerations
A top knot requires slightly more intentionality than a classic messy bun—you’re creating a specific shape rather than an organic pile of hair. This is actually what makes it so versatile; you can make it look sporty, fashion-forward, or polished depending on how much texture you pull out and how sleek you keep the base. Try using a tiny bit of styling cream or texture spray to help shape it and keep it exactly where you want it.
6. Double Messy Buns
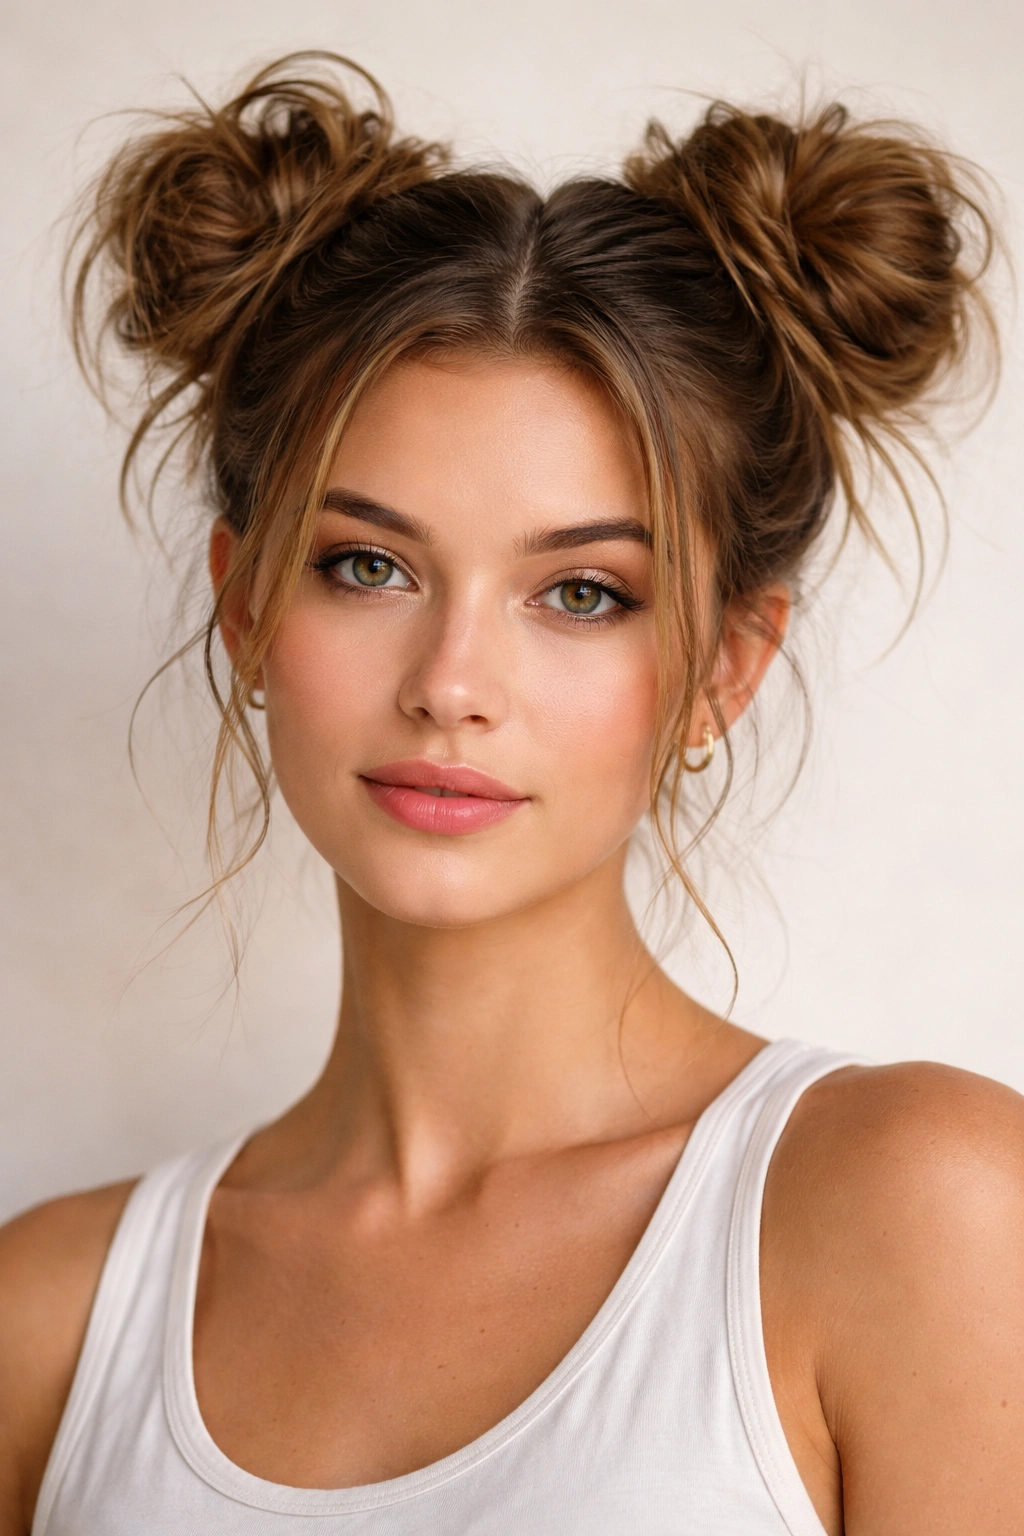
Double messy buns mean exactly what they sound like: two separate buns, typically one on each side of your head. This style is playful, youthful, and unexpectedly sophisticated if styled with intention. It works wonderfully if you have thick hair that looks overwhelming in a single bun, or if you just want something that feels different and deliberately styled.
Why This Style Is Worth Trying
Double buns create a sense of balance and symmetry that’s visually appealing, even though each individual bun is intentionally messy. They also distribute hair more evenly across your head, which means you’re not putting all your hair weight in one spot. If you have very thick hair, two buns can actually be easier to manage and hold better throughout the day than one large bun. The style also reads as intentional and playful rather than practical, which makes it feel fun rather than rushed.
Creating Double Messy Buns
Start by parting your hair down the middle—from your forehead to the nape of your neck. You can do this with a precise part or a slightly more textured, undone part depending on the vibe you’re going for. Take one section and create a high messy bun on one side of your head, then repeat the exact same process on the other side. The key is making sure both buns are positioned at the same height and roughly the same size so the style feels intentional rather than accidental. Once both are secure, pull out sections equally from both to create balanced texture.
Styling Tips
This look works best when you don’t try too hard to make everything perfect. Leave a few pieces down on the sides if you want, let the buns be slightly different sizes or levels of messiness, and don’t overthink it. The more effortless it looks, the better it reads. You can also vary this by doing one high bun and one low bun, or one tight and one loose—experiment and see what feels best on your head.
7. Textured Messy Bun with Waves
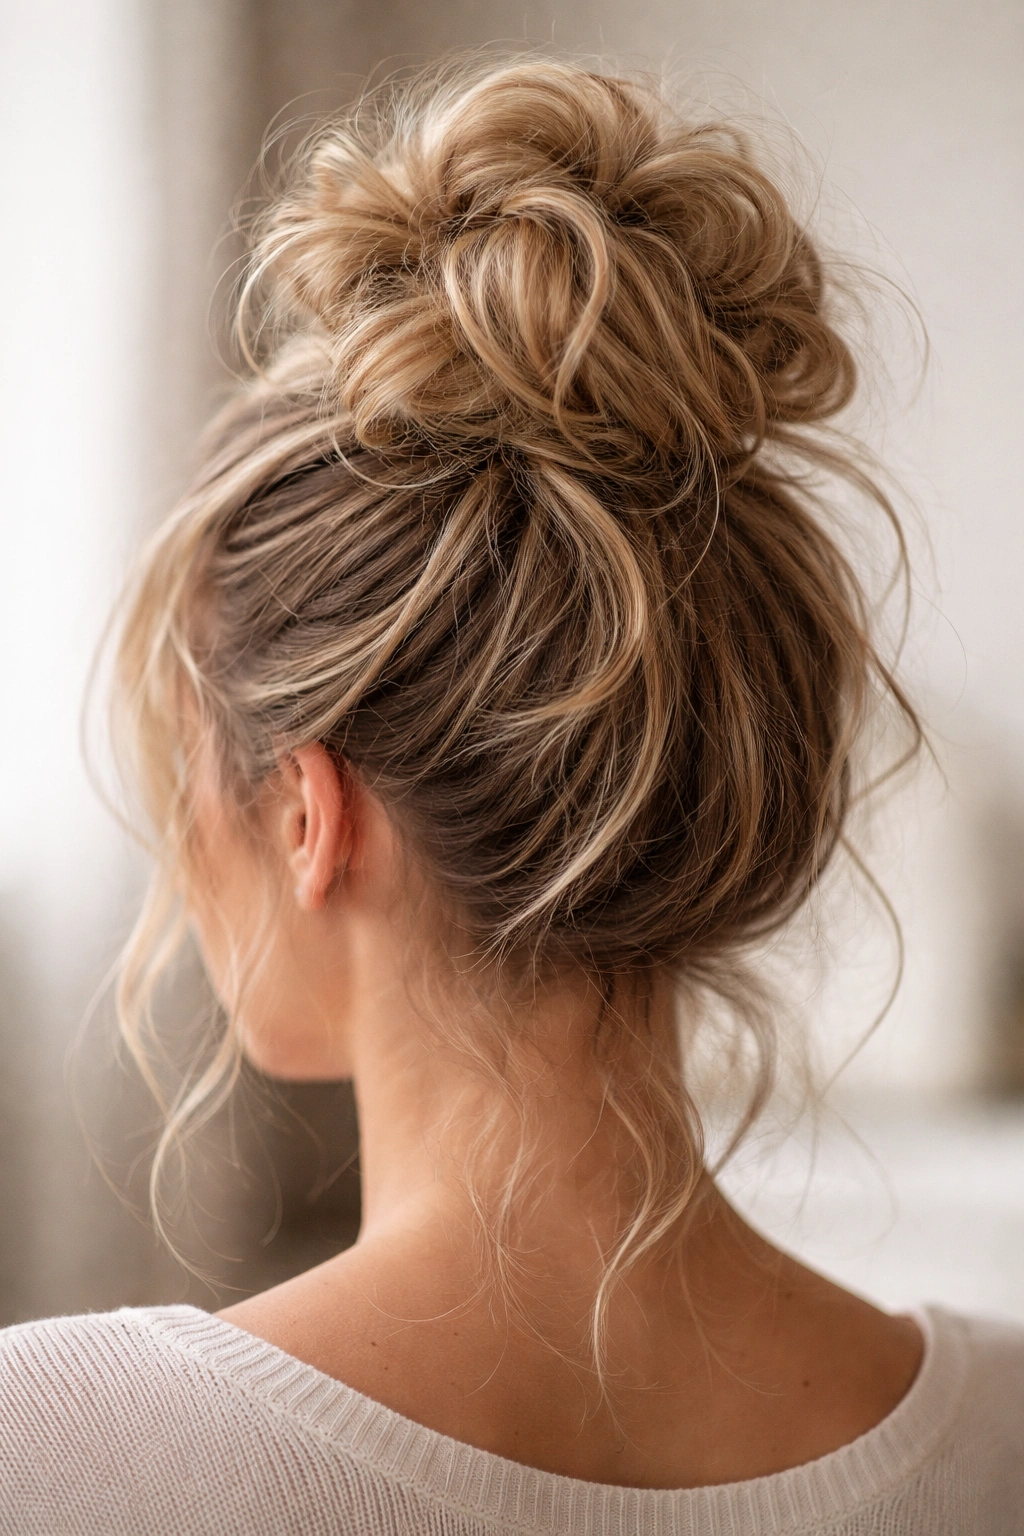
A textured messy bun with waves takes advantage of pre-existing wave or curl texture in your hair, creating a bun that looks extra voluminous and interesting. If your hair is naturally wavy, you can enhance the texture before gathering it into a bun. If your hair is straight, you can create waves or curls beforehand and then gather them into the bun, which gives you a much more impressive-looking final result than starting with straight hair.
Why Texture Matters
Texture changes everything about how a messy bun looks. Waves and curls naturally create volume, visual interest, and a sense of movement that straight hair gathered into a bun simply can’t achieve. When you start with textured hair, you need to pull out fewer pieces and do less “work” to create an impressive messy bun—the texture does the heavy lifting for you. This style is especially good if you want a messy bun that photographs well or if you just love how waves look on you.
How to Create Waves First
If your hair is straight, you have several options: use a curling iron to create loose waves throughout your hair (don’t aim for tight curls—you want soft, brushed-out waves), use a sea salt spray and scrunch your hair to encourage texture, or let your hair air-dry after misting it with water and a wave-enhancing product. You can also braid your hair while damp and let it air-dry or sleep on the braids, then release them in the morning for natural-looking waves. Once your hair has texture, gather it into a messy bun using the same technique as the classic version—but you’ll find the bun looks fuller and more impressive with minimal effort.
Pro Tips for Maximum Texture
Use a texturizing spray or dry shampoo on the waves before gathering them into a bun—this adds grip and makes the whole thing hold better. You can also lightly brush out your waves to make them softer and less curl-defined before gathering them, which creates a more effortless, undone wave texture. This style works beautifully with any hair length and is particularly impressive on medium to long hair where you have enough length to create substantial texture.
8. Sleek High Messy Bun
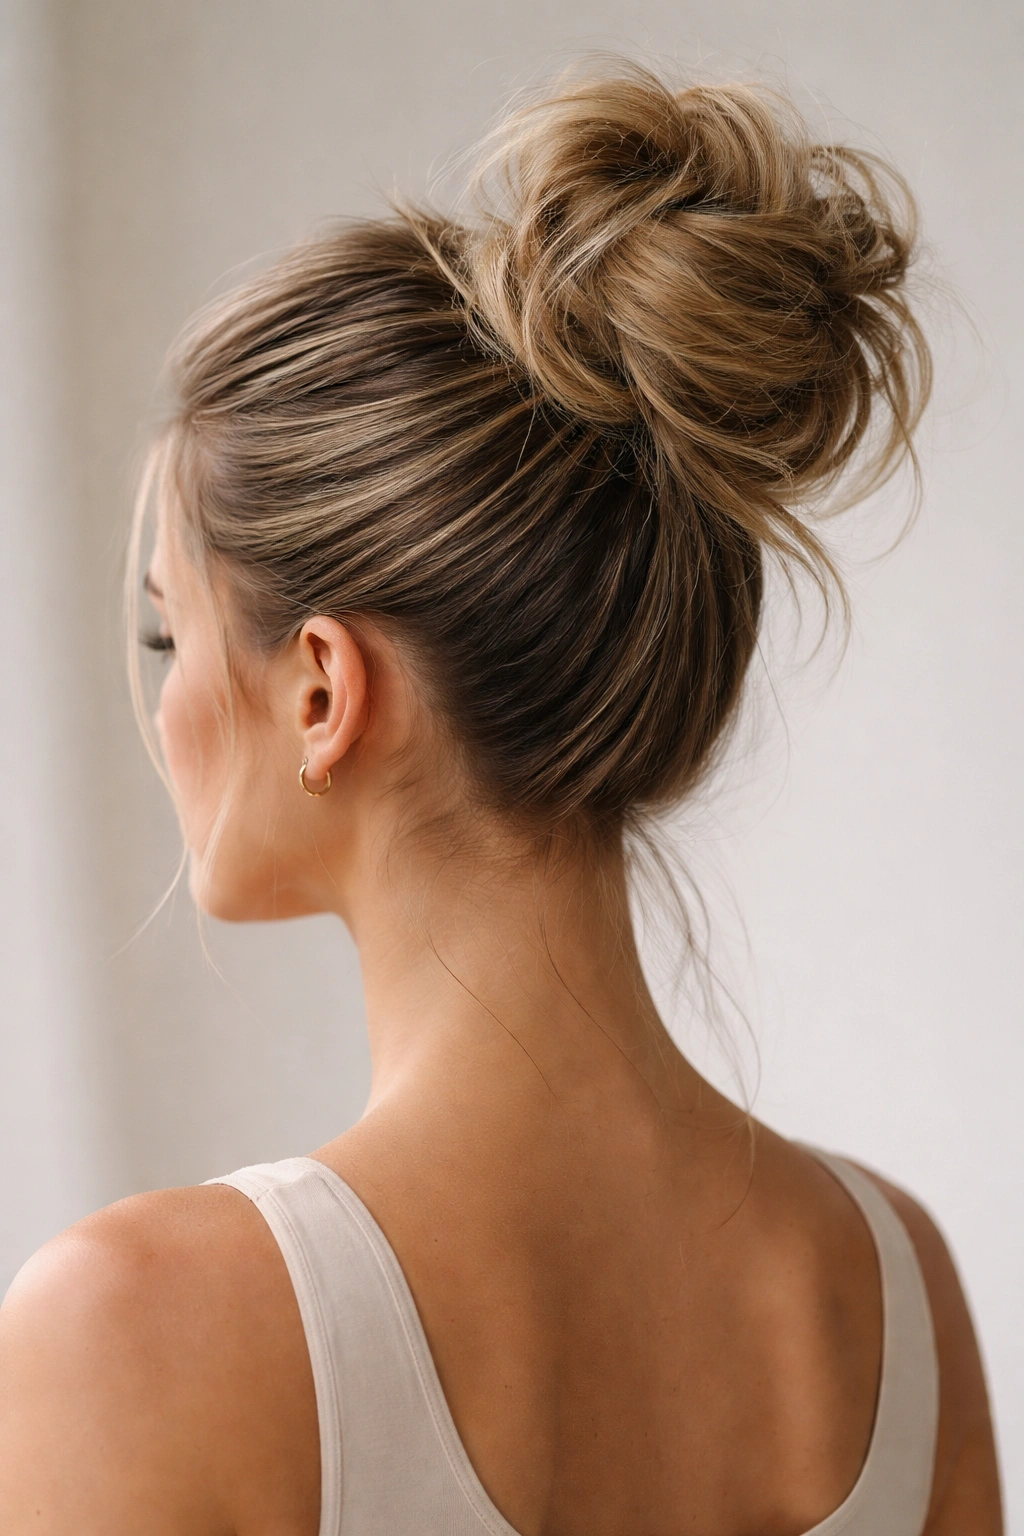
A sleek high messy bun sounds like a contradiction, but it’s actually one of the most sophisticated messy bun options. The base is sleek and controlled—pulled back smoothly with no flyaways—while the bun itself is deliberately messy and textured. This style bridges the gap between “polished” and “undone,” making it perfect for professional settings, special events, or any time you want to look intentional and put-together.
Why Sleek Bases Are Better Than You Think
A sleek base actually creates more drama and visual interest when contrasted with a messy bun. It says “I took time with this” rather than “I threw this together,” even though creating a sleek base might actually take a similar amount of time as other messy bun methods. The sleek back also tends to be more flattering on certain face shapes, particularly if you have a rounder or wider face and want more definition through the cheekbones.
How to Create a Sleek Base
Start with hair that’s either very smooth naturally or slightly damp. Use a fine-toothed comb to smooth your hair back—you can apply a smoothing serum or gel if you have flyaways or texture. Pull your hair into a high ponytail, and smooth it back as you go, using bobby pins or a smoothing brush to keep everything in place. Once you have a smooth, sleek ponytail secured with an elastic, then create your messy bun by twisting the ponytail, wrapping it around the base, and pulling out pieces to create texture. The contrast between the sleek back and the deliberately undone bun is what makes this style work so beautifully.
Keeping Everything in Place
Use a smoothing product that has some hold—a light gel, a smoothing serum, or a smoothing wax works better than just a serum alone. Make sure your elastic is secure and your bobby pins are placed strategically. You can even use a small brush to smooth flyaways before pulling everything up, which takes an extra 30 seconds but makes a noticeable difference in how polished everything looks.
9. Braided Messy Bun
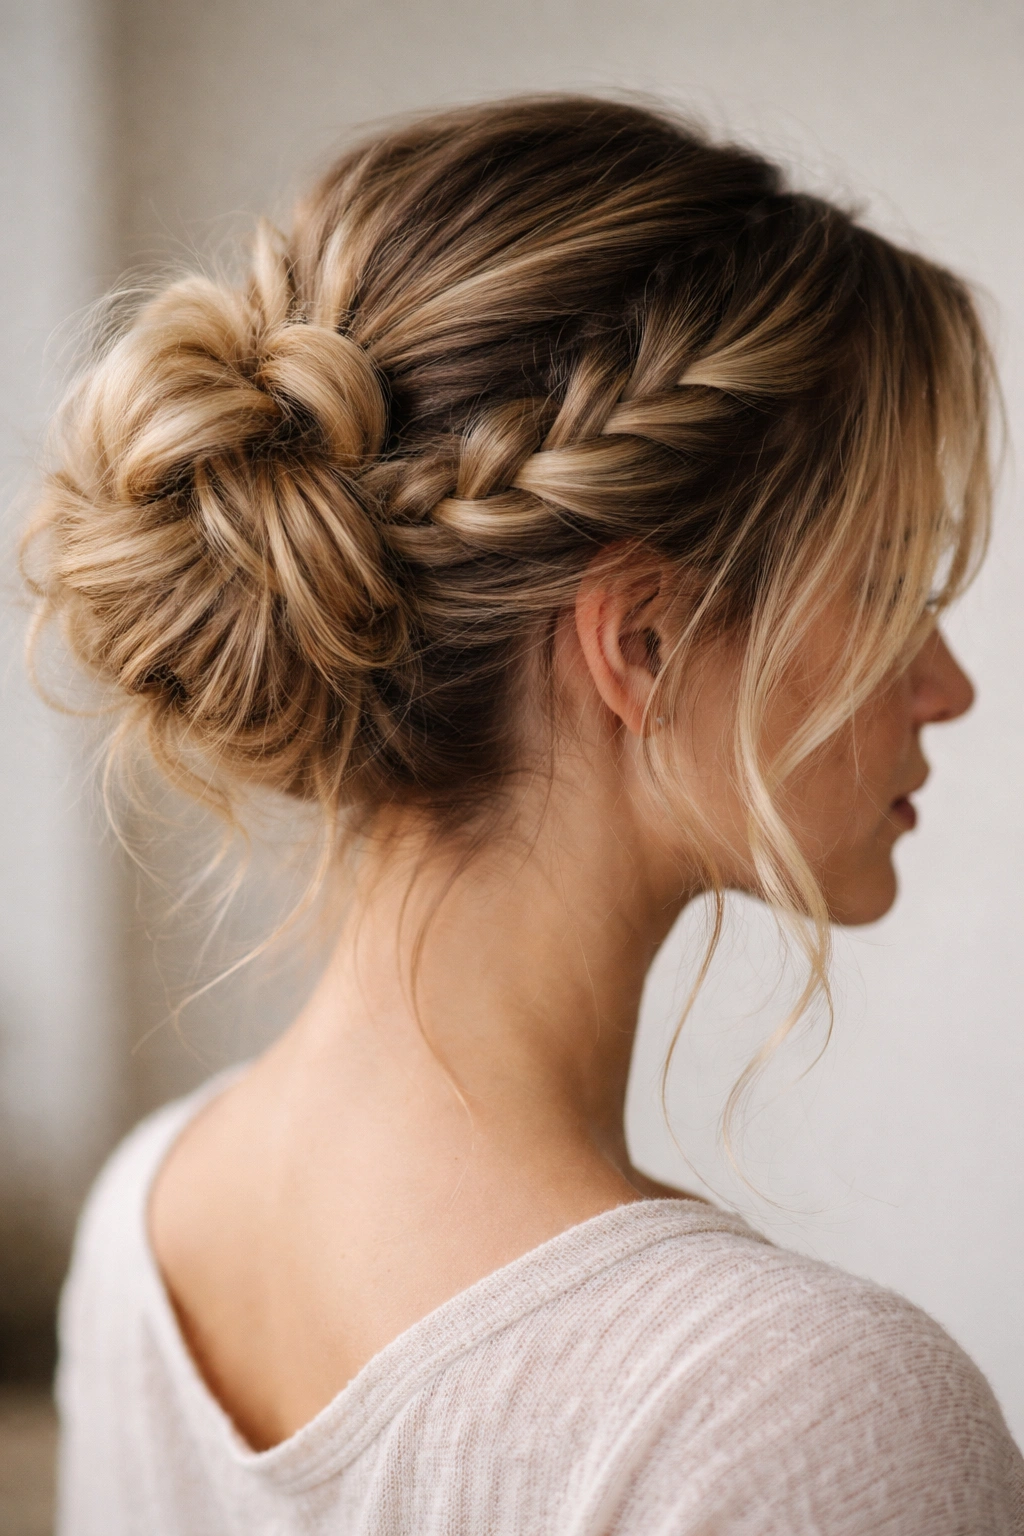
A braided messy bun incorporates a braid (or multiple braids) into the bun itself, adding detail and visual interest without requiring you to leave your hair down. It’s more dressed up than a plain messy bun but easier than you might think to create. This style works beautifully for events, special occasions, or any time you want to look like you put genuine effort into your hair without it actually taking much longer than a regular messy bun.
Why Braids Elevate the Look
Braids add texture, dimension, and a sense of intentionality that transforms a casual messy bun into something that looks more carefully styled. They also add visual interest and create a focal point, which is why this style photographs so well. The braid also helps secure the bun, meaning you might need fewer bobby pins overall while still maintaining excellent hold throughout the day.
Creating a Braided Messy Bun
You have several options here. You can create a single thick braid by gathering a portion of your hair, braiding it (loosely, not tightly), then gathering all your hair together and forming it into a bun around or incorporating the braid. Alternatively, you can create two or three braids in sections of your hair, then gather everything into a bun so the braids are visible and woven through the messy texture. Start by sectioning your hair into parts—you can do this down the middle or on the sides depending on what you prefer. Braid each section loosely (tighter braids look less effortless), then bring all the braided sections together and create your messy bun.
Styling Notes
Use the braids as anchoring points for your bobby pins, which means they’ll hold even better. You can make the braids as tight or loose as you prefer—looser braids photograph better and look more undone, while tighter braids hold better throughout the day. If you have fine hair, looser braids are often the move because they create the illusion of more volume.
10. Messy Bun with Face-Framing Pieces
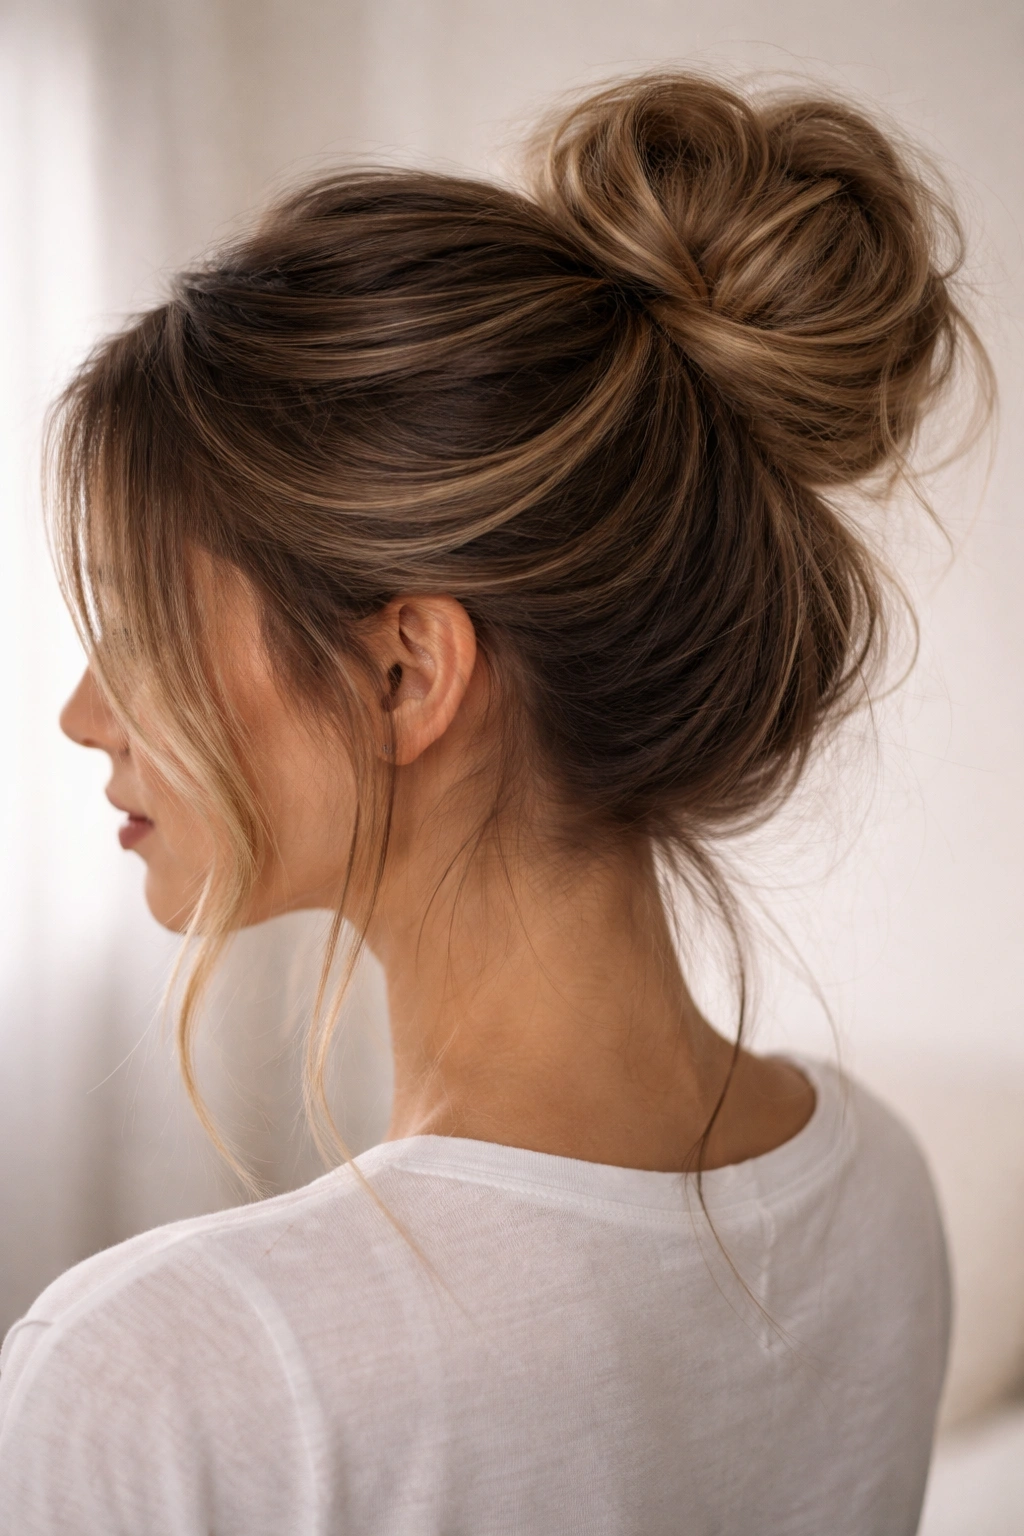
A messy bun with intentional face-framing pieces means leaving one or more sections of hair down in front to frame your face while the rest is gathered into a bun. This creates softness and definition without the commitment of wearing your hair down, and it’s incredibly flattering on nearly every face shape. The face-framing pieces draw attention to your features and create a sense of movement even though most of your hair is up.
Why Face-Framing Pieces Matter
Face-framing pieces create definition, add softness, and actually make most face shapes look more symmetrical and balanced. They’re also helpful if you have a longer face and feel like a full messy bun makes your face look too bare, or if you’re between having bangs and not having bangs and want that framing effect without committing to an actual cut. The pieces also give you something to do with hair that might otherwise be flyaways, and they make the whole style feel more intentional.
How to Create Face-Framing Sections
Before gathering your hair into a bun, take a small section of hair on each side of your face—start about an inch or two back from your hairline. Leave these sections completely separate and gather the rest of your hair into a high or low messy bun as usual. Once the bun is secured, you can leave the face-framing pieces completely down and straight, curl them loosely with a curling iron, braid them, or tuck them slightly behind your ears. You can also pull them back slightly and secure them behind the bun with a bobby pin if you want them out of your face but still visible.
Variations on This Theme
You can leave just one face-framing piece on one side if you prefer asymmetry, or you can leave multiple thicker sections that create a different silhouette. Some people prefer thin, delicate pieces while others like thicker, more substantial pieces. Experiment with what feels flattering on your particular face shape.
11. Thick Messy Bun with Maximum Volume
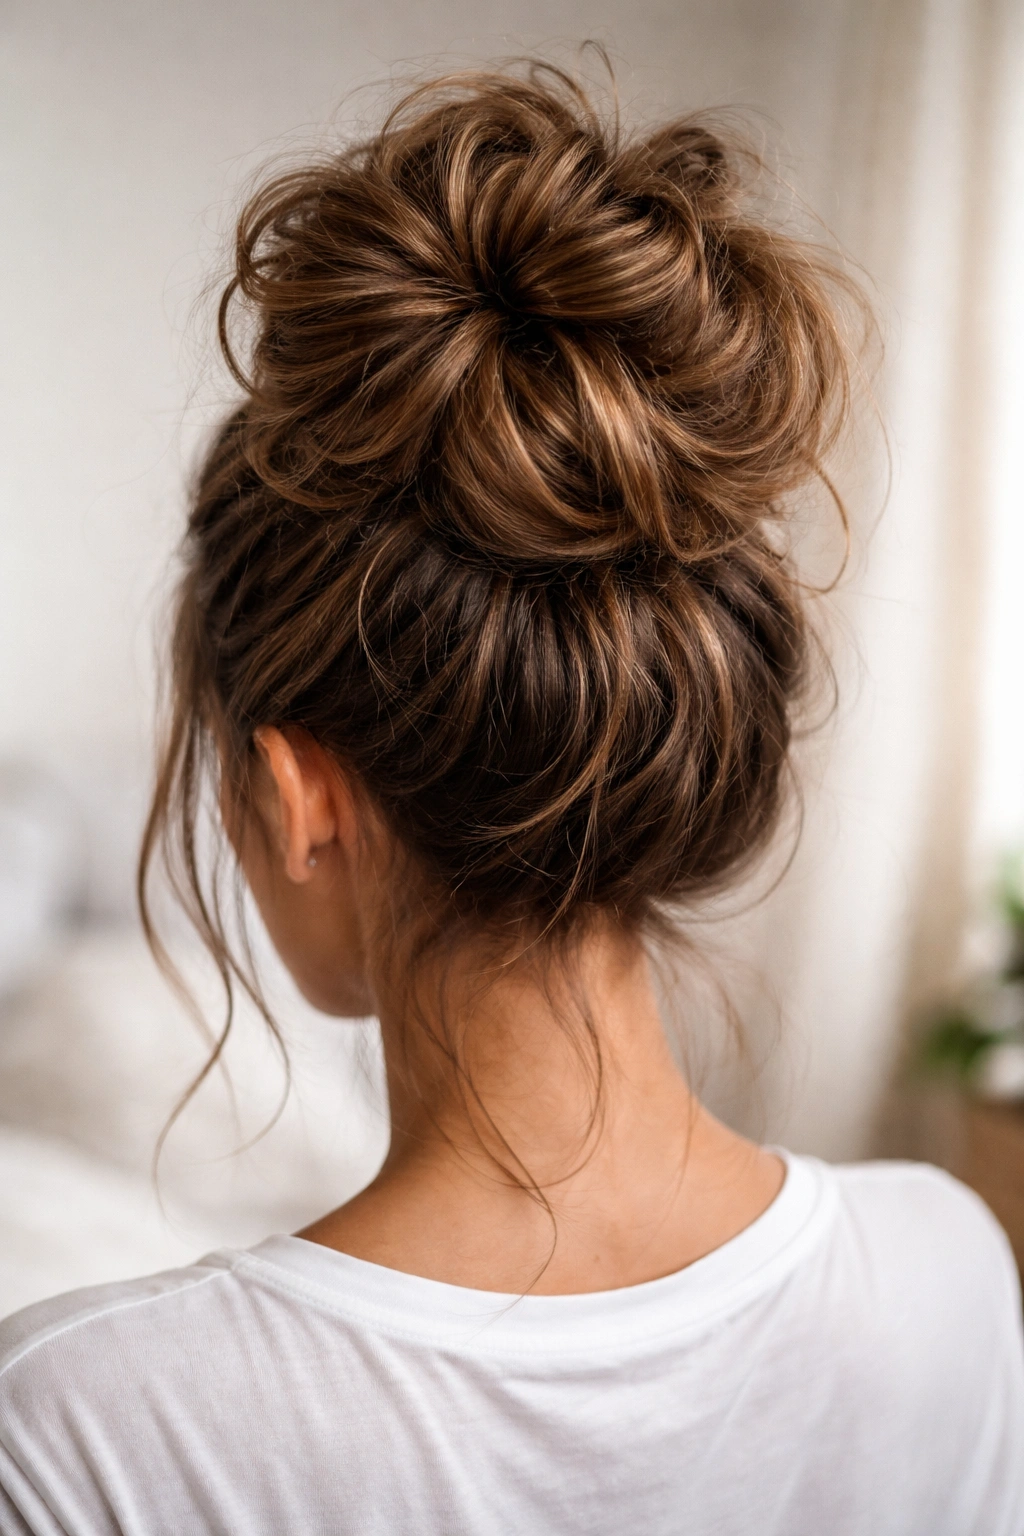
If you have thick, heavy hair or simply love a big, voluminous messy bun, this approach embraces thickness and creates intentional, noticeable volume. Rather than trying to minimize your hair or create a tight, controlled bun, you’re leaning into the fullness and creating a statement piece. This style works beautifully on people with naturally thick or curly hair and is one of the few messy bun styles where more is actually better.
Why Thicker Buns Read Differently
A big, voluminous messy bun reads as confident and intentional rather than sloppy. It works especially well on people with thick hair because trying to create a small, delicate bun often looks worse than just embracing the volume. This style also photographs really well because of the sheer presence of it, and it’s excellent if you have a lot of hair and often feel like you can’t do anything with it besides wear it down.
How to Create Maximum Volume
Start with hair that has texture—use a texturizing spray, create waves, or let your natural texture work. Gather your hair into a high ponytail or a slightly loose ponytail (the base doesn’t need to be super tight here because the volume will hold it). Rather than creating a single twist or loop, create multiple loops with your hair, wrapping different sections around the base and securing each one with a bobby pin. The idea is to create a bulkier, less organized bun that’s intentionally full. Pull out sections—more than you would for a regular messy bun—and let them fall naturally. The finished bun should feel substantial and full rather than neat and compact.
Styling Tips for Control
If your bun feels like it’s getting too loose or flying apart, add bobby pins strategically to secure the loose sections. You might need more bobby pins for this style than others because you’re dealing with more volume, but that’s fine—the pins should be invisible. A light texture spray or dry shampoo added before styling can help everything grip together and hold throughout the day.
12. Undone Messy Bun for Short Hair
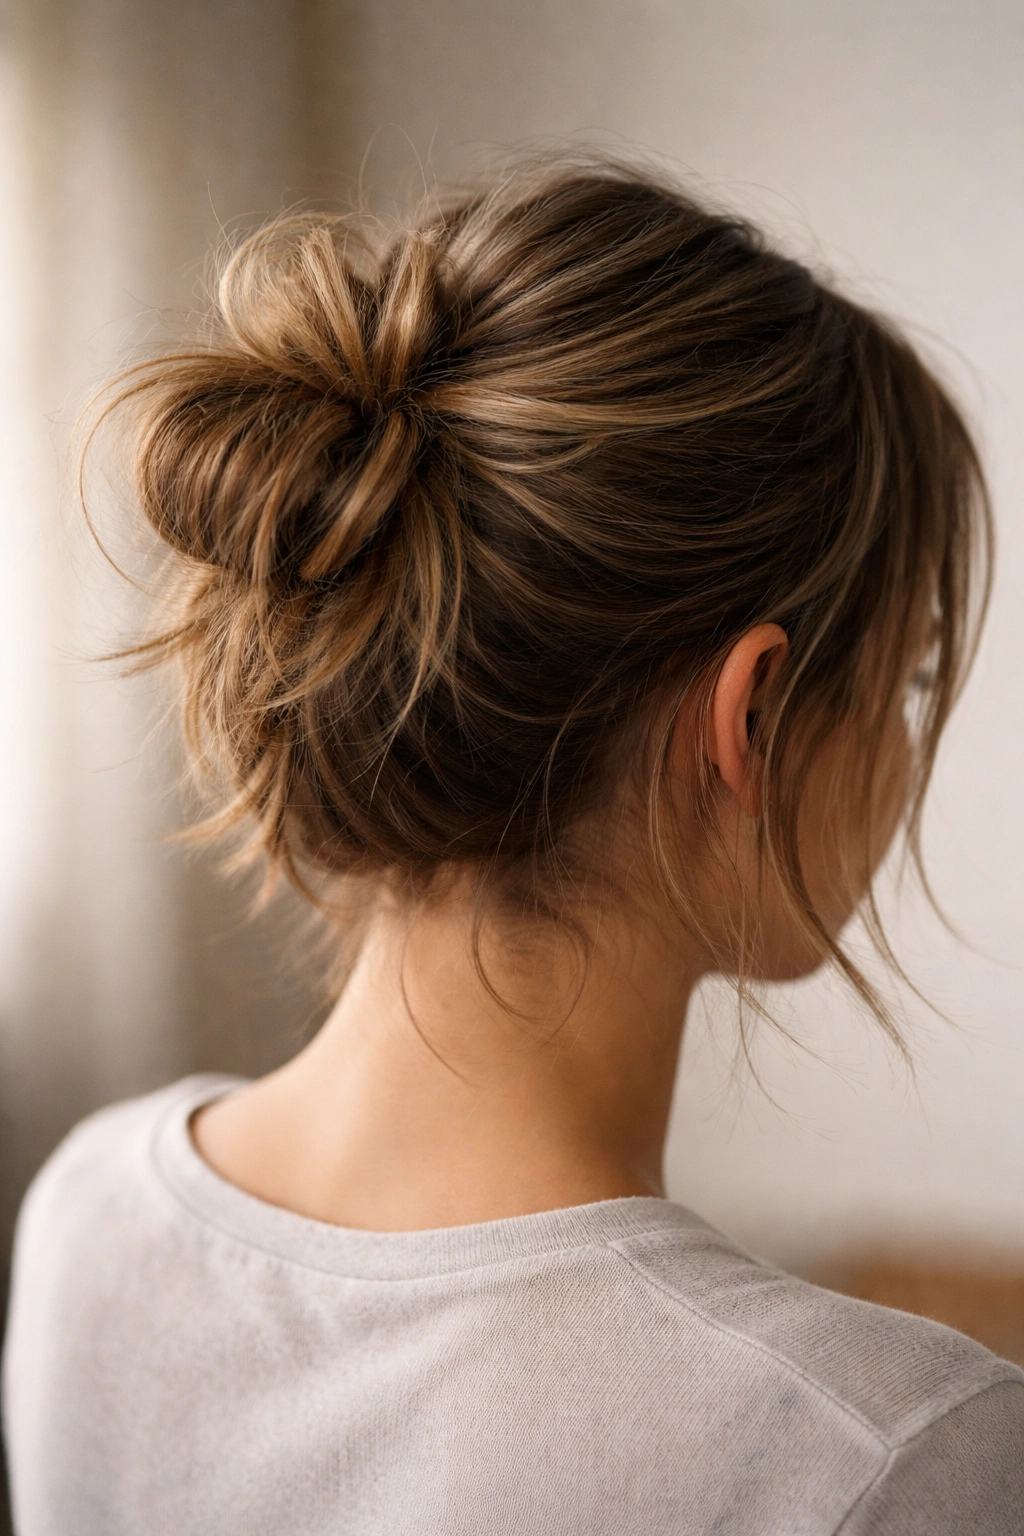
If you have shorter hair (shoulder-length or shorter), creating a messy bun requires a slightly different approach than with longer hair. This style works with truly undone texture and doesn’t try to create the same height or volume as longer-haired versions. The result is charming, undeniably practical, and genuinely flattering when styled right.
What Makes Short Hair Buns Different
Short hair messy buns rely more on texture and less on volume than their longer-haired counterparts. You need your hair to have some natural wave or curl, or you should create texture beforehand because there’s simply not enough length to pull and arrange the way you would with longer hair. The beauty of this approach is that it actually looks more effortless and undone—short-hair messy buns naturally read as “I didn’t try very hard” even when you’ve been intentional about creating them.
Creating a Messy Bun with Shorter Hair
Start with textured hair—either naturally wavy, curly, or created with a curling iron or braiding. Gather what you have at the crown or back of your head. You won’t have as much to work with, so the bun will be smaller and tighter than longer-hair versions, and that’s perfect. Secure with an elastic, twist or loop what you can, and pin it. Rather than pulling out pieces to create texture, you might already have plenty of texture showing. Focus instead on creating a polished shape while letting your natural texture be the “mess” rather than trying to manipulate pieces.
Making It Work for You
The secret to short-hair messy buns is understanding that “undone” is the entire point. You’re not trying to create the same dramatic bun as someone with very long hair would create—you’re creating something smaller, tighter, and more inherently textured. Use texture sprays, sea salt sprays, or curl-enhancing products to maximize what you already have. If your hair is naturally curly or coily, this is actually one of your best options because your natural texture automatically creates interest without requiring you to pull and arrange pieces.
Final Thoughts
A great messy bun isn’t about perfection—it’s about understanding what works with your specific hair, knowing how to execute that style consistently, and recognizing that the appeal of the style is its intentional imperfection. The styles above cover everything from super casual and quick to slightly more elaborate options, all of which take less than five minutes once you’ve done them a few times. Start by trying one or two that seem closest to your hair type and face shape, then experiment from there.
The most important thing to remember is that messy buns are forgiving. If your first attempt doesn’t look exactly like you imagined, that’s fine—you can add or remove bobby pins, pull out more or fewer pieces, or tighten or loosen your base until it looks the way you want. After a few tries, you’ll develop the muscle memory to create your favorite style almost without thinking about it, and you’ll have a reliable, versatile look you can reach for whenever you need it.
