



Four-texture hair is as individual as it is beautiful, and if you’re rocking those signature tight curls and coils, you already know that styling options are virtually limitless. The challenge isn’t finding things to do with 4C hair — it’s knowing exactly which styles work best for your lifestyle, occasion, and daily maintenance preferences.
What makes 4C hair special is its natural shrinkage, incredible versatility, and the way it holds shape and volume without heat styling. Your hair can transform into dramatically different silhouettes depending on how you style it, which means you’re never limited to one look. Whether you’re preparing for a professional meeting, a casual weekend outing, a special celebration, or just wanting to switch things up on a Tuesday, there’s a 4C-friendly style waiting to become your new favorite.
The real key to mastering 4C styling is understanding your specific hair density, porosity, and the length you’re working with — because the best styles are the ones that actually work with your hair’s natural texture rather than against it. A style that looks stunning on someone with shoulder-length hair might need tweaking if you’re working with hair past your bra strap. Similarly, what keeps a coily crown defined and popping for fine-textured hair might need different products or techniques if your hair is thick and densely packed.
This is why we’re diving deep into 10 genuinely cute 4C styles that range from protective to bold to professional to laid-back. Each one comes with honest details about how to actually achieve it, who it works best for, and how to keep it looking fresh.
1. Defined Coils with Edge Control
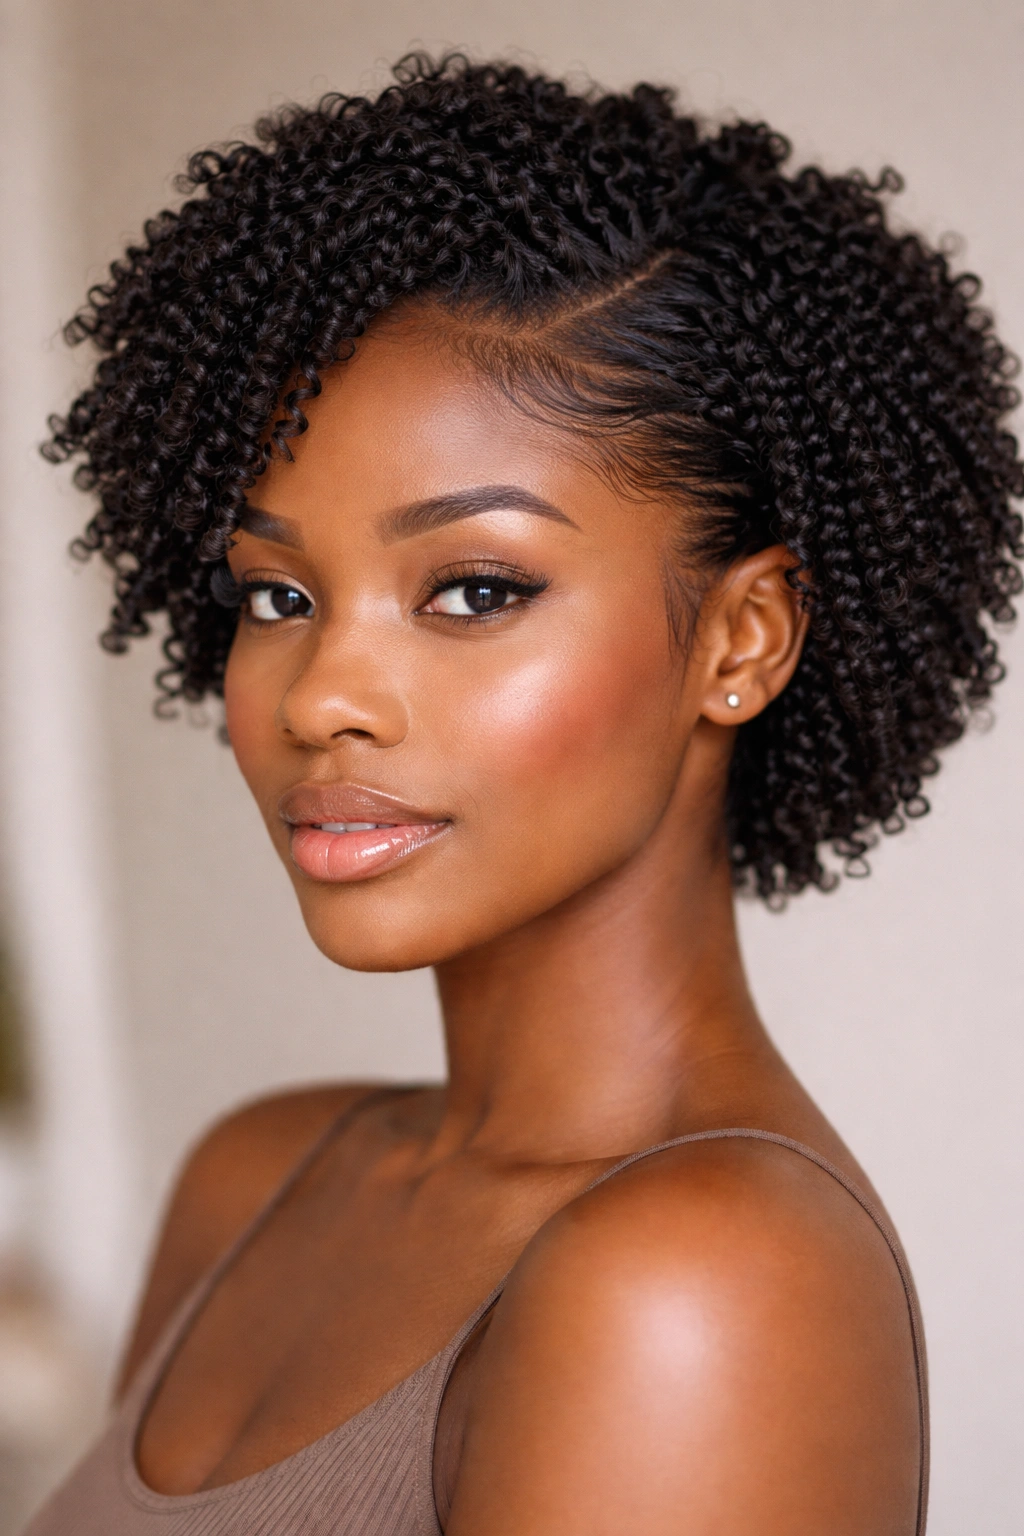
There’s something undeniably polished about coils that are intentionally defined and separated, and the good news is that 4C hair practically begs for definition work. This is the style that makes people stop and ask what you did to your hair because it looks so intentional and beautiful — even though it’s actually just your natural texture with some strategic moisturizing and styling help.
How to Create Perfectly Separated Coils
Defined coils start with damp hair and the right products. After shampooing and conditioning your hair, apply a leave-in conditioner that has slip and hold to damp (not soaking wet) hair. The moisture content matters enormously — too much water and your coils won’t hold their shape, but too little and you’re fighting your hair’s natural springiness. Work the leave-in through your hair in sections, using your fingers to gently rake through and allow your natural coil pattern to emerge. Follow with a gel or lightweight styling cream that has medium to strong hold without flaking or crunchiness. The magic happens when you let your hair air dry completely — never rush this step or you’ll trap moisture that leads to frizz.
Products That Actually Make a Difference
Not all gels are created equal for 4C hair. Heavy, alcohol-heavy formulas will leave your coils crunchy and stiff, while overly lightweight ones won’t provide the definition hold you’re after. Look for gels with ingredients like flax seed, aloe vera, or cinnamon that offer hold and moisture. Eco-styling gel remains the gold standard for many 4C stylists because it delivers clean definition without crunchiness, though experimenting with different brands helps you find what works with your specific curl pattern. The key is applying enough to define each coil section without overloading your hair — think of it as sculpting rather than sealing.
Best For and Maintenance Timeline
This style looks absolutely stunning for the first week, after which you might notice some frizz around the edges or coils that have relaxed slightly. The good news is you can refresh it with a light spritz of water and maybe a tiny bit of gel at the crown and perimeter. It’s genuinely low-manipulation once installed, which means your hair stays healthy and protected. Defined coils work beautifully for professional settings, casual hangouts, and literally anywhere because they read as intentional and put-together without requiring any heat styling or damaging techniques.
2. Sleek High Bun with Swoop Bang
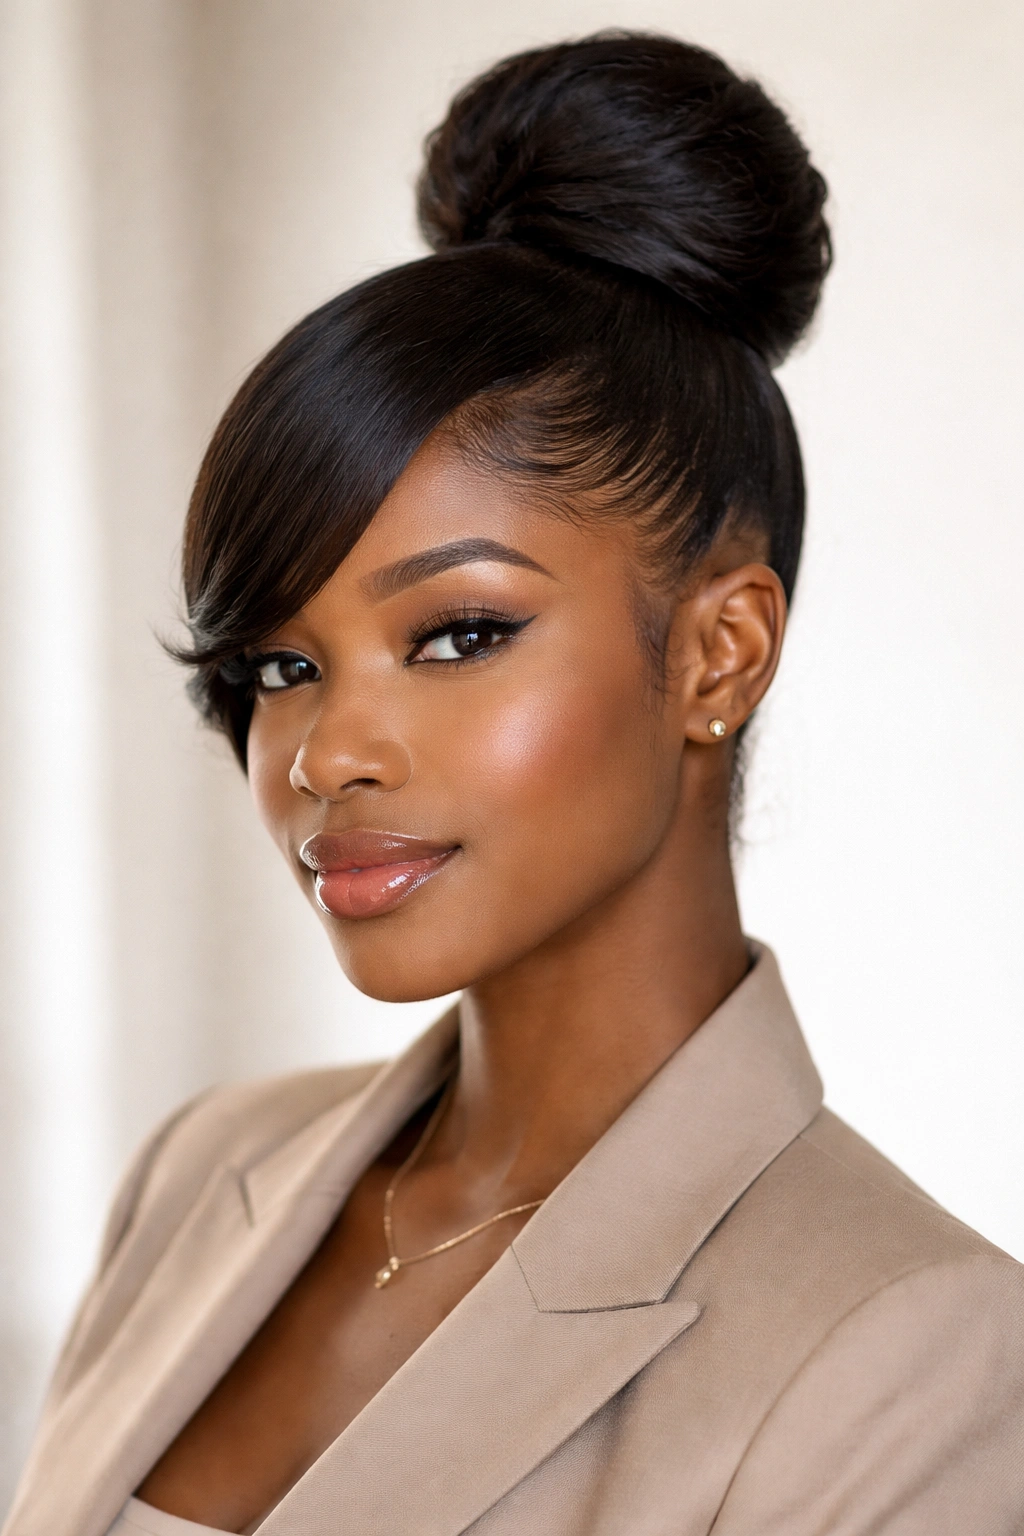
A high bun is the ultimate multitasking style — it’s professional enough for presentations and important meetings, cute enough for weekend plans, and protective enough that your hair gets a real break from daily manipulation. When you add a swoop or curl piece framing your face, you’ve elevated it from purely practical to genuinely fashionable.
Creating That Effortless Swoop
Start with hair that has some moisture and hold already built in from a previous wash day or a quick refresh. Gather your hair into a high ponytail at the crown, using your hands or a soft elastic band to secure it. Before twisting the ponytail into a bun, separate a small section from the front — this becomes your swoop piece. Twist or braid this section, then wrap the rest of your ponytail into a bun shape and secure it with bobby pins. Finally, drape your swoop section across your forehead or along your hairline and pin it into place. The swoop should look relaxed and intentional, not stiff or over-controlled.
Securing Without Damage
This is where edge control enters the conversation, and if you’ve had tension concerns with buns in the past, you’re not alone. The secret is using a lightweight edge control that has slip — avoid anything too heavy or sticky because pulling too much product through your edges actually causes more breakage. Apply sparingly with a soft brush or your fingers, and avoid pulling your baby hairs so tight that you can see your scalp straining. Your edges can look polished and framed without being tortured. Use smooth, covered elastic bands rather than traditional rubber bands, and alternate which area of your scalp you pull the bun from every few days to prevent tension on one specific spot.
Wearing Timeline and Refresh Options
A high bun typically stays fresh and polished for 3-4 days, sometimes longer depending on how much you manipulate it throughout the day. If the bun itself looks slightly fuzzy by day three, you can lightly smooth the outer edges with a tiny bit of gel on a soft toothbrush. The beauty of this style is that it genuinely works for professional settings, casual plans, and even date nights when paired with earrings or hair accessories. It’s equally at home in a boardroom or a coffee shop.
3. Textured Twist-Out for Natural Volume
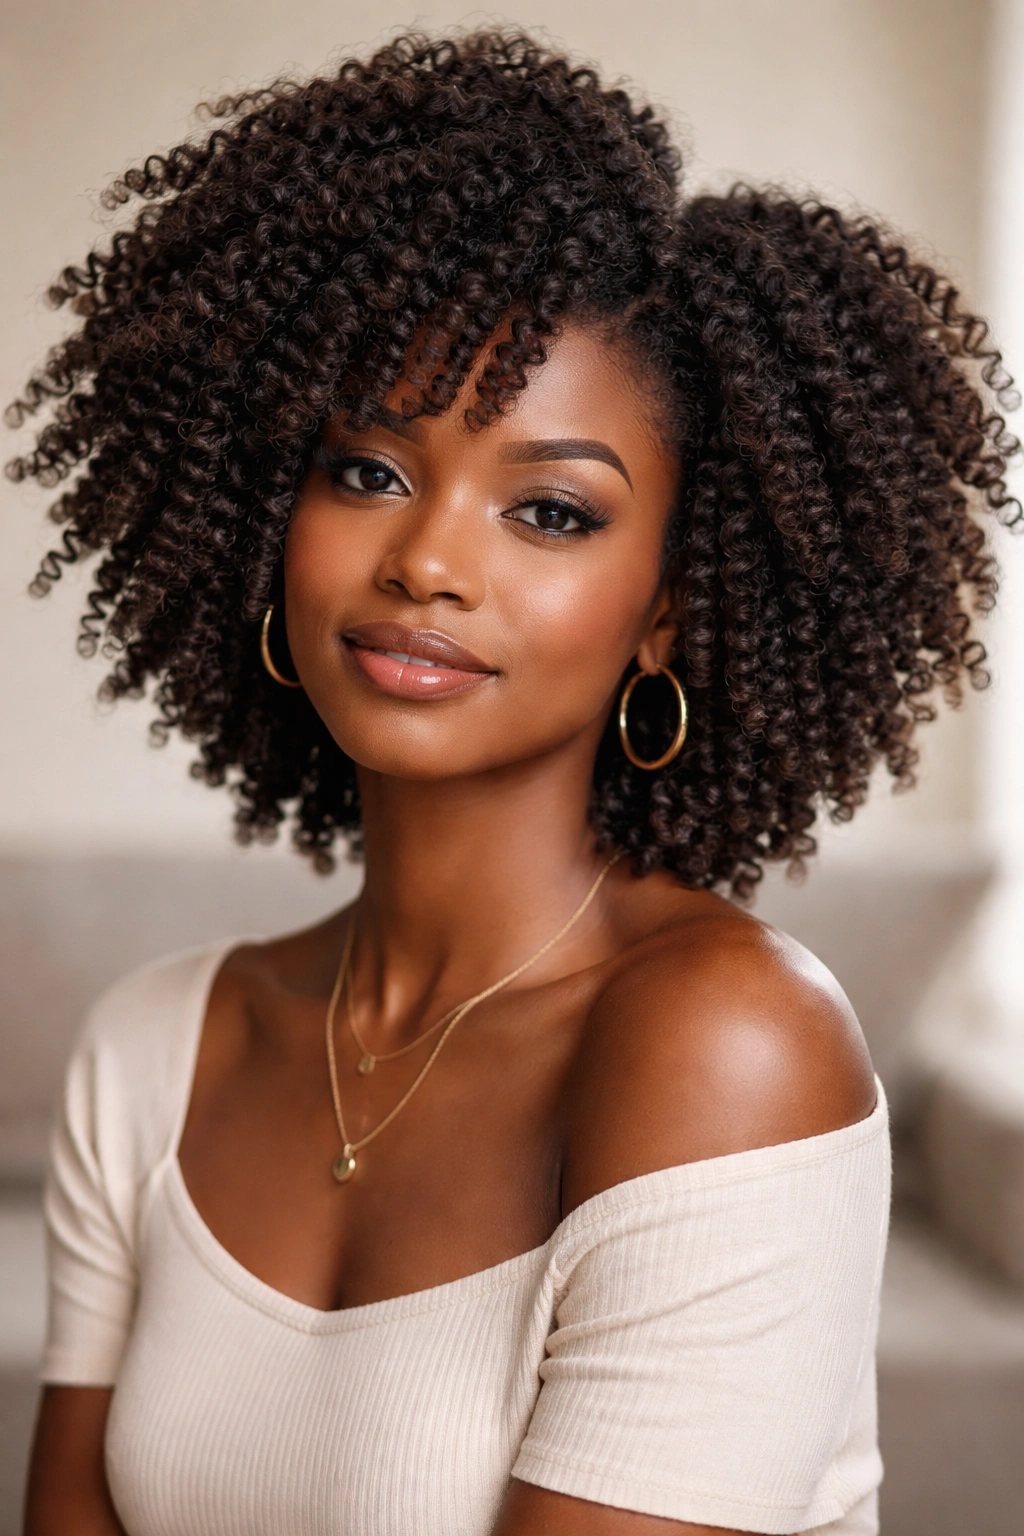
A twist-out delivers full, voluminous curls that last for days and celebrates your hair’s natural texture in the most gorgeous way possible. The styling process takes some time and intention, but the payoff is a look that commands attention and shows off your hair’s true personality.
The Two-Strand Twist Foundation
Start with freshly washed, deeply conditioned hair that’s still damp. Apply a leave-in conditioner and then your styling cream or gel, working it through the hair in sections. Divide your hair into manageable sections — somewhere between 8 and 20 depending on your hair volume and thickness. Take two strands of hair in each section and twist them around each other from the roots all the way to the ends, keeping tension consistent so the twist holds its shape. Pin or band the twisted section to your scalp and let the entire head air dry completely or, if you’re in a rush, sit under a hooded dryer. This overnight dry time is essential — pulling the twists out before your hair is completely dry will disrupt the curl pattern and lead to less definition.
Unraveling for Maximum Impact
Once your hair is fully dry, gently unraveling each twist is where the magic happens. Take your time with this step; rushing through it or using too much force defeats the entire purpose. Slowly and gently unravel each twist, letting the curl pattern emerge naturally. You should see beautiful, defined S-waves and coils all over your head. If your hair feels a bit tight or crispy at first, a light spritz of water and a tiny bit of oil or serum smoothed through will soften it without disrupting the pattern.
Styling Range and Longevity
A twist-out looks stunning for 4-5 days if you keep manipulations minimal and refreshing with a light spritz of water as needed. It pairs beautifully with accessories like clips, headwraps, or scarves. This is the style you choose when you want volume that reads as effortless but is actually quite intentional. It works equally well for casual outings, creative professional settings, and anywhere you want to make a statement with your hair.
4. Protective Braided Crown
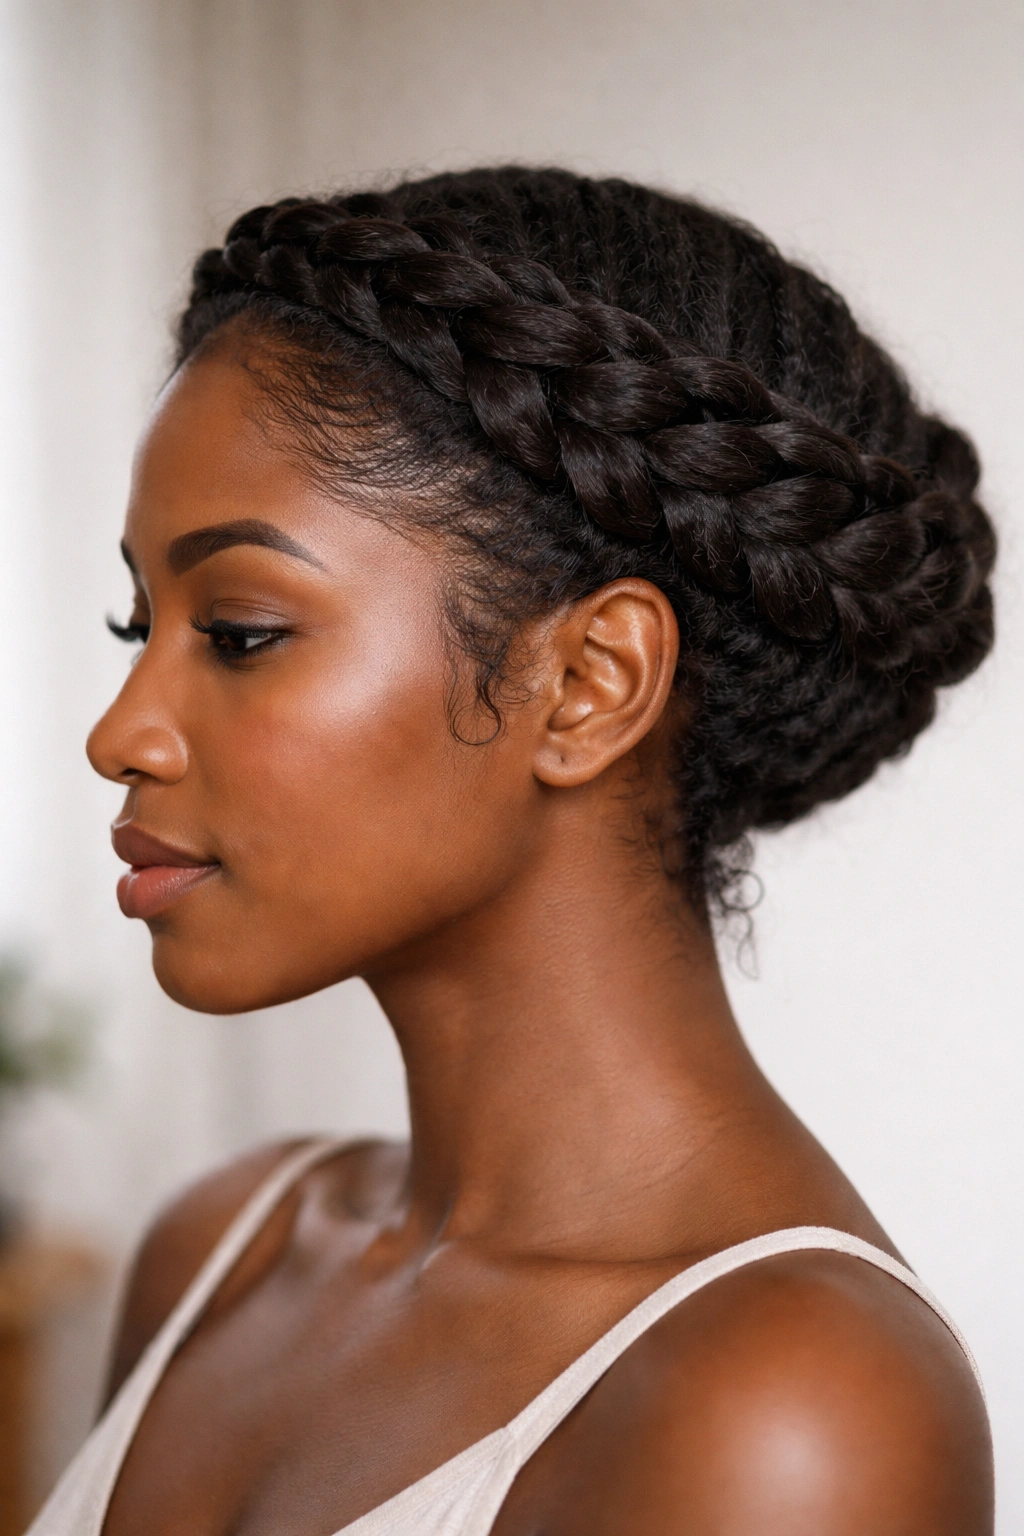
Crown braids that frame your face and wrap around your head are both a protective style and a genuinely beautiful look that reads as carefully done without requiring heat or tension-causing techniques. This style keeps your ends tucked away safely while looking intentional and polished.
Technique for a Secure Crown
Start with detangled, moisturized hair. You’ll create a braid that starts at one temple, travels across the crown toward the back of your head, and anchors where you want it. Cornrows, traditional braids, or a hybrid approach all work beautifully depending on your preference and skill level. If you’re braiding your own hair, sections of your hair should be slightly damp and have enough moisture to hold the braid pattern without excess water that will lead to mildew. The braid should be snug enough to hold its shape but not so tight that you feel tension or discomfort on your scalp. This is the crucial balance that keeps your edges safe.
Securing the Braid and Adding Finishing Touches
Once your braid reaches the back of your head, you have several options for securing it: tuck the ends into the braid itself and secure with bobby pins, form a small bun with the braided ends, or let the braid trail down your back into a ponytail. The security matters because a loose braid that comes undone defeats the purpose and looks unfinished. Consider using hair clips or decorative pins to anchor the braid in place, which adds both security and visual interest. You can weave thin ribbons or yarn through the braid for subtle color and texture.
Styling Flexibility and Protective Benefits
A crown braid genuinely works for casual hangouts, professional settings, workouts, and anywhere you want your hair protected from daily friction and manipulation. The ends of your hair are tucked away safe from weathering and breakage, which means you’re actively helping your hair grow and strengthen while looking beautiful. Wear it for 4-5 days and then take it down for a couple of days to let your hair and scalp rest. This protective-style rotation is one of the best-kept secrets for maintaining healthy 4C hair over time.
5. High-Definition Puff with Coil-Out
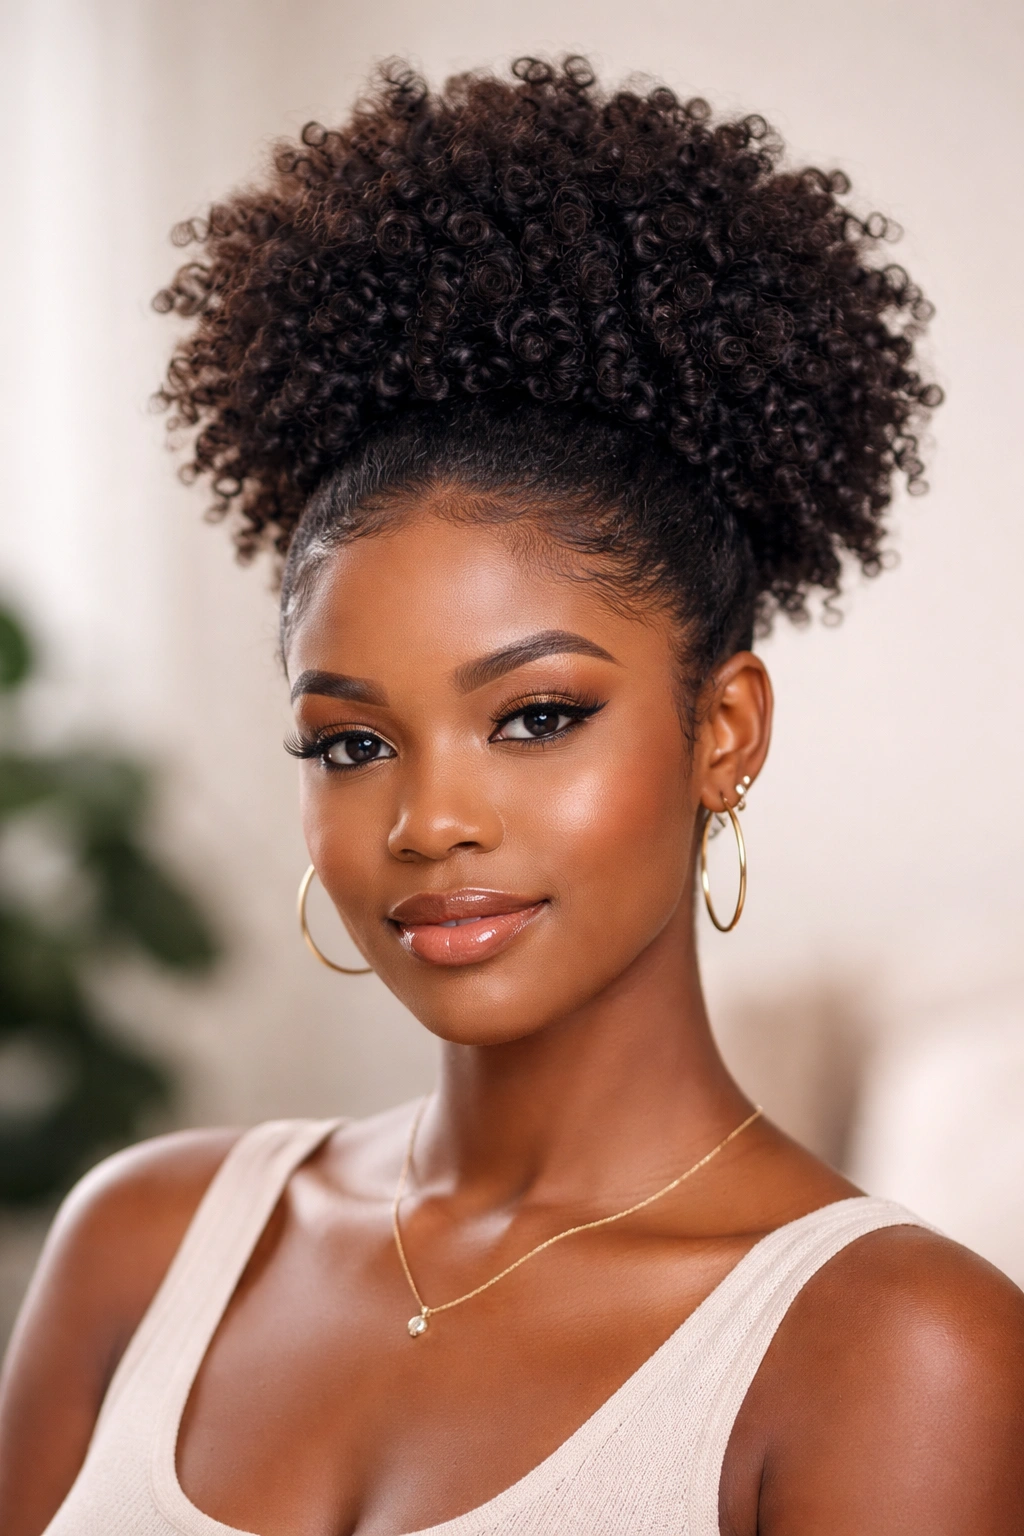
A high puff is the ultimate go-to style when you want something that looks effortlessly cute without spending significant time on it, and adding coil-out definition takes it from casual to intentional. This works beautifully if you have a wash day or refresh day where your hair still has moisture and shape.
Gathering and Securing the Perfect Puff
Section off the crown of your hair from roughly ear to ear, leaving the sides and back down. The size of your puff depends on your preference and hair density — some people love a dramatic, massive puff, while others prefer something more compact and controlled. Secure this top section into a high ponytail using a soft elastic band or hair clip. The key is creating enough tension that the puff sits securely without pulling so hard that your baby hairs are screaming. Smooth any flyaways with a light touch of edge control applied with a soft brush.
Defining the Crown Curls
While the puff sits in its ponytail, take a moment to define the actual coils in the puff itself. Using light fingers or a comb, gently separate and rake through the hair to enhance the coil pattern. If your hair feels slightly crunchy from previous styling, a light spritz of water will refresh it without soaking it. The definition you’re creating should look intentional but not over-worked — think of it as revealing your natural texture rather than forcing a shape onto it.
The Hair Down Portion
The hair remaining down on the sides and back can be styled in countless ways. Some people leave it as a textured canvas with defined coils, while others braid it or form smaller puffs. The beauty of this style is its modularity — you can change up what you do with the bottom half depending on your mood and plans while keeping the main puff crown consistent. Wear this style for 3-4 days, refreshing the crown if needed with a spritz of water and a touch of moisturizing cream.
6. Box Braids with Accessory Details
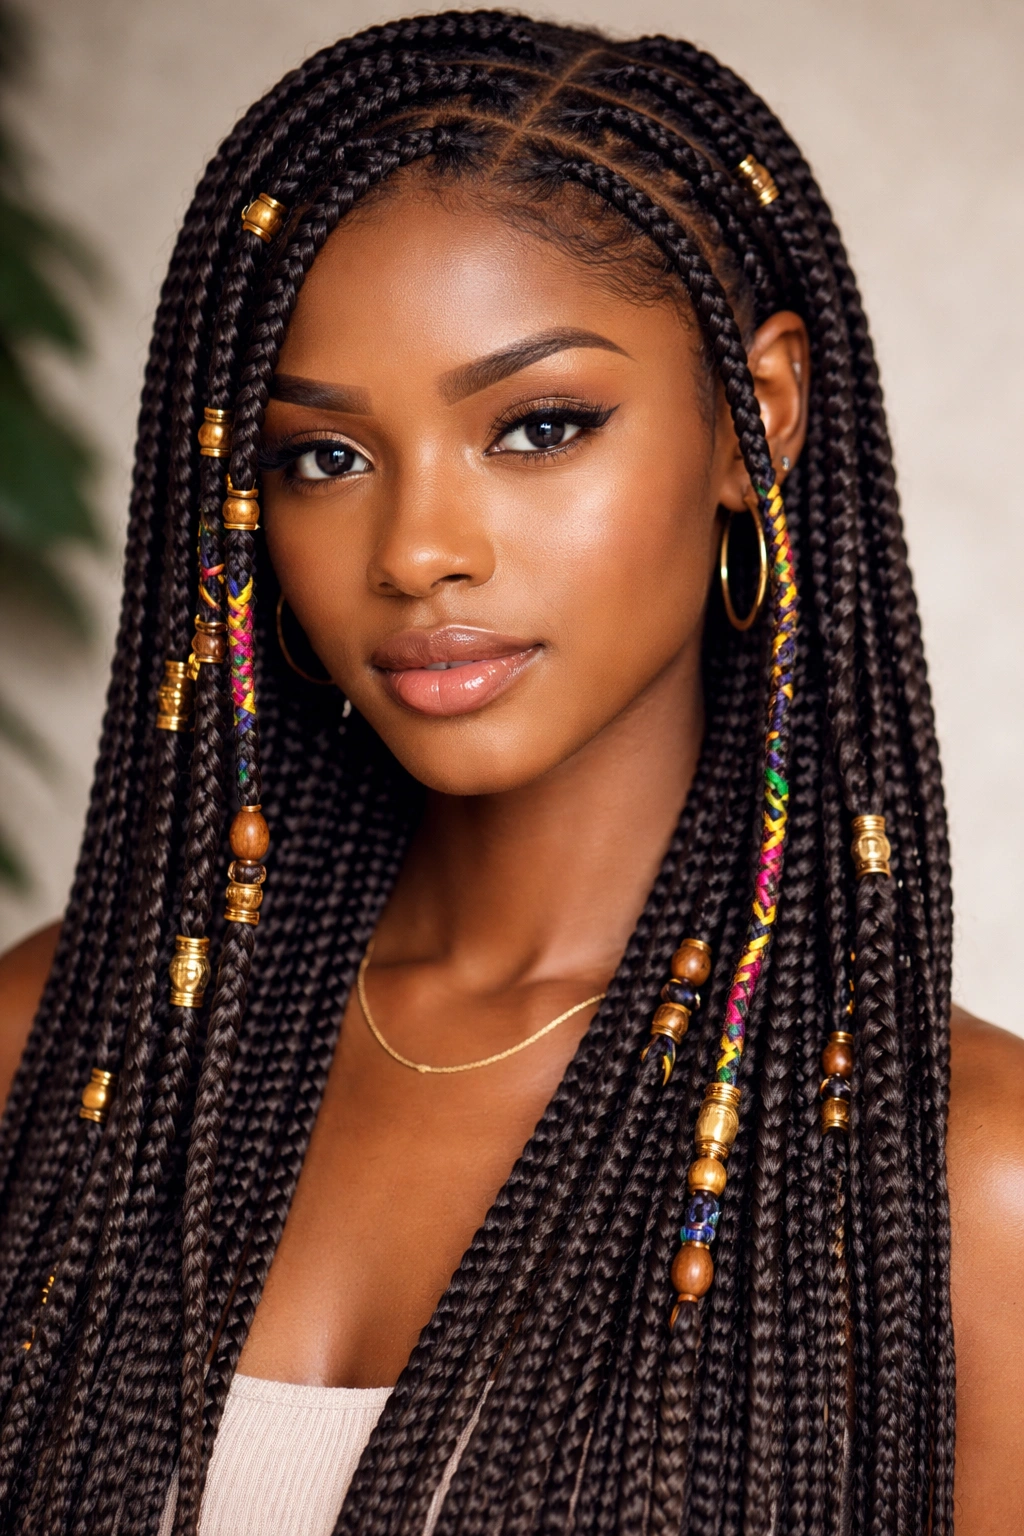
Box braids remain a beloved protective style specifically because they keep 4C hair completely protected from daily friction while offering genuine styling flexibility. When you add decorative elements like beads, rings, wraps, or colorful thread, you’re taking a functional protective style and making it visibly creative.
Creating Clean, Consistent Box Braids
Box braids require either significant time and patience if you’re braiding your own hair, or a trip to a talented braiding specialist if that’s accessible to you. Either way, the foundation is the same: each braid section should be clean, uniform, and secure. Your braids should start close to the scalp — not so tight that you feel immediate scalp tension, but tight enough that they won’t unravel. The thickness and length of your braids matter for both aesthetic and practicality. Thinner, longer braids offer more styling versatility and a more delicate look, while thicker braids are faster to install and often hold longer before fraying at the ends.
Adding Creative Flair Through Accessories
Once your braids are installed, this is where personalization happens. Wrap colored thread around select braids in patterns that feel intentional — maybe every third braid gets wrapped, or you create a gradient effect, or you highlight just the front face-framing braids. Slide decorative beads over braid ends for both visual interest and weight that helps the braids hang beautifully. Gold cuffs, cuff links, or decorative hair rings all add a touch of intentional style. Consider leaving some braids bare and some decorated for a balanced look that reads as carefully curated rather than overdone.
Maintenance and Longevity
Quality box braids can last 6-8 weeks or even longer if you take care of them properly. Keep your scalp clean by washing regularly with a gentle cleanser, and keep the braids moisturized with a lightweight oil or braid spray to prevent dryness and breakage. Sleep on a satin pillowcase or bonnet to minimize frizz and protect the braids. The beauty of this style is that it’s genuinely hands-off — you’re protecting your hair while the braids do their job, and you can spend your energy on other things rather than daily styling.
7. Flat Twist Updo for Formal Occasions
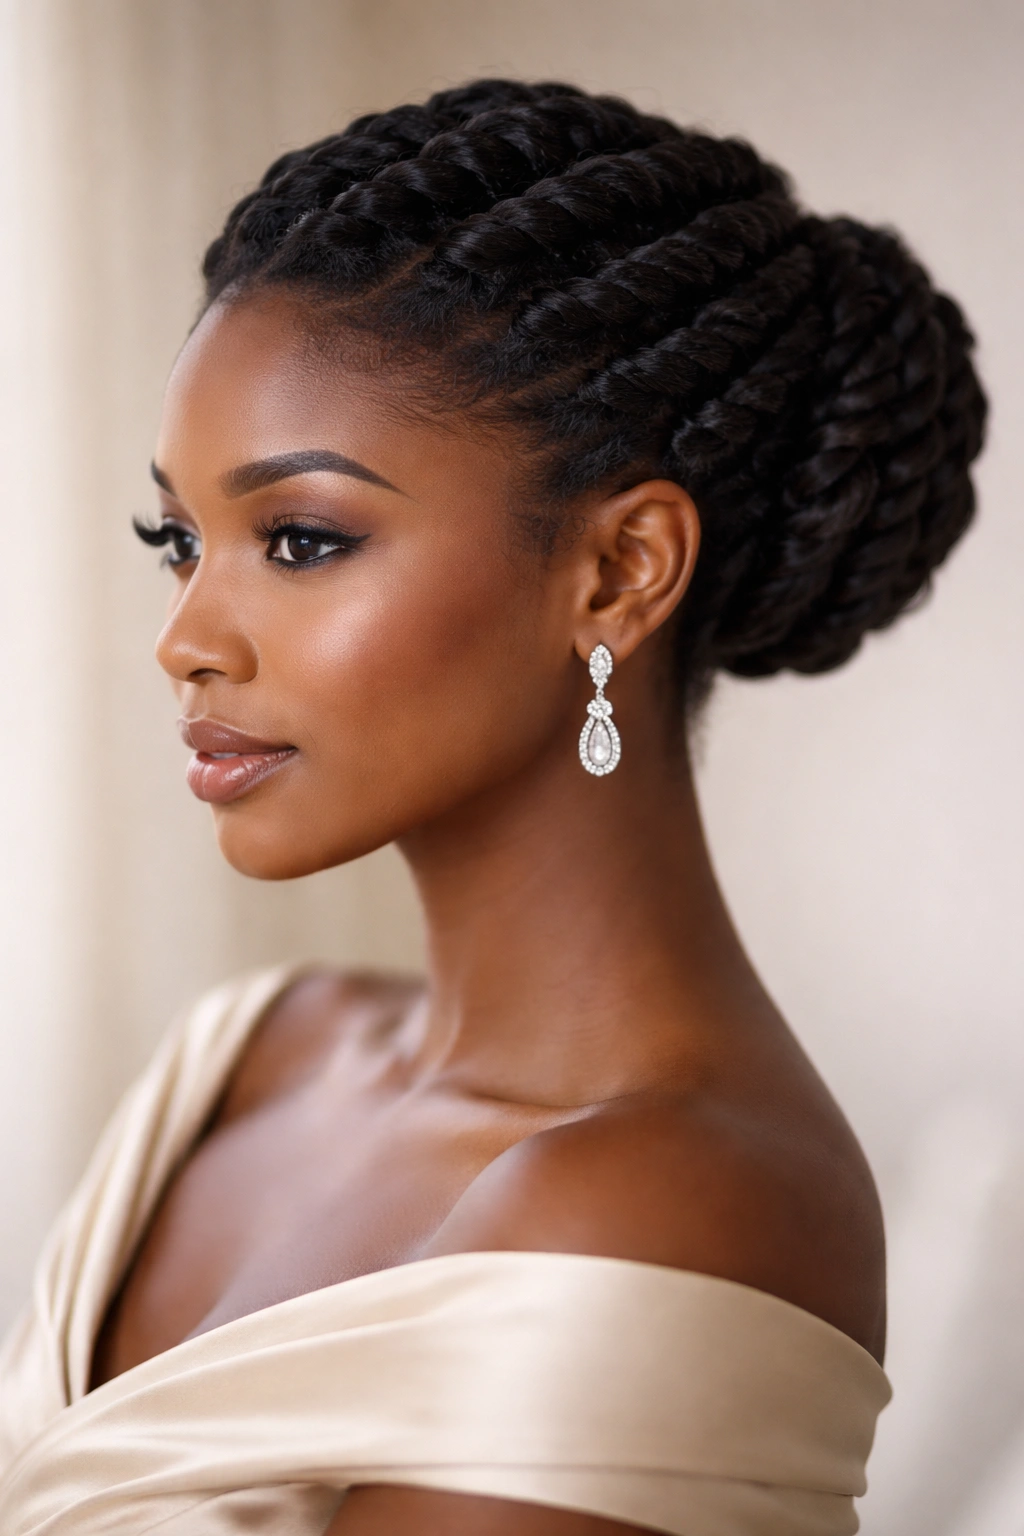
When you need to look absolutely polished and intentional for formal events, a flat twist updo delivers elegance and sophistication while keeping your hair protected and your face completely open. This is the style that photographs beautifully and works for weddings, celebrations, professional galas, and anywhere you want to look put-together.
Mapping and Creating Your Flat Twists
Start with hair that has moisture, definition, and some hold already established. Section your hair thoughtfully — you might create two flat twists from your temples that travel toward the back of your head, or create multiple smaller twists in a pattern that speaks to you. Each flat twist is created by taking two small sections of hair at the root and twisting them around each other while simultaneously incorporating more hair from your scalp as you move down the head, similar to a cornrow but with a twisted rather than braided texture. This takes practice if you’re doing it yourself, so give yourself grace and patience as you develop the skill.
Securing the Updo Structure
As your flat twists progress back, guide them toward where you want your updo to sit — usually the crown or nape of your neck. Once all your twists have traveled to your gathering point, secure them together with bobby pins and arrange them into a bun shape, a twisted coil, or whatever updo aesthetic appeals to you. The twists themselves add visual texture and interest, so you’re not relying on slicked smoothness to look polished — the structure and intention of the twists is the style.
Finishing and Accessorizing
Add a light touch of edge control to your hairline to frame your face, and consider adding a decorative comb, hair stick, or jewelry piece to anchor the updo and add visual interest. This is genuinely one of the most elegant 4C styles you can create, and it’s entirely protective — your ends are tucked away and your hair isn’t experiencing any tension or manipulation once the style is installed. Wear it for special occasions or whenever you want to feel absolutely polished and intentional.
8. Wash-and-Go with Wave Cream
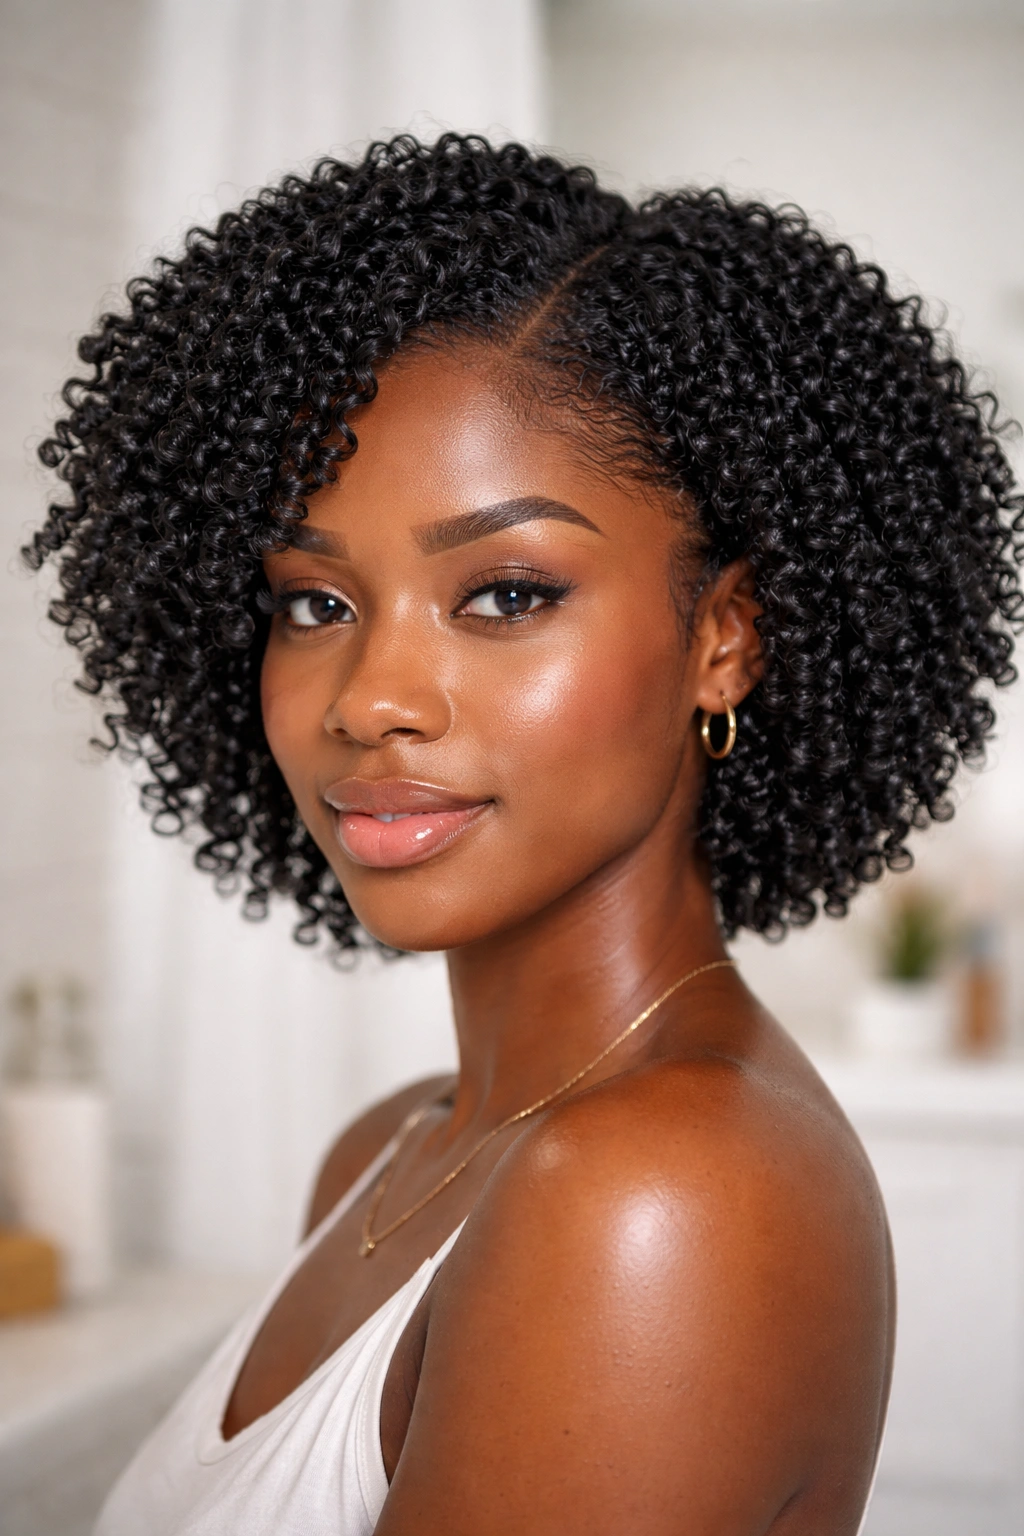
Sometimes the most beautiful style is actually no style at all — just your hair in its cleanest, most hydrated, most natural state. A wash-and-go celebrates your 4C texture exactly as it is and works beautifully if you’ve found products that enhance rather than fight your natural pattern.
The Foundational Wash Routine
A truly successful wash-and-go starts with a thorough but gentle cleansing. Use a sulfate-free shampoo or cleansing conditioner that removes product buildup and dirt without stripping your hair of moisture. Follow with a rich, moisturizing conditioner, allowing it to sit for 5-10 minutes so it can penetrate and hydrate your coils. Many people find that a deep conditioning treatment once weekly significantly improves their wash-and-go results. Rinse with cool water if you can tolerate it, which seals the cuticle and enhances shine.
Product Application for Definition and Hold
While your hair is still dripping wet, apply a lightweight leave-in conditioner in sections, ensuring every strand gets moisture. Follow with a wave cream or curl-defining cream that enhances your coil pattern without weighing it down. The key is using enough product that your hair has moisture and hold, but not so much that it looks wet or heavy. Apply your product by sections, using your hands to encourage your natural curl pattern to emerge as your hair dries. Avoid touching or manipulating your hair too much as it dries, which causes frizz.
Drying Method and Final Results
Air drying is the gold standard for wash-and-gos because it respects your natural texture. Some people sit under a hooded dryer or use a diffuser attachment on a regular blow dryer to speed things up, which is fine as long as heat is on a low or medium setting. Once your hair is fully dry, you should have gorgeous, defined coils that look intentional and beautiful without any styling work beyond the initial product application. A true wash-and-go style lasts 2-3 days before you feel like it needs refreshing, making it perfect for people with busy schedules.
9. Senegalese Twists with Dimensional Color
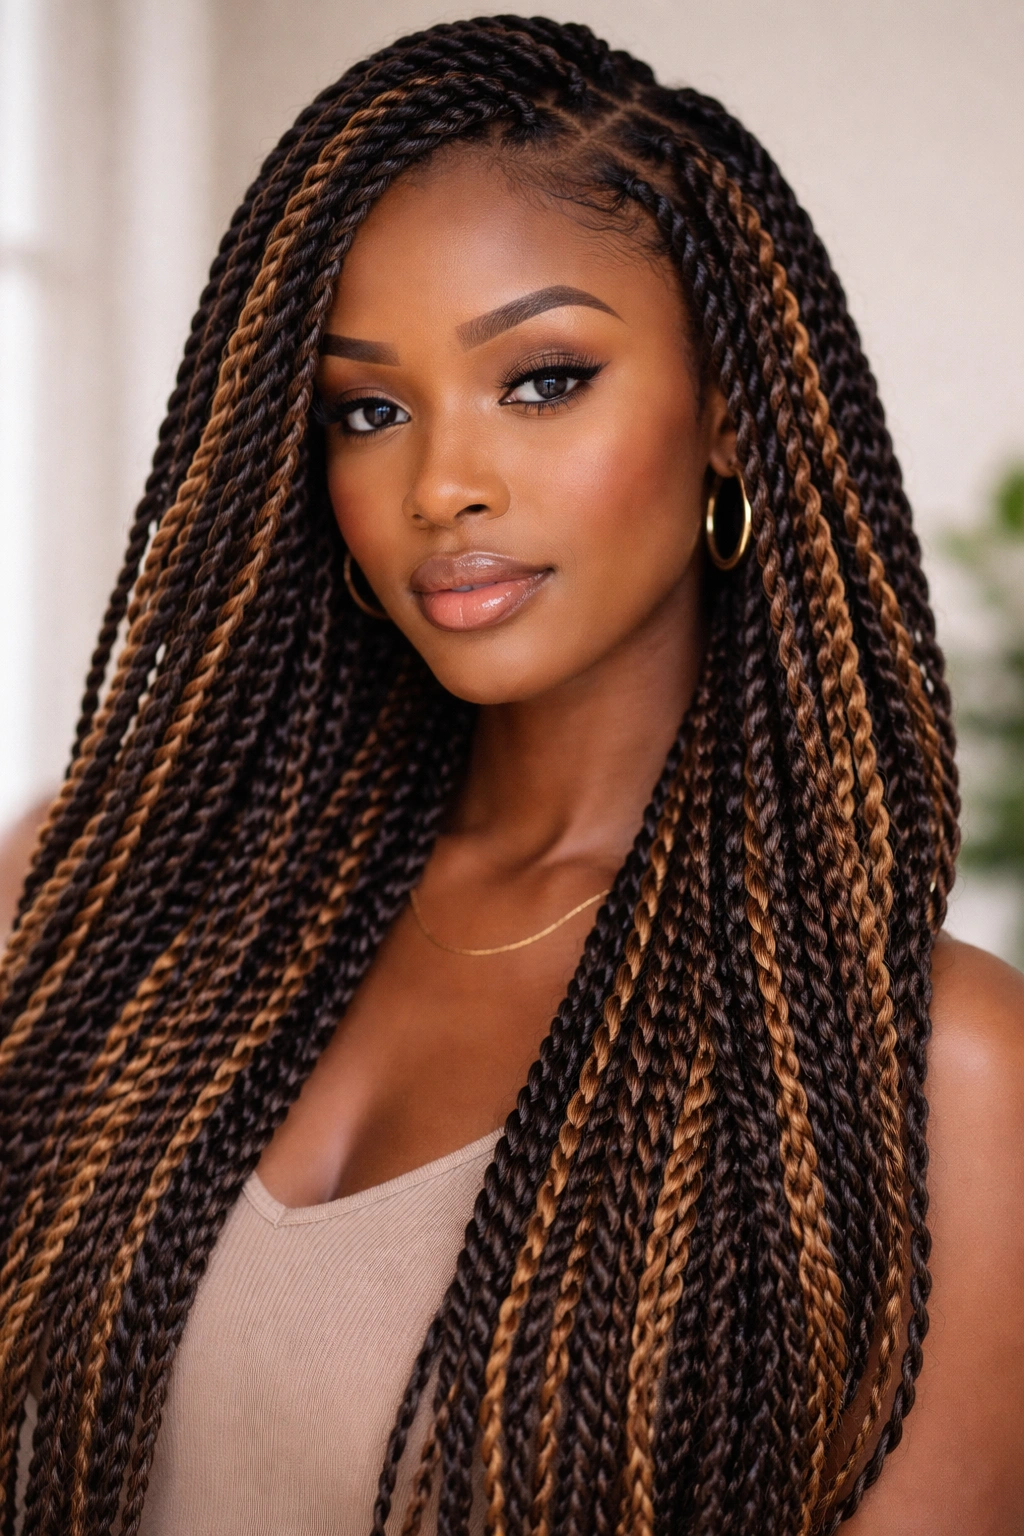
Senegalese twists are a protective style that stands out because of the defined, rope-like texture they create, and adding color — whether subtle or bold — transforms them into a genuinely eye-catching look. This style works if you have someone skilled to install it or if you’re willing to invest the time in creating the twists yourself.
Understanding the Installation Process
Senegalese twists differ from regular two-strand twists because they’re created with extensions, giving them a uniform thickness and the ability to last much longer. Your natural hair is twisted together with extension hair in a way that creates a rope-like, almost braided appearance. The twists sit close to your scalp and can be created at various thicknesses, though medium to thicker twists are more durable and last longer. Installation takes considerable time — a full head often requires 4-8 hours depending on the number of twists and their thickness — so plan accordingly or visit a specialist.
Color Options and Visual Impact
This is where Senegalese twists become genuinely creative. You can choose extensions that match your natural hair color for a low-key protective look, or you can select contrasting colors that create visual drama and interest. Copper, burgundy, blonde, gray, and jewel tones all create different aesthetics. Some people blend two different extension colors throughout their twists for a dimensional effect, while others use one bold color in their front-facing twists and a matching natural color in the back. The extensions make color expression accessible even if you prefer not to color your natural hair.
Longevity and Protective Benefits
Senegalese twists can last 4-6 weeks or longer with proper care. Keep your scalp clean, your twists moisturized, and your hair protected at night with a bonnet or scarf. The protective benefits are substantial — your natural hair isn’t being manipulated, isn’t experiencing friction, and has time to grow and strengthen while the twists do their job. This is the style for someone who wants to protect their hair while also making a bold, visible style statement.
10. Accessorized Bantu Knots for Playful Texture
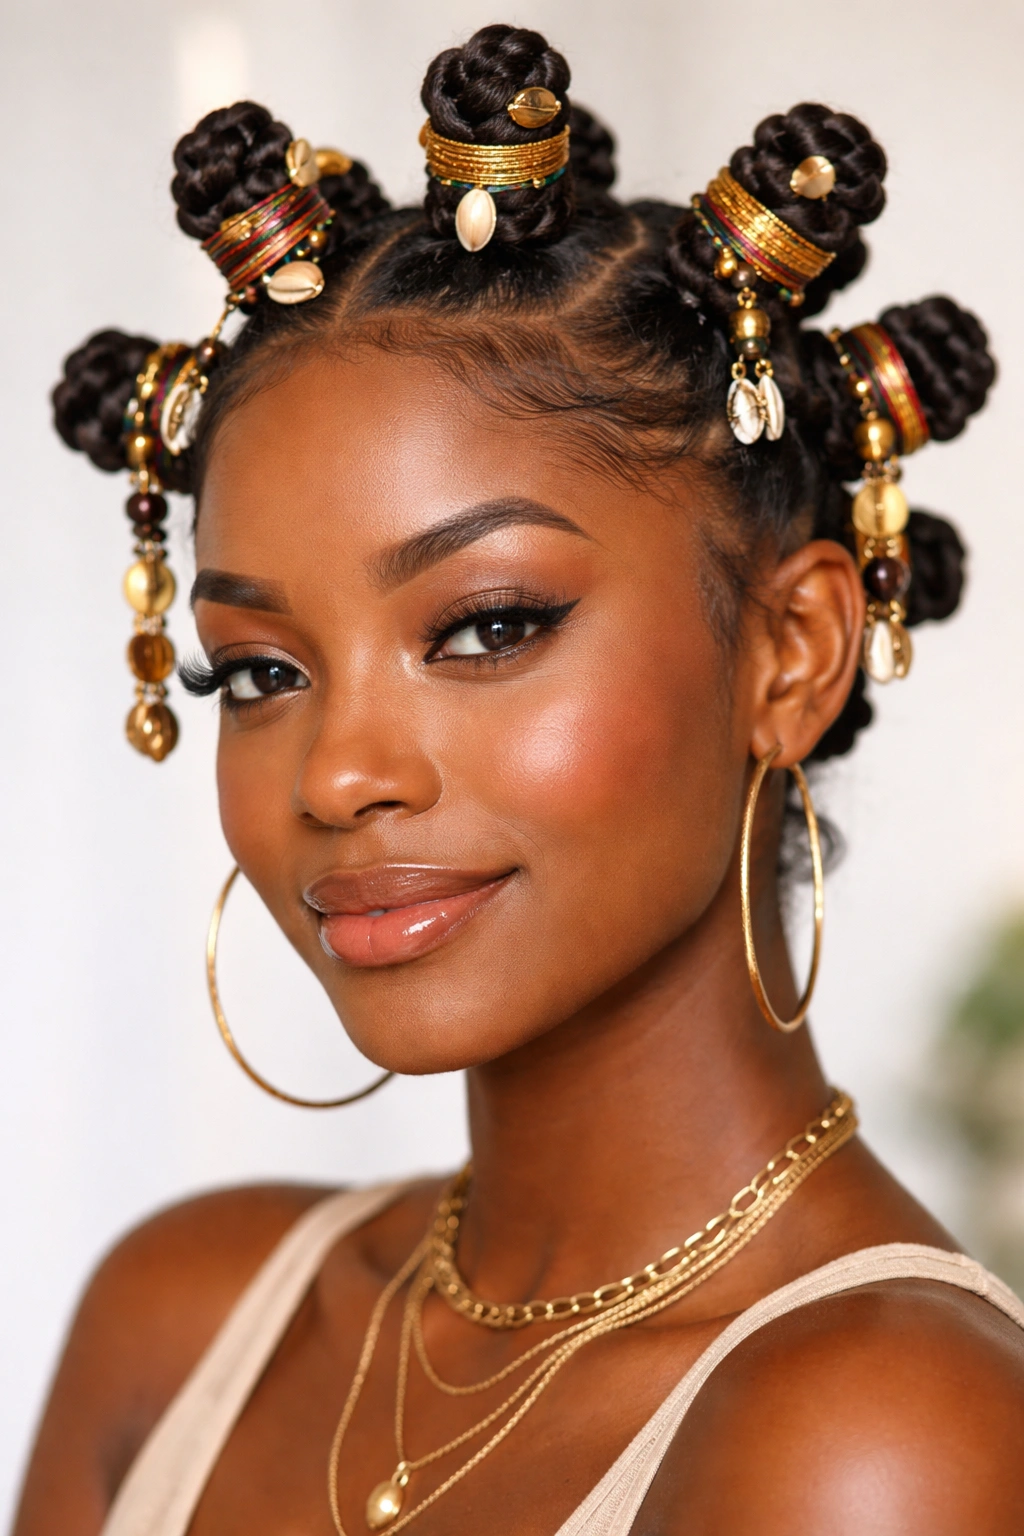
Bantu knots are small, bud-shaped coils that you secure to your scalp by wrapping hair around itself, and they’re both a protective style and a genuinely cute, playful look that works beautifully for casual settings. Adding accessories like beads, rings, or wraps makes them even more visually interesting.
Creating Secure, Even Bantu Knots
Start with damp, detangled hair that has moisture and some hold. Section your hair into the number of knots you want to create — typically 8-15 depending on your hair volume and preference. Take one section and twist it around itself from the roots, wrapping the hair into a spiral shape that sits against your scalp, similar to the way you’d wrap a rope into a coil. Secure the wrapped knot with bobby pins so it doesn’t unravel, and then move to the next section. Consistency matters here — if your knots are similarly sized and secured at the same tension, the overall look is more intentional and polished.
Adding Personality Through Accessories
Once your knots are secure and your hair is dry, this is where you add visual personality. Slide decorative beads onto some or all of your knots — choose colors that complement your skin tone or that match an outfit. Wrap colored thread or yarn around the base of select knots for pattern and visual interest. You can create a gradient where one side of your head has darker accessories and the other has lighter ones, or you can go full maximalist and bedazzle every single knot. The beauty of Bantu knots is how much personality and individuality they express.
Styling Options and Longevity
Bantu knots look beautiful as-is for 3-4 days, and then they can be unraveled into beautiful, textured coils for an entirely different style. You essentially get two looks from one installation. You can sleep on them and refresh them in the morning, and they’re genuinely low-maintenance throughout the week. This is the style for people who want something cute and intentional but don’t want to commit to a longer-term protective style.
Final Thoughts
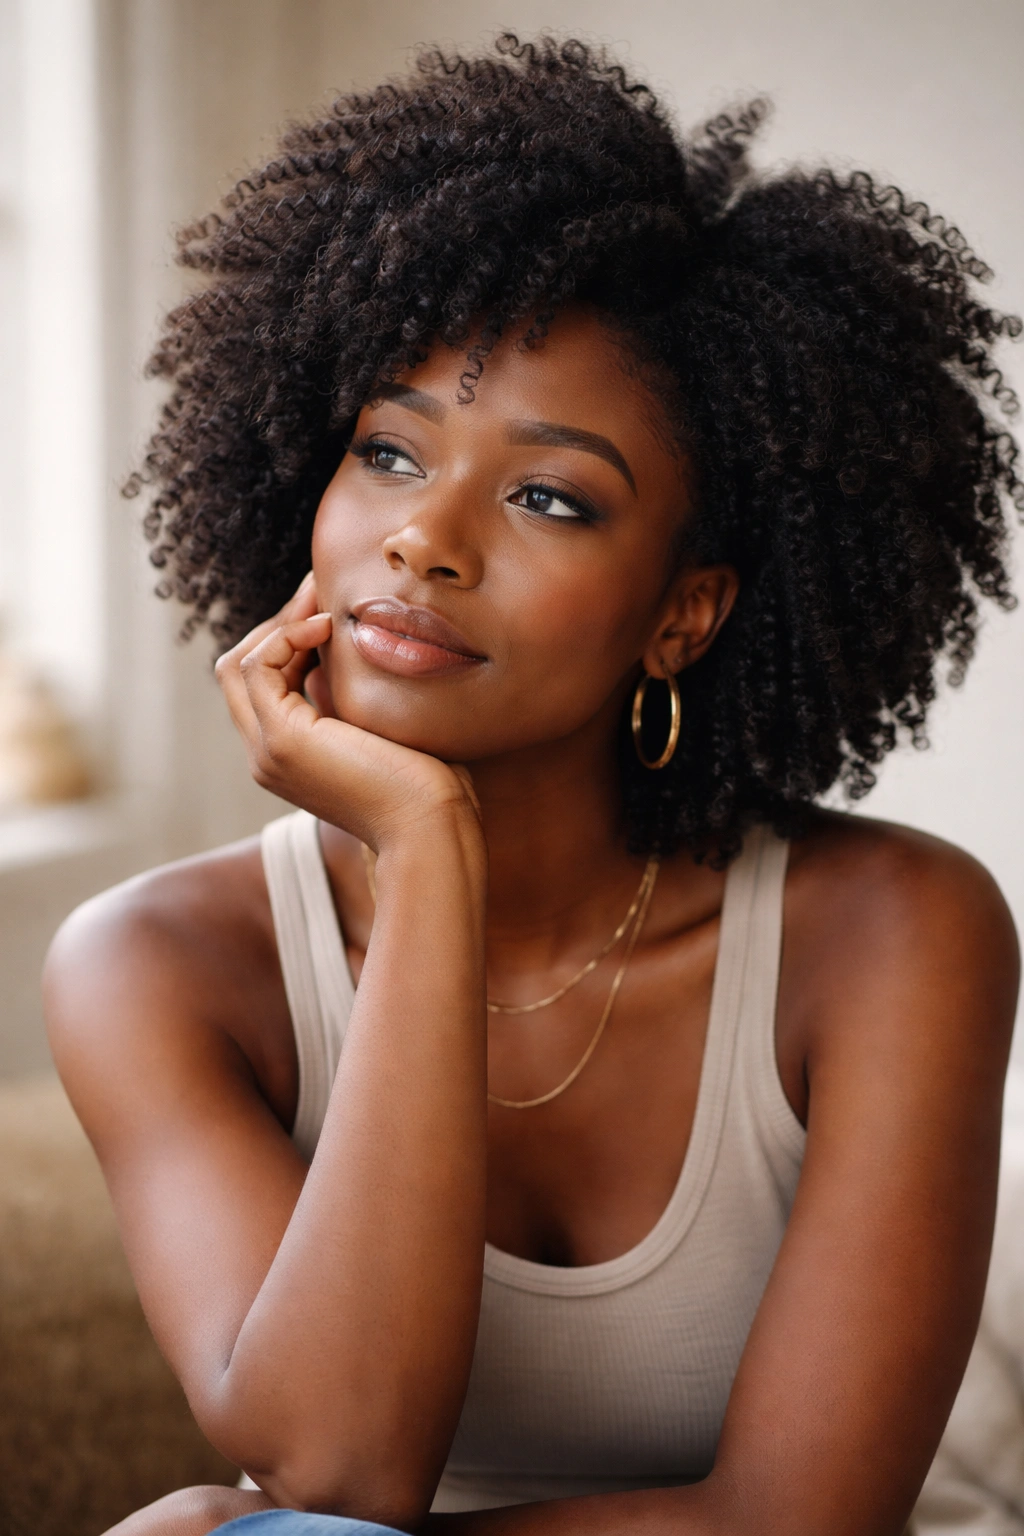
Your 4C hair is endlessly versatile and genuinely beautiful in every single form it takes. Whether you’re choosing a defined style for professional settings, a protective style that keeps your hair healthy while you live your life, or a playful style that expresses your personality and creativity, there’s a 4C style that works for your hair and your lifestyle.
The real secret to successful 4C styling isn’t about following rigid rules or using specific expensive products — it’s about understanding your hair’s moisture needs, respecting its natural texture, and choosing styles that feel good on both practical and emotional levels. A style that looks stunning in a photo but leaves your scalp sore or causes breakage isn’t actually a win, no matter how cute it is. Similarly, a style that feels effortless and looks beautiful and keeps your hair healthy and protected is absolutely worth the time investment.
Give yourself permission to experiment, to try techniques multiple times before declaring them impossible, and to adapt these styles to work with your specific hair, lifestyle, and preferences. The most beautiful version of each of these styles is the one that works genuinely well with your hair type and that makes you feel confident and beautiful every single time you see yourself in the mirror.
