



Messy buns have become a go-to hairstyle for anyone seeking an effortless, polished-yet-casual look that works whether you’re running errands, heading to the gym, or just having a low-key day. For those with relaxed hair, messy buns offer a particularly appealing advantage: the smooth, straight texture creates clean lines and a refined appearance even when the bun itself is intentionally tousled and undone. What makes messy buns so versatile for relaxed hair is that they look intentionally chic rather than accidentally sloppy—there’s a difference between a bun that looks like you threw your hair up five minutes ago and one that’s been strategically styled for maximum impact.
The challenge many people face with relaxed hair, however, is achieving that perfect balance between “relaxed and effortless” and “actually planned and polished.” Relaxed hair has less natural texture to work with, which means you can’t always rely on built-in hold or grip the way you might with textured hair. That’s actually an advantage in disguise because it means you have complete control over the final look—you’re not fighting against curl patterns or shrinkage. With the right techniques, tools, and styling tricks, you can create messy buns that look sophisticated, stay put all day, and suit any occasion from casual to semi-formal.
This guide covers eight distinct messy bun styles specifically designed for relaxed hair, each with step-by-step instructions, styling tips, and guidance on when to wear each version. Whether you want something tousled and undone, sleekly pulled together, or somewhere in between, you’ll find a style that works with your relaxed hair texture and your personal aesthetic. Each style can be customized based on hair length, thickness, and how much volume you want to create.
1. The Classic High Messy Bun
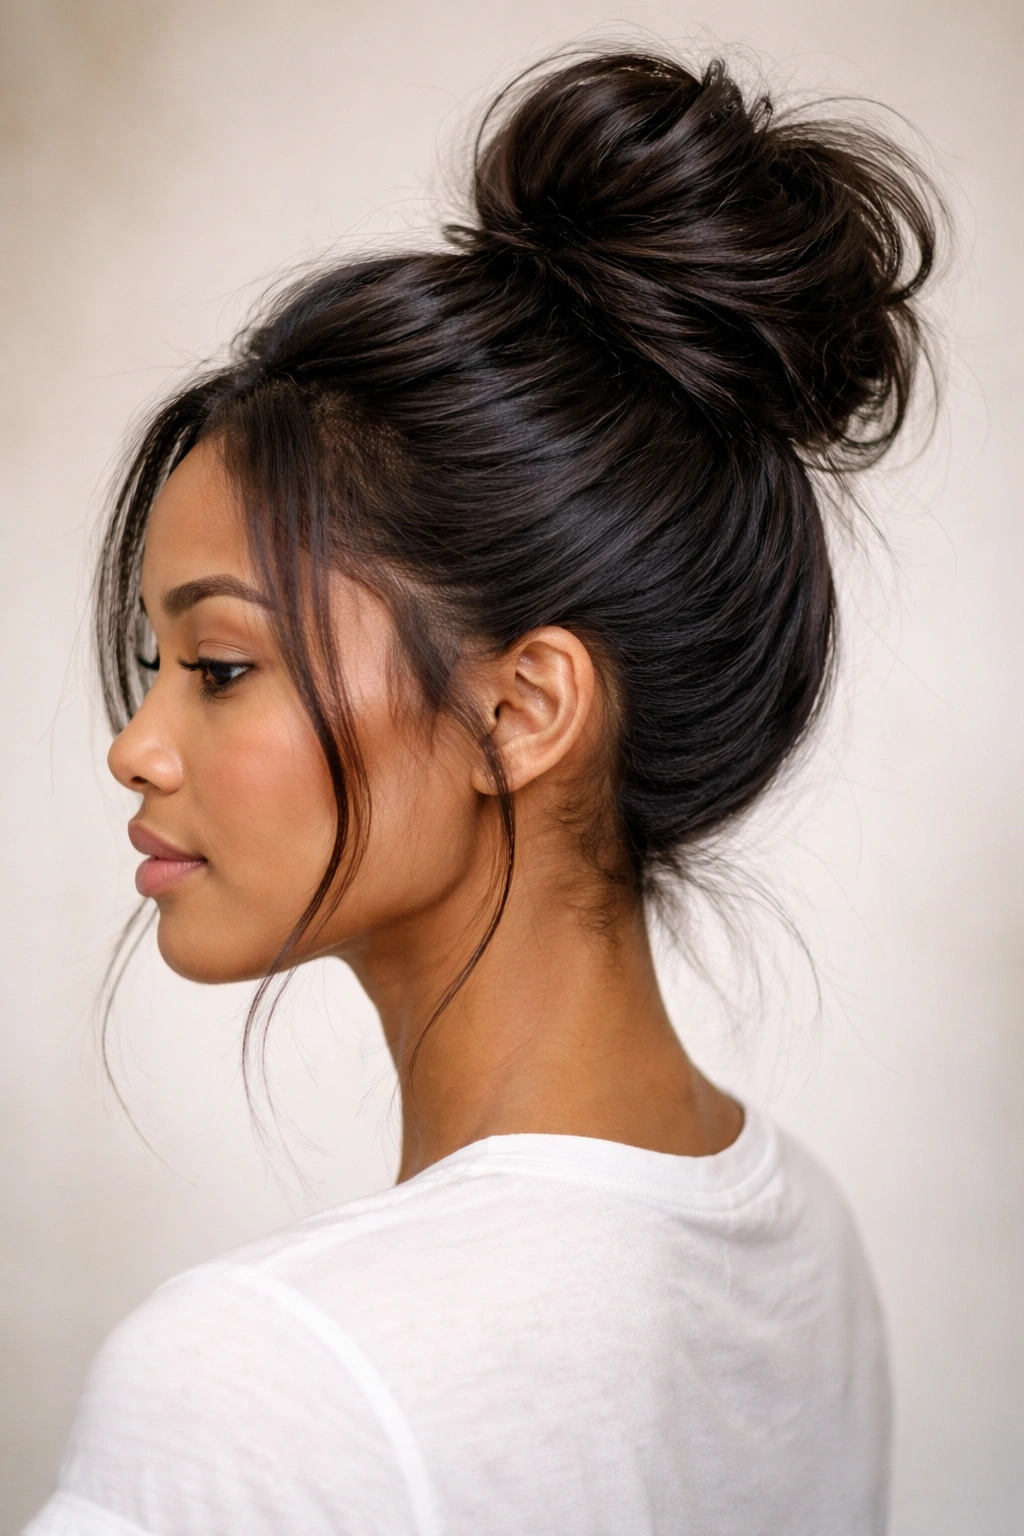
The classic high messy bun is the foundation of every messy bun collection—it’s the style that works for almost everyone and suits nearly every occasion. For relaxed hair, this style creates a clean, polished silhouette while maintaining that effortlessly undone vibe. The key to making this work with relaxed hair is creating strategic texture and volume at the crown, which prevents the bun from looking too slick or overly formal.
How to Create the Look
Start by flipping your head upside down and using your fingers to gently backcomb the crown area—this creates grip and volume without needing heat or extra products. Flip back up and use a fine-tooth comb to smooth the surface while maintaining that teased interior. Gather your hair at the crown (roughly where the top of your head is widest) and secure with a clear elastic band. Don’t make the ponytail too tight—relaxed hair benefits from a slightly looser base that you can then manipulate into texture. Once your ponytail is secured, twist or braid the tail loosely, then wrap it around the base of the ponytail and pin with bobby pins. Pull out a few face-framing pieces to soften the look and create that intentional messiness.
Why This Style Works for Relaxed Hair
Relaxed hair’s smooth texture means this bun won’t look shapeless or droopy the way it might if you just piled hair on top of your head without any texture. By backcomb-teasing the crown, you create an internal structure that holds everything in place while the finished surface remains sleek and intentional. The face-framing pieces add dimension and prevent the overall look from feeling too severe or formal, which is exactly what distinguishes a messy bun from a strict high ponytail.
Pro Tips for Maximum Hold
Apply a lightweight texturizing spray to the crown before backcombing—this gives you more grip and makes the teasing stick better without weighing down relaxed hair. Use at least four to six bobby pins positioned at different angles around the bun base, not just in one spot. If your bun feels wobbly after a few hours, use a clear elastic band to cinch around the base underneath the finished bun; nobody sees it but it keeps everything locked in place.
2. The Low and Loose Messy Bun
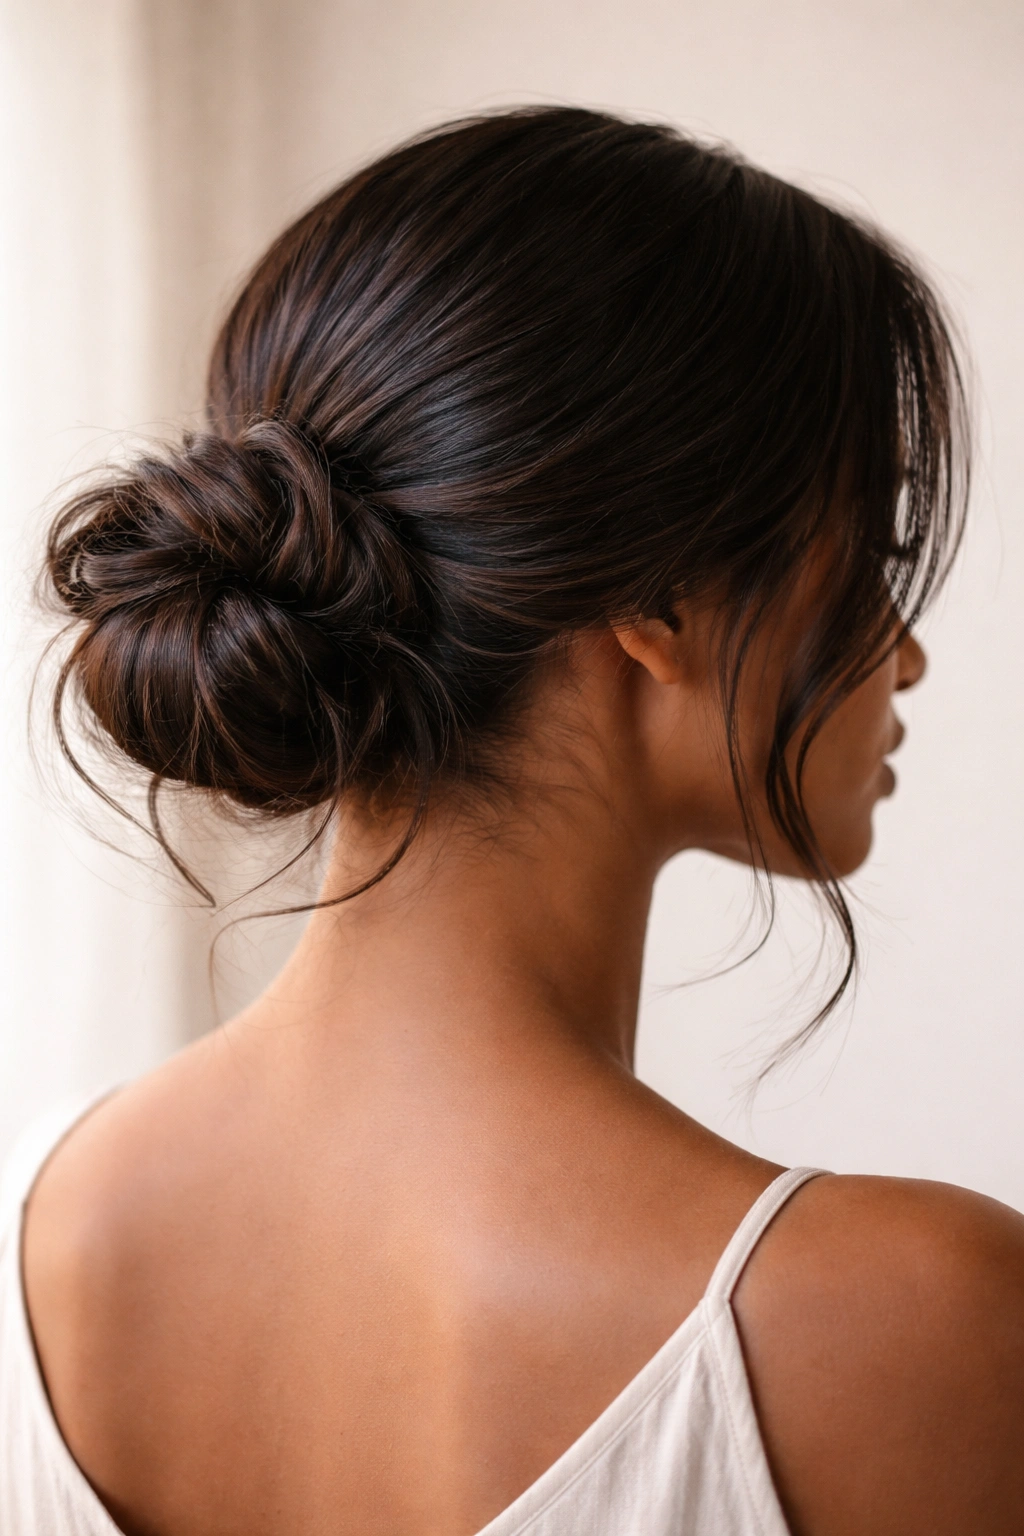
The low messy bun reads as more sophisticated and polished than its high counterpart, making it perfect for work, dinners, or any situation where you want to look put-together without appearing overly formal. With relaxed hair, a low bun positioned just at the nape of the neck creates an elegant line while the loosely styled interior keeps it from feeling rigid or severe. This style works beautifully for both thick and thin hair because the low placement naturally creates fullness at the back of the head.
The Step-by-Step Method
Create a low ponytail by gathering hair at the nape of your neck—aim for a point roughly two inches above where your neck meets your shoulders. Secure with an elastic, but leave this ponytail intentionally loose and somewhat floppy. Rather than twisting the tail tightly, separate it into two sections and loosely wrap them around each other, then circle that around the base of the ponytail. The wrapping should be casual and imperfect; any gaps or loose strands are actually part of the design. Pin in place with bobby pins, then gently pull at the edges of the bun to make it wider and fluffier. Pull out one or two pieces from near your ears to frame the face.
What Makes It Work on Relaxed Hair
Relaxed hair’s weight and smooth texture mean that a low bun maintains its shape throughout the day without needing constant adjustments. The lower position distributes the weight evenly across your neck and shoulders, preventing the tension headaches that sometimes come from high styles. Because relaxed hair doesn’t have built-in texture, you have complete control over how much you pull and tease, allowing you to customize the volume to match your face shape and personal preference.
Styling Tricks for Longevity
Use a texturizing or sea salt spray on the ponytail section before wrapping it—this gives you something to grip and keeps the wrapped sections from slipping. If you have fine relaxed hair, don’t skip the backcombing step even for a low bun; it prevents the whole thing from collapsing into a sleek knot after an hour. Smooth the exterior of the bun with a small brush and finishing spray for a polished appearance, but let the interior stay imperfectly textured for that messy-on-purpose look.
3. The Side-Swept Messy Bun
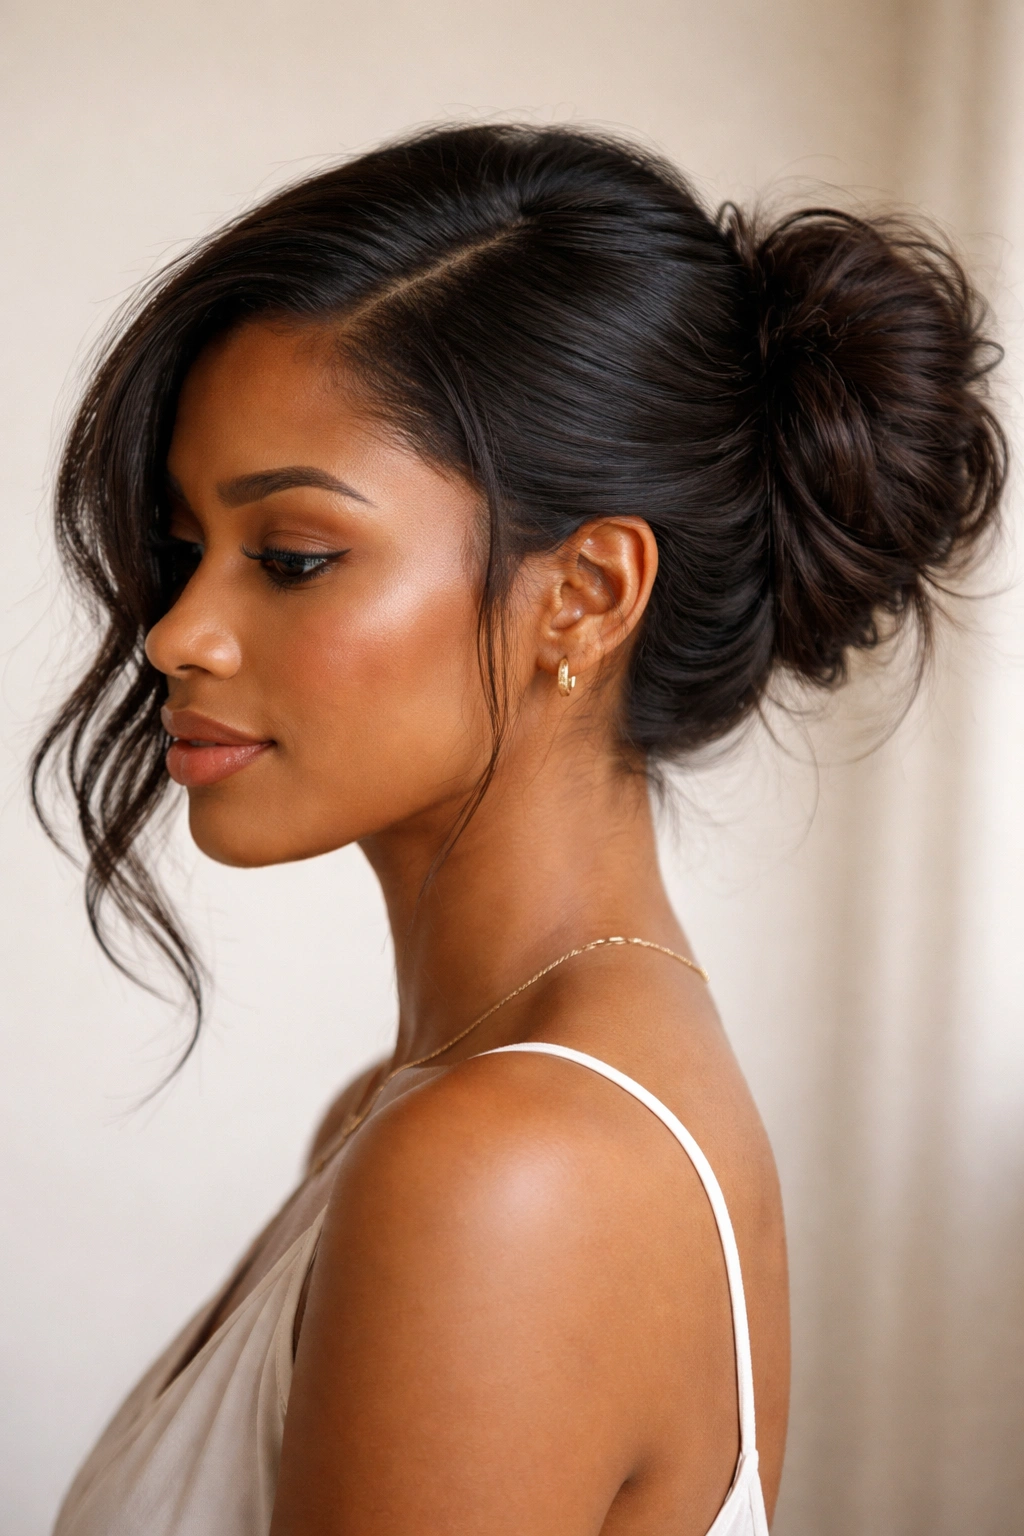
A side-swept messy bun offers visual interest and asymmetry that flatters most face shapes while remaining relaxed and wearable. With relaxed hair, this style creates the illusion of volume on one side while keeping the other side sleek, making it an excellent choice if you have finer hair or want to add dimension to your look. The side-swept position feels younger and more playful than a centered bun while still maintaining sophistication.
Building the Look from the Ground Up
Begin by creating a deep side part that runs from one temple back toward your crown, angling it slightly toward the back of your head. Gather all your hair to one side—usually the side with more hair after the deep part—and position this side ponytail low and off to the side rather than directly at the nape. The ponytail should sit roughly where your ear is at the level of your collar. Secure loosely and create texture by loosely twisting or braiding the tail. Wrap it around the base and pin securely, then gently pull at the wrapped sections to create volume. Leave the other side of your head smooth and sleek, allowing that deep side part to frame your face.
Why Relaxed Hair Excels with This Style
The smooth texture of relaxed hair means the sleek side section stays perfectly smooth and polished without flyaways or frizz, creating a true contrast with the textured bun side. This smooth-versus-textured contrast is actually harder to achieve with very textured hair because the whole head wants to have similar texture. You can use serums or shine sprays on the smooth side to enhance that polished contrast without worrying about making the bun side look greasy or overdone.
Making It Wearable for Every Day
Apply gel or edge control to the smooth side section to keep it sleek throughout your day. Don’t pull the bun too tightly—side-swept buns can create tension headaches if overly taut, so a loose foundation is essential. Use a flexible hold spray rather than a rigid one, which allows the bun to shift slightly without pieces completely escaping. This style works beautifully for three to four days if you sleep on it carefully, as the side-swept shape maintains its form better than centered buns.
4. The Double Messy Bun
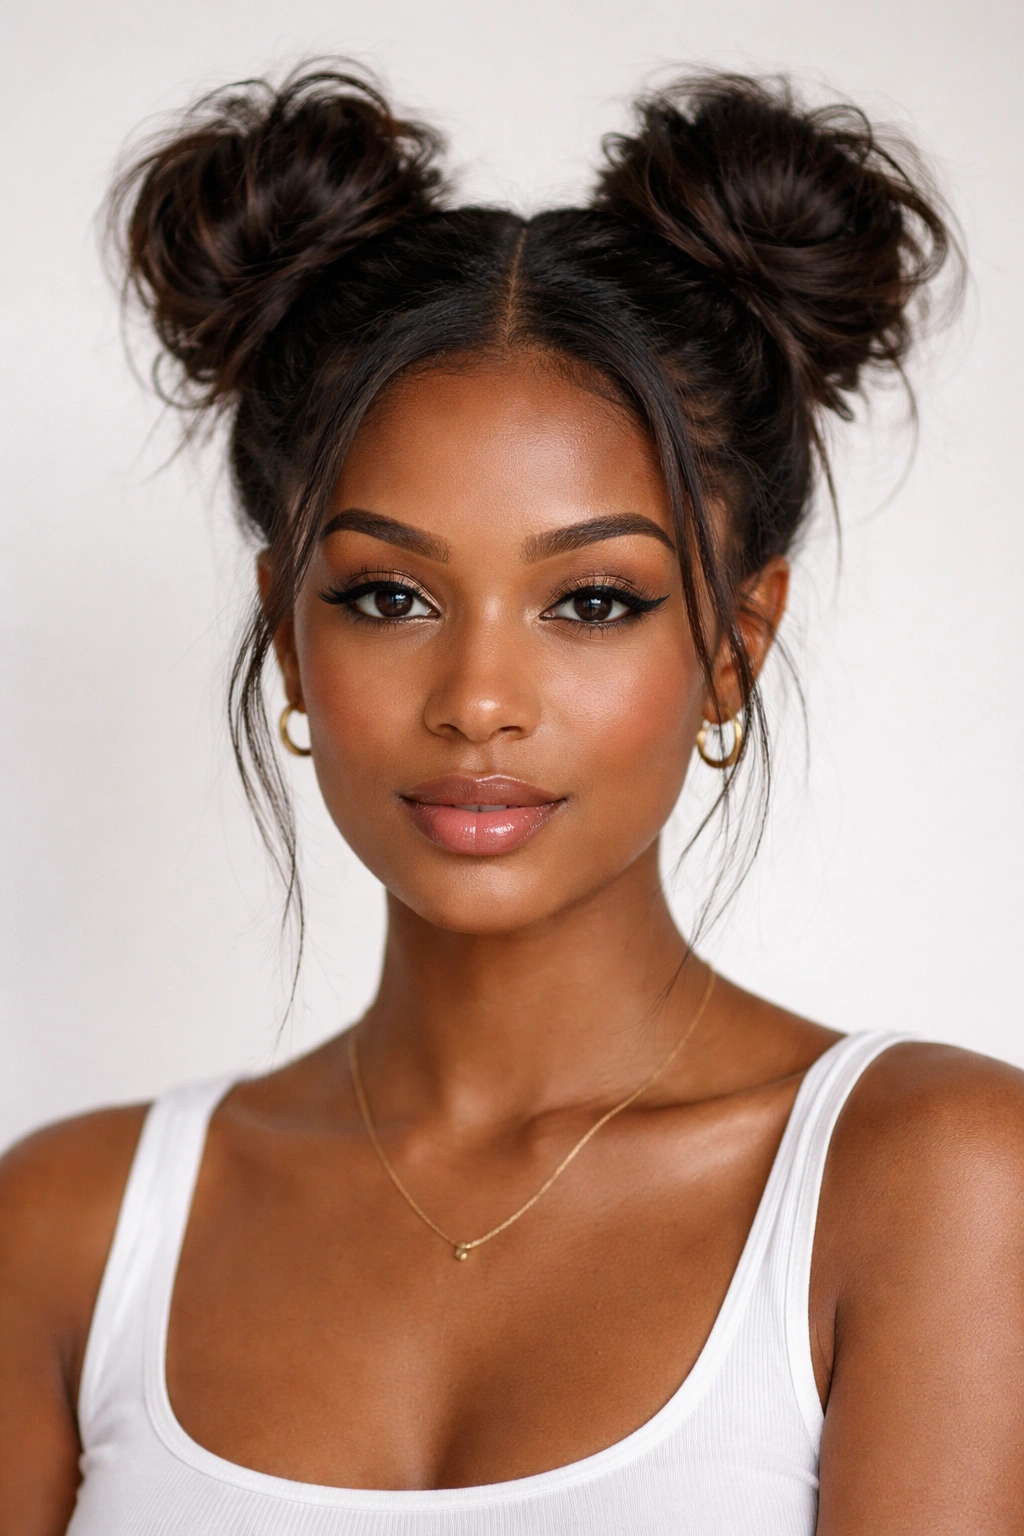
Double buns have evolved from their playground origins to become a genuinely wearable, fashion-forward style that reads as playful yet intentional. With relaxed hair, twin buns positioned slightly higher than you might expect create a balanced, modern look that works for casual settings, festivals, or anytime you want to inject personality into your styling. The two-bun structure means neither bun needs to be as full or perfect as a single bun would—the overall design carries the look.
Creating Balanced Twin Buns
Create a center part running from your forehead straight back to your nape. Divide your hair into two equal sections, one on each side of the part. On the first side, gather hair at roughly mid-head height (higher than you’d place a single bun, but not at the very crown) and secure with a small elastic. Repeat on the other side, making sure both ponytails are at the same height. Create texture in each ponytail by lightly backcombing or by loosely twisting and wrapping the tail around its base. You want each bun to be roughly the same size, so stand in front of a mirror and compare as you’re building. Pin each one securely, then gently tease the exterior to create that intentional messiness.
Why It Works with Relaxed Hair
Relaxed hair’s weight distribution means your two buns won’t pull the center part off-balance or cause your scalp to feel strained. The smooth texture makes each bun look defined and intentional rather than accidentally messy. Because you’re working with two smaller buns rather than one large one, you can create more visible texture and detail—each bun can be slightly different without looking unplanned, which is actually part of the charm.
Styling Tips for Double Bun Success
Make sure both elastics are positioned at exactly the same height by using a mirror or asking someone to check for you—even a quarter-inch difference is visible and distracting. Use smaller elastics for this style rather than the thicker ones you might use for a single bun; thinner bands make the individual buns appear more intentional and less bulky. If one side of your hair is naturally thicker than the other, position the thinner side’s bun slightly higher and tease it a bit more to visually balance the overall style.
5. The Textured Wrap Messy Bun
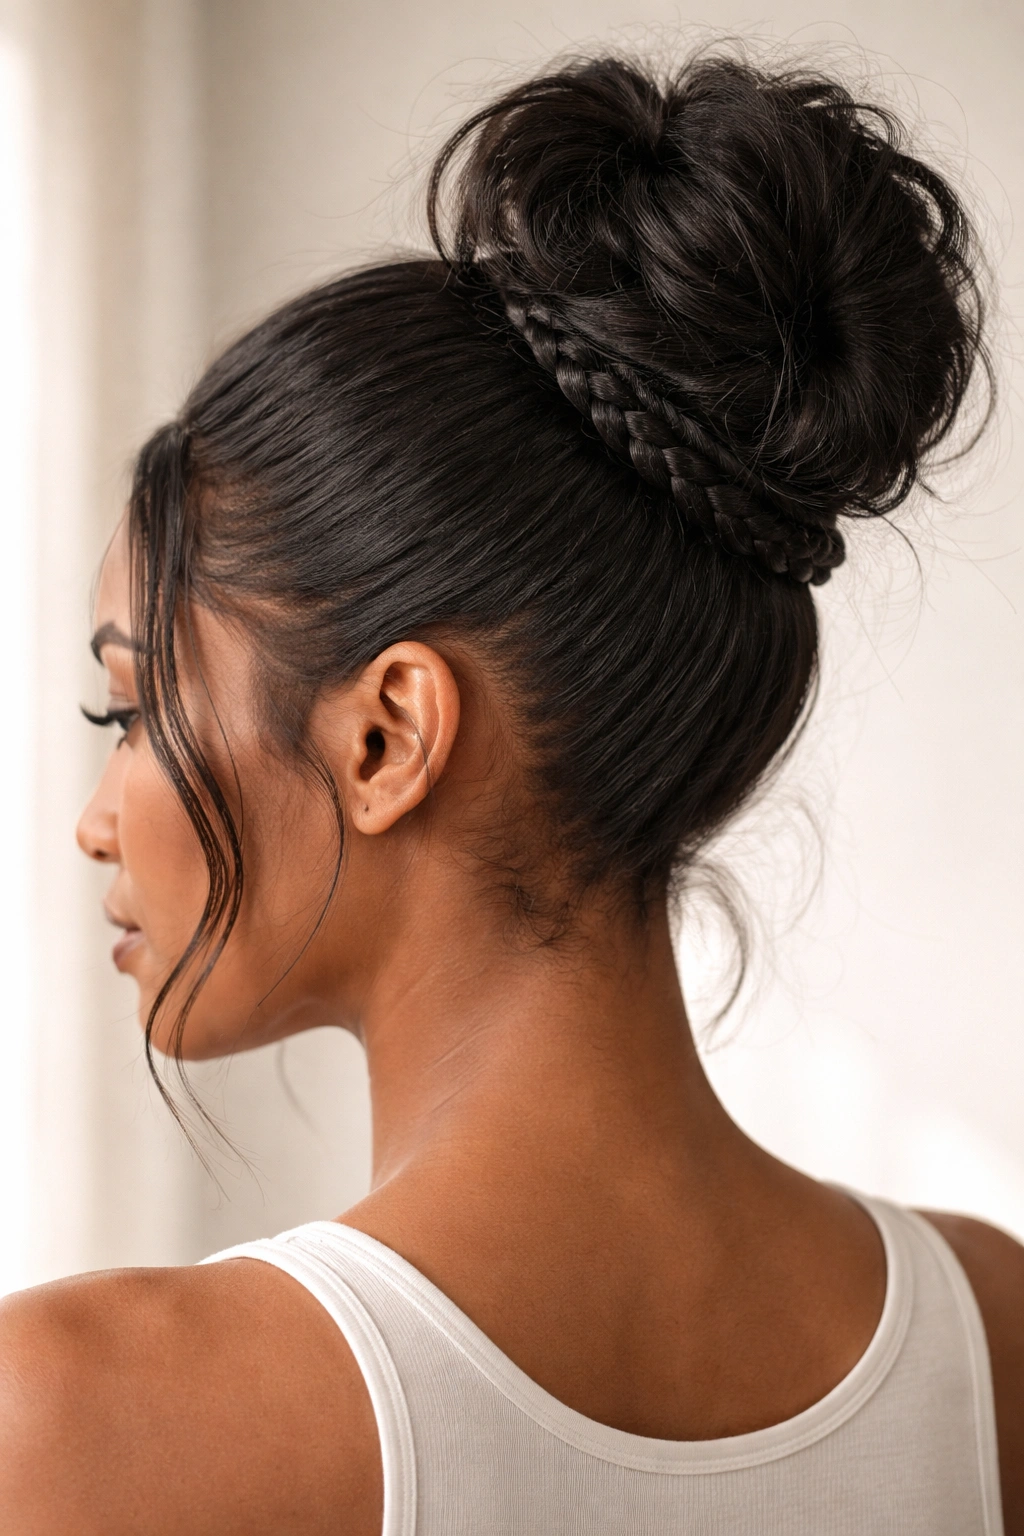
The textured wrap messy bun takes the basic concept and adds intentional detail through braids, twists, or wrapped sections that create visual interest and dimension. With relaxed hair, this style shines because the smooth base texture provides contrast for the detailed sections you’re adding, making the overall look more sophisticated and designed-looking. This is an excellent choice when you want your messy bun to feel intentional and put-together rather than purely casual.
The Wrap Technique Breakdown
Start with a high or mid-height ponytail positioned where you’d normally place a single messy bun. Before wrapping the tail around the base, separate the ponytail into two to three equal sections. Loosely braid or twist each section separately—the looser you make these braids, the more relaxed and undone the final look will be. Wrap each braided or twisted section around the base of the ponytail in slightly different directions, so some wraps go clockwise and others counterclockwise. Pin each wrap in place as you go, using bobby pins hidden underneath the wraps. Once all sections are secured, gently pull at the braids or twists to widen them and create a softer, more voluminous appearance.
Why Relaxed Hair Showcases This Style
The braids or twists you create in relaxed hair stay defined and visible because the hair holds its shape—you won’t have the frizz or texture breakdown that sometimes occurs with other hair types. This means your detail work remains visible and impressive throughout the day. The smooth, straight sections of hair between the braids or twists create visual contrast that makes the textured elements pop, creating a more sophisticated, editorial-quality look than you might achieve with other hair types.
Execution Tips for Maximum Impact
Don’t braid or twist too tightly—a loose braid looks more relaxed and interesting than a tight, formal one. Use a texturizing spray on the ponytail before braiding to give yourself more grip and help the braids hold their definition. After wrapping and pinning, take a moment to carefully pull at each braided section to soften and widen it; this transforms a neat braid into a beautifully undone textured element. This style takes slightly longer to create than a basic messy bun but rewards that extra time investment with a polished, intentional appearance.
6. The Sleek Top with Messy Bottom Bun
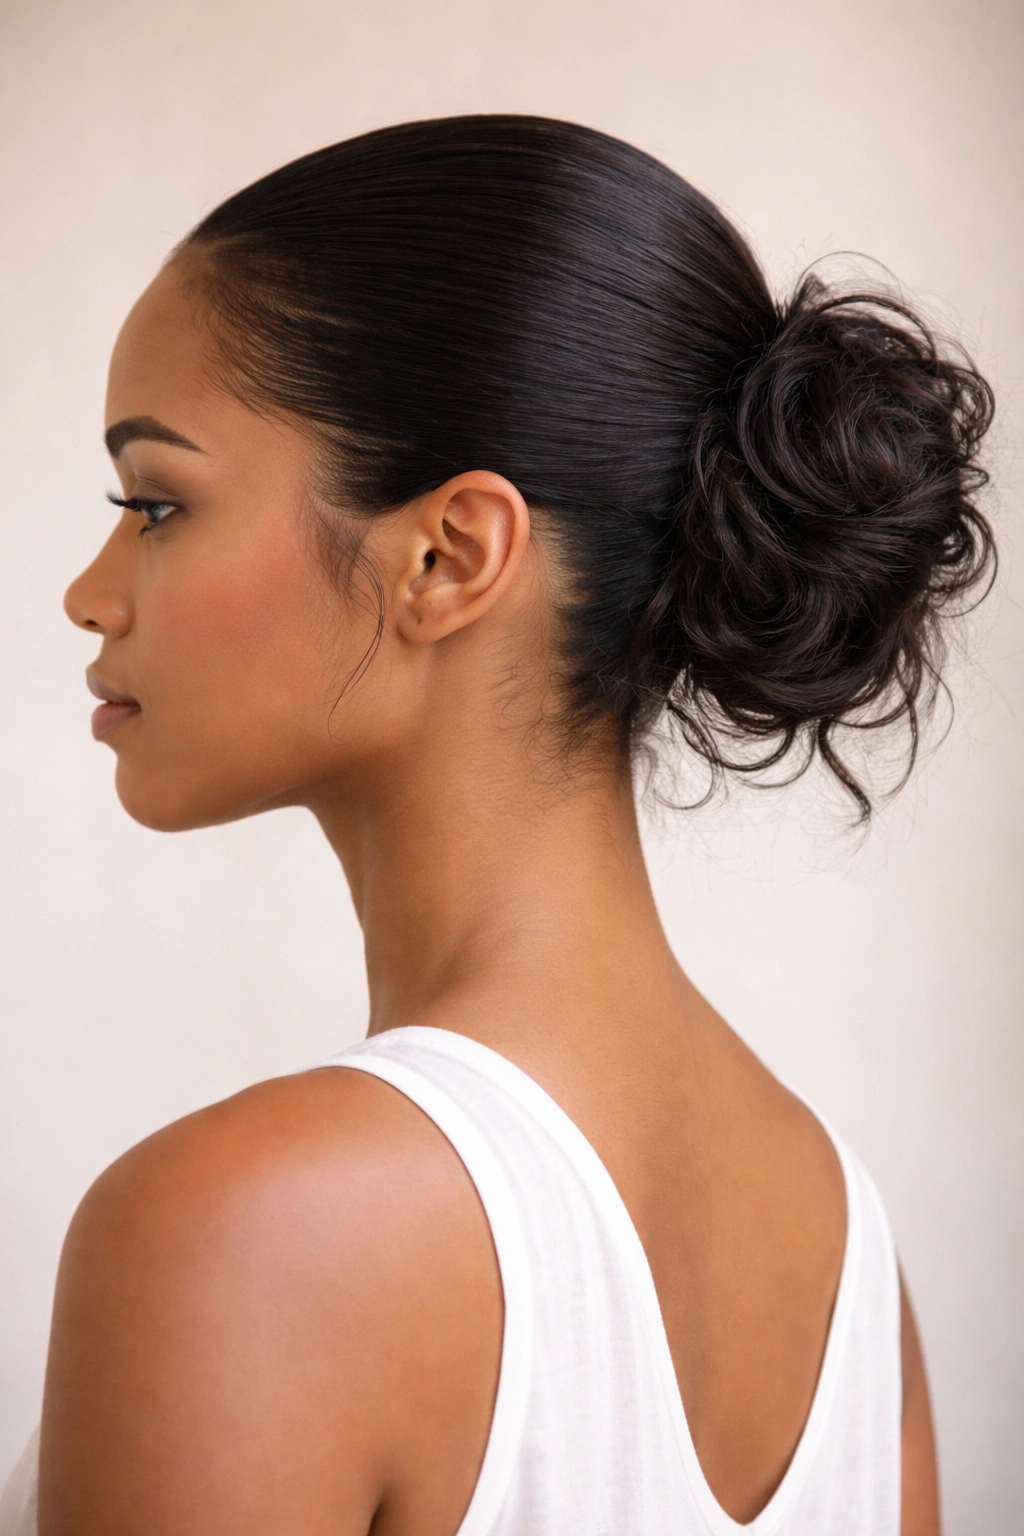
This hybrid style combines the sophistication of a sleek top section with the relaxed texture of a messy bun, creating visual interest and balance. The sleek crown catches light and reads as polished, while the loosely textured bun at the back feels casual and effortless—together, they create a look that works for both professional settings and casual outings. With relaxed hair, the contrast between the sleek top and textured bottom is particularly striking and well-defined.
Building the Two-Part Structure
Start by sectioning off the top crown area—roughly from your temples back to the crown of your head. Smooth this section down tightly against your scalp using a fine-tooth comb and smoothing serum or gel. Secure this top section in place with bobby pins positioned flat against your head or with a small elastic hidden beneath the section. Gather the remaining hair into a ponytail at the nape of your neck, lower than you might normally position it. This lower positioning helps the ponytail feel separate from the sleek top section. Create texture in this lower ponytail by backcombing, loosely twisting, or braiding, then wrap it around its base and pin. The contrast between the polished top and textured bottom should be visibly distinct.
The Science Behind Why It Works
Relaxed hair’s natural tendency to lay flat means your sleek top section will remain genuinely sleek and polished throughout the day without frizz or flyaways working loose. At the same time, the relaxed texture cooperates beautifully with your texturizing efforts on the bottom section, holding whatever texture or bulk you create. The two sections visually separate because of the difference in texture and styling rather than relying on an actual physical boundary, creating a sophisticated overall effect.
Maintenance and All-Day Wear
Use an edge control or gel on the sleek top section, but apply it sparingly so the hair doesn’t look wet or overly product-heavy. The sleek top section might loosen slightly after several hours, particularly at your hairline—keep bobby pins and a fine-tooth comb with you for quick touch-ups. This style actually improves as the day goes on; the sleek section relaxes slightly and the textured bottom becomes even more undone, creating a beautiful worn-in look by evening.
7. The Braided Detail Messy Bun
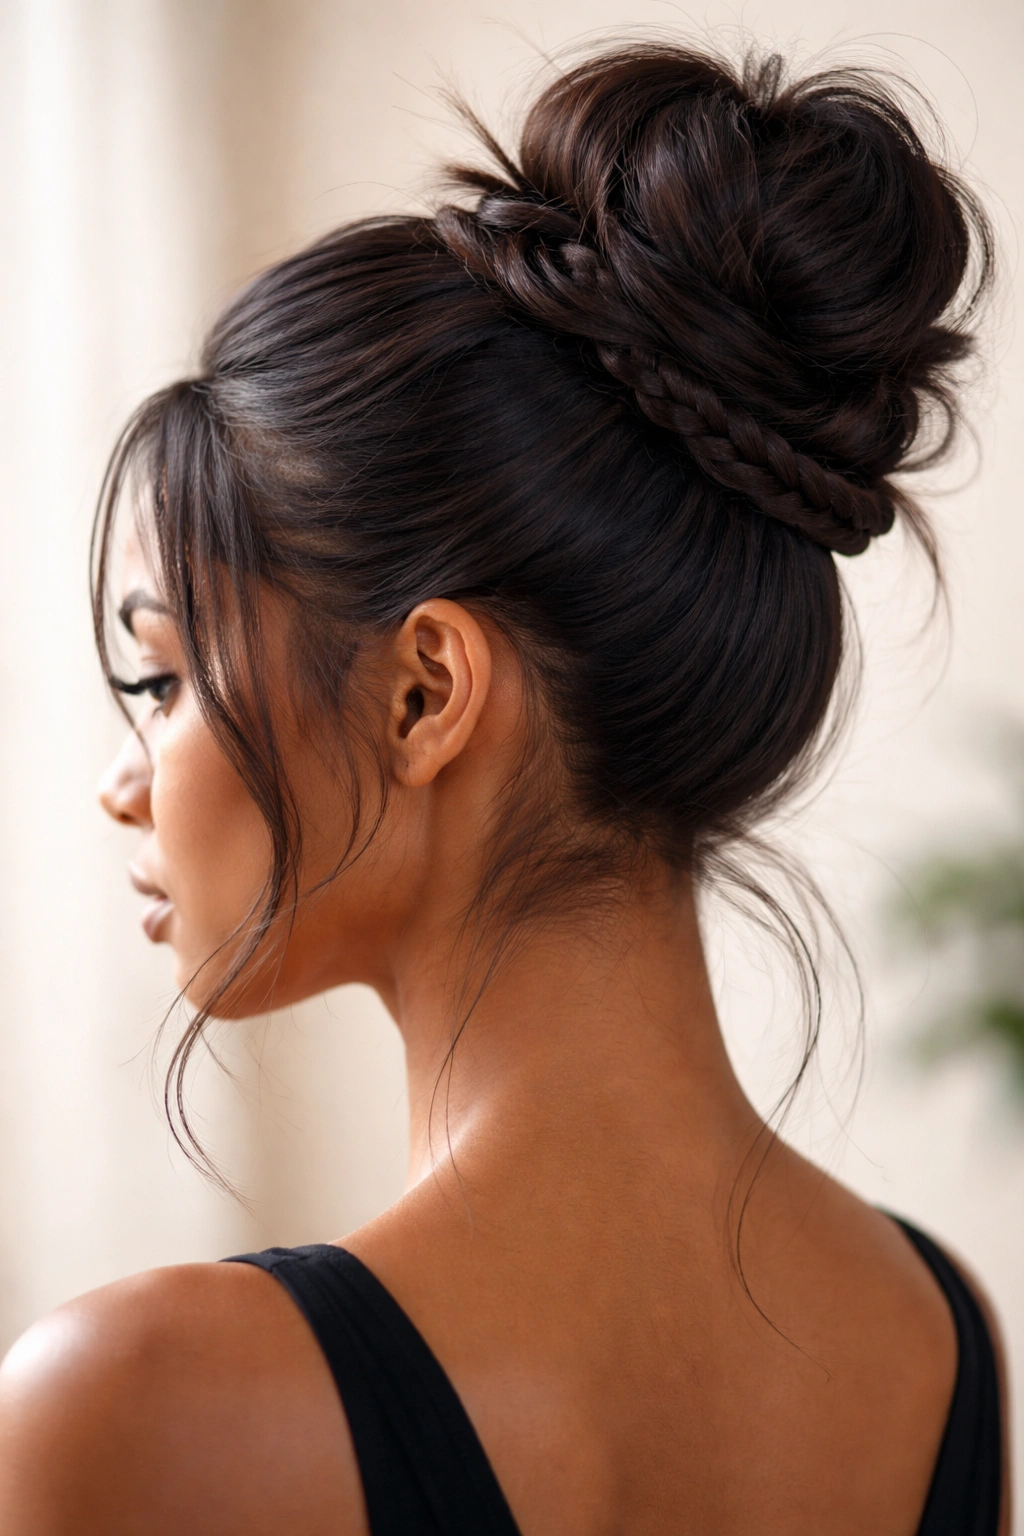
Incorporating braids into your messy bun adds structural interest and visual dimension that elevates the style from casual to genuinely polished. With relaxed hair, braids remain defined and visible throughout the day, making them an excellent design element. You can incorporate a single statement braid that wraps around the bun base, multiple smaller braids woven through the bun, or a partial braid that connects to the ponytail—the variations are endless.
Single Braid Wrap Method
Create a high or mid-height ponytail and secure loosely. Before building the bun itself, take a small section from the outer edge of the ponytail and braid it loosely—this braid should be roughly two to three inches long. Use this braided section as your wrap, circling it around the base of the ponytail and pinning it in place. Gather the remaining ponytail hair and create your messy bun as usual, positioning it inside the wrapped braid. The braid becomes a decorative frame for the bun, adding visual interest and sophistication. Gently pull at the braid to widen it and create a softer appearance.
Multi-Braid Integration Technique
Alternatively, separate your ponytail into three sections and braid each loosely, then wrap all three braids around the base simultaneously in slightly different directions. This creates a more textured, dimensionally interesting appearance than a single wrap. The braids can overlap, crisscross, or spiral around the base—experiment to see what visual effect appeals to you most. Pin each braid independently to ensure they stay in place throughout your day.
Why Relaxed Hair Displays Braids Beautifully
Braids in relaxed hair maintain crisp definition because each strand stays smooth and distinct—there’s no frizz or texture breakdown that can make braids look fuzzy or poorly executed. The braids remain visually prominent throughout the day, maintaining their detail and impact from morning through evening. This makes braided detail buns an excellent choice when you want a style that looks intentional and carefully designed rather than effortlessly thrown together.
Braid Longevity and Touch-ups
Gently pull at your braids immediately after securing them to soften them slightly and create a more relaxed appearance—tight braids look too formal for a messy bun aesthetic. Use bobby pins hidden underneath the braids rather than visible ones, creating a polished look where the braids seem to float around the bun. If any braid starts to unravel during the day, simply re-pin it—you don’t need to start over.
8. The Undone Wave Messy Bun
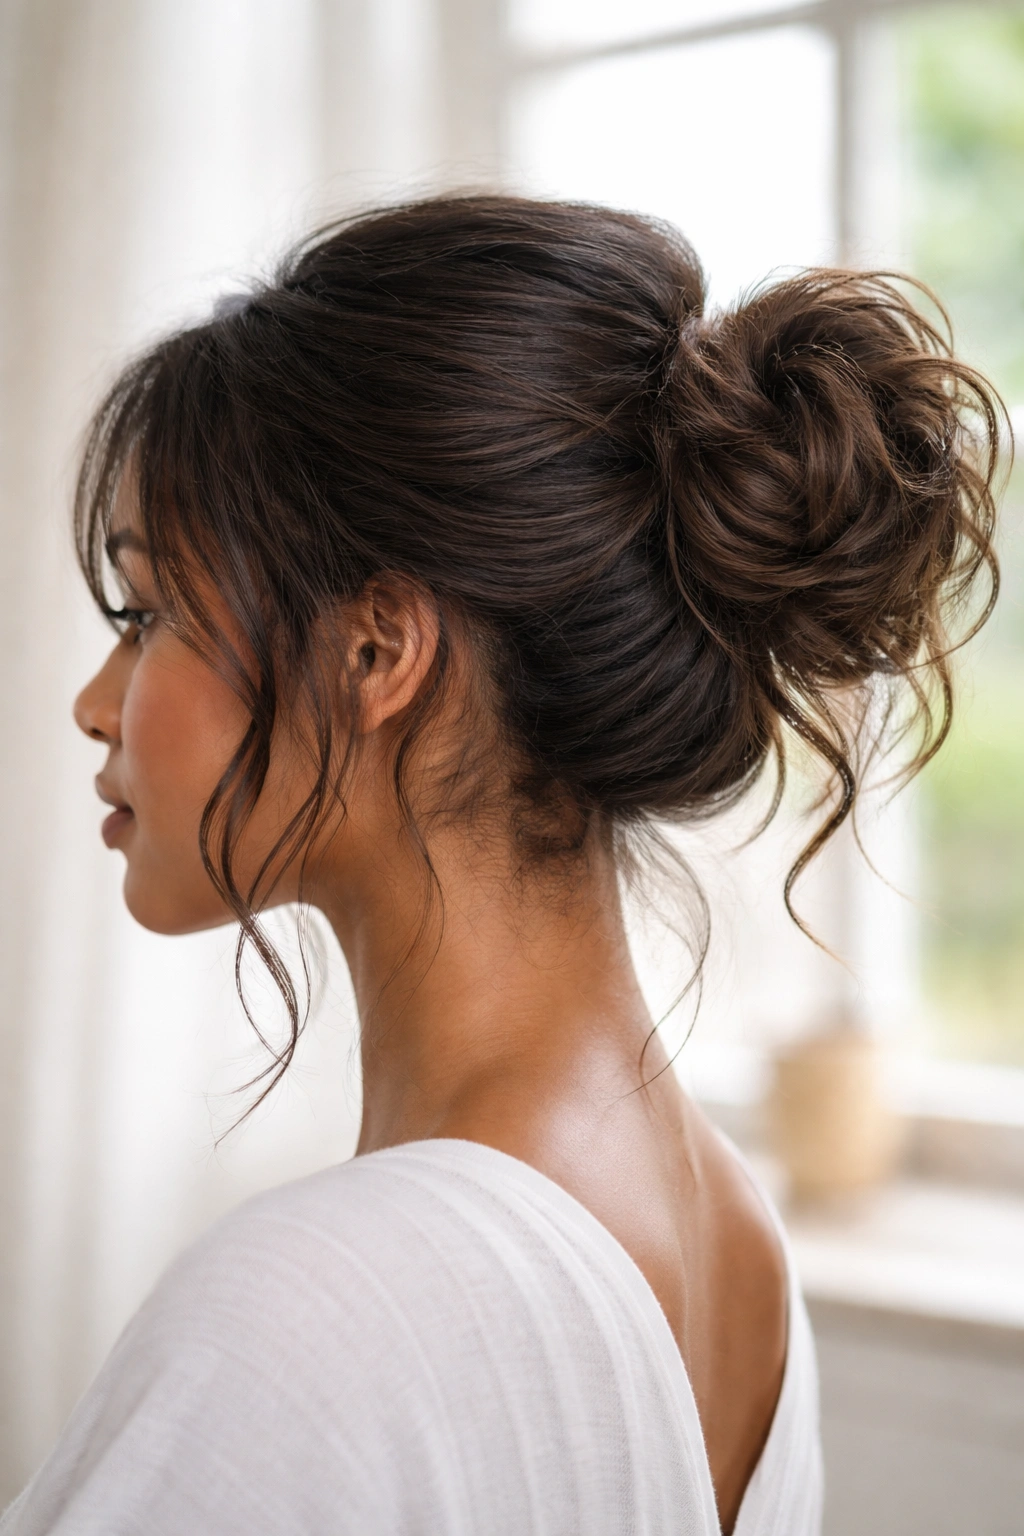
The undone wave messy bun incorporates subtle waves or bends into the hair before assembling the bun, creating texture and visual interest that reads as effortlessly sophisticated. With relaxed hair, these waves can be created through various methods and hold beautifully throughout the day, creating a romantic, lived-in aesthetic. This style is perfect when you want something that feels polished yet completely undone, with an almost beach-day vibe.
Creating the Wave Foundation
Before assembling your bun, create soft waves throughout your hair using one of several methods: sleeping in braids overnight, using a curling iron to create loose waves, using a crimper for texture, or even the braid-and-heat method. The waves don’t need to be uniform or perfect—the more irregular they are, the better. Once you have waves throughout your hair, gather it into a ponytail at whatever height appeals to you. The existing waves mean your ponytail already has texture built in, so when you twist or loosely braid it and wrap it around the base, those waves become part of the finished bun’s visual texture. This creates a naturally undone appearance that reads as intentional rather than accidental.
Amplifying the Wave Effect
After securing your bun, gently pull at the entire structure to loosen it and make the waves more visible. You want some waves to escape the bun completely, falling as loose pieces around your face and neck. The escaping waves create the impression that you threw your hair up without much effort, even though you’ve actually taken time to create and incorporate texture. This contrast between the time investment and the effortless-looking result is what makes this style special.
Why Relaxed Hair Works Perfectly with Waves
Relaxed hair holds waves beautifully because the hair is straight enough that waves remain visible and defined—they don’t spring up or revert as the day progresses. The waves you create stay exactly where you put them, allowing you to build them into your bun styling with confidence that they’ll remain part of the finished look. This makes undone wave buns particularly reliable for all-day wear or special events where you need your style to hold.
Creating Long-Lasting Waves
Use a texturizing spray or light hairspray on your waves before assembling them into a bun to help them hold their shape. If you’re creating waves with heat tools, make sure your hair is completely cool before gathering it into a ponytail—warm hair doesn’t hold wave shape as effectively. Sleep waves hold longer than heat-created waves, so consider creating them the night before if you need maximum longevity. This style actually looks better on day two after sleeping on it, as the waves become even more relaxed and undone.
Essential Tips for Messy Bun Success
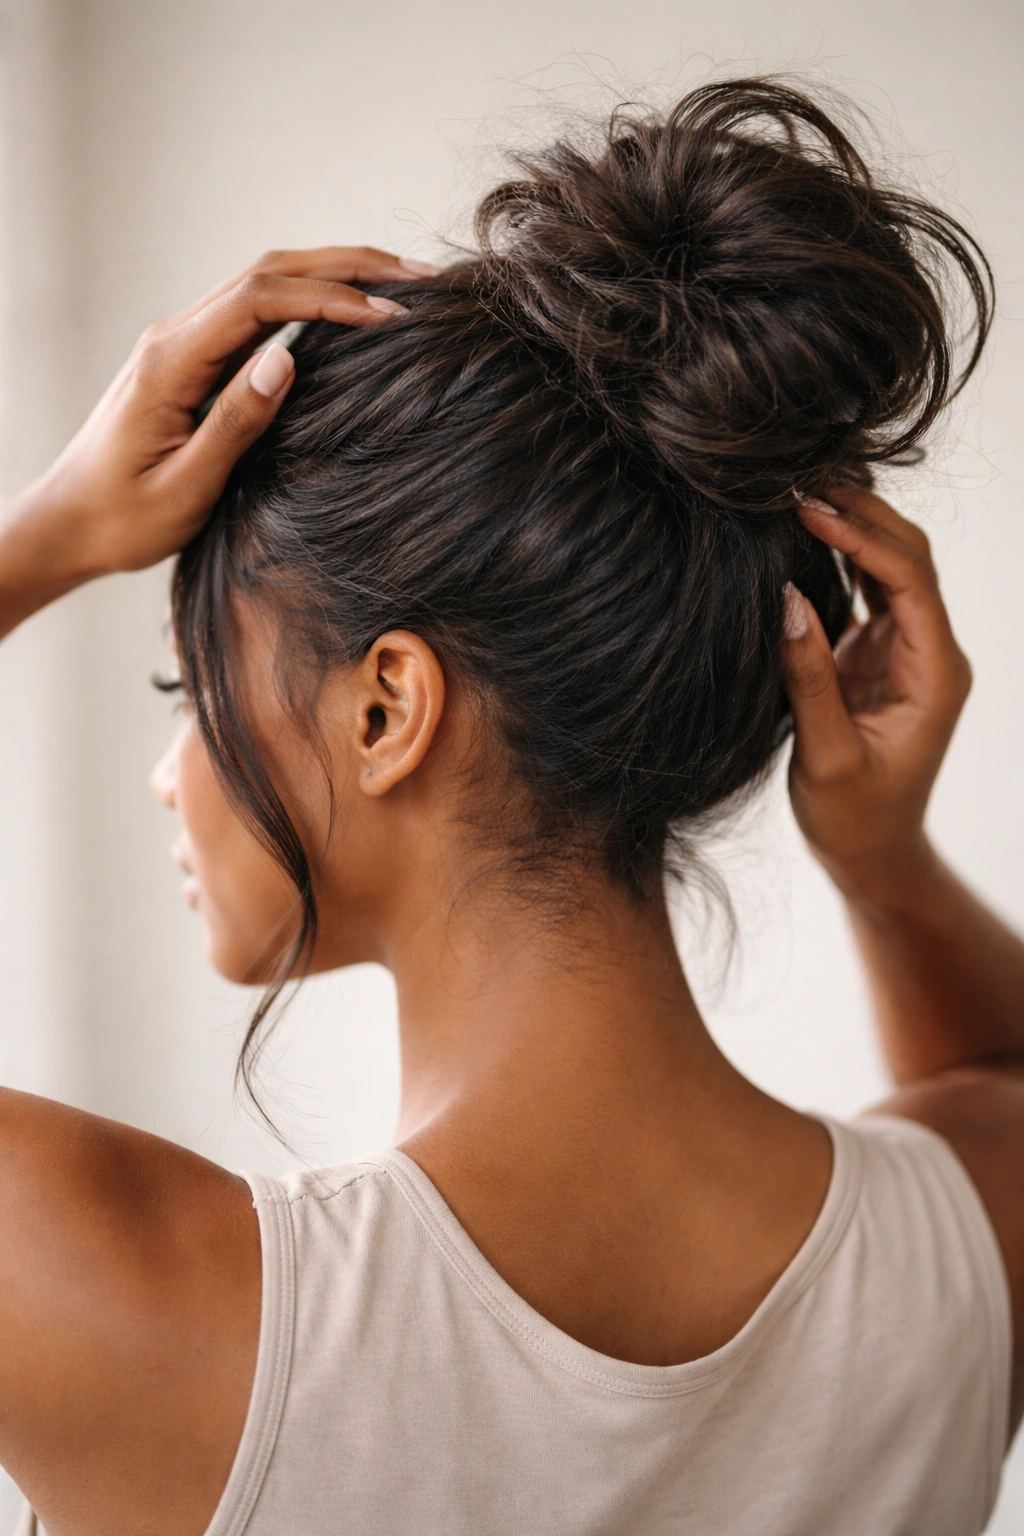
Certain foundational techniques apply across all messy bun styles and are particularly important when working with relaxed hair. Understanding these principles will help you adapt any of the eight styles to your specific hair length, thickness, and personal aesthetic.
The Importance of Texture and Grip
Relaxed hair’s smooth texture means you can’t rely on natural grip or friction to hold buns in place the way you might with textured hair. Creating deliberate texture through backcombing, loose braiding, or twisting before assembling your bun provides the grip you need to keep everything secure. This is non-negotiable—a bun built on smooth, untextured hair will slip and collapse. Even five minutes of light backcombing at the ponytail base creates enough grip to transform a droopy bun into one that holds beautifully all day.
Product Selection Matters
Choose products specifically designed for relaxed or straight hair rather than general styling products. Texturizing sprays and sea salt sprays give relaxed hair something to grip, creating hold and texture without weighing the hair down. Lightweight smoothing serums or shine sprays work beautifully on the smooth sections of styles like the sleek top with messy bottom. Heavier pomades and oils tend to weigh down relaxed hair, making buns droop faster. Test products on a small section before committing to them for an entire bun-styling session.
Hair Length and Bun Adaptations
Shoulder-length relaxed hair works beautifully for messy buns, though the buns might be slightly less full than with longer hair. Mid-back length hair creates voluminous, impressive buns with minimal effort. Very long relaxed hair can create thick, heavy buns that might require extra bobby pins or a larger, thicker elastic band for secure hold. If you have very short hair, focus on styles that prioritize texture and detail, like the textured wrap or braided detail buns, which create visual interest without requiring maximum volume.
Bobby Pin Strategy and Positioning
Use bobby pins with the wavy side down—this is the gripping side that actually holds hair in place. Position pins at different angles rather than all going in the same direction; pins at perpendicular angles create more secure hold. For most messy buns, you need at least six to eight bobby pins properly positioned, not just one or two securing the wrap. Hidden pins are less important than properly placed pins; viewers will notice a drooping bun far more than they notice where your pins are positioned.
Creating a Polished Finish
Once you’ve assembled your bun and secured it, take a moment to smooth the exterior with a fine-tooth comb and finish spray. This polishes the look while maintaining the intentionally undone interior texture. Smooth down any flyaways around your face and hairline using edge control or a small brush. The final look should be visibly intentional—polished but not severe, textured but not accidentally messy. This balance separates a well-executed messy bun from one that actually looks accidental.
Final Thoughts
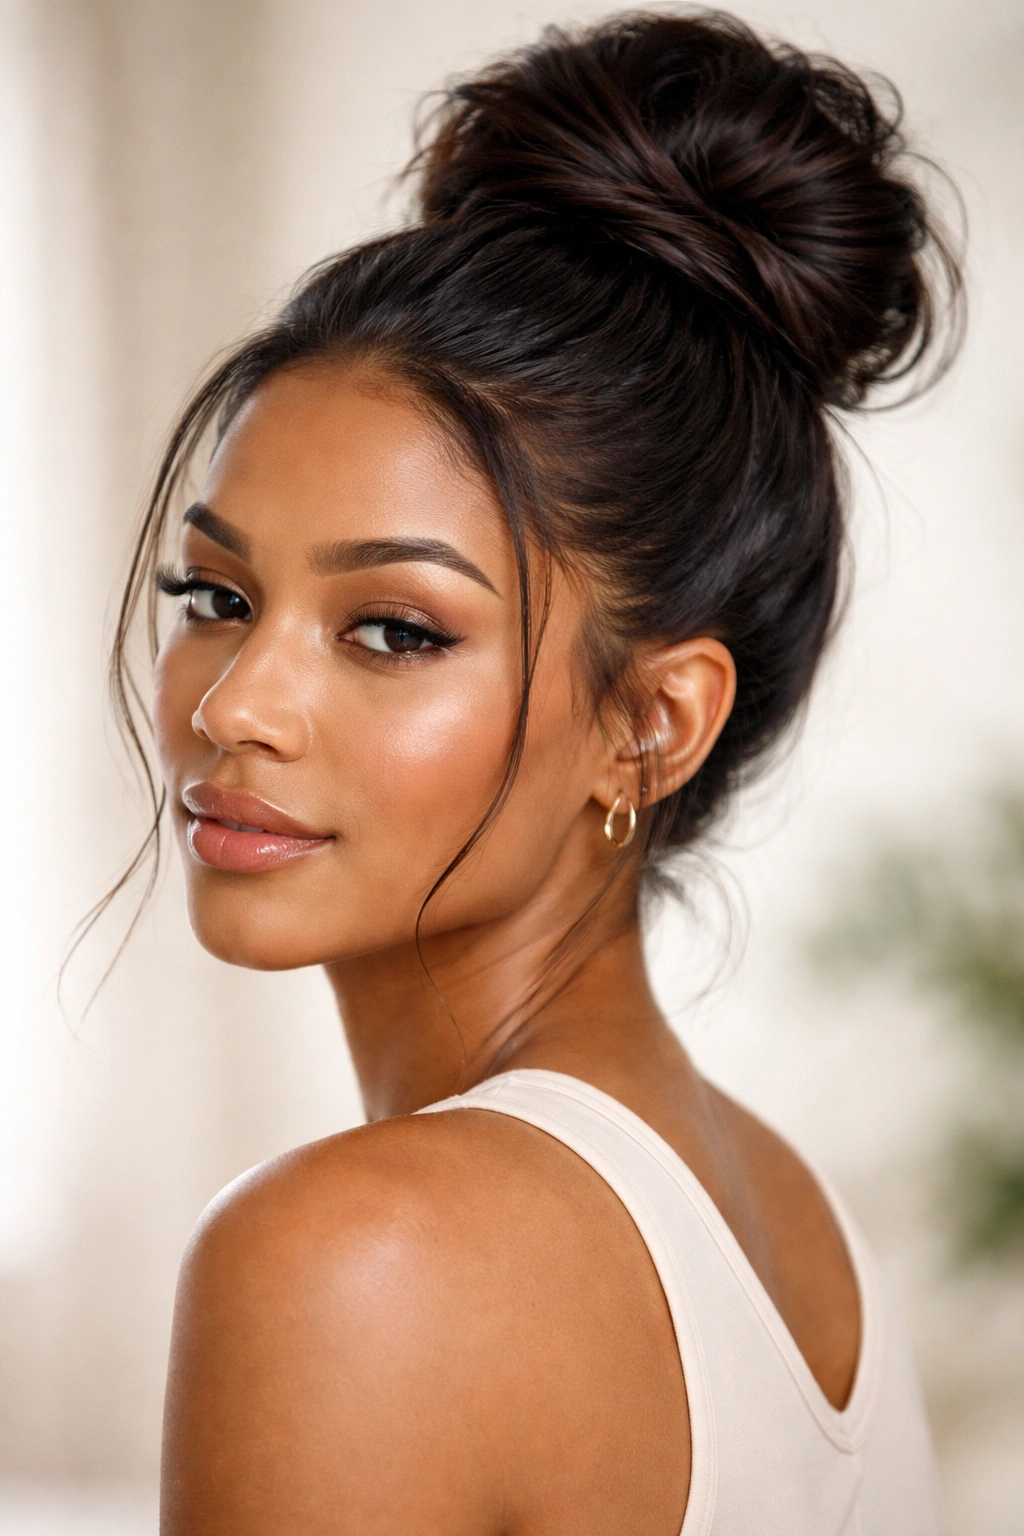
Messy buns offer relaxed hair a wonderful opportunity to create effortlessly polished looks that work across virtually every setting and occasion. The smooth texture of relaxed hair actually becomes an advantage when creating messy buns because you have complete control over the final appearance—you’re not fighting against curl patterns or unpredictable texture. Instead, you’re intentionally creating dimension, hold, and visual interest through strategic styling choices.
The eight styles covered in this guide provide a foundation that you can adapt to your personal preferences, hair length, and the specific occasion you’re dressing for. A high classic messy bun suits casual Fridays and weekend errands, while a sophisticated low bun or sleek top with textured bottom works beautifully for professional settings and dinners out. Double buns, braided details, and undone waves add personality and fashion-forward flair when you want to make a statement.
The real key to messy bun success lies in investing a few extra minutes in creating texture through backcombing or braiding before assembling your bun, choosing products designed for relaxed hair, and positioning bobby pins strategically. These foundational techniques transform what could be a drooping, slip-sliding mess into a genuinely polished style that holds beautifully throughout your day. Your relaxed hair texture is not a limitation—it’s an asset that allows you to create sleek, defined, intentional-looking messy buns that look just as good at 5 PM as they do when you first finish styling them.
