Five minutes, one elastic, and hair that has already decided to misbehave. That’s the exact moment lazy bun hairstyles earn their keep. They’re the answer when you want your hair off your face, your neck to stop sweating, and your mirror to stop judging you.
The nice part is that a lazy bun does not need to look messy in the careless sense. A good one looks deliberate because the shape is right, the tension is balanced, and one or two loose pieces are doing the heavy lifting. Smooth the crown, soften the ends, and leave a little irregularity where the eye naturally expects it. That tiny bit of slack is what keeps the whole thing from reading like a panic knot.
Hair texture changes the game more than people admit. Fine hair usually needs a little dry shampoo or texture spray so the bun has something to grip. Thick hair needs a style that does not collapse under its own weight. Layered cuts need pins, not hope. Curly hair gets its own rules, because stretching curls too hard into a tiny knot usually just creates frizz and regret.
So here’s the good news: there isn’t one “right” lazy bun. There are a bunch of them, and the best one depends on your length, texture, and how much effort you want to spend before coffee. Some of these are polished enough for work. Some look best with second-day hair. A few are so fast they feel a little cheeky. All of them can look chic without acting like they asked for a big production.
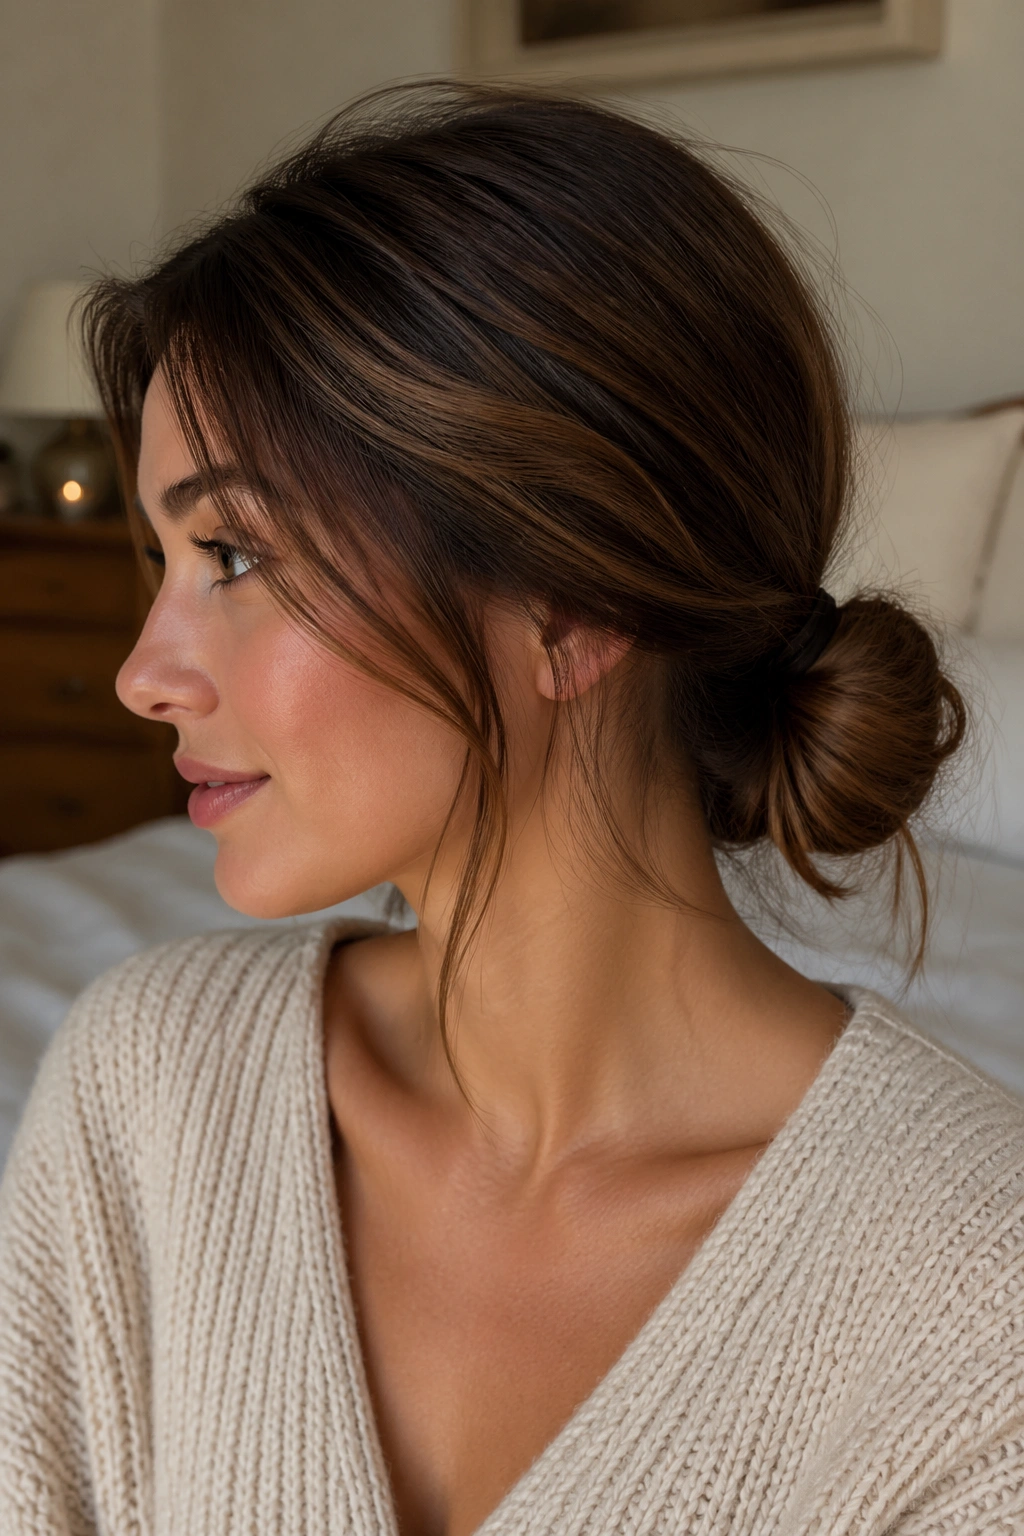
1. Low Loose Knot
The low loose knot is the bun I reach for when I want my hair to look calm, not controlled. It sits near the nape, feels soft around the edges, and has that easy, unfussy shape that works with almost any outfit. The trick is to keep the center relaxed and let the ends tuck in without forcing every strand into place.
How to build it
Start with a low ponytail and secure it with a thin elastic. Twist the tail once or twice, then fold it into a loose knot and pin the corners with 2 bobby pins, one on each side. Leave about 1 inch of softness around the ears so the bun doesn’t look stapled to your head.
- Best for medium to long hair.
- Works well on hair that’s been worn down for a day.
- Looks better when the bun sits slightly off-center.
- A matte elastic disappears faster than a shiny one.
My favorite part: this one can survive a scarf, a collar, or a windy walk without needing a mirror check every ten minutes.
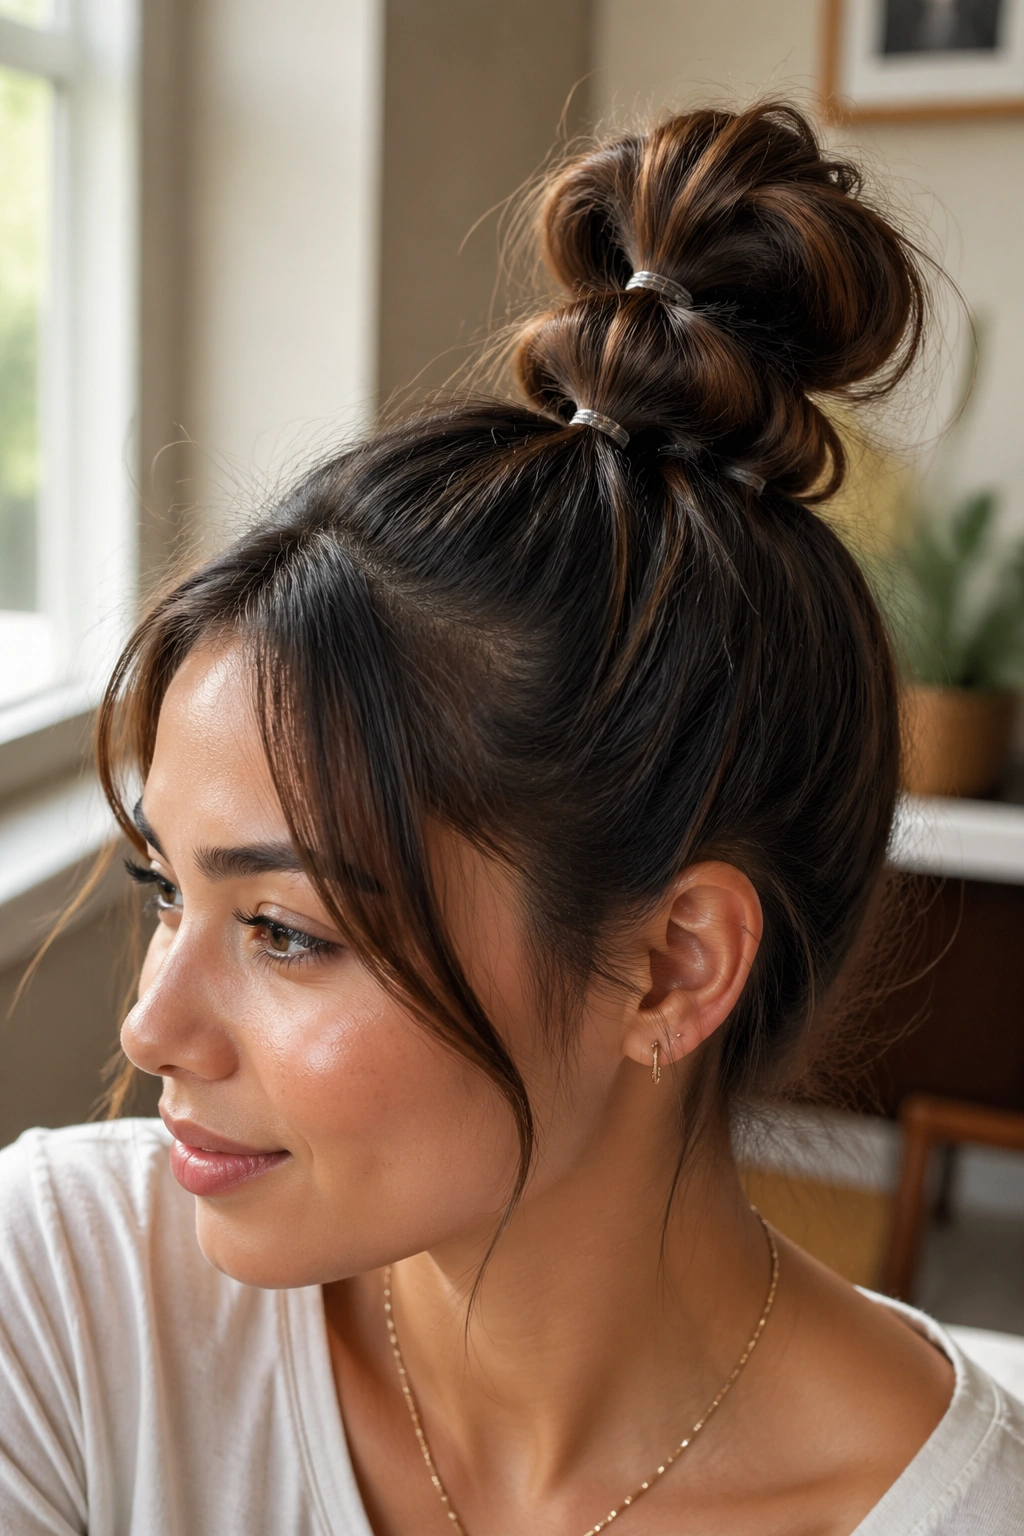
2. High Messy Topknot
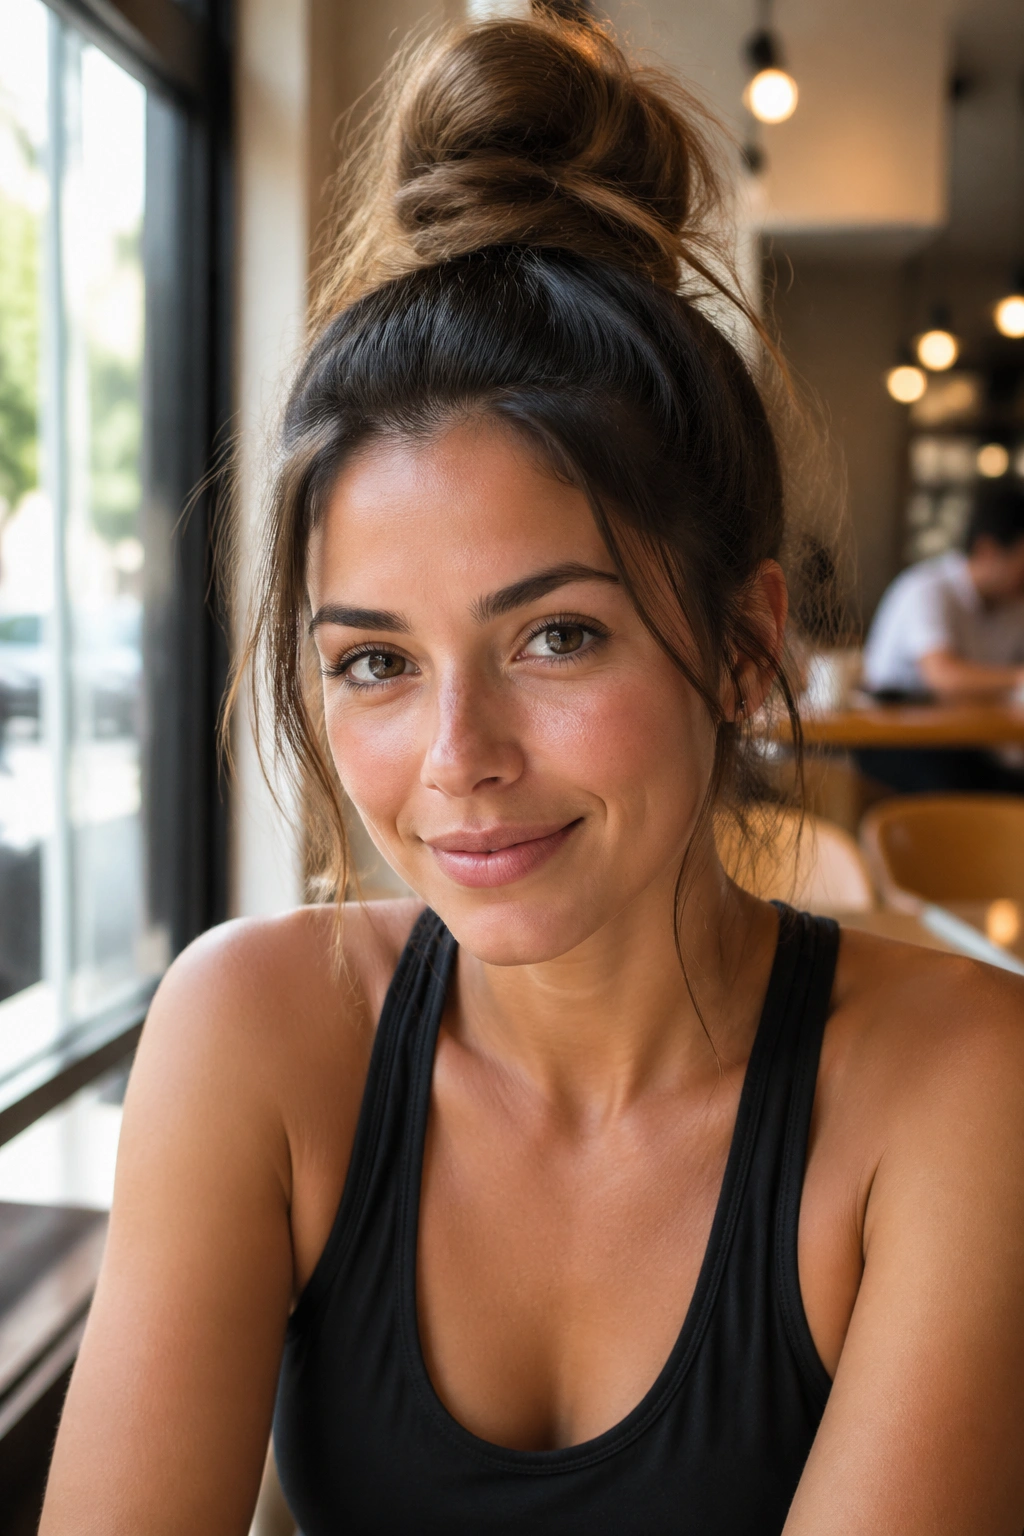
A high messy topknot can look sharper than a neat bun, which still surprises people. When it sits high on the crown, it lifts the face a little and makes even a plain T-shirt look thought-out. The style works best when the base is secure but the bun itself is left a bit imperfect.
If your hair is clean and slippery, rough up the roots with a few sprays of dry shampoo before you gather it up. Then make a high ponytail, twist the length, and wrap it around the base once or twice. Pull two or three small pieces loose near the hairline. Not too many. You want movement, not a halo of escapees.
This style does a lot with very little. It’s the one I’d pick for errands, a gym day, or any time you want your face open and your hair out of the way without looking like you quit halfway through styling.
No need to overthink the shape.
3. Twisted Nape Bun
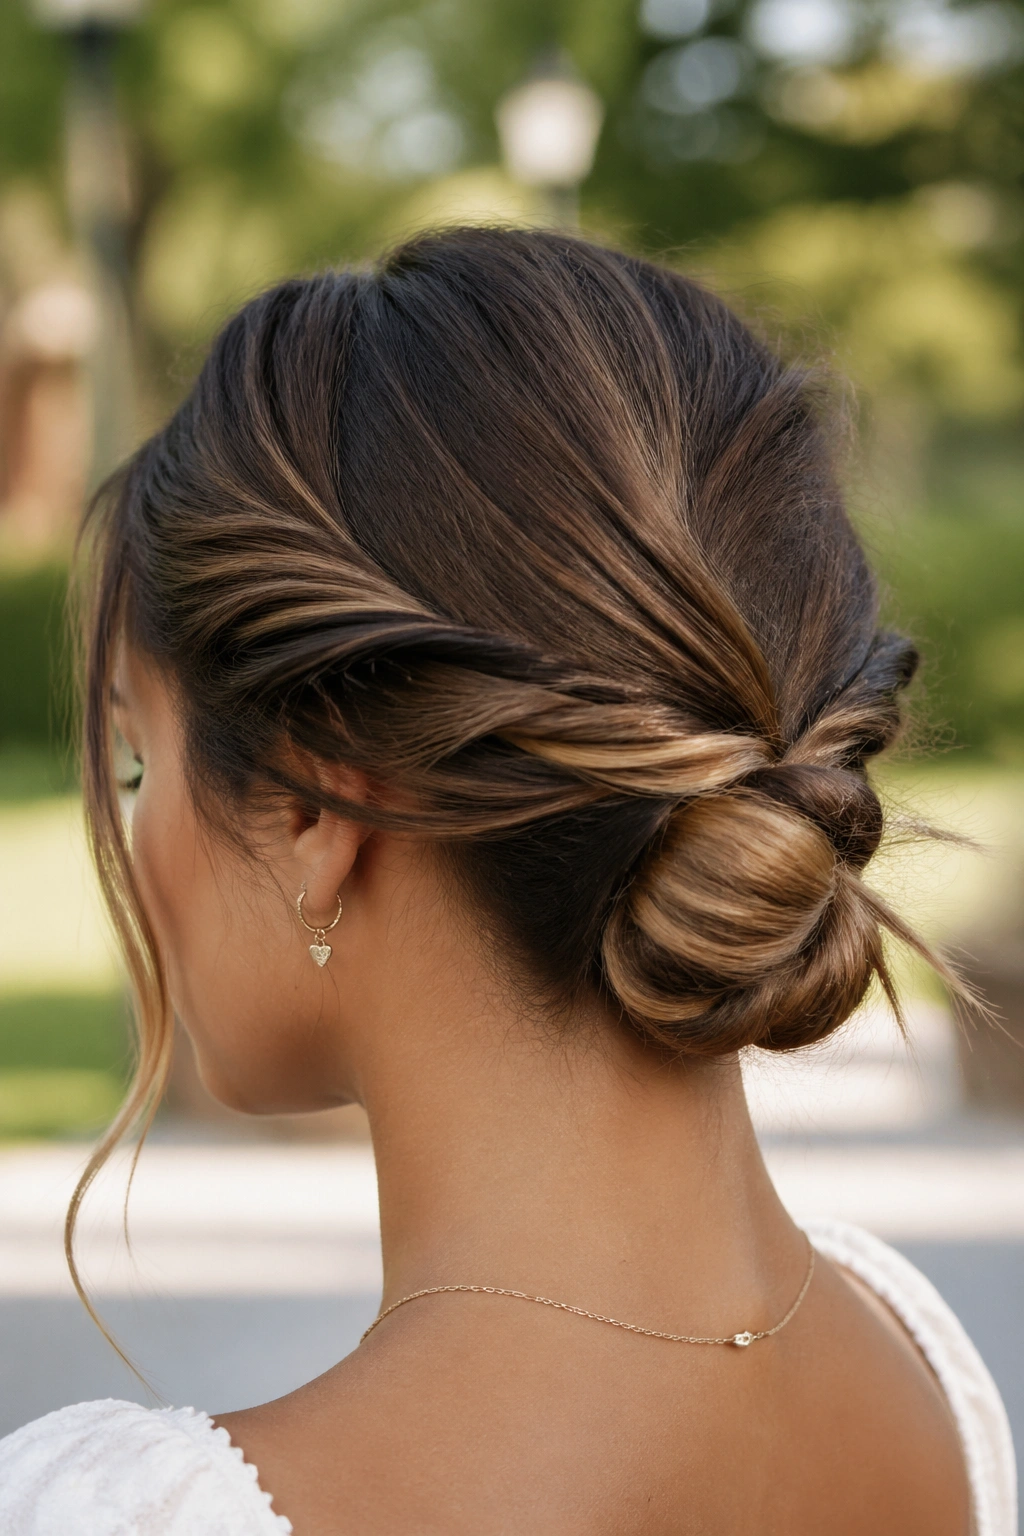
Why does a twisted nape bun look so much more intentional than a plain knot? Because the twist gives the eye a line to follow. Instead of a lump of hair sitting at the back of the head, you get a clean wrap that feels soft and a little old-school in a good way.
Take your hair into a low ponytail, split it into 2 sections, and twist each section in the same direction before wrapping them around each other. Coil the whole thing into a small bun at the nape, then pin it through the center so it does not slide up. If the ends poke out a little, leave them. That tiny imperfection keeps the style from getting stiff.
How to style it
- Use 4 to 6 pins if your hair is thick.
- Press the bun flat at the back so it sits close to the head.
- Pull one small front piece loose if your face feels too framed.
- Skip heavy oil near the roots; it can make the twist slip.
This one is especially good with collars, scarves, and anything that makes a giant bun feel clumsy.
4. Claw-Clip Fold-Over Bun
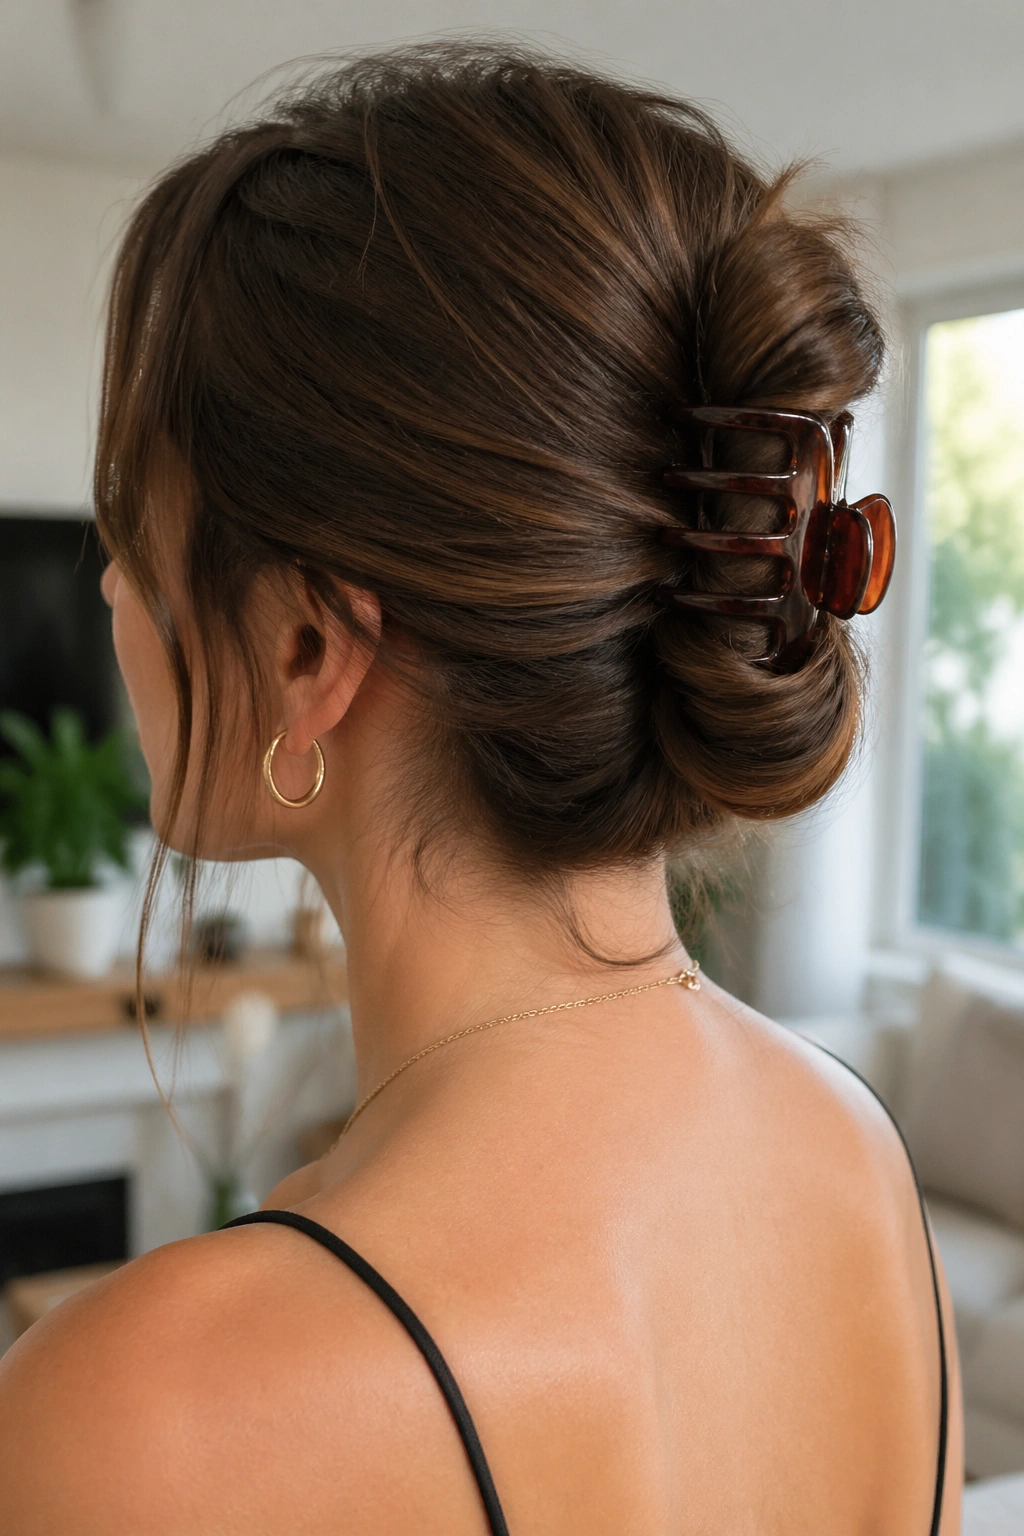
If you’ve got one claw clip and no patience, this is the style that saves the day. It works because the clip does the hard part while your hands do barely enough to count as styling. The result looks casual, but not accidental.
Gather the hair as if you’re making a low ponytail, twist it upward, and fold the length back on itself once. Clamp the clip over the folded section so it grips both the twist and the base. A medium clip usually works best; too small and it starts slipping, too large and the whole thing gets top-heavy.
A few things matter here:
- Choose a clip with teeth that actually catch hair.
- Keep the twist tight at the base, loose at the ends.
- Let a few layers fall naturally instead of fighting them back in.
- If your hair is fine, mist the roots first so the clip has texture to hold.
This is the style I’d call a clean cheat. Fast, practical, and a little cooler than a plain ponytail.
5. Braided Bun
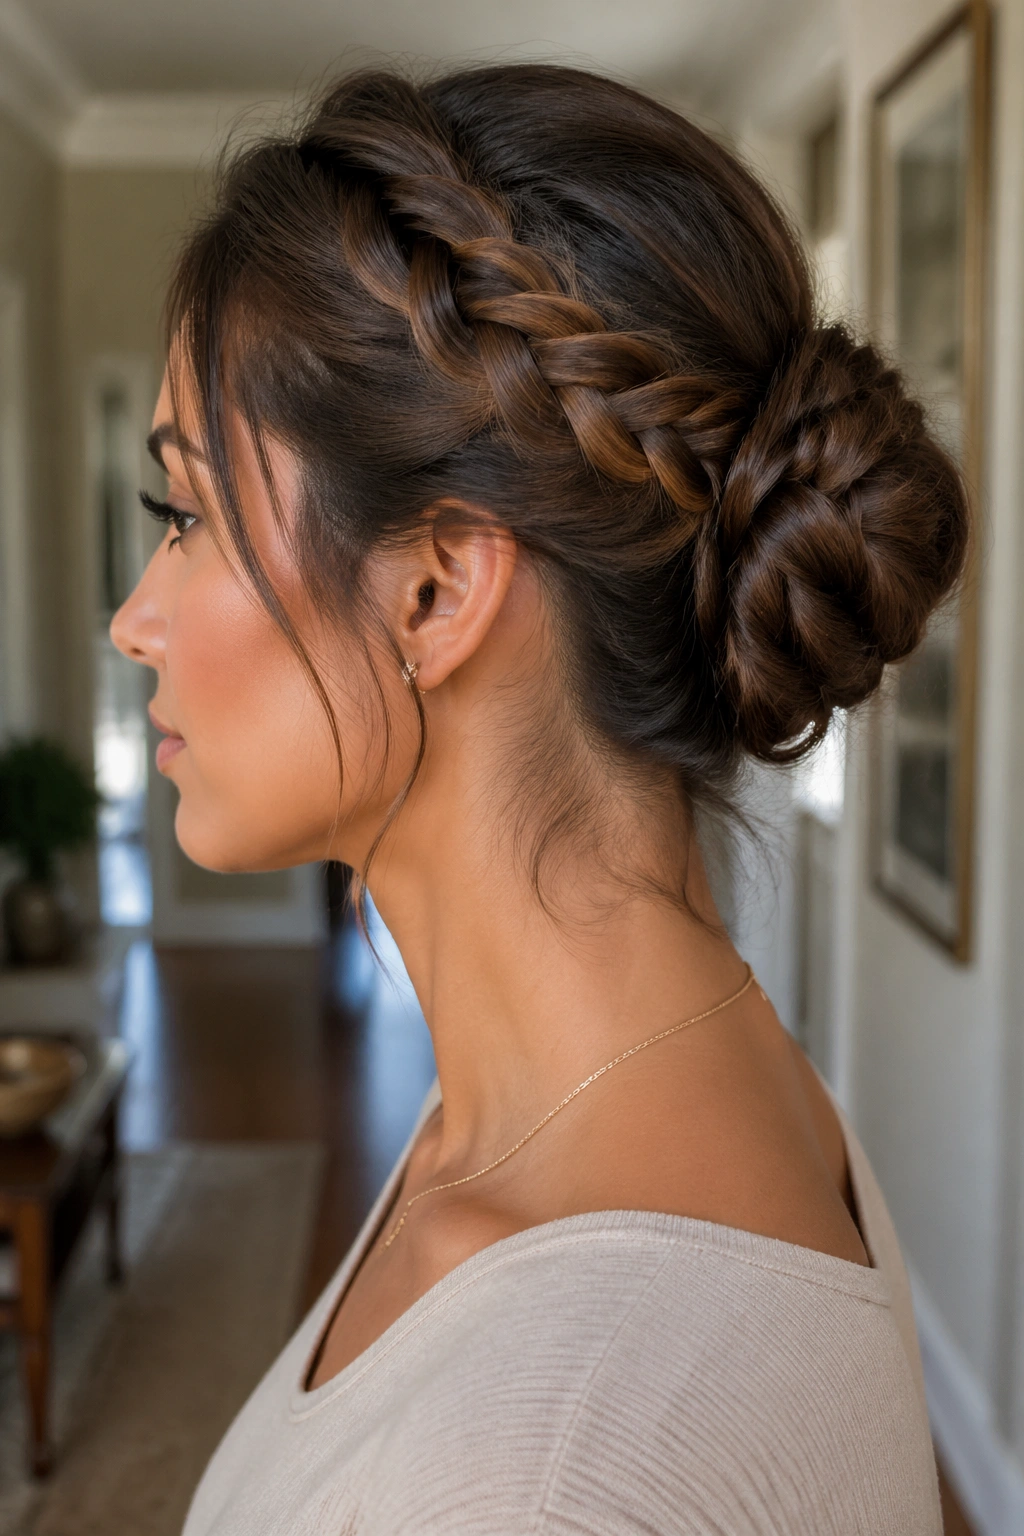
A braided bun is one of those styles that looks like you planned your life more than you did. The braid gives structure, which is useful if your hair is layered or tends to fray at the ends. It also keeps the bun from ballooning into a shape that feels too round or too soft.
Start with a low or mid ponytail, braid it all the way down, and secure the end with a tiny elastic. Wrap the braid around itself in a circle, then pin the coil down in two or three spots. If you want a more lived-in finish, gently tug the braid wider before you wrap it. That little move makes the bun look fuller without adding bulk.
I like this style because it solves a real problem: loose ends. Instead of having those slippery tips escape every ten minutes, the braid keeps them contained. It works beautifully on second-day hair and on hair that has a few shorter layers around the face.
It’s a tidy mess, which is the best kind.
6. Slicked-Back Bun
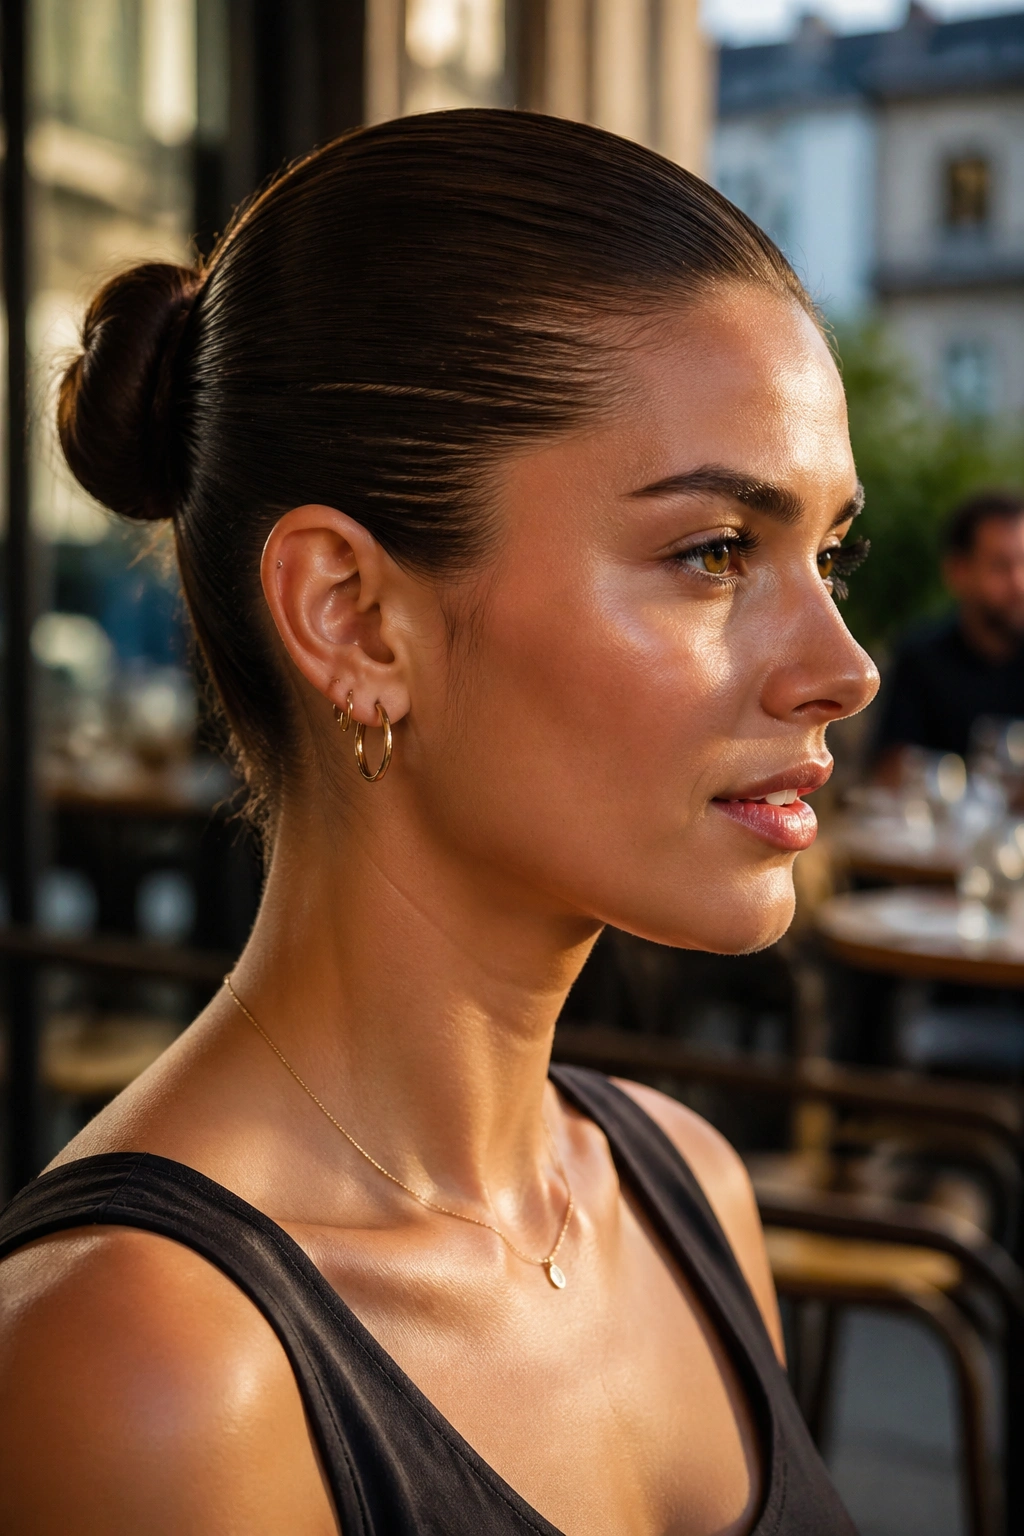
Compared with a soft, undone knot, a slicked-back bun feels more exact. The shape is tighter, the outline is cleaner, and the whole look leans polished even if the actual styling takes ten minutes. It’s the bun I’d choose when I want hair off my face and I do not want to think about it again.
Brush the hair back with a little gel, cream, or edge control near the front and sides. Use a boar-bristle brush if you have one; it smooths the surface better than finger-combing ever will. Then gather the hair low or mid-height, twist it into a compact bun, and pin it down so the base stays flat.
A good slicked bun should look glossy, not wet in a greasy way. Use less product than you think, especially at the crown. Too much and the style starts sliding by lunchtime. Too little and the flyaways keep doing their own thing.
This one is best when you want sharp lines, a bare neck, and zero fluff around the hairline.
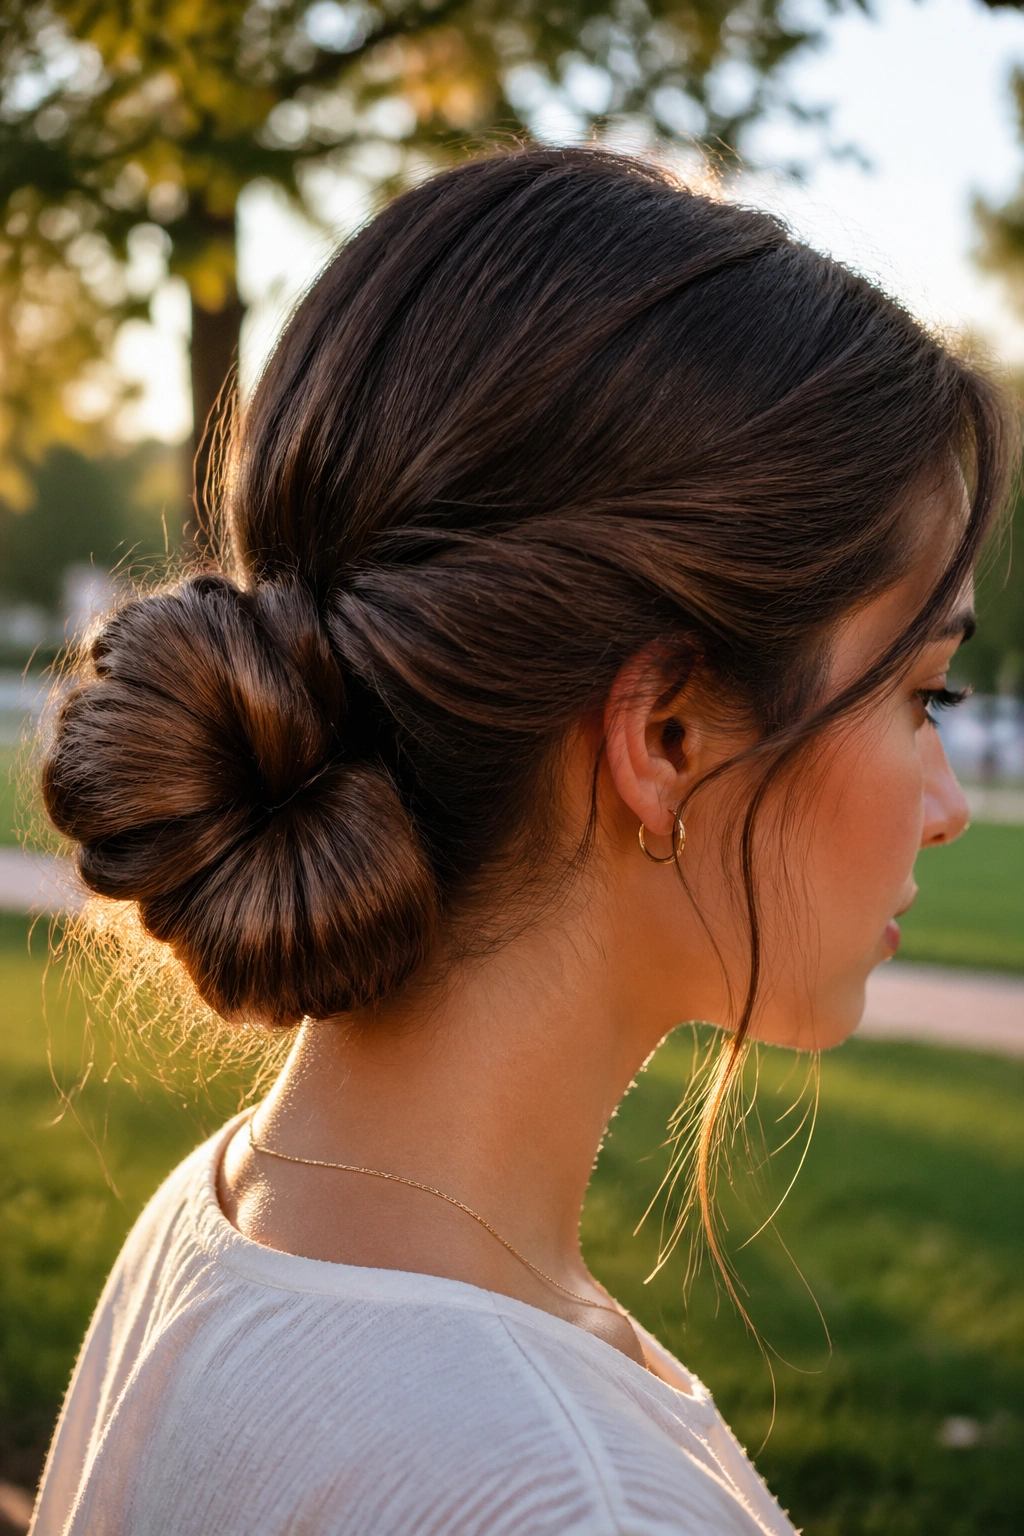
7. Side Bun with Soft Pieces
A side bun changes the whole mood because the placement does half the work. Put the bun low and slightly behind one ear, and the style stops feeling formal in that stiff, bridesmaid sort of way. It becomes softer, easier, and a little more romantic without trying too hard.
What to leave loose
Leave one narrow piece on each side of the face, or just one piece on the heavier side if your cut already frames your face. Keep the bun itself compact, then pull the sides loose only after the pins are secure. That order matters. If you loosen too soon, the bun turns into a shapeless loop.
A side bun is a nice match for earrings, an open neckline, or a sweater with a wide collar. It also flatters hair that has a slight wave because the uneven texture helps the side placement feel natural.
I like this one for dinners, daytime events, and those in-between moments when a topknot feels too sporty but a chignon feels too serious.
8. Rope-Twist Bun
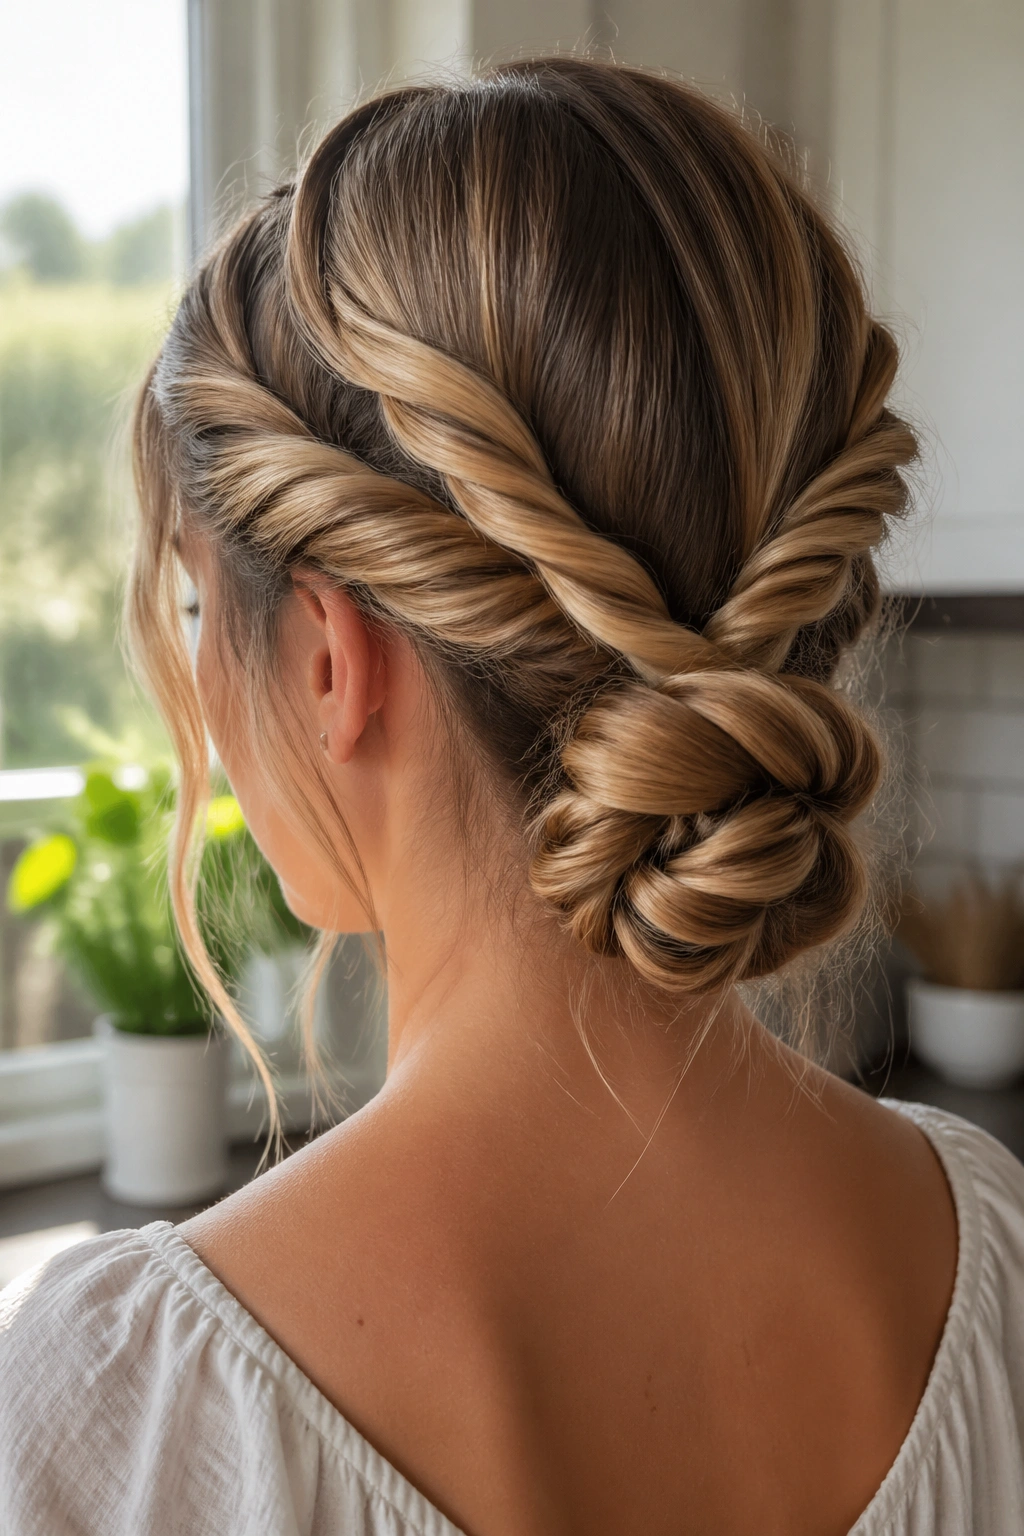
Two strands can do more than three. That’s the whole appeal of a rope-twist bun. It has a little more twist and shine than a basic knot, but it does not ask you to braid hair neatly, which is why it lands in that sweet lazy place.
Split the ponytail into 2 sections, twist each one clockwise, then wrap them around each other counterclockwise so they lock together. Coil the rope around the base, pin the ends under, and smooth the surface with your fingers instead of a brush. A brush tends to puff the twist apart.
Why it holds so well
The opposing twists keep the bun from unraveling as fast as a single twist. That makes it a smart choice for thick hair or hair that tends to slide out of regular buns. It also gives the bun a slightly ridged texture, which looks better than a flat lump.
Use this when you want a style that feels clean but not severe. It’s tidy, but it still has movement.
9. French Twist Bun
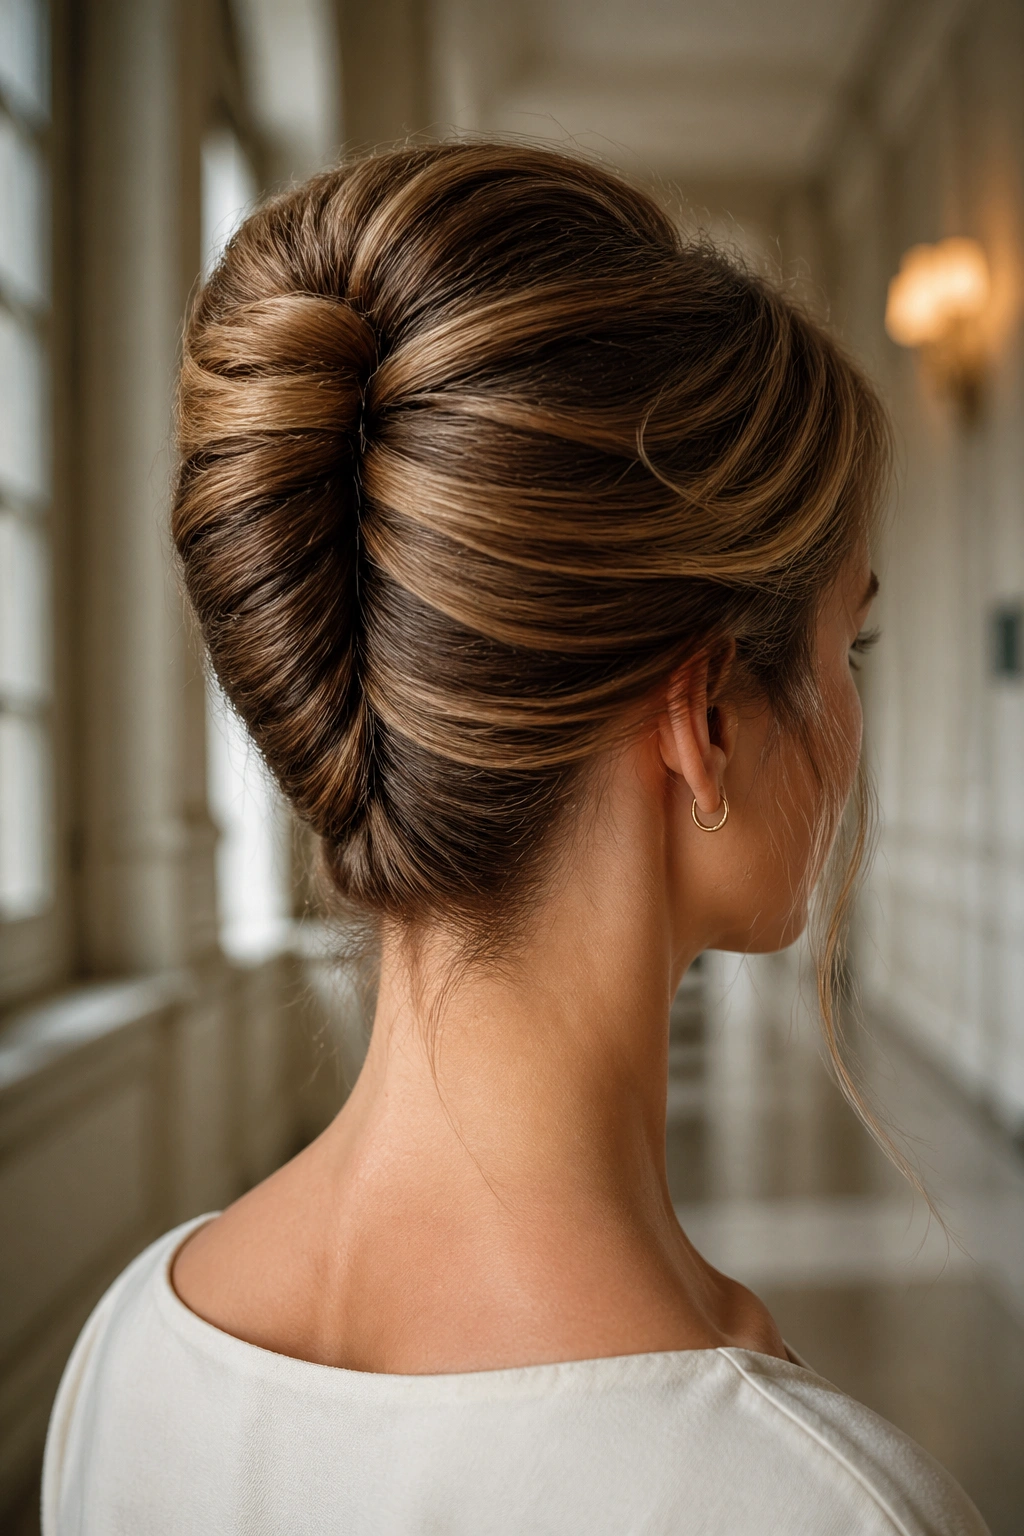
The French twist bun sits somewhere between a classic updo and a lazy knot, and that’s why it works. It looks more polished than a tossed-up bun, but it doesn’t need the kind of precision that makes some updos feel like homework.
Brush the hair back into one hand, twist it upward along the back of the head, and tuck the ends inside the roll. Pin the twist vertically with 3 or 4 bobby pins placed along the seam. If the hair is layered, a few shorter pieces may poke free at the top. Let them. That softness keeps the style from looking too lacquered.
Unlike a round bun, the French twist stays flatter against the head, which makes it a smart pick under coats, high collars, or anything with a lot going on around the neckline. It also opens the face in a nice, clean way.
I reach for this when I want a little structure but don’t feel like building a full formal updo.
10. Sock Bun
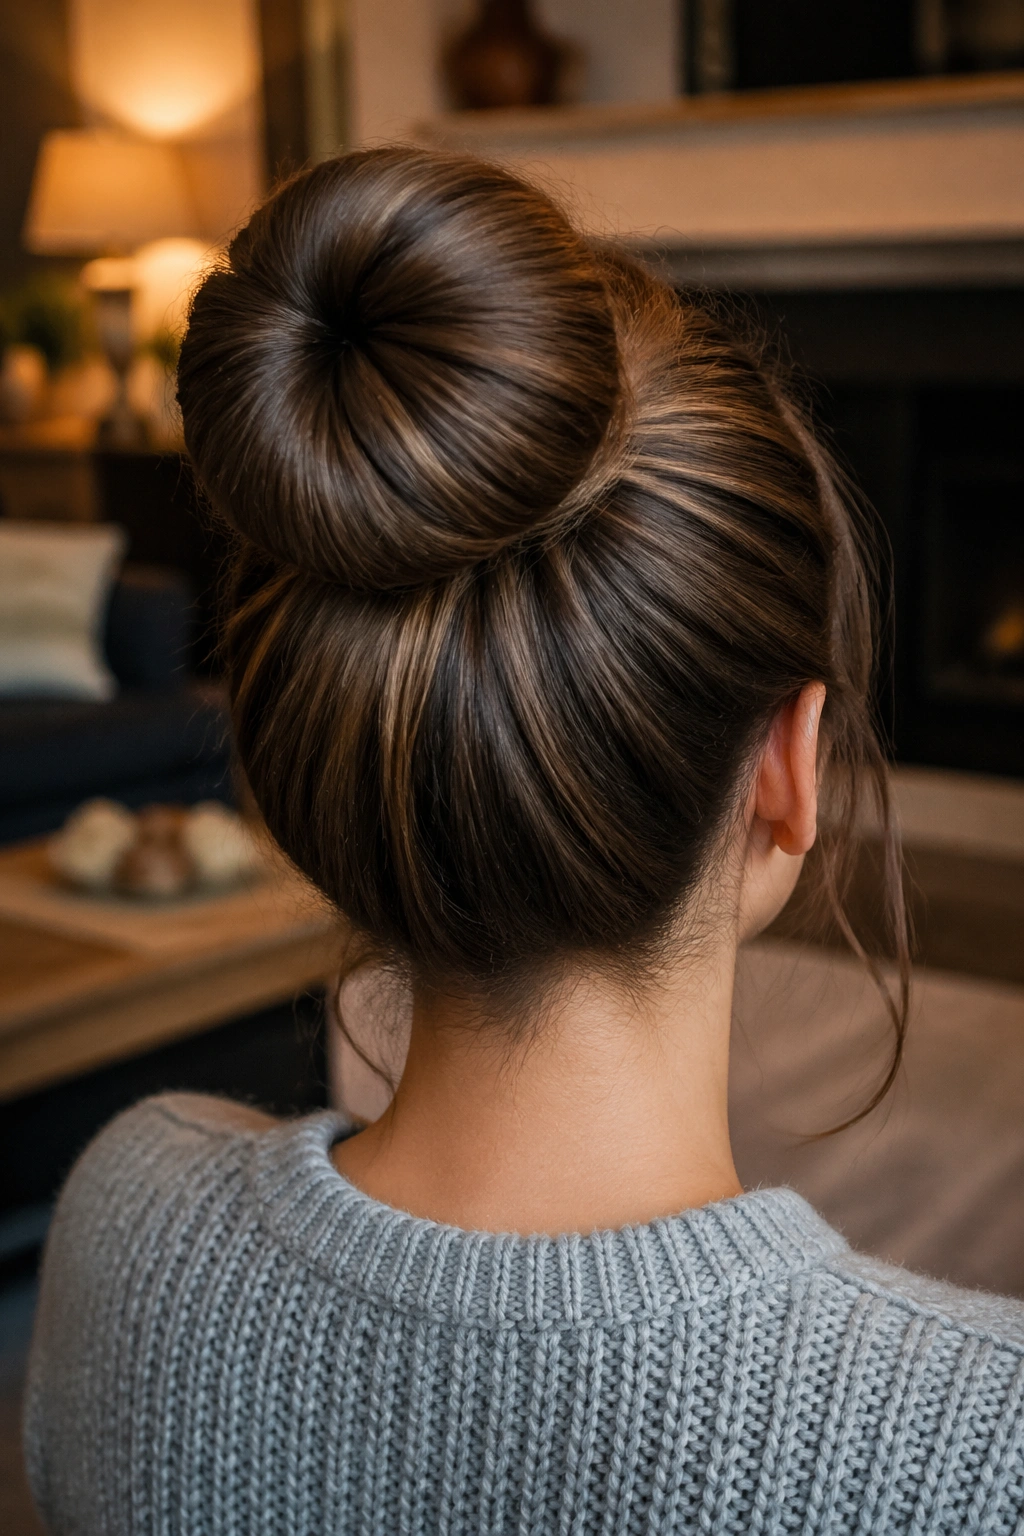
If your bun always looks tiny, a sock bun fixes that in a very straightforward way. The donut shape gives the hair a built-in form, so the result looks full even when your ponytail is not especially thick. It is a blunt trick, and I mean that in the best way.
Slide a hair donut, rolled sock, or foam ring over a high or low ponytail. Spread the hair evenly around it, then tuck the ends under and roll the donut down until it disappears. If your hair is layered, use a few pins to trap the short pieces before they slip out.
- Best for fine or medium hair that needs volume.
- Good when you want a round, neat silhouette.
- Works better if the ponytail is brushed smooth first.
- A small amount of spray keeps the finish from frizzing.
The shape is the whole point here. It gives you a bun that looks full, balanced, and a little more dressed up than a loose knot.
11. Curly Pineapple Bun
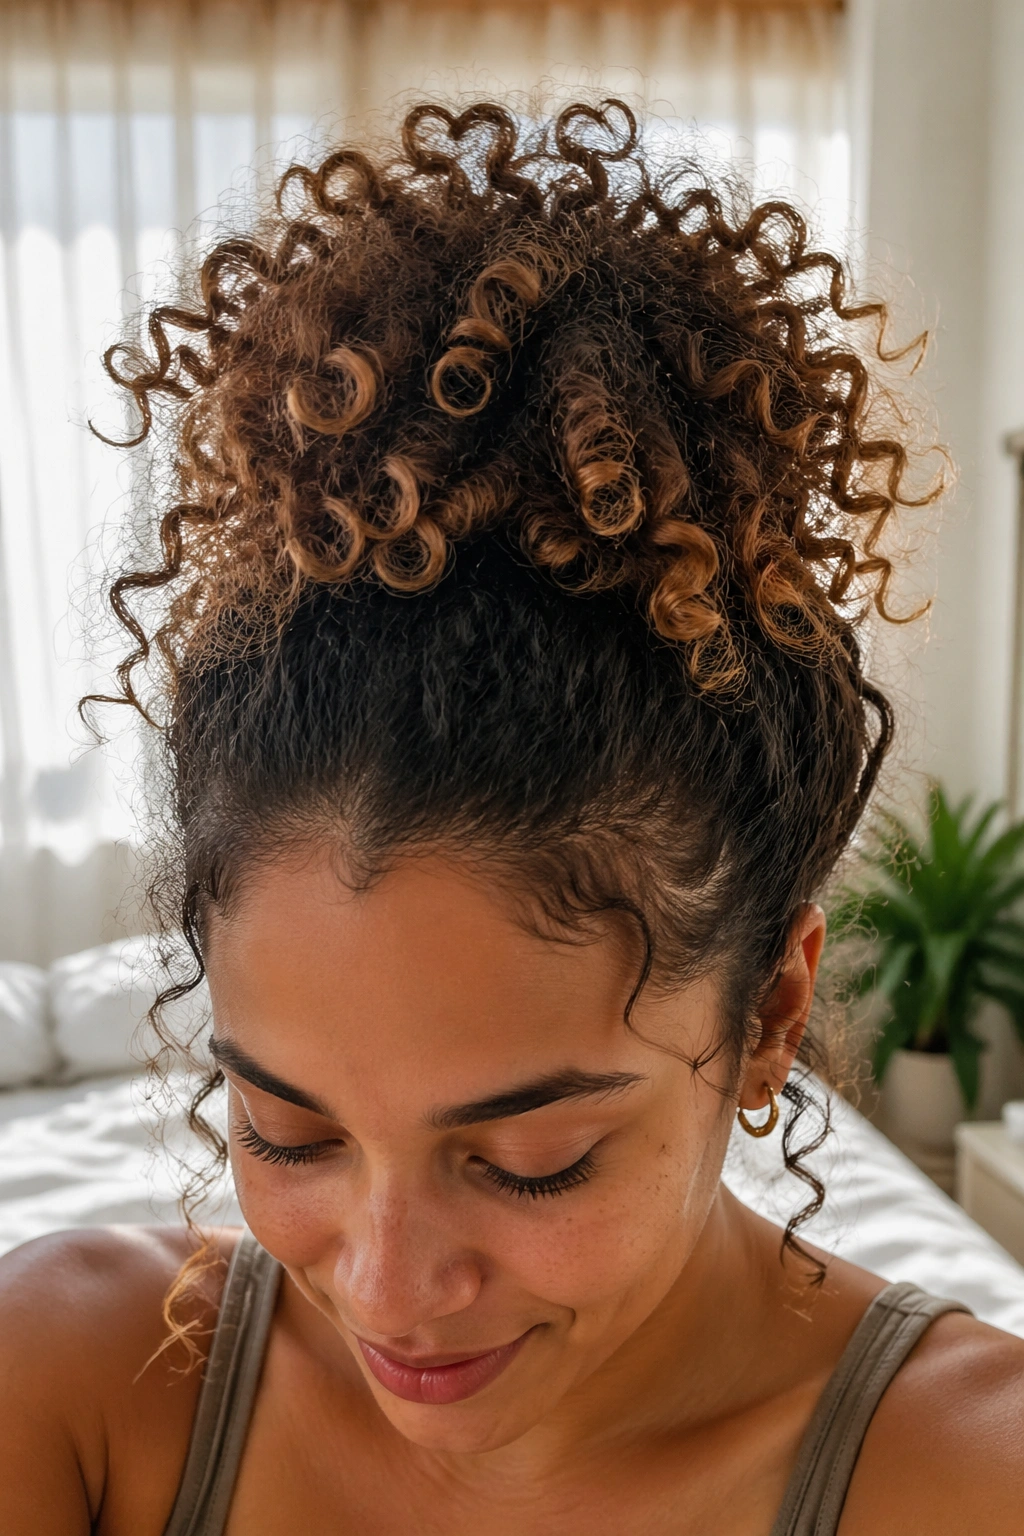
Curly hair plays by its own rules, and the pineapple bun respects that. Instead of forcing curls flat into a tight knot, this style keeps them lifted, loose, and springy at the top of the head. The result is less helmet, more shape.
Gather the curls high with a soft scrunchie, but stop before you pull them all the way through on the last wrap. Let the ends fan out and sit loosely over the top. If your curls are dry at the ends, a tiny bit of leave-in cream on the palms helps keep the shape from turning fuzzy.
One small thing matters here: don’t smush the curl pattern under a hard elastic. That’s how you end up with a dent in the middle and flat roots at the back. A satin scrunchie or soft coil tie is kinder and usually more comfortable too.
This is the lazy bun for curl days when you still want your texture to show up and be the star.
12. Figure-Eight Bun
A figure-eight bun looks more complicated than it is, which is always a nice bonus. The shape gives the bun two loops that cross in the middle, so it has a bit more visual interest than a standard coil. It also keeps the style flatter and more secure than a big round knot.
Make a low ponytail, divide the length in half, and loop one section over and around the base. Then take the second section and tuck it through the space you made, crossing it so the bun forms that narrow figure-eight shape. Pin where the loops meet. Use longer pins if your hair is thick; short ones tend to pop out.
Best hair type for it
- Medium to long hair with some grip.
- Hair that has a slight wave or second-day texture.
- Cuts with layers that need a structure to cling to.
- Days when you want a low bun that feels different from the usual knot.
This one has a neat little edge to it. Not fussy. Just a little smarter-looking.
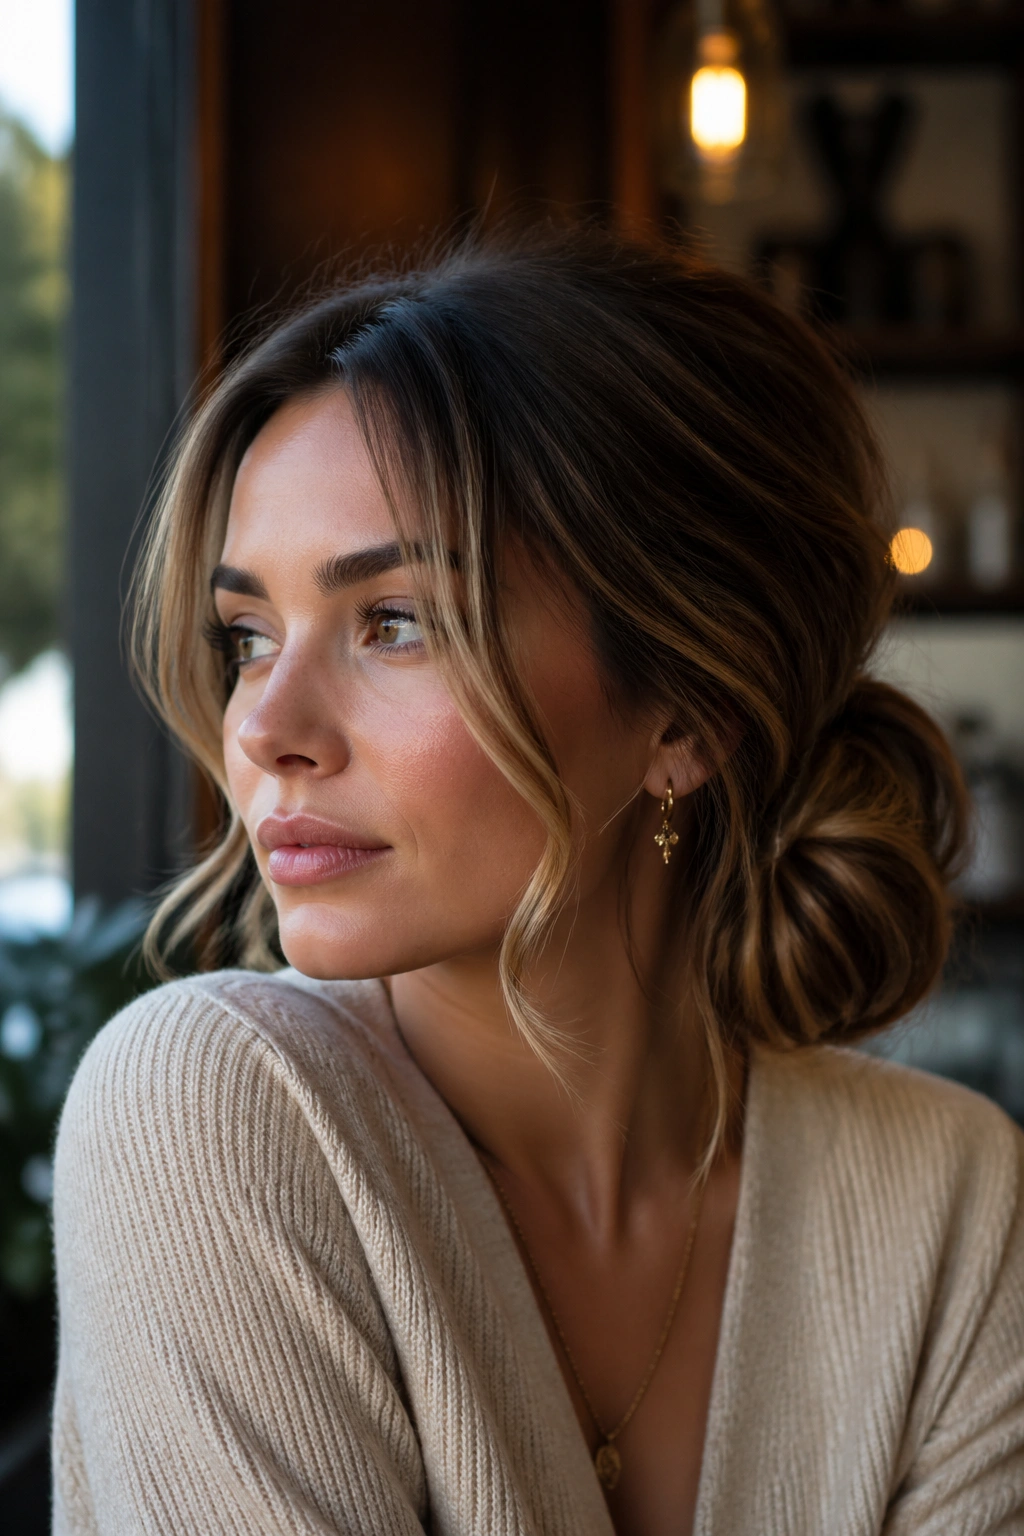
13. Messy Chignon

A messy chignon is what happens when a low bun decides to have a social life. It sits at the nape, folds softly, and leaves a few deliberate wisps around the face and neckline. The shape feels more refined than a loose knot, but it still belongs in the lazy-bun family because perfection would ruin it.
I like this style best when the hair has a little texture already. Freshly washed hair can be too slick, so a bit of dry shampoo or a day of wear helps. Twist the hair into a low coil, tuck the ends under, and pin the bun so it lies close to the head. Then pull out just enough softness to break the outline.
Compared with a classic low bun, the chignon carries more shape through the back and less bulk on top. That makes it useful if you want something elegant under a jacket or with a dress neckline.
It is a quieter style. That’s exactly why it works.
14. Half-Up Lazy Bun
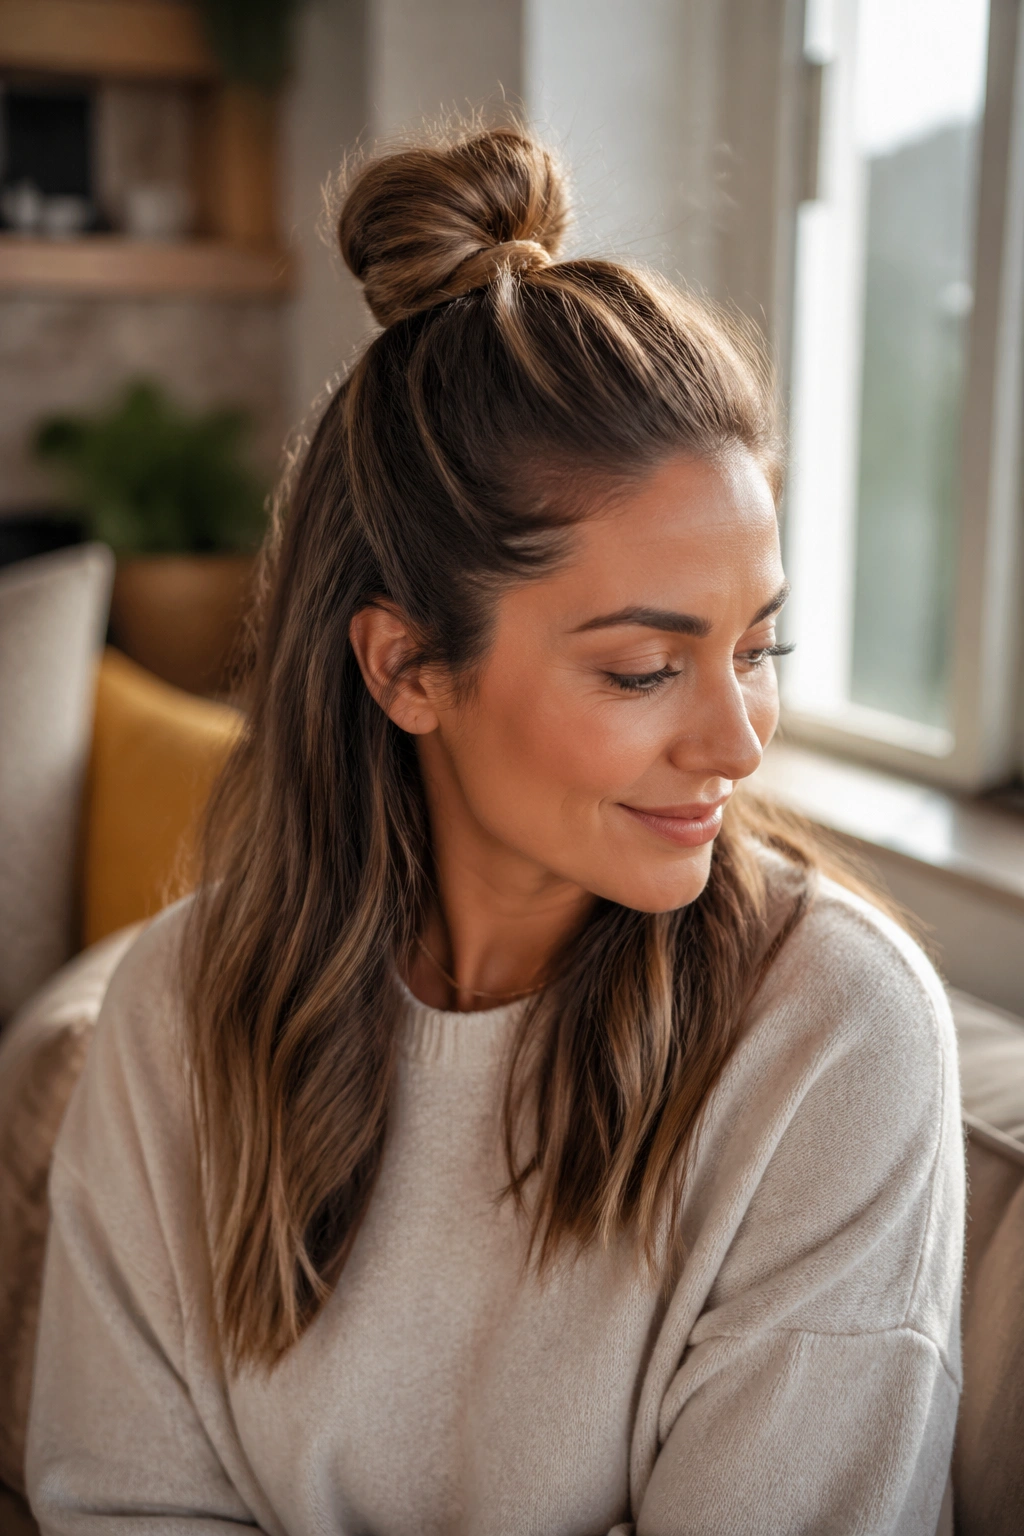
A half-up lazy bun is the answer when you want your hair out of your eyes but don’t want to commit the whole head to an updo. It keeps the top section pulled up and leaves the rest down, which makes it especially good for waves, curls, and layered cuts that look better with some length showing.
How to keep it from collapsing
Take the top third of your hair, gather it at the crown, and secure it with a thin elastic. Twist that section into a tiny bun and pin it low, not high and wobbly. The lower the base, the less it tries to tip over. If you’re working with heavy layers, use 2 crossed pins instead of one.
The shape should look relaxed, not half-finished. That means the lower hair needs some movement too. A quick bend with a curling wand on the ends can help, though you can skip that if your hair already has texture.
This is one of those styles that looks nicer on the second look than it does in the mirror. That’s a good sign.
15. Double Mini Buns
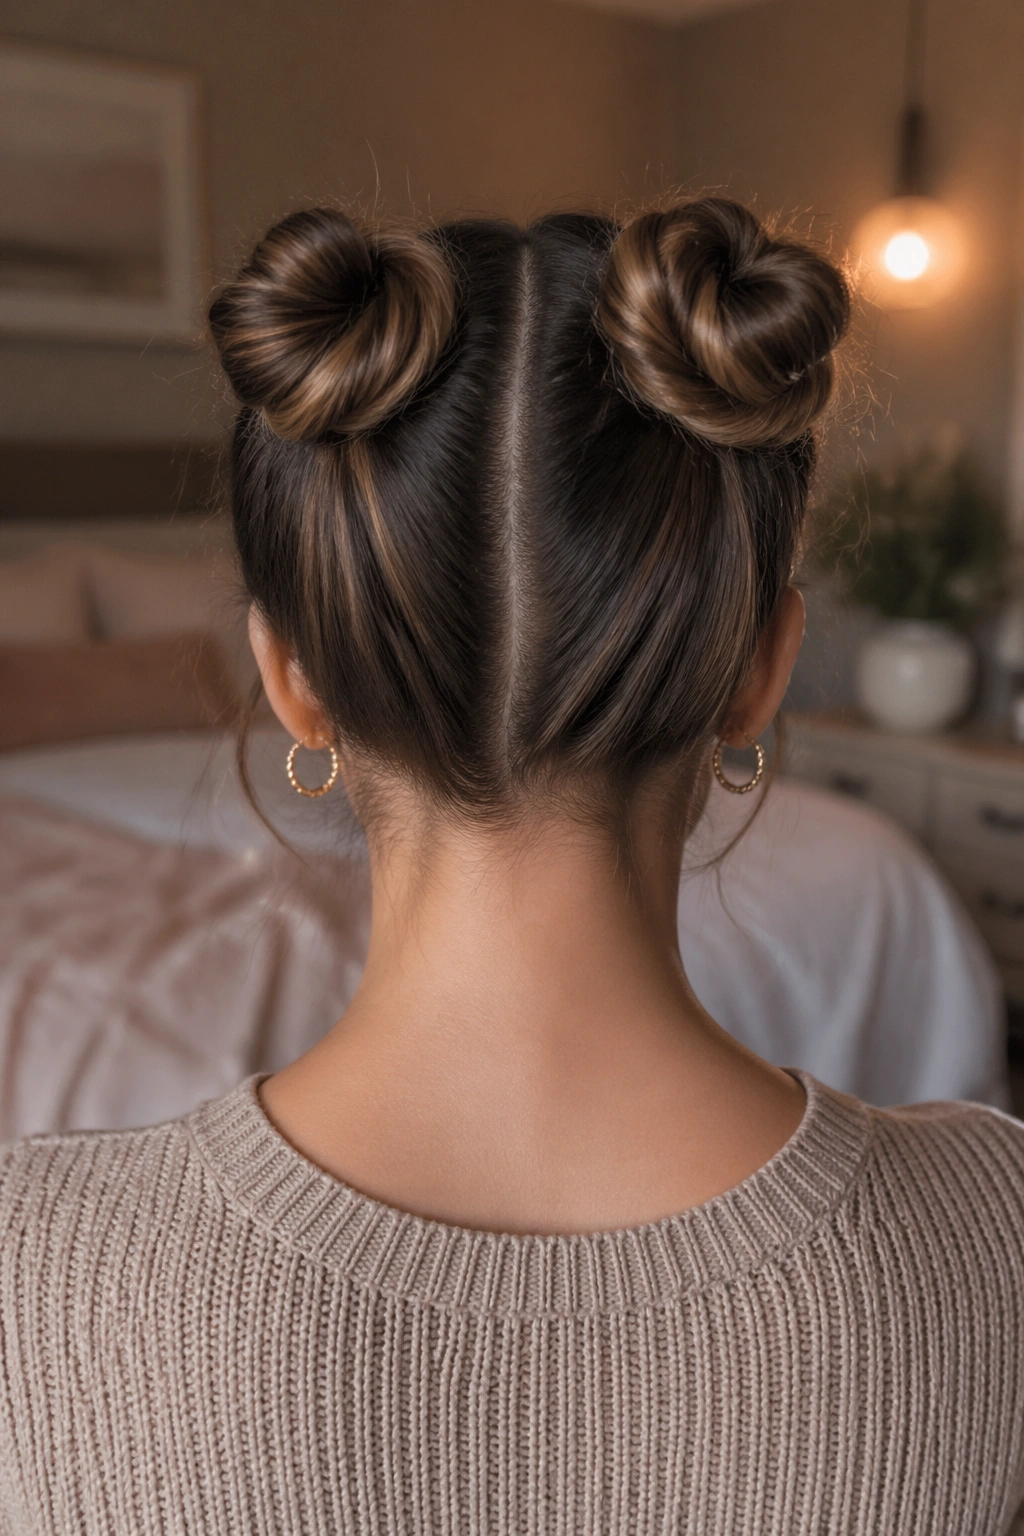
Double mini buns are playful, sure, but they can still look chic when they’re kept small and placed well. The key is not making them too high or too oversized. Two compact buns at the back of the crown or low near the nape feel cleaner and less costume-y.
Split the hair into two even sections, make two tiny ponytails, twist each one into a knot, and pin them down. If your hair is short, that’s even better. The style can look more intentional when the buns are tiny rather than bulky. A center part keeps the symmetry crisp, but a slightly off-center part softens the whole thing.
Use this when you want something a little different from the usual single bun. It also works well for casual weekends, concerts, or any day when you want to say, “I made an effort,” without actually making much of one.
Tiny, neat, done.
16. Scarf-Wrapped Bun
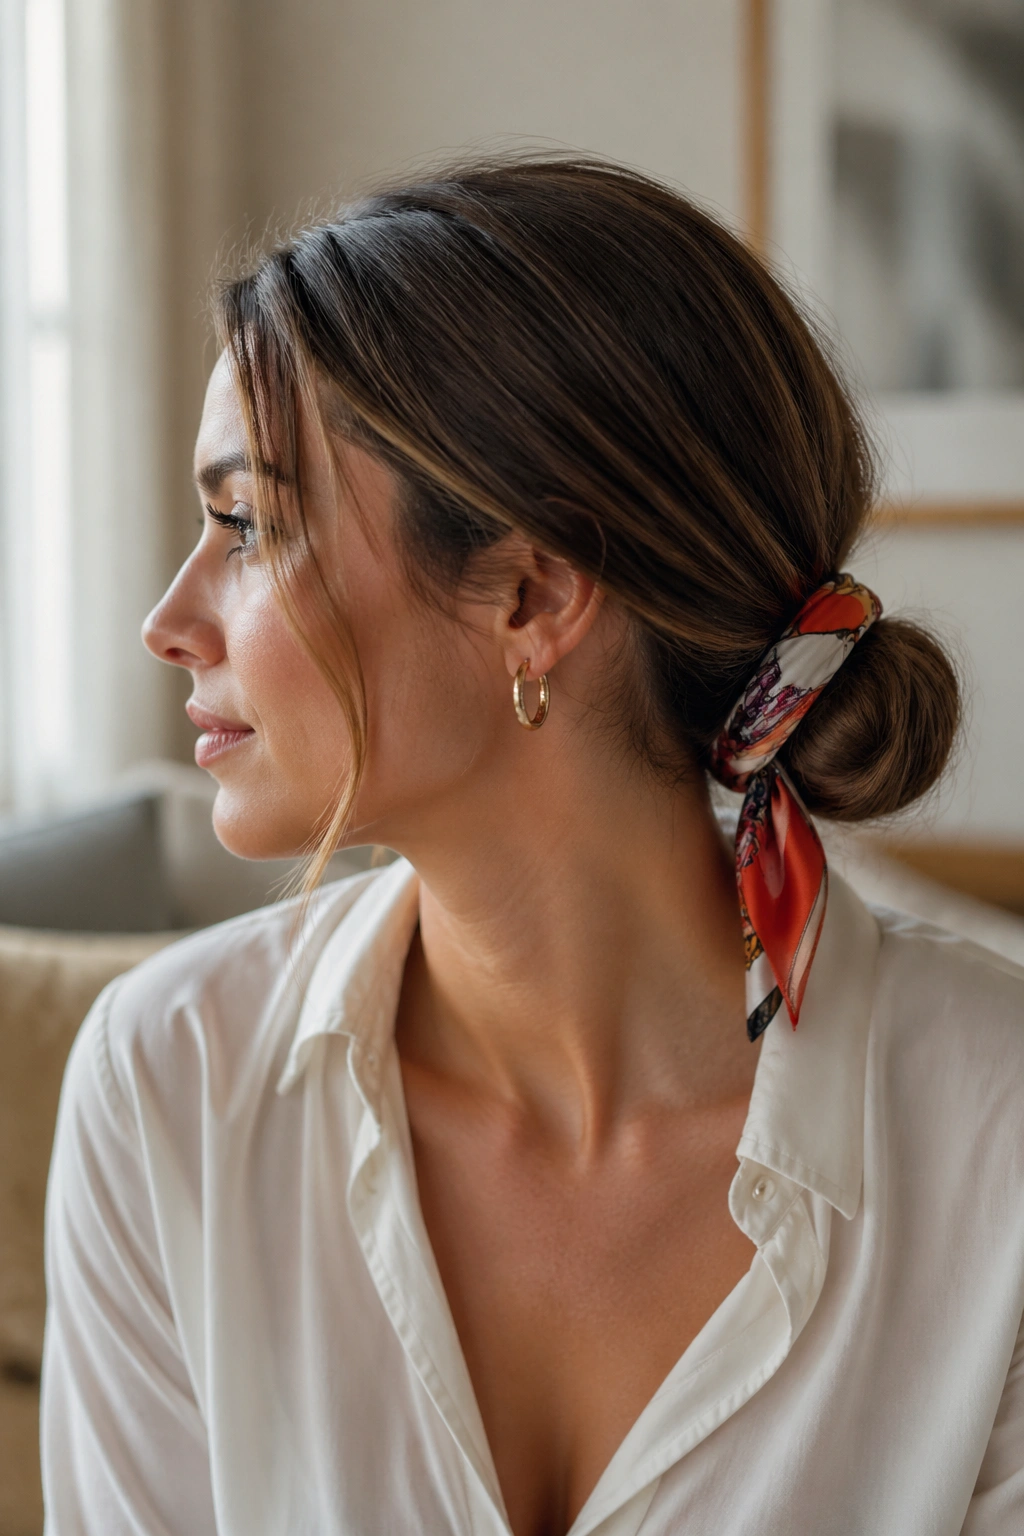
Can a scarf rescue a plain bun? Absolutely. A scarf wrapped around the base adds color, hides a tired elastic, and makes even the simplest knot look styled on purpose. It’s one of the fastest ways to make a lazy bun feel finished.
Tie the hair into a low bun first, then fold a slim scarf into a band and wrap it around the base once or twice. Knot it underneath or to the side so the bow does not sit awkwardly on top. Keep the fabric close to the bun rather than letting a long tail dangle unless that’s the point.
How to keep the knot flat
- Choose a scarf that is small to medium in width.
- Use matte fabric so it grips a little better.
- Tuck the knot under the bun if you want a cleaner finish.
- Keep the bun compact; a giant bun plus a scarf can look clumsy.
This style is useful when you want color without adding more hair work. Easy win.
17. Hair-Stick Bun
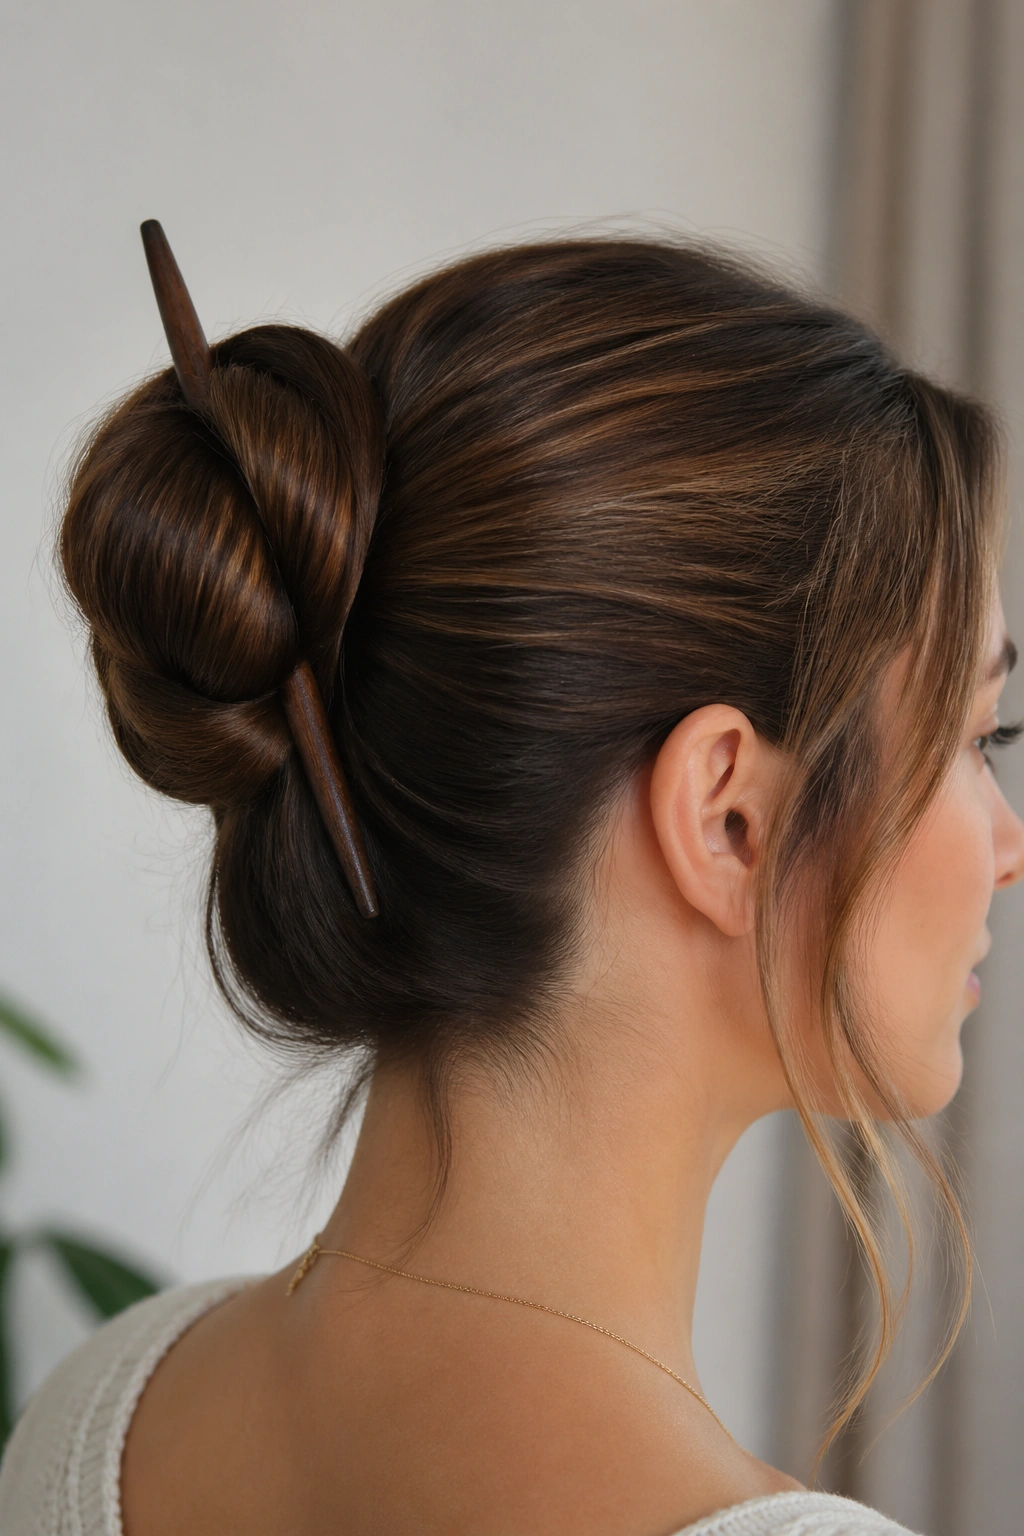
A hair-stick bun has that old-school, collected look that pins alone sometimes miss. The stick gives the style a single point of focus, and because the hardware is minimal, the whole thing stays light. It also solves the “too many bobby pins” problem, which I am personally happy to avoid.
Twist the hair into a bun, hold the coil in place with one hand, and slide the stick through the center so it catches both the base and the outer loop. If your hair is thick, a second stick placed at a slight angle can lock the bun more firmly. The bun should feel secure without being pinned flat into submission.
Unlike a clip, a hair stick tends to sit closer to the head and keeps the silhouette clean. It’s a nice choice for long hair that has enough weight to hold the stick in place. Shorter layers can work too, but they usually need a few hidden pins.
Minimal gear. Good shape. That’s the appeal.
18. Wet-Look Low Bun
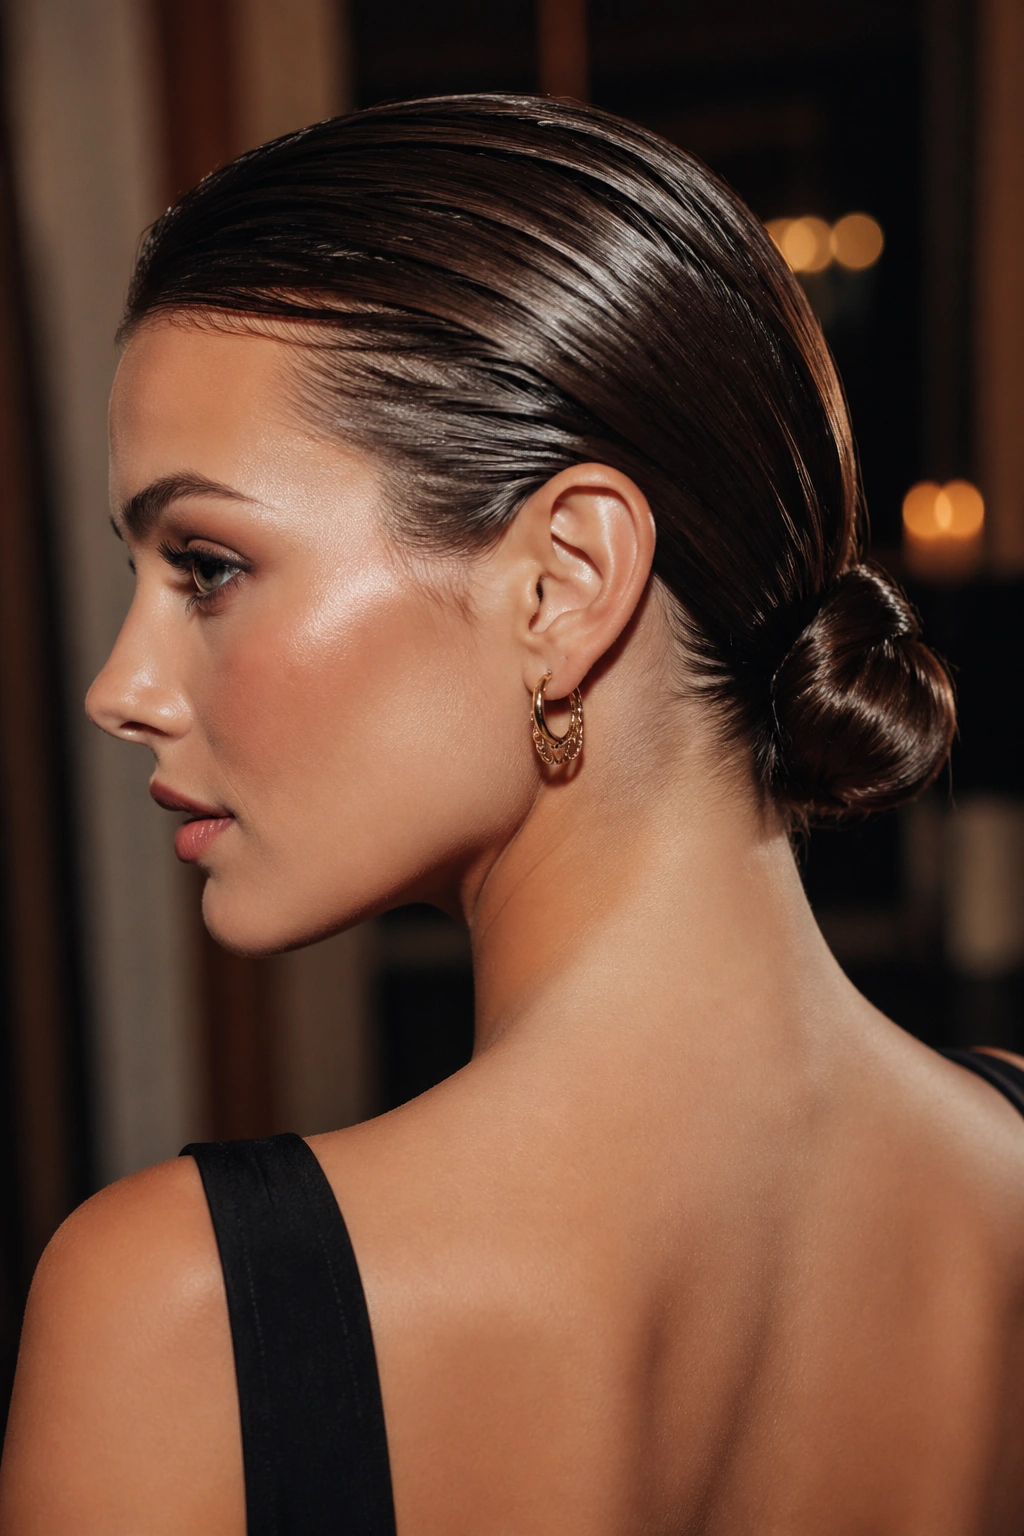
A wet-look low bun is the slicker cousin of the regular low bun. The difference is shine. Lots of it. The surface looks smooth and glossy, and the front stays firmly controlled, which makes the style feel sharper and more fashion-y than a casual loose knot.
Work a small amount of gel or styling cream through damp hair, then comb it straight back into a low ponytail. Twist the length into a bun and smooth any gaps with your fingertips. A fine-tooth comb helps with the front, but don’t pile product on the ends or the bun can look heavy.
The style does best when the shape stays simple. No sprawling bun, no huge loose pieces. Keep it compact and low, then let the shine do the talking. It is a strong look for evenings, hot weather, or any day when frizz is acting rude.
Use less product than your first instinct says. That is usually the whole secret.
19. Bubble-Banded Bun
The bubble-banded bun is a little playful, but it still lands on the chic side when you keep the bubbles neat and the bun compact. It starts like a segmented ponytail and ends in a wrapped shape that gives the hair a bit more structure than a plain coil.
Make a ponytail, then add clear elastics every 2 to 3 inches down the length. Gently tug each section so it puffs out into a rounder shape. After that, wrap the whole thing around the base and pin the ends under. The bubbles add volume before the bun even starts.
Best for long hair
- Long hair holds the shape without feeling crowded.
- Thick hair makes the bubbles fuller.
- Fine hair benefits from a bit of texture spray before you start.
- Layered ends stay more contained when each section is elasticized.
This style has a bit of personality without needing a lot of skill. That’s a nice combination, and it feels fresher than a standard wrap bun.
20. Flat Twist Bun
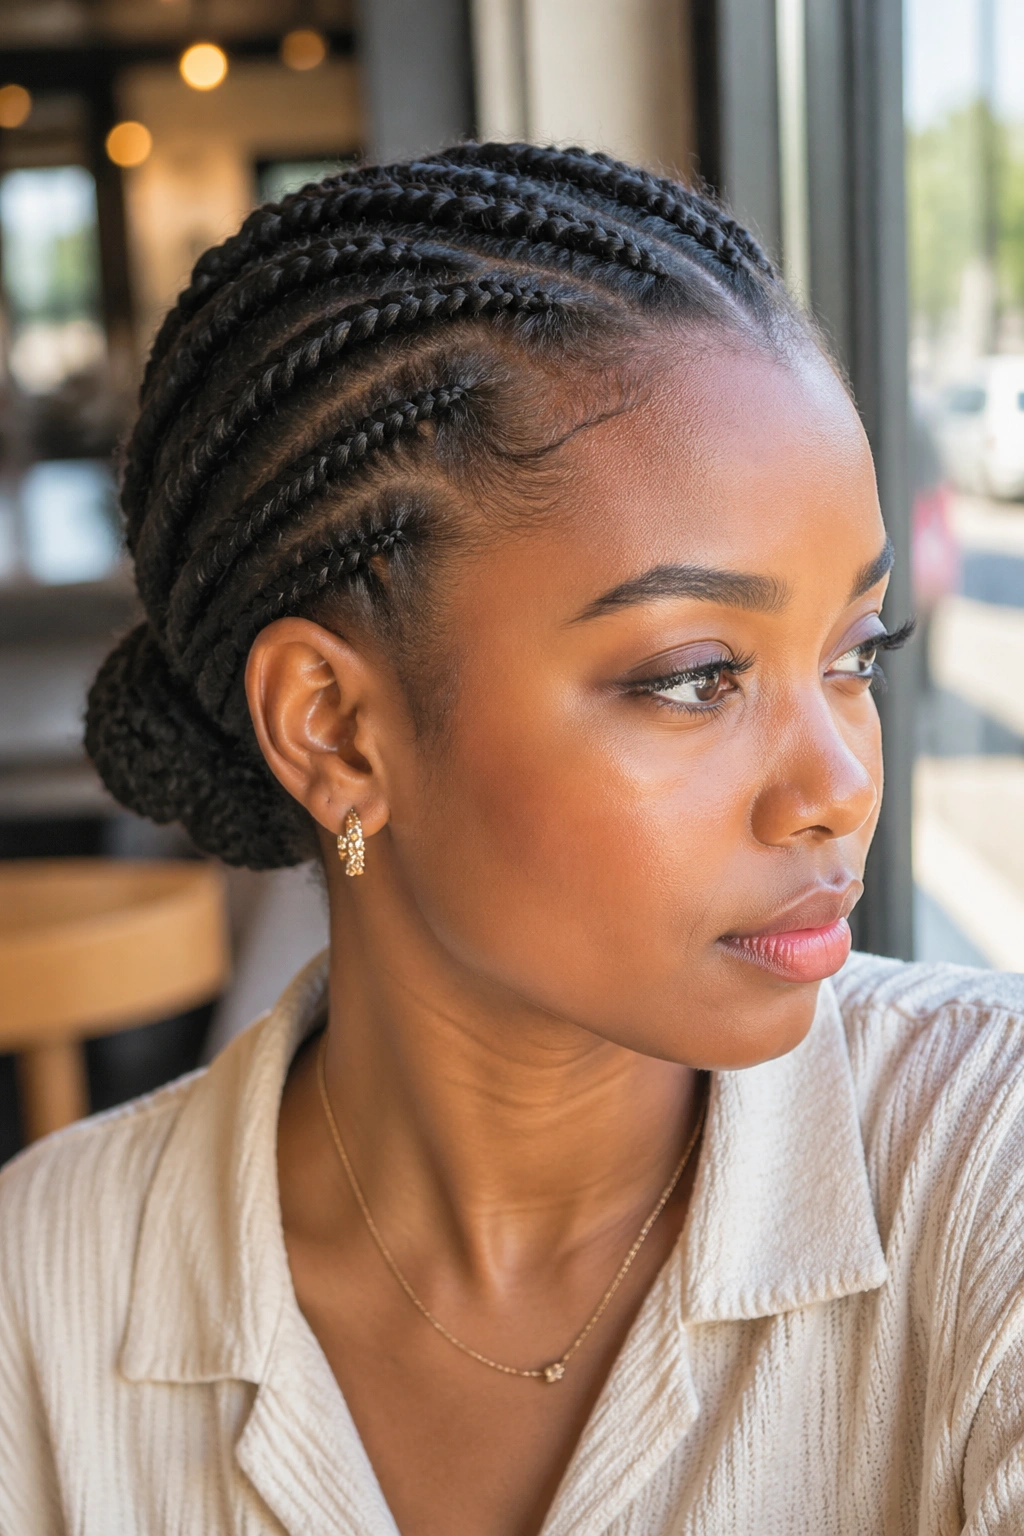
Flat twists into a bun make a lot of sense for textured hair, especially when you want the front and sides to stay calm. The twists lie close to the scalp, which keeps the style neat before the bun even starts. It’s tidy without being stiff.
Part the hair into sections, flat twist each side back toward the nape, and gather the remaining length into a low bun. Pin the bun close to where the twists end. If you want the style to feel softer, leave the bun slightly puffed instead of pressing it flat. If you want more polish, smooth the parts and edges with a light cream or gel.
This one works well because it gives shape at the scalp and movement at the bun. You don’t have to choose between neat and natural. You can have both. That’s rare enough to be worth liking.
It is also one of the more dependable lazy bun styles for hair that does not love being yanked into a single tight knot.
21. Bare-Minimum Puff Bun
The bare-minimum puff bun is for the days when you want the least possible fuss and still want to look like you made a choice. It works especially well on curls, coils, and hair with a lot of body. Instead of flattening the texture, it lets the puff sit up and do what it already wants to do.
Pull the hair into a loose high or mid ponytail with a soft tie, but do not drag the ends all the way through on the last wrap. Let the hair puff out, then tuck or pin the loose ends so they form a rounded bun-like shape. A few face-framing pieces can stay out if your hair likes to fall that way.
This is the style I’d call the last honest lazy bun. No extra steps. No fake polish. Just enough shape to make it look intentional and enough softness to keep it from feeling overworked.
If your hair has volume of its own, use it. That’s the whole point.