



Getting kids’ hair done in the morning doesn’t have to mean wrestling with a flat iron or spending thirty minutes on an elaborate style that’ll be destroyed by recess anyway. A messy bun is the ultimate hack for parents and kids alike — it’s cute, it keeps hair out of their face, and it actually looks intentional even when you’ve thrown it together in about two minutes flat. The beauty of the messy bun is that it works on almost any hair texture, length, and type. Whether your kid has fine, silky hair or thick, curly curls, there’s a messy bun variation that’ll work for them.
What makes messy buns perfect for kids is how forgiving they are. A strand falling out? That’s part of the charm — it’s supposed to look undone. Your child ran their hands through it halfway through the day? Still looks great. Unlike sleek ponytails or intricate braids that fall apart if a single hair is out of place, messy buns are designed to handle the chaos of active, playful kids. Plus, they keep hair secure enough for sports, playground time, and actual learning without being so tight they cause headaches. The key is knowing which styles work best for different hair types, occasions, and your kid’s tolerance for hair accessories.
1. The Classic Twisted Bun
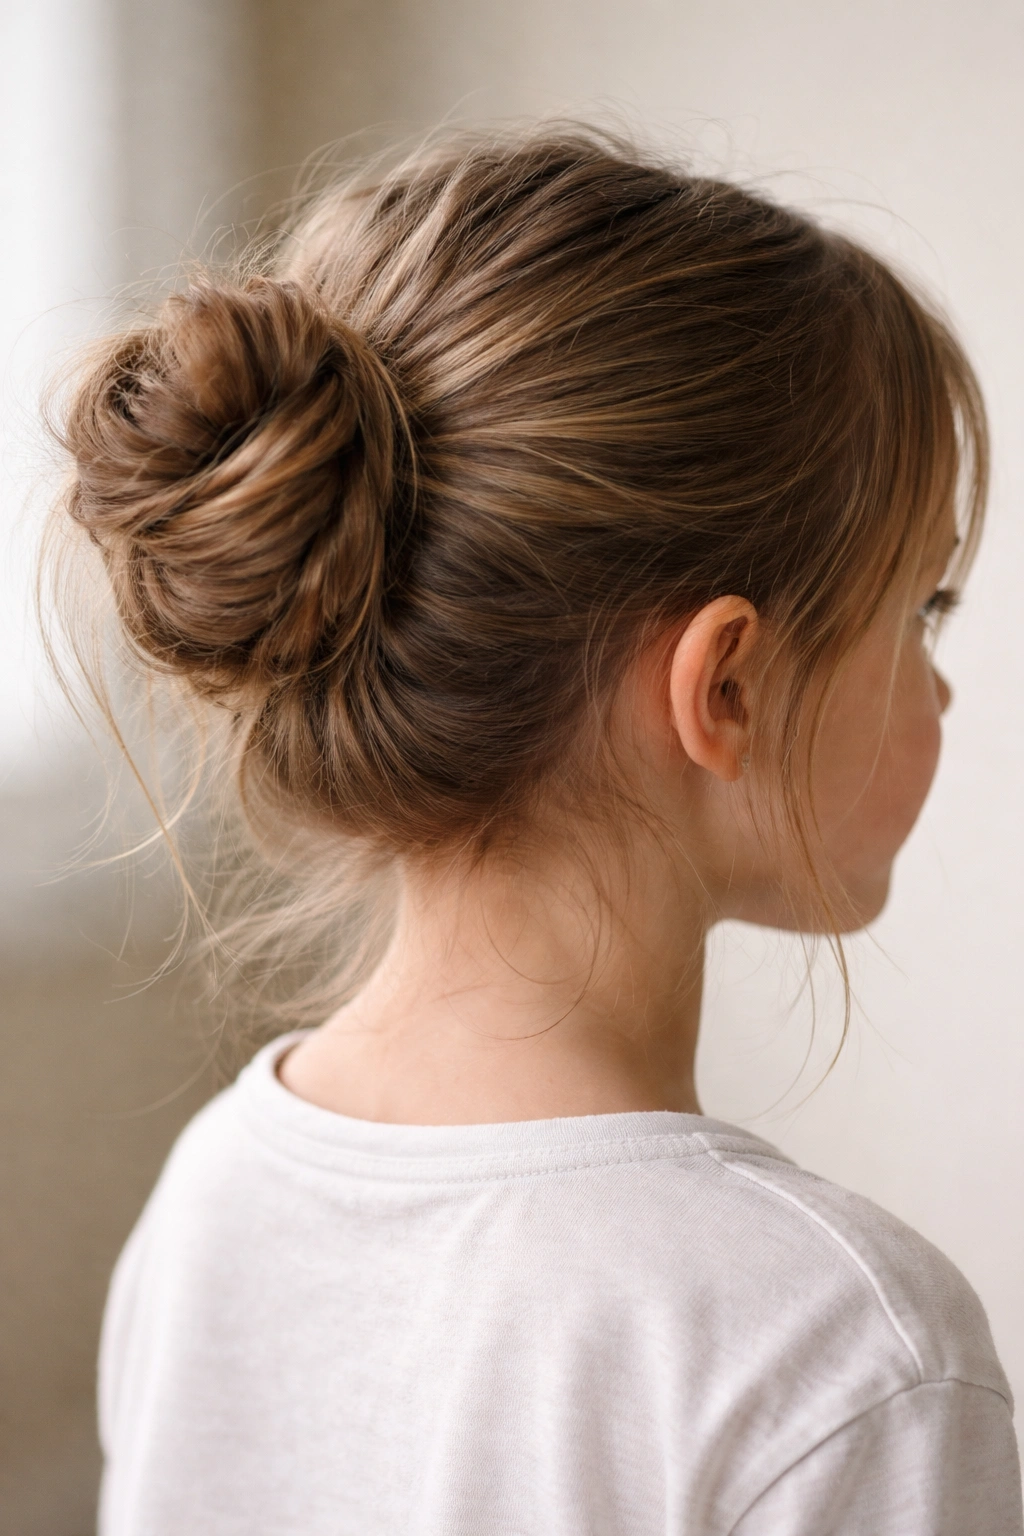
This is the style that works on literally every kid, regardless of hair texture or length. You simply gather the hair into a ponytail (high, middle, or low — your choice), then twist the ponytail and wrap it around the base to form a bun. It’s the foundation of the messy bun world, and once your kid masters this one, they can do variations on their own as they get older. The twisted bun has a natural texture that looks intentionally undone, which is exactly what you’re going for with a messy style.
Why This Style Is the Go-To Choice
The classic twisted bun works because it requires zero products and almost no skill. You don’t need a straightener, texturizing spray, or any complicated technique — just your hands, a hair tie, and maybe a bobby pin if you want extra security. Kids love it because it actually feels lighter and less restrictive than other bun styles. The twisting motion creates natural volume that looks way more interesting than a smooth, sleek bun. Even on second-day hair, when texture already exists, this style looks intentional and polished rather than sloppy.
How to Create It Perfectly
- Brush or comb out any major tangles, but leave some texture in the hair (don’t make it too smooth)
- Gather hair at the crown or top of the head into a high ponytail, securing with a elastic hair tie
- Twist the entire ponytail tightly from the base all the way to the ends
- Wrap the twisted ponytail around the base of the ponytail like a coil, tucking the ends underneath
- Secure with bobby pins inserted underneath the bun so they’re hidden
- Gently pull at the bun with your fingers to loosen it and create that intentionally-messy texture
Pro tip: If your kid’s hair is slippery or fine, do a half-twist instead of a full twist — twist the ponytail loosely and wrap it around the base without twisting it so tightly that it’s hard to manipulate.
2. The Double Bun Look
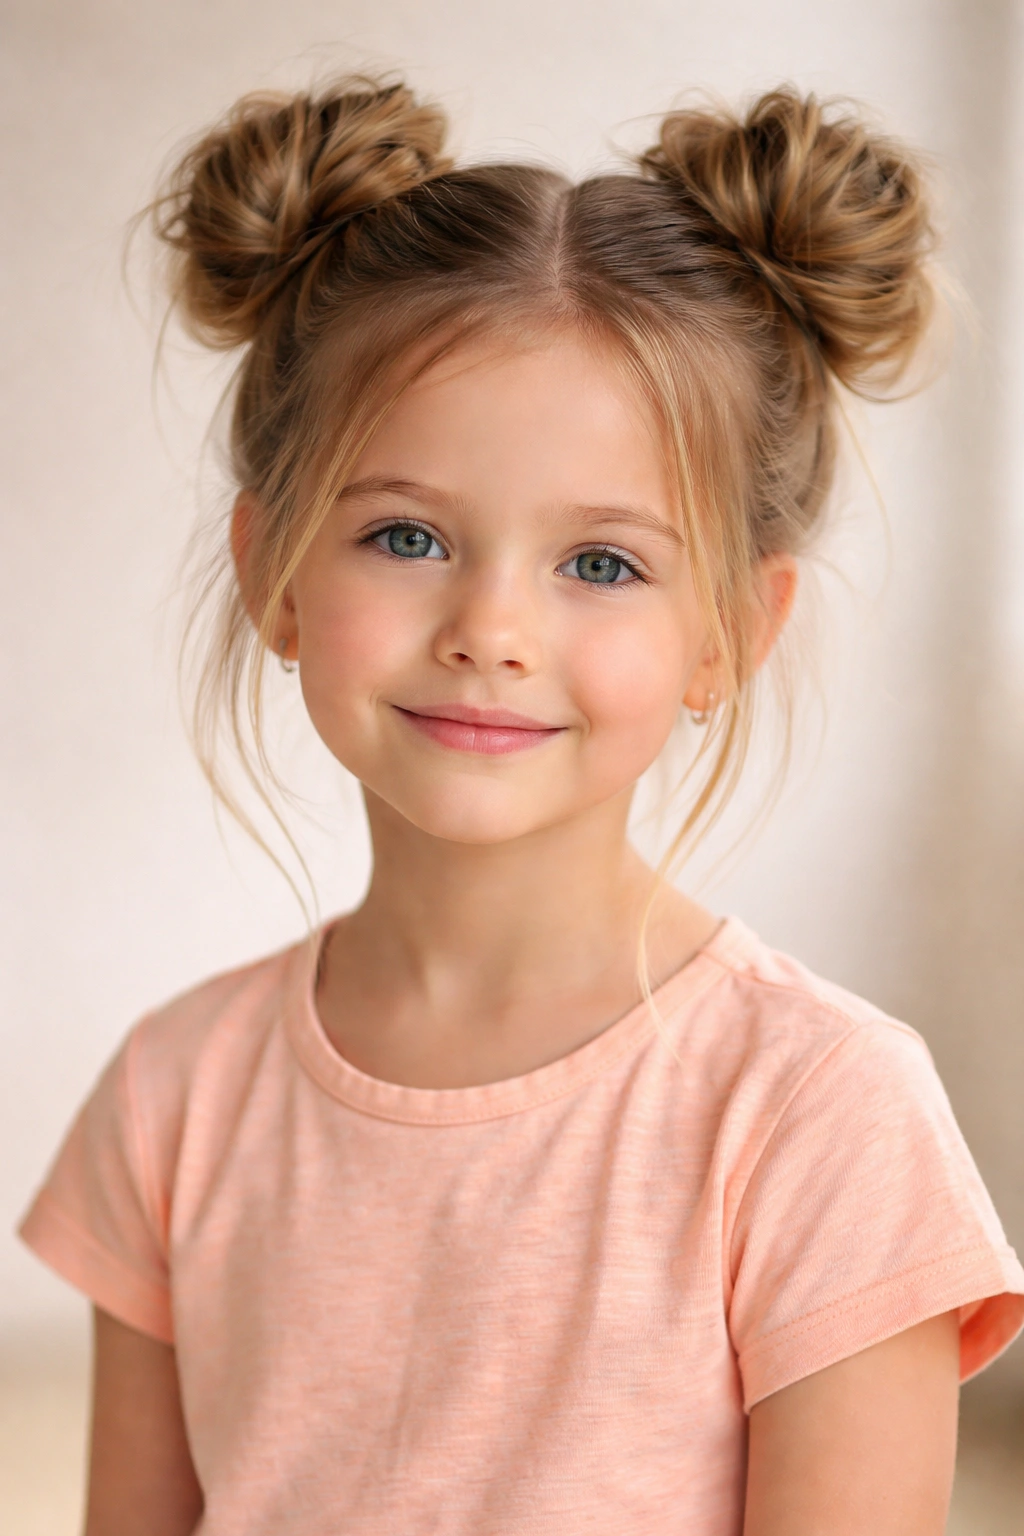
Double buns are pure joy for kids — they’re playful, fun, and honestly adorable. This style works best on kids with shoulder-length hair or longer, and it’s perfect for those days when your child wants something a little more special than a single bun but doesn’t have the patience for anything too complicated. You’re essentially creating two small buns on either side of the head, which gives off that effortlessly cool vibe that kids actually want to wear. It’s practical enough for a regular school day but fun enough that your kid feels like they’re wearing something special.
Why Kids Actually Love This One
Double buns appeal to kids because they feel symmetrical and balanced in a way that’s satisfying — if you’re a kid who loves things to match and make sense, having two equal buns feels right. The style also frames the face nicely and keeps hair completely off the neck and shoulders, which is a huge comfort factor on warm days or during active play. Double buns also work on various hair textures because each bun is smaller and easier to manage than one large bun. Plus, kids feel like they look a little bit cool and a little bit playful at the same time, which is exactly what every kid wants from their hairstyle.
Step-by-Step to Create Double Buns
- Part the hair down the middle from the crown to the nape of the neck, creating two equal sections
- Secure one section with a hair tie, leaving the other section loose for now
- Take the secured section and twist it or roll it into a bun on one side of the head, pinning it in place
- Repeat with the second section, creating a matching bun on the opposite side
- Pull gently at each bun to create texture and that messy, undone look
- Adjust both buns so they’re roughly equal in height and position
Pro tip: If your kid has thinner or finer hair, creating double buns actually works better than a single large bun because each bun can appear fuller and more voluminous with less hair.
3. The Wrapped Bun With Accessory
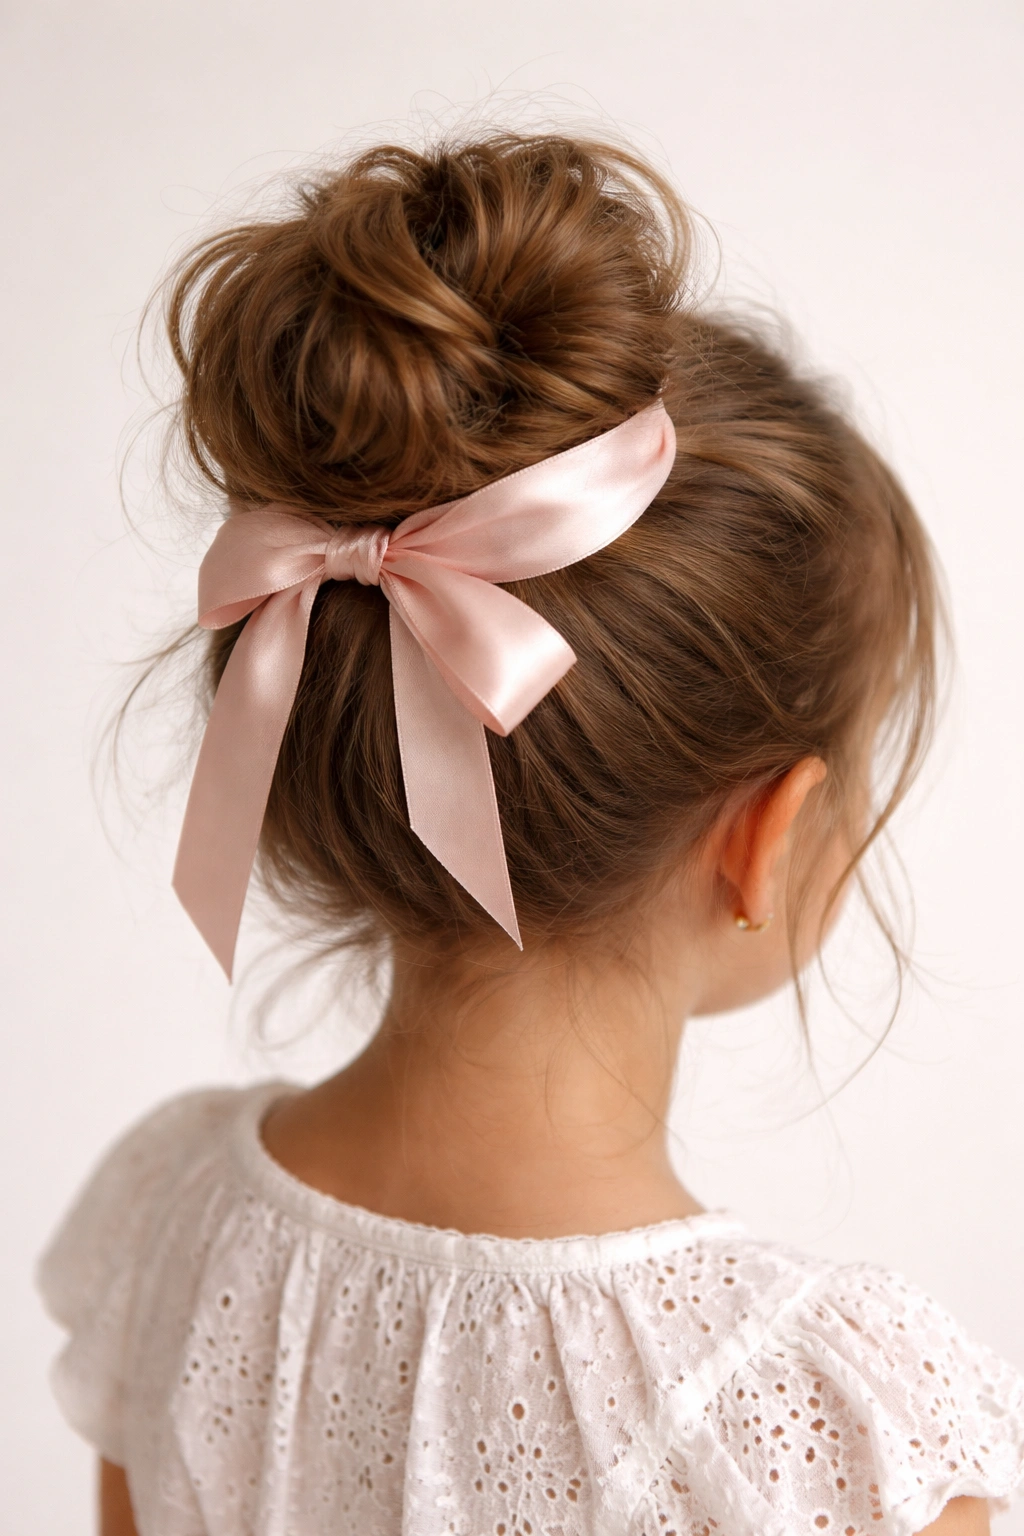
Taking a basic messy bun and wrapping it with a fabric scrap, ribbon, or velvet hair tie completely changes the vibe — suddenly it looks a little more polished and intentional, but still undeniably messy and cute. This style is perfect for kids who want to add a pop of color to their look or who feel more put-together with a little accessory involvement. The wrapped bun is also a great way to cover up any hair ties that might be visible, which some kids prefer. You’re creating a classic messy bun, then using a second decorative element to frame and define it, which adds visual interest without complicating the actual process.
How the Accessory Elevates Everything
Adding a wrap around the base of the bun serves both a practical and aesthetic purpose. Functionally, it holds some of the shorter pieces in place, making the bun look neater and more intentional. Aesthetically, it draws attention to the bun and gives the style a finished quality that feels more special than a plain bun. Kids especially love this because they get to choose the color or pattern of the wrap, making the style feel more personalized. A metallic hair tie, a patterned scrap of fabric, a velvet choker wrapped around the bun base, or even a small silk scarf can completely transform the look of a basic messy bun into something that feels intentional and stylish.
Creating a Wrapped Bun Base
- Create a classic twisted or rolled bun at the crown or high on the head, securing with bobby pins
- Loosen the bun gently with your fingers to create that messy texture
- Take your decorative wrap (fabric scrap, ribbon, velvet tie, or hair accessory) and wrap it around the base of the bun
- Tie it off or tuck the ends underneath so it’s secure and hidden
- Adjust the bun so the wrap sits cleanly around the base without bunching up
- Pull a few face-framing pieces down loosely if you want a softer look
Worth knowing: Velvet hair ties work especially well for this style because they stay in place without slipping and add a luxe, intentional feeling to even a very messy bun.
4. The Half-Up Messy Bun
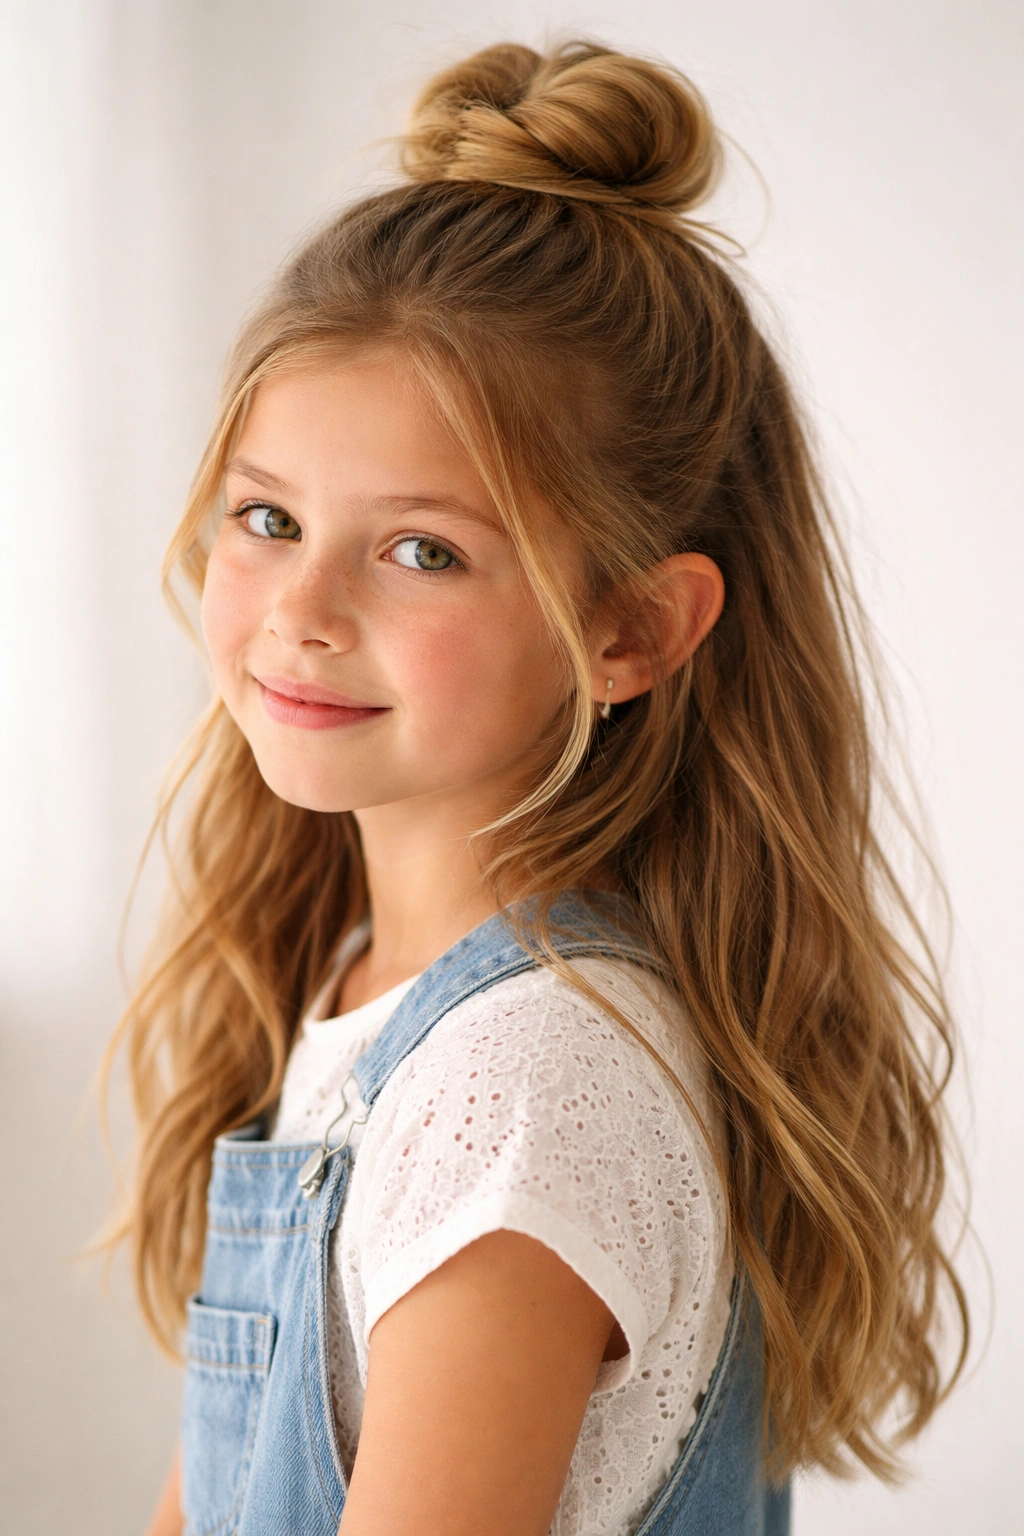
This is the style for kids who don’t want a full bun but still want their hair partially pulled back. You’re taking the top half of the hair, gathering it into a small bun, and leaving the bottom half down. It’s practical for keeping hair out of the face without feeling like a “full” hairstyle, and it works beautifully on kids with longer hair. The half-up bun is also perfect for kids who have somewhere between shoulder-length and mid-back-length hair and want a style that’s not quite a full ponytail but more than just leaving it completely down. It’s the kind of style that looks effortlessly cool because it actually requires minimal effort.
Why Half-Up Is the Sweet Spot
Kids love the half-up messy bun because it gives them the best of both worlds — the practicality of having their hair partially pulled back with the freedom of wearing it down. It’s also one of the most flattering styles for virtually every face shape because you’re framing the face with the down portion while keeping the crown clean and open. The half-up style is perfect for school days, outdoor activities, and even more casual social occasions. It doesn’t read as “fully done up,” so kids feel like they’re just wearing their normal hair, but it’s actually doing serious work in terms of keeping hair functional and out of their face.
How to Build the Perfect Half-Up Bun
- Take a horizontal section of hair from temple to temple across the top and back of the head
- Gather this section into a ponytail at the crown, leaving the bottom half of the hair completely down
- Twist or roll the ponytail into a small bun, securing with bobby pins
- Loosen the bun gently to create that messy, undone texture
- Leave some pieces around the face unclipped if you want a softer, more face-framing look
- Make sure the bun sits cleanly at the crown so it doesn’t interfere with the down hair underneath
Pro tip: If your kid’s hair is very thick, take a slightly smaller section for the half-up portion so the bun doesn’t feel too heavy or bulky at the crown.
5. The Bubble Bun
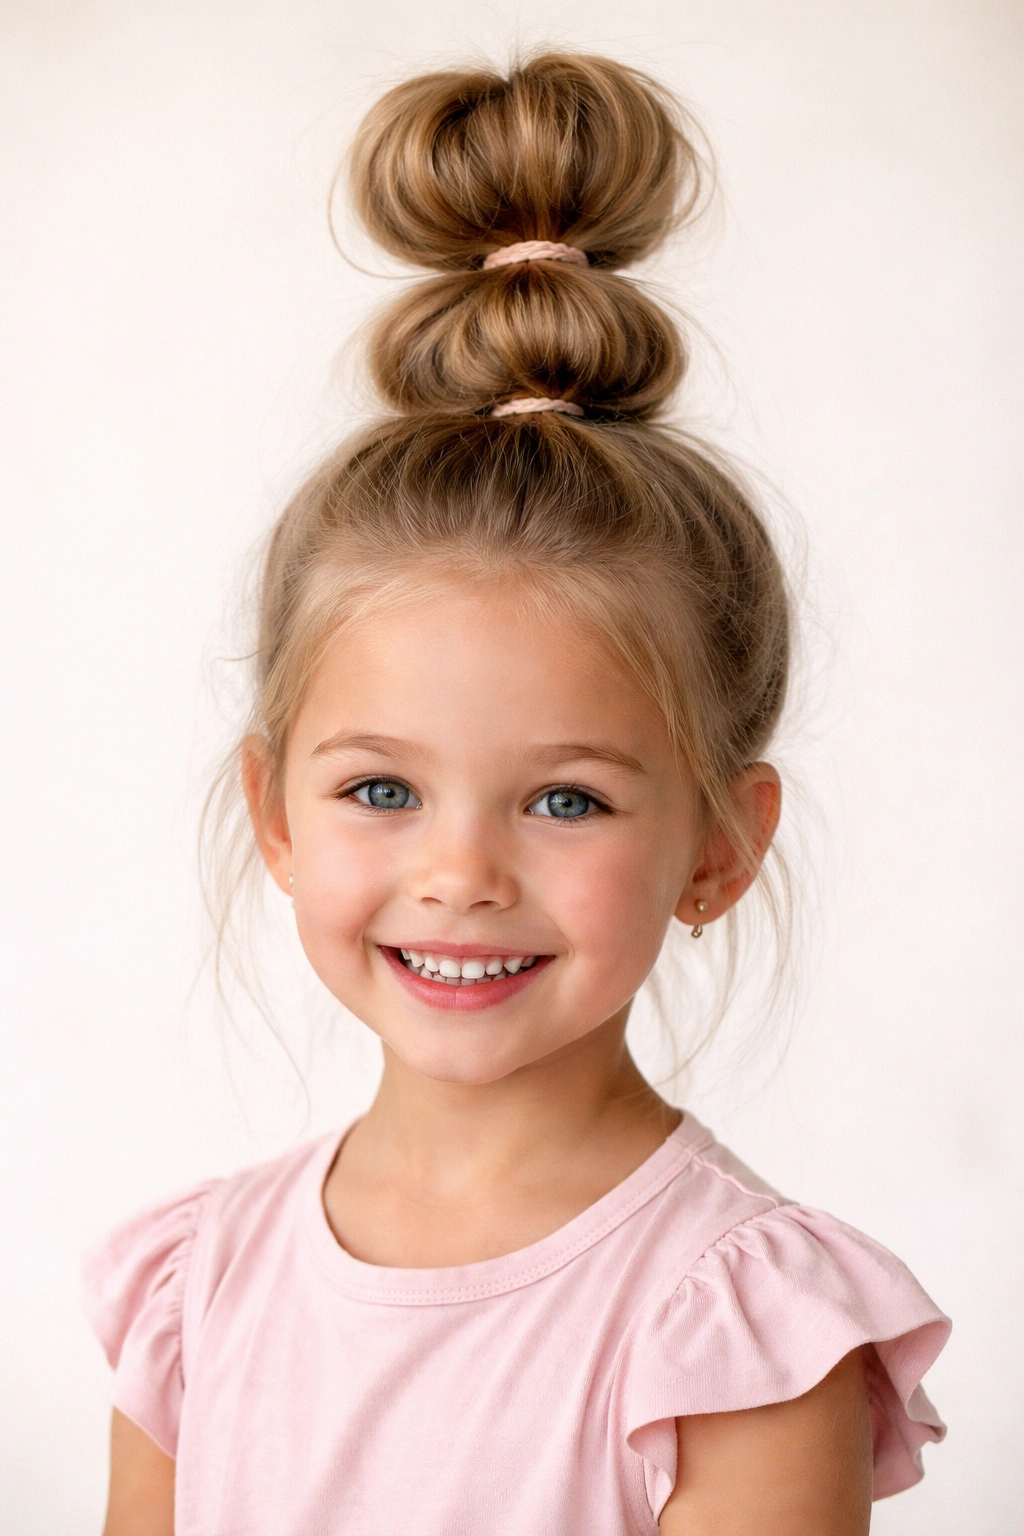
The bubble bun is genuinely one of the easiest styles to create, and kids find it delightful because it looks playful and a little bit quirky. You’re creating multiple mini buns stacked vertically along a center ponytail, which creates that bubble effect. It works on medium to long hair and is perfect for kids who want something a little different from the standard bun. The bubble bun is also surprisingly functional — it keeps hair completely secure and off the shoulders, and because it’s divided into sections, it doesn’t create that heavy feeling some kids experience with one large bun.
Why Bubble Buns Are Deceptively Cool
This style might look complicated, but it’s actually very straightforward to create. Kids love bubble buns because they look a little bit fashionable without requiring any fancy technique or products. The bubbles create natural volume and texture, so even on flat or limp hair, the style has visual interest and movement. Bubble buns also work well on curly or textured hair because the texture already exists in the hair — you’re just sectioning it strategically. The style also gives off a playful, creative vibe that appeals to kids who want their hairstyle to match their personality.
Creating Bubble Buns Step by Step
- Create a high ponytail at the crown and secure with an elastic hair tie
- Divide the ponytail into 4-5 equal sections using elastic hair ties spaced about 2 inches apart down the length of the ponytail
- Gently puff out each section between the ties by pulling it away from the scalp, creating bubble shapes
- At the very end of the ponytail, twist the remaining hair into a small bun and secure with bobby pins
- Adjust each bubble so they’re roughly equal in size and puff
- Pull gently at the edges of each bubble to create that messy texture
Pro tip: This style works great the day after washing because the hair has some texture already, making the bubbles easier to create and longer-lasting.
6. The Braided Base Bun
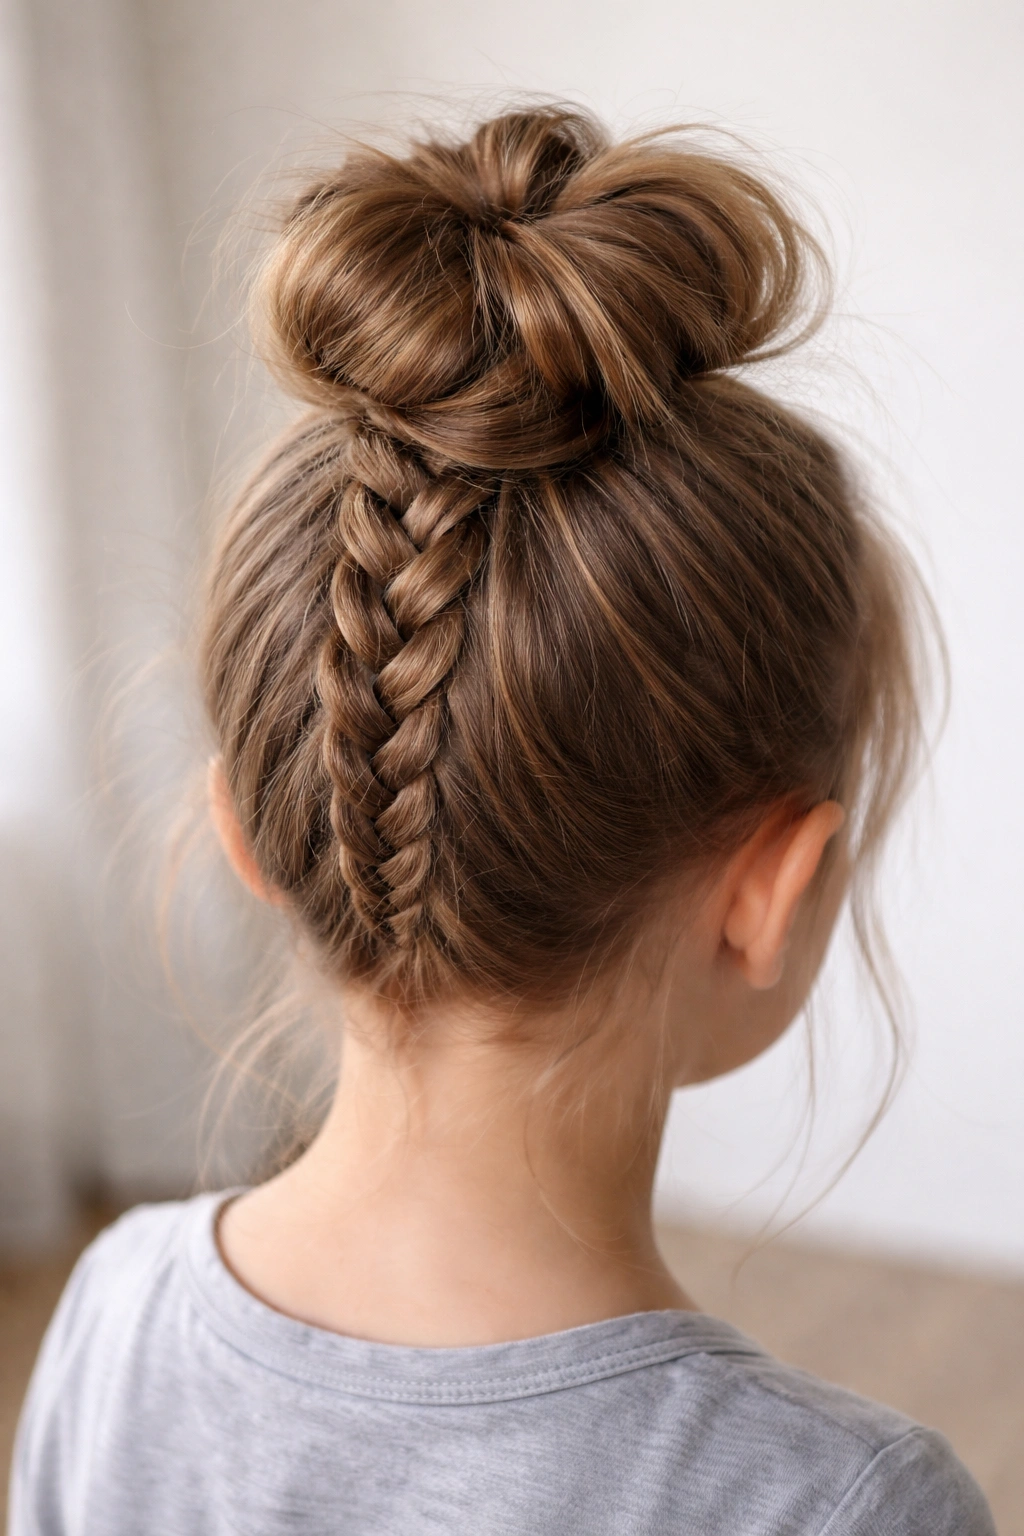
If your kid can tolerate a braid (some kids absolutely love them, others would rather do almost anything else), a braided base bun is a gorgeous option that looks intentional and well-executed without being overly complicated. You’re creating a braid from the nape of the neck upward, then gathering the remaining hair and the braid into a bun at the crown. This style is perfect for kids with medium to long hair and works especially well on slightly textured or curly hair because the braid holds beautifully. The braided base bun is elevated enough to feel special but still casual enough for everyday wear.
Why the Braid Adds Legitimate Style
Adding a braid to the base of the bun completely changes the vibe of the style. It looks more intentional, more polished, and slightly more sophisticated than a standard bun, but it’s not so fancy that a kid feels overdressed for school or regular activities. The braid also serves a practical purpose — it keeps the lower portion of the hair structured and secure, so the whole style lasts longer throughout the day. Kids appreciate that a braided base bun feels special without being uncomfortable or high-maintenance. It’s the kind of style that works equally well for a regular school day or a slightly dressier occasion.
Building a Braided Base Bun
- Start by creating a Dutch braid (or French braid, whichever you prefer) from the nape of the neck upward toward the crown
- Continue the braid up the back of the head, ending at the crown area
- Gather all the remaining hair (including the ends of the braid) into a ponytail at the crown
- Twist or roll the ponytail into a bun, securing with bobby pins
- Loosen the bun and the braid slightly to create texture and that intentionally-messy look
- Adjust the braid so it’s visible and forms a nice frame for the bun
Worth knowing: This style actually works well for keeping hair secure during sports or active play because the braid at the base provides extra anchor points that a regular bun doesn’t have.
7. The Side Messy Bun
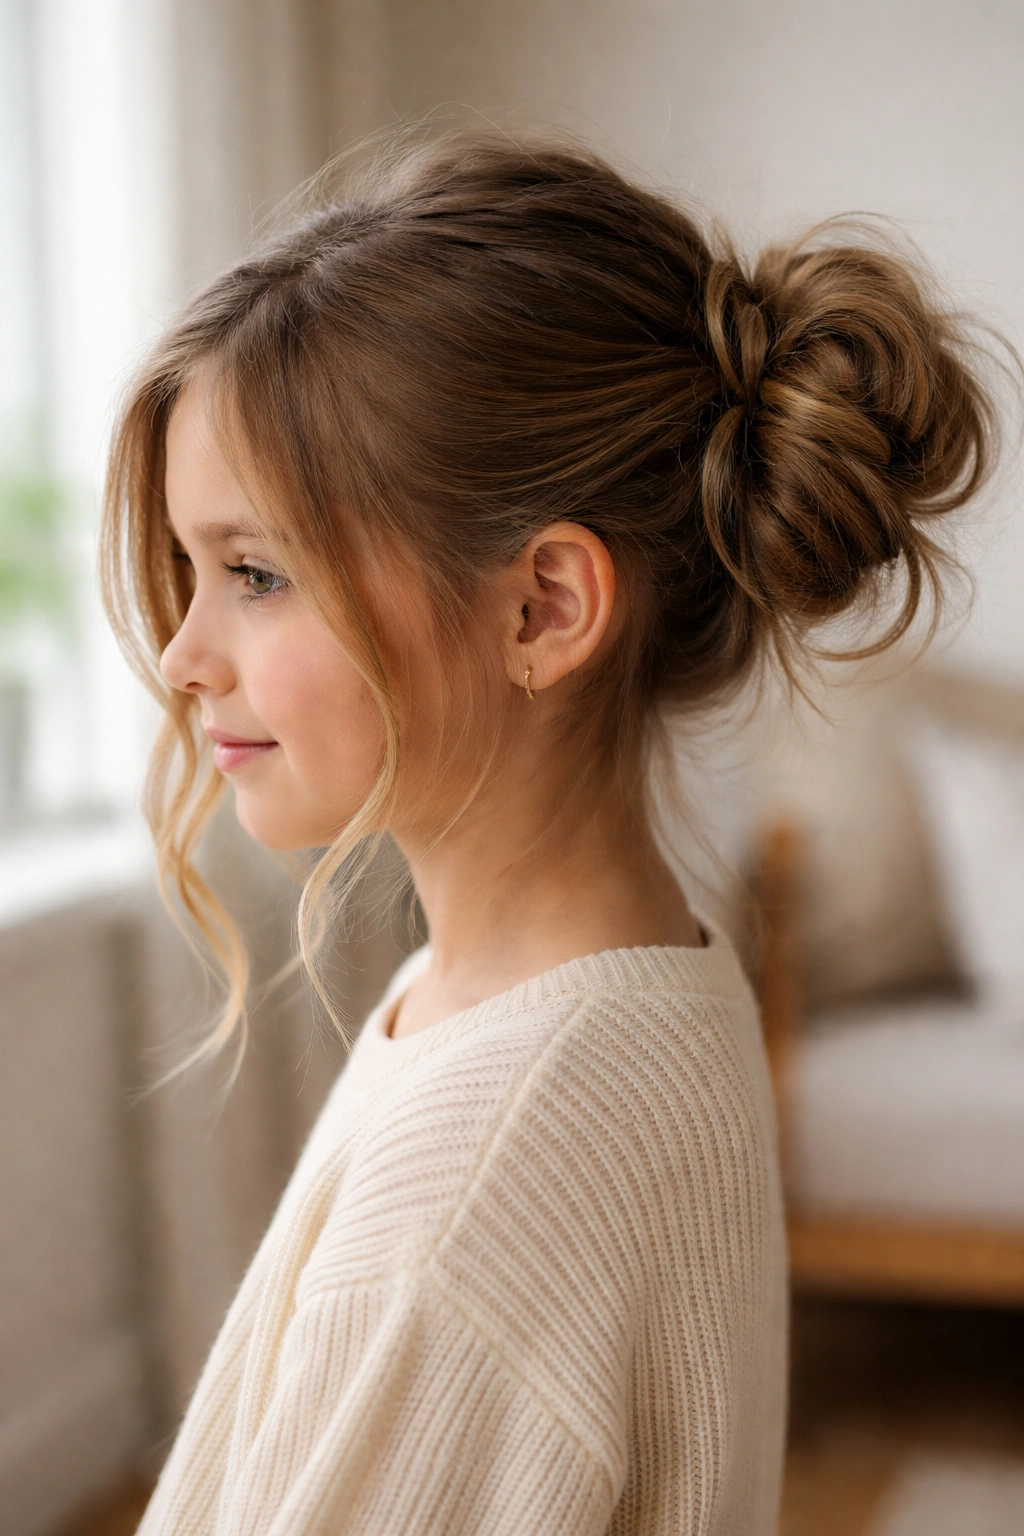
A side messy bun is all about asymmetry and that casual, slightly-off-duty vibe that’s actually really appealing to kids who want something a little different from the standard centered bun. You’re creating your messy bun off to one side of the head rather than at the crown, which completely changes the feel and personality of the style. Side buns work beautifully on longer hair and are perfect for kids who want to show off more of their hair while still having it partially pulled back. The side positioning also naturally creates that face-framing effect without you having to do anything extra.
Why Asymmetry Feels Cool to Kids
Side messy buns appeal to kids who feel like they have a sense of style and want their hair to reflect that. The asymmetrical placement makes the style feel less “mom-done” and more like something the kid chose themselves. It’s also genuinely flattering because it shows more of the hair, which works well for kids with thicker or longer hair who want to showcase that. The side bun also creates a beautiful diagonal line from the bun toward the opposite ear, which is visually interesting and naturally frames the face in a flattering way.
How to Create a Perfect Side Bun
- Gather a large section of hair from one side of the head, starting around the ear and going back toward the nape
- Secure this section with an elastic hair tie, positioning it off to one side rather than at the center
- Twist or roll the ponytail into a bun, securing with bobby pins
- Loosen the bun to create that messy, undone texture
- Gently pull some face-framing pieces down around the ear and jawline for a softer look
- Make sure the bun sits securely to the side without sliding toward the center as the day goes on
Pro tip: Side buns actually look better when they’re slightly lower than a centered bun — aim for a position that’s about an inch or two above the ear rather than higher up on the head.
8. The Textured Ponytail Bun
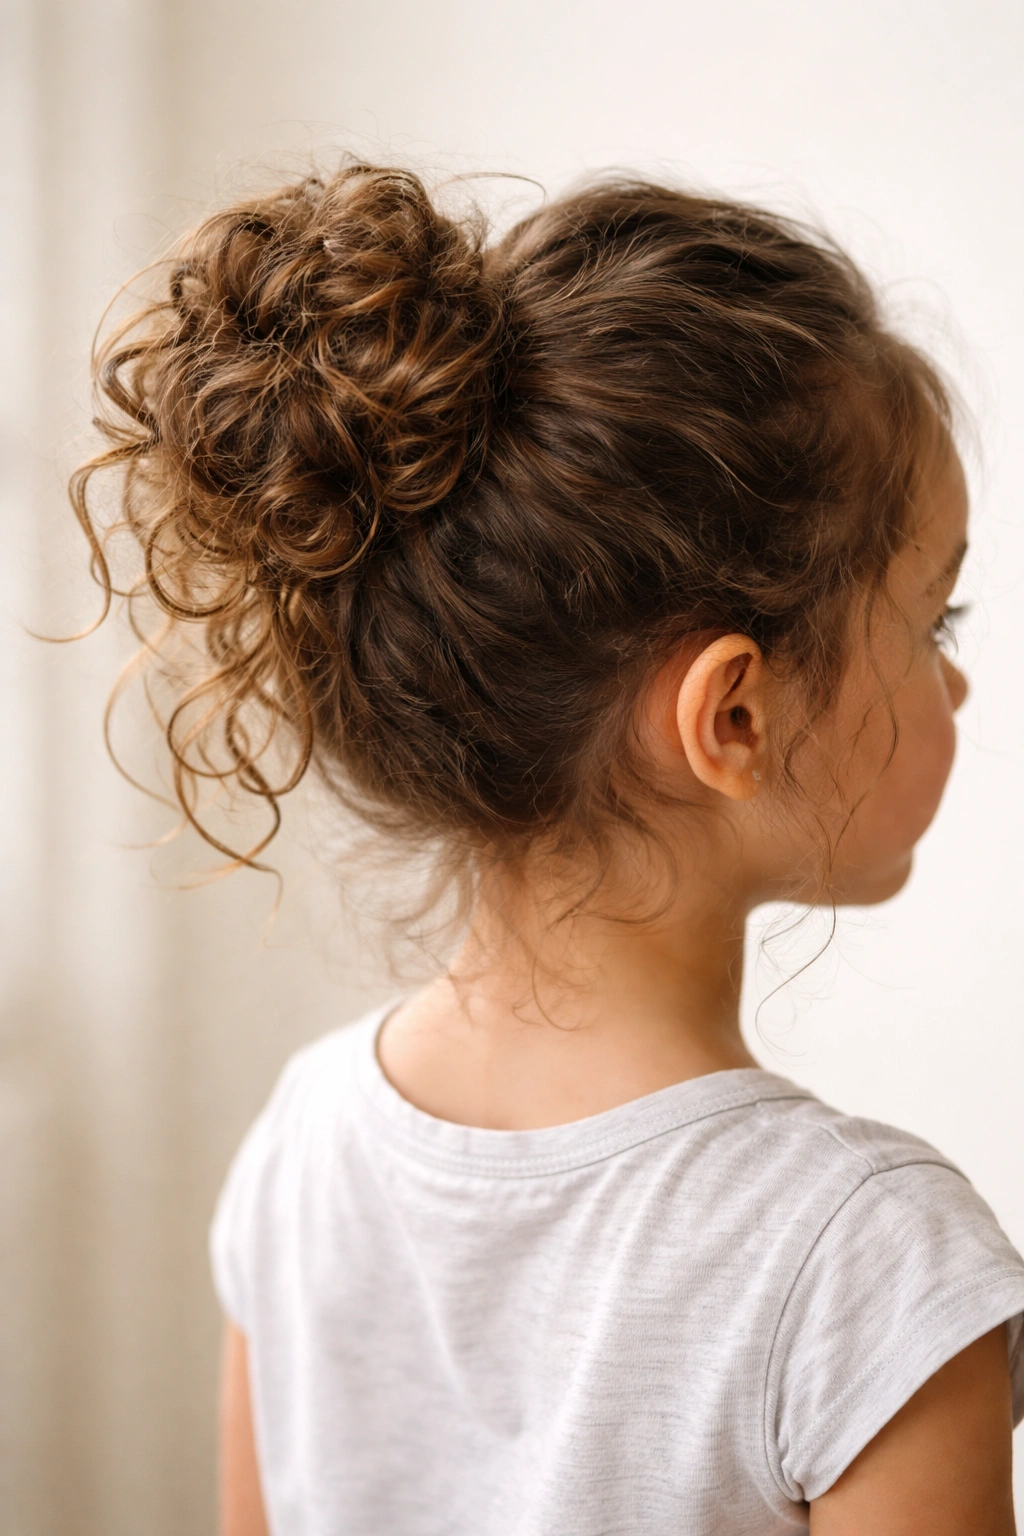
This is the style for kids whose hair naturally has texture, wave, or curl and you want to embrace that rather than fight it. Instead of starting with a standard ponytail and then bunning it, you’re creating a messy bun directly from textured hair that already has movement and shape. This style celebrates the kid’s natural hair texture and is actually one of the easiest options if you’re working with curly or wavy hair because you’re not trying to smooth or straighten anything. The textured ponytail bun looks intentional and special without requiring any heat styling, products, or technique.
Why Texture Is Your Secret Weapon
If your kid has naturally curly, wavy, or textured hair, a textured ponytail bun is honestly the easiest messy bun style to execute. You’re not fighting the hair’s natural texture — you’re celebrating it. The texture automatically creates that messy, undone look without you having to do anything special to achieve it. Kids with curly or wavy hair often feel like they have to straighten their hair to make it look “nice,” so a style that works beautifully with their natural texture is genuinely empowering. It’s also typically faster to create because you’re not styling or smoothing the hair beforehand.
Creating a Textured Ponytail Bun
- Lightly spritz hair with water if it needs refreshing, or work with hair as-is if it still has texture from a previous wash
- Gather the hair into a ponytail at your chosen position (crown, middle, or side)
- Secure with an elastic that matches your kid’s hair color so it’s less visible
- Gently separate the ponytail into sections and loosely roll or twist each section
- Wrap the rolled/twisted sections around the base of the ponytail to form the bun, pinning as needed
- Gently pull at the bun and texture to create a lived-in, effortlessly undone appearance
- Use bobby pins that match the hair color to blend them into the texture
Worth knowing: If your kid’s textured hair tends to frizz, a light pass of serum or leave-in conditioner on the hair before bunning helps smooth flyaways while maintaining the natural texture.
Final Thoughts
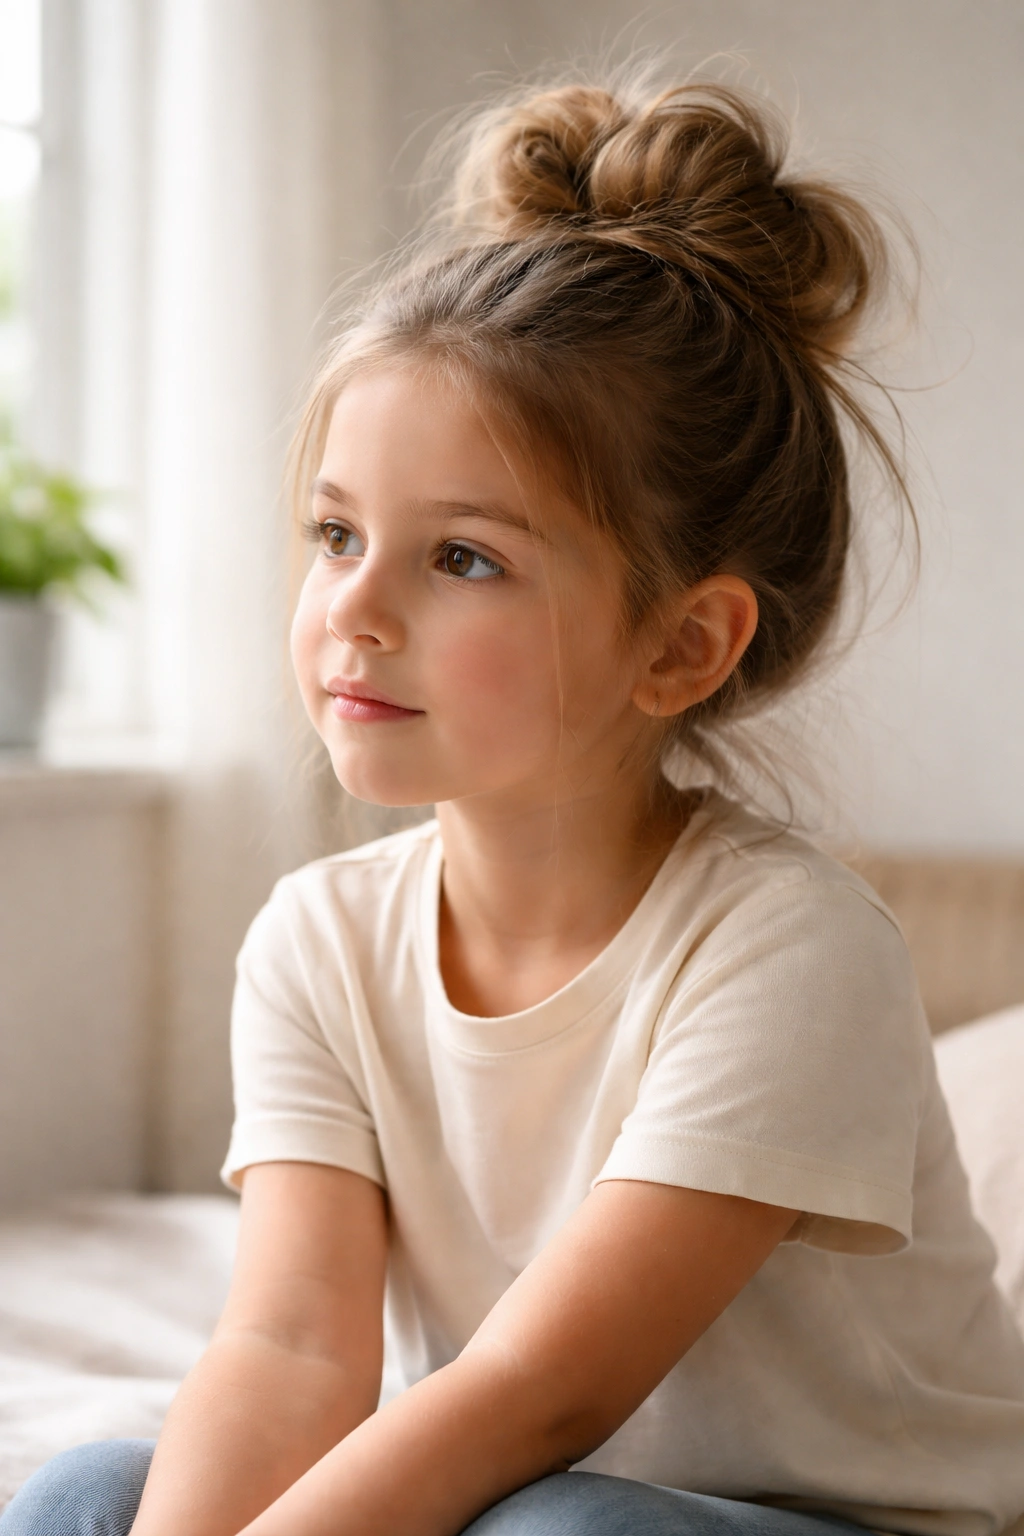
The messy bun is genuinely one of the most versatile, forgiving, and actually useful hairstyles available for kids — and the fact that there are so many different ways to create and style one means your kid never has to get bored with their go-to look. Whether you’re working with fine, straight hair or thick, textured curls, whether you need something ultra-quick or you have time to add a little extra detail with a braid or accessory, there’s a messy bun variation that’ll work perfectly for your kid’s hair type, personality, and the occasion.
The real beauty of teaching kids these styles is that they’re simple enough for kids to eventually do themselves as they get older. A kid who can twist a ponytail and wrap it into a bun has mastered a hairstyle they can use literally forever — in elementary school, middle school, high school, and beyond. These aren’t complicated, trend-dependent styles that require special products or professional techniques. They’re practical, functional, cute, and totally doable with nothing but a brush, a few hair ties, and maybe some bobby pins.
Start with whichever style feels most natural for your kid’s hair texture and length, and don’t stress about achieving perfection. The messier it looks, the better — that’s literally the point. Your kid gets to have hair that feels comfortable, looks intentional, and keeps them functional through their day. That’s a win in every direction.
