



If you’ve been scrolling through hair inspiration and feeling frustrated because most messy bun tutorials don’t account for your hair texture, curl pattern, or the unique needs of Black hair—you’re not alone. The standard “twist your ponytail and pin it” approach doesn’t translate the same way for coils, curls, and textured strands. The good news? Messy buns are incredibly versatile when you understand how to work with your specific hair type instead of against it.
Messy buns have become a go-to style across every hair texture and lifestyle. They work for lazy mornings, polished office days, post-workout confidence, and everything in between. For Black women with natural, transitioning, or textured hair, though, achieving a messy bun that looks intentional—not like you just woke up—requires a slightly different approach than what you’ll find in most mainstream beauty content. The texture itself becomes your greatest asset, adding dimension and visual interest that straight-haired messy buns simply can’t replicate.
The styles that follow aren’t just variations on the same theme. Each one plays to the strengths of textured hair—celebrating coils, honoring curl patterns, and creating volume naturally. Whether you’re looking for something you can do in five minutes before work or a more involved style for a special occasion, these approaches give you real options that work with your hair, not against it.
Why Textured Hair Makes the Best Messy Buns
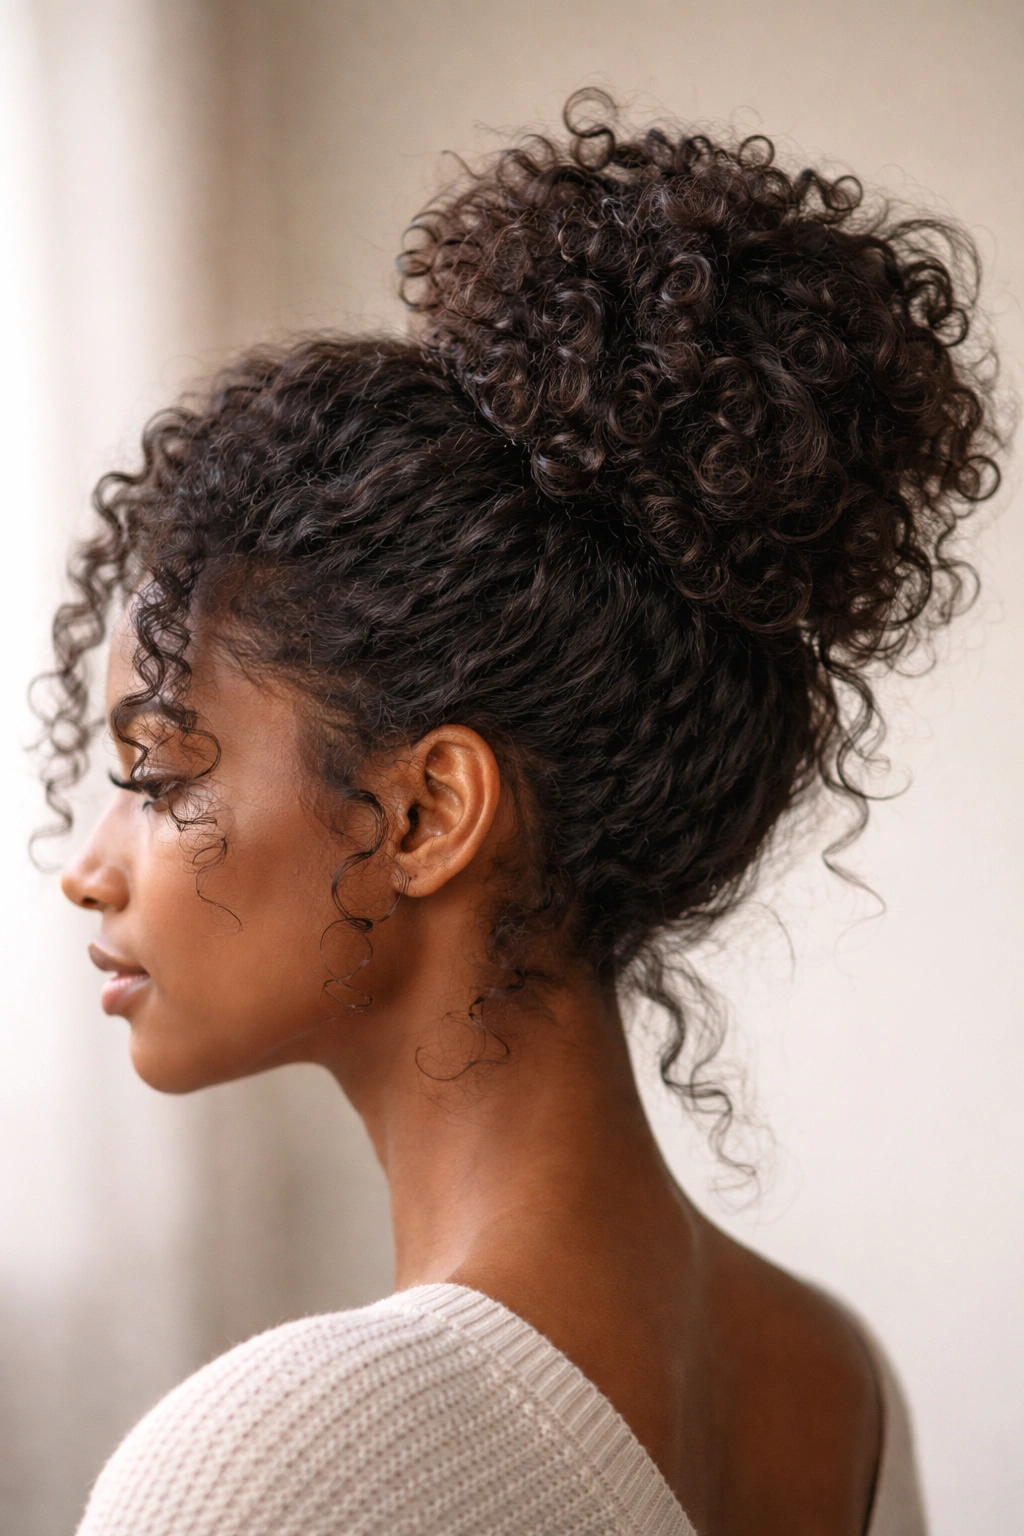
Messy buns on textured hair have an inherent advantage that often goes unspoken. The volume and natural curl or coil pattern creates texture and dimension automatically, meaning you don’t need to tease, backcomb, or artificially create that “lived-in” look. Your hair naturally does what other hair types have to work hard to achieve.
The flexibility of textured hair is also a genuine game-changer. Coils and curls can be shaped, re-positioned, and adjusted throughout the day without losing the style. If a section shifts or a curl pops in a different direction, it typically reads as intentional rather than messy in a bad way.
Another huge benefit is that textured hair holds styles longer. Once you’ve set a bun, the structure of your curl or coil pattern keeps it in place. You won’t find yourself constantly tucking pieces back in like you might with straighter textures. This staying power means your style looks polished hours after you’ve styled it.
The Science of Why These Work
Curly and coily hair has a natural grip that straight hair lacks. When you twist, coil, or braid textured strands, the friction between the curls creates hold without needing excessive tension or product. This is why protective styles have been used in Black communities for centuries—the hair naturally supports itself.
The moisture profile of textured hair also plays a role. Properly moisturized curls and coils have a natural spring and bounce that helps maintain structure. This elasticity means your bun can shift slightly throughout the day without falling apart entirely.
1. Classic High Messy Bun with Defined Coils
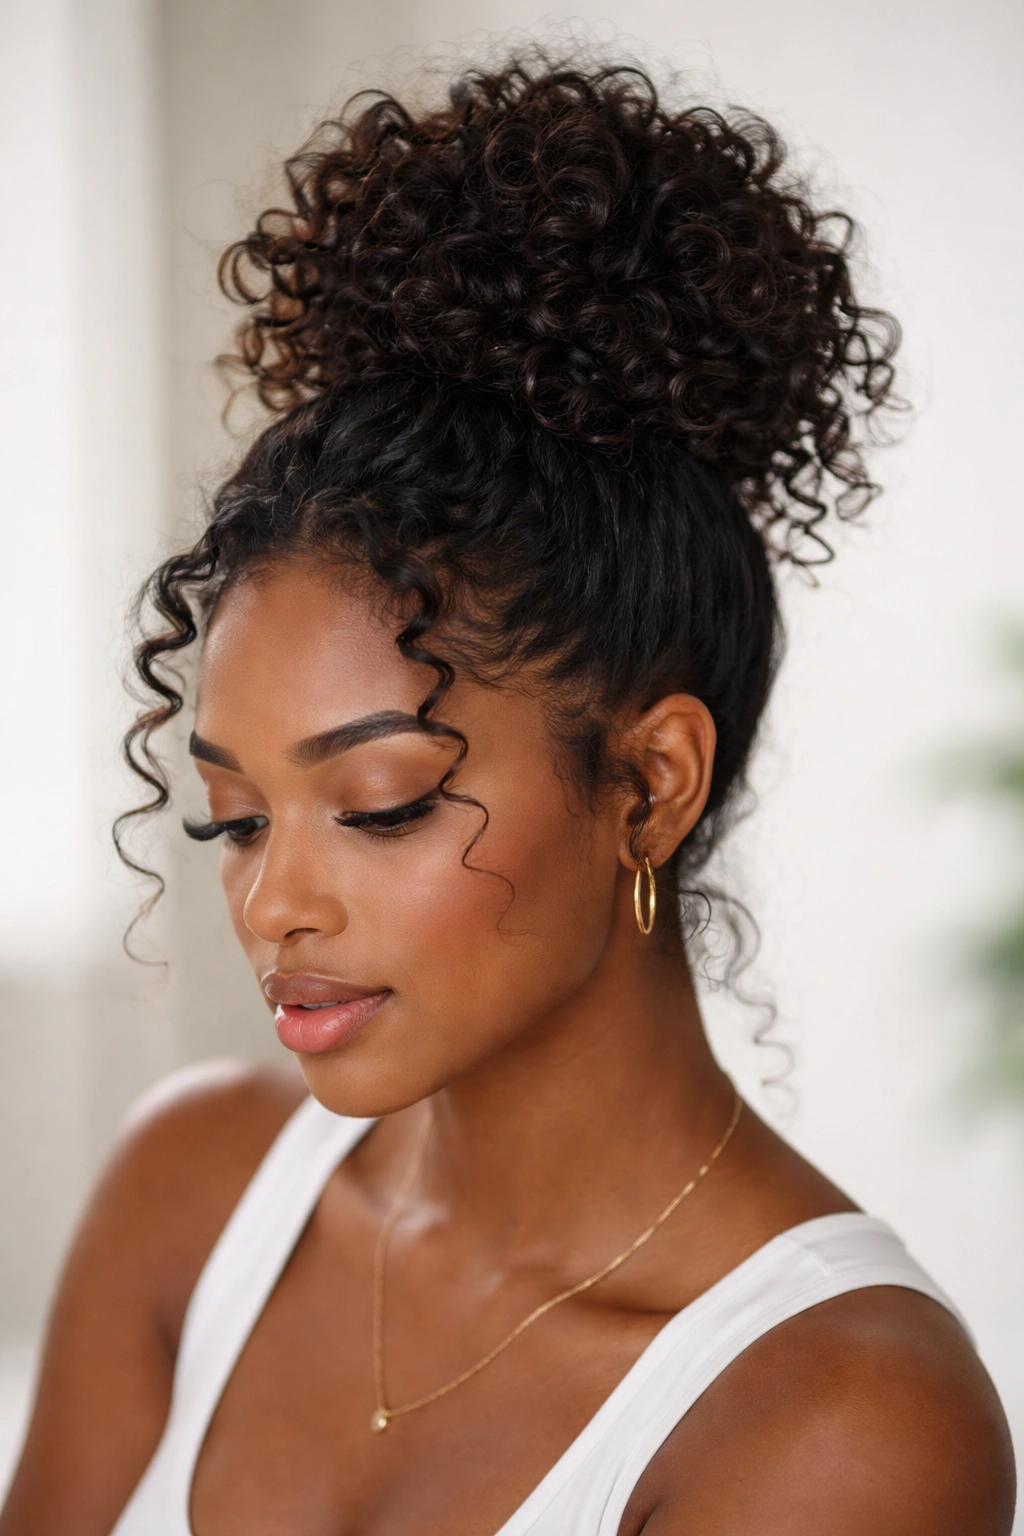
This is the style that works when you want polish without effort. A high messy bun anchored at the crown plays up the natural volume of coily hair while maintaining a put-together appearance that translates from casual to semi-professional. The key is letting your coils sit loosely rather than compacting them too tightly, which preserves their definition and bounce.
Start with hair that has been washed, conditioned, and has its moisture in check. Apply a light curl-defining cream or gel to damp hair and let your coils air dry or diffuse dry for maximum definition. Once fully dry, flip your head forward and gather your hair at the crown into a high ponytail. Don’t make it tight—you want it snug enough to hold but loose enough that individual coils can show through.
How to Secure It Properly
Divide your ponytail into two or three sections. Twist each section loosely—this creates a visual that’s clearly intentional rather than accidental. Wrap each twisted section around the base of your ponytail, positioning them at different angles so they don’t all stack in the same direction. This staggered approach creates volume and dimension. Secure everything with bobby pins, tucking them in so they disappear into the texture.
The Finishing Touches That Matter
Let a few coils intentionally fall around your face and neck. These aren’t mistakes—they’re strategic. They soften the style and add that “I didn’t try too hard” aesthetic that makes a messy bun work. Use a light hold hairspray so the coils can still move naturally throughout the day. Heavy products will weigh down your coils and make the style look flat by midday.
Pro tip: Refresh this style the next day by spritzing your hair with a curl refresher spray and gently re-fluffing the bun with your fingers. Many women successfully wear this style for 2-3 days with light refreshing in between, making it an excellent protective approach.
2. Textured Low Bun with Face-Framing Pieces
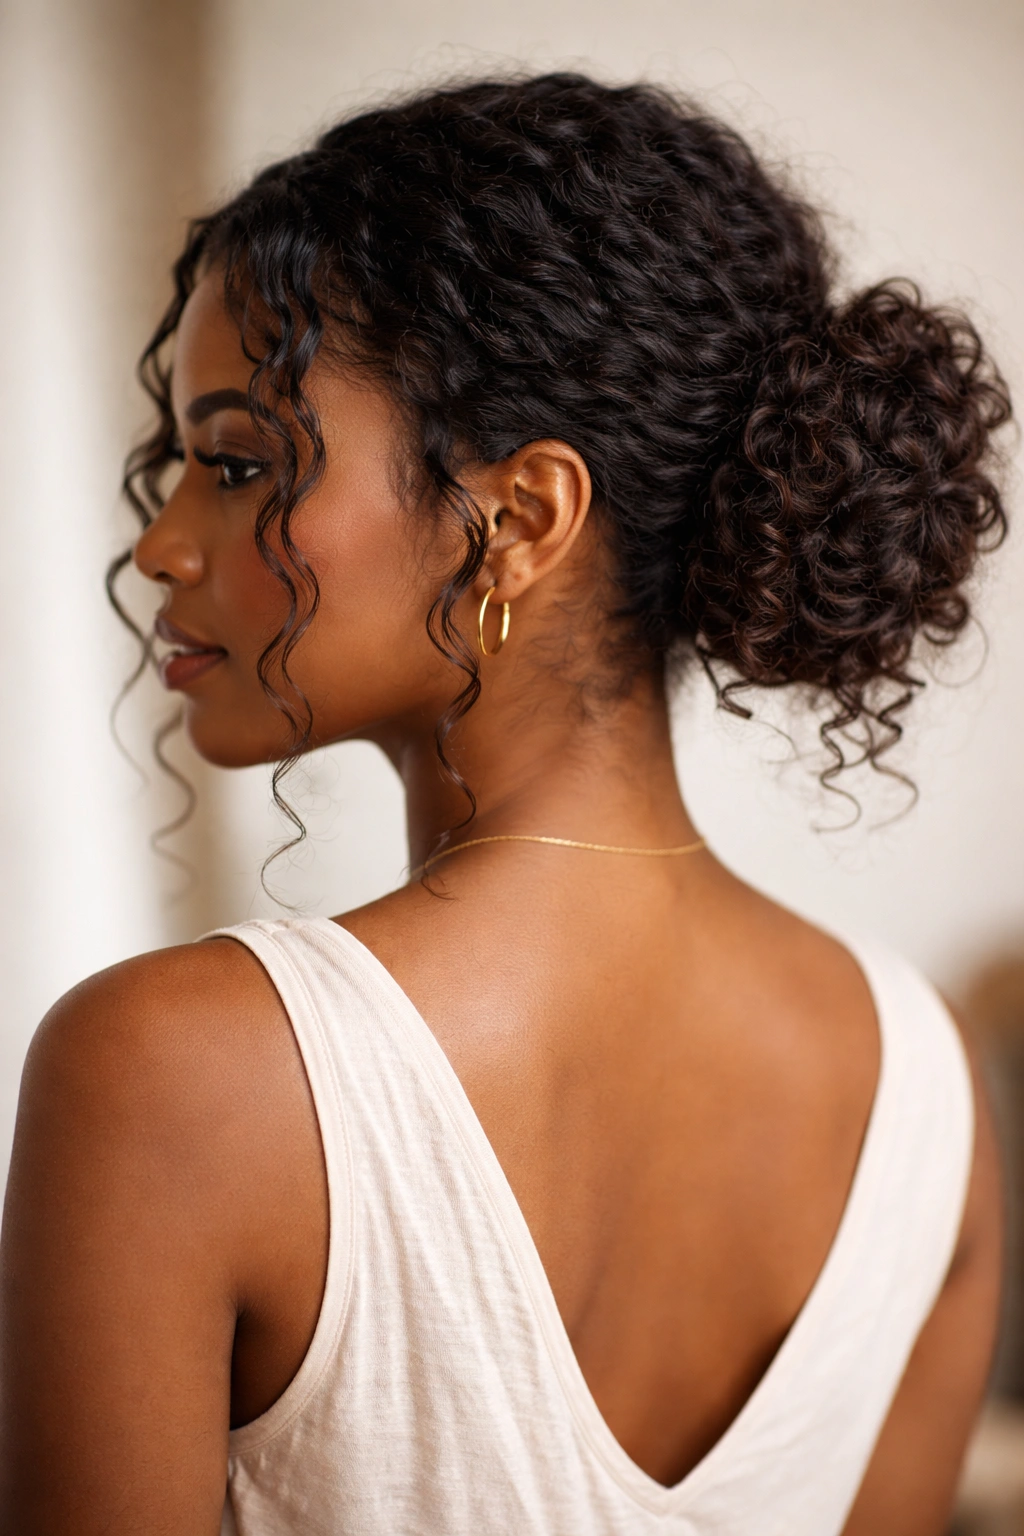
A low bun worn at the nape of your neck instantly reads as refined while being incredibly comfortable. This style particularly suits anyone with medium to coarse texture because the lower placement keeps everything compact without requiring tight tension that could stress your hairline. The face-framing pieces add softness and movement that prevent the style from feeling severe.
Begin with clean, moisturized hair. You can work with damp or dry hair for this style—damp curls will tighten as they dry, creating more defined face-framing pieces, while dry curls will maintain more volume and bounce. Apply your moisturizer or styling cream and let your curl pattern fully develop.
Gather your hair into a low ponytail positioned at the nape of your neck, leaving out a section on each side of your face—roughly a quarter-inch thick from your temple down to your chin. Don’t make your ponytail tight. The entire point is for this to feel loose and effortless. Divide your ponytail into 2-3 sections and loosely coil each one, wrapping them around the base of your ponytail at varying angles.
Styling the Face-Framing Pieces
Your face-framing sections are what elevate this from “basic bun” to “intentional style.” Take each piece and create a soft spiral by gently twisting it away from your face. This direction elongates your face and frames your features beautifully. If you have tighter coils, you might separate them into smaller individual pieces to create more delicate framing. If you have looser waves, you can keep them as thicker sections.
Pin these pieces loosely so they’re secured but can still move. They should frame your face, not cling to it. A light hairspray helps them stay in place without looking stiff.
Why This Works for Professional Settings
Many Black women report that their textured hair styles feel less “acceptable” in certain professional environments, which is both frustrating and unfair. A low messy bun with face-framing pieces reads as intentional and polished in nearly any context. It’s sophisticated without being extreme, and it showcases your curl pattern rather than hiding it.
Worth knowing: This style works especially well if you’re transitioning from relaxed to natural hair. The lower placement and looser construction means you can incorporate relaxed and natural sections without it being visually jarring—the varied texture actually adds to the messy, intentional aesthetic.
3. Twisted Rope Messy Bun
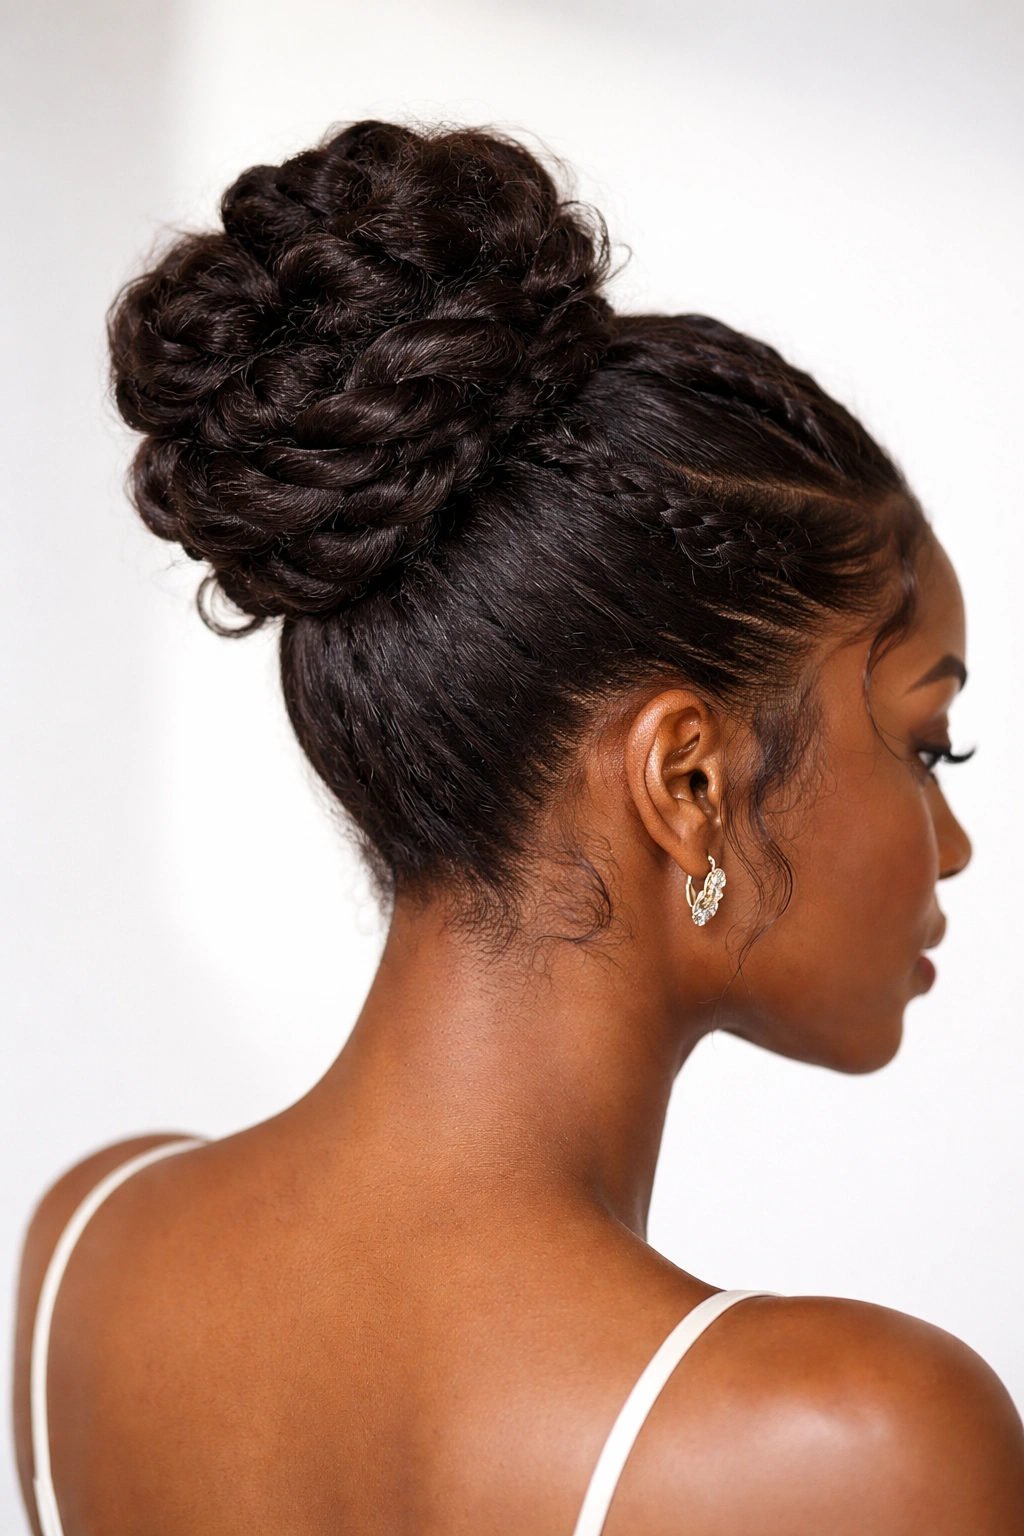
This style creates visual interest through structured twists that look far more intentional and complex than they actually are. If you like the appearance of elaborate updos but want something you can actually do in under ten minutes, this is your answer. The rope texture of the twists adds dimension that photographs beautifully and catches light differently throughout the day.
Start with moisturized, defined hair. Apply a lightweight styling cream and allow your curls to fully set. This style works best when your curl pattern is clearly defined rather than extra frizzy, so using a styling product with light hold is essential.
Gather your hair into a high ponytail at the crown. Make it snug but not painfully tight—you want your hairline protected from excess tension. Divide your ponytail into three equal sections. Take the first section and twist it from the base of the ponytail all the way to the ends. As you twist, gently coil the twisted rope around the base of the ponytail, positioning it like a spiral staircase. Secure the end with a bobby pin hidden in your hair.
The Construction Method
Repeat this process with your second and third sections, positioning each twisted rope at a slightly different angle so they layer and create depth. This staggered placement is what makes it look intentional and voluminous rather than flat and stuck to your head. The visible twists are the star of this style, so position them where they’ll be seen—don’t hide them under your hair.
Texture and Finish
Because this style relies on visible twists, it works best with hair that has a clear coil or curl pattern. If you have looser waves, you can still create this style, but the visual effect will be softer and less defined. Either approach is beautiful—just know that tighter coils create more dramatic visual texture.
Once your twists are secured, gently tug on various sections to create a looser, less compact appearance. This breaks up the structured twists just enough to add that “messy” element that keeps it from looking overly formal. A very light hairspray helps everything hold without looking crunchy.
Pro tip: The twists in this style actually become less defined throughout the day as they settle and your curls expand slightly. By evening, it looks even more effortlessly messy, which many people prefer over the freshly-done appearance.
4. Puff and Bun Hybrid Style
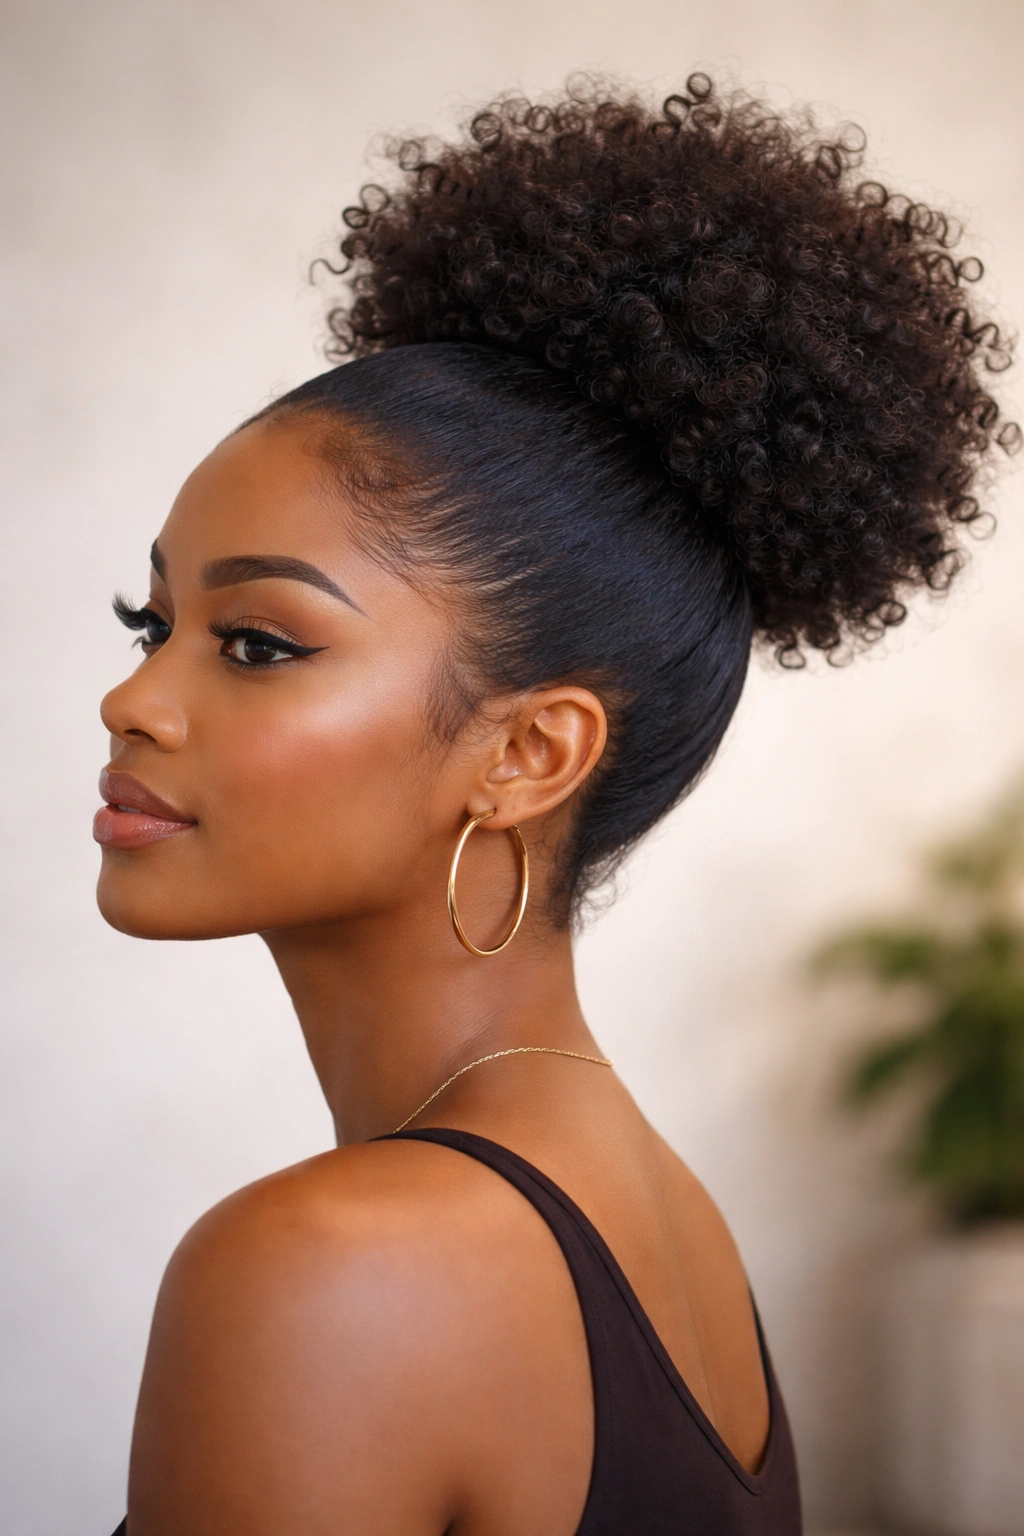
This style is part protective style, part everyday fashion—it combines the volume of a topknot puff with the structure of a bun, giving you maximum visual impact with genuine practicality. It’s perfect for days when you want your hair off your face and neck but don’t want to fully commit to an updo. This approach also works well if you have longer hair that you want to feel lighter and more manageable.
Start with clean, moisturized hair. Apply a lightweight gel or mousse to damp hair and allow it to air dry or diffuse dry. Once dry, create a high ponytail at the crown, gathering it so it sits at the very top of your head. This high placement is crucial for the proportions of this hybrid style.
Smooth down the front hairline and the sides with a small brush and some lightweight edge control product. Use minimal product here—you want to avoid a dramatic contrast between the sleek sides and the voluminous puff. A subtle definition is more modern and flattering.
Creating the Puff Base
Gently flip your ponytail upside down and shake it out so your curls expand and create volume. This is the puff base. Once your hair has expanded, slowly flip your head back up. Your puff should now sit at the crown with significant volume. If it’s too compact, separate the curls slightly with your fingers to encourage more expansion.
Take half of your ponytail and smooth it back, securing it against the base of your puff with bobby pins. This creates a smooth base layer. The remaining half of your ponytail gets twisted or coiled loosely and wrapped around the base of the puff to create a bun shape.
The Proportions Matter
The success of this style depends on getting the proportions right. Your puff should be noticeably larger than your bun—aim for your puff to take up about two-thirds of the visual space, with your bun occupying the lower third. This proportion reads as intentional and modern rather than accidental or unbalanced.
Let individual curls pop out of the puff in an organic way. These aren’t mistakes to fix—they’re essential details that add life and movement to the style.
Insider note: This style looks particularly striking when your hair has a visible highlight, color, or dimension. The volume of the puff really showcases any color work you’ve done, making it a great choice if you’re displaying highlights or a new color.
5. Braided Messy Bun Crown
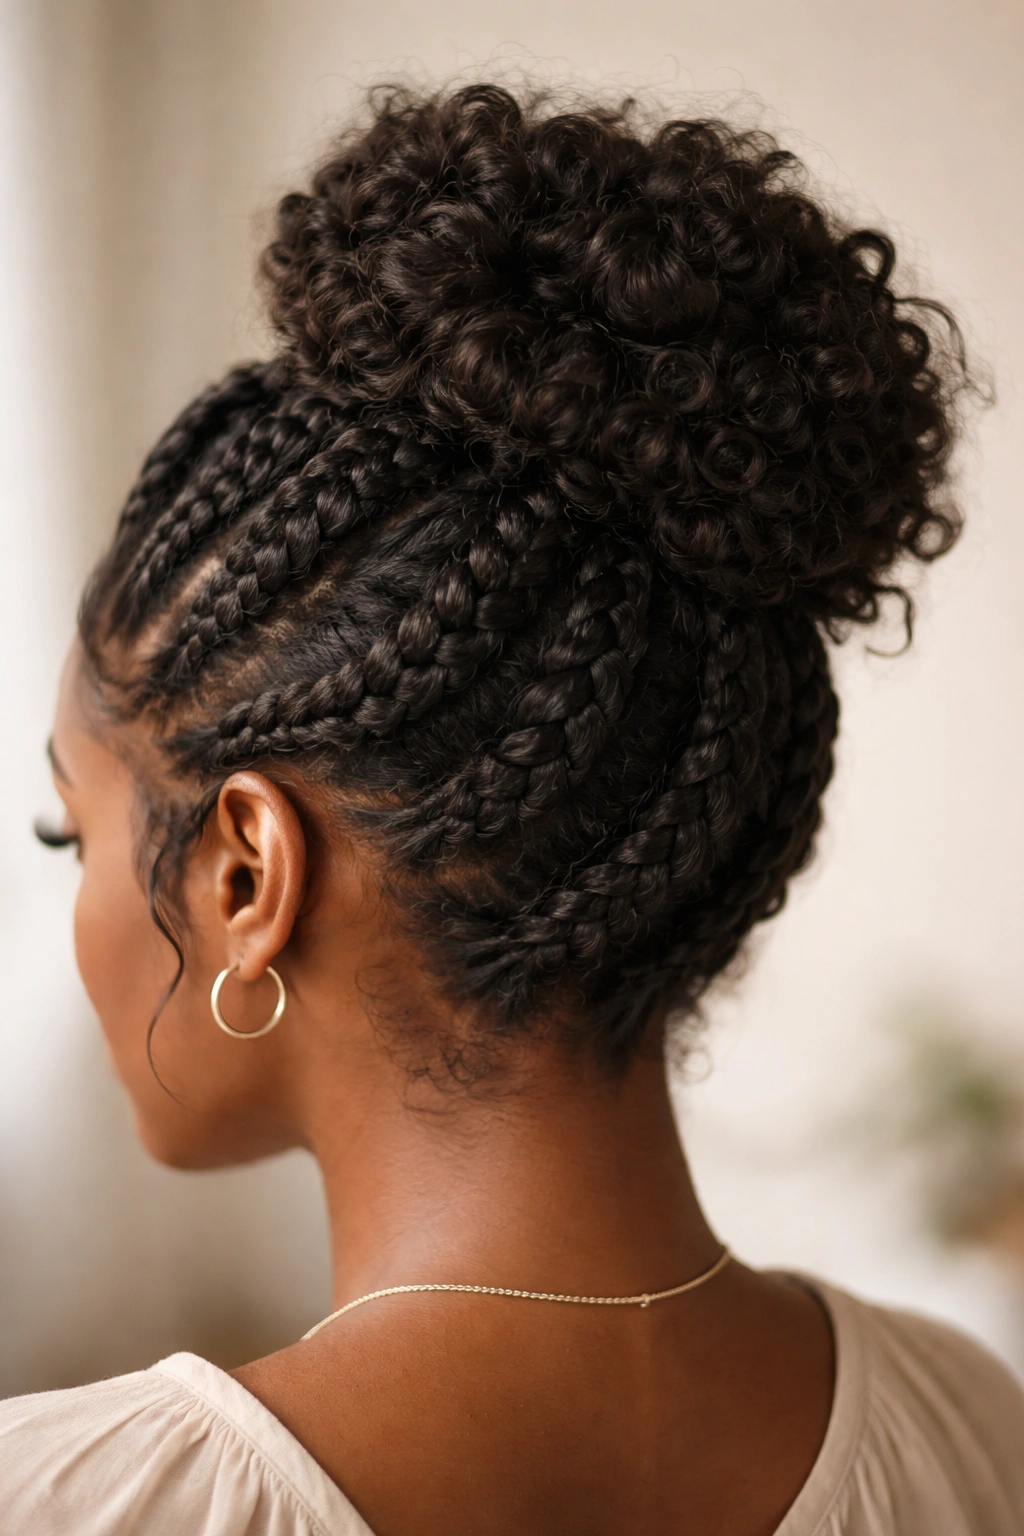
Braids are having a permanent place in Black hair culture and style, and combining them with a messy bun creates something that’s both protective and visually sophisticated. This style works beautifully for special occasions or for someone who wants their style to feel especially intentional. It’s more involved than a five-minute bun, but the payoff is a genuinely stunning updo.
Start with clean, moisturized hair. Braids hold better on hair with a few days of product buildup, so if you’re doing this style, you might plan it for day two or three hair rather than freshly washed. Apply a moisturizing cream to your hair and allow it to fully set.
Create a center or side part, depending on your face shape and preference. If you have a rounder face, a side part tends to be more flattering; if you have a longer face, a center part works well. Gather your hair into a high or mid-level ponytail, leaving out two sections at the front—one on each side of your part, running from your temple to behind your ear. These sections will become your braids.
The Braiding and Bun Construction
Braid each side section all the way down. You can do traditional three-strand braids, which are classic and clean, or try more intricate braids like goddess braids or feed-in braids if you have the skill and time. Thicker braids look more modern; thinner braids feel more delicate and romantic.
Wrap each braid around the base of your ponytail, positioning them on opposite sides so they frame the bun. Secure the ends of the braids with bobby pins hidden in your hair. Now take your main ponytail and divide it into 2-3 sections, twisting or coiling each section and wrapping them around the center to create your bun.
The Styling Details
Gently tug on the braids to loosen them slightly—this creates a softer, more organic appearance and adds volume to the braids themselves. Let a few curls escape from your bun and braids. These intentional flyaways add movement and keep the style from looking too tight or formal.
This style can be dressed up or down depending on your accessories. Without jewelry or with minimal jewelry, it reads as casual-elegant. With statement earrings and a few shiny bobby pins, it becomes special-occasion ready.
Worth knowing: Braided messy buns are legitimately protective. Because your hair is braided and bundled, it experiences less manipulation and environmental stress. Many women rotate this as a protective style when they need a break from daily styling, making it both beautiful and functional.
6. Loose Curl Romantic Bun
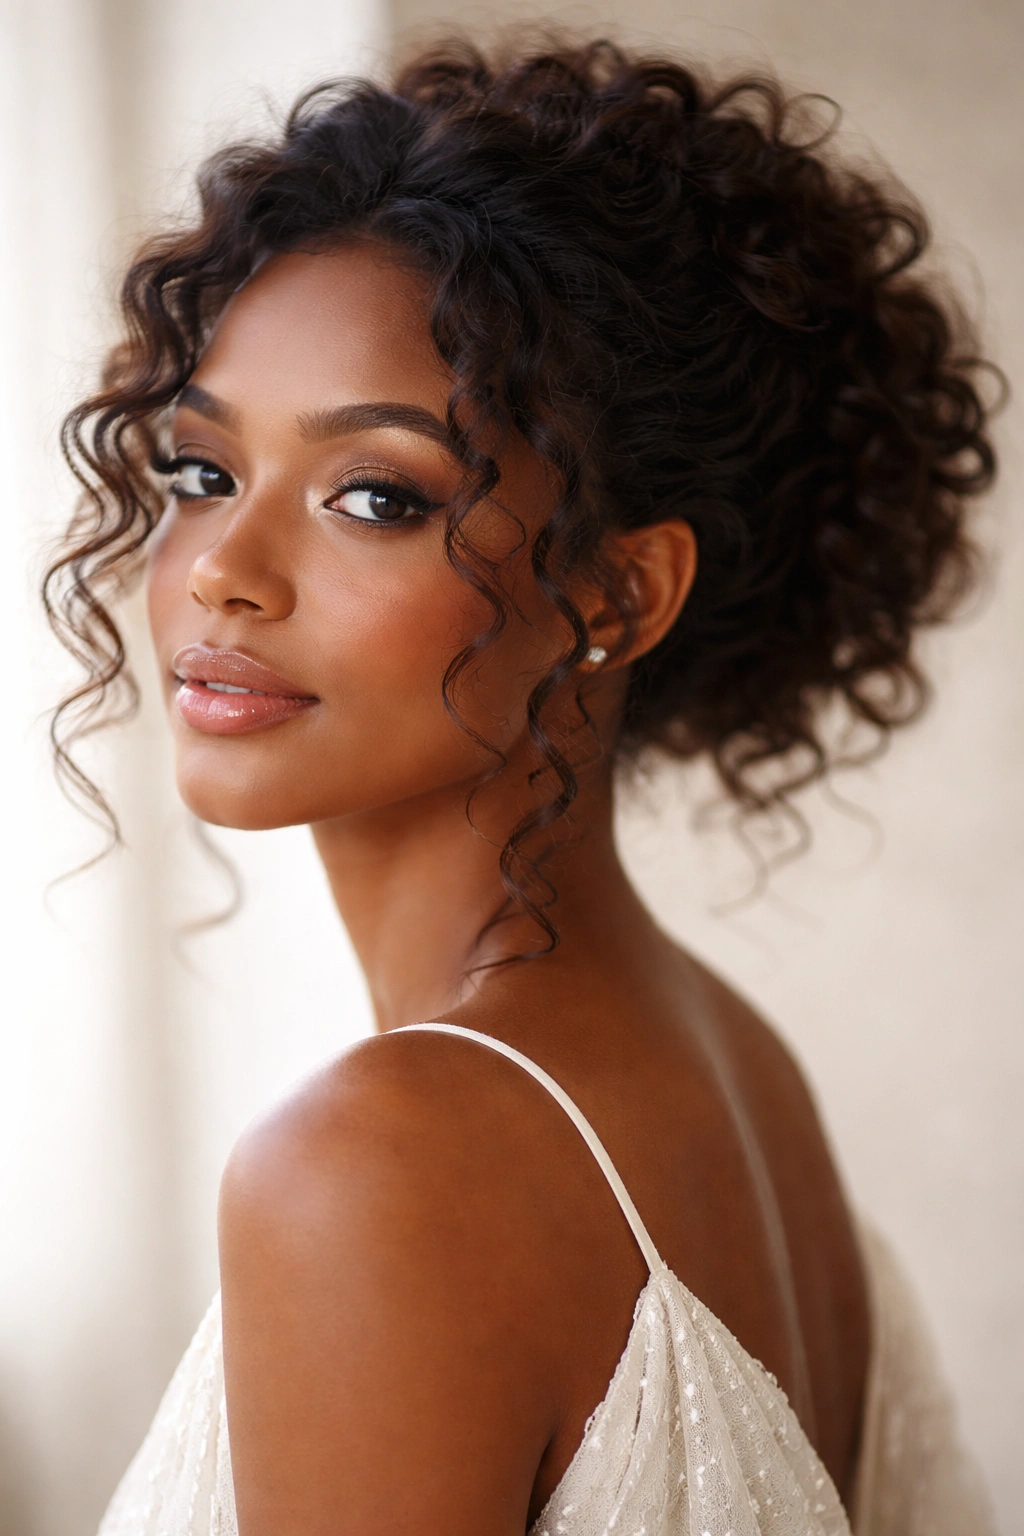
This style celebrates your curl pattern by keeping it as loose and free as possible while still technically being in a bun. It’s the most romantic of the bunch, with soft, voluminous curls framing your face and creating an almost cloud-like effect. This is the messy bun for days when you want to feel beautiful and put-together without looking overly styled.
This style works best on hair with a looser curl pattern—think waves to medium curls. If you have tighter coils, you can still create this style, but your bun will read as more structured; looser curls create the ethereal, romantic effect this style is known for.
Apply a lightweight curl-defining cream or serum to damp hair and allow it to air dry completely. Once dry, flip your head and gather all your hair loosely at the nape of your neck or slightly to one side. Your ponytail should be intentionally loose—think “barely gathered” rather than “secured tightly.”
The Bun Construction
Instead of twisting your ponytail, gently coil it into a loose shape at the base, allowing lots of curls to stick out in every direction. Don’t compress it. Imagine you’re creating the shape of a bun, but your curls are the stars—the bun is almost incidental. Secure with just a few bobby pins, focusing on holding the shape without flattening anything.
The key difference between this and other messy buns is restraint in the securing process. You’re aiming for something that looks like it could fall apart at any moment—but won’t actually fall apart. It should feel delicate and romantic rather than structural and organized.
Styling for Maximum Softness
Pull small sections of curls out of the bun and let them frame your face. These pieces should look organic—like they naturally escaped rather than being intentionally placed. If you pull too many or position them too deliberately, you lose the romantic effect.
Use an ultra-light hairspray, or skip hairspray entirely if your curls have good hold from your styling product. You want this bun to move with you, shifting slightly throughout the day while maintaining its general shape.
Pro tip: This style looks especially beautiful if you have length throughout your hair. If you have shorter layers, they might stick out too much and make the style feel less romantic and more accidentally disheveled. If that’s your hair situation, try one of the more structured styles instead.
7. Two-Strand Twist Bun
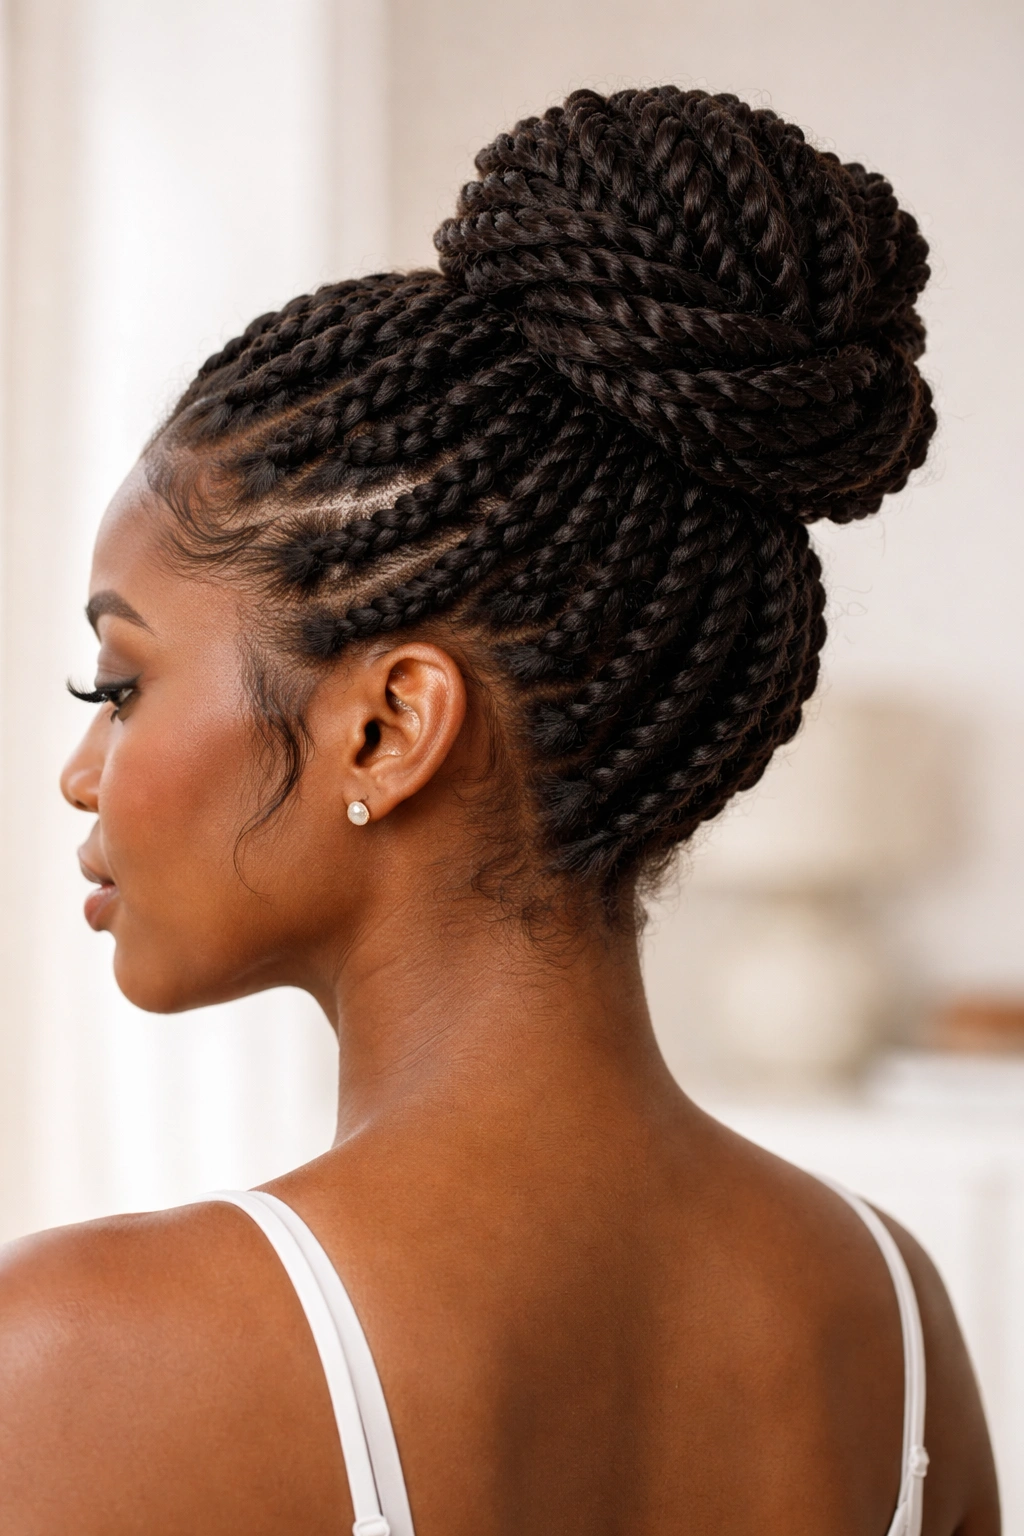
Two-strand twists are a classic protective style in Black hair culture, and transforming them into a bun takes that protective benefit and elevates it into something special. If you already have your hair in two-strand twists, converting them to a bun takes literally five minutes. If you’re starting fresh, plan to dedicate time to creating the twists, but they’re a worthy investment.
If you’re starting with hair that isn’t already twisted, apply a moisturizing product to clean, damp hair and section your hair into 4-8 sections, depending on how voluminous you want your final bun to be. More sections create a fuller bun; fewer sections create a sleeker look. Using clips to keep sections separated, create two-strand twists in each section by taking two strands of hair and twisting them around each other all the way to the ends.
From Twists to Bun
Once your twists are complete, gather them into a high or mid-level ponytail. Since your hair is already twisted, you don’t need to do any additional twisting for the bun—instead, simply coil your twisted ponytail around the base, positioning the twists so they stack and create dimension. Secure with bobby pins.
Depending on the tightness of your twists, you might gently separate individual twists slightly to encourage a looser, more voluminous appearance. This breaks up the structured look and adds that intentional messiness.
Why This Is Actually Protective
Two-strand twists are considered a protective style because they minimize daily manipulation and environmental stress on your hair. By keeping them in a bun, you extend that protection while having a beautiful style to show for it. This is ideal if you’re trying to retain length or give your hair a break from daily styling.
The twists also hold significantly longer than loose hair in a bun. You can keep this style for several days, refreshing it lightly with a curl refresher spray each morning. Many women do a full week of two-strand twist buns as part of their protective styling rotation.
Insider note: The twists become softer and more romantic-looking the longer you wear them. By day three or four, the structure loosens naturally and the style looks even more effortlessly messy than it did on day one.
8. Sleek High Bun with Curly Texture
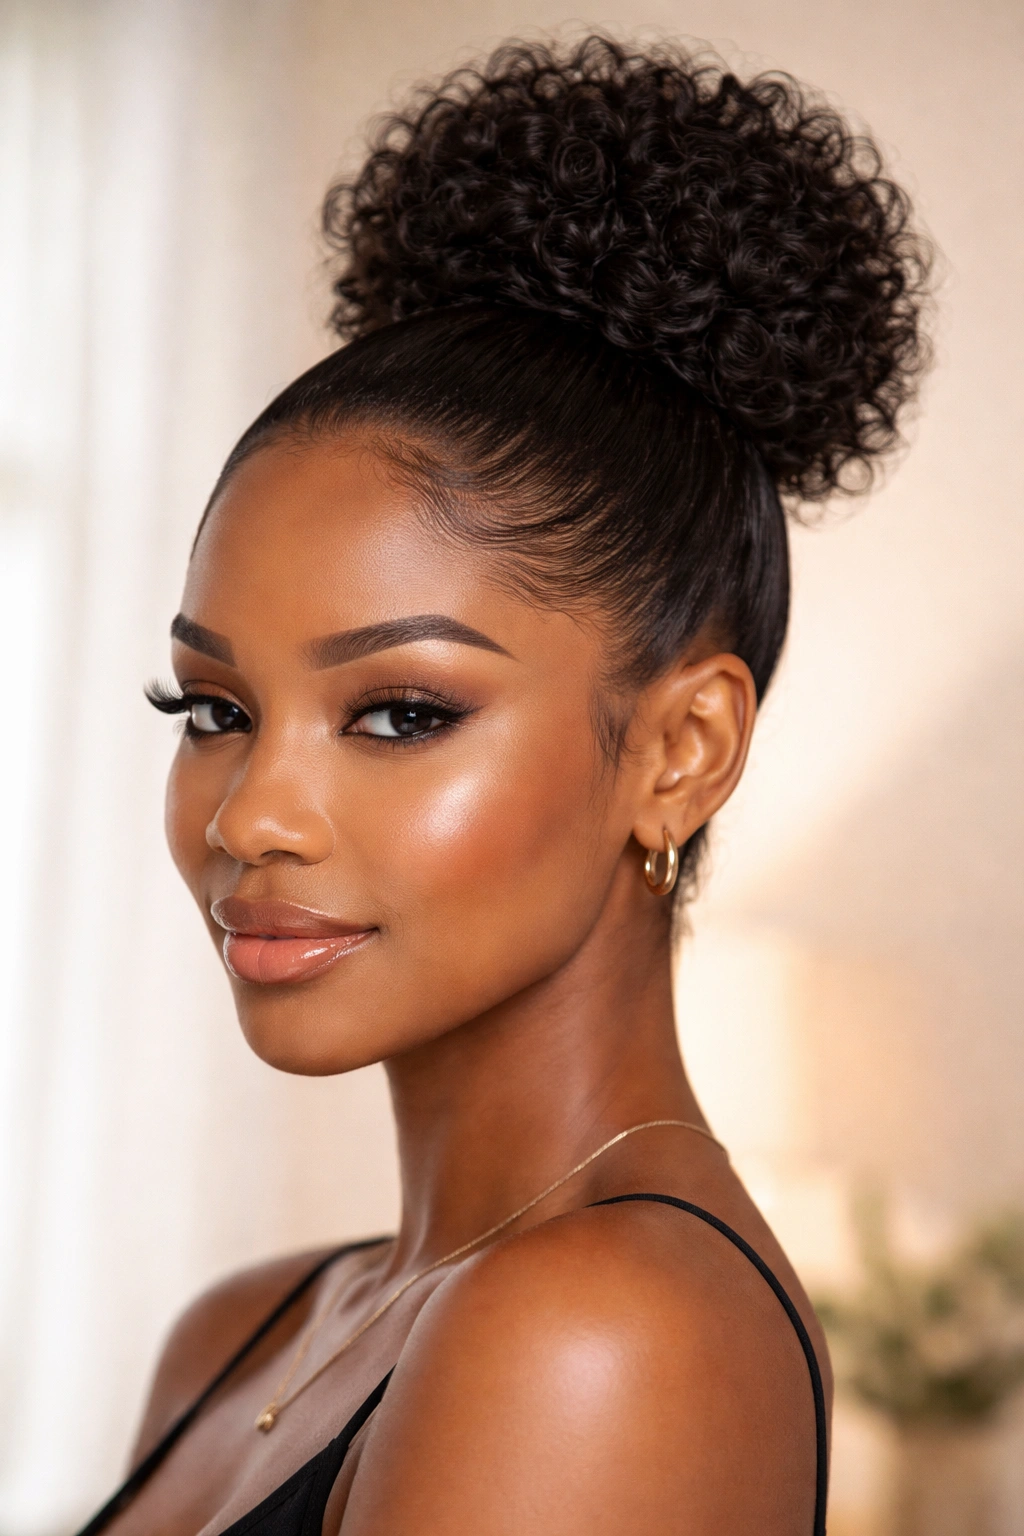
This style splits the difference between polish and pattern. Your hairline is smooth and controlled, creating a clean, refined silhouette. Meanwhile, your bun is all voluminous, defined curls—showcasing your texture right at the top of your head where it can be fully appreciated. It’s an excellent balance for professional settings or occasions where you want to look polished without appearing to hide your natural hair.
Smooth your hairline with edge control product and a fine-tooth brush or toothbrush. Start at your hairline and smooth your hair back, brushing gently and firmly to create a sleek surface. This is the moment where your technique matters—if you brush too roughly, you risk breakage; if you don’t use enough pressure, you won’t get that smooth finish.
Once you’ve smoothed your hairline and sides, gather your hair into a high, firm ponytail. This ponytail needs more tension than a truly messy bun because you’re aiming for a sleek, controlled appearance. Use an elastic band that grips your hair firmly without feeling overly tight.
Creating the Textured Bun
Now that your ponytail is secured, flip the textured portion out. Take your ponytail and create two or three loose coils, wrapping them around the base of the ponytail at different angles. The contrast between your smooth, sleek hairline and these voluminous, textured coils is the entire point of this style.
Gently pull on your coils to encourage them to expand and show off their curl pattern. Secure everything with bobby pins, making sure they disappear into the texture.
The Finishing Details
The sleekness of this style means every detail matters. Make sure your hairline is truly smooth—no flyaways, no frizz. Use an edge control product that provides lasting hold without flaking throughout the day. A tiny bit of lightweight hairspray on your smooth sections helps everything stay in place.
This style photographs beautifully, especially in professional headshots or formal photos where you want to appear polished and intentional.
Pro tip: If your hairline is sensitive or you experience breakage easily, don’t create this style too frequently. Once or twice a week is ideal; more often can stress your hairline. Always use gentle techniques and prioritize your hair health over aesthetics.
9. Protective Style Messy Bun with Extensions
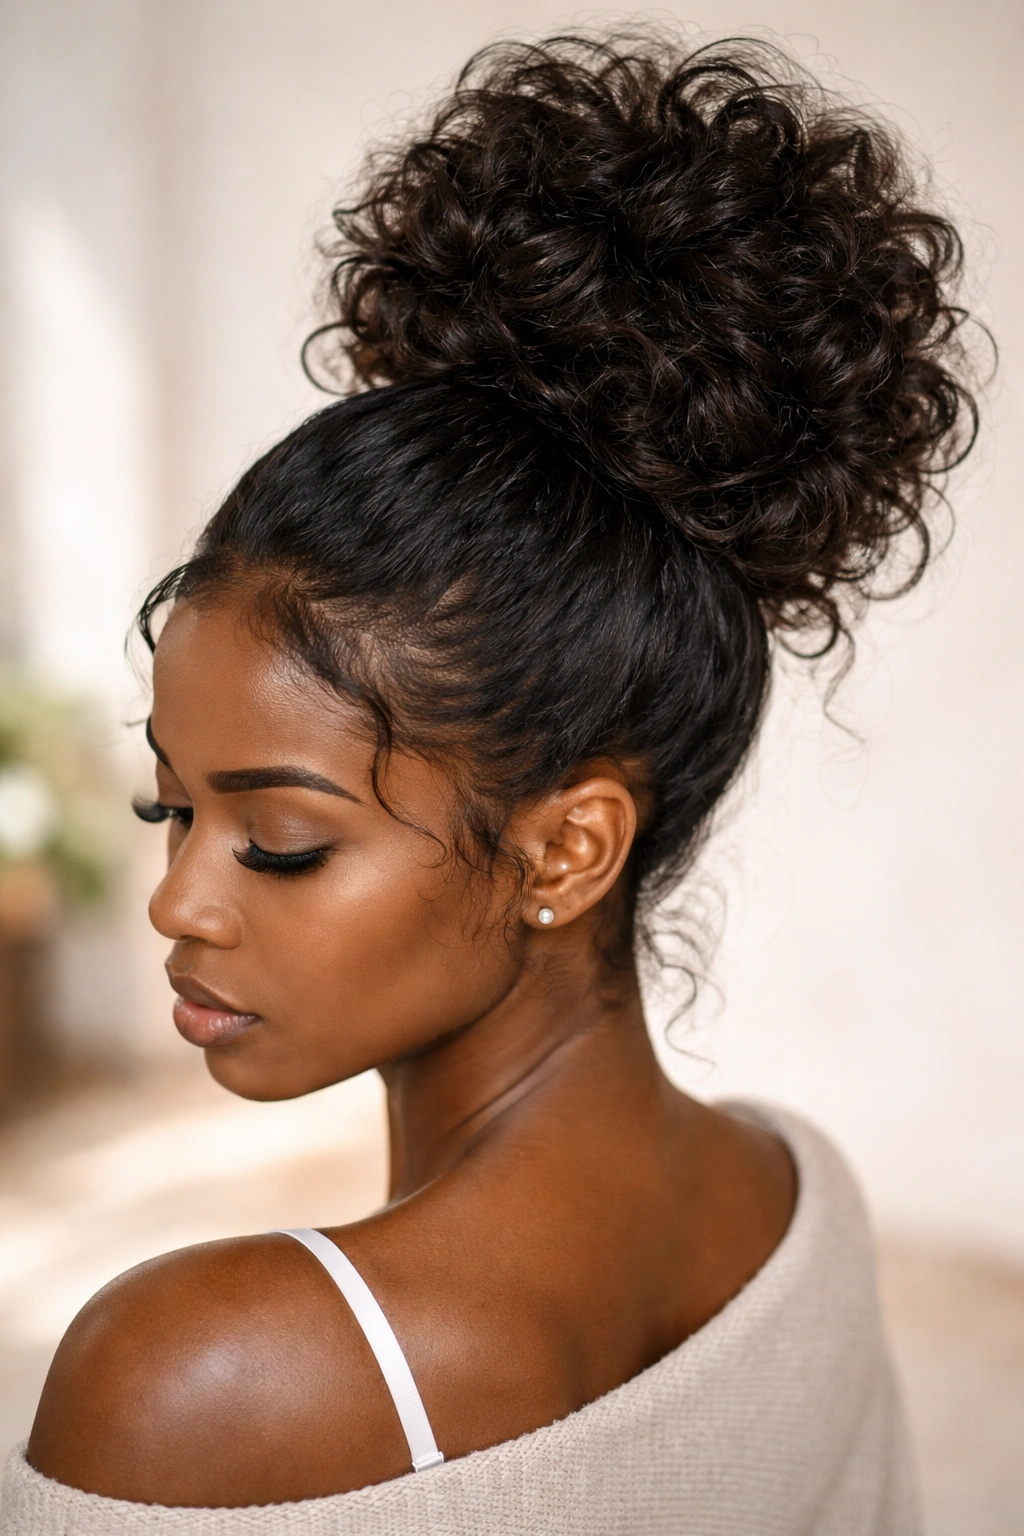
Adding extensions—whether clip-in curly extensions, human hair extensions, or braiding hair—transforms a simple messy bun into something dramatically voluminous. This style is perfect if you want maximum impact, have shorter hair that feels too delicate for some styles, or simply want to experiment with a different look. Extensions also function as protection for your natural hair, since they absorb some of the handling and manipulation that your actual strands would otherwise experience.
Prepare your natural hair by twisting or braiding it and wrapping it as a base. If you’re using clip-in extensions, prepare a section of your hair to clip them into—usually the lower back section of your ponytail. If you’re using sewn-in or adhesive extensions, follow the application method specific to your extension type.
Create a high ponytail with your natural hair. Attach your extensions securely, ensuring they’re positioned so they blend seamlessly with your natural hair. Your extensions should feel stable and not wobble or shift when you move your head.
Creating the Voluminous Bun
Take your ponytail—now including your extensions—and divide it into two to four sections, depending on how voluminous you want your bun. Twist or coil each section loosely, wrapping them around the base of your ponytail at different angles. With extensions, your bun will be noticeably larger and fuller than with natural hair alone.
Fluff your bun generously, separating the coils and allowing curls to pop out in every direction. Extensions are meant to be seen, so don’t try to keep this looking neat and compact. The whole point is maximum volume and texture.
Extension Care While Styled
While wearing extensions in a bun, take steps to maintain their quality. Use gentle hair products designed for extensions—some regular products can build up or damage extension hair. Gently detangle your bun before bed if you’re wearing the style for multiple days. Avoid tight elastic bands that can damage the extension attachment points.
When you remove the extensions, gently unravel your bun and carefully detangle the extensions and your natural hair. Never rush this process, as doing so risks breakage in both your natural hair and the extensions.
Worth knowing: This style is especially forgiving if you’re trying to hide new growth or two-texture hair (a mix of relaxed and natural sections). The volume of extensions easily covers any texture differences, allowing you to blend everything seamlessly.
10. Voluminous Bubble Bun Effect
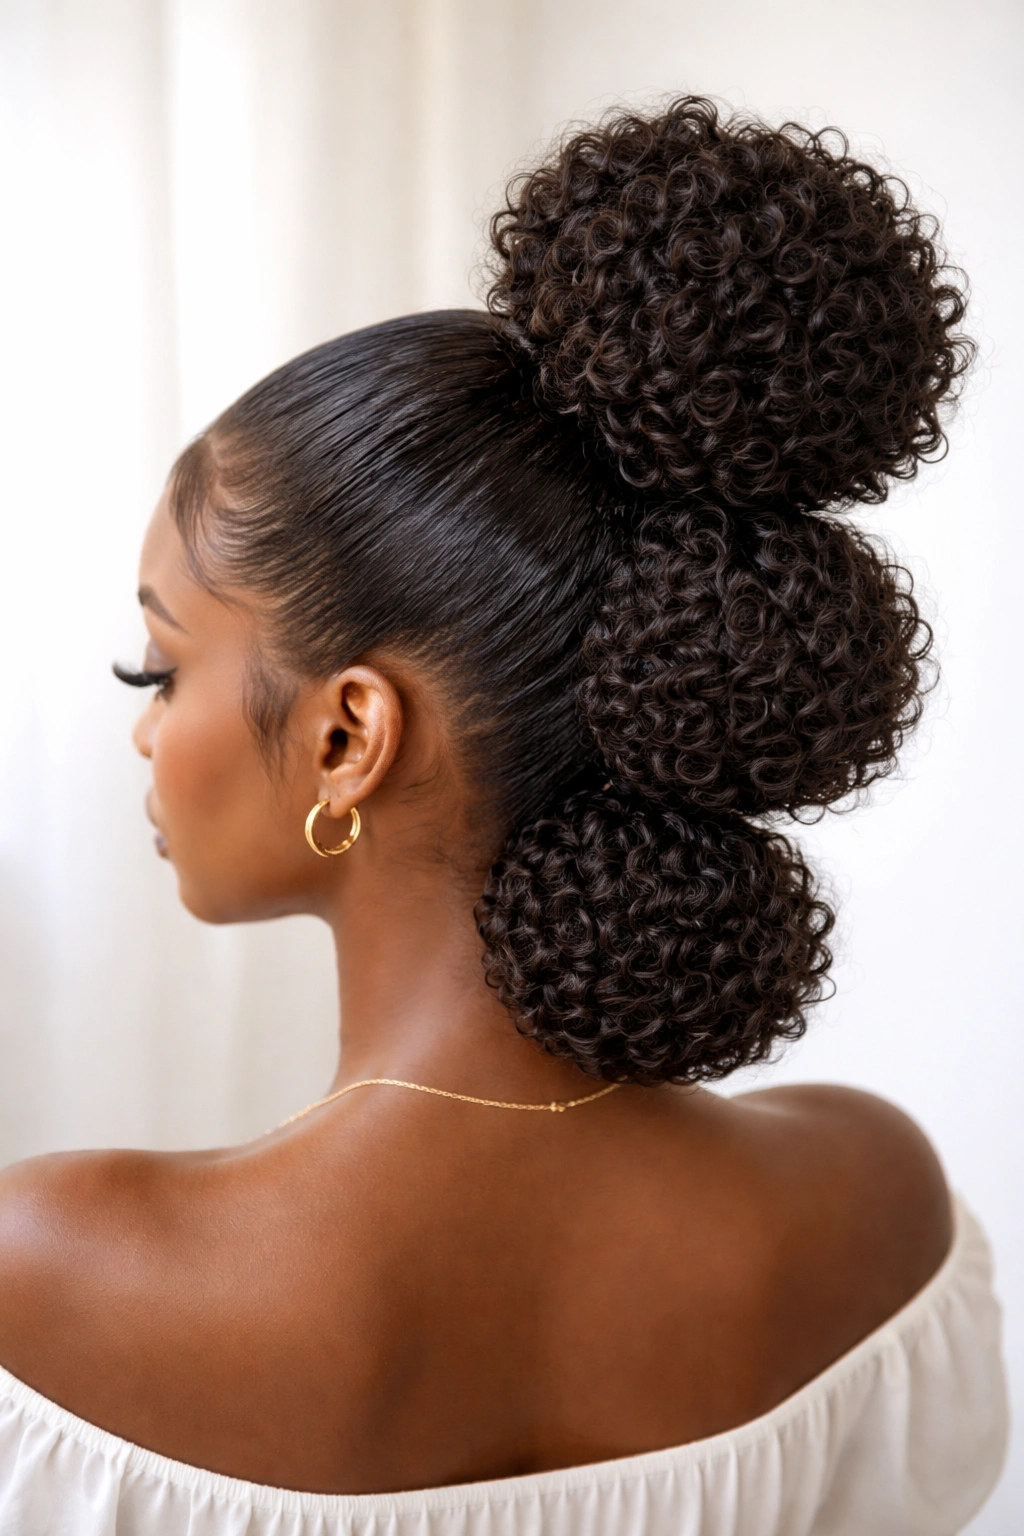
This final style creates a statement bun made up of multiple rounded sections—almost like a stack of buns—creating a geometric, modern silhouette that’s unmistakably eye-catching. It requires patience and precision, but the result is a style that reads as fashion-forward and intentional. It works beautifully on hair with significant volume and curl pattern definition.
Begin with fully moisturized, defined curls. This style requires clear, bouncy curl definition to create the distinct rounded sections that define the bubble bun effect. Apply a lightweight styling product and allow your hair to fully set before attempting this style.
Create a high ponytail at the crown with firm tension—this bun style requires stability. Now, divide your ponytail into three equal sections stacked from the base upward. You’ll be creating three distinct bun clusters, each with its own elastic band.
The Stacking Technique
Secure your lowest section (closest to your hairline) with an elastic band, creating the first “bubble.” Gently fluff and pull this section to encourage curl expansion and roundness. This first bubble should be full and defined.
Above it, secure your middle section with another elastic band, creating your second bubble. Again, fluff and pull to encourage roundness and volume. Finally, secure your top section, creating your third and final bubble. Each bubble should be roughly the same size and roundness—this is what creates the geometric appeal of the style.
The Visual Impact
The contrast between the elastic bands holding each section is actually part of the style’s appeal in a modern context. Don’t hide your elastics; let them show. They create visual breaks that enhance the geometric bubble effect. Some people even use metallic or colored elastic bands to emphasize this architectural quality.
Gently separate curls within each bubble to maximize volume and ensure each section is as round as possible. This style is all about drama and impact, so go bold with the fluffing.
Pro tip: This style holds best on day-two or day-three hair, when your curls have settled slightly and have a bit of product buildup for grip. Fresh, super-bouncy curls sometimes expand so much that your bubbles lose their defined roundness.
Maintaining Your Messy Bun Throughout the Day
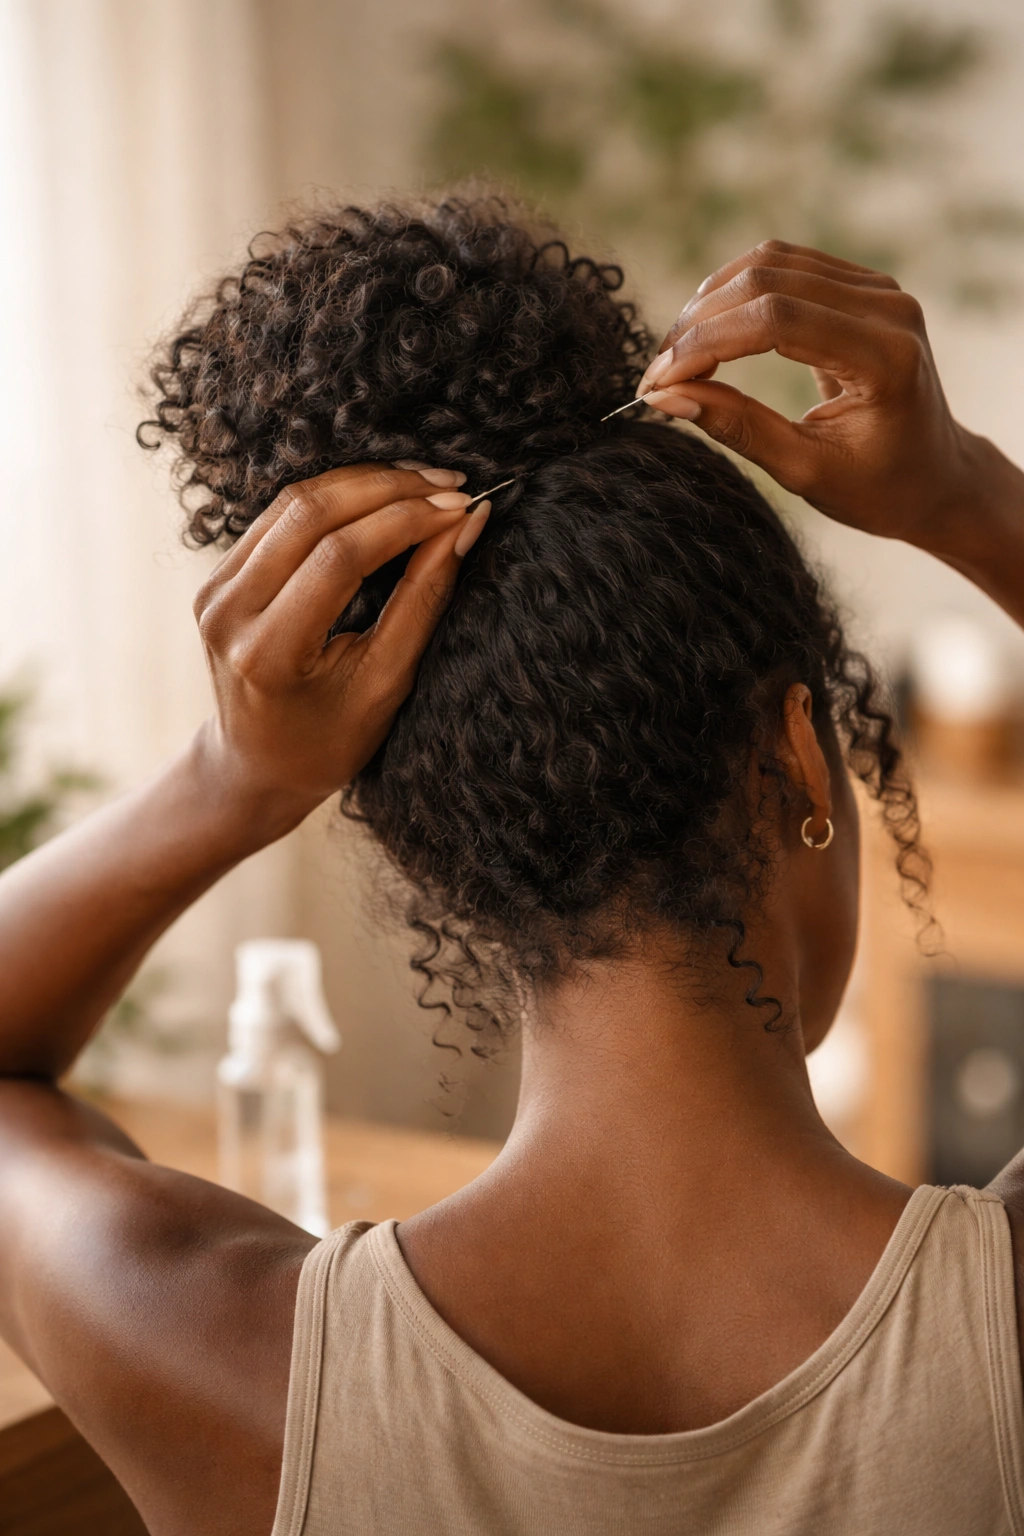
Regardless of which messy bun style you choose, maintenance throughout the day keeps it looking intentional. Carry bobby pins that match your hair color so you can discreetly tighten any sections that shift. A small spray bottle of curl refresher helps your curls maintain their bounce and definition, especially if you’re wearing your bun for multiple days.
Avoid touching your bun unnecessarily—each touch potentially moves hair and disrupts your style. If you notice flyaways, secure them with a bobby pin rather than trying to smooth them down, which often makes them more noticeable.
By evening, your bun may have naturally loosened slightly. This is actually ideal—it often looks more intentionally messy as the day goes on. If you prefer a tighter look, you can re-fluff and resettle your bun before heading to an evening commitment.
Protecting Your Hair While Wearing a Bun
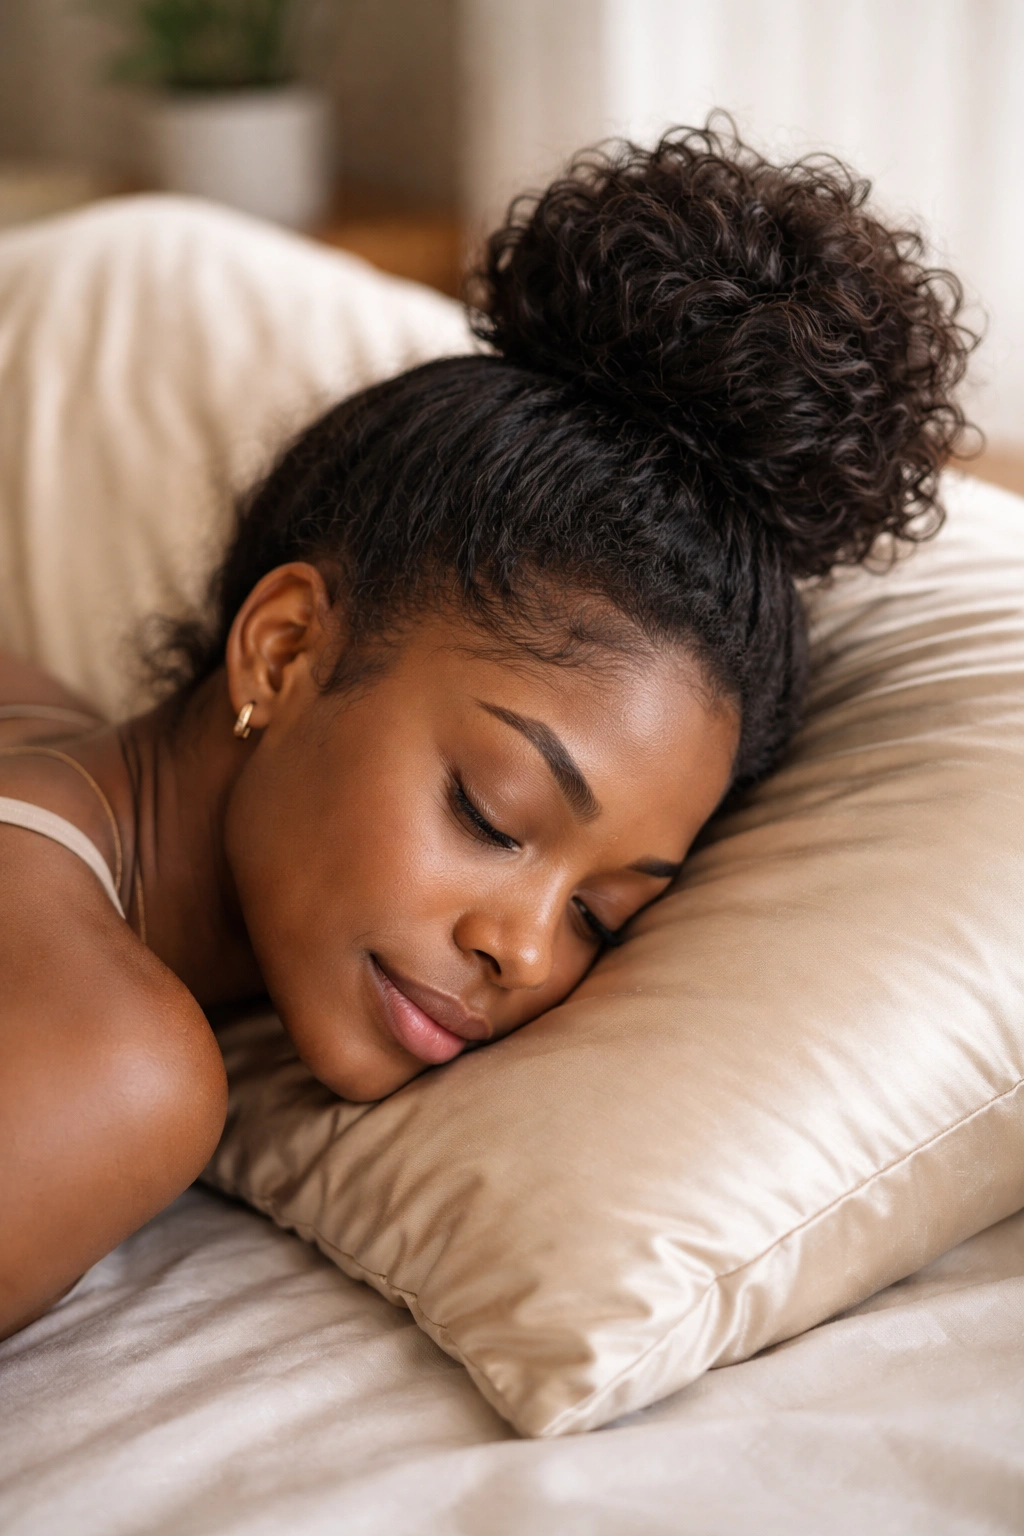
Messy buns are generally gentle on your hair, especially compared to tight ponytails or heavily manipulative styles. However, you can optimize the experience to support hair health. Never sleep in a tight bun—if you want to keep a style overnight, use a silk or satin pillowcase to reduce friction, or loosely redo your bun with minimal tension.
Avoid putting your bun in the exact same position every single day. Rotating your bun position—high, mid-level, low—prevents stress from accumulating in the same areas of your hairline and hair shaft. Similarly, changing which side you part your hair distributes styling stress evenly.
Check your hairline regularly for signs of tension. Small bumps, redness, or tenderness means you need to give your hair a break or switch to looser styles for a while. Your health always comes before aesthetics.
Final Thoughts
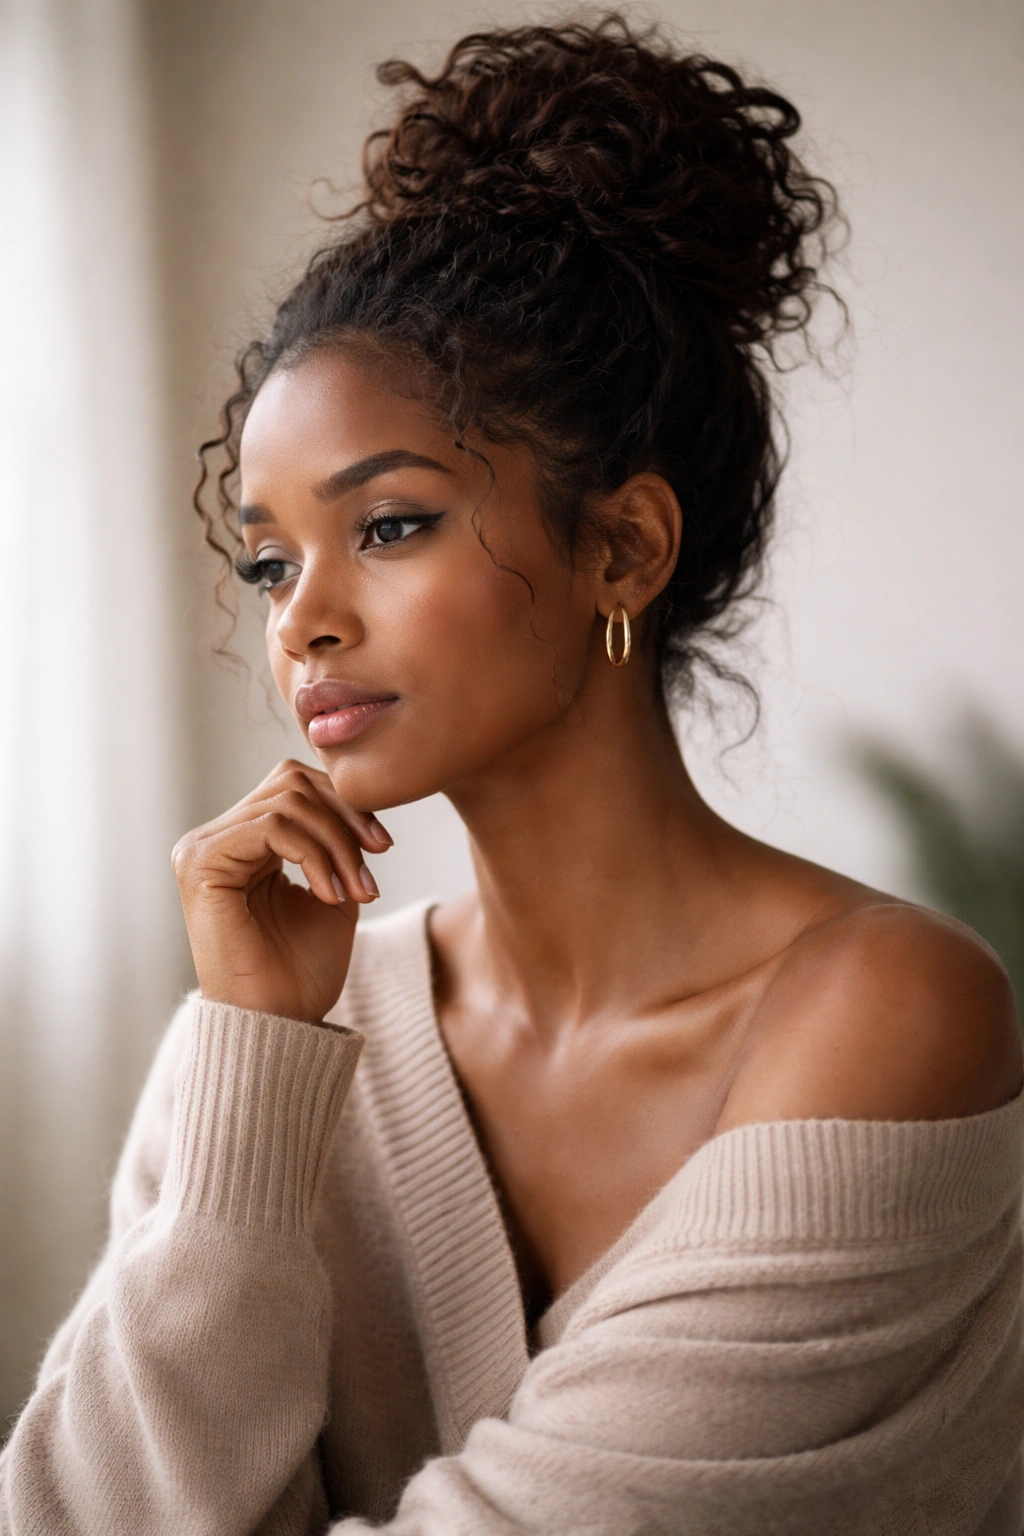
Messy buns are more than just a convenient hairstyle—they’re an opportunity to celebrate your natural texture while maintaining a polished, intentional appearance. These ten approaches give you options for different occasions, hair lengths, curl patterns, and time commitments. The most important thing to remember is that textured hair brings its own advantages to this style. Your curls and coils naturally create the dimension and texture that other hair types have to work to achieve.
Start with one style that resonates with you and practice it until it feels natural and quick. Once you’ve mastered one, experimenting with the others becomes easier because you understand the core principles. The variation keeps your styling fresh and prevents your hair from falling into the same patterns every single day.
Your hair is beautiful. These styles are designed to honor that beauty while serving your practical, everyday needs.
