



If you’ve ever wrestled with styling curly hair, you know that the relationship between texture and gravity is… complicated. While straight-haired friends effortlessly pull off sleek low buns, you’re left with the challenge of creating a hairstyle that actually looks intentional—not like you’re trying to contain a rebellion happening on your head.
Here’s what changes everything: low messy buns are specifically forgiving for curly hair. The beauty of this style is that your curls aren’t fighting against it; they’re the entire point. A low messy bun on curly hair doesn’t require sleek precision or hours of styling. Instead, it celebrates the texture you’re working with, turning what might look like “my hair got away from me” into a deliberately polished, effortless look that actually holds throughout the day.
The real magic is understanding how to position a low bun in a way that works with your curl pattern rather than against it. Low placement matters because it keeps the weight of your curls grounded, reducing the tension that causes stretching and frizz. Messiness becomes your advantage—the looser sections and intentional flyaways actually enhance the style rather than detract from it. Whether your curls are tight coils, springy waves, or something in between, a low messy bun can be your go-to style for days when you want to look polished without the styling effort.
Why Low Buns Work Especially Well for Curly Hair
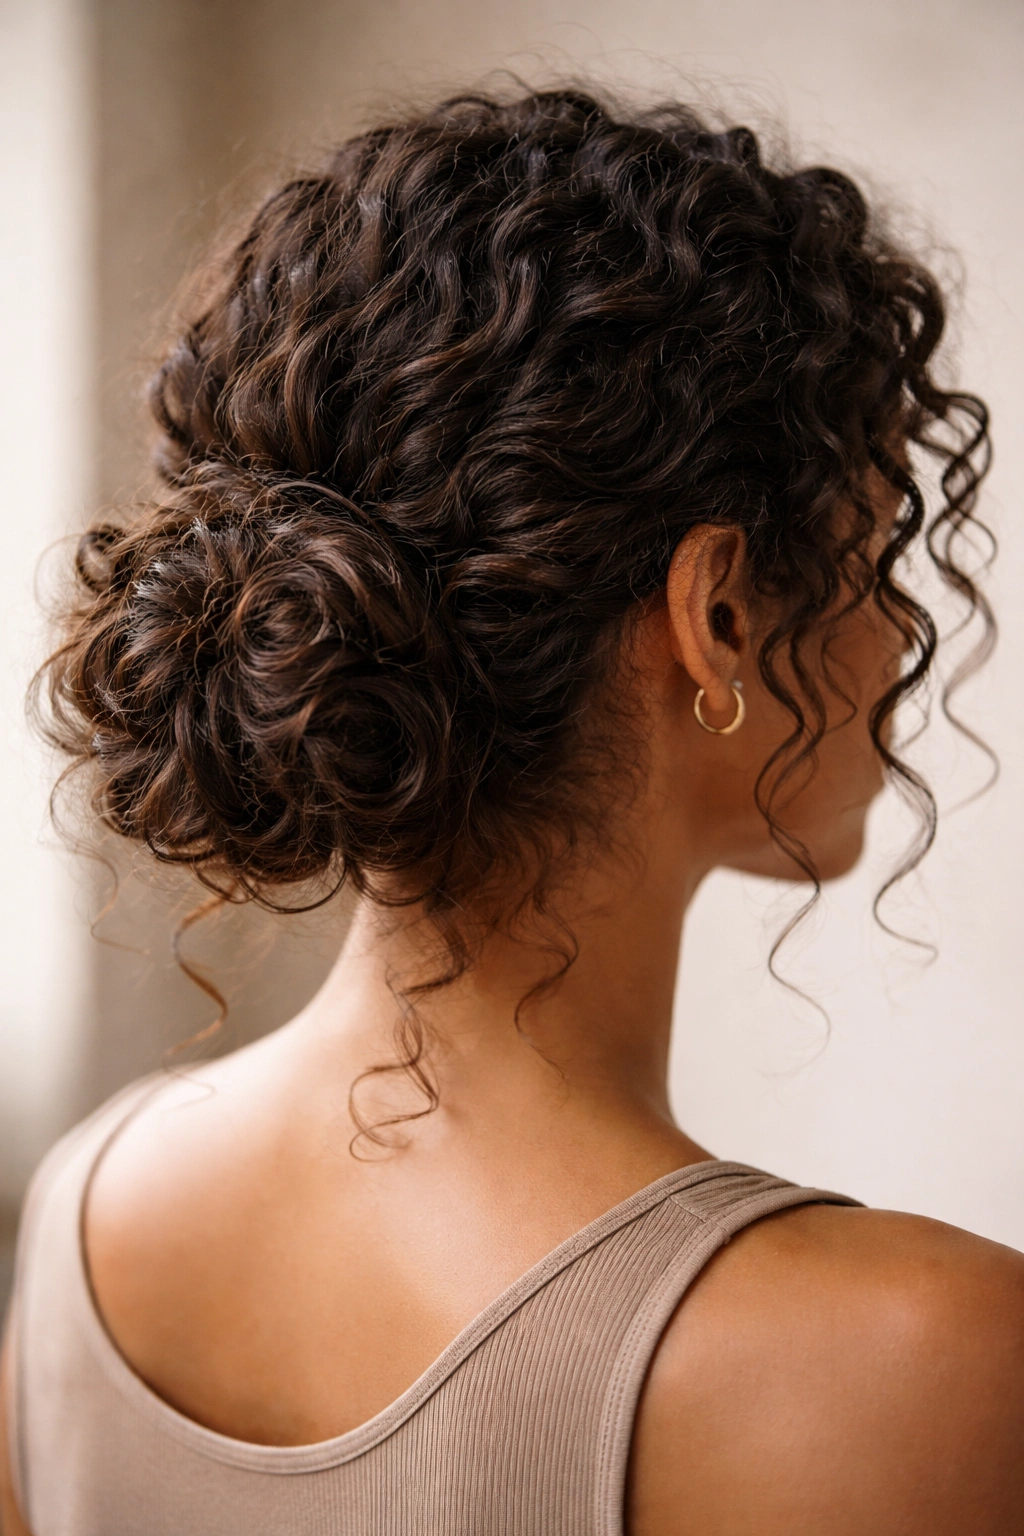
Curly hair has density and weight that create natural volume—something straight-haired friends often achieve through backcombing and teasing. A low bun placement takes advantage of this built-in texture instead of fighting it. When you place a bun at the nape of your neck rather than the crown, you’re using gravity as your ally.
The lower positioning distributes weight evenly through your curls, which prevents the stretching and distortion that happens when you pile everything on top of your head. This means your curl pattern stays intact, your roots don’t get pulled flat, and the whole style looks intentional rather than hastily thrown together (even when it kind of was).
Low buns also minimize the heat and manipulation that high buns require. Since you’re working with natural texture rather than smoothing and slicking, you can achieve this look with significantly less damage. Your curls maintain their natural pattern, your ends stay healthier, and you’re actually encouraging your hair to thrive rather than constantly stress it.
Benefits of Messy Buns for Curly Hair
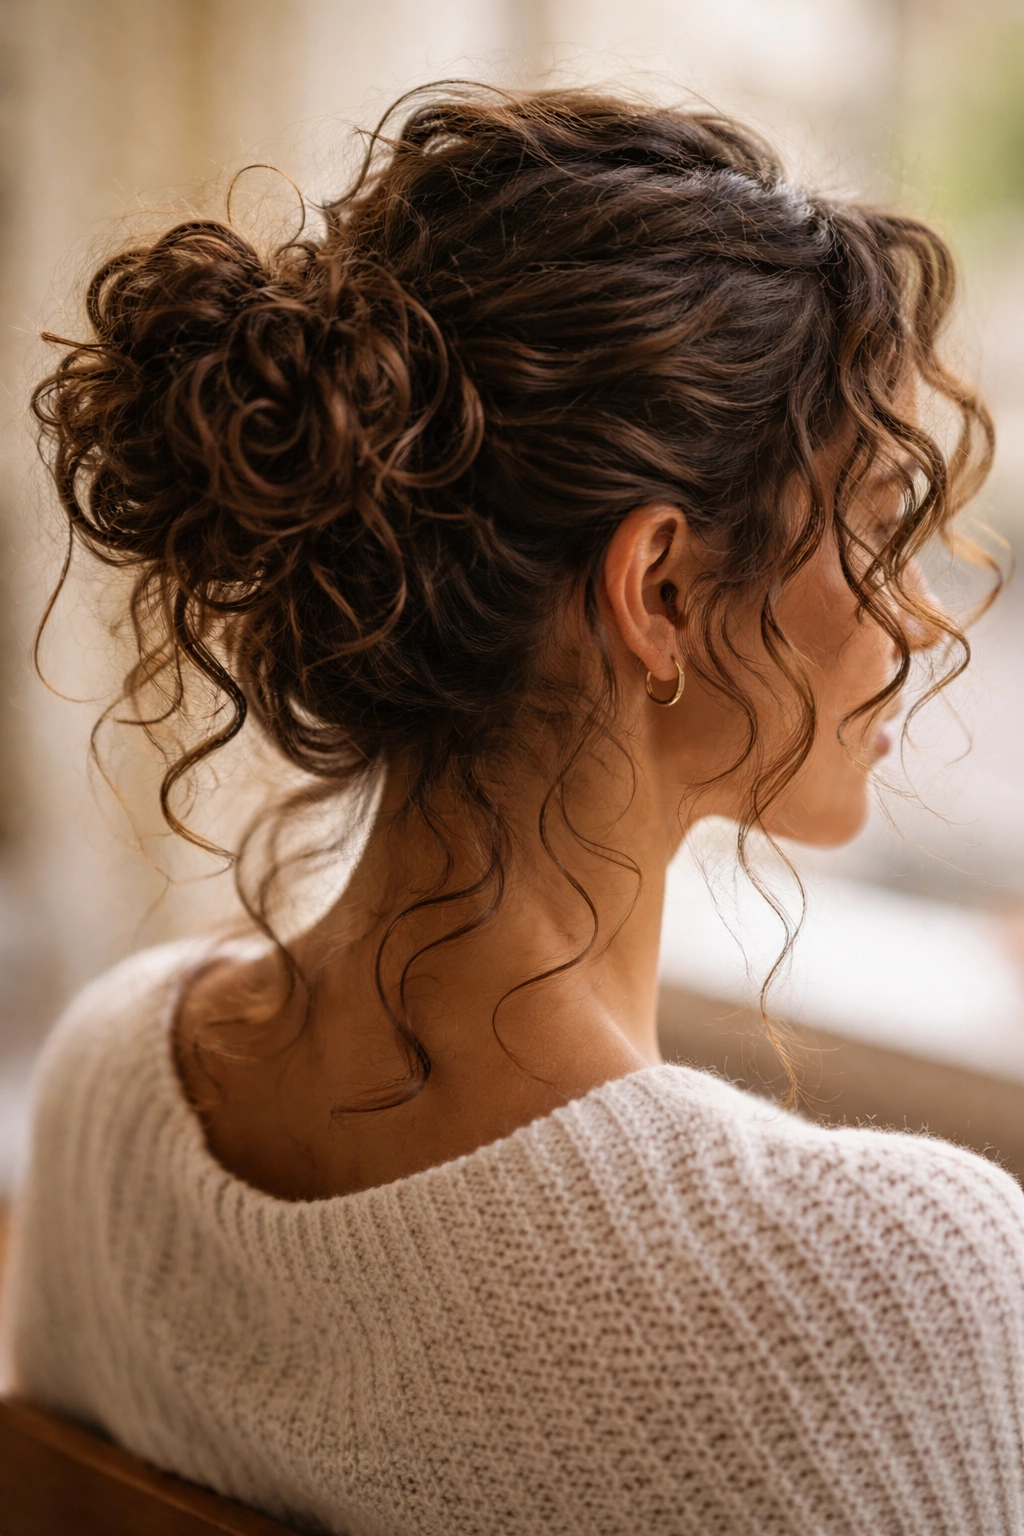
A messy bun on curly hair serves multiple purposes that go beyond just looking good. It’s a protective style that keeps your curls contained without flattening them, which means less frizz from friction with your shoulders and clothes throughout the day. The reduced manipulation means less breakage at the crown and along your lengths—crucial for maintaining healthy curl definition.
Messy buns are also incredibly time-efficient. Instead of spending 30 minutes styling individual curls, you’re spending 5-10 minutes creating a style that looks put-together and intentional. This is especially valuable on days when your curls are having an unpredictable moment, or when you need something quick but still polished enough for work, errands, or a casual outing.
The style also extends your wash cycle. If you’re following a curl routine, you know that repeated washing strips moisture and causes buildup. A low messy bun keeps your curls styled and protected between wash days, allowing you to go longer without restyling and reducing the frequency of full hair washes. For curly-haired people, this means healthier, shinier, more defined curls overall.
1. The Textured Low Bun with Face-Framing Pieces
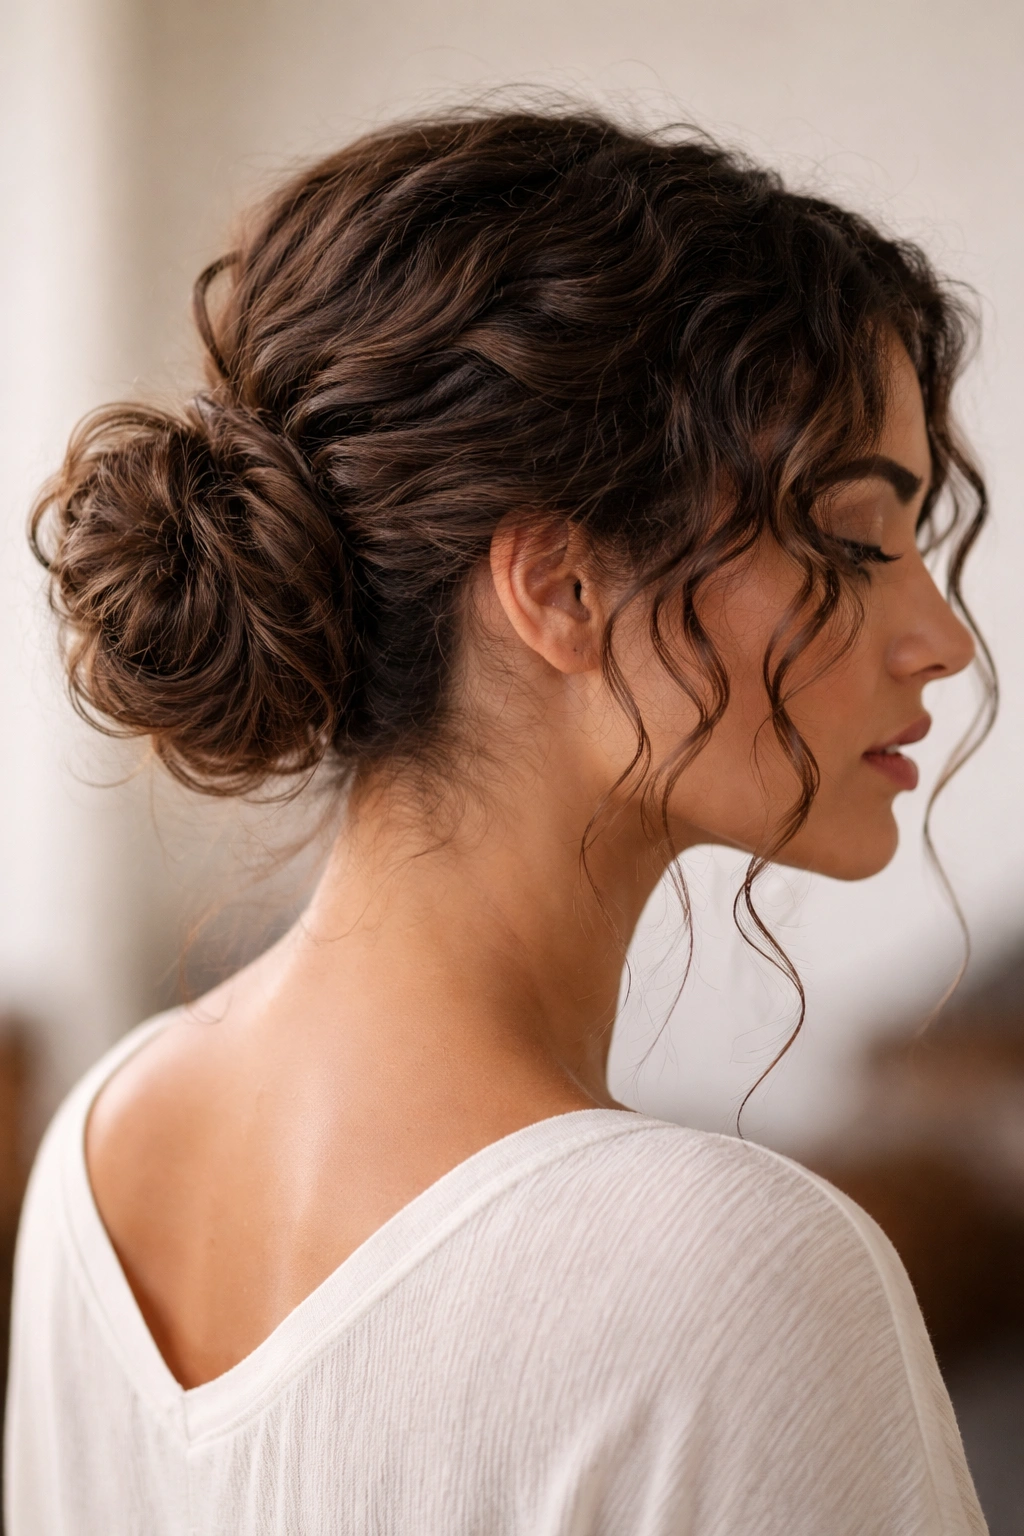
This style leans into natural texture and uses strategically placed strands around the face to add dimension. Instead of scraping every single curl back into the bun, you intentionally leave 2-3 sections loose on either side of your face. These pieces frame your face and prevent the style from feeling too severe—something especially important if you have a sensitive scalp or prefer looser styling.
What Makes This Version Work for Your Curls
The genius of this approach is that the face-framing pieces encourage your natural curl pattern to shine. Rather than fighting your texture, you’re highlighting it. The curls around your face catch light and add movement to the overall look, making the style feel modern and intentional rather than like you’re just trying to tame your hair.
The bun itself sits low, right at the nape of your neck, which means most of your length is actually framing your face and shoulders. This creates better visual balance and plays to curly hair’s natural strengths—volume, texture, and the ability to hold loose waves without styling products.
How to Create It
Start with hair that’s been curled or is naturally textured—air-dried curls work beautifully for this style. Flip your head upside down and flip back up, then use your fingers to gently separate the back section of your hair (about 60-70% of it) from your face-framing pieces. Don’t worry about making this separation perfectly straight; that imprecision is actually what makes the style work.
Flip upside down again and loosely twist the back section into a low bun at the nape of your neck. Secure it with bobby pins tucked underneath so they’re hidden, then gently pull a few pieces of the twisted bun outward to create dimension. Take those face-framing curls and arrange them around your face however feels flattering—you can tuck one side behind your ear or leave both sides loose and flowing.
Pro tip: Use a smoothing cream or curl-defining gel on your face-framing pieces if your hair tends to frizz, but keep the bun itself a bit messy and undone. This contrast between polished face-framing pieces and an intentionally textured bun is what makes the style work.
2. The Voluminous Pineapple-Inspired Bun
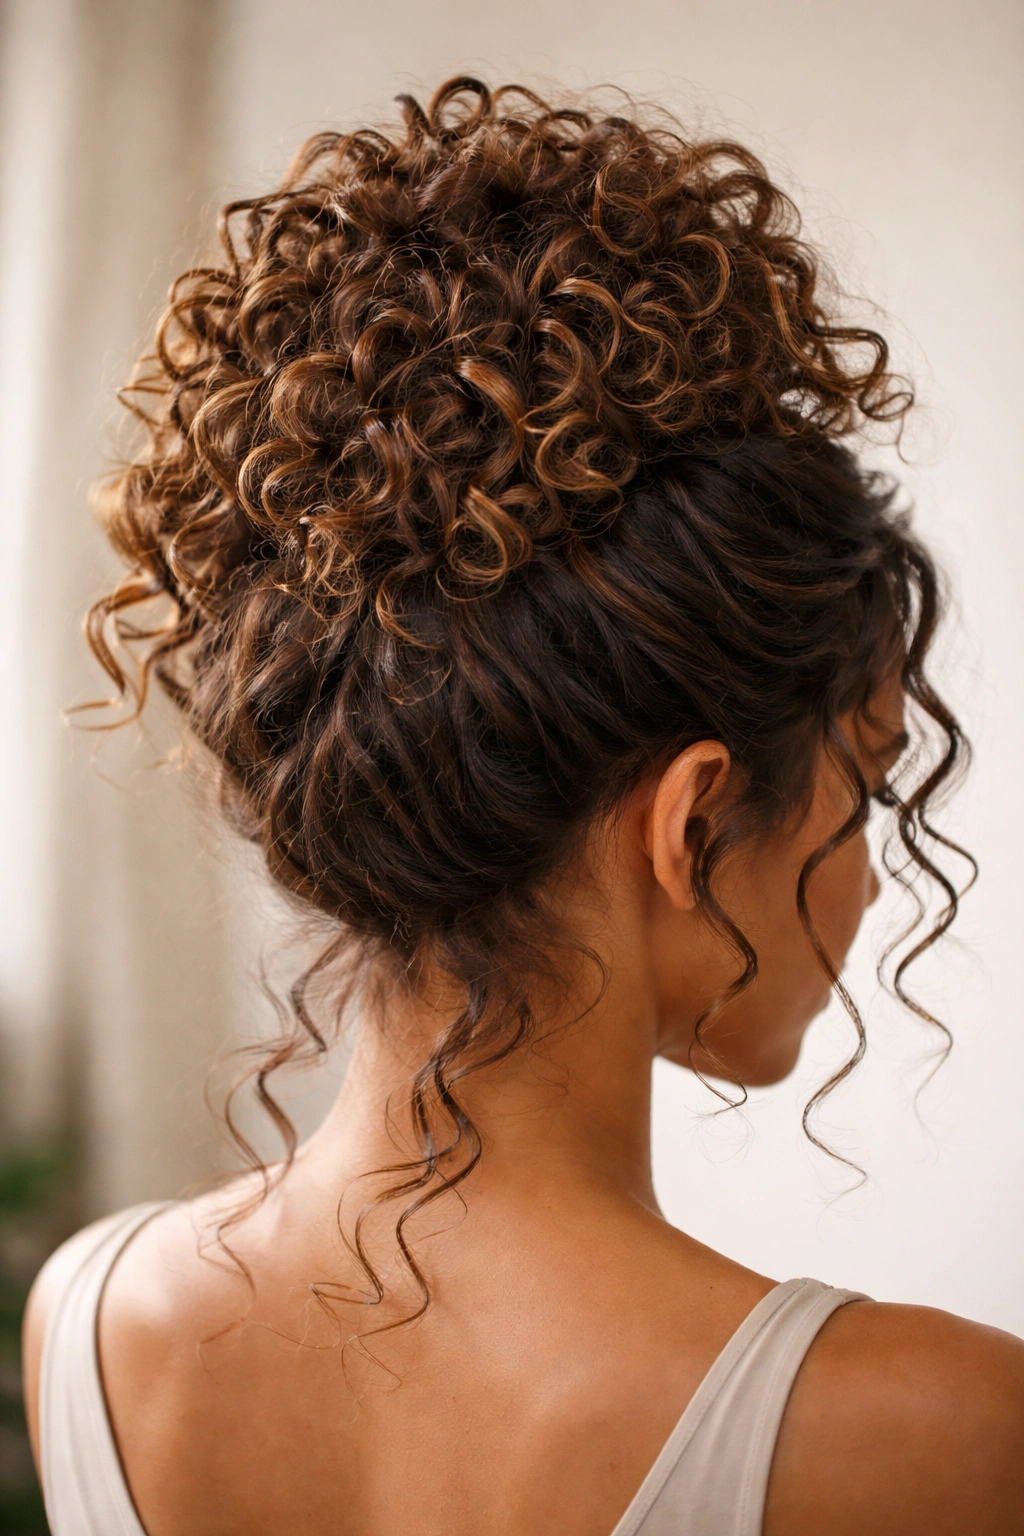
The pineapple method is legendary among curly-haired people for preserving curl definition—it’s how many people sleep with their curls. This style takes that technique and transforms it into an intentionally voluminous, textured bun that looks intentionally messy.
Why This Approach Enhances Your Natural Pattern
Instead of trying to compress your curls into a sleek bun, you’re stacking them in a way that celebrates their natural volume. The pineapple-inspired placement—gathering curls at the crown and allowing them to cascade downward into a low bun—creates incredible dimension. Your curl pattern remains fully visible and defined, and the style actually looks bigger and more dramatic than it would if you tried to smooth everything down.
This is also one of the easiest styles to maintain throughout the day. Because you’re working with your hair’s natural structure rather than against it, you don’t need to retouch it constantly. A light spritz of curl refresher spray keeps everything looking fresh for 8+ hours.
Creating This Style Step-by-Step
Start by gathering the top 1/3 of your hair into a very loose, high ponytail at the crown—think of it as a crown ponytail rather than a traditional one. Secure it loosely with a silk scrunchie (this prevents breakage). Now take the rest of your hair, flip your head down, and gently twist everything at the nape of your neck into a low bun. Secure with bobby pins.
The magic comes next: Go back to that crown ponytail and gently spread and fluff it, letting those curls fan out and cascade over the low bun. You can pull out individual curl coils and arrange them around the bun’s perimeter. The crown volume combined with the low bun creates this gorgeous, sculptural effect that celebrates your curl texture.
This style works best with curls that have been refresh-spritzed or are freshly styled, as that water content helps the curls hold their shape throughout the day.
3. The Curved Low Bun with Twisted Details
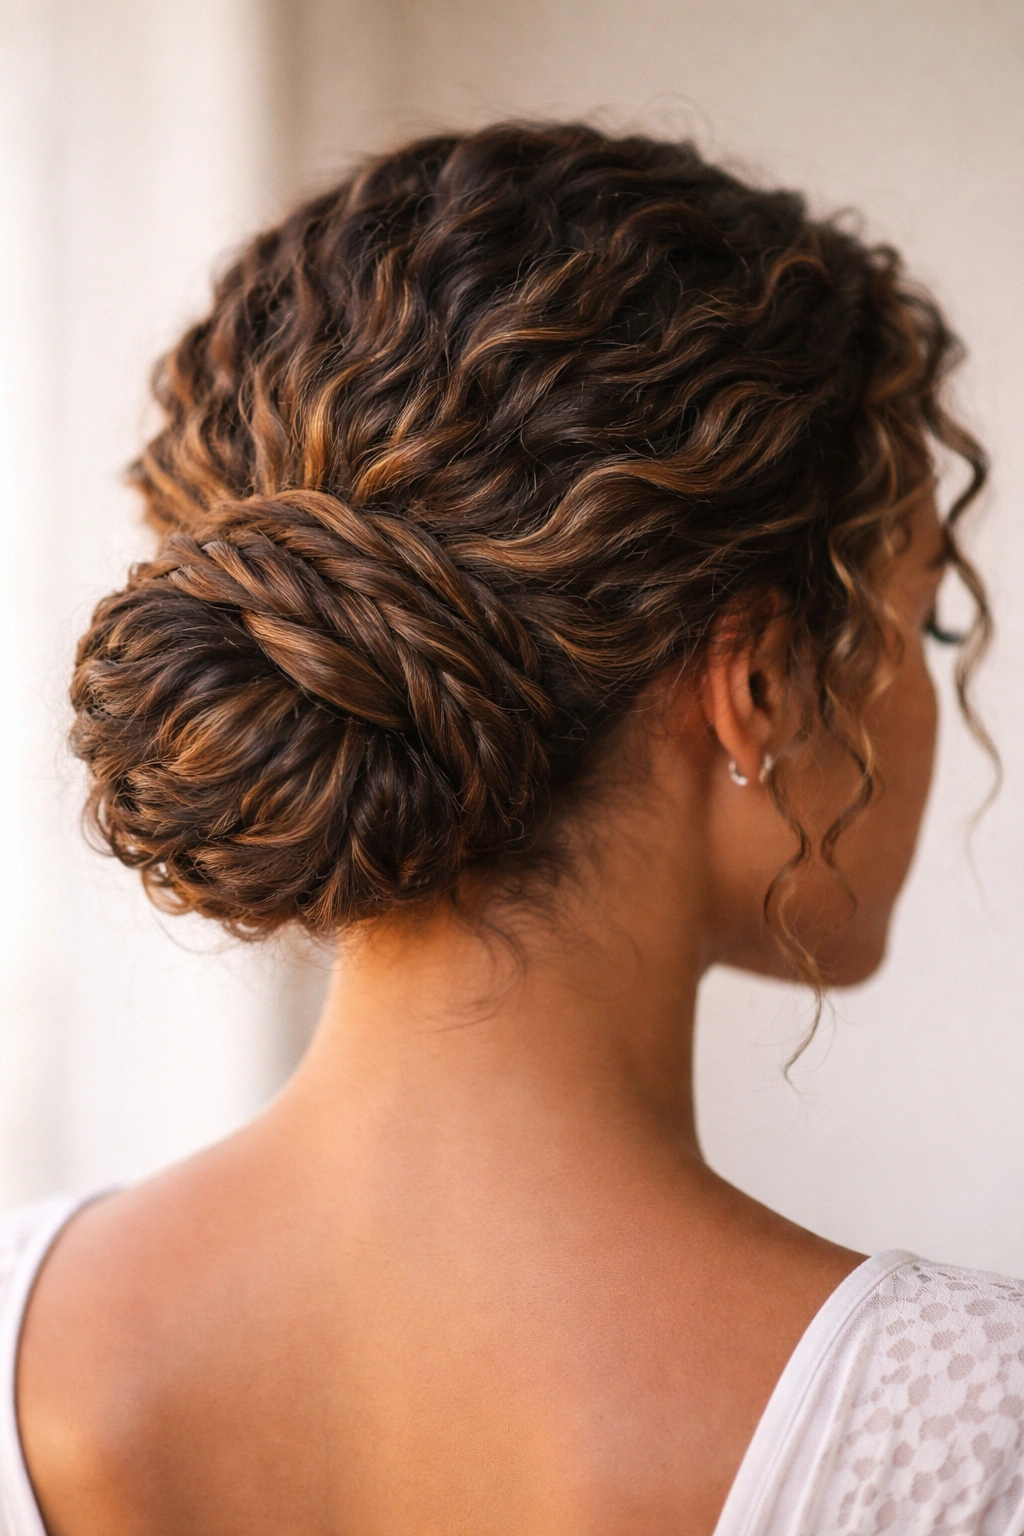
Rather than a round, gathered bun, this style creates an elongated, curved silhouette that hugs the lower back of your head. The twisted details wind throughout the style, adding visual interest and creating defined sections within the messiness.
How Curly Hair Uniqueness Shines Here
Curls naturally create texture and visual interest, and the twisted sections in this style highlight that. Each twist is made up of individual curl coils, so even when twisted together, you can still see the texture and dimension. This style looks especially striking if you have color or highlights—the twists showcase dimensional color beautifully.
The curved placement is also more flattering than a traditional round bun for many face shapes. It creates an elongated silhouette that can balance rounder faces and adds movement to the overall look.
Step-by-Step Creation
Divide the back section of your hair into 3-4 sections, depending on the thickness of your hair and how many twists you want to see. Starting on one side of your head, take the first section and loosely twist it, following the curve of your head toward the nape of your neck. As you twist, don’t pull tightly—let the individual curls show within the twist.
Secure the first twist with a bobby pin or two, keeping them hidden underneath. Repeat with the next section, slightly overlapping where the twists meet. Once all sections are twisted and secured, you can leave the style like this (very textured and intricate) or gather the ends of the twists and loosely bunch them together for a more unified bun shape. Pull out a few face-framing curls and use a smoothing cream or oil to define them.
This style takes about 10 minutes and looks significantly more polished than that timeline suggests.
4. The Undone Spiral Bun
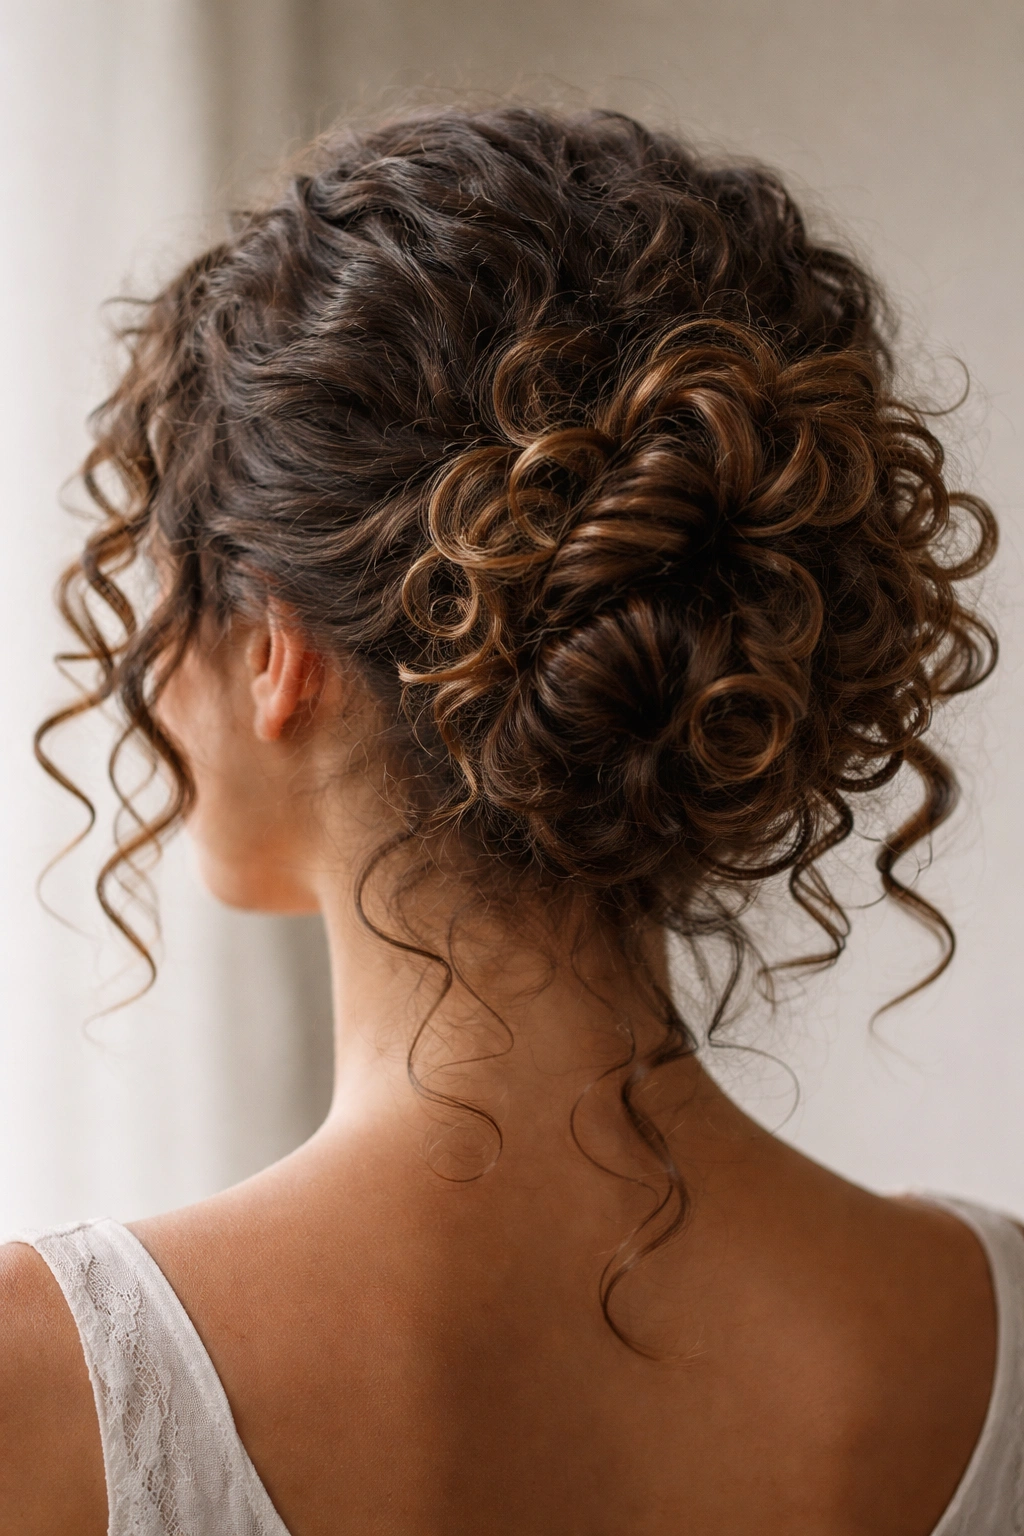
If you naturally have spiral or coil curls, this style celebrates them. Rather than trying to tame or blend your curl pattern, you’re arranging individual spirals into a loose, sculptural bun that’s almost like a work of art.
Why This Maximizes Your Spiral Texture
Spiral curls are stunning, but they can be tricky to style without flattening them. This bun keeps each spiral intact and visible, actually showcasing your natural curl pattern as the main feature of the style. The result looks intentionally curated rather than carelessly thrown together—very different from what happens when you try to compress spirals into a standard bun.
The undone quality of this style also means it works beautifully on days when your curls are perfectly defined or slightly less defined. The messiness accommodates natural variation, making it a reliable choice when your curls aren’t cooperating perfectly.
How to Construct It
Start by gently separating your curls into individual spirals using your fingers and a light touch—no combing, as that will destroy definition. Take about 60-70% of your hair and loosely gather it at the nape of your neck, but don’t twist or compress it. Instead, very gently start looping individual spirals and tucking the ends under, securing each loop with a bobby pin as you go.
Work your way around, creating an arrangement that feels balanced. Some spirals you’ll loop upward, some downward—this asymmetry is what makes it look intentionally messy rather than sloppy. Leave some face-framing spirals completely loose and unincorporated into the bun.
The final step is the most important: Go back through the bun and gently pull outward on each looped spiral to increase volume and create dimension. You want it to look three-dimensional and textured, not flat or compressed.
5. The Chunky Low Bun with Defined Curl Sections
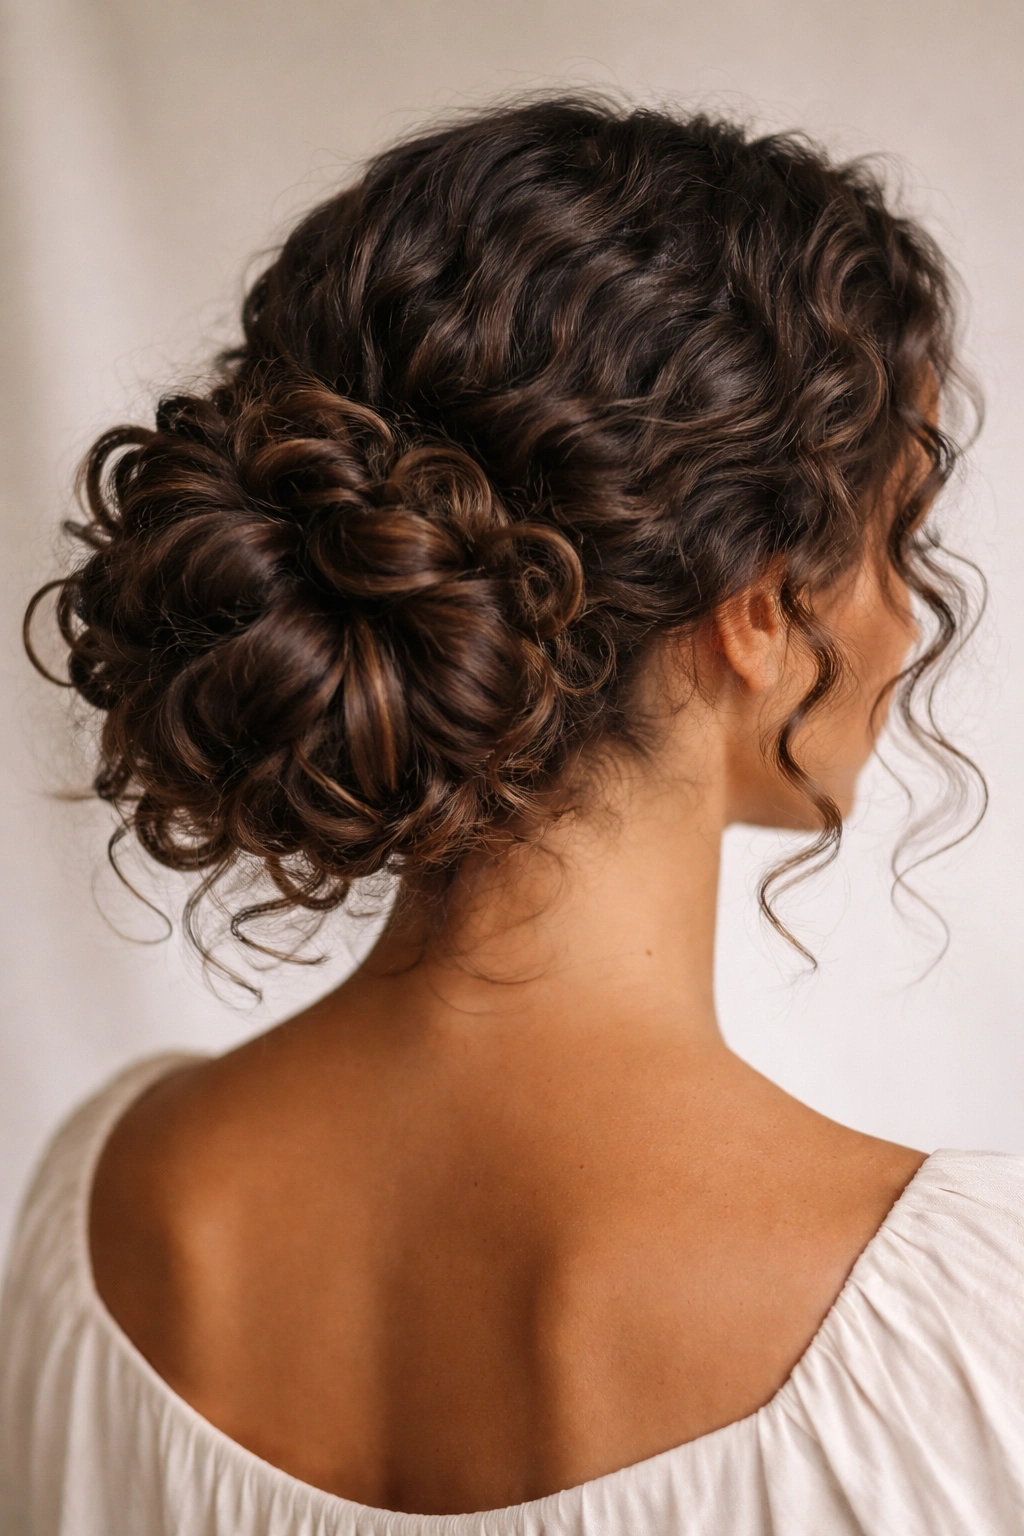
This style works beautifully if your curls are on the thicker, chunkier side or if you have naturally thicker hair that tends to feel heavy. Instead of trying to blend everything together, you’re creating visible sections that showcase the weight and beauty of your curls.
What Makes This Approach Uniquely Suited to Curly Hair
The chunky bun acknowledges that your hair has density and texture—instead of fighting that, it celebrates it. The defined sections within the bun create visual interest and dimension, making the style feel more intentional and sophisticated than a traditional smooth bun would be.
This also works beautifully for longer curls that tend toward frizz. By creating defined sections, you’re actually creating natural boundaries that contain frizz better than if you tried to smooth everything into one unified bun shape.
Creating Defined Sections
Divide the back half of your hair into 4-6 sections (depending on hair thickness and your preference) using your fingers. Take the first section, and using a medium-hold curl cream or styling gel, you can gently define the curl coils within that section if you want extra definition. Some people skip this step and let the natural curl texture speak for itself.
Gather all sections loosely together at the nape of your neck and secure them into a very loose bun—you want each section to remain visually distinct, so don’t compress everything together. The key is leaving space between sections so you can see where each one starts and ends.
Once secured, take each section and gently pull it outward and slightly upward to create volume. The bun should look three-dimensional and chunky, with clear visual sections. This isn’t a sleek, polished bun—it’s deliberately textured and loose.
Worth knowing: This style holds best when your curls are freshly styled with some product for definition and hold. Air-dried day-3 curls will work, but you’ll have better longevity with freshly styled hair.
6. The Side-Swept Low Bun
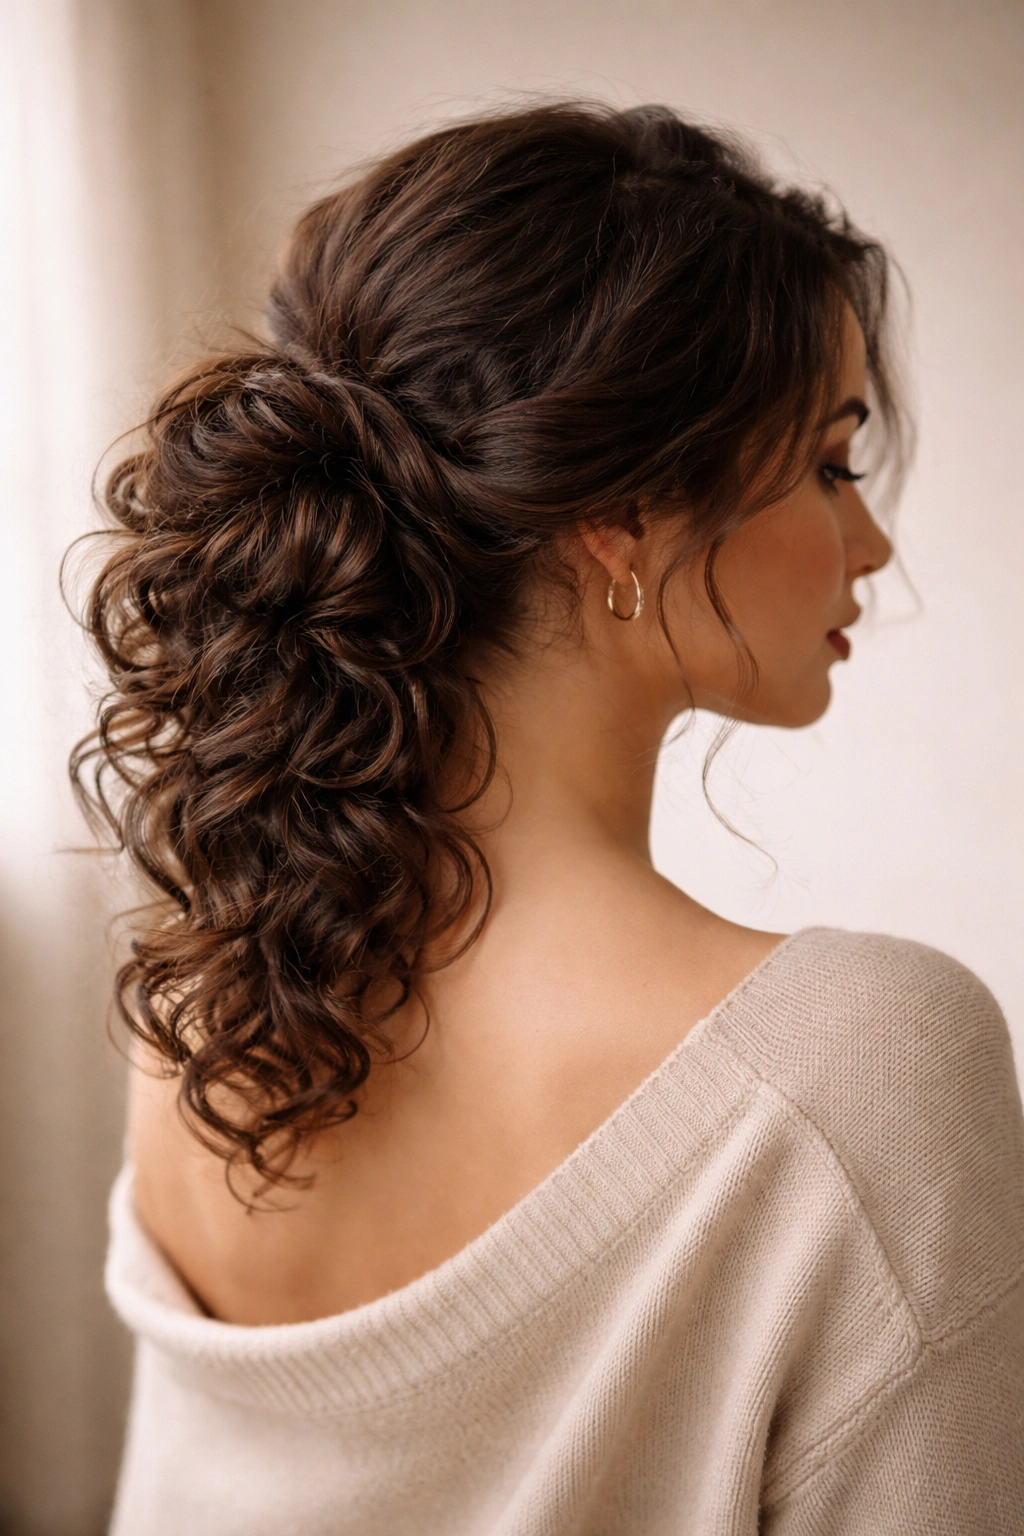
Instead of centering the bun at the nape of your neck, you’re sweeping it to one side—creating an asymmetrical, romantic style that works beautifully with curly hair’s natural movement.
How Side-Swept Placement Changes the Look
The asymmetry of a side-swept bun adds sophistication and visual interest. It’s more flattering for many face shapes because it creates movement toward the face. With curly hair specifically, the side-swept placement allows your natural wave and curl pattern to cascade over your shoulder—you’re not fighting gravity, you’re working with it.
This style also photographs beautifully and translates well for occasions where you want to look more polished than a centered bun would feel. It’s the messy-bun equivalent of getting dressed up without actually doing much more work.
Building Your Side-Swept Bun
Flip your head to one side—whichever side you want the bun on. Gather the back section of your hair loosely and bring it toward the side of your neck where you’re sweeping the bun. Twist or loosely gather this section (don’t compress too tightly), and secure it with bobby pins tucked underneath.
Now take the opposite side of your hair (the side away from the bun) and arrange it so it sweeps toward and slightly over the bun. You can tuck it behind your ear on the back side, or let it flow loosely—both work beautifully. The goal is creating an asymmetrical silhouette where one side has more visible curl structure and the other side is more streamlined.
Pull out face-framing curls on both sides and use a smoothing cream or light serum to define them. The contrast between the polished face-framing pieces and the textured, loose bun on the side creates visual interest and sophistication.
7. The Two-Strand Twisted Low Bun
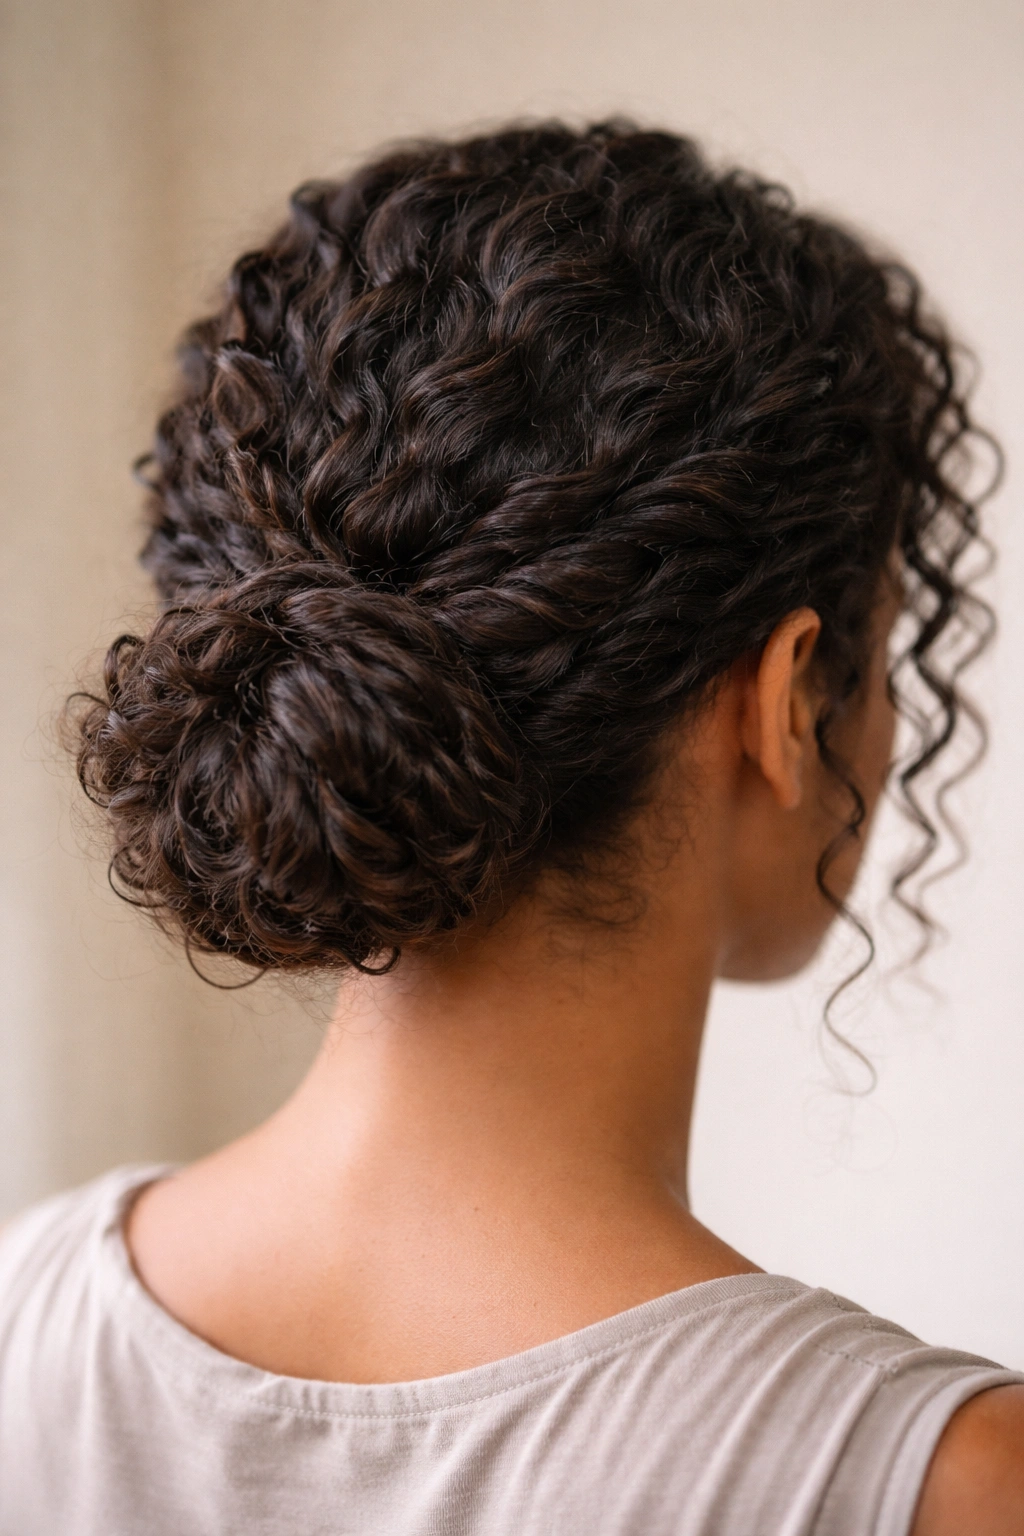
Rather than a traditional twisted bun where you twist all your hair together, this style creates two distinct twists that wind toward the nape of your neck and loosely gather into a low bun.
Why Two-Strand Twists Showcase Curly Hair Beautifully
Two-strand twists are a classic protective style for curly and coily hair because they showcase texture without manipulating it excessively. Using this technique for a bun means you get the best of both worlds—a protective style that’s also beautiful and intentionally styled. Each twist is made up of individual curl coils that remain visible and defined.
The dual-twist approach also creates visual balance and dimension. Rather than one thick, heavy twisted bun, you have two lighter twists that intertwine—much more visually interesting and flattering for curly hair.
Constructing Your Two-Strand Twisted Bun
Part your hair down the middle at the back of your head, creating a left section and a right section. Starting on the left side, take a small section of hair at your temple and begin loosely two-strand twisting it (twisting two sections of hair around each other) as you move toward the nape of your neck. Don’t pull tightly—let your natural curls show within the twist.
Repeat on the right side, creating a matching twist that mirrors the left side. Both twists should arrive at the nape of your neck at roughly the same point. Secure both twists with bobby pins, allowing them to intertwine slightly if they naturally want to.
Gently pull outward on the twists to add volume and texture, and leave some curls at your crown slightly loose and flowing. This style can look super polished and intentional, or very relaxed and undone—both work beautifully.
Pro tip: If your twists feel too loose or are coming undone by midday, use a light hold spray before twisting. This gives you the structure you need without creating crunchiness or stiffness.
8. The Loose Knot Bun with Fly-Away Curls
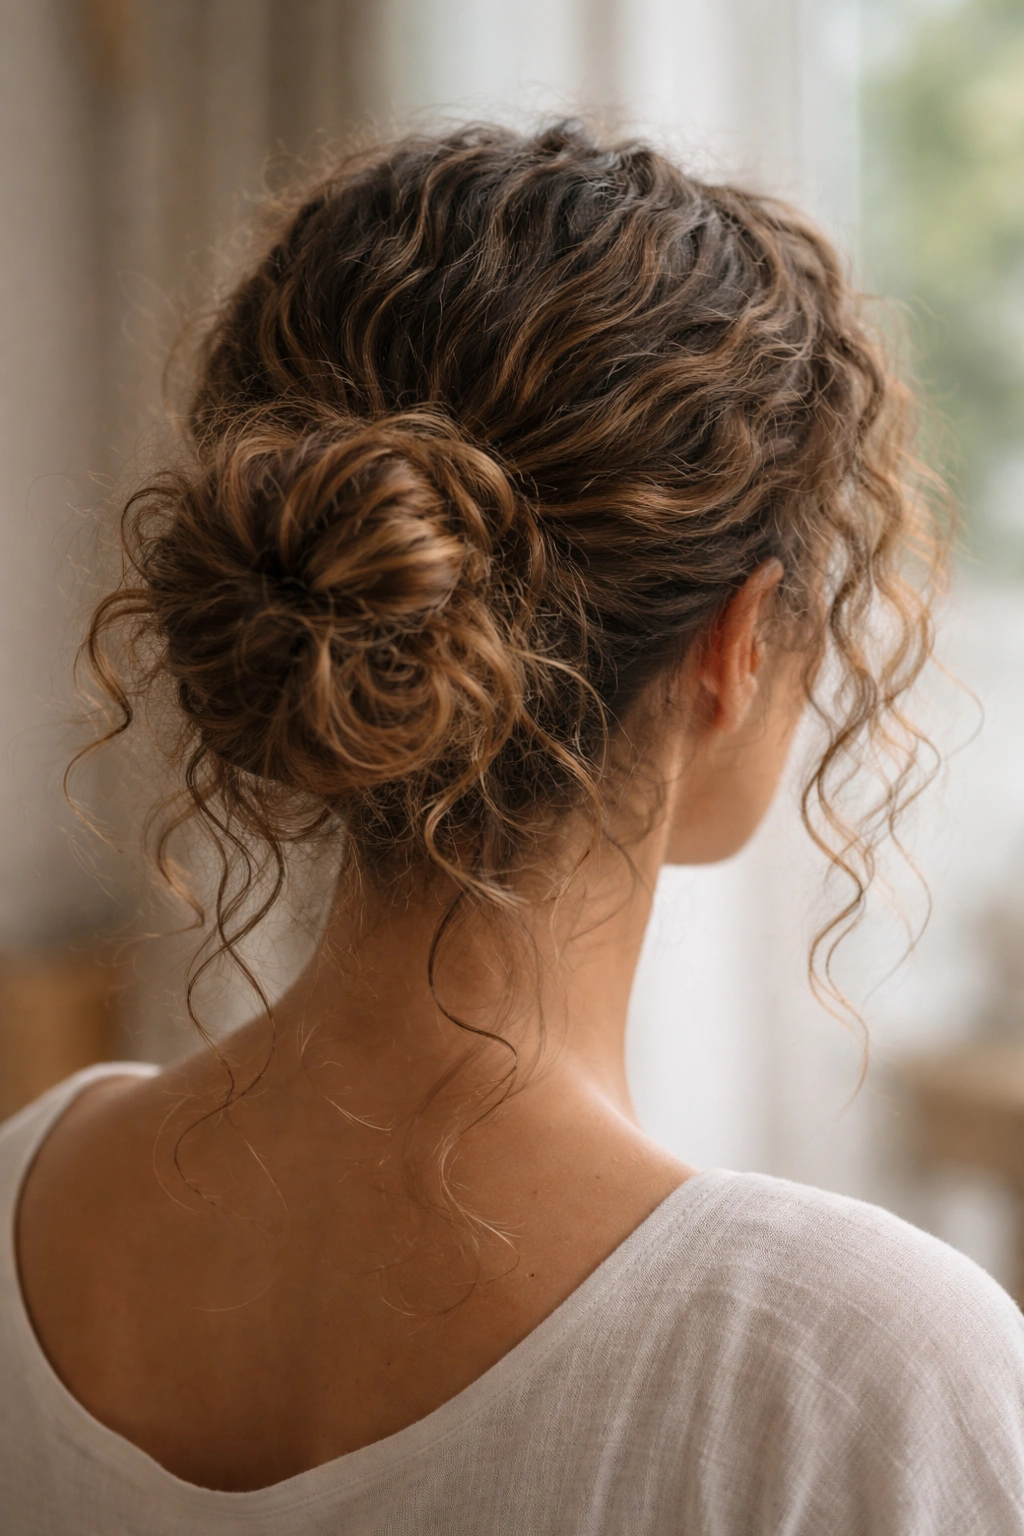
This final style leans completely into the “messy” part of messy bun. Rather than twisting, sectioning, or arranging anything precisely, you’re creating a loose knot with your hair and letting as much texture and flyaways show as possible.
Why This Works as an Actual Styled Look (Not Just Lazy)
The loose knot bun celebrates imperfection as intentional style. Your flyaways, loose curls, and undone pieces aren’t mistakes—they’re the whole point. This style works beautifully with curly hair because your texture naturally creates exactly this kind of undone beauty. You’re not fighting your hair’s nature; you’re leaning into it completely.
This is also the most forgiving low bun style. Your curls don’t have to be perfectly defined, your flyaways don’t need to be tamed, and the bun doesn’t need to be structurally perfect. It works on day-1 curls, day-3 curls, and everything in between.
Creating Intentional Messiness
This genuinely takes about 3 minutes. Flip your head down, gather your hair loosely at the nape of your neck, and tie it into a simple, loose knot (like you’re tying a shoelace, but looser). Flip back up and secure the knot with bobby pins tucked underneath, making sure there’s no visible tension—it should feel and look completely relaxed.
Now comes the styling: Pull out at least 10-15 curls around your face and let them flow completely loose. These aren’t carefully positioned face-framing pieces; they’re just loose curls doing their thing. Use your fingers to rough up the bun slightly, creating visible texture and separating curl sections. The messier and less precise this looks, the better.
Don’t use smoothing cream or styling products on the bun itself—you want it to look completely undone. You can use a light curl refresh spray if your curls need definition, but the whole point is that this requires minimal product and styling.
This style works beautifully for casual days, as a post-shower style while your curls are still setting, or whenever you want to look intentionally polished without actually doing much work.
Tips for Making Low Messy Buns Last with Curly Hair
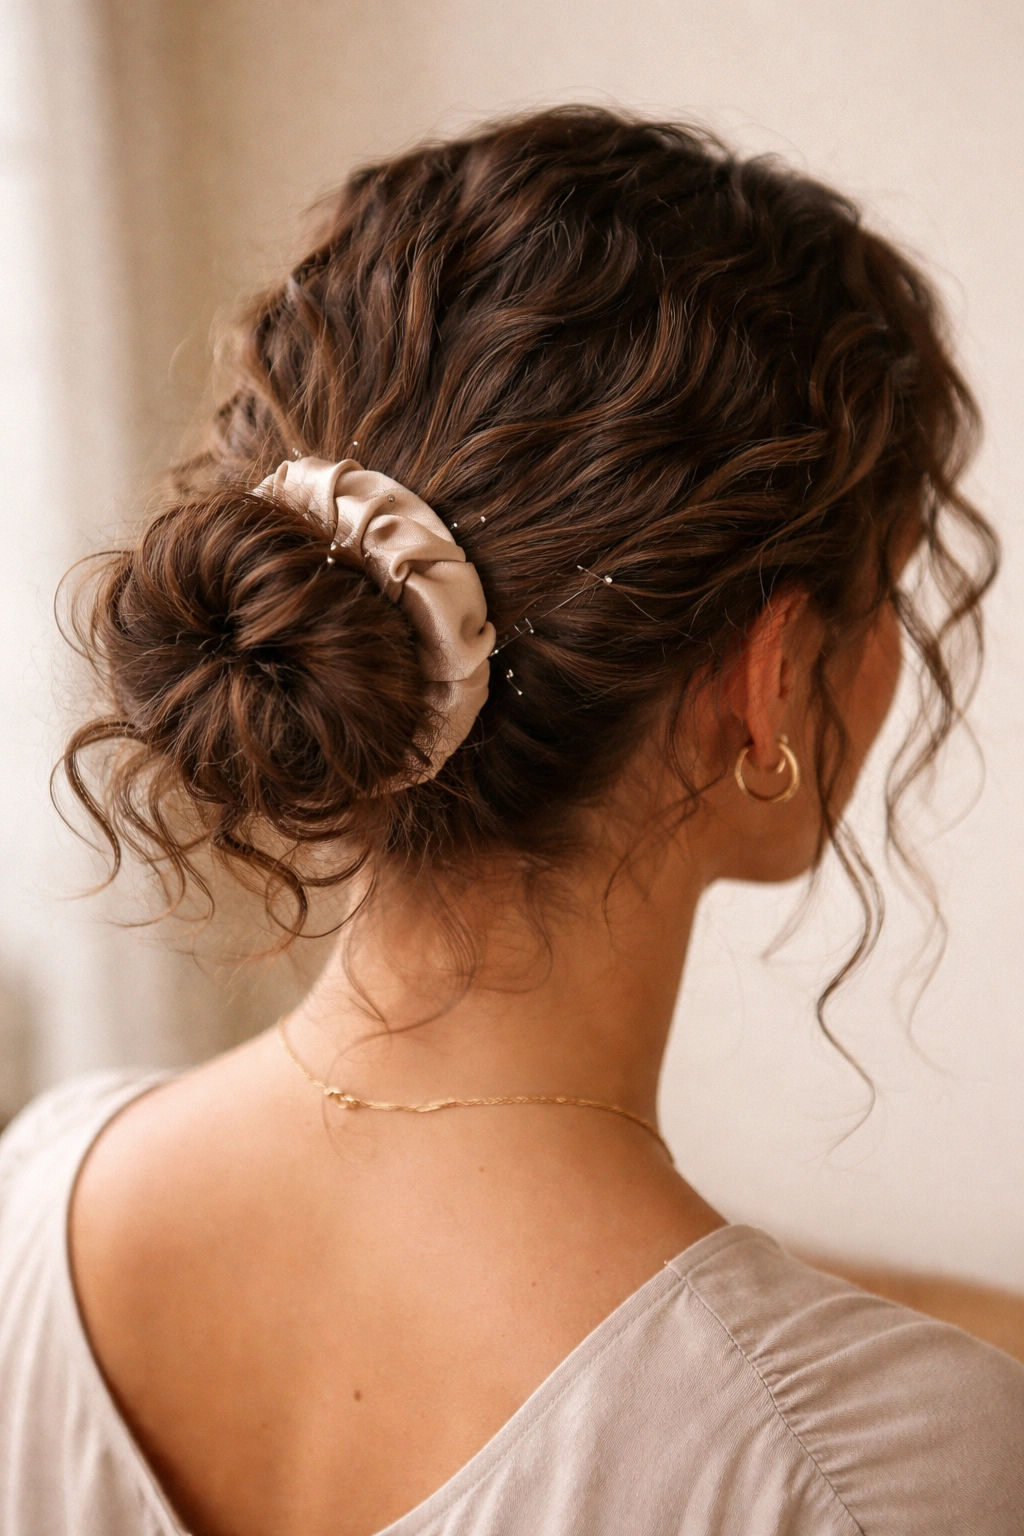
Low messy buns can absolutely last through an entire day or longer, but curly hair requires slightly different maintenance than straight hair. The key is understanding that your curls are holding the structure of the bun, not elasticity or smoothness.
Use the right hair ties. Silk or satin scrunchies are non-negotiable for curly hair. They grip your curls without creating creases, and they don’t cause breakage the way elastic hair ties do. Avoid anything with a metal clasp—metal gets caught in curls and creates tangles.
Refresh your curls midday if needed. A light spritz of curl refresher spray or rose water mist can revive wilting curls and tighten up the bun’s structure. You don’t need to completely restyle—just a quick mist and gently rearranging a few pieces can extend the life of the style significantly.
Secure strategically with bobby pins. Use 4-6 bobby pins per bun, tucking each one horizontally underneath the bun so they’re completely hidden. Pin into the densest part of your curls for maximum hold. Cross-pin if needed—one pin going left-right and another going up-down—for extra security.
Avoid tight tension. A low bun should feel comfortable and secure, but never tight. Tight tension breaks curls at the roots and causes damage. If your bun feels snug, it’s too tight—loosen it immediately.
Sleep on your bun. If you’re wearing a low messy bun all day and want it to last into the next day, keep it in while you sleep. This actually preserves the style beautifully. Use a silk pillowcase or bonnet to prevent friction and frizz while you sleep.
Common Mistakes to Avoid
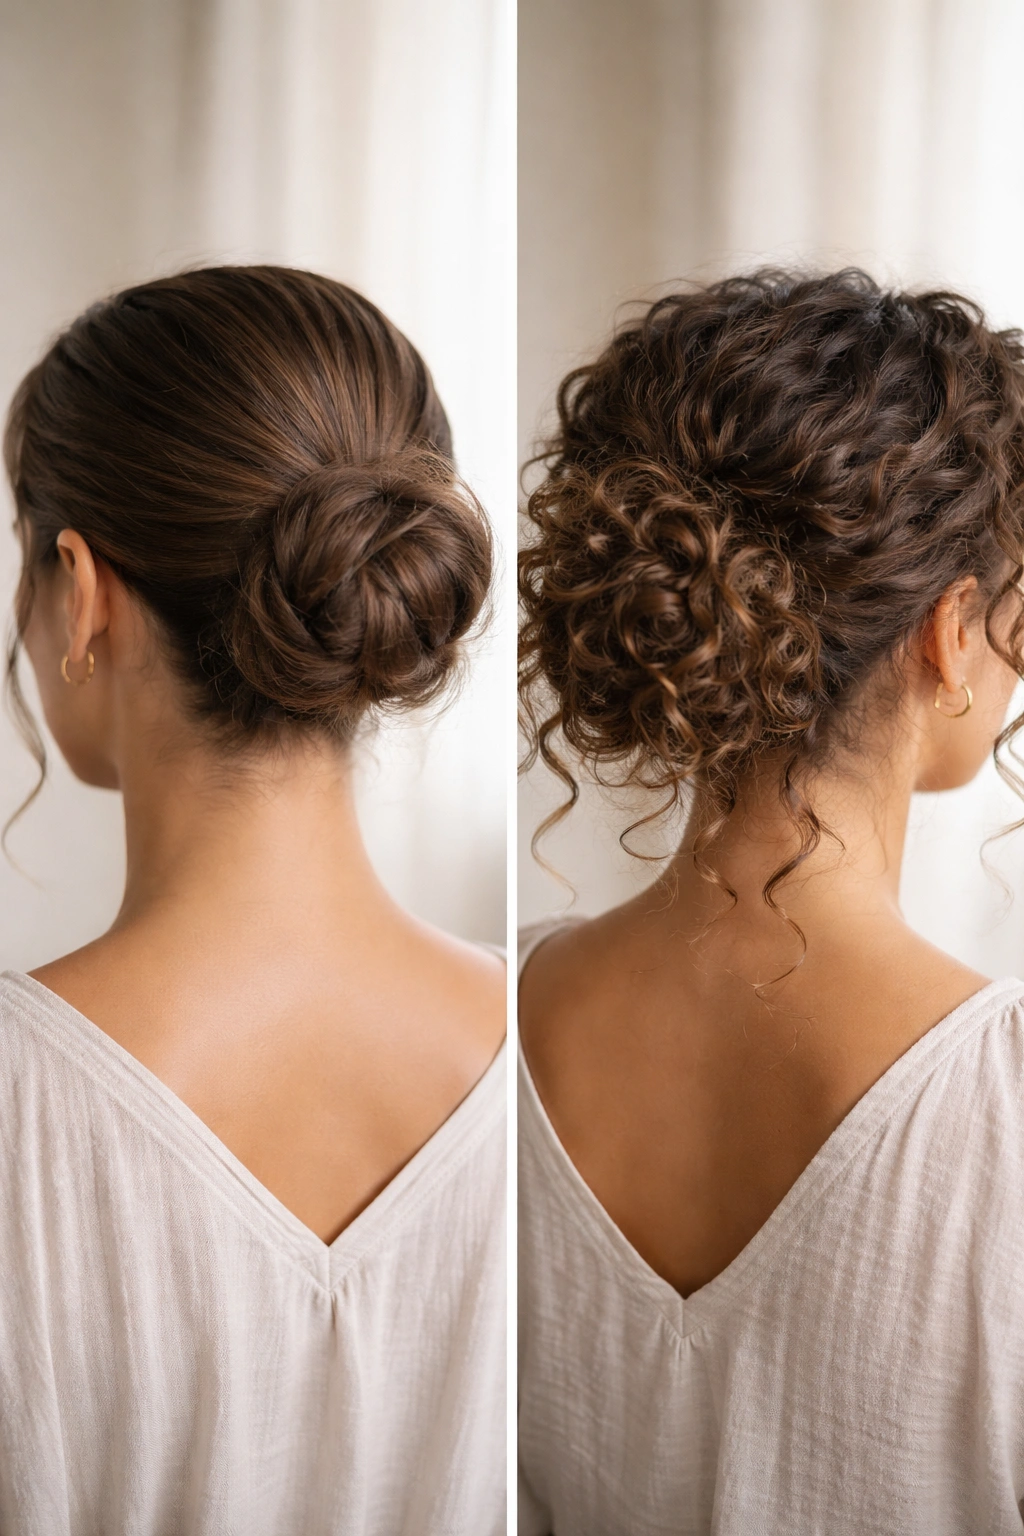
The most common mistake with low messy buns on curly hair is trying to make them too smooth and polished. You end up fighting your natural texture, which defeats the entire purpose. A messy bun on curly hair should look textured and undone. If it feels too sleek, you’ve gone against your hair’s nature.
Another mistake is gathering the bun too tightly. This breaks curls at the roots, causes frizz, and creates an uncomfortable bun that won’t last. Your bun should feel secure but completely relaxed—like you could leave it in all day and not develop a tension headache.
Using the wrong products is also common. Heavy serums and smoothing creams will weigh down your curls and make them look greasy. Instead, use lightweight styling products designed for curly hair—curl creams, gels with flexible hold, and refresher sprays that add definition without weight.
Finally, avoid trying to tame every single frizz or flyaway. This is a messy bun, which means some flyaways are actually part of the look. Trying to perfect every strand defeats the purpose and makes the style take three times longer. Embrace the texture, the movement, and the undone quality. That’s where the beauty lives.
Final Thoughts
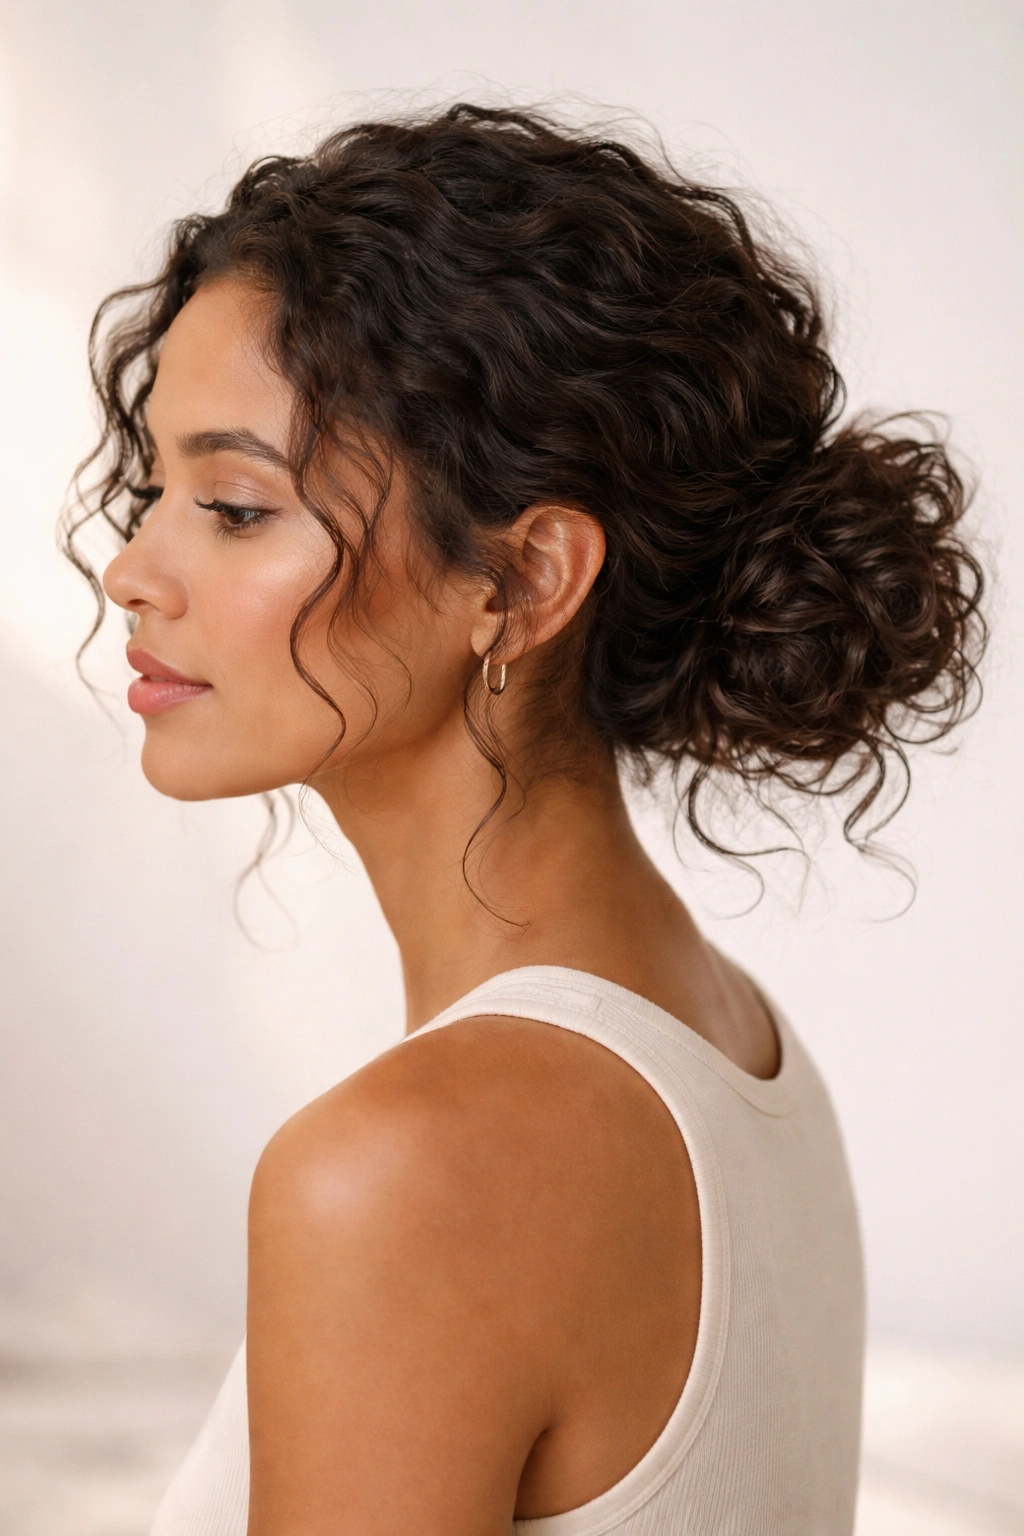
A low messy bun isn’t just a practical option for curly hair—it’s genuinely one of the most flattering, easiest styles you can wear. These eight variations give you options for every occasion, hair texture, and time you have available. Whether you’ve got 3 minutes or 15 minutes, whether your curls are perfectly defined or slightly undone, there’s a low messy bun style that will work.
The real win is recognizing that your curly hair’s natural texture isn’t something to fight against when styling—it’s your greatest asset. A low bun works because it celebrates that texture rather than fighting it. You’re not trying to sleek your curls down or compress your natural volume. You’re creating a style that looks intentional, polished, and completely effortless because you’re working with your hair, not against it.
Start with whichever style feels most approachable, and don’t worry about getting it perfect on your first try. These styles are forgiving because they’re meant to be a little undone. Each time you create one, you’ll develop a feel for how tight or loose to gather, where to position the bun for your face shape, and how to arrange your flyaway curls in a way that feels flattering. Your low messy bun will become one of those go-to styles you can throw together in five minutes and wear confidently anywhere.
