



Curly hair at a wedding deserves the spotlight—and a messy bun might be one of the most flattering, forgiving, and genuinely gorgeous ways to wear it. There’s something about the texture and movement of curls that makes a casual-looking updo feel intentional, romantic, and effortlessly elegant all at once. Unlike sleek, perfectly polished styles that demand absolute precision, a curly messy bun actually thrives on the natural dimension and volume that curls already provide. The texture becomes the feature, not something you’re trying to smooth away.
The beauty of a curly messy bun for a wedding is that it suits virtually every dress code and setting—from intimate garden ceremonies to formal black-tie receptions. It’s polished enough to feel appropriate and special, yet relaxed enough that you don’t have to sit rigidly the entire night terrified your hair will collapse. Your curls literally work with you to create that coveted undone-but-intentional aesthetic that takes hours to look like you didn’t try at all. Guests will assume you spent the morning at a high-end salon, and you might not have to correct them.
The key to nailing a curly messy bun for a wedding is understanding that “messy” doesn’t mean careless—it means strategic softness. It’s about enhancing your natural curl pattern, allowing some pieces to fall freely, and using the density and spring of your curls to create dimension and movement. Every style here is designed to work with your natural texture, not against it, and each one can be customized to complement your face shape, dress style, and personal vibe.
Why Curly Hair Works Beautifully for Wedding Buns
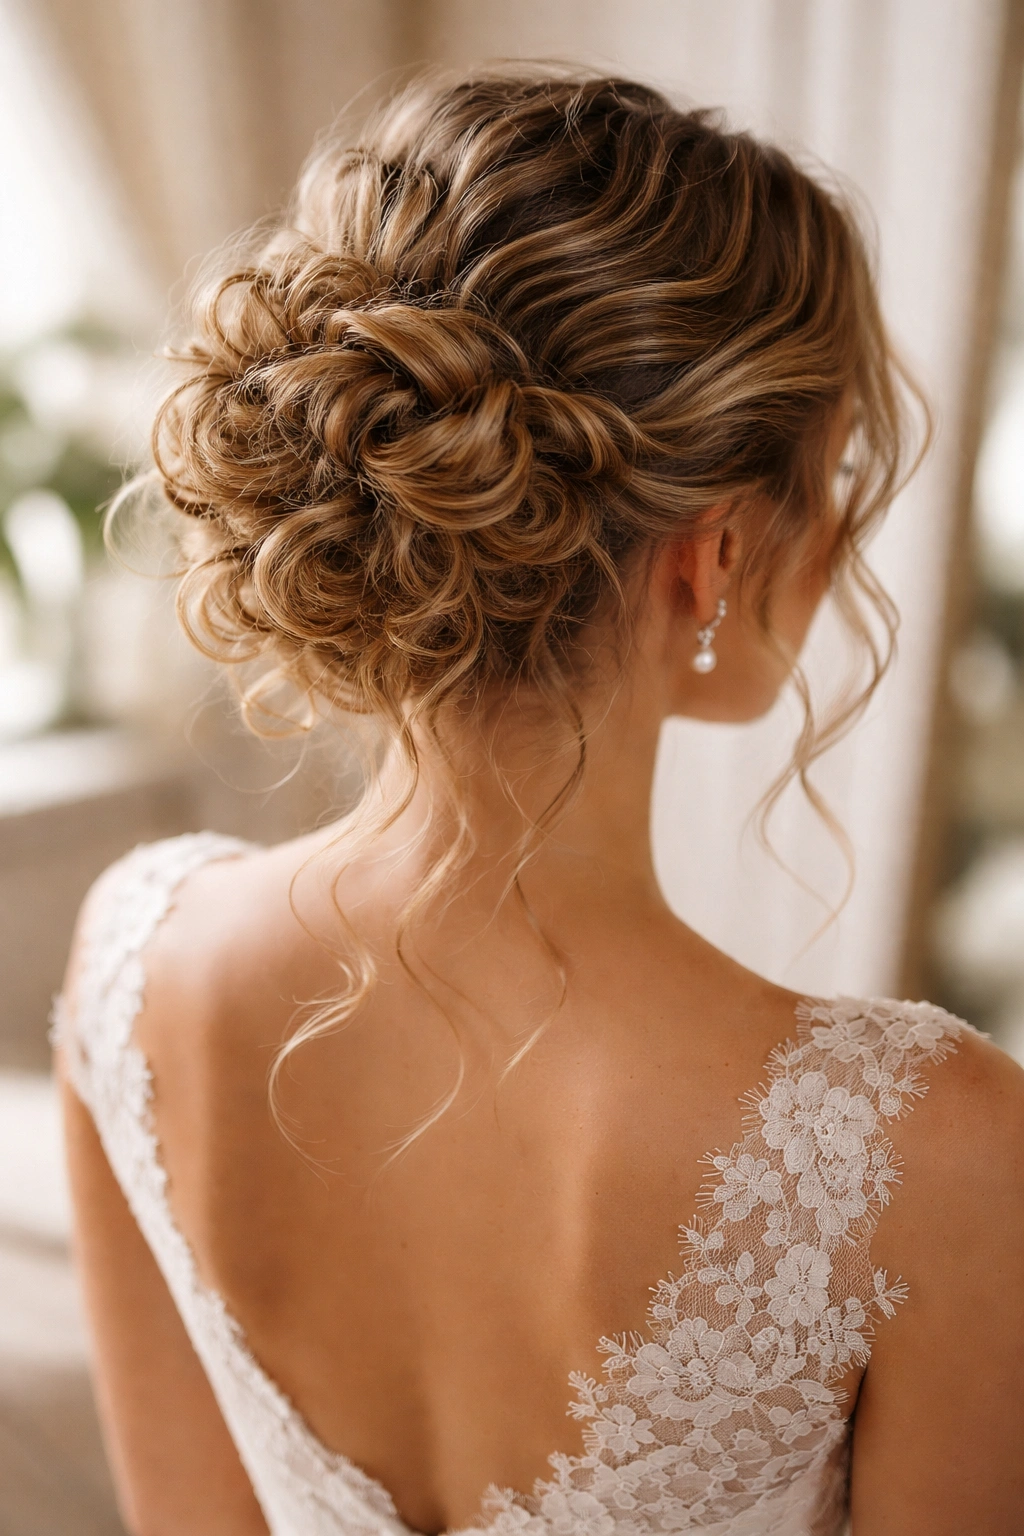
Straight hair has to fake texture and movement through styling tricks—teasing, waving, curling. But you’re starting with built-in texture, which means your messy bun automatically reads as intentional and romantic instead of accidental and lazy. Curls naturally create what straight hair has to work to achieve: visual interest, dimension, softness at the edges, and an almost sculptural quality.
The weight and spring of curls also hold a bun together differently than straight hair does. Your curls grip each other, creating internal structure that means fewer bobby pins, fewer re-dos during the reception, and more movement that actually looks beautiful as it loosens throughout the night. As your curls relax into the style, the bun becomes even softer and more romantic—the opposite of what happens with straight hair, which just falls flat.
What Makes a Curly Messy Bun Wedding-Ready
A wedding-worthy curly messy bun lives in that sweet spot between “looks intentional and special” and “you can actually move your head and dance.” It should have defined curls visible throughout—you’re not hiding your curl pattern under a tight, smooth twist. There’s softness at the edges, with some face-framing pieces or a few intentional wisps catching the light. The overall shape should feel substantial and elegant, not like you literally just threw your hair up five minutes before the ceremony.
The style should also feel secure enough that you’re not mentally checking it every time you laugh or hug someone. You want your bun to shift and settle throughout the night, picking up movement and becoming slightly more relaxed, but not to completely surrender and fall down halfway through dinner. The balance is: structured enough to stay put, soft enough to look romantic.
Styling Timeline and Preparation
Your curls will perform best if you work with them when they’re in the right moisture state. Curls styled while damp will set differently than curls styled fully dry—and for weddings, the difference matters. Most curly-haired brides and guests find that styling after their curls are about 75% dry (still slightly cool to the touch but no longer dripping) gives them the best combination of control and definition. The curls will set as they finish drying into the style you’ve created.
The night before, refresh your curls with a light spritz of water and a curl cream or leave-in conditioner. Let them air-dry or diffuse into their natural pattern. This gives you a foundation of bouncy, hydrated curls to work with the next morning. Avoid sleeping on your styled curls, as that crushes them; instead, either pineapple your hair (gather it loosely on top of your head in a scrunchie) or sleep on a silk pillowcase to minimize frizz and disruption to your curl pattern.
1. The Romantic Textured Loop
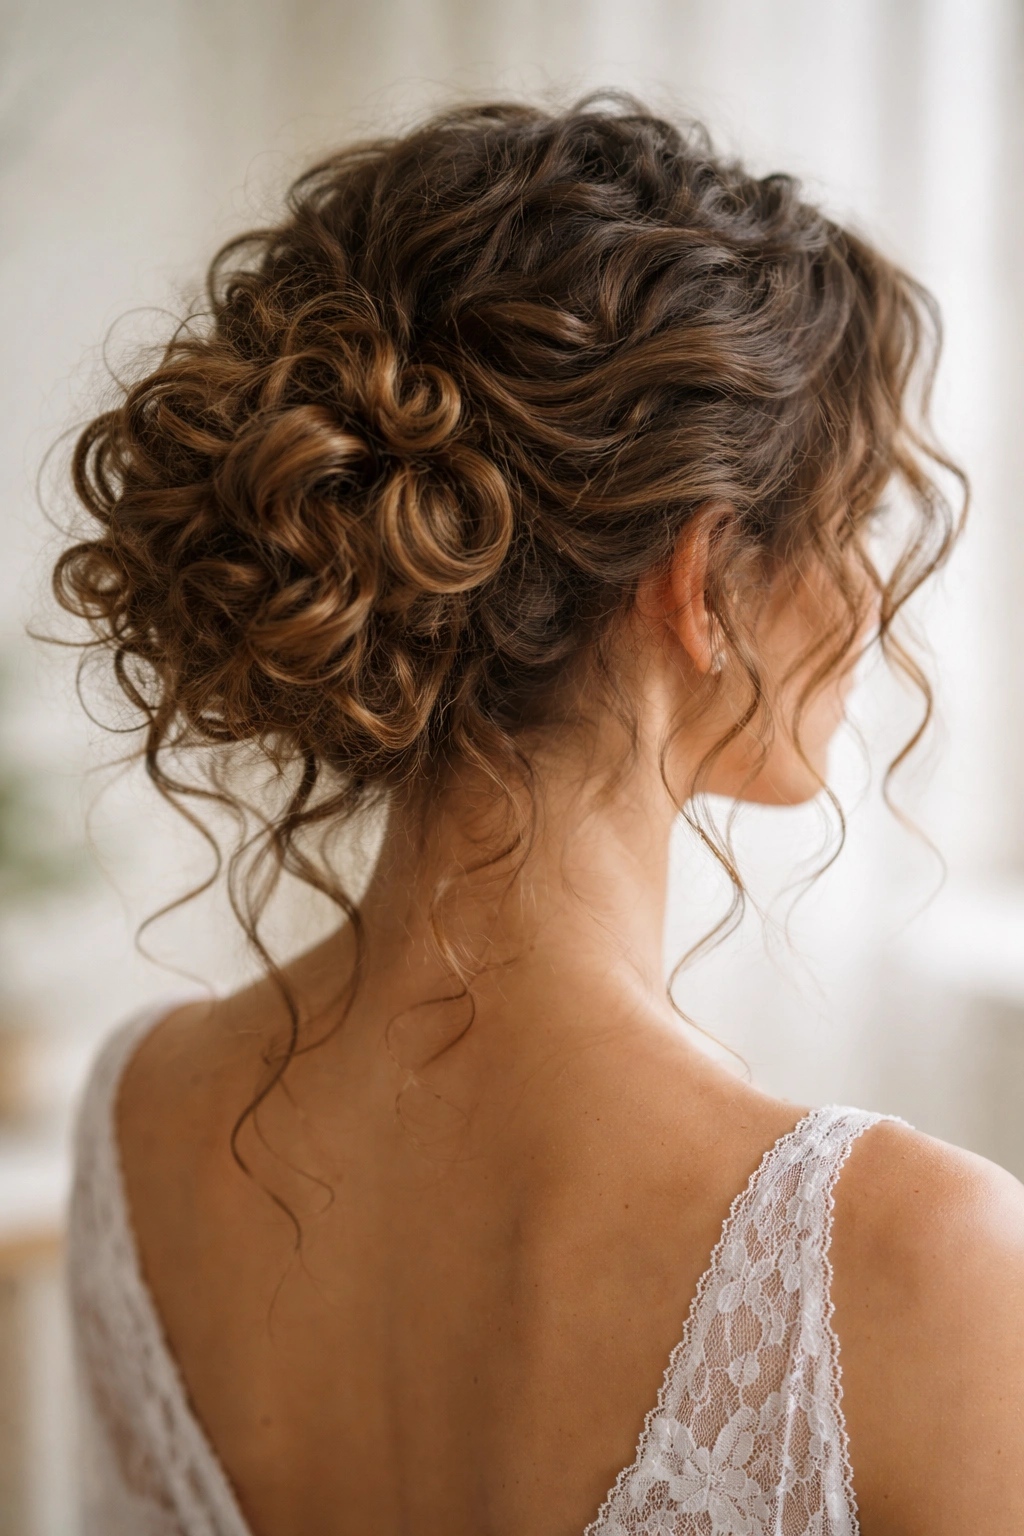
This style embraces the full volume of your natural curls by creating a loose, organic shape that showcases defined curl patterns throughout. Instead of smoothing everything back and tucking it away, you’re letting your curl texture become the visual feature of the bun—it’s basically your most beautiful curls arranged into a shape rather than flattened down.
The Romantic Textured Loop works particularly well if you have medium to thick density curls with bounce and definition. The style celebrates texture rather than hiding it, so the more distinct your curl pattern, the more stunning this looks. It’s ideal for brides and guests who have spent years learning to love and care for their curls and want them to actually be visible in their wedding photos.
How to Create the Look
Start with curls that are about 75% dry—still slightly cool but no longer wet. Apply a light curl-defining cream or gel to enhance definition without making curls crunchy or too heavy. This is your foundation layer; you’re not trying to manipulate the curls yet, just prep them to hold their shape.
Flip your head forward and gather all your hair loosely at the nape of your neck, roughly where you want the bun base to sit. Don’t pull it tight; you want it gathered softly. Secure with a small elastic, but leave some curls loose around the edges—aim for about 3-4 inches of curl length hanging below the elastic.
Take the section of curls below the elastic and gently create a loose loop by lifting it up and tucking it back into the base, securing it with bobby pins on either side. Your goal is a shape that looks like a soft, undefined bun, not a tight spiral. The curls should maintain their individual texture; you’re not combing or smoothing them flat.
Pro Styling Tricks
Pull a few face-framing pieces loose from the bun—just 2-3 small sections—and gently separate the curls so they look intentionally wispy rather than accidentally escaped. A light mist of hairspray helps these pieces hold their shape without getting crunchy.
Use bobby pins that match your hair color, and let them sit visible rather than trying to hide them completely. On dark curls especially, you want a few pins showing—it reads as intentional and adds to the “romantic” vibe.
If your bun feels too loose as the night goes on, you don’t need to re-do the whole thing. Just smooth a tiny bit of styling cream or light hairspray over any frizz, adjust the placement of your face-framing curls, and you’re good. The beauty of texture is that slight imperfection reads as beautiful, not sloppy.
What to Watch For
The main pitfall here is pulling too tight when you’re gathering your hair at the nape. Tight gathering creates tension and can lead to frizz around your hairline, plus it makes the style feel less romantic and more restrained. Aim for a gentle, secure hold that doesn’t feel tense.
Also avoid the urge to smooth your curls flat once the bun is in place. The whole point is visible texture, so keep your hands off your curls once they’re positioned. Any smoothing or finger-combing will disrupt your curl pattern and defeat the entire aesthetic.
2. The Undone Crown Bun
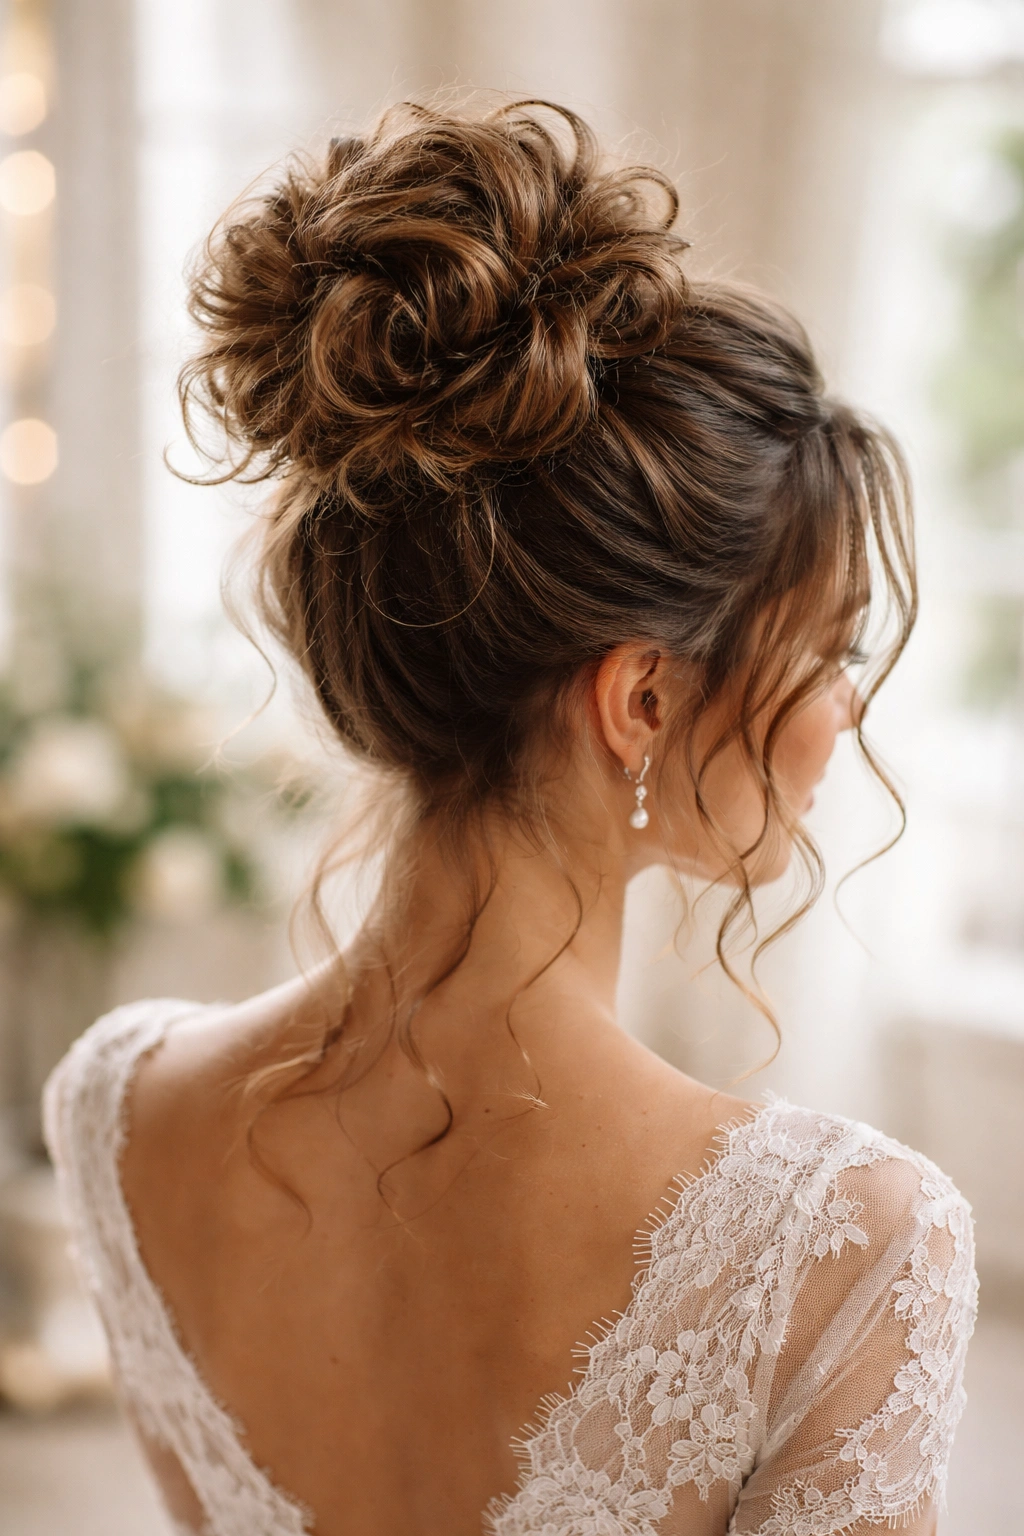
This style works brilliantly if you want your bun to sit higher on your head and create the illusion of lifted, voluminous curls. Instead of a low bun at the nape, you’re creating a bun that sits roughly at the crown area—it’s more visible from the front and the sides, making it a fantastic choice for weddings where you’ll be photographed from every angle.
The Undone Crown Bun feels polished and wedding-appropriate while maintaining that effortlessly soft appearance. Your curls are more or less contained and secured, but they’re not confined in a tight, neat shape. It’s a style that reads as “intentional updo” while looking relaxed enough for a casual-chic ceremony or outdoor garden wedding.
Building the Crown Base
Start with dry or nearly-dry curls and apply a lightweight mousse or curl cream to refresh definition. You want curls that hold some body and bounce—not weighed down, but defined enough to maintain shape throughout the day.
Gather all your hair at roughly the crown area of your head, slightly back from where you’d crown yourself with a tiara. This positioning is key: it’s high enough to look intentional and to sit above your ears, but not so high that you look like you have a topknot. Secure loosely with an elastic, again leaving some curl length loose.
Gently create a loop with the hair below the elastic by lifting and tucking it into the base, then secure with several bobby pins. You’re aiming for a shape that’s roughly bun-sized but still looks organic and undefined—not a tight, smooth shape.
Creating Intentional Softness
The magic of this style is the soft, wispy pieces around the crown and face. You’re not trying to avoid flyaways; you’re creating them strategically. Pull 3-4 small sections of curl around your face and gently separate the curls, so they look like intentional face-framing rather than accidents.
Take a small curling iron or wand (if your curls need refreshing at the very crown) and gently touch up a few curls around the back of your bun. You want them to feel bouncy and alive, not flat against your head. A few springy curls showing through the top of the bun creates a dimension that reads as effortlessly romantic.
Finish with a medium-hold hairspray—not so much that it crunches your curls, just enough that everything stays positioned through the ceremony and dancing.
Styling for Different Face Shapes
If you have a longer face, this crown positioning naturally balances proportions. If you have a rounder face, emphasize the softness of the face-framing pieces and make sure they’re loose and wispy—this elongates and softens features beautifully.
For a square face, you want slightly fuller, rounder pieces around the sides and soft, wispy pieces at the temples to soften angles. Adjust where you place your face-framing curls to flatter your specific features rather than using the same placement for everyone.
3. The Twisted Spiral Bun
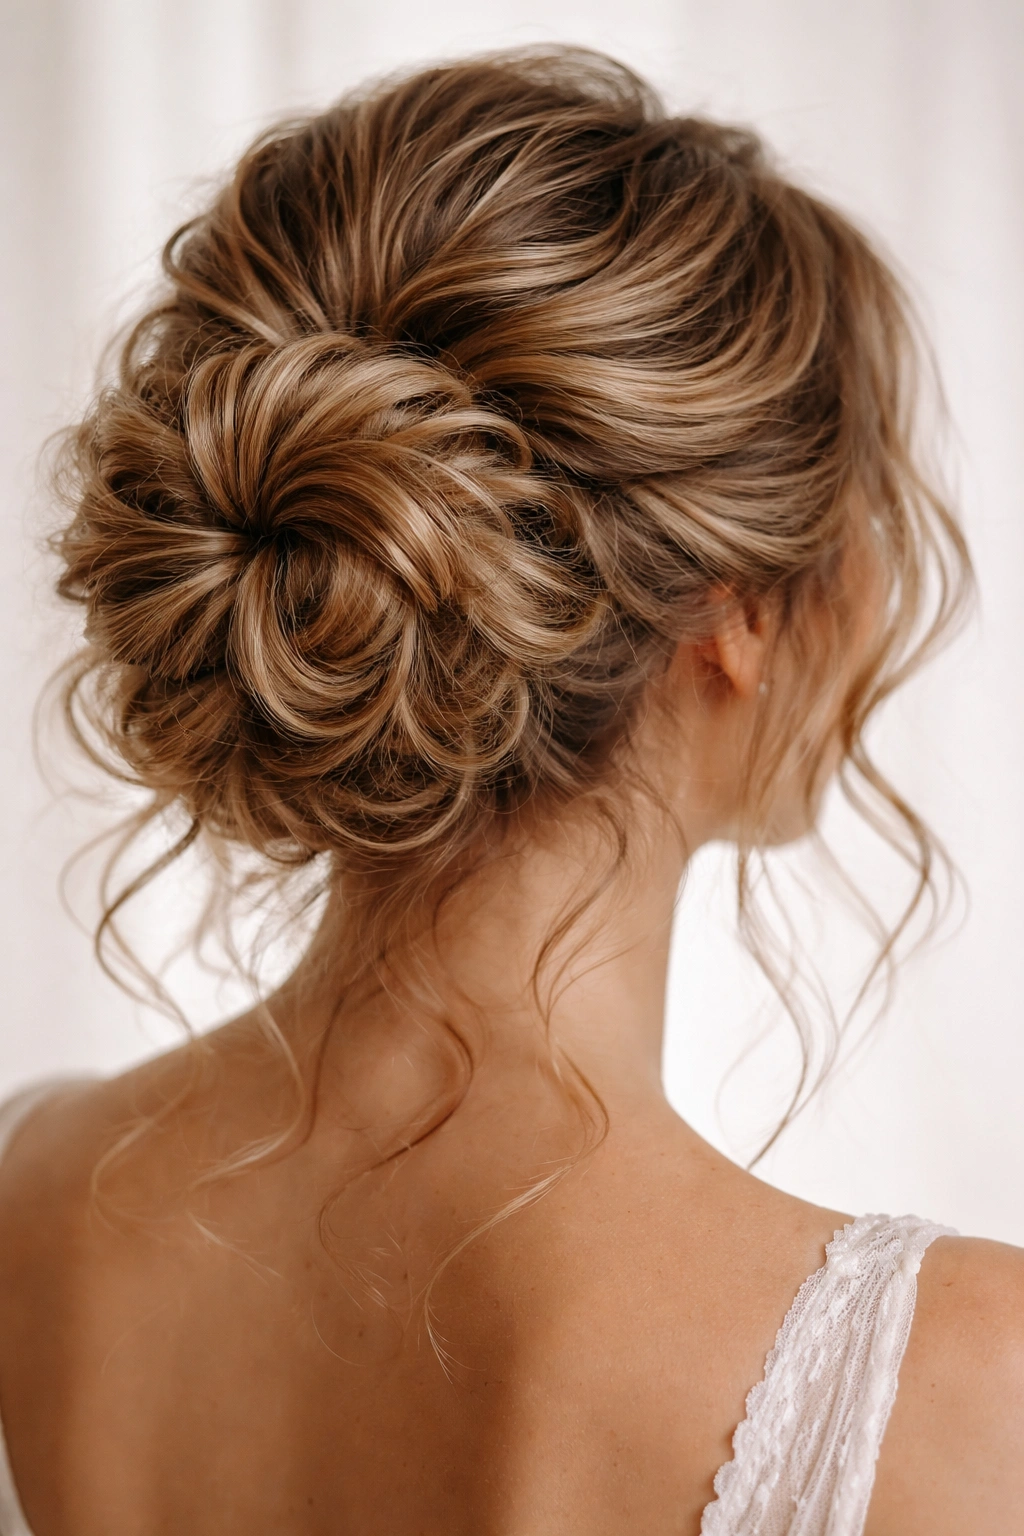
This style is pure romance—you’re creating a bun using twisted sections of curls that spiral around and into each other, forming a bun that’s complex and interesting without looking fussy or overdone. The twisted spiral method works beautifully with curly hair because each twist shows off your curl pattern, and the spiraling motion creates natural texture and dimension.
The Twisted Spiral Bun is ideal if you love a more detailed, intricate style but still want to maintain that messy, romantic aesthetic. It’s not as simple to create as some other styles, but it’s absolutely worth the extra five minutes—the result looks like you hired a professional stylist.
Creating the Twist Foundation
Begin with curls that are fully dry. Lightly mist your entire head with a curl refresher spray or light water mist, then apply a medium-hold curl cream or light gel. You want curls that are hydrated and defined but not so wet that they’re slippery to work with.
Create a horizontal parting across the back of your head, roughly from ear to ear, at about the height where you want your bun to sit. The hair above this line will form the bun; the hair below will stay down as a base and anchor point.
Divide the top section into 2-3 larger sections. Starting on one side, gently twist a section of curls between your fingers, following the natural spiral pattern of your curls. As you twist, you’re not smoothing your curls flat—you’re guiding them into a spiral while maintaining their texture and definition. The twist should feel loose and organic, like you’re braiding with your fingers rather than mechanically twisting.
Building the Bun Shape
As you complete each twist, wrap it around the base area you’ve designated for the bun, securing with bobby pins as you go. You’re not creating one tight coil; you’re layering twisted sections around and into each other, building a bun that’s substantial and full but still looks soft and undone.
Don’t aim for perfection here. The beauty of the twisted spiral method is that slight irregularities and texture showing through make it look more romantic and intentional, not sloppy. Stray curls and separated curl coils visible throughout the bun are features, not flaws.
Once you’ve wrapped and pinned all your twisted sections, step back and look at the overall shape. You should see interesting texture and dimension throughout the bun, with different angles and heights creating visual interest. If any section looks too flat or smooth, gently separate a few curls on that section to add back dimension.
Finishing Touches
Pull 2-3 soft, wispy pieces around your face and gently separate the curls. These should look delicate and intentional, not accidentally escaped. Use a light hairspray to hold everything in place—enough to keep your style secure through the night, but not so much that your curls feel stiff or crunchy.
A small hair accessory like a delicate clip, pearl pin, or small comb tucked into the back of the bun adds an extra touch of elegance without overwhelming the style. The accessory is visible but subtle—it’s an accent, not a decoration.
4. The Cascading Waterfall Bun
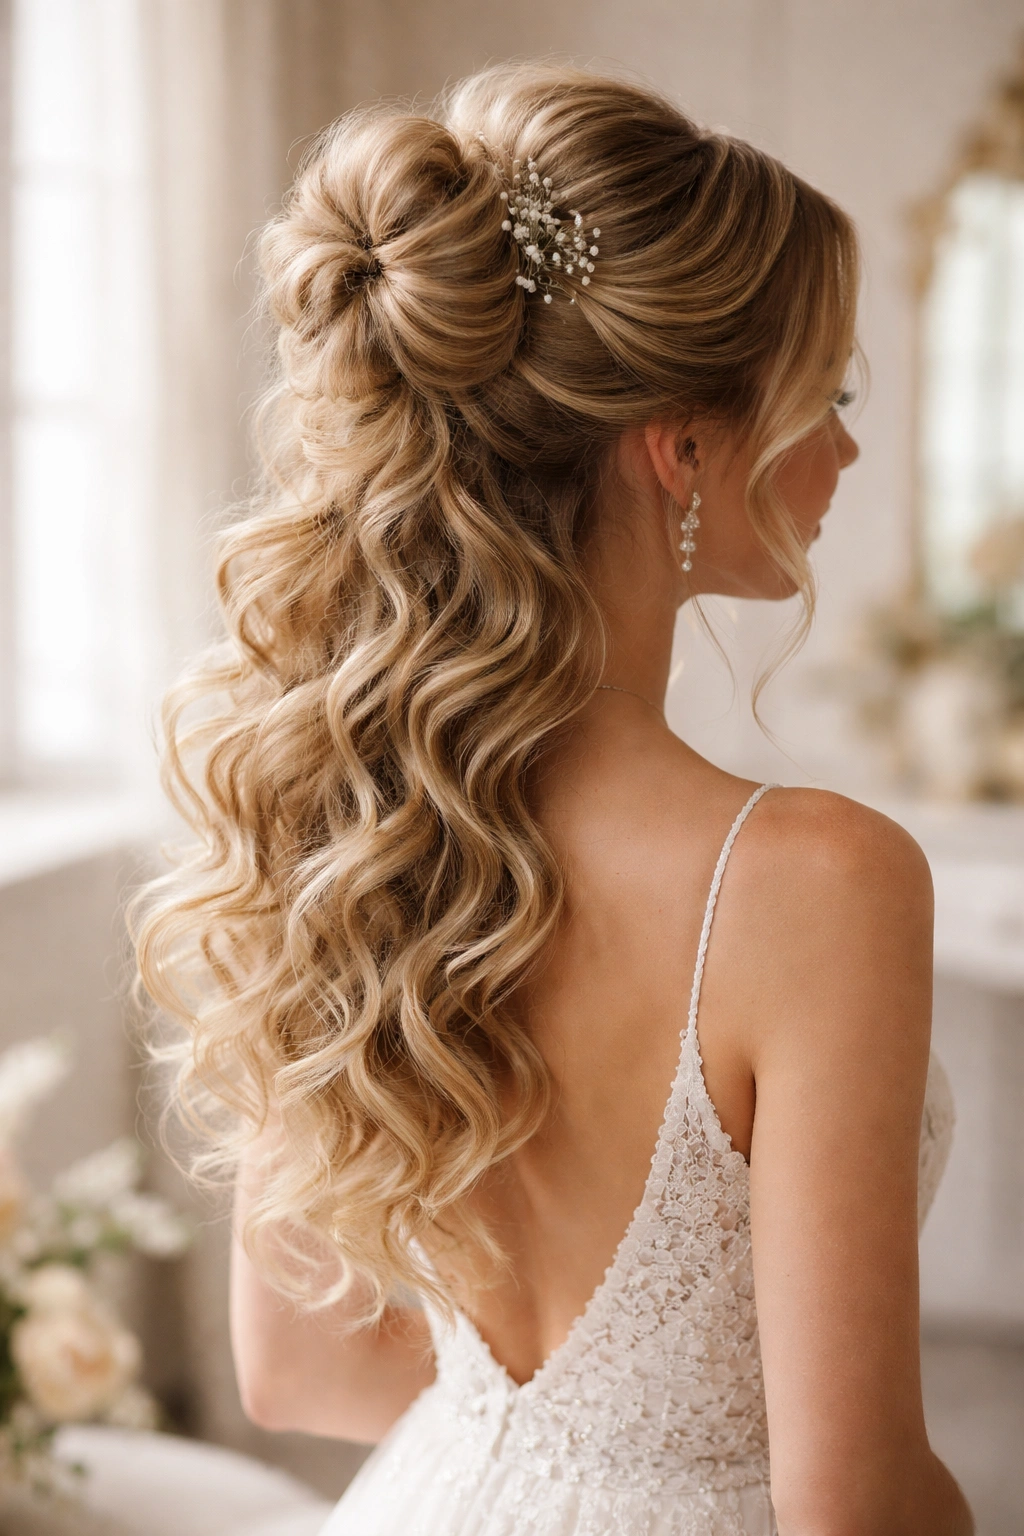
This style is essentially a hybrid between a bun and a style with down curls—you’re creating a bun shape while allowing sections of curl to flow down from it, creating a cascading, romantic effect. It’s perfect for weddings where you want some hair up and styled (to keep it off your neck and face during the ceremony) while maintaining the visual drama of wearing your curls down.
The Cascading Waterfall Bun is ideal if you have longer curls (shoulder-length or longer) and you want a style that looks special and wedding-appropriate from the front and side angles, but that also shows off your curl length. It’s essentially asking “why choose between wearing your hair up or down?” and answering “don’t.”
Creating the Bun Base
Start with curls that are dry or nearly dry, and refresh them with a light curl cream or gel applied to the mid-lengths and ends (not the roots, which will make everything too heavy at the base). You want curls that have bounce and body, especially at the ends where they’ll be visible flowing from the bun.
Gather a section of hair at the crown or high on your head—roughly the top third to half of your hair—and secure with an elastic. The section you’re gathering should sit high enough that there’s substantial curl length below it that can cascade down. Leave the lower section completely loose.
Create a basic bun with the gathered upper section by loosely looping it and securing with bobby pins. This bun will be the anchor point; it doesn’t have to be perfectly shaped or particularly neat because half of it will be covered by the cascading curls from below.
Building the Cascade
Here’s where the magic happens: take the loose curl section below the bun and create 2-3 large, loose braids or twists, working them from the sides of your head backward. These braids don’t need to be tight or neat; they should look soft and organic, with lots of curl texture visible throughout.
As you create each braid or twist, weave it into or wrap it around the base of your bun, securing with bobby pins so it looks like curls are flowing out of and around the bun. You’re aiming for a effect where curls seem to cascade from the bun down the back of your head and shoulders.
The loose ends of these braids or twists should hang freely, creating the cascading visual. Let your longest curls hang loose and separated so they’re clearly visible and attractive. The overall effect should be: intentional bun with romantic curls flowing from it, not “I put my hair up and forgot to finish the style.”
Adjusting for Movement and Comfort
Make sure the main bun feels secure and won’t slip out as the night goes on—you want the bun to hold while the cascading sections feel free to move. Test the security by gently tugging on your bun; it should feel stable. The cascading sections should move freely with you, flowing with your movements in a way that looks beautiful in photos and videos.
A light hairspray holds the bun section in place and keeps your face-framing pieces where you’ve positioned them, but avoid spraying the cascading sections too heavily—you want them to maintain their softness and movement throughout the night.
5. The Nested Knot Bun
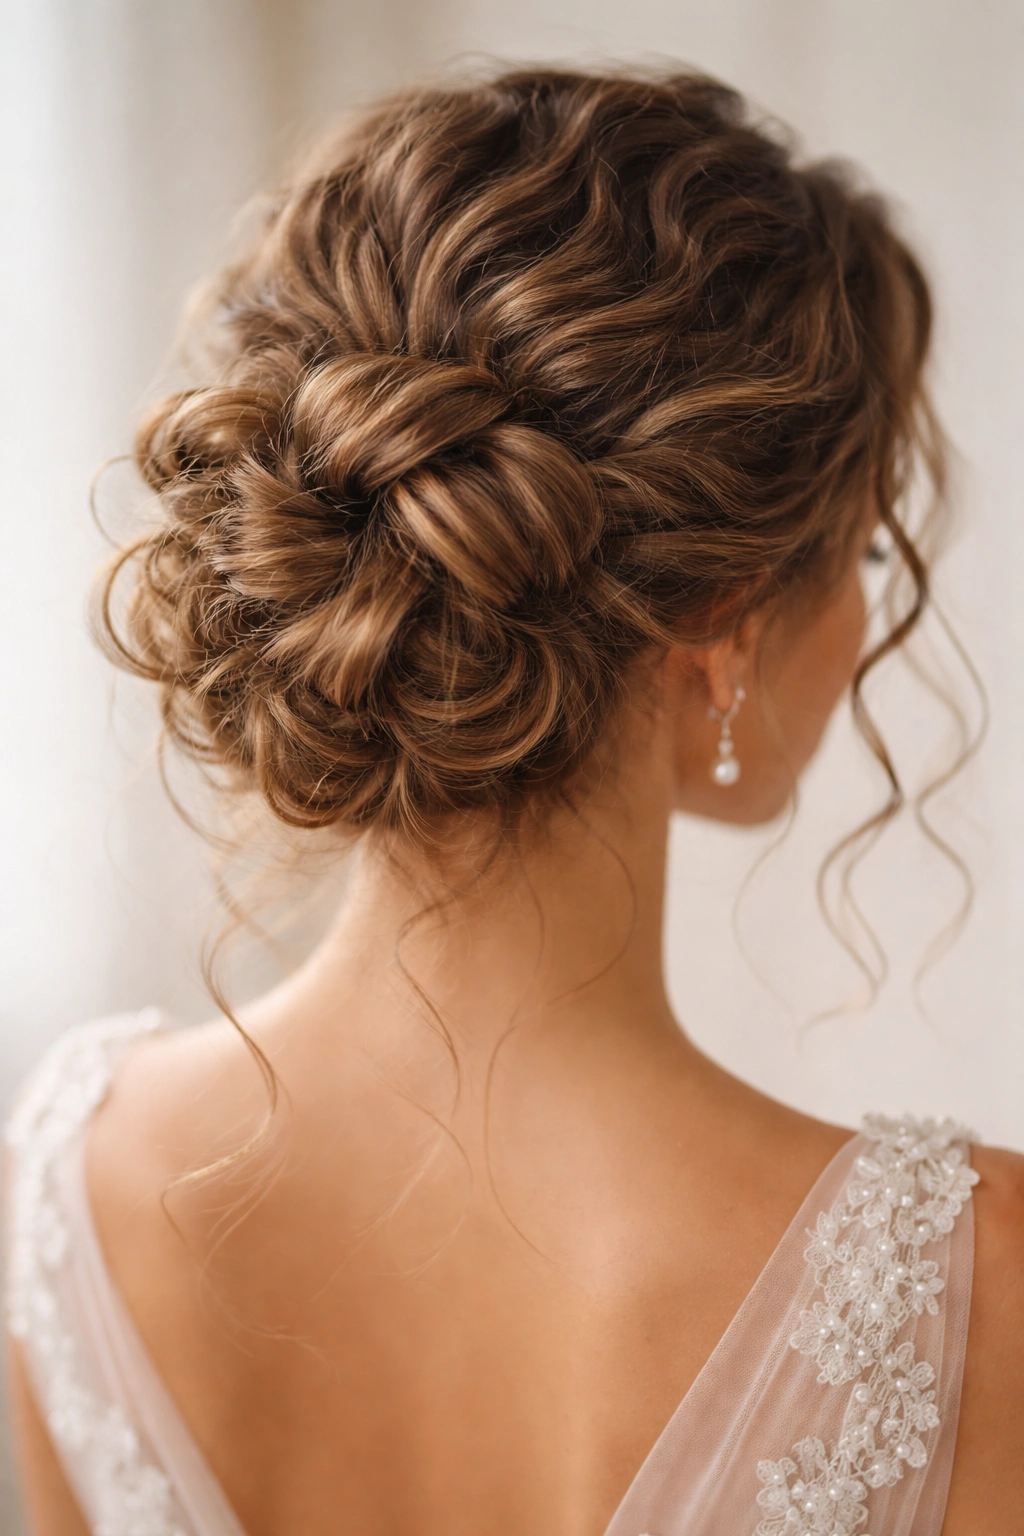
This style is sophisticated and genuinely interesting to look at—you’re creating a bun by tying your curls into a loose knot shape, letting the knot itself become the featured texture rather than smoothing everything into a traditional bun shape. It looks complex but is actually quite simple to execute, and it creates a bun that photographs beautifully from every angle.
The Nested Knot Bun works wonderfully if you have medium to thick density curls with spring and bounce. The method relies on your curls’ natural texture to create the interesting, knotted shape, so this style truly shows off what curly hair can do. It’s wedding-appropriate because it reads as intentional and special, while still maintaining that effortlessly beautiful messy aesthetic.
Tying the Knot
Start with fully dry curls that have been refreshed with a light curl cream. You want curls with enough definition and moisture that they hold shape but aren’t slippery or weighed down. Apply product through your mid-lengths and ends, concentrating on the areas you’ll be knotting.
Gather all your hair loosely at the nape of your neck or slightly higher, depending on whether you want a lower or higher placement for your bun. Secure loosely with an elastic—this is just a temporary gathering point, not the final style.
Now here’s the unique part: take the gathered hair section (still hanging below the elastic) and literally tie it into a loose knot, like you’re tying a piece of string. Don’t pull too tight; you want the knot to be loose and organic-looking. Once you’ve created the knot shape, position it so it sits against your head where you want the bun to be.
Securing and Shaping
Pin the knot in place with several bobby pins, working around the shape to hold it securely without pulling it too tight. The pins should be tucked into the knot itself, hidden by your curls. Step back and look at the overall shape—it should look like a defined knot rather than a traditional smooth bun.
Now gently adjust the knot to enhance its appearance. Pull a few curl sections out to add dimension and softness. Some curls might naturally spiral out from the knot; that’s beautiful and intentional-looking. Separate any sections that look too flat or compressed.
The beauty of this style is that slight irregularity is actually the whole point. You’re not aiming for a perfectly symmetrical, smooth bun—you’re aiming for a bun that looks like an actual knot of beautiful curls, which it is.
Adding Final Details
Pull 2-3 soft pieces around your face to create a romantic frame. These should look naturally loose, not artificially separated. A light hairspray holds everything in place without making curls stiff or crunchy.
A delicate hair stick, decorative clip, or small comb tucked through the knot adds elegance and helps secure it further. The accessory should feel like an intentional decoration, not a desperate attempt to hold a unstable style together.
6. The Side-Swept Romantic Bun
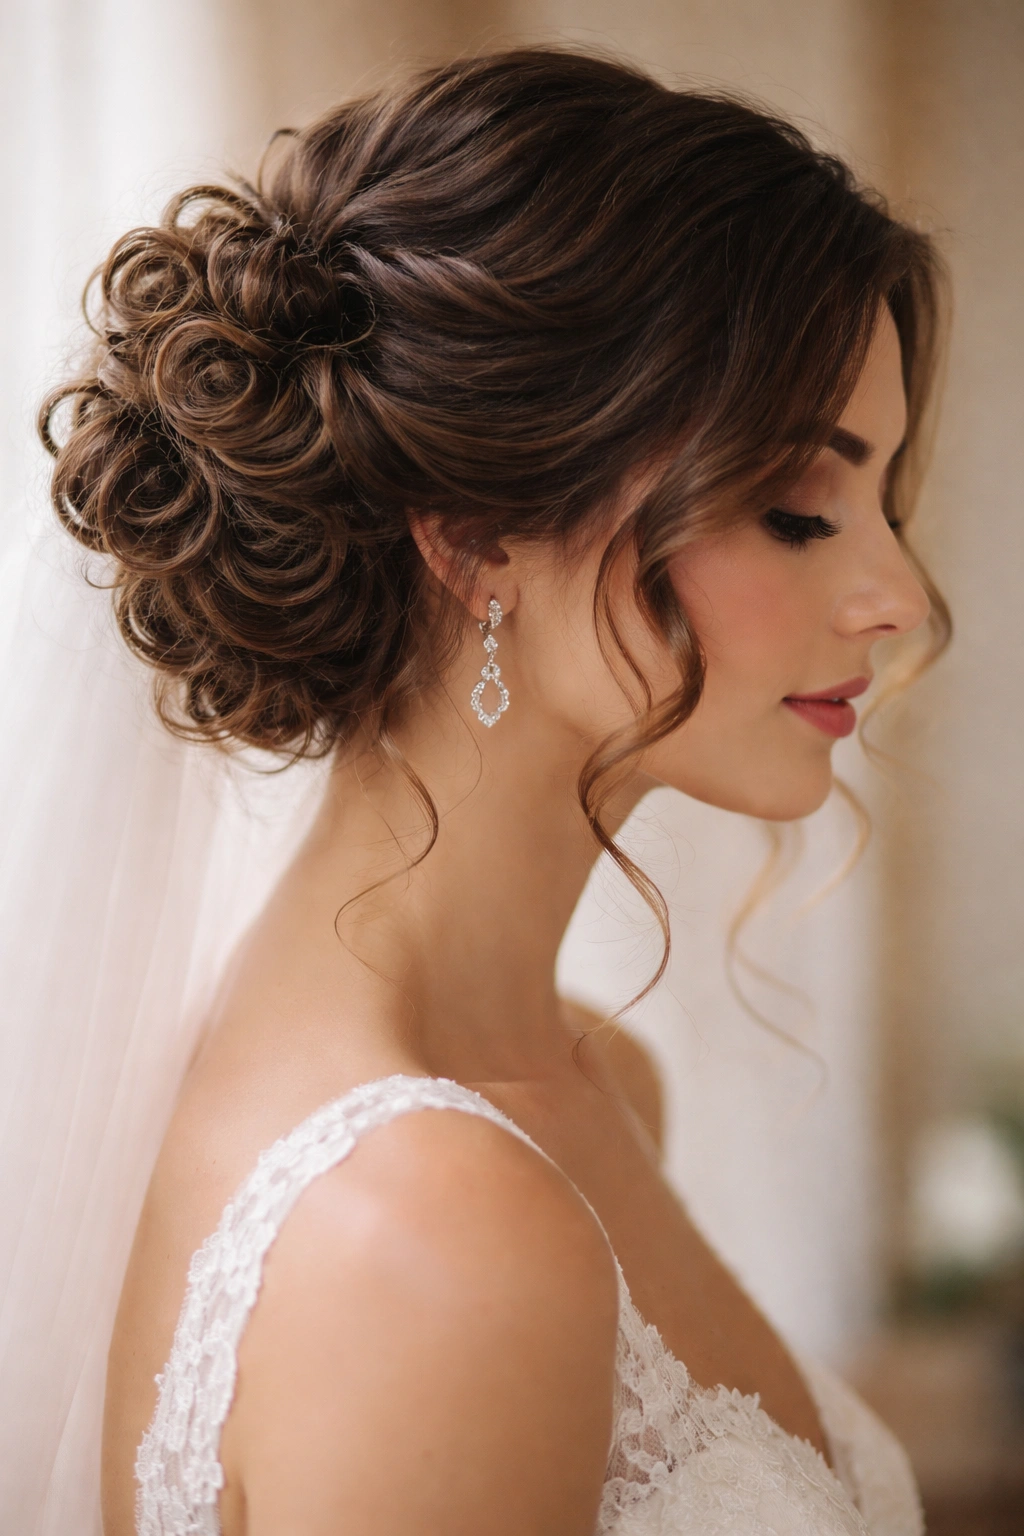
This style is inherently elegant—you’re sweeping all your hair to one side of your head and creating a bun there, which is naturally flattering to most face shapes and creates a beautiful asymmetrical look that photographs gorgeously. A side-swept bun is especially stunning in bridal portraits and photos from the side, and it works beautifully under a veil or with a hair accessory tucked into the side.
The Side-Swept Romantic Bun is ideal if you want a style that feels a bit more formal and intentional than a centered bun, while still maintaining softness and the visible curl texture you love. It’s a style that works with nearly every dress style and it’s especially gorgeous with sleek, off-the-shoulder wedding dresses or tops.
Creating the Sweep and Base
Start with fully dry, defined curls. Apply a light curl cream or defining product to refresh and hydrate your curls without making them slippery. You want curls that hold their shape but maintain their softness.
Flip your head to one side—let’s say your right side. Gently gather all your hair as if you’re sweeping it toward the right side of your head, roughly at the level of your right ear or slightly lower. The key is a gentle gathering, not a tight pull; you’re creating a soft sweep, not a severe side part.
Secure the gathered hair with an elastic positioned on the side where you’ve gathered everything. This is your anchor point. Leave a few inches of curl length hanging below the elastic to work with.
Building the Bun
Take the curl length below the elastic and gently create a loose loop, tucking it into and securing it against the side of your head where you’ve gathered your hair. This creates a bun that sits on the side rather than at the back or crown. The shape should be soft and organic, not tight or neat.
Secure with several bobby pins tucked into the bun shape, hiding them in your curls. The bun should feel stable but look soft and romantic.
Now for the magic: gently separate curls around the entire bun, especially along the side that faces the camera. You want every angle of the bun to show interesting texture and dimension. Pull a few loose curls around your face on the opposite side (the side of your head that’s now more exposed since you’ve swept everything to the other side).
Styling the Exposed Side
The beauty of a side-swept bun is that you’re creating balance between the full, substantial bun on one side and the soft, open feeling on the other side. Make sure the exposed side of your head looks intentional and beautiful—gently separate any curls there so they look soft and romantic, not slicked-back and severe.
Face-framing curls are especially important in this style. You want 2-3 soft pieces around your face to soften your features and create movement. These pieces should look like they naturally fell that way, not like you deliberately escaped them from the bun.
A light hairspray holds everything in position. Since you’ve swept all your hair to one side, you might feel like you need more product to hold it, but actually, your curls’ natural grip and weight usually hold a side-swept bun beautifully. Use restraint with product; you don’t want everything to feel cemented in place.
7. The Double-Twist Elevated Bun
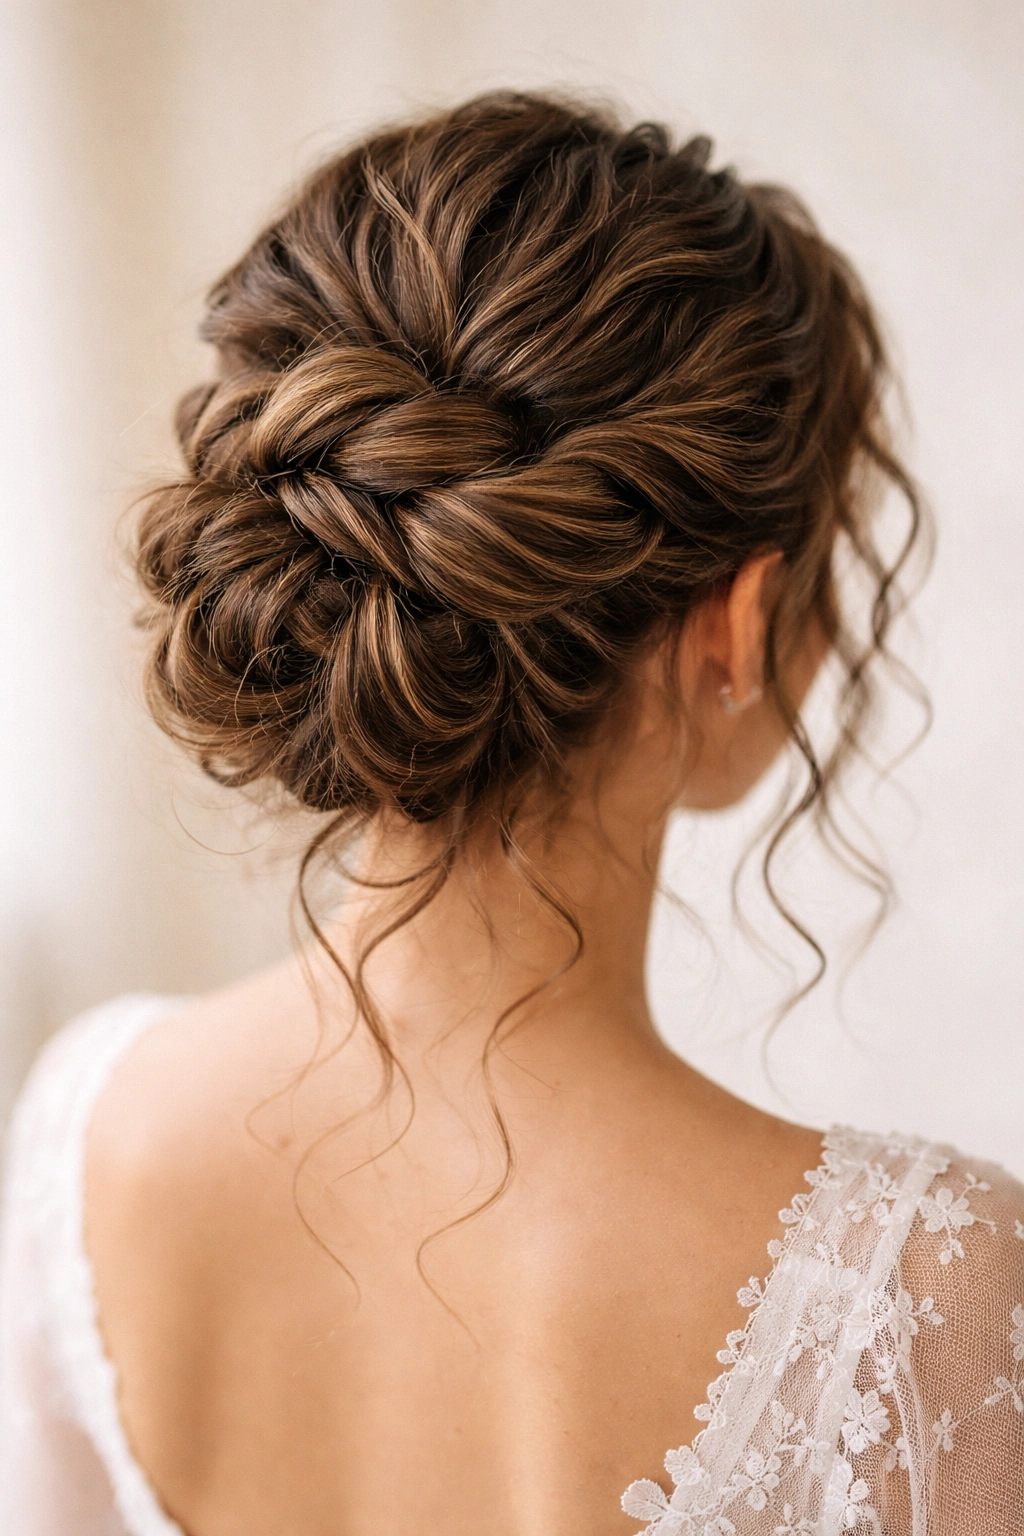
This style is all about elegant complexity—you’re creating a bun using two thick twists that coil around each other, creating a bun that’s visually interesting, substantial-looking, and absolutely wedding-appropriate. The double-twist method creates a bun that’s fuller and more defined than a single gathered bun, but still maintains that soft, romantic feel.
The Double-Twist Elevated Bun works beautifully if you have medium to thick density curls and you want a style that looks like you hired a professional hairstylist. It reads as intentional and special, while the visible twist texture keeps it from feeling too formal or austere. It’s the perfect balance for weddings where you want to look polished but not overly complicated.
Creating Your First Twist
Start with dry or nearly-dry curls and refresh them with a light curl cream or gel. You want curls that have definition and hold their shape, but that aren’t weighed down or overly stiff.
Divide your hair into two equal sections by making a vertical parting down the center back of your head. You’re going to create a twist with each section.
Take one section and gently twist it between your fingers, following the natural curl pattern. You’re not twisting tightly; you’re guiding your curls into a loose, organic spiral that maintains texture and definition. The twist should look like a piece of rope made of curls, not a smooth, slicked twist.
As you twist, work your way down toward the nape of your neck. Twist all the way to the ends.
Creating the Second Twist and Coiling Them Together
Repeat with the second section, creating a matching loose twist down to the ends. Now you have two thick twists hanging down the back of your head.
Cross these two twists together at the nape of your neck and begin coiling them around each other, wrapping them around each other to form a bun shape. Secure with several bobby pins as you coil, making sure everything feels stable.
The resulting bun should look like two thick, textured ropes of curls coiled around each other. It’s substantial, interesting to look at, and undeniably romantic.
Finishing and Refining
Gently separate some of the coils and curl sections throughout the bun so that lots of texture and individual curls are visible. You’re not trying to smooth or neaten the twists; you’re enhancing the texture that’s already there.
Pull a few soft face-framing pieces to create a romantic frame. Since this style is fairly substantial and structured, delicate face-framing pieces provide beautiful balance.
Use a medium-hold hairspray to set everything in place. The double-twist method is quite secure, so you don’t need heavy product—just enough to hold your style through the night and keep any flyaways smooth.
A delicate hair pin or decorative comb tucked into the bun adds a subtle finishing touch without overwhelming the style.
8. The Loose Coil Topknot
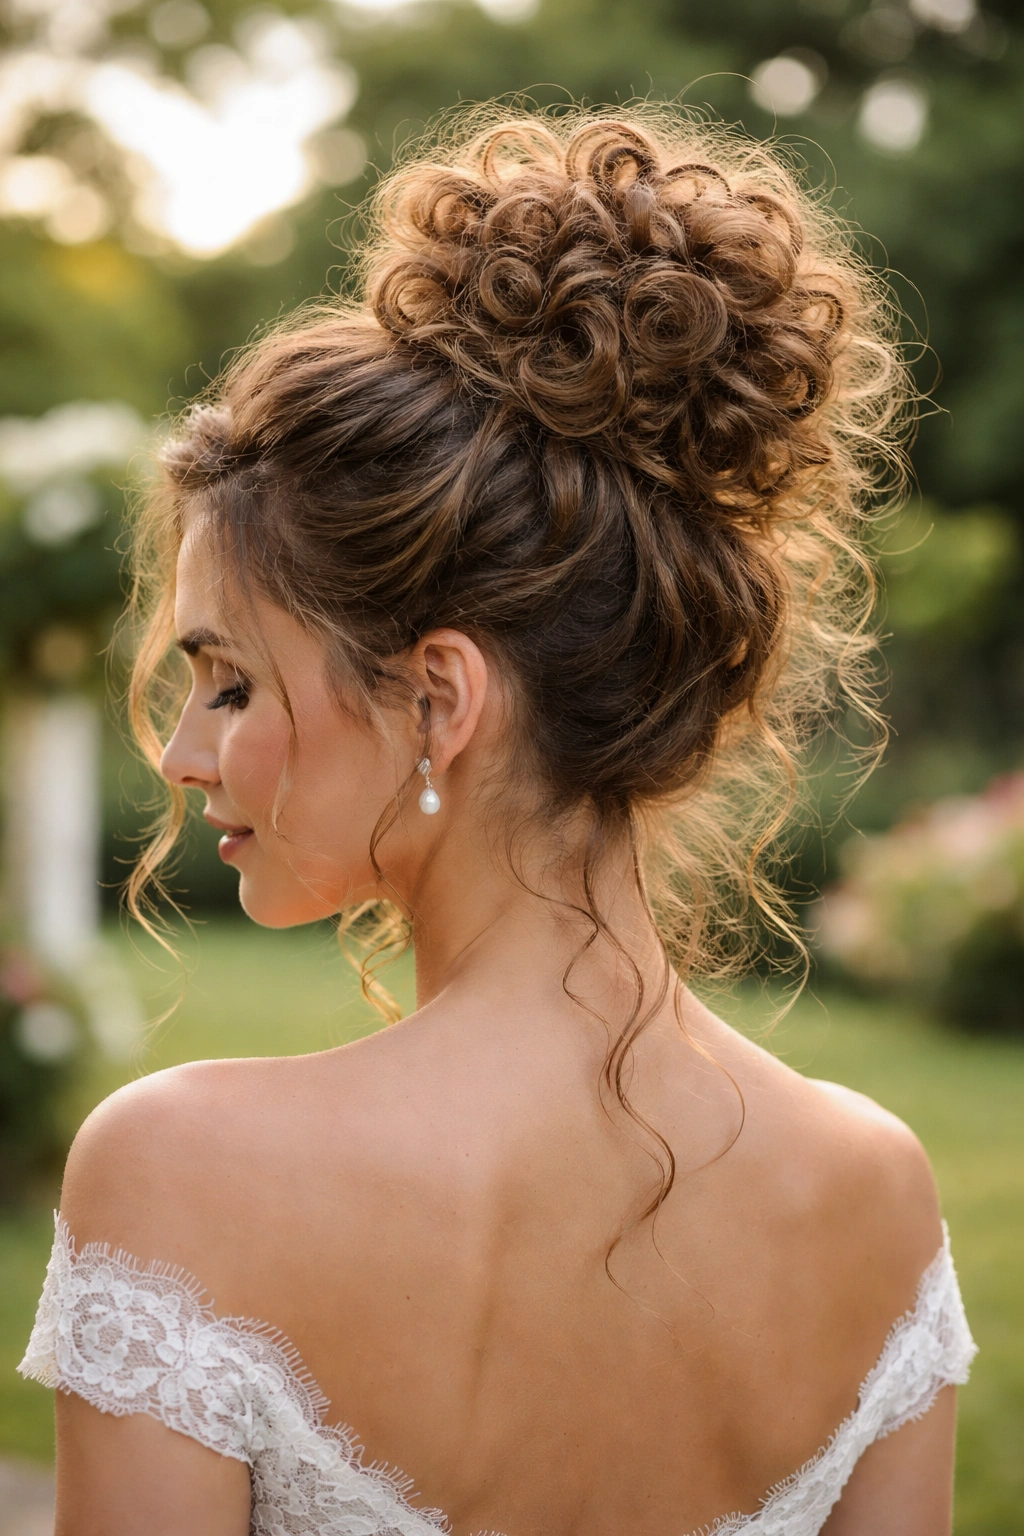
This style is the most modern and casually romantic of all the options—you’re gathering your hair high on top of your head and creating a bun using loose coils of curls that sit like a crown of texture. It’s less formal than some other styles, which makes it perfect for more relaxed, bohemian, or garden-style weddings, but the positioning and intentionality make it absolutely appropriate for any wedding setting.
The Loose Coil Topknot works wonderfully if you have defined curls or coils with bounce and spring. The style celebrates and showcases individual curl pattern, so the more distinct your coils or curls, the more stunning this look becomes. It’s ideal for anyone who loves their natural hair texture and wants it to be the star of the show.
Creating the High Gather
Start with dry, defined curls. Apply a lightweight curl cream or mousse to refresh definition without making curls heavy or weighed down. You want curls that bounce and spring when you move.
Flip your head upside down and gather all your hair at the crown of your head—right at the top, where a tiny human crown would sit. This positioning creates natural volume and lift. Secure with an elastic, still with your head flipped if possible (this maximizes volume).
Flip your head back up. You should see a substantial high ponytail. Leave a good amount of curl length below the elastic to work with—at least 4-6 inches, depending on your curl length.
Creating the Coil Bun
Take a section of the ponytail below the elastic and gently coil it around your finger or a round brush to create a spiral. Don’t coil tightly; you’re letting the curls form their natural coil while you guide them into position. Once you’ve created a coil, secure it to the base with a bobby pin.
Repeat with another section of the ponytail, creating a second coil and securing it. Continue until all the ponytail hair has been coiled into a bun-shaped cluster.
Your finished bun should look like a collection of loose, textured coils clustered together at the crown of your head. It’s not a tight, neat bun—it’s a bouncy, textured crown of curls.
Styling for Maximum Impact
The key to making this style look wedding-appropriate rather than just “hair piled on top of the head” is intentional styling. Gently separate individual curls and coils throughout the bun so that lots of texture is visible. Some curls might naturally spiral out and down; that’s beautiful and intentional.
Pull 2-3 soft, wispy pieces around your face. With a high topknot style, these face-framing pieces are especially important for balance and softness. They should look delicate and romantic.
A light hairspray holds everything in place, but use restraint—this style should feel bouncy and alive, not cemented. A thin, decorative hair stick or small comb tucked through the bun feels elegant and helps secure everything further.
The Loose Coil Topknot looks especially beautiful when you can see movement—hair that slightly bounces or shifts as you move, that catches light at different angles, that looks alive and full of texture. Avoid heavy product that makes everything stiff.
Essential Tips for Long-Lasting Curly Wedding Buns
The difference between a bun that looks gorgeous all evening and one that’s fallen apart by the reception is often just a few key technique adjustments. The most important factor is using the right amount of product—not too much that your curls feel stiff or crunchy, but enough that you’re enhancing definition and hold without sacrificing softness.
Start with curls that are in ideal condition: hydrated, defined, and at the right moisture level for styling (about 75% dry, still slightly cool to the touch). Curls that start in poor condition will never perform well, no matter how good your technique is. Invest in a good leave-in conditioner and curl cream that you can apply the night before to set yourself up for success.
Pin Placement and Technique
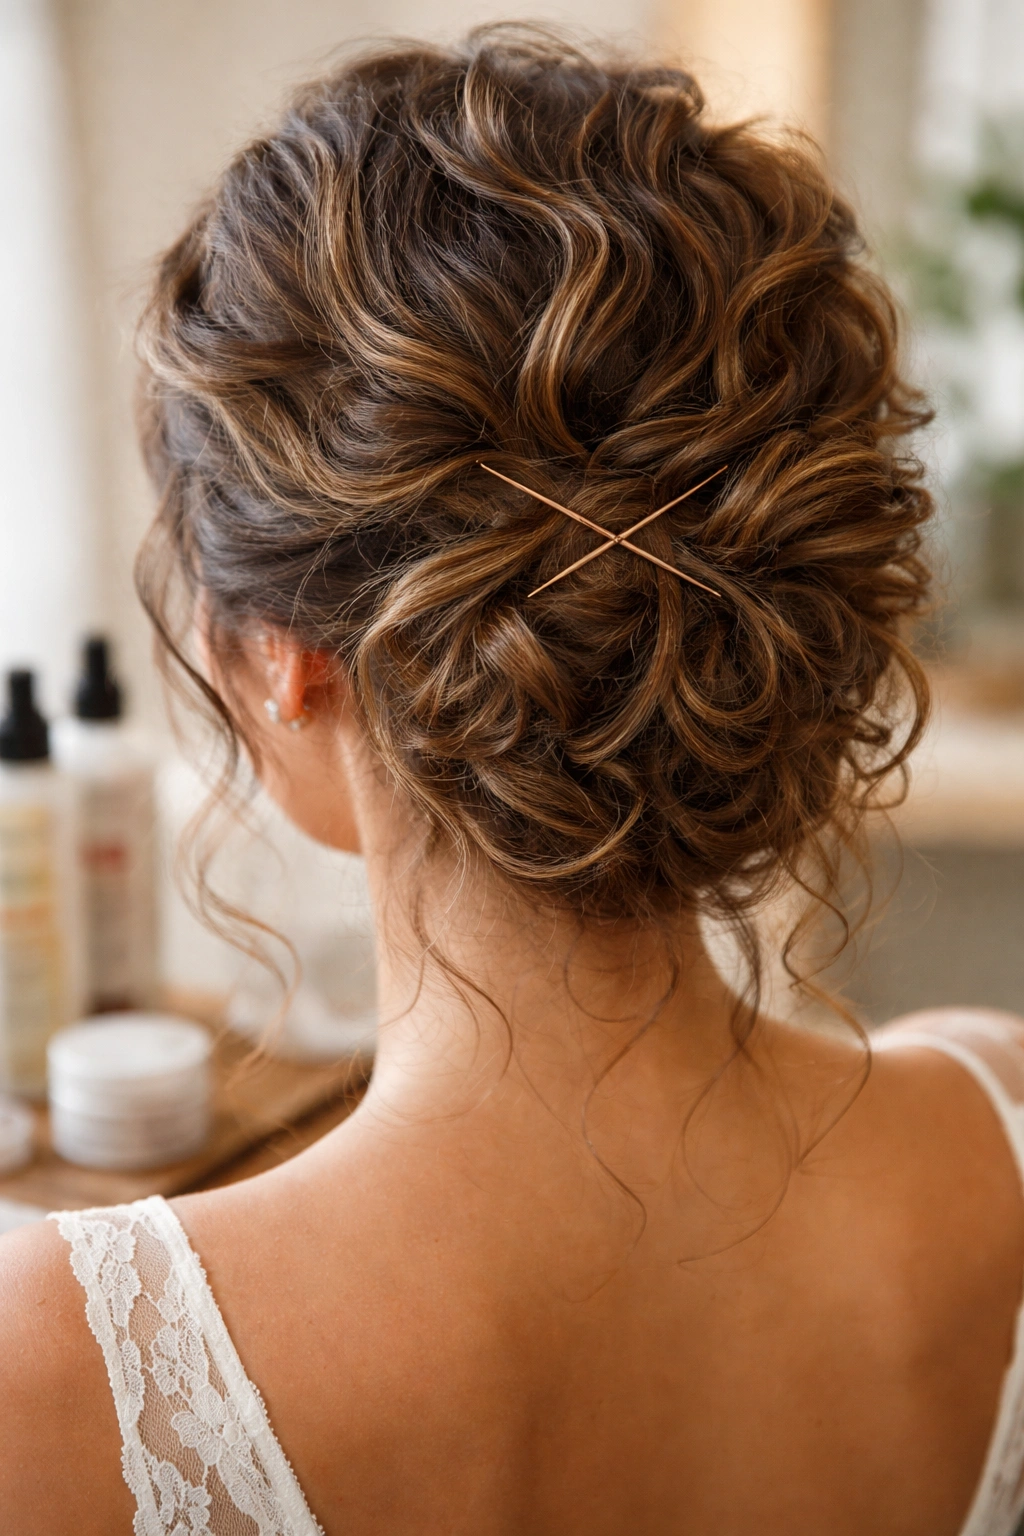
The way you place bobby pins makes an enormous difference in how secure your bun feels and how well it holds throughout the night. Never put pins in a straight line; instead, crisscross them through the bun in an X pattern. This distributes weight and tension more evenly than a line of pins, making your bun far more stable.
Use bobby pins that match your hair color—dark pins in dark hair, light pins in light hair. It’s not about hiding the pins; it’s about them looking intentional rather than obviously corrective. Embrace the visible pins as part of the style.
Insert pins horizontally rather than vertically. Horizontal pins grip better and hold weight more effectively than vertical pins. Twist pins as you insert them into your hair (rather than straight in) to help them grip and lock in place.
Managing Frizz Without Overdoing It
Frizz is inevitable with curly hair, especially throughout an entire wedding day and evening. Rather than trying to prevent all frizz (impossible), focus on managing it so it looks intentional and romantic rather than unkempt.
Use a very light hairspray—a flexible hold, not a heavy one. Spray your finished style from about 8-10 inches away, using light, feathering motions rather than heavily misting one spot. You want the finest possible mist, not a heavy coating that makes your curls feel stiff or look wet.
A tiny bit of smoothing serum or frizz cream applied to just the top layer of your bun (never worked through the whole thing) helps tame flyaways without making your style look slicked-down or unnatural. Apply it with a tiny comb or your fingertip, smoothing it very lightly over just the surface.
Preparing Your Curls the Night Before
The night before the wedding, refresh your curls with a generous spray of water and a leave-in conditioner or curl cream. Let them air-dry into their natural pattern or diffuse them with a blow dryer. This gives you a foundation of bouncy, well-hydrated curls.
Avoid sleeping on your styled curls; you’ll crush them and create weird bends. Either pineapple your hair (gather it loosely on top of your head in a soft scrunchie or clip) or sleep on a silk or satin pillowcase to minimize friction and frizz.
The morning of the wedding, don’t wash your hair. Instead, refresh your curls by lightly misting them with water and applying a curl cream or light gel. Your curls will re-set into a beautiful pattern without the shock and effort that comes from shampooing and re-drying.
Adjustments Throughout the Night
Your bun will naturally relax and shift throughout the evening—this is actually beautiful and part of the charm of a curly messy bun. As your bun loosens, the style becomes softer and more romantic. Don’t be afraid of this; embrace it as part of the style’s evolution.
If you notice sections that have gotten too compressed or flattened, gently separate the curls there to restore dimension. You’re not re-doing the style, just making tiny adjustments that take 30 seconds.
If you’re concerned about your bun slipping or loosening too much, you can add one or two more bobby pins to reinforce the base—do this in the bathroom where you can see what you’re doing, and take your time so you’re not creating visible dents or disruptions in the style.
Products and Tools That Work Best
Not all haircare products are created equal when it comes to wedding styling, and having the right tools makes the job infinitely easier. The best products for curly wedding buns are those that define and enhance curl pattern without making curls stiff, crunchy, or overly heavy.
Leave-In Conditioners and Curl Creams
A good leave-in conditioner is the foundation of a beautiful curly bun. Apply it the night before and the morning of to hydrate and define your curls. Look for lightweight formulas that enhance curl definition without weighing curls down or making them feel greasy.
Curl creams are applied to damp or wet curls to define and enhance pattern. For wedding styling, you want a curl cream that’s not too heavy—you need your curls to have body and bounce, not to feel weighed down at the crown. Apply to mid-lengths and ends, avoiding the roots.
A light gel or mousse can be applied after curl cream to add extra definition and hold. Again, lightweight is key. You’re not going for crunchy hold; you’re enhancing definition while maintaining softness.
Hairspray Considerations
For curly hair, flexible-hold hairspray is your friend. Heavy-hold hairspray makes curls feel stiff and look unnatural. A flexible or medium hold gives you staying power without the crunch.
Apply hairspray in light, feathering motions from 8-10 inches away. You’re not trying to coat your hair; you’re giving it a light mist that will help hold curl shape and tame flyaways. Multiple light applications are better than one heavy application.
Avoid aerosol hairsprays if possible—they tend to make curly hair feel stiff and look flaky. Pump sprays or mist bottles give you better control and more natural-looking results.
Tools You’ll Actually Use
A wide-tooth comb or paddle brush is essential for detangling curly hair without disrupting curl pattern. Use it on damp hair before styling, and avoid combing through your curls once they’re dry and in your style.
Bobby pins in your hair color are non-negotiable. You want at least a box of 50 for a wedding bun—you’ll need more than you think, and some will inevitably disappear or become lost in your hair.
A hair elastic (preferably a silk or satin scrunchie rather than a rubber elastic) is gentler on curls. You might use this for gathering your hair before creating the bun, or for the initial ponytail gather.
Optional tools that some stylists swear by: a velcro brush or round brush (useful for smoothing frizz or creating coils), a fine-tooth comb (for separating coils and creating detail), or a hair stick (for securing buns or adding an elegant finishing touch).
Final Thoughts
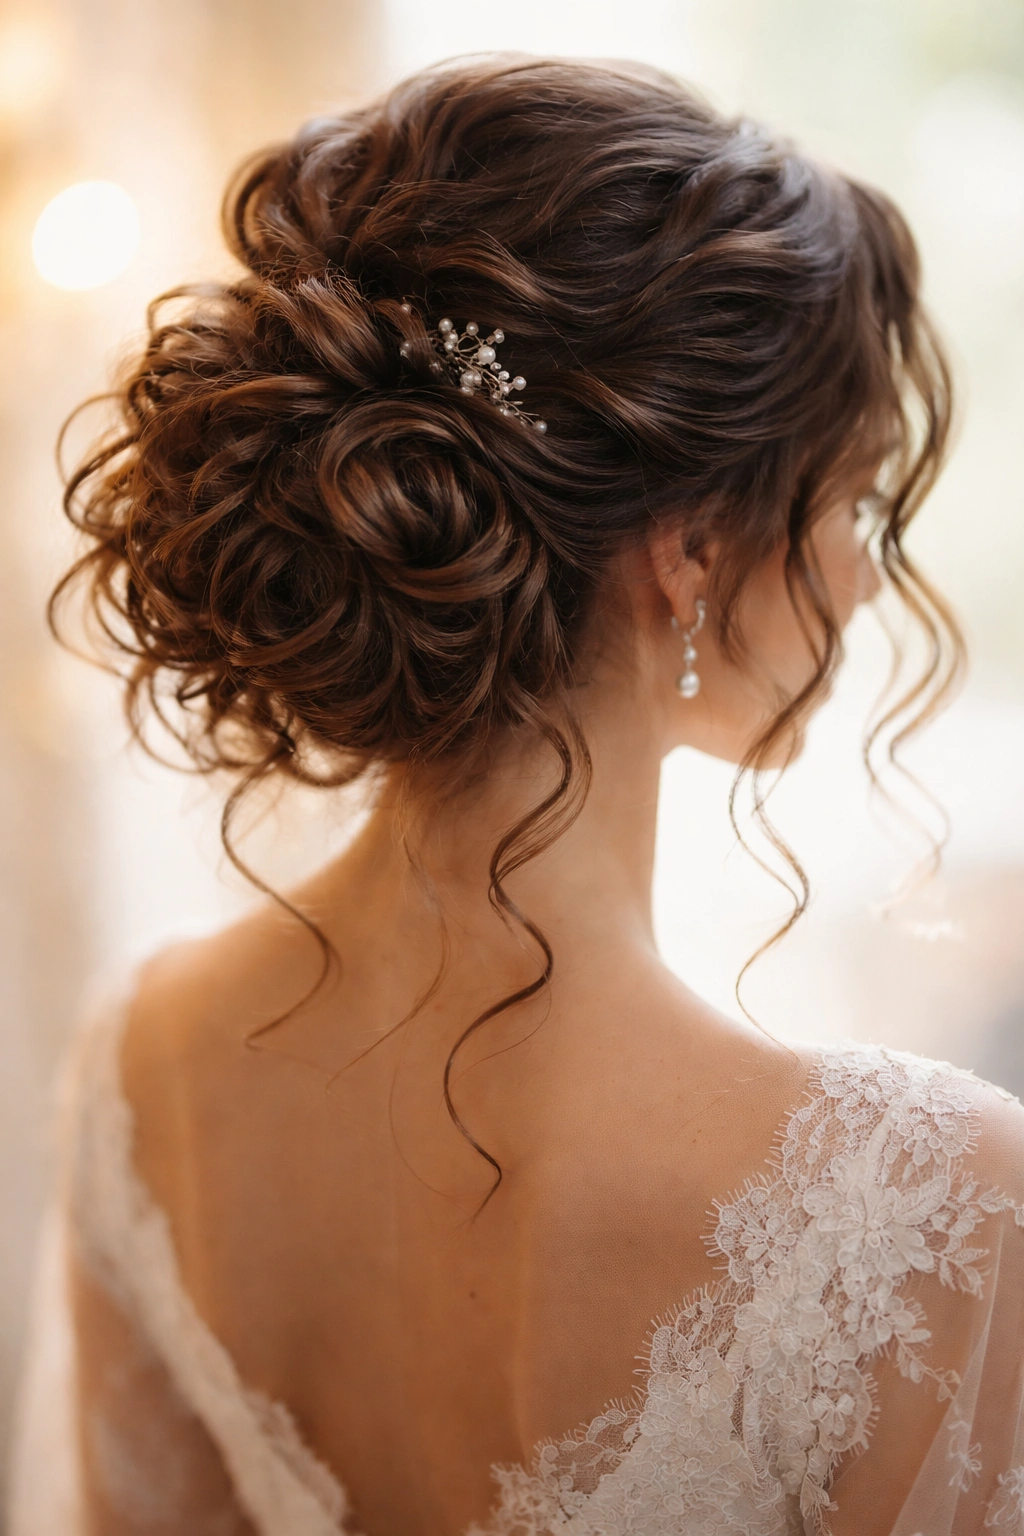
A curly messy bun for a wedding is genuinely one of the most forgiving and flattering hairstyles you can choose. Your curls do most of the work for you—creating texture, dimension, and movement that straight hair has to labor to achieve. Once you understand the basics of enhancing definition, securing strategically, and embracing softness over perfection, you can create a style that looks absolutely professional and genuinely beautiful.
The key is starting with healthy, hydrated curls and approaching the style with a mindset of enhancing rather than fighting your natural texture. Every style here is designed to work with your curl pattern, not against it. Your curls are the feature, not something to hide or smooth away.
Pick the style that resonates with your aesthetic and dress style—whether that’s the romantic texture of the Textured Loop, the sophisticated complexity of the Double-Twist, or the modern casual elegance of the Loose Coil Topknot. With good product, thoughtful pin placement, and a willingness to let your style relax and soften throughout the night, you’ll have a bun that looks stunning in photos, feels secure enough to live in comfortably, and actually improves as the evening goes on.
Your curls are beautiful. Let them shine on your wedding day—or on any special day where you want to feel genuinely gorgeous from head to toe.
