



A half-up messy bun sits right at that sweet spot between “I tried” and “I didn’t really try”—the kind of style you can throw together in under five minutes that somehow looks intentionally effortless. What makes this particular look so powerful is its versatility: it works on freshly washed hair or day-three texture, flatters almost every face shape, and transitions seamlessly from a casual weekend morning to an evening out with friends. Whether you’re working with pixie-length layers, shoulder-length hair, or hair that reaches your mid-back, the half-up messy bun can be adapted to work beautifully for your specific length.
The beauty of mastering different half-up bun variations is that you’re essentially learning to create multiple distinct styles from a single foundational technique. You’re not limited to one rigid approach—instead, you can play with placement, texture, detail work, and finish depending on your mood, your hair’s current state, and where you’re headed. A twisted version feels more polished than a chaotic tousled one. A braided component adds visual interest and hold. A side-swept placement looks more contemporary than a centered approach. The core mechanic stays the same, but the personality of the style shifts dramatically based on these small adjustments.
The fact that these styles work across all hair lengths is genuinely game-changing. Someone with fine, shoulder-length hair might approach a half-up bun differently than someone with thick hair past their shoulders, but both can absolutely nail the look with the right technique tweaks. Shorter hair benefits from a lower placement and more secure anchoring. Longer hair gives you more room to play with volume and texture. Curly hair holds shape naturally and creates that “messy” aesthetic with minimal effort. Straight hair might need a bit more intentional texture-building to avoid looking limp. The gorgeous thing is that none of these variations are wrong—they’re just different interpretations of the same core idea.
1. The Classic Half-Up Messy Bun
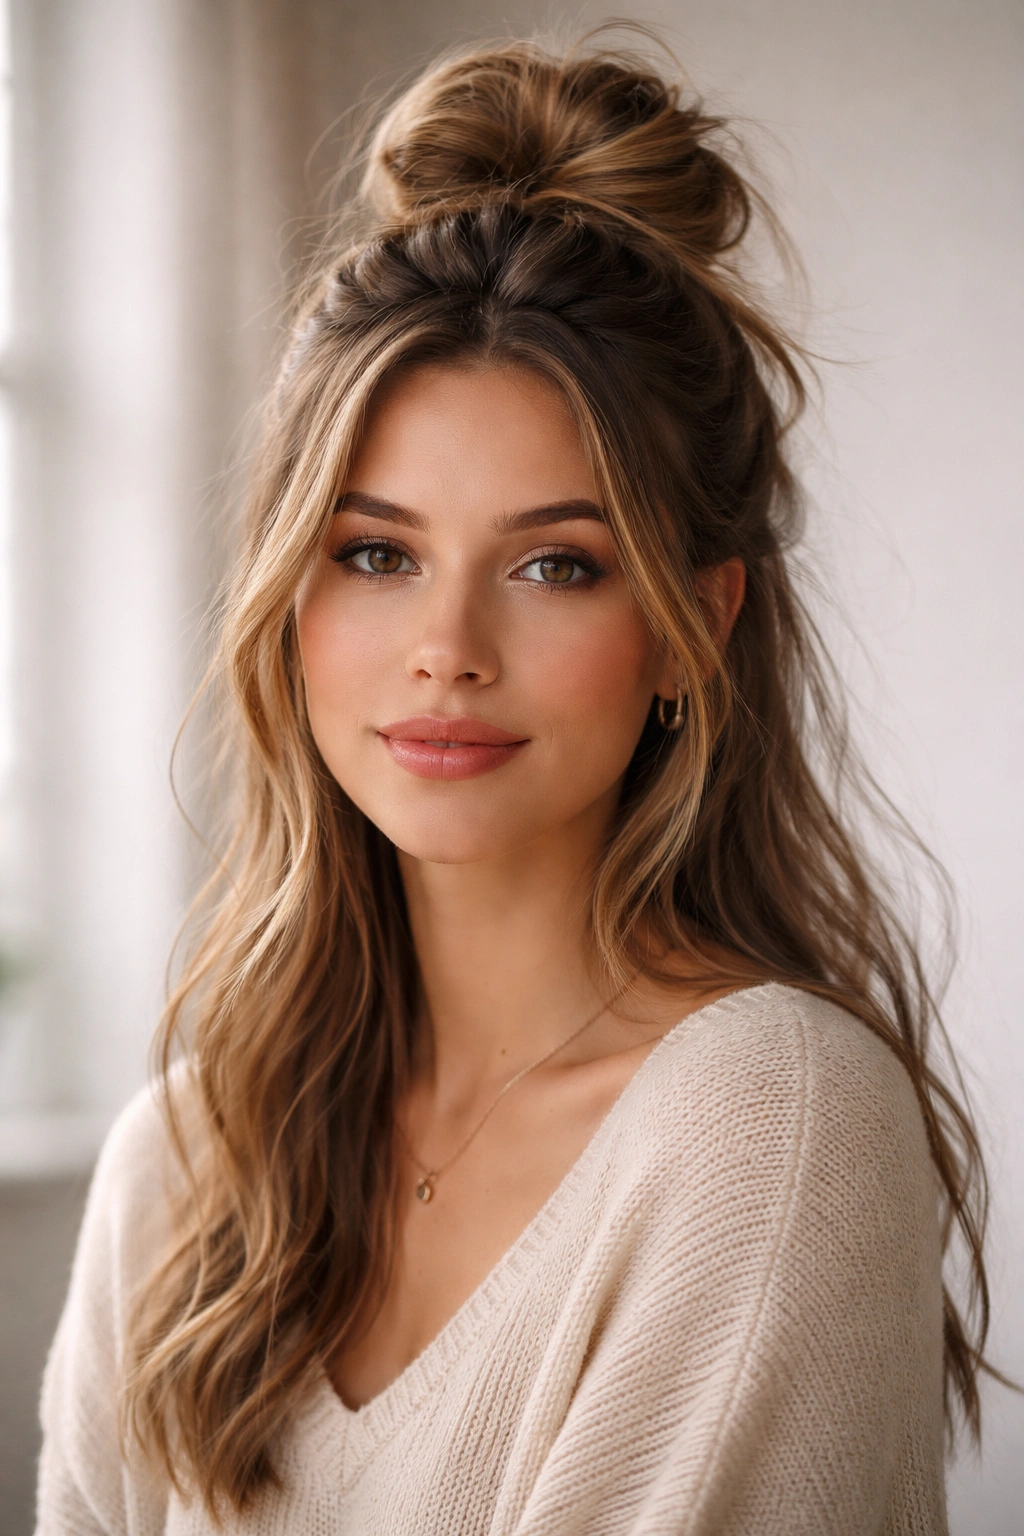
This is the foundation that launched a thousand imitators, and for good reason—it’s genuinely simple to execute once you understand the mechanics. You’re essentially taking the top half of your hair, gathering it loosely at the crown or slightly back from your hairline, securing it with an elastic, and then gently pulling apart the bun to create that intentional messiness. The key is in the looseness of the gathering and the deliberate undoing that happens after you’ve secured the elastic.
How to Create This Timeless Look
Brush or comb through your hair gently, starting at the ends and working your way up to avoid unnecessary breakage. If your hair is freshly washed and smooth, lightly mist it with a texturizing spray or a bit of dry shampoo to give it grip and prevent slipping throughout the day. Using your fingers (not a comb—fingers give you better control and a more organic result), separate the top half of your hair by creating an imaginary line from temple to temple, crossing over the crown. Gather this top section loosely at the back of your head, about two inches above where your natural crown sits.
Secure this gathered section with a small elastic band, but here’s the critical part: only make it snug enough to hold; don’t pull aggressively tight. Take the tail of hair (the part that wasn’t caught in the elastic) and wrap it loosely around the base of your ponytail, creating the “bun” shape. Secure this wrapped section with bobby pins inserted at the base, aiming for at least three pins for secure hold without visible hardware. Now comes the styling magic: gently pull small sections of the bun outward and slightly upward in different directions, creating a deliberately unstructured silhouette. Tease individual strands slightly to add texture and prevent the look from appearing too neat.
What Makes It So Versatile
This style works equally well on second-day hair with natural texture as it does on freshly washed and blow-dried hair. On shorter hair (shoulder-length or just past), you might wrap the elastic lower and use smaller bobby pins for better proportion. On longer hair, you have more hair to work with in the gathering phase, which actually makes this style easier to create because you have more volume to play with. The messy factor also becomes your friend—imperfections aren’t mistakes, they’re part of the design.
Pro tip: If your bun feels like it’s slipping or losing structure throughout the day, consider securing it with a small claw clip over the elastic as an extra anchor point.
2. The Twisted Half-Up Bun
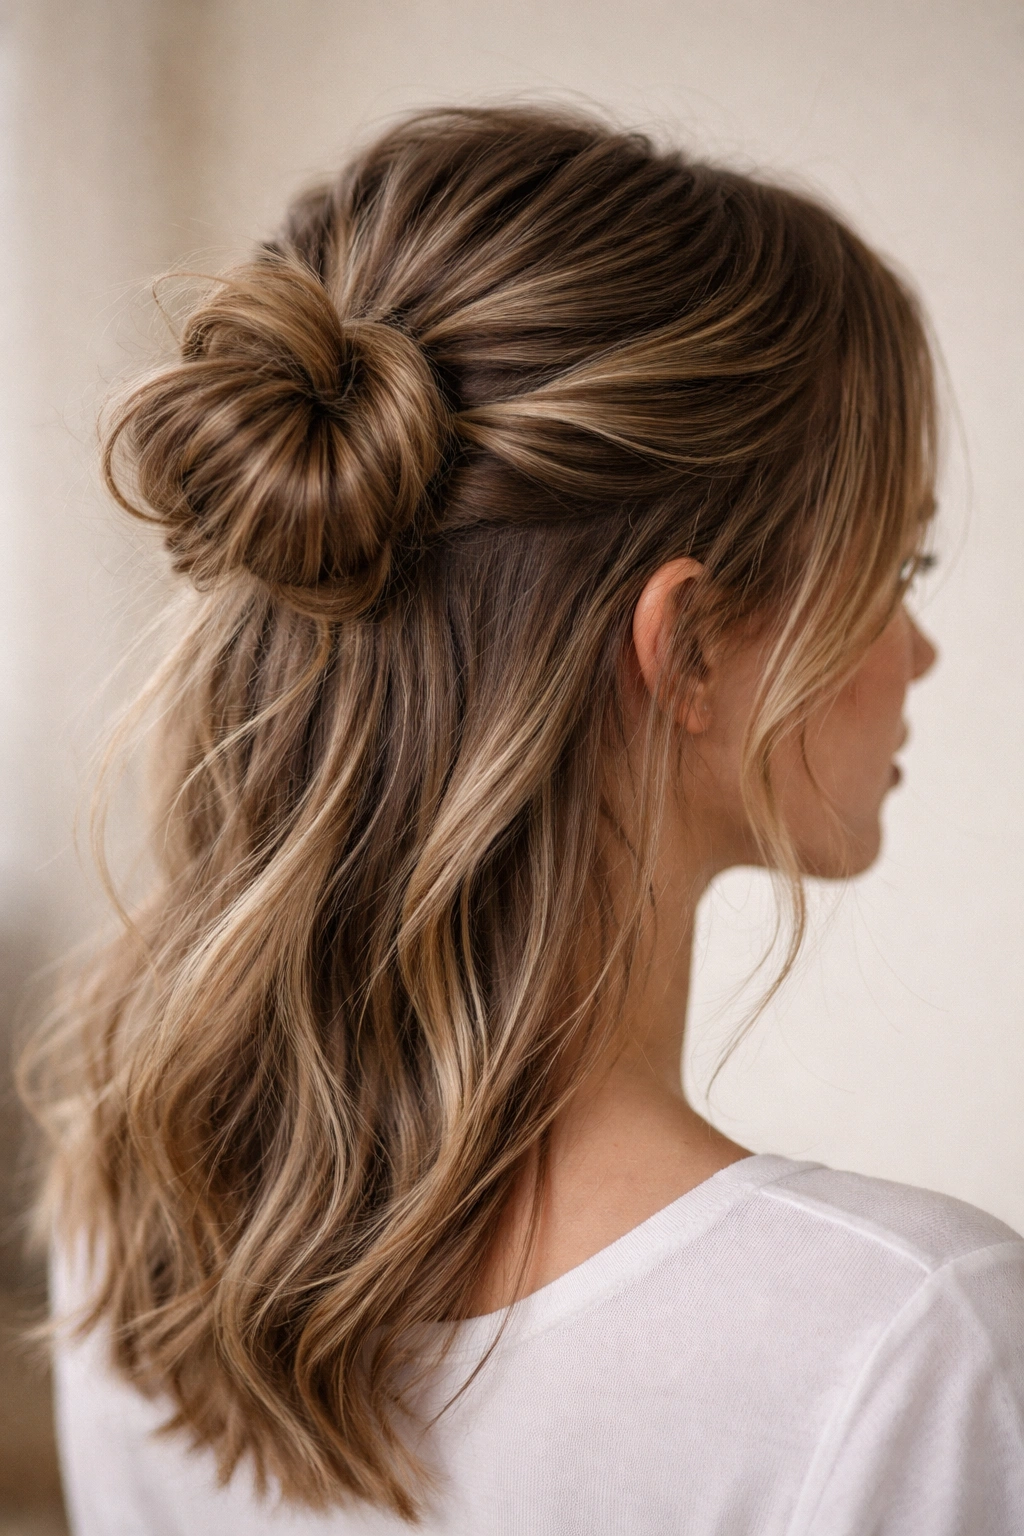
Add an extra dimension of sophistication by incorporating a twist (or two) before you form your bun. This variation transforms the casual vibe into something with slightly more intentional styling, making it work beautifully for environments where you want to look polished without appearing overly formal. The twist creates a visual anchor that draws the eye and adds architectural interest to an otherwise simple style.
The Twist Element That Changes Everything
Start by parting your hair down the middle or creating a slight side part, depending on what flatters your face shape. From one side of your part, take a two-inch-wide section of hair at your temple and begin twisting it loosely in the direction away from your face. As you twist, you’ll naturally be moving backward toward the crown. Keep twisting until you reach approximately where the crown of your head peaks, then secure this twist temporarily with a bobby pin. Repeat on the opposite side—take a two-inch section from the other temple and twist it in the same direction, meeting it with your first twist.
Once both twists have met at the crown, release the temporary bobby pins and gather both twisted sections together along with the remaining top-half hair. This gathered section becomes your half-up section, which you’ll secure with an elastic. The twisted components are now permanently part of your gather. Take the tail and wrap it around the elastic base as you would with any bun, then pull everything apart slightly to create that soft, undone texture. The twists act as a framework—they prevent the style from looking completely chaotic while still maintaining that effortlessly tousled aesthetic.
The Visual Payoff and Hold Factor
Twists provide two major benefits that straight gathers don’t: they look intentional (signaling that you put effort into this style), and they actually hold better because the twisted texture locks the hair in place more securely than a simple gather would. This means your style is more likely to maintain its structure throughout the day, especially if you have fine or slippery hair texture. The twist also naturally creates some texture as it cools, so if you twisted while your hair was slightly damp, you’re building lasting hold into the structure itself.
Quick facts about twisted half-ups:
- Works beautifully on all hair lengths, with twisted sections visible even on shorter styles
- Creates a slightly more dressy vibe than the completely casual classic version
- Twists help secure fine hair better than loose gathers alone
- The twisted detail catches light differently depending on your hair color and texture
3. The Braided Half-Up Bun
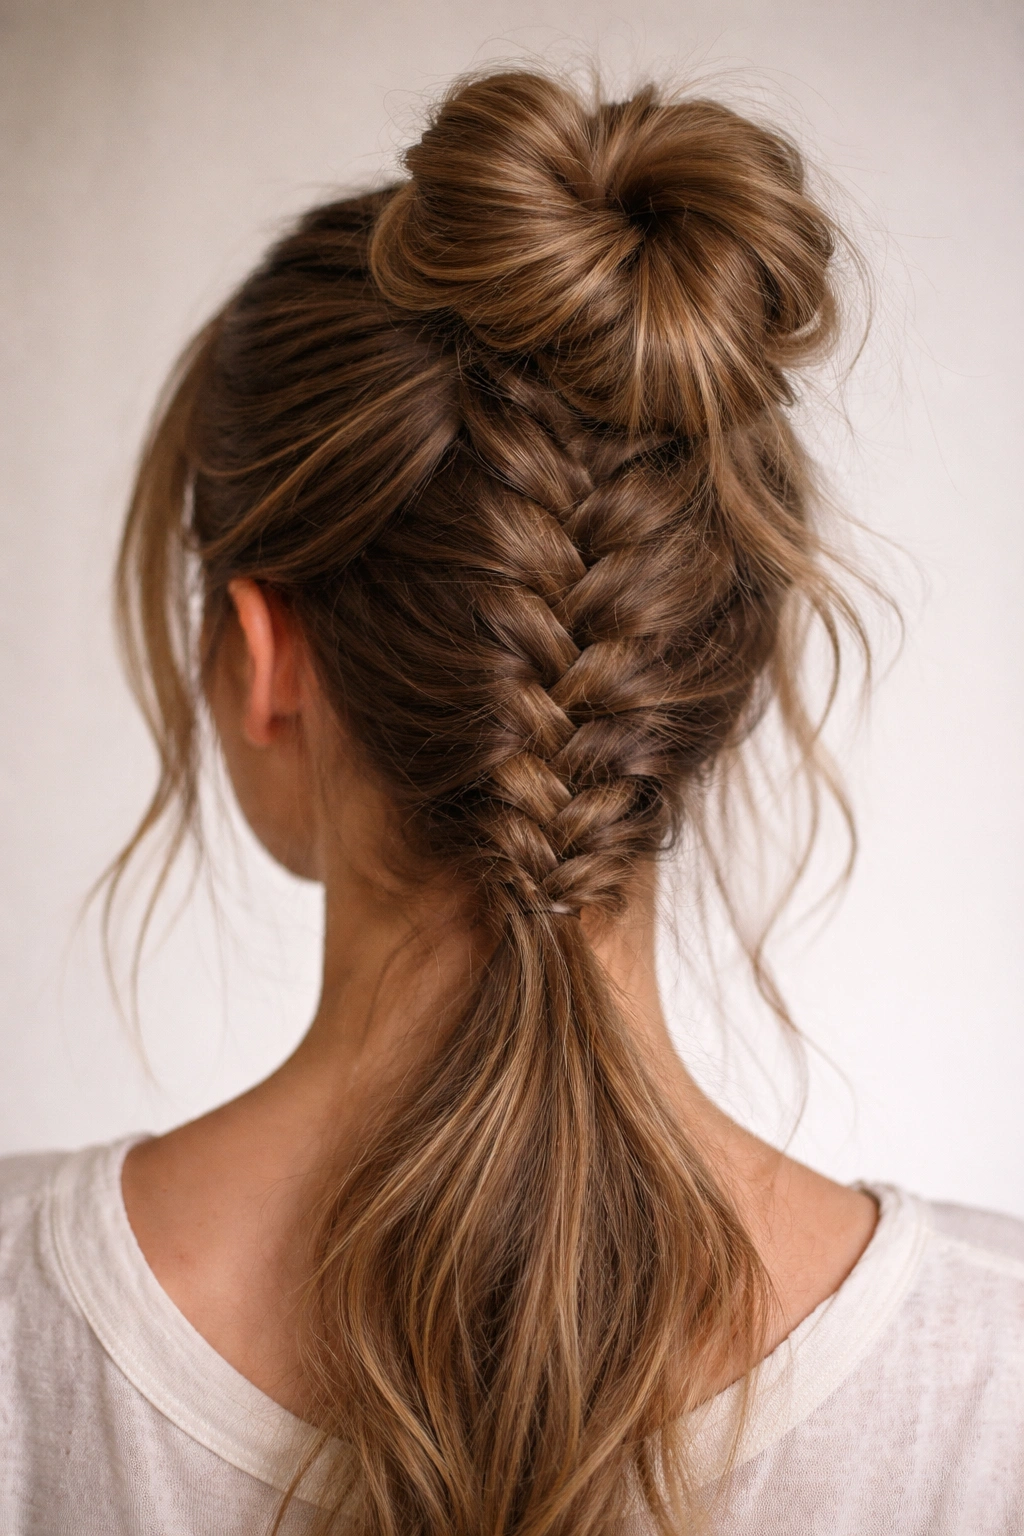
Braids add texture, visual complexity, and superior hold—three things that make this variation genuinely functional beyond just being pretty. Whether you’re doing a loose, two-strand braid or a fuller three-strand version, the braid becomes the functional anchor that keeps everything in place while looking intentionally styled. This is the choice when you need your hair to survive movement, wind, or hours of wear without gradually collapsing.
Building the Structure with Braids
You have a few options for braid placement, and each creates a subtly different aesthetic. The most traditional approach is creating one French braid from the nape of your neck up toward the crown, then gathering it with your top-half hair into your half-up section. Start at the nape with three small sections of hair and begin the classic over-under-over French braiding motion, gradually adding hair from either side as you braid upward. As you reach the crown, stop adding new hair and finish with a simple three-strand braid for the remaining length.
Alternatively, create two smaller side braids starting from your temples, bringing both toward the back where they meet your half-up gather. This approach creates wonderful frame to the face and feels more contemporary than a single centered braid. Or create one braid from your side part toward the back—this asymmetrical approach suits many face shapes and adds subtle visual interest.
Regardless of which braid approach you choose, incorporate that braid into your half-up gather, secure with an elastic, and then wrap the hair tail around the base to form your bun. Pull sections gently to create softness, but the braid itself will naturally display some structure because that’s the nature of braided hair.
Why Braids Change the Game
A braid is inherently more stable than a simple gather, which means this style holds beautifully in humid conditions, during physical activity, or just through a busy day of repeated head movement. The braided component also buys you time—braids naturally hold waves and texture, so if you’d braided while your hair was damp, the braid itself will continue to release texture throughout the day. You’re essentially building longevity into the structure from the start. Additionally, braids work equally well on second-day or even third-day hair because the slight texture and grip already present in older hair actually helps the braid sit more securely.
Worth knowing: On finer hair, a French braid that gradually incorporates hair as it goes typically holds better than trying to grab a thick section all at once.
4. The Textured Wave Half-Up Bun
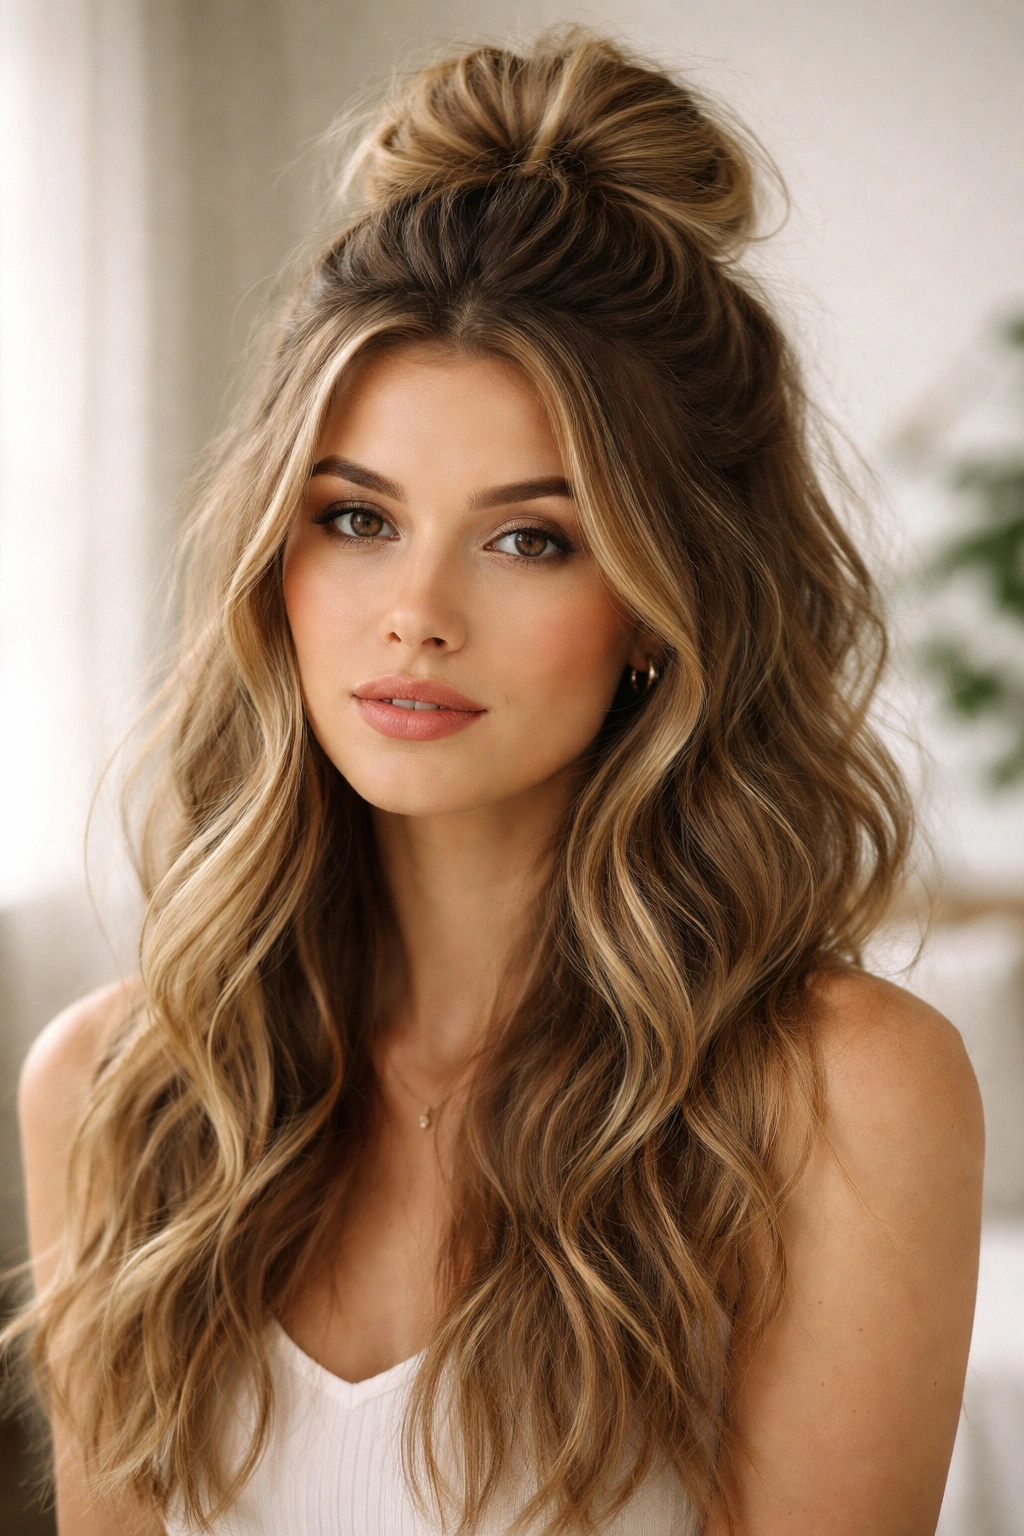
If you have natural wave or curl texture, or if you’re willing to create texture before styling, this variation leans into movement and dimension in a way that smooth, sleek half-ups simply can’t replicate. The texture becomes the protagonist of the style rather than a secondary consideration. On curly or wavy hair, this style often requires almost no effort—your hair naturally creates the dimension. On straighter hair, it requires a bit of intentional prep work, but the payoff is a genuinely three-dimensional, dynamic look.
Creating Texture That Works With Your Hair
For naturally curly or wavy hair, scrunch in a light mousse or cream product into damp hair, then air dry or diffuse. The natural texture becomes your texture base. Then simply gather the top half, secure it, wrap your bun tail, and pull apart gently. Your natural waves do most of the visual work. For wavy hair that tends toward straight at the roots, apply texturizing spray to the top section before gathering—this adds grip and prevents the crown from appearing flat.
For straight hair, you have several texture-building options. Create loose waves using a curling wand on the top section before gathering—wave the wand through that top section, allowing the wave to set and cool completely before you gather. Alternatively, create texture by braiding that top section overnight or for several hours, then releasing the braid just before you style. You can also use a texturizing spray, mousse, or salt spray on damp hair, then blow dry your roots with your head flipped upside down for natural volume and wave.
The actual half-up bun component remains mechanically identical—gather, secure, wrap, and pull apart. But because your hair itself already has movement and wave built in, pulling sections apart reveals all that dimension rather than just creating a fluffy, shapeless mass.
The Dynamic Quality This Creates
Textured wave half-ups photograph beautifully and look intentionally styled without actually requiring significant effort if you’re working with your hair’s natural texture. There’s actual movement in the style—the waves catch light differently as you move your head, creating depth that completely changes how the style looks from different angles. This is also the version that looks best with minimal or no additional products because the texture itself is the focus. You’re not trying to smooth and polish (which would defeat the purpose), so you can actually go lighter on styling products than you might with other versions.
Pro tip: If you’re building texture with a curling wand, let each wave cool completely before moving to the next section—the cooling allows the wave to set structurally into the hair, ensuring it lasts all day rather than gradually falling flat.
5. The Side-Swept Half-Up Bun
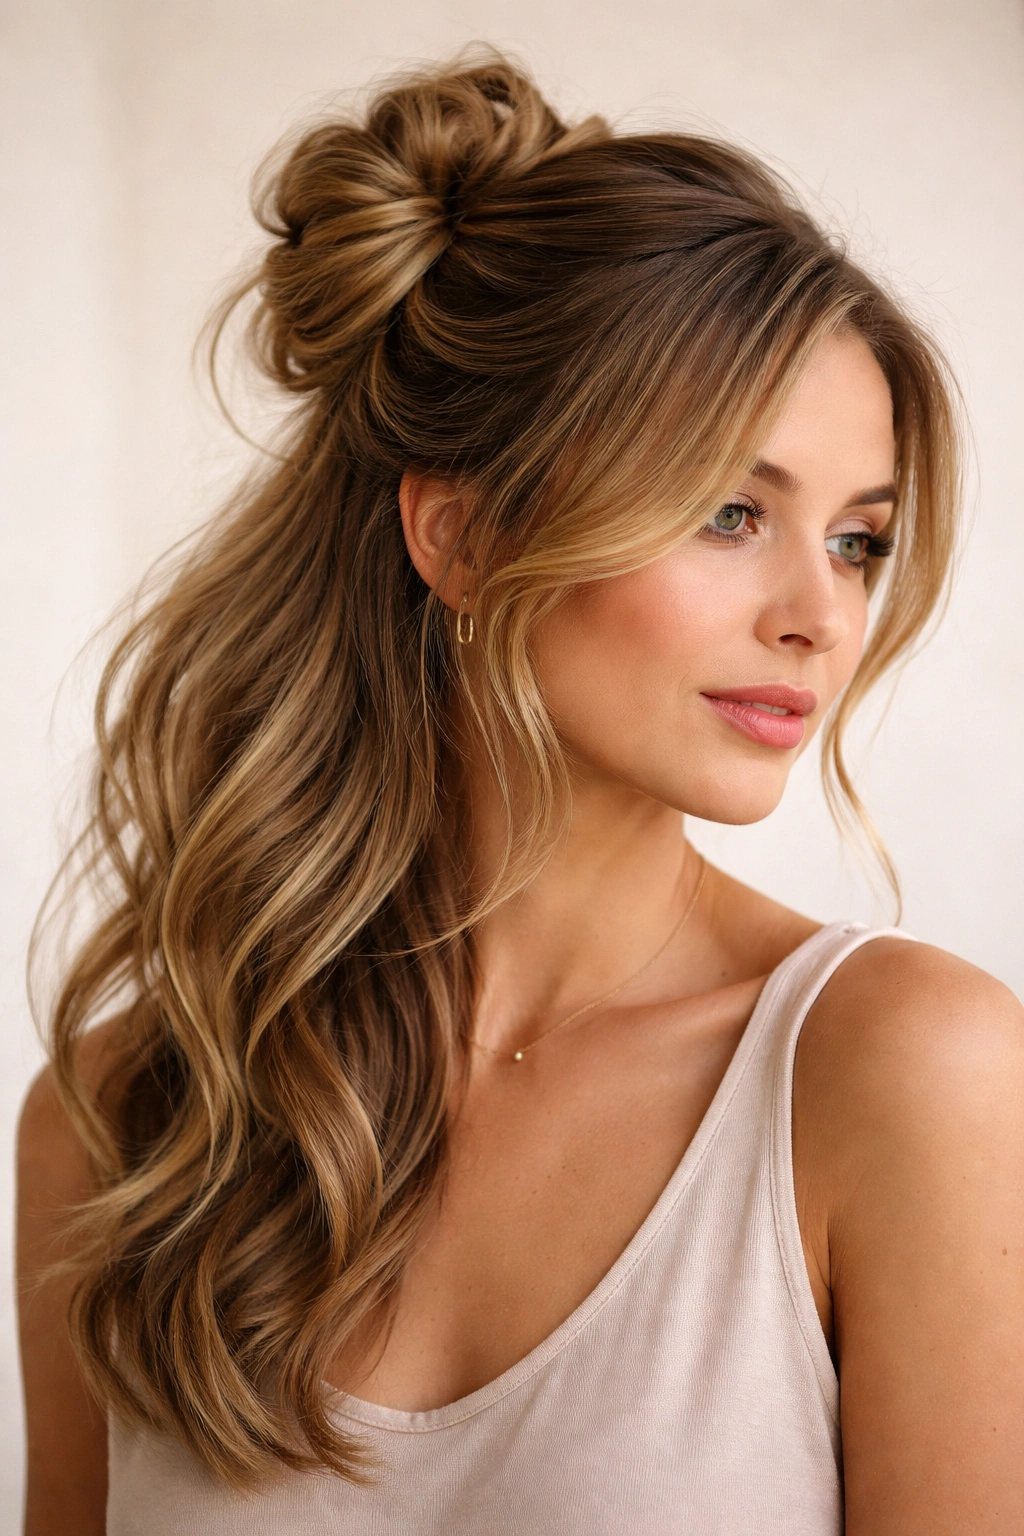
Asymmetry is a styling superpower, and moving your half-up bun to the side transforms the entire visual balance of the style. Instead of a centered bun at the back of your crown, you’re creating a bun that sits over one shoulder or dramatically to one side, which changes the face framing and creates a more fashion-forward vibe. This placement works especially well if you have a face shape that benefits from asymmetrical framing or if you simply prefer the look of off-center styling.
Placement and Balance Considerations
For a side-swept placement, gather your top-half hair slightly off-center—instead of gathering directly at your crown, angle your gather toward one side of your head, positioning it more over that side of your skull. Secure with an elastic, wrap your bun tail, and pull apart gently. The result is a bun that sits more to one side, creating an asymmetrical silhouette that draws attention toward your opposite shoulder and face profile.
The degree of “sideness” is entirely up to you. A subtle side-sweep moves your bun just barely off-center, creating visual interest without feeling dramatic. A more pronounced side-sweep positions your bun well over to one side, creating that romantic, swept-to-the-side vibe that photographs beautifully. The side-swept placement often looks more romantic or editorial than a centered approach, making it an excellent choice when you want to elevate the casual vibe of a half-up bun.
When to Choose This Placement
A side-swept half-up bun genuinely flatters most face shapes because asymmetry naturally draws the eye. If you have a rounder face, an asymmetrical placement can create visual length. If you have a longer face, the offset can make proportions feel more balanced. Beyond face shape, this placement works beautifully with side-parted hair or hair with natural side-sweep styling already built in. It also photographs exceptionally well, which is worth noting if you’re styling for photos rather than just a regular day.
The side-swept version also works well with that textured, wave-based approach from the previous style—a textured, side-swept half-up bun is genuinely romantic and editorial without being overly done or formal.
Quick facts about side-swept placement:
- Creates automatic visual interest through asymmetry
- Works well with side-parted hair or side-swept bangs
- Pairs beautifully with face-framing layers or curtain bangs
- Balances out round or angular face shapes depending on which direction you sweep
6. The Double-Bun Half-Up Style
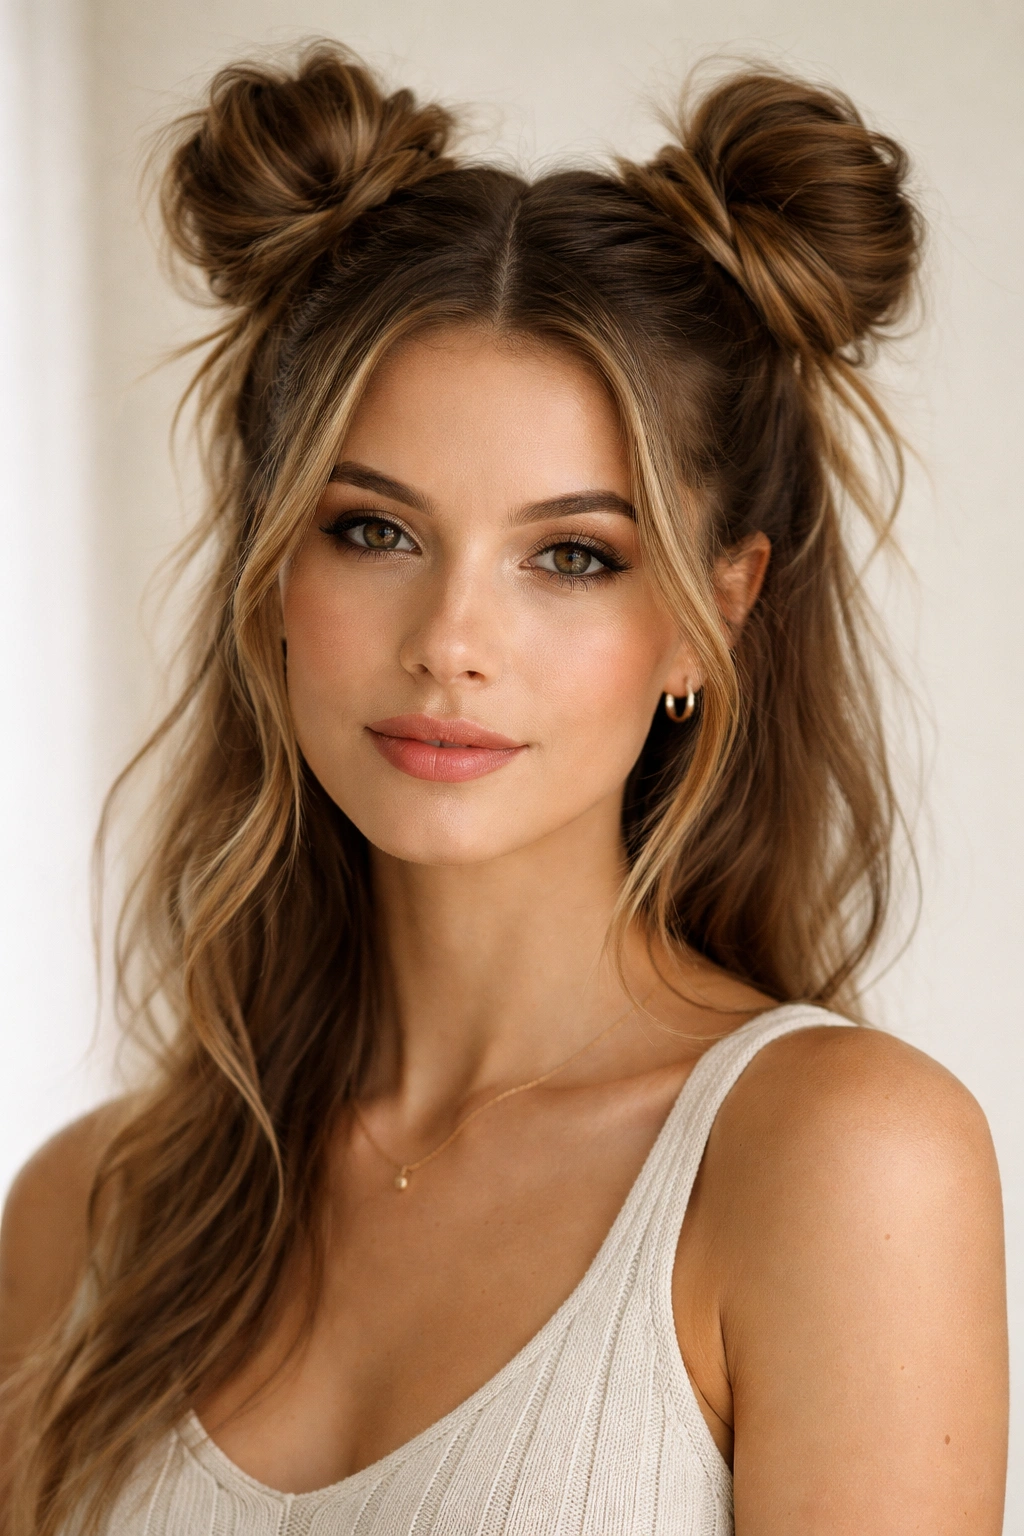
Instead of gathering all your top-half hair into one central bun, split it into two smaller buns positioned on either side of your head. This variation is genuinely fun, creates a playful vibe, and actually works better on certain hair lengths than you might expect. On shorter hair, two smaller buns look more proportionate than one large bun would. On longer hair, two buns distribute the weight better and can actually feel lighter and more comfortable than a single larger bun.
Creating Two Buns That Complement Each Other
Start by creating a deep center part from your forehead straight back. On one side, gather that half into a ponytail positioned slightly higher than where a centered crown bun would sit—aim for somewhere along the top-back quadrant of your head. Secure with a small elastic. On the opposite side, gather the other half into an identical ponytail at the exact same height (this is where looking in the mirror or checking from multiple angles helps). Now you have two ponytails positioned symmetrically on either side.
Take each ponytail tail, wrap it around its elastic base to create a bun shape, and secure with bobby pins. Pull both buns apart gently to create that soft, undone texture. The result is two distinct buns framing your head—playful, balanced, and genuinely fun without veering into “costume” territory if you keep the messy factor intentional and the proportions appropriate for your head size.
The Appeal of Paired Buns
Double buns create instant visual interest and personality. They make a statement in a way that a single bun simply doesn’t. They also work beautifully with minimal face framing—with two buns, you don’t need loose face-framing pieces because the overall symmetry and balance of the style is already visually interesting. This is also the style that truly shines on shorter hair (chin-length through shoulder-length) because the proportions feel more balanced with two smaller elements rather than one central larger one.
Double buns also photograph remarkably well and feel inherently less “overdone” than they might sound—they’re playful without being silly, intentional without being formal. They work for casual settings, creative work environments, and anywhere you want your hair to convey personality and confidence in your styling choices.
Worth noting: Exact symmetry of bun placement matters more with double buns than with single buns—take a moment to ensure both buns sit at identical heights on each side of your head.
7. The Bouffant Half-Up Bun
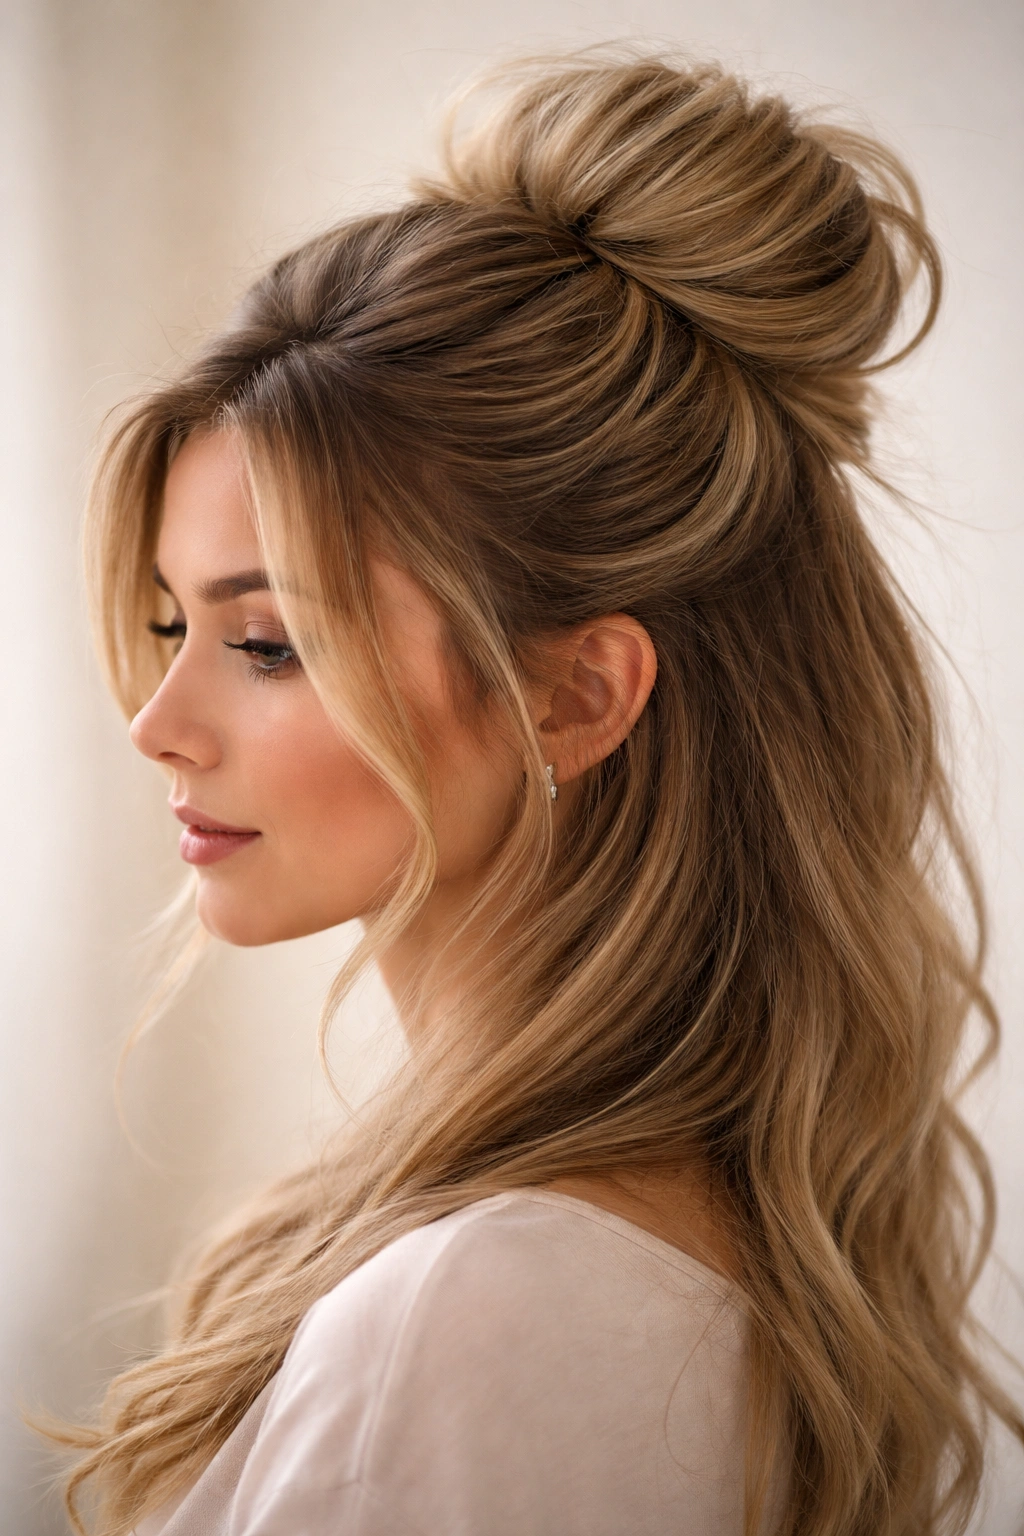
This variation emphasizes height and volume at the crown, creating a style with genuine presence and structure. Instead of pulling your bun apart into a loose, casual shape, you’re deliberately creating height by backcombing, teasing, or strategically placing volume into specific areas. The bouffant approach transforms a casual half-up bun into something with more visual weight and formality—still effortlessly messy, but intentionally voluminous.
Building Volume Where It Counts
After gathering your top-half hair but before securing it with an elastic, take a medium-width section from the center-top of that gathered section. Gently backcomb this section using short, quick downward strokes with a fine-toothed comb or teasing brush. This isn’t about creating a massive rats-nest—it’s about roughing up the hair structure just enough to create grip and hold. Do this to 2-3 sections from various parts of your top-half gather, creating pockets of backcombed texture throughout.
Now secure your entire gathered section with an elastic, wrap your bun tail around the base, and arrange the backcombed sections to create height where you want it. Gently smooth the outer layers of your bun while leaving the backcombed interior intact—this creates a polished exterior with textured structure beneath. You can strategically pull sections of the bun upward more than sideways to emphasize height at the crown.
When Bouffant Energy Suits Your Goal
A bouffant half-up bun feels more deliberately styled than a completely casual version, which makes it excellent for days when you want your hair to feel like you actually put effort in (even if the process only takes a few extra minutes). It works beautifully for date nights, professional environments with a creative dress code, or anytime you want to elevate a casual half-up bun into something with more presence. The volume also flatters fine or thin hair because the backcombing creates the illusion of fuller hair and more volume than you actually have.
This approach also works wonderfully on longer hair because you have more hair to backcomb and arrange, which naturally creates more dramatic volume. On shorter hair (shoulder-length or just past), use this approach more sparingly—backcomb fewer sections and create more subtle height rather than trying to force dramatic bouffant energy when your hair length doesn’t naturally support it.
Pro tip: Backcombing works best on slightly textured or second-day hair—freshly washed, super-slippery hair is actually harder to backcomb effectively because there’s nothing for the comb to grip.
8. The Low Half-Up Bun
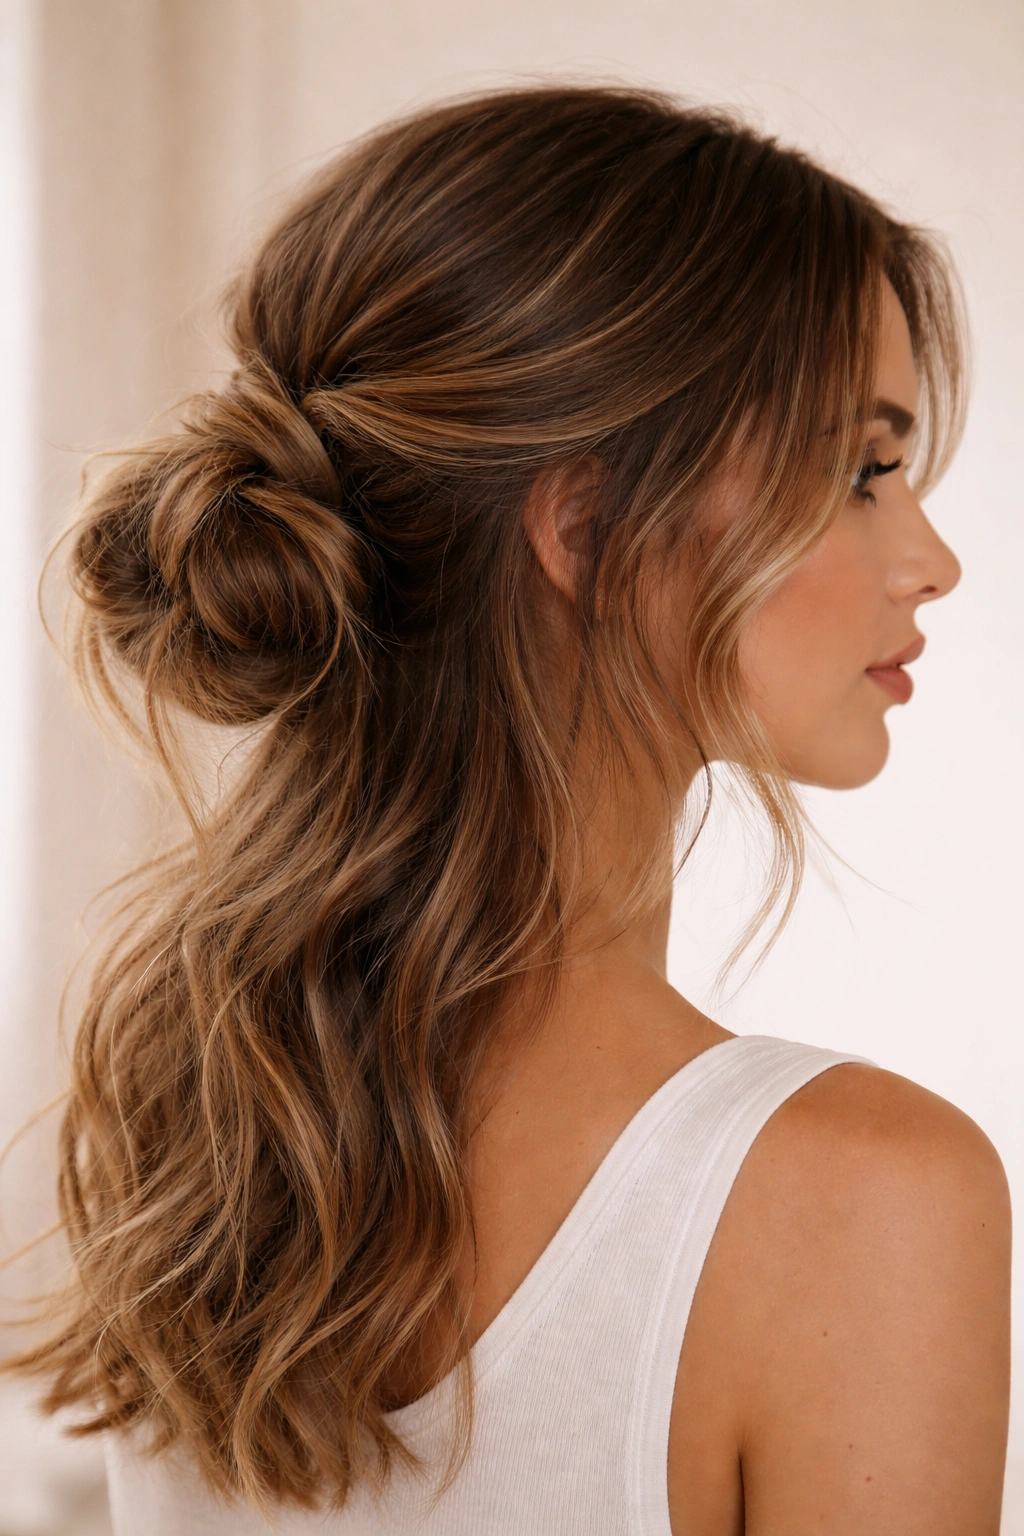
Moving the half-up bun significantly lower—placing it closer to your nape than your crown—creates an entirely different aesthetic. This lower placement works especially well on longer hair and creates a more romantic, relaxed vibe than a crown-positioned bun. The lower placement also changes the proportions and can be more flattering on certain face shapes and hair lengths where a crown placement would feel top-heavy.
Placement Mechanics and Proportions
Instead of gathering your top half at the crown or slightly below, gather it significantly lower—imagine creating your half-up gather at approximately ear level or just slightly higher. This means you’re leaving more hair down and free around your face and shoulders. Secure this lower gather with an elastic, wrap your bun tail around the base, and pull apart gently. The result is a soft, low bun with significantly more hair left down, creating an entirely different visual impact than a higher placement would.
On longer hair, this lower placement is genuinely elegant—it keeps your length visible while still having a gathered element. On shoulder-length or shorter hair, this placement can actually feel awkward because you don’t have enough length below your gather to create visual balance. This is where hair length genuinely matters for this particular variation.
The Visual and Comfort Benefits
A low half-up bun creates more face framing and neck exposure than a crown placement, which many people find more flattering. It also tends to feel more comfortable if you’re wearing the style for extended periods—lower placements put less tension on your scalp. The lower position also feels more relaxed and effortlessly elegant, especially when paired with waves or texture. This is the version that photographs beautifully for casual, candid-style photos rather than more formal, posed situations.
Quick facts about low placement:
- Works best on hair longer than shoulder-length
- Creates more romantic, relaxed aesthetic than crown placement
- Allows maximum face framing and displays your length beautifully
- Feels more comfortable for extended wear
9. The Piece-y Half-Up Bun
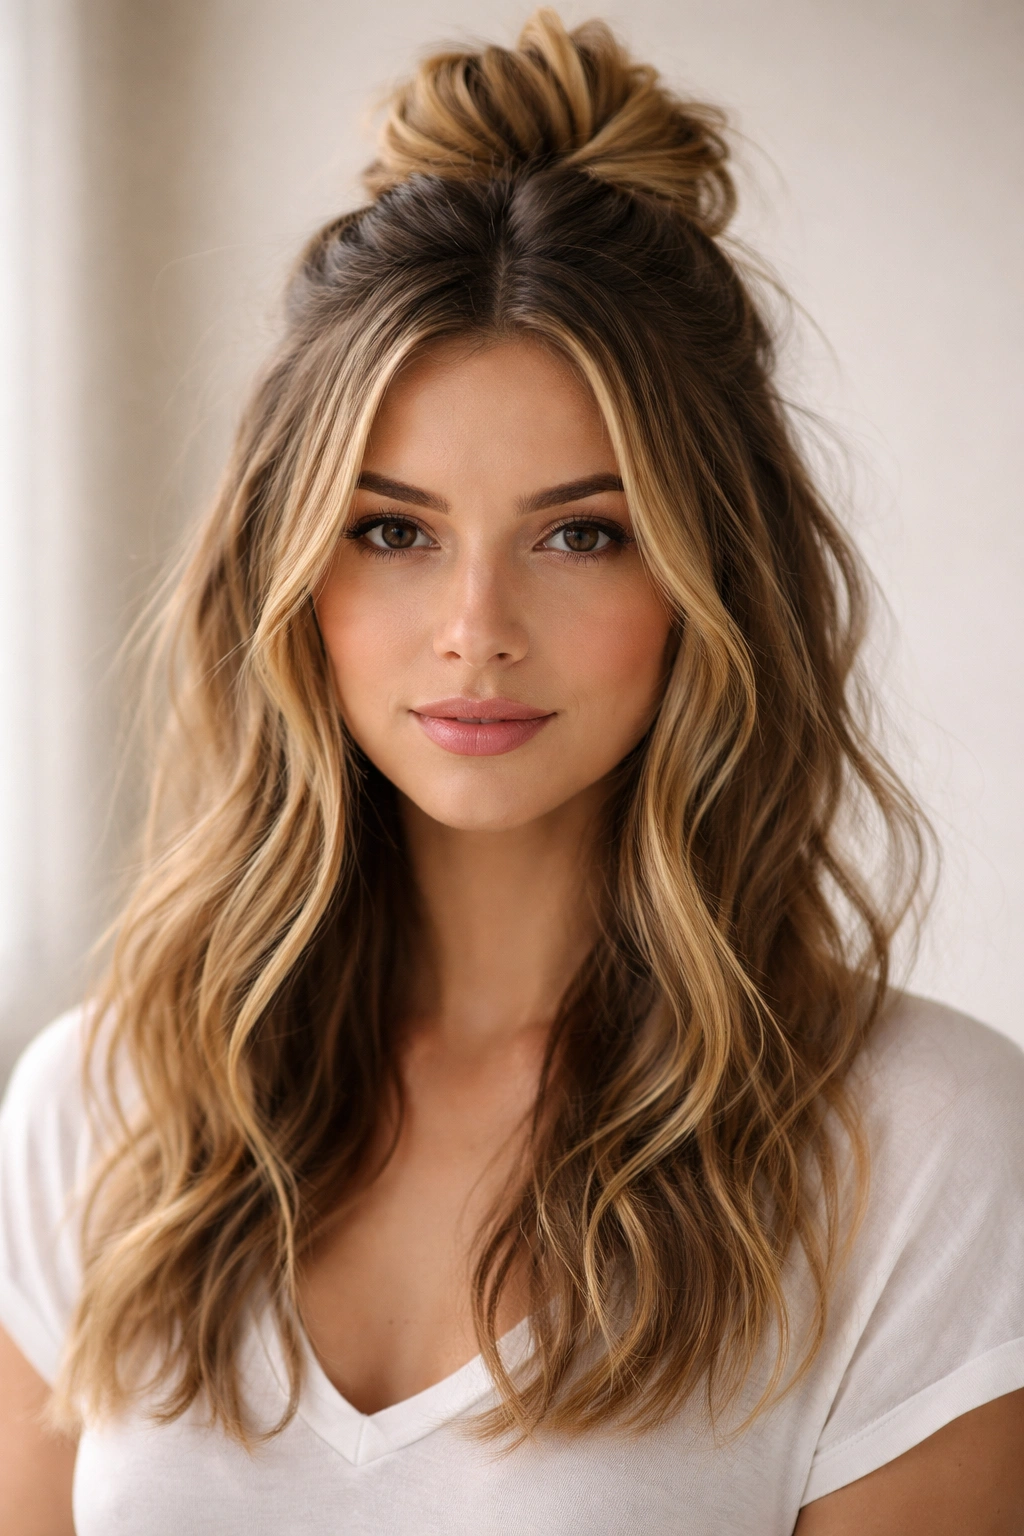
Instead of gathering all your top-half hair neatly into a bun, leave strategic strands out around your face and throughout, creating a style with intentional piece-iness and multiple layers of visual texture. This variation requires slightly more deliberate styling but creates an exceptionally dimensional, modern look. The loose pieces soften the overall effect and create movement even when your hair is otherwise stationary.
Creating Intentional Piece-iness
Start with the basic half-up gathering technique, but before you secure your elastic, release two small sections of hair from your temples—these will frame your face. Secure your gather with an elastic (missing those two temple pieces), wrap your bun tail, and pull apart to create softness. Now use your curling wand, straightener, or fingers to add waves or curls to those released temple pieces, creating movement that contrasts with the gathered-up portion of your hair.
If you want to extend the piece-iness further, you can also leave a few strategic strands down throughout the back—three or four individual strands or small sections positioned around your head, separate from your bun, that you can curl or wave. This approach creates genuine dimension and makes the style feel intentionally modern rather than just casually undone.
When Piece-iness Becomes Your Star Element
This variation works beautifully for people with longer hair (past shoulder-length) and works exceptionally well on textured or wavy hair that already has natural dimension. The piece-y approach also suits modern, fashion-forward styling better than the completely gathered versions—it feels current and intentionally styled. It photographs beautifully from the side, showing off the depth and layering of the style, and works well for lifestyle or fashion contexts rather than purely professional ones.
This is also the version where individual pieces can escape throughout the day without that being a problem—that’s literally the point of the style, so escaped wisps feel like an intentional part of the aesthetic rather than a failure to maintain the style.
Pro tip: Use a light texture spray or mousse on your face-framing pieces to add grip and ensure they hold their wave or curl throughout the day rather than gradually falling flat against your head.
10. The Sleek Half-Up Bun
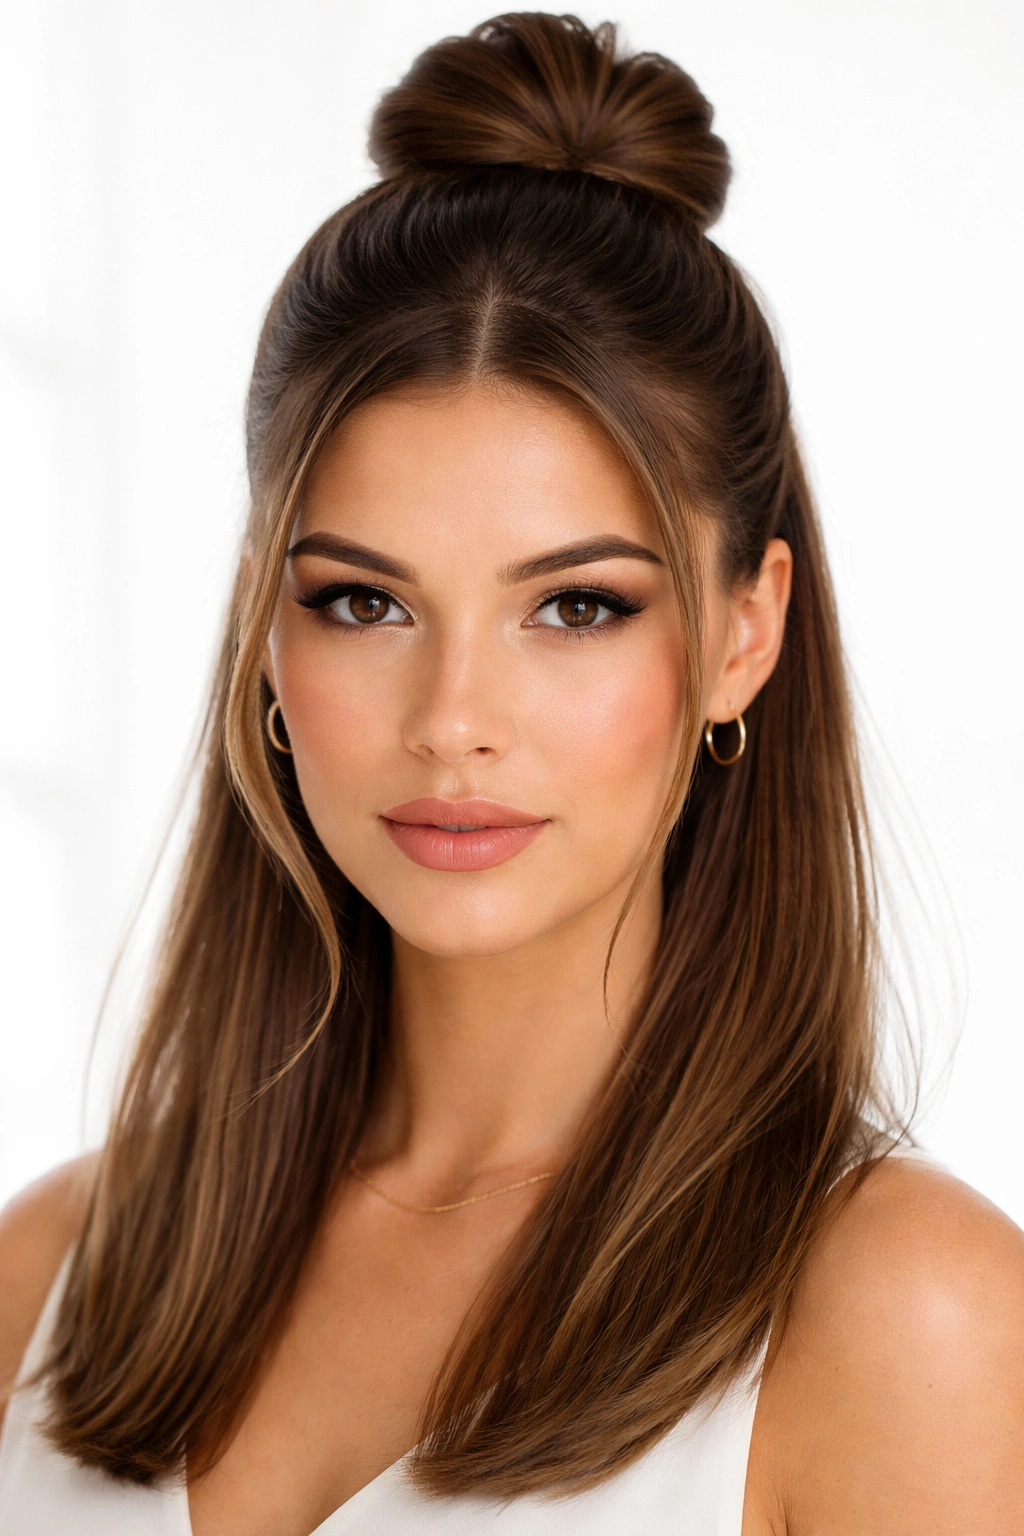
Finally, for days when you want a half-up bun that reads as intentional and polished rather than casual and undone, create a sleek version that minimizes the “messy” in messy bun. This variation uses smooth lines, precise placement, and clean finishes to create a refined style suitable for professional environments or situations where you want obvious polish and intention behind your styling choices.
Achieving Genuine Sleekness
Start with completely smooth hair—blow dry with a paddle brush for maximum smoothness or use a smoothing cream product. Create a precise center or side part, using a fine-toothed comb to define clean lines. Gather your top-half hair with a comb rather than your fingers, smoothing every surface and ensuring no flyaways or texture interrupt the clean lines. Secure with a thin elastic that matches your hair color.
Wrap your bun tail smoothly around the elastic base, tucking the end underneath and securing with bobby pins positioned underneath so they’re invisible. Instead of pulling your bun apart to create softness, leave it relatively smooth and compact. You want defined shape, not textured messiness. Use a light hairspray to set any flyaways and ensure everything stays precisely in place throughout the day.
Professional Polish Without Losing the Half-Up Advantage
This sleek version maintains the face-framing benefit and Crown-accessible update capability of a half-up style, but reads as more professionally put-together than its casually undone siblings. It works beautifully in corporate or formal professional environments, during job interviews, for formal events, or anytime you want your hair to communicate precision and intention. You’re not sacrificing the practicality of having half your hair up—you’re just refining the execution.
This version also works on all hair lengths and textures, though it requires slightly more preparation work than the messier versions. On finer hair, ensure your gather isn’t overly tight (which would create visible scalp tension and look uncomfortable). On thicker hair, you might need an extra bobby pin or two to ensure stability throughout the day.
Worth knowing: A sleek half-up bun works beautifully with minimal additional styling—you don’t need waves or texture to make it work, and honestly, adding texture would undermine the sleek aesthetic you’re going for.
Final Thoughts
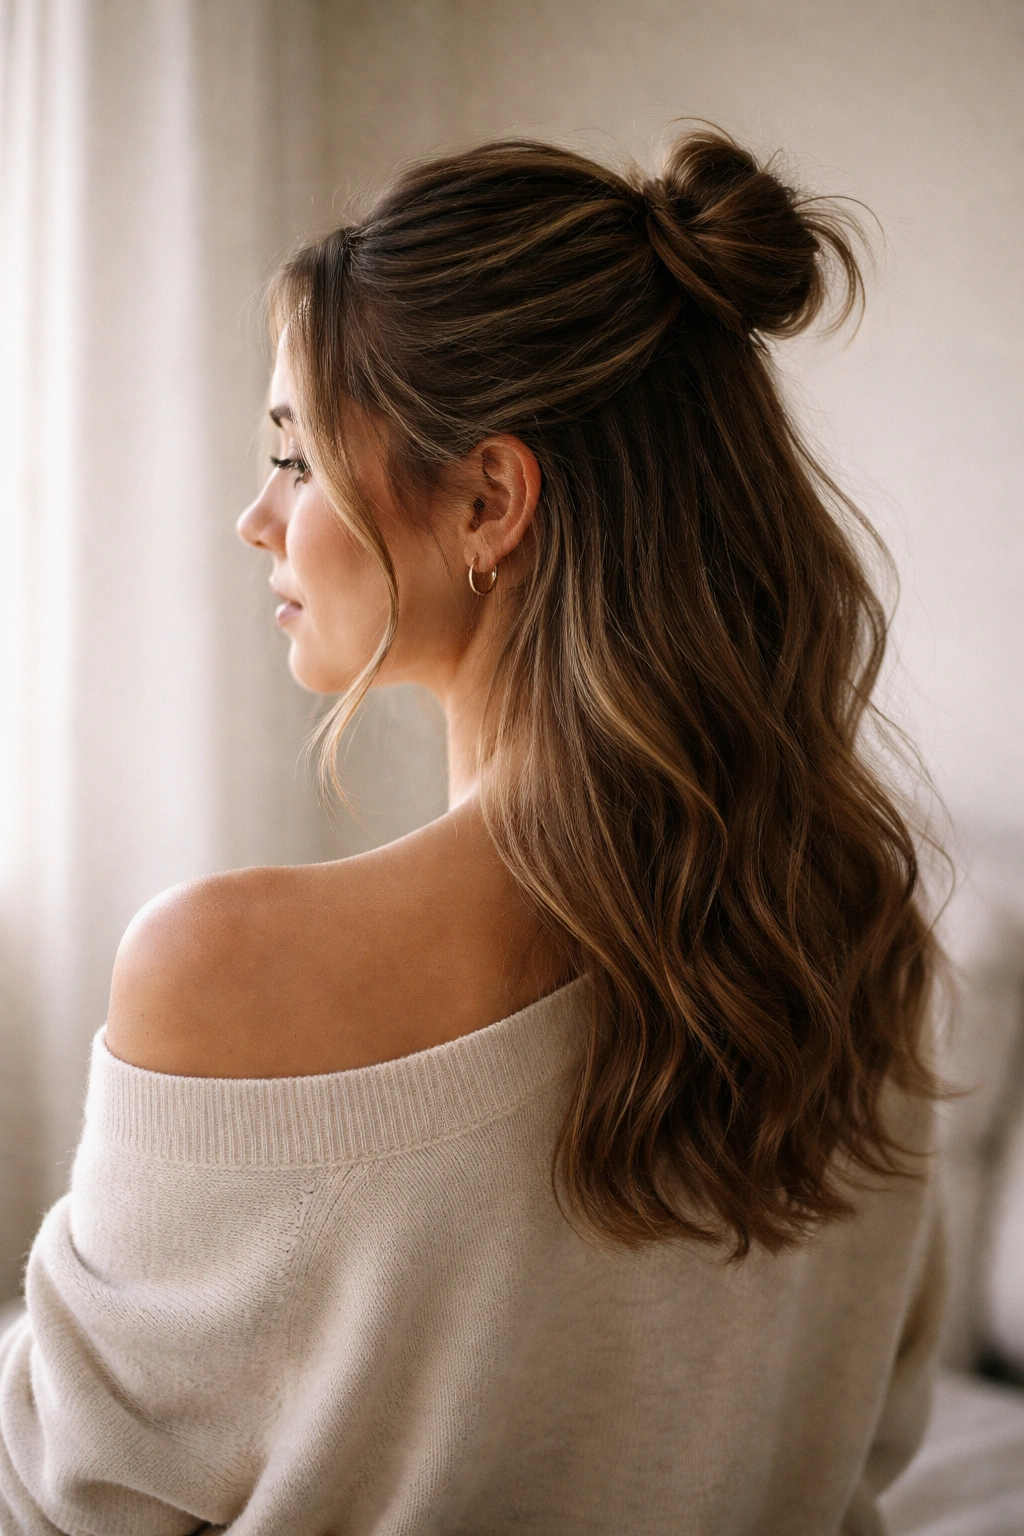
Half-up messy buns represent one of the most genuinely versatile styling options in your rotation, with enough variation to keep the look feeling fresh across multiple days and settings. What makes these styles so powerful is that they’re not limited to a single hair type, length, or texture—they adapt beautifully to what you actually have. The classic version works if you have 15 minutes and want something completely effortless. The braided iteration gives you all-day hold and structure. The textured wave approach leans into dimension and movement. The bouffant version creates presence when you need it.
The real styling superpower here is recognizing that you don’t need to master one perfect half-up bun—you need to understand the core mechanics well enough to pivot and adapt based on what serves you best on any given day. Some days you want romantic and soft (textured waves, side-sweep, or piece-y). Some days you need professional and polished (sleek). Some days you just want fun and playful (double buns or bouffant). Every single version in this rotation works beautifully on any hair length when you’ve adjusted the specifics to suit your hair’s actual texture, volume, and natural characteristics.
Start with whichever version appeals to you most, practice that until the gathering and securing becomes second nature, then branch out to other variations. You’ll quickly discover which approaches work best with your hair’s individual texture and which placements flatter your face shape most. That’s when styling stops feeling like a decision you’re making and starts feeling like a confident choice—which is exactly when your hair looks its best, regardless of which variation you’ve chosen.
