



Box braids remain one of the most versatile and protective styling options for afro hair, offering both beauty and practicality that can last for weeks with proper maintenance. Whether you’re looking for a dramatic transformation, a subtle upgrade to your everyday look, or a low-maintenance protective style that keeps your natural hair safe while it grows, box braids deliver on all fronts. The genius of box braids lies in their adaptability — the same fundamental braiding technique transforms completely depending on length, thickness, added hair, color integration, and how you choose to style and accessorize them.
What makes box braids so appealing for afro hair is that they work with your natural texture rather than against it. The braiding process doesn’t require heat, harsh chemicals, or damaging manipulation beyond the initial installation. Your natural curls and coils stay protected under the braids while you sleep, shower, and go about your daily life. Plus, once you’ve invested the time in getting them installed, you unlock weeks of styling possibilities — you can wear them down for length and volume, pull them up into buns and ponytails, wrap them with thread for extra flair, or add accessories that completely change the vibe.
The challenge many people face isn’t whether box braids work (they absolutely do) — it’s knowing which style variation suits their lifestyle, hair goals, and personal aesthetic. Box braids come in countless iterations, each with different installation techniques, styling potential, maintenance requirements, and visual impact. This guide walks through twelve distinct box braid styles, covering everything from the most classic versions to creative modern adaptations, so you can choose the perfect option for your next protective style.
1. Classic Waist-Length Box Braids
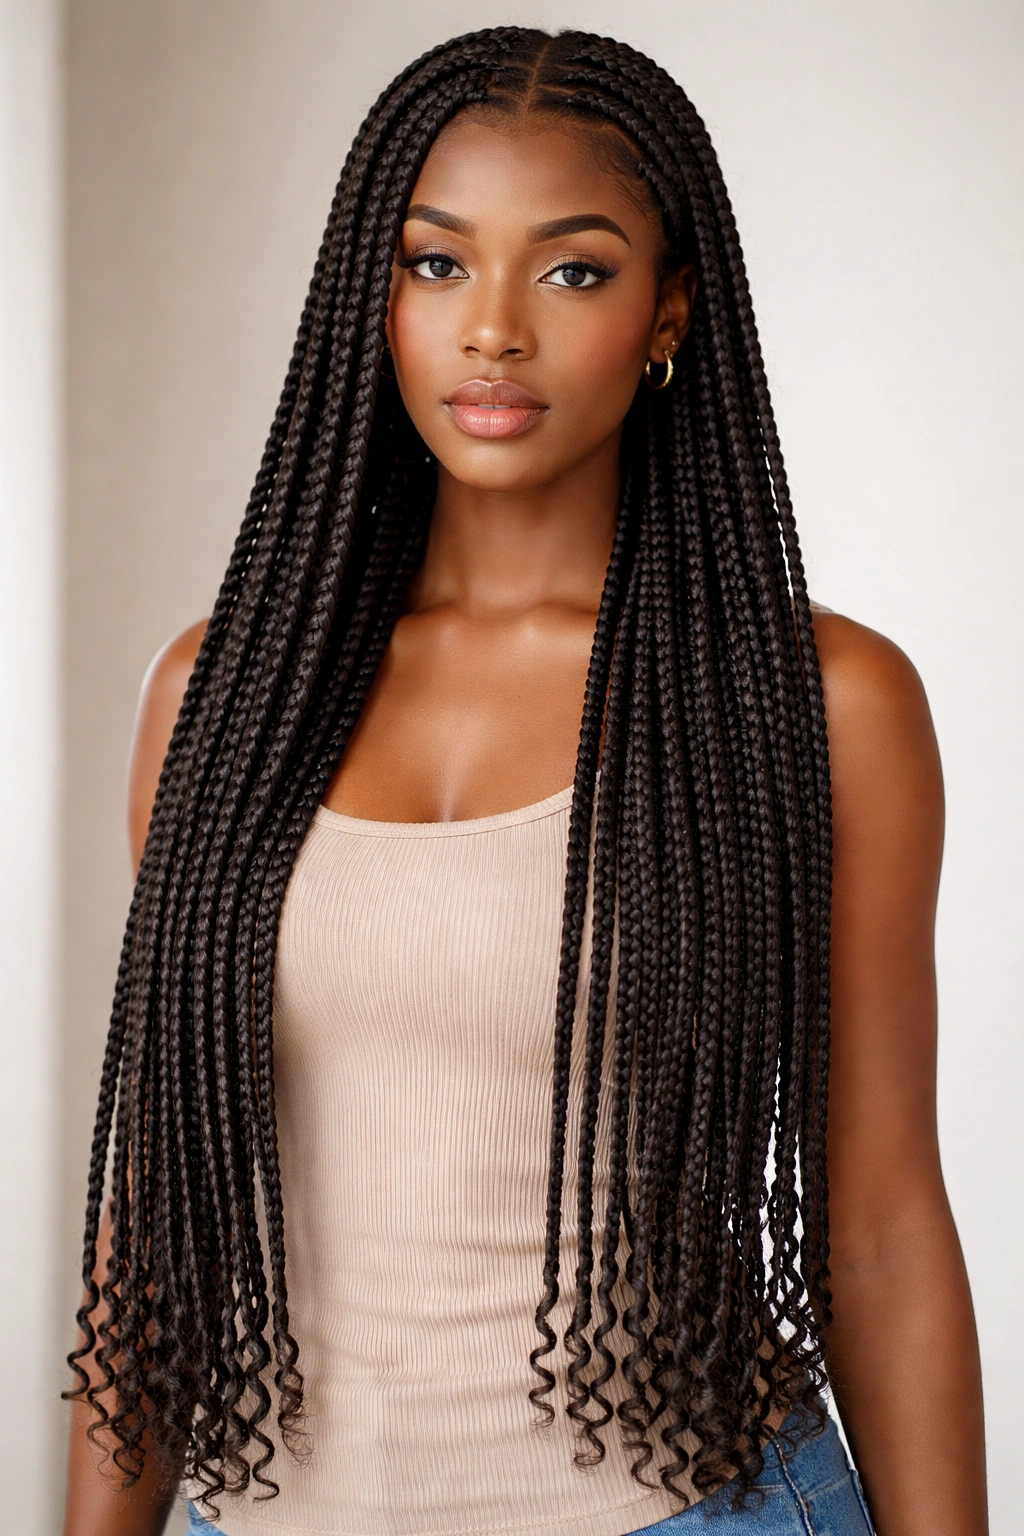
Classic waist-length box braids are the gold standard of protective styling — recognizable, timeless, and endlessly versatile. These braids typically measure around 18 to 24 inches in length and use a moderate thickness that balances visual impact with manageability. The style works by braiding your natural hair from the roots and extending the length with added hair (usually synthetic braiding hair or human hair extensions), creating individual square-shaped sections that run the full length of your head.
Installation and Longevity
The installation of classic box braids takes anywhere from 4 to 8 hours depending on your hair thickness, the number of braids you’re getting, and your stylist’s speed and skill level. Most people keep classic box braids in for 4 to 6 weeks, though some can last up to 8 weeks if you maintain them carefully. The timeframe depends heavily on how quickly your natural hair grows at the roots (which will cause the braids to loosen) and how well you protect them at night with a silk or satin bonnet or pillowcase.
What Makes This Style Work
- Low maintenance once installed — you can wash, condition, and air-dry your braids without undoing them, making daily care straightforward
- Protects your natural hair — the braiding pattern seals the ends of your natural strands and minimizes friction and breakage
- Affordable and accessible — classic box braids require less added hair and styling time than many other braid variations, keeping costs reasonable
- Works with any hair texture — whether you have very coily, tightly coiled, or wavy natural hair, box braids protect and showcase your hair
Pro tip: Refresh your braids’ appearance around week three by spritzing them lightly with water mixed with a tiny bit of mousse, then re-braiding the top inch or so near your scalp to tighten any loose sections.
2. Goddess Box Braids
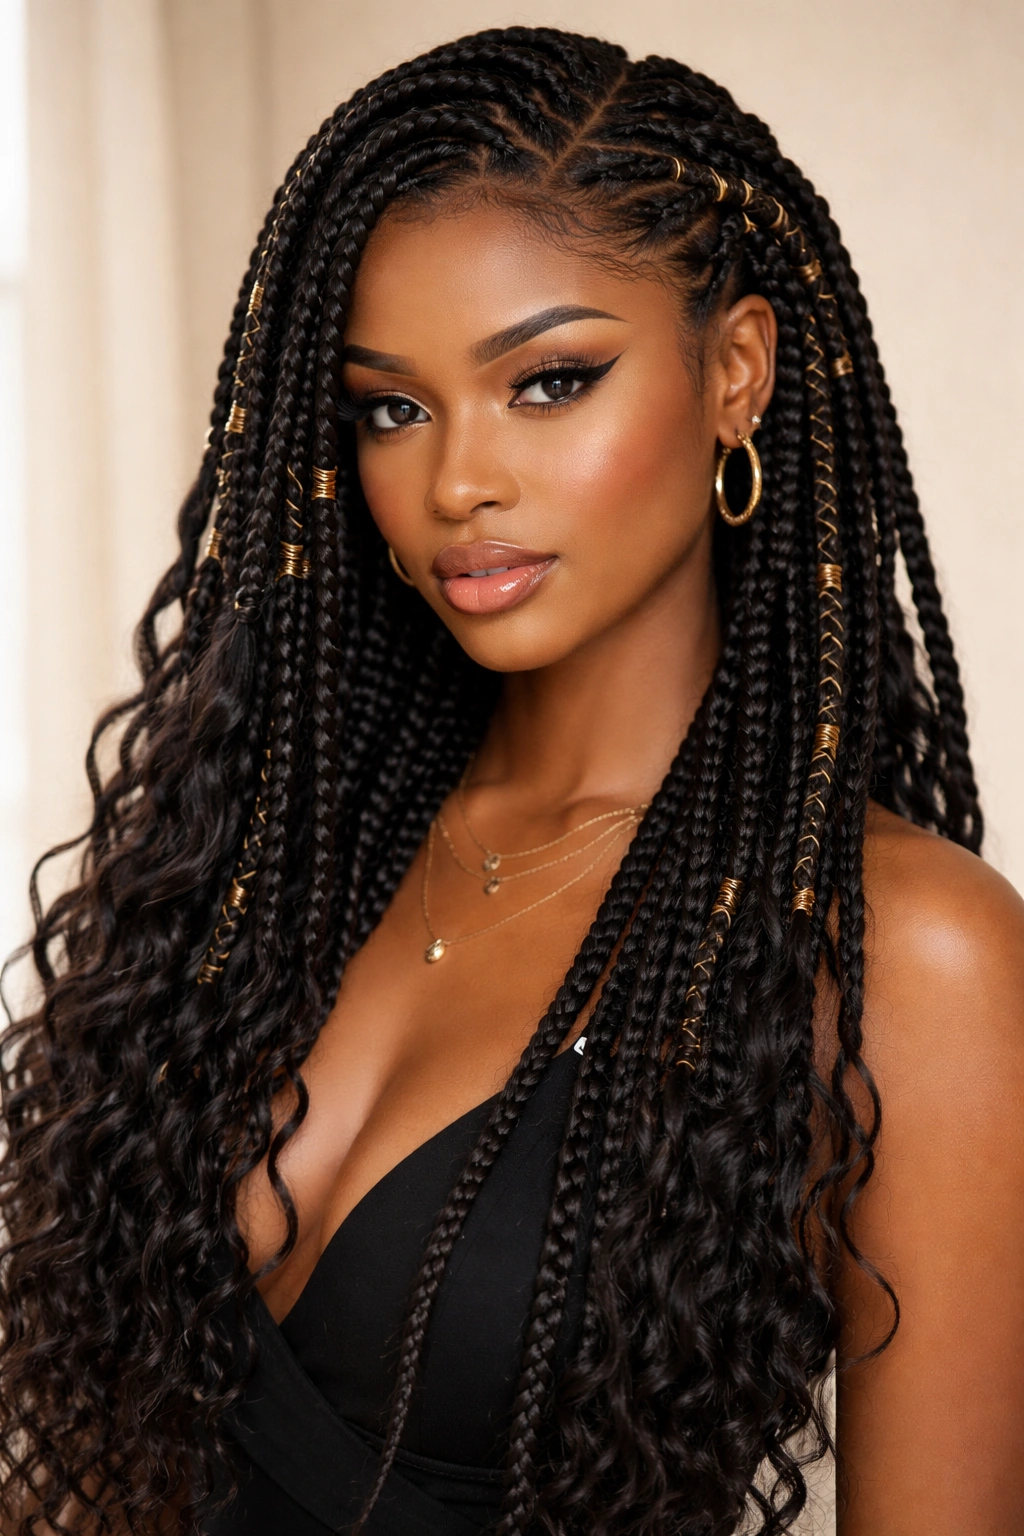
Goddess box braids take the classic formula and add wrapped elements, typically at the crown, along the sides, or throughout the entire style. The wrapping (usually with matching thread, yarn, or fabric strips) covers portions of the braids and creates a more refined, polished appearance that photographs beautifully and feels slightly dressier than unwrapped braids. The wraps can be thin and delicate, thick and bold, or mixed throughout for visual texture.
Why Wrapping Changes Everything
Goddess braids offer the same protective benefits as classic box braids, but the wrapped sections feel more deliberate and styled. Many people wear goddess braids to events where they want their protective style to look intentional and elevated — weddings, professional photos, special occasions, or when you simply want your braids to feel like a complete look rather than a casual protective style.
Styling and Maintenance Details
- Creates more styling opportunities — wrapped sections make great anchor points for updo styles, and the visual contrast reads differently than plain braids
- Requires slightly more installation time — expect an extra 1 to 2 hours on top of classic box braid installation time for the wrapping work
- Wraps can be adjusted or removed — if you want to change the look, you can take off the wraps without damaging your braids, giving you flexibility as weeks pass
- Works beautifully in high buns, ponytails, and crown styles — the wrapping makes even simple updos look intentional and finished
Worth knowing: Use quality thread or yarn for wrapping — cheap materials shed and pill, which looks messy. Natural fibers like jute or cotton tend to hold color better than synthetic thread over several weeks.
3. Jumbo Box Braids
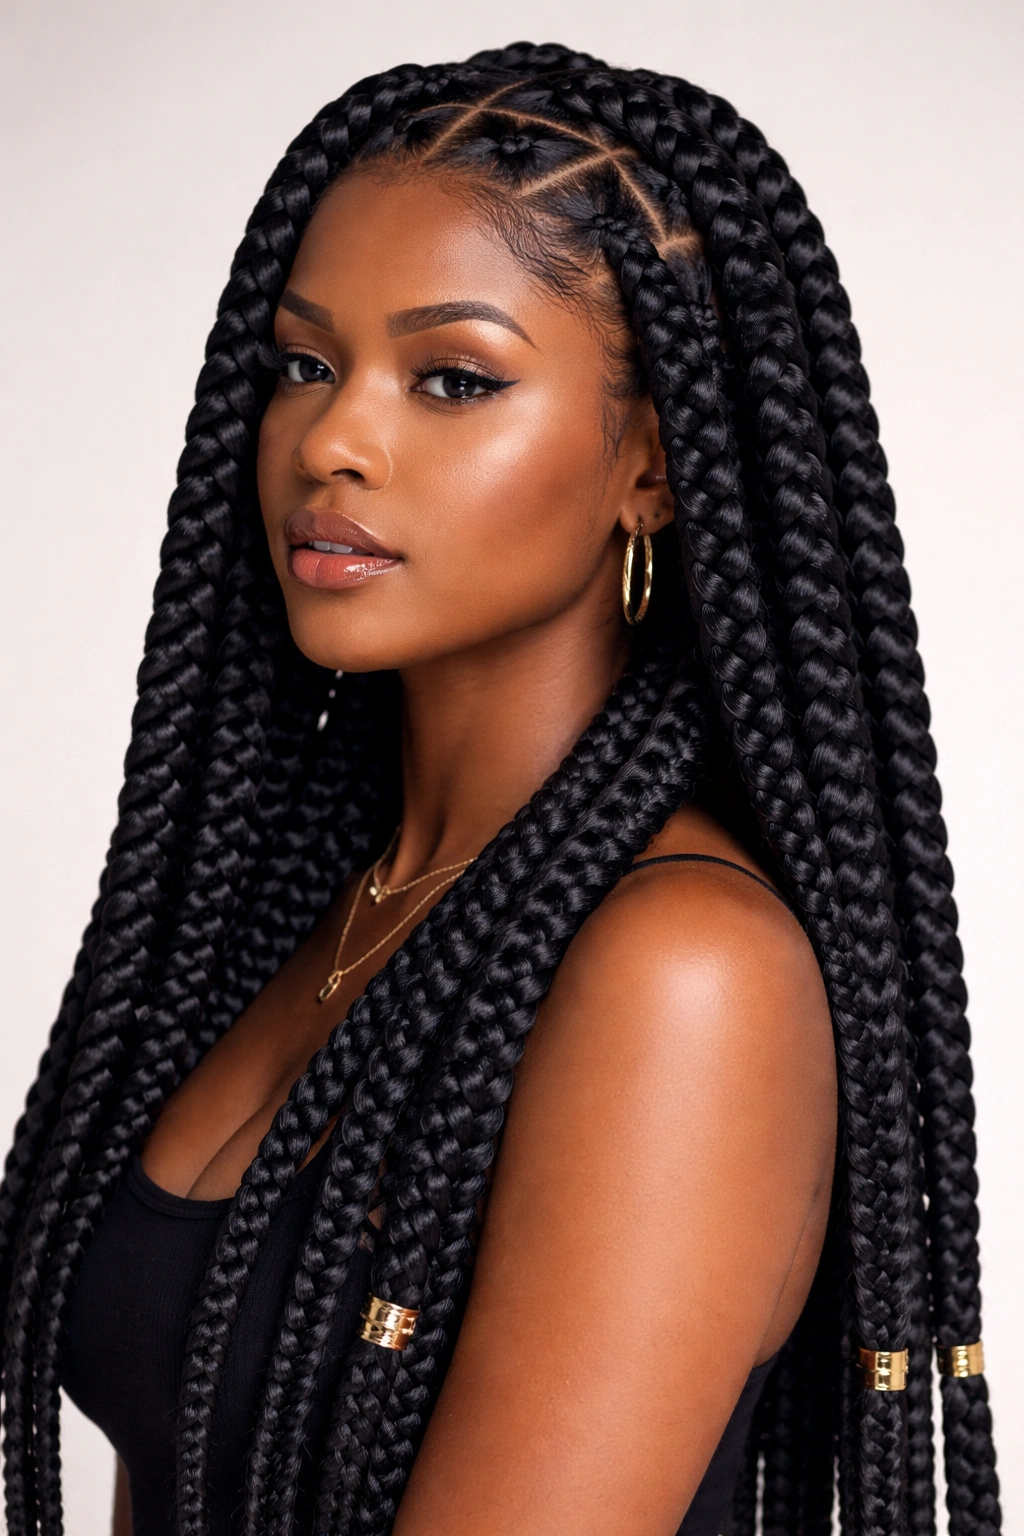
Jumbo box braids sacrifice quantity for impact — instead of 50 to 100 smaller braids, you’re installing 15 to 30 much thicker braids that create bold geometric patterns across your scalp. Each braid can be up to an inch or more in width, making them impossible to miss. Jumbo braids work best on heads with fuller hair density and suit people who love a statement look and prefer the minimalist aesthetic of fewer, larger braids.
Installation Advantages and Considerations
Jumbo box braids install much faster than classic braids — often in 2 to 4 hours instead of 6 to 8. Because there are fewer braids, the process moves quickly, and your scalp feels less tension since the weight is distributed across fewer sections. However, the thicker braids can feel heavier overall, so make sure your hairline and neck can comfortably support the weight before committing to this style.
Visual Impact and Longevity
- Makes a bold statement — there’s no mistaking jumbo braids; they command attention and work beautifully for anyone who loves a confident, eye-catching look
- Shorter installation and styling time — fewer braids mean faster installation, faster protective styling at night, and faster removal
- Requires fewer styling products — you use less added hair and fewer products overall, which can save money
- Maintains longer than classic braids — the thicker sections stay tight and neat-looking for 6 to 8 weeks or even longer
- Requires more scalp tension management — the weight concentrates in fewer points, so it’s essential to protect your hairline and avoid tight pulling at installation
Insider note: If you love the jumbo braid look but worry about weight or tension, ask your stylist for slightly thinner “large” braids (around 0.5 inches) instead of true jumbo — you still get speed and visual impact with less weight on your scalp.
4. Curly Box Braid Ends
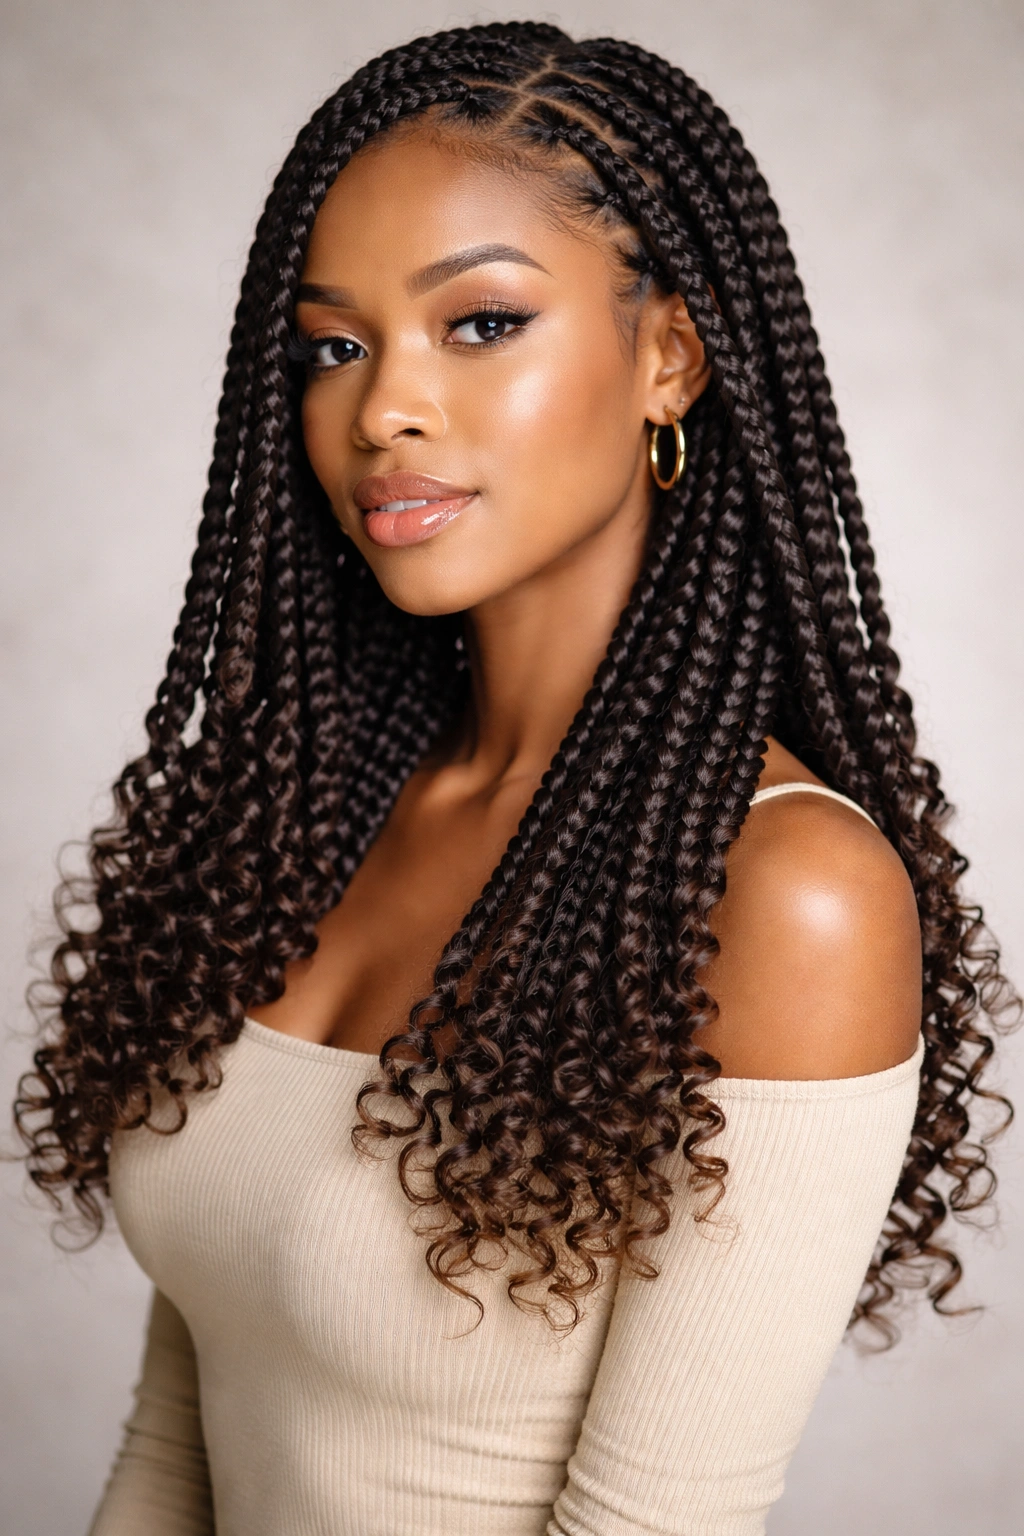
Curly box braid ends replace the straight synthetic or human hair extension ends with textured, curly ends made from curly braiding hair or loc extensions with curls attached. When you undo the braids at the ends instead of keeping them tightly woven all the way through, the curly texture unfurls into springy coils that add movement, volume, and a softer silhouette than traditional straight-ended braids. This variation offers the protective styling benefits of box braids with a more dynamic, textured appearance.
Creating and Styling Curly Ends
The curly ends are typically created by unraveling about 2 to 4 inches of the braid at the tip and allowing the curly hair to bloom outward. This technique works with both synthetic curly braiding hair and human hair curl extensions — synthetic curls generally hold their shape permanently once released, while human hair curls may loosen slightly over time as the style ages. The effect is immediately softer and more approachable than rigid straight braids.
What Curly Ends Add to Your Style
- Softens the overall silhouette — the curly, bouncy ends create a rounder, fuller appearance around the face and shoulders
- Adds visual texture and depth — straight and curly elements together create more interesting visual composition than braids alone
- Requires minimal additional styling — the curls are built in and require no daily manipulation or product application to look full and textured
- Transitions easily between styles — curly-ended braids work for casual everyday wear, dressed-up occasions, and everything in between
- May require slightly longer installation time — setting and fluffing the curly ends takes extra time compared to straight-ended braids
Real talk: Curly ends look most impressive in the first 2 to 3 weeks. As the style ages, the curls may loosen or compress slightly from friction and wear, so expect them to be bouncier fresh and softer-looking by week four.
5. Two-Toned Box Braids
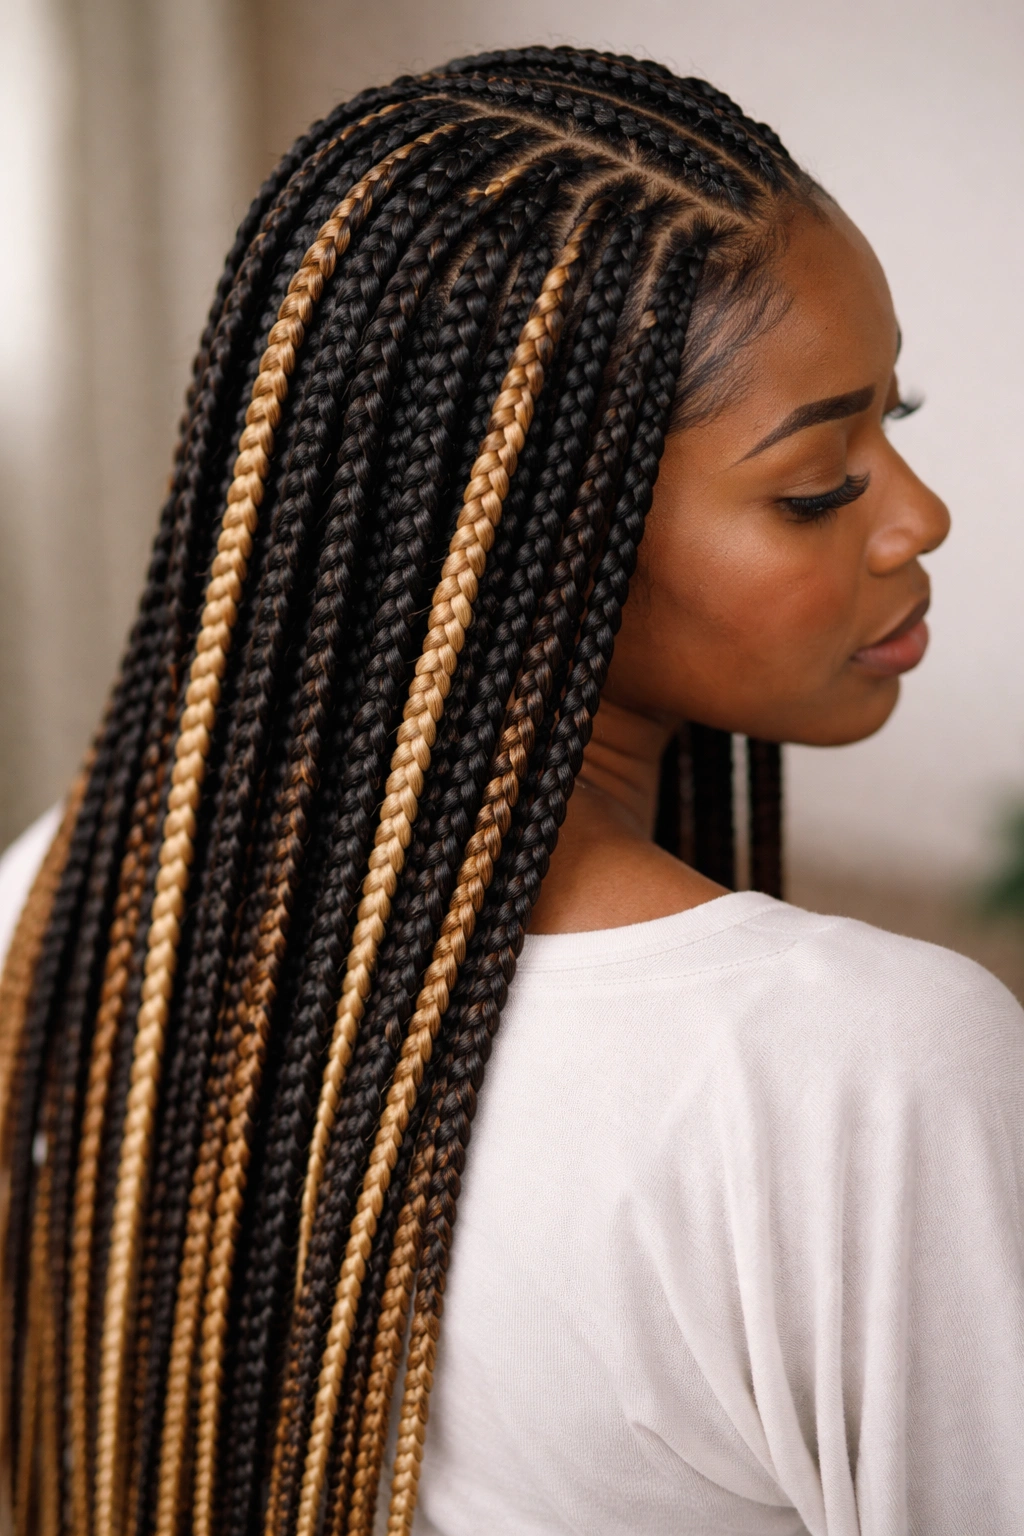
Two-toned (or multi-toned) box braids incorporate a second color into each braid, typically by adding colored braiding hair or extensions alongside your natural hair or a base color. The effect can be subtle — a thin stripe of contrasting color running through each braid — or dramatic, with equal portions of two bold colors creating a nearly checkerboard effect. Two-toned braids work with any color combination you love, from natural tones (black and brown, dark brown and caramel) to creative combinations (black and blonde, burgundy and gold, purple and silver).
Color Integration Techniques
Two-toned effects are achieved by either twisting two different colors of braiding hair together as you braid, or by braiding each color separately and then weaving them together. Some stylists create the effect by braiding a base color and then wrapping a contrasting color around the outside. The method your stylist chooses affects the final appearance, so discuss your color vision clearly before installation begins.
Styling and Maintenance Considerations
- Creates visual interest and depth — two-toned braids photograph beautifully and add dimension to your look
- Allows creative expression within the protective styling format — if you love color but want a protective style, two-toned braids deliver both
- Works with natural or bold colors — you can keep it subtle with earth tones or go bold with jewel tones and pastels
- May show fading at different rates depending on the materials — if you’re using synthetic braiding hair, color may fade slightly over time
- Can be mixed with wrapped sections — two-toned braids pair beautifully with goddess-style wrapping for extra polish
Pro tip: If you’re trying two-toned braids for the first time, start with a color combination that’s easier to maintain and refresh, like black and a warm brown. Bold colors like red or purple look stunning initially but fade noticeably within 4 to 6 weeks.
6. Mohawk Box Braids
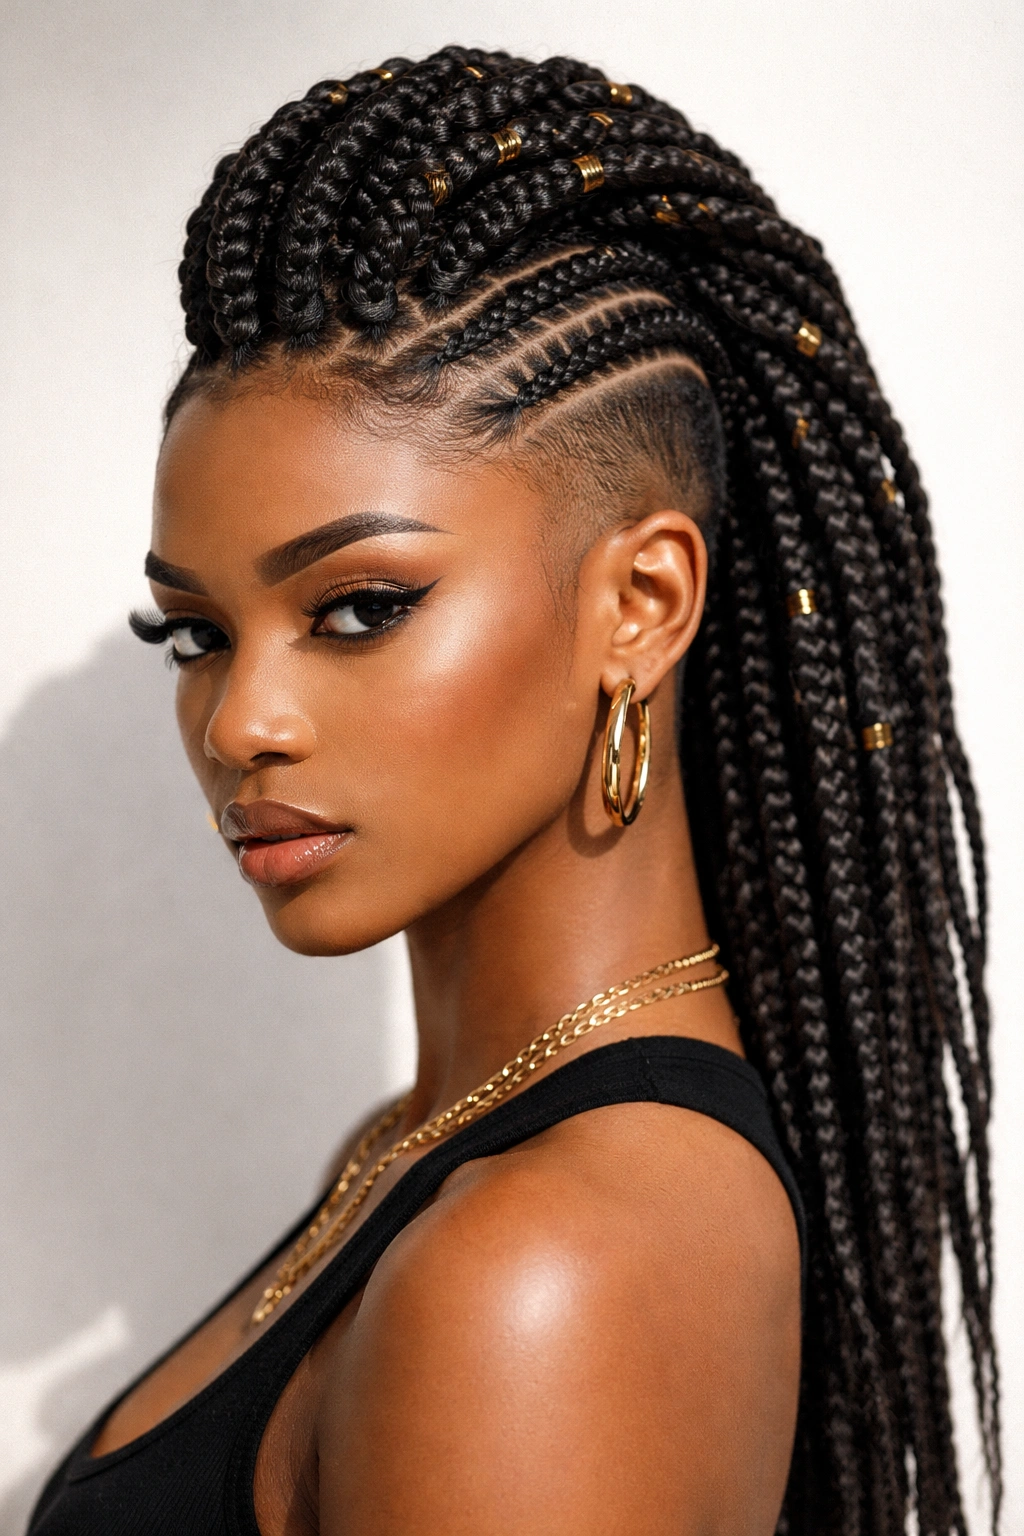
Mohawk box braids style your braids into a dramatic center-stripe pattern with shaved, faded, or close-cropped sides (or looser braids on the sides). This is a bold, high-fashion look that requires the right confidence and lifestyle to pull off. The braids run down the center of your head in a vertical Mohawk formation, while the sides showcase your natural hair, a fade, a shaved design, or a contrasting style. This variation is popular in fashion, performance, and artistic communities.
Creating the Mohawk Effect
The Mohawk braid pattern is typically created during the initial braiding appointment by planning which sections get braids and which get left unbanded or styled separately. Some people keep the sides completely shaved or faded, while others braid the sides with thinner, looser braids that create visual separation from the center Mohawk. The effect is unmistakably bold and works best when you commit fully to the look.
Who This Style Suits Best
- High-impact statement look — Mohawk braids announce your willingness to take risks and stand out
- Requires specific head shape and confidence — this style suits people with well-proportioned heads and serious styling conviction
- Works beautifully with color and creative additions — jewel-toned braids, metallic thread wraps, and bold beads enhance the artistic effect
- Demands professional maintenance — if you have shaved or faded sides, you’ll need regular touch-ups every 2 to 3 weeks
- Offers styling flexibility with the braids themselves — once the Mohawk stripe is established, you can still style those braids into updos, zigzags, or intricate weaving patterns
Worth knowing: This style commands attention everywhere you go, so make sure you’re genuinely ready for that level of visibility before committing to the installation.
7. Side-Swept Box Braids
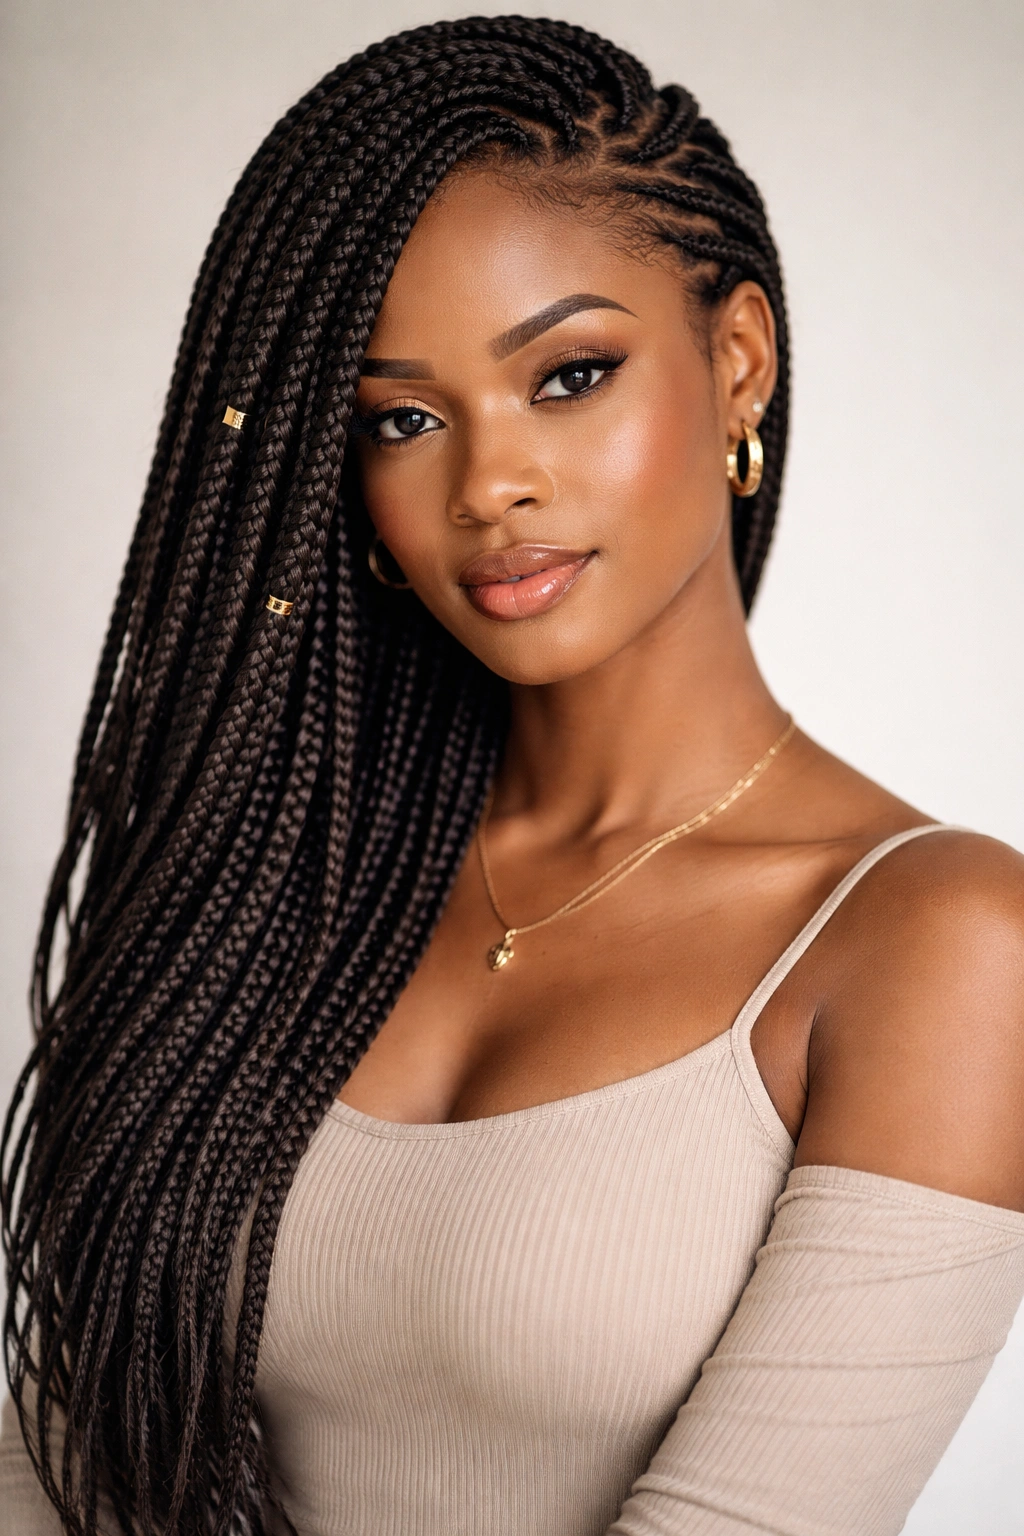
Side-swept box braids style your braids to one side of your head, creating an asymmetrical, dramatic silhouette. Instead of braiding straight back from your hairline or creating symmetrical patterns, all or most of your braids are directed and styled toward one side — typically over your shoulder or cascading down one side of your back. This style works beautifully for people who love asymmetrical aesthetics, want to frame one side of their face, or prefer the way braids feel and look when they’re concentrated on one side.
Creating and Maintaining the Side Sweep
The side-swept effect is created partly during installation (braids are woven in a diagonal pattern from front to back) and partly through daily styling choices. You can enhance the effect by braiding or twisting the braids on top into patterns that direct flow toward the favored side, or by using bobby pins and hair accessories to anchor braids in place. Many people sleep with their braids pinned or in a loose bonnet on the swept side to maintain the pattern overnight.
Visual and Practical Benefits
- Flatters the face differently than center-parted or symmetrical styles — the asymmetry can emphasize your facial features beautifully
- Feels less heavy than fully braided styles — if weight is a concern, sweeping braids concentrates them on one side where they may feel less taxing
- Creates unique styling opportunities — you can tuck the swept braids behind your ear, wrap them, pin them into shapes, or let them cascade dramatically
- Works as both a casual and dressed-up look — side-swept braids transition easily between everyday and special-occasion wear
- Requires active styling maintenance — this look demands daily attention and pinning to maintain the sweep; it won’t naturally stay side-swept on its own
Insider note: This style looks particularly striking when combined with smaller box braids rather than thick jumbo braids — the finer texture creates a more elegant, flowing cascade when swept to the side.
8. Feed-In Box Braids
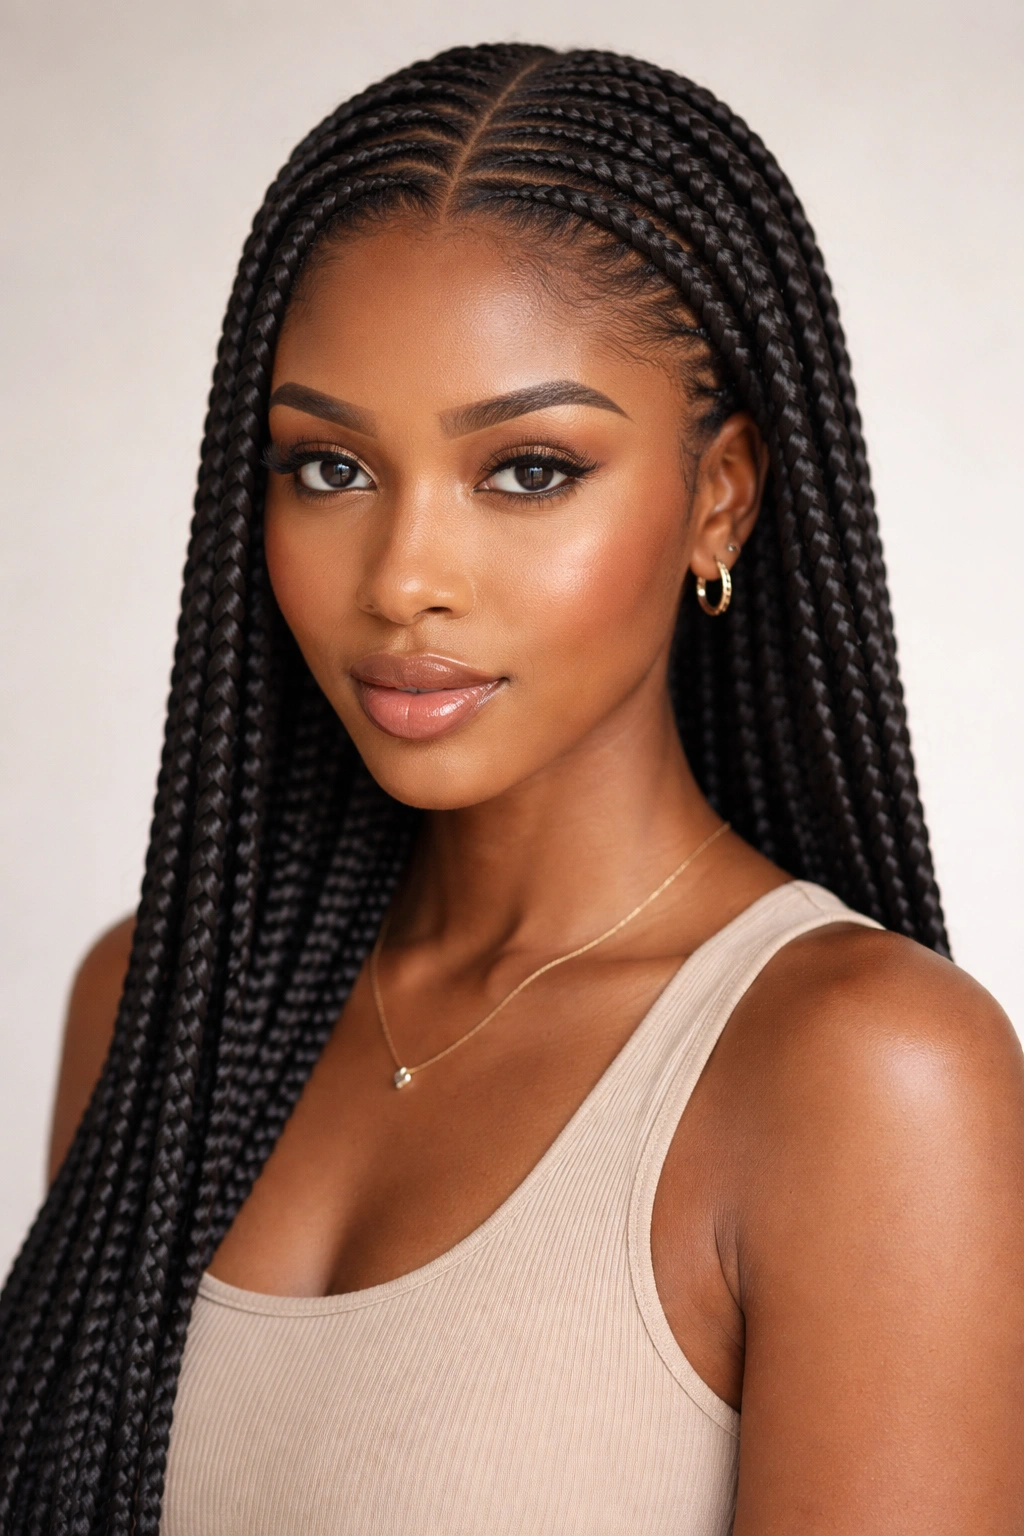
Feed-in box braids use a specific installation technique that gradually incorporates added hair into your natural hair as the braid progresses from root to end. Instead of directly braiding three distinct sections from the start, you begin with three very thin sections of your natural hair and gradually “feed in” pieces of the added hair as you braid down. This creates a smoother, more natural-looking scalp and root area because the braids sit flatter against your head and blend seamlessly with your natural hairline.
The Feed-In Installation Process
Feed-in braiding takes longer than traditional box braids — typically 6 to 10 hours instead of 4 to 8 — because each braid requires careful, gradual hair feeding throughout its entire length. However, many people consider the extra time worth it because the result looks more refined and feels more comfortable on the scalp. The reduced tension and flatter appearance also mean feed-in braids can last slightly longer (up to 8 to 10 weeks) with proper maintenance.
Why Feed-In Braids Stand Out
- Creates a more natural-looking scalp — the graduated feeding makes the roots blend beautifully with your hairline and scalp, avoiding the bumpy appearance of traditional box braids
- Sits flatter against the head — feed-in braids feel less rigid and create a sleeker overall silhouette
- Better for sensitive scalps — the gradual feeding distributes tension more evenly, reducing pulling and irritation
- Lasts longer with less frequent touch-ups — the tighter root area means less loosening as your natural hair grows
- Requires more skill and experience from your stylist — not every braider does feed-in; you’ll need someone with specific expertise
- Costs more than traditional box braids — the increased installation time translates to higher service fees
Pro tip: Ask your stylist about their experience with feed-in braids specifically and look at photos of their previous work. The technique looks dramatically different when done well versus poorly, so seeing examples before booking is essential.
9. Half-Up, Half-Down Box Braids
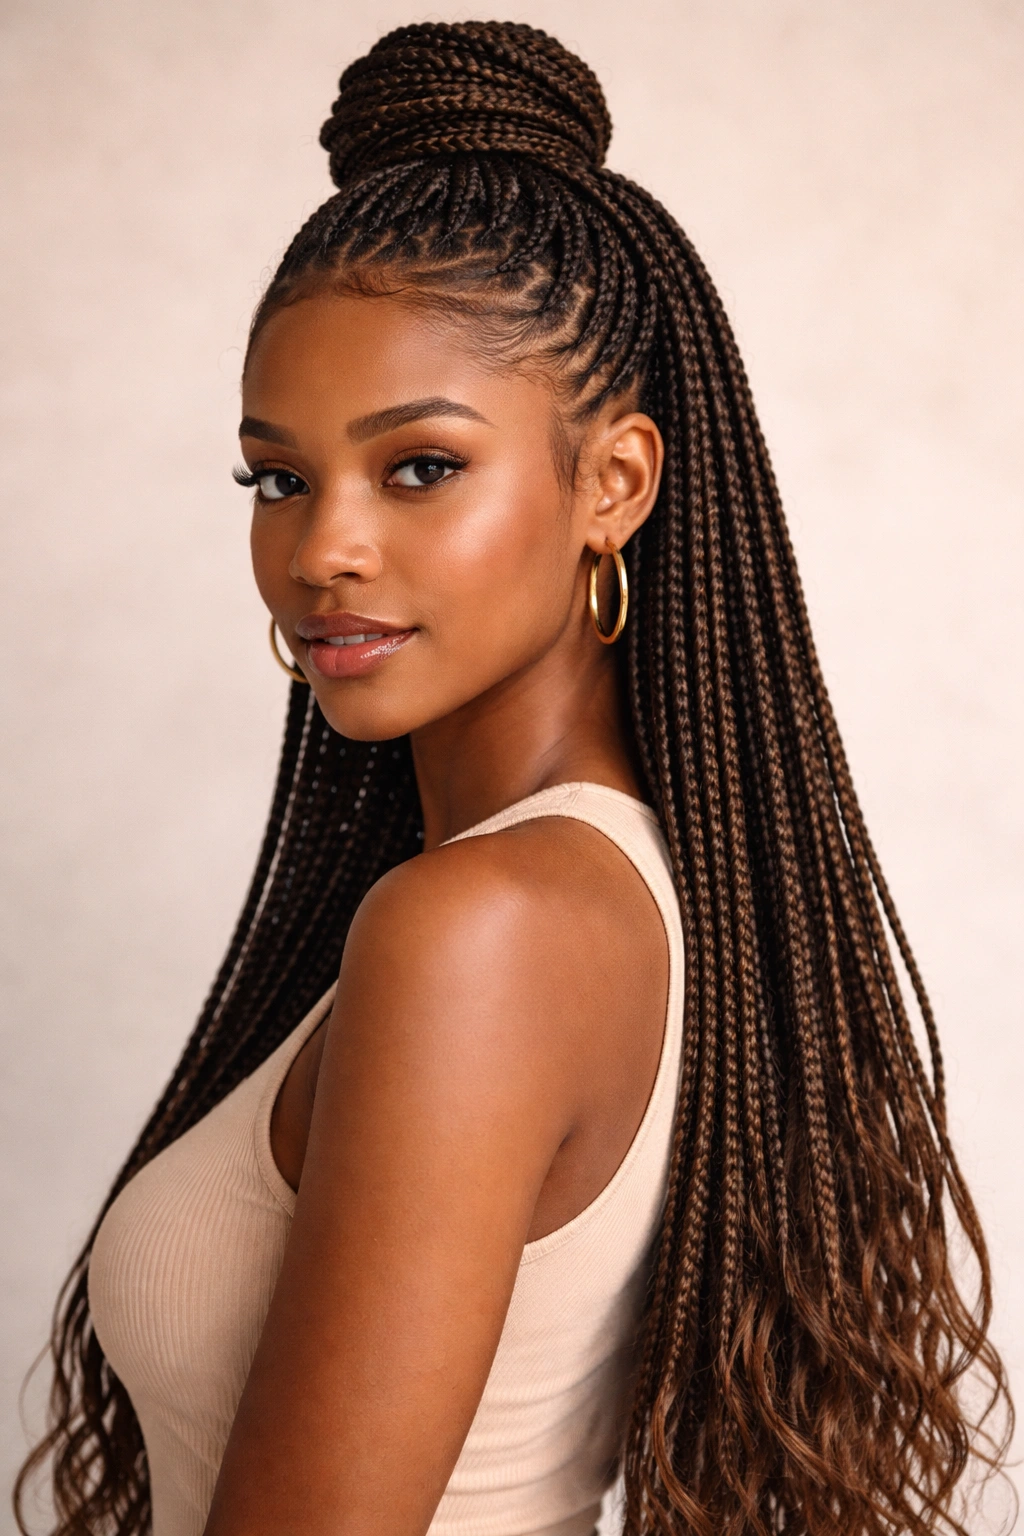
Half-up, half-down styling takes braids (usually installed in a traditional or feed-in style) and styles them so that roughly half the braids are gathered up in an updo while the other half flow down. This hybrid style offers the best of both worlds — the protective styling of braids with the free-flowing appearance of letting them down. You can create the effect by braiding only the top half of your head and leaving the bottom half unbraided, or by installing full head braids and then styling them into the half-up pattern.
Styling Variations Within Half-Up, Half-Down
The half-up portion can take many forms — a simple high ponytail, a twisted or braided crown, a bun, a claw-clip gather, or an intricate updo pattern. The down portion can be left straight, curled at the ends, twisted into sections, or left completely loose. This versatility means you can change the specific styling daily without reinstalling your braids, giving you maximum flexibility from one protective style installation.
Lifestyle and Practical Advantages
- Feels lighter and less heavy than fully braided styles — having braids down rather than gathered reduces the overall weight you carry on your scalp
- Offers the most daily styling flexibility — you can experiment with different up styles, different ways of arranging the down portion, and different accessory placements
- Transitions between casual and professional easily — pull the down braids up into a bun for work, let them down for evening
- Protects your natural hair while showing movement — the protective benefits of braids with the aesthetic appeal of flowing hair
- Works beautifully with added accessories — clips, cuffs, beads, and wraps look striking when you have both up and down sections to style
- Requires some daily maintenance — unlike leaving braids fully up or down, half-up styling needs daily attention to look intentional
Real talk: This style works best if you have enough braids on your head to create full volume both up and down. If your braids are thin or sparse, half-up styling can look unbalanced.
10. Fulani-Inspired Box Braids
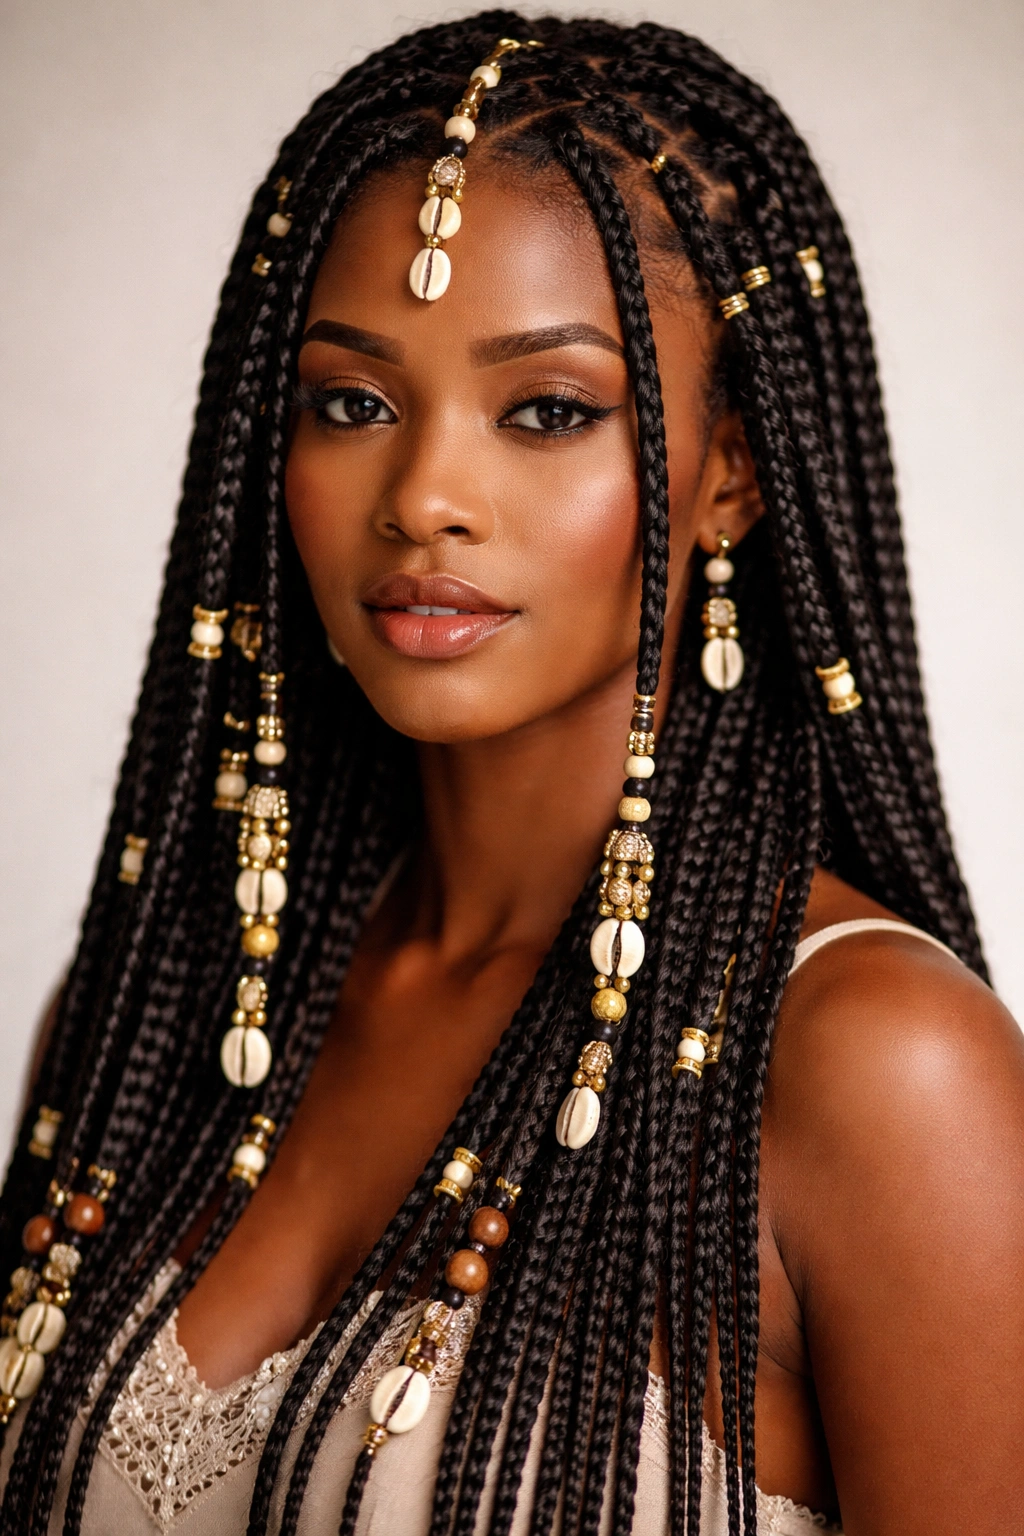
Fulani-inspired box braids take design elements from traditional Fulani hairstyling — specifically the incorporation of beads, cowrie shells, decorative cuffs, and a specific braiding pattern — and adapt them into a modern box braid style. Traditional Fulani braids typically feature a center-parted pattern with decorative elements woven throughout. When adapted into box braids, the effect combines the protective styling of box braids with the cultural and aesthetic elements of Fulani-inspired design.
Design Elements and Customization
Fulani-inspired box braids are customized with your choice of beads (glass, metal, wood, or acrylic), cowrie shells (if that’s meaningful to you culturally), and thread wrapping. Many people add gold or metallic thread throughout to echo the rich, luxurious aesthetic of traditional Fulani styles. The beads can be positioned randomly for texture or placed in strategic patterns for visual organization.
Cultural Respect and Personal Expression
- Honors and celebrates the beauty of Fulani hairstyling traditions — wearing Fulani-inspired braids, when done respectfully, shows appreciation for the cultural artistry
- Allows personal customization while respecting tradition — you can adapt the essential design elements (beads, patterns, wrapping) to match your aesthetic
- Combines protective styling with decorative artistry — you get the benefits of protective braiding plus the visual richness of intentional ornamentation
- Tells a story through your styling choices — the specific beads, colors, and wrapping you choose communicate something about your aesthetic and values
- Works across all ages and occasions — from children’s styles to elder hairstyles, Fulani-inspired braids are appropriate everywhere
- Requires thoughtful sourcing and quality materials — invest in real materials like natural wood beads, brass cuffs, and quality cowrie shells rather than cheap plastic imitations
Worth knowing: If Fulani-inspired styling comes from a culture not your own, research respectfully and learn about the significance of the elements you’re incorporating. Wearing the style as an appreciation for its beauty is different from appropriating it without understanding its cultural meaning.
11. Colored Bead Box Braids
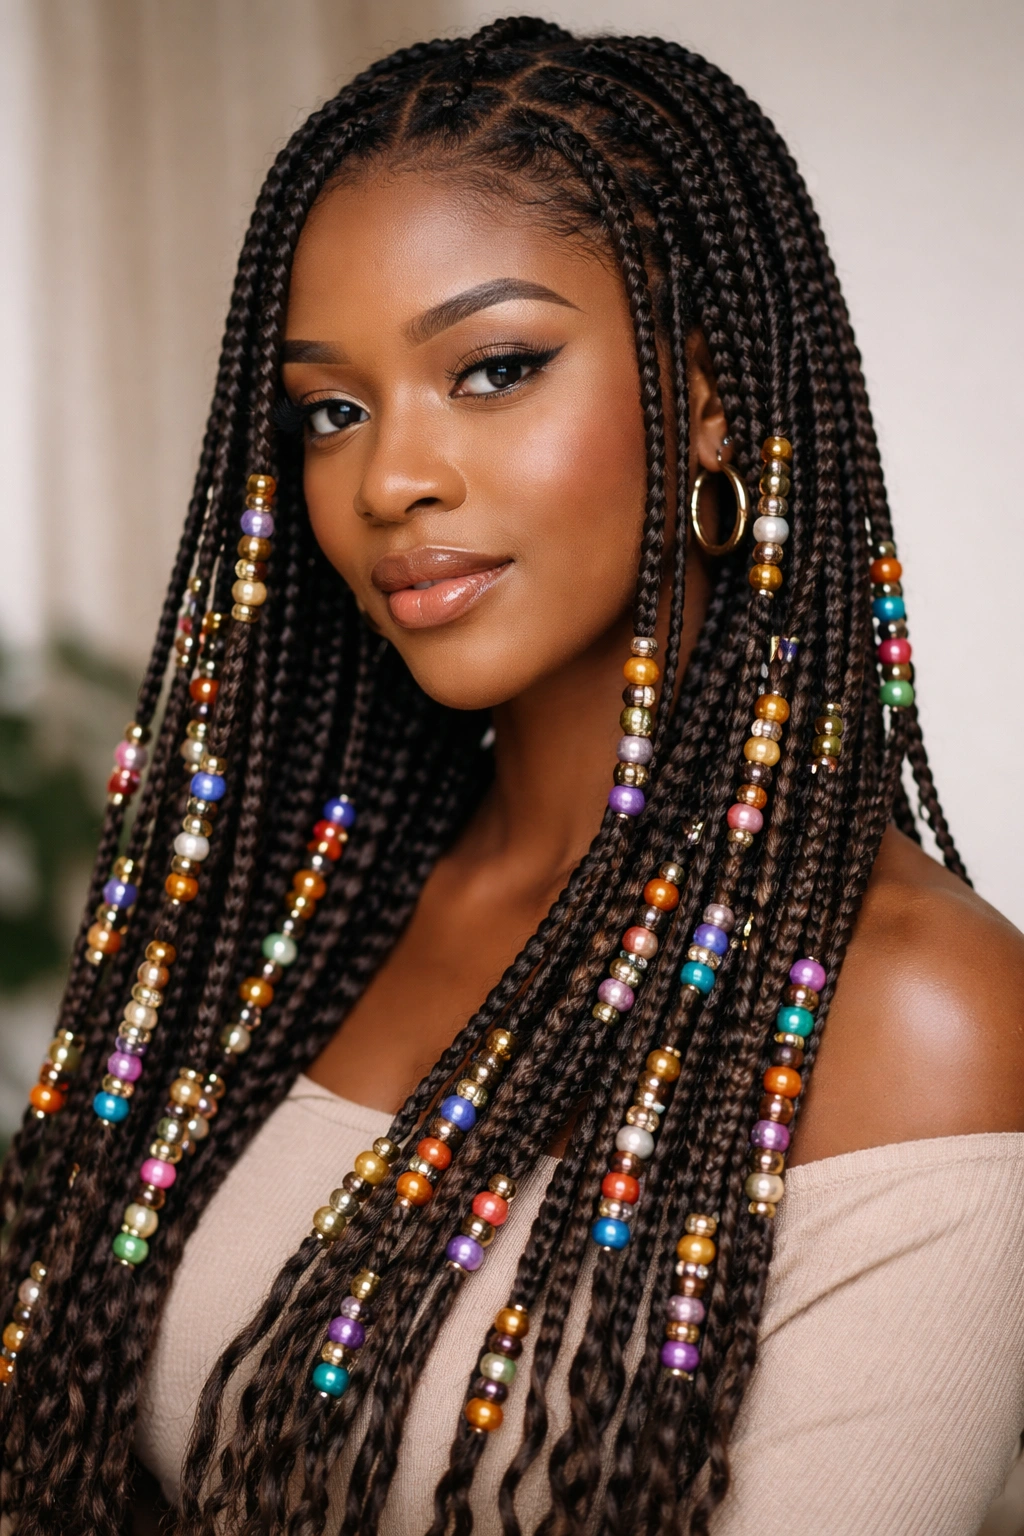
Colored bead box braids incorporate decorative beads into your braids, typically by threading beads onto individual braids or groups of braids after installation. The beads can match your braid color, contrast with them, or coordinate with your overall outfit and personal aesthetic. Glass beads, plastic beads, metal cuffs, wooden beads, and acrylic beads all work, each creating a different visual and textural effect.
Bead Placement and Styling Strategies
Beads can be positioned densely (multiple beads per braid), sparsely (scattered throughout), or in specific patterns (clustered near the ends, arranged in color sequences, or concentrated on one side). Some people use beads to mark the beginning of colored sections, others use them purely for visual decoration. The beauty of beaded braids is that the positioning is entirely up to your personal preference and styling vision.
Visual Impact and Maintenance Considerations
- Immediately transforms the look and feel of your braids — beads completely change the aesthetic without requiring new installation
- Allows daily creativity and changes — you can add, remove, or rearrange beads as frequently as you like
- Adds weight and texture — beads create visual interest and, depending on their material and size, auditory interest (beads make subtle clicking and rustling sounds as you move)
- Works for any occasion or mood — minimal beads for professional settings, densely beaded for festivals and celebration
- Can be adjusted without professional help — unlike installation changes, you can modify beading on your own or with a friend
- Requires checking for slippage — make sure beads are positioned securely enough that they don’t slide down your braids as you wear them
- May tangle in braids slightly — particularly if you’re using very small or delicate beads that can catch on the braid texture
Pro tip: If you’re beading braids for the first time, start with a few beads positioned near the ends where they’re easiest to secure and adjust. Once you feel confident with placement, you can get more creative.
12. Triangle/Knotless Box Braids
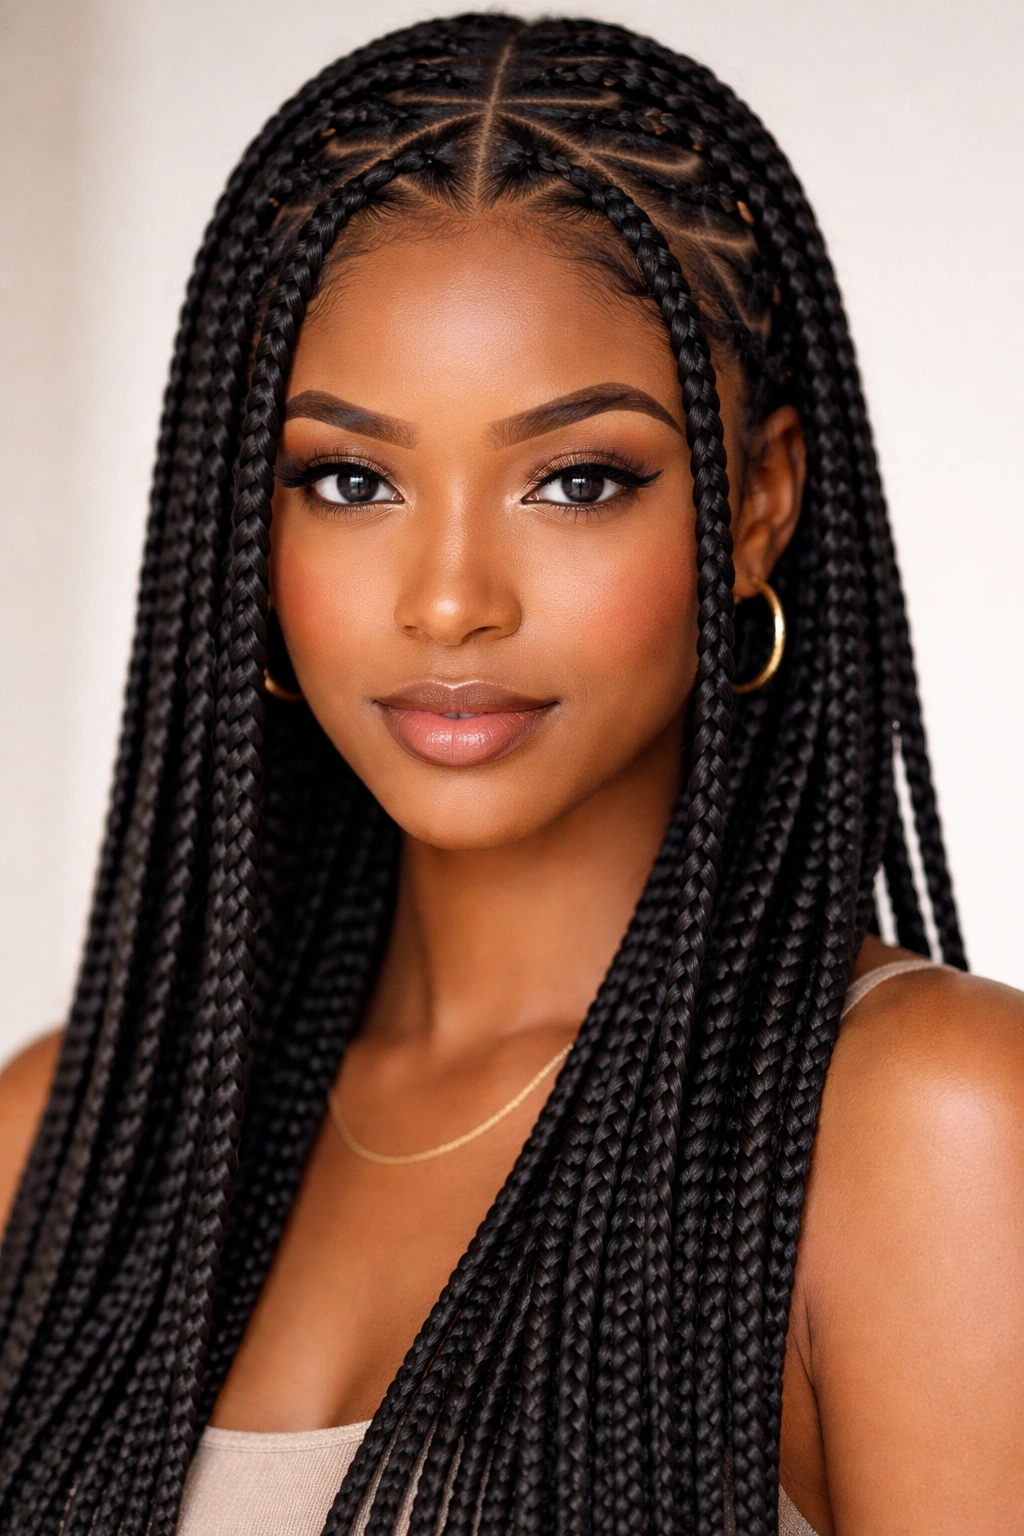
Triangle box braids (also called knotless braids or loop braids) use a different installation technique than traditional box braids. Instead of starting with a knot at the root where three sections of hair begin braiding, this technique uses a loop or threading method that allows braids to begin smoothly at the scalp without bulky knots. The result feels smoother against your scalp and looks more seamless at the roots.
Installation and Comfort Differences
Knotless braids install similarly to feed-in braids in that they require a specific technique and usually take longer than traditional box braids (typically 6 to 9 hours). The key difference is that knotless braiding begins with a smoother start rather than a three-strand knot, distributing tension differently across your scalp. Many people report that knotless braids feel less tight initially and remain more comfortable throughout the wear period.
Why Knotless Braids Are Growing in Popularity
- Reduced scalp tension and pulling — the smooth start and even distribution mean less pressure on your hairline and sensitive areas
- Looks more refined and natural at the roots — without visible knots, the braids blend more seamlessly with your scalp
- Feels comfortable for extended wear — many people keep knotless braids in for 8 to 10 weeks without discomfort
- Works beautifully with any braid length or thickness — you can do knotless jumbo braids, knotless thin braids, any variation
- Requires an experienced stylist — not all braiders offer knotless braiding, so finding someone skilled in the technique is essential
- May cost slightly more than traditional box braids — the extra installation time and technique expertise justify a higher fee
- Creates a softer aesthetic — the smooth roots and refined appearance feel slightly more elegant than traditional knots
Insider note: If you have a sensitive scalp, experience breakage around your hairline, or simply want the most comfortable braiding experience possible, knotless braids are worth the extra time and investment.
Final Thoughts
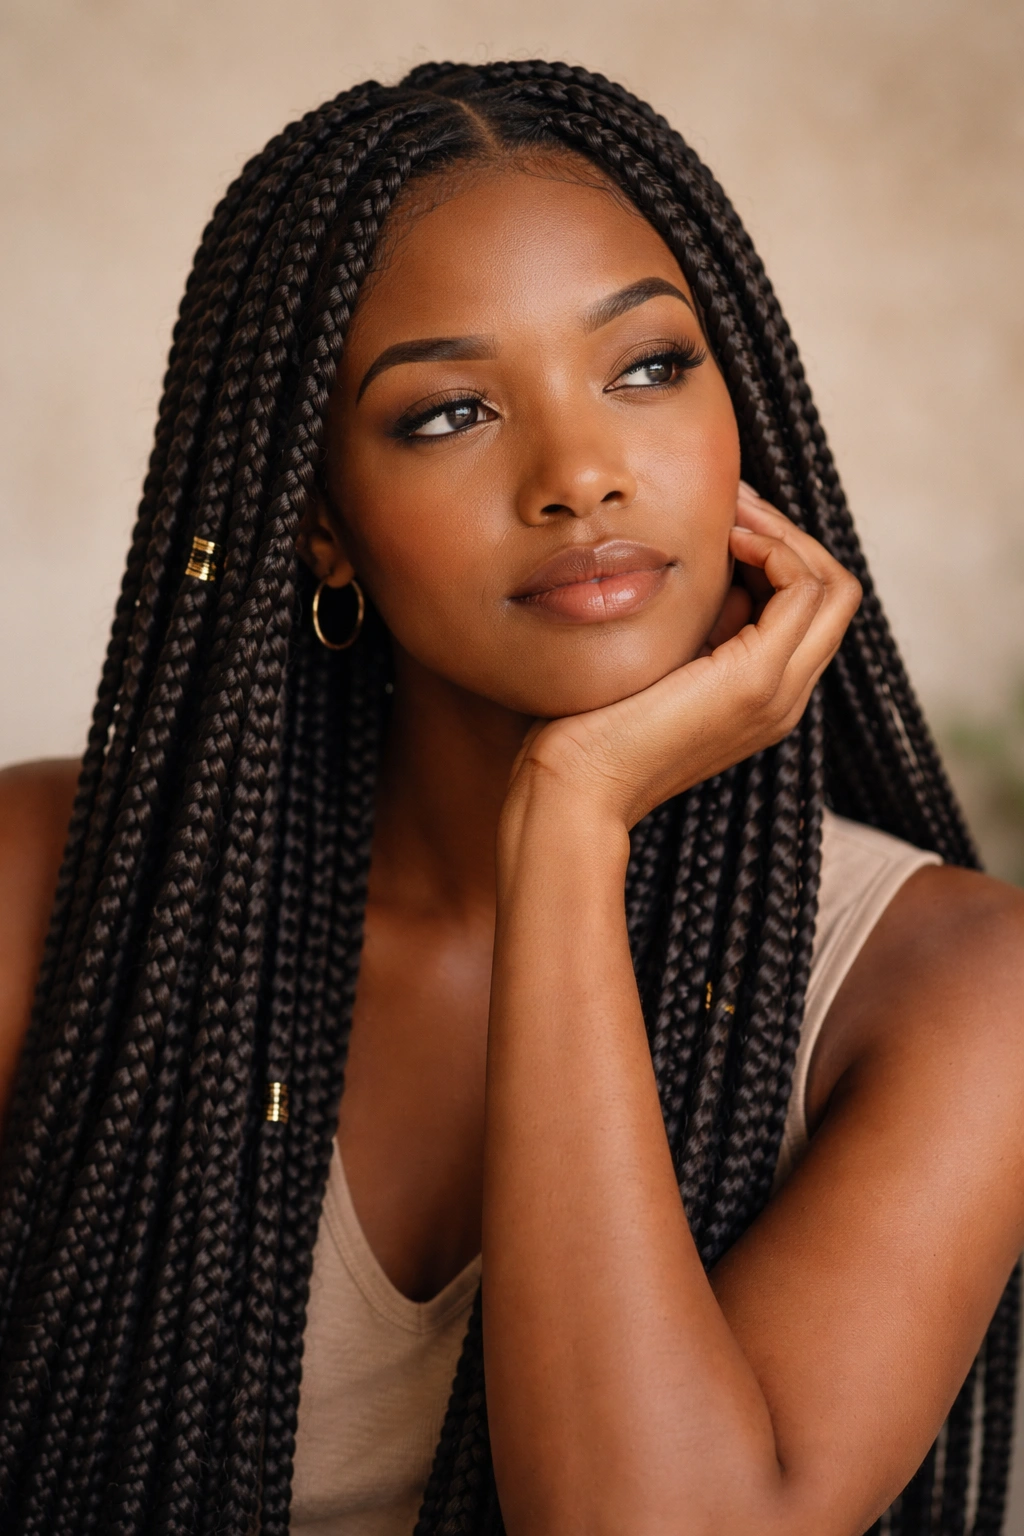
The perfect box braid style is the one that aligns with your lifestyle, aesthetic preferences, and hair care goals. Whether you choose classic waist-length braids for timeless versatility, goddess wraps for polished refinement, jumbo braids for bold confidence, or any of the other variations here, the fundamental power of box braids remains the same — they protect your natural hair while allowing you creative expression and weeks of low-manipulation styling.
The right stylist makes all the difference in how your chosen style looks, feels, and lasts. Take time to find someone whose previous work you admire, whose hygiene standards are impeccable, and whose communication style makes you feel heard and understood about your vision. Discuss your lifestyle (how many hours you can commit to styling, whether you need a professional or casual look, what your nighttime routine looks like) so your stylist can recommend the best variation for your actual life, not just the one that photographs most dramatically.
Once your braids are installed, commit to maintaining them thoughtfully — moisturize your scalp regularly, sleep with protective silk or satin coverage, wash gently when needed, and pay attention to what your hair and scalp are telling you. Box braids should feel protective and comfortable, never tight or painful. If something doesn’t feel right, address it promptly rather than toughing it out for weeks. Your natural hair’s health and your physical comfort always come first.
