



The messy bun has a reputation for being, well, messy. Most people throw their hair up in a hurried spiral and call it done — but that’s where the disconnect happens. A truly polished messy bun isn’t actually messy at all. It’s intentional, structured, and designed to look effortlessly put-together rather than like you’ve just rolled out of bed. The difference between a sloppy messy bun and a clean, elegant one comes down to technique, texture preparation, and understanding which style actually suits your face shape and hair type.
The beauty of the polished messy bun is that it works everywhere. Wear it to the office and look professional and composed. Wear it to brunch and feel relaxed yet refined. Wear it to a wedding and absolutely nail the “guest who clearly has her life together” vibe. It’s the rare hairstyle that bridges the gap between casual and dressy, effortless and intentional, fun and sophisticated. The trick is knowing which variation to choose and how to execute it so that every strand falls exactly where it should — which looks accidental but absolutely isn’t.
What separates a clean messy bun from its chaotic cousin is preparation and precision. You need the right products, the right sectioning technique, and the right understanding of how to create structure without looking stiff. You also need to know that not every messy bun style is created equal. Some work better for thick hair, others for fine hair. Some flatter round faces, others suit longer face shapes. Some hold up all day, others are better for shorter occasions. The eight styles ahead represent the most flattering, most wearable, and most genuinely polished variations you can master — each one designed to look intentional, elegant, and sophisticated while maintaining that coveted “I didn’t try too hard” attitude.
What Makes a Clean Messy Bun Different
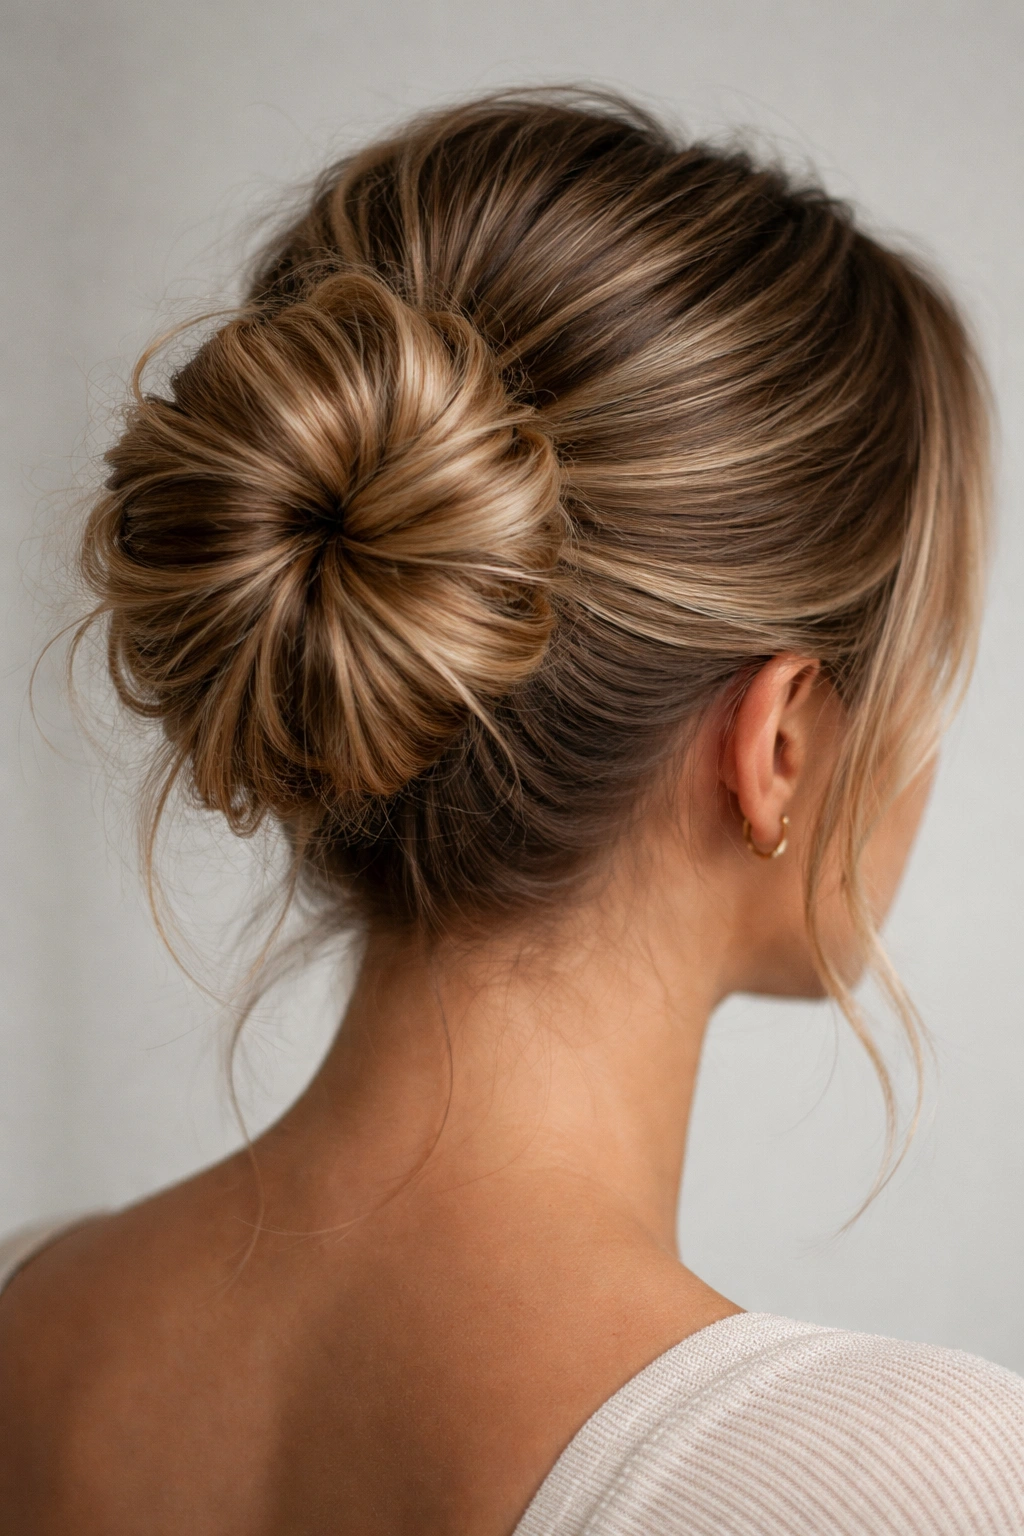
The confusion between a messy bun and a clean messy bun comes down to one fundamental difference: control. A standard messy bun happens when you twist or loop your hair without any real plan and hope it holds. A clean messy bun is built on a foundation of intentional sections, strategic texture, and precise placement of each component.
The visual difference is unmistakable. A clean messy bun has a defined shape — whether that’s a compact knot, a romantic spiral, or a textured bubble effect. The individual pieces and loops are visible and arranged on purpose, not scattered randomly. The base stays tucked and secure, while the top layers are left slightly loose and textured for that signature soft, pieced quality. Nothing is flying away. Nothing looks like you forgot to finish getting ready.
Texture is absolutely critical to a clean messy bun. This isn’t about creating literal texture with heat styling tools, though that helps. It’s about making sure your hair has enough grip and hold to stay exactly where you place it. That’s why all the best clean messy bun styles start with the same fundamental preparation: either second-day hair with natural oils, hair that’s been dry-shampooed for grip, or hair that’s been lightly textured with a texture spray or salt spray. Freshly shampooed, silky-smooth hair won’t hold a clean messy bun — it’ll just slip out of position within an hour.
The other defining characteristic is neatness at the base. While the top can be deliberately undone, the foundation of a clean messy bun is always smooth and polished. The base of the bun is typically twisted, braided, or wrapped tightly to create a secure anchor. Only once that foundation is solid do you loosen and separate the top layers to create the tousled, romantic effect. It’s the contrast between the neat base and the relaxed crown that makes the whole thing read as sophisticated rather than sloppy.
Essential Techniques for a Polished Messy Bun
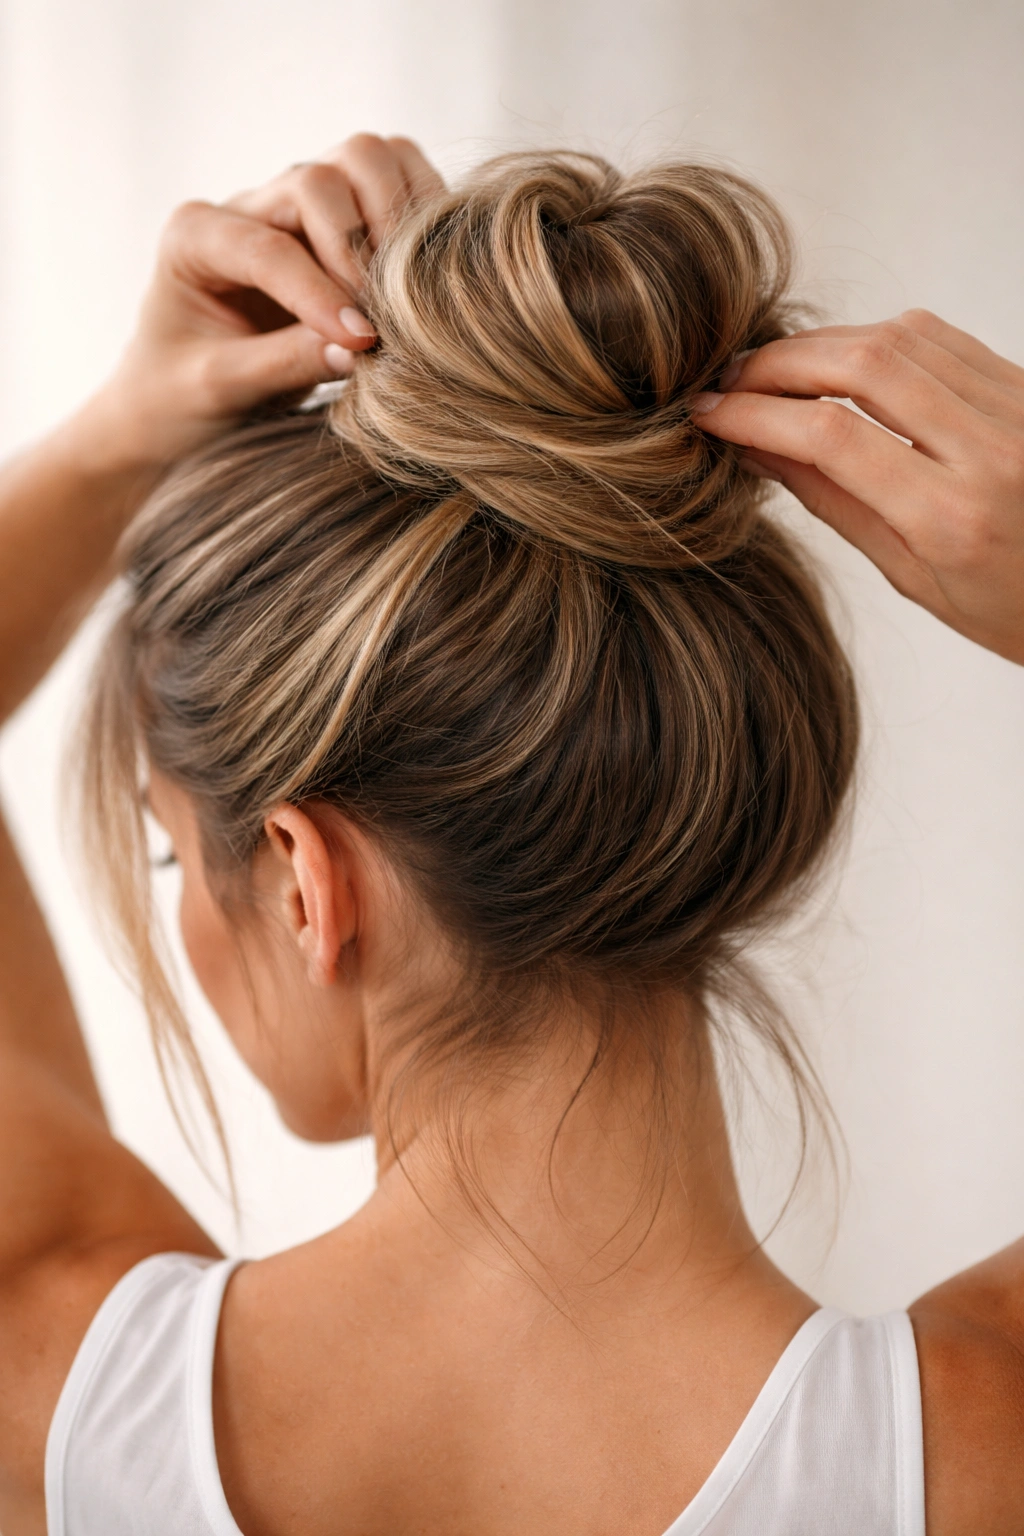
Every single clean messy bun style relies on a handful of core techniques that you’ll use over and over. Master these, and you can execute any of the eight styles that follow with confidence and consistency.
Sectioning is your first skill. Always divide your hair into at least two sections before you start building your bun: the base section that will form the foundation of your bun, and the top section that you’ll manipulate for texture and shape. For most of the styles ahead, you’ll gather all your hair as if you’re making a normal ponytail, then work with the bottom two-thirds as your bun base and leave the top third slightly loose to be separated and texturized after the bun is formed.
Twisting versus braiding creates fundamentally different textures. A twisted bun base is smoother and more refined — you simply twist a section of hair tightly and wrap it into a knot. A braided base creates more visible texture and is actually easier for beginners because it holds more securely. Choose your technique based on how much texture you want and how much time you have. Twists are faster; braids are more forgiving.
Texturizing and loosening is what separates a clean messy bun from a tight, boring one. Once your base is secured, use your fingers to gently pull and separate the top layers of hair. Don’t yank — use small, controlled movements to create soft, intentional waves and loops. This is done one section at a time, moving from the center outward, until you’ve created the amount of texture you want.
Securing without slipping matters more than most people realize. Always use bobby pins that match your hair color, and pin strategically at the base where the pins won’t show. For clean messy buns, you typically need 4-6 bobby pins minimum, sometimes more depending on your hair thickness and the style you’re creating. Pin in an X pattern or a crosshatch formation for maximum hold.
Product application should be minimal but intentional. A light spray of texture spray before you start builds grip. A tiny amount of pomade or wax on your fingers helps tame flyaways at the very end without making anything look greasy. Avoid heavy products that weigh hair down — clean messy buns look best when they’re airy and soft, not slicked down.
1. The Classic Twisted Messy Bun
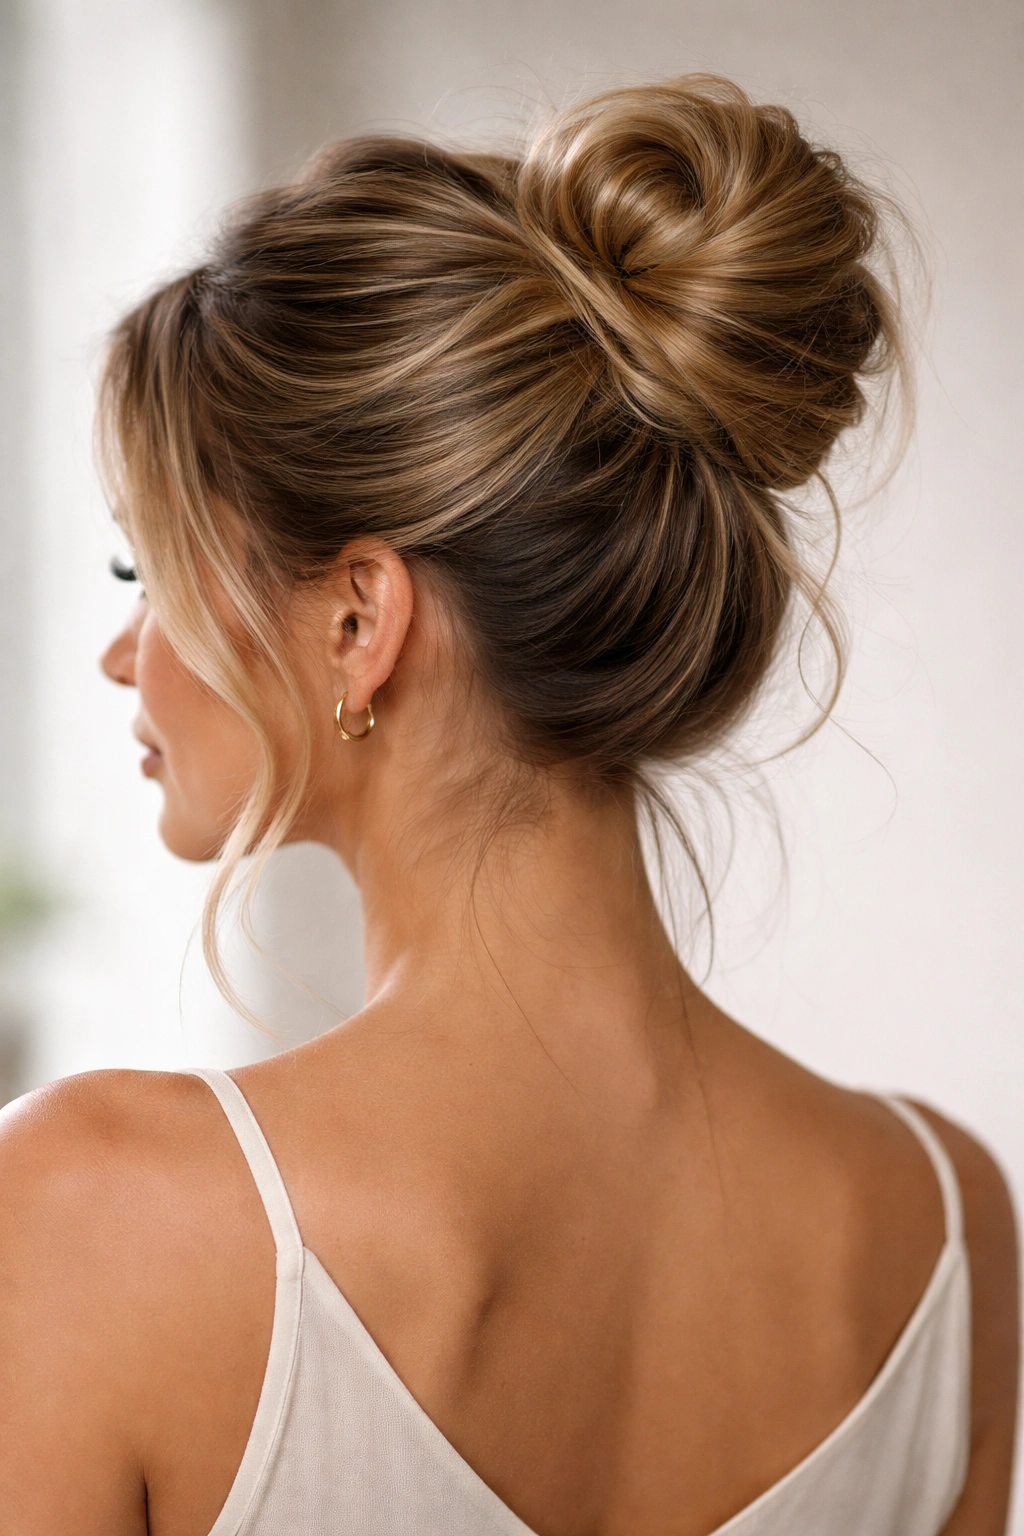
This is the foundation style that most people are actually trying to achieve when they attempt a messy bun. It’s refined enough for professional settings, romantic enough for dates, and achievable enough that you can master it in three tries. The classic twisted messy bun works on almost every hair type and every face shape because the variations are flexible.
How to Create It
Start with textured hair — second-day hair is ideal. Flip your head upside down and gather all your hair into a high or mid-height ponytail using an elastic. The height depends on your preference and face shape; higher buns elongate the face, while mid-height buns are more flattering on round faces. Flip your head back up and twist the entire ponytail clockwise (or counterclockwise, whichever direction feels natural). Keep the twist tight and controlled as you wrap it around the base of the ponytail, forming a spiral knot. Secure the end with bobby pins inserted into the bun base so they’re hidden. Now comes the critical step: use your fingers to gently pull out small sections of the twist, starting from the top and working downward, creating that soft, undone look. Pull at different angles to create dimension and texture.
Why This Style Works
The twisted messy bun works because the mechanics are simple enough that beginners can execute it, but sophisticated enough that it looks intentional and elegant. The spiral of the twist creates natural dimension without requiring any heat styling or additional texturizing products. The slight messiness reads as romantic rather than sloppy because the base twist is clearly defined and the pulling-out happens in a controlled, visible way. This style also has incredible staying power — the twisted base holds hair more securely than a looped or wrapped bun, so it’s perfect if you’re going to be active or if you need your hair to last through a full day.
Quick Style Facts:
- Best for: All hair types, especially medium to thick hair
- Hold time: 8+ hours with proper securing
- Face shape: Flattering on most faces; wear high for elongated faces, mid-height for round faces
- Skill level: Beginner to intermediate
- Best occasion: Office, casual dates, brunch, errands
Pro tip: Spray your twist with light texture spray before you pull out the sections — it grips better and creates more defined texture pulls.
2. The Low Romantic Messy Bun
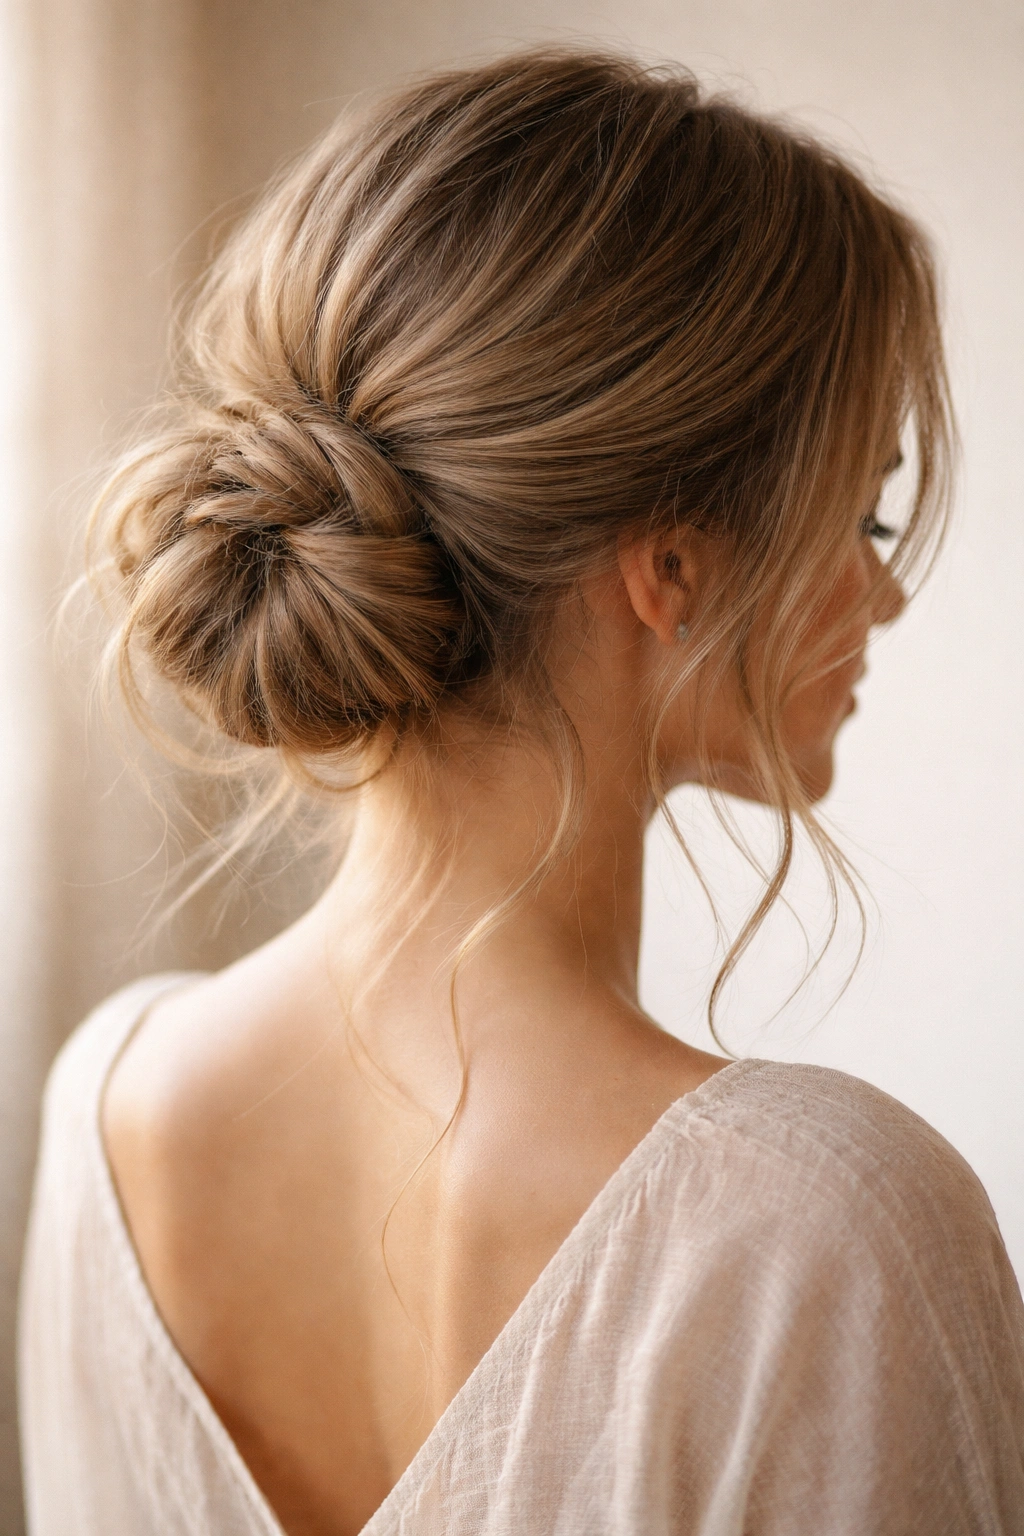
If the classic twisted messy bun is your professional go-to, the low romantic messy bun is your “I’m effortlessly elegant” style. Positioned low on the back of the head, this version reads as soft, feminine, and intentionally undone in the best possible way. It’s the messy bun style you see in editorials and fashion campaigns because it photographs beautifully and flatters virtually everyone.
How to Create It
Gather your hair into a low ponytail at the nape of your neck — aim for where your ponytail would sit if you were wearing your hair in a low pony. Use a textured elastic or wrap a small section of hair around the base of the elastic to hide it. Divide the ponytail into two equal sections. Twist each section loosely, then wrap them around each other to create a loose, braided-looking spiral. Secure the end as it wraps around the base with bobby pins. This creates a bun that has more definition and visible texture than a single-twisted version. Gently pull sections from the top and sides to create a soft, slightly undone crown. The key here is to leave more strands loose than you would in a classic bun — this style should look like you took down your hair halfway through the day and decided to pin it back up casually.
Why This Style Works
The low position is incredibly flattering because it elongates the neck and creates a graceful line from the shoulders up. The romantic quality comes from the fact that there are more visible, separated strands at the crown, giving it a genuinely relaxed vibe. The double-twist base is stronger than a single twist, so it holds up better when you have more strands pulled loose. This style also works beautifully with face-framing layers because the softness at the front of the face combined with the looseness at the crown creates a cohesive, intentional look.
Quick Style Facts:
- Best for: All hair types; especially flattering for longer faces and those with defined jawlines
- Hold time: 6-8 hours (lower buns shift more easily than high ones)
- Face shape: Most flattering on longer, oval faces; also beautiful on heart-shaped faces
- Skill level: Intermediate
- Best occasion: Dates, weddings, brunch, casual events
Worth knowing: Low messy buns can slip down throughout the day because gravity works against you. Pin them extra-securely and consider using a hair stick or decorative pin for both function and style.
3. The Sleek Messy Bun with Face-Framing Layers
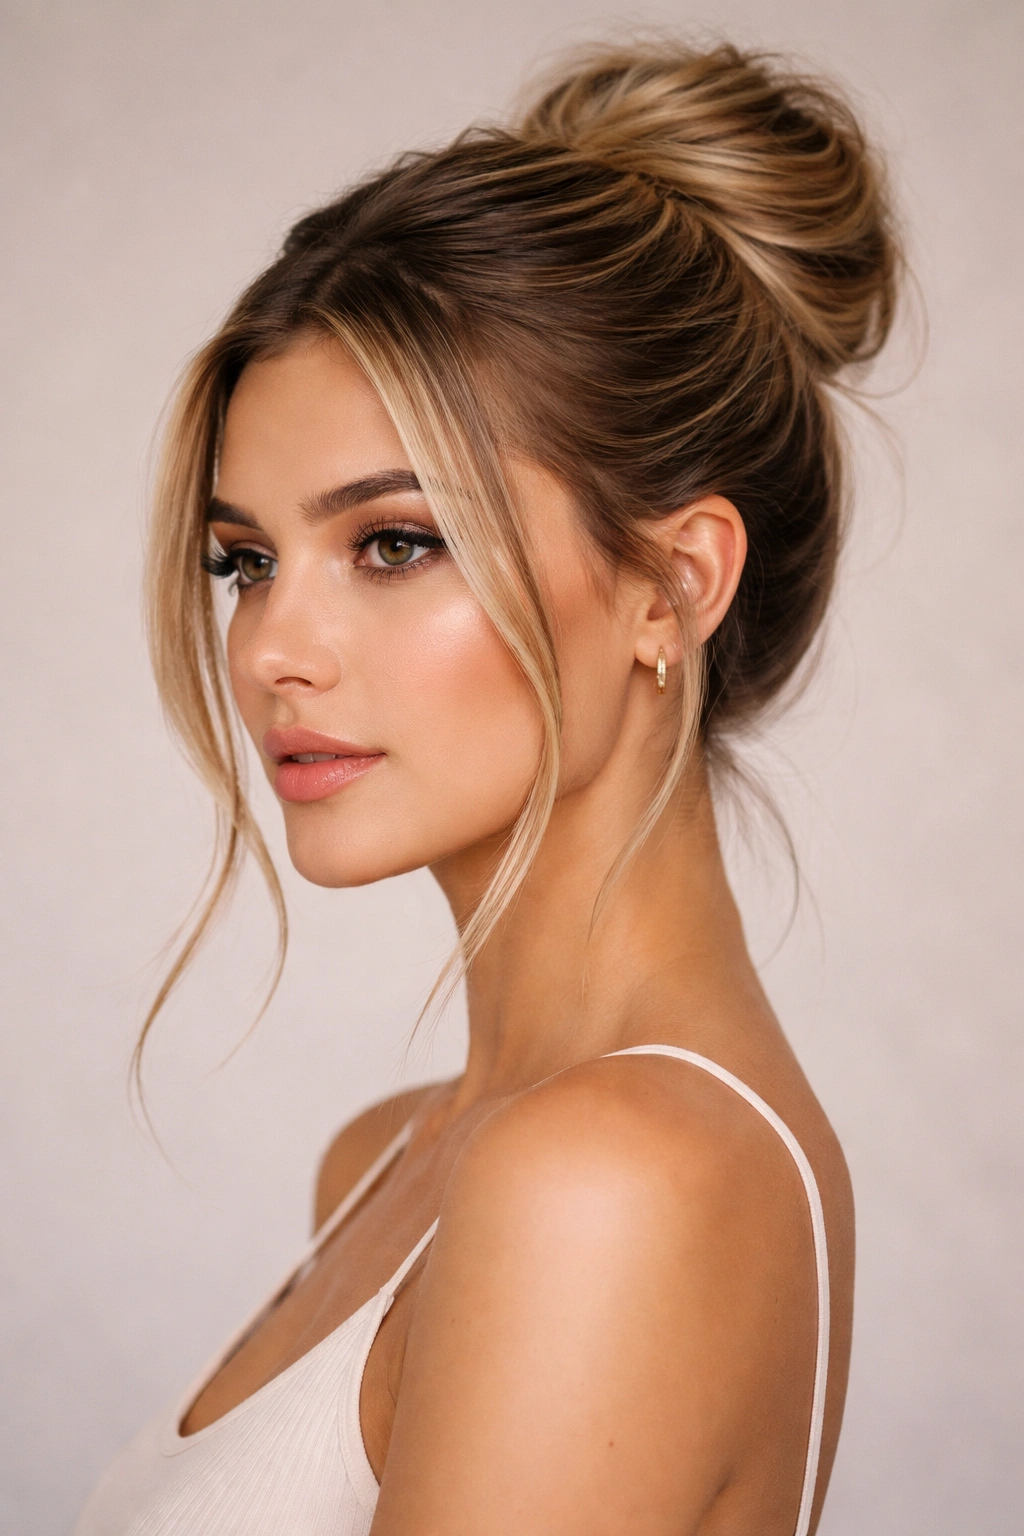
This variation adds intentional face-framing pieces before you create the bun, elevating the whole look into something that feels modern and editorial. It’s perfect if you have any kind of layers in your cut, but you can create this effect even with a blunt cut by strategically pulling out a few front strands before building the bun.
How to Create It
Before gathering your hair into a ponytail, pull out two face-framing sections — one on each side of your face, starting from around your temples. These should be about one inch wide and run from the hairline back to around ear level. Clip these sections out of the way temporarily. Now create your ponytail with the remaining hair and build your messy bun using whichever technique you prefer (twisted, braided, or looped). Once the bun is secure and you’ve texturized the crown, release the face-framing sections. Leave them completely straight and smooth, without any texture — this creates a striking contrast with the messy crown. If you want to enhance the frame, you can very lightly curl the ends of these sections away from the face using a 1-inch curling iron, just enough to create a soft bend.
Why This Style Works
Face-framing pieces create the illusion of a more sculpted, intentional hairstyle. They also soften your overall look, which is crucial if you’re wearing a messy bun because the style itself is already textured and relaxed. The straight, polished frame against the textured crown creates visual interest and makes the whole thing read as “thought out” rather than “thrown together.” This is also the best messy bun style if you have any texture or wave in your natural hair that you want to downplay — the sleek face-frame draws the eye inward rather than emphasizing texture throughout.
Quick Style Facts:
- Best for: Those with layers or fine features; works on all hair types
- Hold time: 7-9 hours (same as the base bun style you use)
- Face shape: Flattering on most faces; especially beautiful on square and angular faces
- Skill level: Intermediate
- Best occasion: Office, dates, mixed casual and dressier events
Insider note: The straighter and sleeker your face-frame, the messier you can make the crown and still look polished. They balance each other out.
4. The Braided Wrap Messy Bun
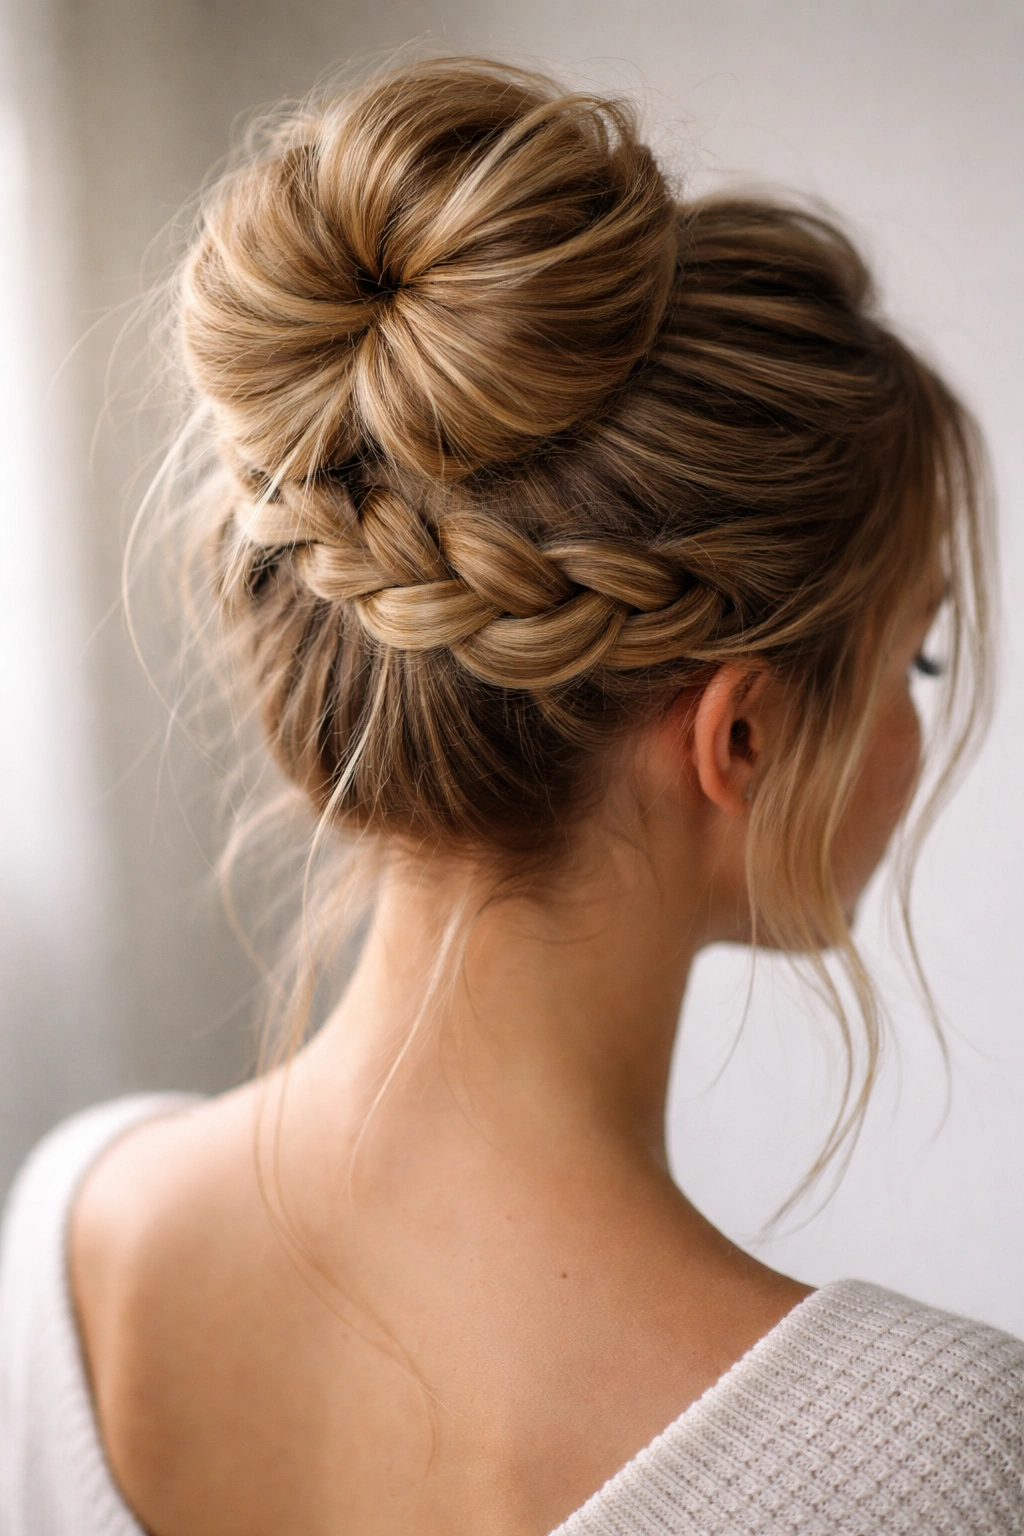
This style adds a visual element that makes it instantly more interesting than a basic twisted bun. Instead of wrapping your entire ponytail into a single bun, you create a braid and wrap that braid around your base, leaving the ends slightly loose for texture. It sounds complicated but is actually easier to control than you’d think.
How to Create It
Gather your hair into a high or mid-height ponytail. Divide the ponytail into three sections and create a loose, loose three-strand braid — and by loose, I mean don’t tension it tightly. You want the braid to have some volume as you create it. Stop braiding about two inches from the ends of your hair, leaving those ends loose and unbraided. Now take that braid and wrap it around the base of the ponytail, spiraling it around like you’re creating a bun, and secure it with bobby pins as you go. The unbraided ends should stick out slightly from the spiral, giving you built-in texture. Pull gently on the sides of the braid to expand it slightly, creating more dimension, and separate the loose ends at the crown to create a soft, romantic finish.
Why This Style Works
The braid adds visual texture and interest that a simple twist can’t match. Because you’re working with a braid rather than a twist, the strands naturally separate more, making the texture appear more intentional and less accidental. The visible braid wrapping around the base creates a focal point that makes the style feel more sophisticated and considered. This is also one of the most forgiving messy bun styles because if a few strands escape, they just look like part of the deliberately textured design rather than mistakes.
Quick Style Facts:
- Best for: Medium to thick hair; especially beautiful on those who like visible texture and detail
- Hold time: 8-10 hours (braids hold more securely than twists)
- Face shape: Flattering on most faces; especially nice on those with longer face shapes
- Skill level: Intermediate to advanced
- Best occasion: Weddings, special events, festivals, dates
Pro tip: Create your braid a little bit looser than you normally would — the looser the braid, the messier and more romantic your finished bun will look.
5. The Half-Up Messy Bun
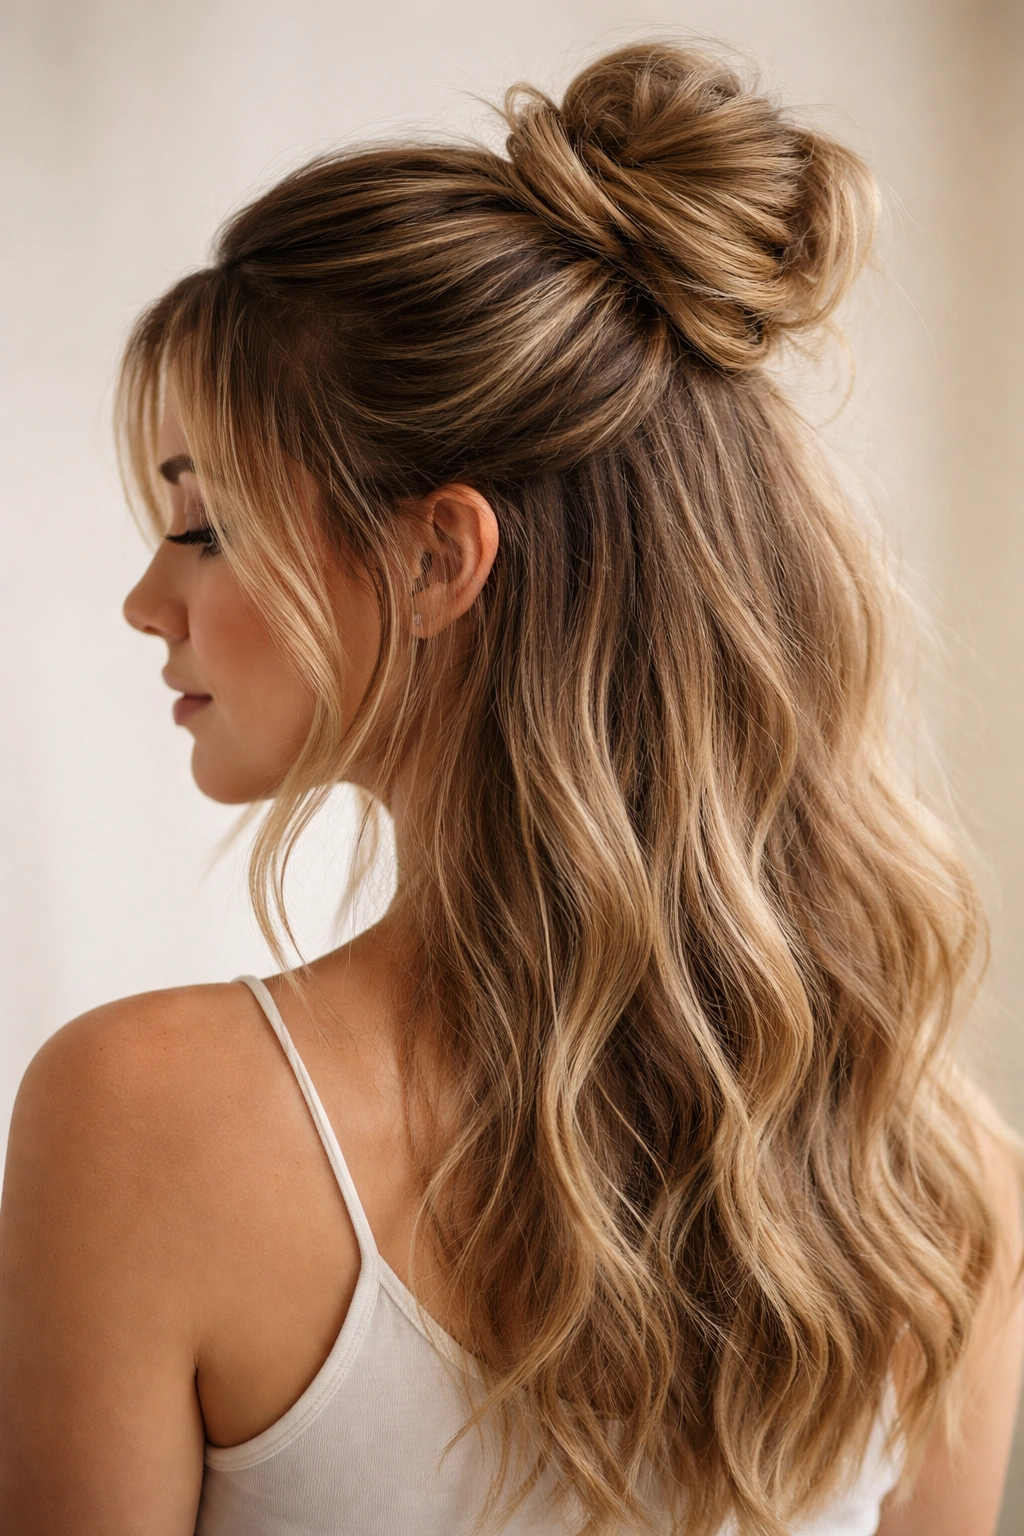
Not everyone wants to put their entire head of hair up, and that’s where the half-up messy bun saves the day. This variation keeps the bottom half of your hair down and loose while the top half is gathered and styled into a textured bun. It’s perfect for days when you want to look polished without committing to a full updo, and it’s incredibly flattering on almost everyone.
How to Create It
Section off the top half of your hair — imagine a line from ear to ear across the crown. Gather only the top section into a ponytail at the crown. Create a small twisted or braided messy bun using just this section, keeping it compact because you’re working with less hair. Secure it well with bobby pins. Leave the bottom section of hair completely down and loose. For a more finished look, curl the bottom section lightly with a curling iron, or create soft waves by braiding it while damp and releasing it dry. The contrast between the structured bun at the crown and the loose waves at the bottom creates a beautiful, intentional look.
Why This Style Works
The half-up messy bun is a psychological win because it feels like you’ve done your hair without actually committing to a full updo. It keeps hair off your face and neck (so it’s practical), while leaving enough length down to frame your face beautifully. The style also works on all hair lengths, which is rare for bun styles — you can do this with shoulder-length hair or hip-length hair equally well. It’s also incredibly versatile; you can dress it up with a claw clip or hair stick, or leave it plain for a casual look.
Quick Style Facts:
- Best for: All hair types and lengths; especially flattering on those with longer hair
- Hold time: 7-9 hours for the bun, all-day wear for the loose section
- Face shape: Universally flattering; works beautifully on every face shape
- Skill level: Beginner to intermediate
- Best occasion: Casual events, office, dates, festivals, mixed settings
Worth knowing: Make sure your bun is small and compact in a half-up style — if it’s too large, it can look unbalanced compared to the loose hair below it. Aim for a bun roughly the size of a golf ball or slightly smaller.
6. The Textured Bubble Bun
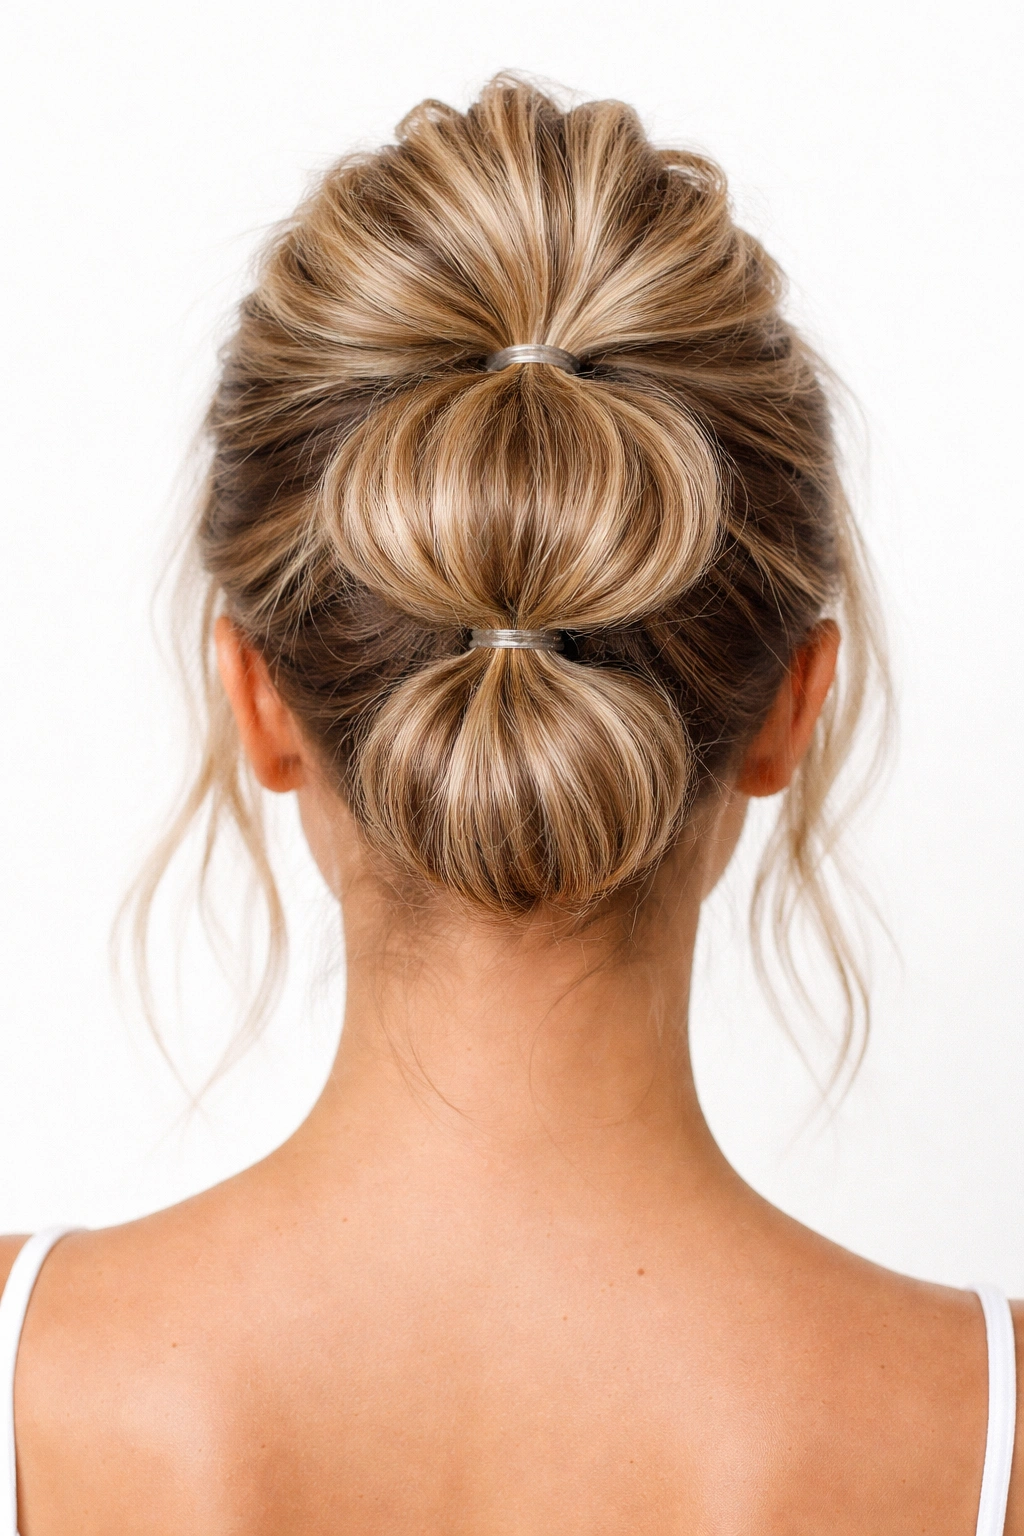
This modern variation builds intentional structure by creating multiple small buns stacked on top of each other, held together with elastics and then texturized into one unified, puffy shape. It’s playful and polished at the same time, which is a rare and delightful combination.
How to Create It
Gather all your hair into a high ponytail. Slide an elastic down about two inches from the base of the ponytail, creating the first bubble. Pull the hair above that elastic gently outward to expand it. Slide a second elastic down about two inches below the first, creating a second bubble. Expand this one too. Repeat once more to create three bubbles stacked on top of each other (you can add more for longer hair). Now comes the blending: gently pull out sections from the sides of each bubble and blend them together, so instead of seeing three distinct separated bubbles, you see one rounded, textured bun shape. The key is to make sure the bottom of each bubble blends smoothly into the top of the one below it.
Why This Style Works
The bubble bun creates instant dimension and a soft, pillowy shape that’s genuinely different from standard messy buns. Because you’re using elastics at intervals rather than creating one tight knot, the style has more volume and presence. It also distributes the weight of your hair more evenly, so it’s more comfortable to wear for long periods. The textured quality is built into the structure rather than created afterward, making the messiness feel very deliberate and modern.
Quick Style Facts:
- Best for: Medium to thick hair; works less well on very fine hair because the bubbles won’t hold shape
- Hold time: 8-10 hours if properly secured
- Face shape: Flattering on round and square faces; the height elongates proportions
- Skill level: Intermediate
- Best occasion: Casual events, festivals, brunch, creative workspaces
Insider note: Tighter elastics create more defined bubbles; looser elastics create a more blended, seamless look. Choose based on how much visible structure you want.
7. The Smooth Underbun Style
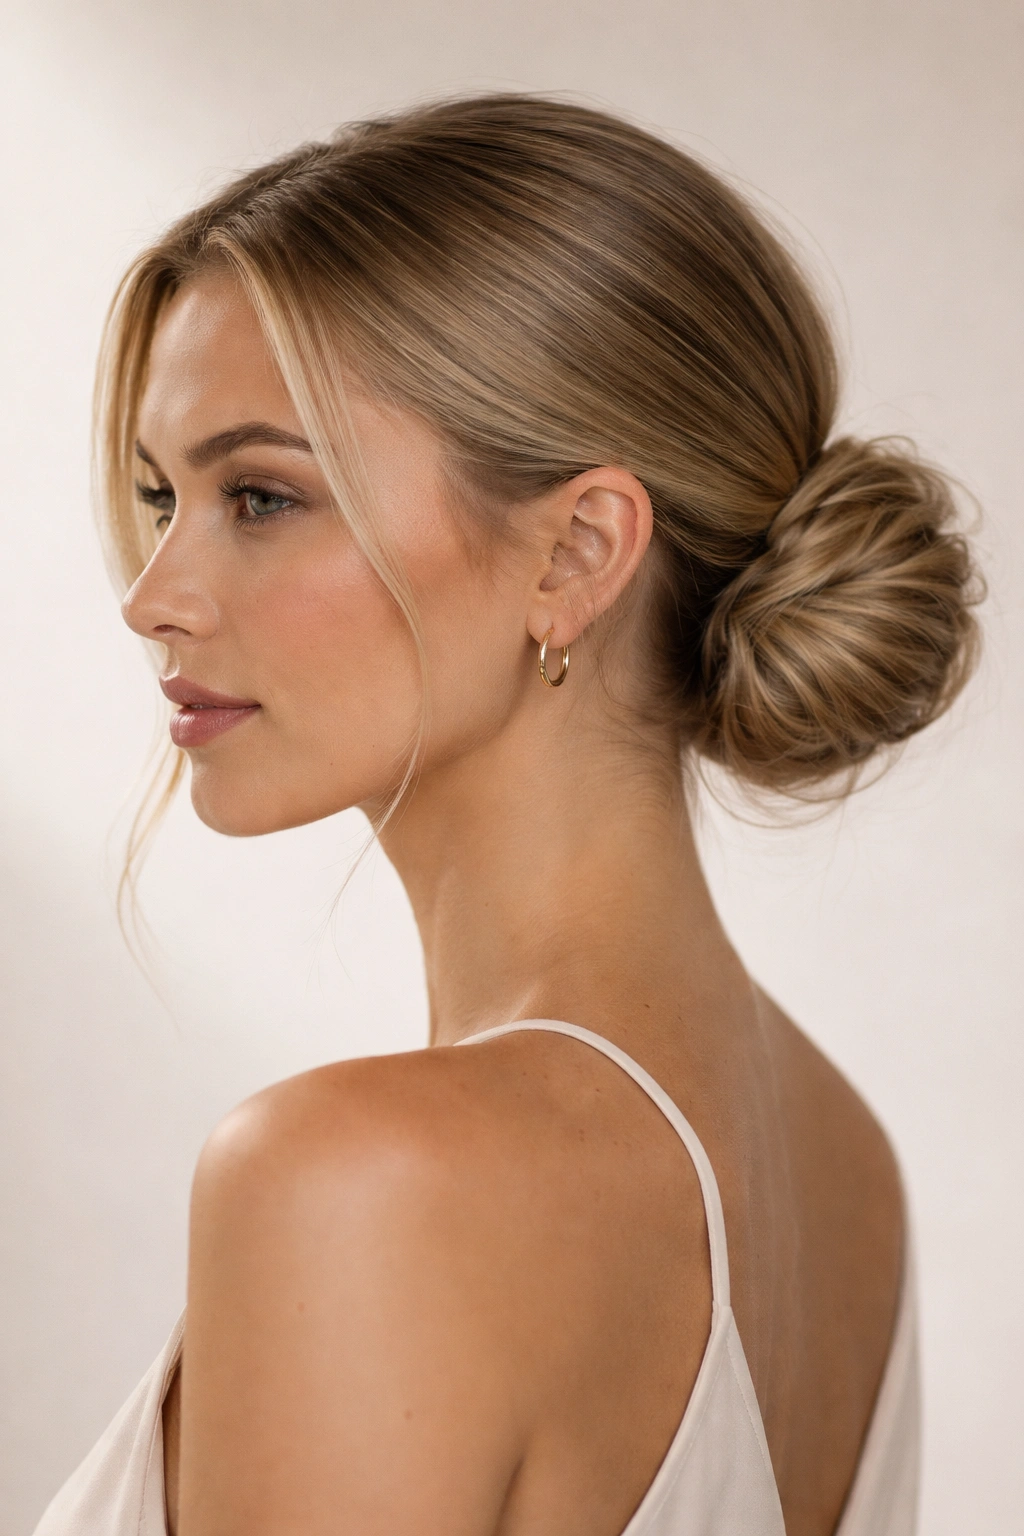
This elegant variation flips the messy bun concept on its head — literally. The top of your hair stays smooth and polished, while the underside of the bun is where the texture lives. It’s sophisticated, unexpected, and reads as very intentional and editorial.
How to Create It
Create a smooth, sleek low ponytail using a smoothing serum or pomade to tame any flyaways — this is the opposite of what you normally do for a messy bun. Smooth the ponytail back completely, creating a refined, almost severe look at the crown. Now at the base of the ponytail, gently twist or braid the hair and wrap it into a bun shape, but instead of leaving the top loose and textured, you’re going to keep the front smooth and work your texture into the back and sides of the bun where it won’t show from the front. This creates a bun that looks polished and sleek from the front but has beautiful textured dimension when viewed from the side or back.
Why This Style Works
The underbun style creates a sophisticated silhouette that flatters professional settings and formal events. The smooth front reads as intentional and refined, while the textured back keeps it from feeling too severe or done. This style is particularly flattering if you have a strong jawline or angular face because the smoothness emphasizes those features. It’s also perfect if you’re transitioning from a sleek style to something messier but aren’t quite ready to commit to a fully textured bun.
Quick Style Facts:
- Best for: All hair types; especially stunning on those with strong facial features
- Hold time: 8+ hours (smooth hair holds better than textured)
- Face shape: Especially flattering on oval, oblong, and heart-shaped faces
- Skill level: Intermediate
- Best occasion: Office, formal events, professional settings, elegant casual events
Pro tip: Use a boar-bristle brush to smooth your ponytail — it tames flyaways better than a paddle brush and creates a sleeker line.
8. The Looped Messy Bun
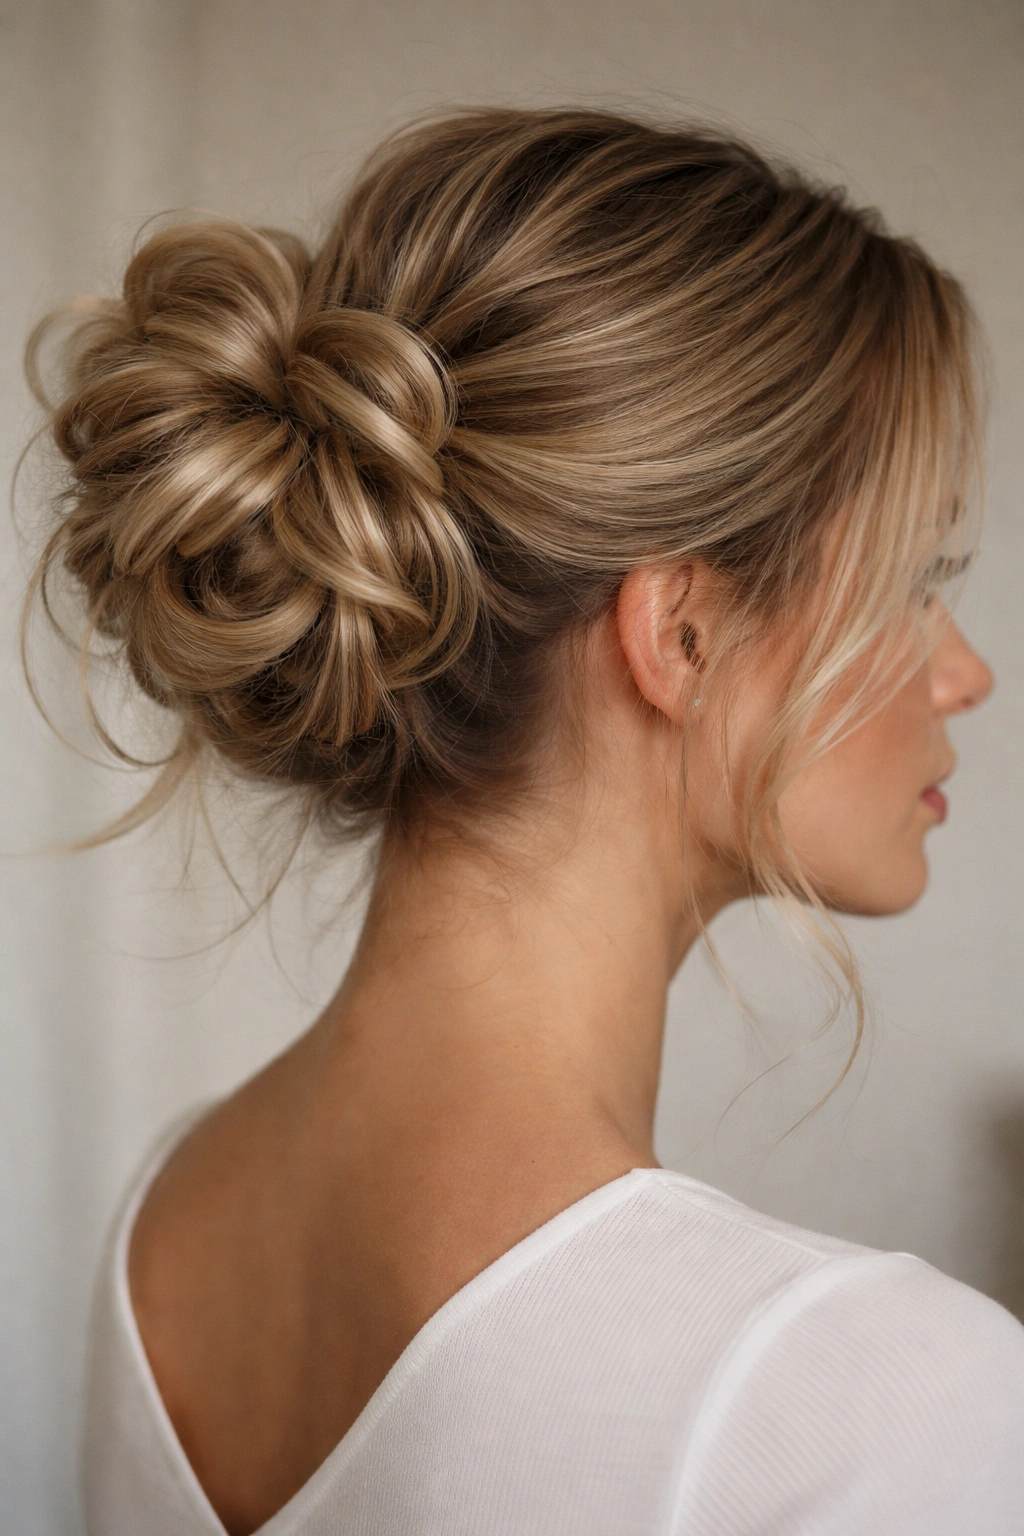
This playful variation is perhaps the most visibly “messy” of all the options, but it’s also the most obviously intentional because you can see exactly how it’s constructed. Instead of twisting or braiding, you’re creating loops and pinning them strategically to build the bun shape.
How to Create It
Gather your hair into a mid-height ponytail. Create a loop by taking a section of the ponytail, folding it up toward the base, and securing it with a bobby pin. Create a second loop next to the first. Continue this process, creating loops of varying sizes radiating out from the base, until you’ve used all or most of your hair. Leave some strands loose at the ends if you want a fuller texture. The key is to vary the size and direction of your loops — don’t make them all the same size or angle. Some loops should be looser and larger, others tighter and smaller. This variation in size creates depth and makes the whole thing look intentionally tousled rather than just randomly pinned.
Why This Style Works
The looped messy bun is the most sculptural variation because you can actually see and appreciate the structure you’ve created. It’s also the easiest to customize because you can adjust which loops you create, their size, and their placement until it looks exactly how you want. This style works beautifully with hair accessories like clips or hair sticks because the loops create natural places to insert them. It’s also the best choice if your hair is fine or slippery because the multiple pins hold infinitely better than a single twist or braid would.
Quick Style Facts:
- Best for: Fine to medium hair; thin hair actually holds loops better than thick hair because there’s less weight
- Hold time: 8-10 hours (multiple pins hold very securely)
- Face shape: Flattering on most faces; especially beautiful on heart-shaped and diamond-shaped faces
- Skill level: Beginner to intermediate (it looks complex but is actually very forgiving)
- Best occasion: Casual events, festivals, creative workspaces, brunch
Worth knowing: Don’t be afraid to leave your ponytail elastic visible in this style — some of the most polished looped buns have a visible elastic at the base. It’s part of the designed look, not a mistake.
Final Thoughts
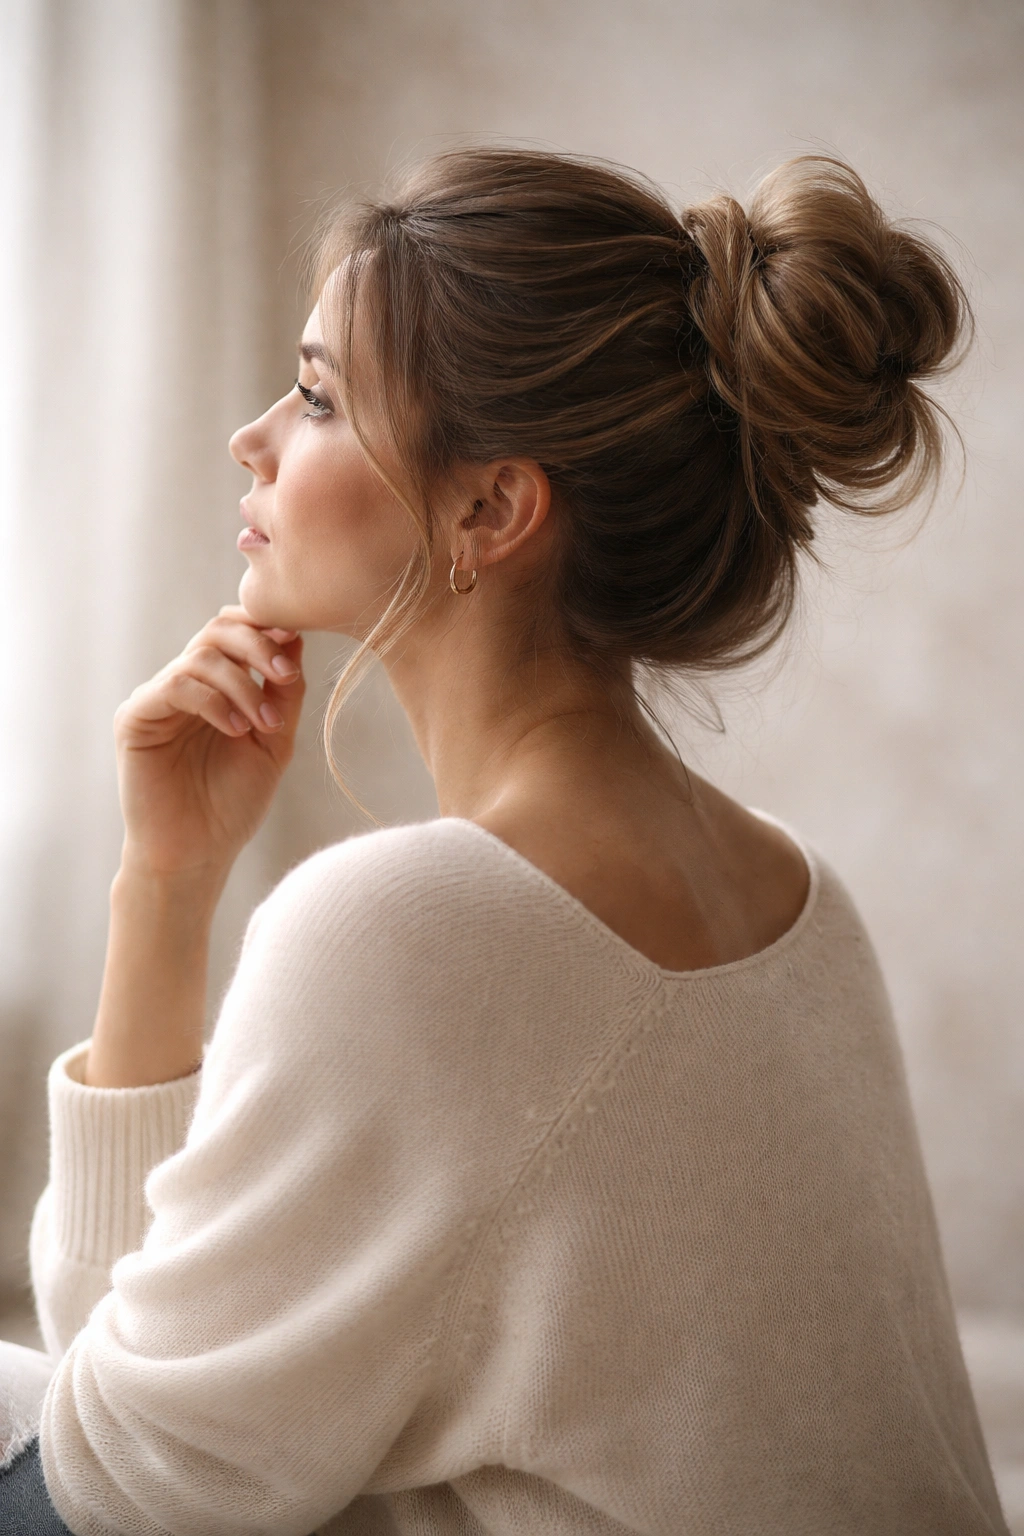
A clean messy bun isn’t luck, and it’s not something that magically happens to people with naturally perfect hair. It’s a learnable skill that comes down to understanding a few fundamental techniques: proper sectioning, intentional texturizing, strategic pinning, and the confidence to know when a bun is finished versus when it needs more pulling and separating.
Each of these eight styles offers something different depending on your hair type, face shape, the occasion, and your personal aesthetic. The classic twisted bun is your workhorse style — master this one first, and you’ll have a reliable option for virtually any situation. The looped bun is your insurance policy if you have fine hair that won’t hold other styles. The half-up bun is your solution when you want polish without commitment. And the braided wrap, the bubble bun, and the underbun are your creative options when you want to feel like you’re trying something new.
The real secret, though, is this: a truly polished messy bun always feels like you woke up that way, even though you absolutely didn’t. You control every strand, every pin, every level of texture. The “effortlessness” is completely intentional. Once you understand that the messiness is actually design, not accident, everything changes. You’ll stop trying to hide your work and start celebrating it. Your bun will read as sophisticated, considered, and genuinely polished — which is exactly what a clean messy bun should be.
