



The messy bun isn’t just a hairstyle—it’s a cultural reset button. There’s something undeniably liberating about pulling your hair up without pretense, yet somehow ending up with something that looks intentionally effortless. The 90s understood this perfectly, and these styles have cycled back into relevance because they capture something authentic that polished perfection simply cannot. Whether you’re rushing out the door or deliberating over your look for the evening, a well-executed messy bun speaks to confidence that doesn’t require explanation.
What makes 90s messy bun styles so enduring is their fundamental principle: they work with your hair’s natural texture rather than fighting against it. They embrace flyaways, celebrate volume, and turn “I didn’t have time to style this” into a refined aesthetic. The best part? You don’t need advanced styling skills or expensive products to pull them off. A few bobby pins, maybe a texture product or two, and you’re done. The 90s gave us permission to stop apologizing for our hair, and that’s a lesson worth revisiting.
The versatility is another reason these styles keep coming back. You can wear them to a casual coffee run, dress them up for an event, adapt them for different hair types and lengths, and make them work across seasons. They’re equally at home in a corporate setting when styled sleek or at a festival when you’re going for maximum texture. Plus, there’s something psychological about the messy bun—it signals both approachability and someone who doesn’t take themselves too seriously. That combination is genuinely timeless.
The styles ahead represent the best of what the 90s offered, filtered through modern technique and today’s understanding of what actually works for different hair types. Some lean into the undone, others add intentional structure. All of them prove that you don’t need complicated steps or hours of styling time to look put-together.
1. The Claw Clip Twisted Bun
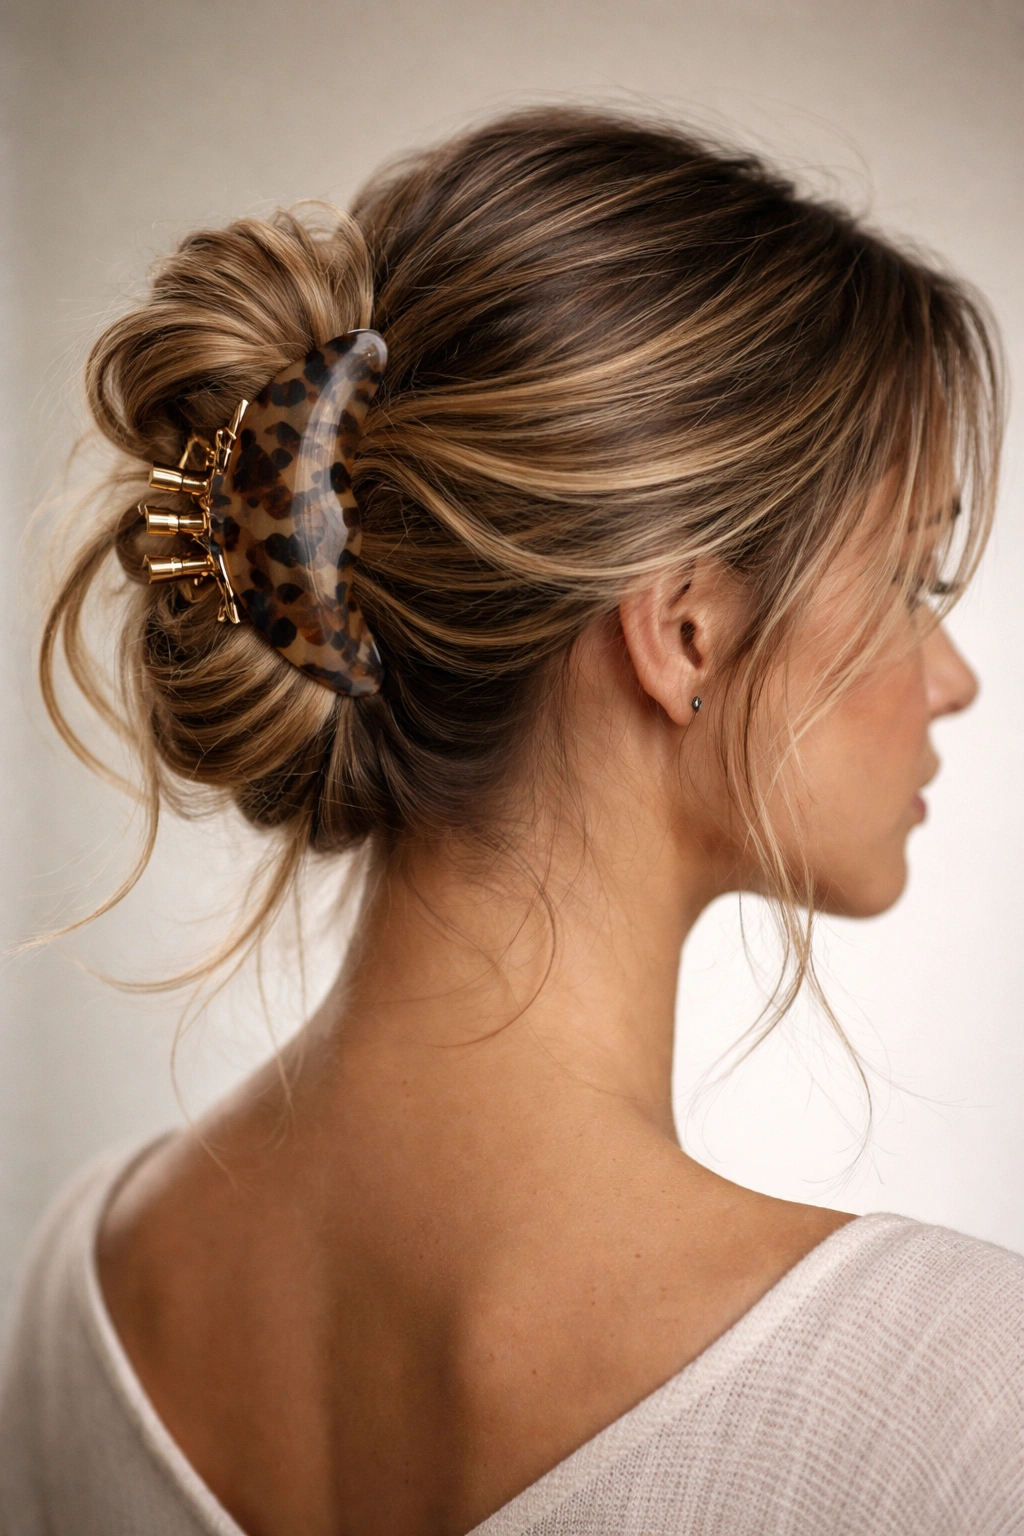
This style became iconic precisely because it looks like you grabbed a claw clip and twisted your hair once, and somehow it worked out perfectly. It’s the messy bun for people who genuinely don’t have a lot of time, yet it reads as intentional and polished. The magic lies in how the claw clip’s teeth grip loose, textured sections of hair, creating dimension and movement that a traditional elastic simply cannot achieve.
What Makes This Style Signature
The claw clip twisted bun works because it doesn’t require your hair to be smooth or perfectly gathered. In fact, the opposite is true—pieces falling out aren’t a failure, they’re the entire point. You’re taking hair that might otherwise look frizzy or unkempt and channeling that texture into a style that feels deliberate. The claw clip itself has become almost a fashion statement, available in tortoiseshell, metallics, pastels, and statement prints. This style transforms a hair clip from a practical tool into an accessory that’s actually visible and contributes to your overall look.
How to Get This Look
Start with hair that has some texture—if your hair is freshly washed and completely smooth, use a sea salt spray or texture powder first. Gather your hair loosely at the crown or slightly off-center, depending on your preference. Don’t make it tight; you want at least an inch of space between your hand and your scalp. Twist the gathered hair loosely, letting it wrap around itself once or twice. Secure it with your claw clip, positioning it so the clip is clearly visible and holding the twisted section. Pull out several pieces deliberately from the crown and around your face—these should frame your face gently. The key is making it look accidental while being intentional about which pieces fall out.
Who This Suits
This style flatters most face shapes because of the loose, framing pieces. It works especially well if you have fine hair (because the claw clip is visible, you don’t need tons of volume) or thick, textured hair (because the pieces that fall out create movement). The only real limitation is hair length—you’ll need at least shoulder-length hair for this to look intentional rather than like a half-hearted attempt. For very long hair, you might want to use two claw clips or a larger claw clip to ensure everything stays secured.
Insider tip: If your hair is slippery or won’t hold texture, spritz the gathered section lightly with hairspray before twisting. This doesn’t add stiffness—it just gives the hair tooth so it grips itself and holds the twist.
2. The Low Undone Ponytail Bun
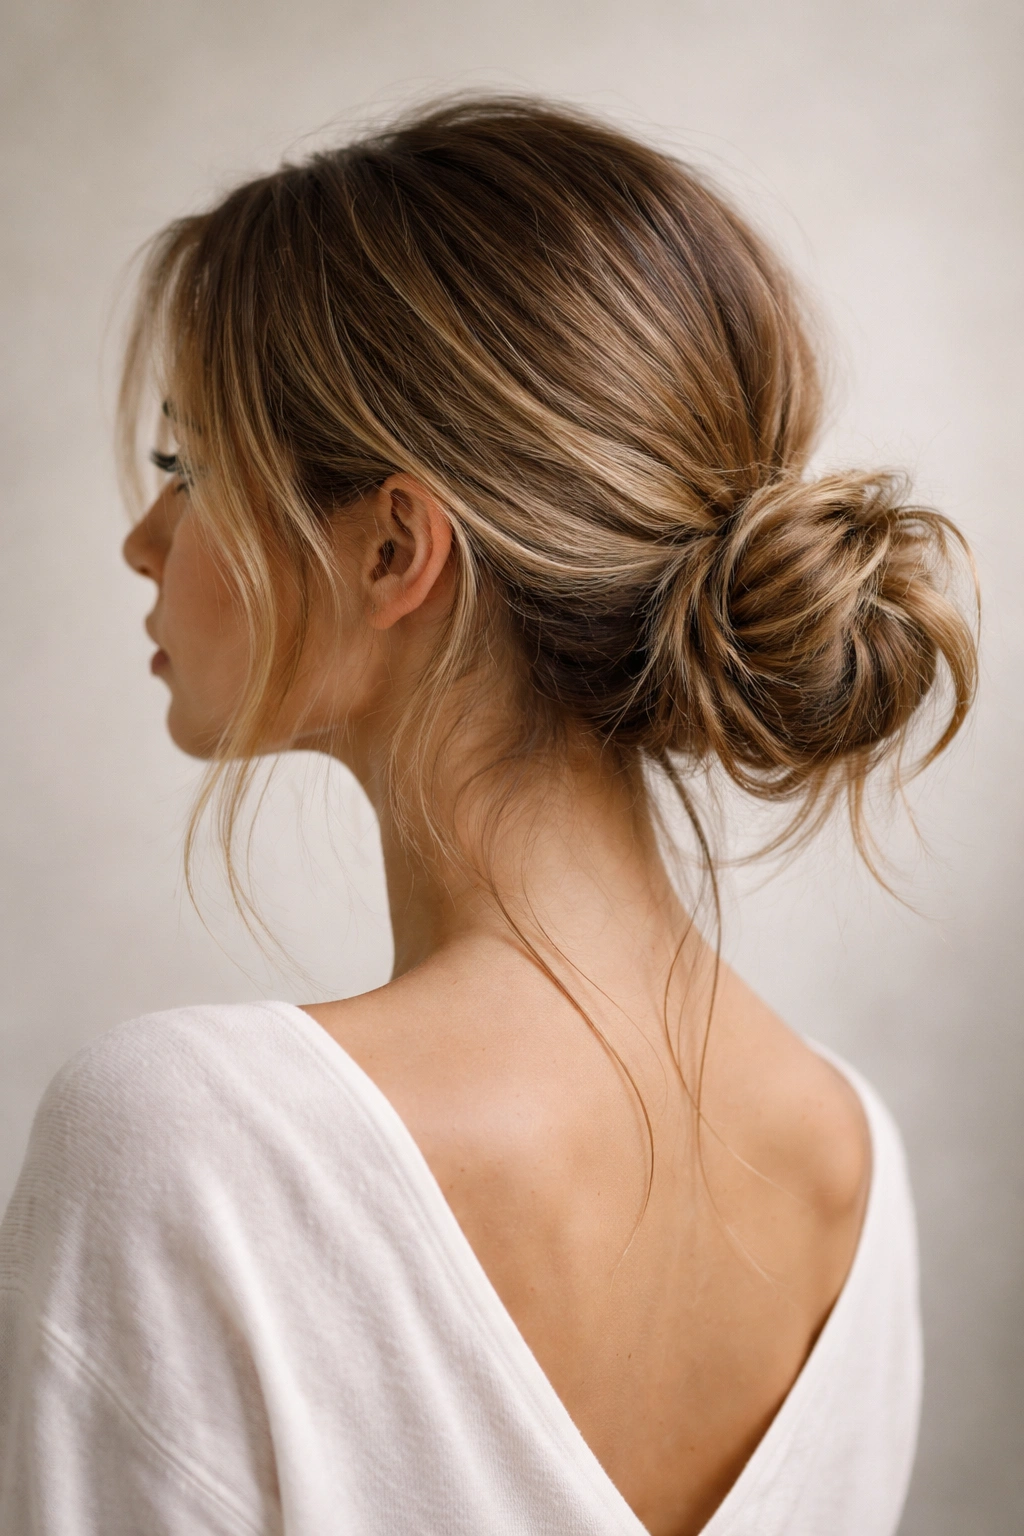
This style exists in that grey area between a ponytail and a bun, and that ambiguity is exactly why it works. It’s more casual than a traditional bun, more structured than a loose ponytail, and remarkably easy to execute. The low placement sits just at the nape of your neck or a touch lower, making it feel relaxed and modern. You’ll see this worn loose enough that a few inches of the actual “bun” is visible as a gathered knot, with the rest of the hair falling in soft waves below it.
Why It Feels Effortlessly Chic
The low undone ponytail bun reads as someone who styles their hair with intention but not obsession. It’s the style of someone who knows what works for them and isn’t trying too hard to prove it. Because the bun itself is loose and imperfectly gathered, it reads as approachable—this isn’t a severe style that signals formality. Yet it’s still pulled back enough to look deliberate and polished. The undone texture means you’re not fighting your hair’s natural wave or texture; you’re embracing it.
Creating It from Scratch
Secure a low ponytail using a soft elastic or scrunchie—velvet scrunchies from the 90s are actually having a legitimate resurgence and work beautifully here. The ponytail should sit roughly four to six inches below where you’d normally place a high ponytail. Don’t make it too tight; there should be some looseness that allows the hair to drape rather than stand stiffly. Take the ponytail and wrap it loosely around the base, creating a shape that’s more “gathered” than perfectly spiraled. Secure it with bobby pins hidden underneath. Now, here’s the crucial part: pull out several face-framing pieces from around your hairline and cheekbones, plus a few pieces from the bun itself. The bun should look like it’s just barely holding together.
Works Best For
This style is forgiving with almost any hair type. Fine hair benefits from the loose gathering because it appears fuller. Thick or curly hair looks amazing because the texture reads as intentional rather than unmanaged. Length-wise, you need hair long enough to wrap around the base of the ponytail—collarbone length is really the minimum. For very fine hair, backcombing the hair in the ponytail section before wrapping it adds grip and makes the bun look fuller. For wavy or curly hair, enhancing your natural texture with a curl cream or wave cream before styling ensures the undone look reads as polished rather than neglected.
Worth knowing: This style actually holds better throughout the day than it looks like it should. The loose gathering means individual hairs can shift slightly without the whole thing falling apart. If you’re doing this for a full day of wear, a light hairspray throughout (not at the base, which would make it look stiff) helps without compromising the undone aesthetic.
3. The Chunky Face-Framing Bun
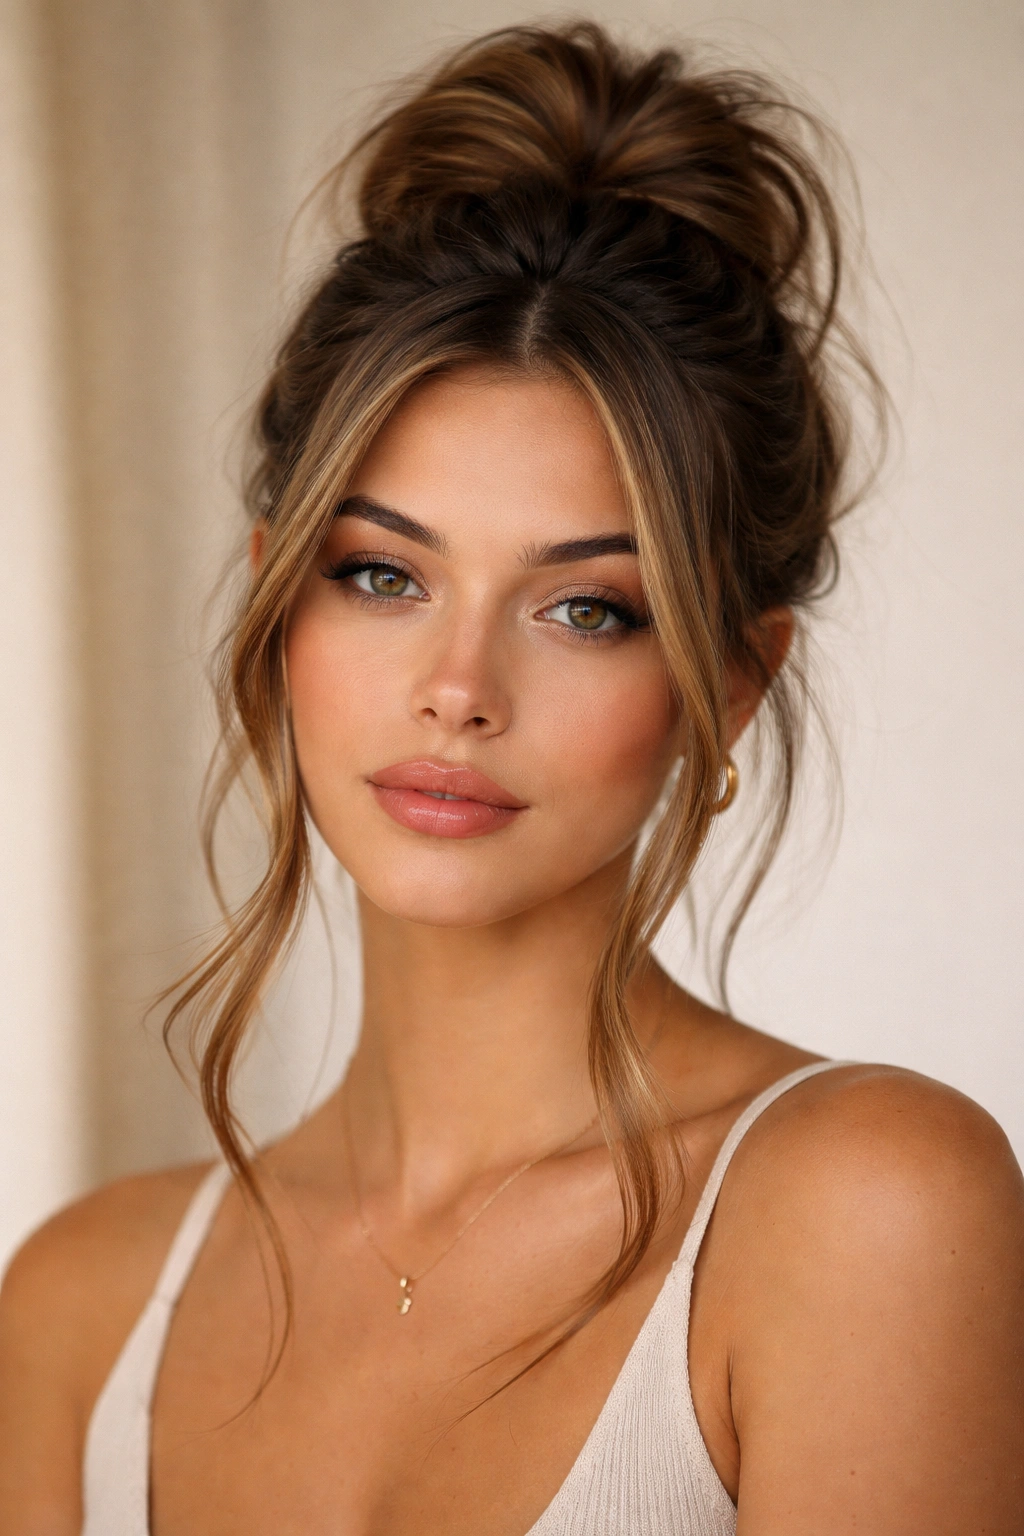
This style introduces intentional structure by creating thick, substantial sections of hair that frame the face. Instead of delicate wispy pieces, you’re working with noticeably chunky sections—maybe two or three pieces that are roughly an inch or more thick. These pieces fall alongside your face while the rest of the hair is gathered into a bun, usually placed at the crown or slightly off-center. It’s a style that plays with proportion and draws attention to your features.
The Visual Appeal
Chunky face-framing sections are bold without being severe. They add definition and create an almost sculptural quality to your hairstyle. The thicker pieces catch light differently than fine strands, creating depth and movement. This style also works psychologically—the chunky pieces frame your face in a way that naturally draws the eye upward, making it a flattering choice if you want to emphasize your eyes or cheekbones. It’s more fashion-forward than purely practical, which is exactly what makes it interesting.
Building This Look
Section out two or three chunks of hair before you gather the rest into the bun. The easiest way is to take a section from each side of your face at about cheekbone level—these should be maybe an inch to an inch-and-a-half thick each. Secure these sections with clips temporarily to keep them out of the way. Gather the remaining hair into a bun, placing it wherever feels right for your face shape and the vibe you’re going for. Secure it firmly—you want this bun to be the anchor while the face-framing sections are the statement. Remove the clips from your face-framing sections and style them as desired. You can keep them smooth and sleek, add some wave with a curling iron, or let your natural texture shine through. The contrast between the gathered bun and the loose face-framing pieces is what makes this style distinctive.
Best For Which Hair Types
This style works beautifully with hair that has some wave or texture, because the face-framing sections benefit from dimension. However, if you have straight hair, this style is still worth trying—you can add a wave with a straightening iron held at a slight angle or a curling wand. Hair length needs to be at least collarbone length to pull this off successfully. The face-framing sections should be long enough to graze your jawline or longer to create the intended effect. This style shines when you have a face shape you want to highlight—it’s particularly flattering for longer faces because the horizontal line of the face-framing pieces creates balance.
Pro tip: This style is the perfect excuse to use texturizing spray or sea salt spray. Apply it to the face-framing sections after sectioning but before styling them, and the texture will make them appear fuller and more intentional.
4. The Textured Wrap-Around Bun
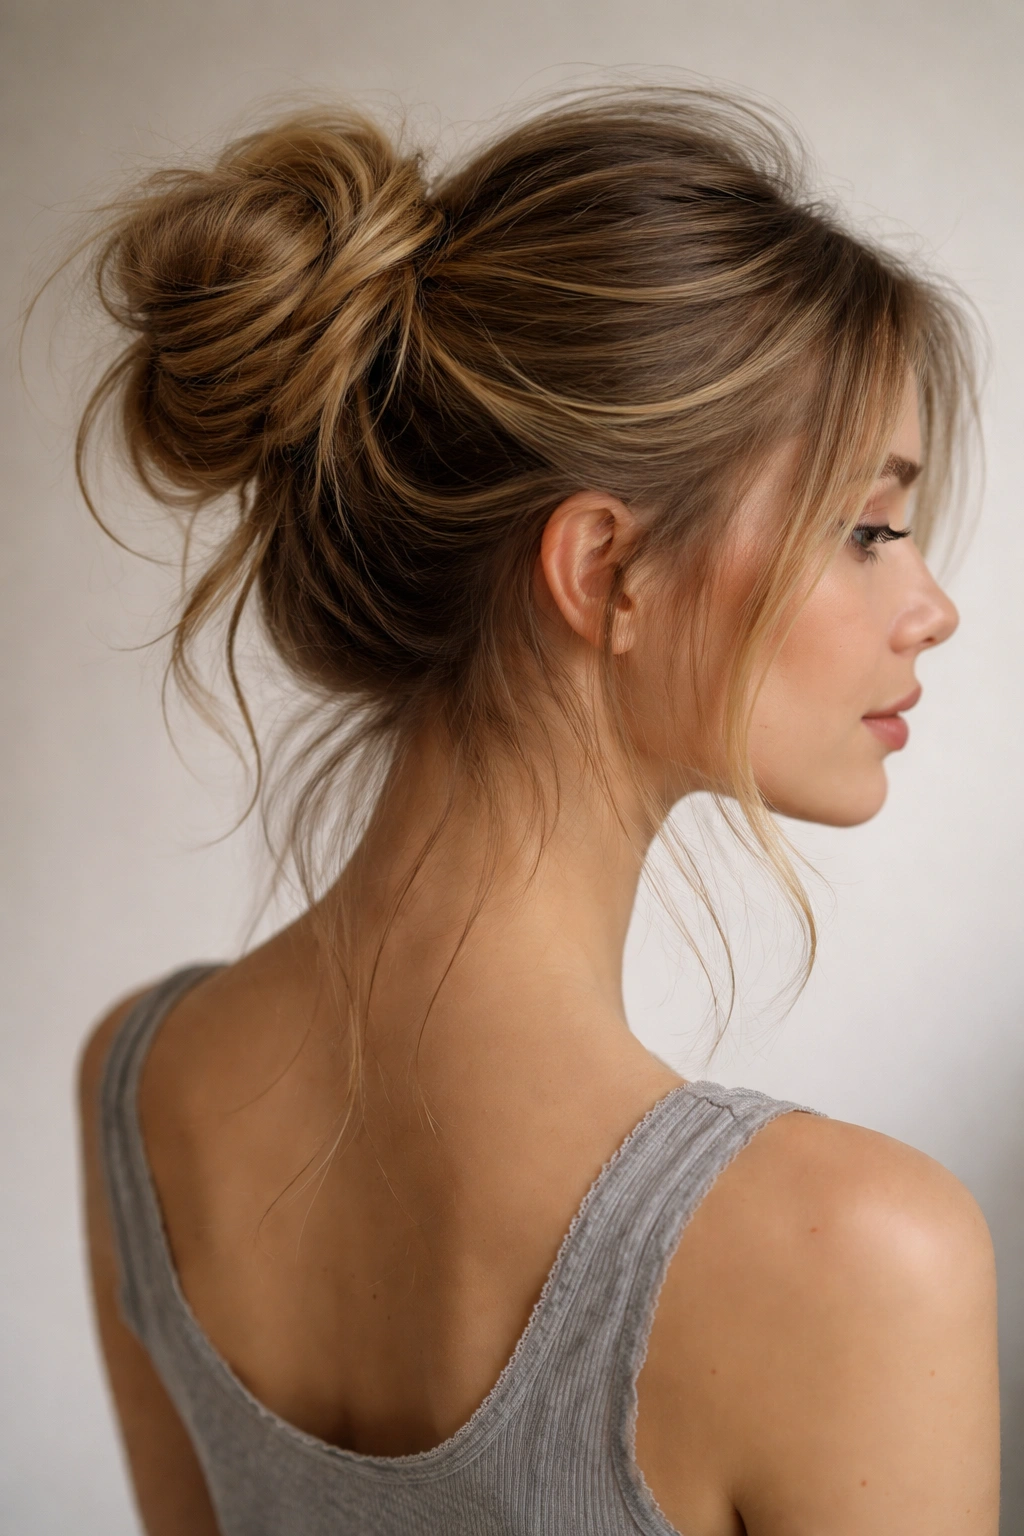
This style takes the concept of wrapping hair around a gathered base and adds an intentional layer of texture and looseness. Instead of the wrapped section being sleek and smooth, it’s actually composed of textured, somewhat messy strands that spiral around the bun’s foundation. The result looks more like your hair naturally curled around itself rather than being neatly wound.
Why the Texture Matters
The wrapped texture is what transforms this from a neat ballet bun into something distinctly 90s and undone. You’re deliberately creating a situation where the wrapping isn’t perfect—some strands stand out, some wrap tighter than others, and some create loops and dimension rather than a smooth spiral. This style celebrates imperfection as a feature rather than treating it as something to hide. It’s the kind of style that photographs beautifully because there’s something organic and three-dimensional about the texture.
Step-by-Step Execution
Gather your hair into a high or mid-height ponytail, depending on where you want the bun to sit. Tease or backcomb the ponytail section for volume and grip. Divide the ponytail into two or three thick sections. Take each section and loosely twist or slightly crimp it with a curling iron to add texture—don’t create defined curls, just break up the smoothness. Begin wrapping these textured sections around the base of the ponytail, letting them overlap and creating some intentional looseness rather than wrapping tightly. Secure everything with bobby pins placed strategically so they’re hidden under the texture. Pull out a few pieces from the bun itself to enhance the undone aesthetic. The goal is for the wrapped section to look textured and slightly undone, not like a precisely executed ballet bun.
Hair Type Considerations
This style genuinely works best with hair that either has natural wave or texture, or that you’re willing to add texture to. If you have naturally straight hair, taking a few minutes to add some waves with a curling iron or texture spray makes a huge difference in how this style looks. Medium to thick hair types shine with this style because the texture reads clearly and the bun maintains shape throughout the day. Fine hair can work too, but you might need the backcomb and texture spray assist to make sure the wrapped section stays visible and structured.
Quick facts about this style:
- The wrapped texture gives the style a modern, intentional-looking edge
- It works for both casual and dressy occasions depending on how polished you make the face-framing pieces
- The texture component means flyaways are part of the design rather than a styling failure
- This style generally holds very well throughout the day because the texture and wrapping create natural grip
5. The Double Bun (Space Buns)
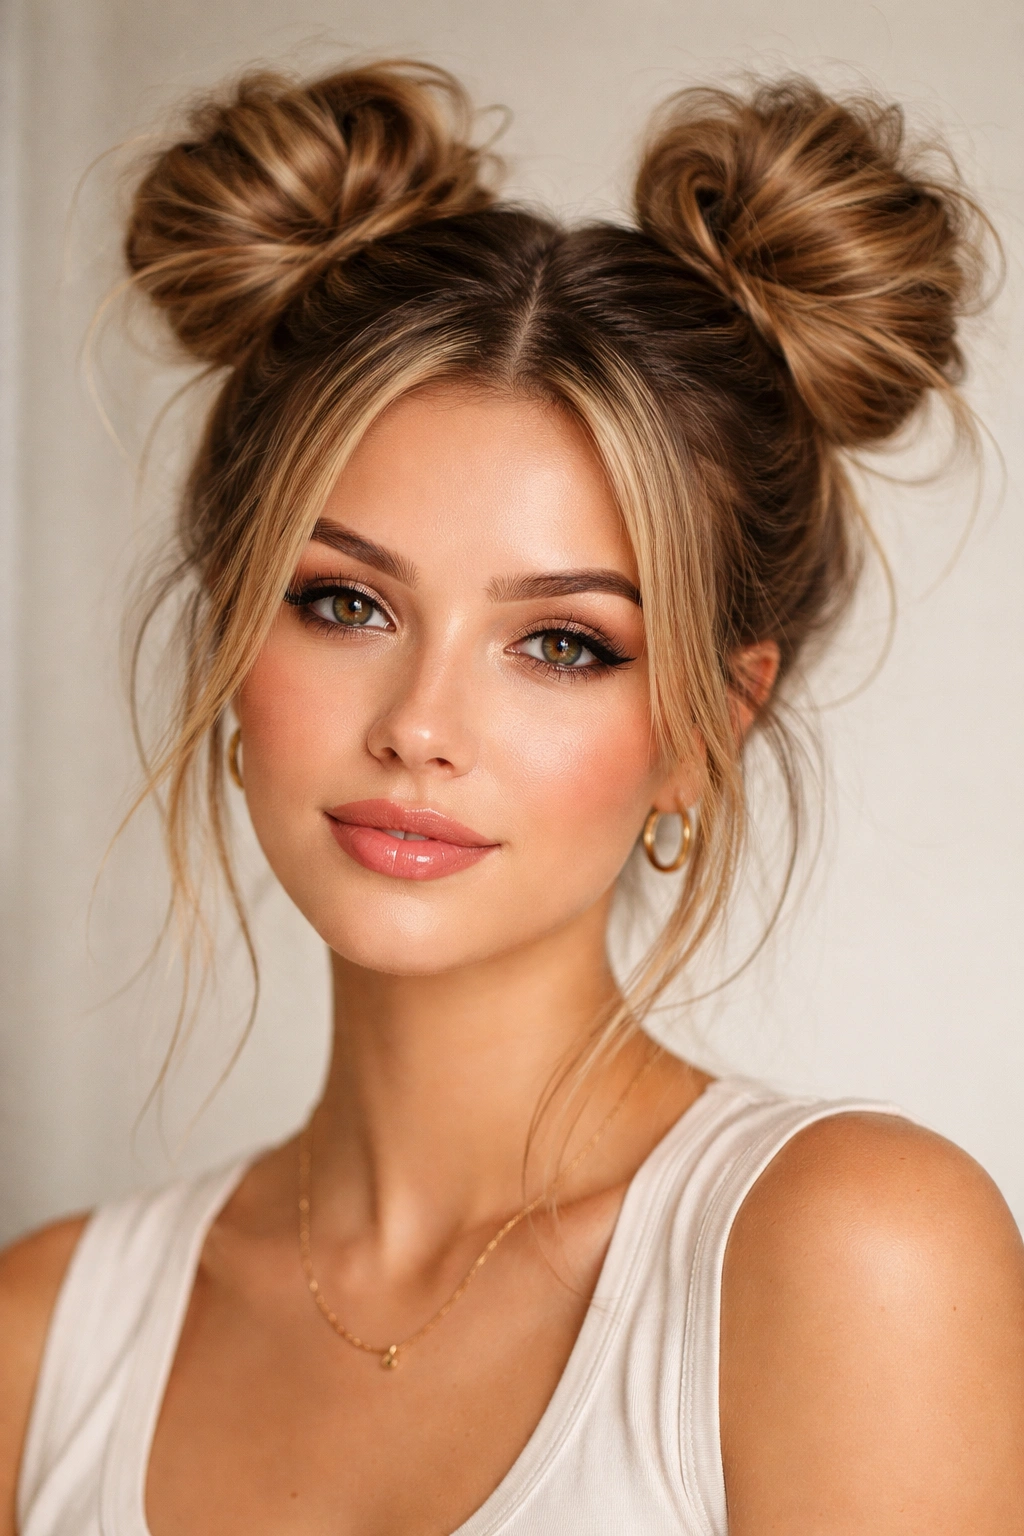
Space buns experienced a massive resurgence because they’re objectively fun, they work across multiple hair lengths, and they bring an unmistakable 90s energy. Despite their playful name, they can actually look quite sophisticated depending on how you style them. Two buns placed on either side of the crown create balance and visual interest, and the style reads differently depending on whether you go for full chaos or more refined placement.
The Visual Statement
Double buns are impossible to ignore, which is part of their appeal. They command attention and signal someone who’s confident enough to make a bold hair choice. Interestingly, they’re also surprisingly flattering for many face shapes because the balance and symmetry of two buns creates harmony. They can read as playful and youthful or surprisingly edgy depending on the texture and styling of the individual buns. The style became iconic in the 90s because it was a rejection of trying to look “serious” or conform to expectations—you were saying “this is fun, and I don’t care if you think it’s silly.”
How to Create Them
Divide your hair down the center using a comb or straightening iron to create a straight part. Separate each half with clips. Working with one half at a time, gather the hair into a ponytail at roughly the level where you want the bun to sit. This is usually at the crown or slightly back from it. Twist or wrap this ponytail into a bun shape and secure with bobby pins. Repeat on the other side. Now, the texture of each bun is where you can differentiate the style. For a more polished look, keep the buns relatively smooth and neat. For the full 90s chaos, let pieces fall out, backcomb each bun for texture, and embrace imperfection. You can also add accent pieces—small face-framing sections, subtle waves, or even small clips on each bun to make them feel more styled.
What Works With This Style
Double buns work best with shoulder-length or longer hair; anything shorter tends to look unintentionally sparse. They’re particularly flattering on people with longer face shapes because the placement creates visual width. If you have very thick or curly hair, double buns are chef’s kiss—the texture makes each bun look full and intentional. Fine hair can work but benefits from backcombing and texture spray to create the appearance of fullness. This style is most comfortable for people who genuinely don’t mind standing out; it’s not a “blend in” hairstyle.
Styling bonus: This style pairs beautifully with 90s makeup aesthetics—brown eyeshadow, winged eyeliner, matte lips. But it also works with modern makeup, which shows how versatile the style actually is.
6. The Sleek High Bun with Loose Tendrils
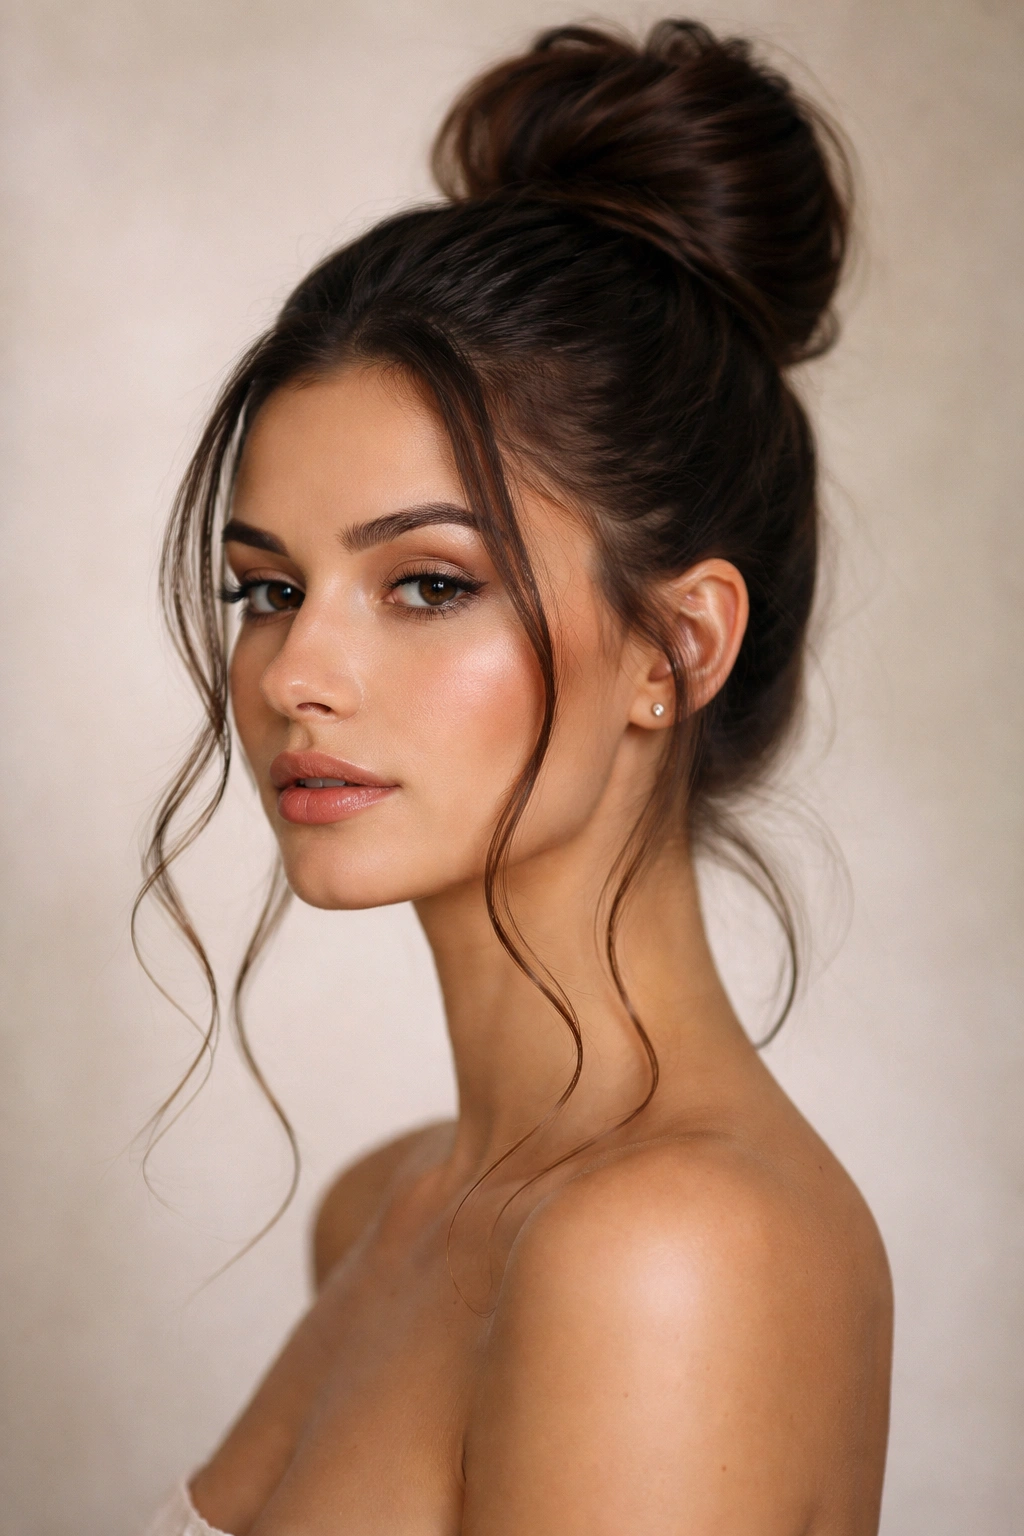
This style splits the difference between polished and undone by keeping the main bun tight and neat while allowing several pieces of hair to fall around the face and neck. It’s the style of someone who has their life together but isn’t above a little romance and movement. The contrast between the structured, sleek bun and the soft, loose tendrils creates visual interest and an unexpectedly sophisticated look.
The Balance of Structure and Softness
What makes this style work is the intentional contrast. The sleekness of the bun signals intention and polish, but the tendrils signal softness and approachability. Together, they create a style that feels both refined and human. This isn’t a severe bun that looks like you’re trying too hard; the tendrils prevent that. But it’s also not so loose that it looks unfinished. It’s the Goldilocks of bun styles—just right.
Creating the Style
Start with hair that’s smoothly combed and free of tangles. Use a fine-tooth comb to gather your hair as high and as smoothly as you can manage, securing it with a thin elastic. For the sleekest finish, use a smoothing serum and wrap a small section of hair from the ponytail around the base of the bun to cover the elastic—secure this with a bobby pin. The bun itself should be neat and compact. Now for the tendrils: before you fully secured everything, you should have pulled out several face-framing pieces. Keep two pieces at your temples and cheekbones, and one or two pieces at the nape of your neck. These should be roughly an inch or thinner. Using a straightening iron held vertically or a small curling wand, add a soft wave or curve to each tendril. The wave should be gentle—you’re creating movement, not ringlets.
Suits Which Features and Hair Types
This style is remarkably flattering for nearly all face shapes because the tendrils create softness that balances a sleek bun. It works beautifully if you have straight hair or if you’re willing to flat-iron your hair before creating the bun. If you have naturally wavy or curly hair, this style is still achievable—you can work with your natural texture on the tendrils if it creates softness around your face. Length-wise, you need hair long enough to reach your mid-back approximately for this style to feel balanced. Shorter hair can work but might look more severe and less romantic.
Worth noting: This style is excellent for people with oily roots or who need their hair off their face. The sleek bun keeps everything contained, and the tendrils provide visual interest so the style doesn’t read as severe despite the slicked-back appearance.
7. The Tousled Side Bun
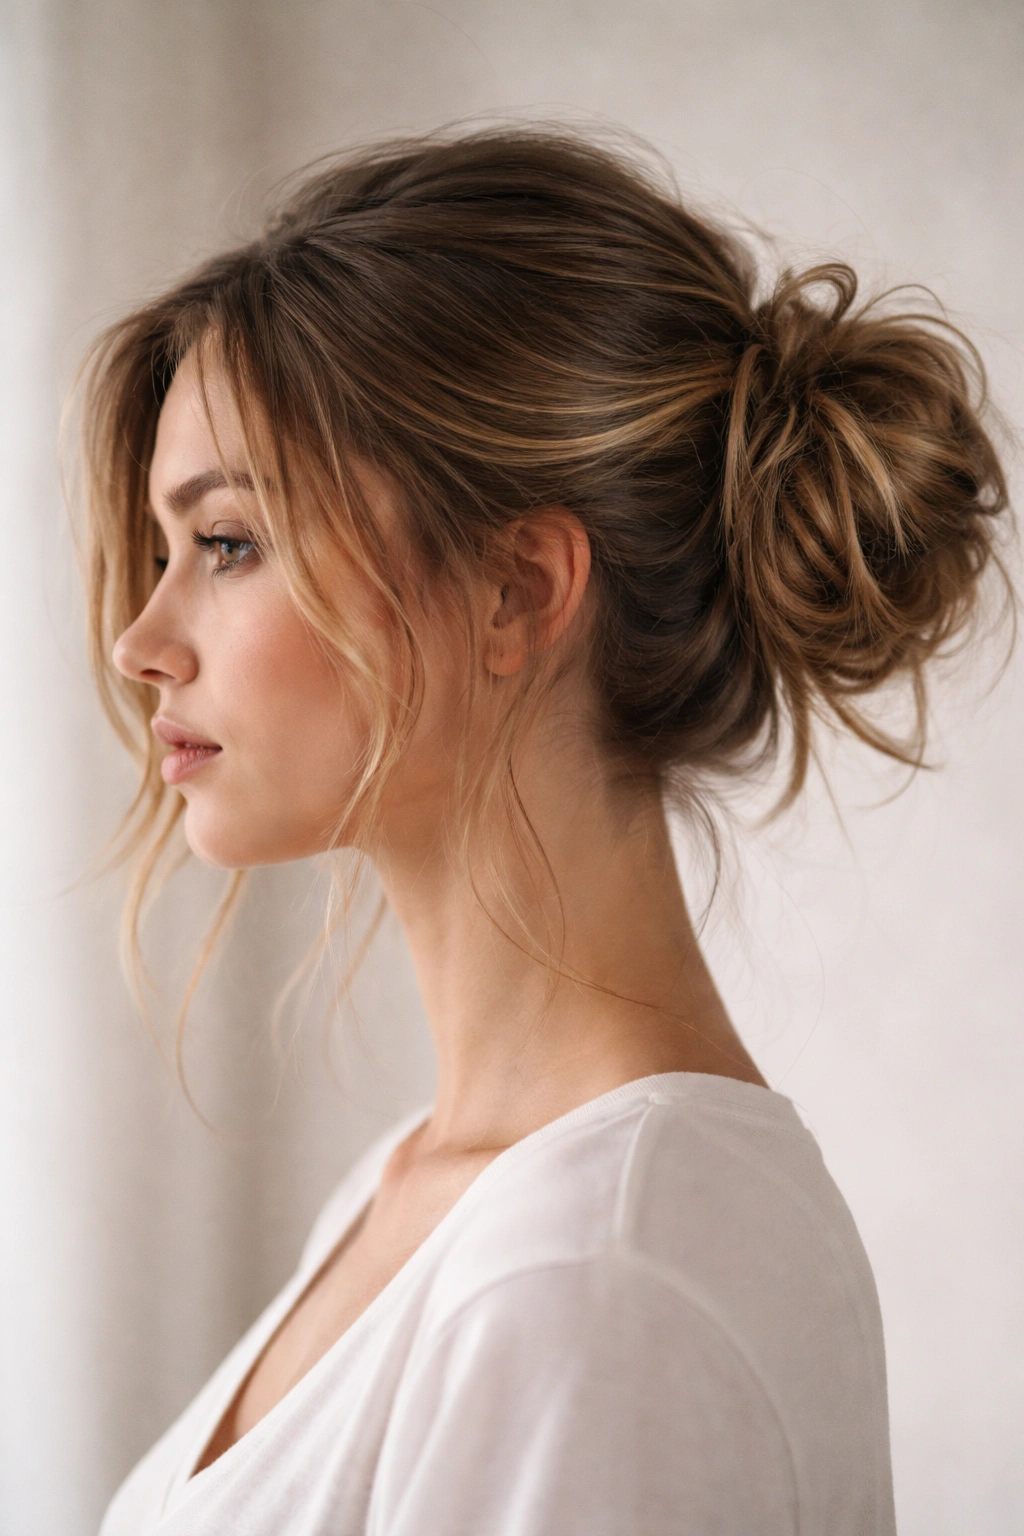
The side bun represents a shift away from the crown as the default placement, and this asymmetry is part of what makes the style interesting. By gathering the hair to one side—roughly at ear level or slightly lower—you create a completely different silhouette than a center or crown bun. Combined with intentional tousling and texture, the side bun reads as relaxed, effortlessly cool, and flattering for people who want to show off one side of their face.
Why Placement Changes Everything
Moving the bun off-center fundamentally changes how the style photographs and how it makes you feel wearing it. A side bun draws attention toward that side of your face and neck, which is useful if you want to showcase a particular feature or if your face shape benefits from the asymmetry. The placement also creates a gentle diagonal line from the bun down toward the opposite shoulder, which is flattering and creates movement even though your hair is technically gathered up.
Building a Tousled Side Bun
Brush your hair to remove tangles, but don’t smooth it completely—you want some natural texture to remain. Create a deep side part, with the bun sitting on whichever side of the part feels right for your face shape. Gather the hair on one side into a low ponytail, roughly at the level of your ear lobe or slightly lower. Don’t make it too tight; there should be some softness at the crown and temple on that side. Twist or wrap the ponytail into a bun, leaving it slightly loose rather than compacting it into a tight knot. Backcomb the bun gently to create texture and volume. Pull out several pieces around your face—these should frame both your face and the side of your neck. Using a curling wand or straightening iron, add soft waves to these pieces and to the bun itself. The waves should look natural rather than tight and controlled.
Best Suited For
This style works well if you have a face shape that’s flattering from one angle more than the other—it allows you to emphasize your preferred side. It’s also excellent if you have thicker hair because the off-center placement and tousled texture actually look intentional rather than sloppy with that volume. Fine hair can work but benefits from backcombing for texture. Medium to long hair is ideal; anything shorter tends to look incomplete with this placement. If you have one side of your hair that’s wavier or more textured than the other, place the bun on the smoother side and let the wavier side frame your face.
Quick facts:
- This style is very forgiving of flyaways because the texture is part of the design
- It photographs beautifully from the side angle
- The off-center placement makes it feel more interesting than a traditional crown bun
- It works for both casual and dressy occasions
8. The Braided Crown Bun
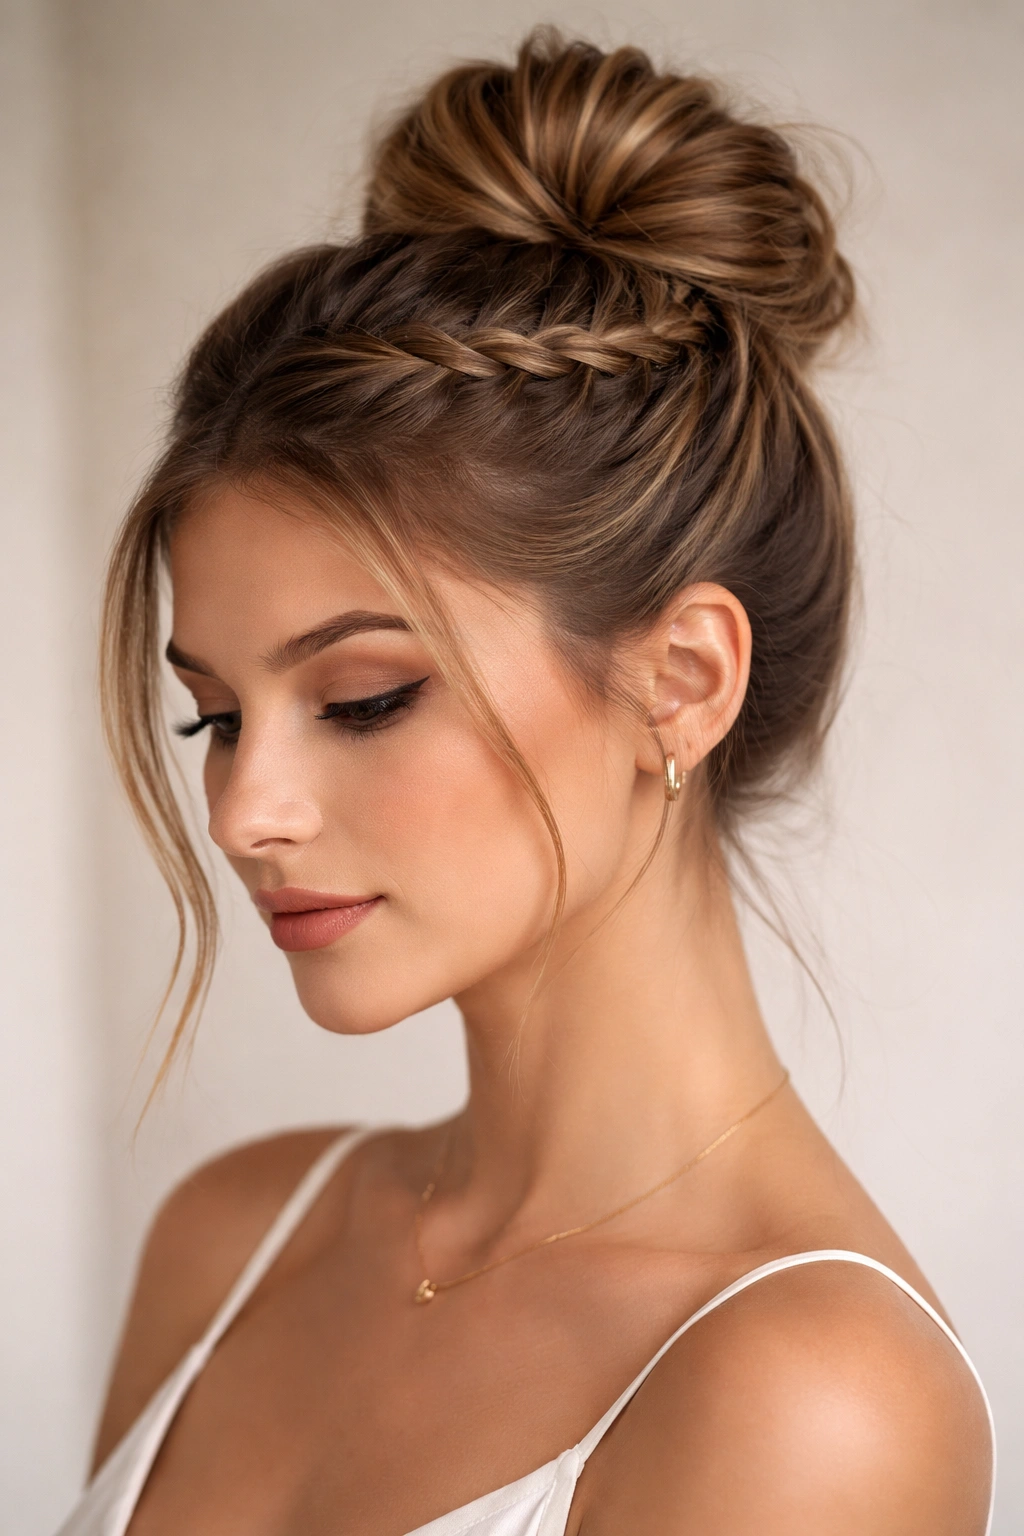
This style combines two classic elements—a braid and a bun—into something that feels more intentional and intricate than either element alone. Instead of gathering hair straight into a bun, you’re creating a braid that spirals toward the crown and then gathering the end into a bun. It’s structured enough to look polished, textured enough to feel modern, and the braid component adds visual interest and sophistication.
What Makes the Braid Component Special
The braid transforms what could be a standard bun into something with clear styling intention. Braids signal that you spent time on your hair, yet they don’t look stiff or overly formal. The braid creates texture and dimension, making the style interesting to look at. Depending on the type of braid you use, you can make this style range from romantic and soft (with a loose, undone braid) to polished and structured (with a neat, tight braid). The crown placement of the braid creates a natural flow from the braid into the gathered bun.
How to Execute It
Begin with hair that’s brushed smooth but still has some texture. You can create a Dutch braid, a classic three-strand braid, a fishtail braid, or a messy braid—the choice depends on your hair type and the vibe you want. Start the braid somewhere near the nape of your neck or one ear, braiding upward and spiraling toward the crown. You don’t need to braid all your hair—you’re creating an accent braid that incorporates some of your hair and leaves some unbraided. As you reach the crown, begin gathering the remaining hair along with the end of the braid, creating a loose bun. Secure the bun with bobby pins and smooth any fly-aways with a small brush or comb. This style benefits from a light hairspray applied to the braid to keep everything neat while still allowing the bun to look undone.
Hair Type Suitability
This style works beautifully with hair that holds a braid well—so medium to thick hair is ideal. If you have fine hair, this style is still achievable, but creating texture in the braid beforehand (with texture spray or sea salt spray) helps it look full and intentional. The braid component works best with shoulder-length or longer hair. Curly or wavy hair is actually ideal for this style because the natural texture makes the braid look effortlessly undone rather than stiff. Straight hair benefits from adding waves or texture to prevent the style from reading as overly formal.
Practical pointer: If you’re new to braiding, a loose, undone braid actually looks better than a too-tight one for this style. Tight braids can look severe, while loose braids read as romantic and modern. Don’t be afraid to pull slightly on the braid strands after you’ve completed it—this creates a fuller, softer appearance.
Final Thoughts
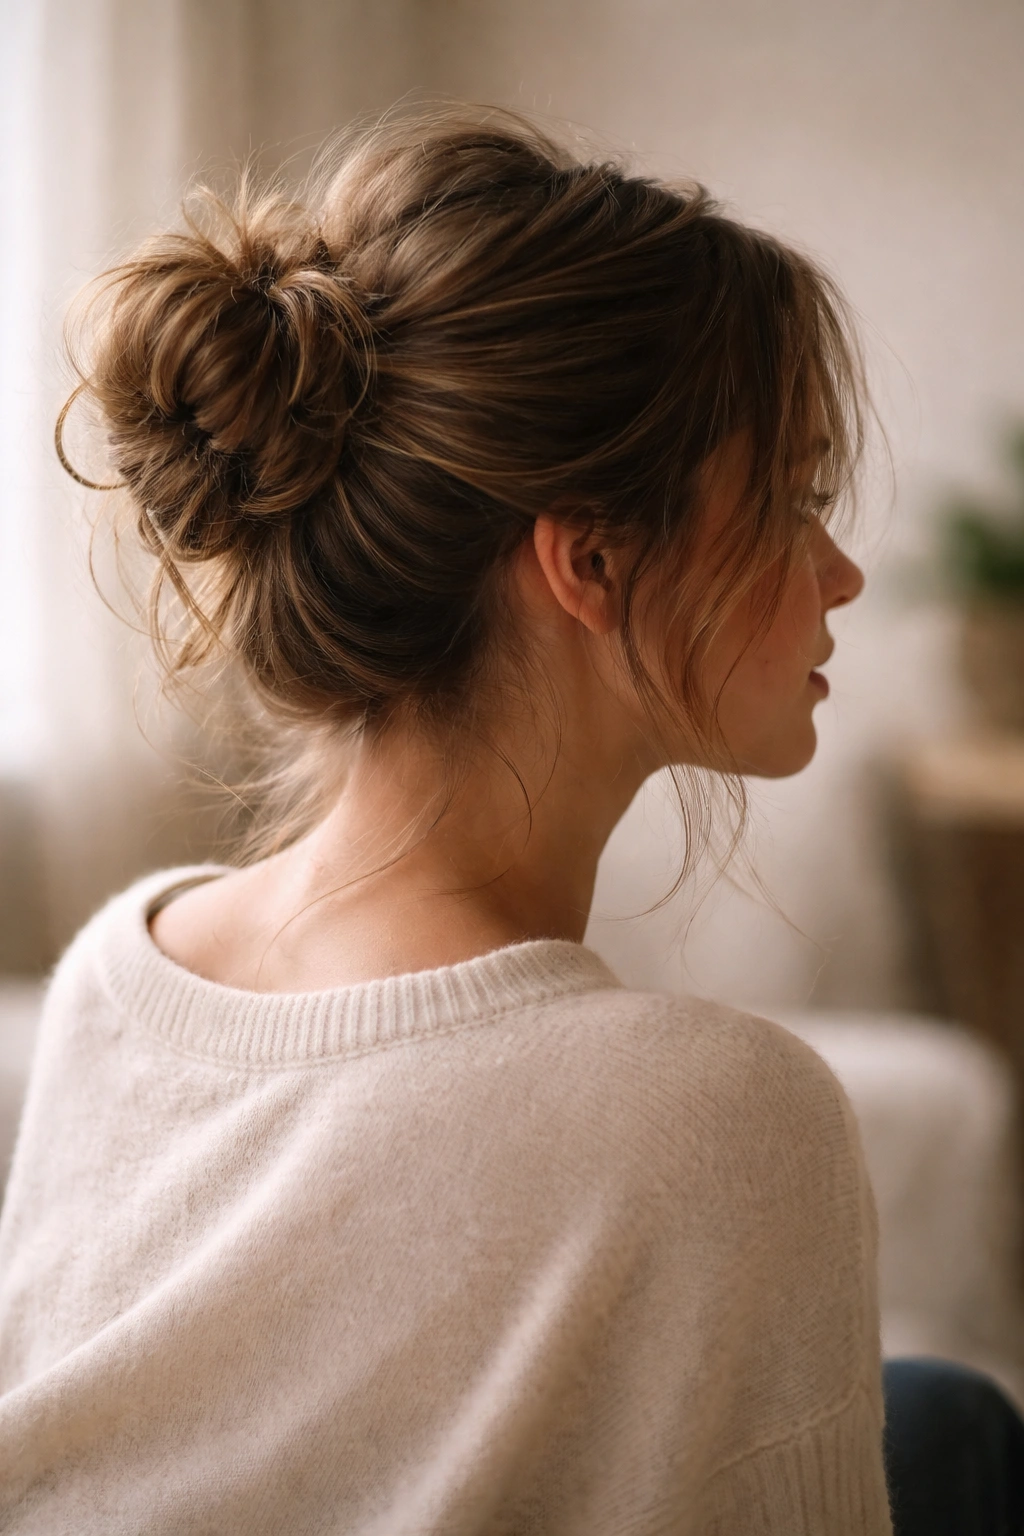
These eight styles represent what made 90s hair culture genuinely special: a rejection of the idea that polished has to mean perfect. Each of these buns celebrates texture, embraces looseness, and actually looks better when it’s not flawlessly executed. That philosophy—that intention matters more than perfection—feels especially relevant now, when we’re collectively tired of the pressure to look impeccably put-together at all times.
The beautiful thing about reviving these styles is that you don’t need special tools, expensive products, or hours of styling time. A few bobby pins, maybe a scrunchie or claw clip, and basic understanding of how your own hair behaves is genuinely all you need. These styles also adapt beautifully to different hair types and textures. Whether your hair is fine, thick, straight, curly, or somewhere in between, there’s a version of these buns that’ll work for you.
What’s equally important to recognize is that these styles aren’t “going out of style” again anytime soon. They’re part of the foundational rotation of hairstyles that work across seasons, occasions, and moods. A good messy bun is like a great white T-shirt—it’s always relevant because it solves a real problem (how to style your hair when you don’t have much time or energy) while still looking intentional.
The next time you’re grabbing your hair into an updo, consider which of these styles resonates with how you actually want to look and feel. Do you want that effortless claw-clip energy, or are you feeling the structure of a sleek high bun with tendrils? Are you in a double-bun mood, or does a braided crown feel more like where you’re at? The variety here means you can match your hair to your mood and confidence level, which is exactly why these styles have endured for decades. They’re not going anywhere.
