



There’s something undeniably elegant about a messy bun that celebrates curl rather than hiding it. Unlike straight-haired messy buns that rely on undone texture, curled messy buns lean into definition, bounce, and dimension—creating a look that’s effortlessly sophisticated without sacrificing personality. The secret is understanding that curls naturally create visual interest and movement; when you style them into a bun while emphasizing their curl structure, you get a finished look that somehow manages to feel both polished and relaxed at the same time.
What makes curled messy buns different from their straight-hair counterparts is that they work with your hair’s natural or styled curl pattern instead of against it. Rather than aiming for that deliberately undone, pieces-falling-everywhere vibe, curled messy buns focus on intentional placement, deliberate texture, and strategic definition. You’re showcasing spirals, waves, and coils as design elements, not trying to flatten or disguise them. The result is a hairstyle that photographs beautifully, holds up throughout the day, and reads as genuinely polished—whether you’re heading to a wedding, a professional event, or just wanting to feel put-together on an ordinary Wednesday.
The beauty of these eight styles is that they work across different curl types, hair lengths, and occasions. Some lean more formal and refined, perfect for events where you need your hair to look intentional and groomed. Others embrace a softer, more romantic aesthetic that feels both elegant and wearable for everyday life. A few styles even offer hybrid options—you can dress them up or down depending on which pieces you emphasize and how much definition you bring to your curls. The thread connecting all of them is that satisfying sweet spot where “messy” stops being a casualty of poor styling and becomes a deliberate, flattering choice.
1. The Romantic Spiral Curl Bun
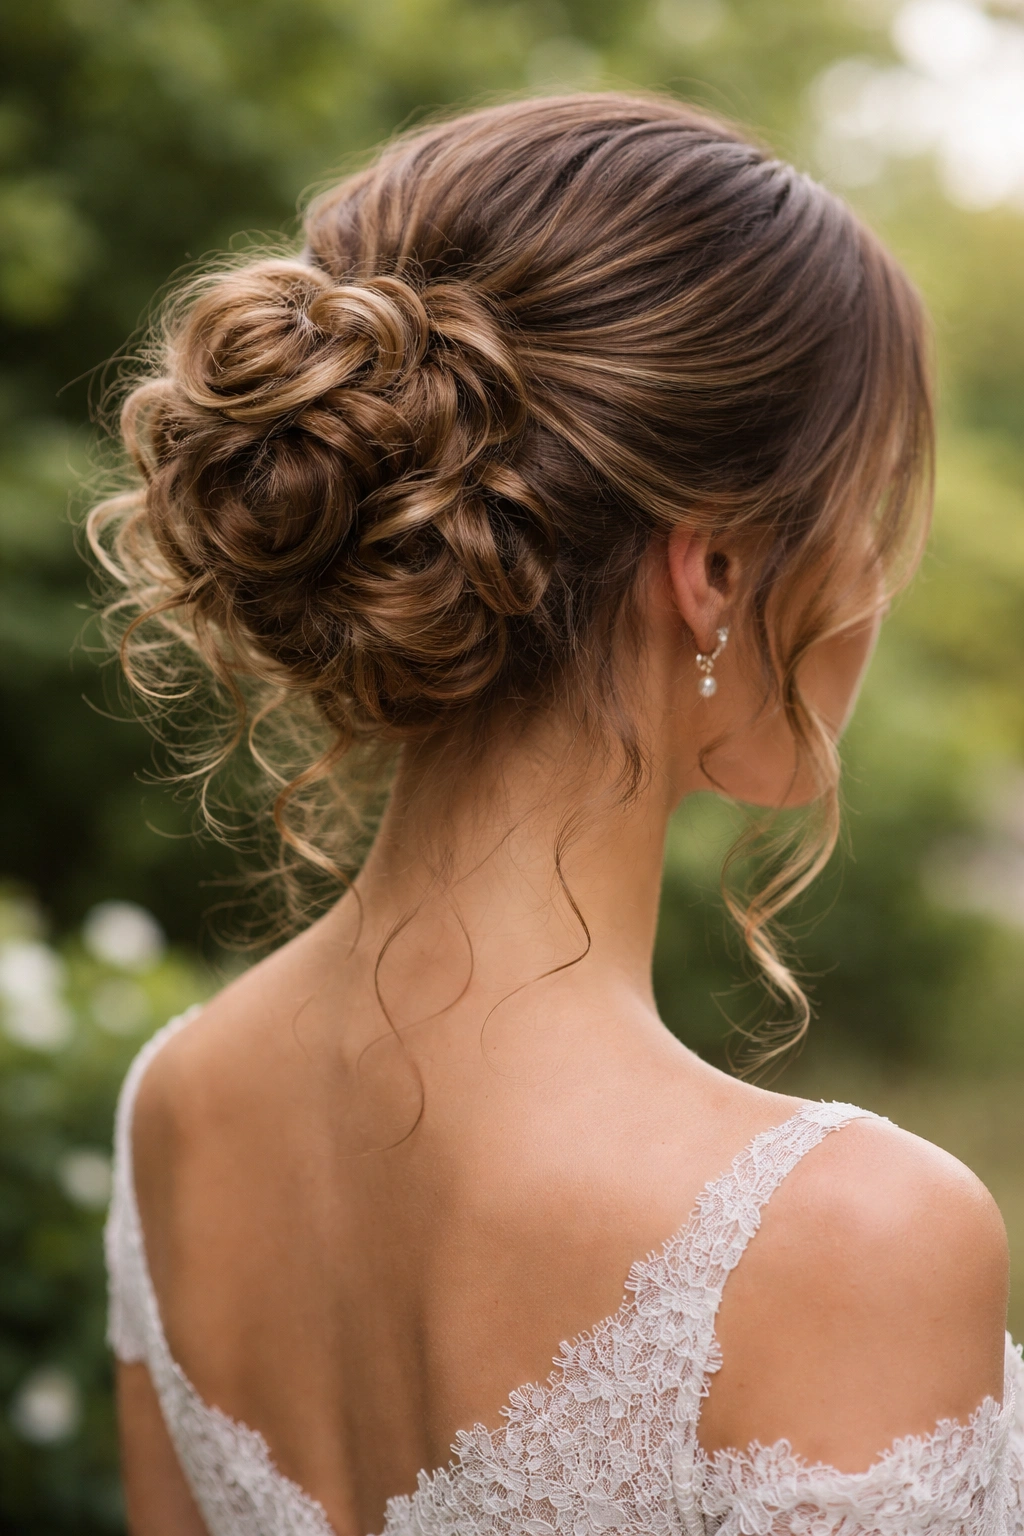
This style is all about honoring individual ringlets and letting them spiral outward from a center base bun. Instead of gathering curls tightly, you create a loose, relaxed base knot and then strategically position pre-formed curls around it—some tucked in, some deliberately left loose to frame the style. The effect is soft, romantic, and undeniably polished; it’s the kind of bun you’d wear to a garden party or an engagement celebration where you want to look intentionally beautiful without appearing overly done.
How to Build the Definition
Start with curls that have been set using your preferred method—whether that’s a curling iron, roller set, or your natural curl pattern enhanced with the right products. The key to this style is not re-curling your hair once it’s already set. Instead, gently separate pre-formed curls by hand or with a wide-tooth comb, creating individual ringlets rather than one cohesive wave. Mist each curl lightly with a lightweight holding spray as you work—this keeps them defined without making them feel crunchy or stiff.
Gather the bulk of your hair into a low, loose ponytail at the nape of your neck, securing it with a soft elastic. Twist the ponytail loosely and wrap it around its base to create a simple bun, securing it with bobby pins. The texture of the curls themselves will create natural volume and dimension; you’re not trying to smooth anything or create a sleek base. Leave face-framing curls loose if your hair allows, or position a few spiral curls to cascade down the sides of your neck. The bun should look like a gathering of spirals rather than one unified shape.
Real-World Wearability
This style holds beautifully for 8-10 hours, making it ideal for events that span an afternoon or evening. The individual curl structure means gravity works with you rather than against you—curls naturally anchor themselves as they sit against each other. If you notice any spirals relaxing by midday, a light mist of flexible-hold spray and a gentle finger-fluff revives the definition instantly without requiring a full reset.
Pro tip: The night before styling, sleep in loose braids or use pineapple braiding (wrapping hair loosely on top of your head) to preserve your curl pattern. This means your curls are fresher and more defined when you build your bun the next morning.
2. The Textured Wave Bun
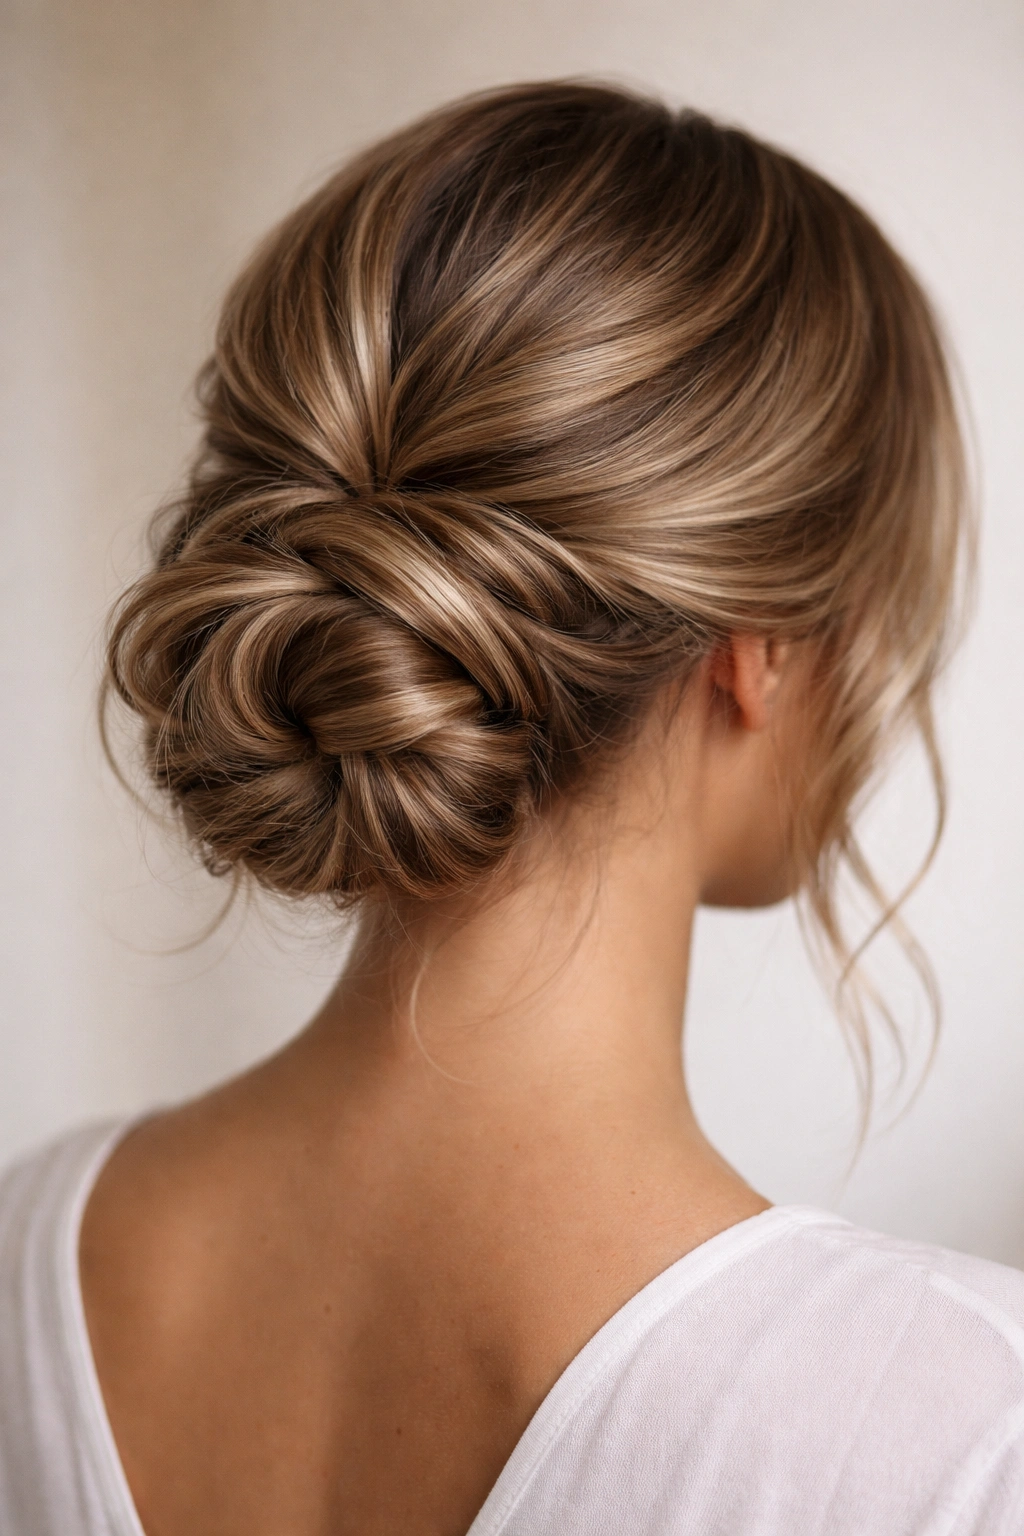
If you prefer waves to tight curls, this style transforms softer, more relaxed wave patterns into a sophisticated bun that reads as intentionally textured rather than casually undone. The waves create movement and visual interest without the intensity of ringlets, making this style feel more wearable for professional settings or any situation where you want “polished” to be the dominant note. The key difference from tighter curl styles is that you’re working with longer-form waves that interlock and layer across each other, creating a more unified—but still dynamic—visual effect.
Creating Consistent Waves
This style works best if your waves are all set in a similar direction, creating visual cohesion. Use a 1.25-inch to 1.5-inch curling iron or large barrel wand to set waves with a consistent pattern—all curling away from the face, or alternating sections to create an S-wave pattern. The waves don’t need to be perfectly uniform; in fact, slight variation in wave size reads as more sophisticated than mechanical perfection. Once your waves are set, avoid running your fingers through them, which breaks up the wave structure.
Gather your waved hair into a low ponytail and secure it with an elastic that matches your hair color—this keeps the visual line clean. Gently twist the ponytail and wrap it into a loose bun shape, tucking the ends in and securing with bobby pins. The wave texture means you don’t need to add much additional texture or separation; the waves themselves create the visual interest. Let a few face-framing waves fall naturally, or pin them back if you prefer a cleaner line. The bun should have a soft, relaxed silhouette while the individual waves remain clearly visible.
Product Strategy for Wave Definition
Texture waves require slightly different product support than curls. Apply a lightweight curl cream or wave-defining cream to damp hair before heat styling to boost definition. Once the style is set, use a flexible-hold hairspray that won’t make waves feel heavy or sticky. The goal is to preserve movement and texture, not create a solid, unmovable sculpture. If waves start to relax partway through the day, a light spritz of texture spray (designed specifically for waves, not curls) refreshes them without requiring heat styling.
Worth knowing: Wave buns photograph exceptionally well because the soft texture reads beautifully in photos while still appearing intentional and groomed in person.
3. The Tousled Ringlet Bun
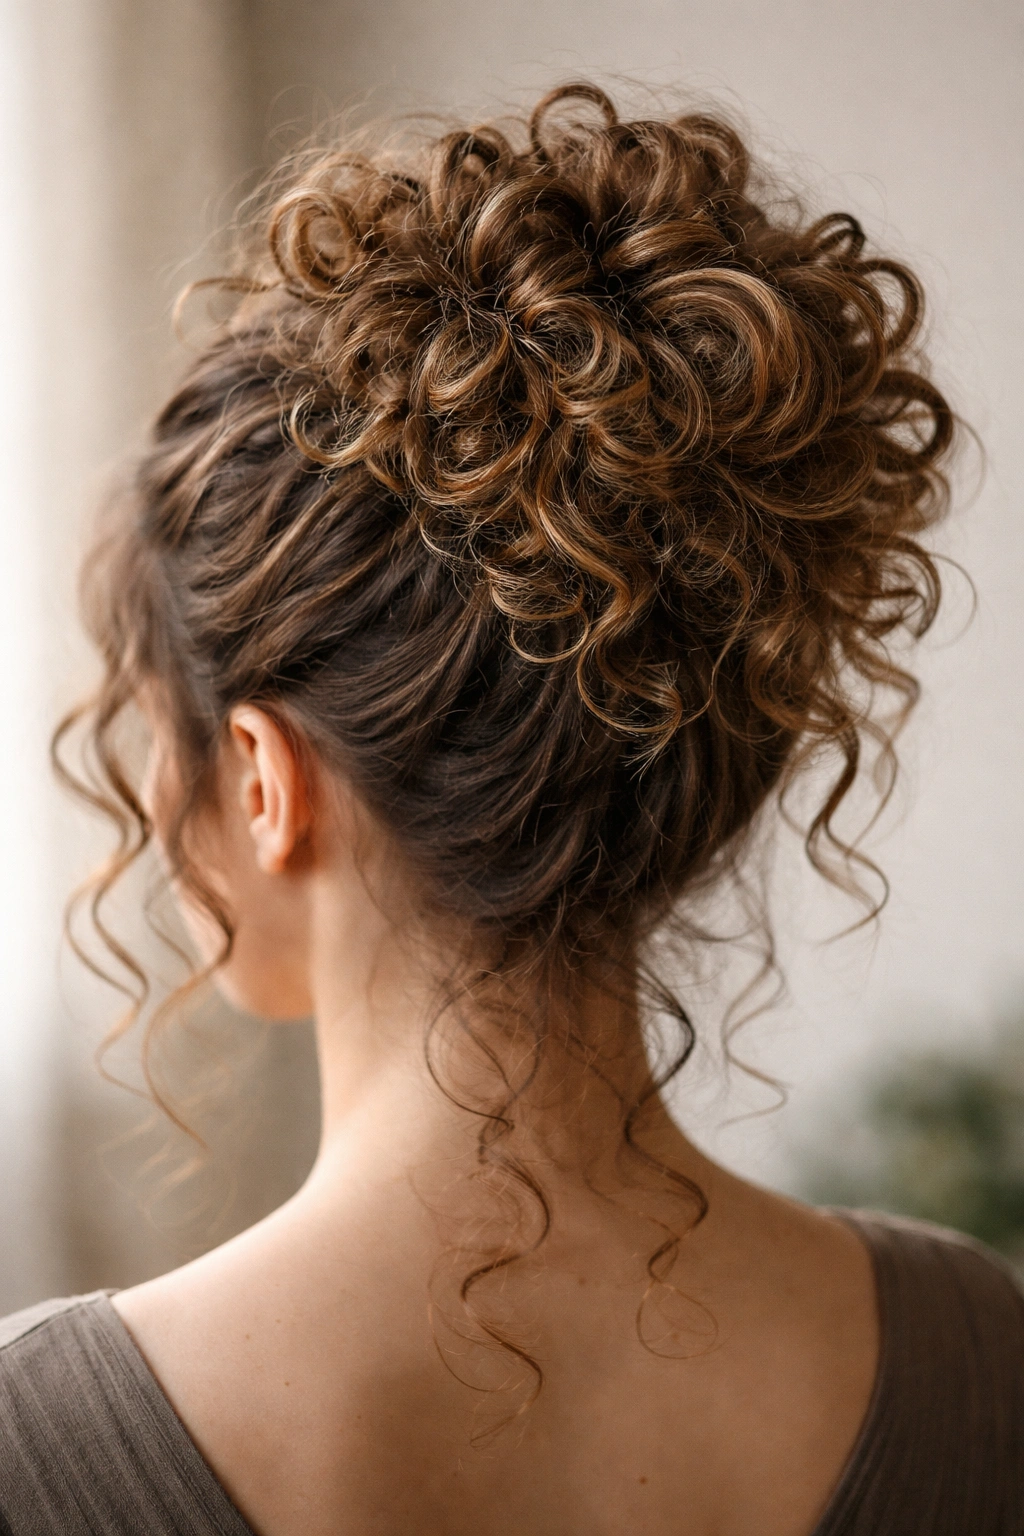
This style celebrates maximum curl definition by using very tight, well-separated ringlets throughout the bun. Unlike the romantic spiral bun, which lets some curls cascade loosely, the tousled ringlet bun maintains defined ringlets even in the gathered sections. The word “tousled” is key here—individual ringlets are clearly visible and intentionally separated, but they’re arranged in a way that feels energetic and dynamic rather than stiff or overly controlled. This is the style for people who love their curls and want to showcase them boldly.
Building Ringlet Separation
Create ringlets using your preferred method—curling iron, hot rollers, or Flexi-rods. The tighter your ringlets start out, the longer they’ll hold definition once they’re gathered into a bun. Once curls are completely cool and set, gently separate each ringlet by hand or using a pick or comb with widely spaced teeth. Don’t worry about creating perfectly uniform ringlets; what matters is that individual curls remain distinct rather than merging together into one mass of texture.
Apply a lightweight gel or curl-defining cream before gathering the hair, which helps individual ringlets stay separated when they’re stacked inside the bun. Gather separated ringlets into a low ponytail without compressing them too much. Twist gently and wrap around the base, tucking ringlets in and allowing others to remain slightly loose and projecting outward. Secure with bobby pins, using multiple pins to distribute weight evenly so ringlets don’t compress. The bun should look almost three-dimensional, with ringlets visibly spiraling in different directions.
Longevity and Maintenance
Tightly-separated ringlets can last 10-12 hours or longer because each ringlet is relatively independent. Humidity is the main threat, as moisture can relax curl definition over time. Combat this by applying a humid-weather spray before leaving home if you live in a damp climate or expect moisture exposure. By evening, you can refresh ringlet definition with a light spritz of flexible-hold spray and a gentle hand-fluff, which takes only 30 seconds.
Insider note: This style works beautifully on second-day curls because they have slightly more natural texture than fresh curls, making ringlets easier to separate and hold definition longer.
4. The Half-Curled Polished Bun
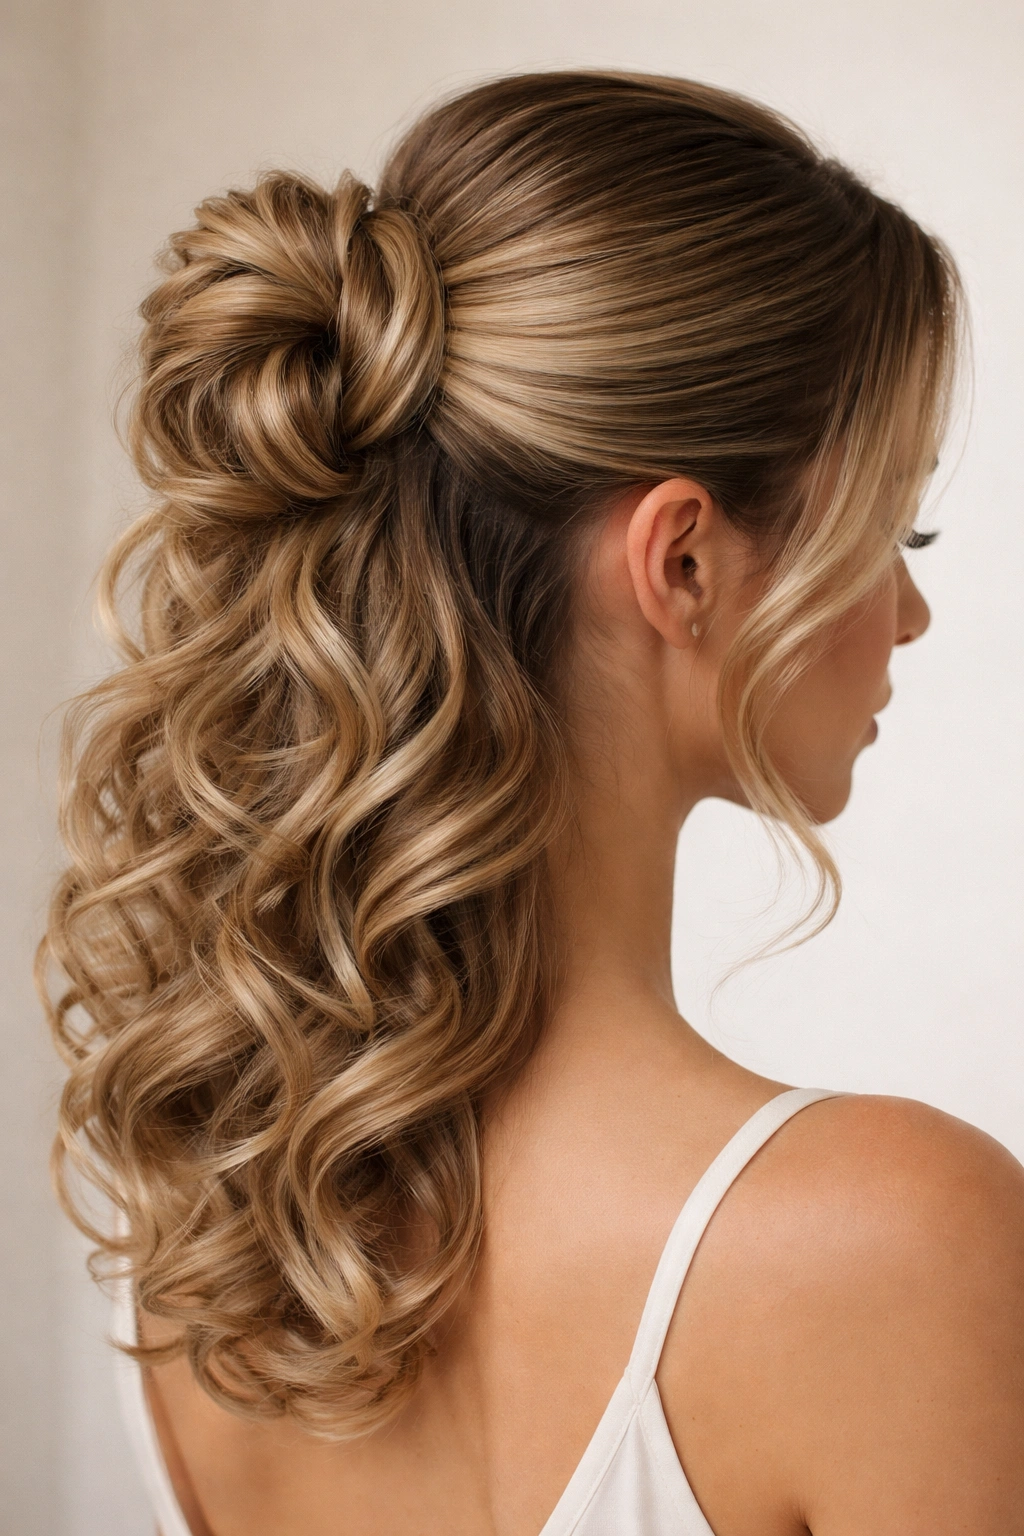
This hybrid style splits the difference between a sleek, polished bun and a curled texture bun by straightening the crown area and base while leaving the bottom half of the ponytail in defined curls or waves. The effect is sophisticated and refined while still celebrating curl texture—it reads as intentionally designed rather than like you simply couldn’t decide whether to straight or curl your hair. This is the style for professional environments, formal events, or any situation where you want “polished” to be the primary message while still incorporating texture.
Styling the Two Zones
Section your hair by dividing it horizontally across your head at about ear level. Keep the top section clipped up. Work with the bottom section first, applying a smoothing cream or serum, then blow-dry this section straight using a paddle brush for a smooth, sleek finish. Once it’s straight and cool, set it with a light hairspray to keep it smooth. Unclip the top section and blow-dry this area smooth as well, creating a unified sleek crown and a slicked-back base.
Now gather all your hair into a low ponytail with the smooth section as your base. This is where the curls come in: take the bottom portion of the ponytail and run it through a curling iron or wand to create defined curls or waves. Work in sections, curling away from the face. Once the bottom half is curled and cooled, gather the entire ponytail and create a bun base, allowing the curls to wrap around and project outward. The straightened section creates the polished foundation, while the curled bottom creates visual interest and sophistication.
When to Wear This Style
This style is ideal for job interviews, client meetings, formal dinners, or any event where you need to appear professionally groomed but want to avoid looking austere or overly severe. The curl component prevents the style from reading as too formal or rigid, while the smooth crown keeps it from veering into “casual” territory. It’s genuinely one of the most versatile curled bun styles because it works in corporate environments, creative industries, and formal social settings alike.
Pro tip: Keep a curl refresher spray in your bag. If curls start to relax by evening, one or two spritzes and a light finger-fluff revive them instantly without requiring heat styling.
5. The Sleek Curl Accent Bun
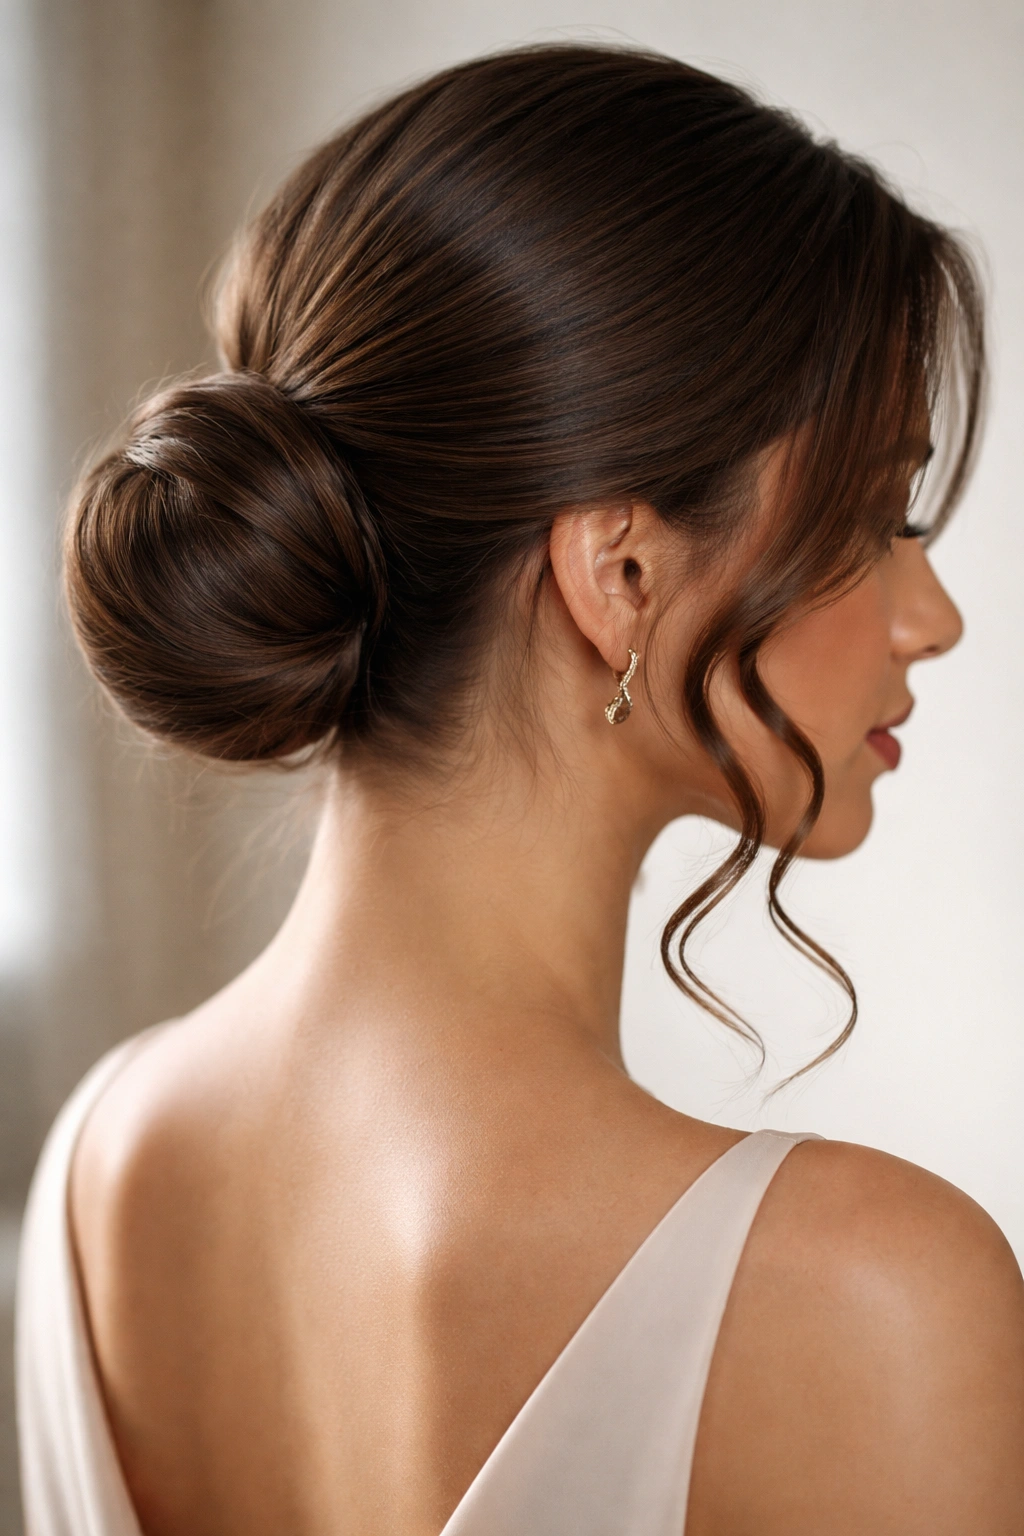
This style features an almost entirely sleek bun base with strategically placed curl or wave accents that frame the face and cascade down the back. Rather than filling the entire bun with curls, you’re using curl as a design accent—which creates a look that reads as elevated and intentional. This works beautifully for professional settings, minimalist aesthetic preferences, or situations where you want the bun itself to be the focus rather than a supporting player in an elaborate curled look.
Creating the Sleek Base
Blow-dry your hair sleek and smooth, using a paddle brush and smoothing serum to create a polished finish. Gather all your hair into a low, tight ponytail and secure it with an elastic that matches your hair color. Create a bun by twisting the ponytail and wrapping it around its base, tucking the ends in and securing with bobby pins. Use smoothing cream on the bun to keep it looking sleek and unified. Some people prefer a completely smooth bun; others like to gently tease the wrapped section to add subtle texture and volume without disrupting the sleek aesthetic.
Adding Strategic Curl Accents
Once your base bun is secured, create two or three face-framing curls using a curling iron, wand, or Flexi-rods. These curls should be clearly defined but not overly tight. Softly curl one section on each side of your face, framing your cheekbones and temple area. If you want additional texture, create 2-3 curls at the back nape area that cascade down, creating the sense of movement without the full volume of a fully-curled style. These accent curls should feel intentional and placed, not like parts of the bun came loose.
Styling Philosophy
This style is all about restraint and intention. Every curl should have a clear visual purpose—framing the face, creating softness where the bun might otherwise look severe, or adding a graceful finishing touch. The curls aren’t there to maximize volume or demonstrate technical styling skill; they’re there to add elegance and movement in specific, strategic locations. This is why the sleek curl accent bun reads as so polished and designer—it feels curated.
Worth knowing: This style translates beautifully across professional, social, and formal settings because the curls signal “intentional styling” while the sleek base signals “grooming and refinement.”
6. The Vintage Curl Crown Bun
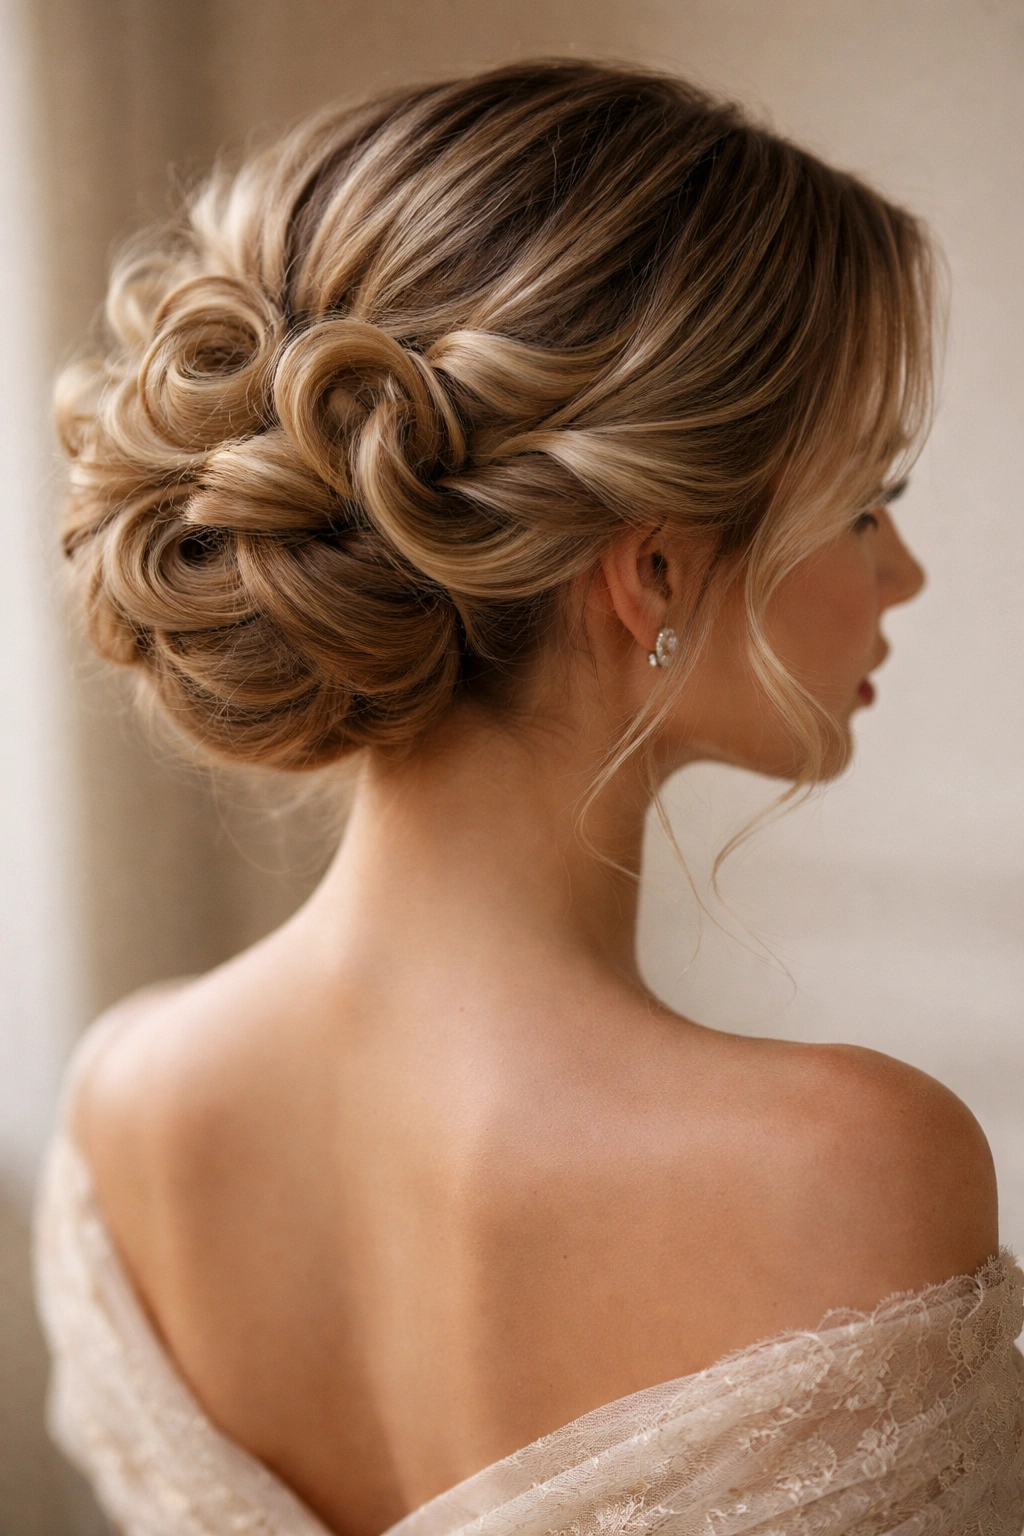
This style draws inspiration from 1940s and 1950s aesthetics, featuring a ring of carefully arranged curls that create a crown-like frame around the bun. Rather than curls being scattered throughout the style, they’re deliberately positioned to create a cohesive, almost sculptural silhouette. This is a statement style—it says you’ve invested time in your appearance and are confident enough to wear something deliberately glamorous. It works beautifully for weddings, formal dinners, special occasions, or any situation where you want to feel genuinely elegant.
Engineering the Curl Crown
This style requires curls that hold definition well. Create large, loose curls or waves using a 1.5-inch or larger barrel curling iron, focusing on the mid-lengths and ends of your hair. You want definition without tightness; think soft, bouncy curls rather than tight ringlets. Once curls are set and cooled, gently separate them with your fingers to enhance definition.
Create a low bun base by gathering and twisting your hair, then wrapping it around its base and securing it. Now comes the crown-building: take individual curls and pin them around the perimeter of the bun, arranging them so they create a complete ring of texture. Each curl should be placed deliberately, creating a connected visual frame around the bun. Vary the direction of curls slightly—some curling toward the face, some away—to create a natural, dynamic crown rather than a uniform, mechanical appearance. Secure each curl gently with bobby pins, making sure pins are hidden beneath the curl itself.
Achieving the Glamorous Effect
The key to making this style read as sophisticated rather than costume-y is using curls that feel soft and natural in terms of size and definition, even though the overall arrangement is clearly intentional. Harsh, overly tight curls feel costume-like; soft, bouncy curls feel genuinely elegant. Similarly, the crown should look like a collection of beautiful curls that happen to be arranged around a bun, not like a structured crown piece that was created separately and attached.
Pro tip: Use a fine-tooth comb to gently tease the crown slightly, which adds subtle volume and makes the curl arrangement look fuller and more luxurious without changing the overall style.
7. The Soft Bouncy Curl Bun
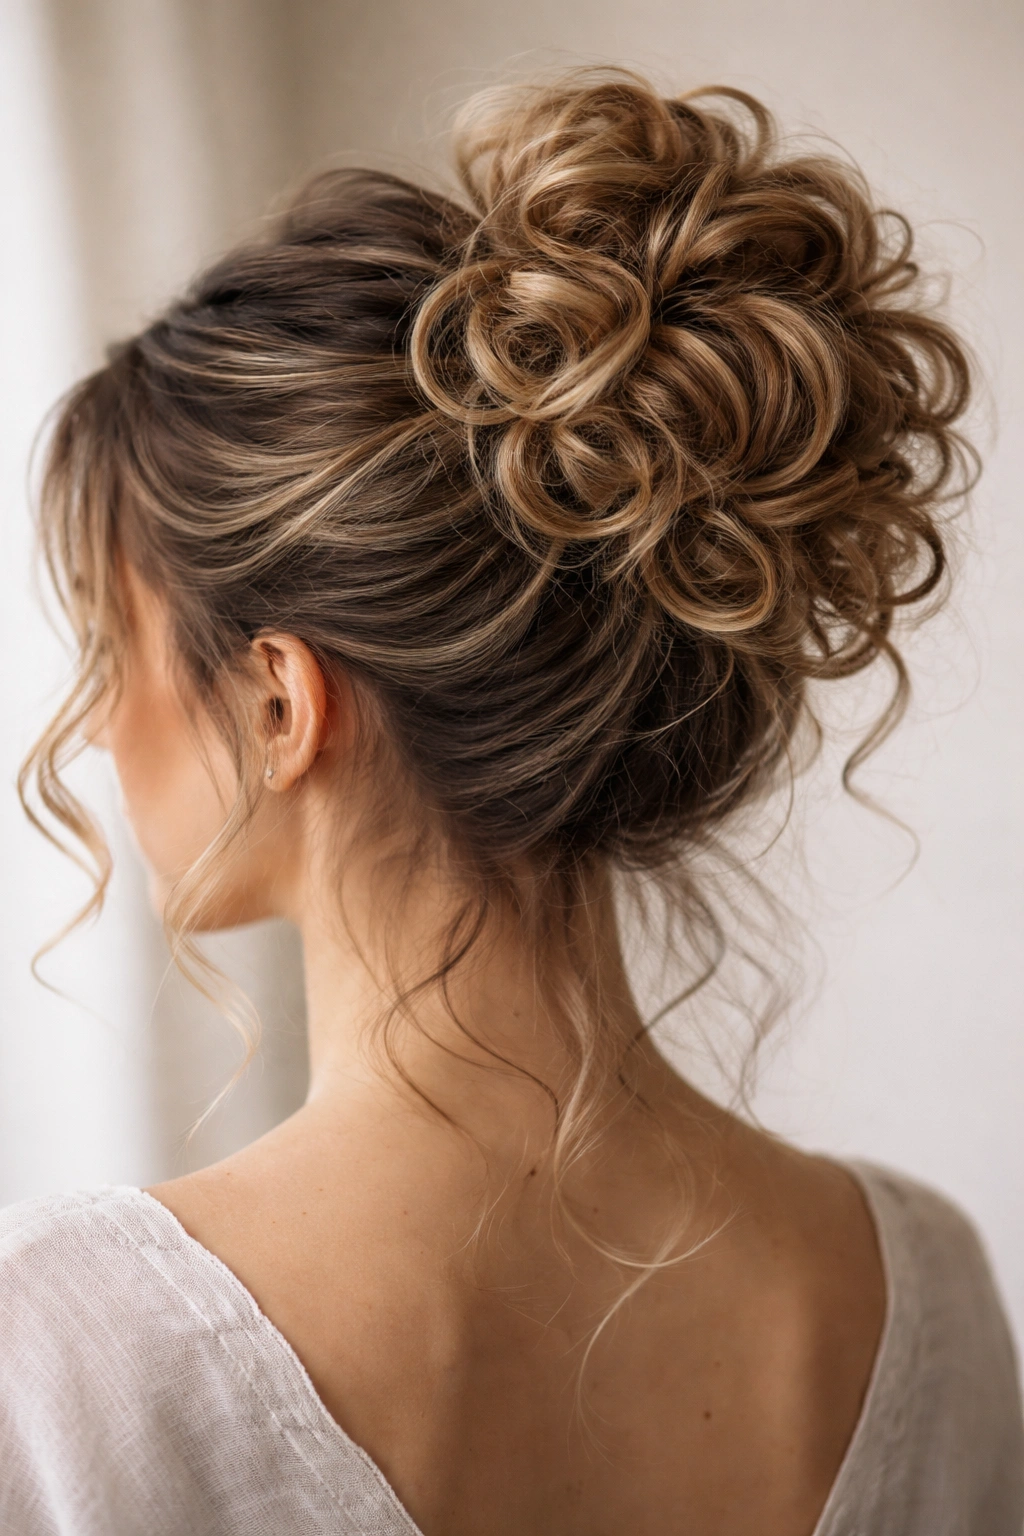
This style prioritizes softness and movement above all else. Rather than showcasing perfectly defined ringlets or mathematically arranged waves, soft bouncy curls celebrate the natural spring and volume that comes from using the right techniques and products. The bun itself is relatively loose and relaxed, allowing curls to project outward and move freely. This style feels genuinely effortless—it’s the curled bun equivalent of “I didn’t spend three hours on this, it just turned out this beautiful”—even though it actually requires some thoughtful technique.
Building Bounce Into Curls
Soft, bouncy curls start with the right base products and heat tools. Apply a curl cream or leave-in conditioner to damp hair, focusing on mid-lengths and ends. Use a larger-barrel curling iron (1.5 inches or larger) or a large-barrel wand, and curl in sections, holding the curl on the barrel for 8-10 seconds before releasing. The longer you hold the curl on the barrel, the tighter and longer-lasting the curl; pull the iron away slightly before the curl cools completely to create a slightly looser, bouncier result.
Curl each section away from your face if you prefer a consistent direction, or alternate sections to create movement in multiple directions. Once all curls are done and completely cool, flip your head upside down and gently tousle your curls with your fingers, creating separation and enhancing volume. This motion helps curls bounce and move rather than sitting as stiff, defined shapes. Apply a flexible-hold hairspray (not a strong-hold formula, which will make curls feel heavy).
Creating the Relaxed Bun
Gather your tousled curls into a low ponytail without flattening the waves or compressing them too much. Use a soft elastic that doesn’t crease hair. Create a loose bun by twisting the ponytail loosely and wrapping it, letting some curls remain loose and some tuck in naturally. The bun should look soft and rounded rather than tight and compact. Leave face-framing curls down; they should fall naturally in front of your ears rather than being deliberately arranged.
The Versatility Factor
This style works beautifully for casual professional settings, weekend hangouts, date nights, or any situation where you want to look polished without appearing overly fussed. The softness reads as approachable and friendly while the clear curl definition reads as intentionally styled and groomed. It’s one of the most wearable curled bun styles because it bridges the gap between “just woke up with great hair” and “I spent time getting ready.”
Real talk: This is the style to wear on days when you want your hair to be beautiful without being the primary focus of your appearance.
8. The Defined Coil Bun
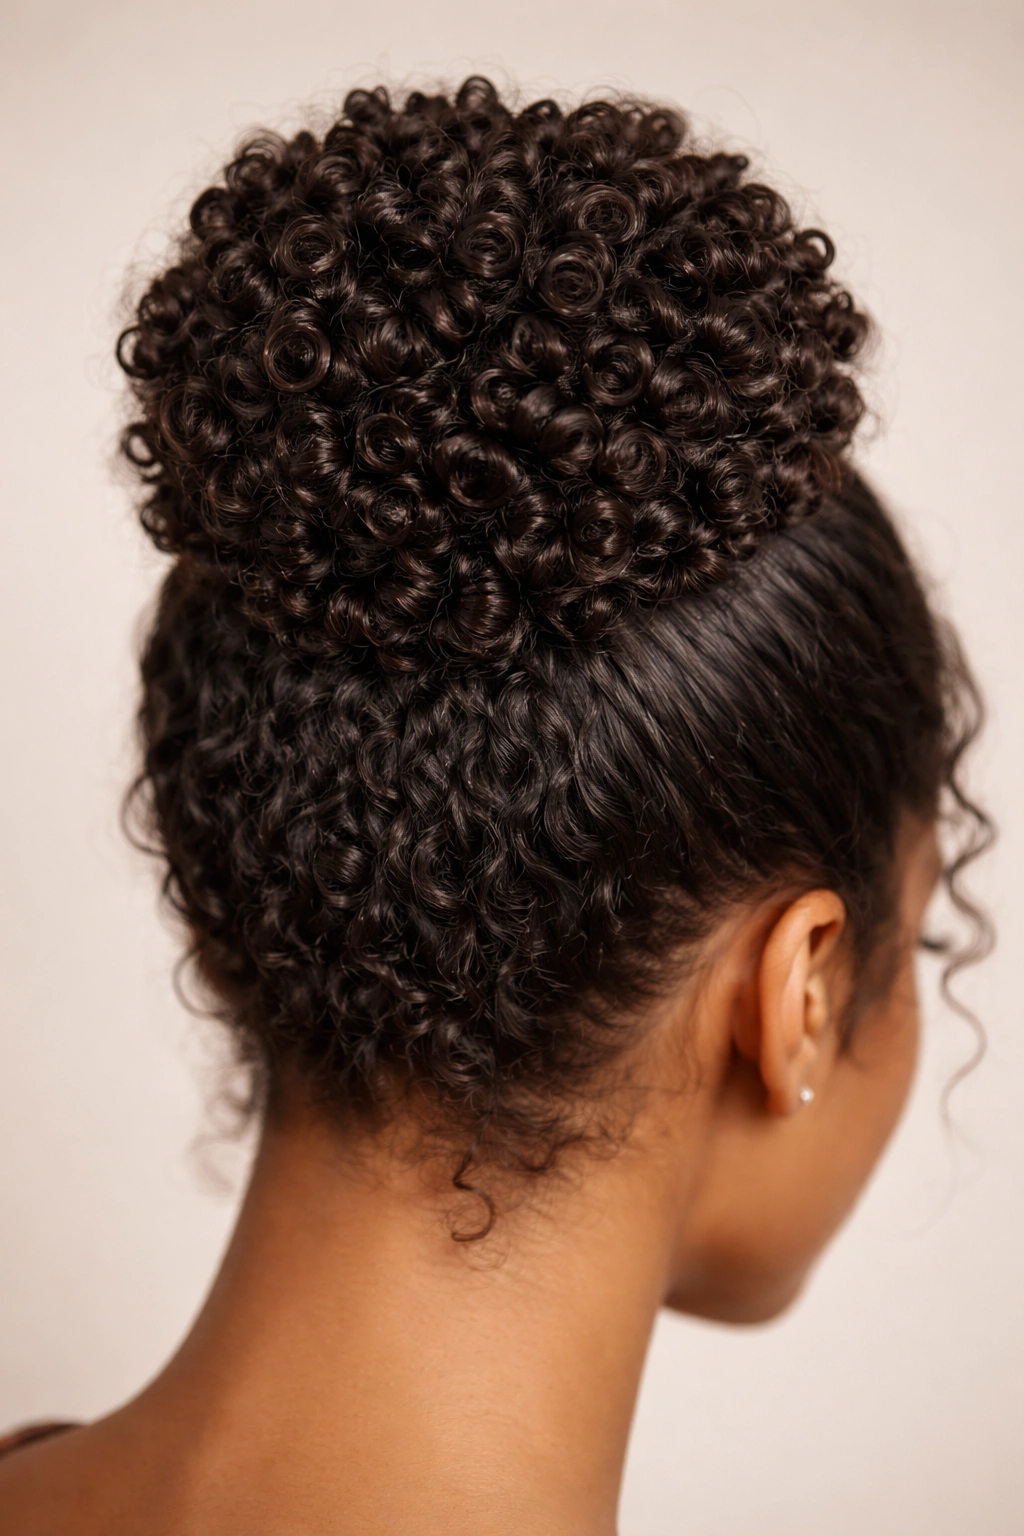
This style celebrates tight, spring-like coils that are gathered and stacked into a compact, visually striking bun. Rather than loose waves or soft curls, defined coils create an almost sculptural effect—the bun reads as a purposeful shape made of individual coil segments. This style works beautifully for naturally coily or textured hair, and it also works for people who’ve set their curls into very tight coils using heat tools or rods. This is a confident, statement-making style that celebrates texture boldly.
Prepping and Defining Coils
If you have naturally coily hair, prep it by applying a curl-defining cream or gel to damp hair, then either air-dry or diffuse-dry to set the coil pattern naturally. If you’re using heat tools, create very tight coils using a small-barrel curling iron, 1-inch Flexi-rods, or perm rods. Work in small sections and curl each section tightly, holding on the tool for 10-15 seconds to ensure the coil sets completely. Once cool, gently remove tools or unwind rods.
Once coils are set, apply a medium-hold gel or curl cream that helps individual coils maintain their shape without flattening them. Use your fingers or a comb with very wide teeth to gently separate coils if they’ve bonded together, but avoid breaking up the coil structure itself. The goal is visible separation without disrupting the coil shape.
Constructing the Bun
Gather coiled hair into a low ponytail and secure with an elastic. Create the bun by gently twisting the ponytail (without compressing the coils) and wrapping it around its base, securing with multiple bobby pins that distribute weight evenly. The coils will naturally create volume and texture; you’re not trying to smooth or refine them, just arranging them into a cohesive bun shape. Some coils will project upward and outward—that’s exactly what you want. The finished bun should look like a carefully arranged collection of defined coils rather than one unified blob of texture.
Occasion and Styling Tips
This style reads as bold, confident, and fashion-forward. It works beautifully for professional settings where your workplace celebrates diverse beauty standards, creative industries, social events, or any situation where you want your hair to be a statement of pride in your natural or carefully styled texture. The style says “I’m celebrating my coils, not apologizing for them.”
Pro tip: Mist the finished bun lightly with a flexible-hold spray that’s formulated to work with coily or textured hair. Many traditional hairsprays make coils feel crunchy; look for products specifically designed for coils, curls, and texture.
Final Thoughts
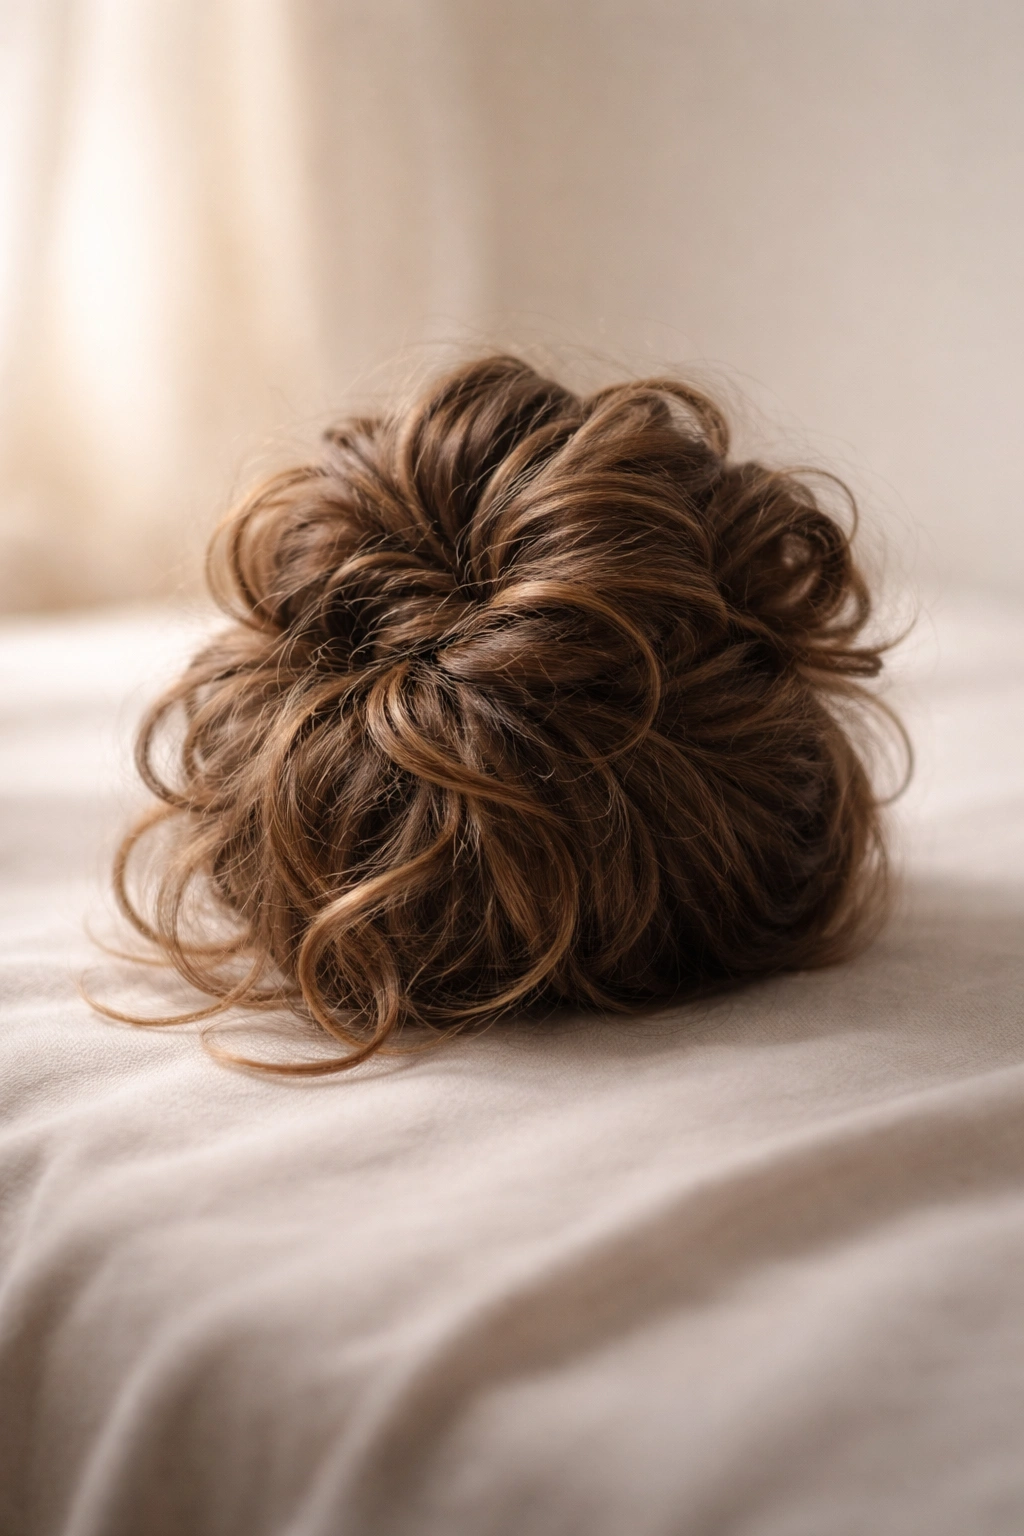
The true beauty of curled messy bun styles is that they transform what could be read as “I didn’t do my hair” into “I invested in intentional, sophisticated styling.” Each of these eight styles works with different curl patterns, hair types, occasions, and personal aesthetics—meaning there’s genuinely a curled bun style that aligns with how you want to present yourself on any given day.
What these styles share in common is that they treat curls as design elements rather than obstacles to overcome. Instead of trying to smooth curls away or ignore them, curled bun styles celebrate them, arrange them intentionally, and let them become the primary visual interest of the hairstyle. That fundamental shift in perspective—from “how do I manage my curls” to “how do I showcase my curls”—is what creates hairstyles that read as polished, intentional, and genuinely beautiful.
The secret to making any curled bun style work in your own life is understanding your curl pattern and choosing a style that works with that pattern rather than against it. Tight, spring-like coils look stunning in a defined coil bun but might feel overdone in a soft, bouncy curl style. Soft waves work beautifully in romantic spiral buns but might look too relaxed in a structured vintage crown bun. The more honestly you assess what your hair naturally wants to do and choose a style that allows your specific curl pattern to shine, the more effortlessly polished your final result will be.
Don’t hesitate to experiment. Create a few different curled bun styles over the course of a week or two, take photos in natural light, and notice which styles make you feel most confident and beautiful. Notice which styles hold up best throughout your day, which ones require the most maintenance, and which ones get the most genuine compliments. Your favorite curled bun style isn’t necessarily the most complicated one or the one that looks best in photos—it’s the one that makes you feel polished, confident, and genuinely like yourself. That’s when a curled messy bun stops being just a hairstyle and becomes a daily confidence boost.
