



If you’ve ever tried pairing a messy bun with a hat and ended up with a lopsided bump that either crushes your style or pokes out awkwardly, you’re not alone. Most messy bun tutorials are designed for hat-free living—they prioritize visual drama and volume in all the wrong places when a baseball cap or beanie enters the equation. The truth is, wearing your hair up under a hat requires a completely different approach than a bun meant to be admired on its own.
The challenge isn’t that messy buns and hats are incompatible—it’s that you need to understand the mechanics of how they interact. A bun positioned too high will create an uncomfortable bulge under your hat and look unnatural from every angle. A bun that’s too loose will unravel the moment you pull the hat over your head. And texture matters more than most people realize when you’re working with limited space. The good news is that once you nail the right technique and position, you can create a polished, effortlessly undone look that actually works beautifully with any hat in your collection.
The styles I’m sharing aren’t just about surviving hat-wearing days—they’re about looking genuinely good while doing it. Whether you’re dealing with a baseball cap, a wide-brimmed hat, a knit beanie, or anything in between, these six approaches will give you options that feel comfortable, look intentional, and won’t unravel or create an awkward bump underneath.
1. The Low Side Ponytail Bun
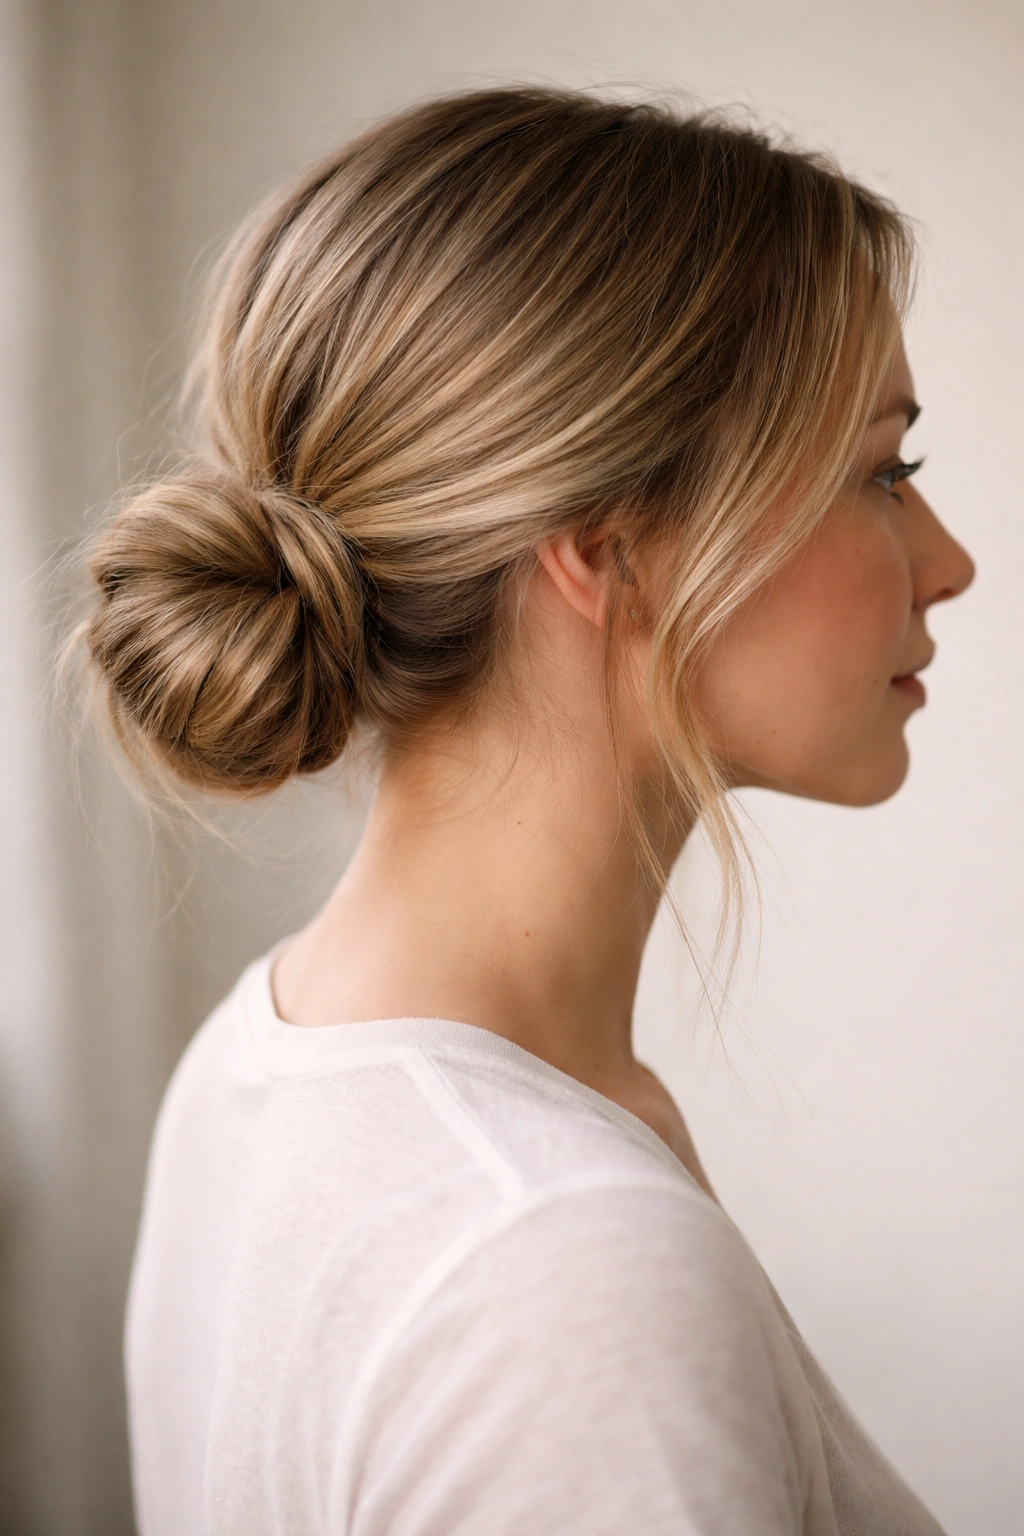
The low side ponytail bun is your secret weapon for wearing hats without any crown-of-your-head bulk. Instead of gathering your hair at the center back like a traditional bun, you’re creating a ponytail that sits low and off to one side, then twisting it into a small, compact bun that nestles right at the nape of your neck.
Why It Works Under Hats
A low side positioning eliminates the vertical height that causes bumps under hats. When your bun sits at the nape of your neck rather than at your crown, it fits naturally inside the hat without creating pressure points or uncomfortable tension. The side placement also means the bun sits slightly outside the main area your hat covers, reducing the overall bulk. This style is particularly brilliant for baseball caps, which sit relatively close to your scalp—a crown bun would fight against the structure of the cap, but a low side bun gives you freedom to wear it comfortably.
How to Create It
- Start with dry or lightly textured hair (use a texturizing spray if your hair is freshly washed and slippery)
- Brush your hair to the side where you want the ponytail—usually the side opposite from where you naturally part
- Secure a low ponytail just above the nape of your neck with an elastic that matches your hair color
- Twist the ponytail loosely around the elastic to form a spiral bun, tucking the ends under and securing with bobby pins
- Keep the bun deliberately loose and slightly messy—this is where pieces should fall out around the face and nape, creating softness
- Secure the bun thoroughly: Use at least 4-5 bobby pins in a crisscross pattern to ensure it won’t unravel when you put the hat on
Pro tip: This style looks even better when you leave a few face-framing pieces out before creating the ponytail. Pull those pieces to the side as well, so they complement the side-swept direction of the bun rather than fighting it.
2. The Wrapped Low Bun
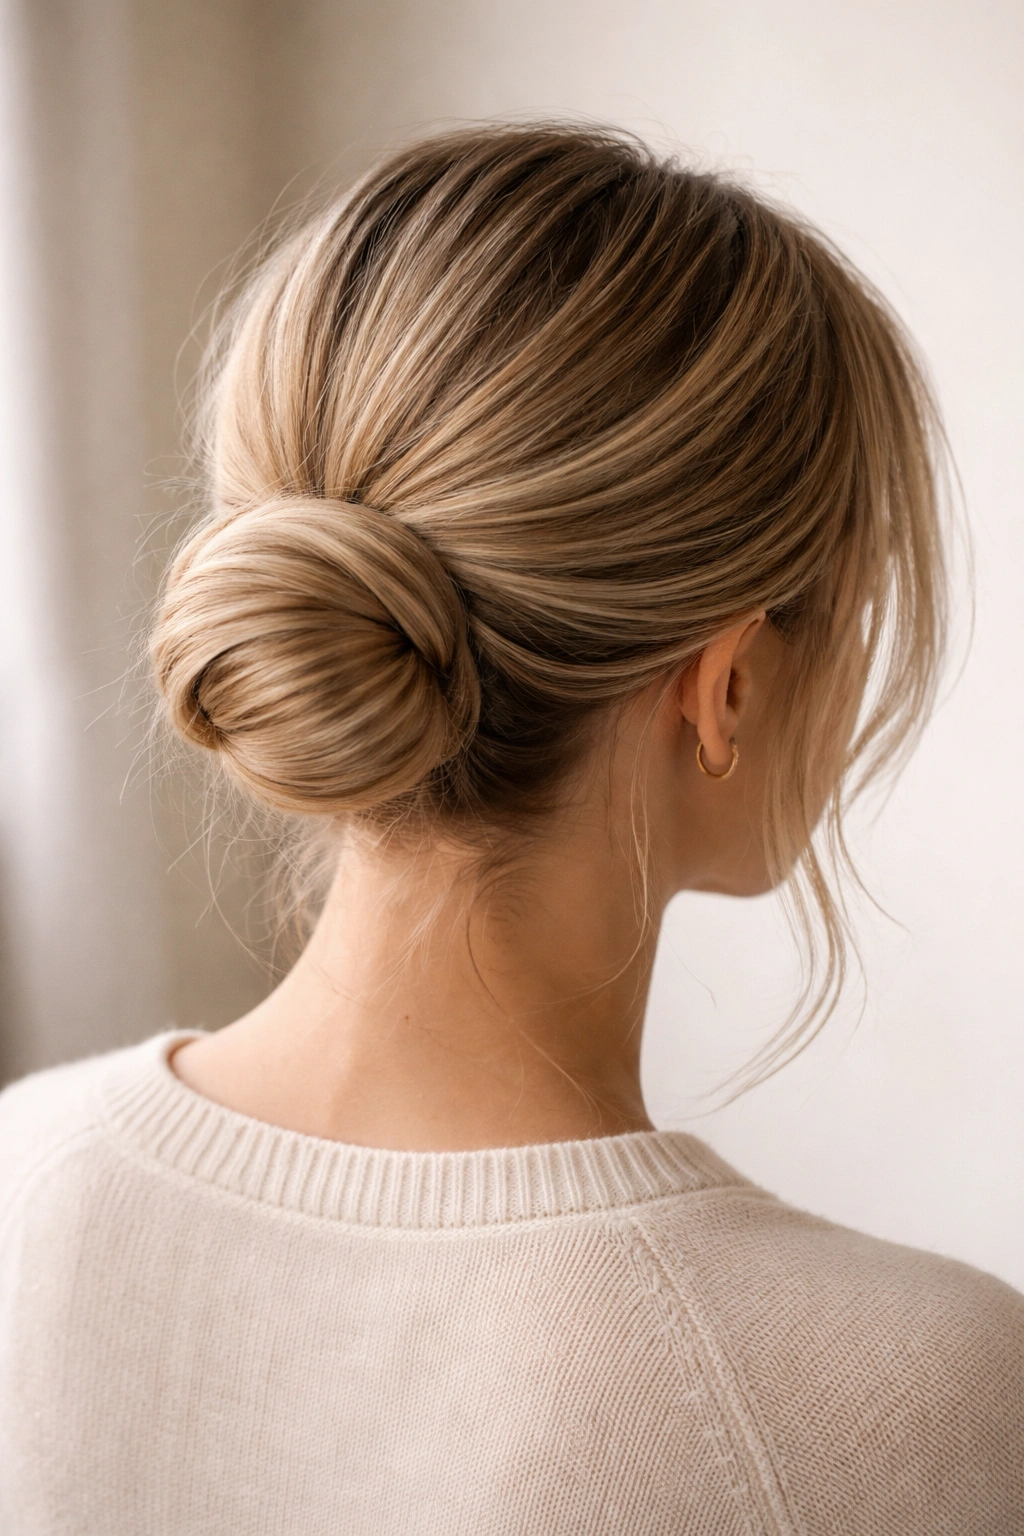
The wrapped low bun is a step up in polish and stability. Instead of twisting your ponytail, you’re wrapping sections of it around the base to create a more controlled, compact shape that sits snugly at the back of your head where it’s completely hidden by most hats.
Why It Works Under Hats
This style creates a flatter, more compact bun than a traditional twisted version because you’re wrapping the hair in horizontal layers rather than spiraling it. The result is a bun that’s wider and shorter—perfect for the space available under a hat. The wrapping technique also holds everything more securely, so you don’t have to worry about it loosening as you adjust your hat throughout the day. It’s especially effective under beanies and winter hats that sit lower on your head.
How to Create It
- Create a low ponytail at the nape of your neck, similar to the previous style
- Separate the ponytail into 2-3 even sections
- Take the first section and wrap it around the base of the ponytail, then secure it with a bobby pin
- Repeat with the second section, wrapping it in the opposite direction to build the bun outward
- Tuck any remaining hair under the wrapped sections and pin everything securely
- Leave small pieces intentionally loose around the nape and face for that messy element
- Use a light hairspray to keep flyaways in place without making it look overdone
Worth knowing: The thickness of your hair determines how many sections you need. Finer hair works better with 2 sections, while thicker hair benefits from 3-4 thinner sections that create more visual interest and texture.
3. The Tucked French Braid Bun
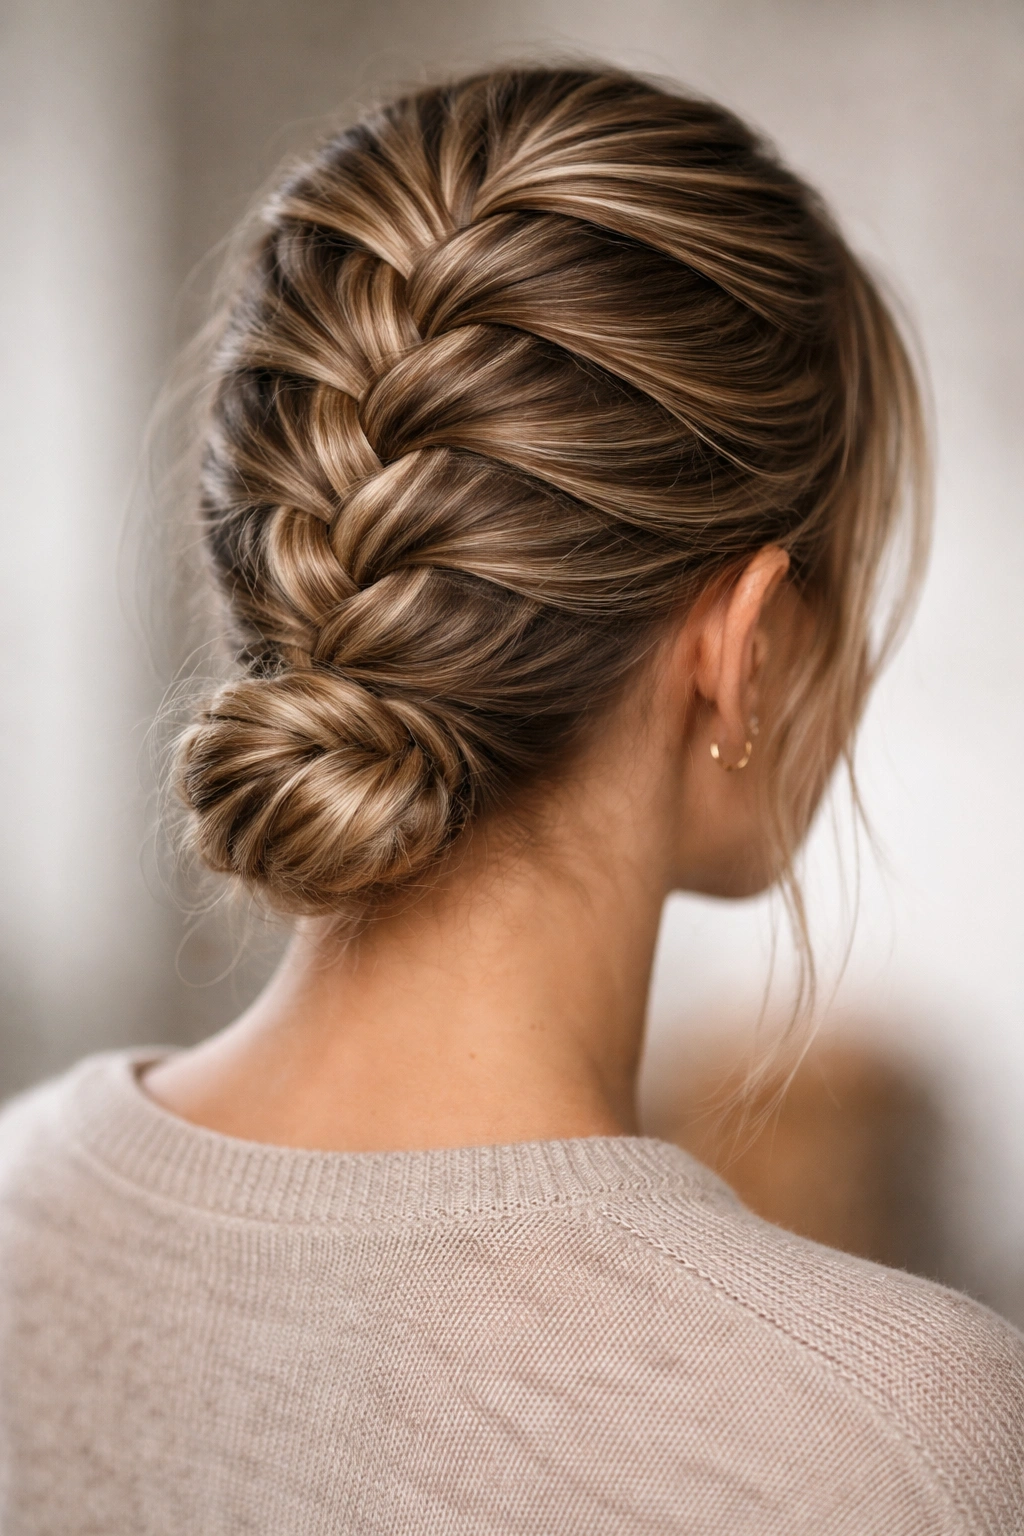
This style starts with a Dutch or French braid that runs from the crown down to the nape, then converts into a small messy bun at the base. It’s more intricate than the previous two styles but offers incredible security and visual interest when your hat is off.
Why It Works Under Hats
The braid distributes tension across your entire scalp rather than pulling at a single point, which means you can wear your hat more comfortably for longer periods without that tight, headache-inducing feeling. The bun portion sits so low and so small that it creates minimal bulk under the hat. The braid itself adds texture and style—when you remove your hat, you’ve got a visibly structured look rather than a flat head of hair. This is perfect for days when you’re wearing a hat for only part of the day and want the style to look intentional when you take it off.
How to Create It
- Start with textured or second-day hair (apply dry shampoo or texturizing spray first)
- Create a Dutch braid (braiding away from your face rather than toward it) starting at your crown or slightly off-center
- Braid down to the nape of your neck, gathering more hair as you go
- Secure the end of the braid loosely with a small elastic
- Unravel the bottom few inches of the braid slightly to create texture
- Take the loosened section and wrap it into a small bun at the nape, securing with bobby pins
- Leave a few pieces out around your face to soften the overall look
- Gently tug the braid to make it wider and messier—this distributes the texture and makes it look less stiff
Insider note: The messier you make this bun, the more intentional and modern it looks. Don’t aim for perfection—aim for “I woke up and braided my hair in a relaxed way.”
4. The Flat Twisted Knot Bun
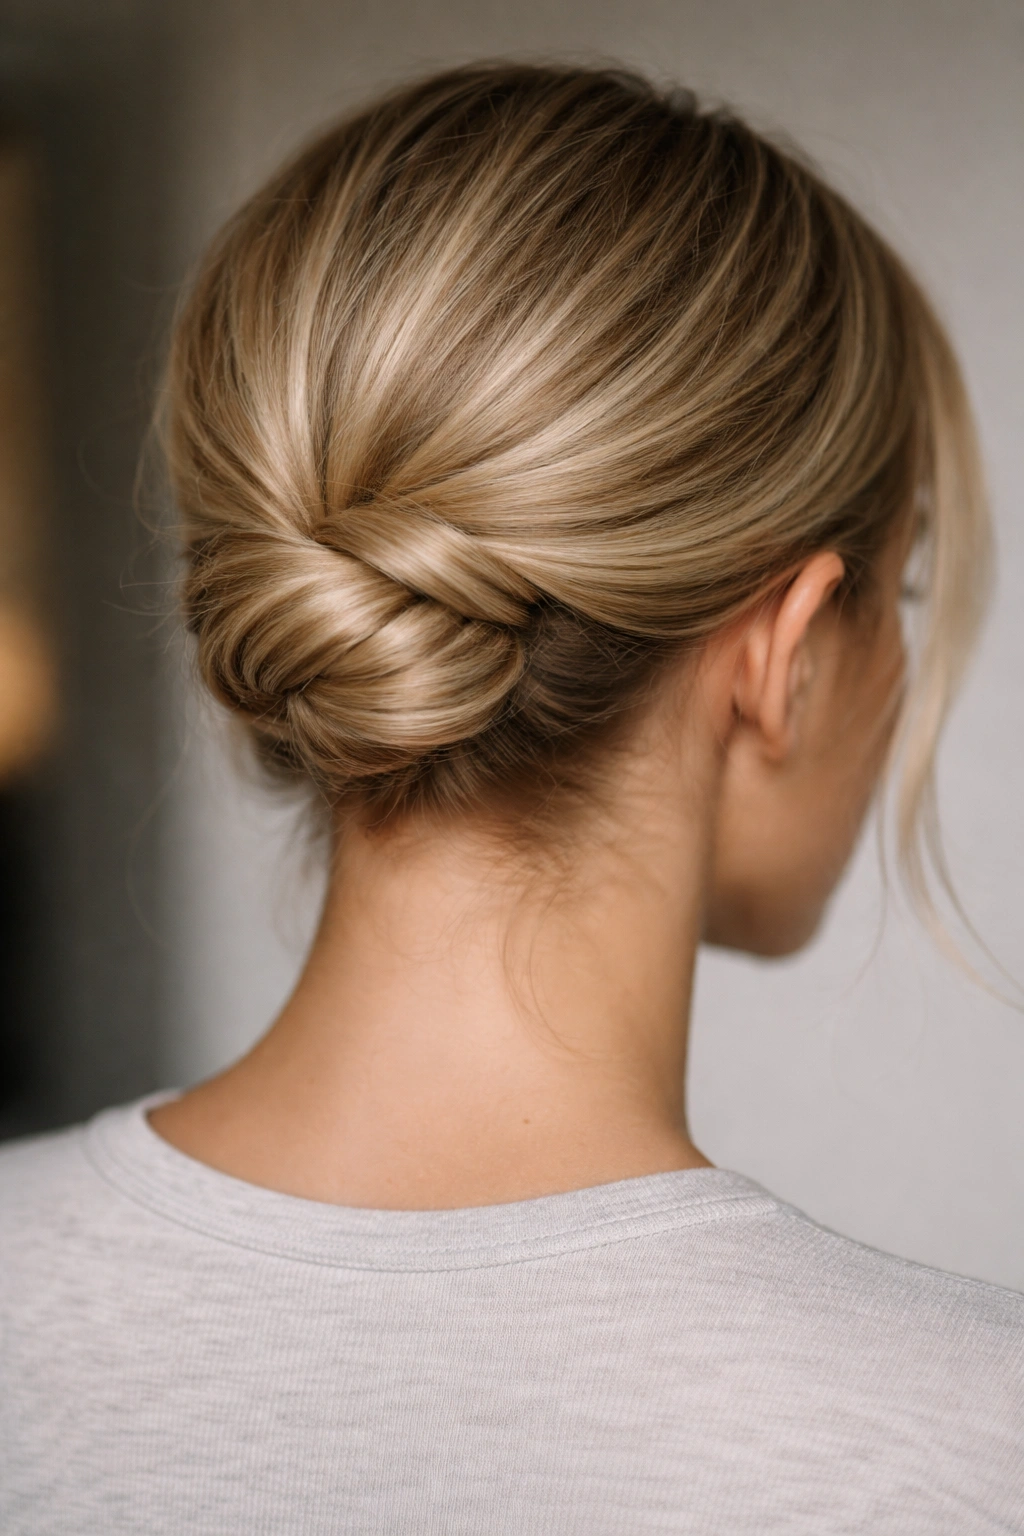
The flat twisted knot bun uses a two-strand twist instead of a traditional bun shape, creating something that looks more like a knot than a coil. It’s flat, controlled, and absolutely invisible under any hat while looking beautifully undone when you wear your hair down.
Why It Works Under Hats
This style has essentially zero vertical height, which is the holy grail of hat compatibility. You’re creating a knot shape rather than a bun, which means all the volume stays flat against the back of your head. It’s the perfect choice for situations where you need your hat to sit smoothly against your head—like under a tight-fitting beanie or a helmet. The two-strand twist method also creates a naturally textured, messy appearance without requiring you to deliberately loosen or tousle anything.
How to Create It
- Pull your hair into a low ponytail at the nape of your neck
- Divide the ponytail into two equal sections
- Twist one section around the other, wrapping them together in a continuous spiral
- Continue twisting until you’ve incorporated all the hair and created a spiral cord
- Wrap this twisted cord around the base of your ponytail to form a flat knot shape
- Secure everything with bobby pins at multiple points around the knot
- Pull gently at the twist to add texture and create a slightly undone appearance
- Use bobby pins that match your hair color so they won’t show if any are visible from above
What to watch for: If you twist too tightly, the bun will look stiff and controlled. The messy element comes from leaving some texture and movement in the twist, so aim for a relaxed twisting pace rather than pulling hard as you go.
5. The Sleek Low Bun with Undercut Detail
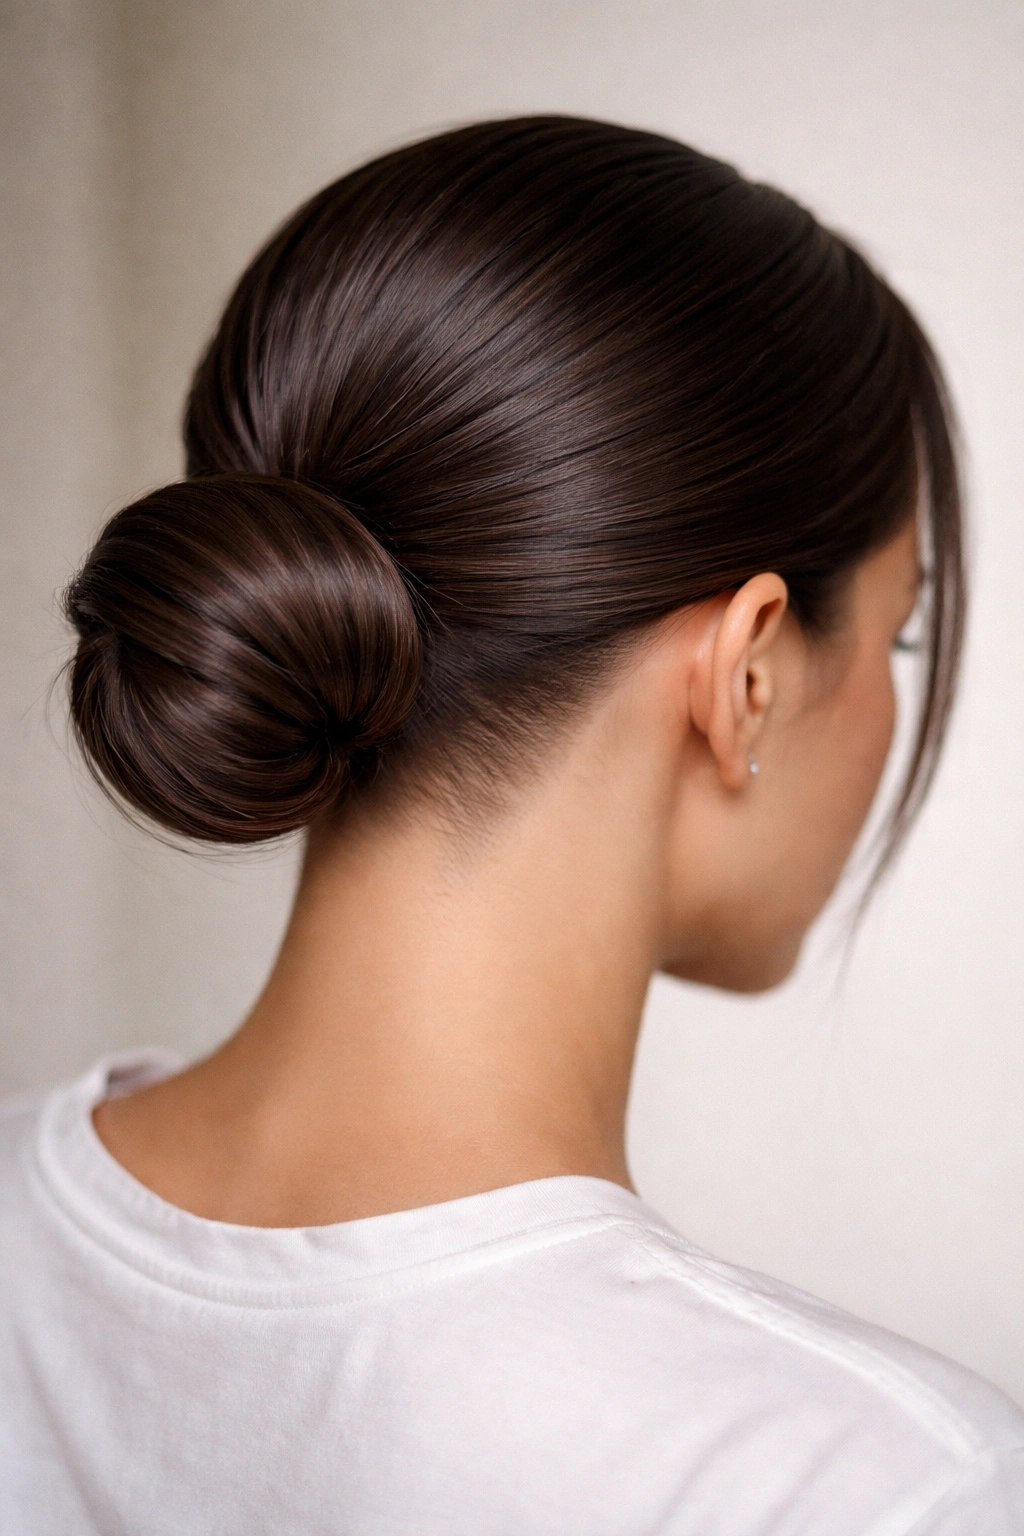
This style is more polished than the others and works beautifully if you have an undercut or shaved section at the nape of your neck. Even without an actual undercut, creating the illusion of one by slicking back the hair at your nape gives you a chic, modern look that somehow feels more pulled-together than a fully messy bun.
Why It Works Under Hats
This is the style to choose when you want to look intentional and styled rather than deliberately undone. The sleekness at the back combines with a purposefully placed bun to create a sophisticated vibe that works under hats you’d normally save for dressier occasions. The low placement means zero hat-related bulges, and the clean edges around the nape prevent loose flyaways from creating a frizzy appearance under your hat.
How to Create It
- Brush your hair back smoothly, using a fine-tooth comb to remove any texture at the nape
- Create a low ponytail using a gel or pomade to keep everything sleek and smooth
- Twist or wrap the ponytail into a small, compact bun at the nape
- Apply a smoothing product (pomade, gel, or wax) to the hairline and any baby hairs around your nape
- Use bobby pins to secure everything firmly
- Optional: add a small hair accessory like a claw clip or minimalist bun cover for visual interest
- For extra hold, finish with a strong-hold hairspray applied in light mists
Pro tip: This style actually improves when you’ve worn it under a hat for an hour. The slight indentation and compression creates a polished look that’s hard to achieve otherwise. Don’t fight the hat head—embrace it as part of the aesthetic.
6. The Braided Wrap Bun
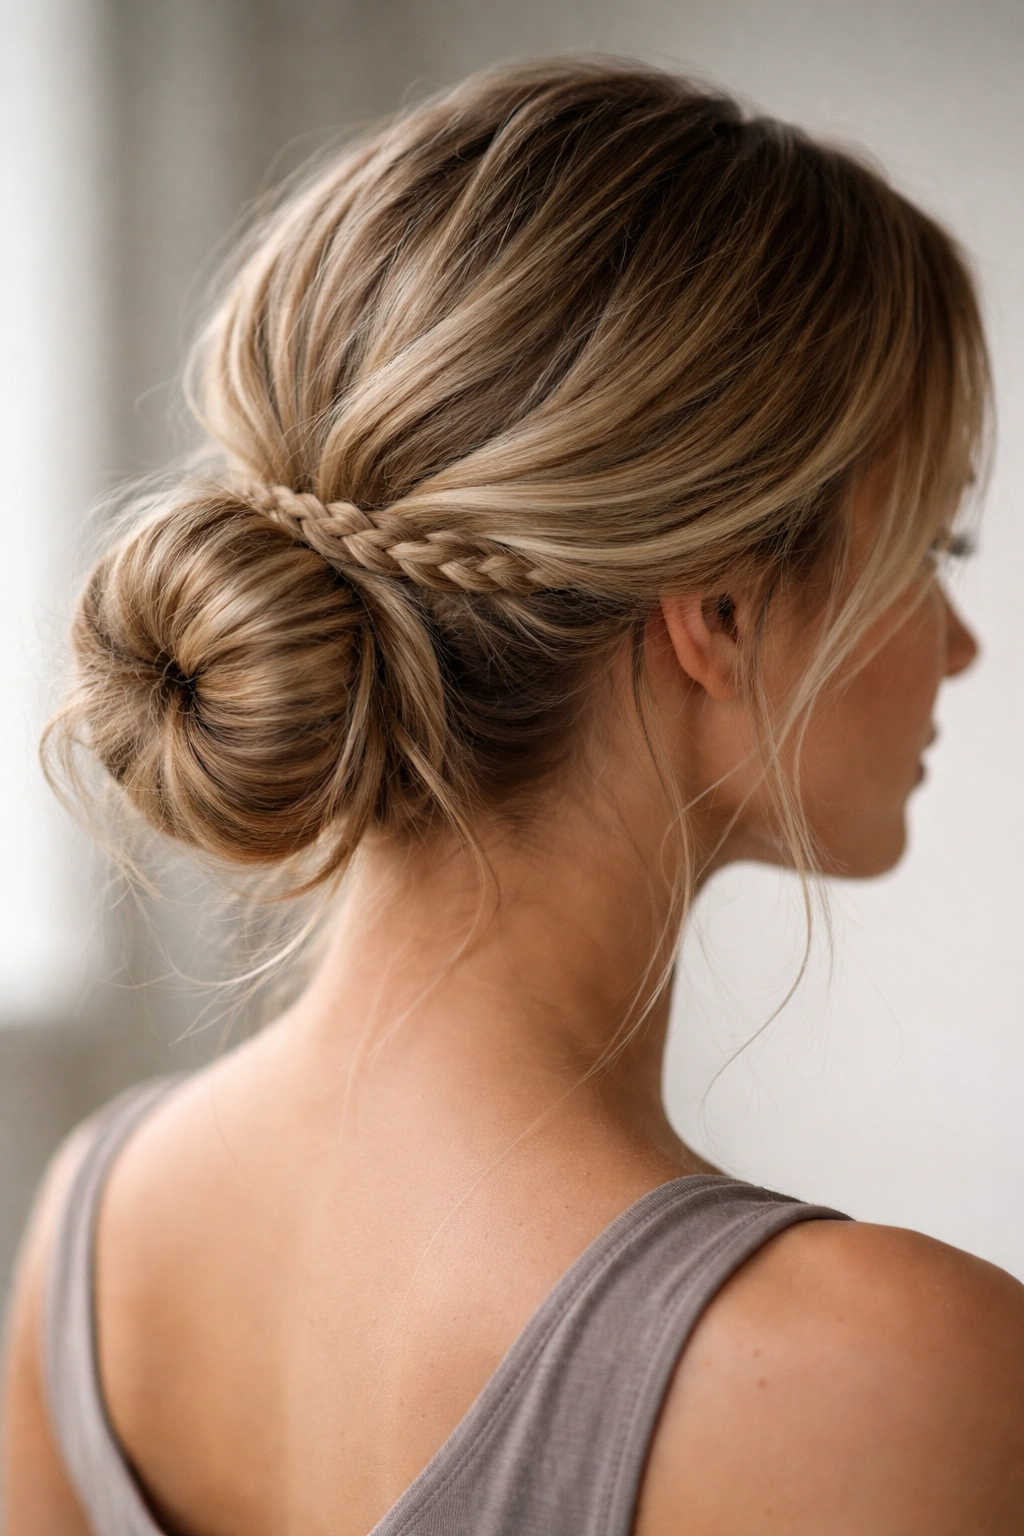
This final style combines a braid with a wrapped bun for maximum visual texture and security. A thin braid (or multiple thin braids) wraps around the base of a loosely twisted bun, creating a decorated, intricate look that manages to be both secure and effortlessly messy.
Why It Works Under Hats
The braided wrap distributes weight and tension, making the overall style feel lighter and less constraining under a hat. The multiple layers—the base bun plus the wrapping braid—create dimension that somehow looks less bulky than a single thick bun. This style also offers incredible security; even if sections work loose under your hat, the braid wrap keeps everything contained and in place.
How to Create It
- Create a low ponytail at the nape of your neck
- Twist the ponytail loosely and coil it into a bun shape, securing with bobby pins
- Take a small section from the ponytail (before twisting it) and create a thin three-strand braid
- Wrap this braid around the base of your bun, tucking it under slightly
- Secure the braid end with bobby pins
- Gently pull at the bun and braid to add texture and create dimension
- Leave small pieces of hair loose around the nape and face
- Set everything with texture spray or dry shampoo to enhance the messy appearance without extra products weighing it down
Insider note: You can create multiple thin braids and wrap them in different directions around the bun for even more texture. This transforms the style from casual to almost bohemian—perfect for those days when your hat is just occasional.
Getting Your Hair Texture Right for Messy Buns Under Hats
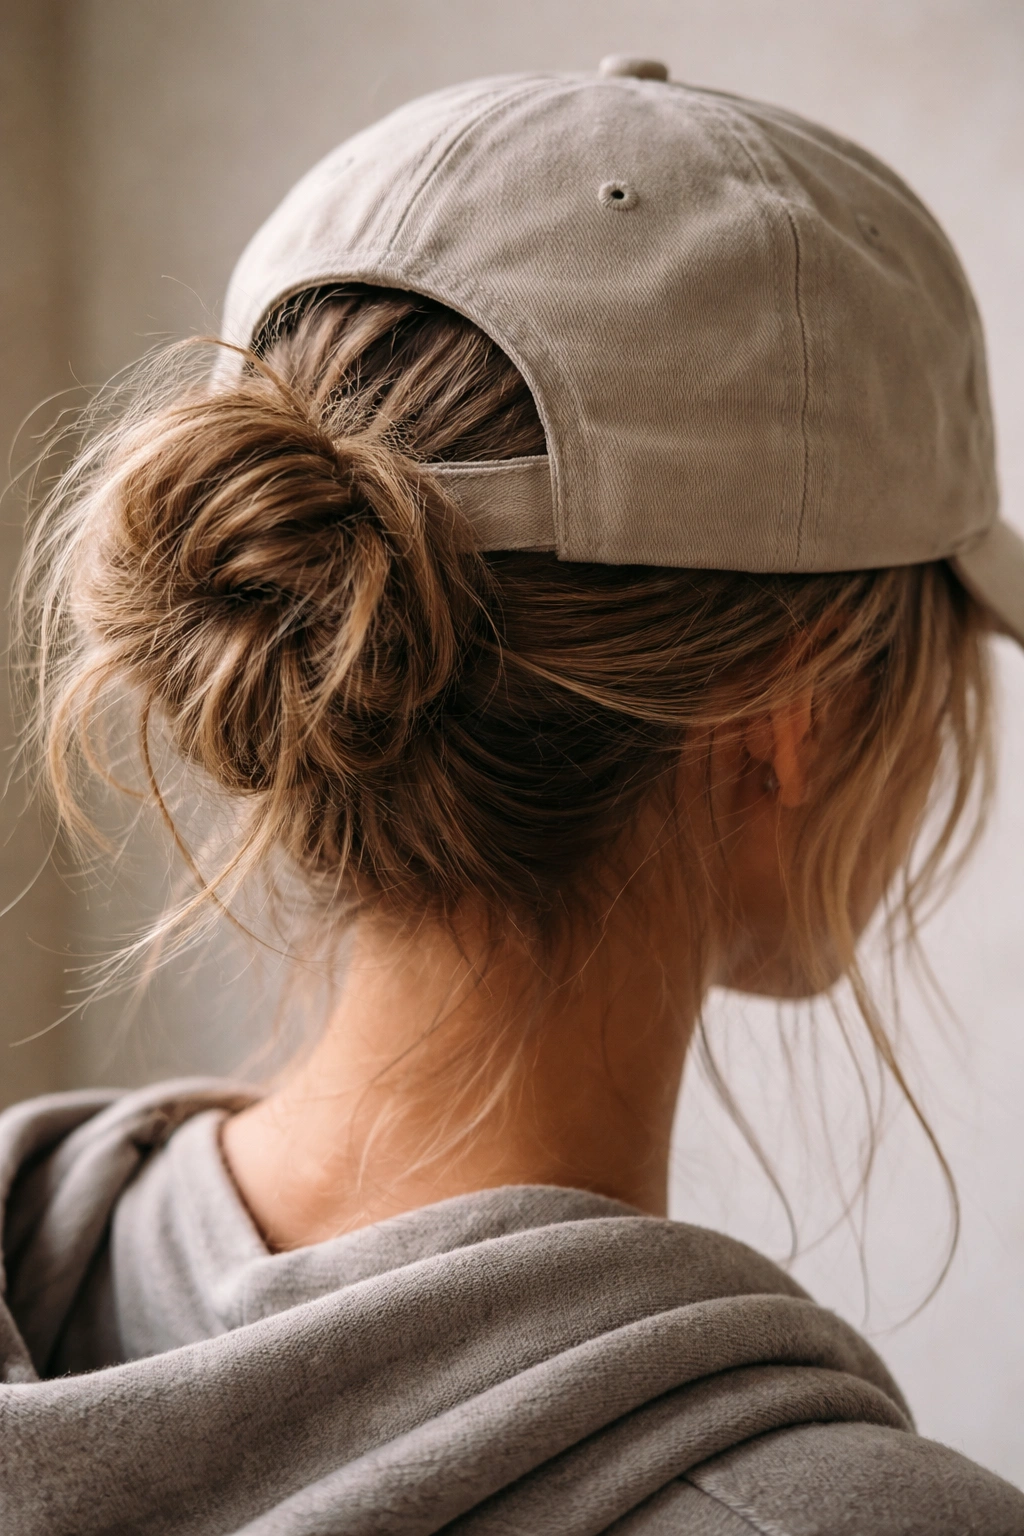
The texture of your hair makes an enormous difference in how these styles hold up, both while wearing your hat and after you take it off. Fresh-from-the-shower hair is actually your enemy here because it’s slippery and will loosen as you move around. The ideal texture is slightly gritty or textured, which gives you grip and prevents constant slipping.
Use dry shampoo or texturizing spray 20-30 minutes before creating your bun. These products add grip to your hair and help bobby pins stay exactly where you place them. Unlike regular hairspray, which works best after you’ve styled, texture products work better before because they change the actual surface of your hair. If you have naturally textured hair or hair that’s naturally oily, you might skip this step entirely.
Second-day or third-day hair is actually ideal for messy bun styles. The natural oils and slight buildup create texture without being visibly greasy. If you need to refresh your hair between wash days, a light misting of dry shampoo focused on your roots does the job without making your hair look dull or powdery.
For people with very fine hair, achieving enough texture can be tricky. Braiding your hair before bed and sleeping on the braids creates gentle waves and texture that lasts through the next day. Alternatively, use texturizing spray liberally—fine hair responds beautifully to even light texture products, and they won’t make it look heavy.
The Hat and Bun Size Relationship
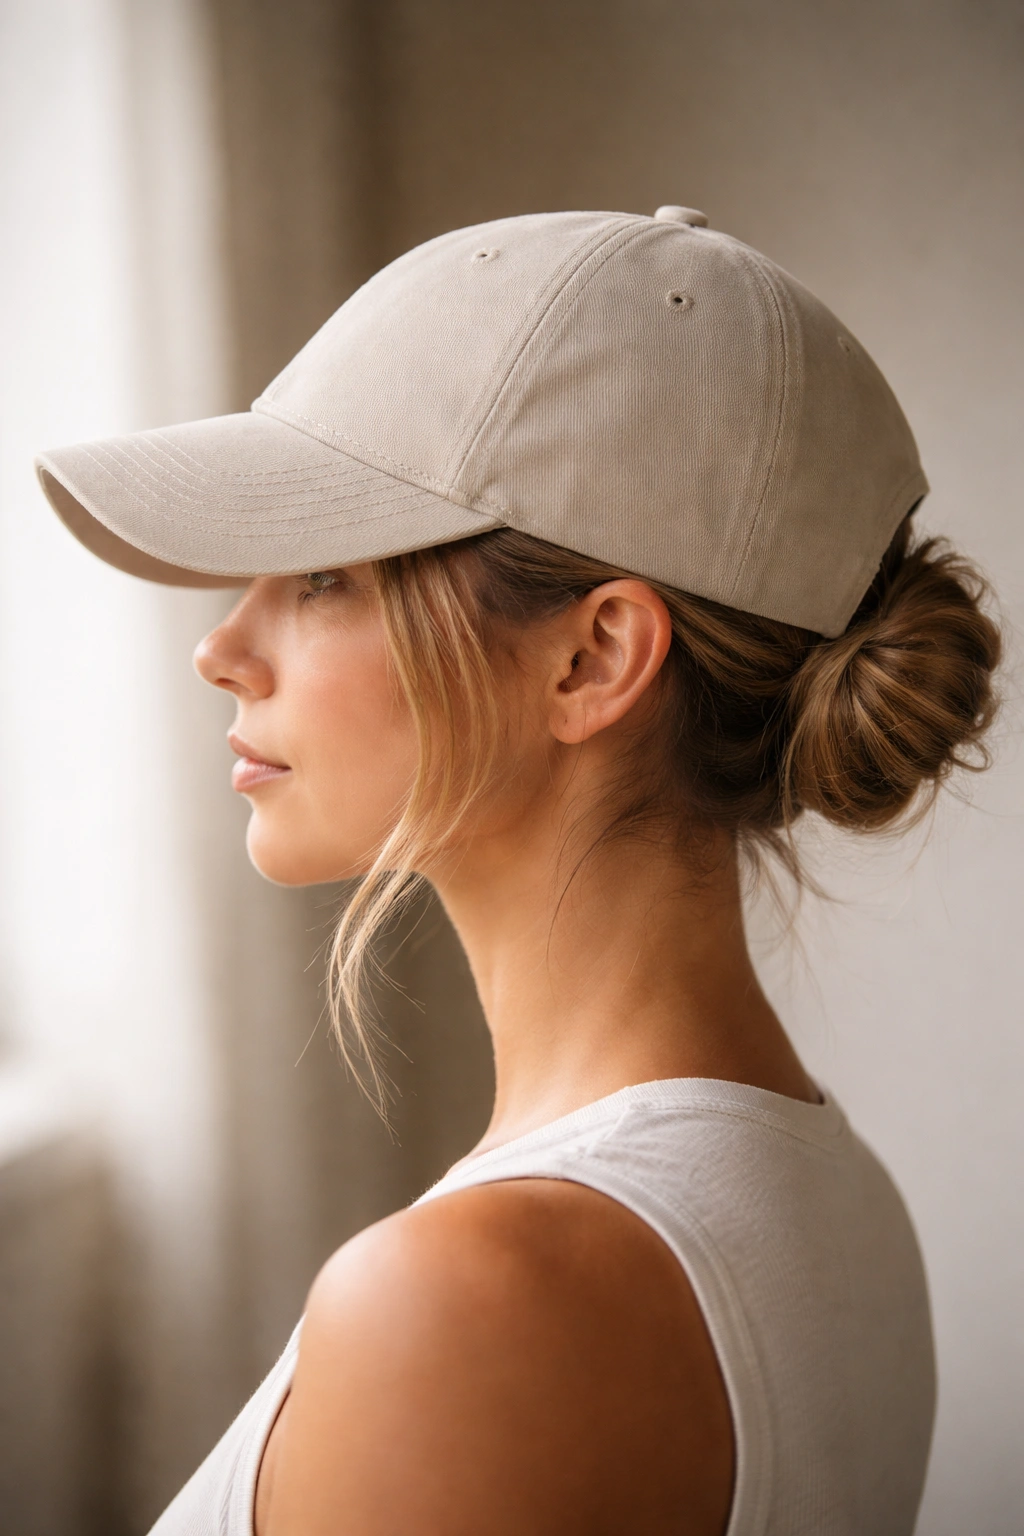
Not all messy buns work equally well under all hats, and understanding the relationship between bun size and hat structure is key to looking good. Baseball caps and fitted hats sit relatively close to your scalp and don’t accommodate bulky buns, so styles 1, 2, and 4 (the low side bun, wrapped low bun, and flat twisted knot) are your best bets. These create minimal vertical height.
Beanies and winter hats sit lower on your head and often have more interior space, but they compress downward rather than allowing height. Again, low placement is essential, but you have slightly more freedom with the bun itself being a touch larger or less compressed.
Wide-brimmed hats like sun hats or felt hats offer the most flexibility because they sit on your head quite high and rest more on your forehead and ears than on the actual top of your head. Any of these six styles works beautifully with a wide-brimmed hat, but the polished, intentional styles (like style 5, the sleek low bun) look particularly elegant.
Bucket hats and trucker hats fall somewhere in the middle. They have structure but allow for slightly more volume than a tight baseball cap. The wrapped low bun or the braided wrap bun work particularly well because the texture reads as intentional rather than accidental.
Hair Length Considerations for Different Bun Styles
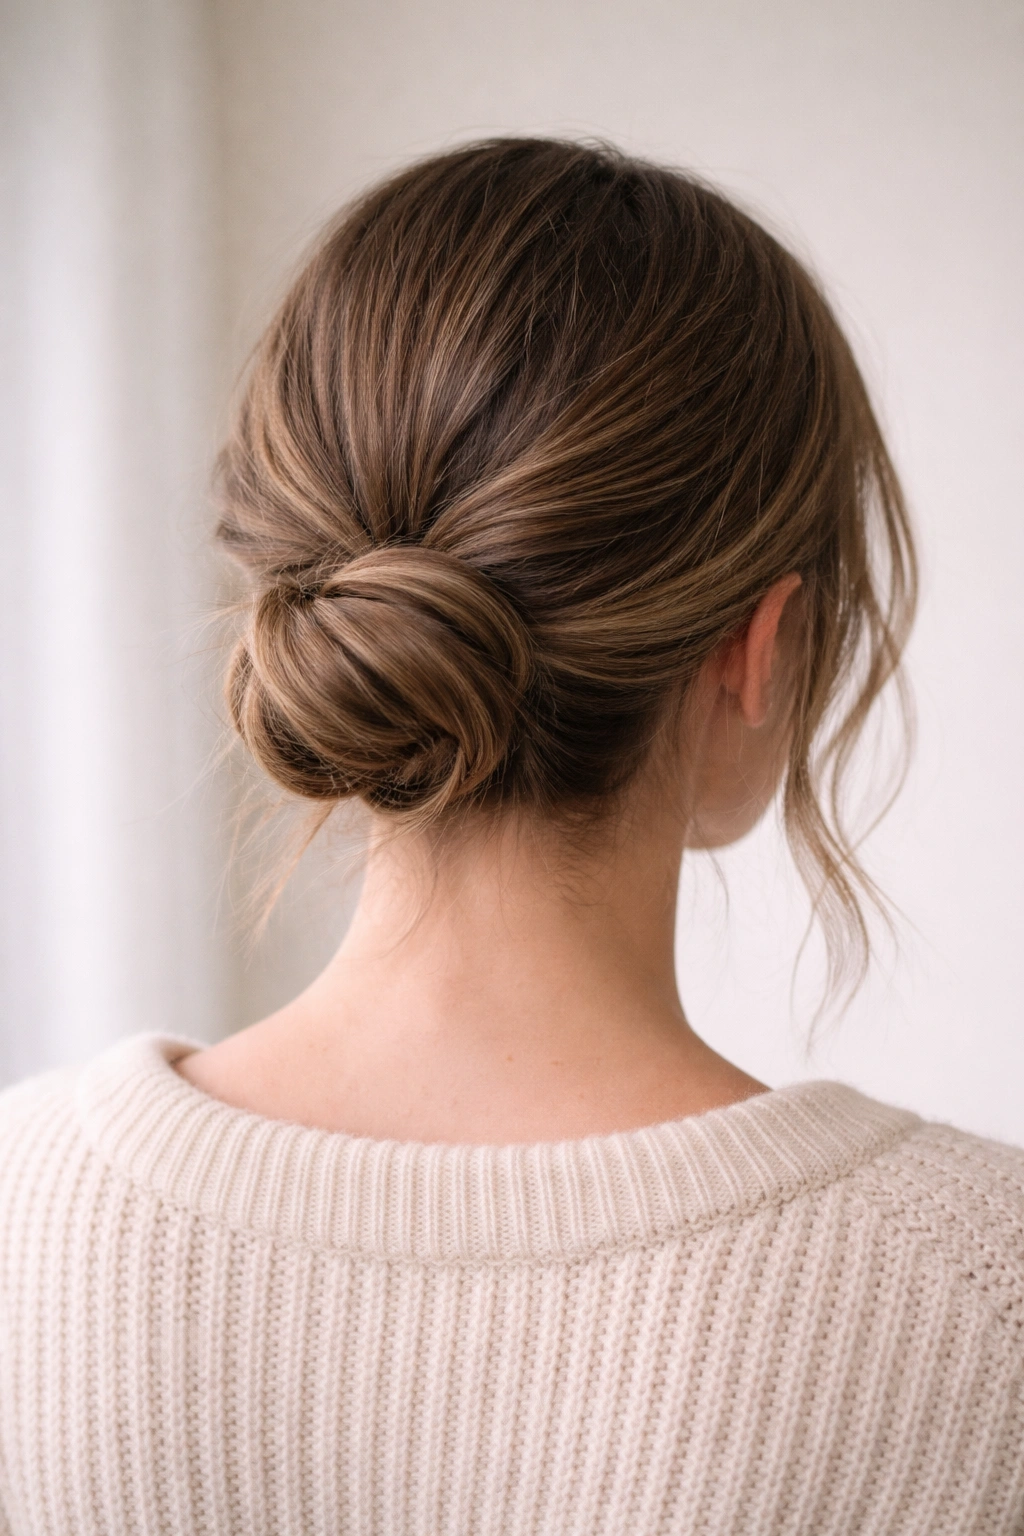
Your hair length affects which styles are practical and how they’ll look once you’ve created them. If you have short hair (chin-length or shorter), traditional buns are basically impossible. Instead, focus on the braided approaches like the tucked French braid bun if your hair is long enough for a small braid, or consider updo-like styles where you’re pulling hair back and securing it rather than actually creating a bun shape.
Shoulder-length or slightly longer hair opens up all these styles, though some will look more refined than others. The wrapped low bun and flat twisted knot bun work beautifully and don’t require length beyond your shoulders. The braided wrap bun also works well with medium-length hair.
Mid-back length or longer hair gives you maximum flexibility with any of these styles. The bun will appear fuller and more substantial, and you’ll have enough hair to create texture without looking thin or sparse. If your hair is very long, you might want to use slightly thicker elastics to anchor your ponytail securely, as longer hair creates more weight and downward pull.
Securing Your Messy Bun So It Actually Stays Secure Under a Hat
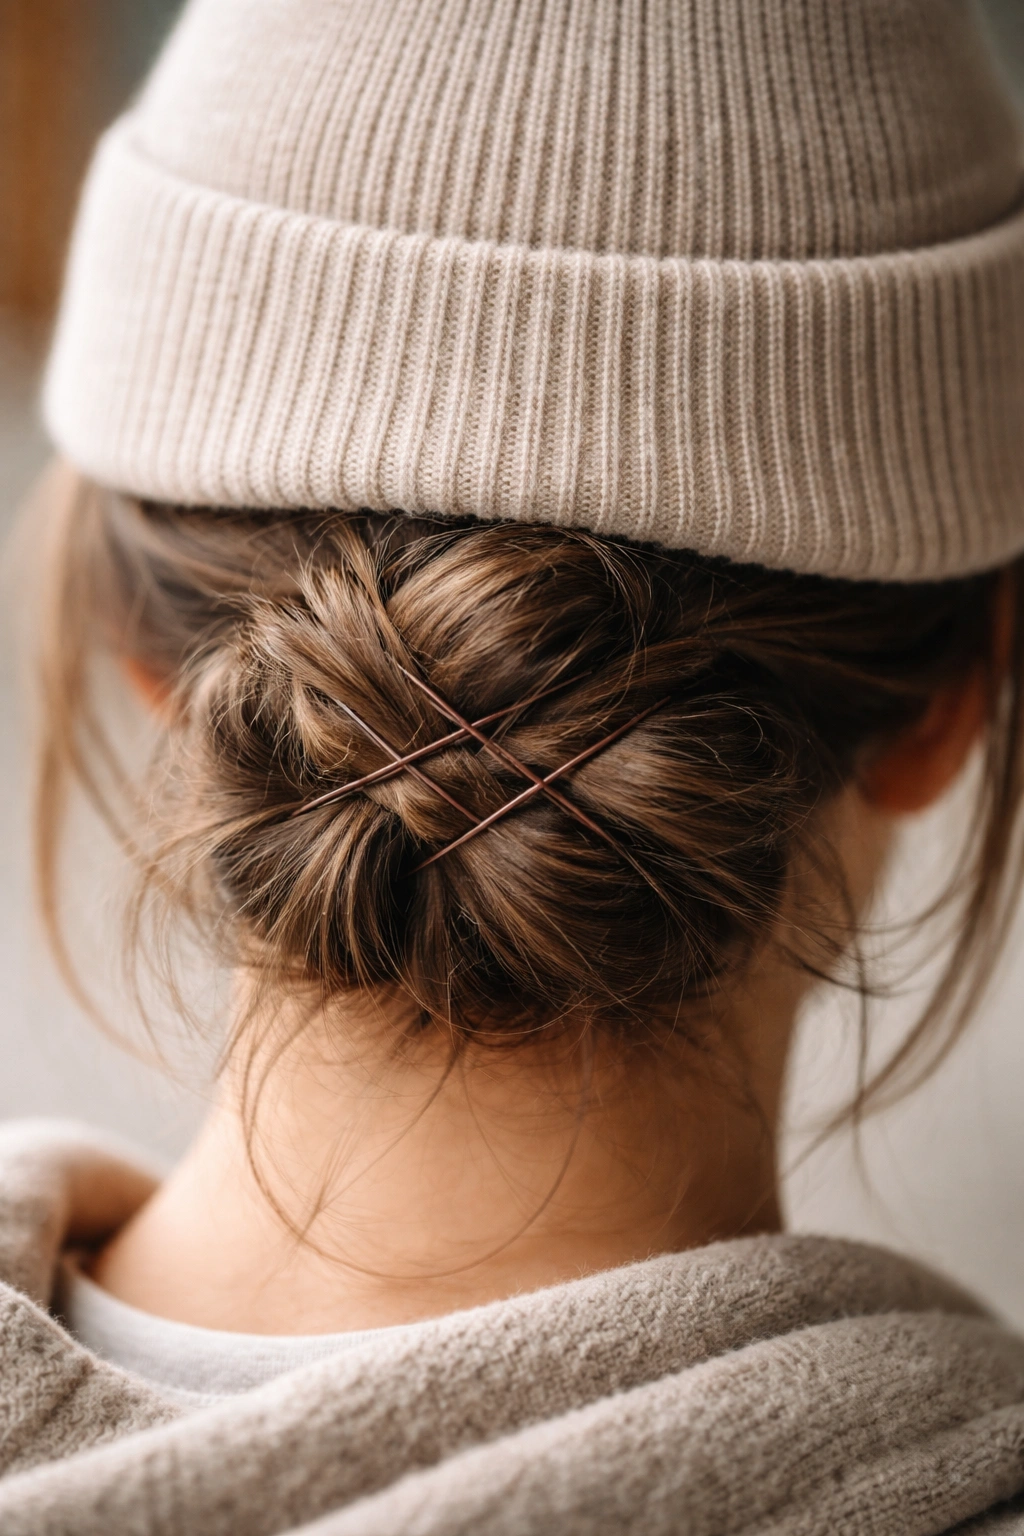
Even the most perfectly constructed messy bun means nothing if it falls apart the moment you put a hat on. Proper securing is the difference between a style that lasts all day and one that’s loose and sliding by noon. Use at least 4-5 bobby pins for any of these styles, positioning them in a crisscross pattern rather than all pointing in the same direction.
Bobby pin placement matters more than most people realize. If you’re creating a low ponytail, place pins at 3 o’clock, 6 o’clock, 9 o’clock, and 12 o’clock positions around the base of the bun—imagine a clock face and distribute your pins evenly around it. This distributes tension evenly and prevents the bun from developing a weak point that unfravels first.
For extra security under a tight hat, use U-shaped bobby pins (the kind designed specifically for thick hair or buns) rather than standard bobby pins. They have more surface area and hold significantly better, especially under compression from a fitted hat. If you’re using standard bobby pins, consider using two bobby pins per position—crossing them in an X shape creates a reinforced anchor point.
Avoid using bun covers or hair sticks unless you’re specifically going for a polished updo look rather than a messy casual vibe. These can create odd shapes under hats, and the bun cover itself might peek out when you’re wearing a fitted cap. Simple bobby pins are honestly your most reliable option.
Dealing With Flyaways and Frizz When Wearing Hats
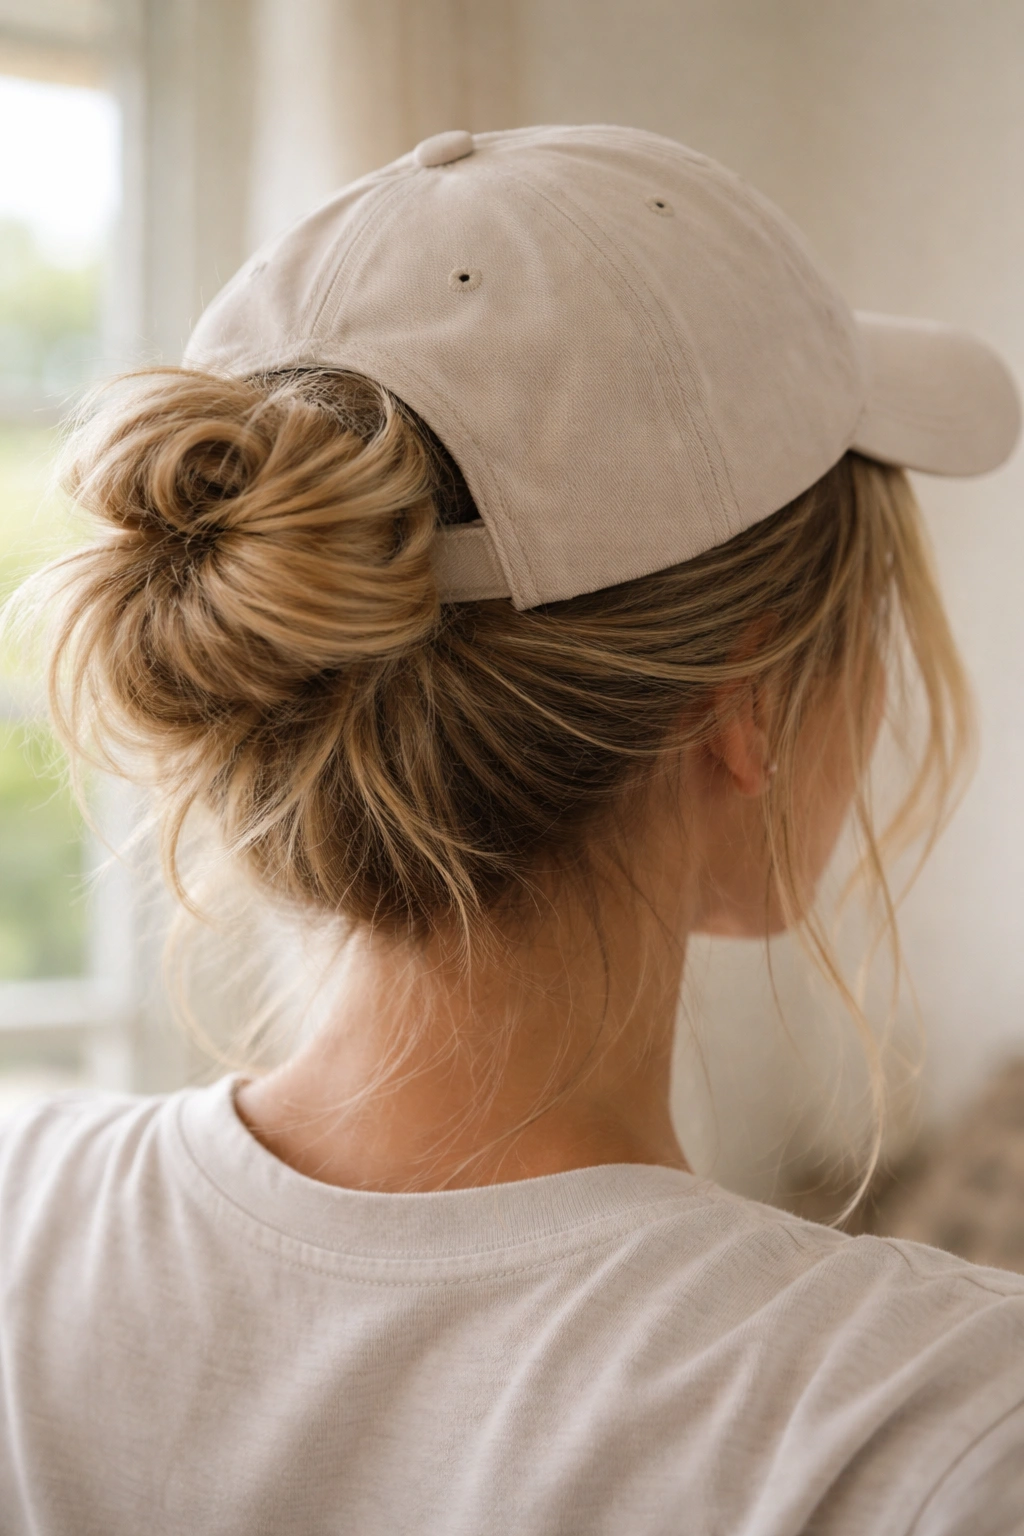
Wearing a hat over your bun creates a warm, humid environment that can activate frizz and cause flyaways to multiply. The static created by friction between your hair and the hat’s interior is also a culprit. Before putting your hat on, tame any small flyaways with a gel stick, wax, or pomade applied in tiny amounts with your fingertips. This is different from full-on styling products—you’re just addressing the baby hairs at your hairline and around your face.
For people dealing with true frizz (not just flyaways), a lightweight anti-frizz serum applied to the mid-lengths and ends of your hair before you create the bun makes a noticeable difference. Focus on the pieces you expect to come loose around your face, not your entire head of hair. A little goes a long way, and too much product makes messy buns look greasy rather than intentionally undone.
After you remove your hat, expect some compression and slight distortion of your bun—that’s completely normal. Instead of trying to fix it, lean into it. A compressed, slightly flat bun actually looks more polished and sophisticated than a perfectly rounded one. If you’ve got visible hat hair (that weird crease), run your fingers through the area and tousle it gently; it usually blends away in under a minute.
The Best Bobby Pin Hack for Messy Bun Security
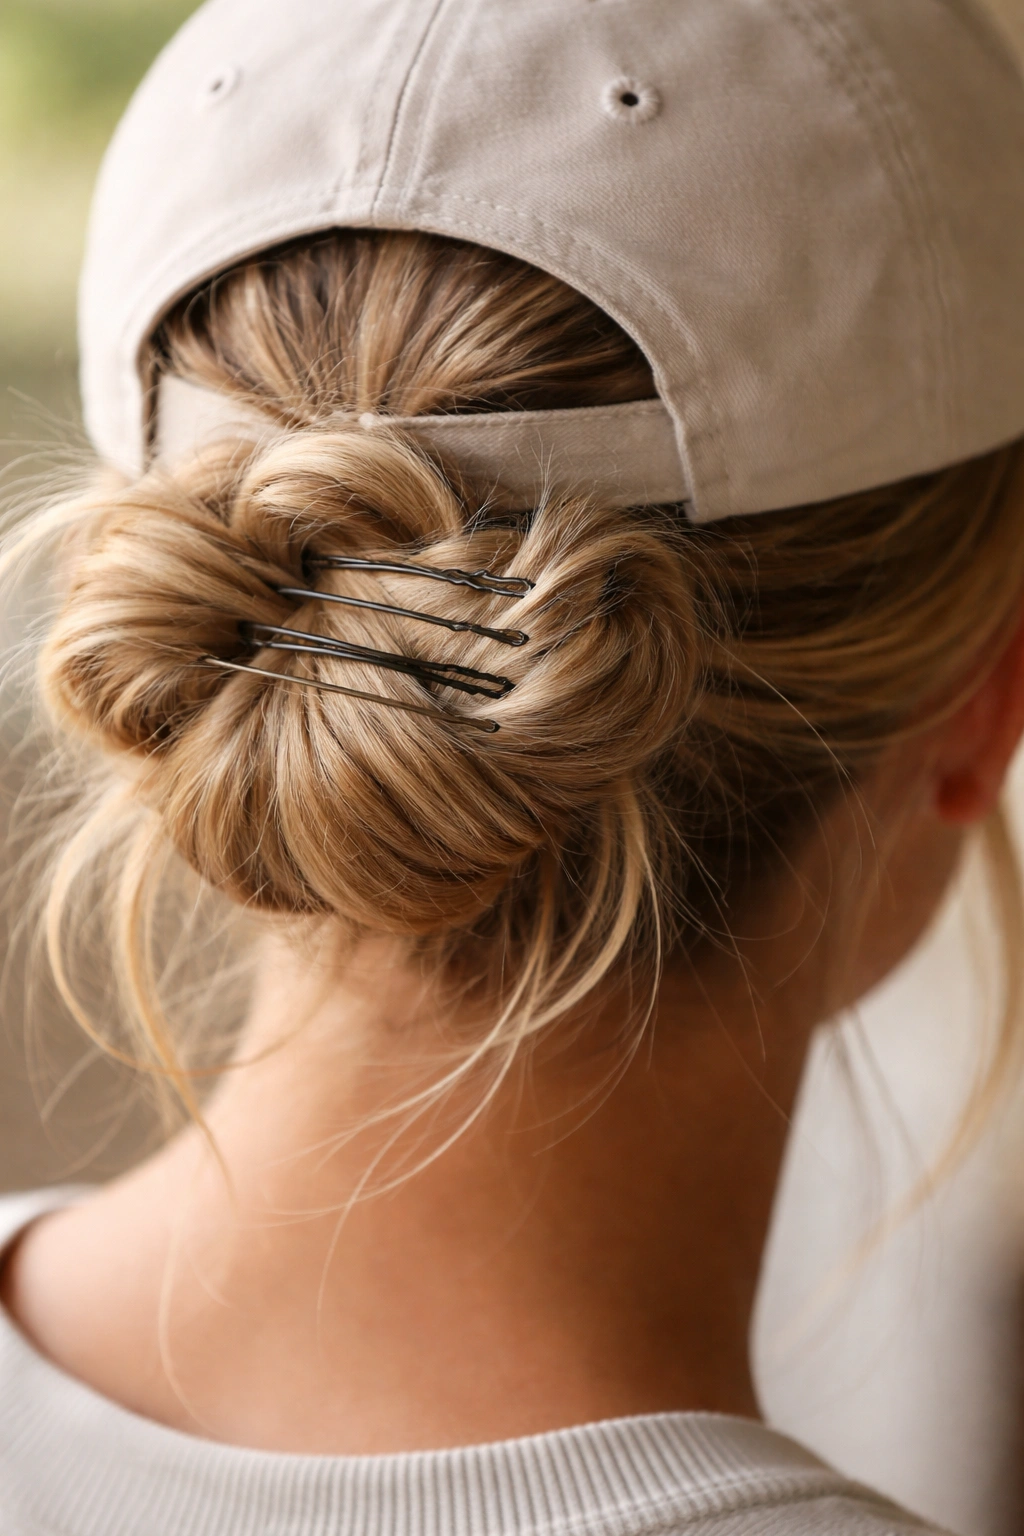
Most people secure buns by pushing bobby pins straight up into the bun structure, which works fine for upright buns. For buns under hats, try positioning your bobby pins horizontally across the bun rather than vertically into it. This creates a larger surface area of contact and distributes pressure more evenly when your hat presses down on your head. Push the pin parallel to your scalp rather than perpendicular to it, weaving it through the twisted or wrapped hair.
This horizontal pinning approach feels slightly less natural when you’re creating the style, but it’s a game-changer for security. Your bun stays exactly where you put it throughout the day, and the reduction in movement means less friction between your hair and your hat’s interior, which actually reduces frizz.
Final Thoughts
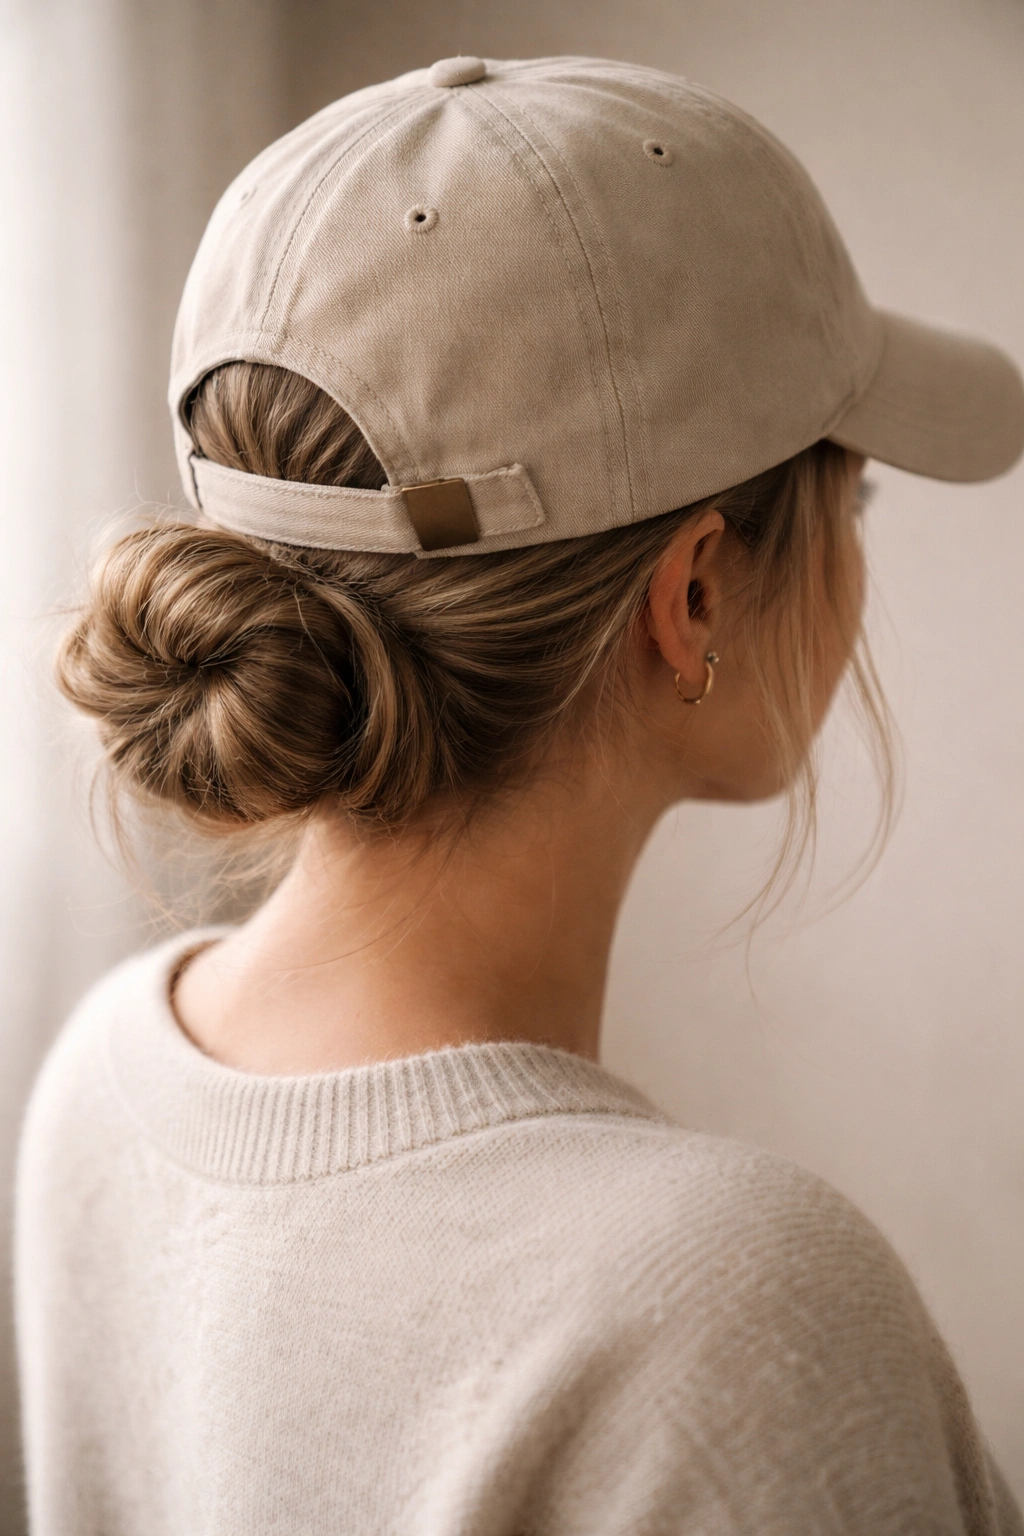
Wearing a messy bun under a hat doesn’t require sacrificing style or comfort—it just requires a slightly different approach than the messy buns you see on social media. The key is positioning your bun low and keeping it relatively compact so it fits naturally inside your hat without creating uncomfortable pressure points or awkward bumps. Texture, secure pinning, and intentional styling all play a role in making these styles work in real life, not just in photos.
The six styles I’ve shared give you options for every occasion and hat type, from the casual flat twisted knot bun for quick hat-wearing days to the more polished sleek low bun for dressier situations. The beauty of messy bun styles is that they’re forgiving—they’re meant to look slightly undone, which means you don’t need to achieve perfection. Pick the style that feels most natural for your hair type and length, practice it a couple of times until you understand how your hair moves, and then wear it with confidence. Once you’ve found your go-to style, you’ll realize you’ve been unnecessarily limiting your hat wardrobe all along.
