



There’s nothing quite like finding the perfect hairstyle that makes you feel confident and polished for a special occasion. Whether you’re heading to a wedding, gala, professional event, or celebration, an updo transforms your natural texture into an elegant statement that turns heads while keeping your hair beautifully contained. Afro updos offer endless creative possibilities — they’re not just practical, they’re genuinely stunning when styled with intention and care.
The beauty of updo styling for textured hair lies in how it showcases the natural structure of your curls, coils, and waves. Unlike some other hair types, afro-textured hair holds volume and shape effortlessly, which means you can create dramatic, architectural styles that literally wouldn’t be possible with straighter textures. You get height, dimension, and visual interest that photographs beautifully and stays put throughout an entire evening of dancing, mingling, or whatever your event demands.
In this guide, I’m walking you through 10 of the most striking afro updo styles that work for serious occasions. Each one comes with specific styling tips, the best face shapes for impact, and exactly what makes it special enough to wear when you want to look absolutely incredible.
1. Classic High Bun with Braided Crown
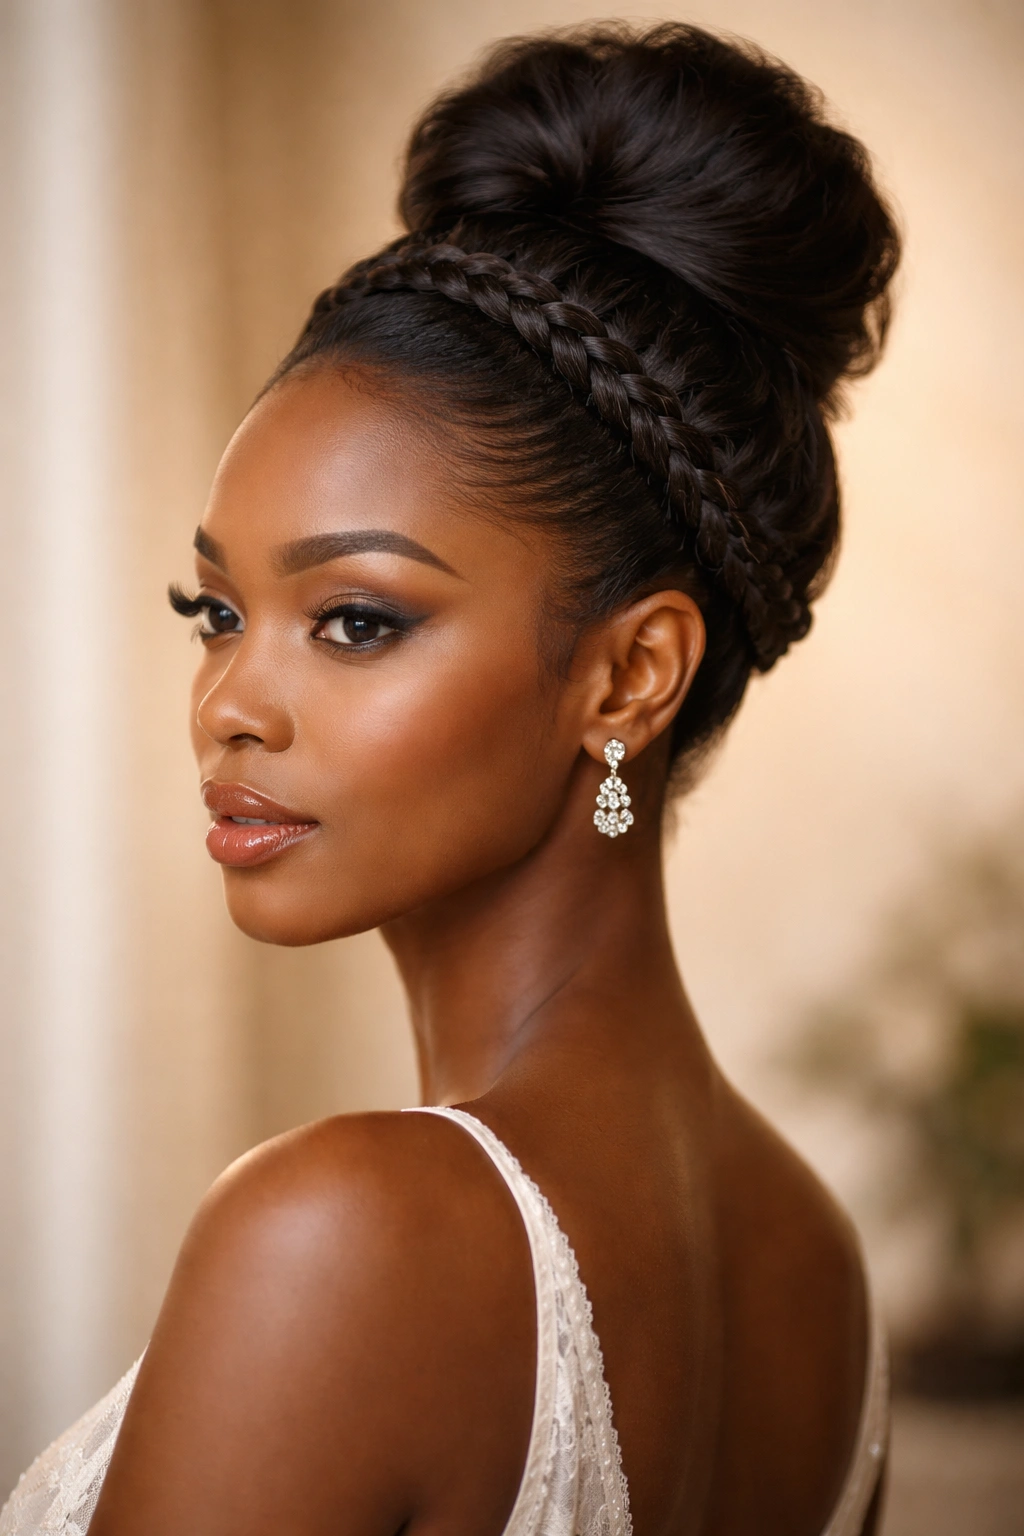
This is the updo that works for literally every special occasion — it’s the style you see at weddings, formal galas, and professional events because it’s impossibly elegant and flattering. The magic happens when you wrap your hair into a high bun at the crown of your head, then weave two or three cornrows from your hairline around the base of the bun to create an almost regal effect.
Why This Style Stands Out
The braided crown adds sophistication without looking overly complicated, and it frames your face beautifully while drawing the eye upward. This style works because it balances volume with polish — your bun sits full and natural at the top, while the braids feel intentional and refined. The height elongates your face and neck, which is why photographers love this look. Best of all, you can dress it up with delicate hair clips, gold cuffs, or fresh flowers woven directly into the braids for a romantic twist.
How to Create This Look
- Start with hair that’s been moisturized and detangled the day before styling — fresh hair can be stubborn and resistant
- Apply a lightweight styling cream or mousse to damp hair sections to help with grip and definition
- Create two cornrows that begin at your temples and spiral toward the back, meeting where your bun will sit
- Gather your remaining hair into a high ponytail at the crown, securing it with a sturdy elastic band
- Twist or coil the ponytail into a bun shape and tuck the ends underneath, securing with bobby pins
- Smooth any flyaways with a finishing gel or edge control
- Set everything with a light hairspray to ensure it lasts through the entire event
Pro tip: This style actually looks better on day-two or day-three hair because there’s more texture and grip — don’t feel pressured to style it the day of your event.
2. Twisted Updo with Side Sweep
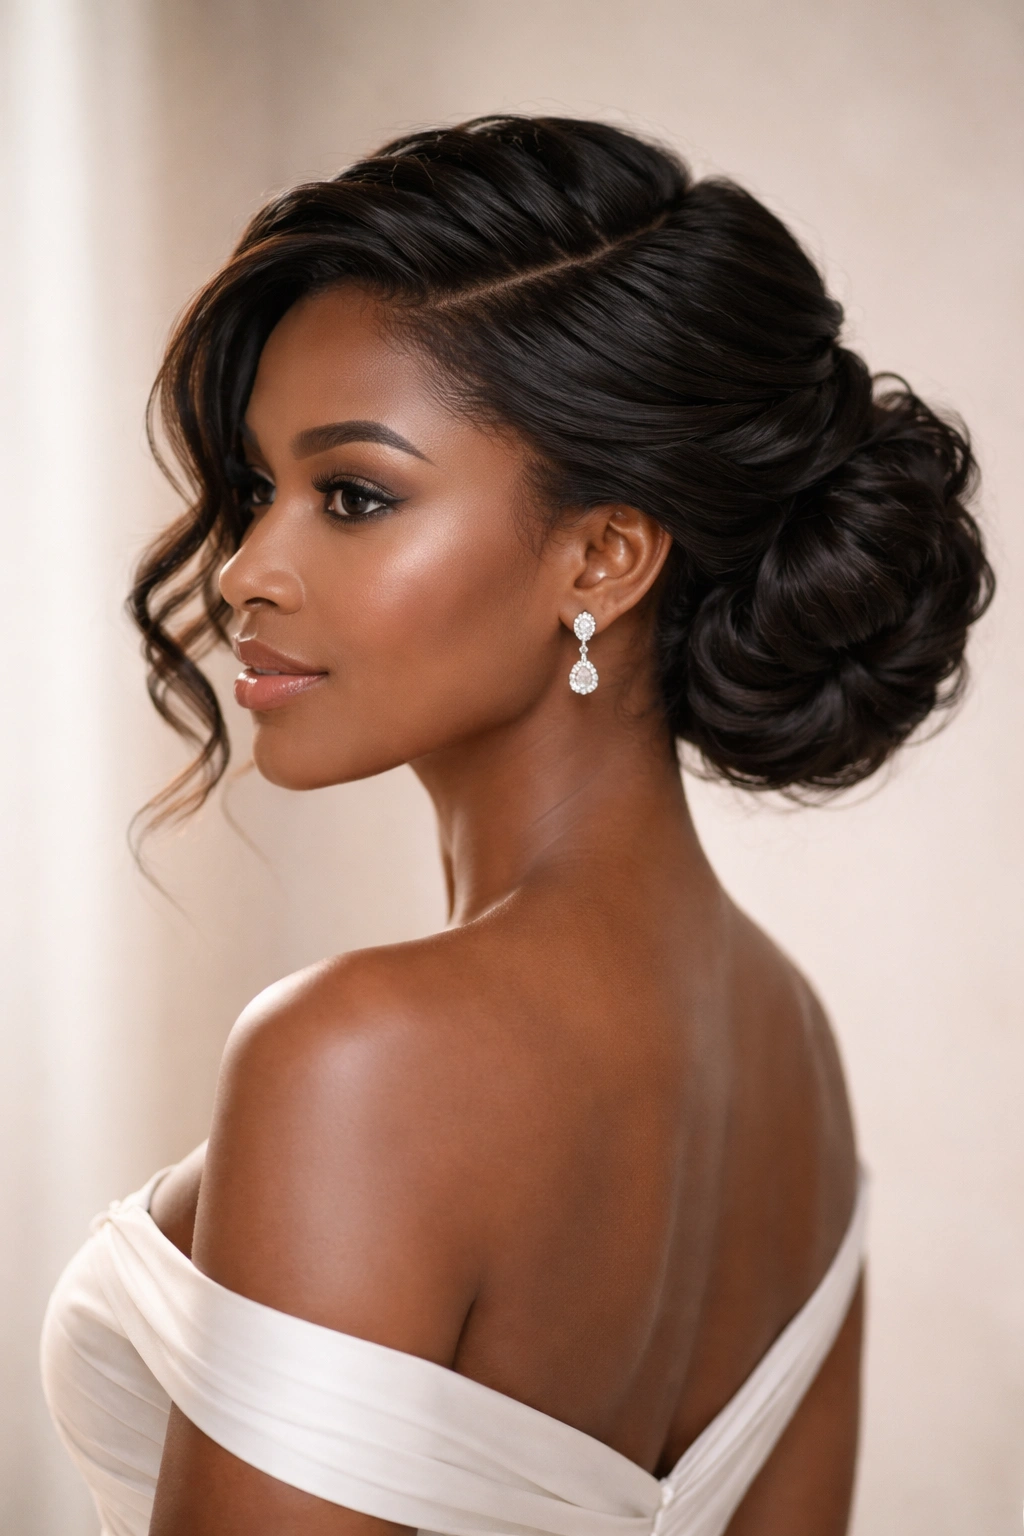
Here’s an updo that feels romantic and modern at the same time. You’re essentially taking the front sections of your hair and twisting them (not braiding — single twisted strands create a different, dreamier effect) and bringing them around to the back where they anchor a side-swept bun. The bun doesn’t sit centered; it tilts to one side, which creates asymmetrical elegance and exposes one side of your neck beautifully.
Why This Style Stands Out
Twisted styles have this inherent softness that flat braids can’t quite achieve. The twists catch light differently than braids, and they look intentionally romantic without being overtly feminine. This style works especially well if you want to show off earrings, since one ear is fully exposed. The side-swept element adds drama and movement — even when your hair is completely still, it looks like it’s flowing. Photography-wise, this style photographs gorgeously from multiple angles.
How to Create This Look
- Part your hair slightly off-center to emphasize the side-sweep direction
- Starting from one temple, take a 2-inch section and twist it firmly from root to tip, pinning as you go
- Create 2-3 more twists on that side, bringing each one around toward the back of your head
- Gather all hair at the base of the twists and form a side-swept bun (rather than a centered one)
- Secure the bun with bobby pins inserted horizontally for maximum hold
- Carefully loosen the twists slightly by gently pulling at the edges — this creates fullness and prevents the look from being too tight
- Finish with hairspray
Worth knowing: This style is particularly stunning if you have natural highlight or color variation in your hair, because the twists will showcase the dimension beautifully.
3. Double Bun Statement Style
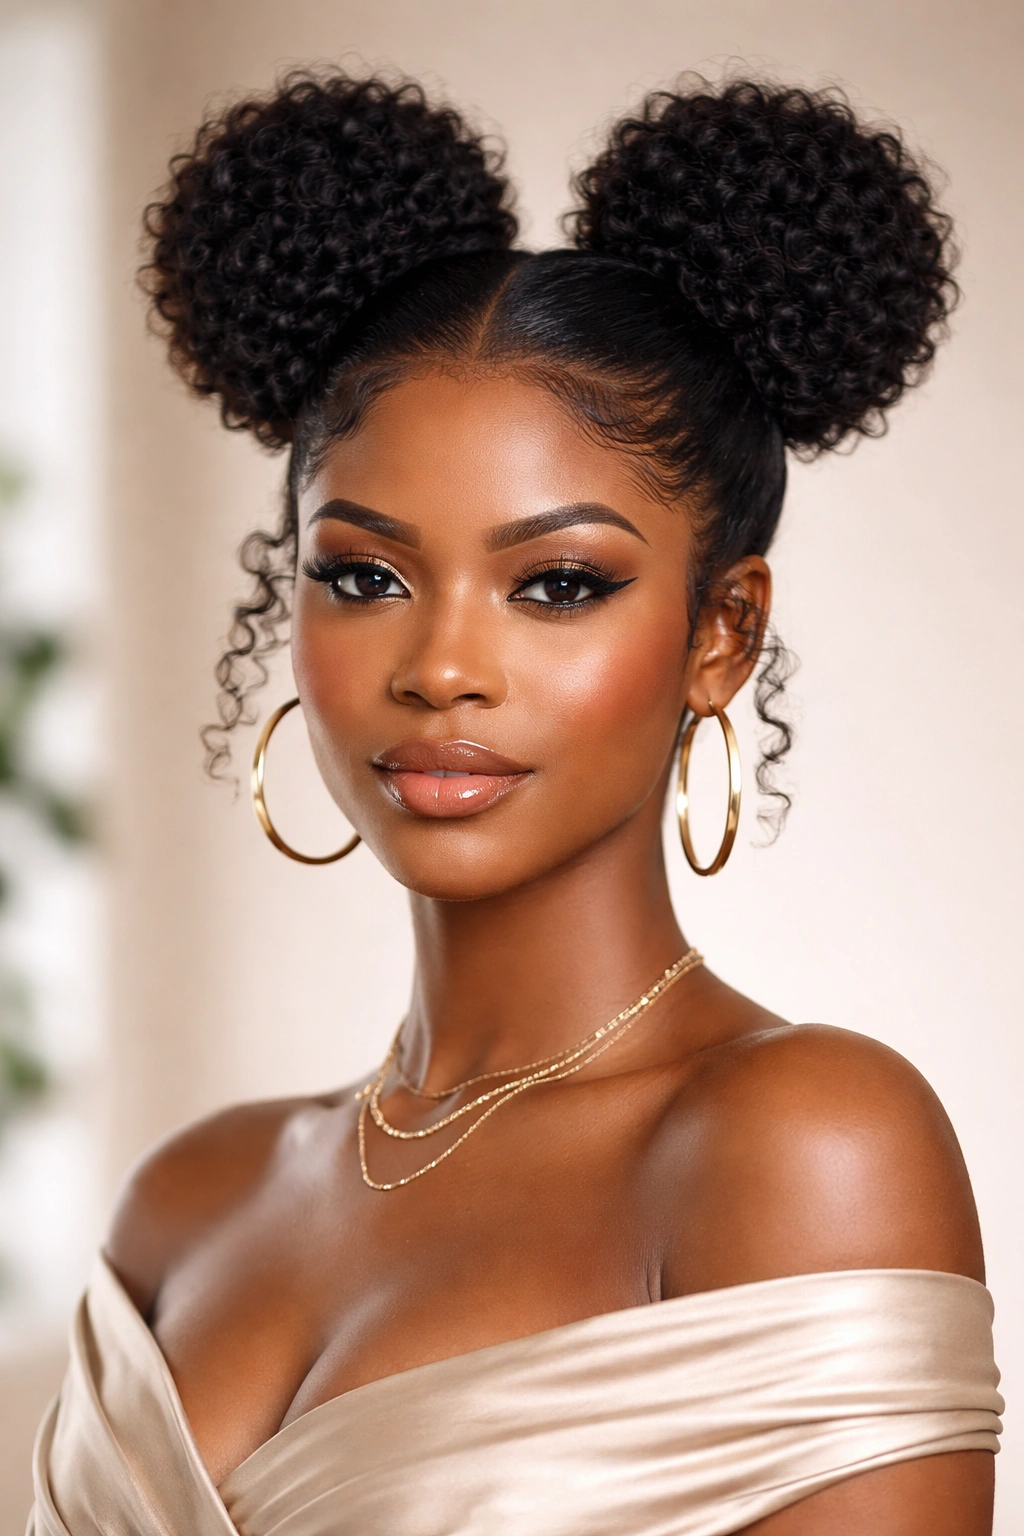
This one is bold, playful, and undeniably striking — two buns positioned at the crown of your head, sitting side by side or slightly staggered. Don’t let “playful” fool you; when executed cleanly, double buns read as fashion-forward and artistic, not juvenile. You’re seeing this style increasingly at formal events because it breaks the mold while maintaining absolute polish.
Why This Style Stands Out
The symmetry of double buns is visually satisfying, and the height adds serious presence to your overall look. This style is particularly flattering if you have a longer face shape because the buns add width at the crown. The style also showcases the texture of your hair beautifully — those natural coils and curls become architectural elements rather than just volume. It’s a statement that says you’re confident enough not to follow convention, which reads as sophisticated in its own way.
How to Create This Look
- Create a center part that runs from your forehead straight down the center of your scalp
- Section your hair into two equal halves on either side of the part
- Gather one half into a high ponytail on one side of your crown, securing with an elastic
- Do the same on the other side, creating two balanced ponytails
- Twist or coil each ponytail into a bun, tucking the ends underneath and securing with bobby pins
- Make sure both buns are approximately the same size and positioned at the same height
- Use edge control to smooth any baby hairs and create clean lines around your hairline
- Set with hairspray, focusing on the base of each bun to ensure they don’t shift
Pro tip: If you’re worried about the buns feeling too heavy or unbalanced, use a small decorative claw clip at the base of each bun to distribute the weight and add visual interest.
4. Wrapped Ponytail Updo
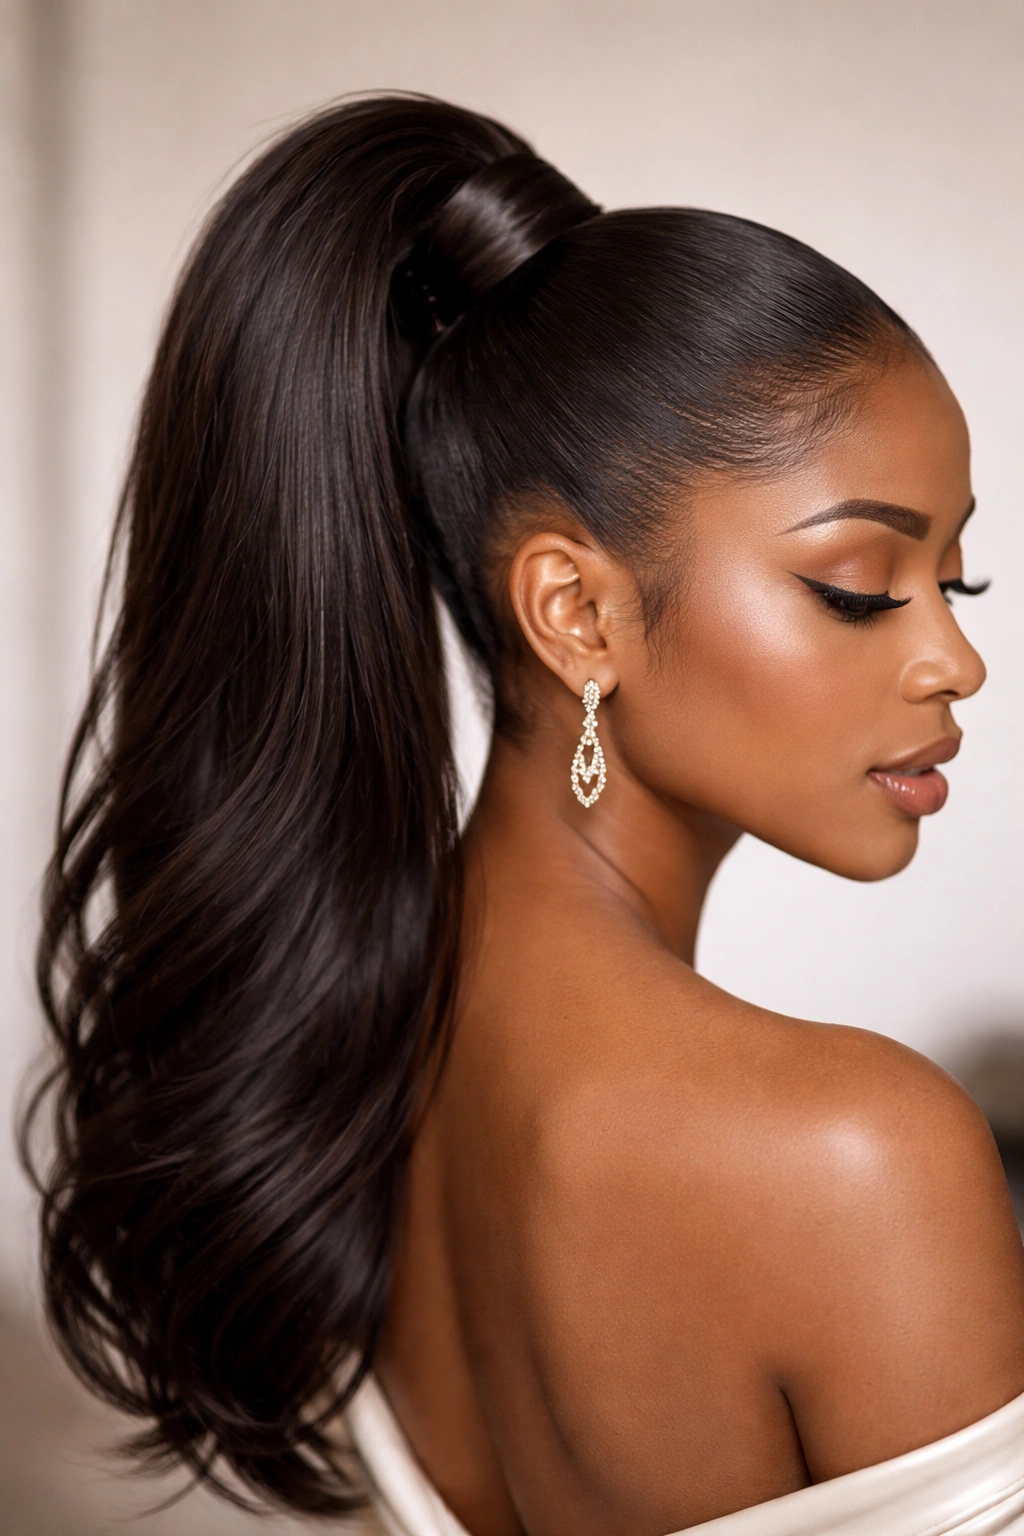
This is the updo for someone who loves the clean, polished, almost architectural look of a high ponytail but wants it elevated for a fancy occasion. You’re creating a sleek high ponytail, then wrapping a section of your own hair around the base of the elastic to hide it, and finally coiling the ponytail itself into an updo shape. The result is impossibly refined and requires surprisingly few products.
Why This Style Stands Out
The wrapped base gives this ponytail an expensive, professionally-done quality. The wrapping section creates a visual break between your scalp and the ponytail body, which makes the style read as more intentional and elevated. Because your own hair is doing the wrapping (rather than a clip or accessory), it looks completely natural and unified. This style also works with absolutely any hair density — thin hair benefits from the optical illusion of the wrapping, and thick hair gets to show off its fullness without looking overwhelming.
How to Create This Look
- Apply smoothing cream or gel to your hair to encourage a sleek finish
- Brush your hair into a high, centered ponytail at the crown
- Secure the ponytail with a sturdy elastic band — tightness matters here because loose ponytails slip
- Take a 1-inch section from the underside of your ponytail and wrap it firmly around the elastic, covering it completely
- Secure the wrapped section with bobby pins tucked behind the ponytail body where they won’t be visible
- Twist the remaining ponytail hair and coil it into a bun shape, pinning as you go
- Smooth your hairline with edge control and set everything with hairspray
Real talk: This style requires a solid elastic that won’t slip, so invest in good hair elastics (the kind ballet dancers and gymnasts use). Cheap elastics can loosen throughout the night, and you don’t want that happening mid-event.
5. Intricate Cornrow Updo
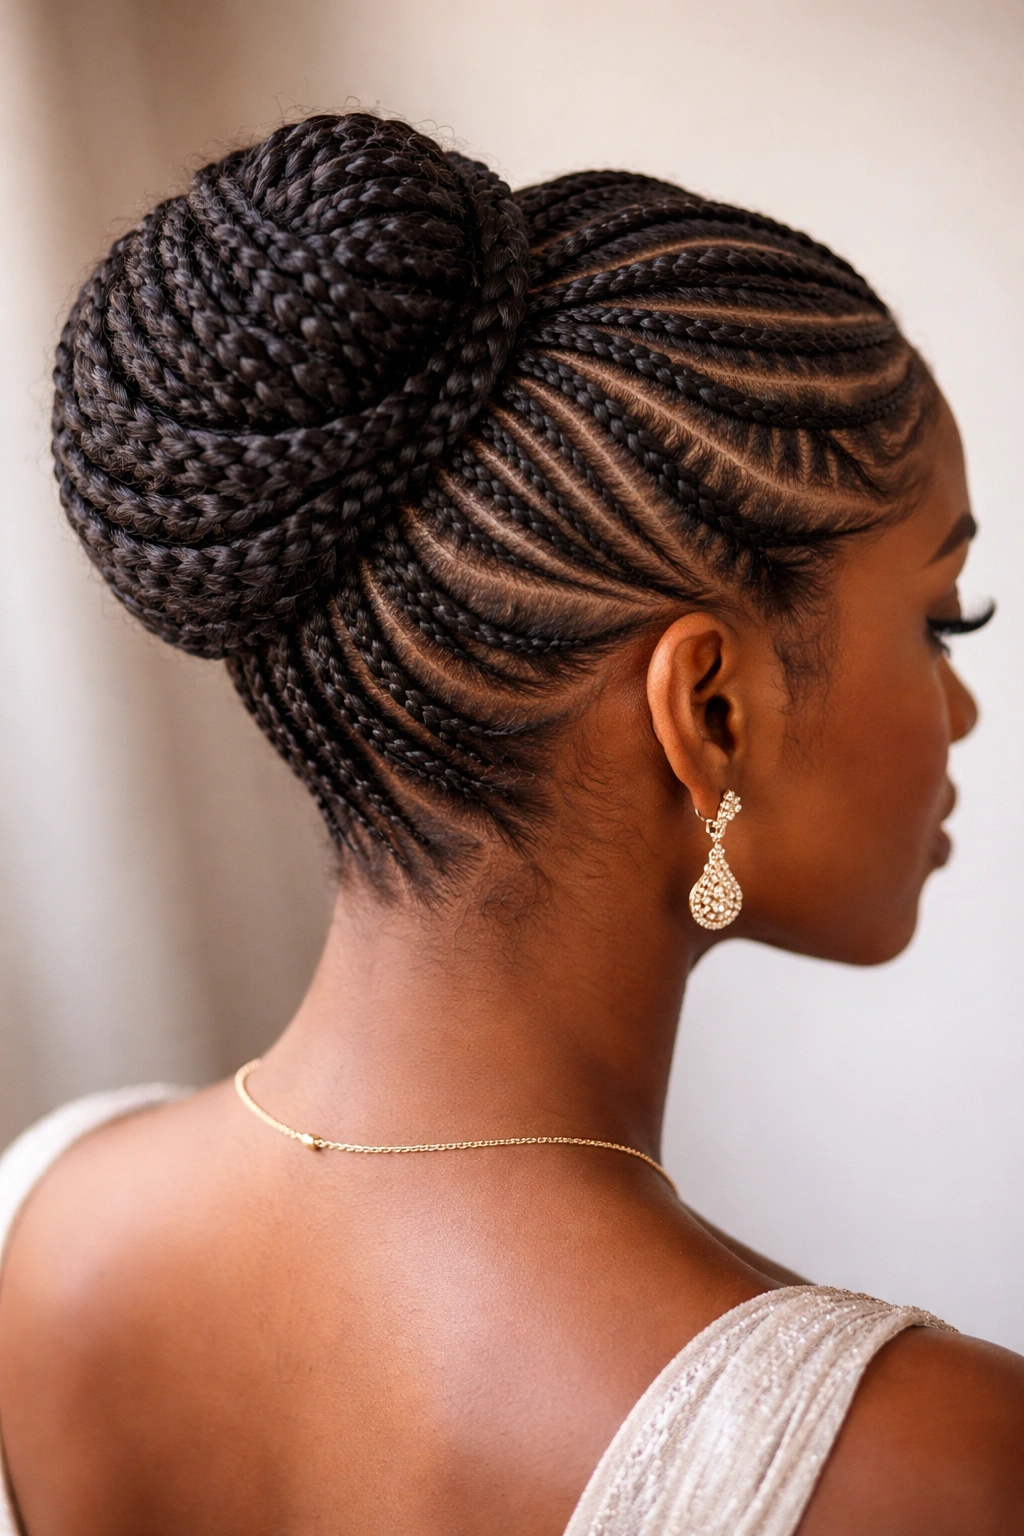
This is the style for someone who’s comfortable wearing their braids proudly and wants something that looks like serious artistry. You’re creating multiple cornrows (typically 4-8 depending on your hair density) that flow in curved or geometric patterns across your scalp, ultimately converging at the back where they’re gathered into a bun or coiled crown. The cornrows themselves are the statement — they’re not subtle.
Why This Style Stands Out
Cornrow updos showcase incredible skill and creativity. The patterns you can create are literally endless — you could do geometric designs, flowing curves, or anything in between. This style celebrates afro-textured hair as the art form it is, and it photographs absolutely beautifully. The braids hold up better throughout a long event than loose styles do, so if you’re going to be dancing or moving around a lot, this is your answer. Plus, once it’s in place, you don’t have to think about it — the style stays perfect from the moment you arrive until the moment you leave.
How to Create This Look
- Start with clean, moisturized, detangled hair (work on this the day before if possible)
- Apply a lightweight braiding cream or mousse to enhance grip
- Map out your cornrow pattern before you begin — even a simple sketch helps ensure symmetry
- Start cornrowing from your hairline, keeping tension consistent (not too tight, which can cause breakage, but snug enough to last)
- Feed hair into each braid as you move backward, working in the direction your pattern calls for
- As cornrows near the back of your head, gather them into a central point or converge them into sections
- Create a bun or coiled crown with the gathered ends, securing firmly with bobby pins
- Finish with a strong-hold hairspray
Worth knowing: This style is a serious time commitment — budget 2-3 hours if you’re doing it yourself, or plan a salon appointment well in advance. But the payoff is that it lasts for days, so you can style it the day before your event and simply refresh it with a scarf overnight.
6. Faux Hawk High Ponytail
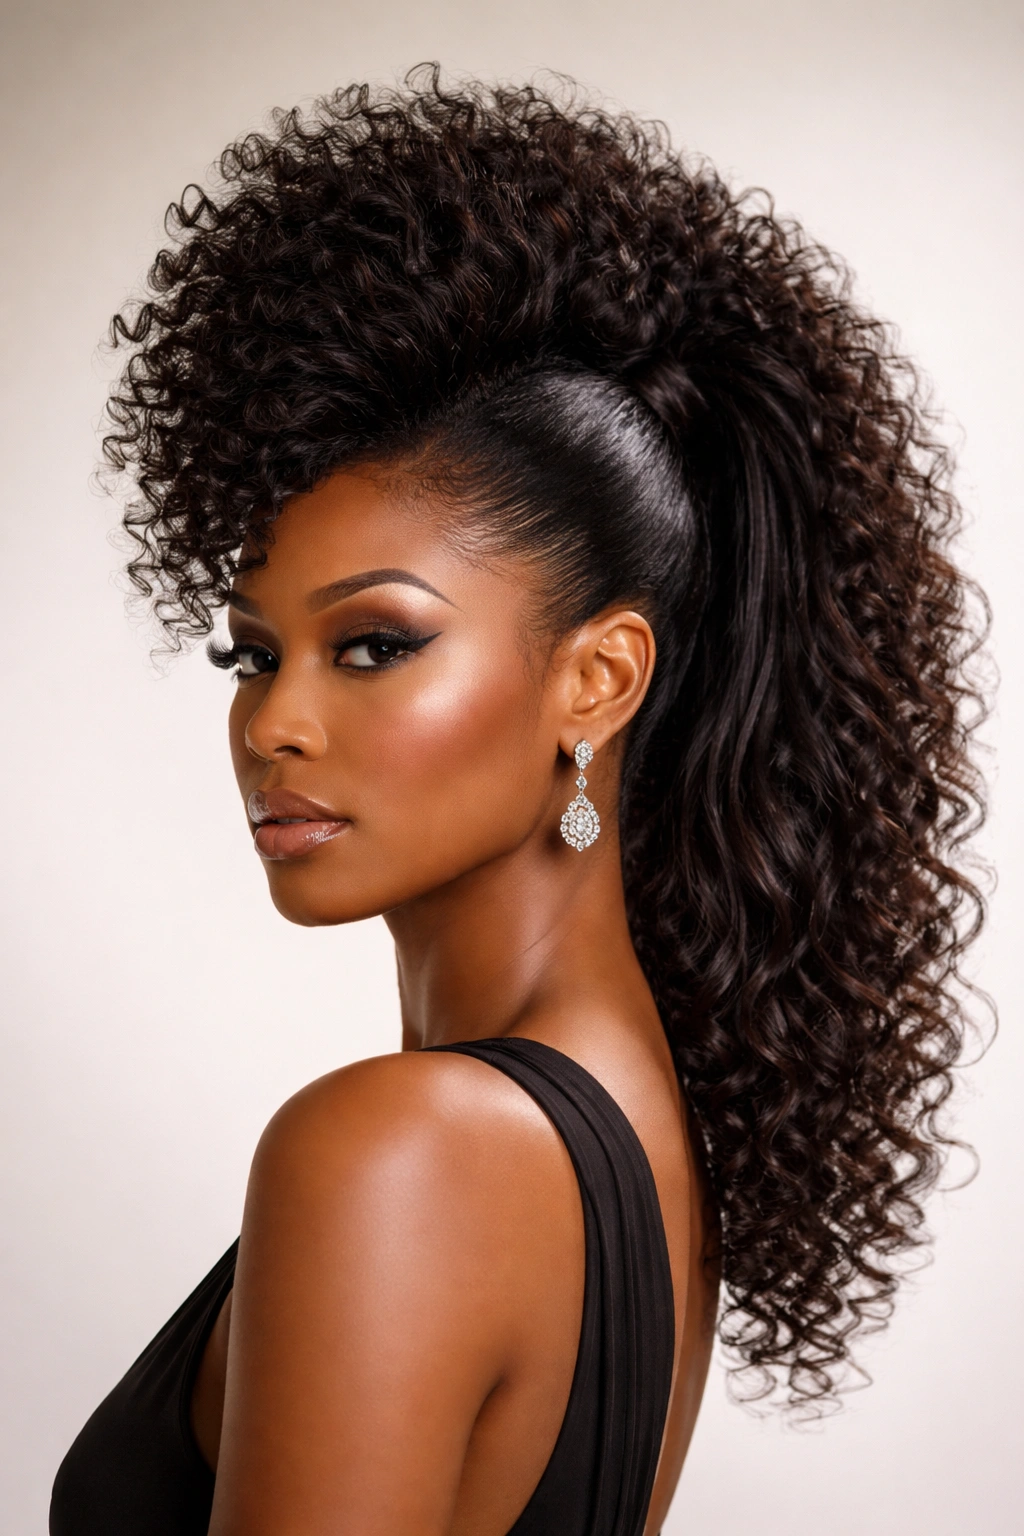
A faux hawk updo takes the edge-forward attitude of actual hawk styling and softens it into something elegant for formal occasions. You’re creating the illusion of a mohawk by smoothing the sides of your hair closer to your scalp while the center section stands tall and voluminous, then gathering everything into a high ponytail at the crown. It’s bold without being aggressive.
Why This Style Stands Out
The faux hawk creates unbelievable height and presence — it’s genuinely transformative for your face shape and proportions. This style draws attention straight up, which elongates your features and makes you appear more statuesque. It’s unexpected enough to be fashion-forward but structured enough to feel entirely appropriate for formal settings. The style also works beautifully for people with hair that naturally gravitates toward volume — instead of fighting that, you’re celebrating it.
How to Create This Look
- Apply smoothing cream to the sides of your hair and slick them down close to your scalp using a fine-tooth comb
- Leave the center section from your forehead to the nape of your neck unsmoothed — this section should remain full and voluminous
- Gather the center section into a high ponytail at the crown, incorporating the smoothed sides as you go
- Secure with a sturdy elastic band
- Gently pull the sides of the ponytail slightly outward to add more dimension and drama
- Coil or twist the ponytail into an updo shape, securing with bobby pins
- Smooth your hairline with edge control for a polished finish
Pro tip: If you want maximum height, blow-dry your center section with a blow dryer before ponytailing to add even more lift at the roots.
7. Coiled Romantic Updo
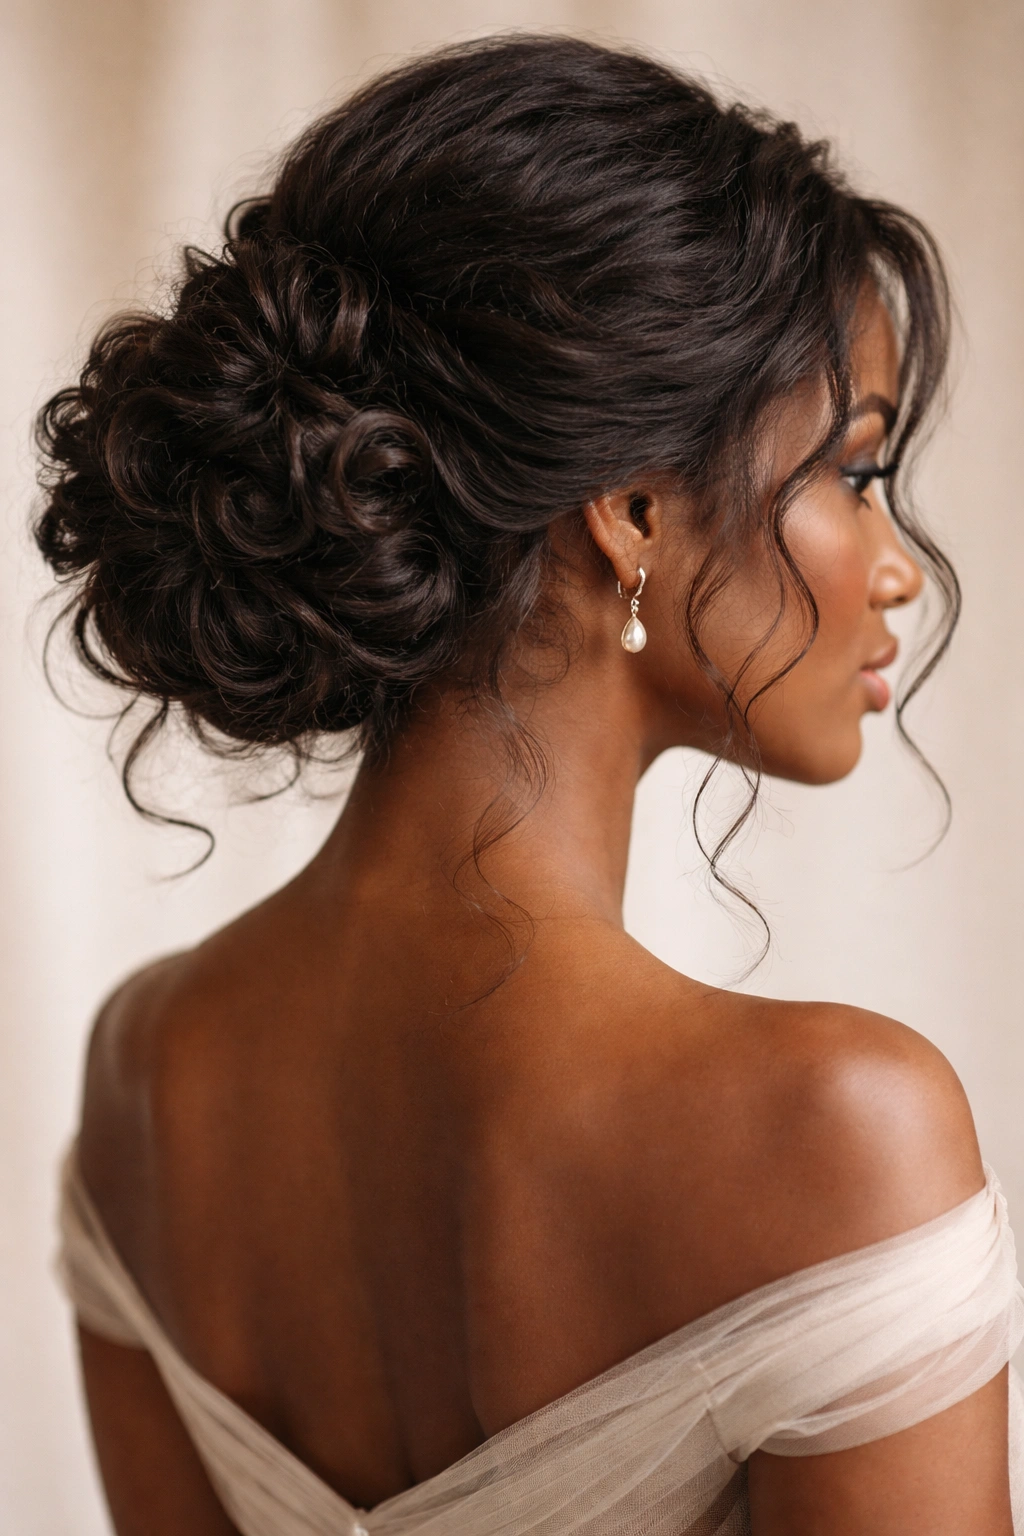
This is the updo for someone who wants an extremely soft, romantic vibe — you’re not sleek or architectural, you’re deliberately loose and touchable. You’re gathering your hair into an updo but intentionally leaving pieces out, coiling sections loosely, and creating an overall effect that looks effortlessly beautiful rather than precisely constructed. It’s romantic without being traditional.
Why This Style Stands Out
There’s something about deliberately loose, coiled updos that feels deeply romantic and modern at the same time. The style celebrates your natural texture instead of fighting it — coils are allowed to spring and move independently. This works beautifully for events where you want to feel beautiful but not overdone. The softness of the style is particularly flattering if you have a rounder face shape, because the loose coils soften your features. This is also the most forgiving updo on this list if your styling isn’t absolutely perfect — imperfection is actually part of the aesthetic.
How to Create This Look
- Apply a curl-defining cream or mousse to damp or refreshed hair
- Gather hair loosely at the nape of your neck or slightly off-center, not into a tight ponytail but a gathered section
- Secure with an elastic, but don’t pull too tightly — you want some movement
- Loosely coil the gathered section, tucking coils and securing with bobby pins as you go
- Leave face-framing pieces out intentionally, pinning them loosely to one side
- Avoid smoothing or flattening anything — you want soft, organic texture
- Use a lightweight finishing spray rather than heavy hairspray to maintain the soft effect
Insider note: This style actually looks better if you style it while your hair is slightly damp or refreshed with a hydrating spray, because completely dry hair can feel stiff. The moisture helps coils hold their shape while staying soft.
8. Swooping Side Updo
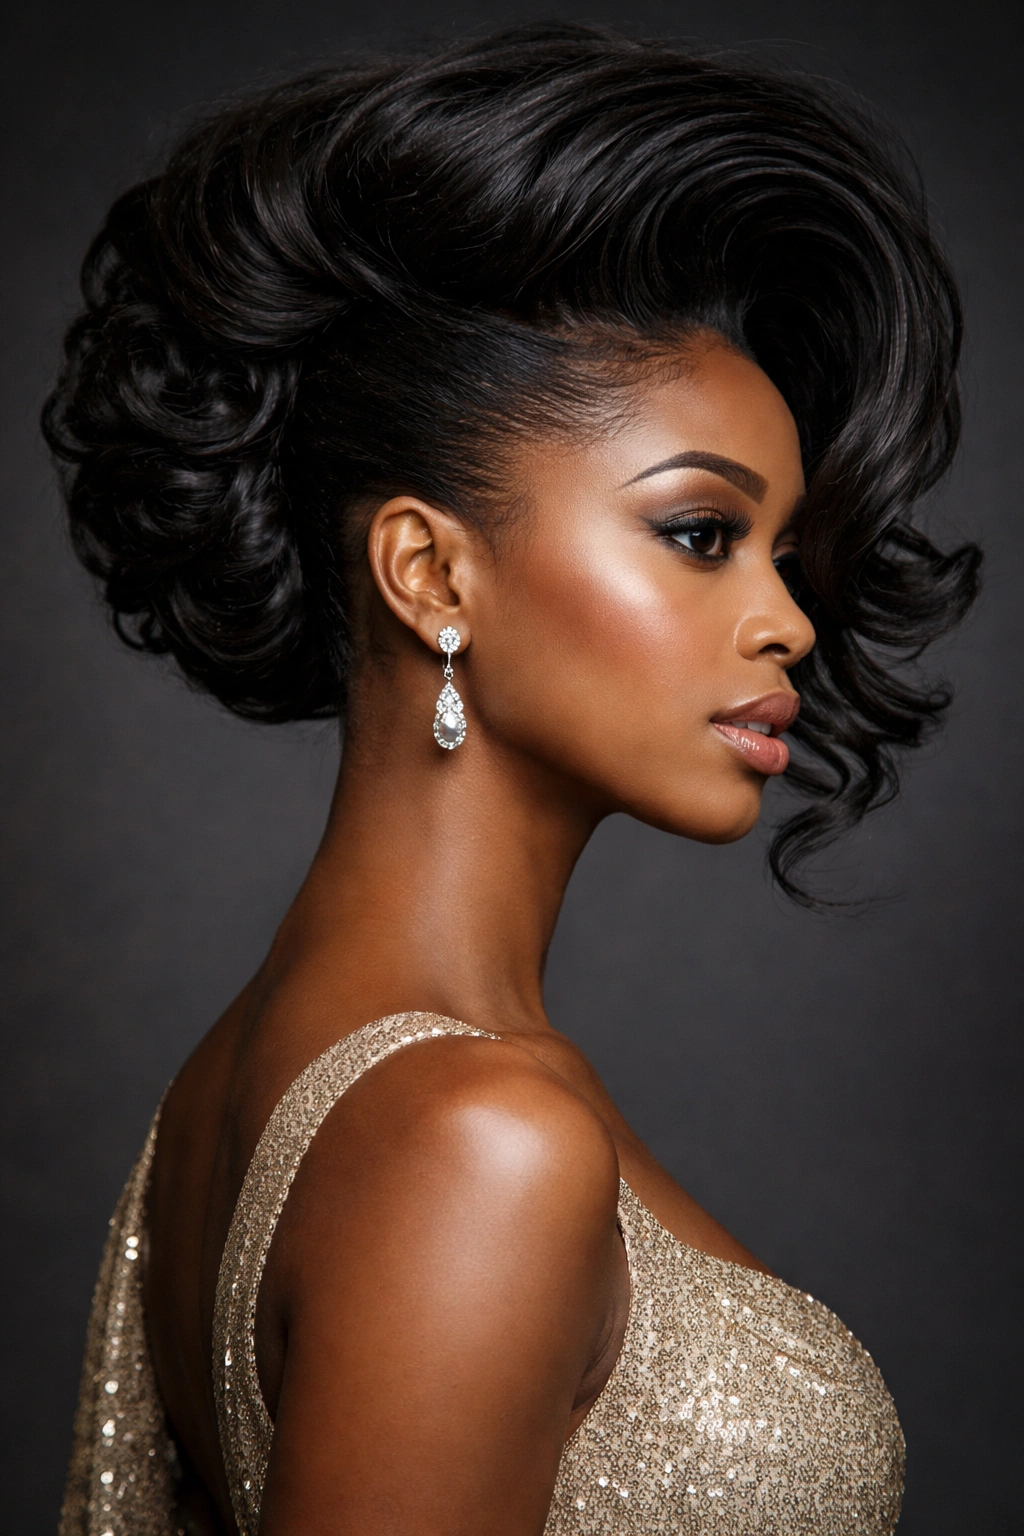
This style takes volume from one side of your head and swoops it dramatically to the other, creating extreme asymmetry and visual movement even when your hair is completely still. You’re gathering all your hair to one side and creating an updo there — a side bun, a side twisted knot, or a side-gathered coil. One side of your head is essentially exposed while the other side showcases all your volume.
Why This Style Stands Out
The swooping motion creates the illusion of movement and flow, which is why this style photographs like a dream. It’s particularly flattering if you want to emphasize one side of your face or if you’re wearing a dress with an asymmetrical neckline. The style is also incredibly wearable for someone with uneven hair density — you can position your updo to be on your fuller side, and it becomes a feature rather than something you’re trying to hide. This is a bold statement style that works for anyone confident enough to wear something unconventional.
How to Create This Look
- Create a deep side part that clearly divides your hair into larger and smaller sections
- Brush the larger section smoothly toward the back
- Create 1-2 cornrows or twists on the smaller side that curve toward the back, anchoring your style
- Gather all hair toward one side at the nape of your neck or slightly below
- Form a bun, twisted knot, or coiled updo on that side, securing carefully with bobby pins
- Allow the updo to sit at an angle rather than centered — this emphasizes the swoop
- Leave the other side of your head entirely smooth and exposed
Worth knowing: This style requires some strategic bobby-pinning on the exposed side to make sure loose hairs don’t fall forward. Use small pins and tuck them at angles where they won’t be visible.
9. Puffed Crown with Twisted Back
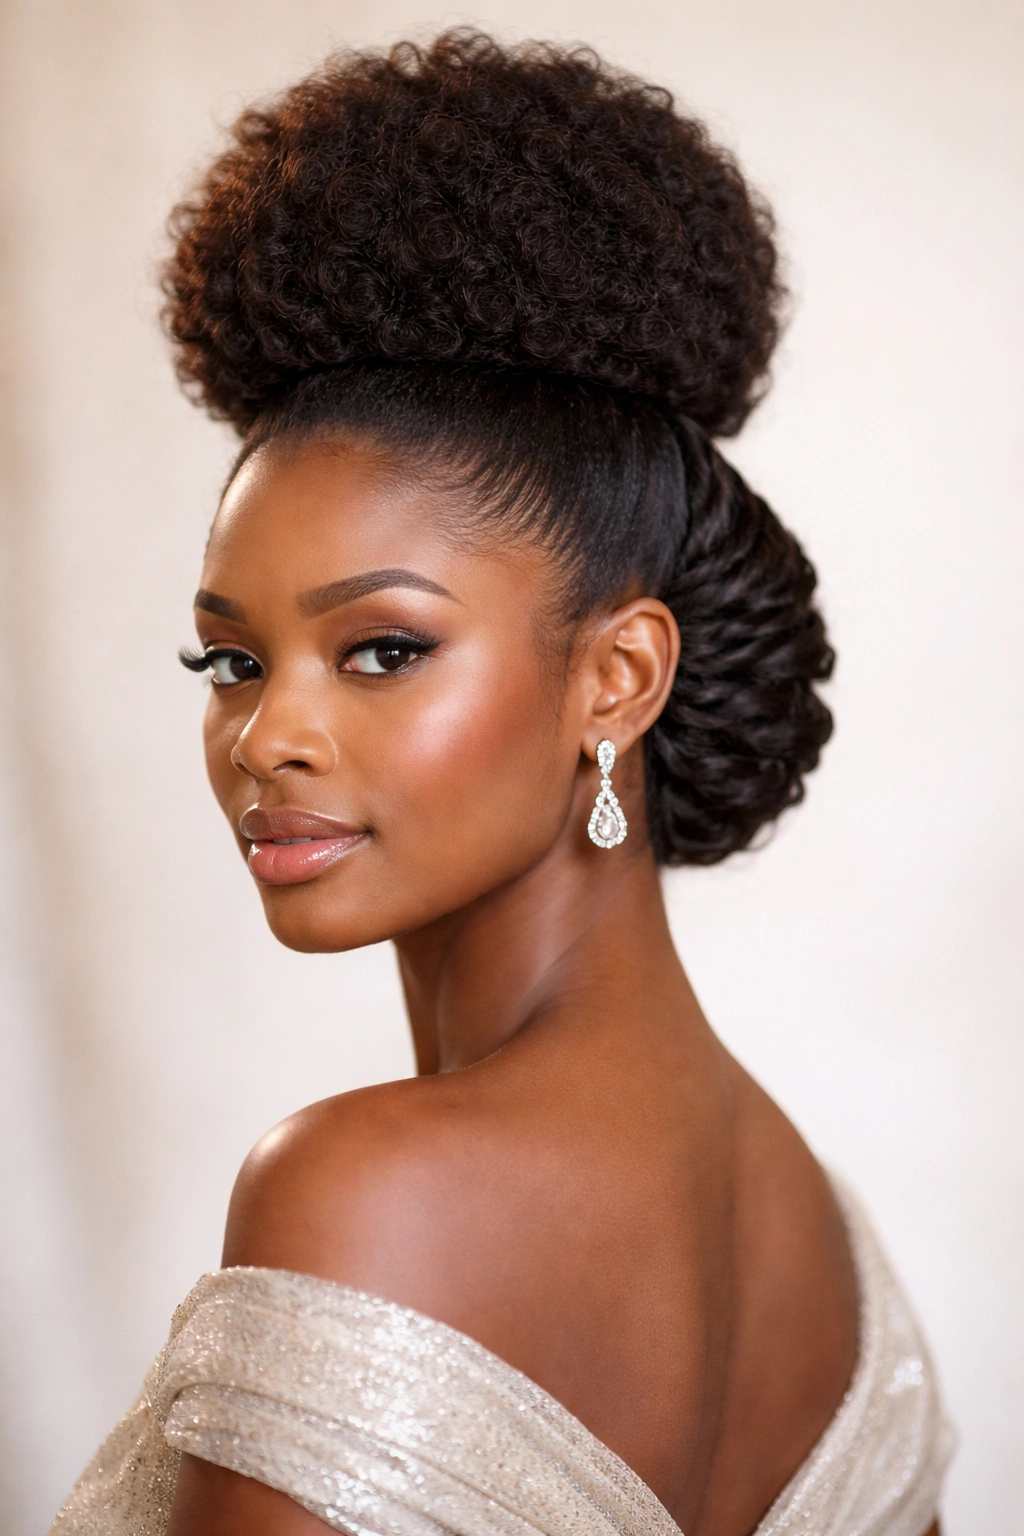
This style combines the best of both worlds — a voluminous puffed crown that sits at the very top of your head, and refined twists that gather the rest of your hair at the back into a secure updo. The puff creates incredible height and presence, while the twists keep everything secure and polished. It’s dramatic without being over-the-top.
Why This Style Stands Out
The contrast between the voluminous crown and the defined twists is visually stunning. This style is exceptional for formal events because it looks both playful and sophisticated simultaneously. The height of the puff makes you appear taller and more commanding, which is why performers and public speakers love this style. The twists at the back prevent the look from feeling loose or unfinished — everything is actually quite secure and will hold up through hours of wear. This style also works across virtually all face shapes because you’re adding height at the crown, which is universally flattering.
How to Create This Look
- Gather hair at the crown into a ponytail, but don’t pull it completely tight — leave some fullness
- Secure the ponytail with an elastic, then flip your head forward and fluff the crown section to maximize volume
- Flip back and arrange the puff to sit directly on top of your head, using bobby pins to secure it in place
- Take the remaining ponytail hair and divide it into 2-3 sections
- Twist each section firmly from root to tip
- Wrap the twists around the base of the puff, creating a frame, and secure with bobby pins
- Gently loosen the puff by pulling at the edges to add fullness and prevent it from looking too tight
Pro tip: Use a texturizing spray or dry shampoo on the puff section before styling — it gives you way more grip and helps the crown hold its shape throughout the event.
10. Sleek High-Top Knot
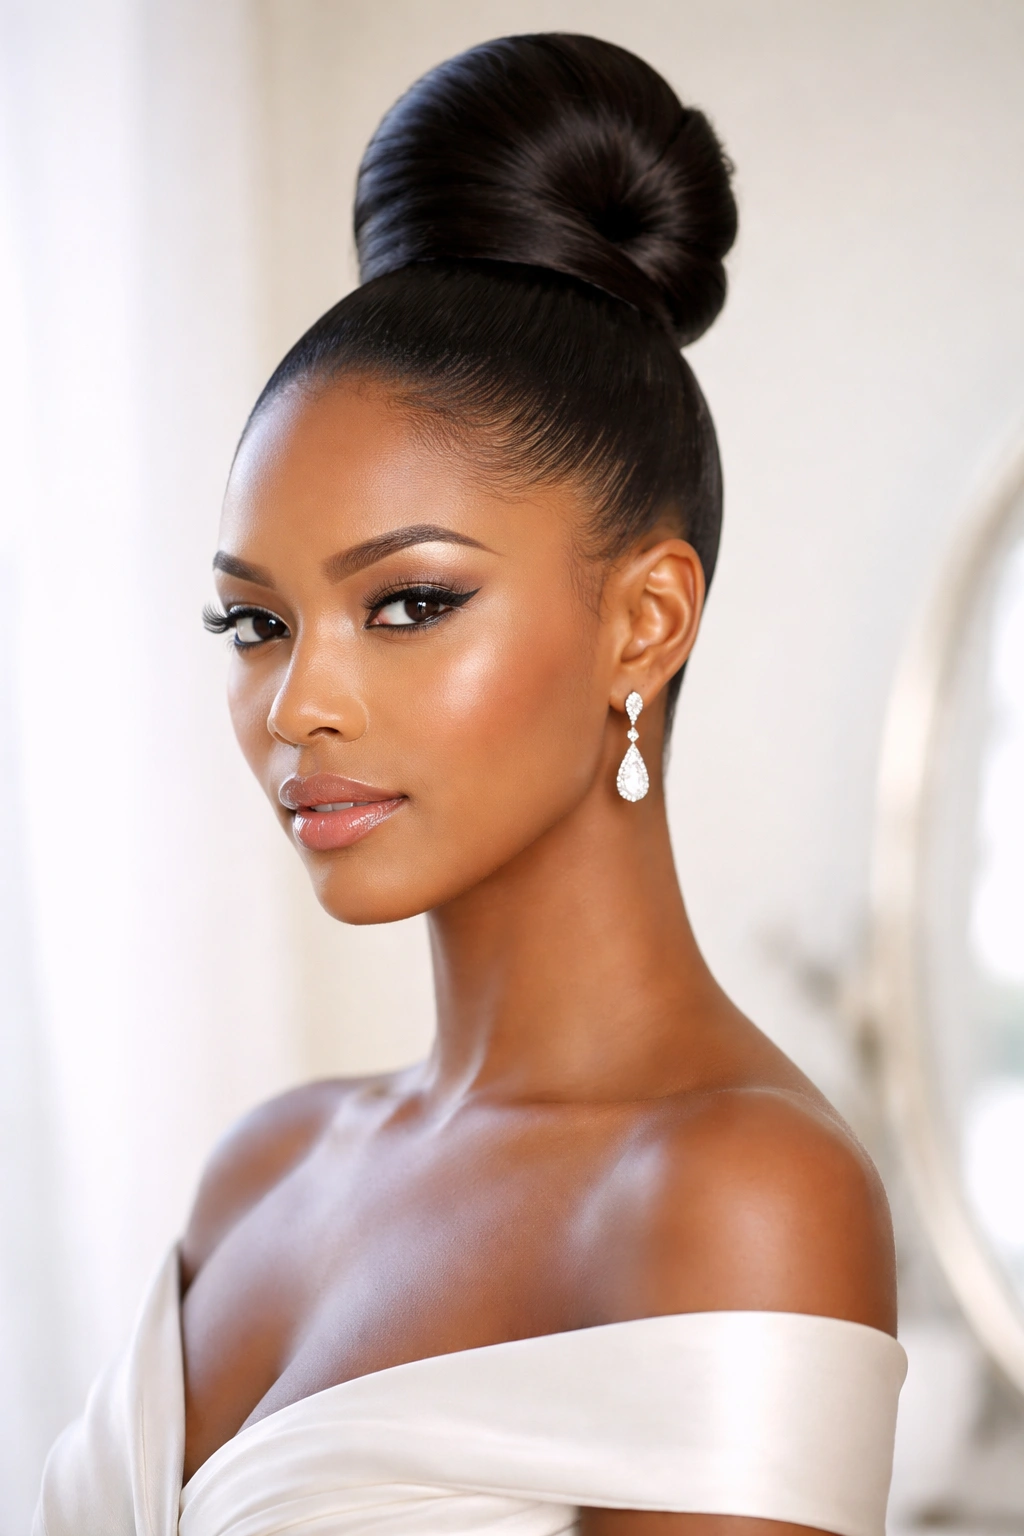
For the special occasion where you want to feel absolutely polished and modern, a sleek high-top knot delivers maximum elegance with minimum fuss. You’re creating a high ponytail at the crown of your head and tying it into essentially a tight knot shape — simple, geometric, impossibly chic. The sleekness requires some technique and product, but the payoff is a style that reads as expensive and carefully done.
Why This Style Stands Out
A sleek high-top knot is the styling equivalent of a perfect white button-up shirt — it’s timeless, universally flattering, and always appropriate. The height draws your features upward and creates an elongating effect on your face and neck. The geometric simplicity of the knot reads as modern and intentional, even though the execution is straightforward. This style works for virtually any occasion, from formal galas to professional events to weddings. It’s also incredibly secure — you can dance, move around, and enjoy your event without worrying about your hair shifting.
How to Create This Look
- Apply a smoothing cream or anti-frizz serum to damp hair
- Use a fine-tooth comb to brush hair into a high, centered ponytail at the crown
- Secure the ponytail with a sturdy elastic band — make it very tight
- Divide the ponytail into two equal sections
- Cross one section over the other, then wrap the crossed sections around each other to create a knot shape
- Tuck the ends of the knot underneath and secure with bobby pins inserted horizontally for strength
- Smooth your entire hairline with edge control, creating clean lines and a polished finish
- Set everything with a strong-hold hairspray, paying particular attention to the edges
Real talk: This style is much easier with longer hair, but it absolutely works on shoulder-length hair too — the knot just sits higher and reads more compact. Make sure your elastic is genuinely tight or the knot will loosen as the day goes on.
Final Thoughts
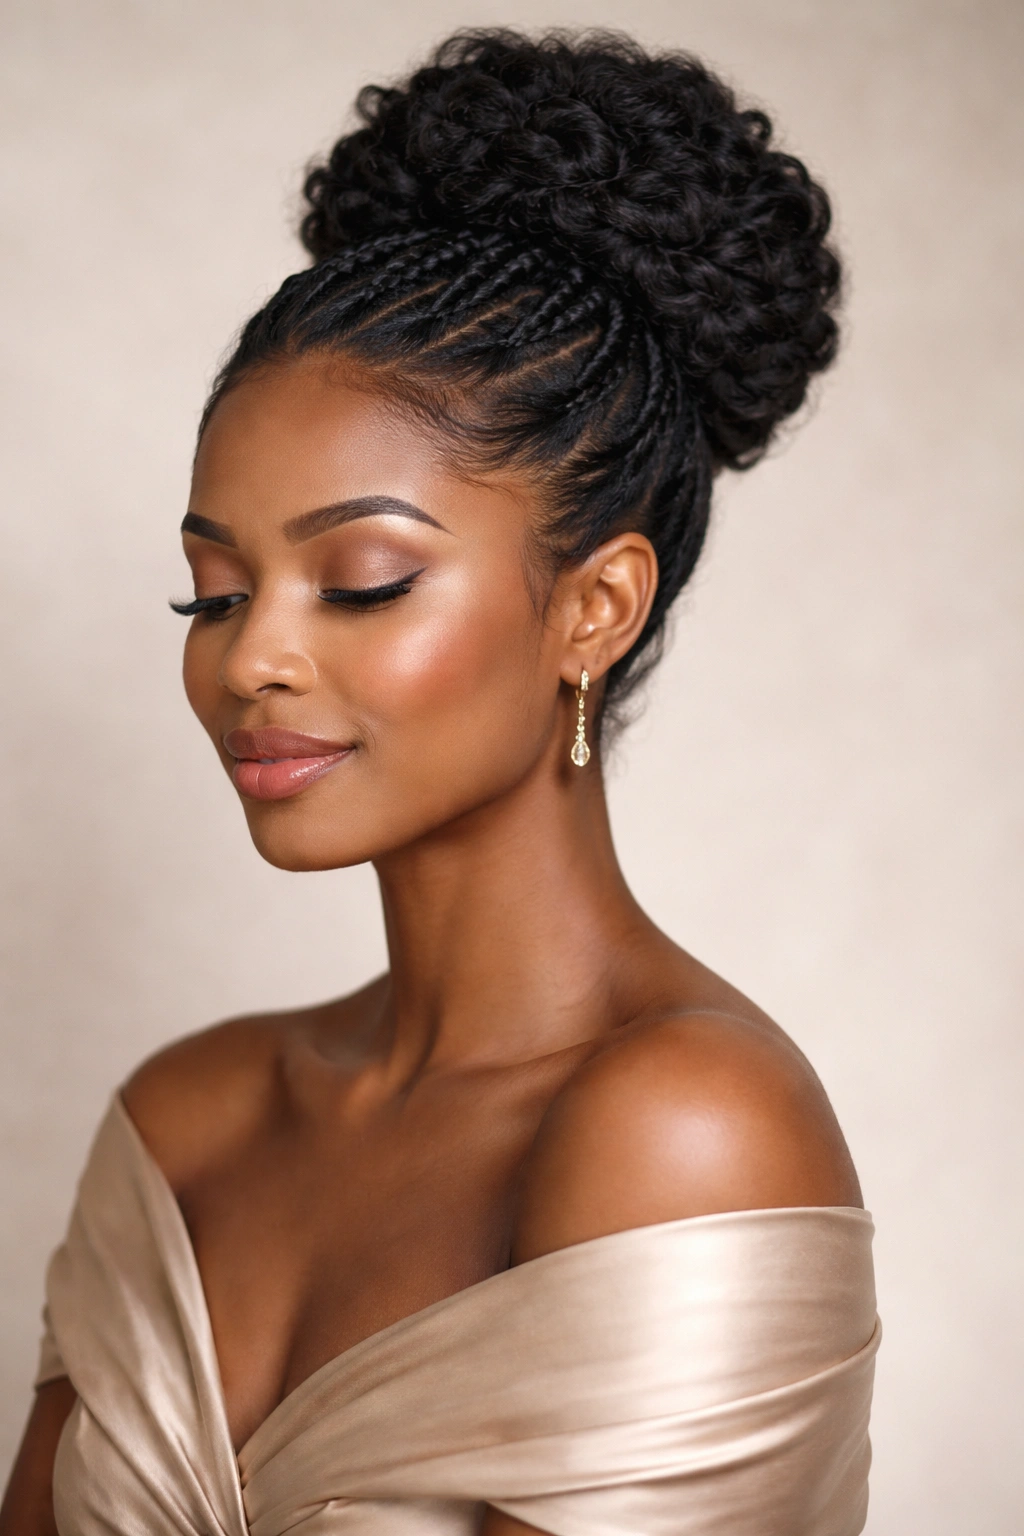
Finding the perfect updo for a special occasion comes down to understanding what flatters your face shape, what level of styling commitment you’re willing to make, and what makes you feel genuinely confident. These 10 styles represent a full range of possibilities — from playful double buns to sleek knots, from romantic coils to intricate cornrow designs. You’re not limited to picking one and sticking with it; many people find that different events call for different styles, and experimenting is half the fun.
The real secret to an updo that lasts all evening is starting with properly conditioned, detangled hair and using products that work with your hair’s natural texture rather than against it. Whether you’re going for total polish or intentional romance, the difference between a style that falls apart by 9 p.m. and one that stays perfect until the end of the night comes down to prep work and the right products. Take your time styling, don’t be afraid to use bobby pins generously, and remember that your updo is supposed to make you feel beautiful and confident — pick whichever style accomplishes that.
