



If you’ve ever tried a trendy messy bun and watched it fall flat within an hour, you’re not alone—especially if you have Indian hair. The truth is that Indian hair has distinct characteristics: it’s typically thicker, denser, and often longer than what most mainstream hairstyle tutorials assume. That thickness is actually a gift for creating textured, voluminous messy buns that hold their shape beautifully. The challenge isn’t whether you can rock a messy bun—it’s finding styles that work with your hair’s natural texture, weight, and behavior rather than against it.
The best messy bun styles for Indian hair lean into volume, acknowledge the importance of secure pinning, and account for how your hair naturally falls and moves. Whether you have straight, wavy, or curly Indian hair, the trick is choosing a style that complements your texture and doesn’t require you to tease your hair to death or use so many bobby pins that styling becomes a frustrating chore. A well-executed messy bun should look effortlessly undone while actually staying put through your entire day—no mid-afternoon collapse while you’re at work or at an event.
What makes these eight styles particularly suited to Indian hair is that they’re designed to work with density and length rather than fighting against it. You’ll find options for different occasions, different hair lengths, and different levels of effort. Some are perfect for lazy weekend mornings, while others are sophisticated enough for professional settings or evening occasions. Let’s dive into the styles that actually work for Indian hair and the specific techniques that make each one hold up beautifully.
1. The High-Volume Twisted Bun
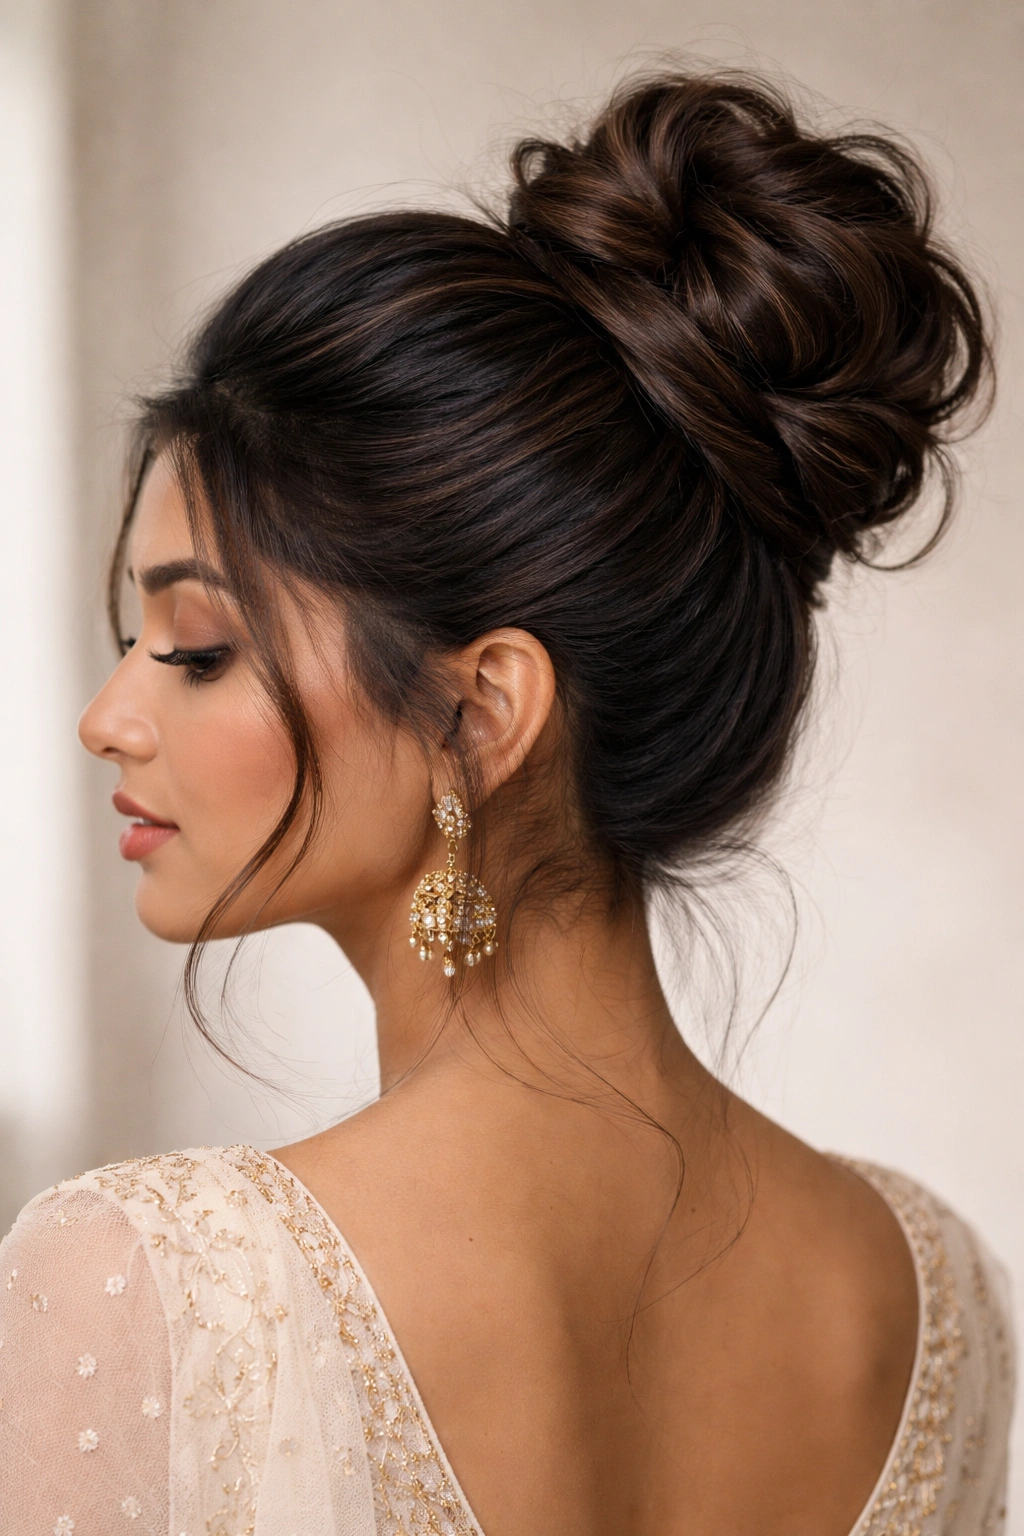
This style is the ultimate power move for thick Indian hair. Instead of gathering all your hair into a standard ponytail and wrapping it around itself, you’ll twist sections of your hair as you wrap them, which creates natural texture and prevents the bun from looking too slick or flat against your head. The twisted sections catch light differently and create dimension that’s especially striking with long Indian hair.
Why It’s Perfect for Indian Hair Thickness
Indian hair’s natural density means you can create serious volume without teasing or backcombing. The twist method works beautifully because it distributes your hair’s weight more evenly around the base, preventing that pinched feeling that can happen when you’re trying to contain a lot of thick hair in one spot. The twisted sections also interlock naturally, holding the style without requiring excessive pinning.
How to Create This Style
- Start with hair that’s been lightly dampened with a texturizing spray or saltwater spray—this helps create grip and prevents slipping
- Create a high ponytail at the crown, securing it with a strong elastic that won’t slip through your hair
- Divide the ponytail into two thick sections
- Twist one section tightly and wrap it around the base of the ponytail
- Pin as you wrap, inserting bobby pins at multiple angles
- Repeat with the second section, wrapping it around the first twisted section to build dimension
- Gently pull and tease the wrapped sections slightly to create that intentionally undone texture
- Secure with a lightweight hairspray that won’t weigh down the bun
Pro tip: Use a texture spray or dry shampoo before styling—this gives your hair grip and makes the twisted sections hold their definition much longer throughout the day.
2. The Sleek Low Bun with Face-Framing Layers
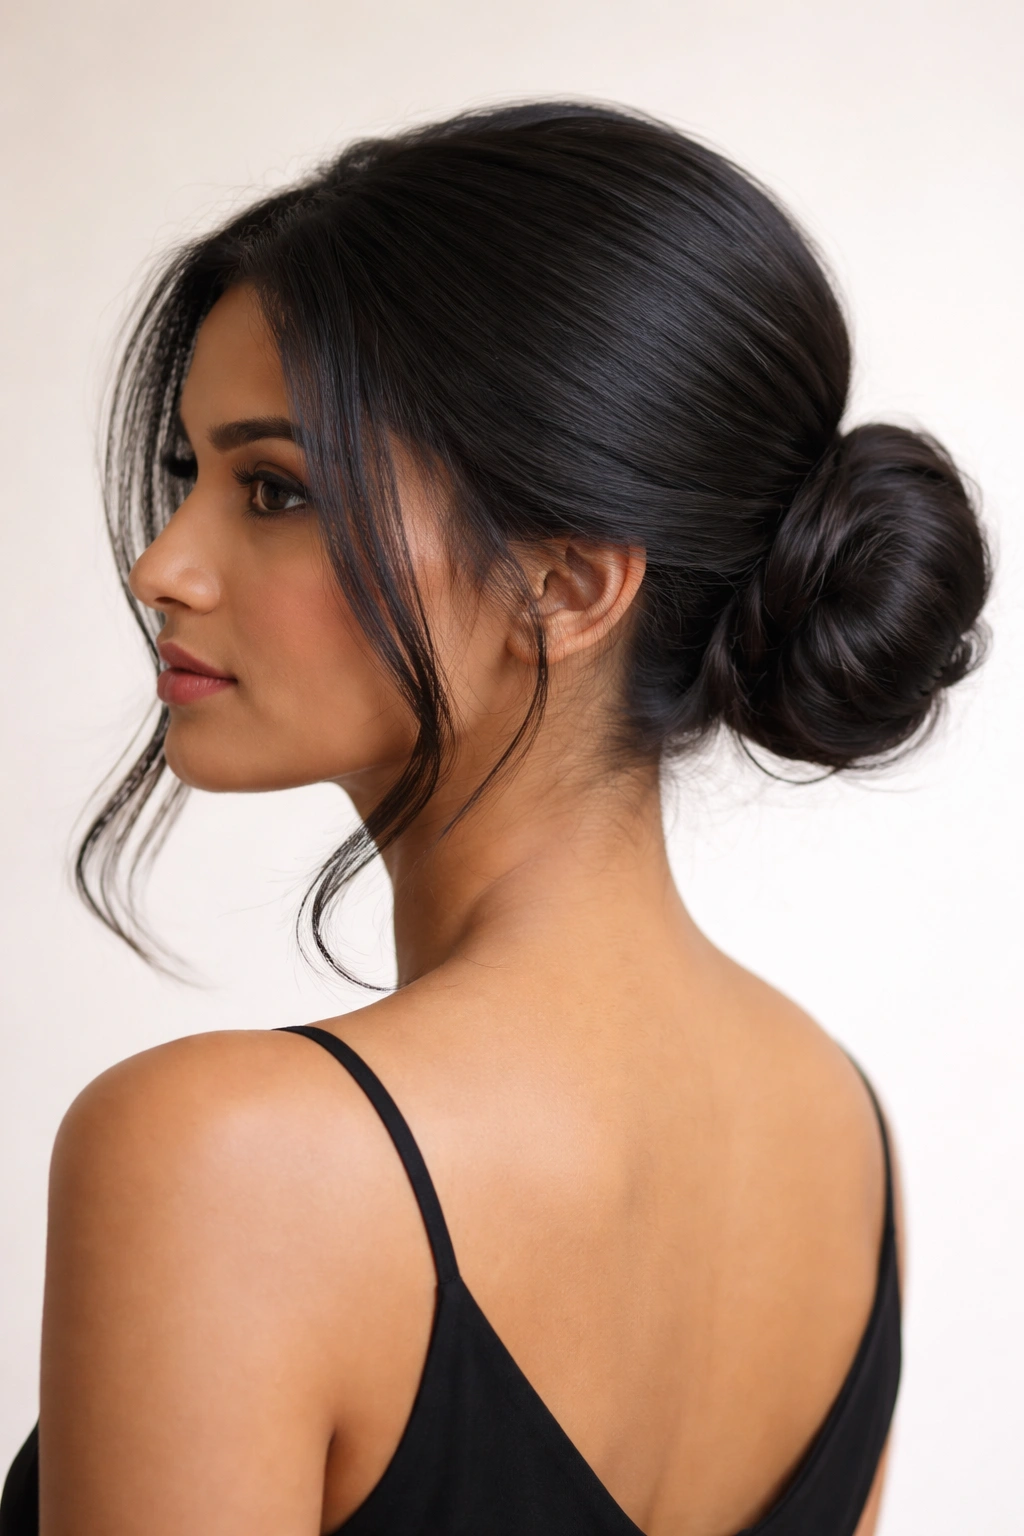
Don’t let the word “sleek” fool you—this isn’t the severe ballet bun. For Indian hair, this style means smooth and polished at the base while maintaining soft, textured layers around your face that give movement and prevent that pulled-too-tight look. This style works especially well for professional settings, office days, or when you want to look put-together without appearing overly formal.
What Makes This Work for Indian Hair
The face-framing layers are key because they address how Indian hair tends to have natural body and sometimes waves or slight curl. Rather than fighting this texture by pulling everything back completely, you’re leaning into it by letting face-framing pieces do what they naturally want to do. The smooth base keeps the style polished, while the layers add softness that prevents you from looking severe.
Styling Steps for This Look
- Apply a smoothing cream or lightweight serum to damp hair, focusing on the crown and sides
- Blow-dry your hair straight or with minimal texture, or work with naturally straight hair
- Create a deep side part and pull a section of hair from your part line (about 2 inches wide) away from the main style—this becomes your face frame
- Gather the rest of your hair into a low ponytail at the nape of your neck, leaving the face-framing section out
- Twist the ponytail once or twice and coil it into a bun, securing with bobby pins placed on multiple sides
- Take your face-framing section and loosely wave it with a curling iron (30 seconds per wave), then tuck it behind your ear
- Use a edge control product on your hairline to smooth any flyaways without making the overall look too stiff
Worth knowing: This style is much easier to manage if you have a blow dryer with a concentrator nozzle and a paddle brush on hand—they help you get that polished base without taking forever.
3. The Messy Ballerina Bun
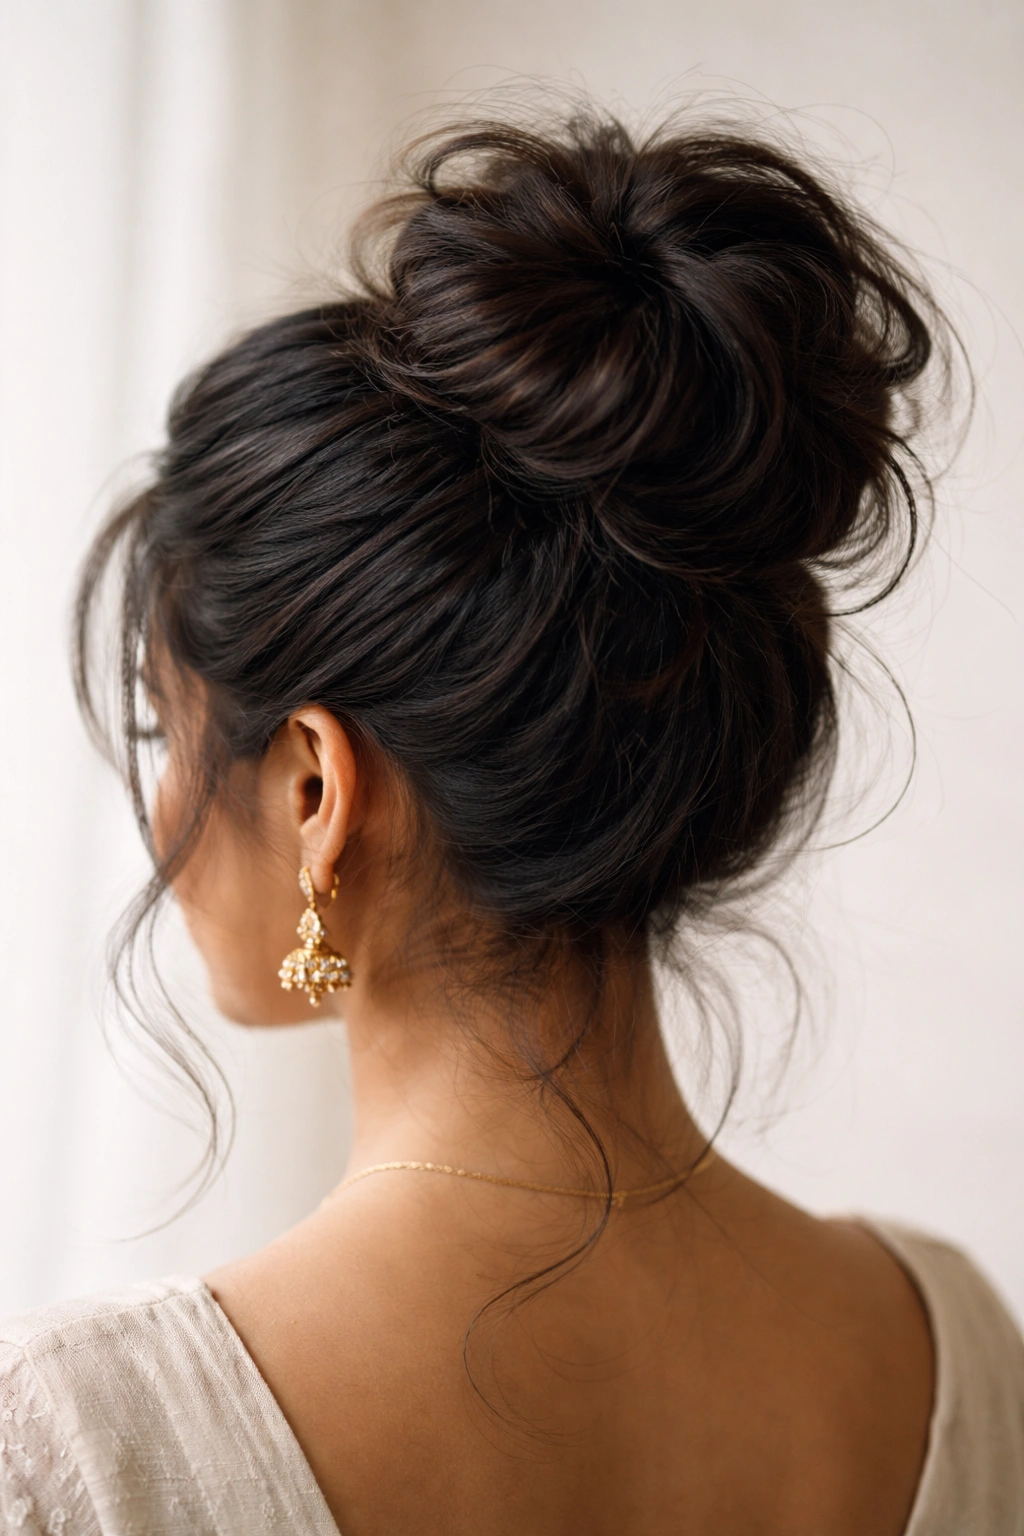
This is the messy bun that looks like it took five minutes but actually gives you the security of a ballet bun’s construction. For Indian hair, the key is starting with enough texture and using strategic teasing at the crown to create volume that reads as intentionally undone rather than just messy-messy. This style is perfect for workouts, casual outings, or anytime you want everything off your face but still looking intentional.
Why Ballerina-Inspired Works for Indian Texture
A true ballerina bun sits right at the crown, where it’s supported by the densest part of your scalp. Indian hair’s thickness means you get natural grip in this area, which is exactly where you need stability most. The style also works with the natural curve of your hair rather than against it—thick Indian hair tends to have a slight curve as it grows, and this bun harnesses that rather than fighting it.
Building Your Ballerina Messy Bun
- Start with damp hair and apply a texturizing spray or sea salt spray throughout
- Blow-dry your hair with a round brush to create body, or air-dry for natural texture
- Create a high ponytail right at your crown, using a sturdy elastic
- Gently backcomb or tease the ponytail at the base to create texture and grip—about 2 inches of the top section
- Twist the teased ponytail loosely and wrap it into a bun shape, tucking the ends underneath
- Leave some wisps and pieces loose around your face and nape—don’t tuck everything in perfectly
- Secure with bobby pins inserted at angles, then lightly spray with a flexible hold hairspray
- You can gently pull some small pieces out with a bobby pin hook to create that effortless texture
Insider note: If your bun starts slipping during the day, lightly mist the bottom section with dry shampoo—it creates instant grip without resorting to more bobby pins.
4. The Side-Swept Messy Bun
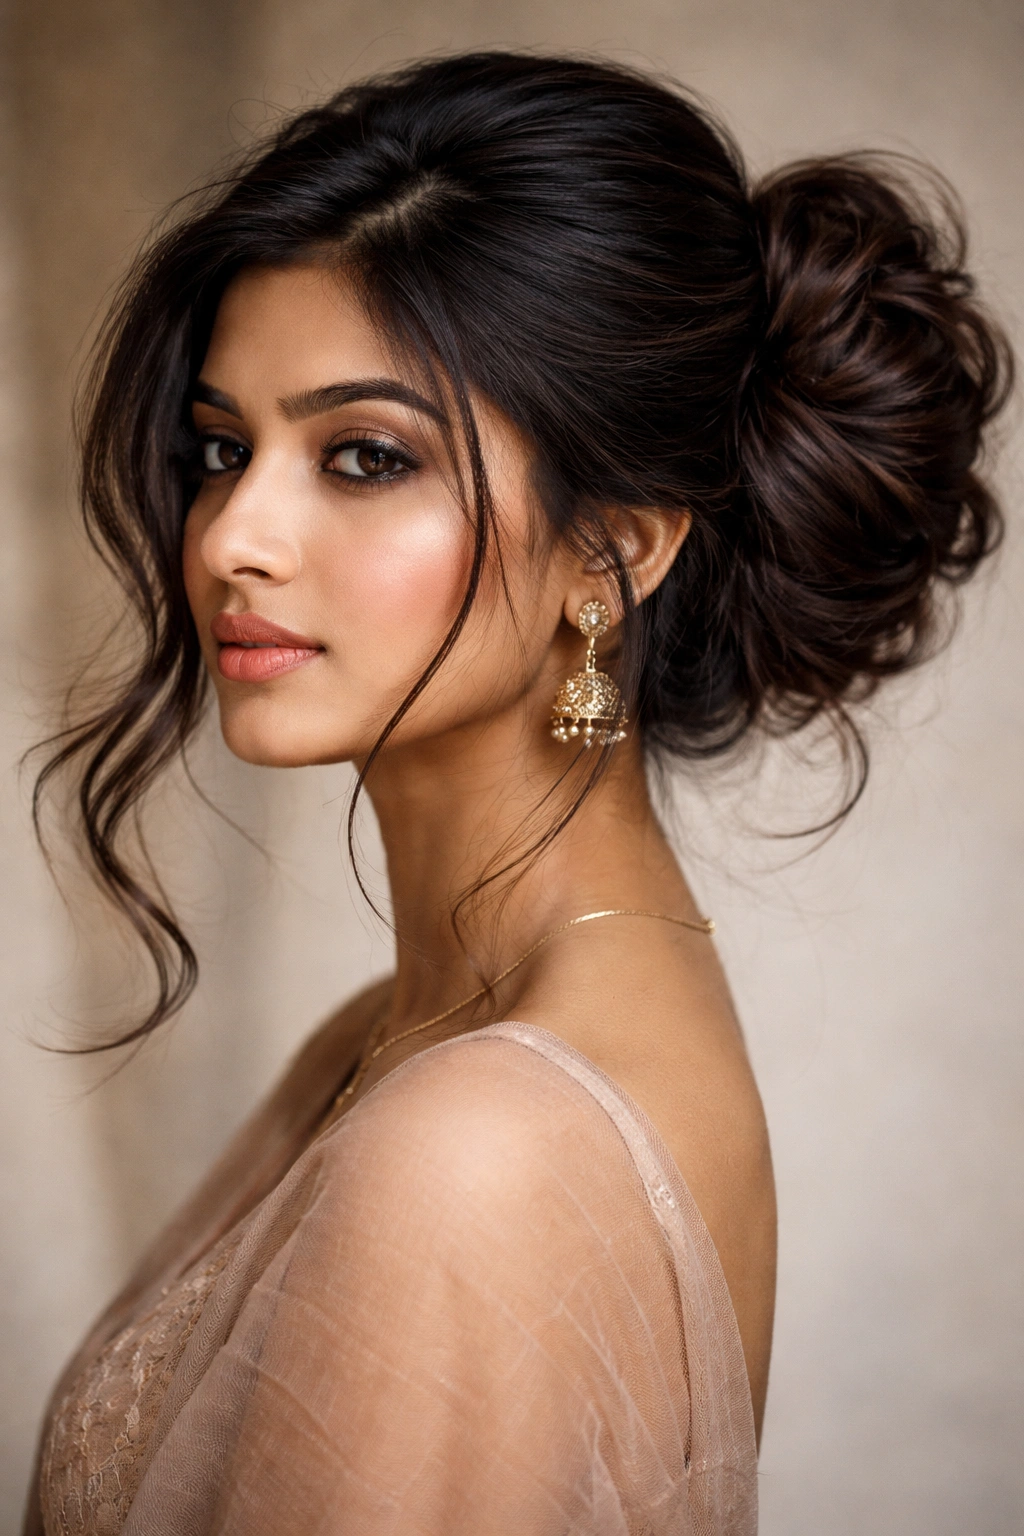
This style takes advantage of Indian hair’s natural volume and creates a silhouette that’s particularly flattering if you have a round face or want to create a softer, less severe appearance. By sweeping the bun to the side, you’re also creating dimension that photographs beautifully and suits both casual and semi-formal occasions. The asymmetry adds visual interest without requiring you to do anything complicated.
How Indian Hair’s Weight Works in Your Favor Here
Sweeping thick, dense Indian hair to one side creates a dramatic, romantic effect that would be harder to achieve with finer hair textures. The weight of your hair naturally holds the sweep, and when you build the bun on one side, it’s actually more stable than a centered bun because your hair naturally wants to go where you’ve directed it. You’re working with gravity and your hair’s natural heaviness, not against it.
Creating the Side-Swept Effect
- Start with slightly damp hair that has some texture—use a texturizing spray, sea salt spray, or light dry shampoo
- Blow-dry with a round brush or air-dry naturally to create soft waves
- Create a deep side part on the side opposite to where your bun will sit
- Gently brush your hair toward the side where you want the bun
- Create a low side ponytail, positioning it slightly off-center (about 2 inches from the back of your ear toward your spine)
- Tease the base of the ponytail lightly to create grip and texture
- Twist the ponytail loosely and wrap it into a bun, allowing some strands to escape and frame your face
- Leave pieces out around your face and neck—these create the soft, romantic quality of the style
- Pin with 4-5 bobby pins, using some with crossover technique (pin crossed over another pin for extra hold)
- Smooth any flyaways with a lightweight edge control, then set with flexible hold hairspray
Pro tip: The side sweep looks especially striking if you wave the face-framing pieces slightly with a curling iron set to 350°F—just 15-20 seconds per piece gives you extra softness and romance.
5. The Sock Bun with Textured Finish
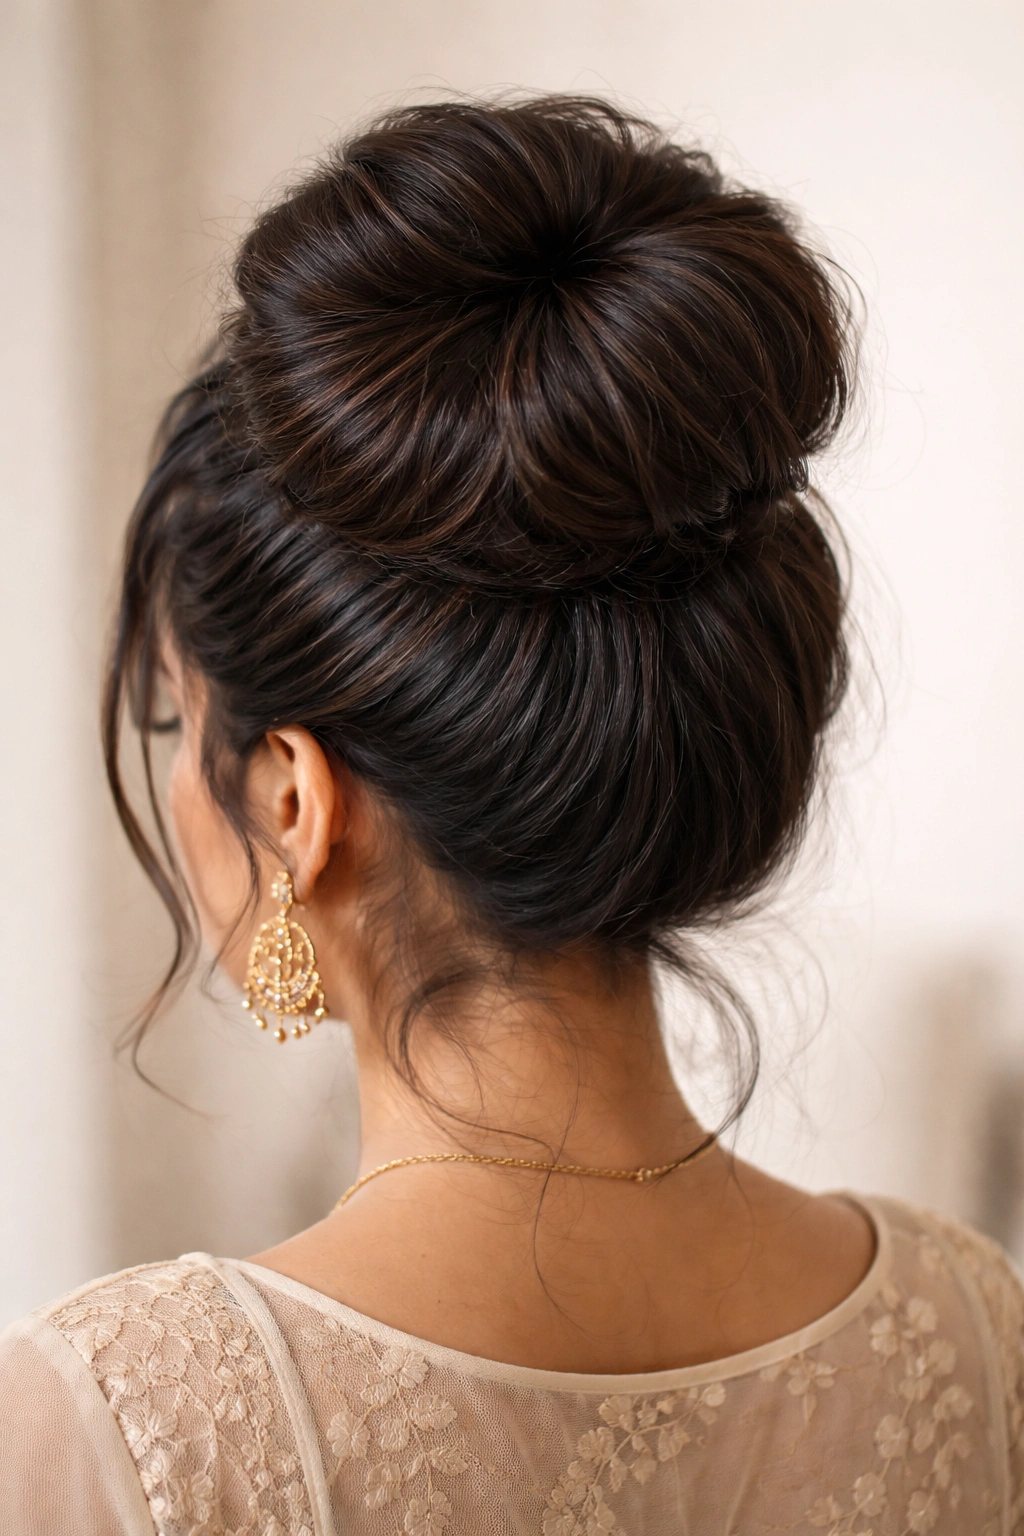
The sock bun (or donut bun) method is one of the easiest ways to create a full, voluminous bun, and it’s especially effective for Indian hair because your hair’s density fills out the donut shape beautifully without looking lumpy or uneven. This style gives you a perfectly rounded bun that looks intentionally styled rather than hastily thrown together, and the textured finish prevents it from reading as too polished or artificial.
Why the Sock Bun Suits Dense Hair Best
A sock bun distributes your hair evenly around a base, which is exactly what you want when you have a lot of thick hair. With finer hair, you sometimes see gaps or an uneven distribution, but Indian hair’s volume means you get a smooth, full donut shape every single time. The method also prevents the tension headaches that can come from pulling thick hair tightly into a regular bun.
The Textured Sock Bun Method
- Take a clean sock (knee-high length works best) and cut off the foot portion, leaving just the tube
- Roll the sock tube tightly into a donut shape
- Gather your hair into a high or mid-height ponytail and secure with an elastic
- Thread the ponytail through the center of the sock donut
- Distribute your hair evenly around the donut until it’s completely covered
- Secure the donut in place with bobby pins inserted around the base
- Now comes the texture: take sections of the covered bun and gently pull and tease them outward
- Use a fine-tooth comb to gently backcomb the outer surface of the bun, creating a soft, textured appearance
- Release a few small strands around your face to soften the overall look
- Spray lightly with flexible hold hairspray to set the texture without making it crunchy
Worth knowing: Dark-colored socks (navy, black, brown) work much better than light colors for this method—they’re far less visible if any sock peeks through your hair.
6. The Dutch-Braided Bun with Underside Texture
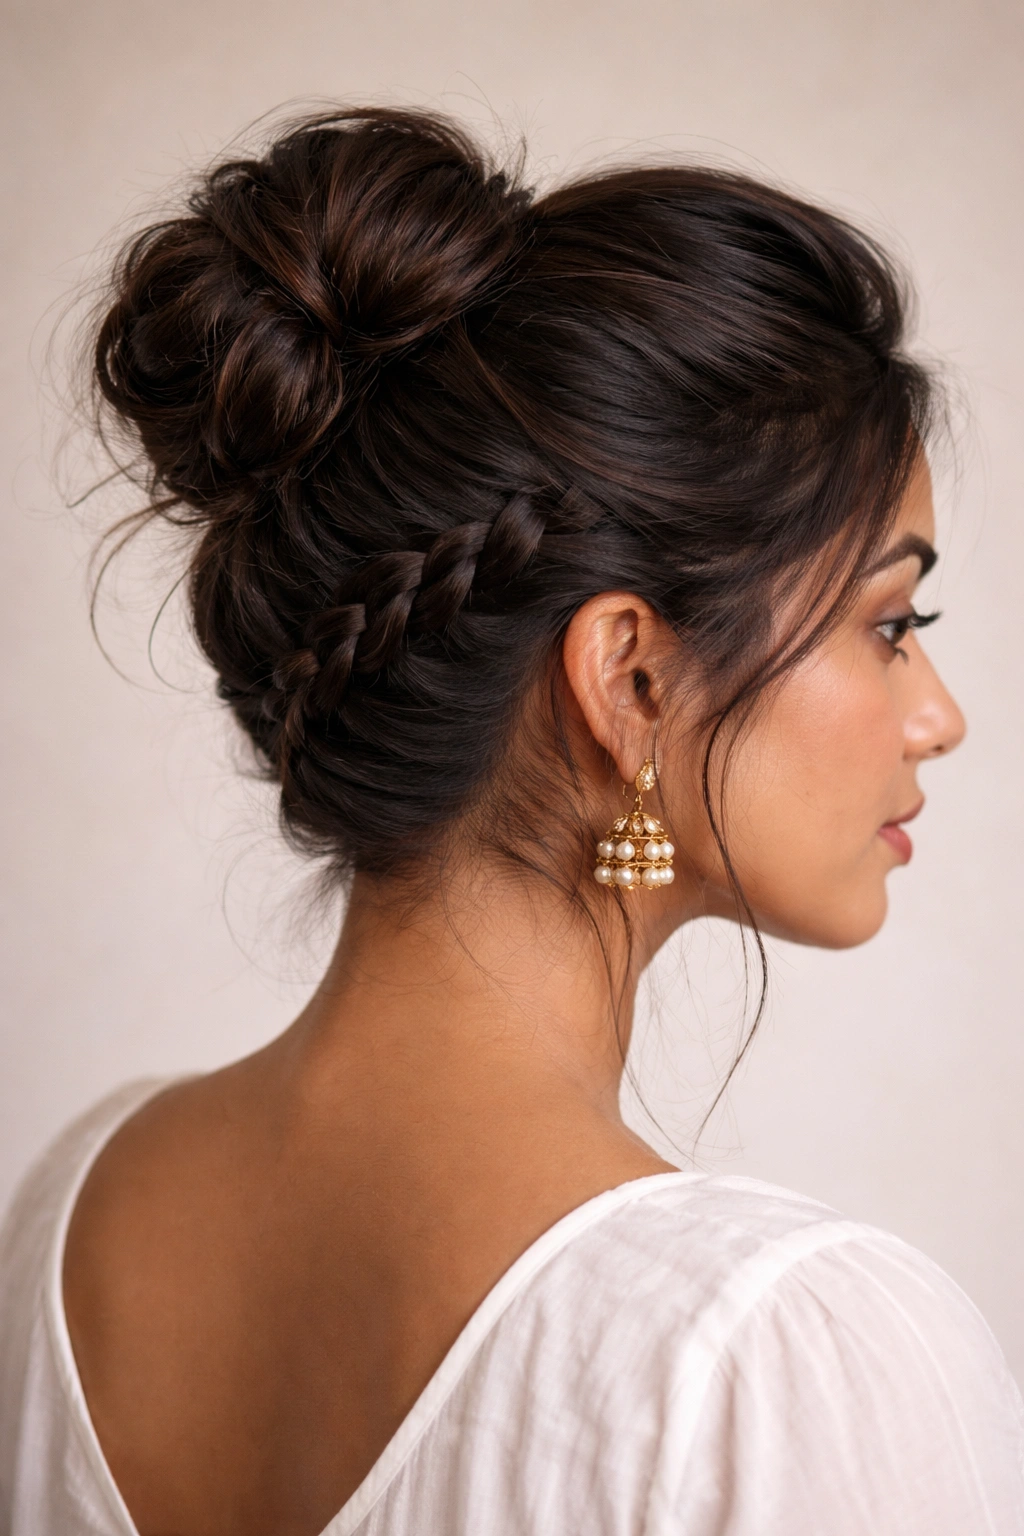
If you want to look like you spent 20 minutes styling but only actually spent 5, this is your style. By incorporating a Dutch braid into the base of your bun, you’re adding sophistication and intricacy that makes the whole look feel more intentional. For Indian hair, the braid actually helps distribute the weight of your thick hair more evenly while the bun itself remains soft and undone-looking on top.
How This Style Maximizes Indian Hair’s Strengths
Indian hair’s thickness and length make it perfect for braiding—the braid holds structure beautifully and doesn’t look thin or stringy. When you combine a structured braid with an unstructured, textured bun on top, you get the best of both worlds: intentionality and ease. The braid also creates a built-in anchor point that prevents the bun from slipping or shifting throughout your day.
Building a Dutch-Braided Bun
- Apply a texture spray to dry hair and mist lightly with water to dampen slightly
- Create a deep side part
- Starting at one temple, create a Dutch braid (reverse French braid) going back along your hairline toward the back of your head
- As you braid, include more and more hair, letting the braid gradually take in all your hair by the time you reach your nape
- Once the braid reaches the back of your head, secure it with a small elastic
- Gather the remaining unbrained hair along with the end of the braid and create a low ponytail
- Tease this combined section at the base to create texture and grip
- Twist loosely and wrap into a bun, allowing pieces to escape
- Secure with 4-6 bobby pins, inserting them at different angles for maximum hold
- Gently pull some of the braid’s outer strands to make it appear wider and softer
- Use flexible hold spray to set everything
Pro tip: This style actually looks better the second day after you sleep on it because the braid softens and the bun becomes even more naturally textured—perfect for when you’re in a time crunch.
7. The Twisted Crown Bun
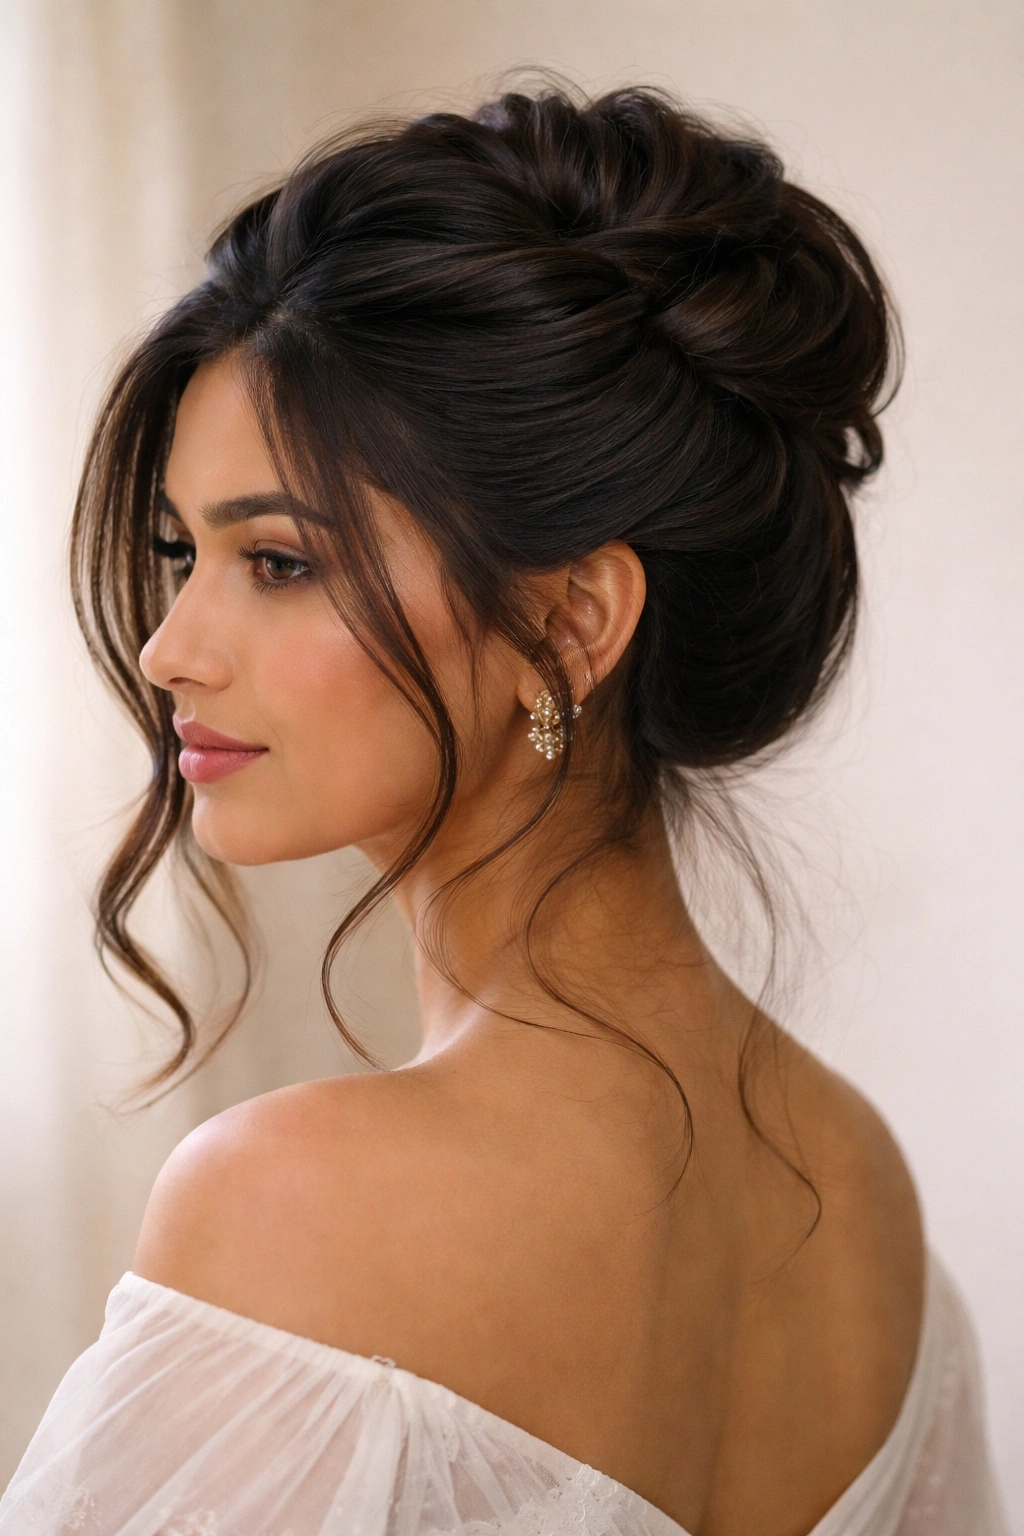
This style frames your face beautifully and works especially well if you have face-framing layers or any shorter pieces around your front hairline. The twists create a crown effect that’s both romantic and practical, and because the twists provide structural support, your bun stays secure even if you have a lot of heavy, long Indian hair. This one is perfect for special occasions or anytime you want to look extra put-together.
Why Twists Work Better Than Braids for Some Hair Types
Twists distribute thick hair’s weight differently than braids do—they’re less structured and allow more texture and movement, which prevents the crown from looking too tight or severe. For Indian hair especially, the twist method creates a softer frame that complements your face without the geometric precision of a braid. The twists also grip your hair naturally, making them more secure without requiring as many pins.
Creating the Twisted Crown Effect
- Apply a smoothing cream or mousse to damp hair and blow-dry straight or with minimal texture
- Apply a light texturizing spray to add grip
- Create a deep side part
- Starting at one side of your temple, take a 1-inch section of hair and divide it into two strands
- Twist these two strands around each other as you gradually pick up more hair from beneath the twist
- Continue this twisted crown pattern from one side of your head to the other, ending at your opposite temple
- Secure the end with a bobby pin
- Gather all your hair (including the crowned section) into a low-to-mid height ponytail at the back of your head
- Tease the ponytail base gently and twist into a bun
- Wrap the bun in place and pin securely
- Go back and gently pull the twisted crown to widen it and create softness
- Release a few small face-framing pieces and curl them slightly with a curling iron
- Set with flexible hold hairspray
Worth knowing: This style works especially well if you have thick bangs or shorter layers—the crown twists look like you’re framing these pieces intentionally rather than just trying to get them out of your way.
8. The Tousled Double-Twist Bun
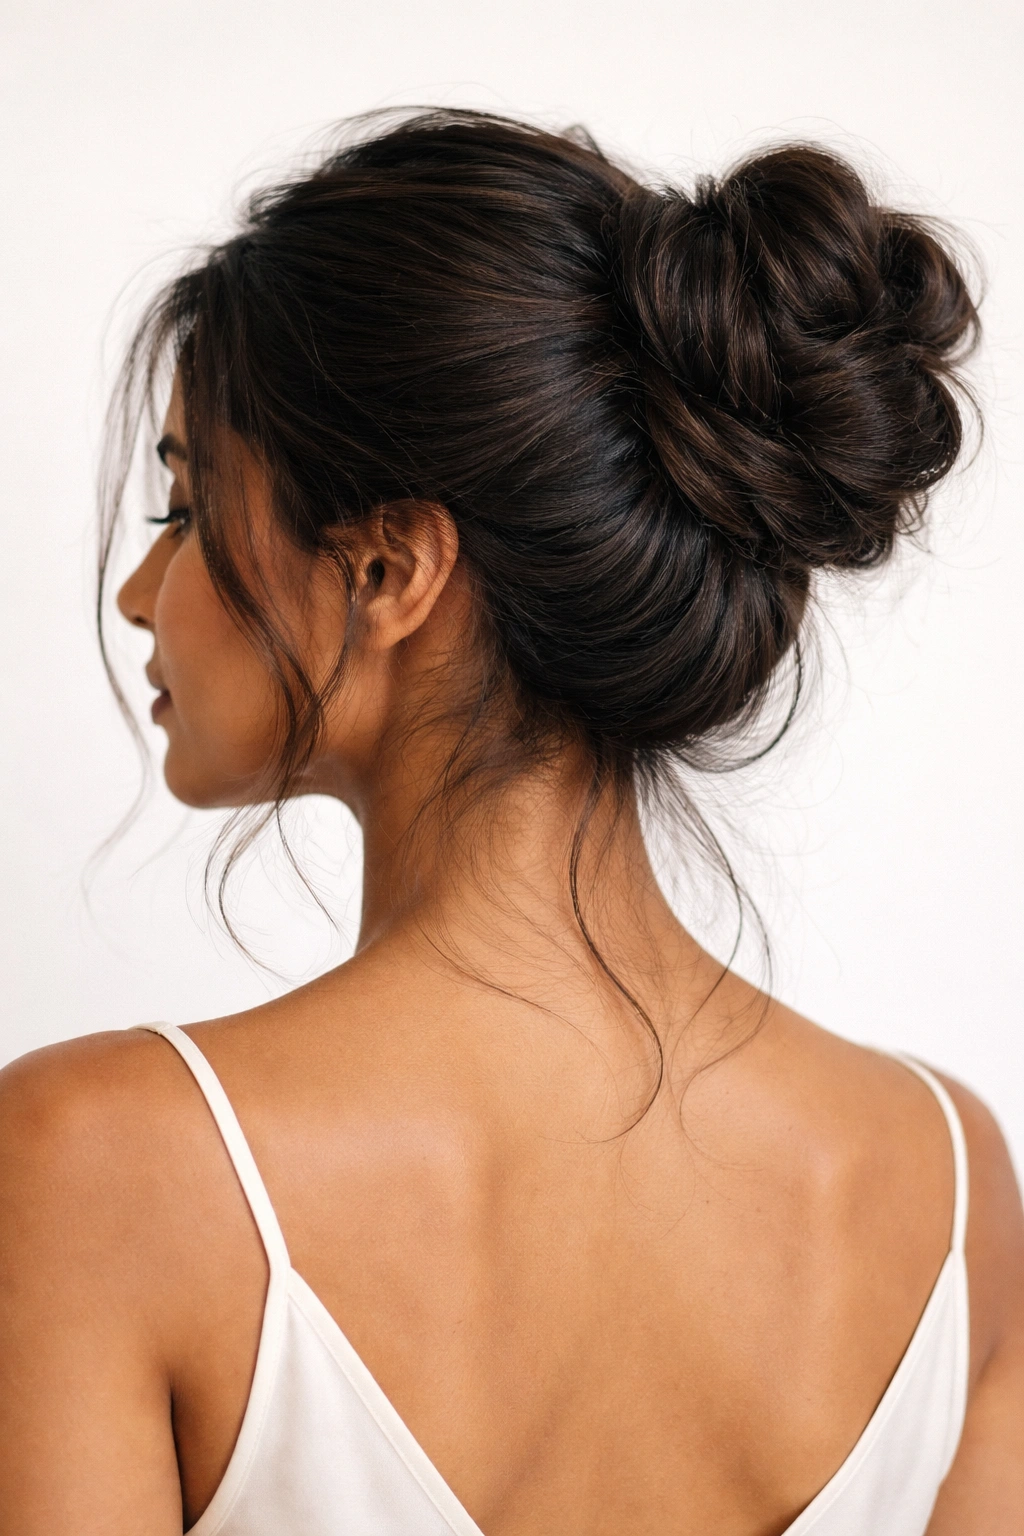
This is the most effortlessly beautiful messy bun you can create, and it works because you’re essentially doubling down on the most forgiving hairstyling technique: the twist. By creating two separate twists and wrapping them around each other, you’re building in natural texture and volume that’s nearly impossible to mess up. It’s the perfect style when you want to look like you didn’t try hard but actually want to look polished.
Why Double-Twisting Is Your Secret Weapon
One twist can sometimes look a little plain or uniform, especially in thick, dense hair. Two twists wound together create intersection points where texture naturally shows, and you automatically get more visual interest without having to tease or manually create texture. For Indian hair, this method celebrates your hair’s natural fullness rather than trying to compress it into a single twist.
Mastering the Double-Twist Bun
- Start with dry or lightly damp hair with some texture—a texturizing spray is perfect
- Create a high ponytail and secure with an elastic
- Divide the ponytail into two equal sections
- Twist the first section tightly, wrapping it around the base of the ponytail and securing with pins as you go
- Twist the second section separately and wrap it around the first twist
- As you wrap, let the second twist slightly overlap the first so they interlock
- Secure this second twist with bobby pins placed at multiple angles
- Gently pull some of the wrapped sections outward to create loose, textured areas
- Leave a few small pieces escaping around your face and neck
- Spray with flexible hold hairspray, letting it dry fully before touching your hair
Pro tip: If you pin the two twists in a crisscross pattern rather than following them around sequentially, your bun becomes significantly more stable and stays put even through workouts or active days.
Final Thoughts

The beautiful thing about messy buns for Indian hair is that your hair’s natural characteristics—its thickness, density, and length—are actually assets rather than obstacles. These eight styles work because they all leverage what Indian hair does best: hold texture, create volume, and maintain structure throughout the day. Whether you’re looking for something quick and casual or polished and special-occasion-ready, there’s a messy bun style in this list that’ll work for you.
The real secret to making any of these styles last all day is understanding that texture is your friend. Use texturizing sprays, dry shampoo, and light teasing strategically—not everywhere, but exactly where you need grip and hold. Invest in good bobby pins (the ones that actually bend and grip rather than slide out), and don’t be afraid to use more pins than you think you’ll need. Your hair is thick enough that you won’t see them, and they make the difference between a style that holds for 8 hours and one that droops by lunchtime.
Start with whichever style speaks to you, practice it a few times to figure out your personal shortcuts, and adjust it based on how your hair actually behaves on humid days or good-hair days. The best hairstyle is always the one that fits your real life and your hair’s actual texture—not some imaginary version of your hair you saw on Instagram. These styles are designed for the real thing, and that’s precisely why they work.
