



Prom night is all about looking effortlessly polished, and there’s something undeniably chic about a well-executed messy bun. Unlike the overly structured updos of decades past, today’s messy bun celebrates texture, movement, and a touch of intentional undone-ness that somehow feels more sophisticated and age-appropriate than rigid perfection. The beauty of this style is that it works with virtually any dress, frames your face beautifully, and gives you the freedom to move, dance, and celebrate without worrying that your hair will betray you halfway through the night.
The versatility of messy buns means there’s genuinely a version for everyone—whether you’re drawn to romantic and loose, sleek and modern, or adorned with accessories that catch the light. You can create these styles on straight hair, waves, curls, or textured hair. They photograph beautifully in both natural and flash photography. And perhaps most importantly, they take anywhere from 10 to 20 minutes to create, depending on your starting texture and which variation you choose.
What makes messy buns perfect for prom specifically is that they balance trendiness with timelessness. You’ll look current and intentional without locking yourself into a style that feels dated by graduation. They also work with formal wear at any price point and suit different face shapes, hair types, and personal aesthetics. Whether your prom dress is classic, bold, minimalist, or heavily embellished, a messy bun can be styled to complement rather than compete.
1. The Classic High Messy Bun
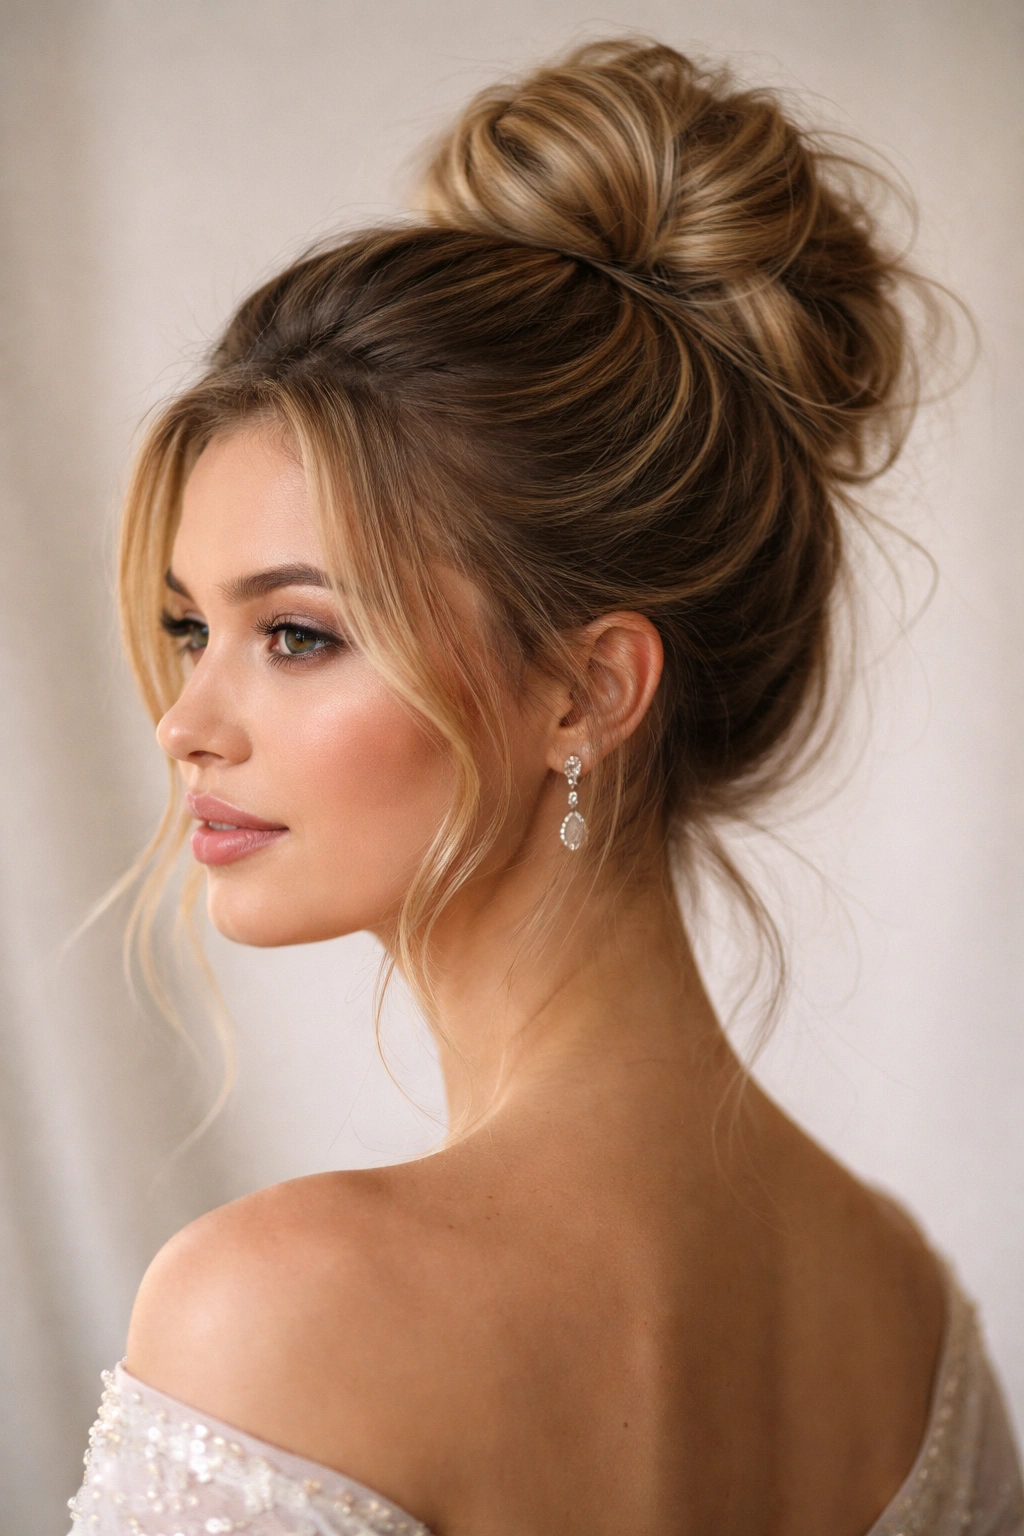
The high messy bun is the foundation style that works for nearly everyone, and when executed properly, it looks like you casually twisted your hair up without trying—even though strategic technique goes into making it look that effortless. This version sits at the crown of your head, which elongates your neck and face, making it one of the most universally flattering options for prom. The key to making it truly work is starting with second-day or textured hair rather than freshly washed strands, which are too slippery to hold the shape you’re creating.
How to Achieve This Look
- Start with hair that has texture or slight waves—use a texture spray or curling iron beforehand to create grip if your hair is naturally straight
- Use a dry shampoo or texturizing spray at the roots for extra hold and volume
- Gather hair into a high ponytail, but don’t make it tight; aim for a ponytail that sits at the crown with a bit of slack
- Take a small section from the ponytail and wrap it around the base where your elastic is, securing with bobby pins
- Gently pull and loosen sections of the ponytail, letting strands fall in different directions rather than keeping everything neat
- Secure everything with hairspray, holding the can at different angles to encourage the “undone” appearance
Why It’s Perfect for Prom
A high messy bun instantly reads as elegant and intentional, even when the styling process is remarkably quick. This position draws attention upward, which means your makeup, face shape, and the neckline of your dress all get emphasized. The style stays secure through hours of dancing and celebration, and the slight imperfection actually adds interest to formal photography rather than detracting from it. Pro tip: Use bobby pins in your hair color rather than black or brown, as they blend seamlessly into the texture you’ve created and become invisible in photos.
2. The Low-Side Messy Bun
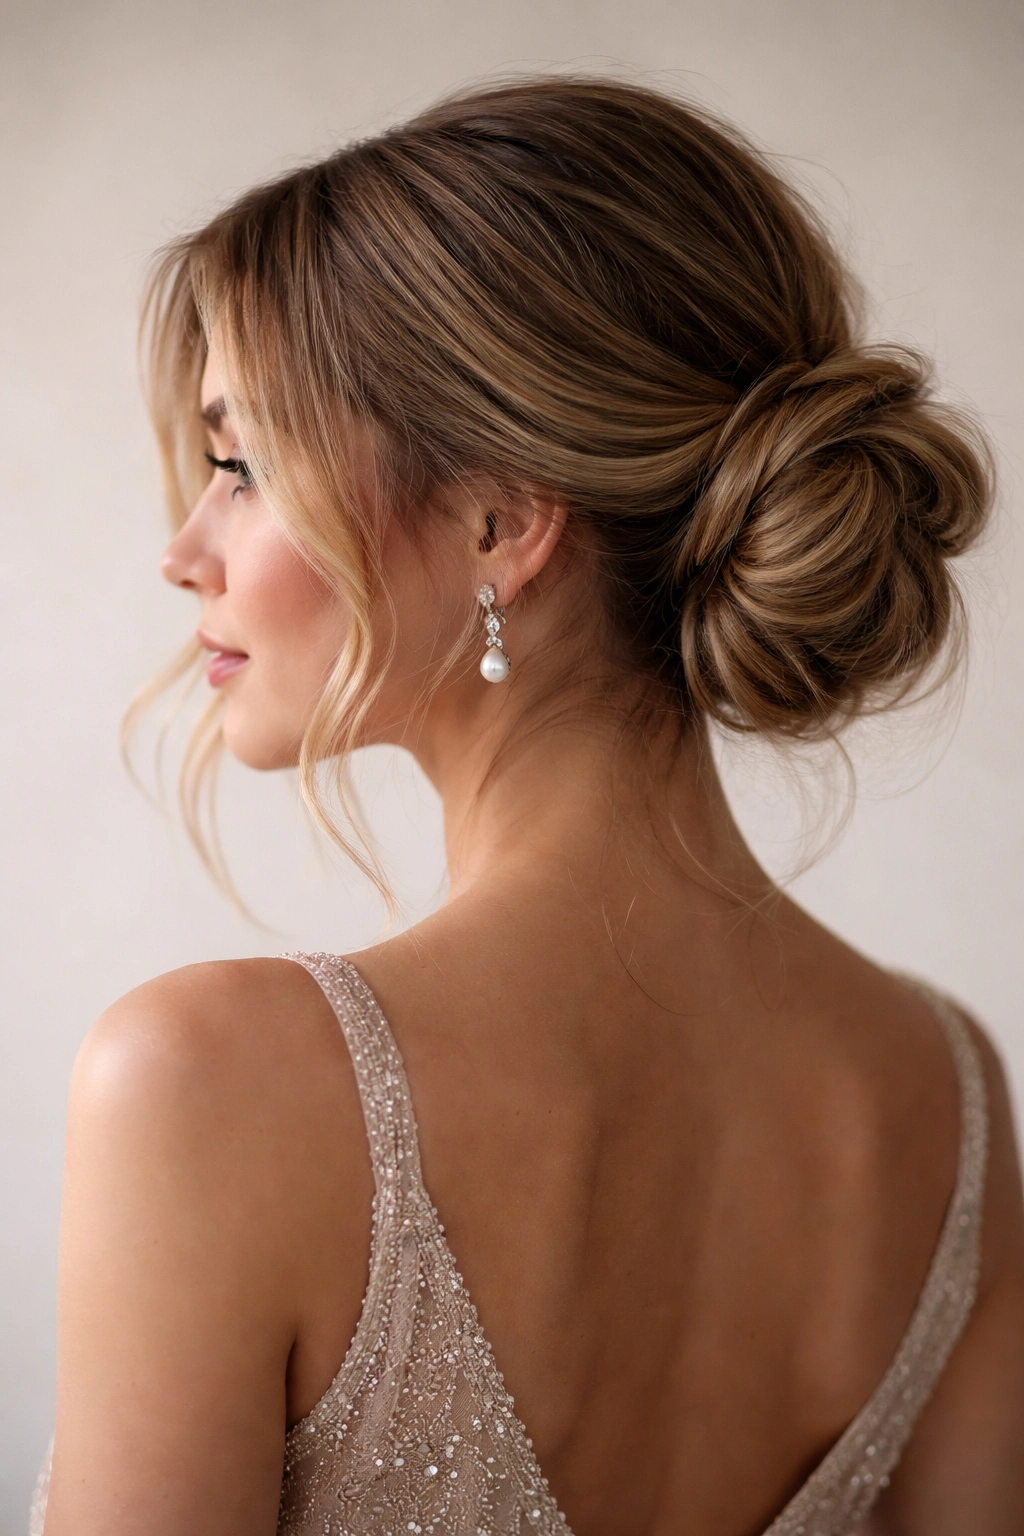
If you’re wearing a dress with significant back detail—a low cut, intricate beading, or an interesting texture—a low-side messy bun keeps your back visible while still getting your hair out of the way. This version sits low on one side of your head, creating an elegant diagonal line that photographs beautifully from the side. The side placement adds sophistication and keeps the look from feeling too casual or gym-class adjacent.
Creating the Perfect Low-Side Placement
- Brush your hair to one side, creating an off-center part that skews toward whichever side you want the bun to sit
- Gather the hair into a low ponytail positioned to the side of your head—aim for a spot that’s roughly where the base of your skull meets your neck on one side
- Don’t pull the ponytail too tight; you want to maintain a soft, romantic quality rather than a strict pull
- Wrap a small section around the elastic and pin, then gently pull and arrange sections to create the messy texture
- Leave one or two face-framing pieces down on the opposite side to soften the effect and create balance
What Makes This Version Stand Out
The low-side placement is fundamentally more sophisticated than a centered bun, partly because it’s slightly less common and therefore reads as more deliberately styled. It works particularly well if you have a longer face shape, as the side placement creates horizontal interest rather than emphasizing vertical length. If your prom dress has a strapless or sweetheart neckline, this bun style complements that choice by showing off your collarbone and shoulders. Worth knowing: This style works beautifully with delicate drop earrings or chandelier earrings, as the side placement of the bun leaves your ears and neck completely visible.
3. The Double Messy Bun
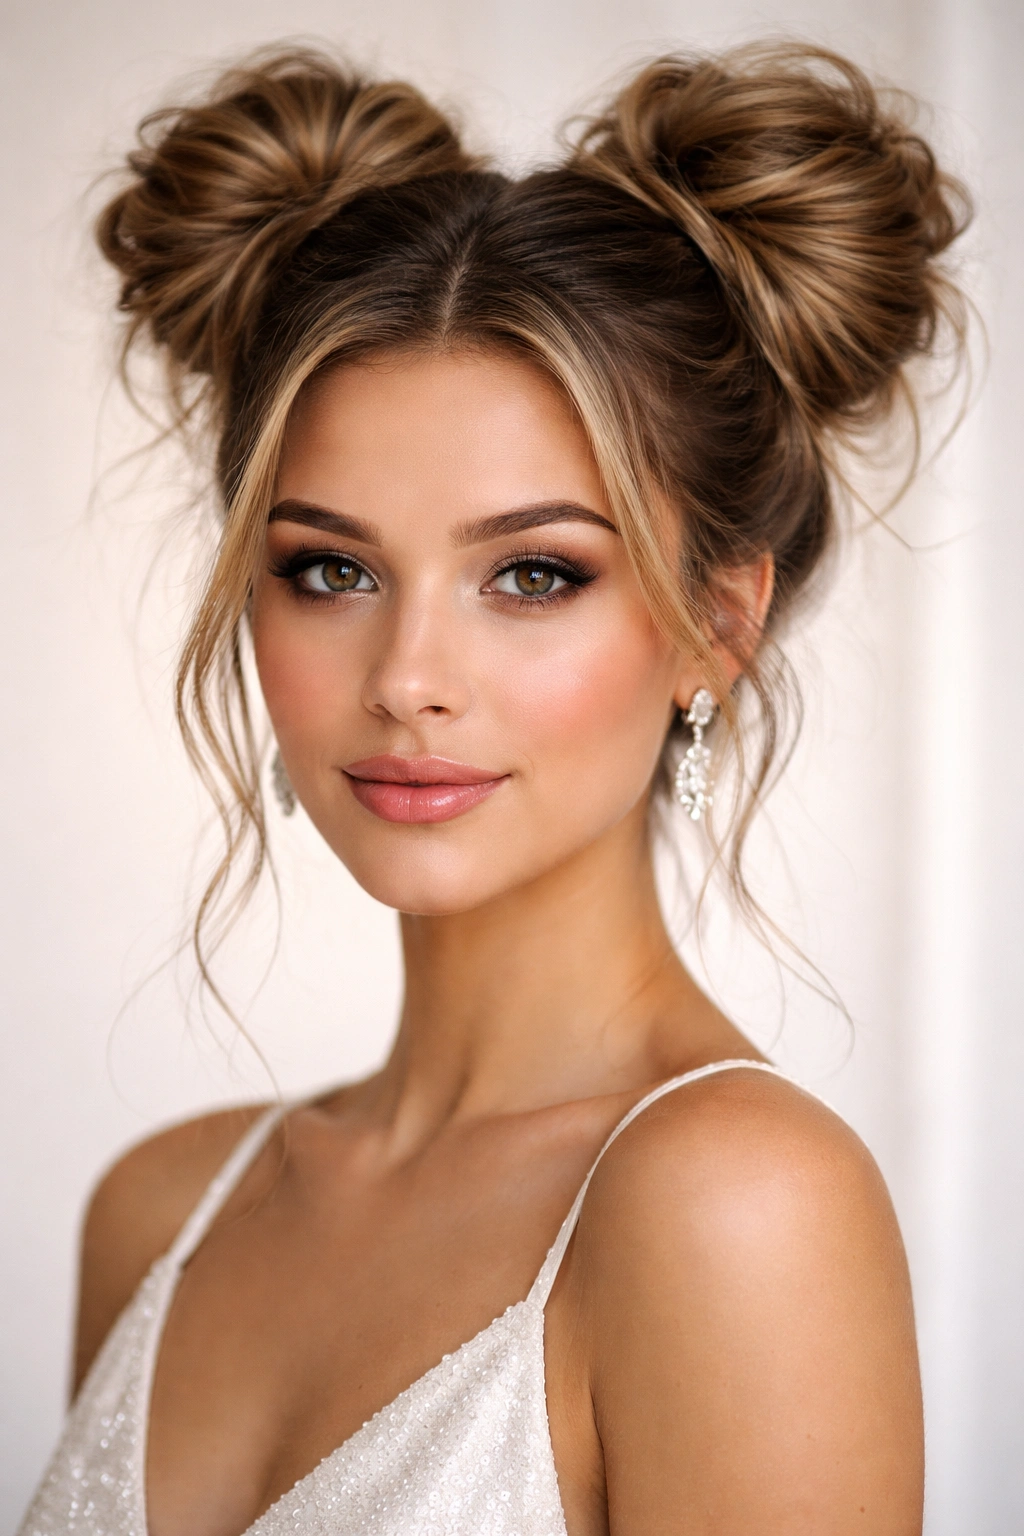
For those who want to make a bolder statement or love a more playful vibe, double messy buns bring personality and a touch of modern edge to your prom look. This style has evolved beyond the cutesy schoolgirl version into something genuinely sophisticated when styled correctly. The key is making both buns equally voluminous and textured, positioned at medium-high rather than very high, which keeps the overall effect elegant rather than childlike.
Styling Techniques for Balanced Double Buns
- Create a center part running from your forehead to the nape of your neck
- Divide your hair into two equal sections on either side of the part
- Gather each section into a ponytail positioned slightly above ear level on each side
- Create texture in each ponytail using the same pulling and arranging technique as the single bun
- Make sure both buns are approximately the same size and have the same level of texture; asymmetrical buns can look unintentional rather than intentional
- Smooth any flyaways with a light hairspray while maintaining the overall messy texture
Why This Works for Prom
Double messy buns have an unexpectedly modern aesthetic when executed with intention. They work best with minimalist or architectural dress designs, as the buns themselves become a design feature. This style is particularly flattering on people with oval or heart-shaped faces, as the buns sit on the sides rather than emphasizing the center. The double bun also photographs distinctly—you won’t see dozens of identical buns in the prom photos because fewer people commit to this option. Pro tip: Coordinate the accessories on each bun if you’re adding them—matching hair clips, pearls, or metallic details create intentional symmetry rather than looking random.
4. The Half-Up Messy Bun
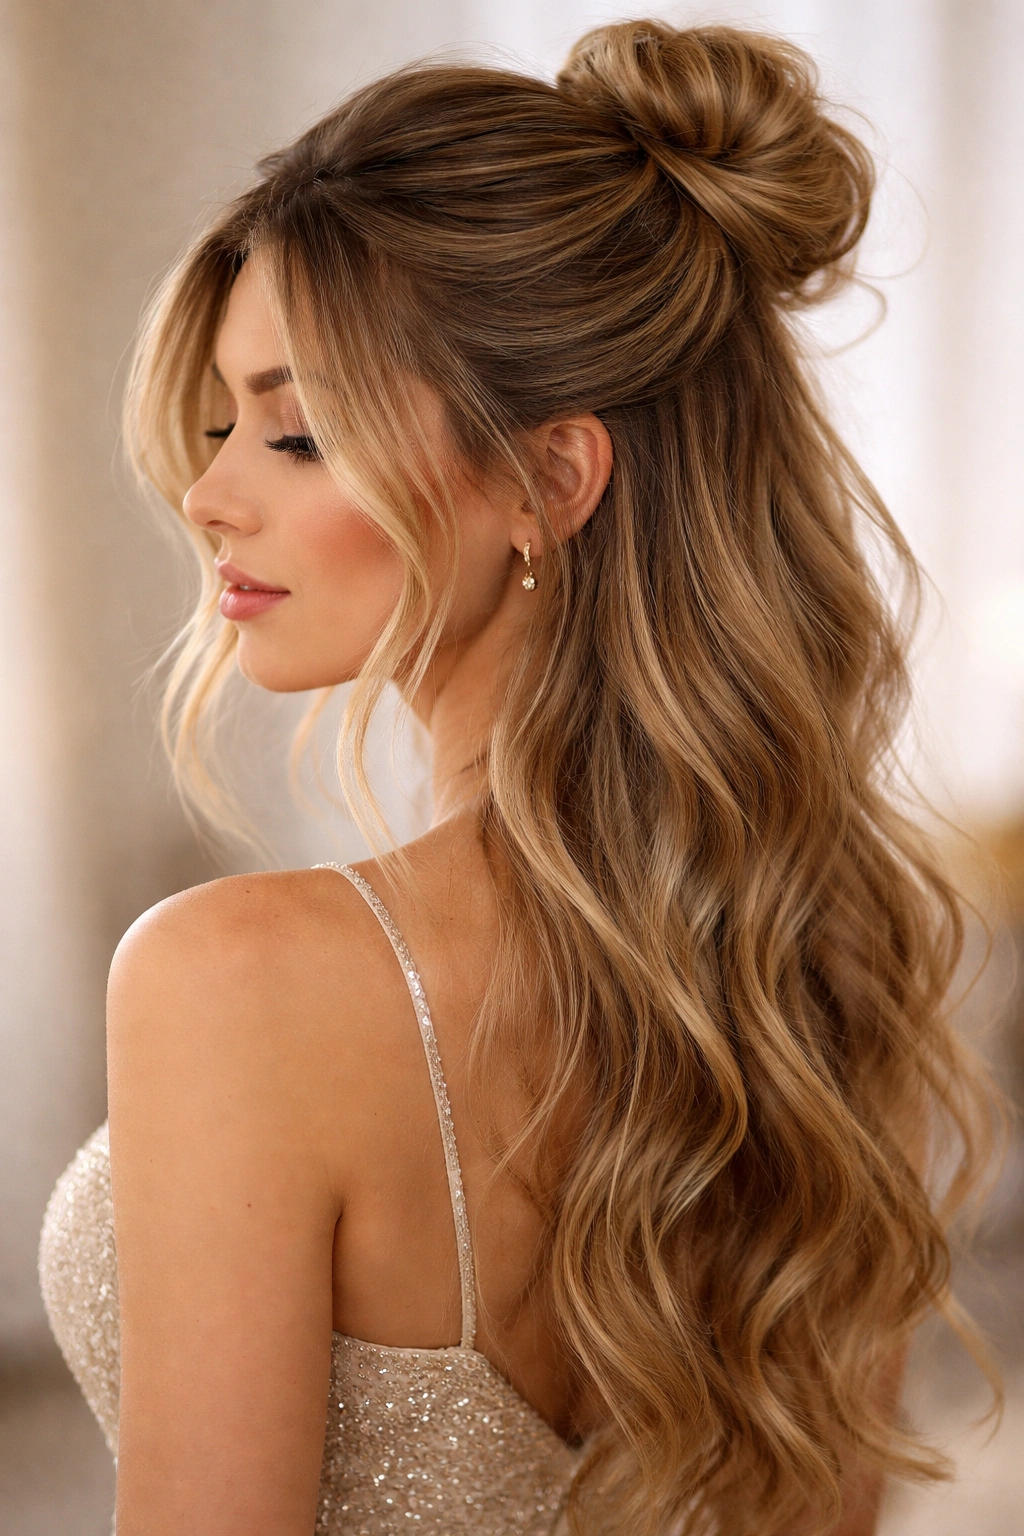
The half-up messy bun is perfect if you love showing off your hair texture or length but still want the practical benefits of an updo. This style takes the front and crown sections of your hair and gathers them into a bun, while the back and underneath sections flow loose. It’s particularly striking if you have long hair, curly hair, or waves, as it shows off your length and texture while keeping hair off your face and neck.
Building Your Half-Up Base
- Start with hair that has texture; if your hair is naturally straight, create loose waves beforehand
- Section off the top half of your head from ear to ear across the crown
- Take that top section and gather it at the back of your head into a ponytail
- Create the bun using the wrapping and arranging technique, making sure it sits where it transitions from the upper to lower sections of your hair
- Leave the bottom half of your hair completely down, allowing waves or curls to flow freely
- Pull a few face-framing pieces down in the front on either side to soften the overall look
The Visual Impact
A half-up messy bun creates balance between structure and flow, which translates to a look that’s simultaneously polished and relaxed. This style shows movement in your hair, which is valuable in both still photos and video. If your dress has a high neckline or significant front detail, the half-up option complements that by keeping the focus on the front and sides rather than the back. The loose hair below the bun also softens your overall silhouette, making the style feel romantic and age-appropriate. Real talk: This version requires your loose hair to be truly beautiful, so invest in your wave or curl texture beforehand. Blow-dry your waves out the night before so they’re set and voluminous by prom night.
5. The Braided Messy Bun
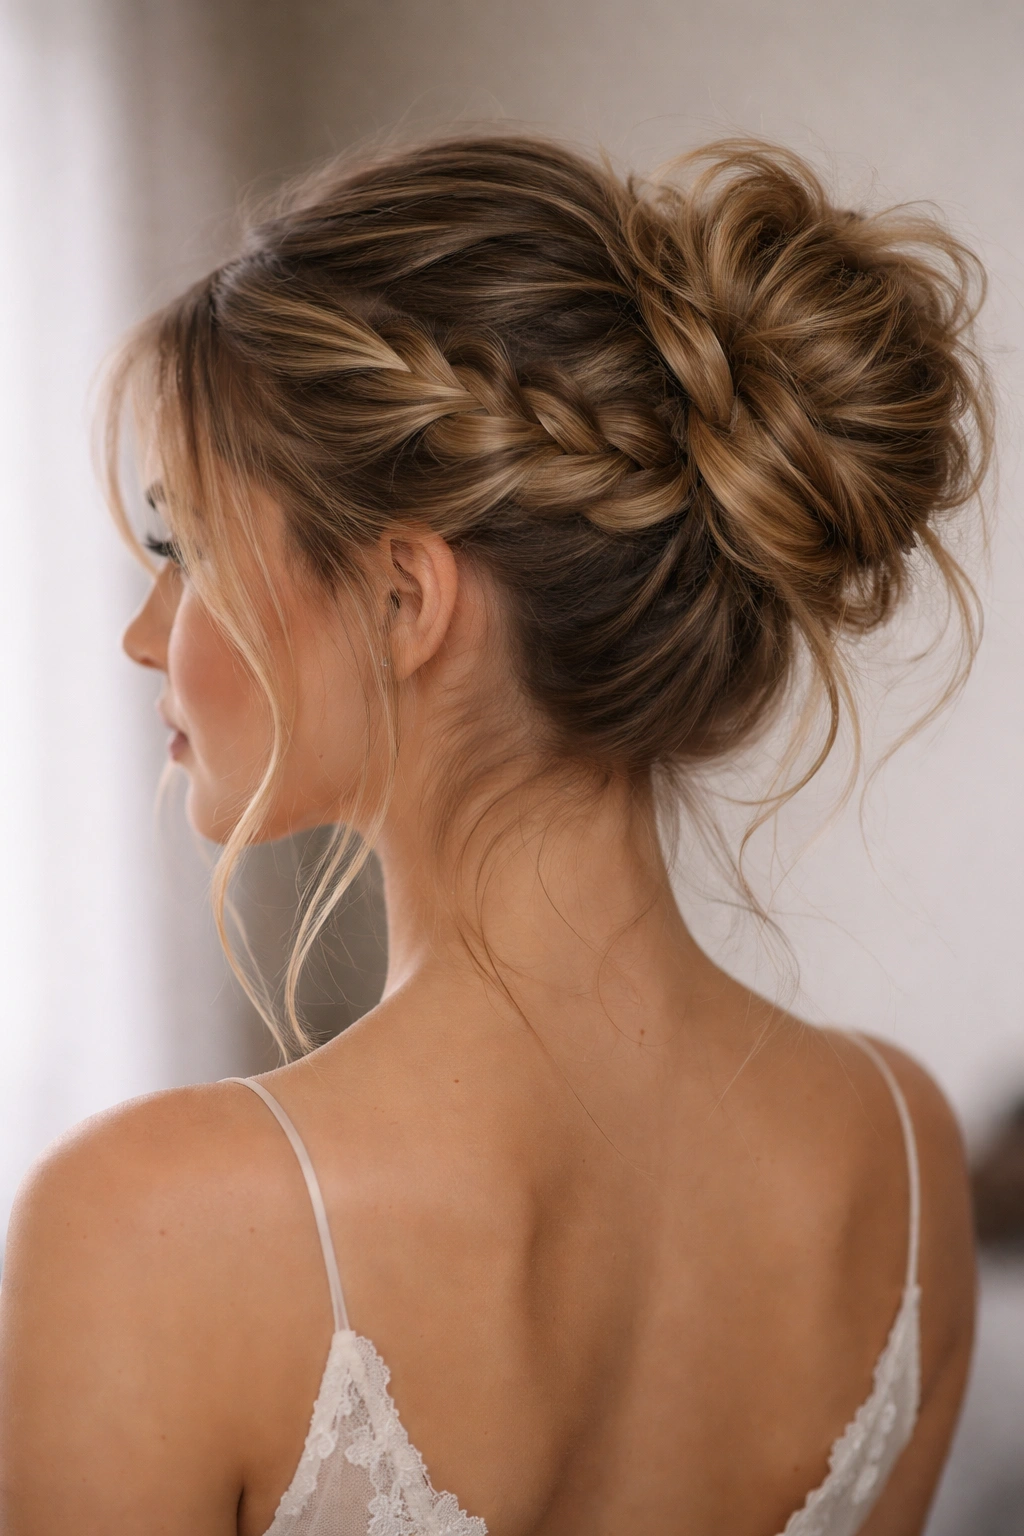
If you want to elevate your messy bun with a touch of detail and texture, incorporating a braid adds visual interest and complexity without making the overall style feel overly done. A braided messy bun works with braids integrated into the ponytail base, braids wrapped around the bun itself, or a combination of both. This version suits people with medium-to-thick hair and works beautifully with both straight and textured hair types.
Incorporating Braid Detail
- Create a Dutch braid or French braid starting at one side of your head and building toward where your bun will sit
- Let the braid angle toward the crown or toward the side where you want your bun
- Gather the hair (including the braid) into a ponytail at your chosen bun location
- As you build your bun, weave remaining hair around the braid, creating a spiral effect
- Alternatively, you can create your basic messy bun first, then wrap a separate thin braid around the base like a crown
- Secure everything with bobby pins in your hair color and finish with light hairspray
Why Braid Details Matter
Braids instantly add a layer of sophistication and intentionality to your styling. They catch light differently than simple twisted sections, creating visual depth that photographs beautifully. A braided messy bun suggests you actually put time and thought into your hair, which elevates the entire look. This style works particularly well if your dress is simple or minimalist, as the braid detail provides visual interest in the styling itself. Insider note: If you’re not confident in your braiding skills, practice the specific braid variation twice before prom night. A slightly imperfect braid in a messy bun actually looks better than a perfectly neat braid, so don’t worry about absolute precision—the messiness is the point.
6. The Twisted Wrap Messy Bun
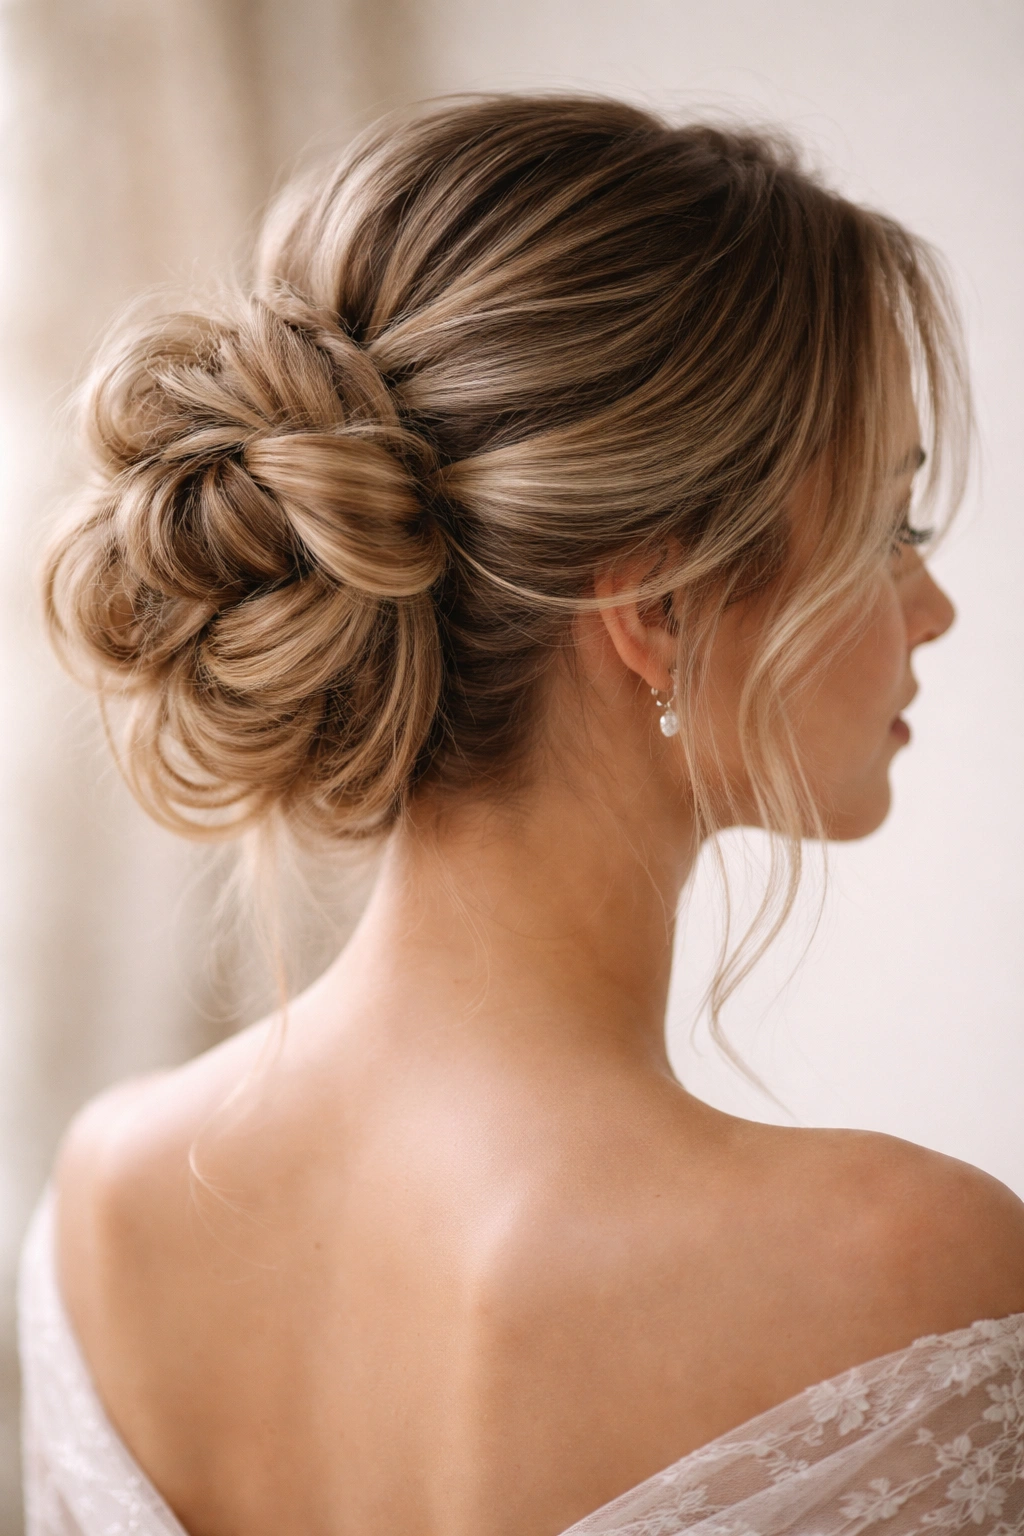
For a texture-heavy, romantic version that looks intentional without requiring intricate braiding skills, the twisted wrap messy bun delivers elegance through simple twisting. This style involves gathering your hair into sections, twisting those sections, and wrapping them around each other to create a voluminous, multi-dimensional bun. It works on most hair types and creates a noticeably different texture than the standard pulled-and-loosened version.
Creating the Twisted Effect
- Divide your hair into three or four sections
- Twist each section loosely—not too tight, as you want the twist to unwind slightly and add volume
- Wrap the first twisted section around your bun location and secure with bobby pins
- Wrap the second section around the first, and continue layering
- Leave some of the twist slightly loose and unraveled to create a lived-in texture
- Arrange the twisted sections so they spiral outward from the center rather than laying flat
- Use hairspray to lock the shape and prevent the twists from unraveling throughout the night
The Romantic Quality
Twisted wraps create an inherently romantic, soft texture that’s distinct from sharper braids or the tousled pull-and-loosen method. This version is particularly flattering for softer dress styles, vintage-inspired prom wear, or anything with lace, ruffles, or delicate details. The spiral texture catches light beautifully and creates dimension in photographs. This style also tends to hold better throughout the night than some other messy bun variations, as the twisting essentially locks the hair structure in place. Worth knowing: This style works best if you start with hair that’s been curled or waved, as the twist shows off the texture and the resulting bun feels fuller and more voluminous.
7. The Sleek-Meets-Messy Bun
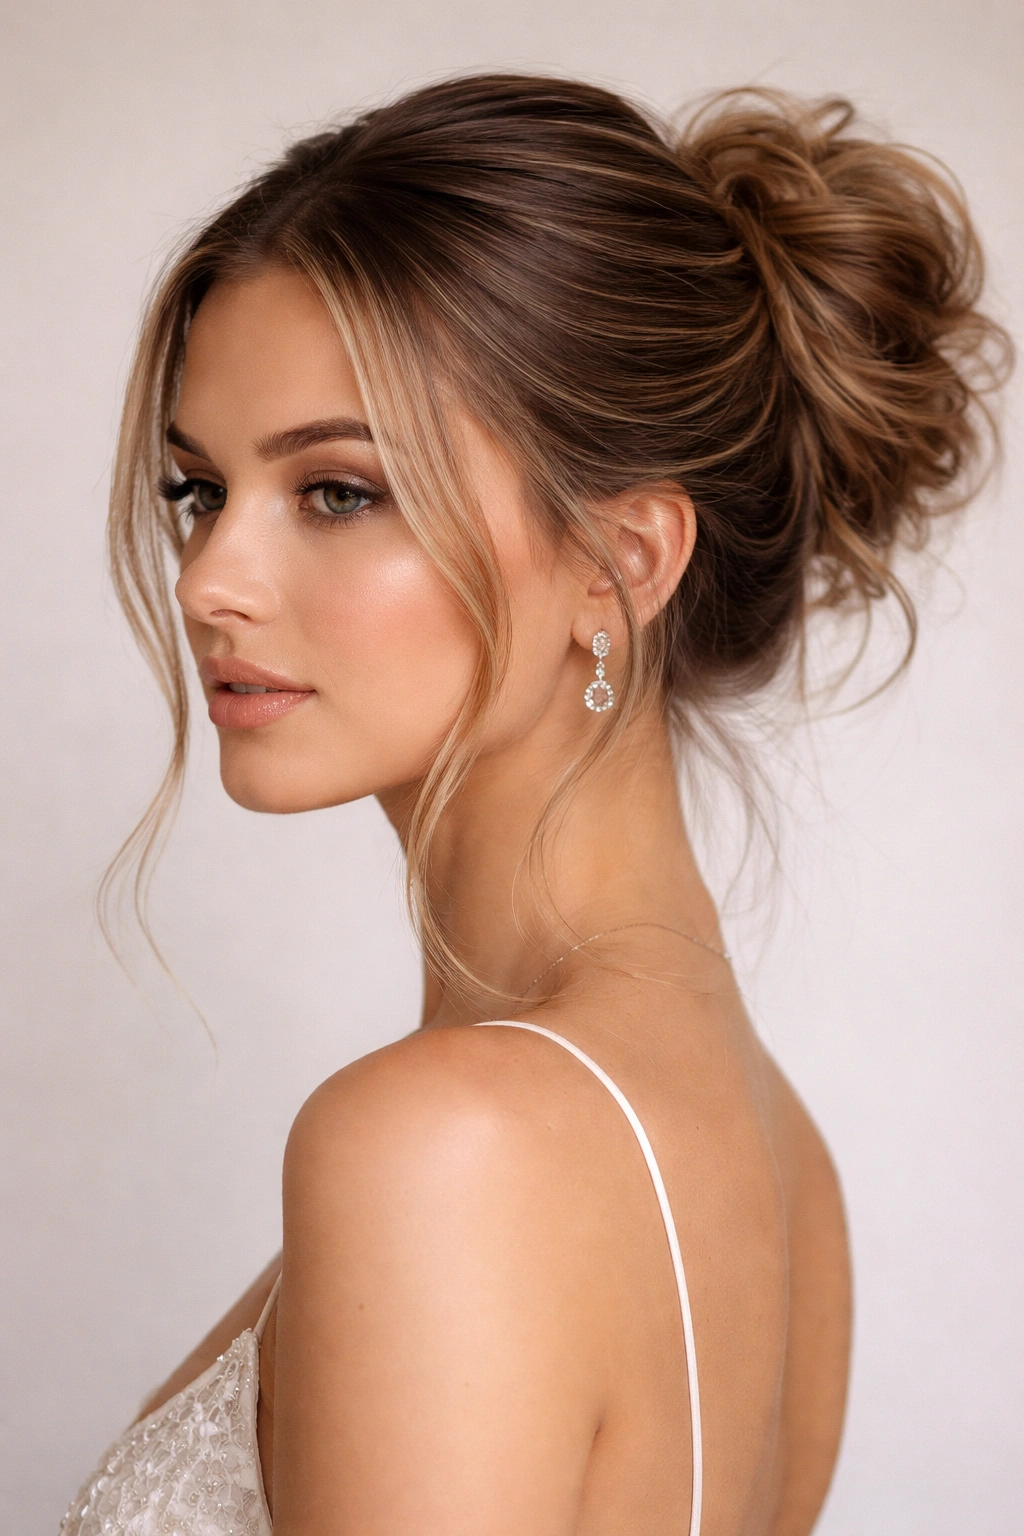
If you want to balance a polished aesthetic with the relaxed appeal of a messy bun, the sleek-meets-messy version offers the best of both worlds. This style uses sleek, smooth sections to frame your face and create a refined base, while the bun itself remains textured and deliberately undone. It’s the perfect choice if you want your styling to read as “intentionally elegant” rather than “casual” while still maintaining the effortless quality that makes messy buns so appealing.
Blending Sleek and Textured Elements
- Apply smoothing serum or gel to the front and side sections of your hair
- Create a deep, asymmetrical side part and smooth the front sections against your head using a fine-tooth comb
- Gather the back section into a ponytail positioned where the sleek sections meet the textured back section
- Create your messy bun using the full, loose texture from the back section
- The contrast between the sleek front and the messy bun creates visual interest and sophistication
- Use minimal hairspray on the sleek sections so they maintain their shine and smoothness
The Polished Edge
This hybrid approach reads as more sophisticated than a fully messy bun because the sleek elements show intention and control. The smooth sections also create lines that are flattering to your face, as they frame and define your features. This version works particularly well if you have shorter hair on top and longer hair in back, as the contrast between the two is maximized. If you’re wearing bold makeup or significant face-framing jewelry, the sleek sections of this style don’t compete for attention but instead work as a clean frame. Pro tip: Apply your smoothing product right before you create the ponytail rather than doing it in advance. Hair treated with smoothing products hours earlier can look greasy by evening.
8. The Textured Waves Messy Bun
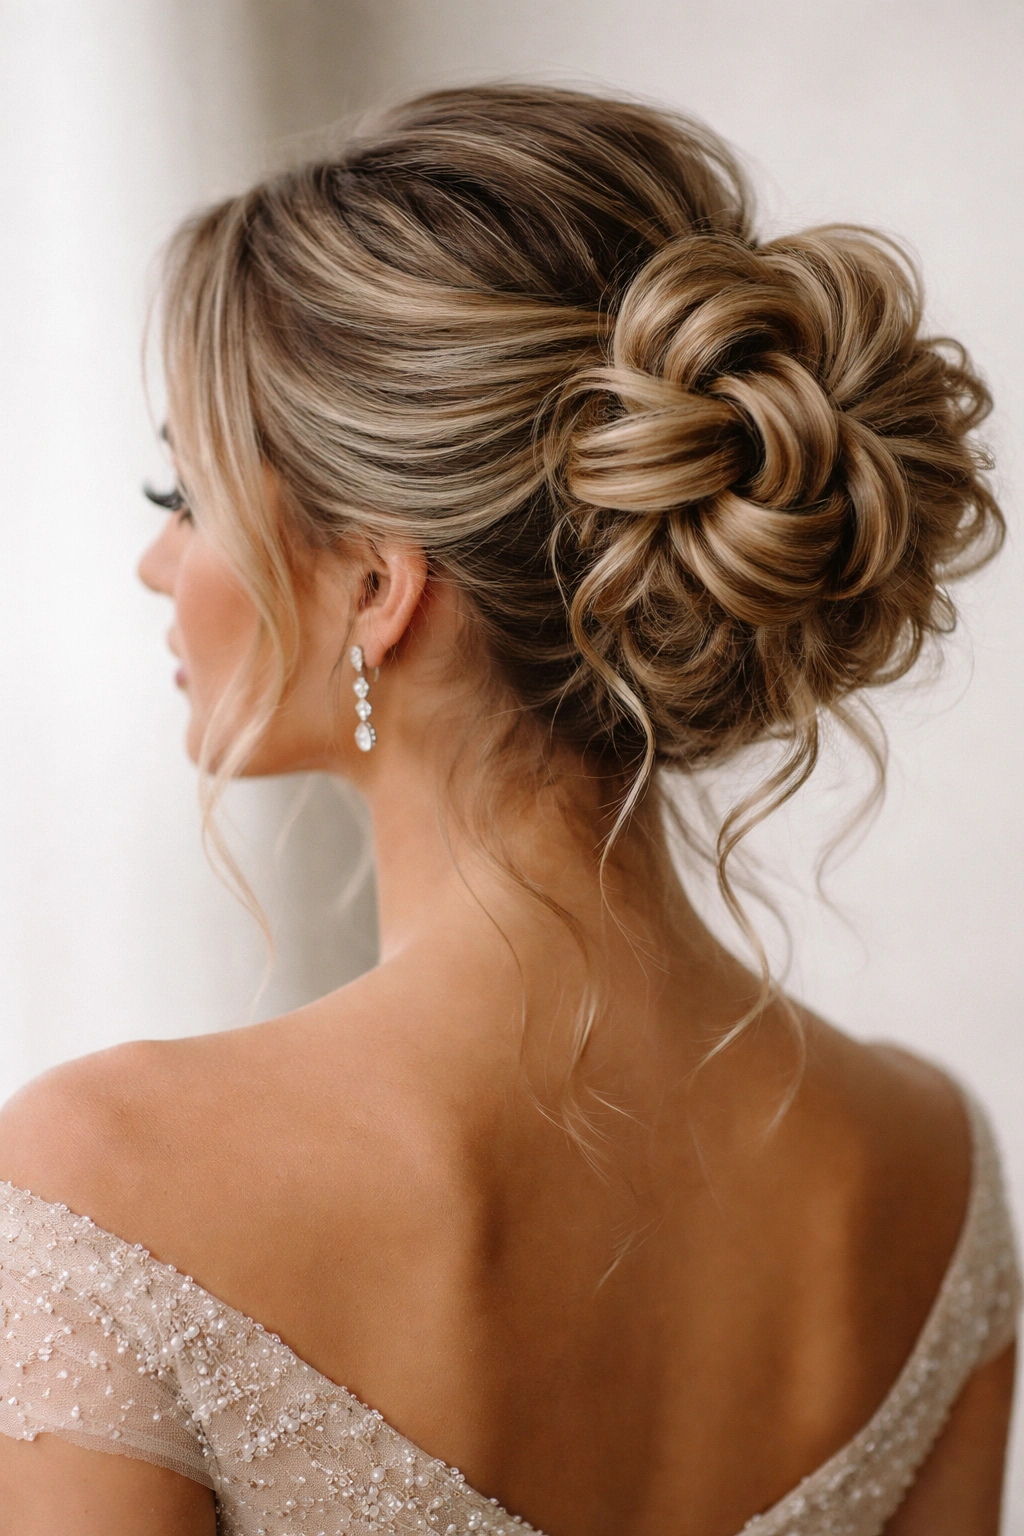
For maximum romance and texture, the textured waves messy bun celebrates voluminous curls and waves incorporated directly into the bun structure. This version is ideal if you have naturally wavy or curly hair, or if you’ve spent time creating waves with a curling iron or heat-free method. The waves and curls become part of the bun’s visual texture rather than being hidden underneath, creating a bun that’s full, romantic, and photographically stunning.
Building Waves Into Your Bun
- Create waves throughout your entire head using your preferred method—curling iron, heat-free braiding method, or air drying with products
- Gather the waved hair into a ponytail at your chosen location
- Rather than pulling the ponytail tight, gather it loosely so the waves maintain their shape
- As you create the bun, arrange the waves so they spiral outward, creating a rose-like effect
- Don’t flatten or compress the waves; instead, encourage them to maintain their shape as they form the bun
- Use bobby pins to secure the structure, but do it subtly so the pins don’t flatten the waves
- Finish with flexible hold hairspray that doesn’t crisp the texture
Why Waves Transform the Bun
Waves create inherent volume and movement that makes a messy bun look effortlessly romantic. The wave texture also catches light and creates dimension in photographs that a smooth-hair bun simply can’t replicate. This version is particularly stunning in formal photography and video because the movement and shine of the waves are captured beautifully. If you have curly or textured hair, this is the version that lets your natural or styled texture shine as a feature rather than hiding it. Insider note: Create your waves the night before prom if possible. Waves or curls are fuller and hold better when they’ve had time to cool and set, which means your bun will look fuller and more intentional throughout the night.
9. The Embellished Glam Messy Bun
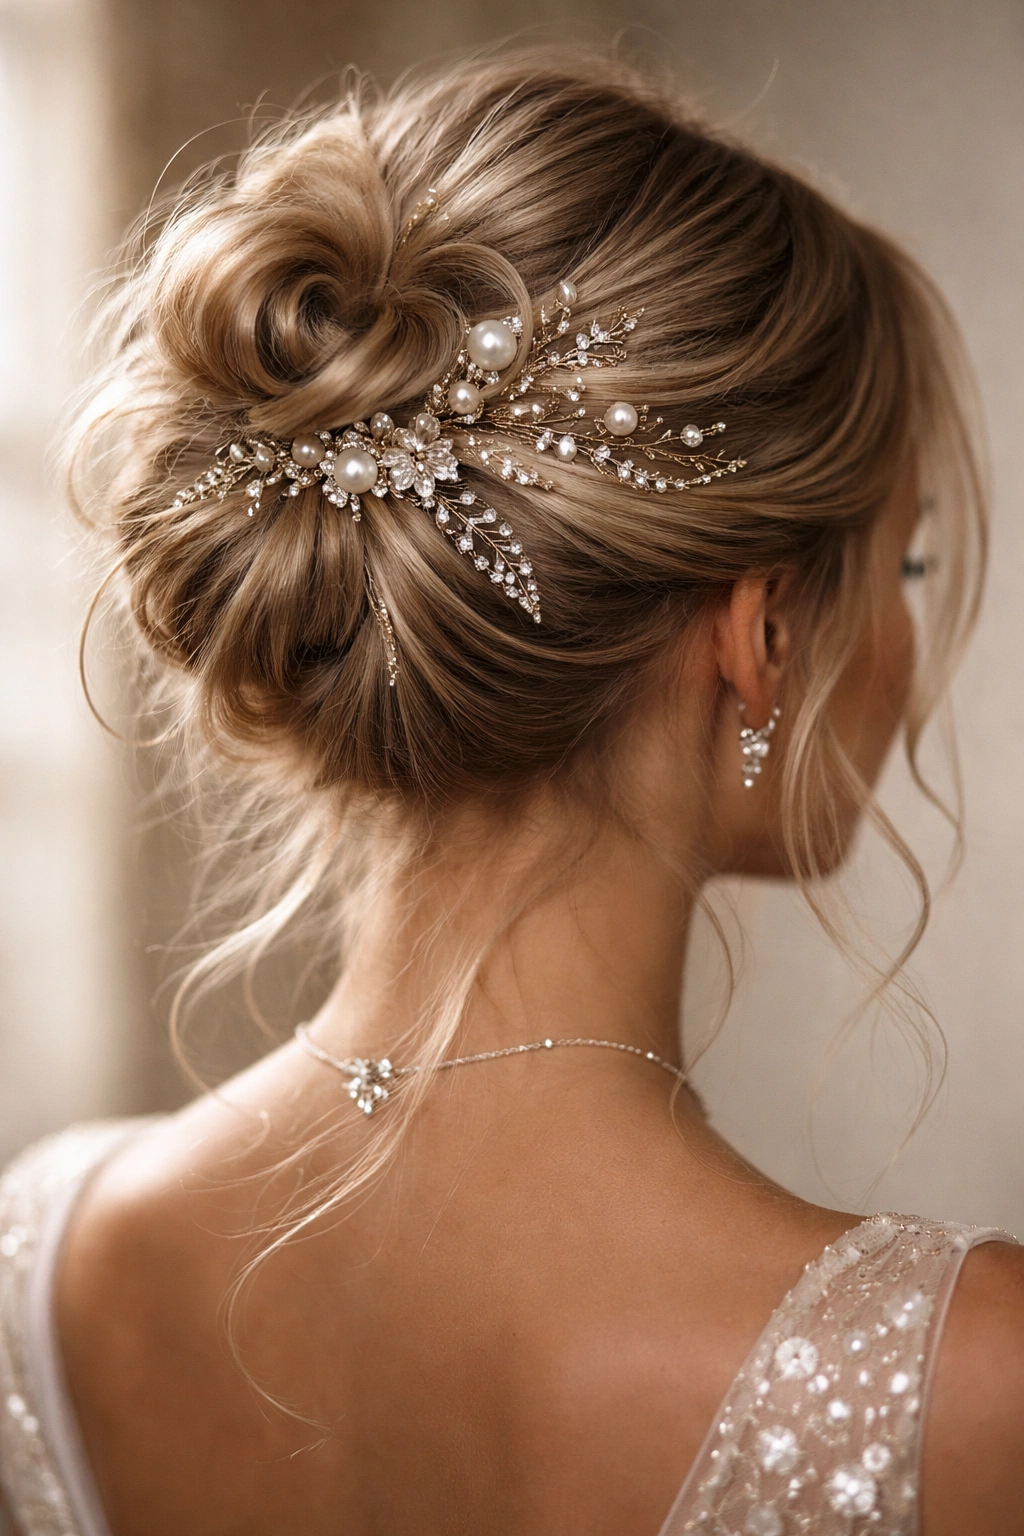
For a show-stopping version that works if you’re aiming for dramatic or glamorous aesthetics, the embellished messy bun incorporates accessories that transform the style into something genuinely special. Pearls, metallic clips, decorative hair combs, rhinestone pins, fabric flowers, or even delicate chains can be woven into or attached to your bun, creating a custom look that feels uniquely yours. The embellishments also photograph beautifully, catching light and adding visual interest.
Adding Accessories Successfully
- Create your base messy bun using any of the above techniques
- Once the bun structure is secure, begin adding accessories
- For scattered pins or clips, insert them at angles so light catches them, and space them around the bun rather than clustering them in one spot
- For larger statement pieces like decorative combs, position them where they’re visible from multiple angles
- For draped elements like chains, weave them through the bun rather than simply laying them on top
- Make sure all accessories are secure and won’t shift during dancing or movement
- If using fresh flowers, insert them right before you leave for prom and keep them as cool as possible
Creating Intentional Glamour
Embellishments instantly elevate a messy bun from casual to special-occasion appropriate. The accessories signal that you’ve put thought and intention into your overall look, which reads as respect for the occasion. This version works if your dress is simpler or minimalist, as the accessories add glamour without making the overall look feel overcrowded. It also works if your dress is elaborate, as long as the accessories complement rather than compete with the dress design. Pro tip: Choose accessories in metals that match your jewelry and other metals you’re wearing. If your dress has rose gold detailing, don’t use silver-toned clips in your hair—the mismatch will be visible in photos.
10. The Romantic Loose Tendrils Messy Bun
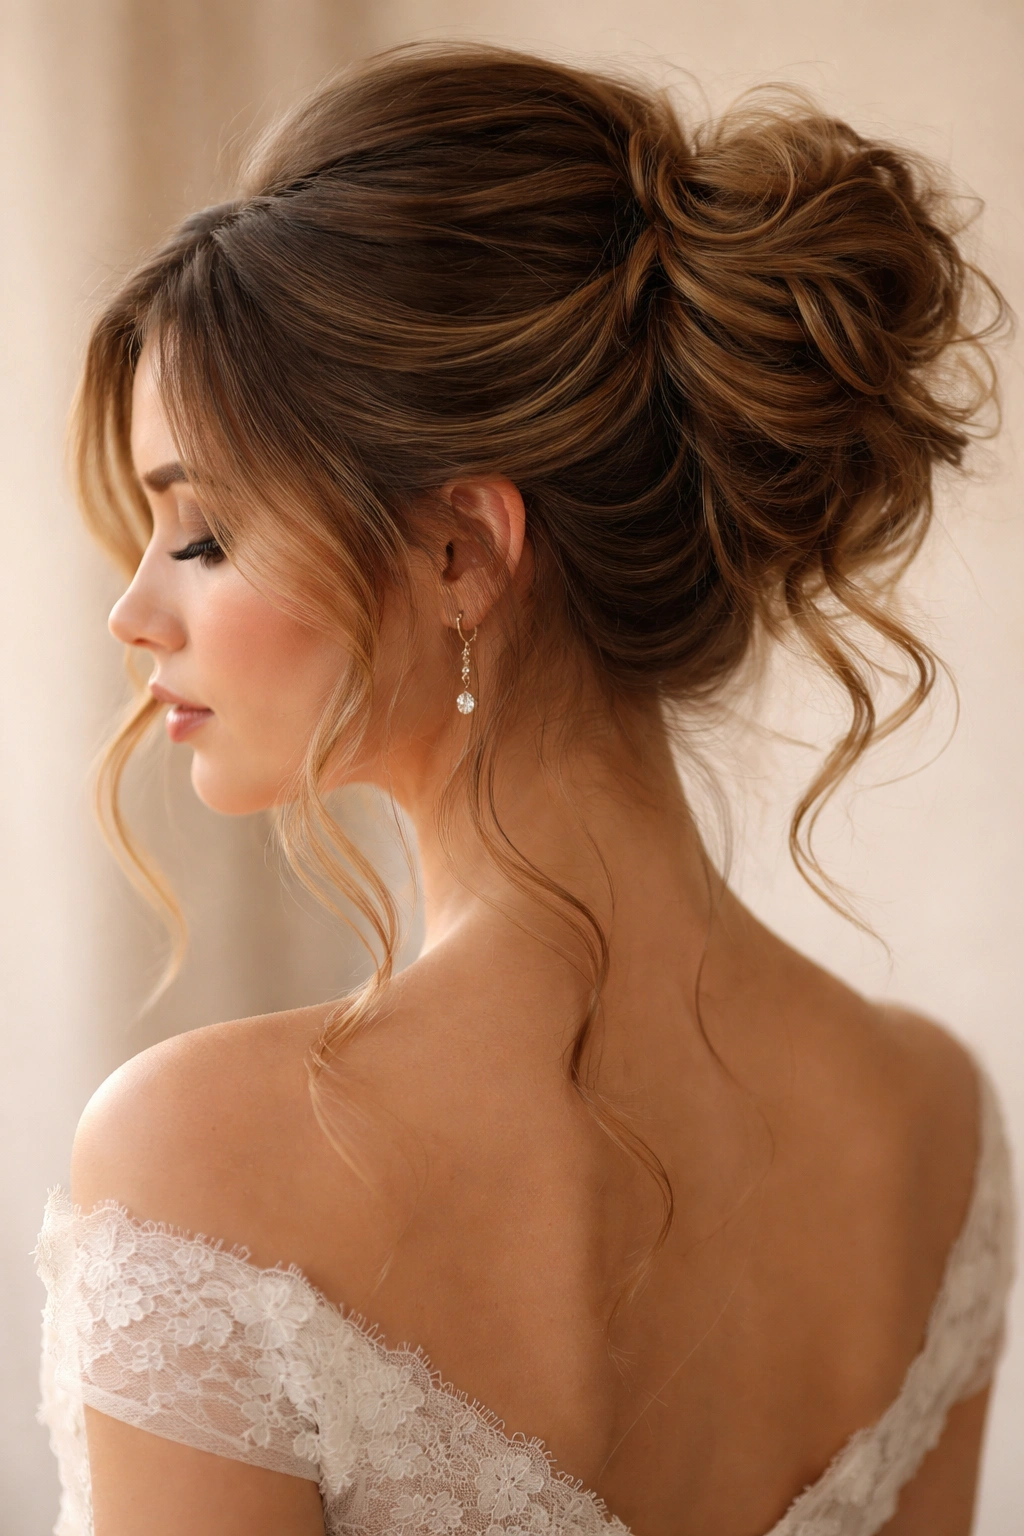
For the ultimate romantic and undone version, the loose tendrils messy bun prioritizes face-framing pieces and soft strands that fall from the bun. This style works beautifully with softer dress styles, vintage-inspired prom wear, and anyone who wants their look to feel effortlessly romantic. The intentional loose pieces are the distinguishing feature—unlike other messy buns where flyaways happen, this version strategically places tendrils where they frame and soften your face.
Placing Tendrils Intentionally
- Before gathering your hair into a ponytail, identify sections on either side of your face that you want to leave down
- Leave at least two to three inches of hair on each side of your face, creating face-framing pieces
- Take additional sections from underneath as you’re gathering the ponytail—don’t incorporate them into the main bun
- Create your messy bun with the remaining gathered section
- Curl the face-framing pieces loosely so they create soft waves that fall near your cheeks and neck
- Arrange these pieces so they’re visible but not in your face; position them so they catch light and create softness
- Use a lightweight hairspray so the tendrils maintain their curl and movement
The Romantic Impact
Loose tendrils create an effortlessly romantic quality that reads as sophisticated rather than undone. They frame your face in a flattering way, drawing attention to your features and makeup. This version is particularly stunning in close-up photography because the tendrils add softness and movement to your hair styling. The loose pieces also make the overall look feel less formal or rigid, which is appropriate if you’re going for a romantic aesthetic rather than a strictly formal one. Real talk: This version requires your loose pieces to be truly beautiful, so spend time curling them properly before the event. The curls will relax slightly throughout the night, but they’ll still read as intentional rather than accidental.
Final Thoughts
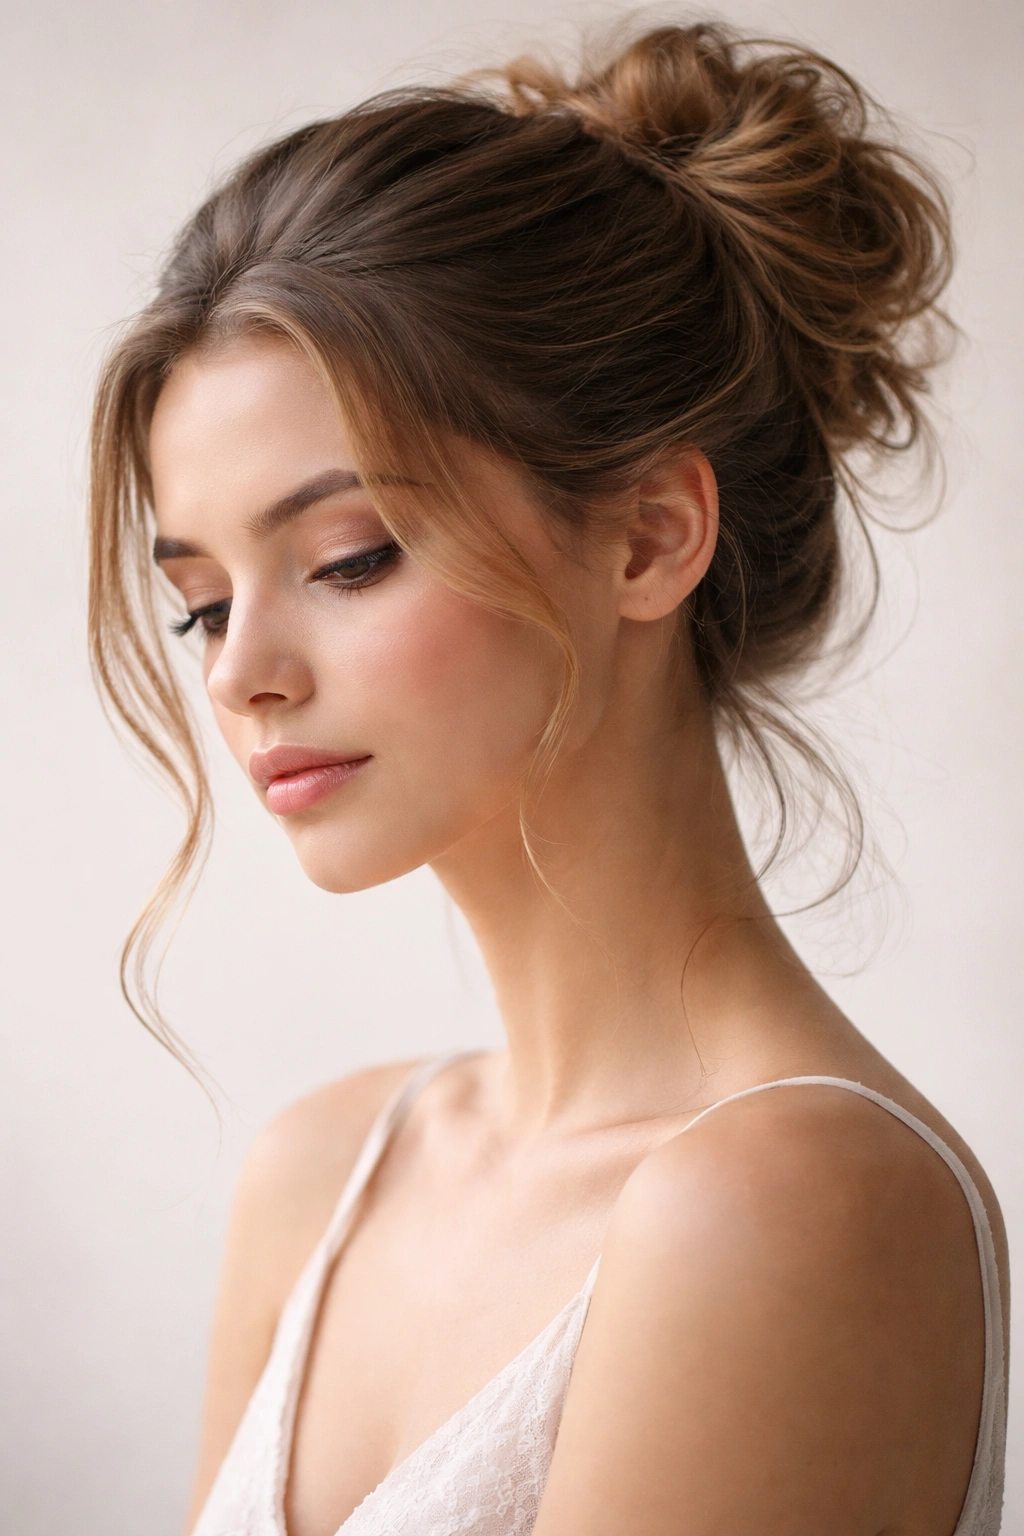
Messy buns remain one of the most reliable and beautiful updo options for prom because they work across different hair types, face shapes, and dress styles while maintaining an effortlessly elegant quality. Whether you choose a high classic version, a braided variation, or a romantic loose-tendrils style, the fundamentals remain the same: texture created beforehand, secure but not tight gathering, deliberate loosening and arranging, and thoughtful styling choices that feel intentional rather than accidental.
The key to making any messy bun work is practicing it at least twice before prom night so you understand how your specific hair behaves and what techniques work best. Even if your first attempt feels slightly imperfect, remember that slight imperfection is literally the point—these styles celebrate texture and movement rather than rigid perfection. Keep bobby pins and lightweight hairspray in your prom bag so you can make any minor adjustments throughout the night, but honestly, a well-constructed messy bun will hold through hours of dancing and celebrating.
Most importantly, choose the version that feels most authentically you. If you naturally gravitate toward romantic, go with waves and tendrils. If you’re drawn to bold statements, try the double bun. If you want to feel polished, the sleek-meets-messy option gives you that controlled elegance. Your hair styling should feel like a natural extension of your personal style and your prom vision, not an uncomfortable departure from how you normally present yourself. The best messy bun for you is the one that makes you feel confident, beautiful, and ready to have an amazing night.
