



Messy buns have become the ultimate casual-elegant hairstyle — the perfect solution when you want to look put-together without actually trying. Whether you’re heading to work, running errands, hitting the gym, or just having a lazy Sunday at home, a great messy bun works. The beauty of this style is that it’s not supposed to be perfect. The more undone it looks, the more chic it becomes. But “messy” doesn’t mean shapeless or boring. There’s a real art to creating a messy bun that actually flatters your face, holds all day, and makes you feel genuinely confident. The styles in this guide range from romantic and textured to sleek and polished, tousled and effortless to deliberately structured. You’ll find variations that work for thick hair, fine hair, shorter lengths, and longer locks. Most importantly, each style can be achieved in under five minutes once you know the technique, making them genuinely wearable for everyday life.
Why Messy Buns Are the Perfect Daily Hairstyle
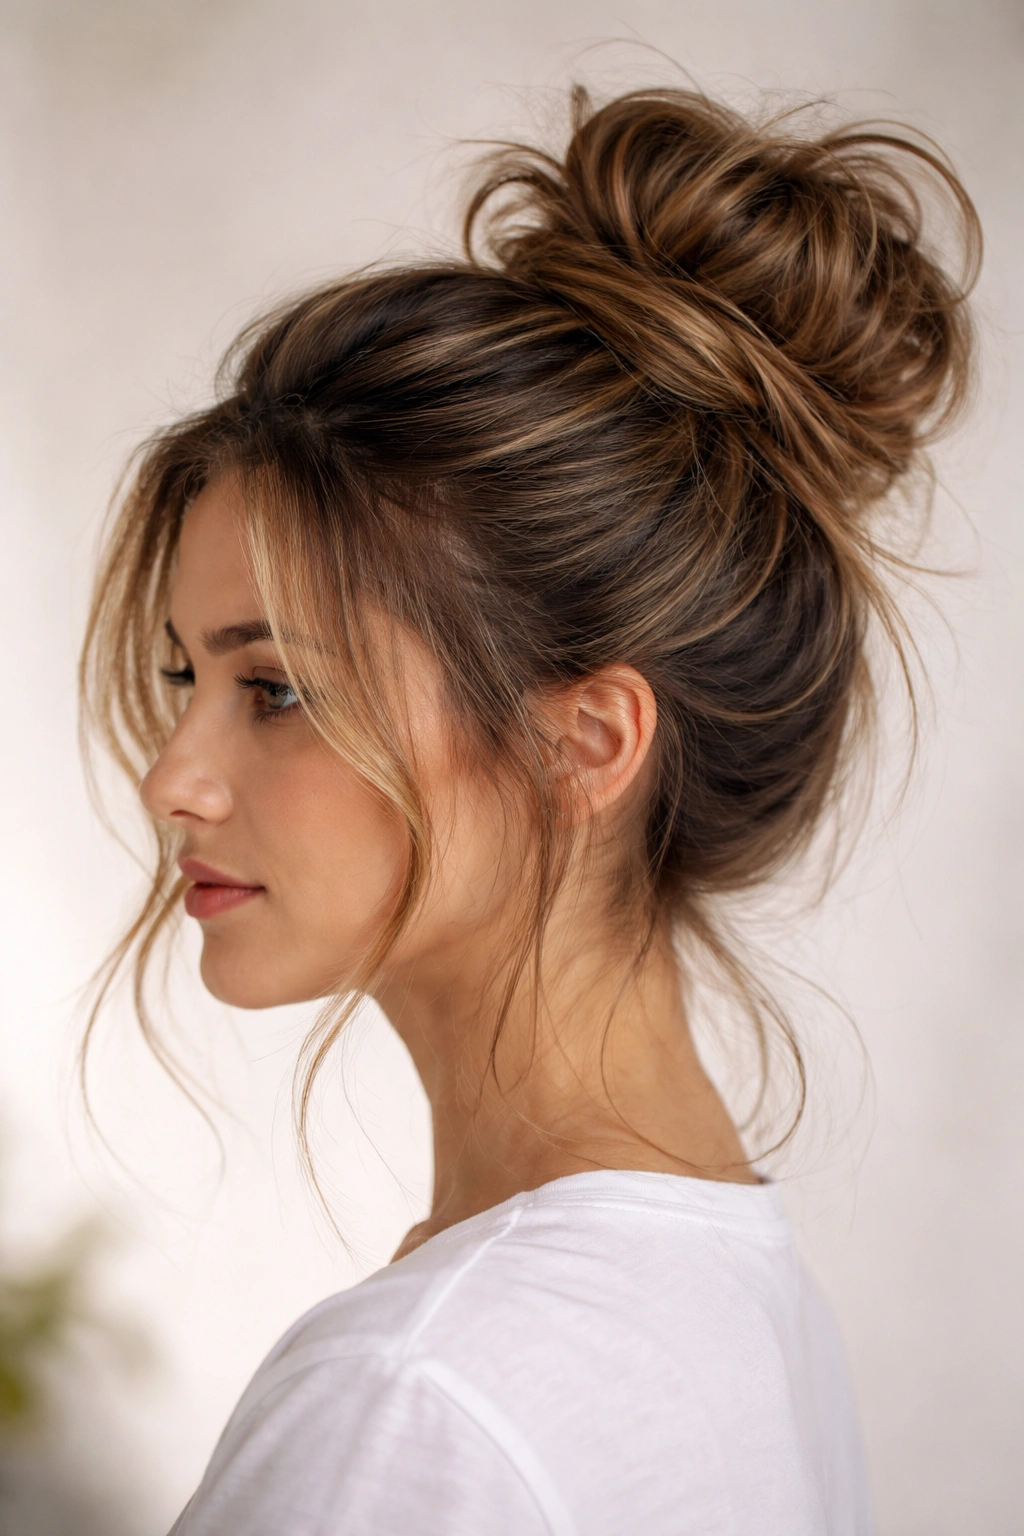
A messy bun is the bridge between “I just woke up” and “I have my life together.” It keeps hair off your face and neck while maintaining enough softness that you don’t look like you’re heading into a corporate boardroom. The style is universally flattering because the texture and loose pieces frame the face in a way that feels romantic rather than austere. You can dress it up with a fancy outfit or down with loungewear, and it works in both contexts. The greatest advantage is the speed — once you master the basic technique, you can create several variations in the time it takes to brush your teeth. Messy buns also protect your hair from damage. You’re not using heat styling, and you’re keeping ends tucked away and protected throughout the day. Unlike tight, sleek buns that can cause breakage and stress on the hair root, a properly done messy bun distributes tension evenly and feels comfortable enough to wear daily without damaging your scalp.
The Essential Technique Every Style Builds On
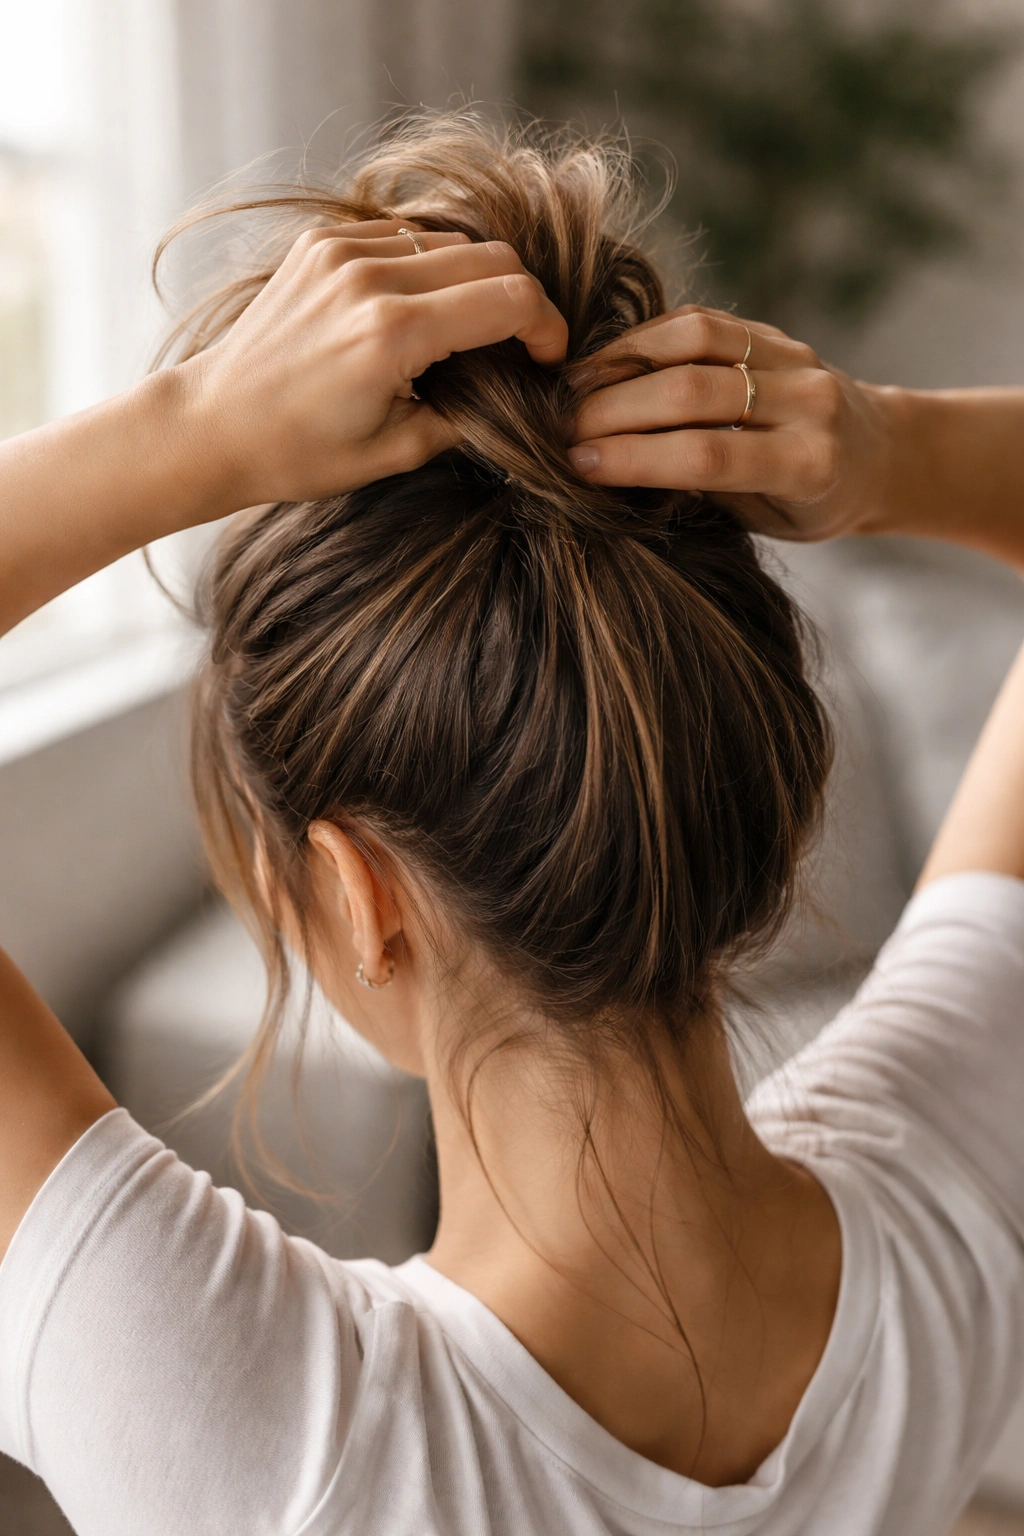
Before diving into the specific styles, understand the foundation that makes all of them work. Start with hair that’s been slightly mussed — either air-dried, with a bit of texture spray, or after a second-day hair wash. Completely fresh, freshly-shampooed hair is actually harder to work with because it’s too slippery and smooth. Gather your hair into a high or mid-height ponytail at the crown or just behind it, depending on which style you’re creating. The placement of this initial ponytail is crucial — it determines whether your finished bun sits elegantly at the top of your head or rests lower and more casually. Use a elastic that’s strong enough to hold all day but forgiving enough that you can gently loosen it later without damaging hair. Many people prefer fabric-covered elastics or silk scrunchies because they grip without creating a tight, uncomfortable sensation. Once your ponytail is in place, the fun begins. You’ll twist, wrap, or tease your ponytail into a bun shape, securing it with bobby pins as you go. The looser and more textured you make this process, the more inherently “messy” and therefore sophisticated the final look becomes.
1. The Twisted Wrap Messy Bun
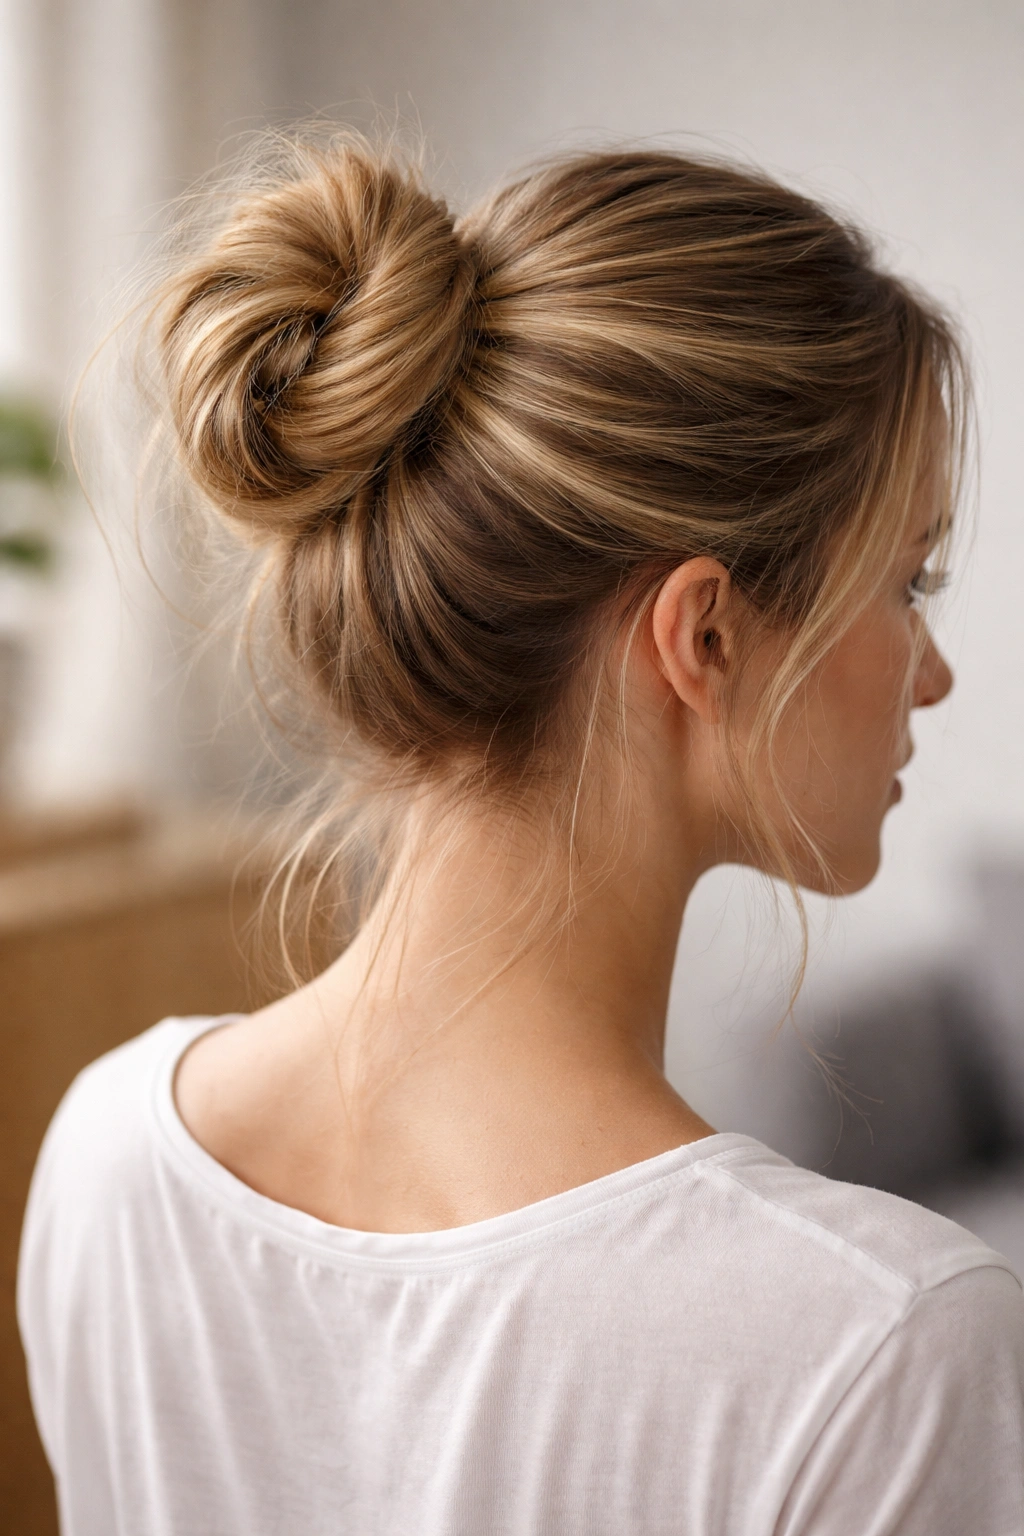
This is the fastest, most foolproof messy bun style, and the one you’ll probably reach for most often when you’re genuinely in a hurry. It works on all hair lengths and textures, and it looks intentional without requiring any special technique. Start with a high ponytail, then twist the entire length of the ponytail fairly tightly. Wrap that twisted ponytail around the base to form a bun, tucking the ends underneath and securing with bobby pins as you go. The twisting creates natural texture and dimension, so even if everything sits perfectly neat, it still reads as intentionally messy rather than slicked-back.
How to Style It for Maximum Impact
The key to elevating this style beyond basic is how you finish it. Once you’ve wrapped the twisted ponytail into a bun, gently pull and tease a few small sections to loosen the twist slightly. This creates the “undone” quality that separates a chic messy bun from a basic one. Don’t be afraid to pull some face-framing pieces down before you finish — they add softness and prevent the style from looking too severe.
Pro Styling Notes
- Works best on second or third-day hair when there’s natural texture
- Takes roughly two minutes once you’re practiced
- Holds all day without significant pins if your ponytail base is secure
- Can be worn high for a perky, youthful vibe or lower for a more elegant, relaxed feel
- Pairs beautifully with small gold hoops or delicate earrings since the neck is completely exposed
2. The Textured Tease Messy Bun
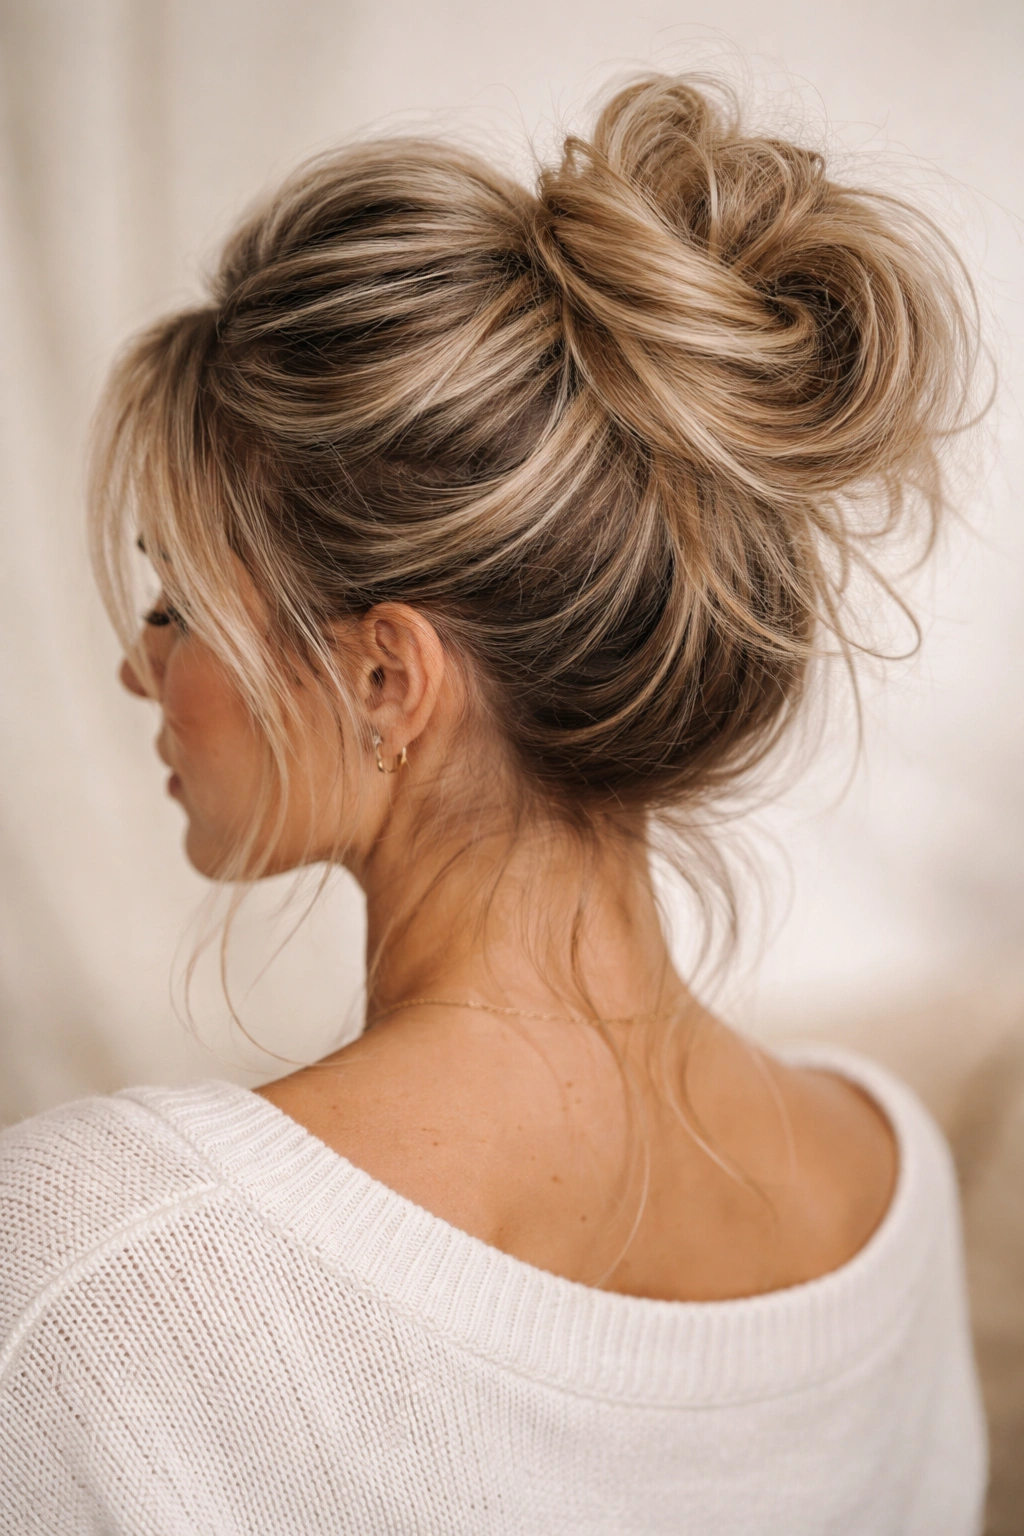
If you want a visibly fuller, more voluminous bun, this is your technique. This style requires teasing, which creates the sought-after texture that makes a bun look intentionally messy rather than accidentally unkempt. The extra step of teasing takes maybe one minute longer than the twisted wrap, but the result is dramatically more interesting visually. Start with a high ponytail, then use a fine-tooth comb or teasing brush to backcomb sections of the ponytail, starting at the ends and working toward the base. This creates immediate volume and texture. Once you’ve teased most of the ponytail, twist it loosely (you don’t need to twist tightly like the previous style) and wrap it around the base. The teasing gives you texture even when the wrap is loose.
Creating the Perfect Teased Texture
The secret to making a teased bun look good rather than ratty is using the right teasing tool and technique. A fine-tooth comb works better than a paddle brush for precise, controlled teasing. Hold a section of hair taut with one hand, then gently backcomb with the other, working only the bottom third to half of that section. You want texture, not matting. Once you’ve teased, smooth the top layer of each section with your comb to seal in the texture underneath.
Styling Tips for This Look
- Teasing powder or texture spray makes the backcombing process significantly faster and easier
- This style photographs beautifully because the texture catches light and creates dimension
- It’s particularly flattering if you have finer hair, since teasing creates the illusion of fullness
- Pair with a delicate hair pin or small claw clip tucked into the bun for extra polish
- Lasts longer throughout the day than smoother messy bun styles because the texture holds
3. The Low Romantic Messy Bun
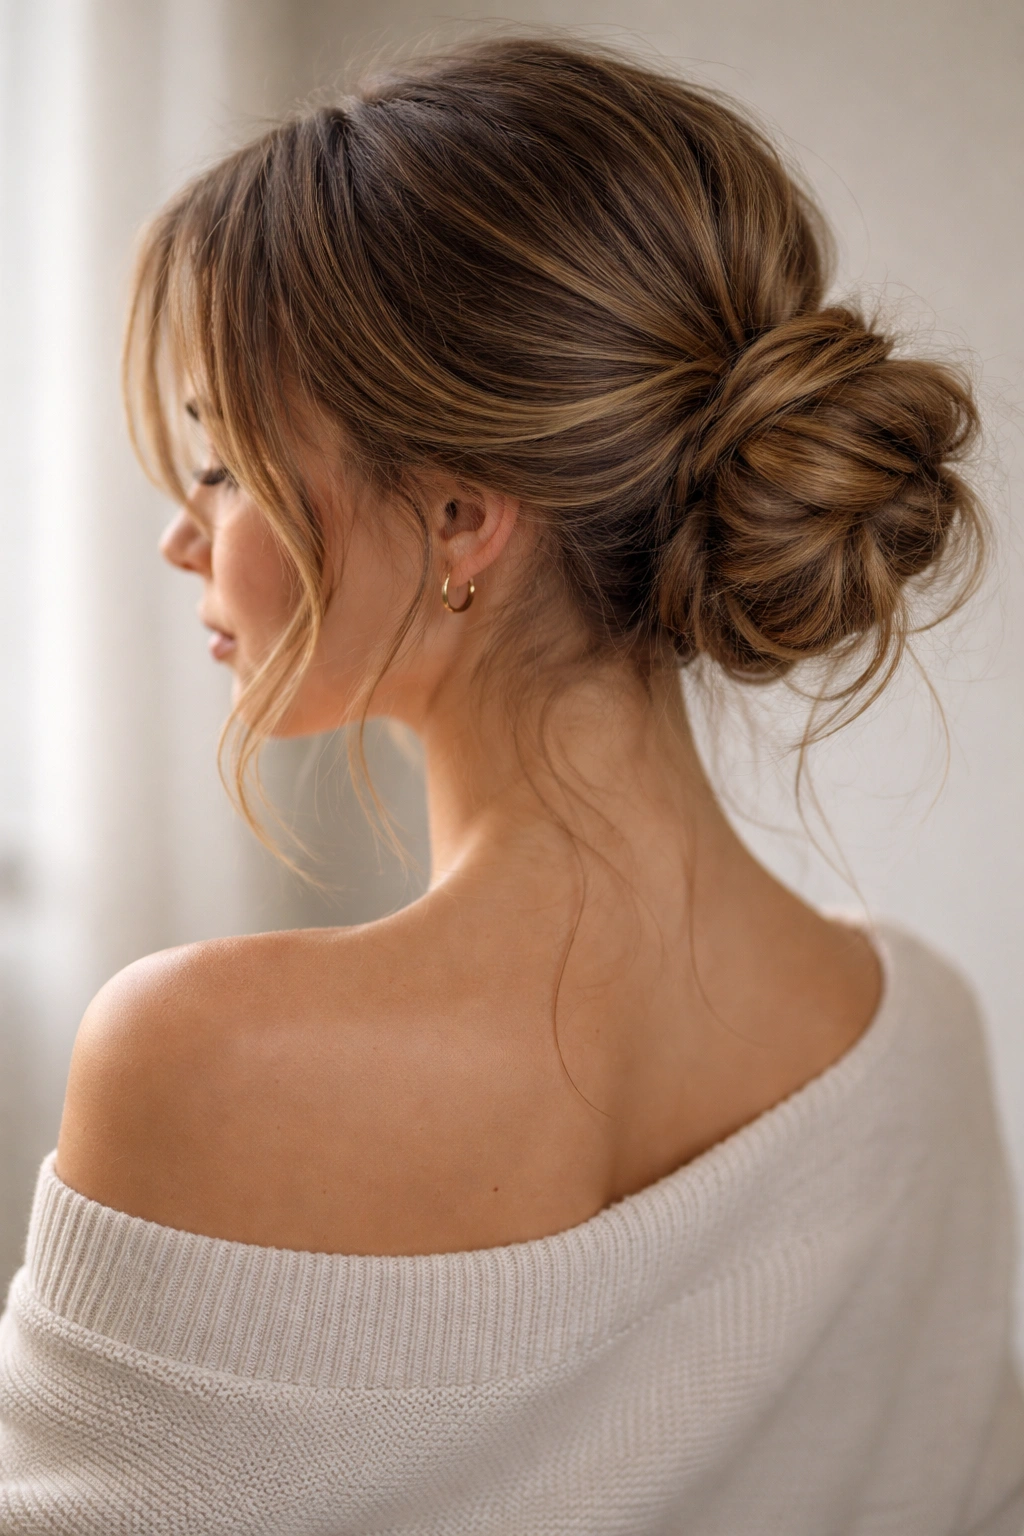
This style sits at the nape of the neck rather than at the crown, creating a softer, more romantic silhouette. It’s the messy bun equivalent of an updo you’d wear to a wedding, but executed in a way that’s still completely casual and wearable daily. The lower placement immediately feels more elegant and mature. Start with a lower ponytail positioned just at the nape of your neck — place it roughly where a shirt collar would sit. Keep this ponytail loose and slightly off-center for maximum romantic effect. Twist and wrap loosely, letting the ends escape and frame your face. This style begs for a few soft tendrils around the face, so deliberately pull a piece or two down beside each ear.
Why This Style Feels So Elegant
The low placement changes the entire energy of the hairstyle. It elongates the neck, creates a more refined silhouette, and photographs beautifully from behind. It also feels significantly dressier than a high bun, so you can pair it with slightly nicer outfits while still maintaining the casual, undone aesthetic of a messy bun.
How to Keep It Romantic Throughout the Day
- Use bobby pins that match your hair color so they’re invisible
- Leave more pieces loose and undone than you think you should — the imperfection is the point
- A delicate gold chain necklace looks stunning with this style since your neck and décolletage are fully visible
- This style pairs beautifully with a linen button-up or a light sweater
- Don’t tease this style — keep it smooth and soft to maintain the romantic vibe
4. The Braided Messy Bun
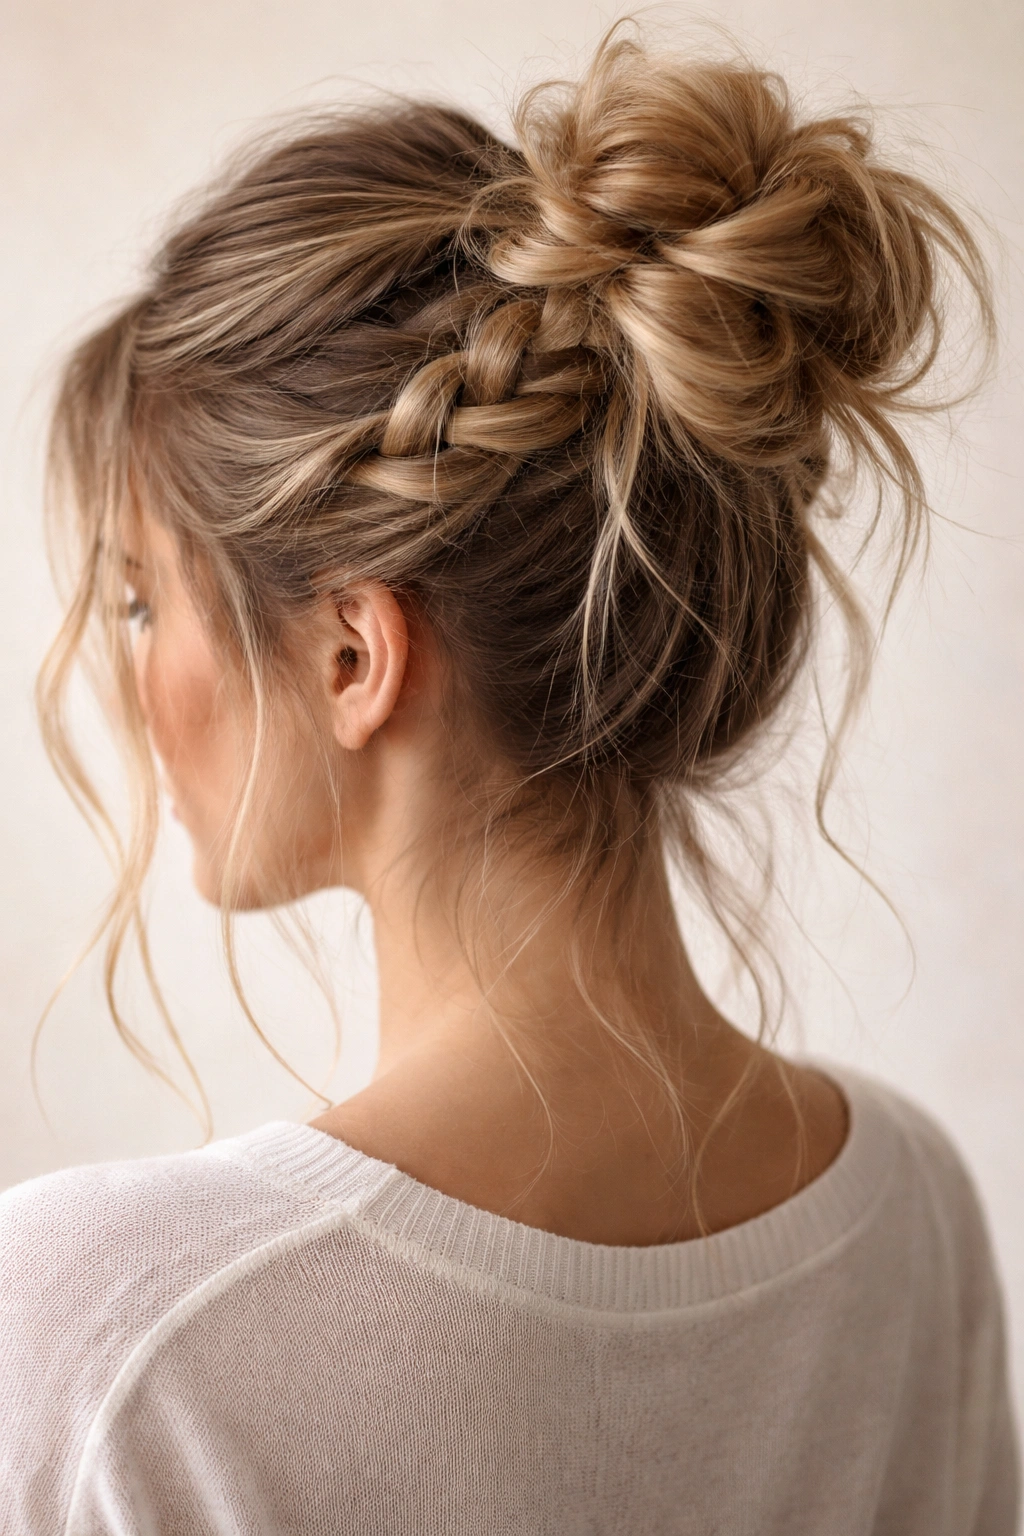
If you can braid, you can create this elevated version of a basic messy bun. The braid adds visual interest and texture while requiring minimal additional time or skill. Start with a high ponytail, then divide that ponytail into three sections and create a loose, slightly undone braid. Don’t braid tightly — you want the braid to look relaxed and naturally textured. Once you’ve braided the length of the ponytail, wrap that braid around the base to form the bun, securing with bobby pins. Some sections of the braid will naturally escape as you wrap, which is perfect. Gently pull a few more pieces loose from the braid to enhance the texture.
Elevating Your Braid for Maximum Visual Impact
The key to making a braided bun look chic rather than try-hard is keeping everything loose and relaxed. Tight, perfect braids look too controlled and formal. Instead, aim for a braid that looks like you casually braided your hair while thinking about something else. Slightly uneven sections? Perfect. Loose pieces? Exactly what you want. This is one of the few hairstyles where imperfection is literally the goal.
Pro Tips for Braided Messy Buns
- Works beautifully with balayage or highlights because the braid shows off dimension
- This style looks particularly good paired with a flowy, bohemian outfit
- The braid creates natural hold, so your bun will last longer throughout the day
- You can create multiple braids within one ponytail for even more texture and visual interest
- Pairs gorgeously with a flower crown, delicate hair pins, or a silk hair ribbon woven through the braid
5. The Side Messy Bun
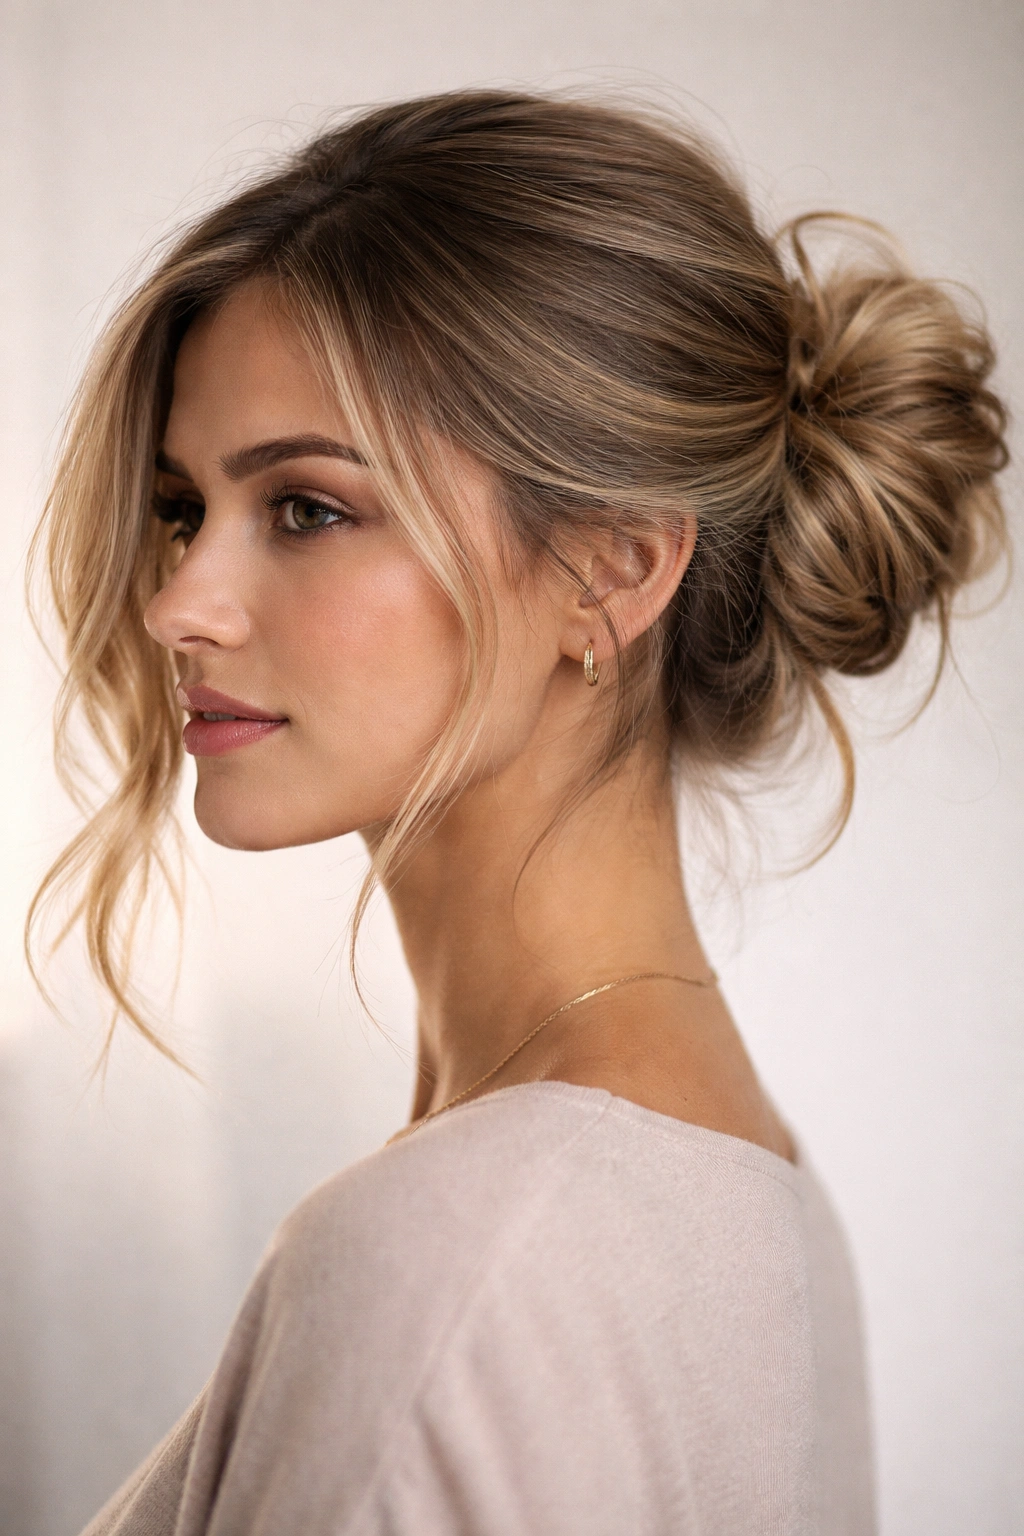
Shifting the bun to one side creates an asymmetrical, modern silhouette that’s distinctly different from a traditional centered bun. This style works particularly well if you’re trying to flatter your face from a particular angle or if you want something that feels more fashion-forward. Instead of creating a ponytail at the crown, gather hair to one side of the head, creating a ponytail that sits behind one ear. Twist and wrap this ponytail to form the bun, leaving the side of your head nearest to the bun relatively close and smooth, while allowing longer tendrils to fall on the opposite side. This asymmetry is what makes the style work.
Creating Flattering Asymmetry
The side placement of your bun should complement your face shape. If you have a rounder face, placing the bun on one side draws attention to the side of your face and creates a slimming effect. If you have an angular face, the asymmetry adds softness. You get to choose which side based on what flatters you most — there’s no rule that it has to be one side or the other.
Styling Details That Matter
- Leave the side opposite the bun completely down and soft, with gentle waves or curls
- This style looks particularly good with a long, lean profile, so it’s perfect to photograph from the side
- Pair with a sleek or leather jacket to enhance the modern, fashion-forward vibe
- Great for asymmetrical earrings or a dramatic side-part that emphasizes the off-center placement
- Works beautifully whether your bun is high, mid-level, or low
6. The Double Bun Messy Style
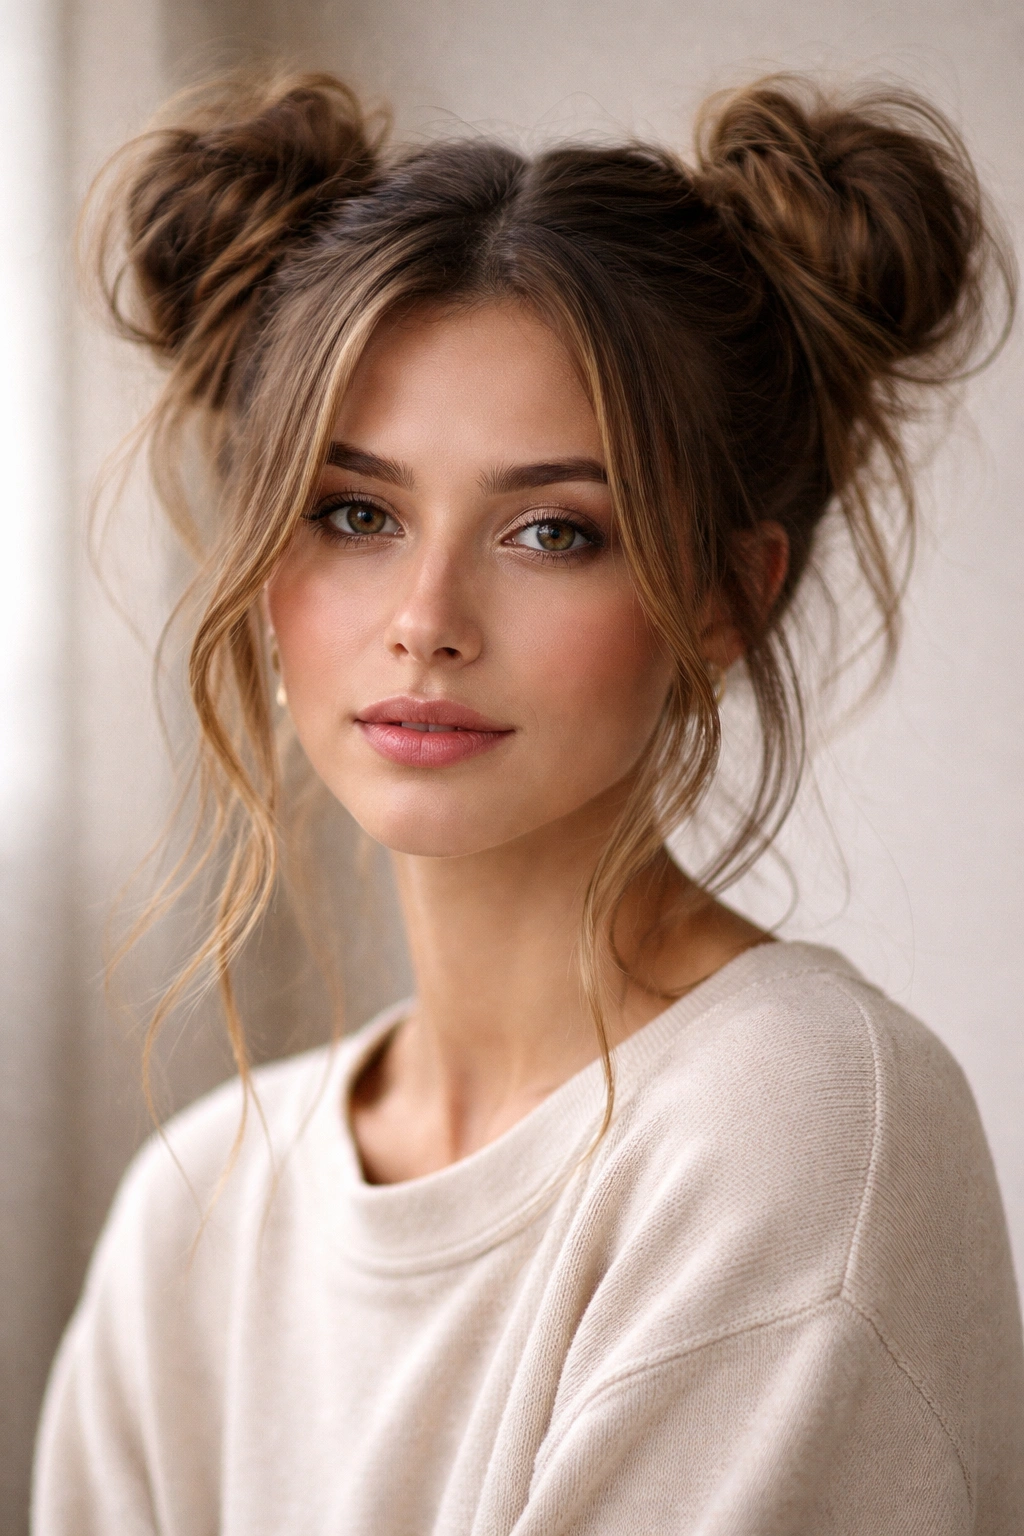
Double buns are having a major moment because they feel playful and youthful without looking childish when executed properly. The trick is making them look intentionally messy and slightly undone rather than cutesy. Create two ponytails — one on each side of the head, positioned roughly at ear level or slightly higher. Rather than creating tight, perfect buns, keep each one loose and textured. Tease each ponytail gently, then wrap loosely, leaving pieces escaping naturally. The key to making this style wearable for daily life rather than just a festival look is keeping each bun fairly loose and soft, with plenty of tendrils around the face.
Balancing Playfulness With Sophistication
Double buns can veer into costume territory if they’re too tight or too perfectly round. Avoid that by intentionally loosening every section. Pull pieces from each bun, tease gently, and let hair escape around the face. This creates a style that reads as intentionally messy and cool rather than trying too hard to be cute.
Making Double Buns Work for Daily Wear
- Position the buns slightly lower than you think — high double buns read more playful, while mid-level buns feel more sophisticated
- Keep hair around the face soft and wavy, not slicked back
- This style looks amazing with a graphic tee, overalls, or a vintage-inspired dress
- Works particularly well if you have thick, textured hair
- Pairs beautifully with minimal makeup and simple gold jewelry
7. The Piece-Pull Messy Bun
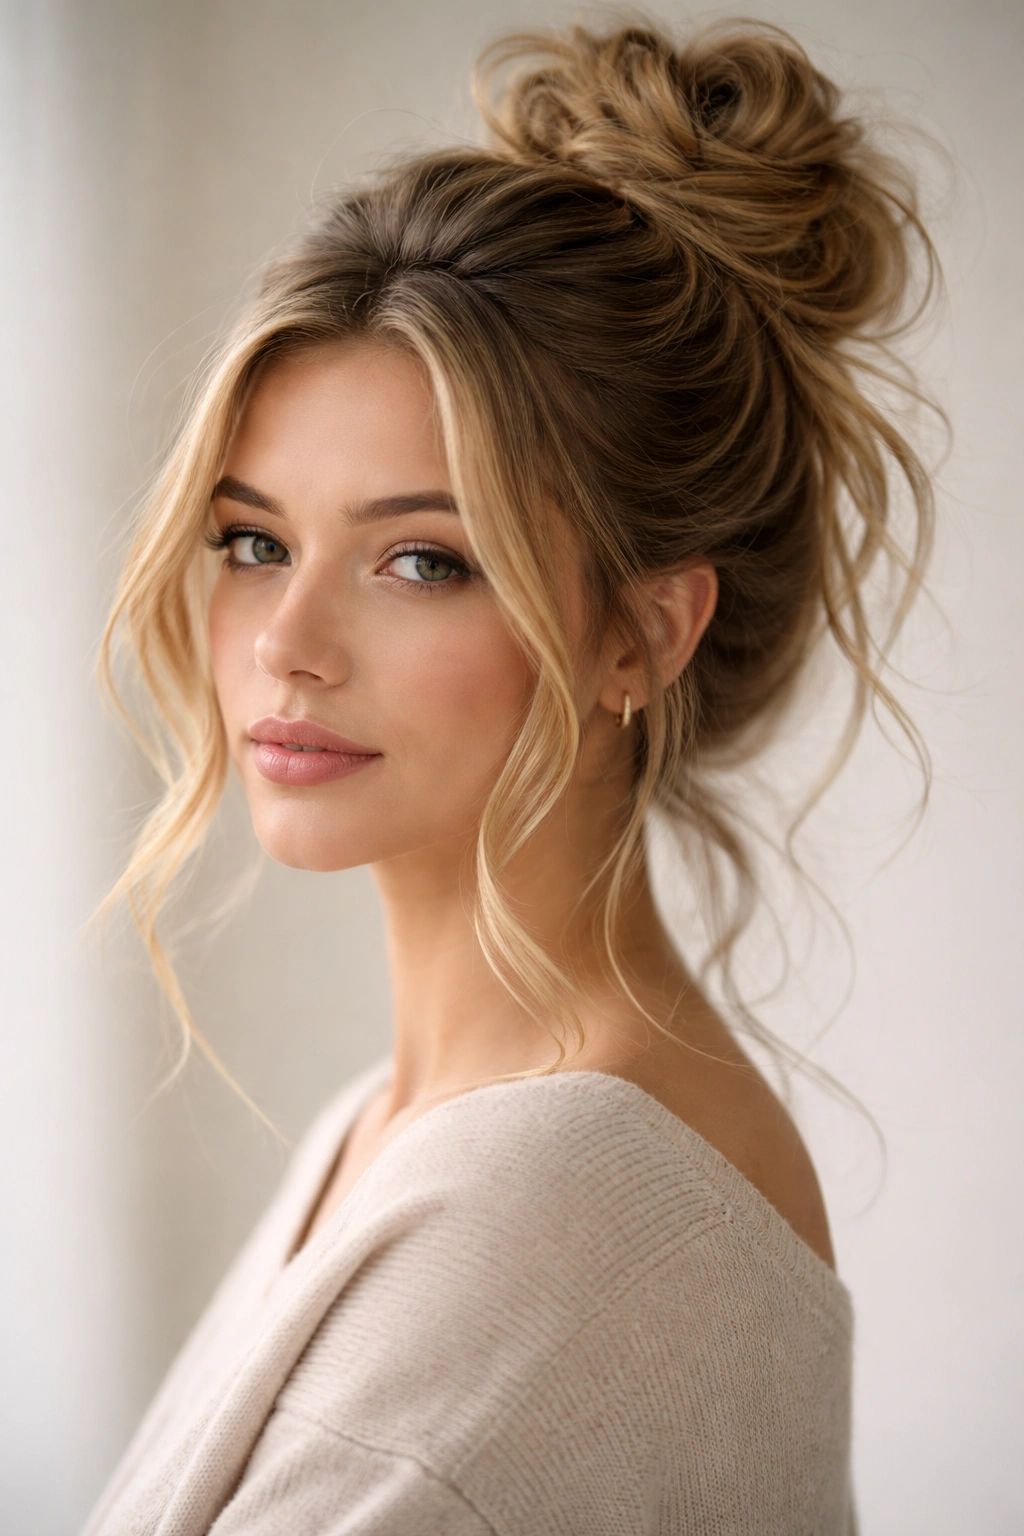
This technique involves strategically pulling small pieces of hair out of your bun to create dimension and movement that makes the style look intentionally crafted rather than accidentally undone. Start with a standard high or mid-height ponytail. Wrap it into a bun and secure with pins, keeping it relatively neat at this stage. Then, systematically pull small sections from the top, sides, and back of the bun, gently stretching each piece slightly as you release it. The pulled pieces should be noticeably longer than the bun itself, creating a halo of soft hair around the structured center. This technique works on any hair texture and length, and it’s where a mediocre messy bun becomes genuinely beautiful.
The Art of Pulling Pieces the Right Way
Pull pieces from multiple angles — from the crown, from the sides, from the nape area. Don’t pull them straight out; instead, pull them at slightly different angles to create irregular, romantic framing. Some pieces should be longer and flow down the neck, while others should be shorter and just barely escape the bun. This variation is what creates the sophisticated, intentional look.
Key Techniques for This Style
- Use bobby pins to hold pulled pieces in place if they keep slipping back into the bun
- This technique works beautifully with texture spray applied beforehand — it helps pieces stay where you place them
- The pulled pieces can be left straight for a modern look or gently curled for a romantic vibe
- This is the most time-consuming messy bun style, taking four to five minutes rather than two
- The extra effort pays off in longevity — pulled pieces create a secure style that lasts all day
8. The Sleek-Top Messy Bun
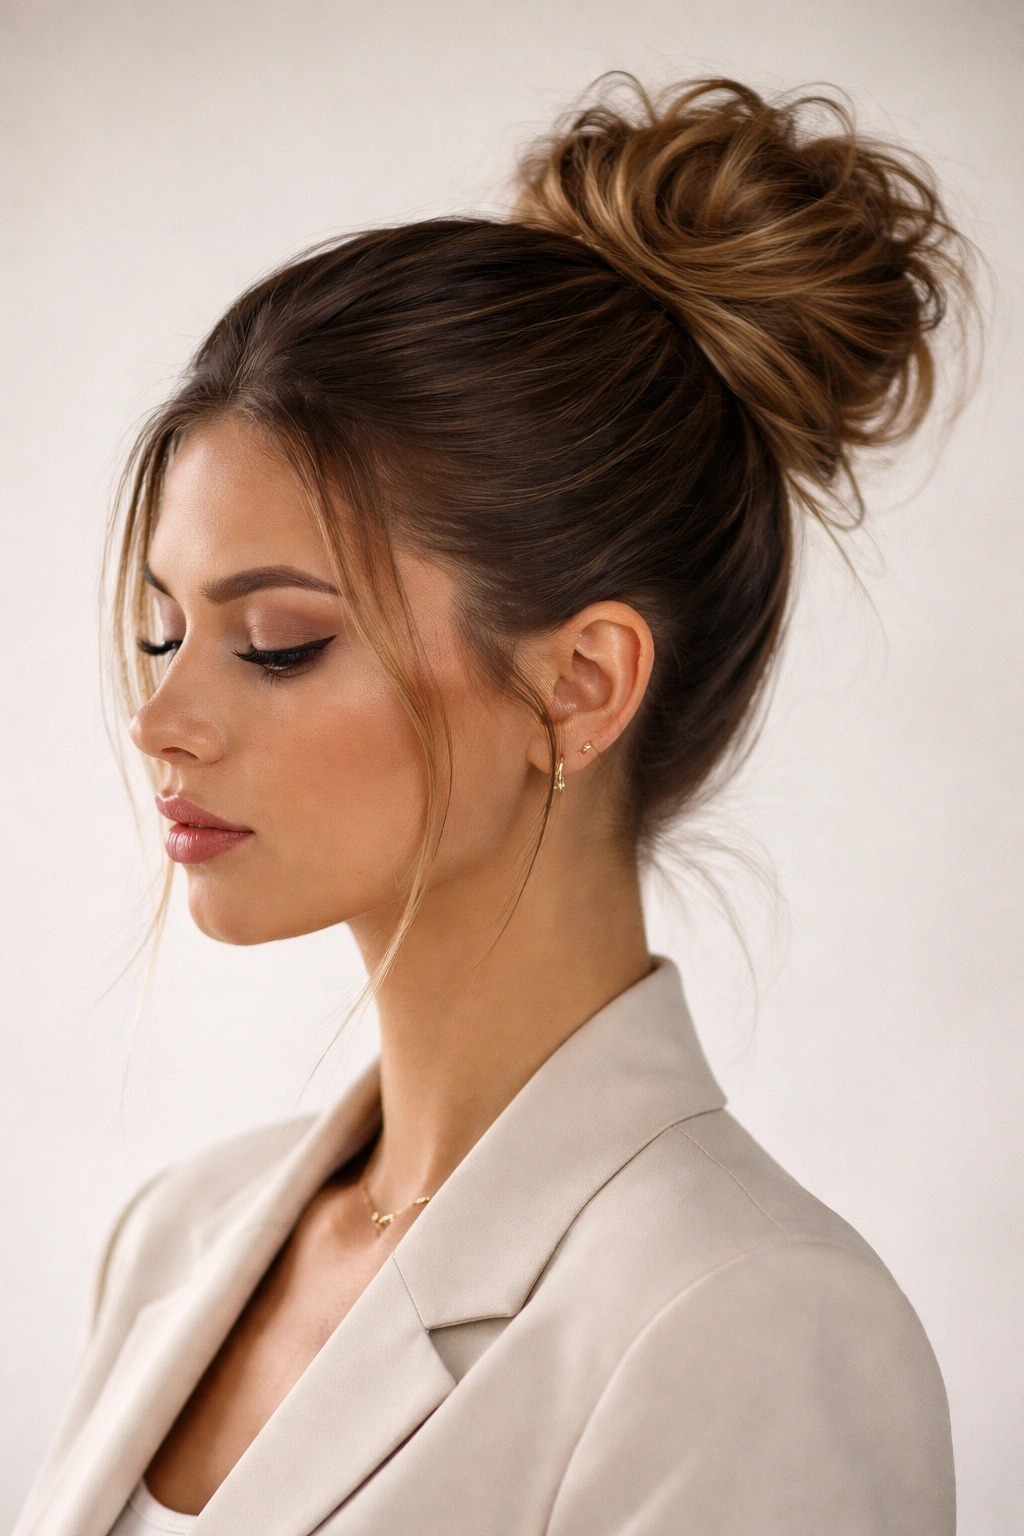
This style combines a sleek, smooth ponytail base with a deliberately messy, textured bun, creating contrast that feels modern and polished. The sleek top makes it work-appropriate while the textured bun keeps it from being too formal. Use a smoothing serum or gel to create a perfectly smooth ponytail with no flyaways — this is the opposite of your typical messy bun ponytail base. Gather this sleek ponytail high at the crown. Then, instead of twisting the entire ponytail, tease just the ends and wrap them loosely to create a messy, undone bun that contrasts sharply with the smooth ponytail base. The juxtaposition of sleek and messy is what makes this style visually interesting.
Why Contrast Creates Visual Interest
The combination of neat and messy creates a style that feels intentionally designed rather than hastily pulled together. The sleek base reads as polished and professional, while the messy bun portion reads as relaxed and cool. Together, they create a balanced, modern aesthetic that works in professional settings while still feeling current and fashion-forward.
Styling This Look for Maximum Impact
- This is the most professional-appropriate messy bun style, making it perfect for workplaces with stricter dress codes
- Use edge control or smoothing serum to keep the base truly sleek throughout the day
- Pair with a structured blazer and minimal jewelry for a truly polished look
- Photographed from the side, this style looks particularly elegant because you see the contrast between sleek and messy
- Works beautifully on finer hair because the sleek base doesn’t require volume
9. The Wrap-Around Messy Bun
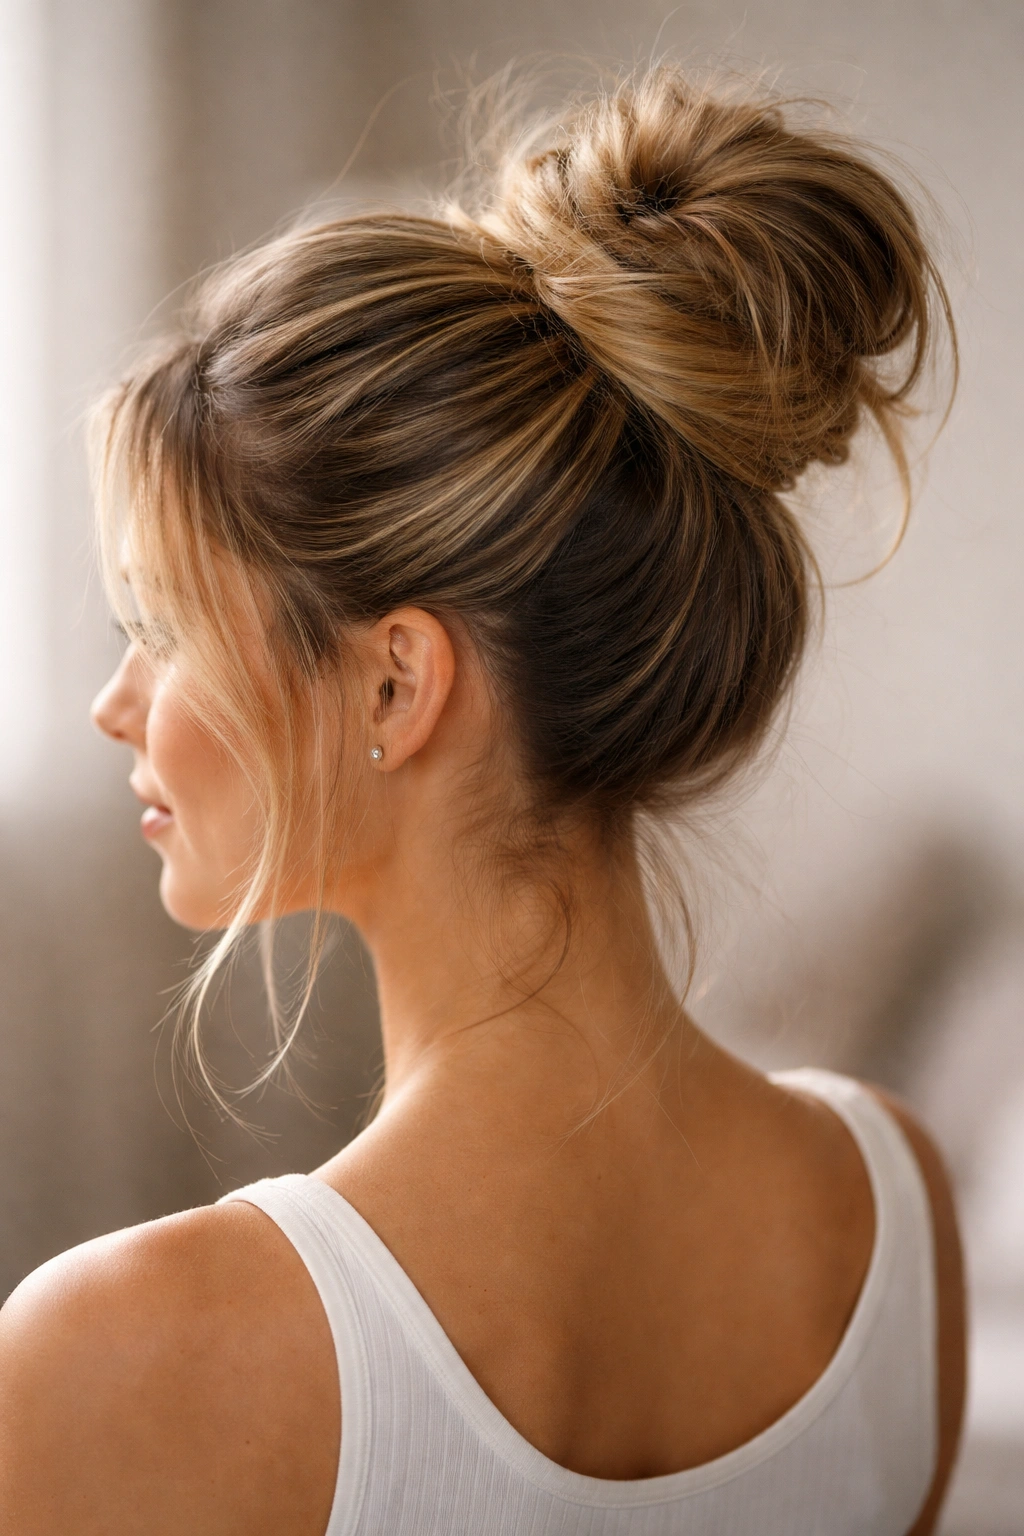
This variation uses a section of hair from your ponytail to wrap and disguise the elastic, creating a finished, polished look while maintaining the messy texture of the bun itself. Start with a high ponytail and tease it lightly for texture. Before you wrap the entire ponytail into a bun, separate out a thin section from the bottom of the ponytail — this section will become your concealing wrap. Take the remaining bulk of the ponytail, twist it loosely, and wrap it around the base to form the bun. Secure with bobby pins. Then, take that thin section you set aside and wrap it around the base of the bun, hiding the elastic and the bobby pins. Secure the end of this wrapping section with a final bobby pin tucked underneath.
Why This Finishing Technique Matters
Hiding your elastic completely changes how polished a messy bun looks. It’s the difference between a style that reads as “I threw my hair up” and one that reads as “I intentionally styled this.” The extra thirty seconds required to wrap and secure this finishing section makes a noticeable difference in the overall impact.
Details That Make This Style Shine
- The wrapping section can be straight, curled, or even braided for different effects
- This technique works on any hair texture and is particularly effective on thick hair
- Pairs beautifully with dressier outfits because the finished look reads as more polished
- The wrapped base is also more secure, so your bun will hold reliably all day
- A thin gold chain or delicate hair pin wrapped around the base adds extra elegance
10. The Undone Topknot Messy Bun
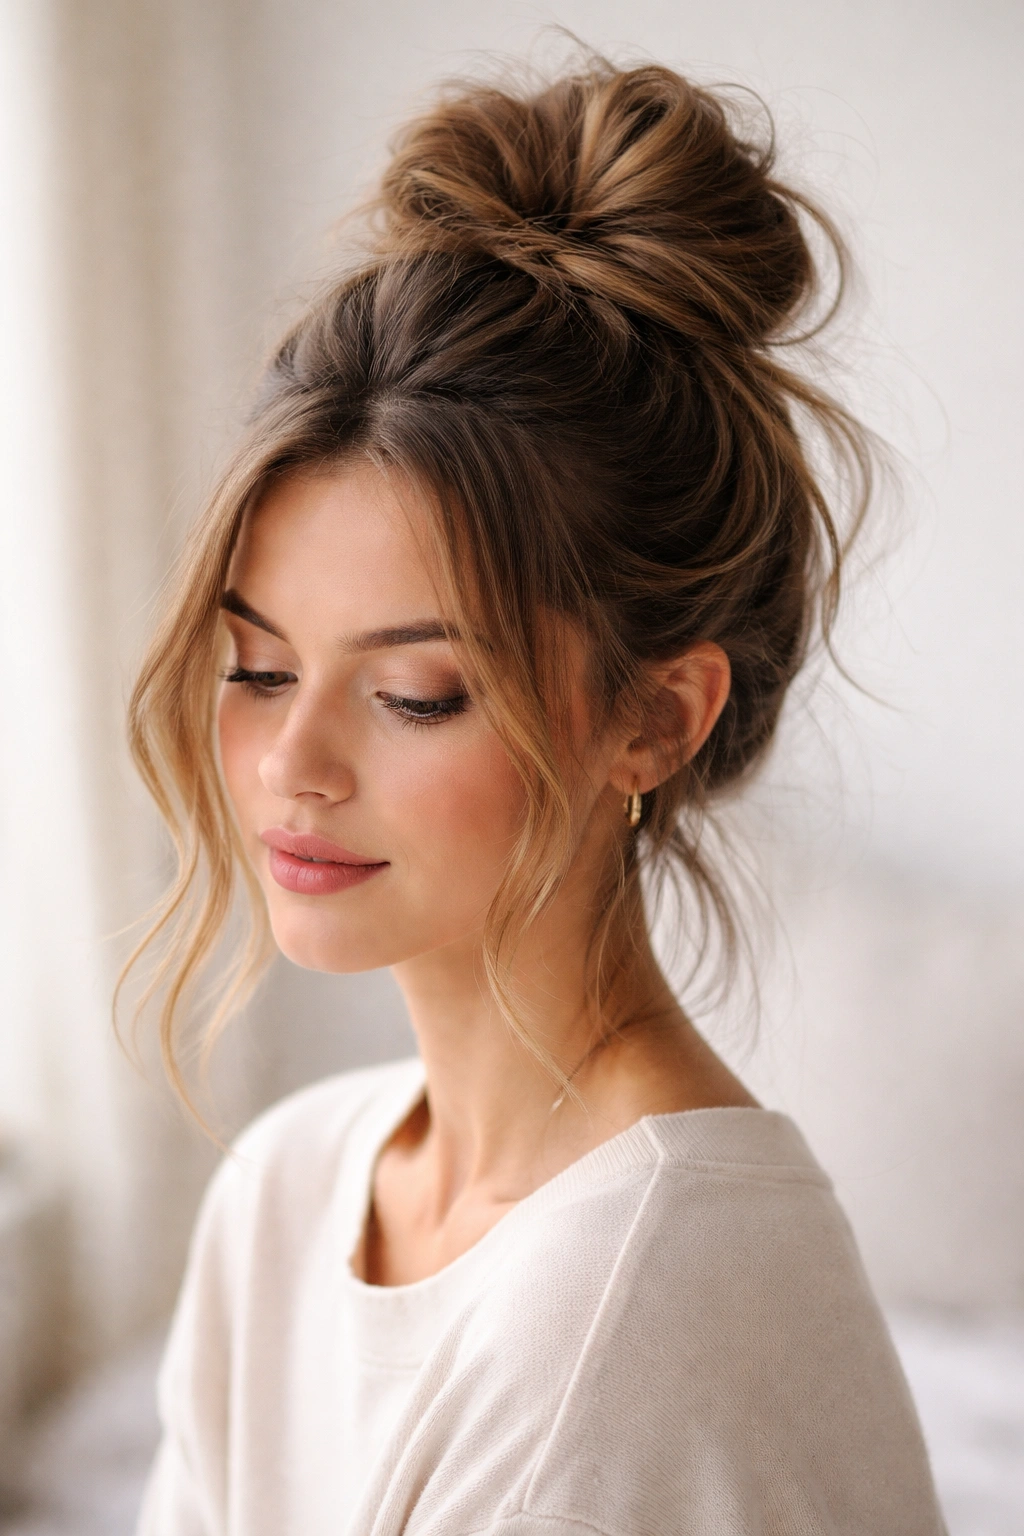
The topknot is essentially a high, deliberately loose messy bun that sits at the very crown of your head. The higher placement and the emphasis on looseness creates a youthful, effortlessly cool aesthetic. This is the style that reads as “I woke up like this” while actually being intentionally styled. Gather hair into a very high ponytail at the very top of your crown — higher than you normally would. Use a loose elastic, not a tight one. Create a loose bun by twisting the ponytail very gently or by creating a simple loop-and-tuck rather than wrapping. The looser and less structured your bun, the better this style works. Pull pieces out around the face and sides, ensuring plenty of soft tendrils frame your face.
Perfecting the “Effortlessly Cool” Aesthetic
The challenge with a topknot is making it look intentionally messy rather than accidentally messy. The key is consistency — every piece should look loosely and deliberately placed, not haphazard. The bun itself should be recognizably a bun, not just a pile of hair at the top of your head. Aim for a balance between undone and deliberately styled.
Making a Topknot Work for You
- This style looks best with longer hair — shorter hair can look too sparse in a high topknot
- Works particularly well with wavy or textured hair, which naturally cooperates with the loose aesthetic
- Pairs beautifully with oversized sweaters, vintage band tees, or athleisure wear
- The very high placement suits heart-shaped or round faces particularly well
- Add a small claw clip or delicate hair pin to the base for a subtle polished touch
Choosing the Right Messy Bun for Your Hair Type
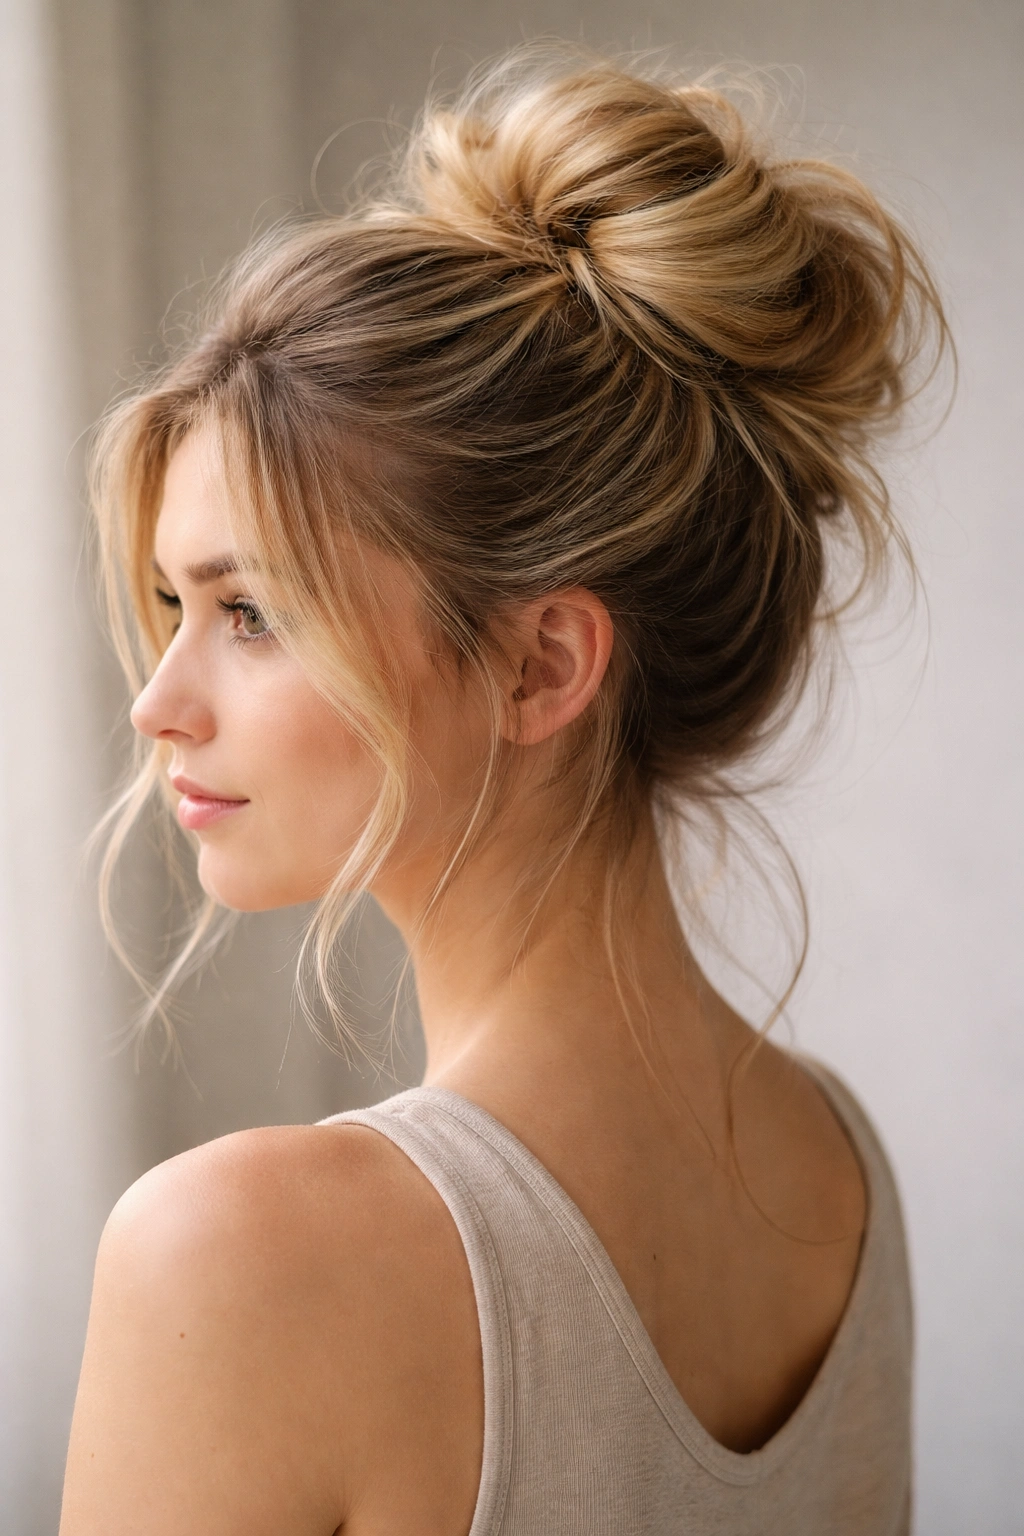
Different hair textures and lengths naturally work better with different messy bun styles. If you have fine or thin hair, the teased texture bun (style two) and the sleek-top messy bun (style eight) work best because they create the illusion of fullness. If your hair is naturally thick and textured, virtually every style will work, but the twisted wrap and side bun styles require the least effort. If you have shorter hair (above shoulder length), avoid the low romantic bun and double bun styles, which need significant length to work properly. If your hair is longer, you have the freedom to try every single style. The key is experimenting — what works beautifully for someone else might need tweaking for your specific hair, face shape, and personal style. Don’t be discouraged if a style doesn’t work perfectly on your first attempt. Each of these buns becomes faster and more refined with practice.
Securing Your Messy Bun for All-Day Hold
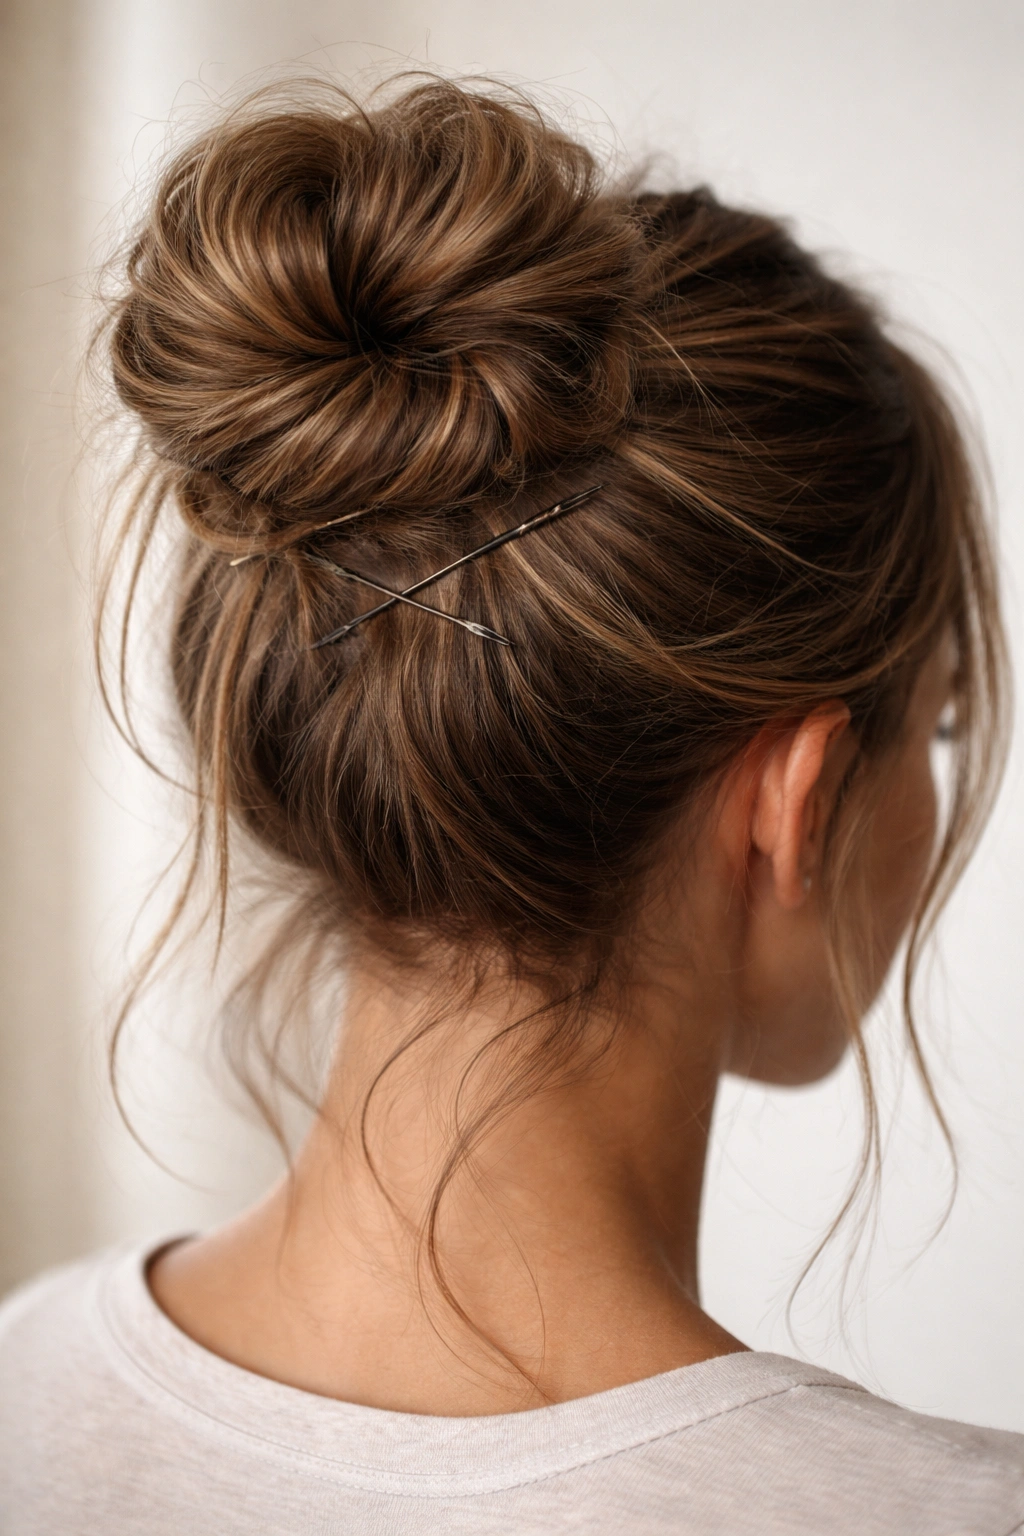
The difference between a messy bun that lasts all day and one that falls apart by noon comes down to bobby pins and technique. Use enough bobby pins — most people use too few. For a bun with thick or long hair, use at least four to five pins. Place pins horizontally into the bun rather than vertically, which distributes the weight more evenly. Crisscross your pins so they’re working against each other, preventing the bun from rotating or sliding. Choose bobby pins that match your hair color so they’re invisible. If you have a lot of hair, consider using texture spray beforehand to help the bun grip itself. A light hairspray mist after you’ve styled everything in place locks the style for hours without making it feel stiff or heavily product-laden. The goal is hold without visible effort.
Final Thoughts
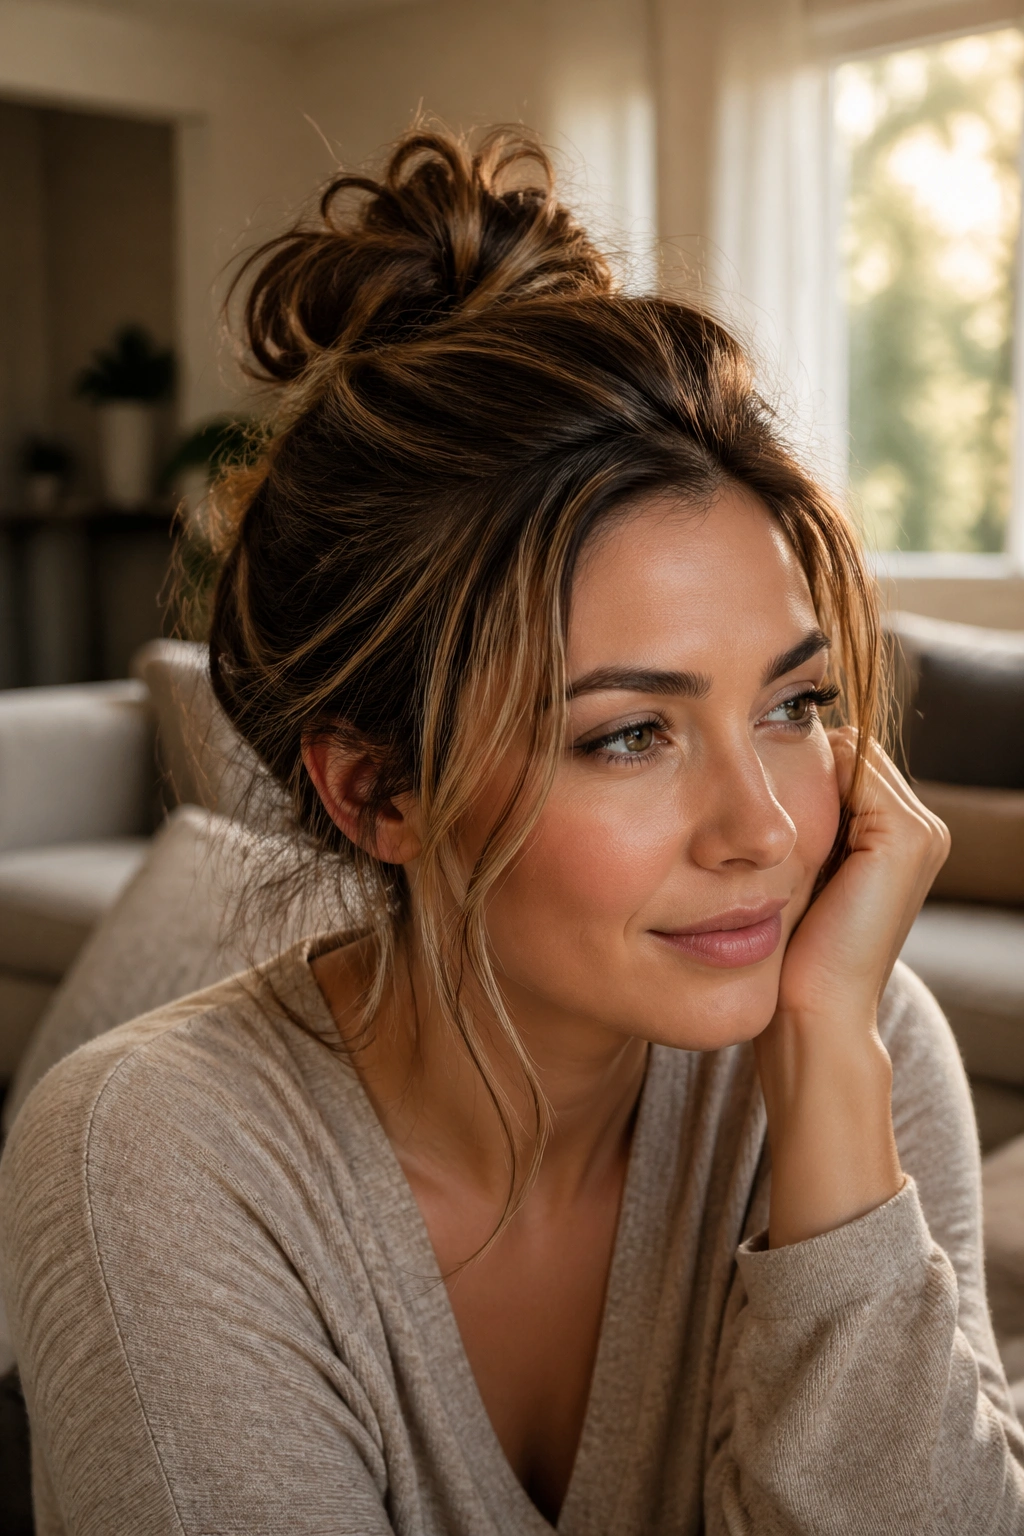
A great messy bun is deceptively simple — it’s loose enough to look effortless but structured enough to last through your entire day. The specific style you choose depends on the occasion, your hair type, and how much time you have in the morning. Start with the twisted wrap or teased texture styles because they’re fastest and most forgiving while you’re learning. Once you’ve mastered the basic technique, experiment with the more complex variations. Each one can be completed in under five minutes with a little practice. The beauty of messy buns is that they genuinely work daily — they’re protective for your hair, quick to create, flattering on most face shapes, and versatile enough to pair with almost any outfit. Keep a few bobby pins and a texture spray in your bag, and you’ll always have a polished, put-together hairstyle ready whenever you need it. The goal isn’t perfection; it’s that balance between intentional and undone that makes you feel genuinely confident in how you look.
