



High messy buns have become a go-to style for anyone with textured hair, and they’re especially versatile for Black women who want to embrace their natural texture while keeping things chic and manageable. Unlike sleek, polished buns, the high messy bun celebrates volume, movement, and the beautiful natural pattern of textured hair—making it a practical option for daily wear, protective styling, and everything in between. What makes high messy buns so appealing is that they work with your hair’s natural characteristics rather than against them. You’re not fighting your curls or coils; you’re playing up their inherent texture and bounce.
The placement of a high bun—positioned at the crown or slightly above the nape of the neck—creates an instantly elongated silhouette that flatters most face shapes. It also keeps hair off your neck and face, which is especially valuable during warmer months or when you’re focused and don’t want strands distracting you. The “messy” part means you can skip the perfectly sculpted, sprayed-into-place look and instead aim for something with personality and ease. This matters because it makes the style actually achievable on a regular Tuesday morning without needing salon-level styling skills.
Black women with all curl patterns—from loose waves to tight coils—can pull off high messy buns, though the approach and final look will vary depending on your specific hair type and texture. A messy bun on 4C coils looks completely different from one on 3A curls, and both are equally valid and beautiful. The styles below cover a range of techniques and finishes, so you can find the approach that matches your texture, the time you have available, and the vibe you’re going for.
1. The Classic High Puff Bun
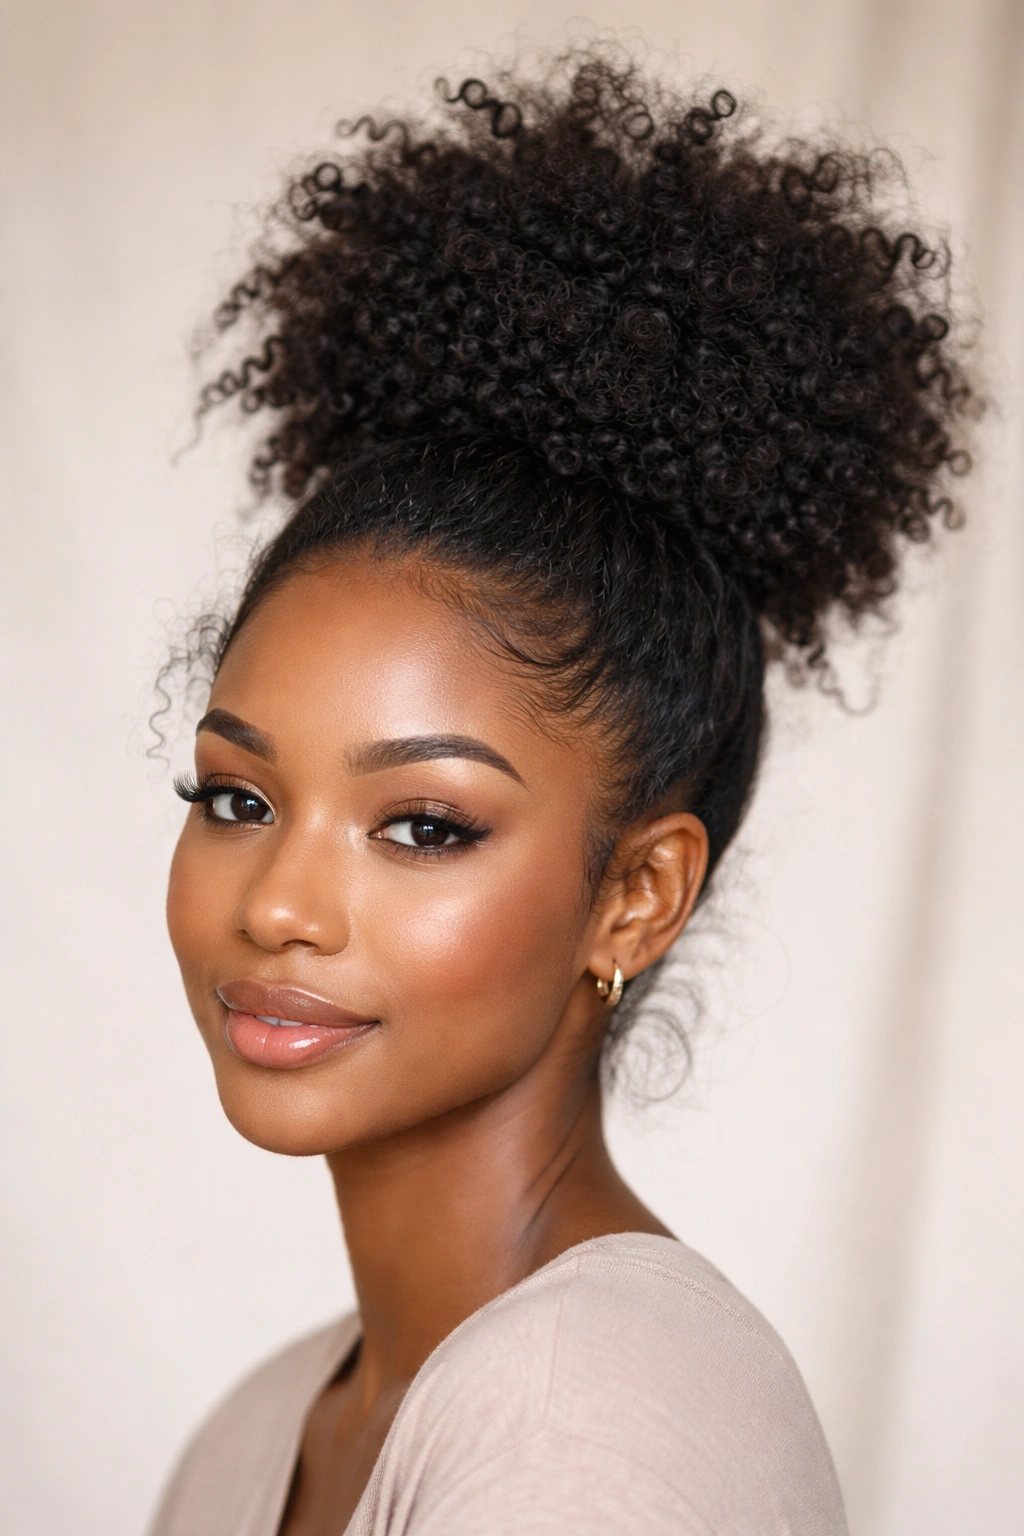
The classic high puff bun is the foundation that many other variations build from—it’s the style you’ve probably seen countless times because it works and it’s genuinely easy to execute. This version sits at the crown of your head and uses your natural hair texture to create volume and fullness without needing to add any length or extra hair. The bun portion remains relatively loose and textured, so flyaways and slightly uneven pieces actually add to the charm rather than looking like a styling failure.
Why This Style Works for Textured Hair
The classic high puff bun works because it accepts your hair exactly as it is on the day you’re styling it. You don’t need perfectly defined curls, moisturized ringlets, or a specific hair pattern—genuinely, messier and more texture-varied is better here. The height at the crown creates instant dimension and draws the eye upward, which is flattering on round and square face shapes especially. This bun also works as a protective style because your hair ends are tucked away in the puff portion, keeping them protected from friction and breakage. Even better, you can wear it for multiple days with a silk bonnet at night, and it actually looks fresher and fuller on day two or three.
How to Create the Classic High Puff Bun
Start with either damp or dry hair, though damp hair often gives you more control and a fuller, more defined puff. If your hair is dry, lightly spritz it with water or a lightweight leave-in conditioner spray to add a tiny bit of moisture and make it easier to work with. Flip your head upside down and gather all your hair at the crown—you want to use your fingers like a comb, gently pulling hair upward toward that central point at the top of your head. Once everything is gathered, flip back upright and secure it with a thick elastic that’s designed for textured hair (look for ones without metal parts that snag). The elastic should be tight enough that the puff doesn’t slip, but not so tight it creates tension or discomfort.
Now comes the fun part: fluff it. Use your fingers to gently pull and separate sections of the puff, creating that full, slightly undone look. You can make it more symmetrical or intentionally lopsided—both are equally valid. If you have any shorter layers or baby hairs around your hairline, that’s perfect; don’t stress about smoothing them down. Lightly mist the whole thing with a light-hold or flexible-hold spray if you want it to last all day without getting flattened.
Styling Tips and Daily Wear
The puff gets fuller over time, so if you’re wearing this for multiple days, expect it to look even better on day two. You don’t need to completely restyle it each morning—just gently fluff it again and you’re set. If it does fall a bit flat, use your fingers to gently pull out sections and add volume back. You can wear this style to the gym, to work, to casual hangouts, or anywhere really. The versatility is honestly the biggest strength here. If you want to dress it up slightly, you can wrap a silk scarf around the base of the elastic, add a decorative hair clip, or even weave a thin chain or beaded strand through the puff.
One honest note: if you have very tight curls or coils, your puff might look more like a defined bun rather than a fluffy puff, and that’s completely fine. The silhouette will be more compact, but the style still works and still protects your hair. The key is accepting whatever shape your specific hair texture naturally creates rather than trying to force it into someone else’s version of a puff.
2. The Twisted High Bun with Edges
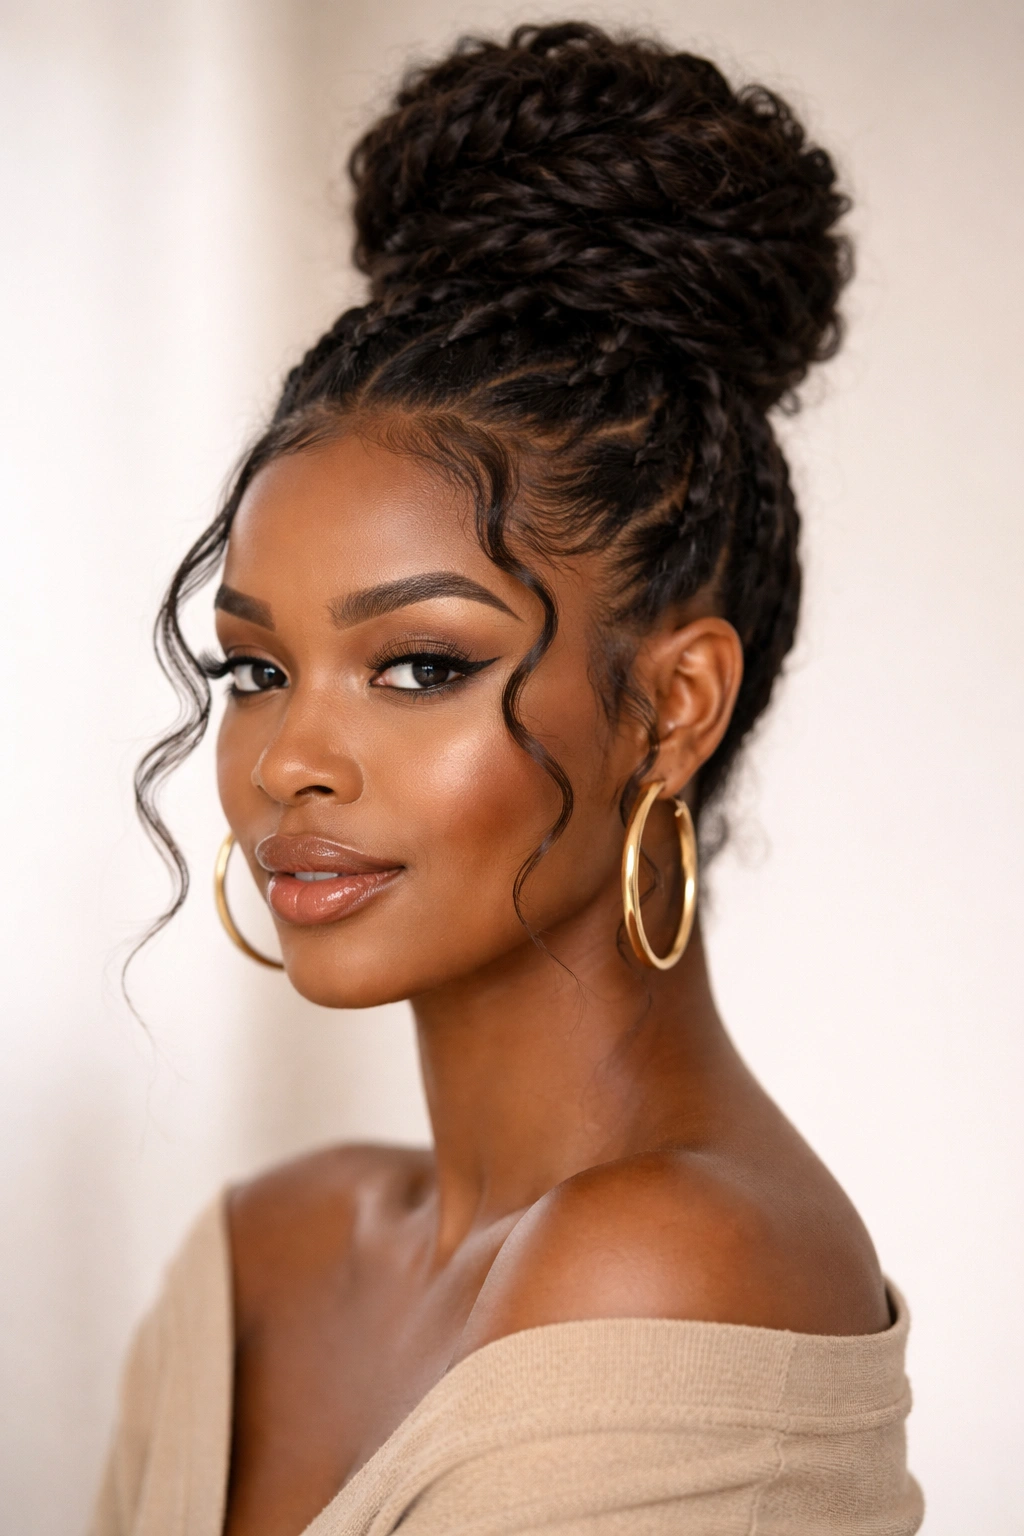
This version adds intentional twists to the high bun, creating a more polished-meets-casual hybrid that works beautifully for situations where you want to look like you actually tried without having spent an hour styling. The twisted sections frame the face and add visual interest, while the high placement keeps the overall vibe modern and flattering. This style is particularly striking on women with medium to coarse textured hair or defined curl patterns, because the twists really showcase your natural texture.
Why Twists Elevate the Basic High Bun
Twists immediately make any hairstyle look more intentional and thoughtfully styled, even when it’s genuinely only taken you ten minutes to do. Incorporating twists into your high bun adds a sculptural quality that the basic puff doesn’t have. The twists also serve a practical purpose: they help contain flyaways and give you more control over the overall shape of the style. If you’re worried about pieces escaping from the bun or you have shorter layers, twists are your solution because they’ll hold those pieces in place while still looking intentional. Additionally, this style reads as appropriate for work or professional settings while still being effortless enough for everyday wear.
How to Create Twisted Sections
You’ve got two main approaches here. The first is to create twists at the front/face-framing sections before gathering everything into your bun. Start with two sections of hair at your temples—roughly two to three inches wide on each side. Divide one section in half and twist those two parts together, working from the roots all the way down toward the ends. Do the same on the other side. Once both twists are complete, gather everything—including the twists—at your crown and secure with an elastic.
The second approach is to gather all your hair into a high puff first, then take small sections from the edges of that puff and gently twist them, wrapping them back around the base of the elastic like you’re creating a crown. This method is honestly easier because you can see what you’re doing and adjust as you go. Pin the twisted sections with bobby pins that match your hair color so they blend in seamlessly. If you’re using the face-framing twist method, you can use a light gel or mousse on the twisted sections to encourage them to hold their shape throughout the day without looking crunchy.
Maintenance and Refresh Techniques
This style tends to last well for two to three days, especially if you protect it with a silk bonnet or scarf at night. When you wake up on day two, the twists might look slightly softened rather than crisp, which honestly just adds to the “I woke up like this” aesthetic. If you want to refresh them, you can gently re-twist any sections that have loosened, or honestly just leave them as they are—softer twists actually look more textured and intentional than perfectly neat ones.
If you notice flyaways or loose pieces that bother you, a lightweight gel applied with a spoolie or old toothbrush will smooth them down without that stiff, wet look. The beauty of this style is that slight imperfection actually works in your favor, so you don’t need to stress about achieving magazine-cover perfection.
3. The Braided High Bun
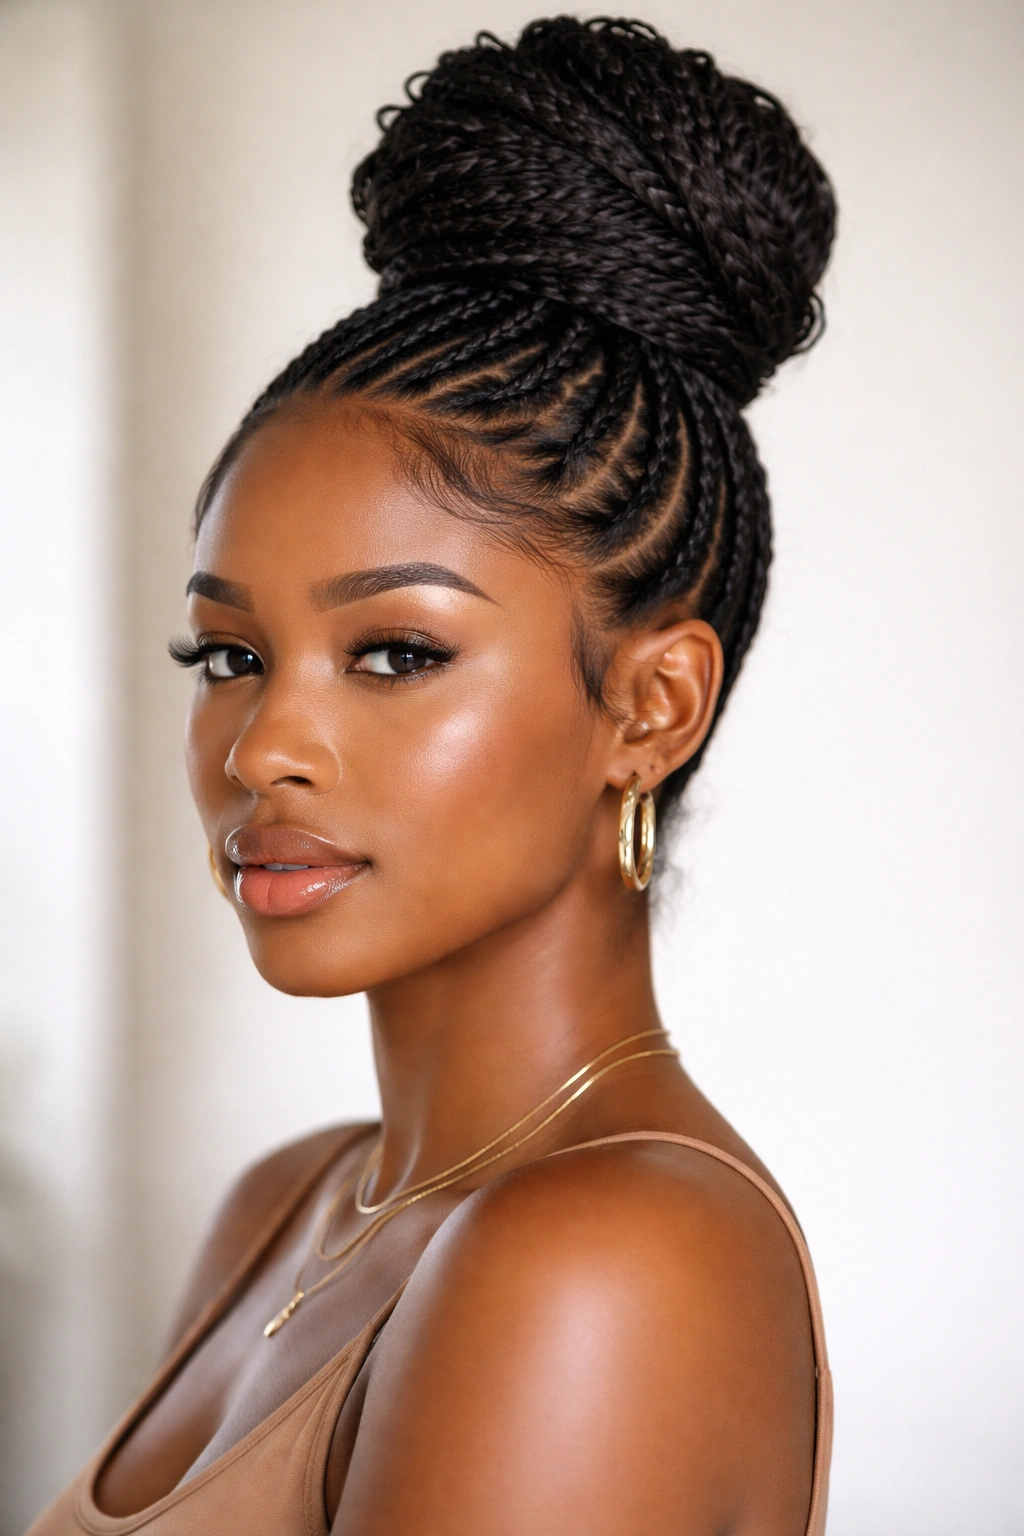
Braids and buns are a classic combination, and when you braid upward toward your crown and then bundle those braids into a high bun, you get a style that’s both protective and undeniably stunning. This version works with virtually every bun style and curl pattern, and it gives you options for how simple or elaborate you want to go. You can do a single thick braid, three thinner braids worked in parallel, or multiple small braids—each approach creates a slightly different visual effect, but all of them look polished and intentional.
Why Braids Make Your Bun More Protective and Defined
Braids are one of the best protective styling techniques for textured hair because they elongate and contain your hair while still allowing it to stay in a low-manipulation style. When you braid your hair and bundle it into a high bun, you’re giving that protective benefit a boost because now your hair ends are secured inside the bun and completely protected from friction. The braids also create clear, defined lines that make the overall style look more sculptural and visually interesting than a basic puff. If you’re growing your hair out, protective styling like braided buns helps you retain length because you’re minimizing breakage and damage. The defined nature of braids also means this style holds up beautifully for three, four, or even five days with minimal touch-ups.
How to Braid and Bundle Into a High Bun
If you want to do a single thick braid, start by tilting your head forward and creating a Dutch braid (braiding underneath rather than over the top) that runs from the nape of your neck up toward the crown. Work slowly and keep the tension moderate—tight braids look neat but they’re uncomfortable and bad for your hair. Once you reach the crown, secure the braid with a small elastic. Now gather any loose hair plus the end of your braid into a ponytail at the crown and secure with a thicker elastic. Wrap the braid around the base of the ponytail like you’re creating a spiral, tucking the end underneath and securing it with bobby pins.
For multiple braids, divide your hair into sections at the nape of your neck. If you’re doing three braids, create three vertical sections. Dutch braid each one going upward toward the crown. Secure all three braids at the crown level, then bundle them together into a high puff or spiral bun. The multiple braids create more dimension and visual interest, plus they tend to hold the bun’s shape more firmly than a single braid approach.
Longevity and Protective Styling Benefits
Braided buns are genuinely one of the best protective styles you can wear for extended periods. You can comfortably keep this style in for three to five days, and your hair actually looks fresher on day three or four than it does on day one because the braid settles slightly and the texture becomes softer. At night, loosely wrap a silk scarf around the whole style—don’t re-braid or manipulate it. In the morning, gently smooth any flyaways and you’re ready to go.
This style is particularly valuable if you’re doing frequent wash days because it allows you to stretch your wash schedule. You can wear a braided bun for several days, sleep in it with protective nighttime wrapping, and still have your hair looking polished and intact. The amount of manipulation is minimal, which means less stress on your curls and coils and more length retention over time.
4. The Stacked High Bun
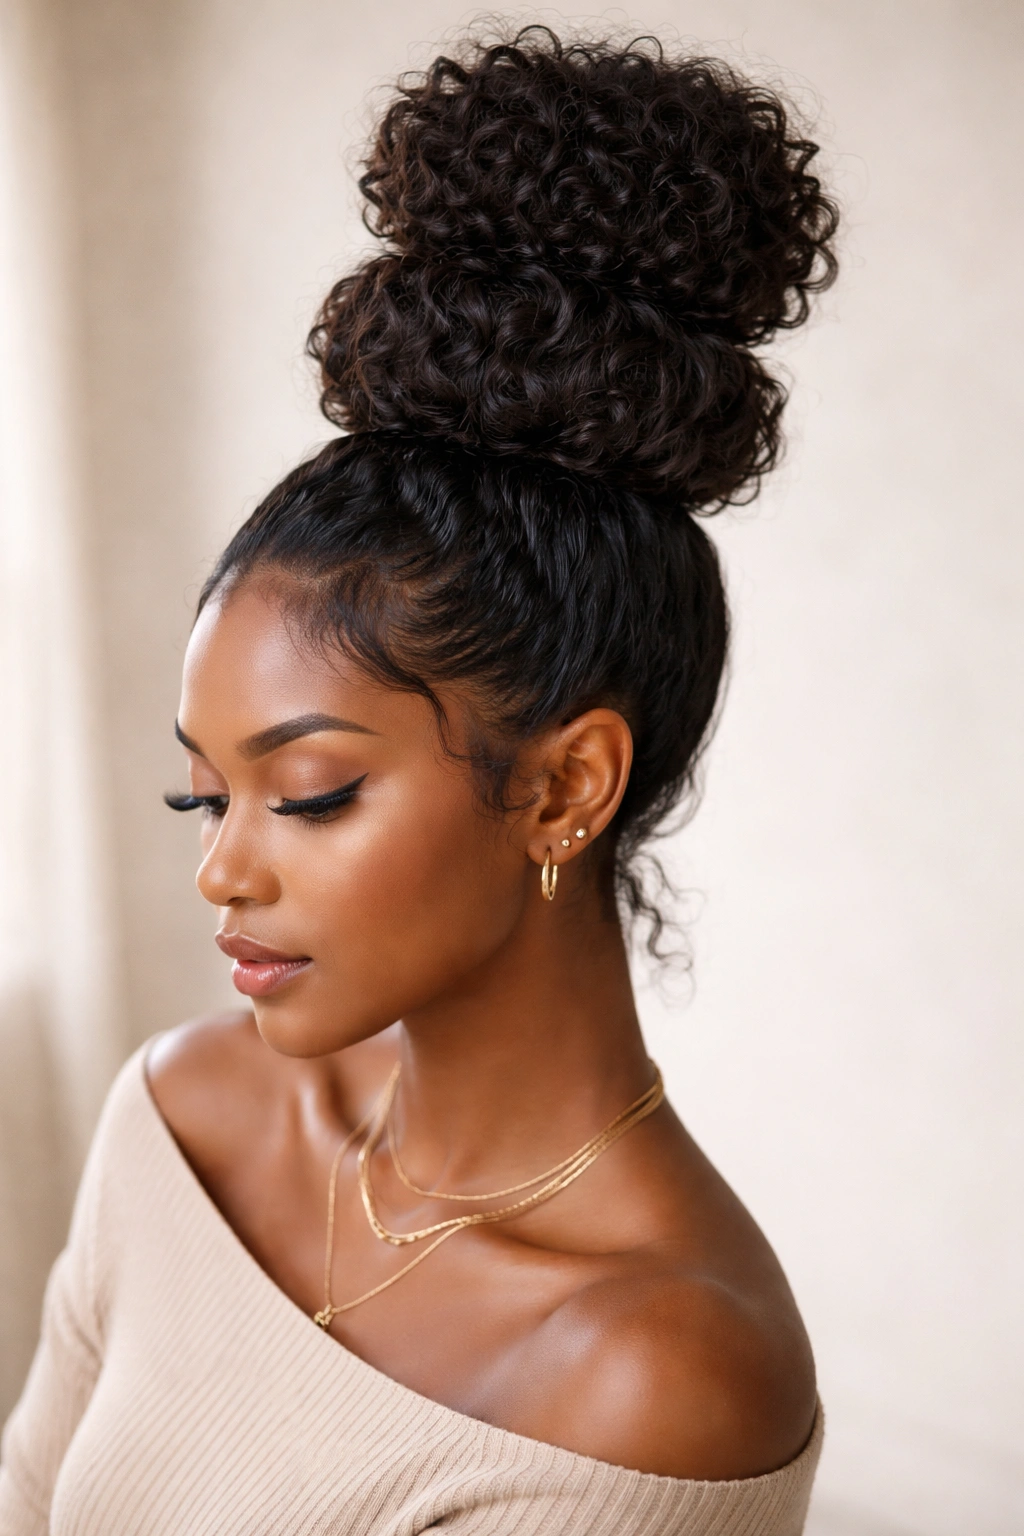
The stacked high bun creates the illusion of multiple buns layered on top of each other, producing incredible volume and a truly eye-catching silhouette. This version requires a bit more intentional styling than the basic puff, but the payoff is a statement style that looks complex enough to impress while being genuinely achievable in about fifteen minutes. This is the style you wear when you want to turn heads and show off the fullness and beauty of your textured hair.
Why Stacking Creates Visual Impact
A stacked bun works because you’re creating multiple focal points of volume rather than one, which immediately makes your hair look fuller and more textured. The stacking technique also creates a really interesting geometric shape that’s modern and fashion-forward. This style is especially impactful on women with denser hair or coarser textures because you can actually achieve multiple distinct bun tiers. It also draws the eye upward along the length of your head and neck, creating a lengthening effect that’s flattering on most face shapes. If you’ve ever wondered how to make thin hair look fuller or how to create a truly statement-making style without adding extensions, stacking is your answer.
How to Create Stacked Bun Sections
Start with damp or moisturized hair for easier manipulation. Create your first bun at your crown using roughly the top third of your hair. Gather that section and secure it with an elastic, then fluff it into a puff. Next, below that first bun, gather the middle third of your hair and create a second bun, securing it with another elastic and fluffing it. Finally, take the remaining bottom third and create a third bun at the lower part of your crown. Each bun should sit slightly below and slightly forward of the one above it, creating that stacked effect.
The key to making this work is using elastics that match your hair color and positioning each bun so you can still see the fullness of the one above it. If they’re too close together or stacked perfectly vertically, the effect gets lost. You want each bun visible and distinct. Once all three are in place, fluff each one individually, making sure they’re all full and rounded. You can use bobby pins to secure any pieces that aren’t cooperating, and a light spray will help everything hold its shape throughout the day.
Styling and Long-Term Wear
This style works beautifully for special occasions, professional environments, or any time you want to make a statement with your hair. Because there’s more structure and more elastics involved, it’s more secure than a basic puff, so it holds up really well to movement and activity. You can wear this style for two to three days. When you sleep, gently wrap the entire style in a silk scarf or bonnet, and in the morning, each bun might have softened slightly, but that actually looks really pretty—the edges become less defined and more textured.
One honest consideration: this style requires slightly more effort than simpler versions, so you’ll want to make sure you’re doing it when you have a bit of time and patience. It’s not an “I rolled out of bed five minutes ago” style, but it’s also not something that requires professional help or advanced skills.
5. The Flyaway Textured High Bun
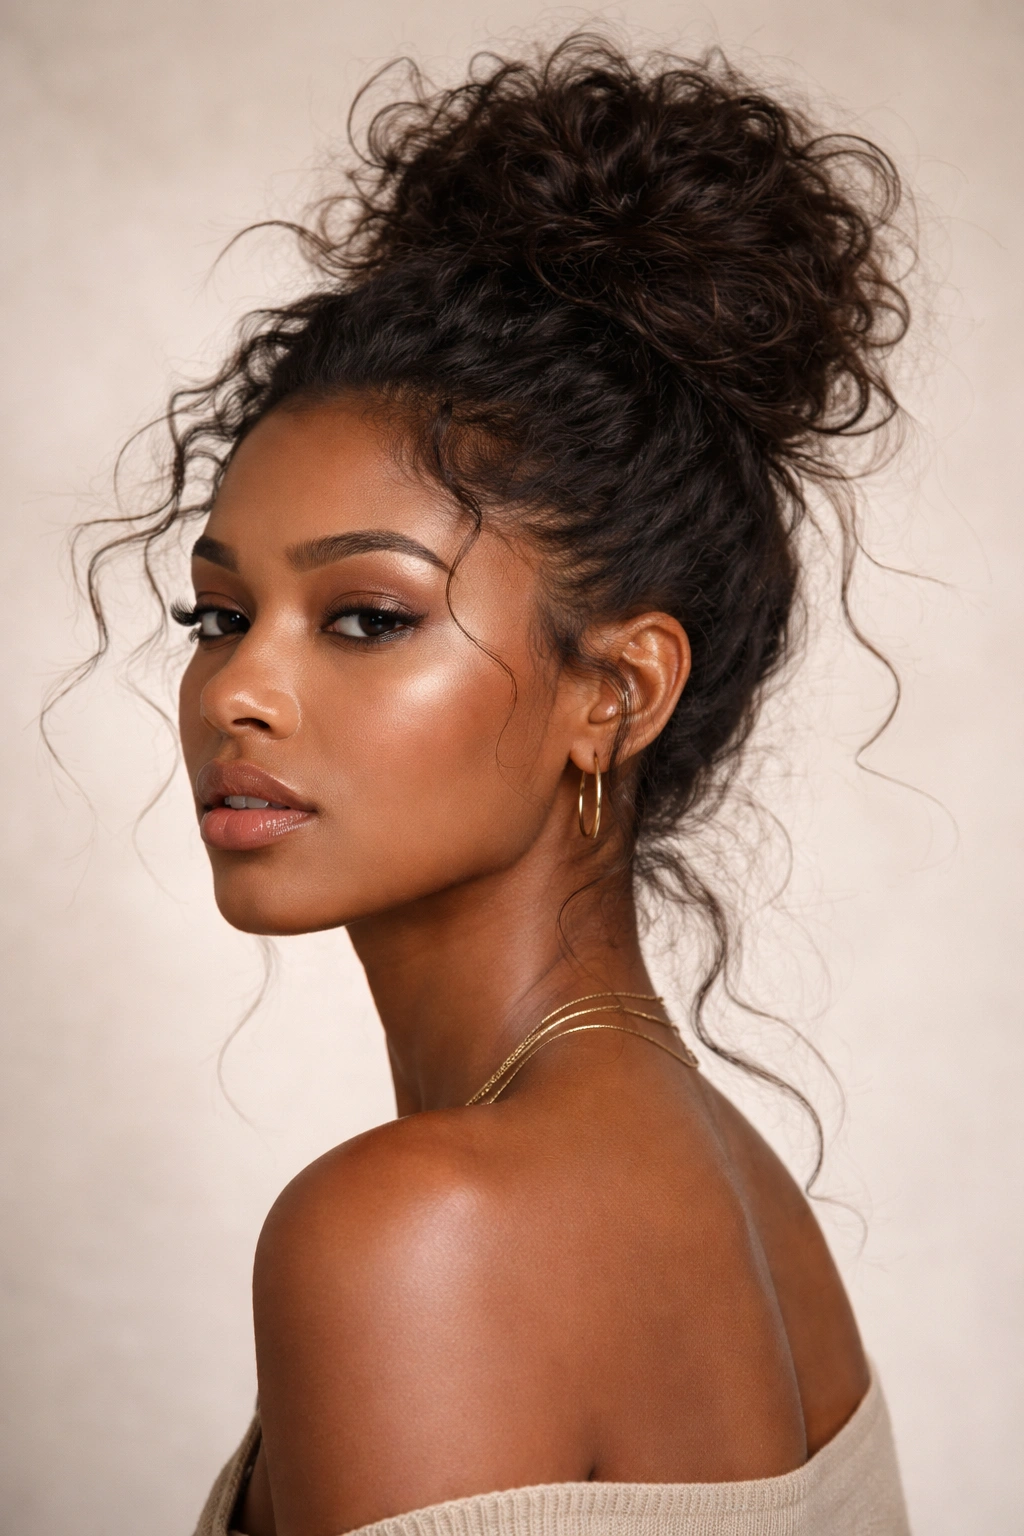
This version celebrates intentional messiness and individual flyaways, creating a style that’s gorgeous precisely because it looks undone. Where other styles aim for neat and contained, the flyaway textured bun leans into texture, movement, and the natural variation in your curl pattern. This is the style for days when you’re feeling your natural hair energy and want something that feels effortlessly cool. It’s also perfect on days when your hair isn’t cooperating or you have lots of shorter layers—this style turns those “problems” into aesthetic features.
Why Embracing Your Flyaways Changes Everything
The flyaway textured bun works because it stops fighting against your hair and starts celebrating it. Instead of trying to smooth everything down or create a perfectly contained bun, you’re intentionally leaving wispy pieces, coils, and shorter strands loose around your face and crown. This creates movement, dimension, and that coveted “I just happened to throw my hair up and look this good” vibe. On a practical level, this approach is also less damaging because you’re not pulling every single piece back tightly. Loose pieces around your face and hairline mean less tension and stress on those delicate areas. The final look is also incredibly versatile—it reads as intentionally artistic and cool, but it’s casual enough for everyday wear.
How to Create the Flyaway Aesthetic Intentionally
Start by intentionally leaving sections loose as you gather your hair into a high bun. Rather than smoothing every piece back, brush your hair back gently and leave face-framing sections deliberately loose. At your crown, gather the bulk of your hair and secure it with an elastic, but don’t worry about making it perfectly neat. Take some of those loose face-framing pieces and either leave them hanging naturally or gently twist them and wrap them around the base of your bun, creating an intentionally undone frame.
Use a mousse or light gel only on the pieces you actually want to define—your face-framing pieces or any specific curl you want to showcase. Leave the rest texture-as-is. This approach is honest about what textured hair actually does; it’s not about forcing it into one specific shape, but rather letting your natural curl pattern be the star. If you have varying curl patterns within your hair, this style showcases that beautifully because looser pieces and tighter coils are all visible and celebrated.
Keeping It Looking Intentional, Not Accidental
The trick with this style is the difference between “intentionally textured” and “I didn’t brush my hair” comes down to one thing: the overall cleanliness and health of your hair. Your hair should be clean, moisturized, and healthy-looking—the flyaways are a styling choice, not a sign of neglect. Sleep on this style with a loose silk bonnet so pieces don’t get matted or kinked. In the morning, you might need to gently fluff the bun portion and maybe re-position a face-framing piece or two, but the overall vibe should remain effortlessly textured.
You can wear this style for two to three days, and honestly it looks better on day two because the pieces have softened slightly and everything blends more naturally together. This is genuinely one of the lowest-maintenance high bun styles once you commit to the aesthetic.
6. The High Bun with Crown Braid Detail
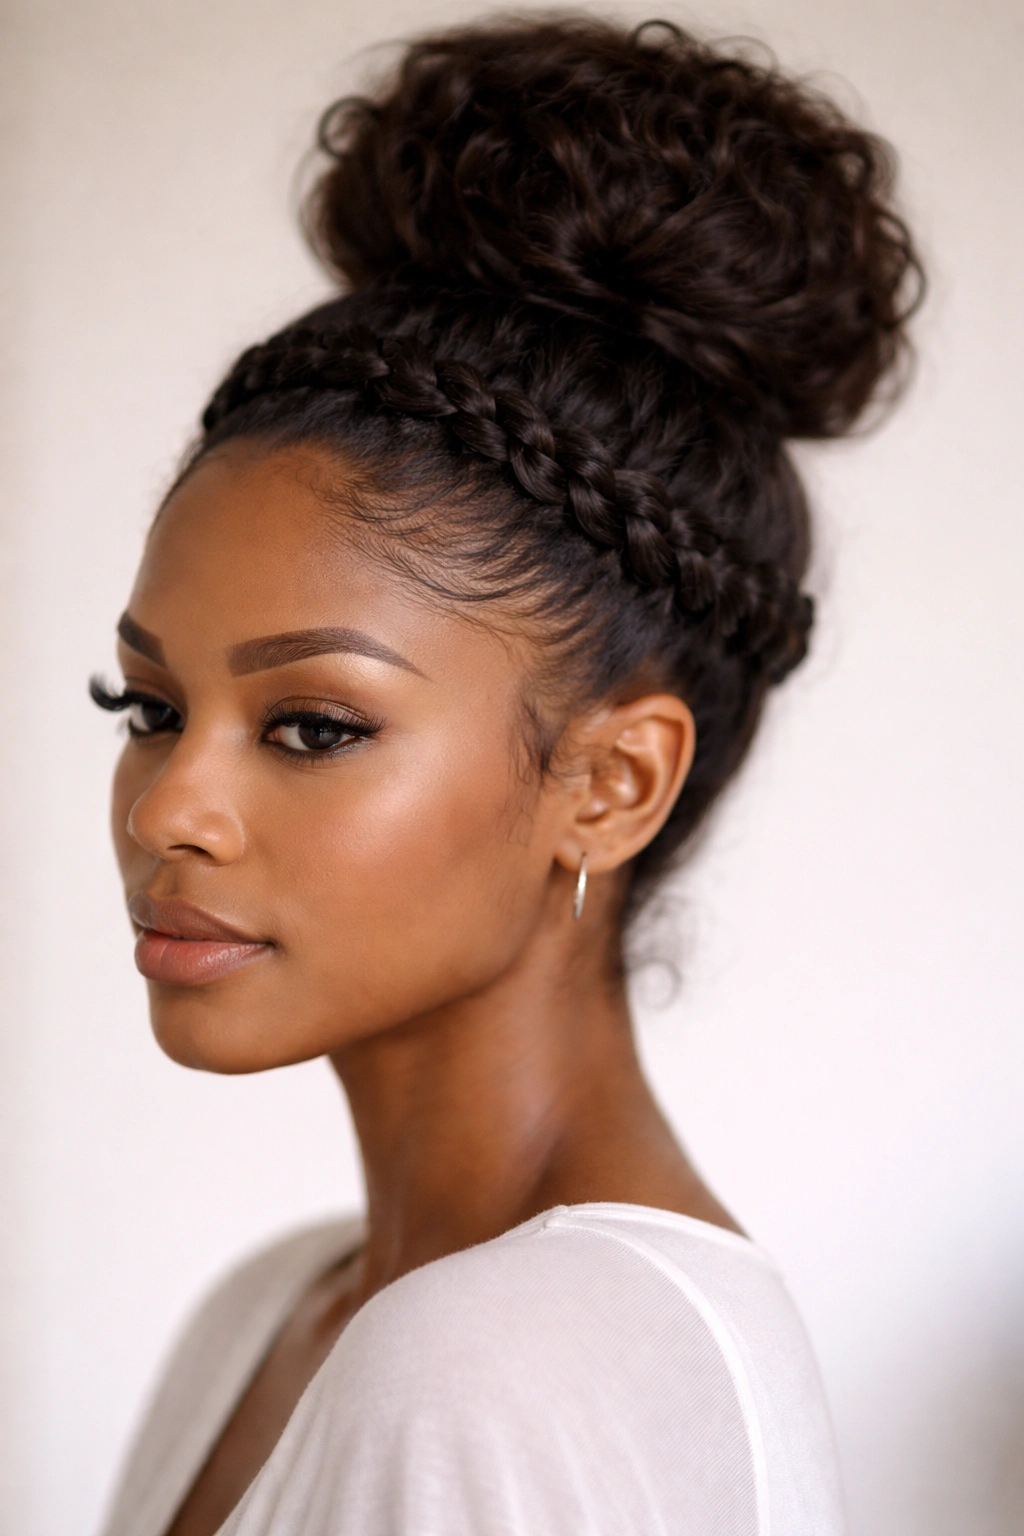
This version combines a high bun with a crown braid (or halo braid) that wraps around your head, creating an ethereal, elegant style that’s surprisingly easier to execute than it looks. The crown braid adds a romantic, polished element that makes this style appropriate for dressier occasions, date nights, or any time you want to elevate your everyday look. It’s also incredibly versatile because the crown braid can be thick or thin, loose or tight, depending on your skill level and the vibe you’re going for.
Why Crown Braids Elevate Your High Bun
A crown braid is a three-strand braid that you work around your head in a circular or semi-circular pattern, and when combined with a high bun, it creates a completely different silhouette than any other bun style. The braid adds visual interest, creates a focal point that frames your face beautifully, and automatically makes the style look more intentional and polished. Practically speaking, the crown braid also helps contain and secure the high bun, so pieces are less likely to fall out as you move throughout your day. This style reads as more dressed-up than the basic puff, making it perfect for work environments, events, or dates where you want to look put-together but still show off your natural hair.
How to Create a Crown Braid Into a High Bun
Start by determining whether you want a full crown braid (going all the way around your head) or a partial crown braid (going from one temple to the other, like a halo). For a full crown, begin at one temple and start a regular three-strand braid. Work the braid around your head toward the back, adding hair as you go using the Dutch or French braiding technique (incorporating new sections into the braid as you work). This keeps the braid looking neat and integrated rather than like you’re just braiding loose sections.
Once you reach the opposite temple, secure the end of the braid with a small elastic. Now gather your remaining loose hair—plus the end of the crown braid—at your crown into a high ponytail and secure it with an elastic. Wrap the braided section around the base of your ponytail to create a spiral or coil, tucking the end underneath and securing it with bobby pins. The crown braid now forms a beautiful frame around the high bun.
For a partial crown braid (which is honestly easier if this is your first time), start at one temple and braid toward the opposite temple across the top/back of your head, finishing behind the opposite ear. Secure that braid with a small elastic, then gather all your hair—including the braid end—at your crown into a high bun. The braid creates a beautiful front-facing detail while the bun sits high and full at the crown.
Occasions and Styling Variations
This is genuinely one of the most versatile styles you can wear because it works for casual Sundays, professional work settings, romantic dates, and special occasions. You can braid tightly for a polished, neat appearance, or braid loosely for a softer, more romantic vibe. Adding small flowers, beads, or decorative pins to the crown braid elevates it even further for special events. You can also use this as a base for other styling—for example, wrap a silk ribbon through the crown braid for extra visual interest.
This style lasts beautifully for two to three days. Protect it at night with a silk bonnet, and in the morning, gently smooth the braid if needed. The beauty of this style is that even if the braid softens and becomes less defined by day two or three, it actually looks more romantic and ethereal—so there’s no real downside to wearing it for multiple days.
Final Thoughts
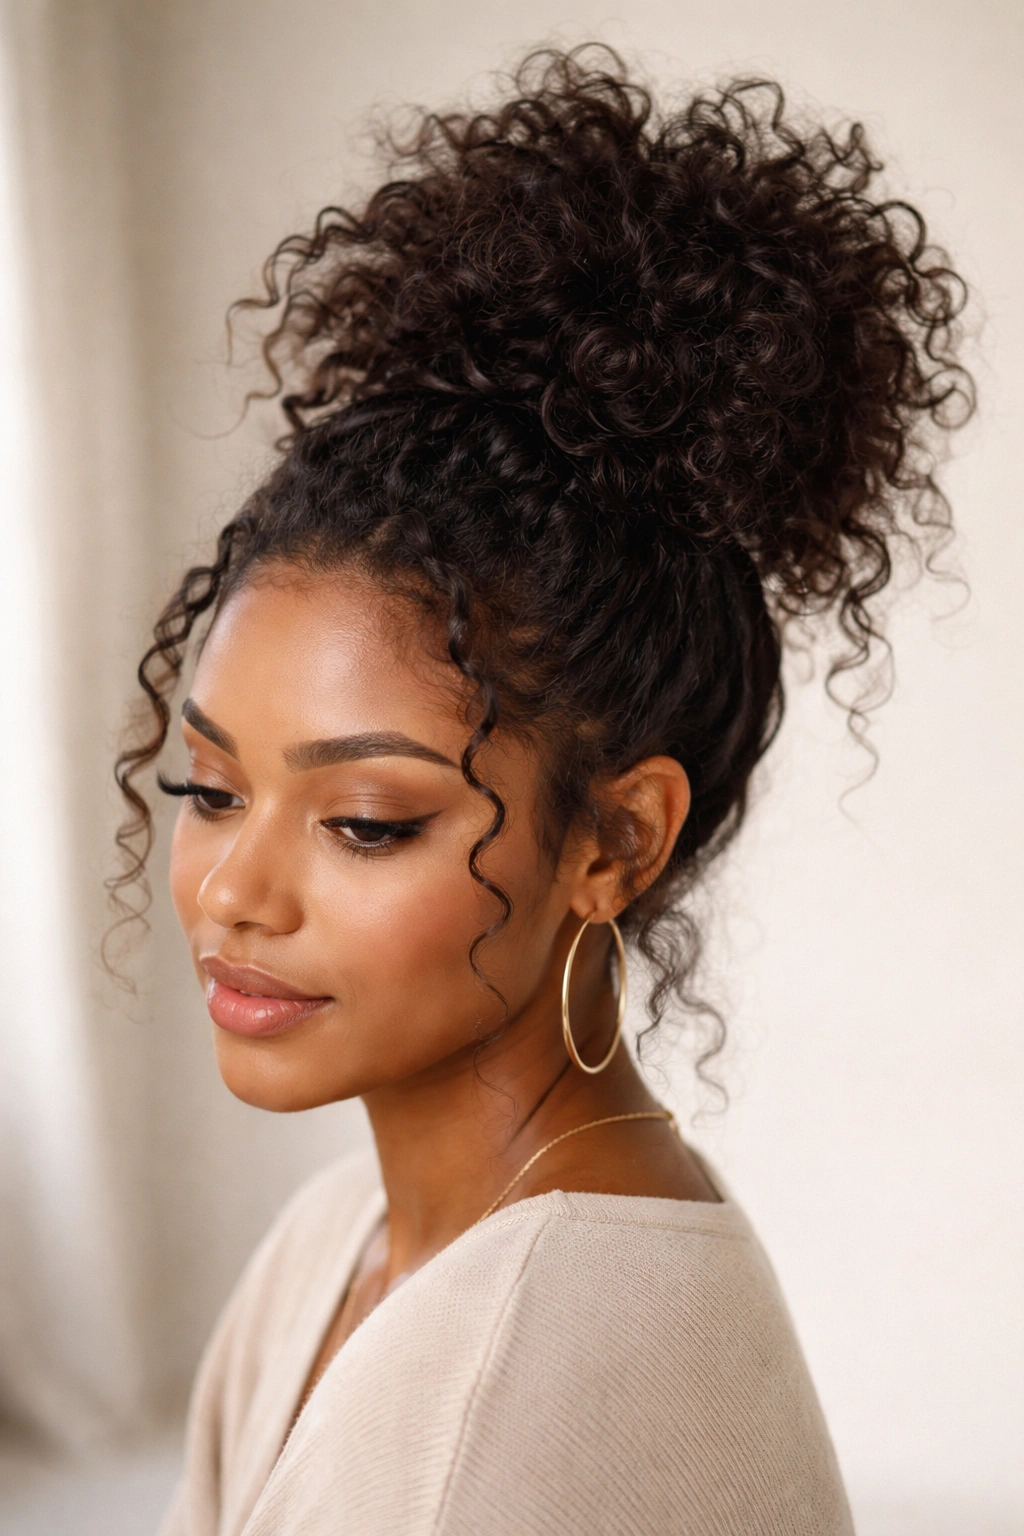
High messy buns are genuinely one of the best styling choices for Black women because they work with your natural texture rather than against it, require minimal heat or product damage, and offer incredible versatility across different occasions and settings. Whether you go for the simplicity of a basic puff, the polish of twisted sections, the protection of braids, the drama of stacking, the coolness of intentional flyaways, or the elegance of a crown braid detail, each style has its moment and its purpose.
The most important thing to remember is that your specific hair texture, density, and curl pattern will influence how each style looks on you, and that’s completely okay. A high bun on 4C coils looks different from a high bun on 3B curls, but both are beautiful. Pay attention to which styles feel easiest and most comfortable for your hair, because those are the ones you’ll actually reach for regularly. Experiment with different elastics, try the styles on days when you have time to figure out what works, and don’t stress about achieving someone else’s version of these styles—find the version that matches your hair, your personality, and your daily life.
High messy buns are low-manipulation protective styles that keep your hair healthy while looking effortlessly cool. That combination alone makes them worth mastering.
