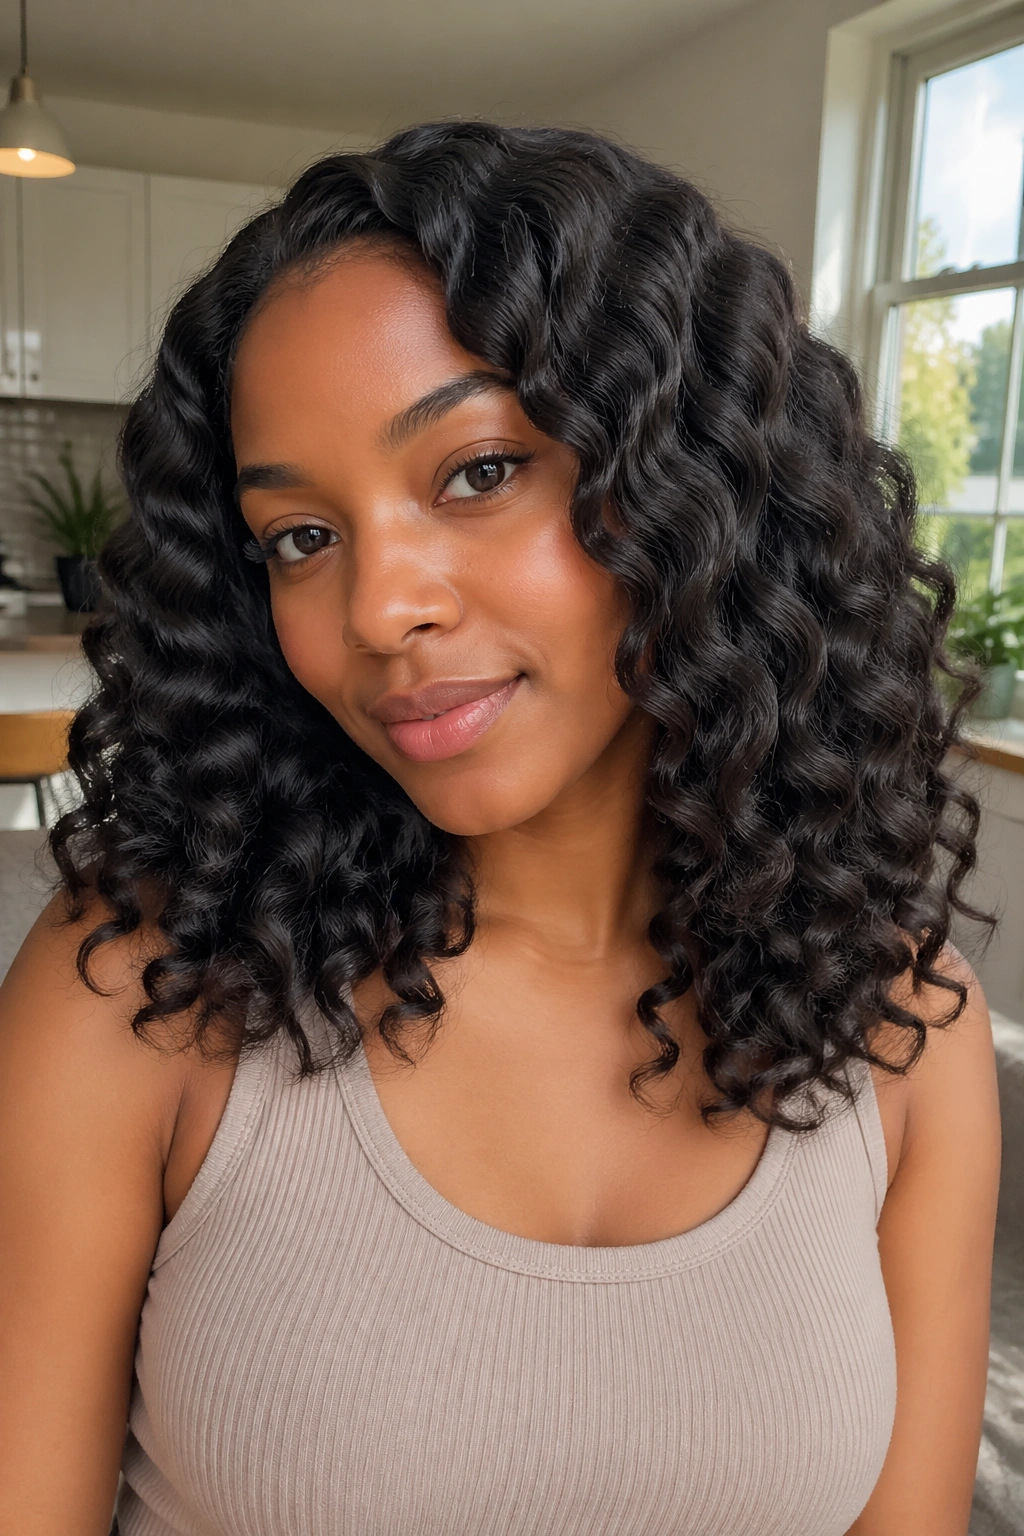
A French braid-out can look soft and cloudlike on one head, then tight and glossy on another. Same technique. Different result. The split usually comes down to braid size, section tension, and whether the hair was damp, stretched, or nearly dry when it got braided. Miss those pieces, and you can end up with flat roots or a frizzy halo that refuses to settle.
That is why French braid-out styles are worth learning as separate looks, not one fixed formula. A small braid pattern gives a tighter bend. Bigger braids leave broader waves. French braiding at the scalp adds lift from the roots, which is a big reason the style can look full without a curling iron anywhere near it.
Natural texture takes to this method in a way straight hair never quite can. Coils, curls, and stretched curls hold a braid pattern with real personality, especially when you separate the braid carefully and stop before the hair turns into cotton-candy fuzz. The trick is knowing which braid layout gives you the shape you want.
Some of these styles are polished. Some are fluffy on purpose. A few are the kind of thing you wear when your hair needs to behave, but you still want movement and life in it. That balance is the whole appeal.
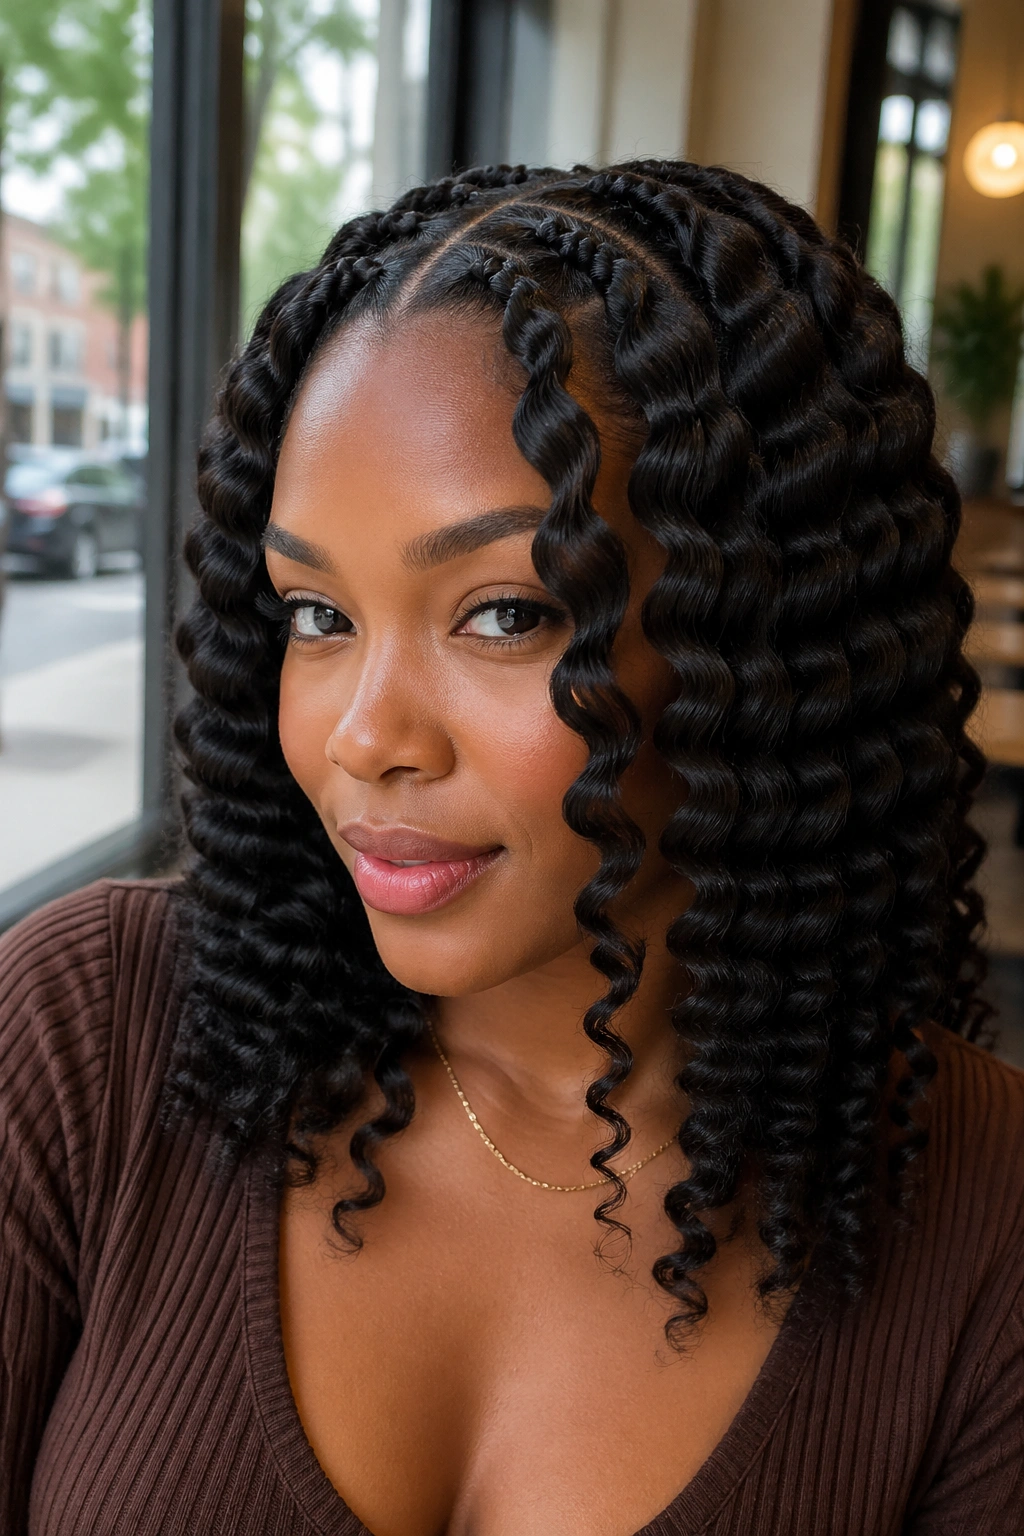
1. Classic Two-Braid French Braid-Out
This is the one I’d call the anchor style. Two French braids, parted down the middle, give you a clean wave pattern that lands somewhere between neat and playful. It’s the easiest place to start if you want a French braid-out without a lot of guesswork.
Why It Works
The two-braid layout keeps each side balanced, and the larger sections create a soft bend instead of tiny ripples. Use sections that are about 1½ to 2 inches wide at the front, then follow the braid down the scalp before finishing the length in a regular three-strand braid.
- Best for shoulder-length to long natural hair
- Works well on hair that is 70 to 85 percent dry
- Gives medium volume at the roots
- Separates into broad, fluffy waves
Tip: Put a little oil on your fingertips when you unravel. Dry hands make frizz happen fast.
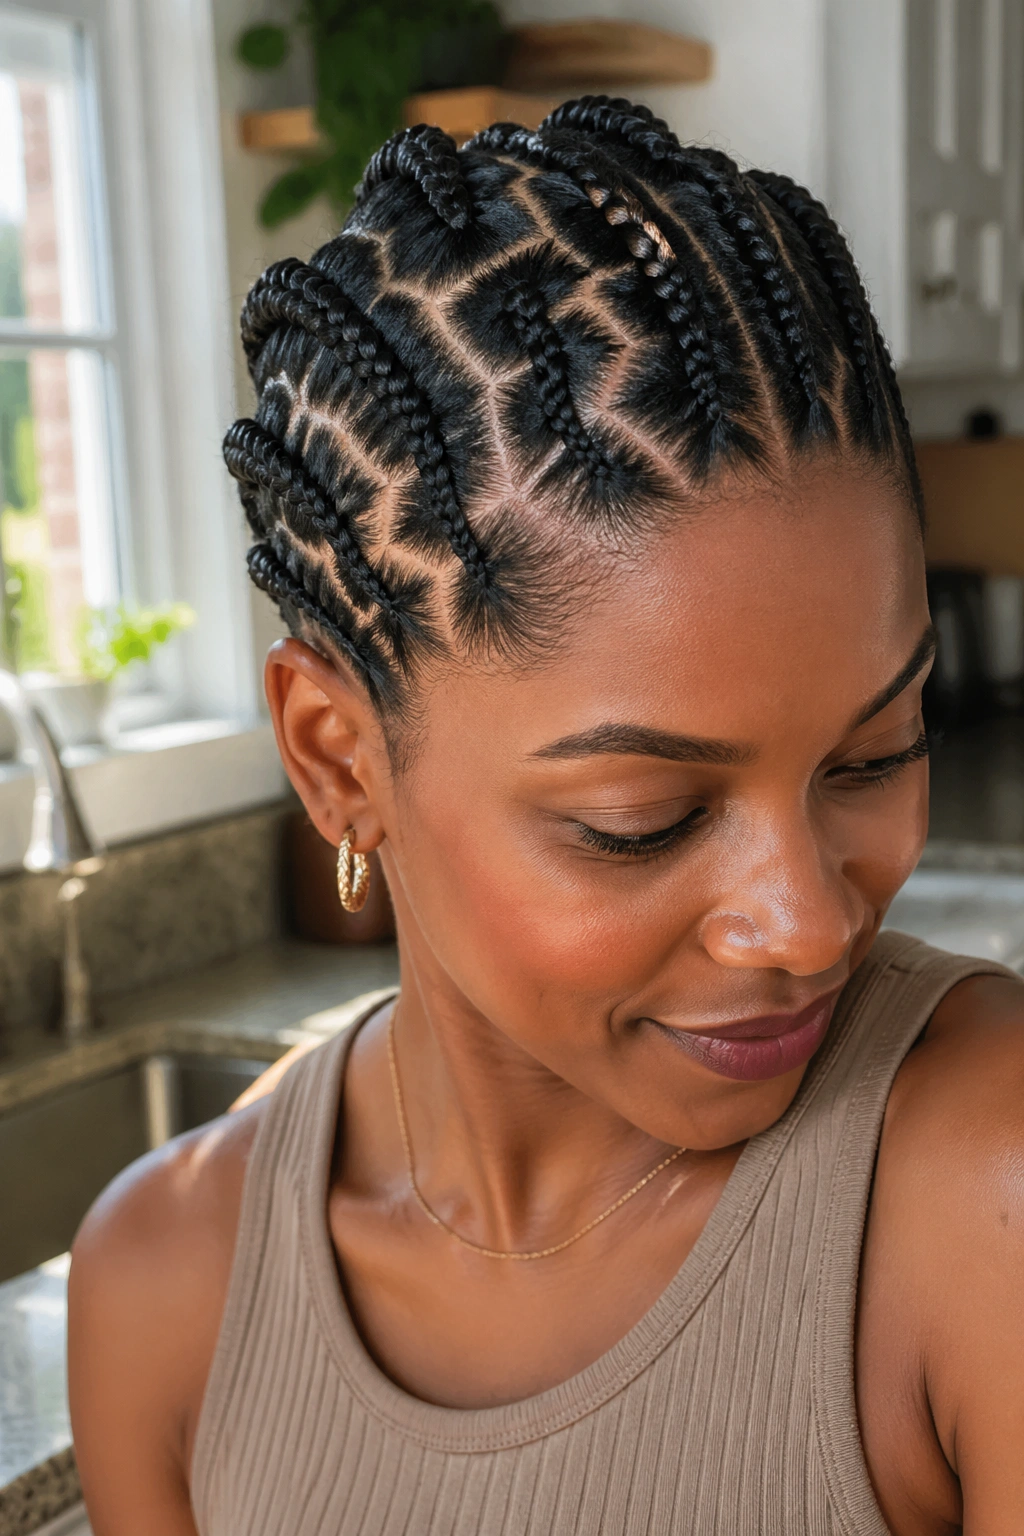
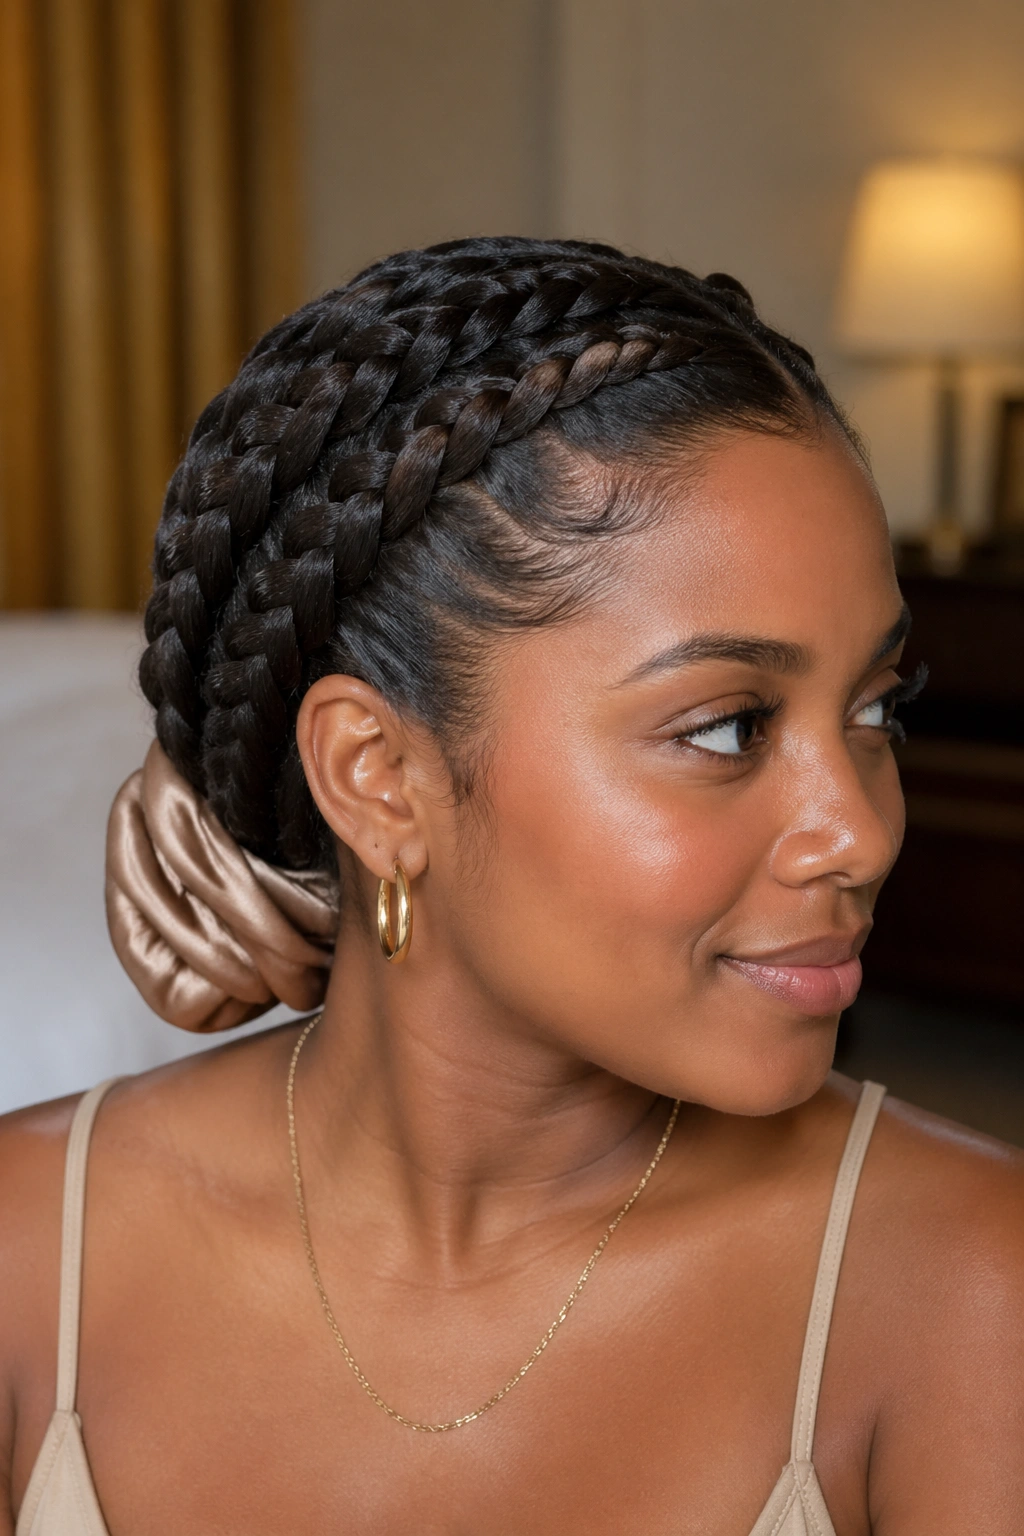
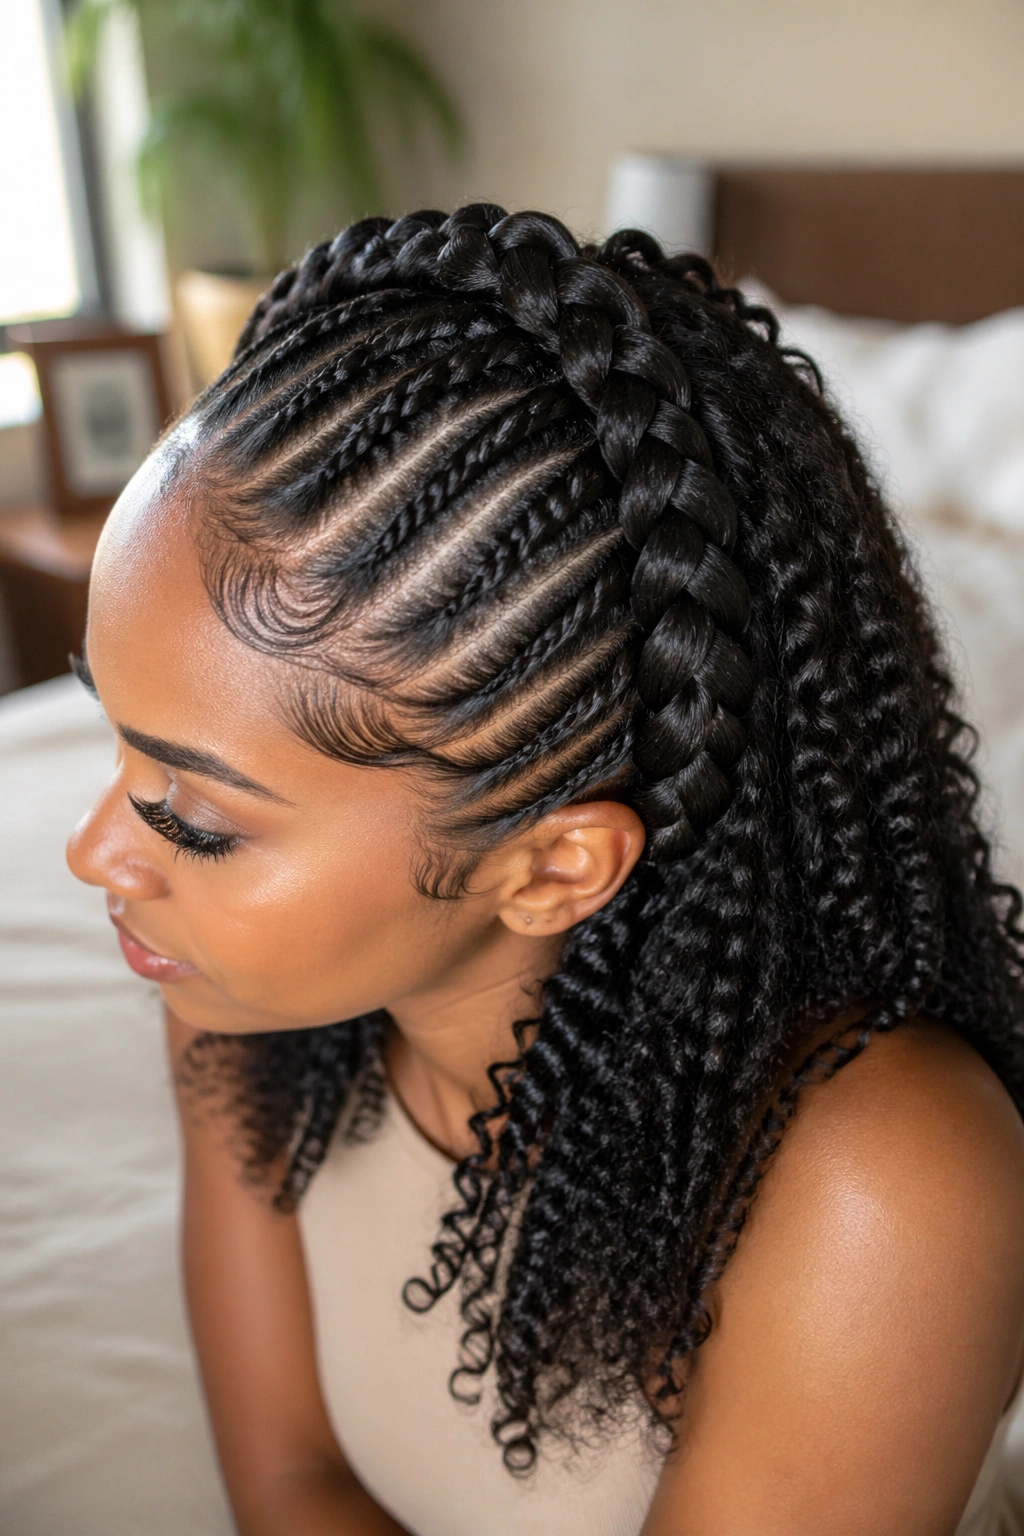
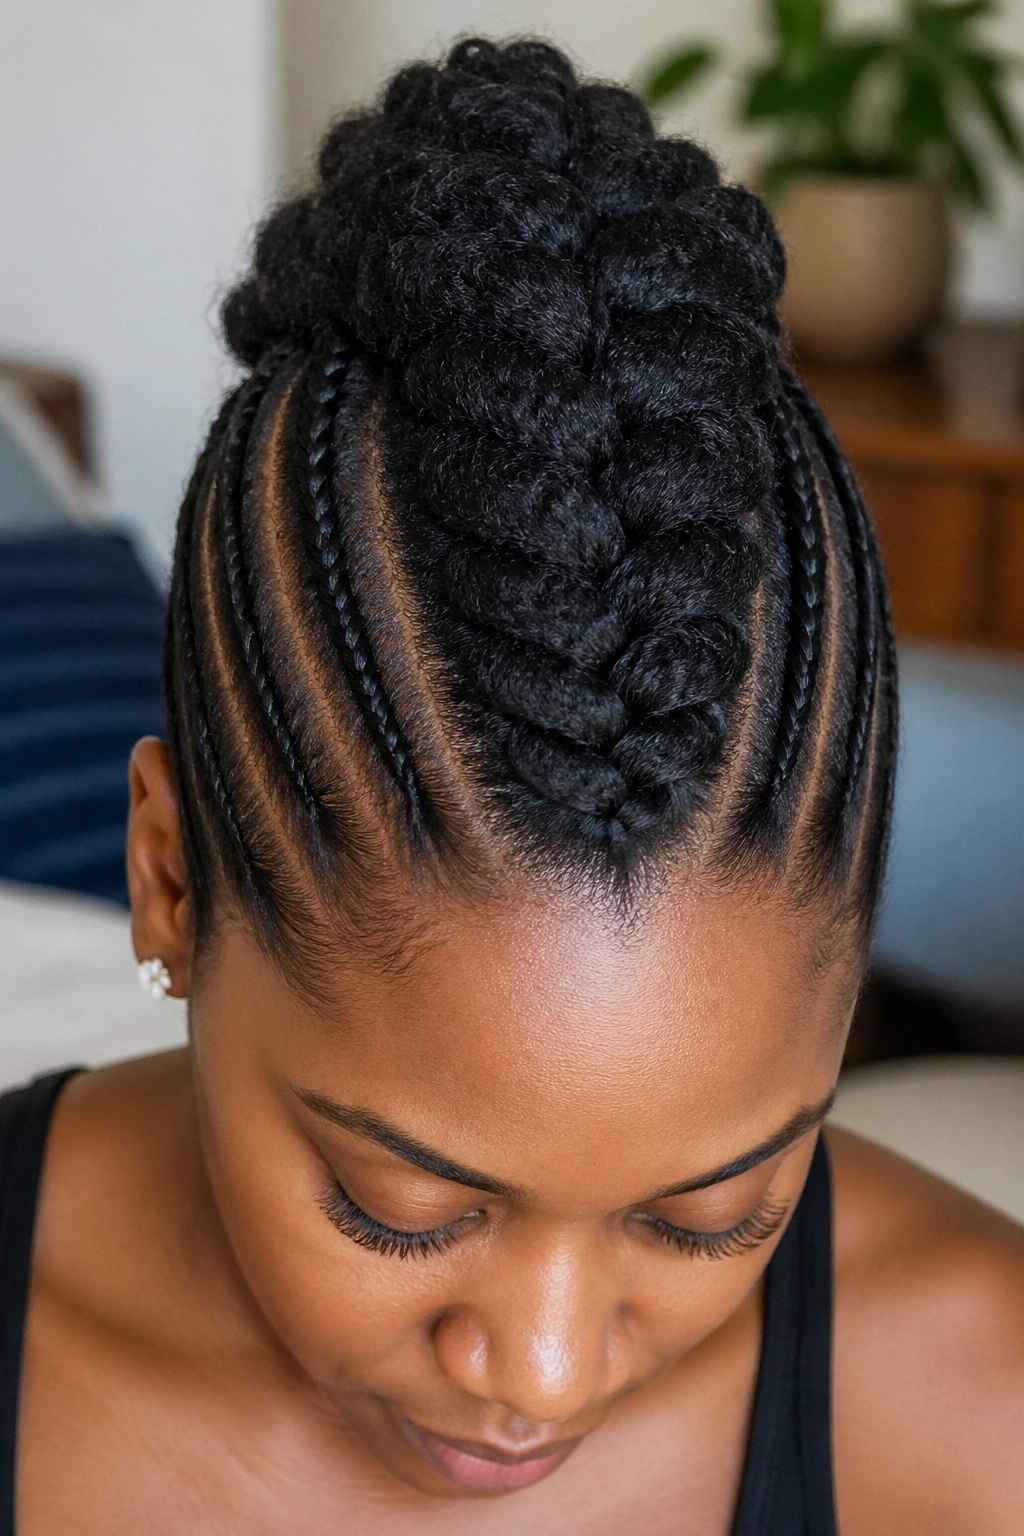
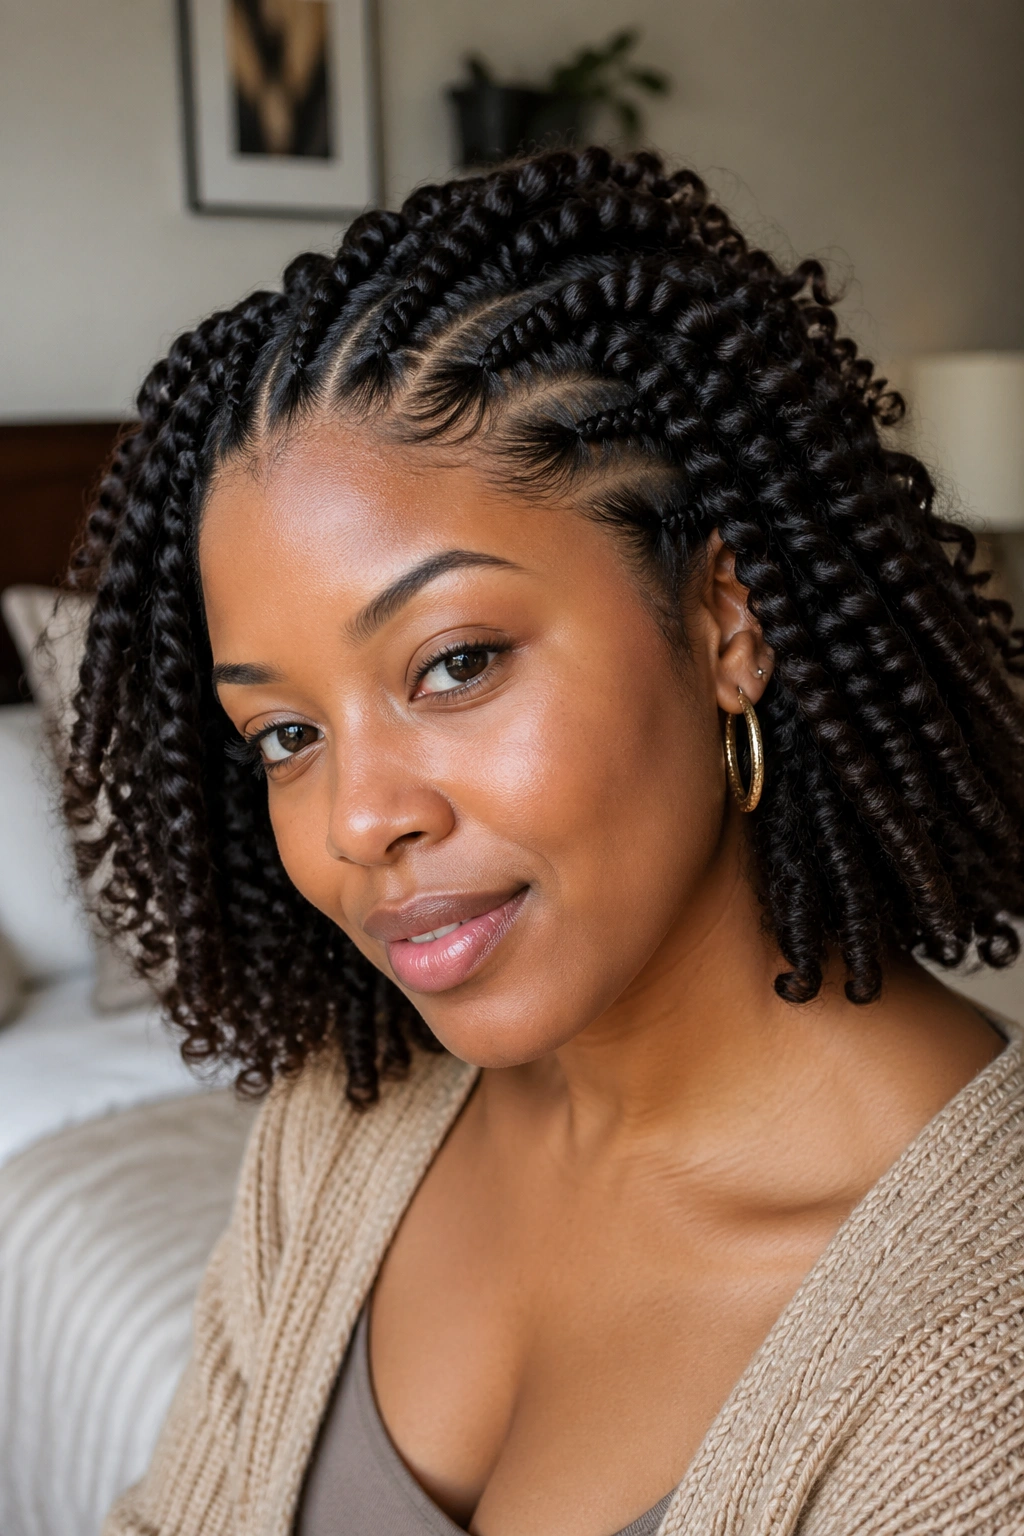
2. Four-Braid Crown and Nape Set
Four braids are where the style starts feeling fuller and more layered. You get more bends, more direction, and a little more control over how the hair falls around the face. It looks intentional without feeling stiff.
The big advantage here is shape. Two braids can sometimes collapse into the same wave pattern from root to tip. Four braids break that up, so the hair has more movement and less of that one-note, pancake-flat finish.
I like this version for thick hair that needs a little structure. Part the hair into four sections: two in front, two in back. Keep the front braids slightly smaller if you want the crown to lift, because that tiny size change makes the hair sit higher when the braids come out.
Wear it with a side part for softness, or keep the part centered if you want a cleaner line.
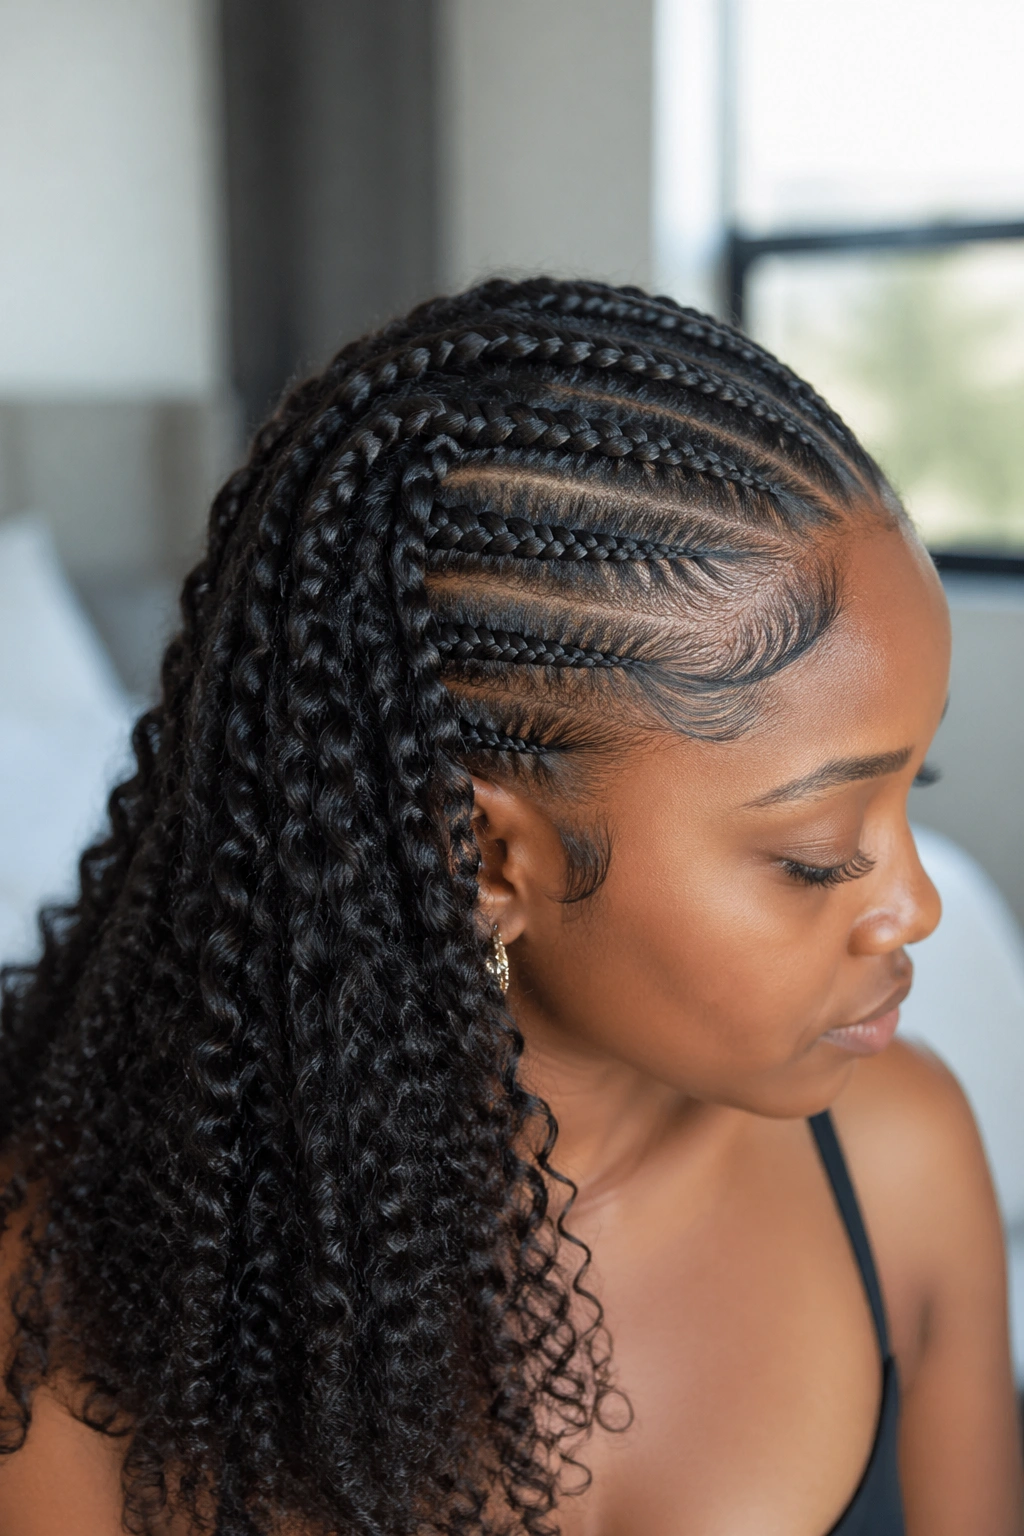
3. Deep Side-Part French Braid-Out
Do you want the easiest way to make a braid-out look more styled? Move the part. A deep side part changes the whole face frame, and it makes the waves fall in a longer, looser sweep across the forehead and cheek.
The Shape Shift
The side part gives one side more hair, which means that side lands with extra weight and a softer drape. The lighter side lifts a little higher, so the whole style feels asymmetrical in a good way. It’s subtle, but the eye notices it right away.
How to Wear It
Braid the larger side in one thick French braid, then split the smaller side into two narrower braids if you want more texture near the temple. Keep the front braid slightly looser at the hairline so you do not get a hard ridge. A loose edge gives a softer finish. A tight edge can look neat, but it also makes the braid pattern obvious in a way not everyone wants.
4. Zigzag-Part Braid-Out for Extra Lift
A zigzag part sounds playful, and it is, but the real reason it works is simple: the part line breaks up flatness at the scalp. Straight parts can make braid-outs look too orderly. Zigzag parts keep the roots from settling in one visible groove.
Picture the hair after unbraiding. The waves still fall in the same direction, but the root area looks less severe and more lifted. That little bit of irregularity keeps the style from feeling too polished.
- Use the tip of a rat-tail comb to draw the zigzag
- Keep each zig and zag around ½ inch wide
- Pair it with medium-sized braids for the best balance
- Great when you want texture without a severe line
Best move: keep the part clean while braiding, then soften it after the set is dry. The style should look crisp up top and airy through the ends.
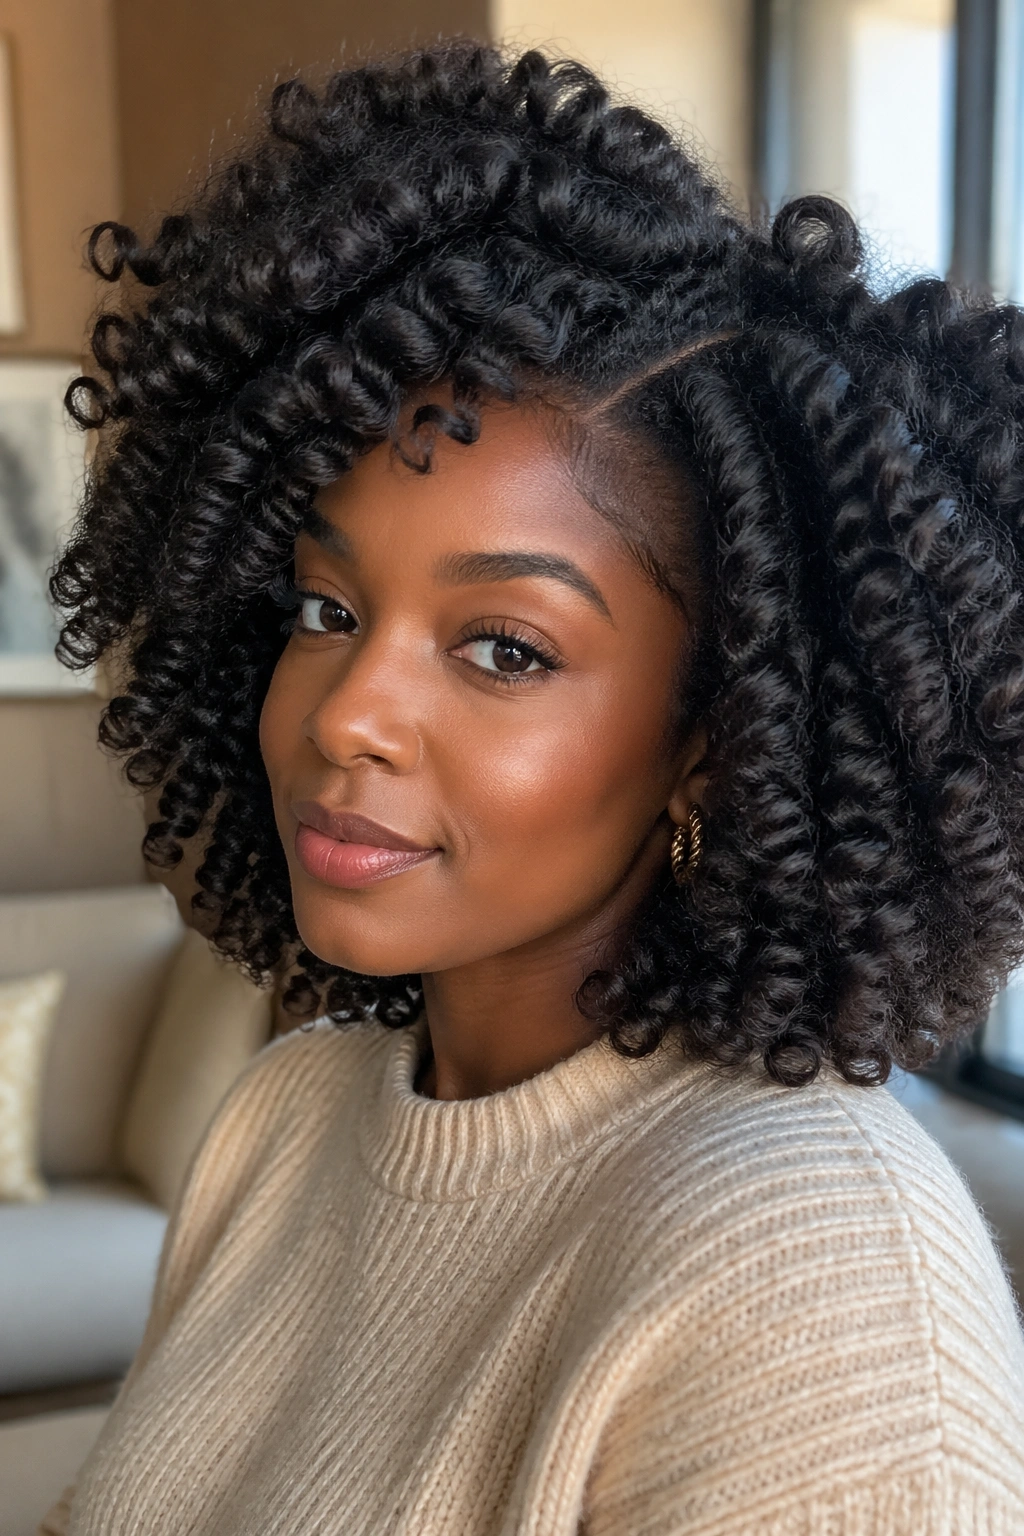
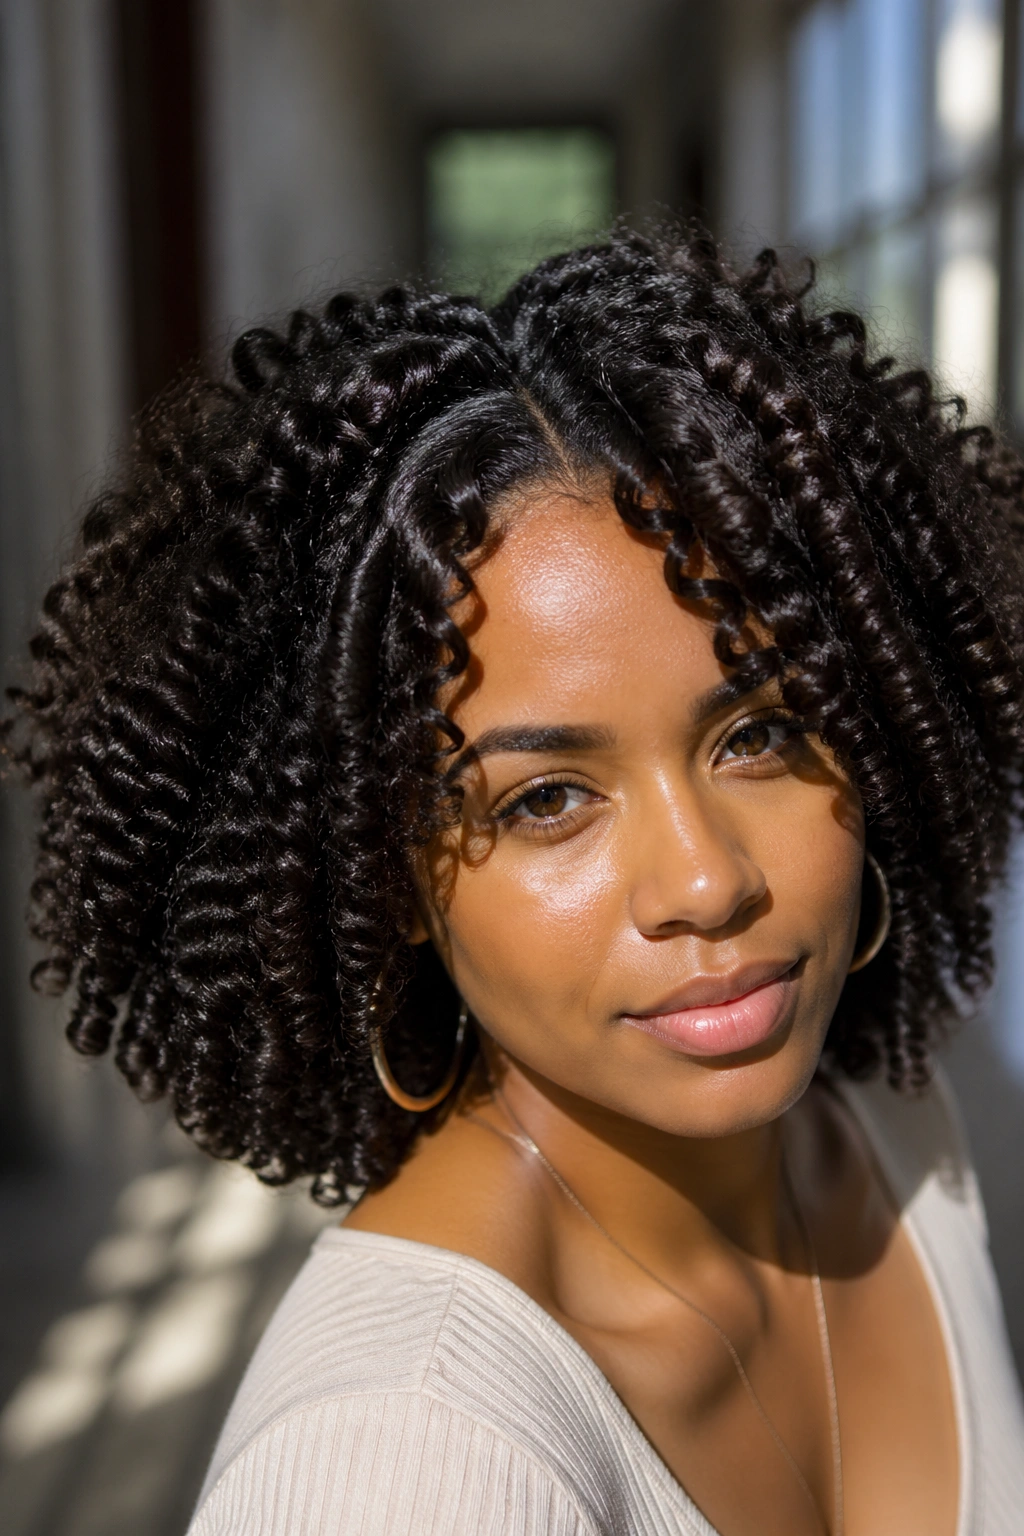
5. Micro-Braid Wave Set
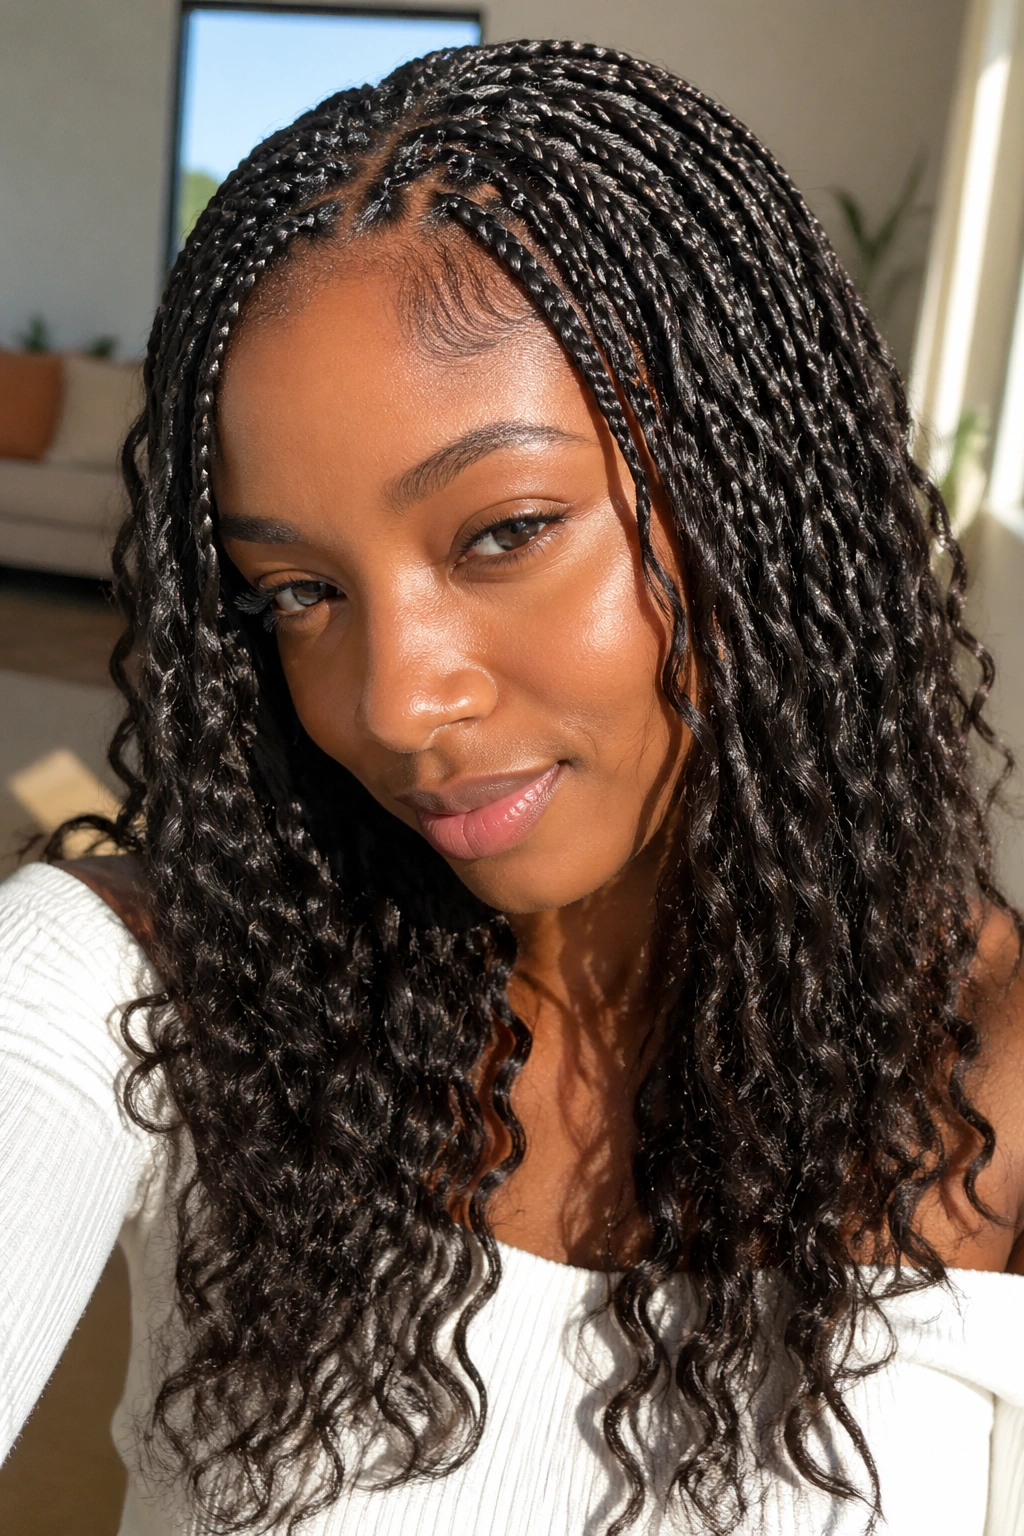
Small braids make a big difference. If you want tight, lively texture that leans closer to crimped waves than loose bends, micro braids are the move. They take longer to install, yes, but the payoff is a dense, springy finish that lasts longer than larger braid-outs.
The key is not to make the braids too tiny at the ends, where hair can snag and fray. A section about the width of a pencil works nicely at the scalp, then you can keep the length smooth and even. Tiny braids near the roots give you lift. Tiny braids through the whole length give you a much tighter wave pattern.
This style loves moisture cream, but not too much. Heavy product can make micro braids stay damp for hours, and that usually means weak definition the next morning. I’d rather see a light leave-in and a small dab of styling mousse than a thick butter that never quite dries.
6. Jumbo Braid-Out with Big Loops
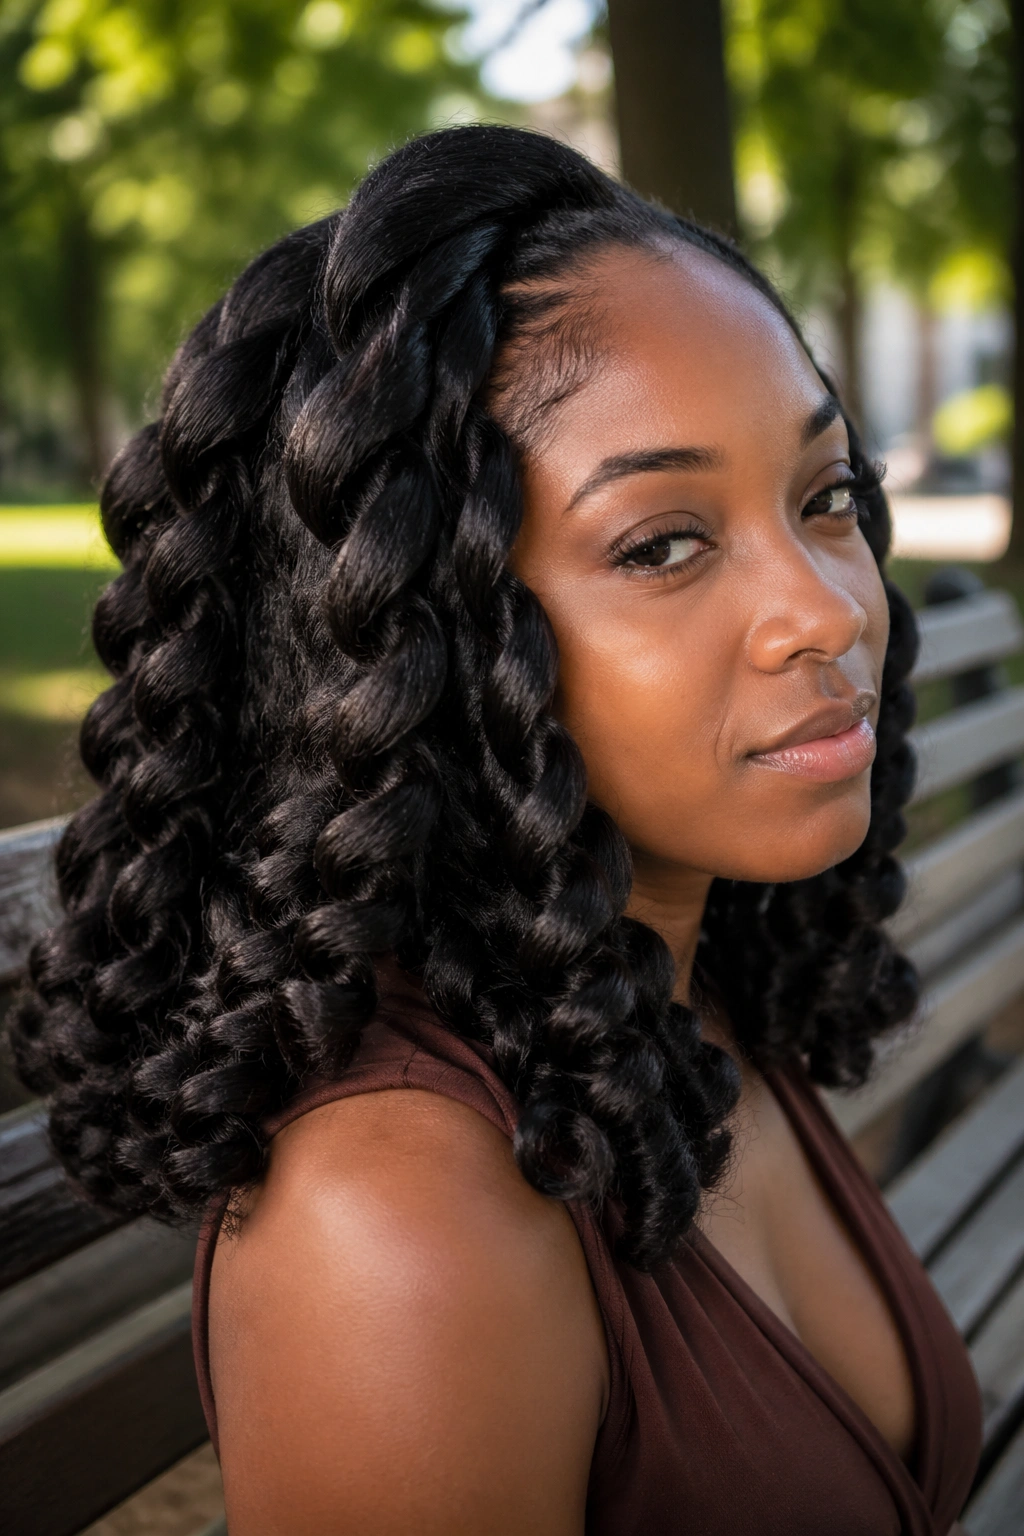
Jumbo braids are the opposite mood. They give you broad, open waves that read soft from a distance and plush up close. If your hair gets big naturally and you do not want to fight it, this is the style that works with the grain instead of against it.
Unlike micro braids, jumbo braids dry faster and unravel faster. They also create a looser braid pattern, which means the ends tend to swing and move more. That makes them a smart pick for long hair or for anyone who likes the look of volume more than detail.
I’d use three to five large braids depending on density. Fewer than that can look too stretched, and more than that starts creeping back toward a tighter set. When you separate the braids, stop while the waves still look chunky. If you keep pulling, the shape turns fuzzy.
7. Half-Up French Braid-Out
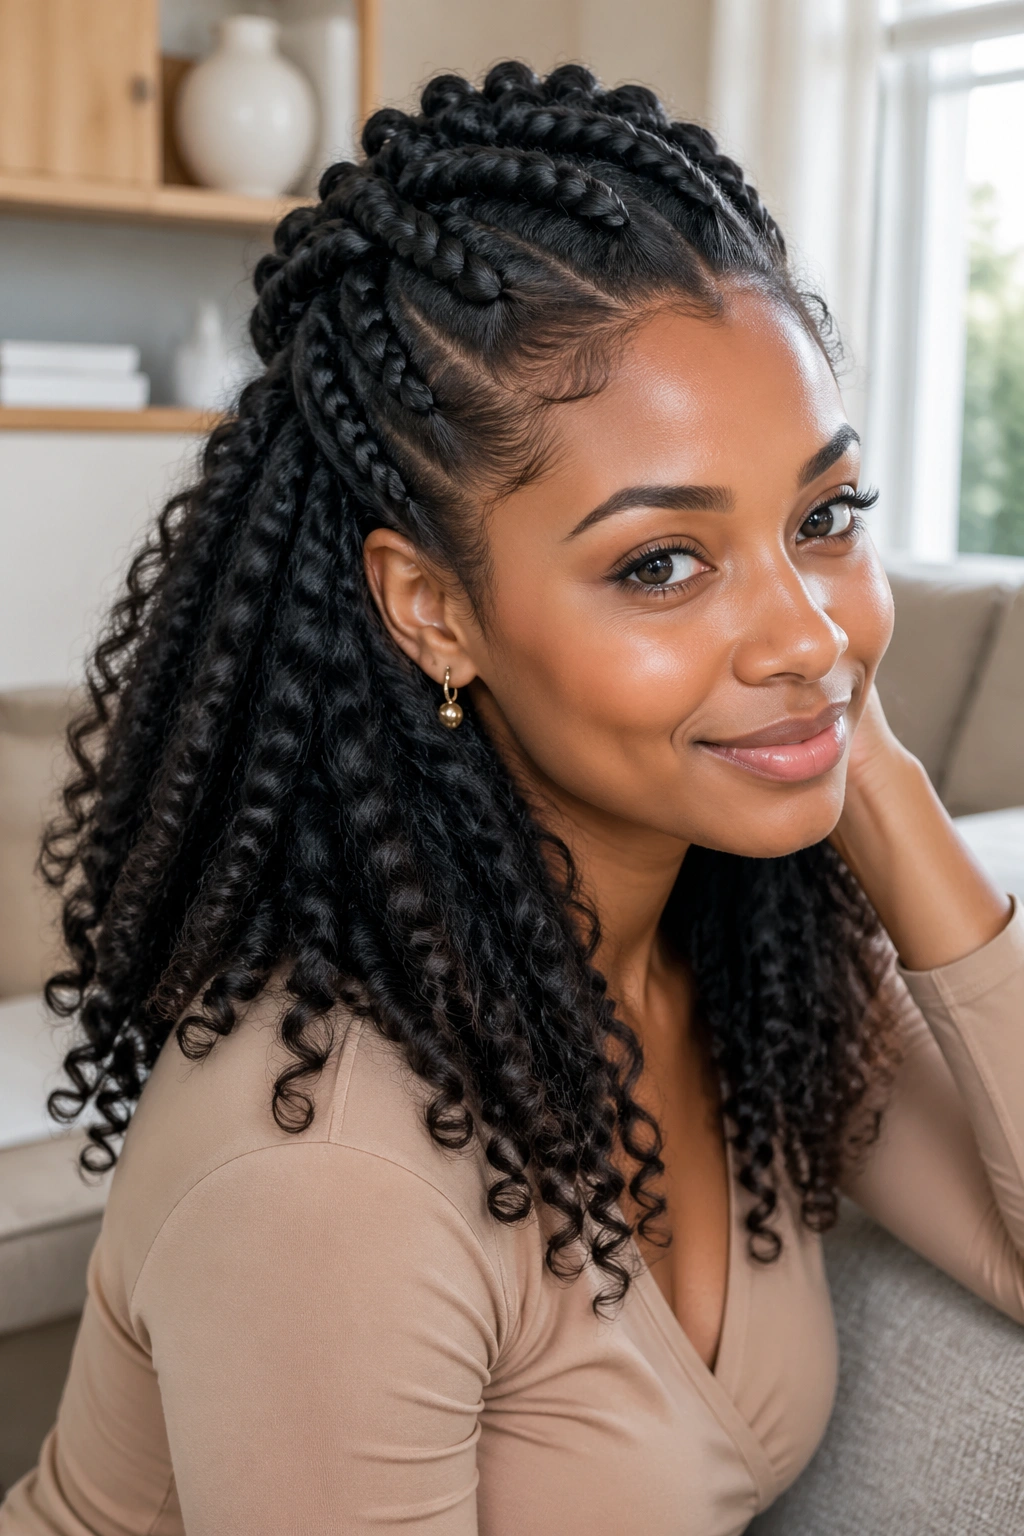
The half-up version is one of those styles that looks more complicated than it is. The top half is braided back and away from the face, while the bottom half stays loose and full. That split gives you lift at the crown and softness everywhere else.
Why It’s a Good Everyday Option
It keeps hair off your forehead without sacrificing the movement at the ends. If your roots get flat fast, this style helps because the braid starts near the hairline and pushes the top section upward before it ever dries.
How to Set It
- Section off the top half from temple to temple
- Create two French braids or one center braid across the crown
- Leave the bottom loose in stretched curls or loose waves
- Fluff only the loose ends after the braids are out
Best for: days when you want your face open, but you still want the hair to feel full and touchable. It’s a nice middle ground.
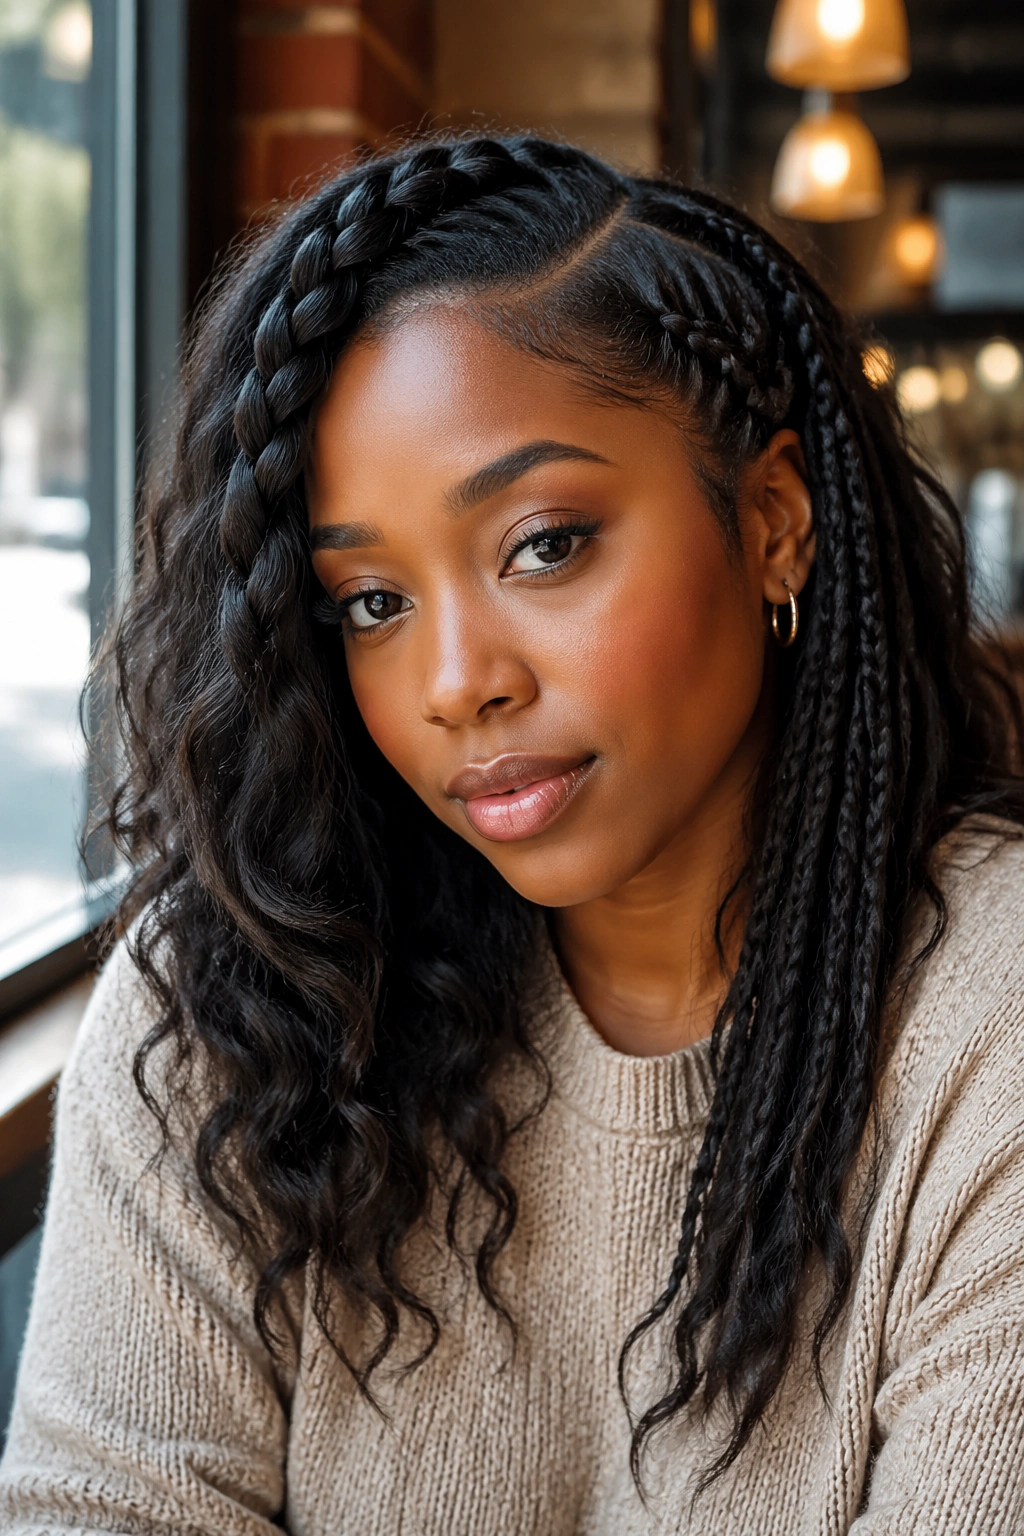
8. Face-Frame French Braid-Out
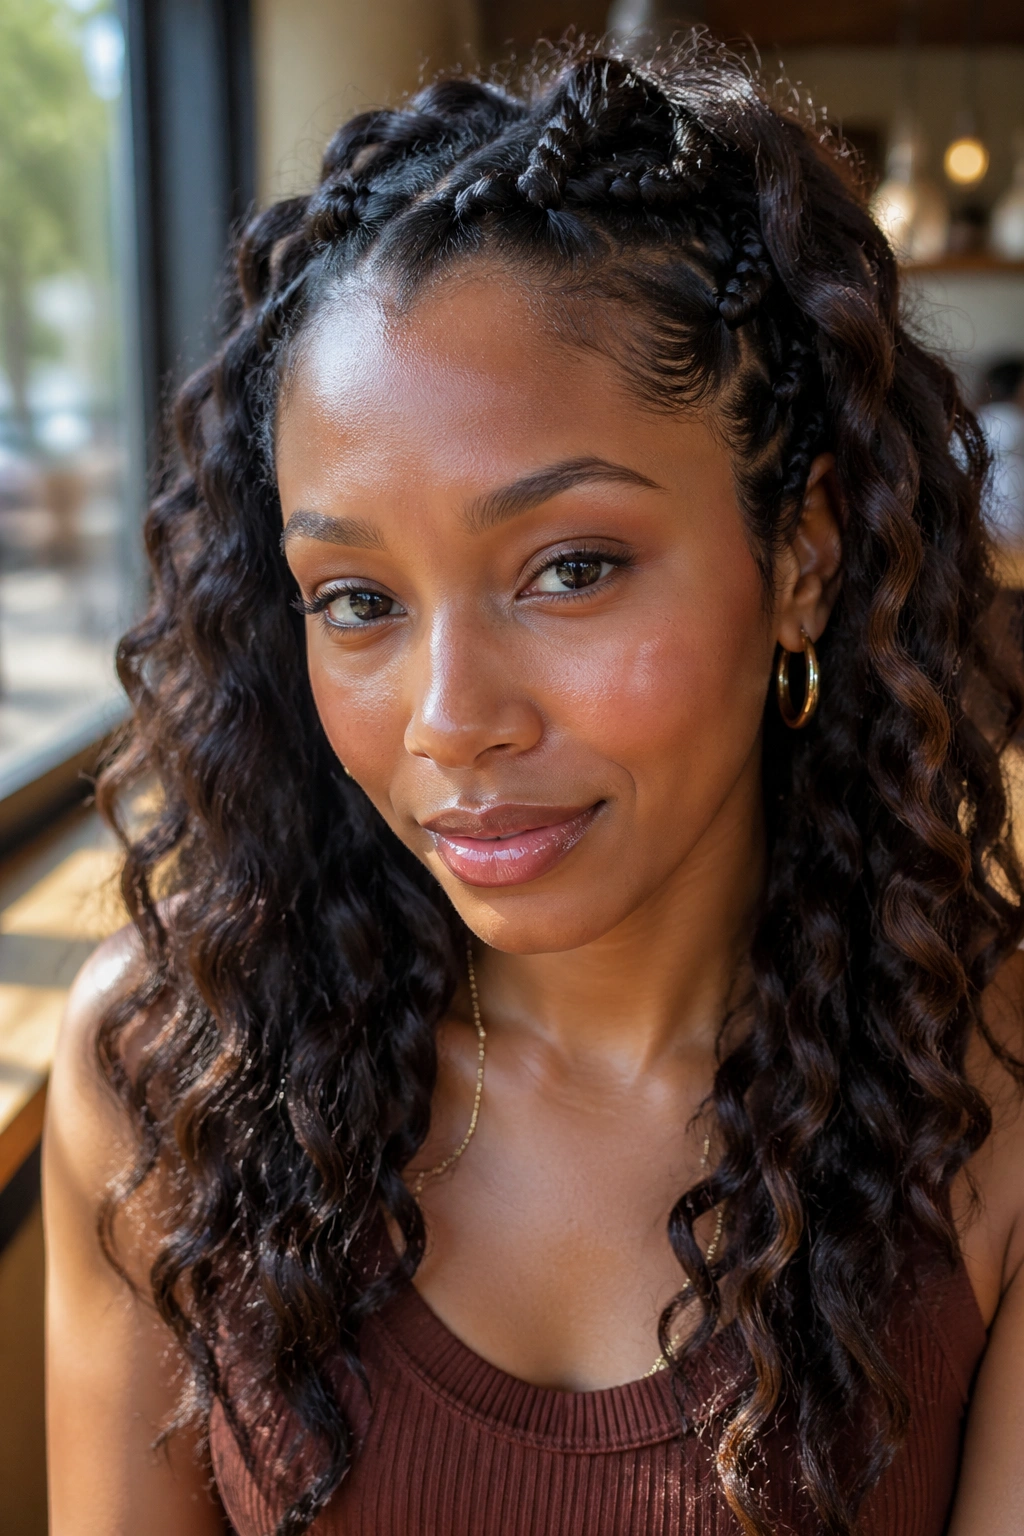
A face-frame braid-out is all about the front. The braids start smaller near the temples and hairline, then open into softer waves through the lengths. It gives your face shape without stealing the spotlight from the rest of the hair.
The front matters more than people think. If the first two inches are too tight, the braid pattern sits like a stripe across the forehead. If it’s too loose, the style loses structure. The sweet spot is gentle tension, especially around the temples, where hair can be delicate.
This works well with a little edge control or a light gel on the first inch of roots. Not much. Just enough to keep the front neat while the rest of the braid-out stays fluffy. I like this version when I want the hair to look styled at brunch but not overworked.
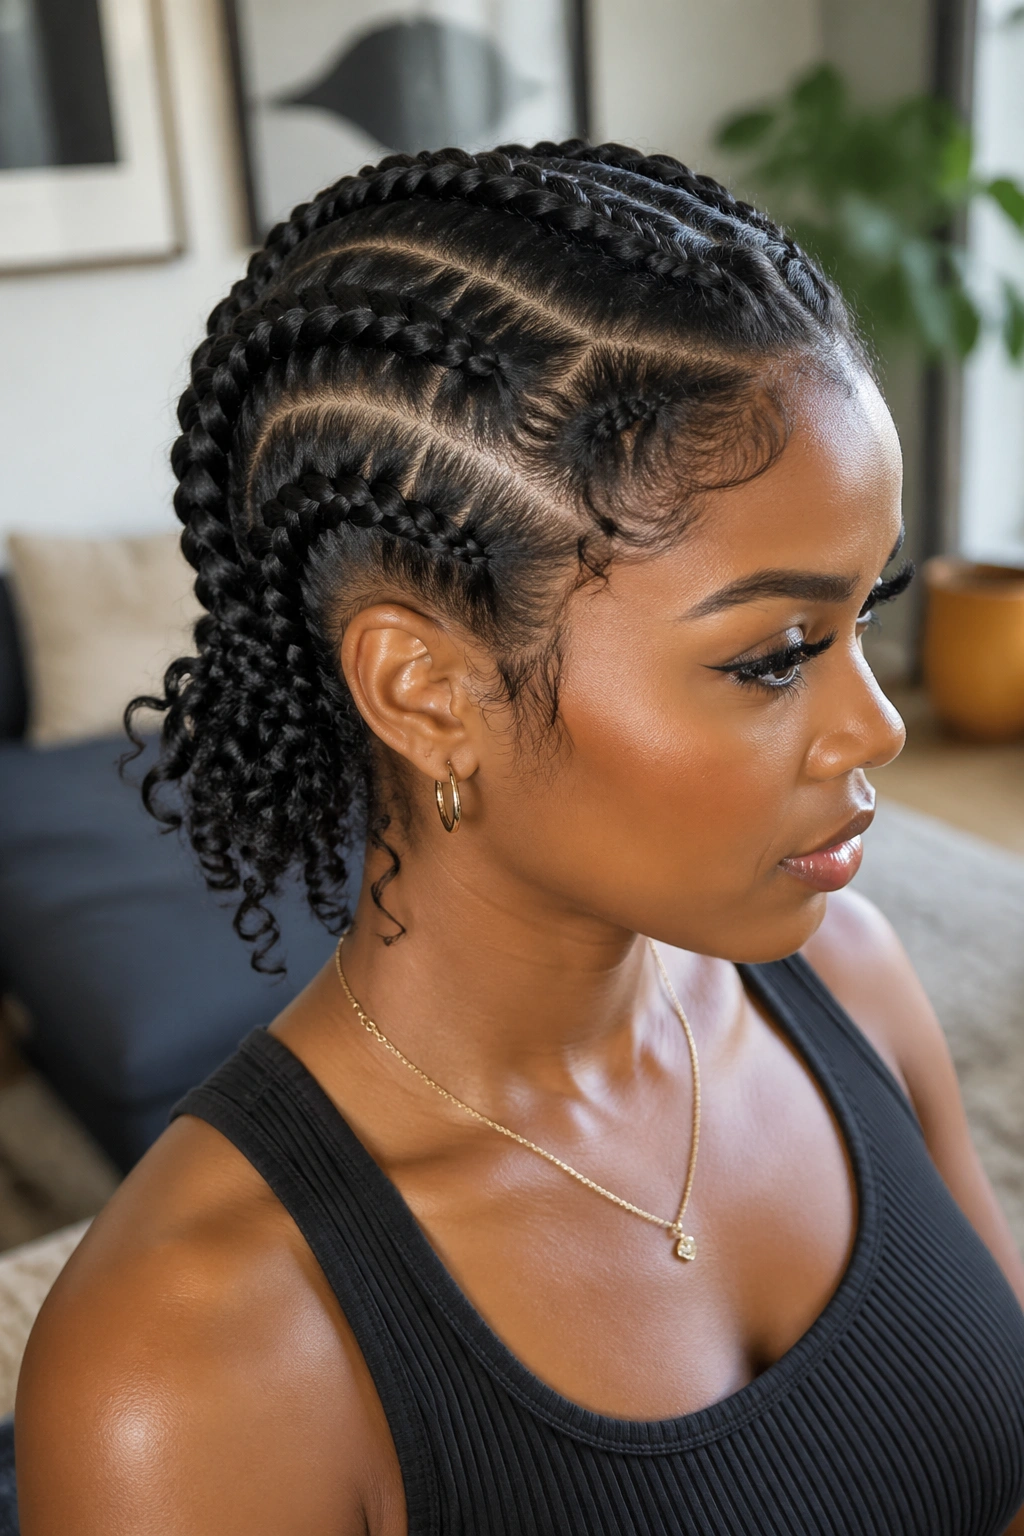
9. Low-Nape Braid-Out with Tucked Ends
Can a braid-out look calm and polished without feeling stiff? Absolutely. A low-nape French braid-out keeps the braids anchored near the back of the head, which gives the style a lower center of gravity and a smoother silhouette.
What Changes Here
The braid starts farther back, so the crown stays flatter and the waves fall lower toward the neck. That makes it a good fit for medium-length hair or for anyone who wants less height at the top. It also helps if the front tends to poof too much on you.
Small Details That Matter
Use slimmer sections near the nape so the braids lie flat. If the ends are left too bulky, they stick out after unbraiding and interrupt the shape. Tuck them under a satin scarf overnight if you want a smoother finish.
A low nape set feels quieter than a crown-heavy set. Sometimes that is exactly what the hair needs.
10. High-Puff Root-Lift Braid-Out
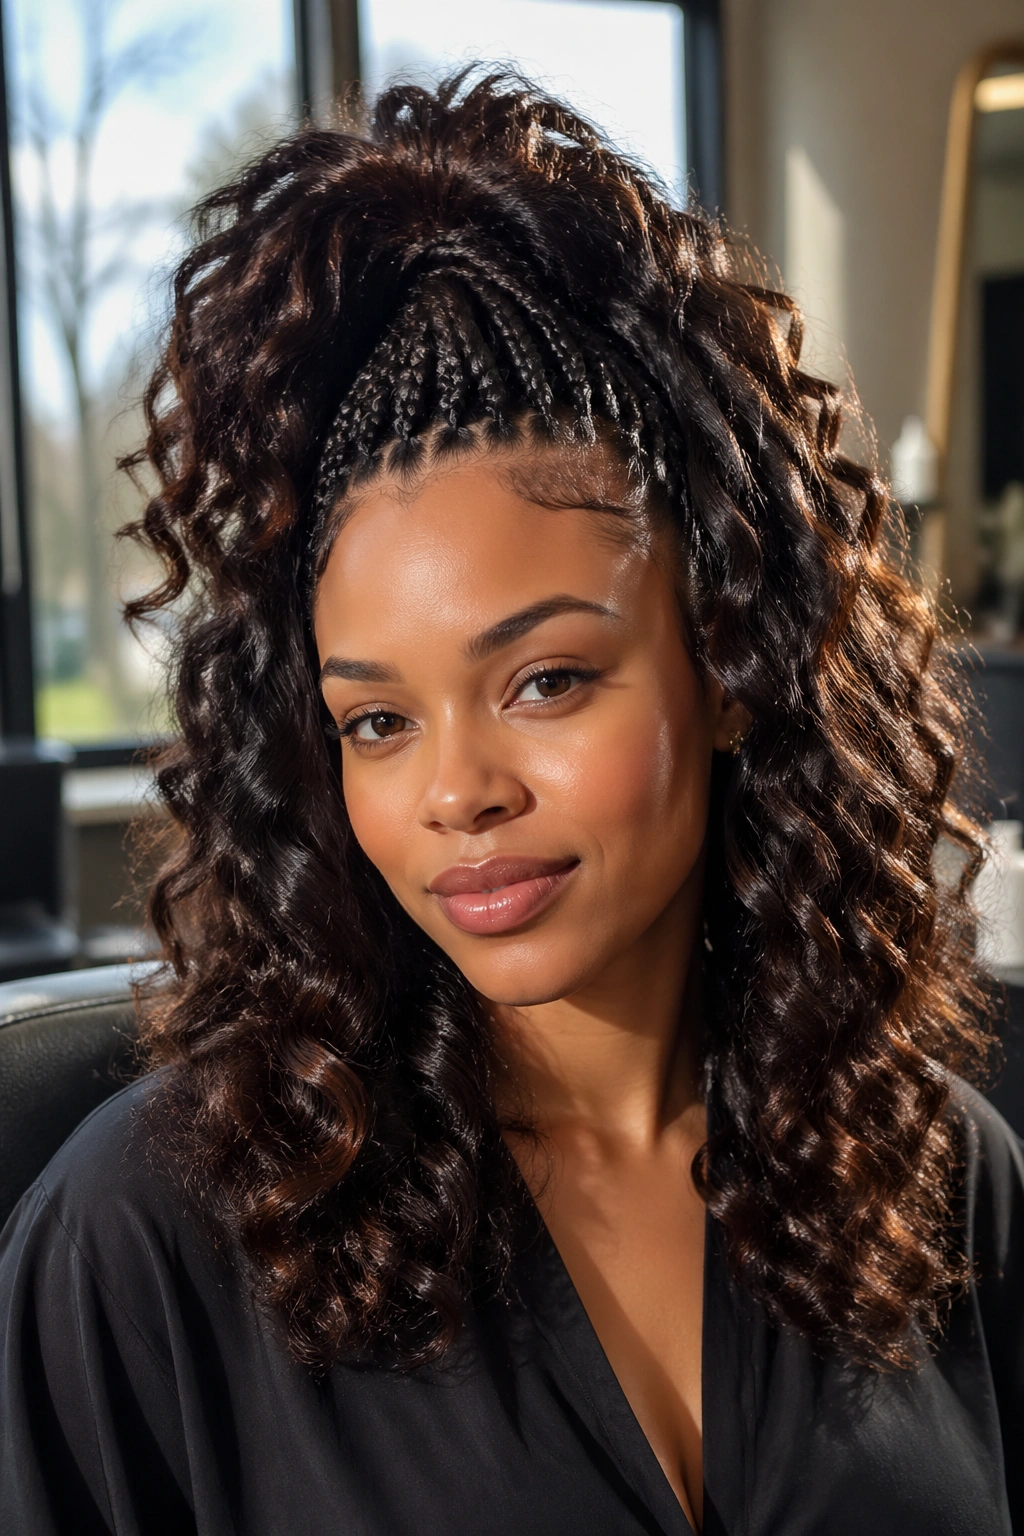
This style is built for people who like the roots big and the lengths soft. The braids begin high on the head, which lifts the hair away from the scalp before the wave pattern even starts. When you take it down, you get a puffier crown and a looser body below.
The first mistake people make here is braiding too tight at the edge. That can flatten the crown in the wrong places and make the style look carved instead of buoyant. A slightly looser feed at the top keeps the root lift natural.
- Start the braids just above the temples
- Keep the first inch gentle
- Use a foam or light setting lotion
- Separate the braids only after they feel fully dry
My take: this style looks best when the roots are the hero and the ends are the supporting cast. Do not over-separate the lengths.
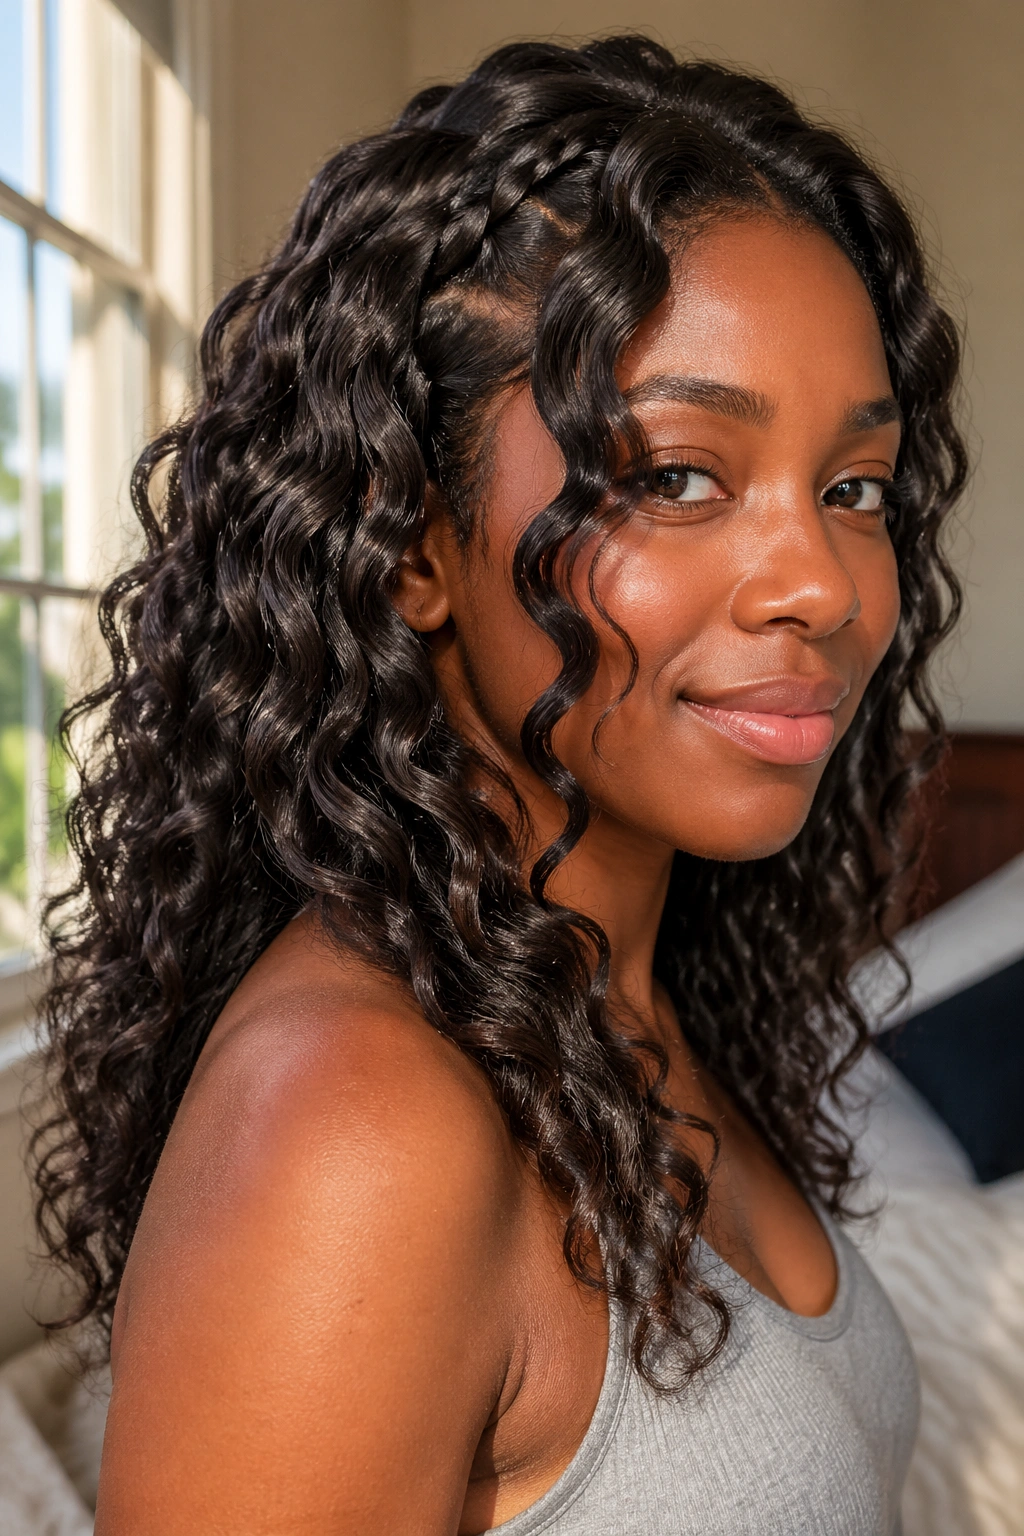
11. Wet Set Braid-Out for Soft Definition
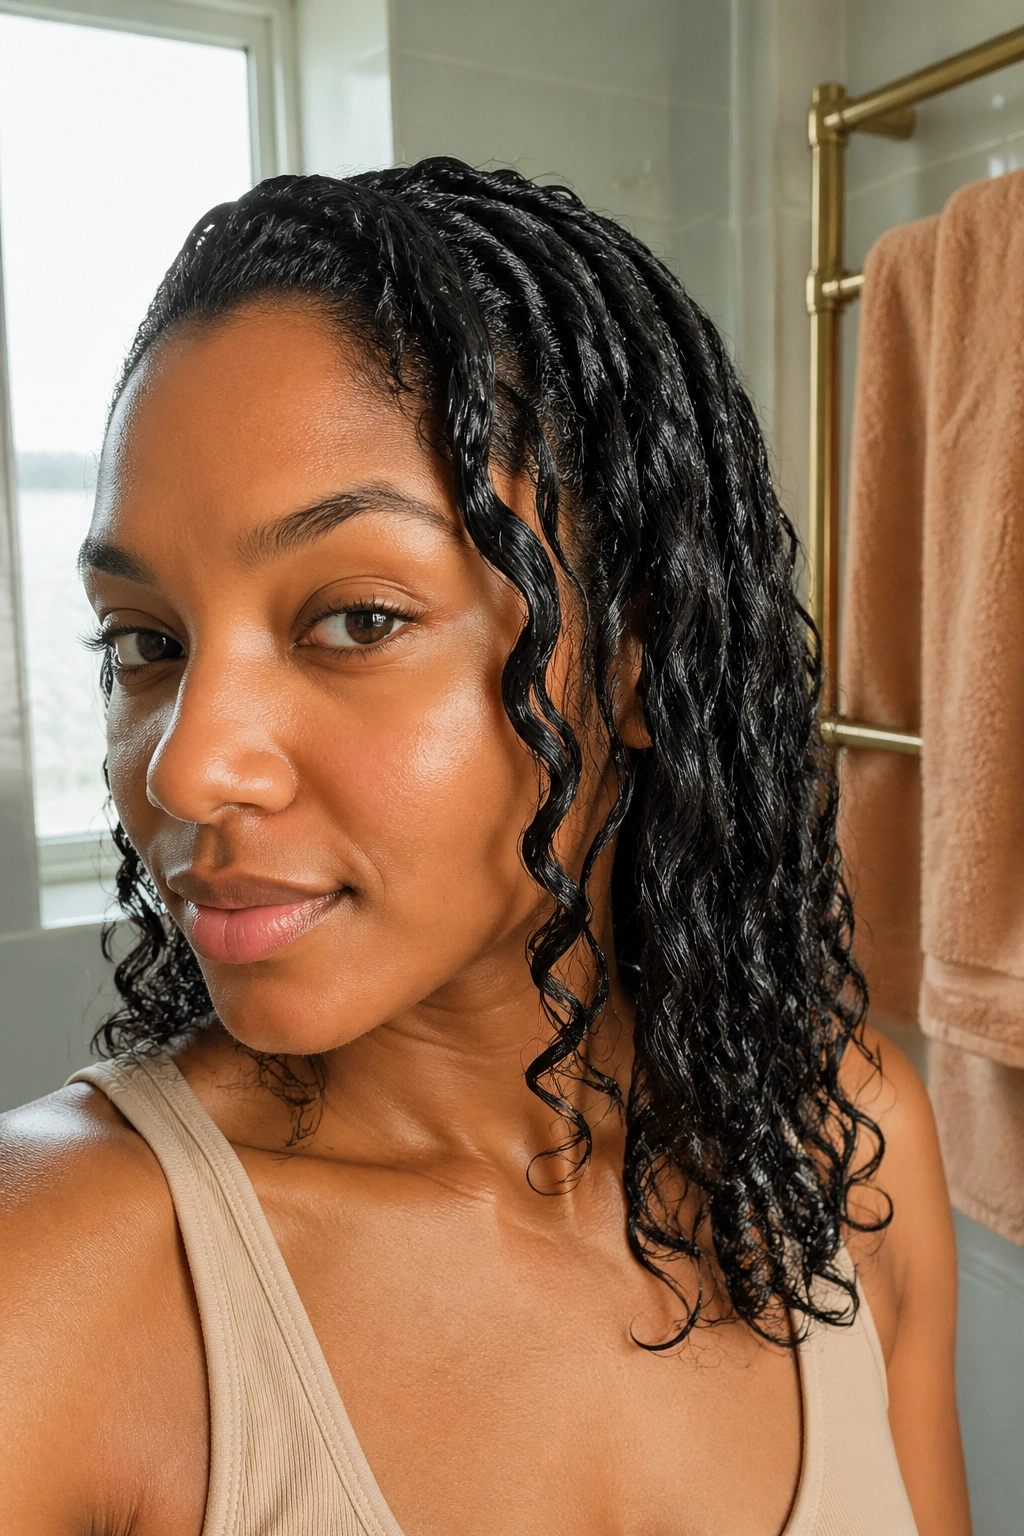
A wet set braid-out gives you the softest wave pattern of the bunch. You braid the hair while it’s damp, add a light leave-in or curl cream, and let the set dry all the way through before taking it down. The result is smoother, more sculpted texture.
The catch is patience. If the hair is still even slightly cool or damp at the center of the braid, the style will loosen too soon. That is why drying time matters more here than in a fluffier set. Thick hair may need a full overnight dry plus a few hours of air time.
I like this version when I want the braid pattern to show up cleanly, especially on humid days when dry styles can fall apart at the roots. The finish is softer than a blow-dried braid-out and usually shinier too, which can be nice if your hair tends to drink up product and look dull.
12. Stretched Blow-Dry Braid-Out
A stretched blow-dry braid-out gives you a longer, sleeker wave pattern than a damp set. The hair starts out elongated, so the final braid-out has less shrinkage and a more visible S-shape through the mid-lengths.
Unlike the wet set, this one is about shape first and moisture second. You can use a tension blow-dry or a diffuser on low heat, then braid once the hair is fully stretched and cool. That cooler start matters. Warm hair loosens faster and can lose the wave before you even separate it.
This style suits people who want braid-out texture without a lot of shrink at the ends. It also works nicely on layered cuts, where the stretched lengths help the layers show up instead of disappearing into a puff. If you want a neat finish, do not skip the cool-down. Seriously.
13. Twist-and-Braid Combo Style
This one gives you a little more texture than a straight braid-out. You start with a two-strand twist at the roots or through the front, then switch to a French braid down the rest of the section. The mix creates a more varied pattern, which keeps the hair from looking too uniform.
Why I Reach for It
It is useful when the front hairline needs gentler handling. Twists are easier on fragile edges, and the braid through the mid-lengths adds the stronger wave pattern you want elsewhere. That blend is practical and pretty, which is rare enough that I notice it.
Quick Setup Notes
- Twist the first 2 to 3 inches near the scalp
- Transition into a French braid once the section feels anchored
- Use the same pattern on both sides for balance
- Unravel with a little oil on your fingertips
The finish is less predictable than a pure braid-out, and that is the point. It has more personality.
14. Flat French Braid-Out for Sleek Roots
A flat French braid-out is the right answer when you want the roots to lie close to the head and the waves to start lower down. It looks cleaner at the scalp than a high-volume set, which makes it useful for workdays or sharper outfits.
The difference is in the tension. Keep the braid snug against the scalp for the first few passes, then ease up as you move down. That keeps the root area smooth while the lengths still open up into texture. If you braid loosely from the start, the whole style balloons.
I’d use a light gel or custard only at the roots, not through the whole strand. Too much product on the lengths makes the braid-out feel heavy, and the wave pattern loses bounce. This style is tidy, yes, but it should still move when you turn your head.
15. Halo French Braid-Out
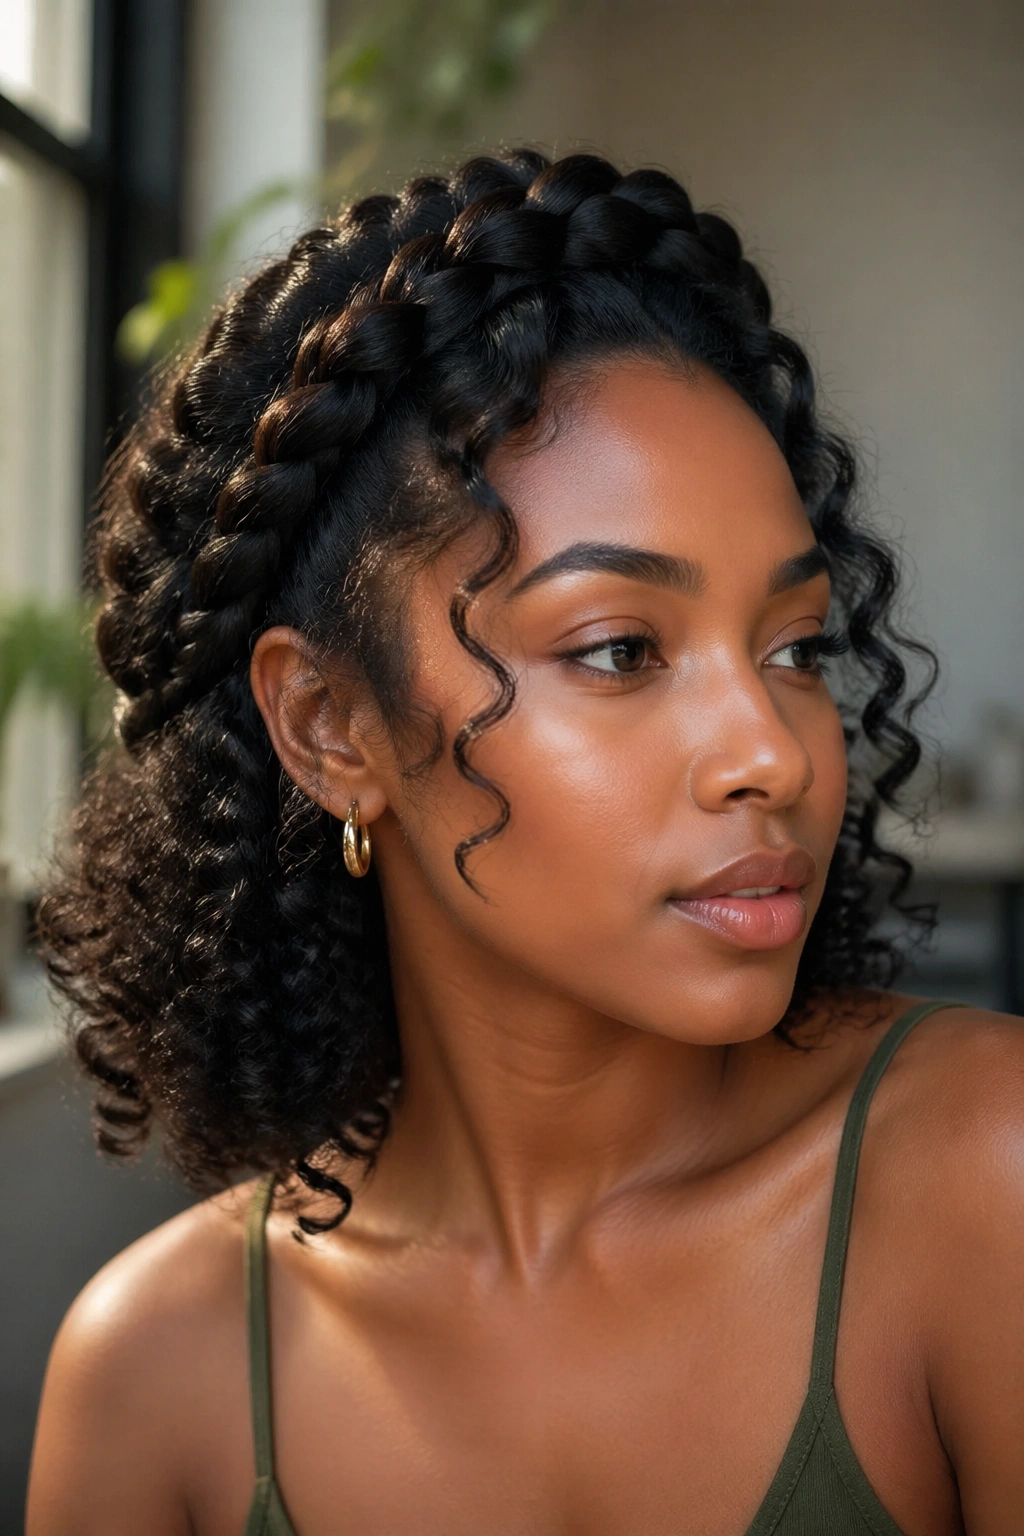
A halo braid-out wraps around the head like a soft crown, and it has a very different energy from a straight-back braid-out. The waves frame the face in a circle instead of falling straight back, which makes the whole style feel more complete.
What Makes It Different
The braid direction changes the way the hair collapses after unbraiding. Instead of one long fall, you get a round shape that hugs the head and creates gentle volume at the sides. It’s flattering on fuller faces and also on narrow ones, because the shape sits evenly around the hairline.
How to Use It
Keep the sections around the temples a little looser so they do not pull. Braid around the perimeter, then tuck the ends under with pins or small elastics if you want a seamless finish. A halo braid-out looks best when it is soft at the edges, not rigid.
16. Mohawk French Braid-Out
A mohawk braid-out is for people who like a little attitude. The braids run down the center strip of the head, leaving the sides either smoothed, pinned, or left lightly stretched. When the braids come out, the center section rises into a bold ridge of texture.
The shape depends on how many central braids you use. One thick center braid gives a broad mohawk line. Three narrower ones give more definition and a bit more control. I prefer the second version when the hair is dense, because it keeps the style from becoming a single giant puff.
- Great with tapered sides
- Works on long hair and medium hair
- Needs the sides secured with gel or pins
- Looks strongest when the center is fully dry
This one is not shy. That’s the point.
17. Bob-Length French Braid-Out
Short hair changes everything, and a bob-length braid-out proves it. The waves sit closer to the face, so each bend matters more. There is less length to hide mistakes, which is exactly why the braid pattern has to be clean.
I like smaller braids on a bob because bigger braids can make the style collapse before the ends show their shape. Keep the sections neat and the tension even, then stop separating as soon as the waves open. Over-fluffing a bob is the fastest way to lose the line of the cut.
This style works especially well when the ends are blunt. The braid-out bends soften that blunt edge and make the bob feel fuller without adding too much bulk at the sides. If your hair hits chin to collarbone length, this is one of the smartest ways to wear the braid-out look.
18. TWA French Braid-Out
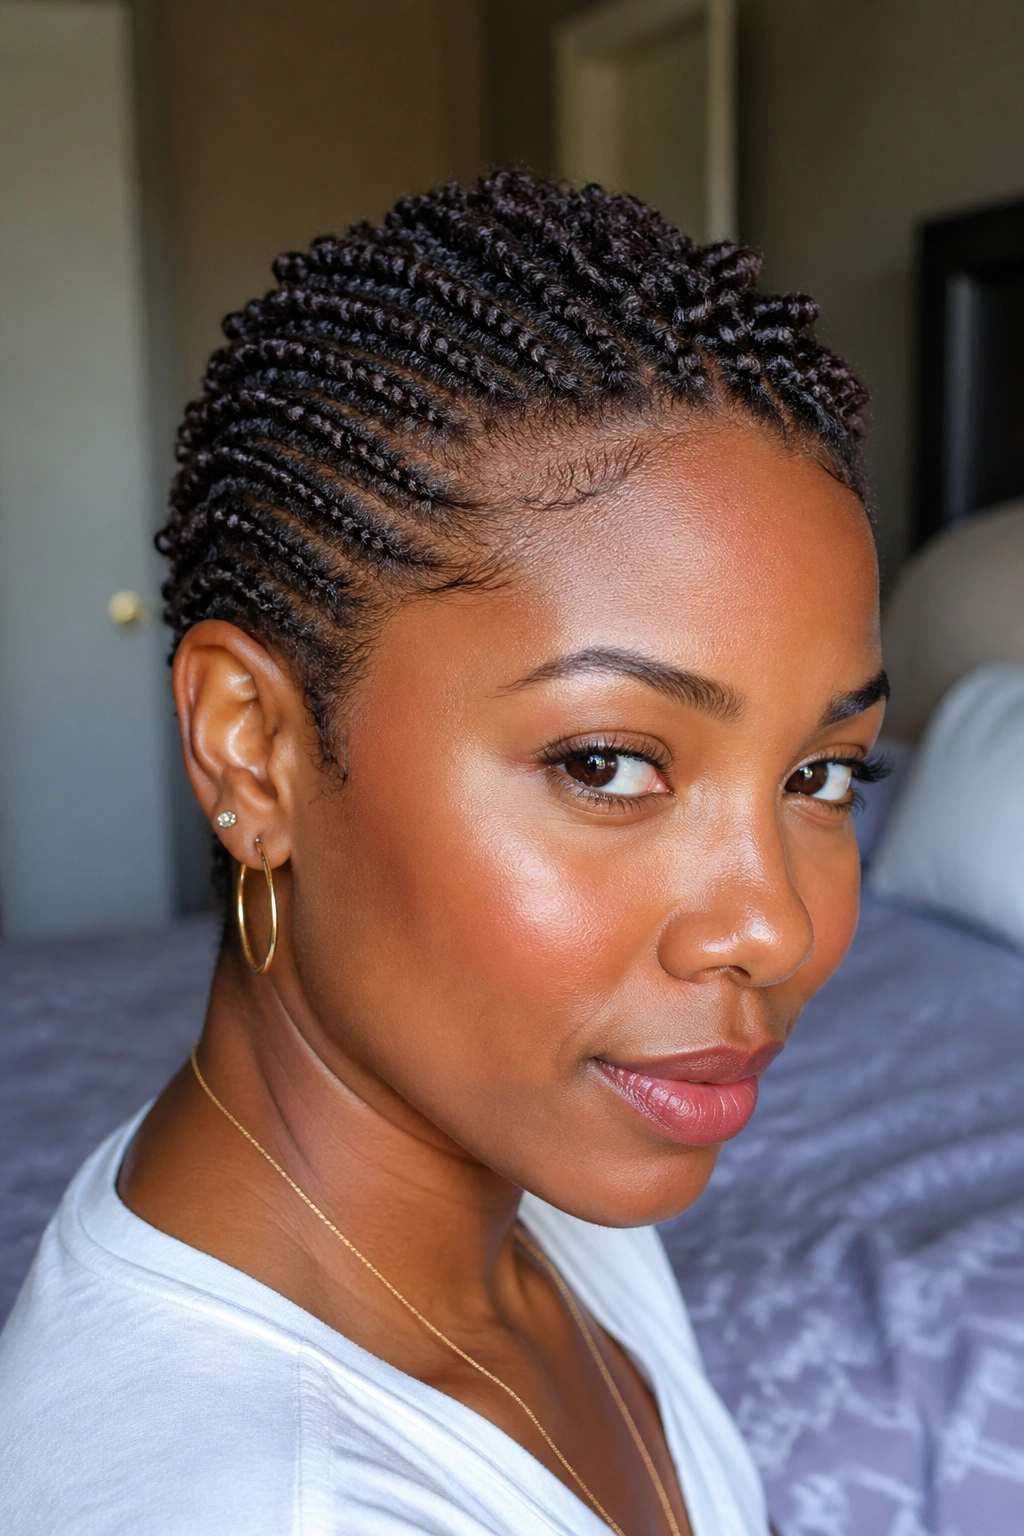
Can very short natural hair still do a braid-out? Yes, and it can be gorgeous. A TWA French braid-out uses tiny, close braids that create soft ridges and a little lift instead of long, swinging waves.
The Reality of Short Hair
You will not get the same finish you would on shoulder-length hair. That is fine. The point is definition, shape, and a bit of texture that makes the crop feel alive. The style reads best when the braids are uniform and the parts are crisp.
How to Wear It
- Use small sections, about ½ inch to ¾ inch
- Add a light cream, not a heavy butter
- Sleep in a satin bonnet
- Separate only with fingertip pressure
The look is subtle, close, and tidy. Short hair can do elegance without acting like it is trying too hard.
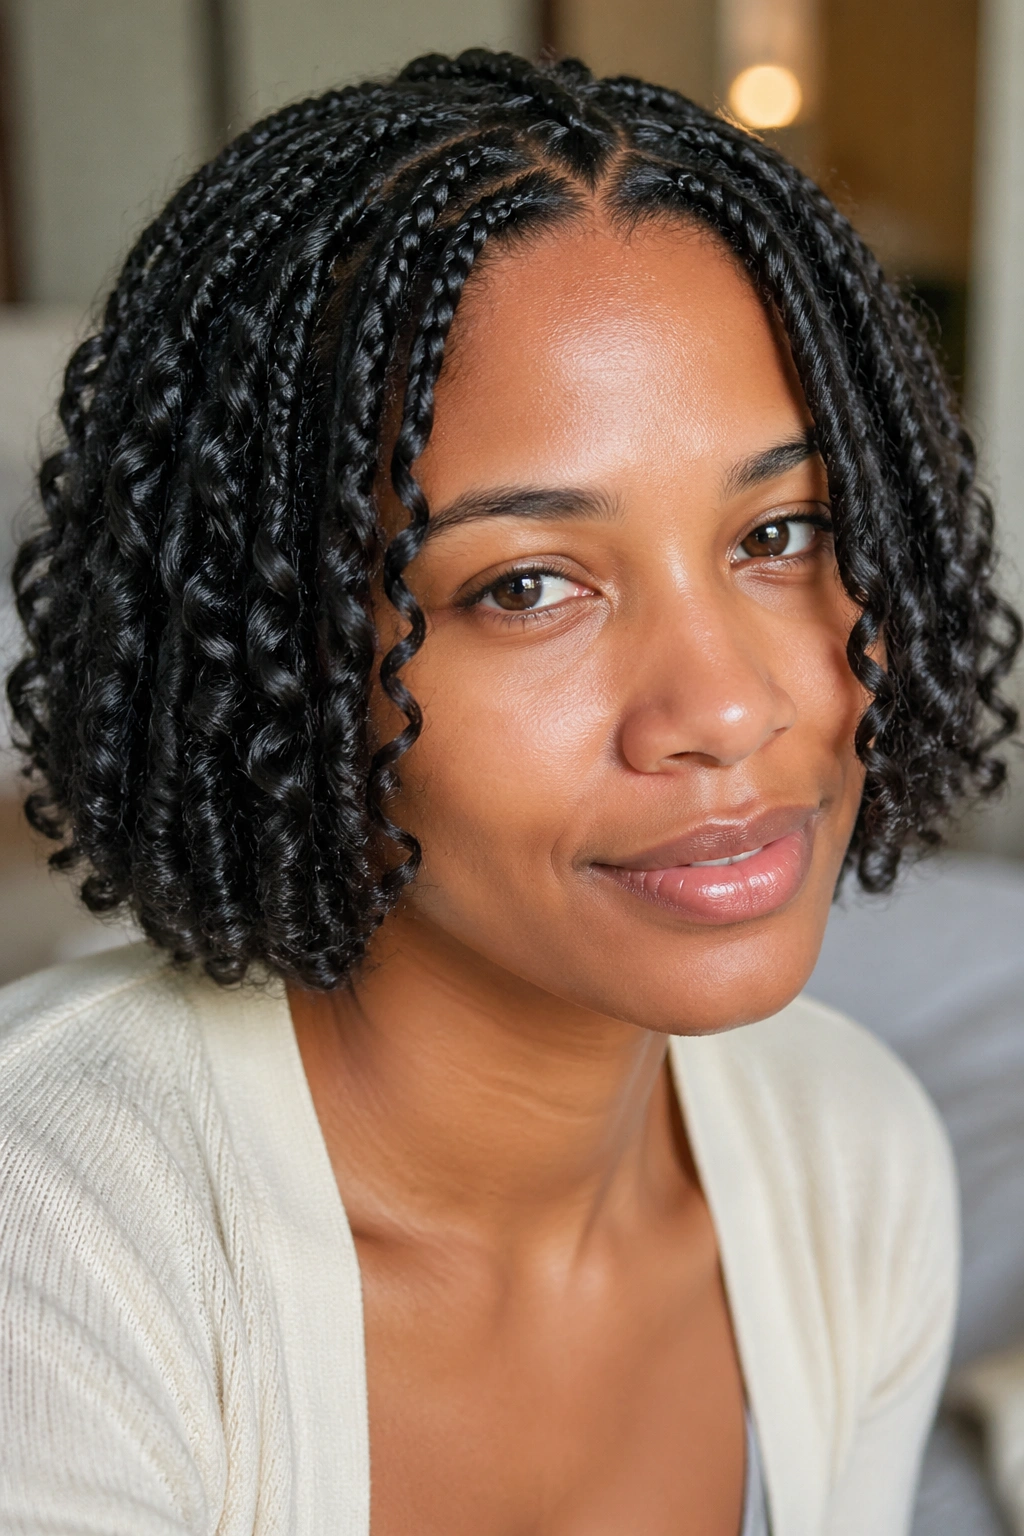
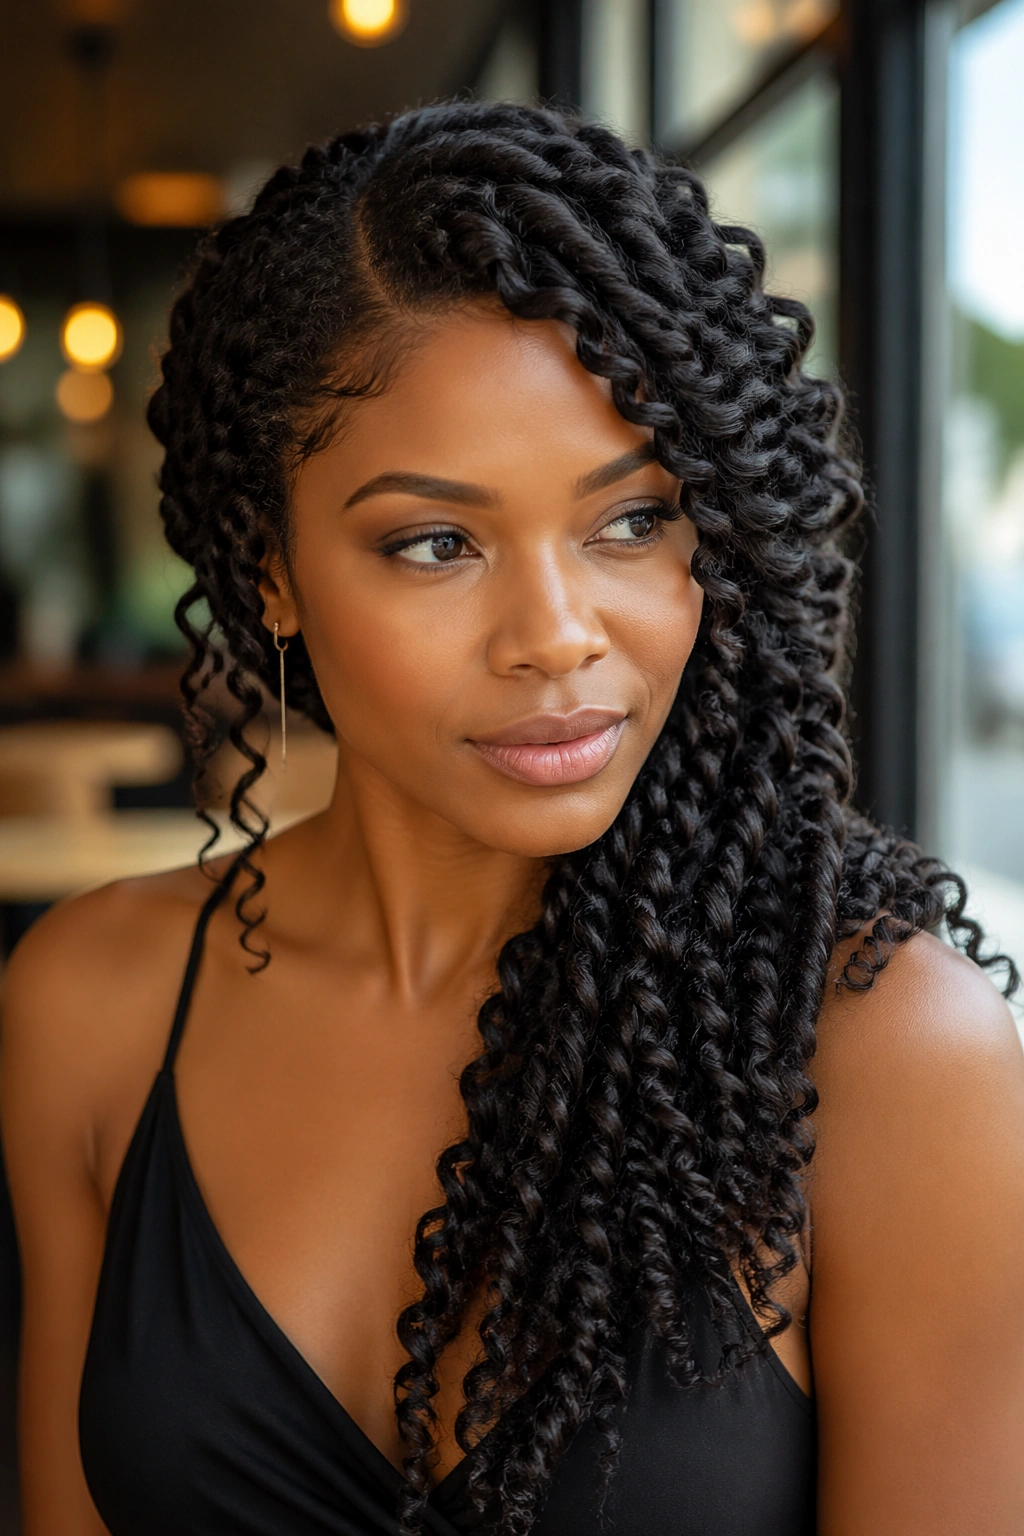
19. Long-Layered French Braid-Out
Long hair gives you room to play, but layers make the braid-out even better. The shorter pieces catch the bend sooner, while the longer pieces stretch the wave out through the ends. That mixed pattern keeps the style from falling into one heavy curtain.
Why Layers Change the Game
A one-length braid-out can look gorgeous, but it can also get heavy fast. Layers break up the weight and help the hair move. That matters when the hair is thick enough to feel like a blanket by the end of the day.
A Good Way to Set It
Braid the layered sections with slightly looser tension at the ends. The shorter pieces near the top already have enough structure; they do not need a death grip. The longer ends can take more product, but not more pulling.
If your hair is past the shoulders and layered through the front, this style gives you that easy swing people always notice first.
20. Beaded-Ends Braid-Out
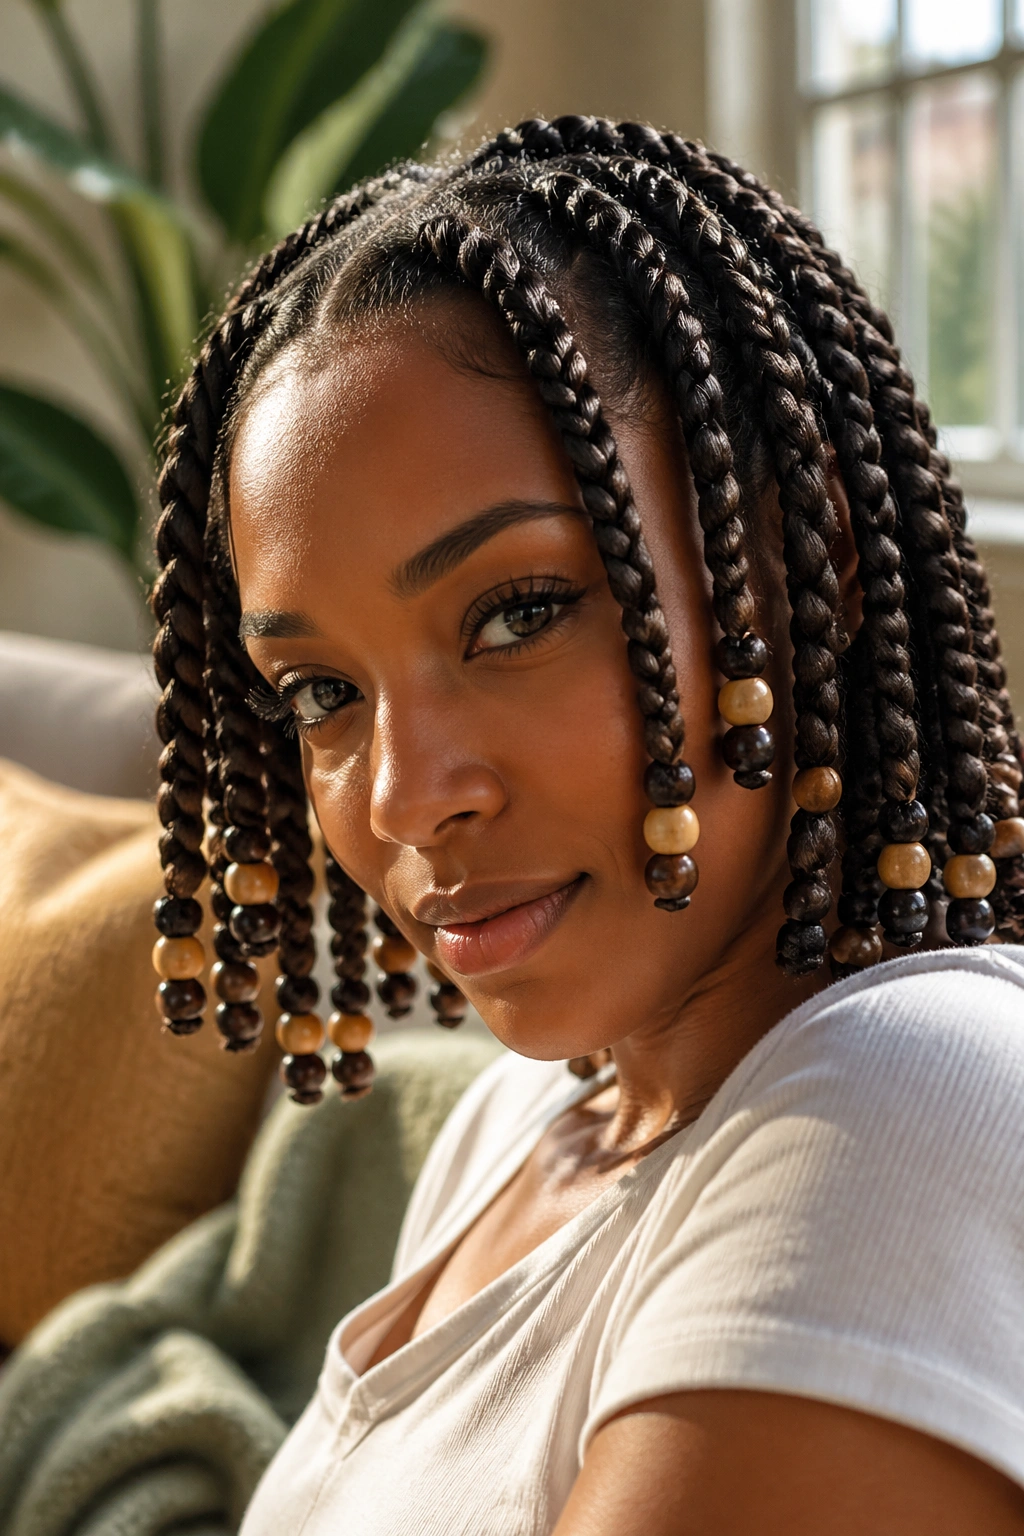
Beads change the whole mood. A beaded-end braid-out turns the finish into part of the style instead of something to hide. The braids stay neat while the ends carry weight, sound, and a little visual rhythm.
The trick is not to overload the ends. Two or three beads per braid is enough for most looks. Too many, and the hair gets dragged down. Too few, and the detail disappears. Choose beads with a smooth inner rim so they do not scrape the hair when you move.
This style is especially useful when you want the braid-out to last as a set for a while before unraveling. The beads help keep the ends compact. Later, when you take them out, the braid pattern holds a bit longer because the tips were protected.
21. Curly-Ends-Left-Out Braid-Out
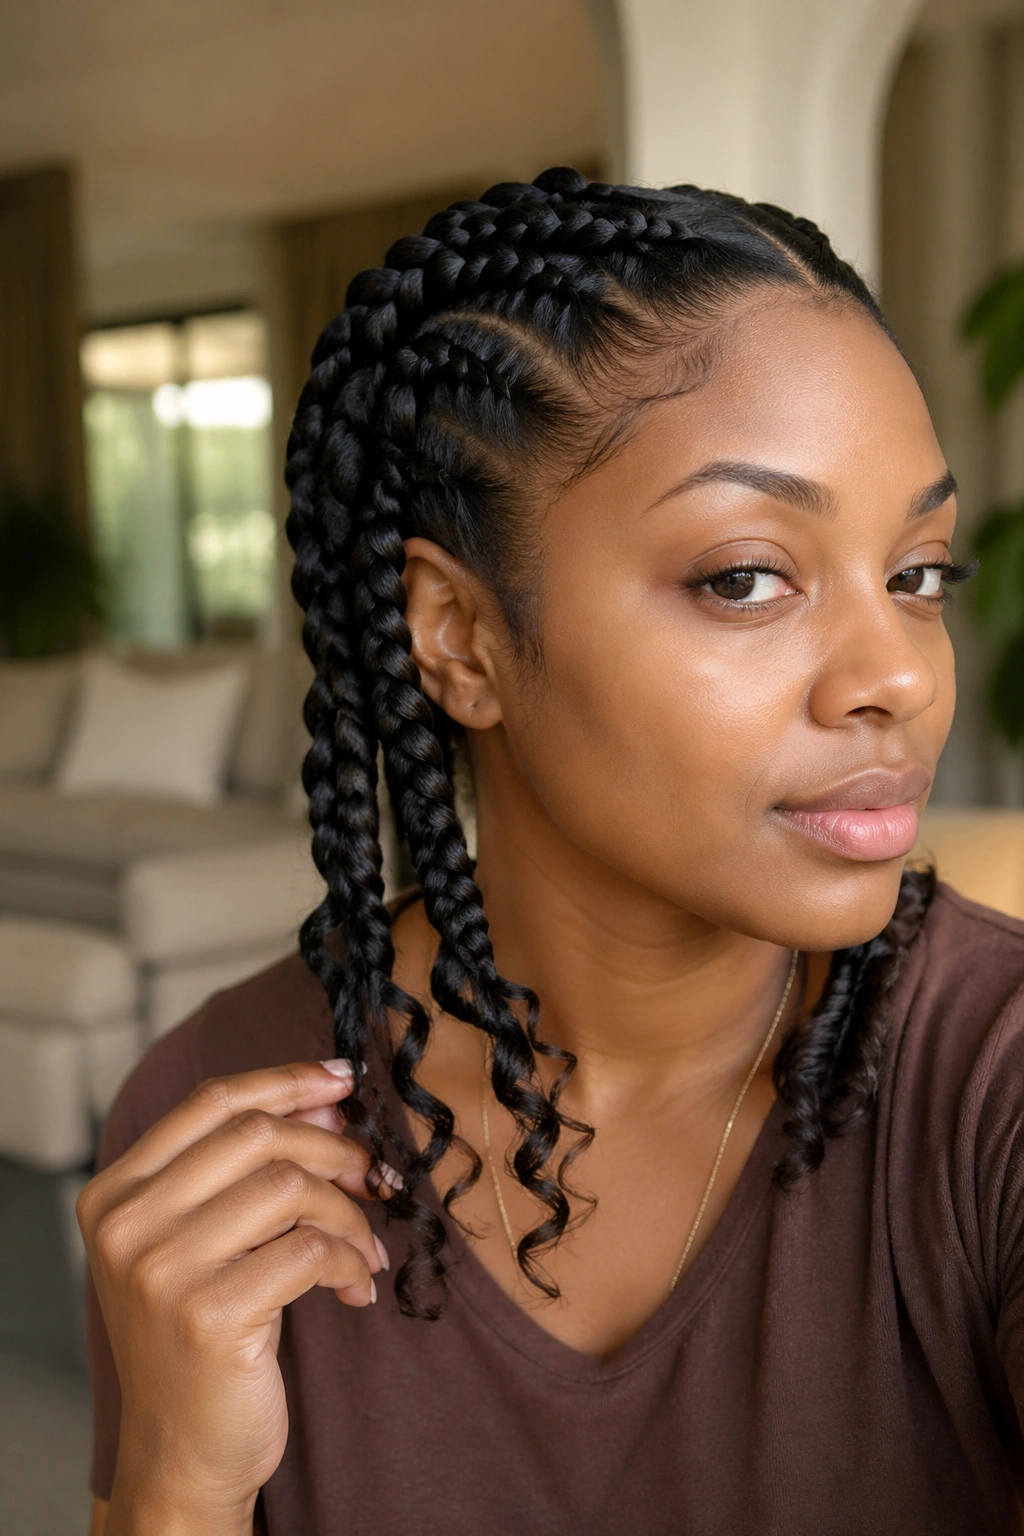
Why tuck the ends when you can let them do their own thing? Leaving the last inch or two out of the braid creates a more relaxed finish, especially if your natural curl pattern already wants to coil at the tips.
The look works best when the loose ends are defined before braiding. A little gel or curl cream on the tips helps them form instead of frizzing. If the ends are too dry, they will puff into a fuzzy tail and fight the rest of the style.
How to Use It
- Braid down until the last 1 to 2 inches
- Leave the ends free or lightly twisted
- Finger-coil the tips if they need help
- Keep the rest of the braid neat and even
I like this on hair that has uneven curl density. The loose ends soften the whole set.
22. Rod-Set Ends Braid-Out
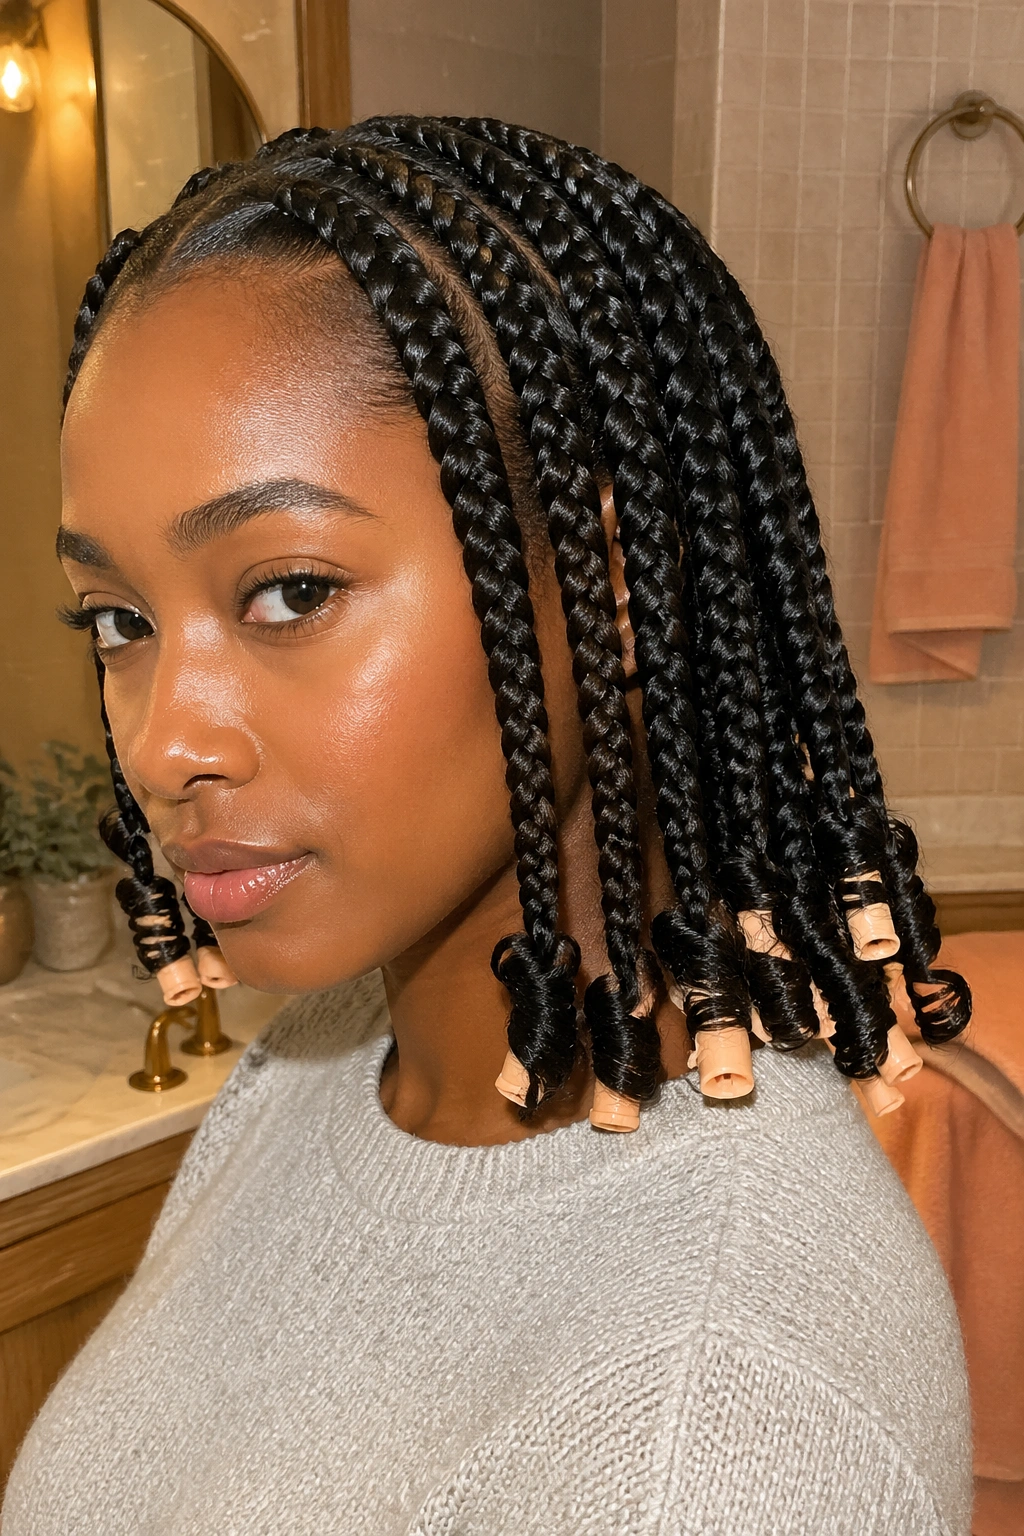
This is one of my favorite combinations when the ends need more polish. You braid the scalp and mid-lengths, then wrap the last section around perm rods, flexi-rods, or small foam rollers. The top gets braid-out texture. The bottom gets a tighter curl.
The contrast is what makes it interesting. Broad waves at the roots and spiral ends at the bottom give the hair more dimension, and the style looks finished even before you separate anything. It also helps if your ends are damaged or prone to frizz, since the rods keep them contained.
A rod size around ½ inch gives a neat curl at the end. Larger rods make the transition softer, which is useful if you do not want the end curl to shout over the braid pattern. Give the ends enough time to dry fully. Damp rod ends are a mess waiting to happen.
23. Pineapple Sleep Braid-Out
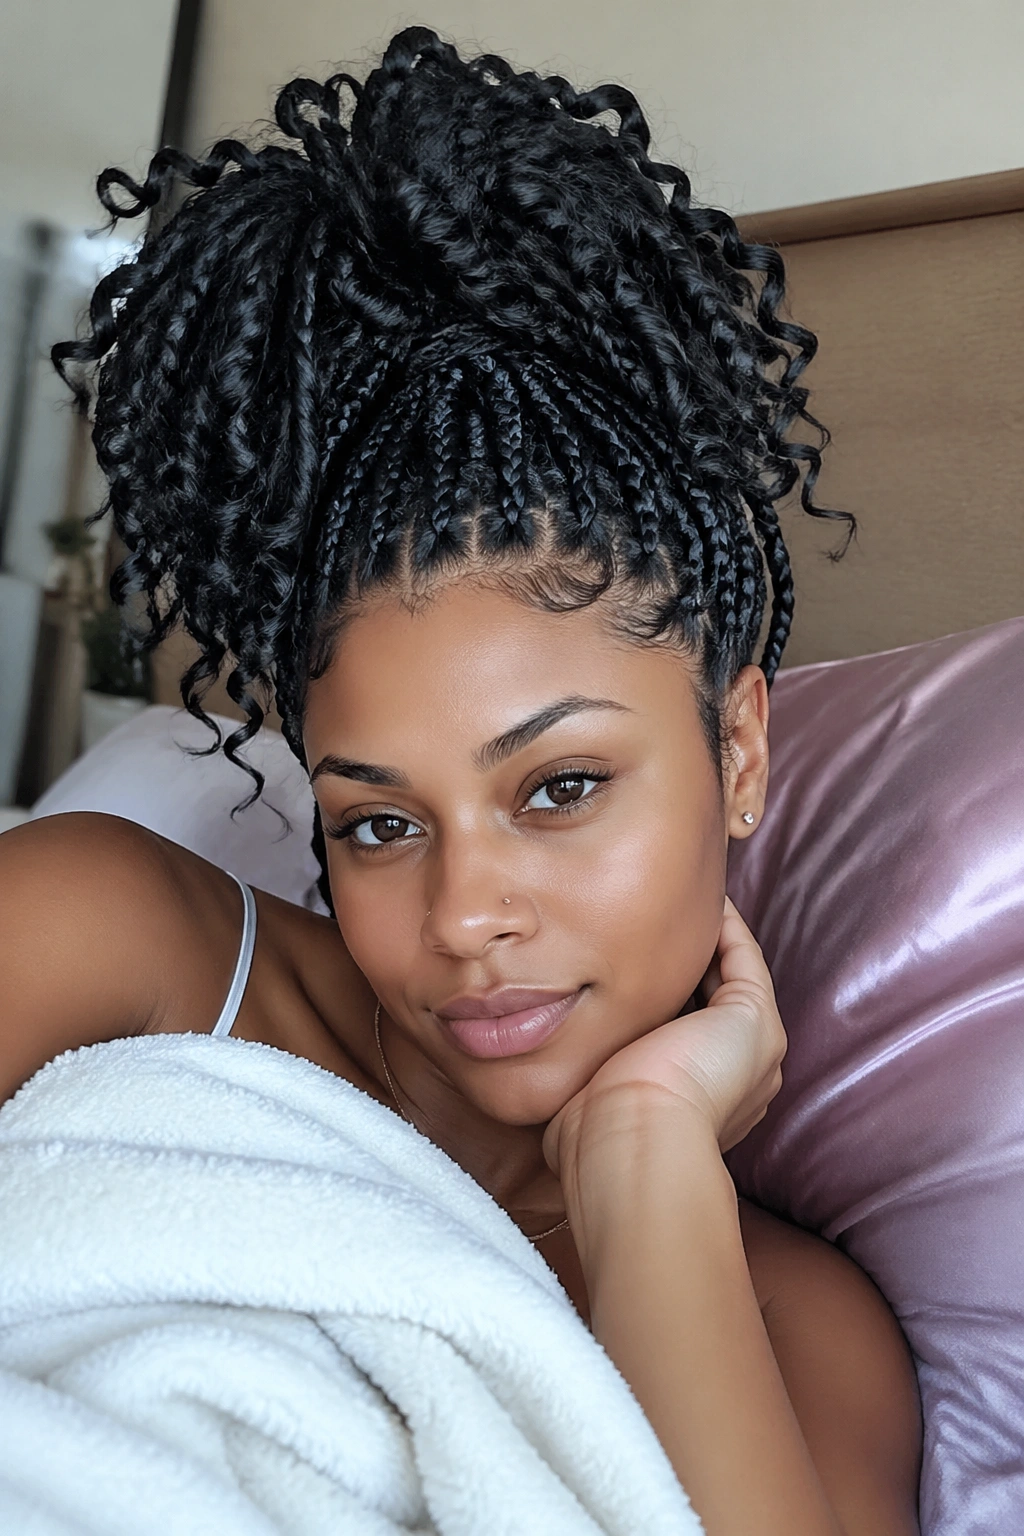
A pineapple sleep braid-out is made for people who want the style to survive the night without losing its shape. The braids are gathered high and loose, often with a silk scarf or bonnet layered over them, so the roots stay lifted and the lengths do not get smashed flat.
This works especially well on medium to long hair. The top stays airy, and the braids keep their pattern instead of being pressed into the pillow. It is not the smoothest overnight option, but it protects volume better than sleeping with the braids hanging loose.
The important thing is tension. Pulling the braids too tight at bedtime will leave the roots sore by morning. Too loose, and everything shifts around and frizzes. A soft, secure hold is the sweet spot. I know that sounds obvious, but most people miss it.
24. Ribbon-Defined Braid-Out
A ribbon-defined braid-out gives you clearer wave lines, almost like the hair was set with a braid that had extra room to breathe. The sections stay smooth, and the resulting waves fall in long, visible bands instead of a cloud of texture.
Unlike a fluffy braid-out, this one asks for cleaner sectioning and less separation afterward. The style is meant to be seen in pieces. If you pull it apart too much, you lose the whole effect.
This is the look I’d choose for dressier outfits or for hair that already has a lot of volume and does not need extra fluff. Keep the products light and the braids even. A silk scarf during the set helps the finish stay crisp at the roots.
25. Fluffed-Out Volume Braid-Out
Sometimes you want the hair big. Not halfway big. Big-big. A fluffed-out volume braid-out gets there by using medium braids, letting the hair dry completely, then separating only the top half of each braid before picking the roots gently.
Why It Feels So Full
The style works because the braids set the shape, while the final fluffing breaks that shape just enough to make the hair spread. The roots catch a little lift from the braid path, and the lengths pile into soft density. It’s one of the best braid-out options for thick natural hair that looks flat when left alone.
What to Watch For
- Use a light oil on the hands, not heavy cream
- Pick the roots in small lifts
- Stop before the curl pattern disappears
- Avoid brushing the lengths
This one is about volume, not neatness. That difference matters.
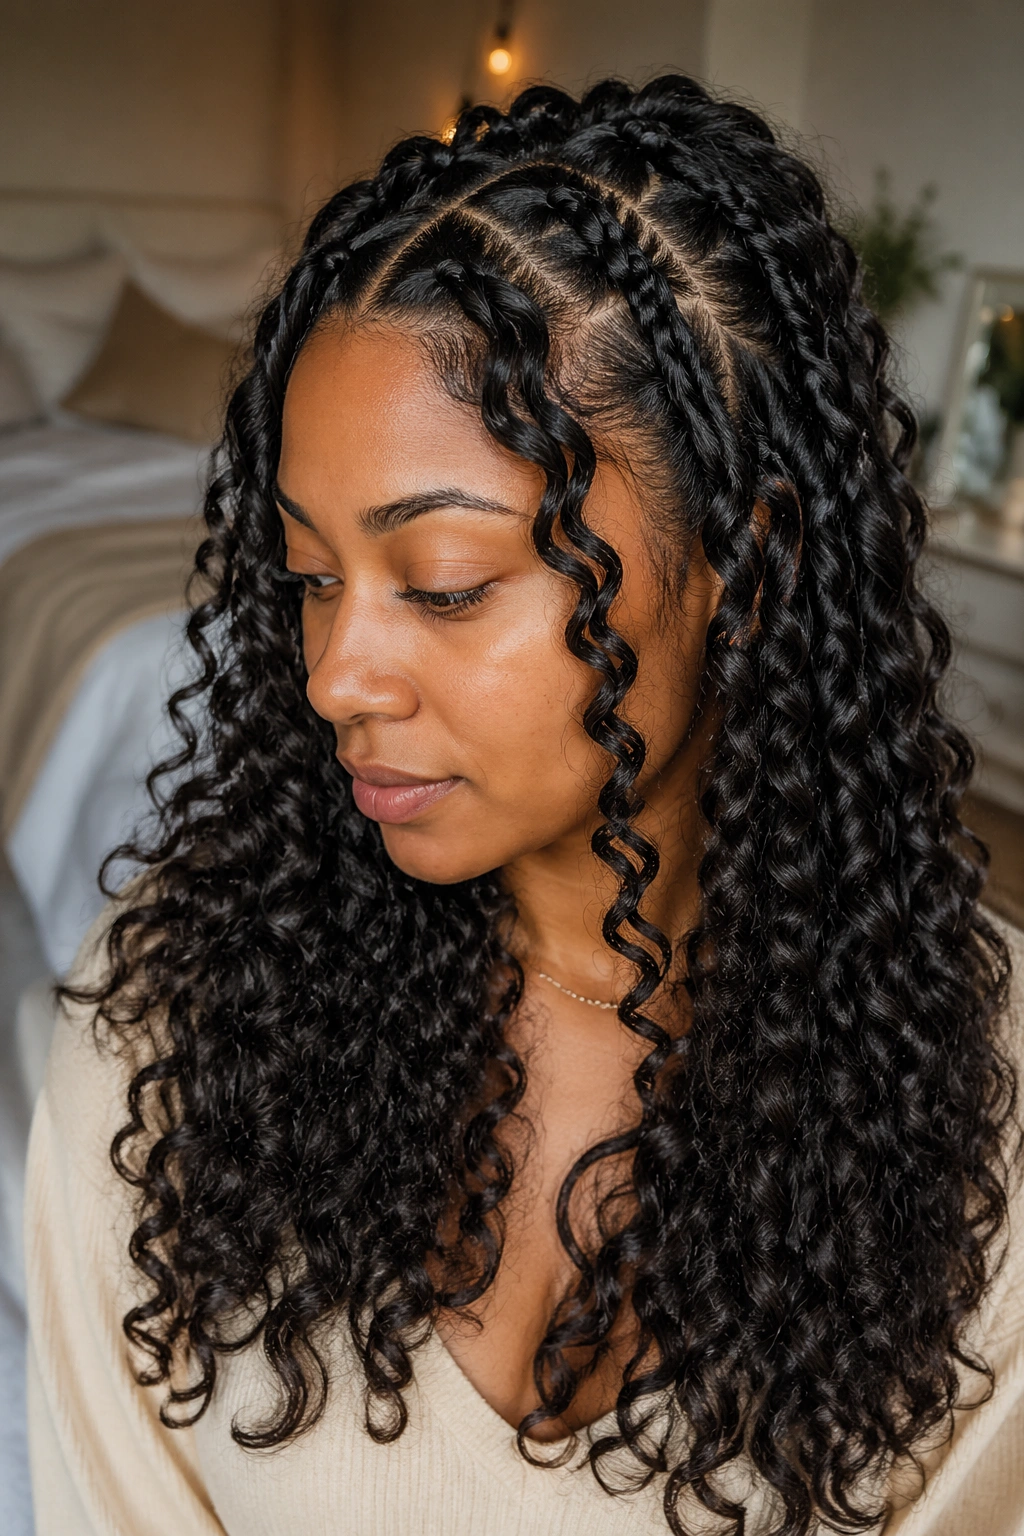
26. Soft S-Wave French Braid-Out
A soft S-wave braid-out is the gentler cousin of a tighter wave set. The braid tension is moderate, the sections are medium-sized, and the finish lands in broad, flowing bends that look almost like ripples in water.
The reason I like this version is balance. It gives enough texture to feel styled, but it does not trap the hair in a rigid pattern. That makes it useful for people who want movement and a bit of shape, not a textbook braid imprint.
Who It Suits
This works nicely on hair that frizzes easily at the ends. The looser wave is less likely to explode into fuzz after separation. It also pairs well with layered cuts, where a hard wave can look choppy and this softer bend looks more forgiving.
A light leave-in and a mousse-finish set the tone here. Heavy product kills the wave.
27. Side-Swept Glam Braid-Out
A side-swept braid-out has a little old-school drama to it, and I mean that in the best way. The hair is braided so the final fall moves across one shoulder instead of landing evenly on both sides. That sweep creates motion before the hair even moves.
The key is starting with a side part and feeding the braid toward the heavier side. If the part is too shallow, the style looks accidental. If it is too deep, the balance gets weird. I like a part that sits a little off center, then a braid line that guides the eye diagonally.
This style is good when you want the braid-out to read as evening-ready without a ton of extra work. Let the front pieces fall softly around the cheekbone, and keep the rest fluffy but controlled. The whole point is shape. A little swagger helps too.
28. Protective Updo Braid-Out

A protective updo braid-out hides the ends, which is nice when the hair is dry, fragile, or simply in need of a break. The braids are pinned or tucked into a low bun, a crown twist, or a rolled shape after they are set. When you take them down, you get a braid pattern that still looks styled, just more contained.
This is the low-maintenance option that still looks finished. The tucked ends stay out of the way, so you are not constantly fighting frizz at the collar or getting tangles from scarf friction. It also keeps the nape smoother, which can be useful under coats, collars, and bag straps.
I would choose this when the hair needs rest more than drama. The texture is there. The shape is there. The ends get a break.
29. Low-Tension Scalp-Safe Braid-Out
If your scalp gets sore easily, low tension is not a luxury. It is the whole game. This braid-out keeps the grip gentle from the first pass and avoids the sharp pull that makes the hairline angry by evening.
The style still gives shape, but it does it with looser feed-ins and fewer tight anchor points. That means the roots may not look as glassy as a tighter set, yet the hair is far more likely to stay comfortable through the day. I think that tradeoff is worth it.
Small Details That Help
- Part the hair while it is lightly stretched
- Use a slip-friendly leave-in
- Avoid tight elastics at the ends
- Sleep with a soft scarf, not a hard wrap
Comfort matters. A cute style you cannot wear is not a win.
30. Second-Day Refresh Braid-Out
A second-day refresh braid-out is what you do when the set is good but the shape needs waking up. The braids may be mostly intact, or already unraveled and a little flat. A mist of water, a dab of light mousse, and a few finger twists at the crown can bring the whole thing back.
Unlike a full redo, this method respects what is already there. You are not restarting the style. You are nudging it. That makes it useful for busy mornings, but also for hair that looks best after the product has settled overnight.
I usually focus on the front first. If the front looks right, the rest can be a little messy and still pass the eye test. That sounds unfair, maybe, but it is true. Face-framing sections do more work than people admit.
31. Heatless Stretch Braid-Out

A heatless stretch braid-out is one of the smartest ways to keep the hair elongated without heat tools. You braid the hair while it is damp or lightly moisturized, let it dry fully, then release it into a soft, stretched wave pattern.
Why It Earns a Place
It cuts down on shrinkage while keeping the texture visible. That matters if you want length to show but still want the hair to look like itself. No blow-dryer. No hot comb. Just time and a decent braid pattern.
How I’d Set It
Use medium sections, not tiny ones. Tiny braids on stretched hair can look too narrow and make the style stiff. Medium braids keep the finish loose enough to move. I like this most on wash days when I want length without flattening the curl life out of the hair.
The style gets better when you leave the braids alone longer than you think you need to. Rushing it is where people mess up.
32. Edge-Defined Braid-Out
Edges matter. Not because everything has to be slick, but because a soft front line can make the whole braid-out look expensive in a way stiff edges never do. An edge-defined braid-out keeps the perimeter neat while the lengths stay fluffy and mobile.
The trick is to use a tiny amount of gel or edge control, then smooth only the baby hairs and front perimeter with a small brush. Do not drag product into the braid itself. That creates hard spots that flake later and leave the front looking patchy.
This style pairs well with almost any braid pattern. I like it most with side parts or halo braids, where the front has to do a lot of visual work. A clean edge line gives the texture somewhere polished to land.
33. Tucked-End Evening Braid-Out
A tucked-end evening braid-out feels a little dressier than the rest because the finish is neat, controlled, and close to the head. The ends are pinned under or wrapped into the shape so the style looks deliberate from every angle. It is one of those looks that photographs well because there is no loose end wandering off to one side.
How to Use It
Braid the hair in a pattern that supports the final shape, then pin the ends under once the set is dry. Keep a few face-framing pieces loose if you want softness around the cheekbones. A light shine oil on the top layer helps the style look finished without turning it greasy.
The real value here is restraint. Not every braid-out has to explode outward. Some of the best ones sit close, move quietly, and still give you that bouncy natural texture when the light hits the waves and the hair shifts with you.