Mornings do not reward elaborate hair. They reward whatever you can finish while one hand is stirring oatmeal and the other is hunting for a missing shoe.
Five-minute braids are the sweet spot for school mornings: fast enough to survive a late start, neat enough to look deliberate, and flexible enough to work on hair that is wavy, straight, frizzy, or somewhere in between. A rat-tail comb, a few small elastics, and a couple of bobby pins can do more than a basket full of fancy tools if you place the braid in the right spot.
The big mistake is chasing perfection. You do not need every section to match, and you do not need a braid that looks like it came from a salon chair. You need grip, a clean part, and a shape that stays put until the last bell.
Maybe your child hates hair touching the face. Maybe your own hair collapses the moment humidity shows up. Either way, these five-minute braids for busy school mornings give you options that are actually realistic, which matters more than styling that looks lovely on a calm Sunday and falls apart by homeroom.
1. The Five-Minute Side Braid

The side braid is the one I reach for when the hair is half-cooperative and the clock is rude. It takes almost no planning, and it still looks like you meant to do something with the hair instead of giving up halfway through brushing.
Start with a deep side part if you want a softer look, or skip the part entirely and sweep everything over one shoulder. Brush the hair smooth, divide it into three sections, and braid down the length in the usual pattern. Keep the tension loose enough that the braid doesn’t look stiff. A little softness makes it easier to widen later, and widening the braid is what gives it that fuller shape.
Why It Works So Fast
- It needs one elastic and no pins.
- It hides uneven layers better than a center braid.
- It works on hair that was washed the night before.
- It looks finished even when the braid is slightly messy.
Pull gently at the outer loops once the elastic is on. That tiny bit of tugging opens the braid up and makes it look thicker. If the ends are wispy, mist them with water and smooth them between your fingers before braiding. A tiny amount of leave-in cream helps too, but don’t overdo it or the braid starts slipping.
Best move: start the braid below the ear. The higher you begin, the more time you spend fighting short pieces around the face.
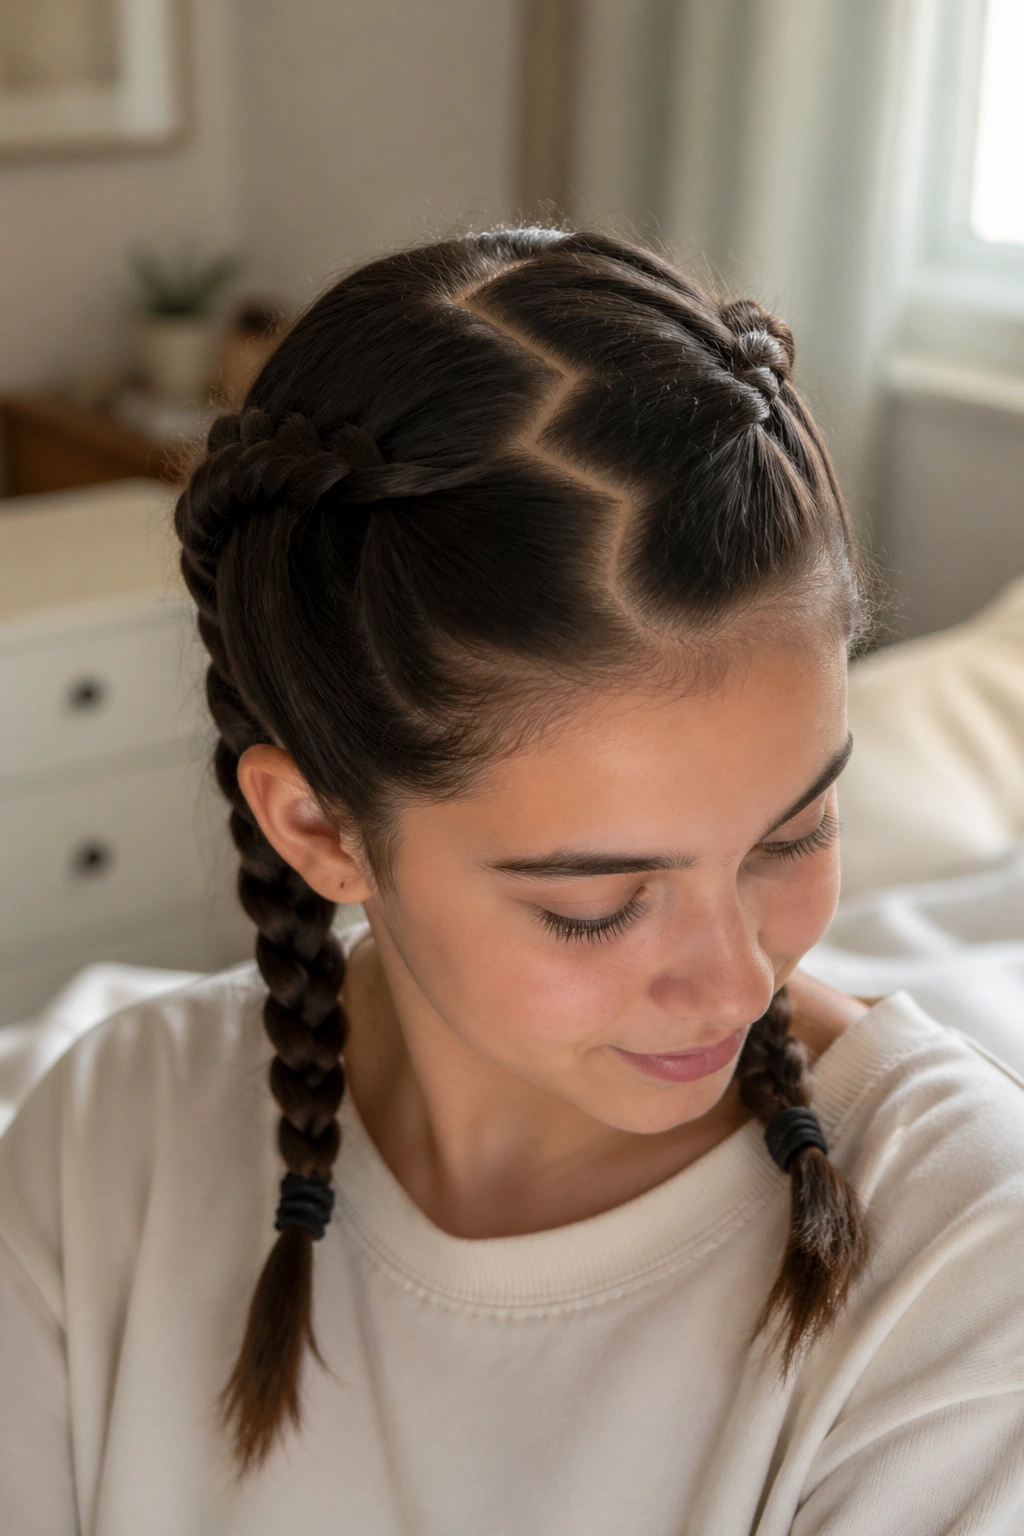
2. Dutch Pigtails That Stay Put
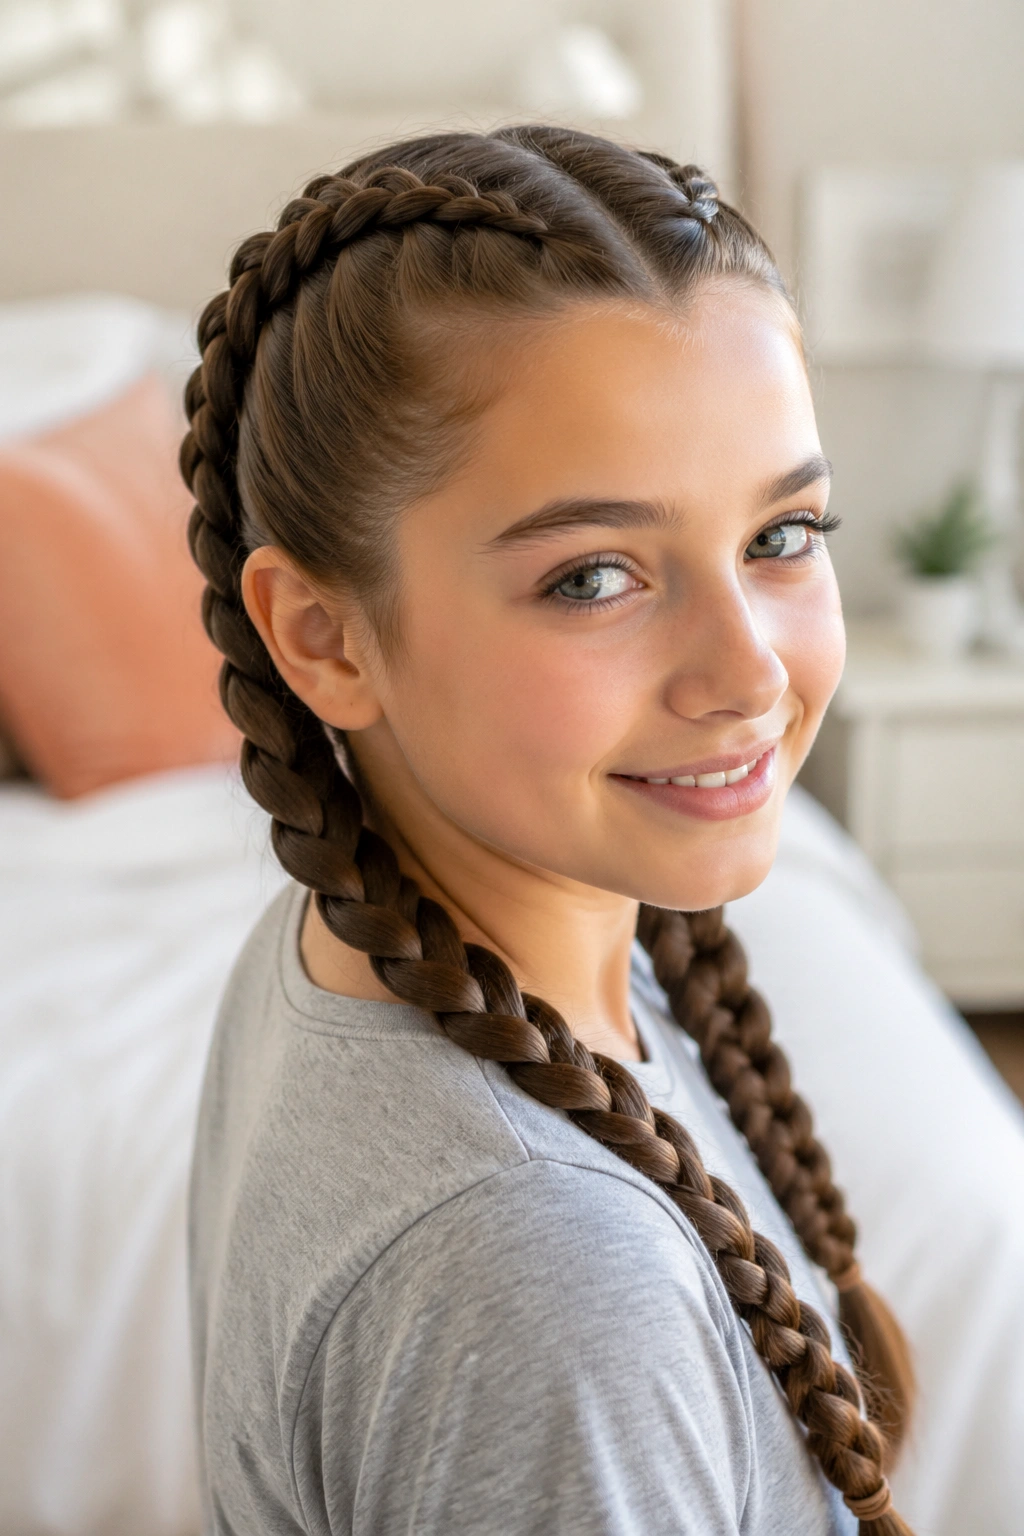
Two Dutch braids sound like a big-school-day hairstyle, but they’re faster than people expect once the part is clean. The trick is to braid under instead of over, which gives the braids a raised look and helps them hold their shape through recess, gym, and the walk from the car to the front door.
This style is especially good for kids with layered hair or for anyone who wants the front pieces locked down. It’s also a good choice when the hair is fresh and slippery. Braids that flatten by noon are annoying; Dutch pigtails tend to stay where you put them.
The part matters more than the braid
A straight center part keeps the look tidy, but don’t spend forever getting it perfect. If one side is slightly thicker, nobody cares after the braids are finished and tugged into place. The real trick is starting right at the hairline and adding hair as you move down.
Quick details
- Use a rat-tail comb to split the hair cleanly.
- Start each braid at the front hairline, near the temple.
- Add small sections as you go, not big chunks.
- Finish with low elastics so the braids don’t spring apart.
If you need a little more time, braid only halfway down and tie the rest into low pigtails. That still looks intentional, and it shaves off a minute or two when the morning is slipping away.
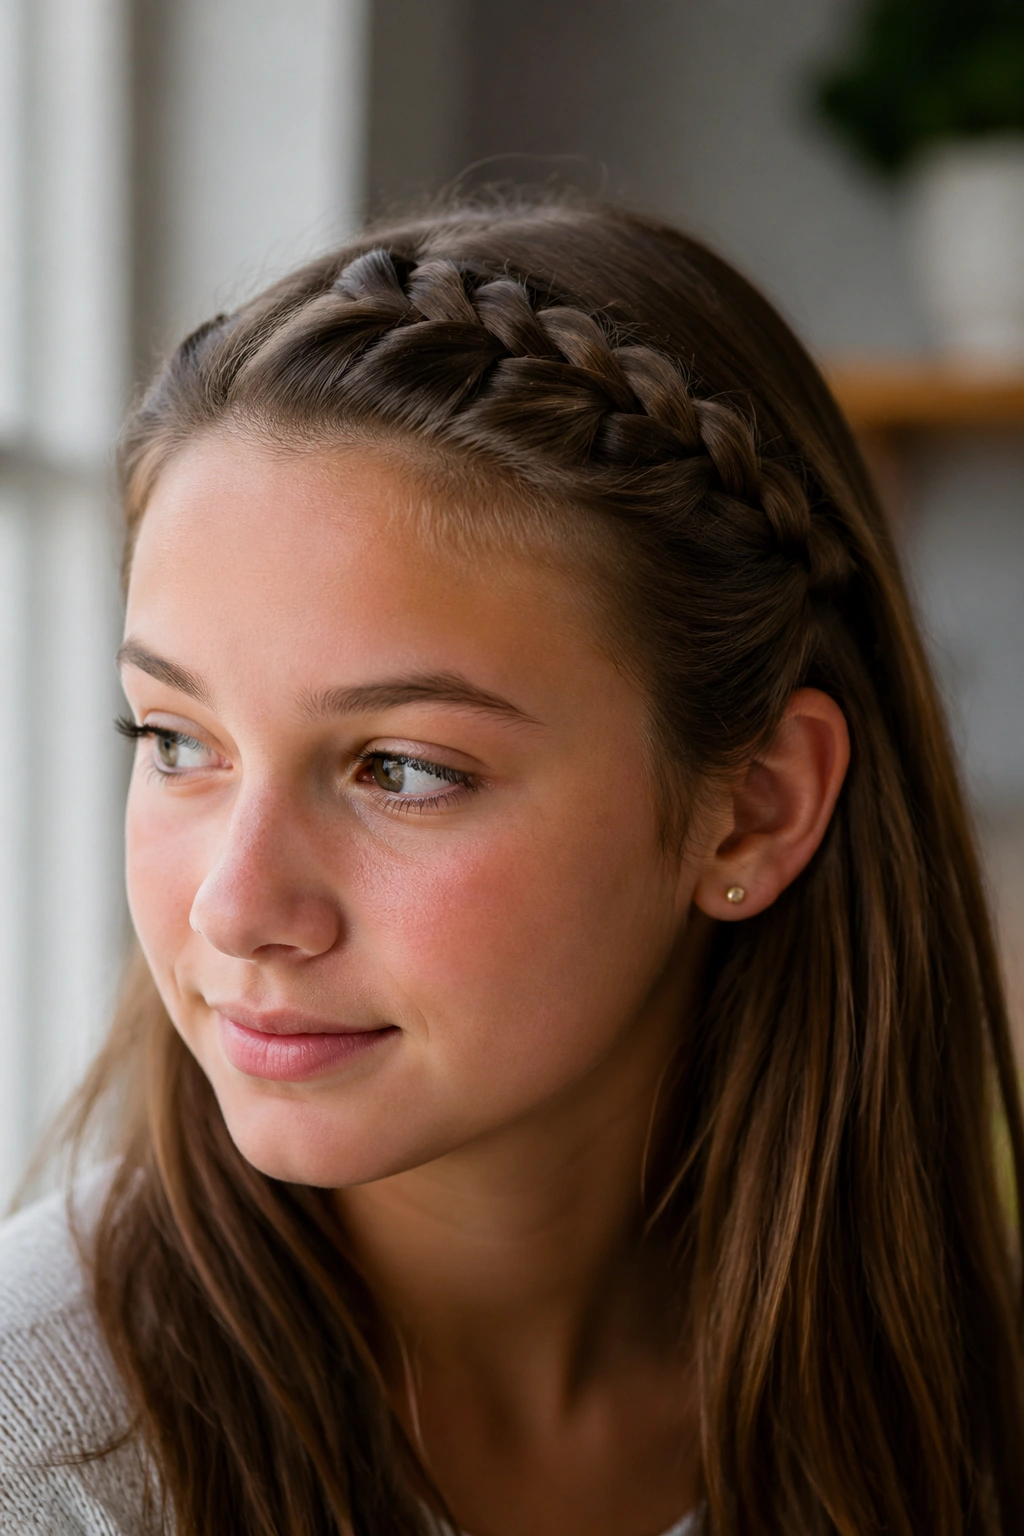
3. The French Braid Headband
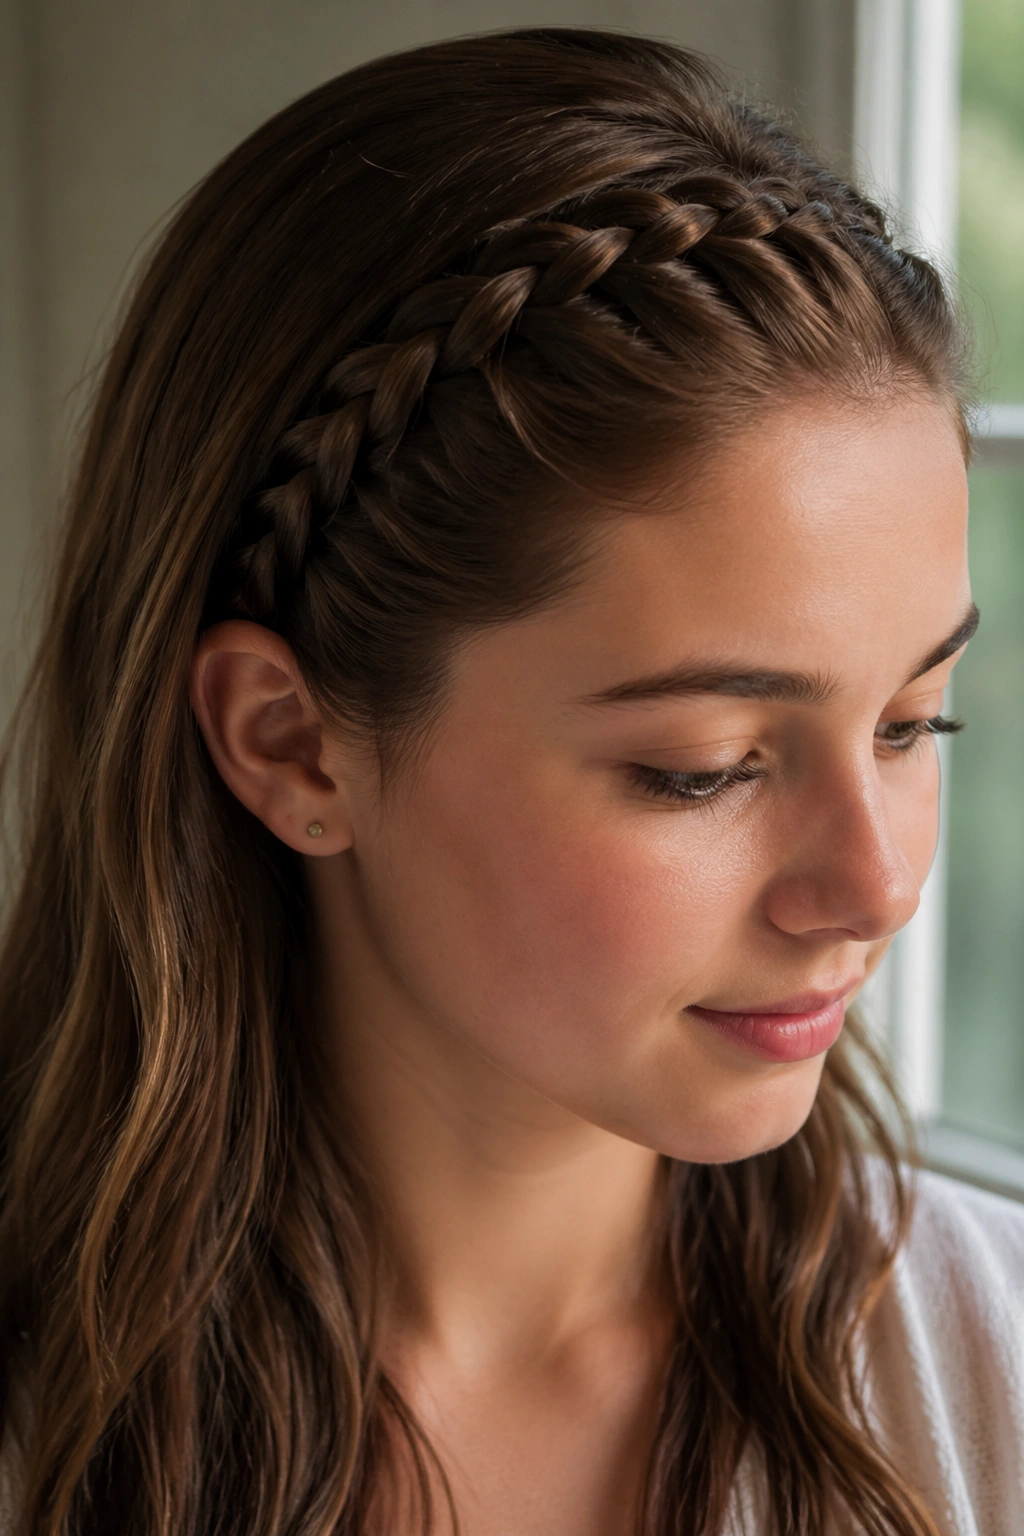
Need hair off the face without pulling everything into a ponytail? A French braid headband is one of the better fixes. It keeps the front layer tidy, shows off the length in back, and works especially well when the hair around the forehead keeps falling forward no matter what you do.
Start on one side above the temple and braid a narrow section across the hairline. As you move toward the opposite ear, keep the braid close to the front rather than drifting backward. That placement is what makes the style look like a headband instead of a random braid floating in space.
How to map the braid line
A small section is enough. You are not trying to braid half the head. Three fingers’ width is plenty for most hair. Once you cross the braid to the opposite side, secure it behind the ear with a tiny clear elastic or a bobby pin tucked under a bit of loose hair.
What to watch for
- Keep the braid low along the hairline so it actually holds bangs back.
- Use smaller added sections near the face for a cleaner line.
- Pin the end where a bit of hair can hide it.
- Finish with a light mist if the hair is slippery.
This braid is a favorite on days when the front pieces are behaving badly and a full updo feels like too much work. It solves one problem cleanly, and that is enough.
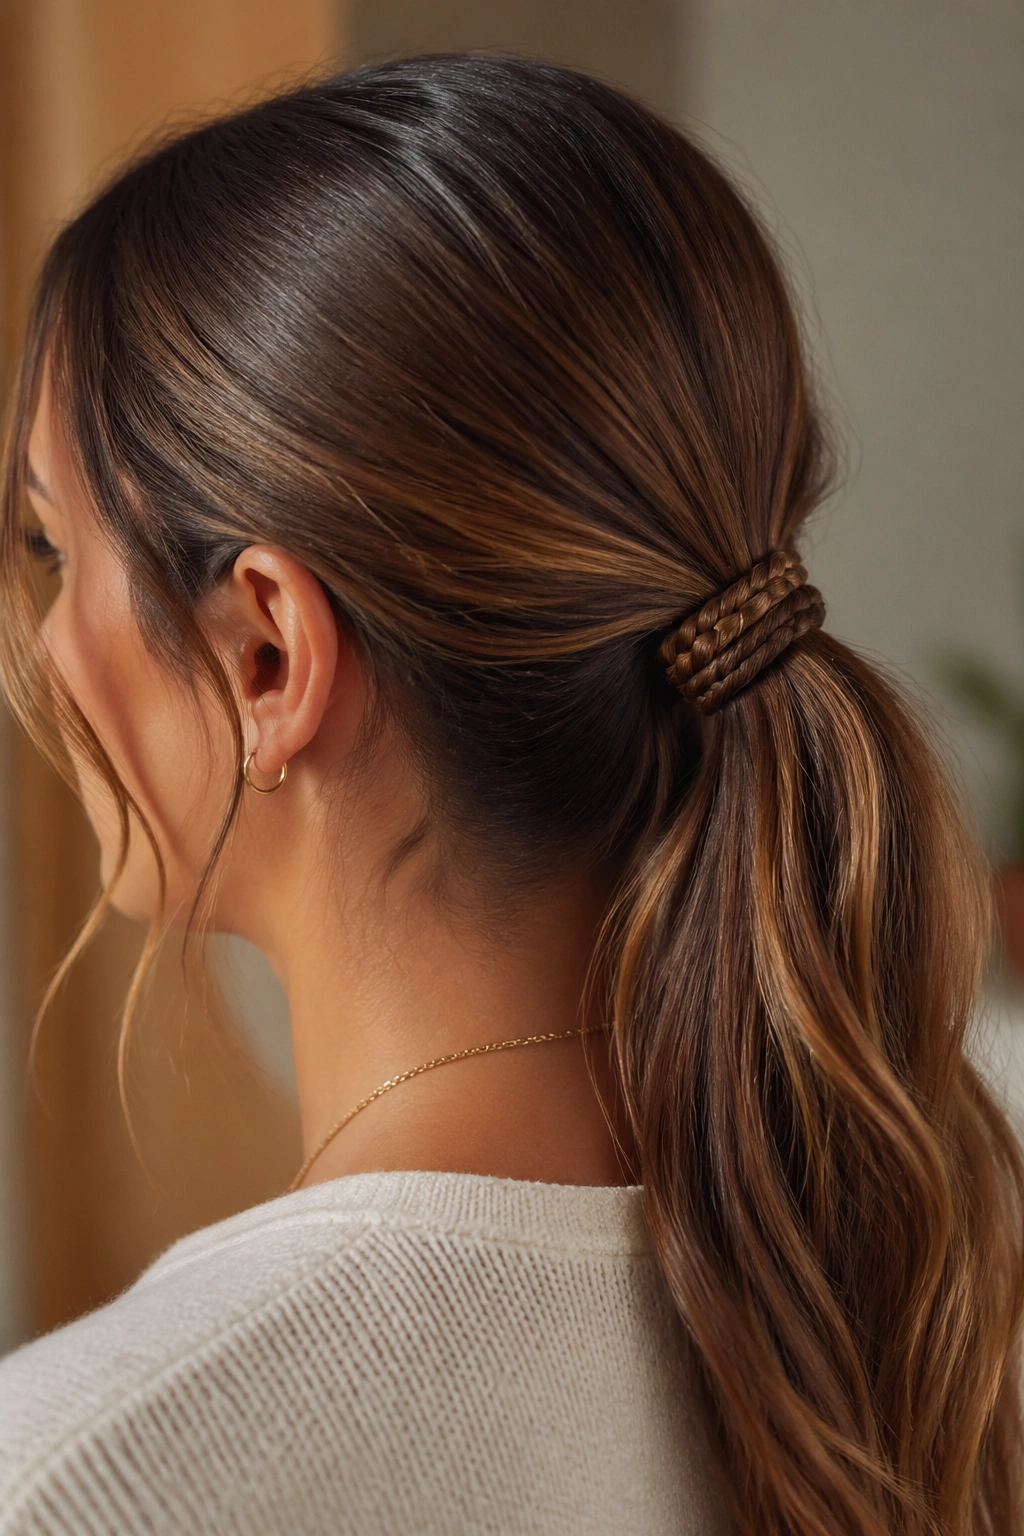
4. Rope-Braid Low Ponytail
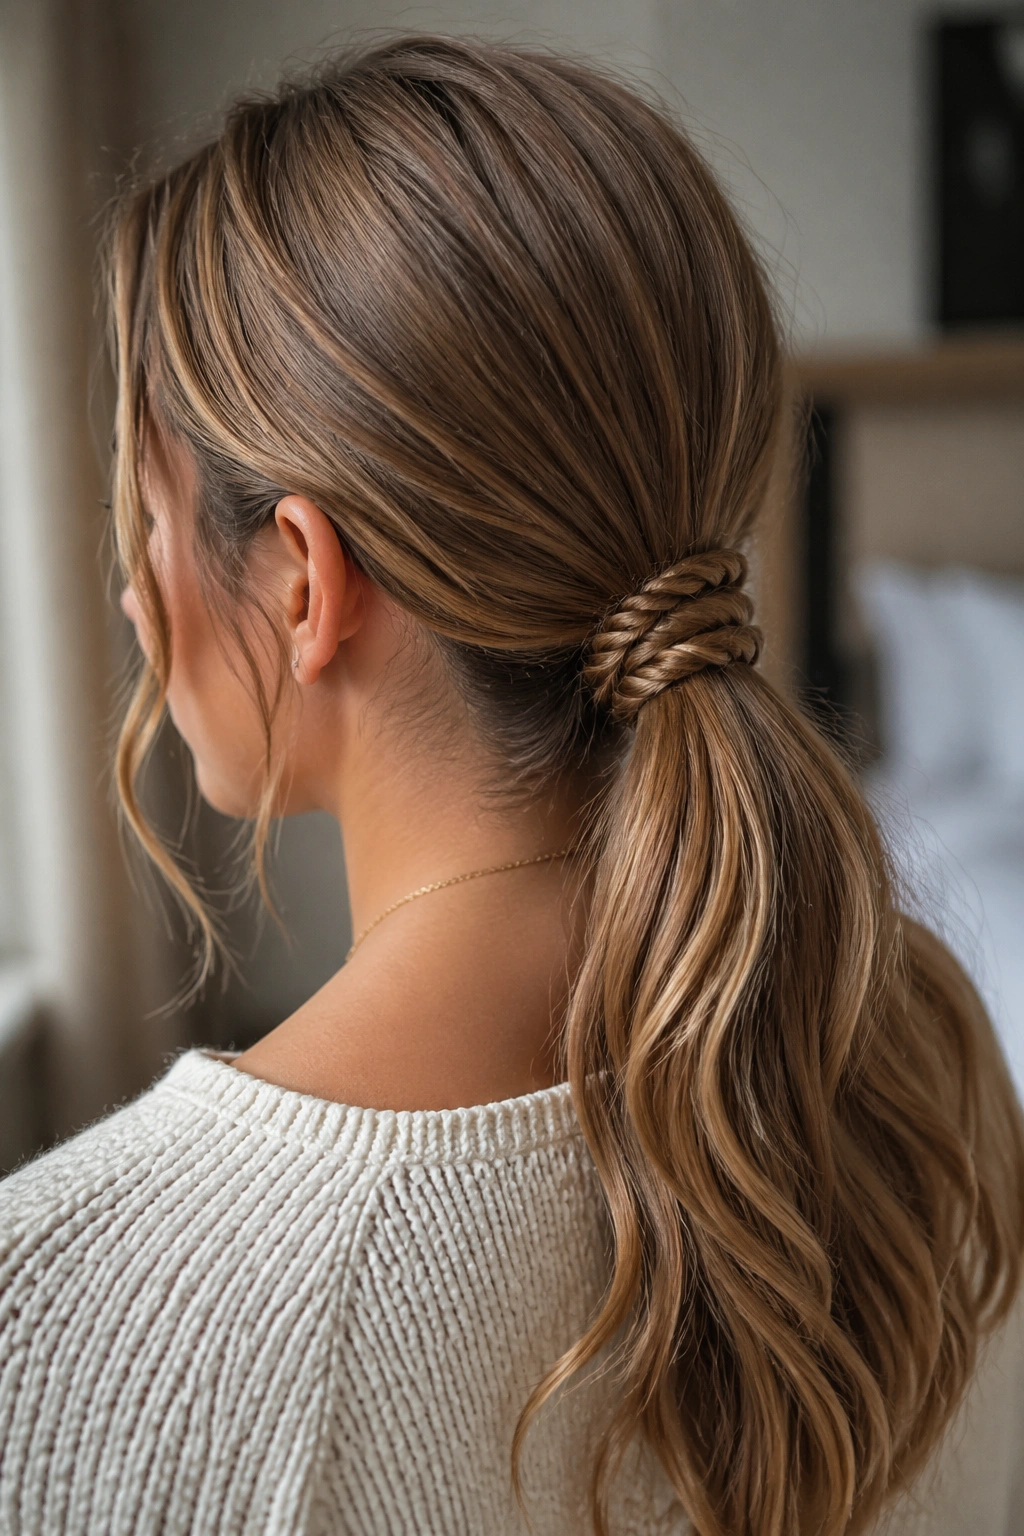
Rope braids are the style I use when the clock is being mean. They look tidy, they take less finger work than a three-strand braid, and they’re a good choice when hair is long enough to tangle but not long enough to feel easy.
Gather the hair into a low ponytail first. That little anchor makes the whole style faster and keeps loose layers from escaping at the crown. Then split the ponytail into two sections, twist each one in the same direction, and wrap them around each other in the opposite direction. Secure the end with a small elastic, and you’re done.
That sounds technical, but it becomes muscle memory fast. The hair twists into a clean rope shape, and it holds better than a loose braid when the ends are fine.
Good for these mornings
- Hair that feels slippery after washing
- Kids who won’t sit still for long
- Long hair that tangles at the neck
- Anyone who wants a ponytail with a little more shape
A rope braid also wears nicely under a hood or jacket collar because the shape is compact. If the ponytail looks too flat, pinch the twists outward a little before tying the end. That gives the braid more volume without adding another step. One small thing, but it matters.
5. The Fishtail Side Braid
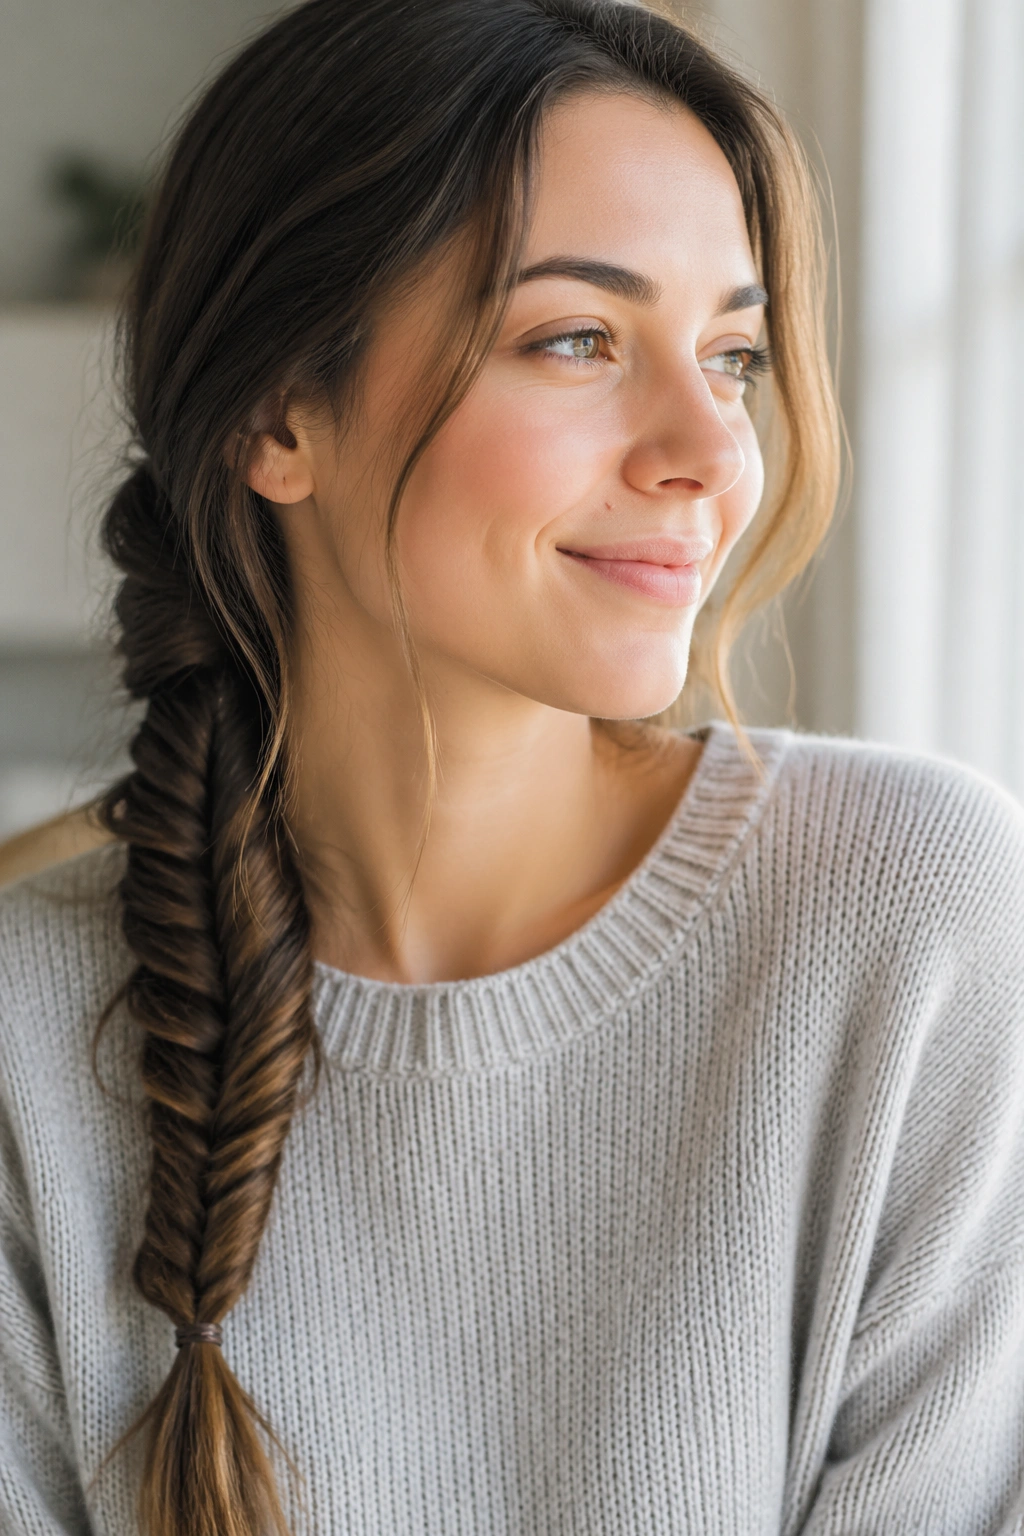
It looks fussy. It isn’t.
A fishtail braid earns its reputation because people assume it requires tiny, fussy fingers and endless patience. The truth is more boring and more useful: once you know the rhythm, it is mostly a matter of taking small pieces from the outside and crossing them over. That’s it. The braid is built from two sections, not three, which is why it feels different in the hand.
For school mornings, keep it loose and one-sided. Pull all the hair over one shoulder, split it in two, and take a small piece from the outer edge of the left side. Cross it over to join the right side. Then do the same from the other side. Repeat until you run out of hair or run out of time. Whichever comes first.
If the hair is layered, start lower on the head and keep the sections slightly larger. Tiny fishtails look tidy, but they eat time. Bigger sections are faster and still give you that woven look.
No one needs to know it took four minutes.
A few strands around the face make it softer, and they also help if the braid is for a kid who hates the feeling of hair pulled tight. Secure the end with a tiny elastic and gently widen the braid by pulling at the loops. That loosens the shape without making it sloppy.
6. The Braided Ponytail Wrap That Hides a Messy Elastic
A braided ponytail wrap is what I reach for when a plain ponytail feels too bare but I still need the same five-minute timing. It uses one small braid as decoration and one elastic as the real anchor, which is a smart trade on a school morning.
Pull the hair into a mid or low ponytail first. Then take a thin section from underneath or from one side near the temple and braid it separately. Wrap that little braid around the base of the ponytail to hide the elastic, then pin it underneath with a bobby pin. If the hair is thick, one pin is not always enough. Use two if the braid feels slippery.
The best part is how forgiving this style is. If the main ponytail looks a little flat, the braid distracts from it. If the elastic is stretched out and ugly, the wrap covers it. If the front is frizzy, the braid gives the style a finished edge.
Who this works best for
- Kids who want a ponytail but not a plain one
- Medium to long hair with frizz at the crown
- Days when the roots need a little disguise
A ribbon can take the place of the wrapped braid if you want a faster version. But the braid gives better grip, and that matters when you’re moving through a whole school day with only one chance to redo it.
7. Half-Up Mini Braids
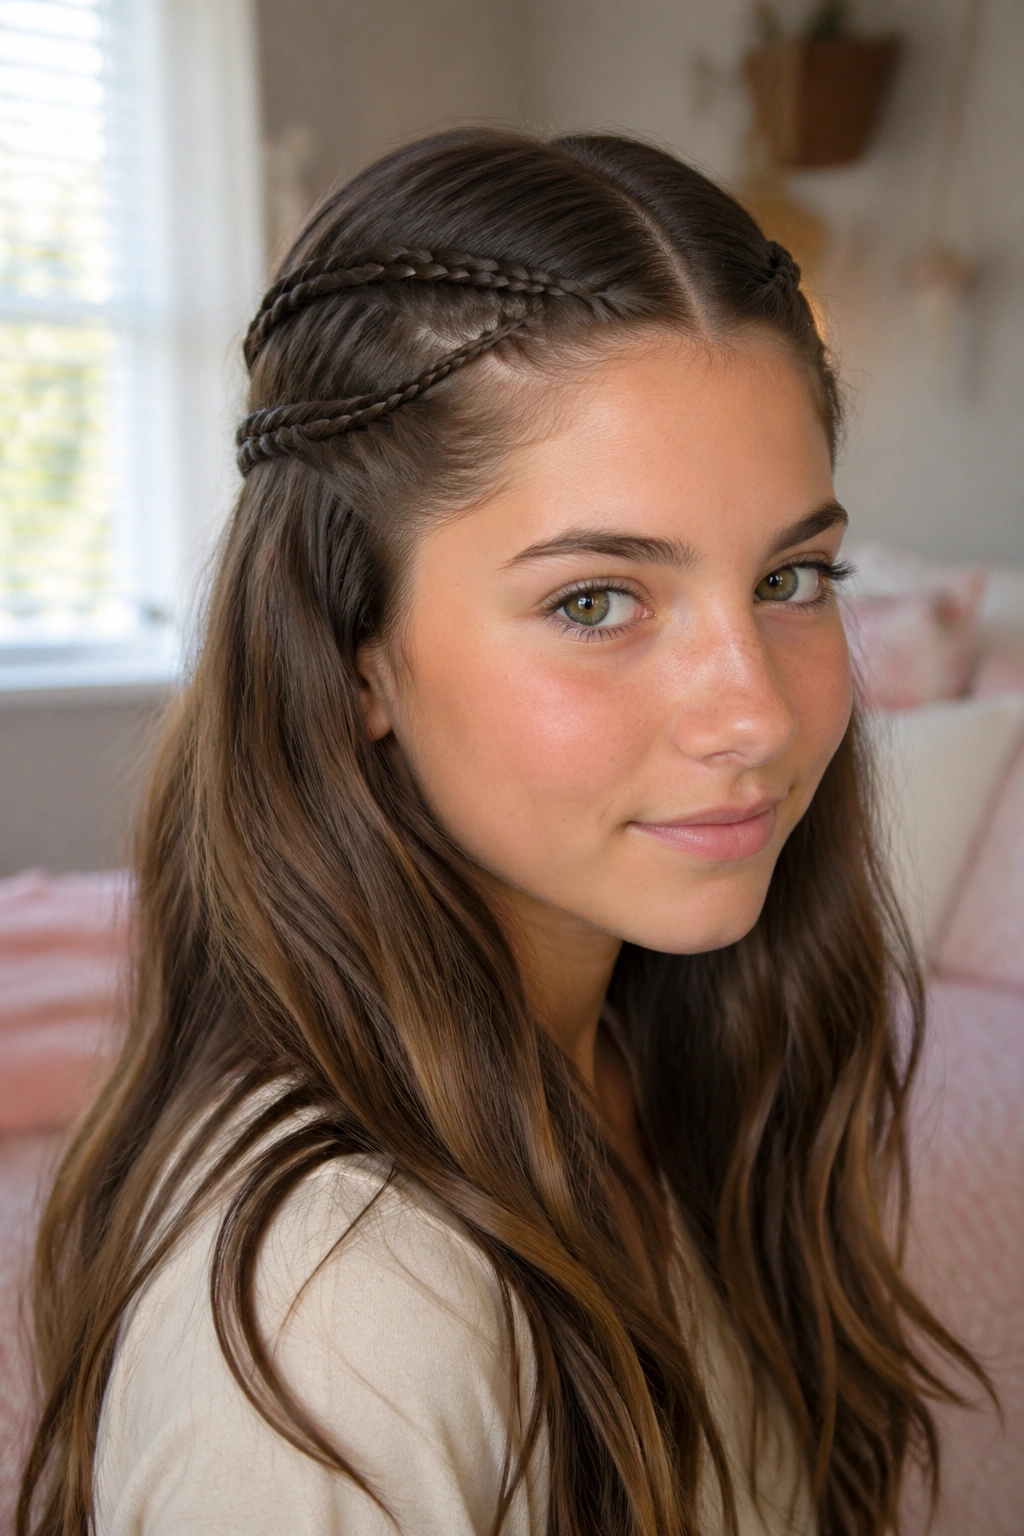
Half-up mini braids are tiny, which is exactly why they work. They keep hair out of the face, they don’t swallow the whole morning, and they look neat even when the rest of the hair is left loose and natural.
Place them near the temples
Take a narrow section on each side, about an inch or two wide, and braid it toward the back of the head. You can stop after three or four crossings if the hair is short, then secure the end with a small elastic. Pull the two mini braids together at the back and tie them into a half-up section, or leave them separate for a more playful look.
Keep the back half loose
The looseness is the point. Letting the bottom section stay down keeps the style from feeling overworked. It also makes this one a good fit for bobs, lobs, and shoulder-length hair that doesn’t stay in a full braid for long.
A tiny tweak that helps
If the braids keep slipping out, mist the front pieces lightly with water before you start. You do not want wet hair, just a little grip. That small bit of moisture keeps flyaways from sliding free before the first class even starts.
This is one of those styles that looks more deliberate than the time it took. I like that in a school-morning braid.
8. Double Braids for Short Hair

Short hair is easier to braid than people think.
That sounds backwards, but it’s true. When the hair is chin-length or grazing the shoulders, there’s less length to wrestle with, fewer heavy ends to swing around, and less chance of the braid getting dragged down by its own weight. Two small braids can look sharper than one long braid that keeps unraveling at the neck.
Start with a center part and braid each side low, near the ears, or begin just behind the temples if the hair is too short for full pigtails. The finish doesn’t need to reach the ends in a tidy ribbon. In short hair, the point is control, not length.
Why this style earns its keep
- It keeps layers from floating into the face.
- It works on bobs, lobs, and thick hair cut above the shoulders.
- It takes less time than trying to force a full braid that won’t cooperate.
- It feels secure without needing a lot of pins.
Use tiny elastics if the ends are short. Bigger elastics make short braids look clumsy. If the hair flips out at the nape, a couple of bobby pins tucked upward can calm it down without making the style stiff. Short hair has a stubborn streak. This one handles it well.
9. Accent Braids Into a Ponytail
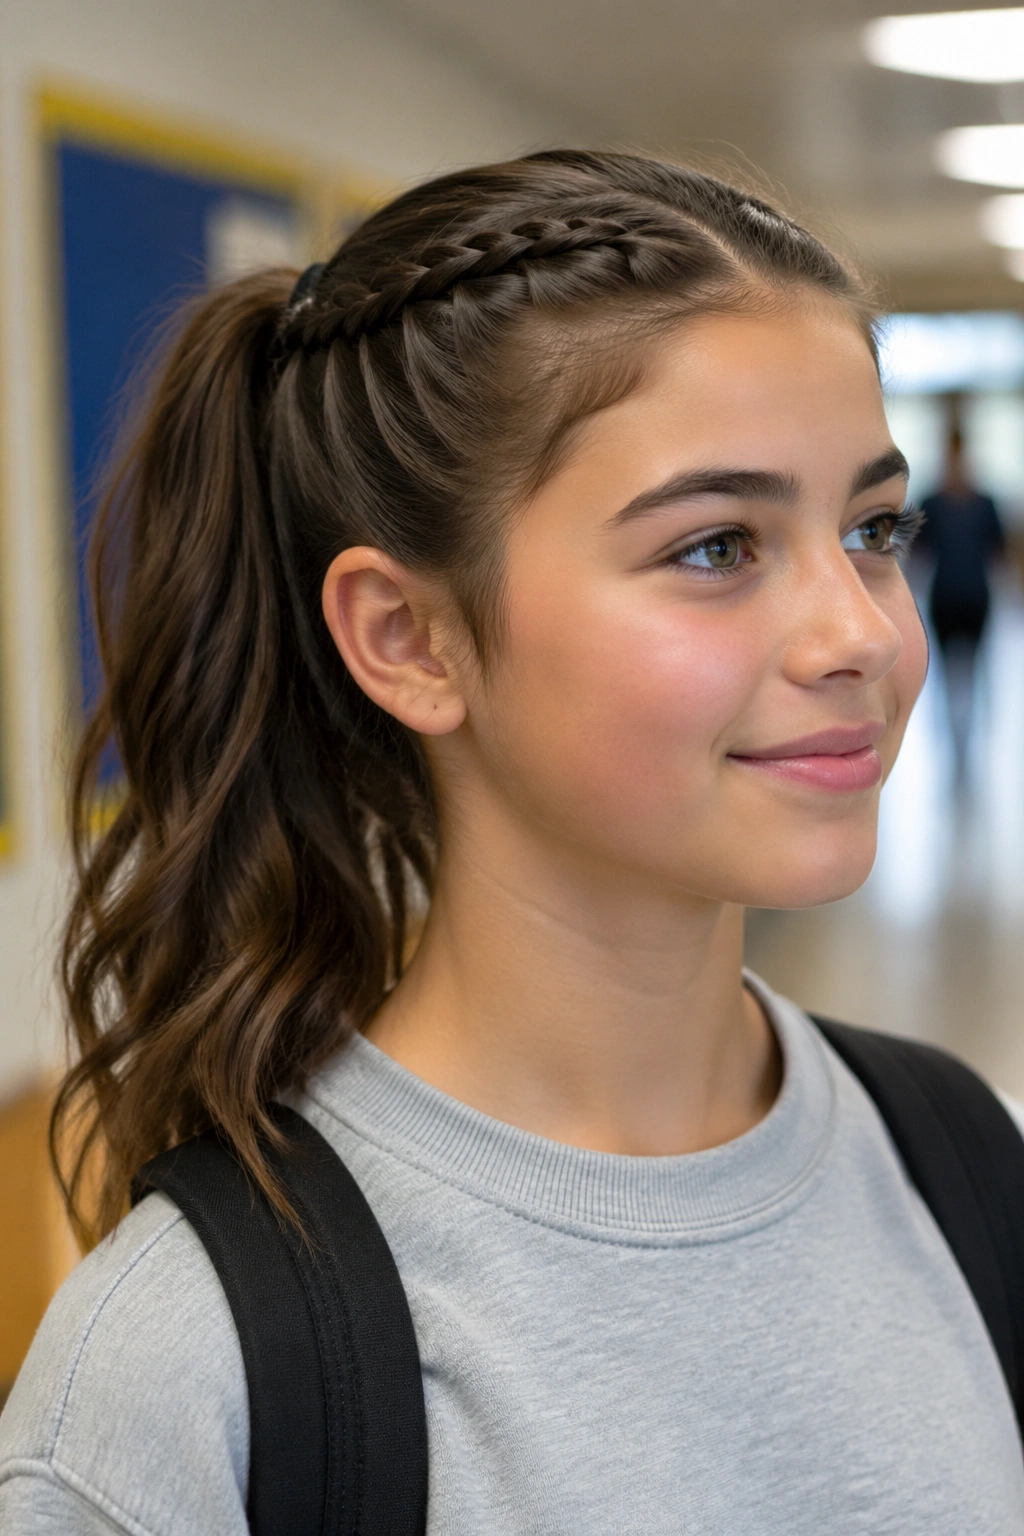
What if the whole head does not need braiding? Sometimes the smartest move is a little accent braid that feeds into a ponytail and does the job in the background.
Take a section from one temple or from both temples, braid it tightly for a few crossings, then gather it into a ponytail with the rest of the hair. The braid gives the front shape and keeps the sides controlled, while the ponytail keeps the timing short. That combination is hard to beat on mornings when someone is already asking where their lunch box went.
How to keep it neat
The braid should start close to the scalp, not an inch away from it. If it floats out from the head, the whole thing looks accidental. Add a little hair as you go if the section needs more body, or keep it plain and small if you want speed over polish.
A narrow accent braid works especially well on wavy or curly hair because the texture helps hide the join. Straight hair is fine too. Use a tiny clear elastic at the braid’s end, then pull everything into the ponytail and cover the elastic with a strand of hair or a ribbon if you want one extra step.
This is a good “I care, but not too much” hairstyle. School mornings need a few of those.
10. The Braided Bun with Loose Ends
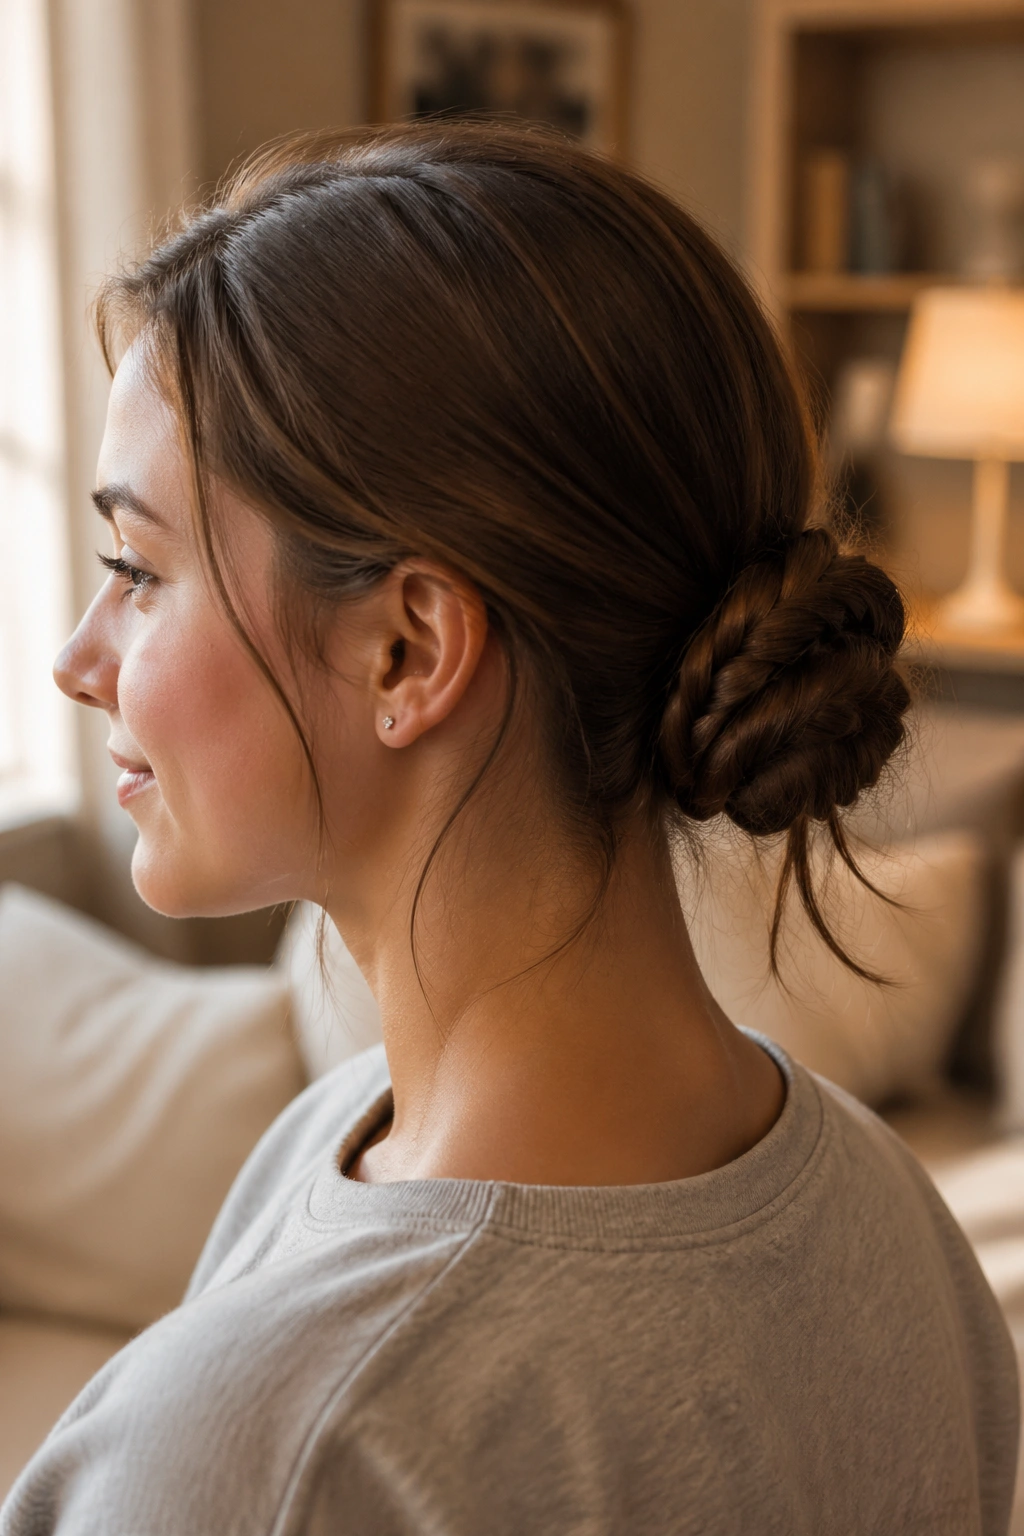
The braided bun is for the morning when the hair refuses to cooperate and the only way forward is containment. It keeps the length up, keeps the ends tucked in, and still looks more thoughtful than a plain knot.
Start with a low ponytail. Braid the ponytail all the way down, secure the end, then twist the braid around its base into a bun. Pin it in place with two or three bobby pins, depending on how thick the hair is. If the braid is long, wrap it twice. If it’s short, let the tail tuck underneath and use the pins to hold the end.
This style is especially useful for thick hair that gets bulky fast. A braid first takes some of the puff out of the bun and gives the pins something to grab.
A few things that help
- Put the ponytail low enough that the bun sits at the nape.
- Use pins that match the hair color if you want them to disappear.
- Tighten the braid before coiling so the bun doesn’t unravel.
- Leave the front a little soft if the face needs movement.
A braided bun can look too severe if it’s pulled hard. Keep the crown slightly relaxed, and the whole thing feels easier to wear for a full school day.
11. The Pull-Through Braid Without the Fuss
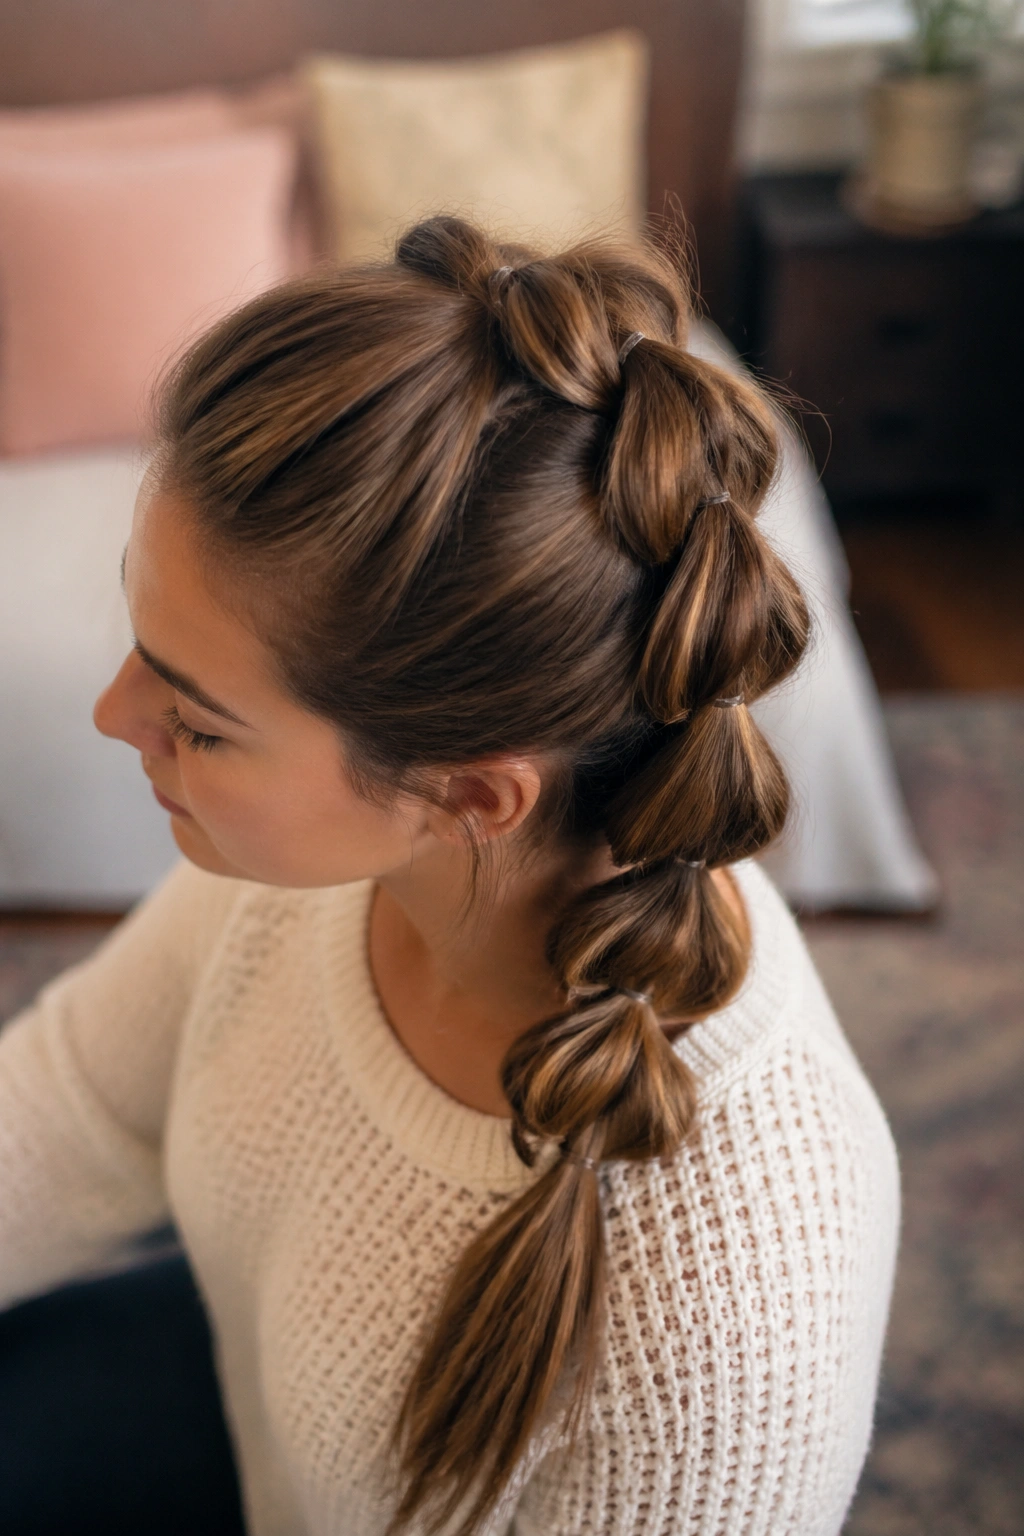
A pull-through braid is not a true braid, and that is the reason it feels so fast. You’re building the look with a chain of small ponytails, which makes it a useful trick for thick hair, layered hair, or any head that needs volume without a lot of finger work.
Start with two sections at the crown and secure them with small elastics, one under the other. Split the top section in half, bring the lower section up through the gap, then add a new section of hair below and repeat. The shape stacks into those rounded, puffed loops that look full even when the hair itself is fine.
Why it looks fuller
The loops create height, and the height is what gives the style its body. A traditional braid can collapse on fine hair or get wispy at the bottom. The pull-through version holds its shape better because each section is anchored with an elastic before it gets folded into the next one.
How to keep it tidy
- Use small, clear elastics so the joins disappear.
- Smooth each section before you clip it in.
- Tug the loops outward only after the last elastic is in place.
- Stop a little above the ends if the hair is layered and frays fast.
It takes more elastics than a regular braid, so keep a few in the bathroom drawer or the backpack pocket. That sounds fussy, but it saves time when one goes flying across the tile floor.
12. The Waterfall Braid at the Temple

Waterfall braids are not reserved for dress-up days. Keep the section tiny and the finish simple, and they become a fast way to keep the front of the hair interesting without dragging the whole head into a complicated style.
Start at one temple with a small three-strand braid. Each time you cross the top strand, drop the bottom strand and pick up a new piece from above. That dropped strand is what creates the waterfall effect. The braid travels along the hairline and leaves the rest of the hair loose underneath.
Small is the trick.
If the section is too wide, the braid starts to look heavy and the morning clock gets angry. Keep it narrow, pin it behind the ear, and let the length fall freely. The style works well on straight hair, but it also looks good on loose waves because the texture makes the dropped strands blend into the rest of the hair.
A small adjustment that helps
Use a bit of dry shampoo at the roots if the hair is too silky. Waterfall braids need a little grip, or the strands slide apart before you finish the second side. A light mist of texture spray can help too, but do not drench the hair. That only makes the braid harder to control.
This is the kind of braid that looks more complicated than it is, which, frankly, is a useful thing on a weekday.
13. Milkmaid Braids Made Simple
Milkmaid braids can be quick if you stop trying to make them perfect. The classic version can look like a weekend style, but the school-morning version is simpler: two braids, crossed over the top of the head, pinned where they belong, done.
Braid the sides first
Part the hair down the middle and make two low braids, one on each side. Tie them off with small elastics. Then lift the left braid up and across the top of the head, pinning it behind the opposite ear. Do the same with the other braid, tucking the end under the first one or crossing it just above the nape.
Cross at the top, not too tight
If the braids are pulled too hard, the style starts to look stiff and can give headaches by lunchtime. Leave a touch of looseness around the hairline. A few soft pieces near the face keep the look from feeling pinned down.
Pinning order matters
- Put one pin at the front of each braid.
- Add a second pin where the braid curves around the head.
- Hide the ends under each other, not under a giant knot of pins.
This style is better on longer hair, but shoulder-length hair can still work if the braids are braided loosely before being pinned. It’s one of those styles that makes a basic braid look like you spent ages on it. You didn’t. That’s the nice part.
14. Zigzag Part Twin Braids
Flat roots hate a zigzag part.
The shape breaks up the scalp line and gives twin braids a little more lift, which is useful when the hair is fine or freshly brushed and falling flat. Instead of drawing a straight line down the middle, use the tip of a comb to make a zigzag from front to back. It takes a few extra seconds and changes the whole feel of the style.
After the part is set, braid two low pigtails or two side braids, depending on hair length. The zigzag does most of the visual work, so the braids themselves can stay simple. This is one of the better choices when a plain center part feels too severe or too familiar.
Quick details that matter
- Use the pointed tail of the comb to make the part.
- Keep the zigzag small and even.
- Don’t spend forever fixing each turn; the pattern shows up once the braids are finished.
- Finish with low elastics so the style sits neatly at the neck.
This one is especially good for younger kids who like their hair to feel playful but not messy. The part gives the style personality. The braids make sure that personality survives the school day.
15. Braided Bangs Pullback
Growing out bangs? Braid them instead of fighting them.
A braided bangs pullback is one of the most useful little styles for awkward grow-out stages, face-framing layers, and those front pieces that seem determined to fall into the eyes every nine seconds. You only braid the front section, which means the rest of the hair can stay loose, in a ponytail, or in a bun.
How far back to go
Take the front section from the side where the bangs naturally part, then braid along the hairline toward the ear. Keep the braid narrow so it blends with the rest of the hair instead of sitting on top like a rope. If the bangs are short, braid only as far as they will cooperate and pin the end behind the ear.
What to do with the ends
- Tuck the end under a side layer with a bobby pin.
- Blend it into a ponytail if the back hair is tied up.
- Leave a tiny tail if the braid is too short to hide, then smooth it with cream.
Curly hair can do this too. The braid may look softer and less tidy, but that softness works. The goal is control, not a perfect line. A front braid like this can turn a bad-bangs morning into something that looks planned. That’s worth a lot before first period.
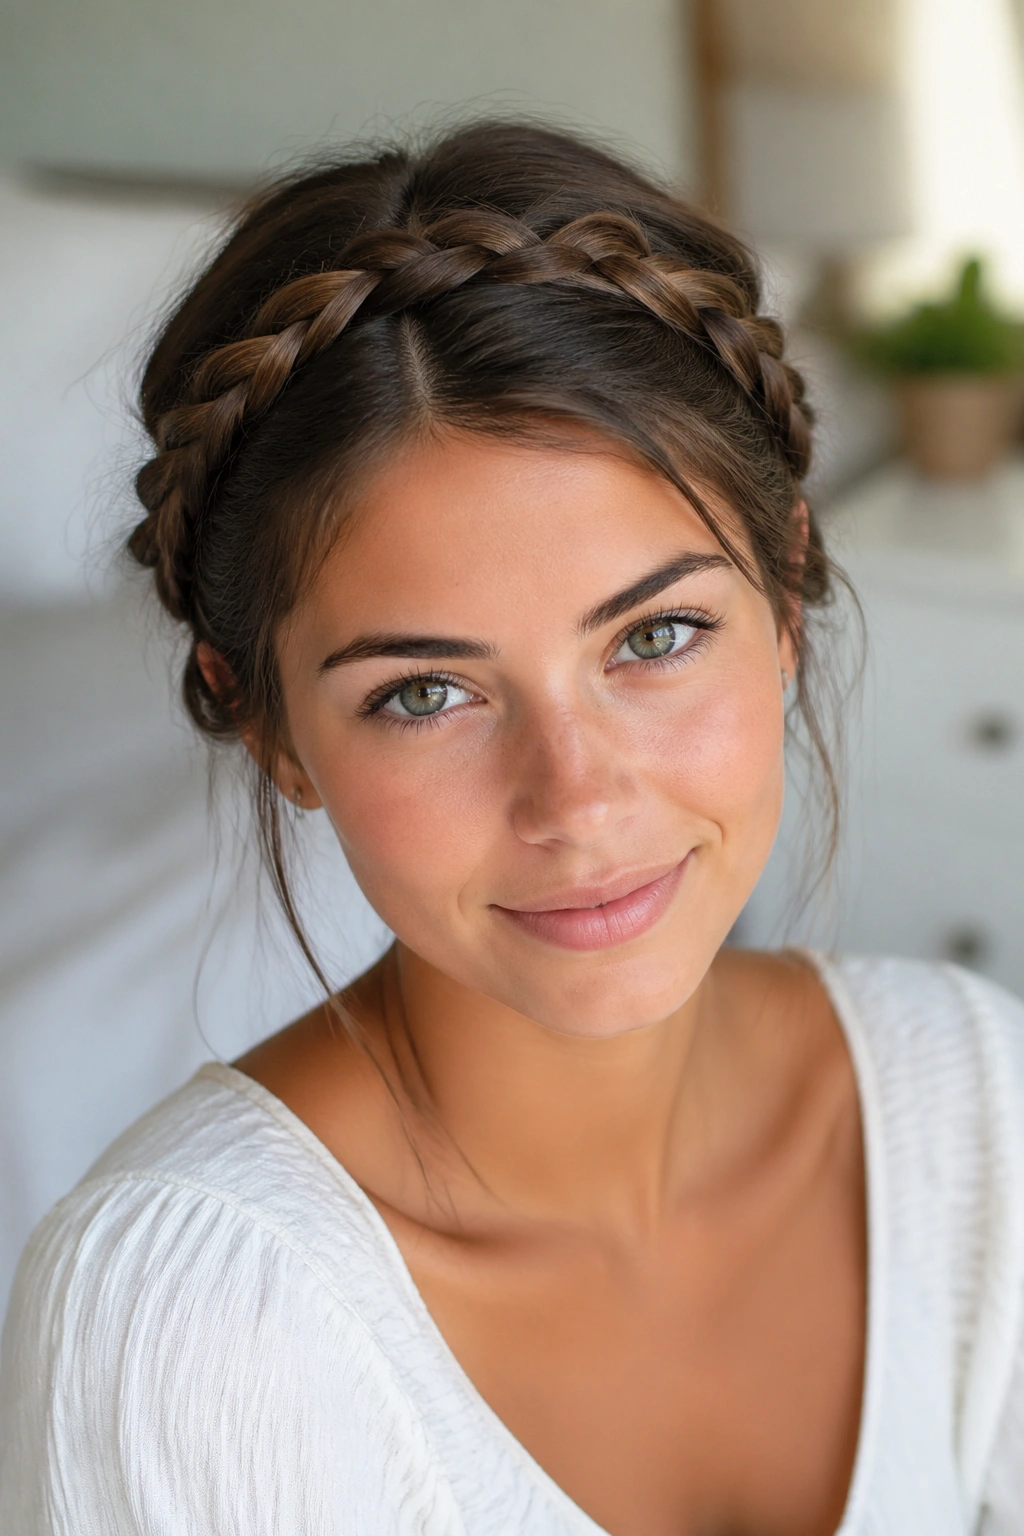
16. The Quick Crown Braid for Busy School Mornings
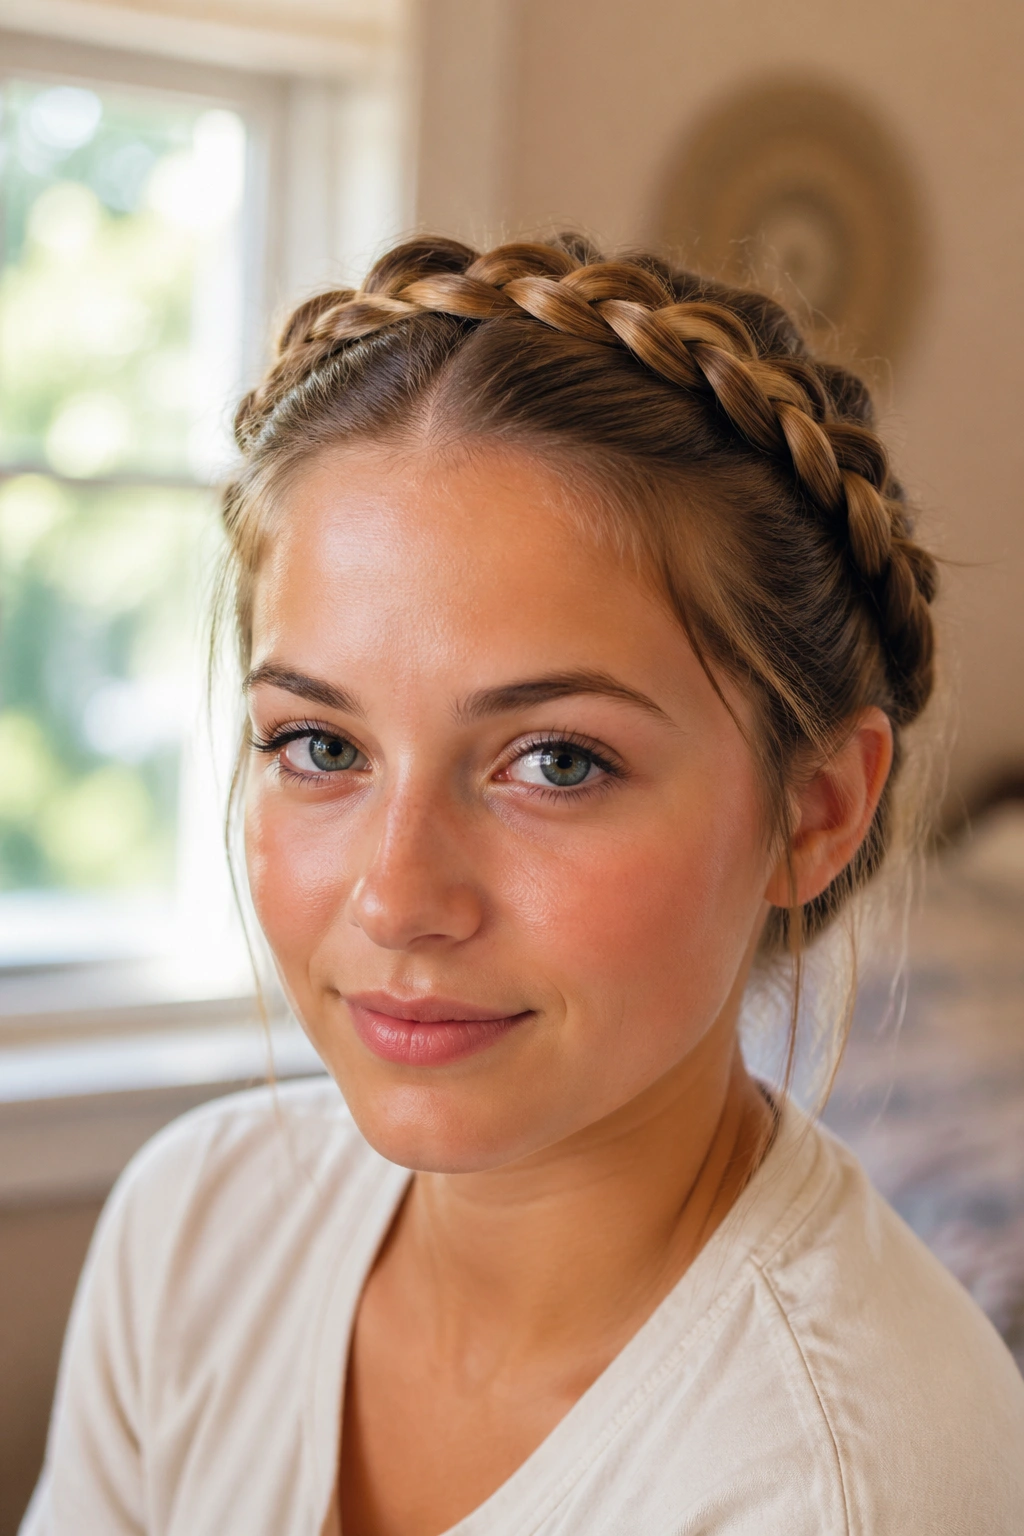
A quick crown braid sounds like a lot, but the stripped-down version is one of the best five-minute braids for busy school mornings when you need the hair up, off the face, and out of the way.
The fastest approach is to make two side braids, one on each side of the head, then bring them up and over the crown. Pin each braid where it crosses the top, and hide the ends under the opposite side or near the nape. If you only have time for one braid, braid along one side of the head and wrap it across the top like a headband. Either version keeps the front neat and gives the whole style a little shape.
This one works well on longer hair because there’s enough length to cross over without the ends popping out. On thicker hair, use extra pins near the ears. On finer hair, a little texture spray at the roots keeps the braid from slipping before lunch.
A practical finishing pass
- Check the hairline for loose pieces and pin them once.
- Tug the braid lightly so the crown doesn’t sit too flat.
- Keep a spare elastic in the bag.
- Use bobby pins in pairs if the hair is heavy.
If I had to pick one braid that feels polished without taking over the morning, this is it. The shape reads clean, the parts stay out of the eyes, and the whole thing can survive a day that starts too early.