Messy French braids for casual date nights work because they look deliberate without looking rehearsed. That’s the sweet spot. You get the neat, face-lifting structure of a braid, but the loose pieces, airy crown, and slightly imperfect finish keep it from feeling stiff or overdone.
A clean, tight braid can be gorgeous, but it can also feel a little too serious for dinner, drinks, or anything that starts with a walk and ends somewhere dimly lit. A looser French braid has more movement. It softens the face, shows off earrings or a neckline, and handles second-day hair better than most styles people try to force into submission.
The trick is balance. Too loose, and it falls apart before you leave. Too polished, and it loses the charm that makes a messy braid feel right for a casual night out. A little texture spray, a few strategic tugs, and a couple of face-framing pieces usually do more for the finished look than another ten minutes in the mirror.
1. Side-Swept French Braid with Soft Face-Framing Pieces
A side-swept French braid has a kind of easy confidence that works every single time. It slides over one shoulder, leaves room for earrings, and keeps the front of your hair from feeling too exposed. That matters on a date night when you want your hair to look styled, not sealed in place.
Why It Works
The side angle does half the work for you. It creates movement across the face, which is flattering on almost every hair length past the chin. The braid itself can stay loose through the lengths, while the front pieces stay soft and a little wispy.
A small amount of root lift at the crown helps a lot here. Tease just the top inch with a tail comb, then smooth the surface lightly so it doesn’t look scratched up. The braid should start at the temple or just behind it, depending on how dramatic you want the sweep.
- Best for medium to long hair
- Works well on second-day texture
- Use a 1-inch clear elastic at the end
- Pull out two thin pieces near the cheeks, not six
Pro tip: stop tugging once the braid starts to look soft. If you keep loosening it, the side shape disappears fast.
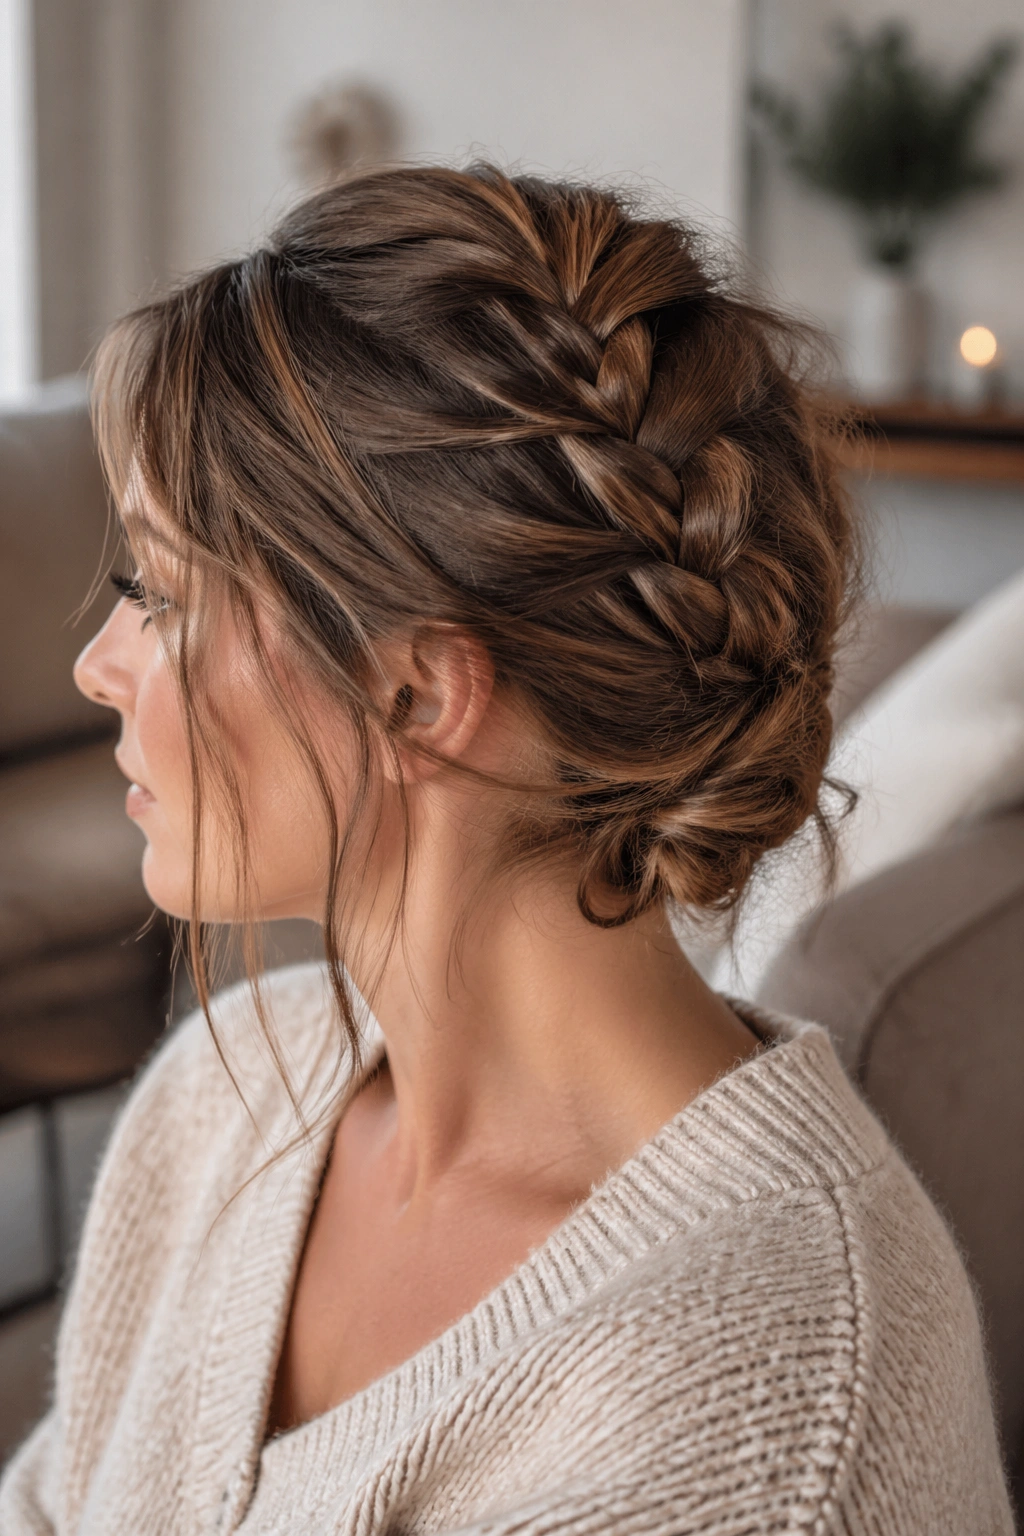
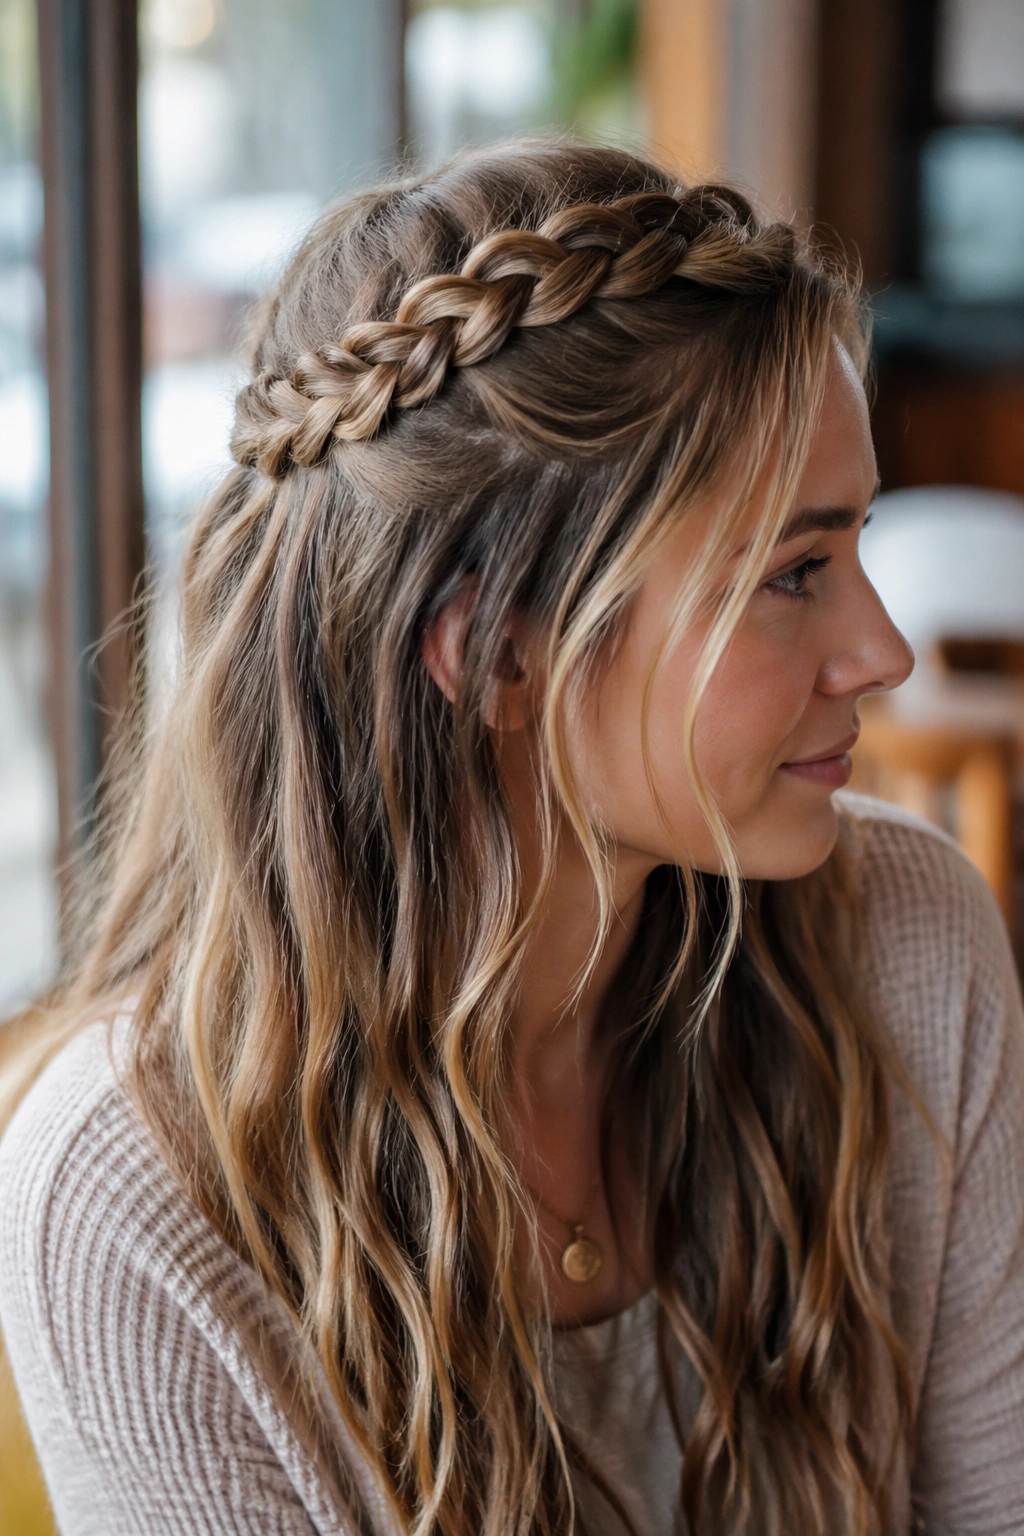
2. Half-Up French Braid Crown with Loose Ends
This one gives you the romance of a braid without giving up your hair completely. The top section is French-braided back into a small crown shape, while the rest falls loose and a little undone underneath. It feels finished, but not fussy.
The best version keeps the braid narrow. If you make it too wide, the style starts to read like a school look instead of an evening one. Keep the braid close to the scalp, braid only the top third of the hair, and let the rest stay soft with a bend through the mids and ends.
A few people overthink the finish here. Don’t. A small bit of frizz around the hairline is fine, and honestly better than a shellacked crown that looks like it came from a formal event. This style likes texture.
A little wave in the loose lengths helps, especially if your hair is straight. Use a 1-inch iron, twist sections away from the face, and leave the ends slightly imperfect. That makes the braid and the loose hair feel like they belong together.
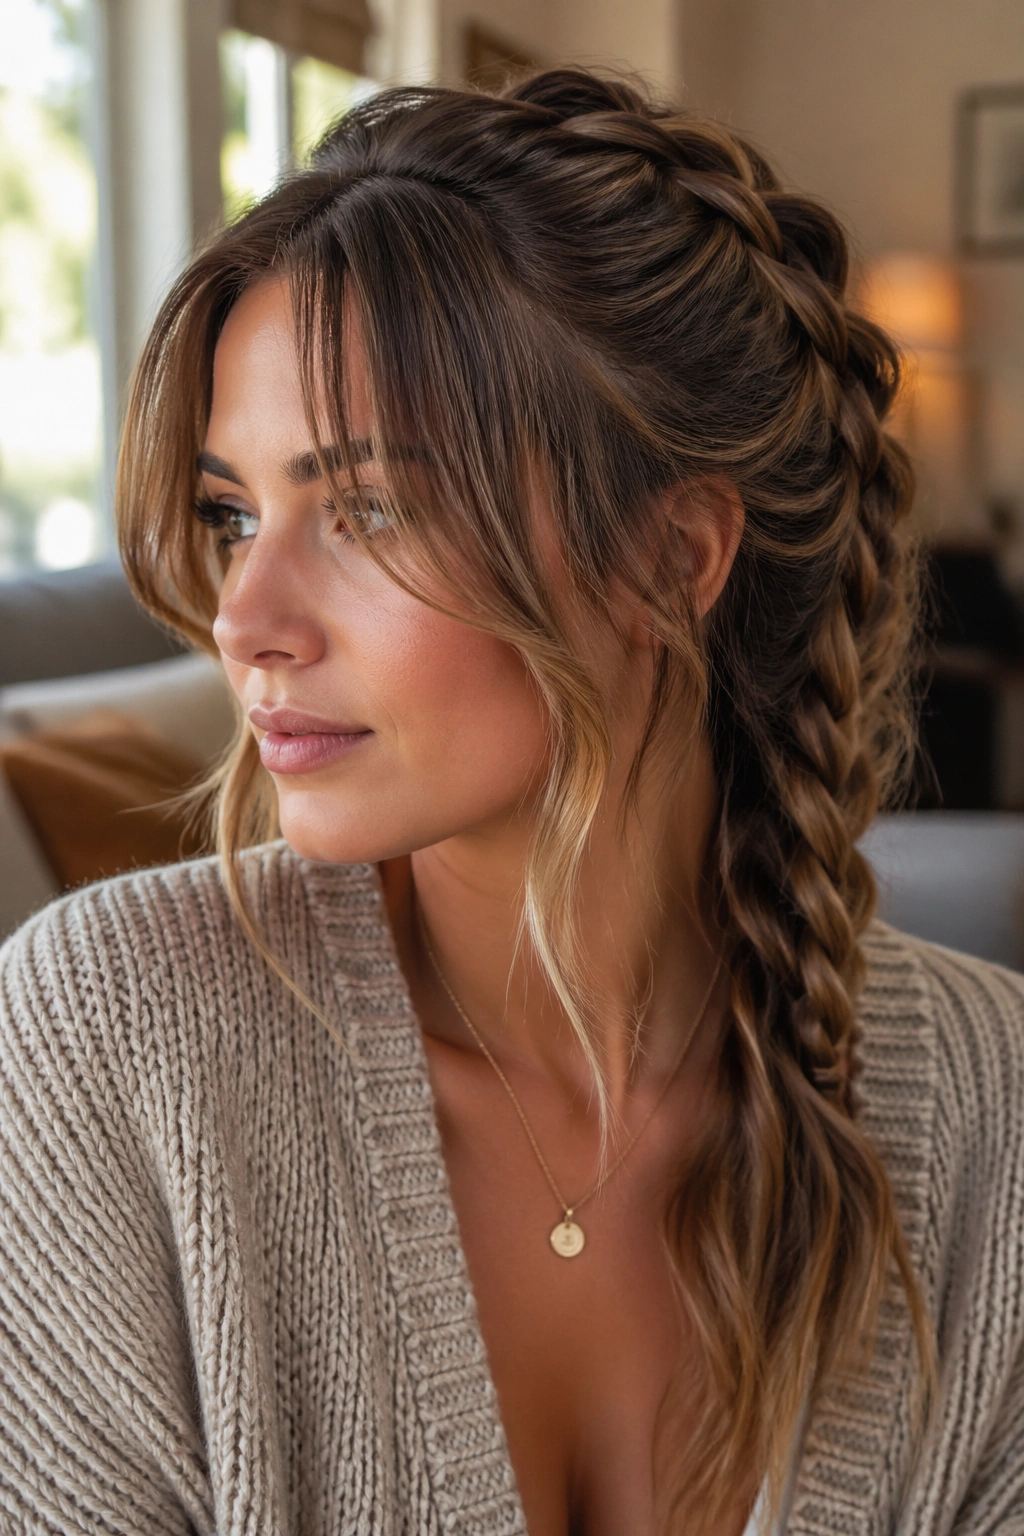
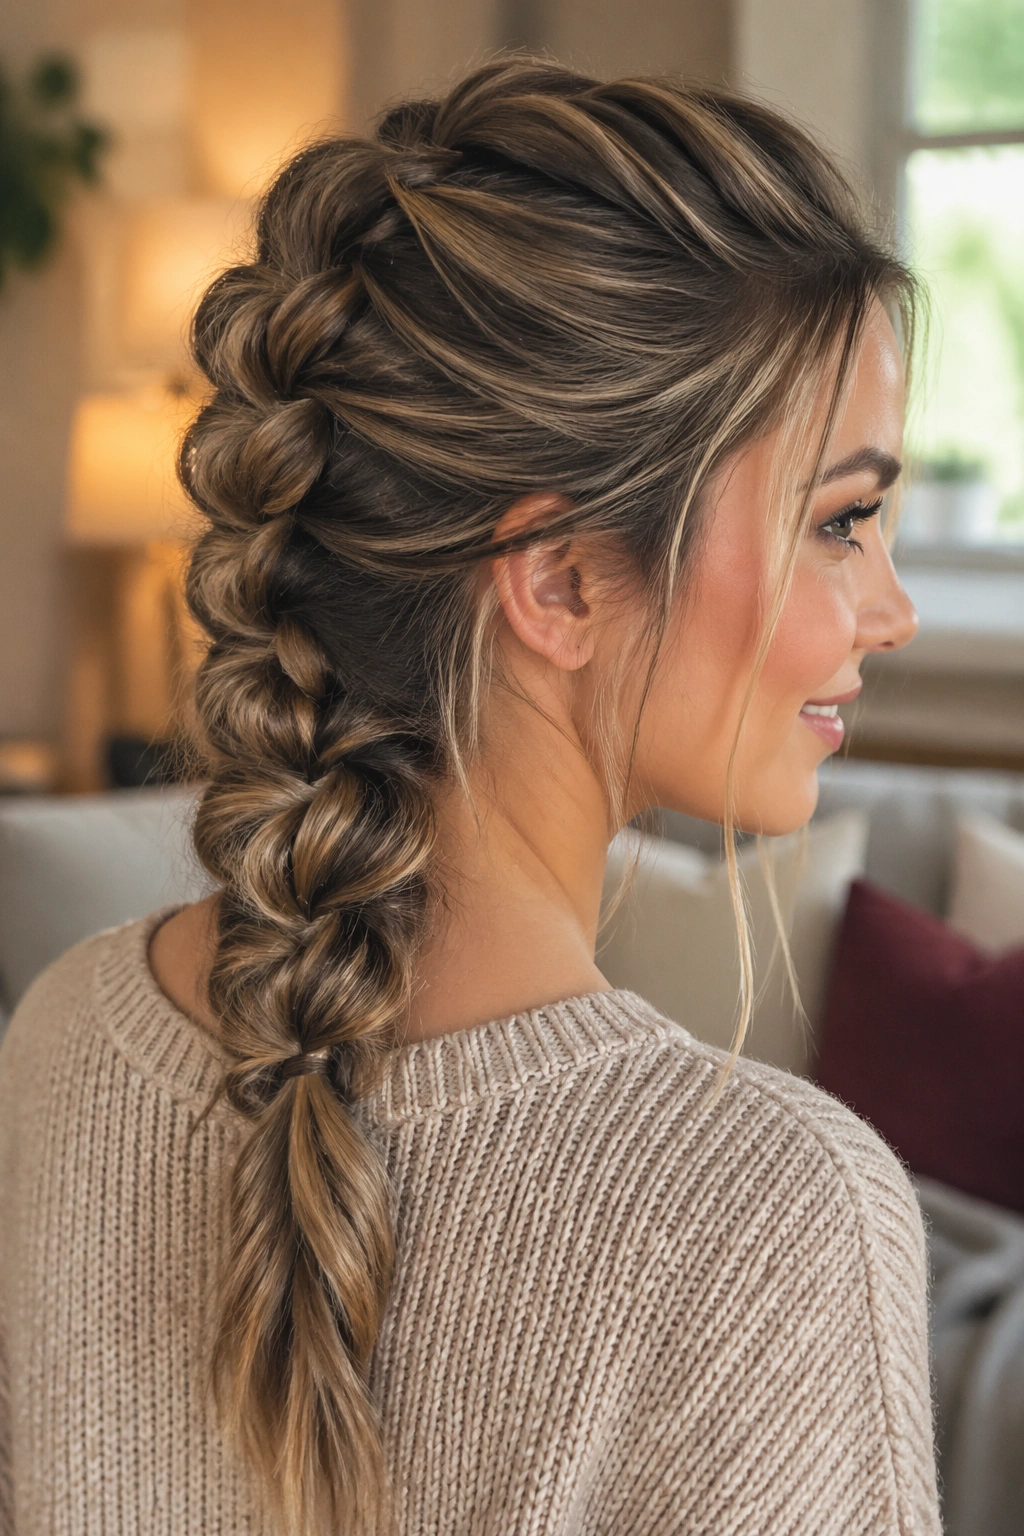
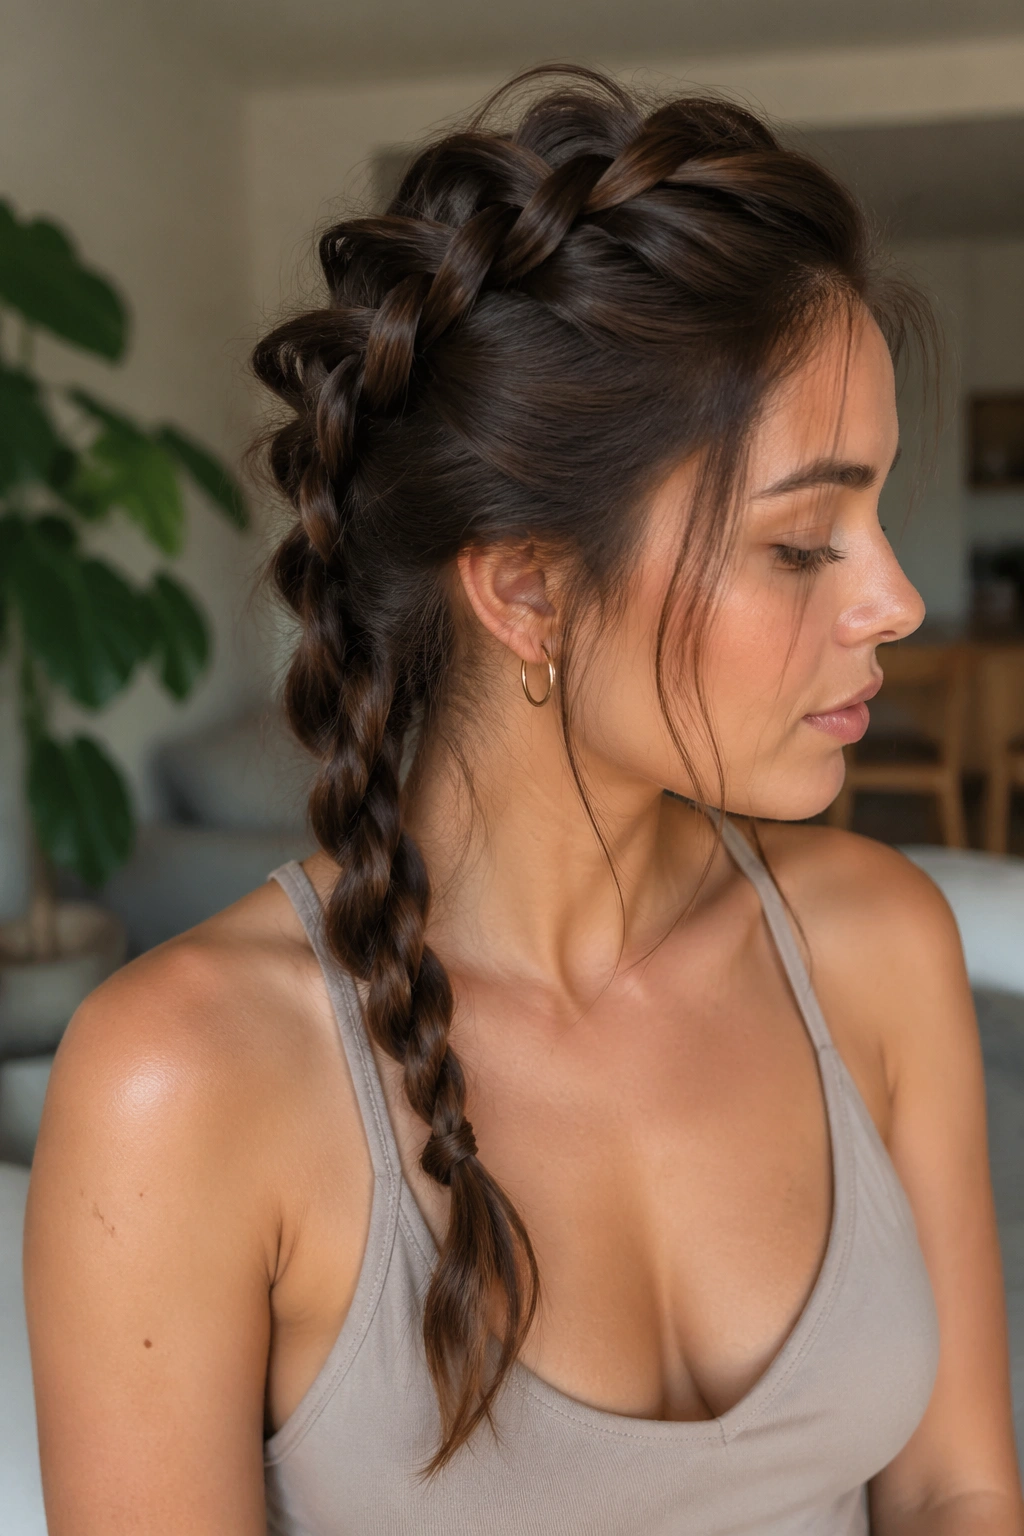
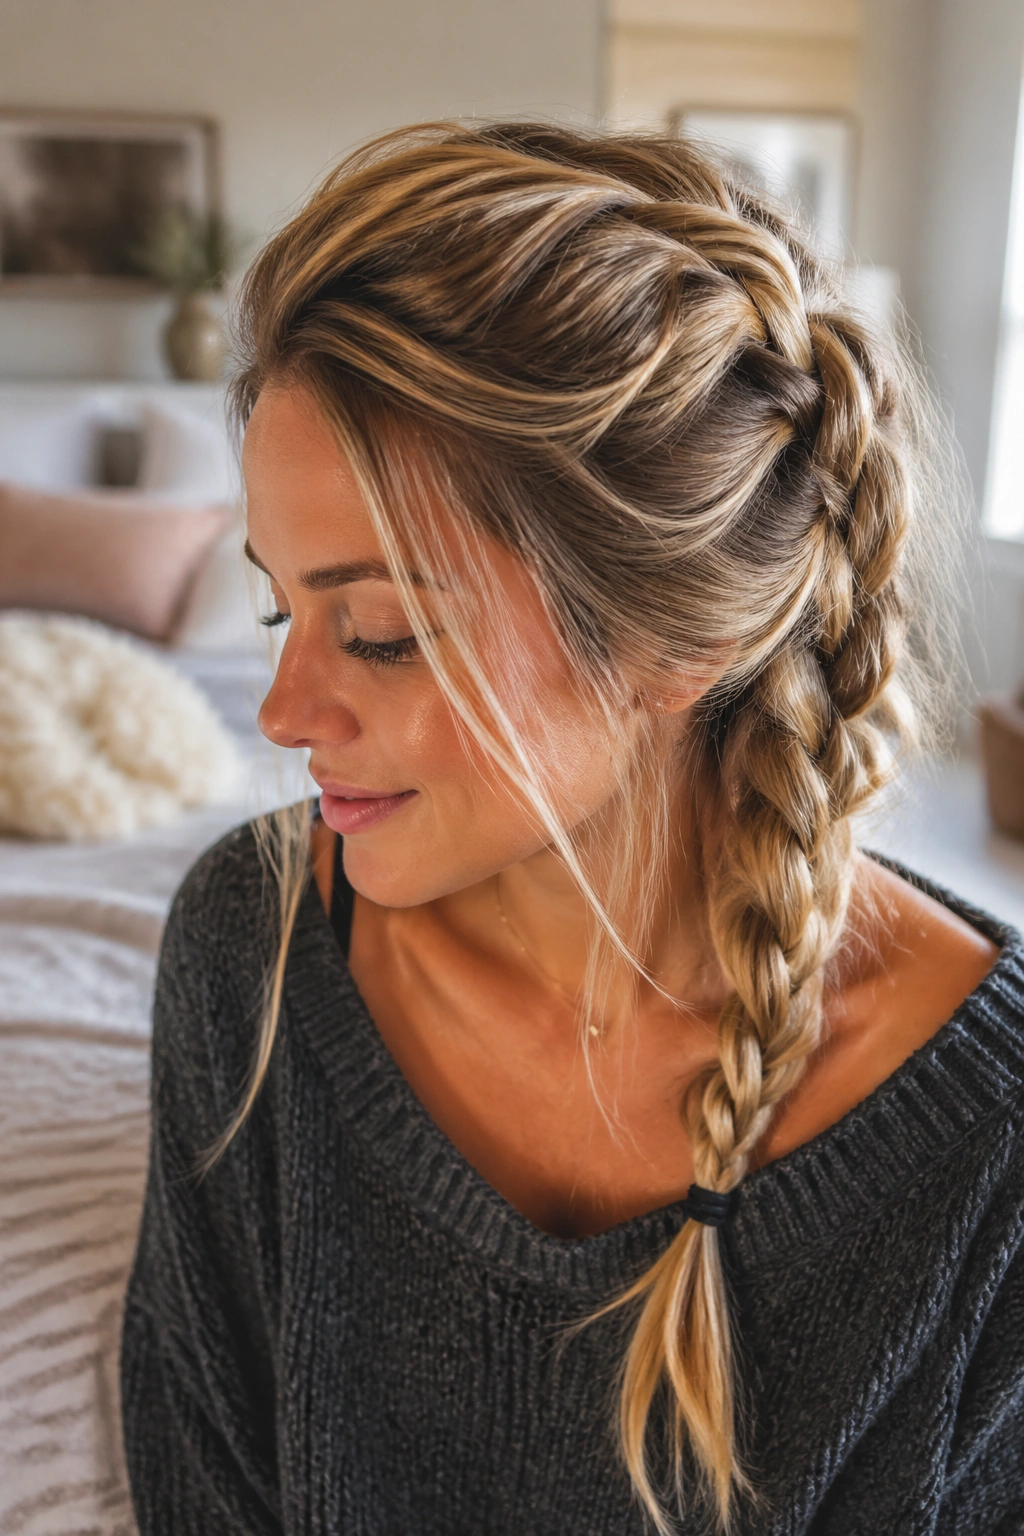
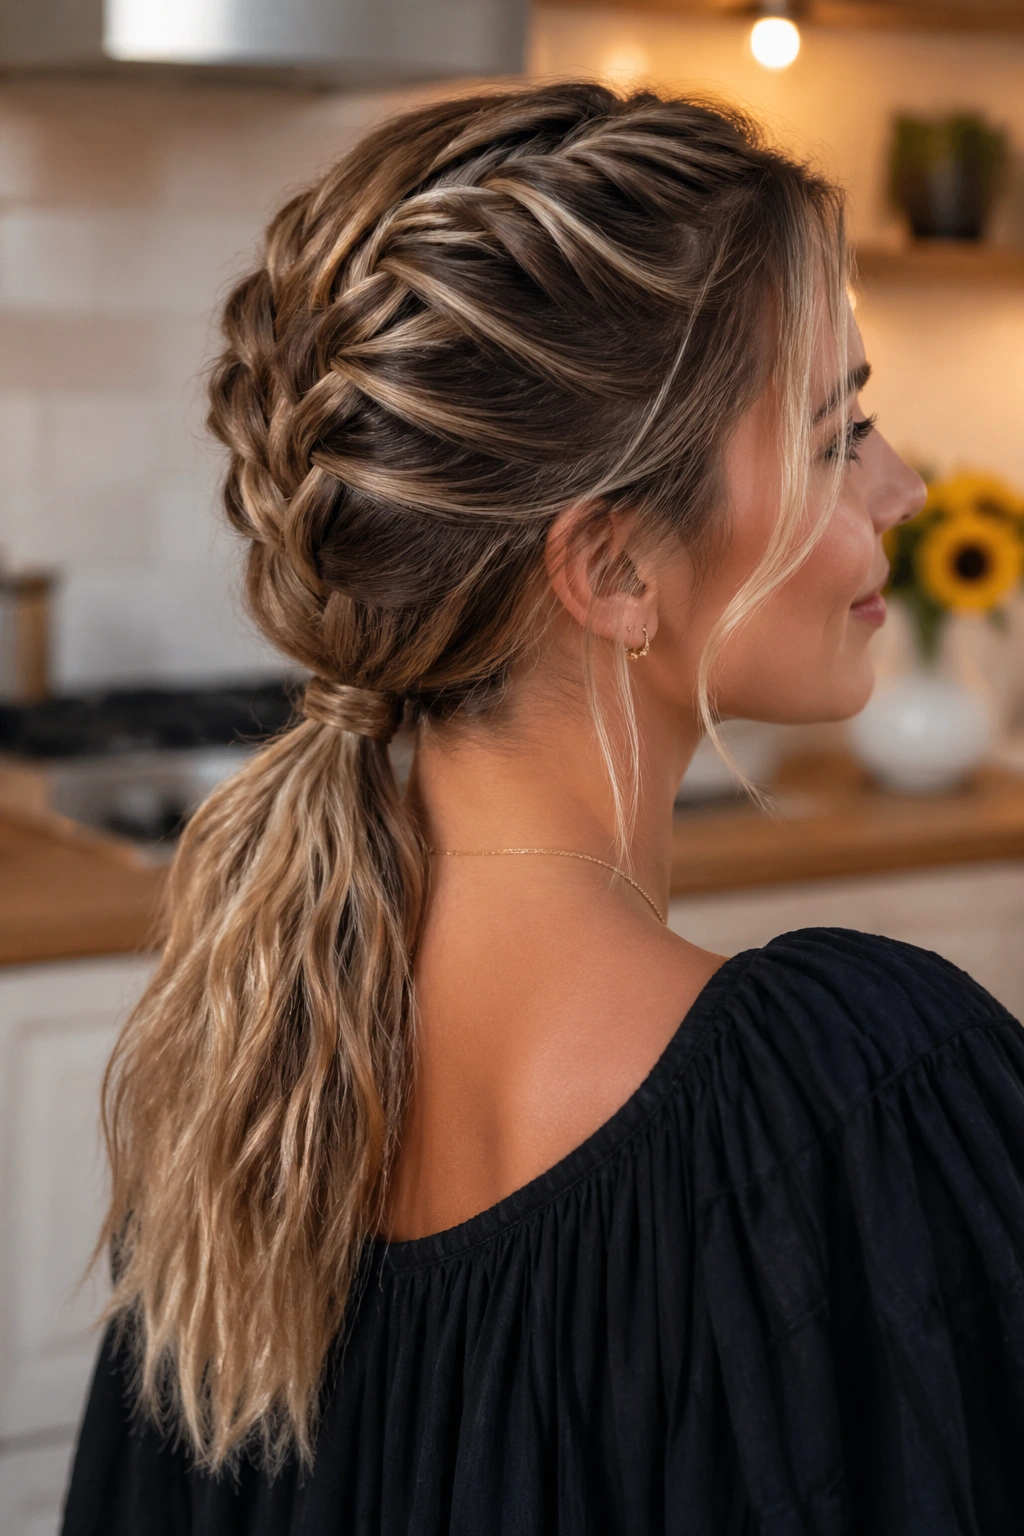
3. Low French Braid Ponytail with a Textured Tail
Why does this work so well for a casual dinner? Because it gives you the structure of a braid up top and the swing of a ponytail below. You keep hair off your face, but the style still moves when you turn your head.
How to Style It
Start the French braid high enough to show shape at the crown, then stop once you reach the nape and secure the rest into a low ponytail. The ponytail can be waved, crimped lightly, or left with your natural texture. Straight ends are fine too, as long as the braid above them has some looseness.
Use a small elastic where the braid turns into the ponytail. Then wrap a thin strand of hair around the elastic and pin it underneath. It takes thirty seconds and makes the whole thing look cleaner.
If your hair is fine, mist the tail with dry shampoo before tying it off. That gives the lengths more grip and keeps the ponytail from looking stringy by the second hour. Keep the braid itself loose at the sides, though. Too much tension at the scalp makes the style look harsh.
4. Two Tiny French Braids into Beachy Waves
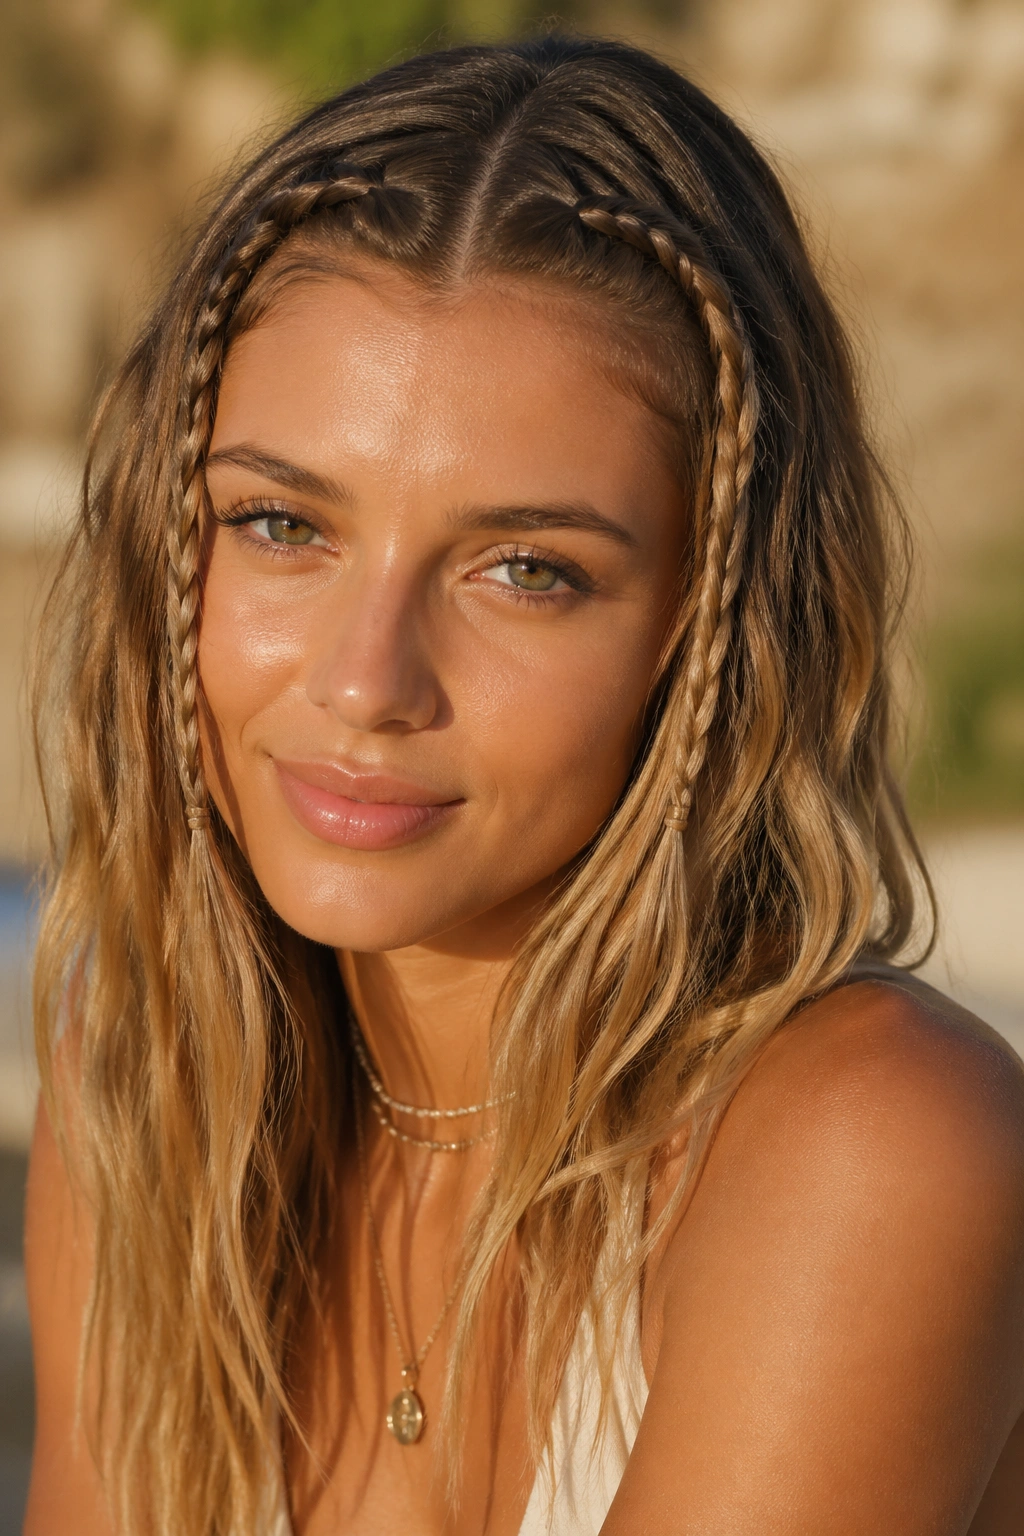
A pair of slim French braids at the front can be charming in a very low-key way. They’re the kind of detail people notice when they’re sitting across from you, not the kind that shouts for attention. That’s a good thing.
Think of this as a soft hybrid style. Braid a small section on each side from the hairline back toward the ears, then leave the rest loose and textured. The little braids act like built-in face framing, which is handy if your hair slips out of regular clips or if you want something more interesting than a single braid.
- Keep each braid narrow, about 1/2 inch wide
- Stop at the top of the ear or just behind it
- Curl the loose lengths in alternating directions for a softer finish
- Secure the braid ends under the back hair with bobby pins
The result feels relaxed, and it works especially well with a T-shirt, a blazer, or anything with a lower neckline. Small detail. Big payoff.
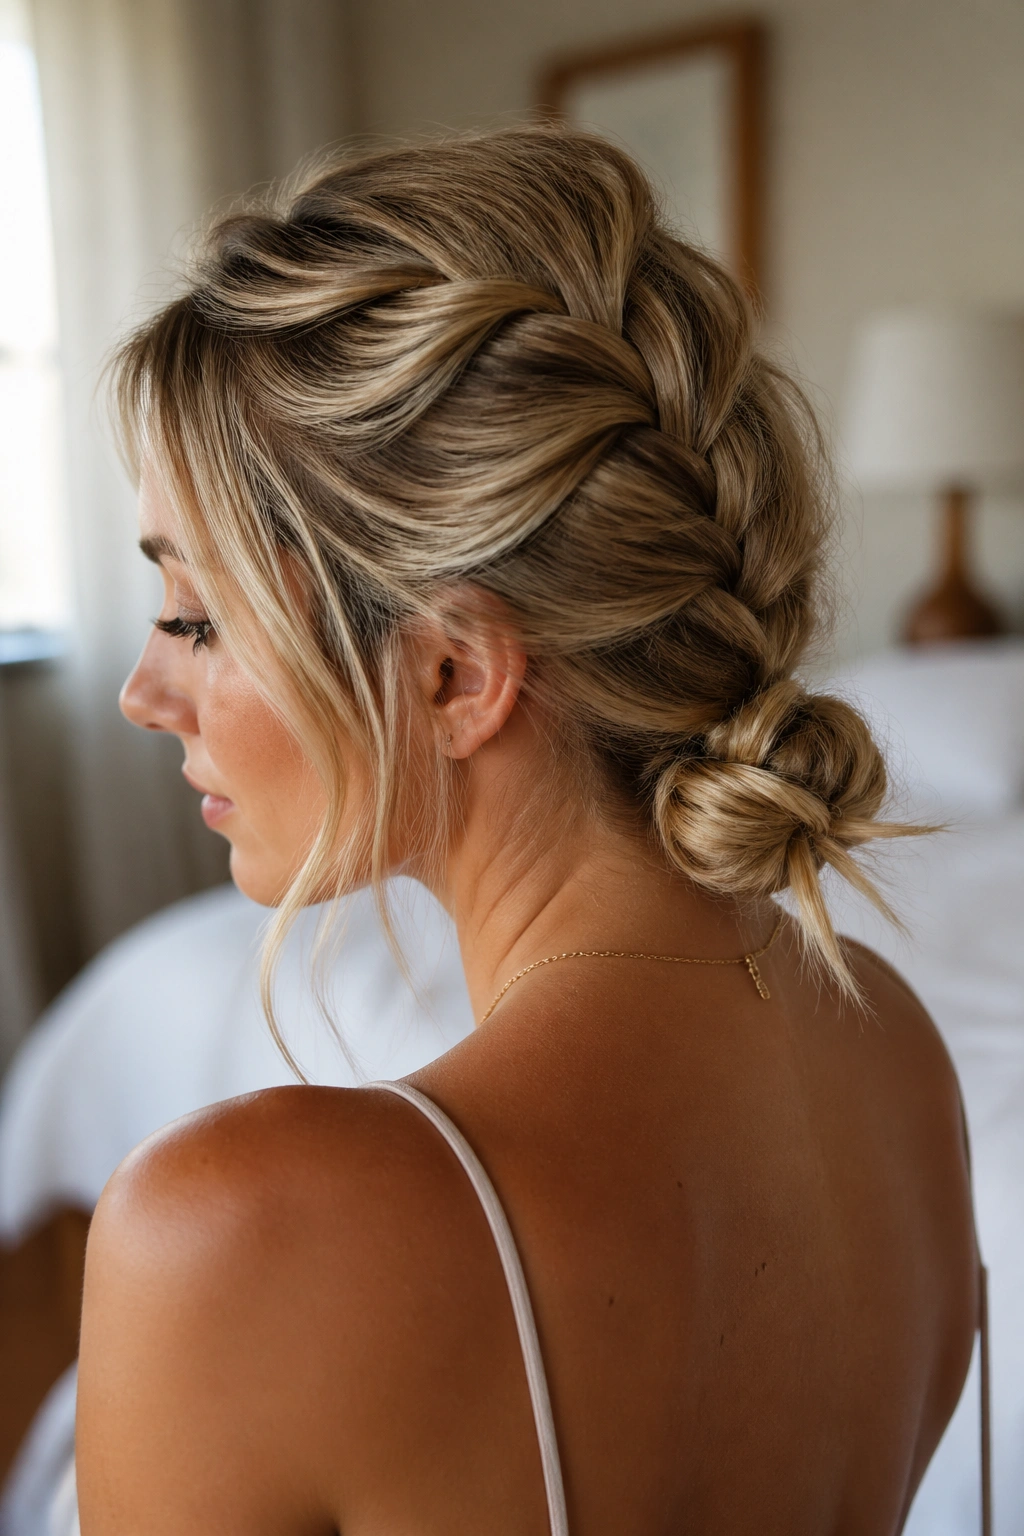
5. French Braid Bun with a Soft Crown

There’s something nice about a braid that finishes in a bun and still doesn’t look too serious. This version starts as a French braid and ends in a loose knot low at the back of the head. The crown stays lifted, the bun stays a little imperfect, and the whole thing feels easy to wear.
A tight ballerina bun would kill the mood here. Don’t do that. Keep the braid slightly undone, then twist the remaining length into a soft bun and pin it in three or four places instead of wrapping it like a rope. Let a few ends poke out on purpose.
This style is useful when you want your neck clear and your hair off your shoulders, but you still want texture around the head. It also plays nicely with statement earrings because it doesn’t crowd the face.
If your hair is layered, expect a few pieces to escape. Good. Those pieces keep the bun from looking too neat. A little mess around the bun makes the style feel lived in.
6. Deep Side French Braid Over One Shoulder

Compared with a center braid, a deep side braid has more drama and less symmetry. That’s the point. It starts from a side part, gathers hair loosely across the crown, and drops everything over one shoulder in a way that looks relaxed but still intentional.
A deep side French braid is especially good if you like a visible braid pattern but don’t want the style to feel bulky. Because the braid lives off to one side, it leaves room at the root for a little lift. That keeps the front from flattening down, which is where a lot of side braids go wrong.
The ends can stay straight, slightly bent, or tucked under with a pin. I prefer a loose tail with the last two inches left a touch rough. It looks more natural that way. And no, you do not need to over-pancake the whole braid. Just widen the outer edges near the shoulder and leave the rest alone.
7. French Braid with Curtain Bangs and Loose Ends
Curtain bangs change the whole feel of a braid. They soften the forehead, make the braid look less severe, and give the style a casual fall that works especially well for low-key plans. If your bangs are growing out, this is one of the better ways to make them cooperate.
What to Watch For
The braid should start a little farther back than you think. If you begin too close to the hairline, the bangs can get swallowed by the braid and the front ends up looking tight. Leave the fringe area free, then braid from just behind it.
A bit of texture spray at the roots helps keep the bangs from slipping flat. That matters more than people realize. Curtain bangs tend to separate and fall where they want, so the braid needs a little grip to hold the overall shape.
- Best for chin-length bangs or longer
- Works with straight, wavy, or loose-curly hair
- Use a round brush only if you want the bangs to curve under
- Let the braid end low and loose for the cleanest line
Small note: if the bangs are freshly washed and silky, wait an hour. They’ll behave better.
8. Pancaked French Braid for Thick Hair
Thick hair can make a French braid look heavy if you leave it tight and narrow. Pancaking fixes that. You pull gently at the outer loops of each braided section, spreading the braid wider and flatter so the final shape has more surface and less bulk.
That widening step changes everything. It lets the braid sit against the head instead of bulking straight out from it, which is especially useful on date nights when you want to keep the style soft and wearable. Thick hair also holds loosened braids well, so the texture usually stays put for hours.
Use a brush, not a fine-tooth comb, for the prep. Thick hair that’s over-brushed can turn puffy at the root before you even start. A little leave-in cream on the ends helps too, but keep it away from the scalp or the braid can slide.
If your hair is very dense, braid in smaller sections. You’ll get a more even pattern and less strain on your hands. That part matters. A braid this size can be tiring.
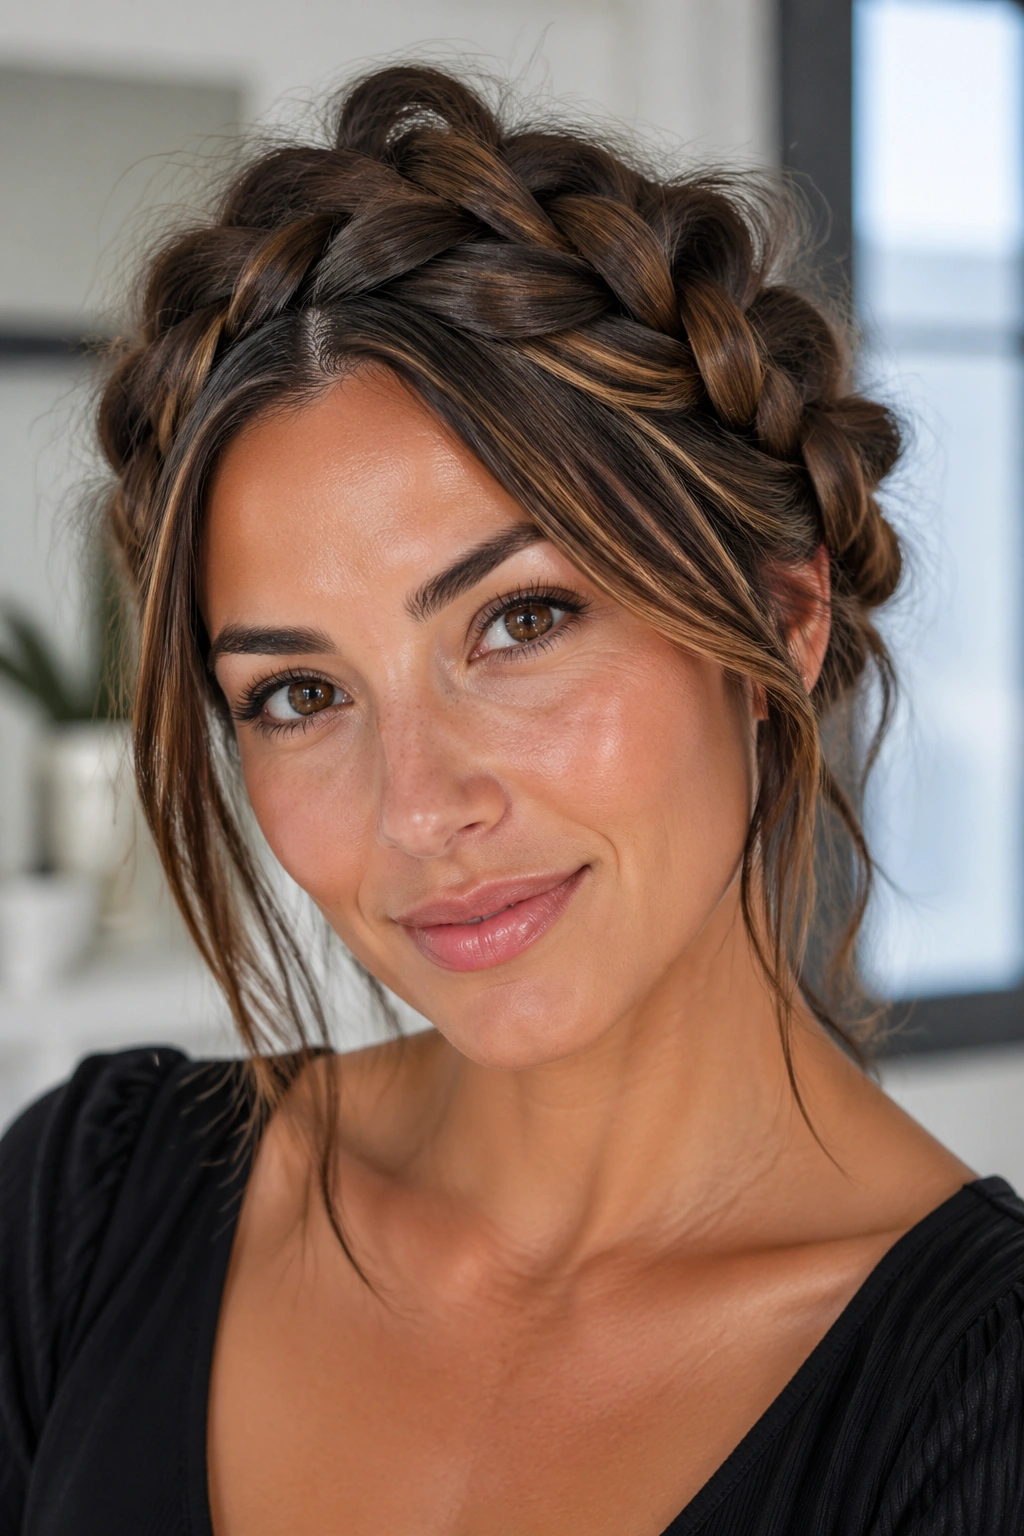
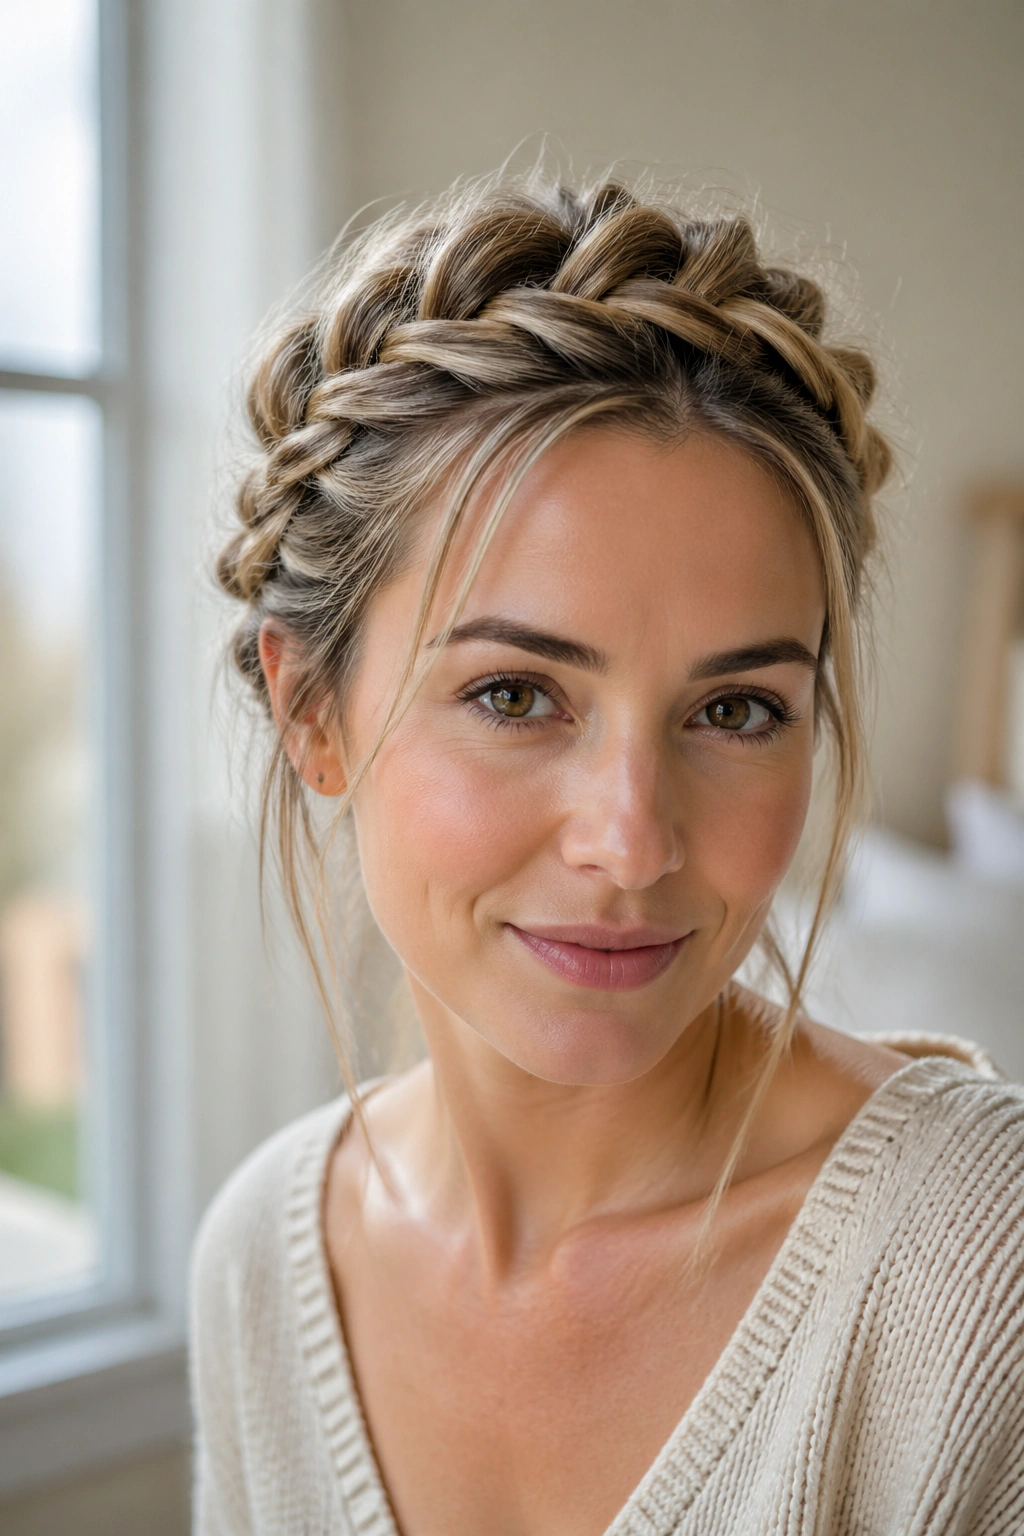
9. Halo French Braid with Wispy Front Pieces
A halo braid sounds formal, but a messy version feels sweet and a little undone in the best way. Instead of wrapping tightly around the entire head, the braid traces the hairline loosely and leaves a few wisps out around the face. It reads soft, not bridal.
Why people like this style is obvious once you wear it. It keeps the hair off your neck, shows off the jawline, and still looks gentle enough for a casual dinner. The key is avoiding a perfect circle. You want an uneven halo, not a molded cap.
How to Make It Feel Relaxed
Start on one side, braid around the head, and pin as you go. Don’t stretch the braid too hard when you’re bringing it across the back. A little slack lets the shape breathe and prevents that stiff, wrapped-around look.
Leave two thin pieces near each temple. Curl them once around a 1-inch iron if they’re stick-straight. That tiny bend gives the front more softness than a full curl would.
10. French Braid Finished with a Ribbon Tie
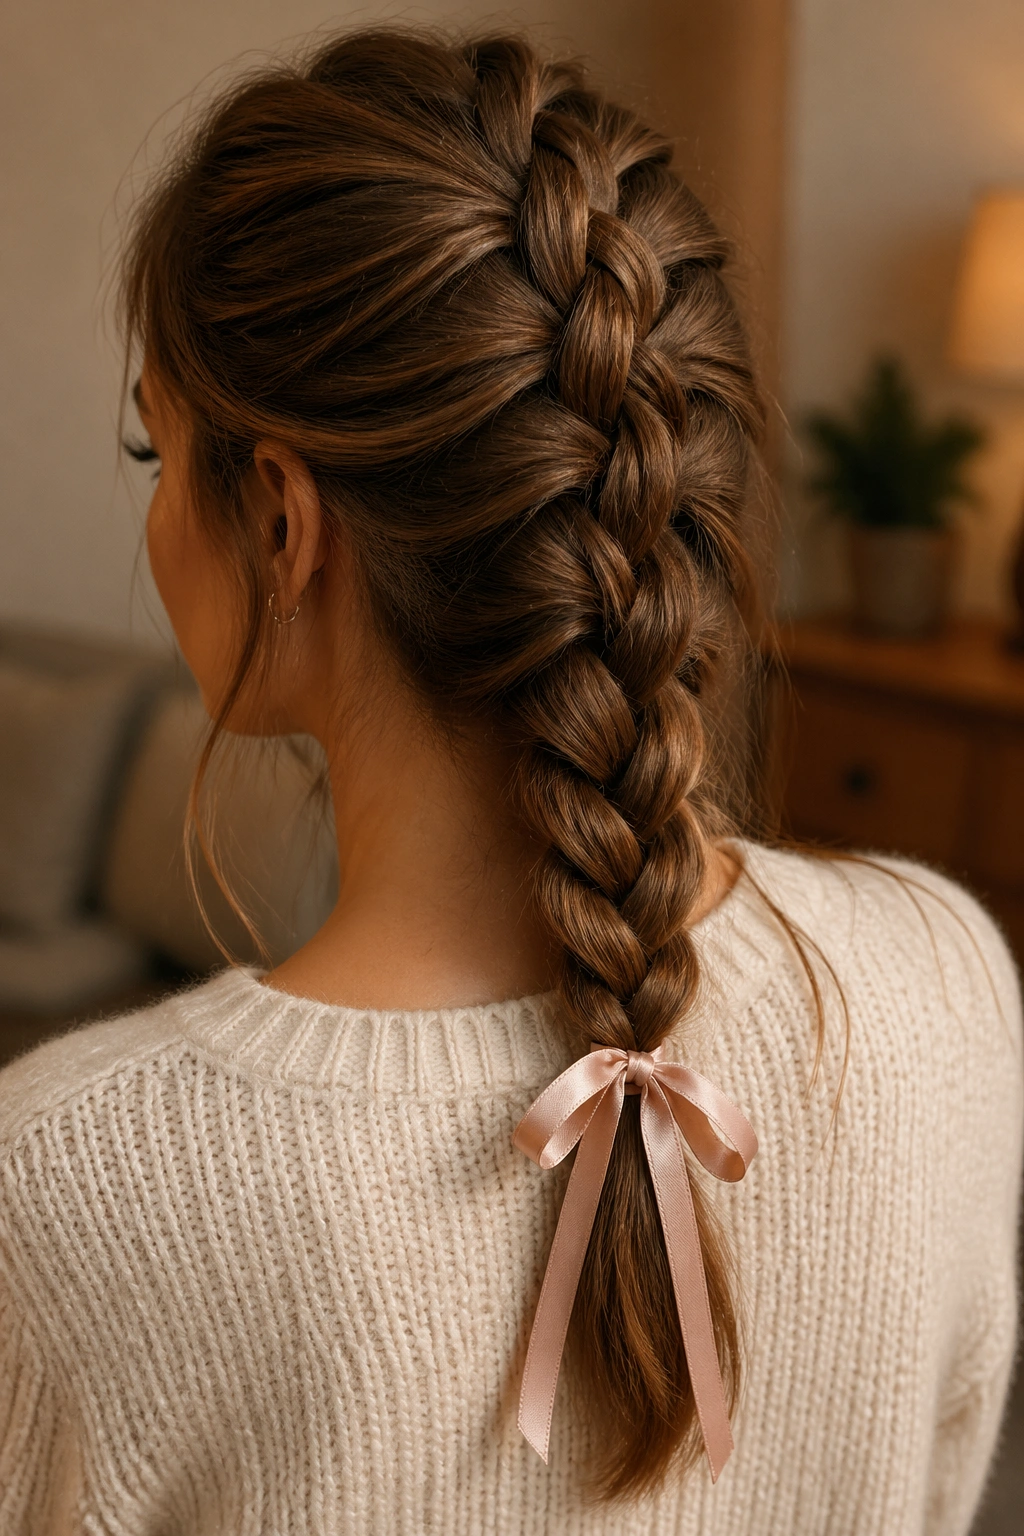
A ribbon at the end changes the mood fast. The braid stays the same, but the finish feels a little more personal, a little less ordinary. Choose a narrow satin ribbon, velvet if the hair is darker, or a grosgrain tie if you want texture.
The important part is restraint. One ribbon is enough. Don’t stack bows, clips, and pins unless you’re going for costume territory, which is a different conversation entirely. Tie the ribbon around the elastic at the end of the braid, then let the tails hang unevenly so it doesn’t look too neat.
This style is good when you want one obvious detail and not a lot of extra work. It also helps if the braid itself is simpler than you’d like; the ribbon gives the finish some character. If the braid starts low and loose, the ribbon can keep it from looking plain.
A small ribbon is charming. A huge one is less charming. That’s the line.
11. French Braid Faux Hawk with Loose Volume
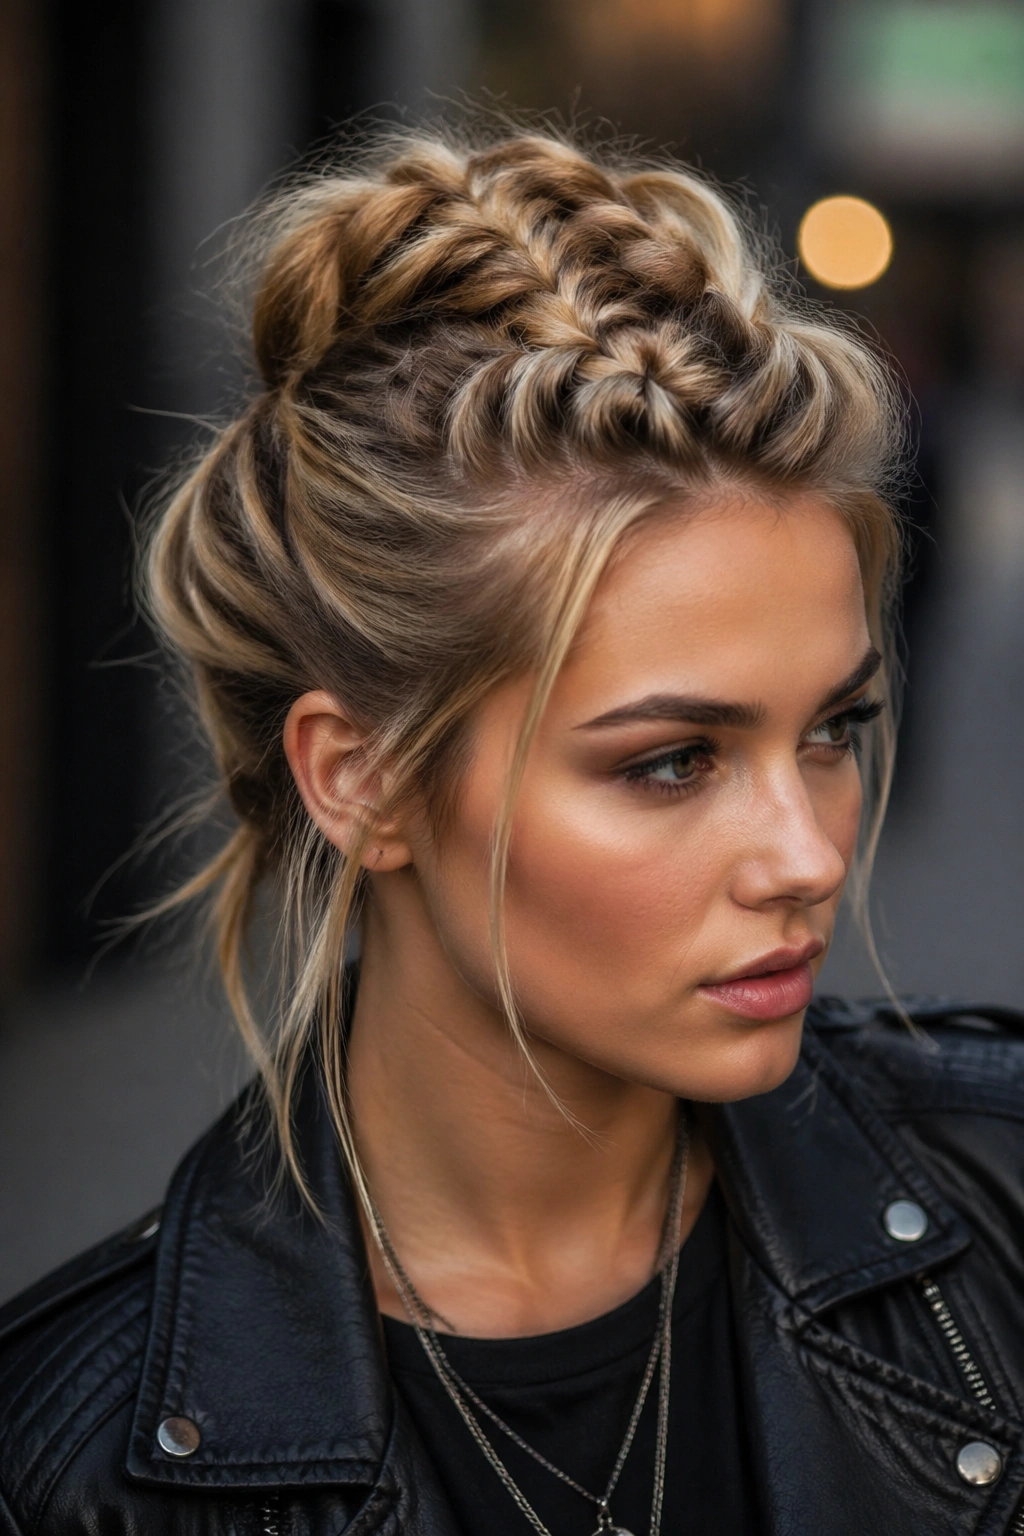
This one has a bit more edge, but it still fits a casual date if the rest of the braid stays soft. The French braid runs down the center of the head, while the sides are kept close and the top gets enough height to create a faux-hawk shape.
The trick is not making it look severe. You’re after shape, not aggression. Keep the side sections loose enough that they don’t flatten the face, and pull the braid edges outward once it’s secured. That gives the center more body and keeps the whole style from feeling helmet-like.
It’s a good choice for thicker hair and for people who like their hair away from the face. A tiny bit of root powder at the crown can help build lift without teasing the life out of the top layer. Use it sparingly. Too much product here gets crunchy fast.
One thing I like about this braid is that it pairs well with a simple outfit. The hair brings enough structure on its own.
12. Short-Hair French Braid That Stops at the Nape
Short hair can do a French braid, and it doesn’t need to be full-length to look good. If your hair barely reaches the shoulders, braid from the front or crown and stop once you get to the nape, then pin the tail flat or tuck it under.
That cropped finish makes the style feel chic rather than compromised. A lot of people keep waiting until their hair is long enough for a full braid down the back. Honestly, that’s unnecessary. A shorter braid with clean tension and a soft front can look better than a longer one that’s dragged thin.
Use small elastics and a few extra bobby pins. Short hair tends to spit out pieces, especially around the nape and above the ears. Spray the pins before sliding them in if your hair is silky. It gives them more grab.
This version works best when the braid is slightly off-center. A tiny shift keeps it from reading too school-uniform.
13. French Braid on Curly Hair with Soft Ends
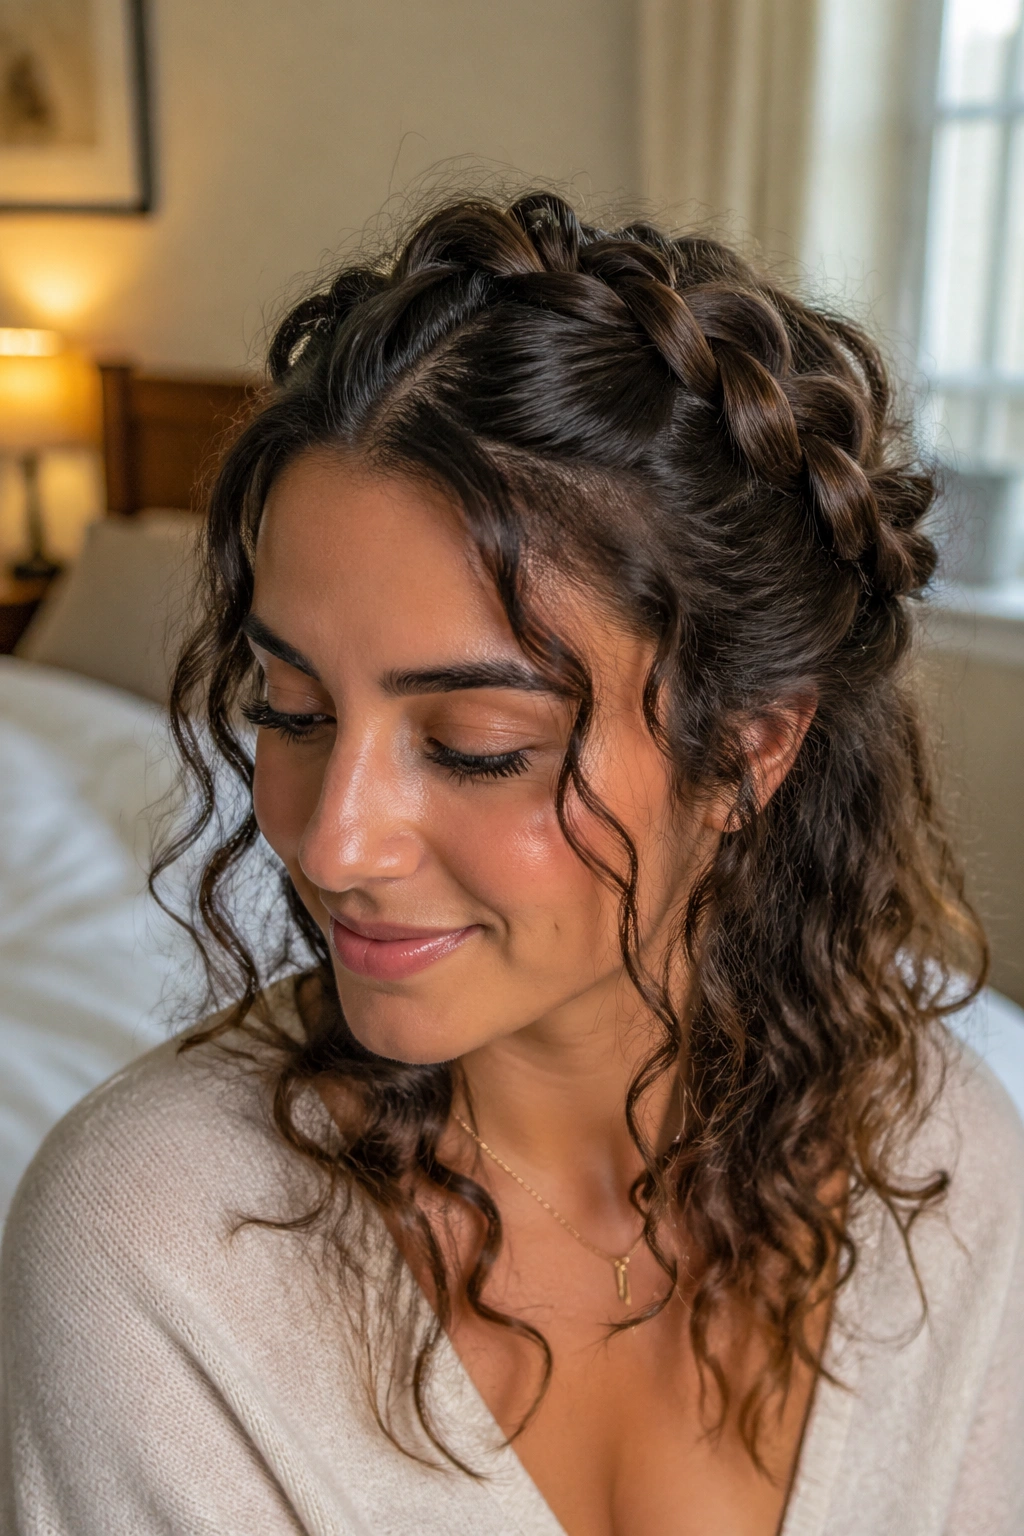
Curly hair gives a French braid more life from the start. You get texture in the woven sections, volume at the crown, and ends that already have movement. The braid does not need much help; it just needs clean parting and a gentle hand.
A lot of people with curls pull the braid too tight because they’re trying to tame everything at once. That usually backfires. The tighter the braid, the more it fights the curl pattern. Leave enough slack that the braid can sit between the curls instead of crushing them.
How to Keep It Soft
Work on stretched or lightly refreshed curls rather than soaking-wet hair. A bit of cream or gel on the roots can control flyaways without killing volume. Then braid using fingers more than a comb, especially around the front where curls often want to spring free.
Leave the ends loose and let them coil naturally. That unfinished tail is the whole point. It makes the braid feel casual, which is exactly what this style needs for a relaxed evening out.
14. Pull-Through French Braid with Extra Texture
A pull-through braid looks more elaborate than a standard French braid, but it’s actually easier to keep full. Instead of three-strand weaving, you build stacked ponytail sections that mimic a braid and keep the shape chunky. For date-night hair, that fullness reads as soft and playful.
The best part is the texture. Each section stands out a little, so the braid has more dimension without needing heat styling. If your hair is fine or slippery, this method gives you more control than a traditional French braid. It also stays visible from the side, which is a nice bonus.
Use small elastics every 1 to 2 inches. After each section is secured, gently tug the outer edges to widen the shape before moving to the next one. That’s where the softness comes from. Skip that step, and the braid can look stiff.
A pull-through braid does take more hands than a simple braid. Worth it, though. The finish holds up well and looks like you spent longer than you did.
15. Twin French Braids with a Loose Back Tail

Two braids can feel sporty, but a loose version with soft ends pushes the look into casual evening territory. Start with two French braids from either side of a center part, then stop each braid at the back and merge the remaining hair into one loose tail.
That keeps the face open and the shape balanced. It also adds a little edge without becoming too polished. I like this when the hair is already textured, because the twin braids give structure while the loose back section keeps everything from feeling boxed in.
Why It’s a Good Date-Night Choice
The style holds up well if you’re out for a long dinner or walking around before and after. The braids stay put, and the tail can be refreshed with a quick mist of wave spray if it starts to fall flat.
- Center part for symmetry
- Side part for a softer, more casual feel
- Keep both braids loose at the temples
- Tie the back tail low, not high
It’s a little playful. Not childish. There’s a difference.
16. French Braid into a Low Knot
A low knot gives a French braid a quieter ending. Instead of finishing with a hanging tail, the braid folds into a small knot at the nape. That keeps the neckline clean while still giving you braid texture through the top and sides.
This style is useful when you want the hair controlled but not slicked back. The braid can start with a loose part, run down the center or just off-center, and stop right where the head starts to curve into the neck. Then the remaining length gets wrapped into a knot and pinned.
Don’t make the knot too tight. It should look like a twist you happened to secure, not a formal knot pinned into submission. A few ends peeking out keep it relaxed. If your hair is layered, those ends may happen on their own, which saves you some effort.
The low knot also works with dresses that have open backs or high collars. It shows the shape of the braid without letting the style compete with the outfit.
17. Slim Hairline French Braid Accent
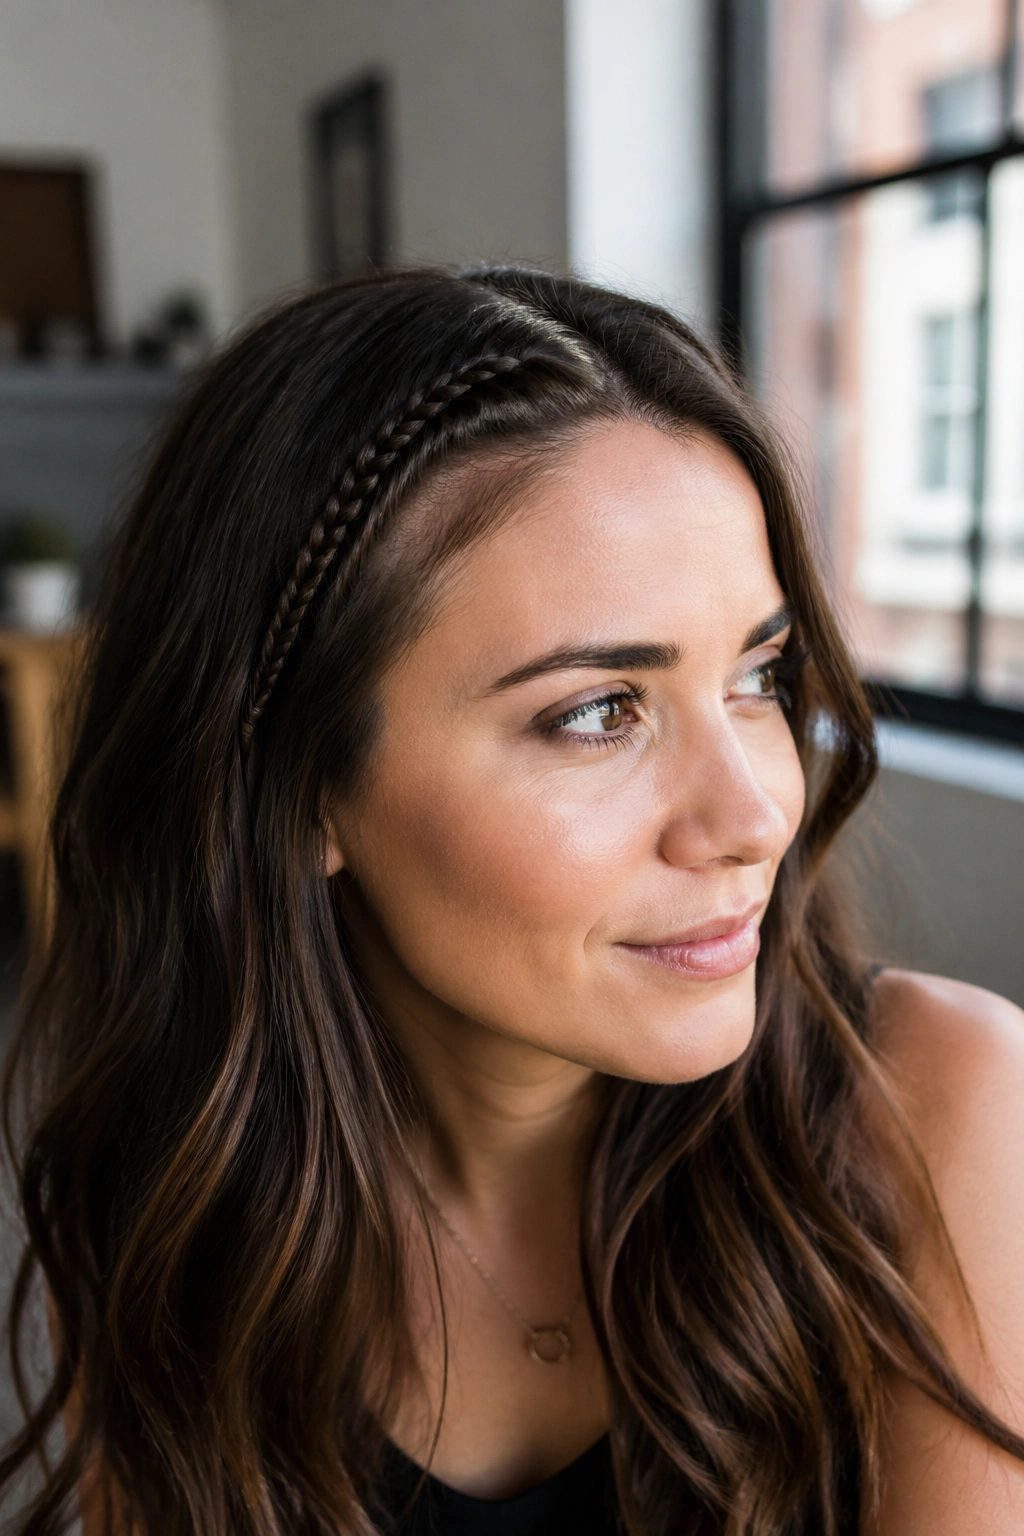
A tiny braid along the hairline is one of those little details that can rescue an otherwise simple look. It gives structure near the face, keeps shorter layers under control, and adds a bit of intention without asking for a full updo.
This is the style for people who want their hair mostly down. Braid a narrow section starting at the temple or just above the eyebrow, then angle it back and pin it out of sight. The rest of the hair can stay wavy or straight. No one needs a lot more than that.
The braid should be thin enough to disappear into the hair, but visible enough to register when you move. That balance is what makes it feel casual and not overworked. If you use too much hair, the accent becomes the main event, which changes the whole mood.
I like this with earrings, bare shoulders, or a soft collar. It’s subtle, but not forgettable. That’s a nice place to be.
18. French Braid with a Hidden Claw Clip Finish
A claw clip at the end of a braid sounds odd until you try it. The braid runs from the front or crown to the back, then the remaining length gets twisted up and clipped low, with the clip hidden by the braid itself or by a few loose sections.
The effect is relaxed and a little undone. You get the tidy front of a French braid, but the back has a softer, more spontaneous shape. That makes it useful for casual date nights where you want to look like you made a choice, not a production.
What matters most here is clip size. A tiny clip won’t hold the twist, and an oversized one can poke out in a way that feels clunky. Pick a medium clip with a matte finish if you can. It disappears better than shiny plastic.
A few face-framing strands keep the whole thing from looking too rigid. Pull them free before clipping the back in place. Easier than trying to fix them afterward.
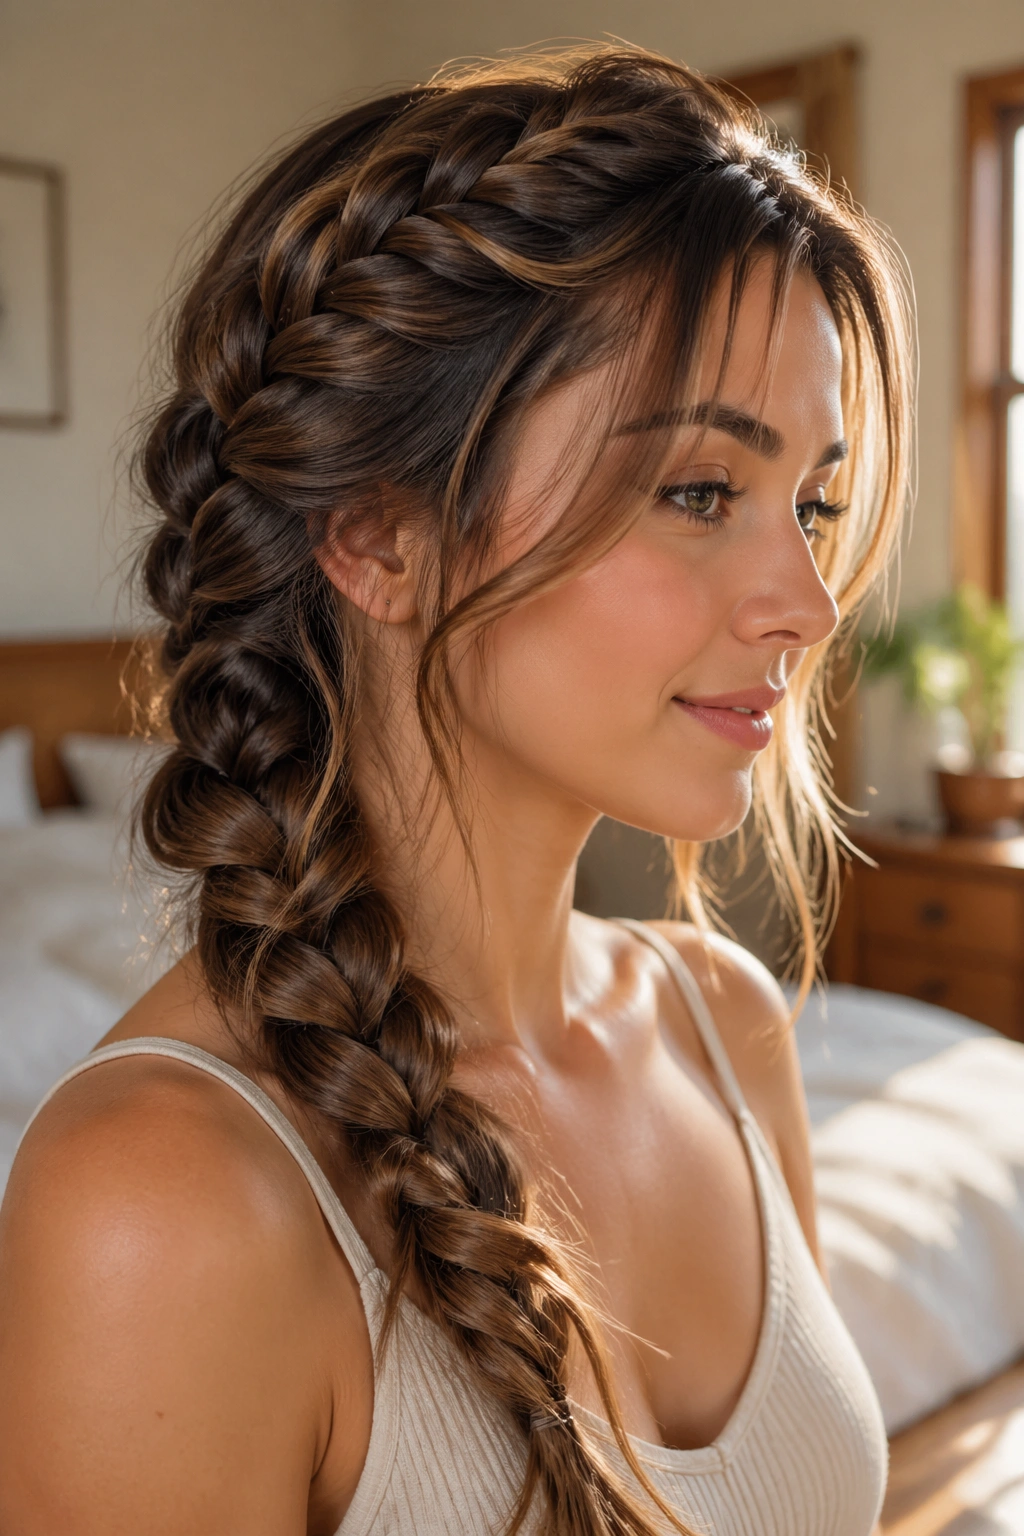
19. French Braid with a Fishtail Tail
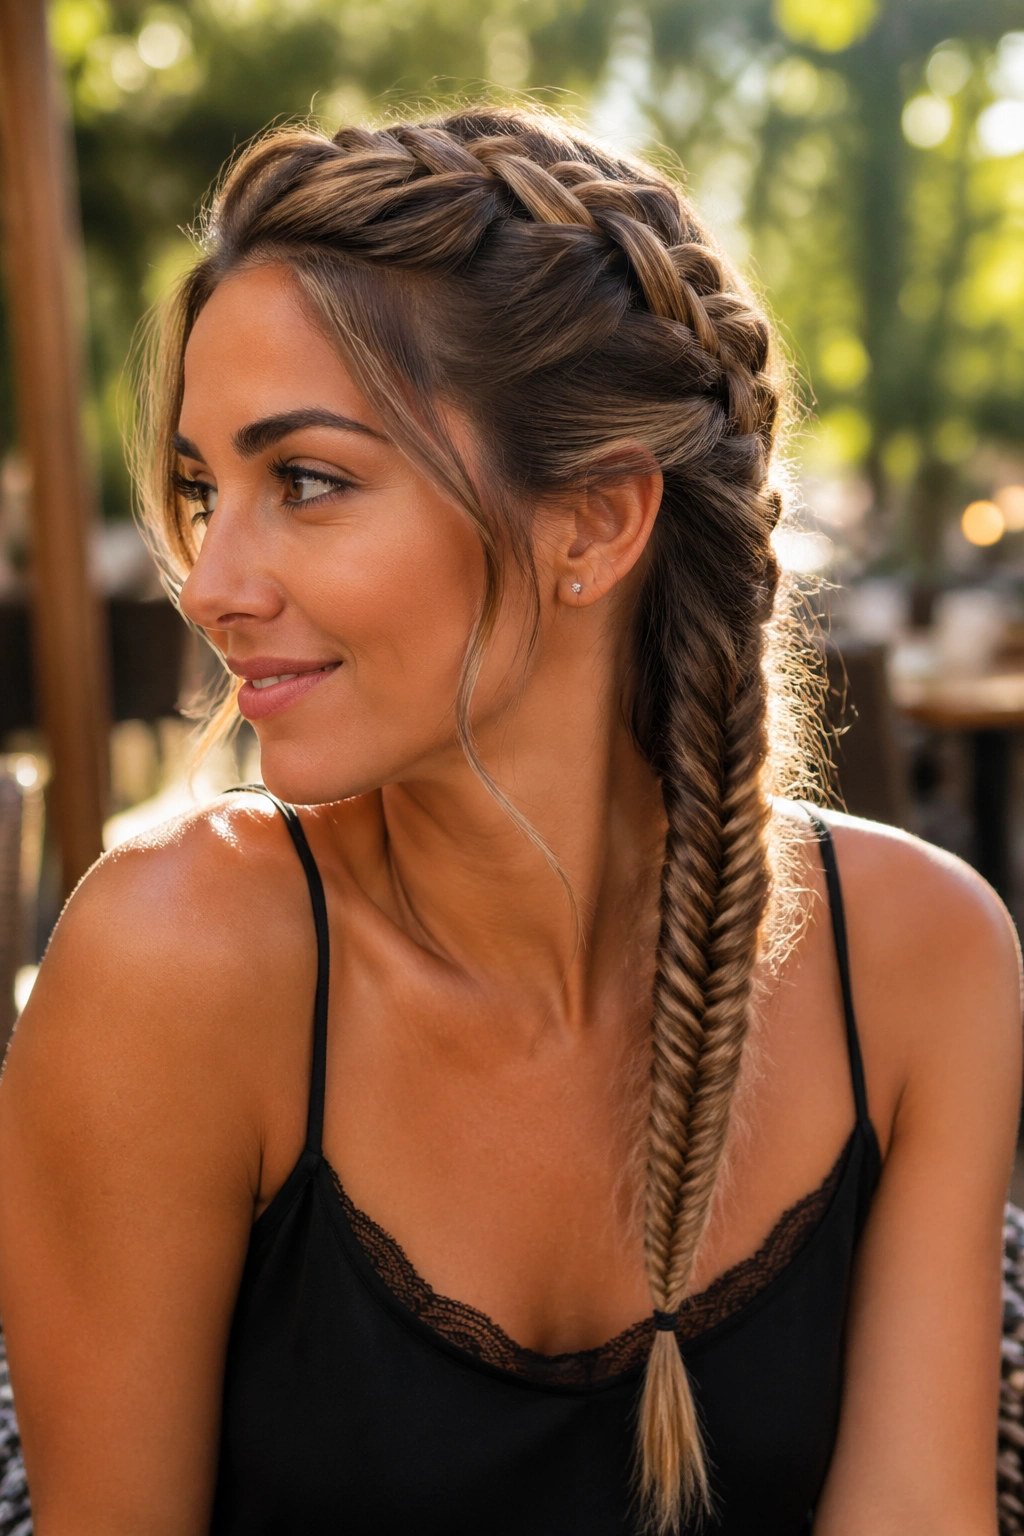
A French braid that ends in a fishtail gives you two textures in one style. The top section looks structured and secure, while the bottom falls into something finer and more intricate. The contrast makes the braid look deliberate without feeling overdone.
This is a good choice if the top of your hair needs control but the ends can stay loose. Braid the crown and midlengths in a standard French pattern, then switch to a fishtail once you reach the lower half. The change in weave is visible, and that’s part of the appeal.
How to Get the Switch Right
Don’t wait too long to switch techniques. If the French braid goes nearly to the ends, the fishtail part gets too short to read. Aim to change around mid-back length, or earlier if your hair is shorter.
A little texture spray helps the fishtail grip. Thin ends can slip apart fast, and the spray gives the final section more bite. A soft tug on the fishtail edges keeps it from looking too skinny.
It’s a small detail, but one that makes the braid feel more intentional.
20. Crown-Lift French Braid for Fine Hair
Fine hair needs help with shape, not weight. A crown-lift French braid gives it that by building a little height at the top before the braid drops through the back. The lift makes the hair look fuller, and the braid gives it enough structure to stay in place.
Start by misting the roots with a lightweight texturizing spray. Then gently backcomb the top section only at the roots, not through the mid-lengths. That’s enough. Over-teasing fine hair makes the surface rough and hard to braid cleanly.
The braid should stay soft through the sides so it doesn’t squeeze the volume out of the crown. Once it’s secured, tug lightly at the loops near the top. Not the whole braid. Just the crown area. That creates a little dome of height that looks natural, not puffed up.
Fine hair often looks best when it’s not trying too hard to imitate thick hair. Let the braid be slim, but give it lift where it counts.
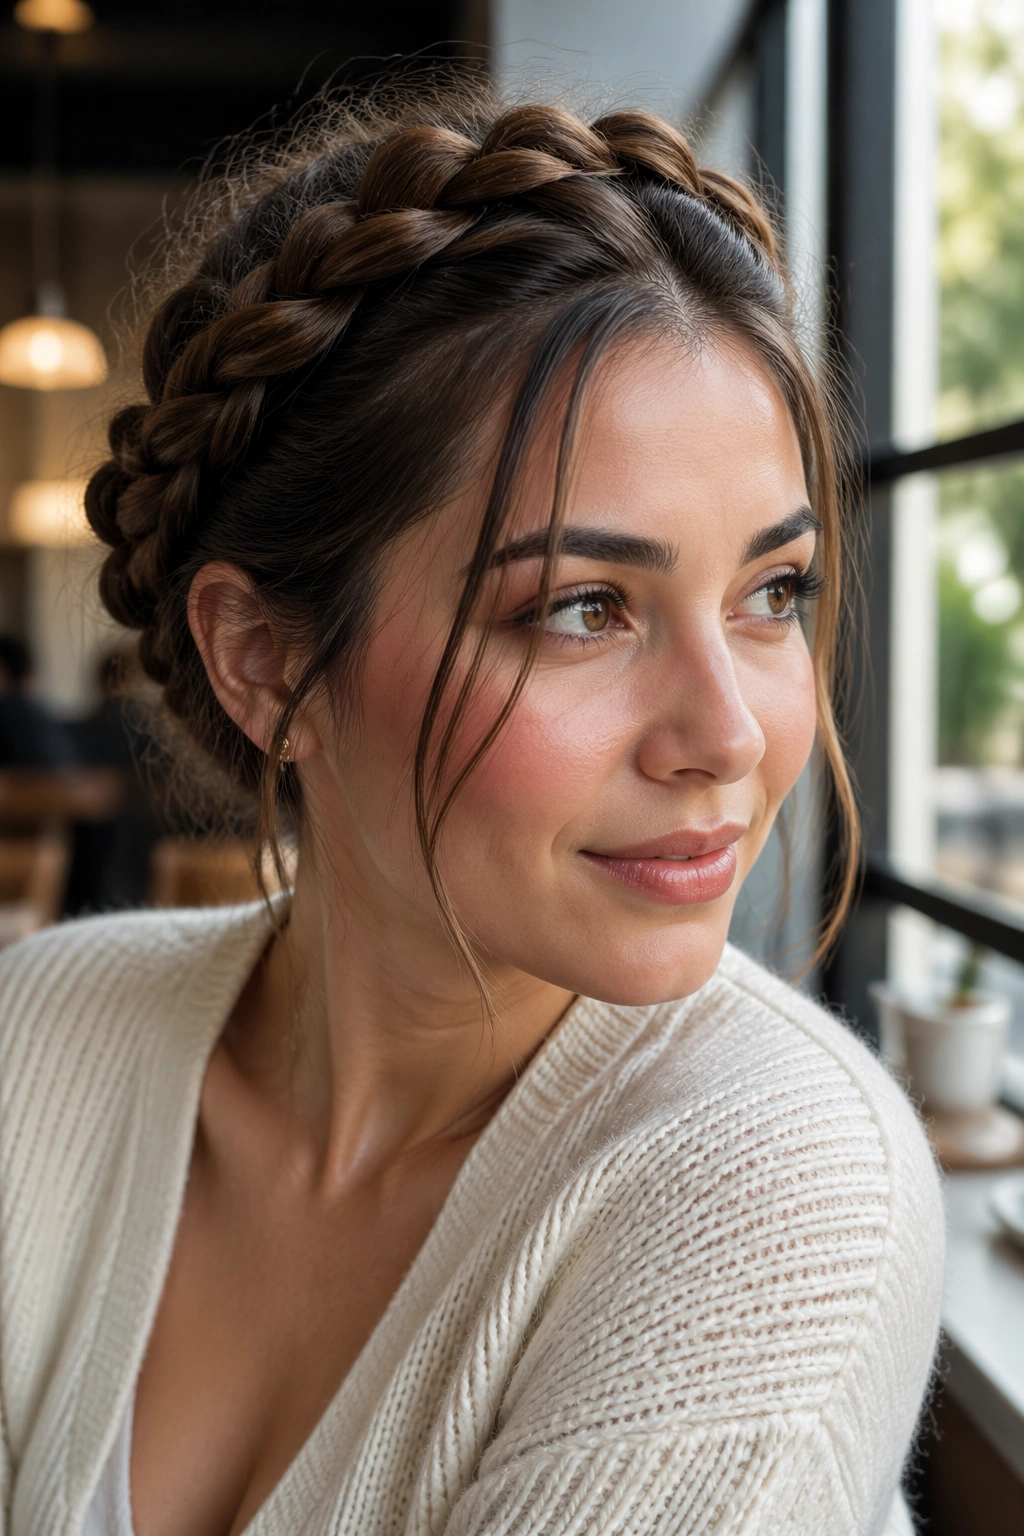
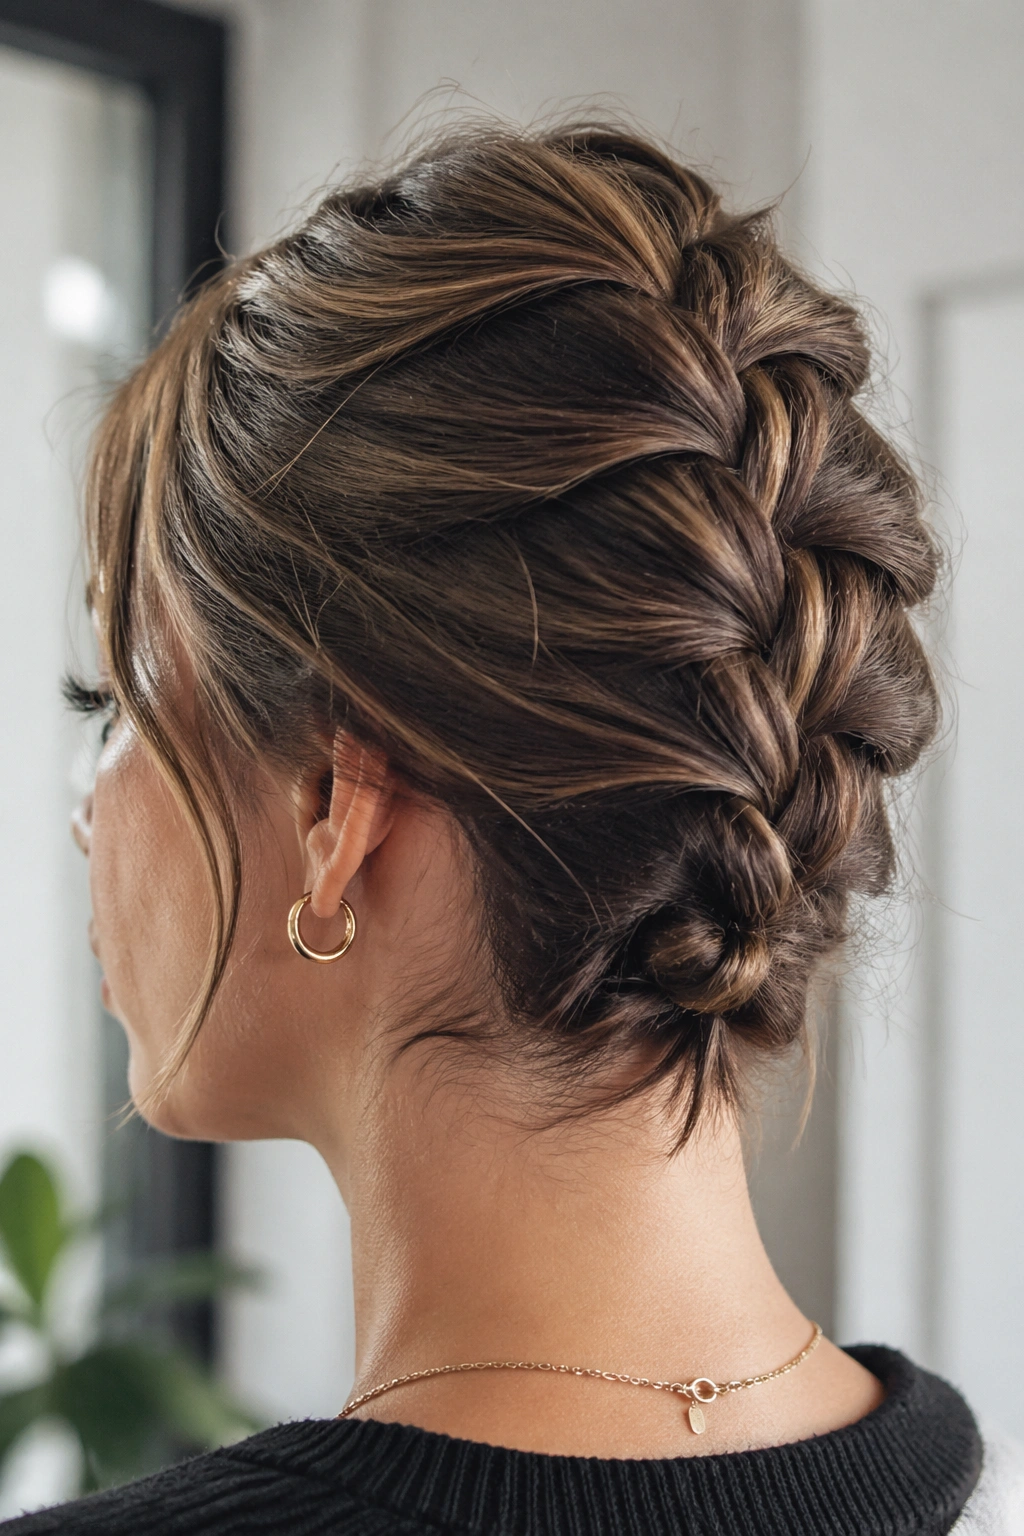
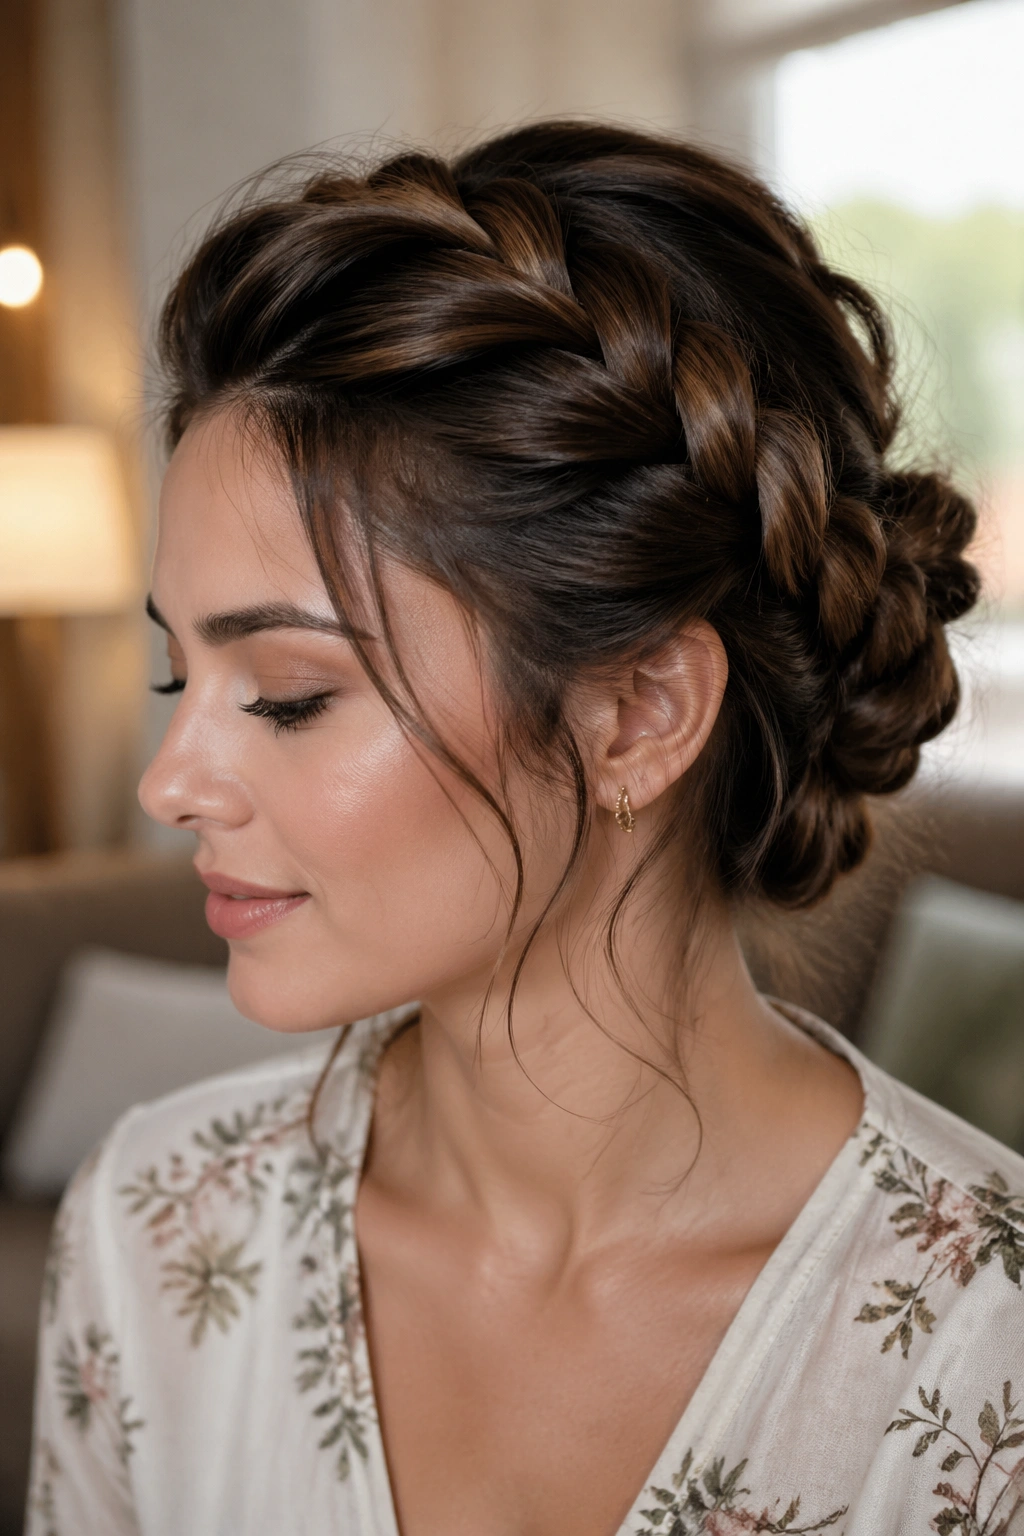
21. French Braid Crown into a Soft Bun
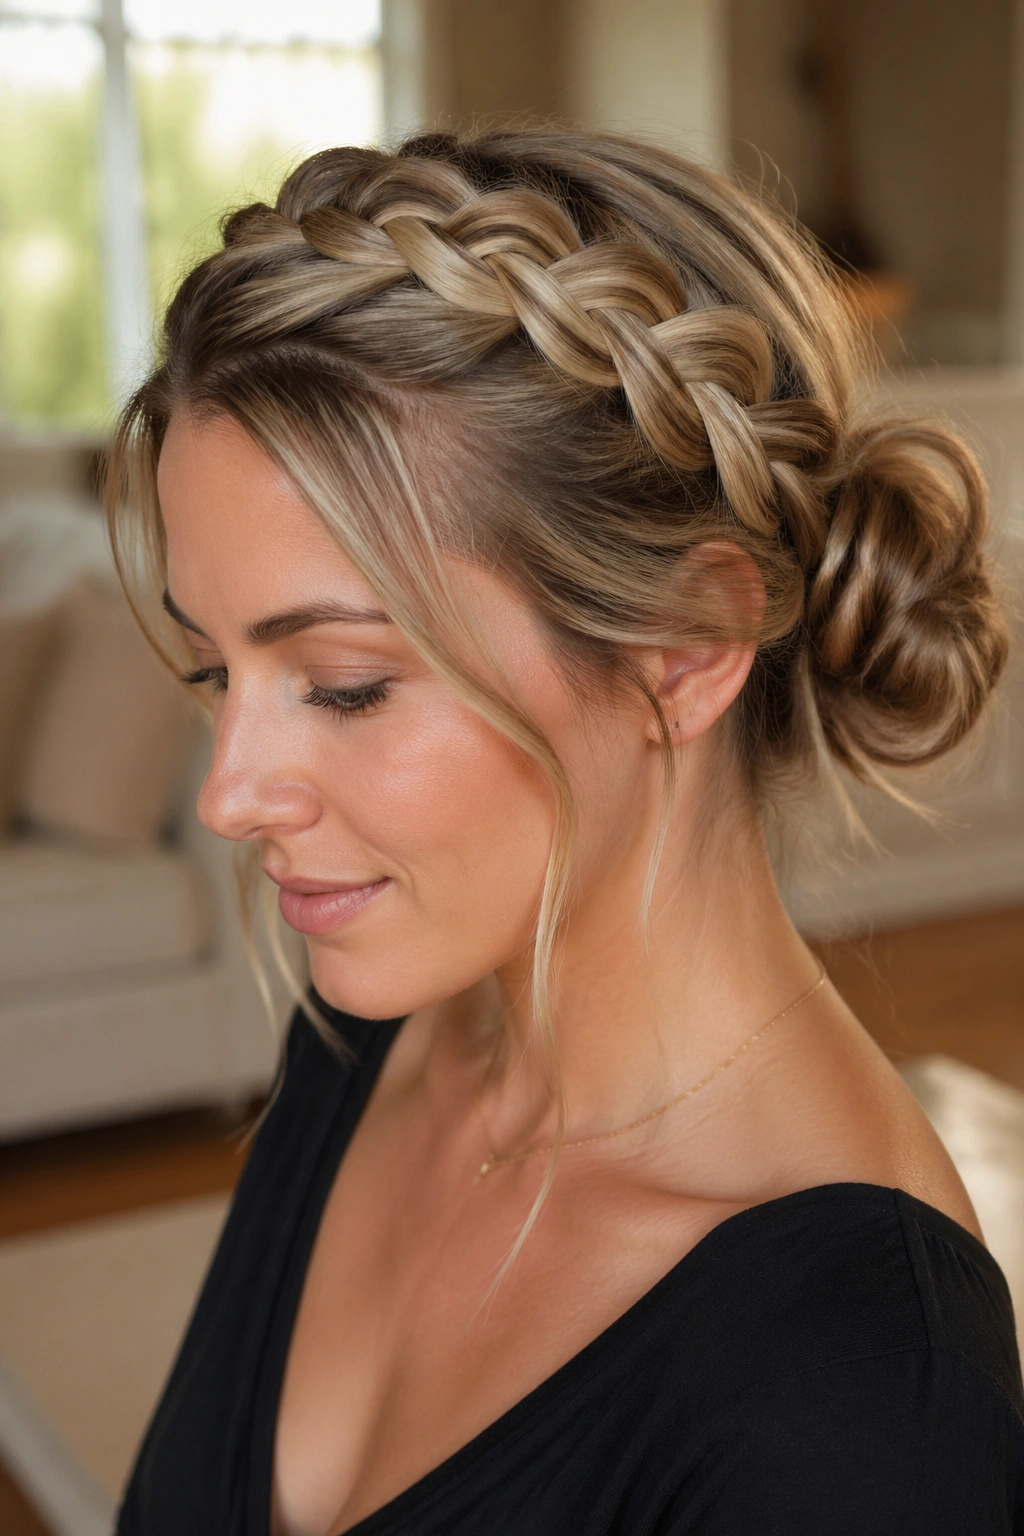
This style starts like a crown braid and ends like a low bun, which gives it a pretty practical shape for a night out. It keeps the hair off the neck, shows the braid pattern around the head, and still has enough softness to feel casual.
The crown section should travel around the top half of the head rather than all the way around. That leaves room for the bun to sit low and relaxed at the back. If you braid too far down, the bun starts to crowd the nape and the whole style feels heavier.
A loose bun is the right finish here. Twist the ends, fold them under once, and pin them in place with two or three bobby pins. Let a few pieces fan out. The stray bits make the braid-to-bun transition look less engineered.
This is one of those styles that wears well with simple clothes. A black tee, a soft sweater, a slip dress — it all works because the hair already has enough shape.
22. French Braid and Rope-Twist Combo
A rope twist changes the texture in a way that feels fresh without looking fussy. Start with a French braid, then split the remaining tail into two sections and twist them around each other until they coil into a rope-like finish.
The braid at the top gives stability. The rope twist at the bottom adds movement and a little irregularity, which keeps the style from becoming too neat. I like this for medium-length hair, especially if the ends tend to fray or puff up. A rope twist hides that better than a straight tail does.
What Makes It Different
Unlike a plain braid-to-ponytail finish, the rope twist has a softer edge and less visual bulk. It also looks good from the side, which matters when you’re sitting at a table or turning your head to talk.
Keep the twist loose. If you wrap it tight, the section flattens and loses the nice spiral effect. A clear elastic at the bottom is enough, though a wrapped strand of hair looks cleaner if you’ve got the patience for it.
23. French Braid for Day-Old Hair with Dry Shampoo
Day-old hair is practically made for messy French braids. The natural oils give the strands grip, the braid holds better, and the final look usually has more body than freshly washed hair ever does. Add dry shampoo if the roots need a reset, but don’t overdo it.
The braid itself should stay relaxed. Freshly washed hair can slip apart; slightly lived-in hair behaves better and gives you those little separated pieces that make the style look casual. If your roots are flat, lift them with dry shampoo at the crown and behind the ears before you start braiding.
What I like about this version is the honesty of it. It doesn’t pretend to be polished. It looks like hair that has already had a day, a little movement, and maybe a bit of weather on it. That’s often more flattering than a braid that’s been over-prepped.
If you want one dependable date-night braid, this is a strong candidate. It’s low effort, and the texture does most of the talking.
24. French Braid for Thick Hair with Hidden Pins
Thick hair can make a braid feel bulky in places you don’t want it. Hidden pins solve that by letting you control the shape without cinching every inch of the braid tight. You can guide the braid flatter at the crown, tuck sides that push out, and keep the finish smooth where it needs it.
A good thick-hair braid starts with sectioning. Divide the top into manageable chunks, braid with your fingers, and pin the braid down at any point where it starts to lift too far off the head. A pin every 3 to 4 inches is not excessive if the hair is dense.
- Use matte bobby pins if possible
- Insert pins in an X shape for stronger hold
- Tuck pins under the braid, not across the surface
- Leave the ends loose or slightly curled
This style is especially useful when you want the braid to last through a long evening. Thick hair can weigh itself down. Pins keep the shape from sliding out of place by the second hour.
25. French Braid with Undone Ends and Loose Tendrils
Some braids look better when the ends aren’t finished too neatly. This style is all about the contrast between a structured braid through the top and a loose, slightly messy tail below. A few tendrils around the temples make it feel softer and more human.
If you have layers, the ends will probably separate a bit on their own. Good. Let that happen. A little fray at the bottom gives the braid a relaxed edge, which suits a casual night much better than a sealed, perfect finish would.
How to Keep It From Falling Apart
Secure the braid with a small elastic, then gently pinch the tail in two or three spots to pull some shape back into it. You are not trying to make it perfect. You’re giving it a bit of texture so it looks deliberate.
If the face-framing pieces are too short to curl, bend them with a flat iron instead. A soft bend is enough. They don’t need to be styled into ringlets to do their job.
This is one of the easiest ways to make a French braid feel lived in instead of formal. It has edge, but not attitude.
26. Side French Braid into a Soft Chignon
A side braid that rolls into a chignon gives you a pretty, grown-up finish without looking like you tried too hard. The braid starts off to one side, follows the curve of the head, and ends in a low tucked knot near the neck.
The chignon should sit loose. That word matters. If you twist it too tightly, the whole style turns rigid and loses its casual date-night feel. Leave a few ends visible, and don’t mind if one side is a little fuller than the other. That asymmetry helps.
This style is useful when you want a braid with a more polished final shape. It still has the loose pieces and touchable texture of a messy braid, but the knot gives it a cleaner finish for a dinner or a more dressed-up casual plan.
A side part makes it even softer. Deep side part if you want more drama. Light side part if you want the face to stay open. Either way, the chignon keeps the braid from feeling unfinished.
27. The Braided Exit: French Braid That Grows Out Gracefully
This is the braid I’d pick when you want the style to age well through the night. It starts as a French braid at the crown, loosens slightly through the middle, and ends in a softly stretched tail that still looks good after a few hours of wear. No awkward hard lines. No overly tight weave that starts pulling at the scalp by dessert.
The key is making peace with a little imperfection from the start. Leave the braid a touch looser than you think you should, especially around the temples and crown. That way, when pieces shift — and they will — the style still holds its shape instead of collapsing into chaos.
A small amount of texture spray at the base and a couple of strategic bobby pins near the nape can help the braid stay put without making it feel fixed in place. That matters on casual date nights, where you want to move, lean back, take your hair down later, and not spend the whole evening wondering if one wrong turn will ruin it.
This is the braid that feels the most real to me. It’s not trying to be perfect. It just works.
If you want, I can also turn these into a more visual styling checklist, a shorter Pinterest-style version, or a salon-ready version with product picks and face-shape notes.