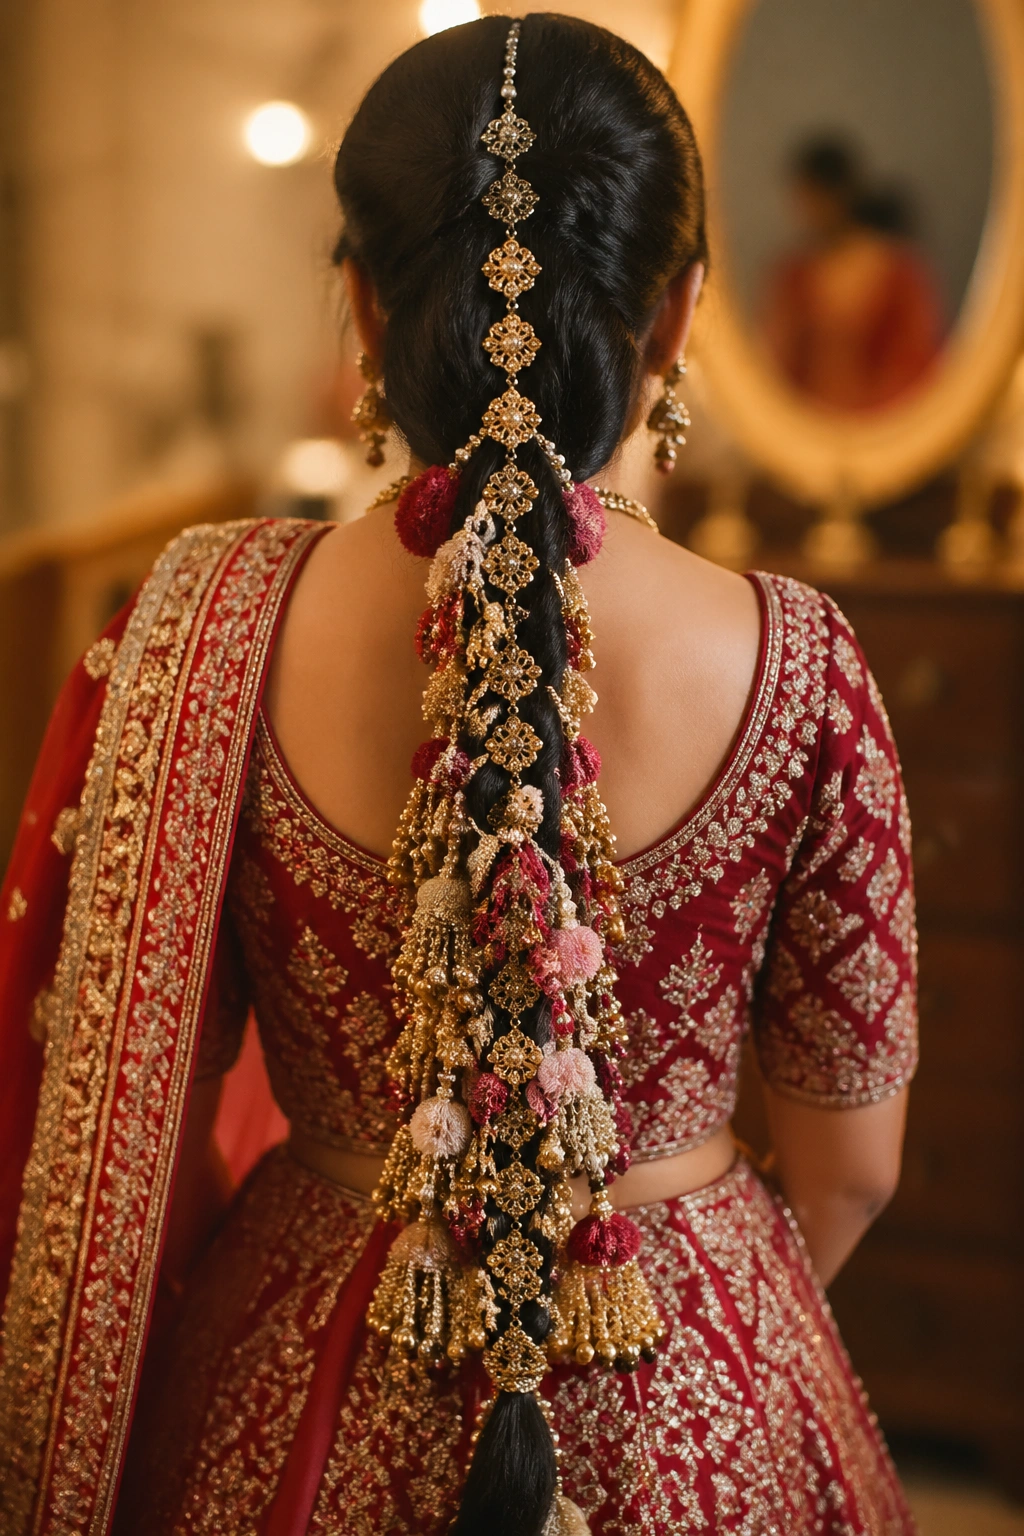
A parandi can change a bridal braid fast. For North Indian brides, it is not just decoration — it adds weight, movement, and that unmistakable back-view drama that makes a braid look finished instead of merely tied back. When the tassels brush the waist and the braid keeps its shape through every turn, the whole look feels anchored to the outfit.
The catch is that a bridal parandi has to do more than look pretty in one mirror. It needs to survive hugs, stairs, a dupatta sliding over the crown, and long stretches of sitting still while the rest of the outfit does the heavy lifting. That is where braid shape, parandi weight, and placement matter far more than most people think.
Some brides want a Punjabi-style braid with gold thread and a dense fringe. Others want pearls, gota, flowers, velvet, or a cleaner rope-twist base that sits neatly under a veil. Same accessory. Very different mood.
A braid that looks right from the front can still fall apart from the back, and a braid that looks heavy in a stylist’s chair can feel perfect once the jewelry is on. The styles below move from classic to modern, and the differences are bigger than they look at first glance. A classic single braid is the safest place to begin.
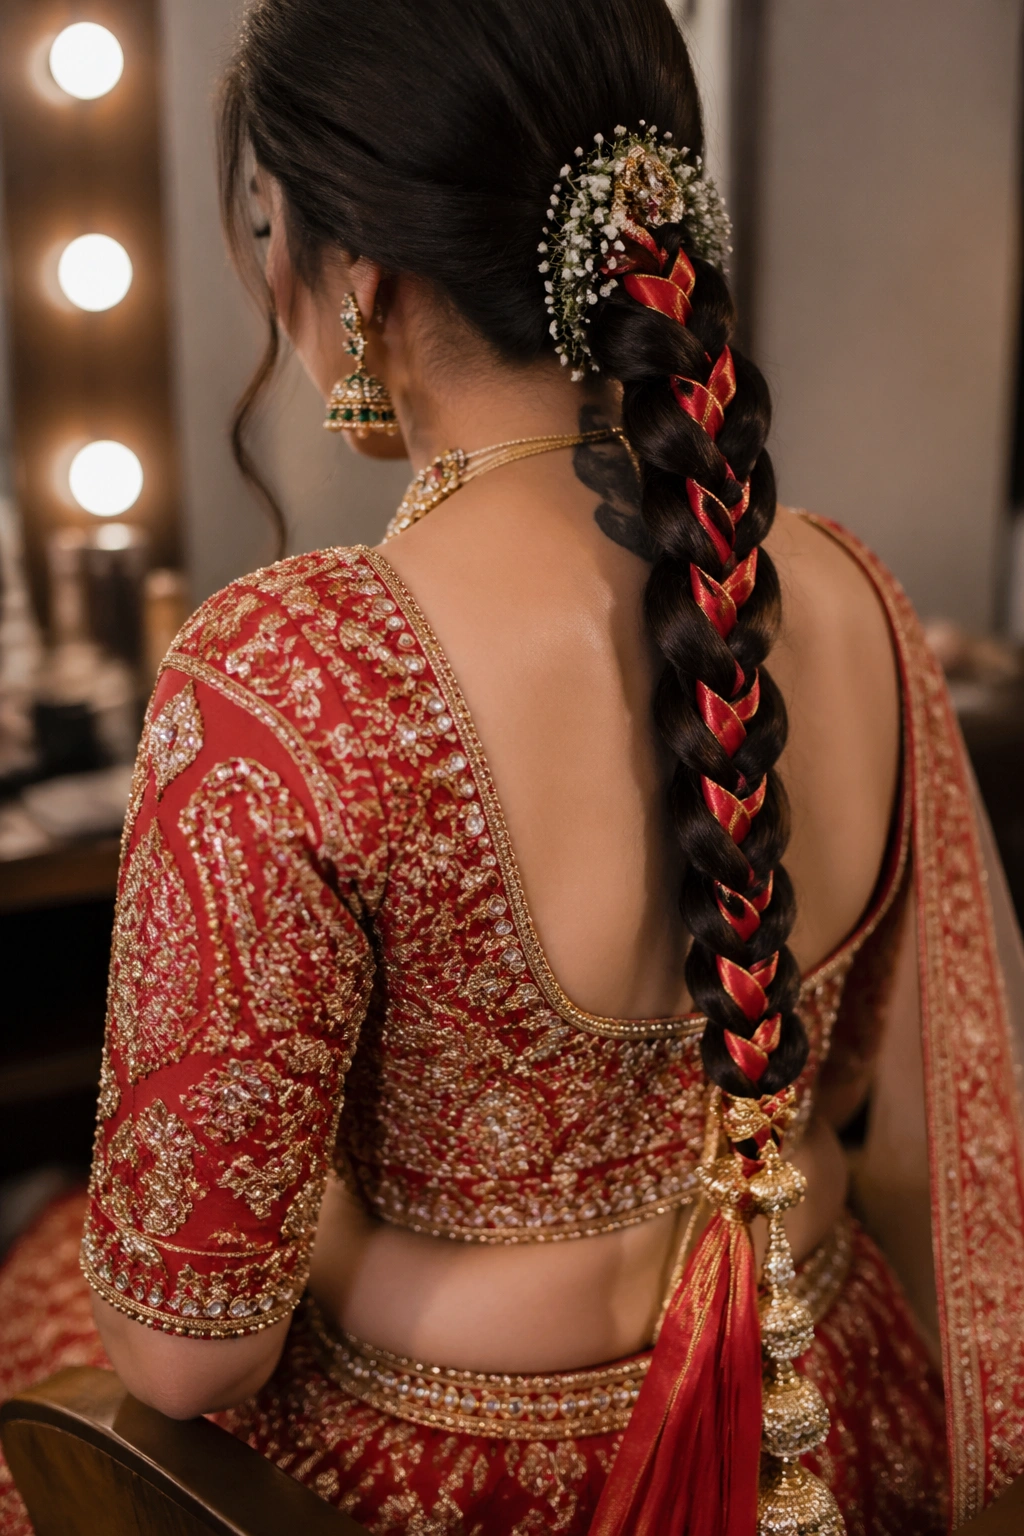
1. Classic Single Parandi Braid
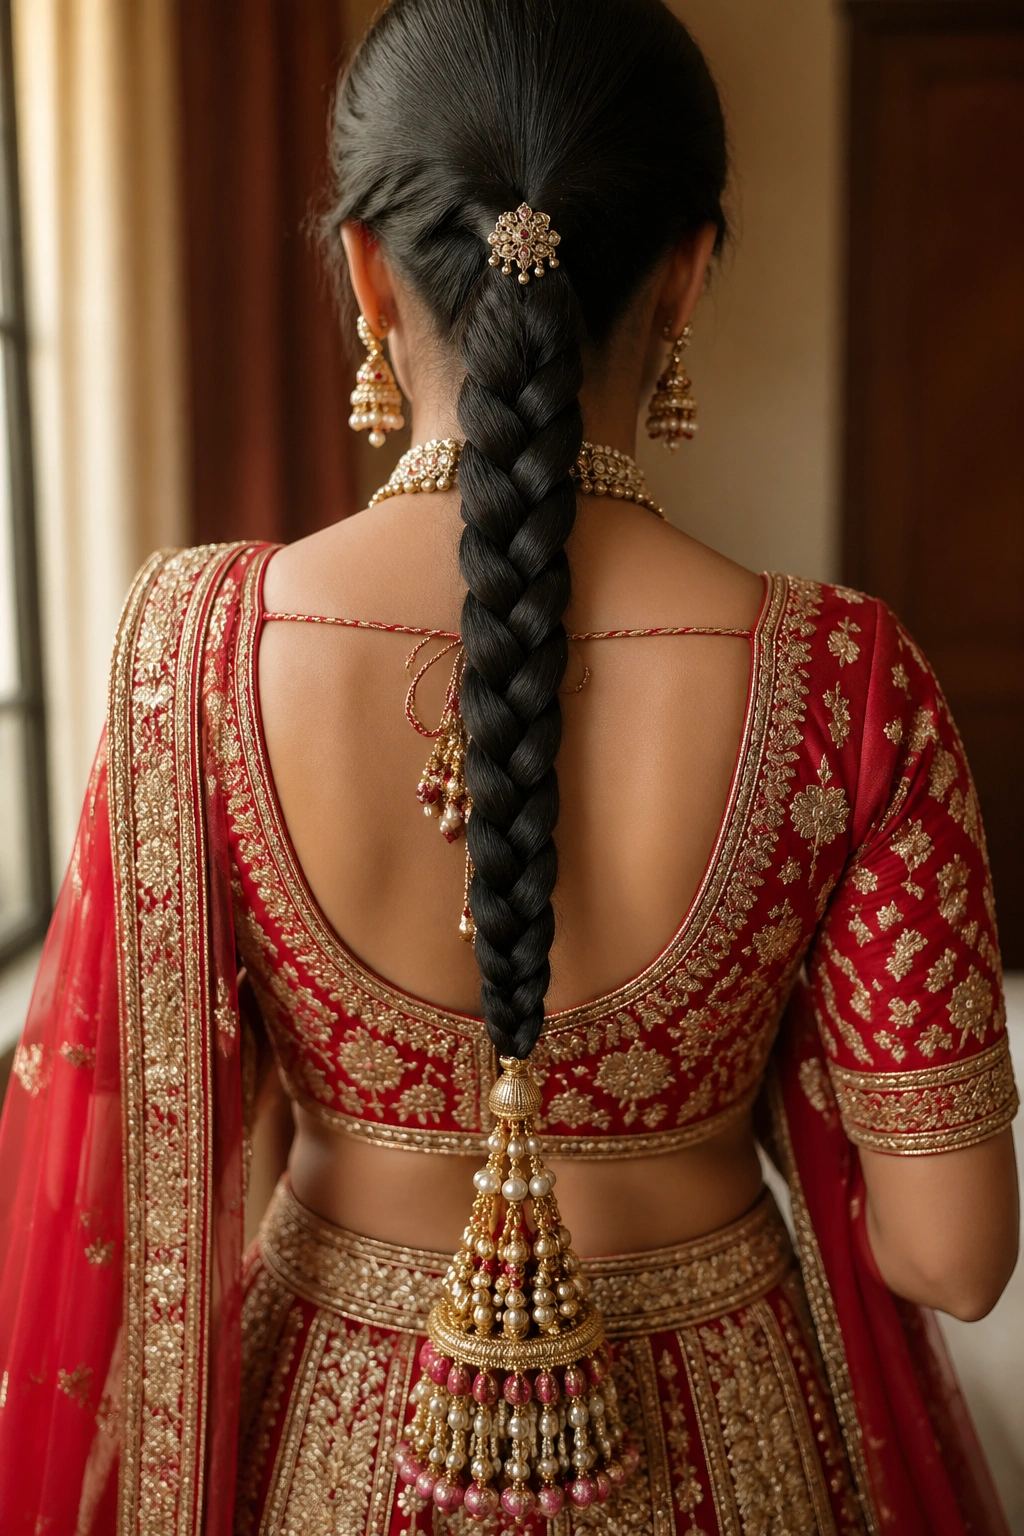
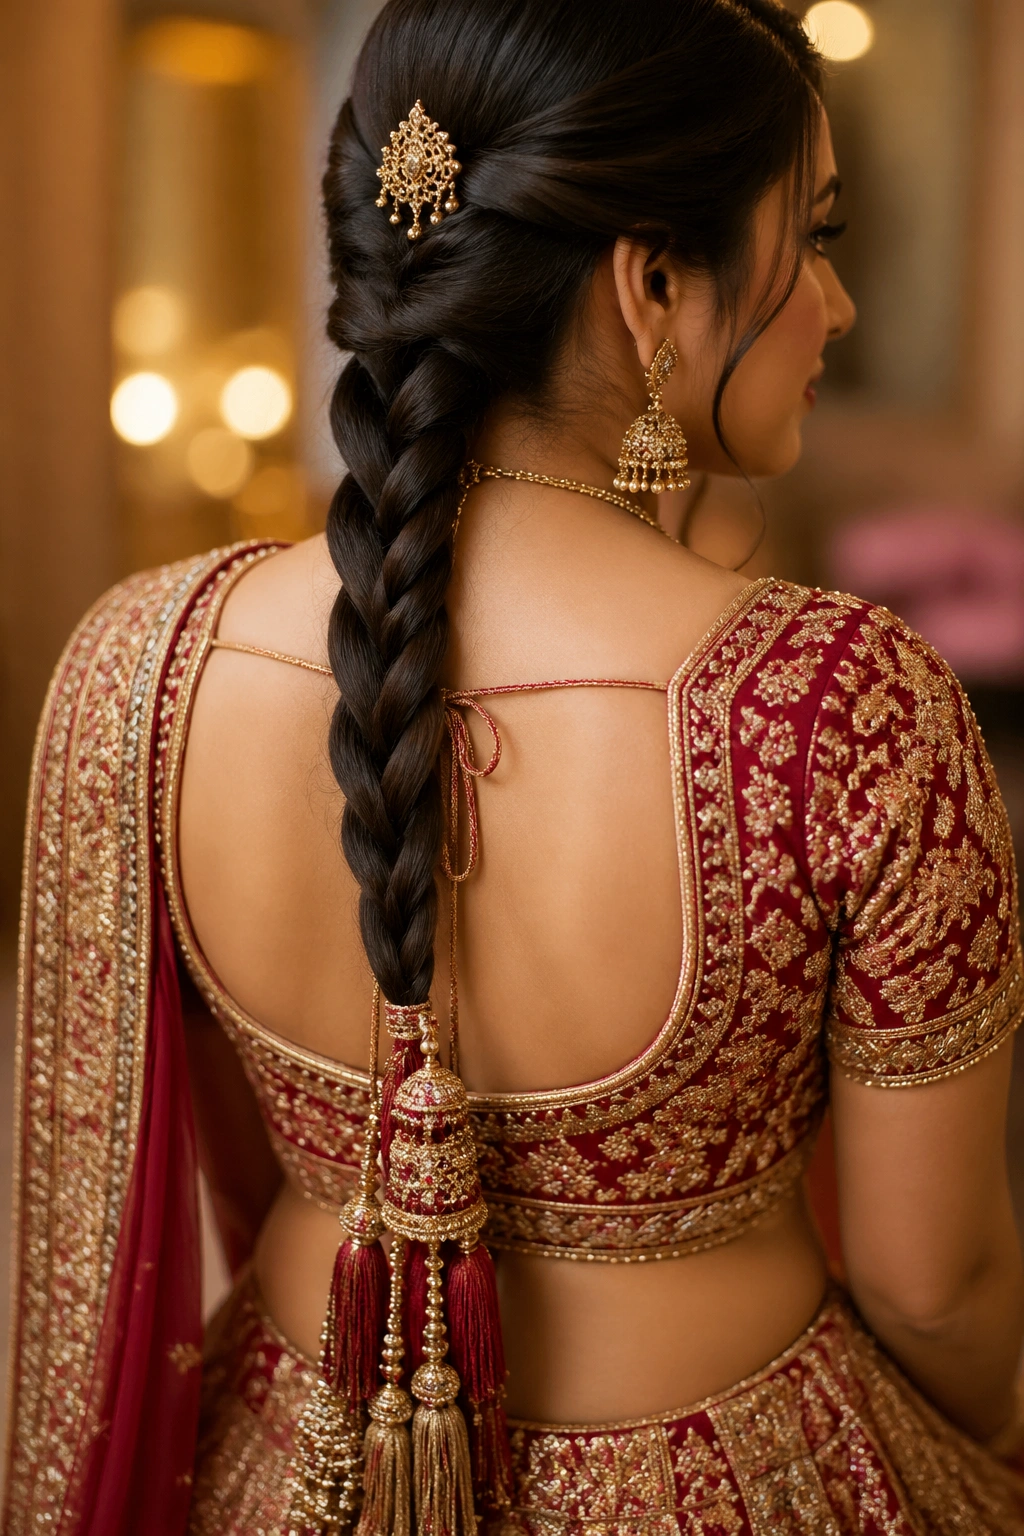
A classic single parandi braid is the look most families picture first. The braid drops straight down the back, the parting stays neat, and the parandi ends the whole line with a little swing. Nothing is trying too hard here, which is exactly why it works so well for a North Indian bride.
What Makes It Feel Traditional
The braid should sit tight at the crown and stay smooth through the middle. If the hair is fine, a padded braid insert or a little hidden padding at the nape helps the plait look full without turning it into a bulky rope. The parandi itself can be gold, red, maroon, or a mix of all three.
A few small details do a lot of work here:
- Keep the braid long enough to reach the lower back so the parandi has space to fall naturally.
- Use two discreet elastics every 2 to 3 inches if the hair is layered.
- Let the tassels finish 4 to 6 inches below the braid tip.
- Match the thread tone to the outfit border, not to every piece of jewelry.
Best tip: keep the braid base sleek and the parandi weight balanced. A wobbly base shows in side photos fast.
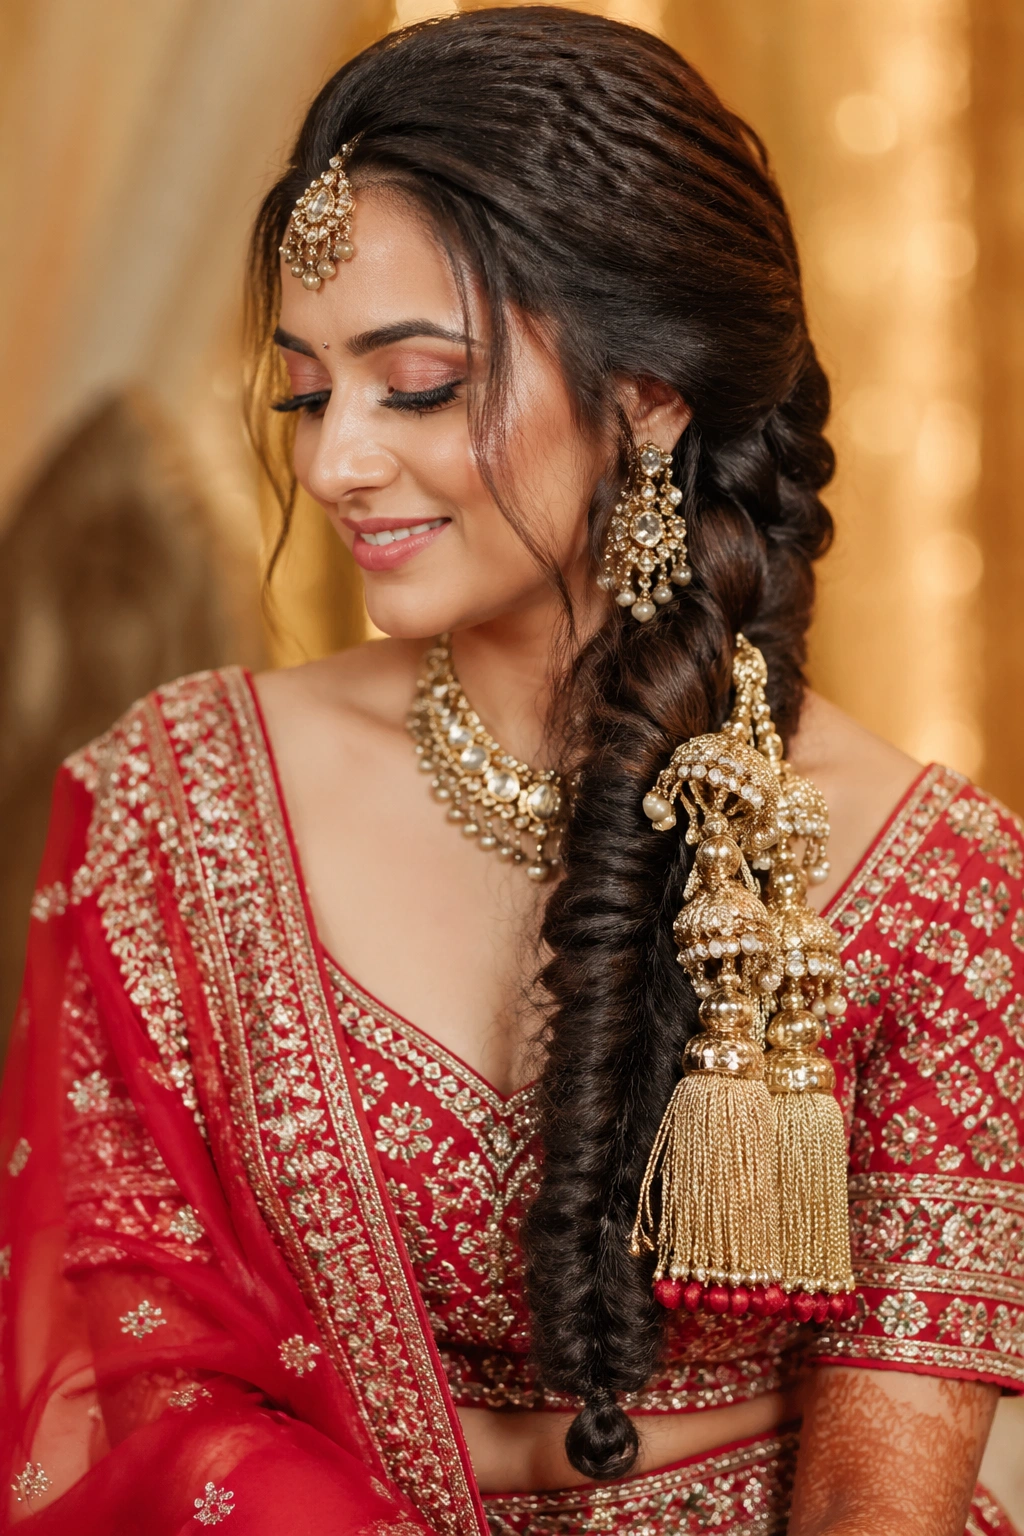
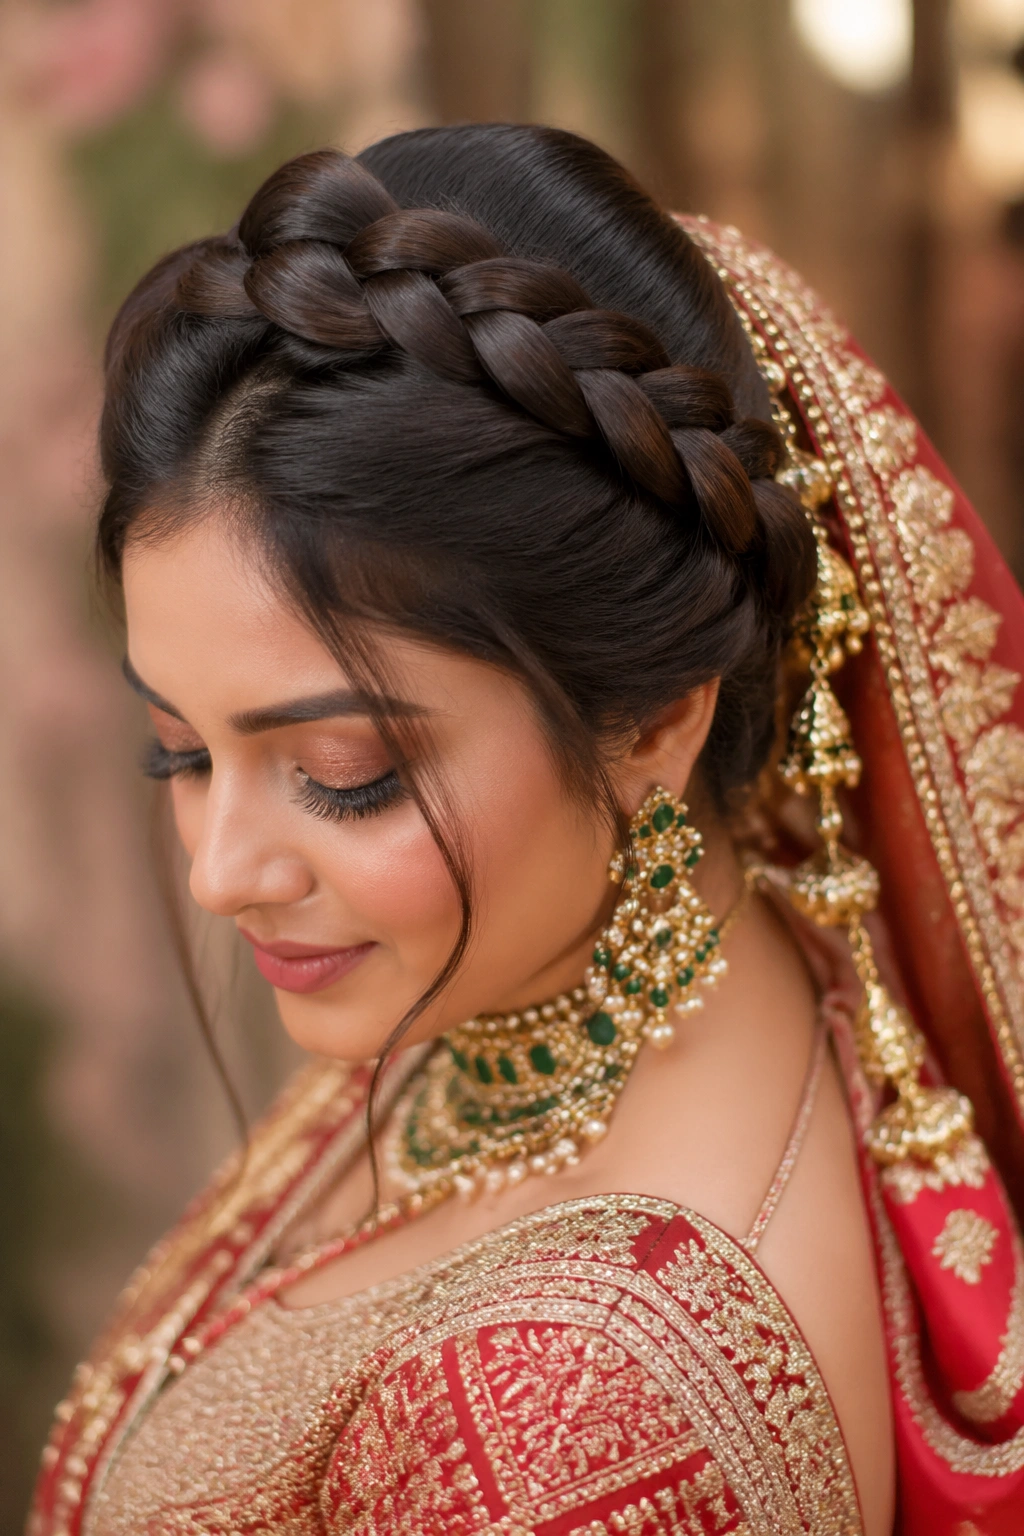
2. Center-Parted Braid with a Bridal Maang Tikka
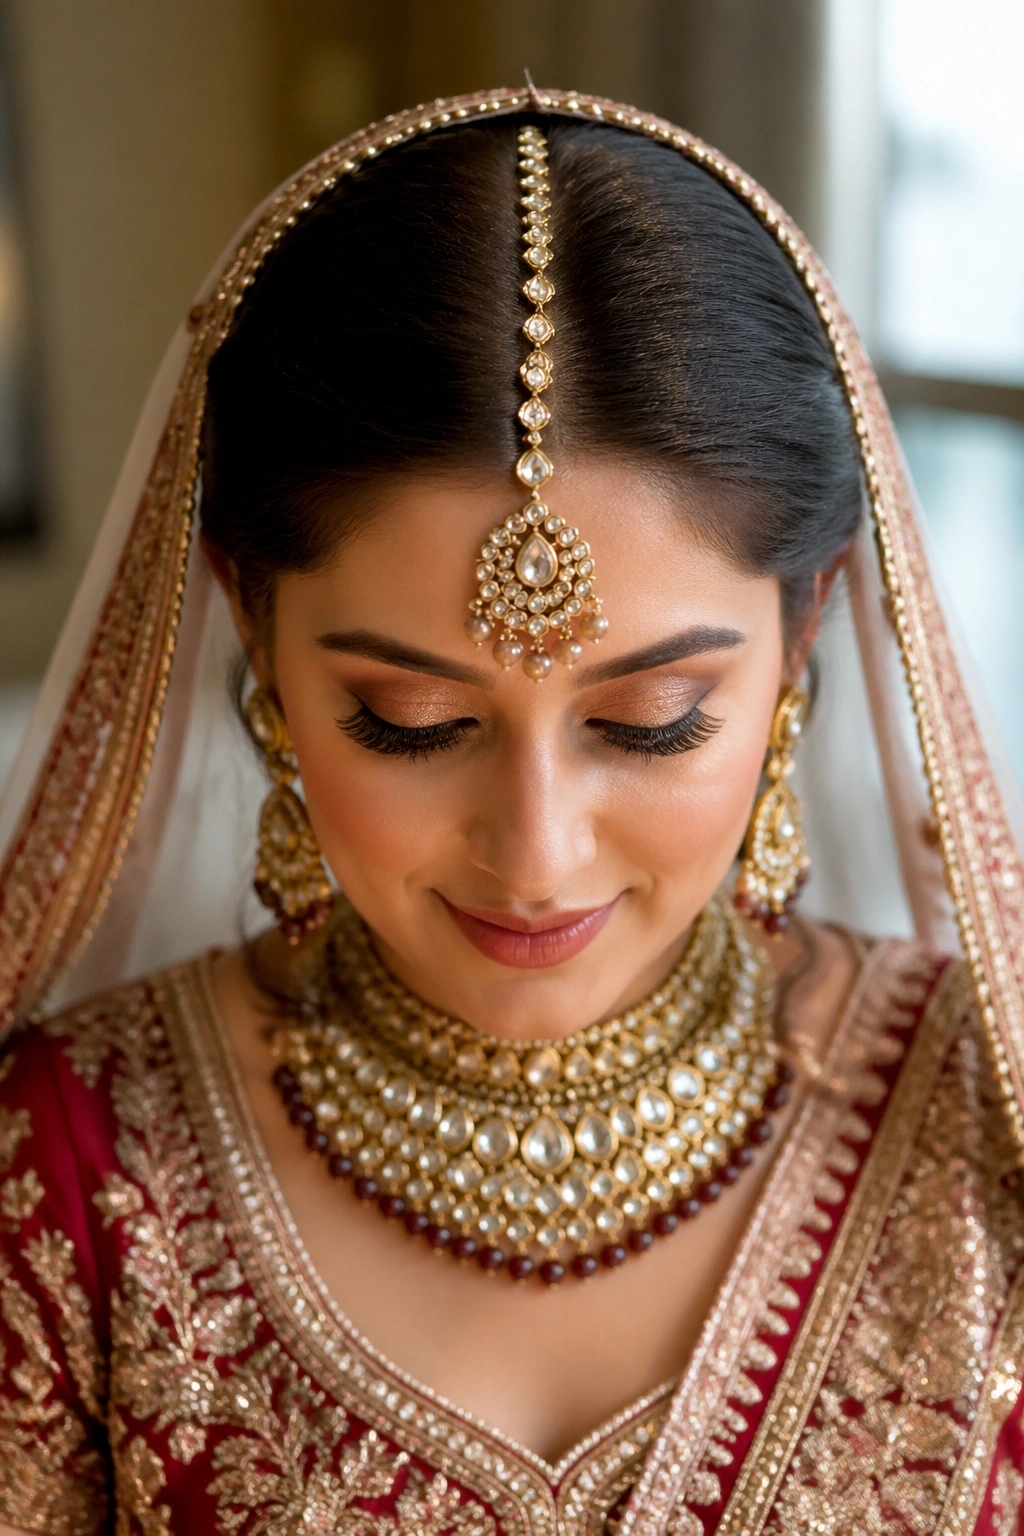
A center part changes the whole mood. It creates a straight visual line from the forehead to the braid, and the maang tikka sits in that line as if it belongs there. The result feels formal, clean, and very bridal.
This style works especially well when the necklace is heavy or the nath is the star of the face. The braid takes the weight at the back, which leaves the front open and calm. That matters more than people admit. If the face is already busy with jewelry, a fussy braid can tip the whole look into clutter.
The parting should be precise, not vague. A narrow comb line, a little smoothing cream near the hairline, and a flat crown make a huge difference. If the dupatta is pinned over the head, the braid has to stay neat under pressure, so the stylist should secure the base before the parandi goes in. A centered braid like this feels composed from every angle.
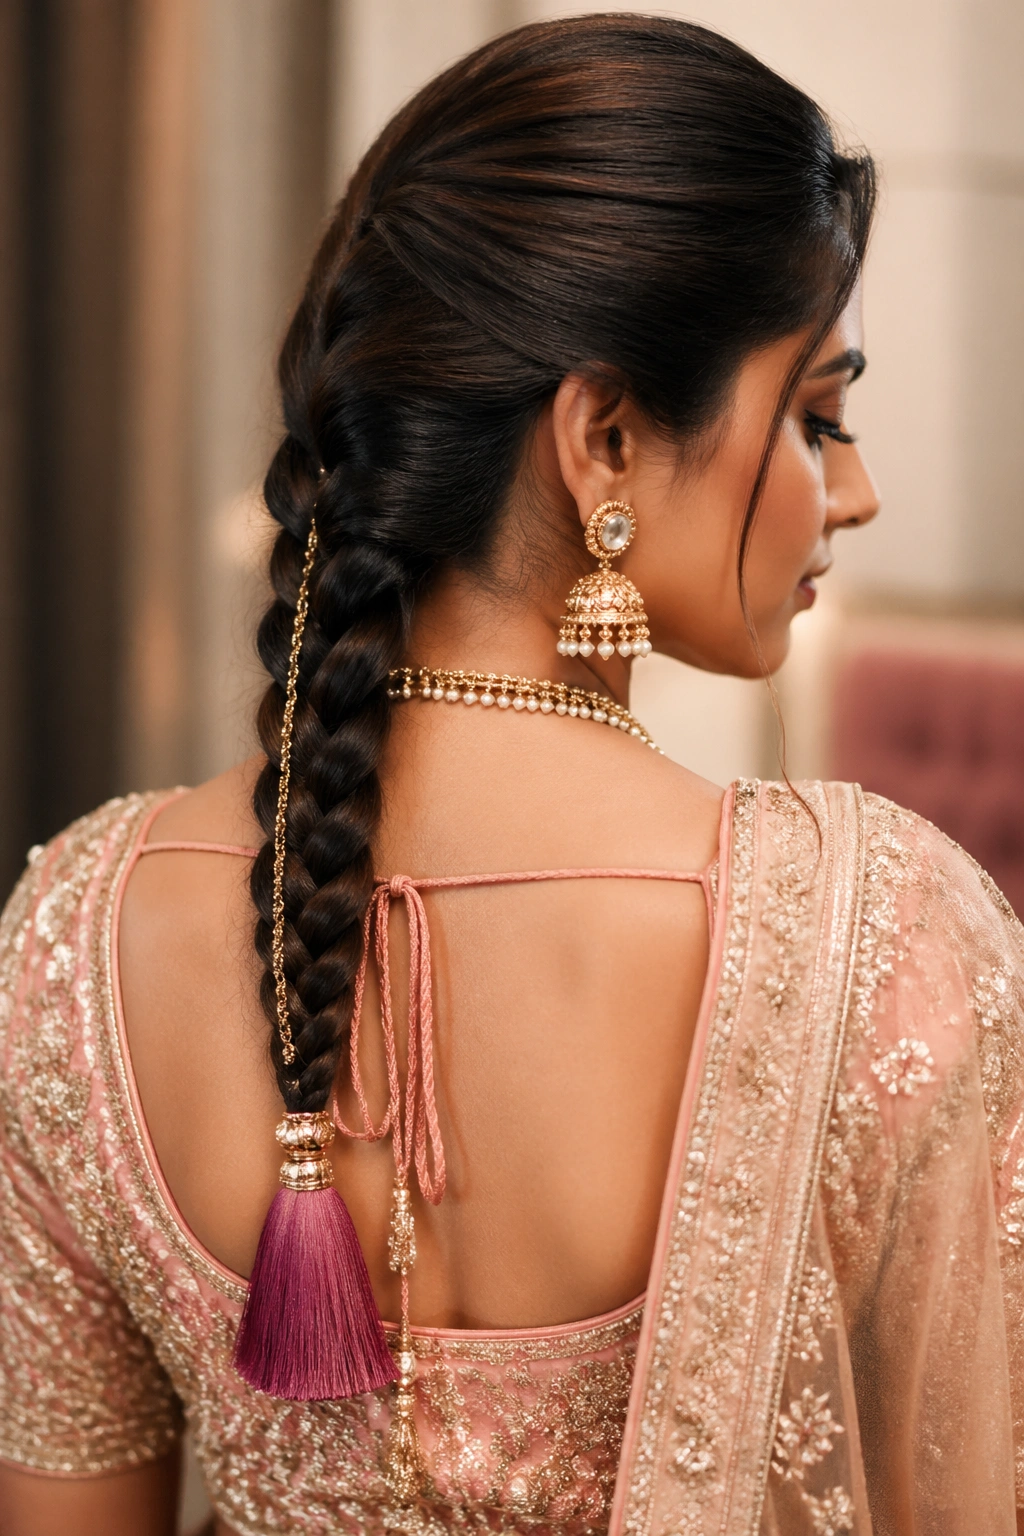
3. Fishtail Parandi Braid for Long Hair

Why does a fishtail parandi braid look so rich even before the ornament goes on? Because the weave itself has texture. A fishtail braid gives the parandi a tighter, more detailed base than a regular three-strand plait, so the accessory feels built into the hair instead of simply clipped on.
How to Style It
The braid works best on long hair or on a base supported with extensions. The hair should have enough grip that the sections do not slide apart halfway through the weave. A touch of texturizing powder or light mousse at the mid-lengths helps if the hair is very silky.
- Start with a low ponytail.
- Split the hair into two sections.
- Pull tiny outer pieces across to the opposite side, keeping the weave tight.
- Tie the parandi low and wrap one strand around the elastic.
- Finish with slim tassels so the braid line stays visible.
The fishtail shape is a smart pick for brides who want detail without extra bulk. It reads intricate, but it still sits cleanly under a dupatta. That combination is hard to beat.
4. Gota Patti Parandi Braid
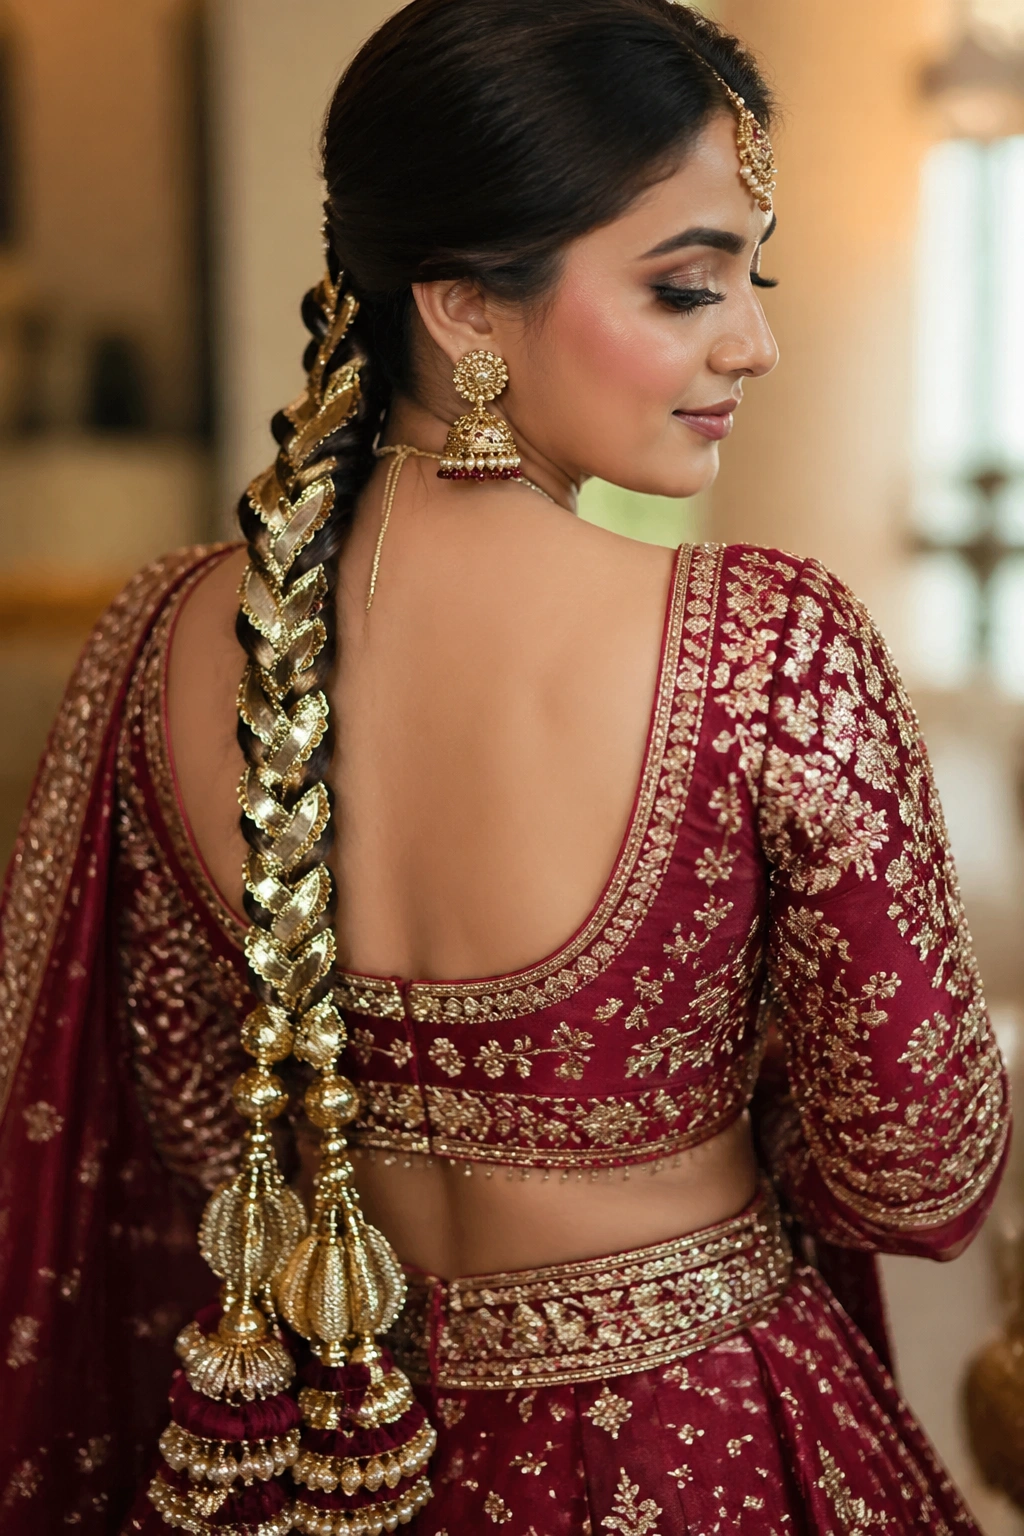
Picture an ivory lehenga with a gold border and a braid threaded with gota strips that flash every time the bride turns her head. That echo is the whole point. A gota patti parandi braid makes the hair feel like part of the outfit instead of a separate idea.
The braid underneath should stay smooth and controlled. Too much teasing under all that shine can make the back look crowded, and the gota ends up fighting with the embroidery instead of supporting it. Keep the braid sleek, then let the metallic trim carry the visual noise.
A few practical choices help a lot:
- Use narrow gota ribbons if the braid is thin.
- Pick antique gold if the lehenga already has bright sequins.
- Keep the tassels medium length so the look does not drag.
- Repeat only 2 or 3 colors from the outfit.
A gota braid looks best when it repeats the outfit rather than copying it line for line. That restraint gives the style room to breathe.
5. Pearl-Strung Parandi Braid
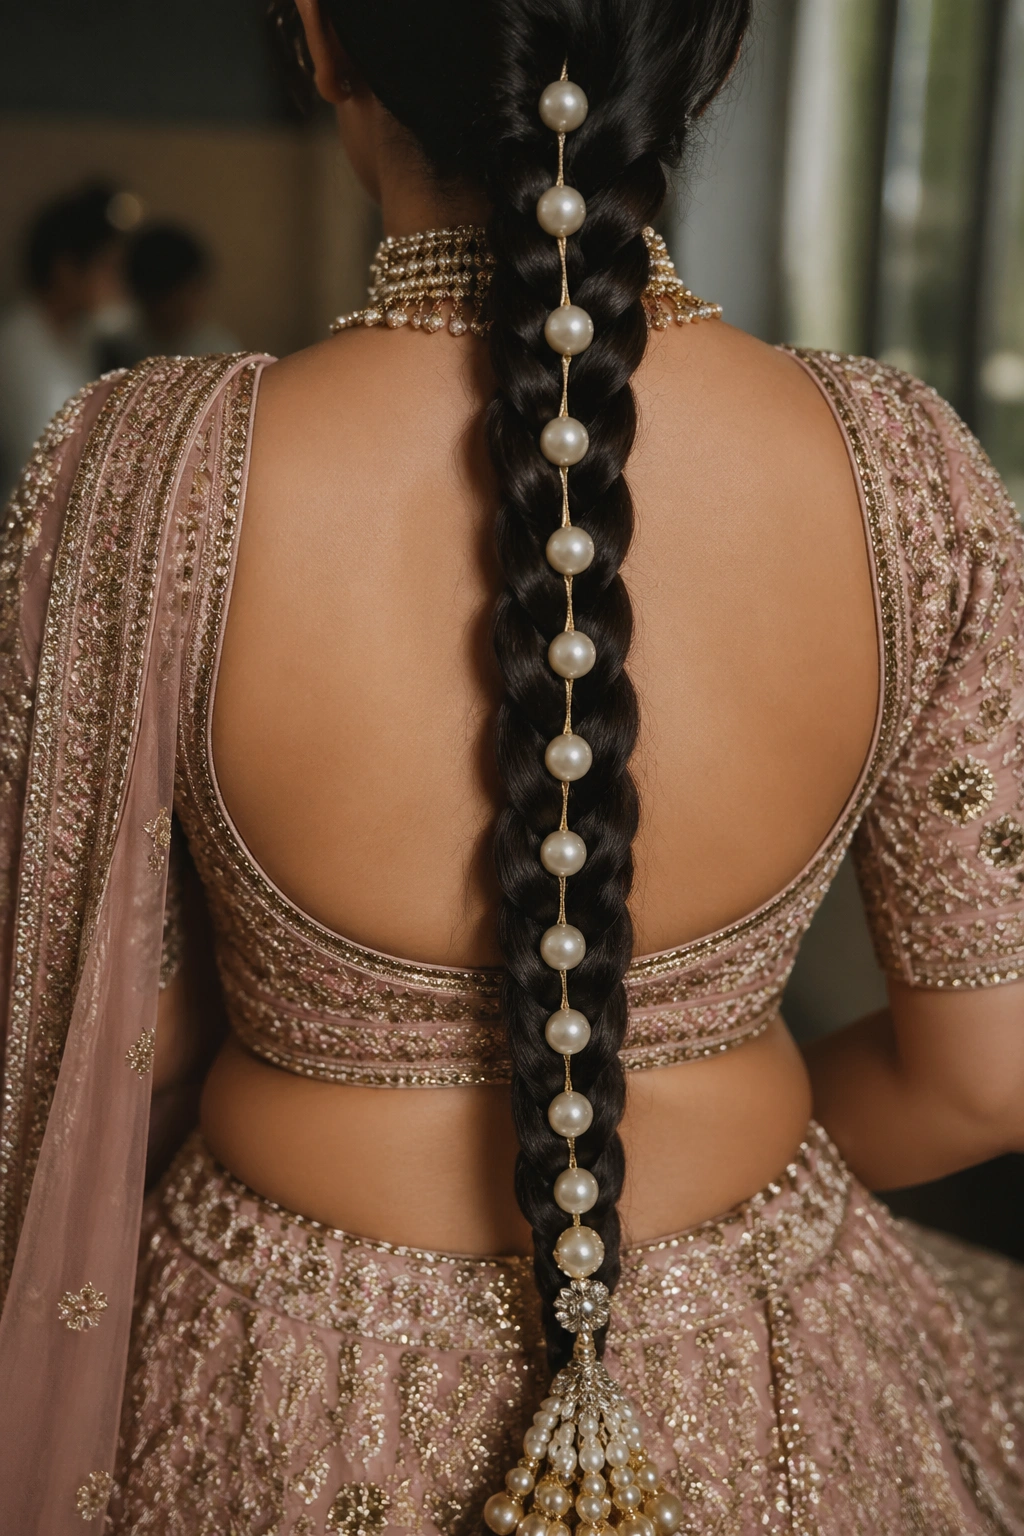
Pearls change the tone of a braid in a way gold cannot. Gold reads ceremonial; pearls read softer, and that softness is useful when the lehenga is already heavy with embroidery. A pearl-strung parandi braid pulls the eye down the back in a clean line, then breaks the shine into tiny, gentle points.
This version sits beautifully with ivory, blush, mint, pale gold, and even a deep red outfit if the rest of the jewelry is dense. The trick is spacing. When the pearls are too close together, the braid starts to look busy. When they are spaced with a little air between them, the whole thing feels calm.
Fine hair needs support here. A hidden braid pad or a firm base keeps the pearls from exposing every lump and bump in the plait. Thick hair needs tighter pinning at the nape so the parandi does not sag after an hour.
Pearls can snag on sequins and zardozi, so the braid should be checked against the dupatta before the wedding events begin. That tiny check saves a lot of fiddling later.
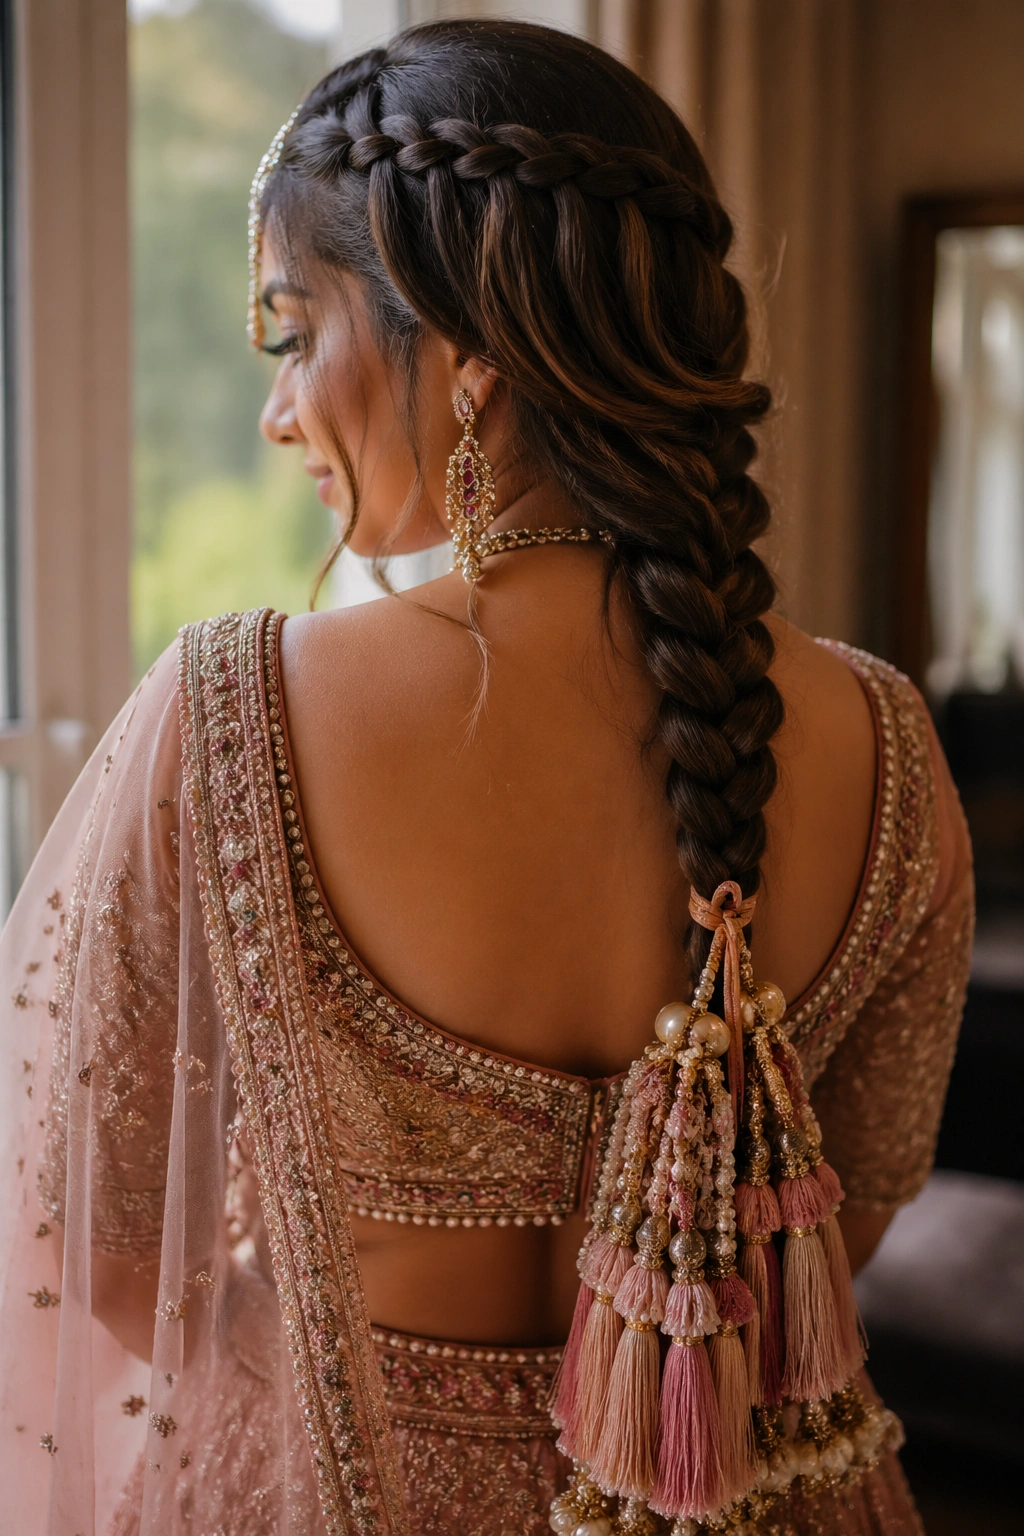
6. Side-Swept Parandi Braid
Unlike a straight-down braid, a side-swept parandi braid keeps the shoulder, earring, and part of the blouse visible. That matters when the blouse has embroidery worth showing off, or when the bride wants her nath and jhumkas to stay in view during close conversation and photos.
The braid should start with a deep side part or a soft sweep from one temple, then gather at the opposite nape. The parandi hangs over one shoulder instead of down the spine, which gives the look movement without stealing the rest of the outfit. It also feels easier to wear if the dupatta sits heavy on one side.
This style suits brides who want romance in the back view but do not want loose curls everywhere. Ask for a braid that sits snug near the scalp and opens only after it clears the shoulder. That keeps the shape neat and stops the tassels from tangling with blouse hooks.
7. Double Parandi Braids for a Punjabi Bride
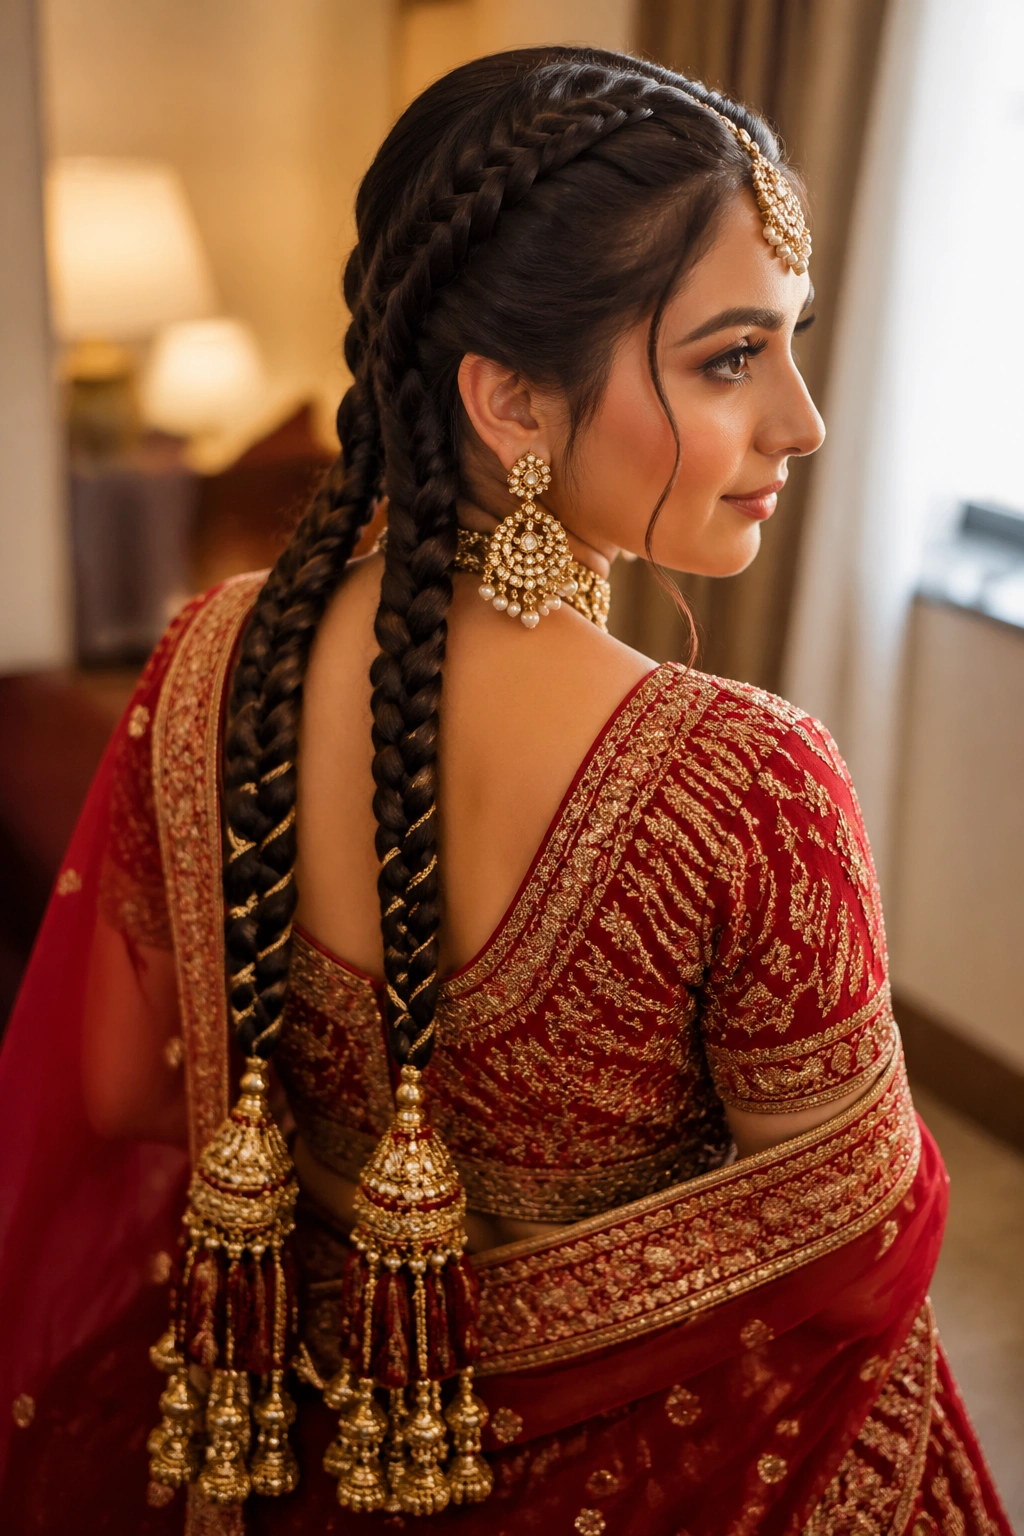
Two braids can be more stable than one. Brides with very thick hair, layers, or a long ceremony often find double parandi braids easier to manage because the weight spreads across both sides of the head instead of hanging from one point.
Where the Style Helps Most
This look sits nicely with a heavily embellished suit or lehenga and gives the bride that unmistakable Punjabi energy. Each braid can carry its own tassel, or both can end in the same parandi color for symmetry. If the outfit is already loud, keep the braids neat and let the accessories do the talking.
- Works well when the dupatta is pinned low.
- Gives finer hair more visual density.
- Looks balanced with a center part and matching earrings.
- Needs extra pins at the crown so the parting does not drift.
The best version is not a perfect mirror image. Tiny differences in the tassel fall make the style feel human, which is usually better than something stiff and over-controlled.
8. Low Braided Bun with Parandi Tail
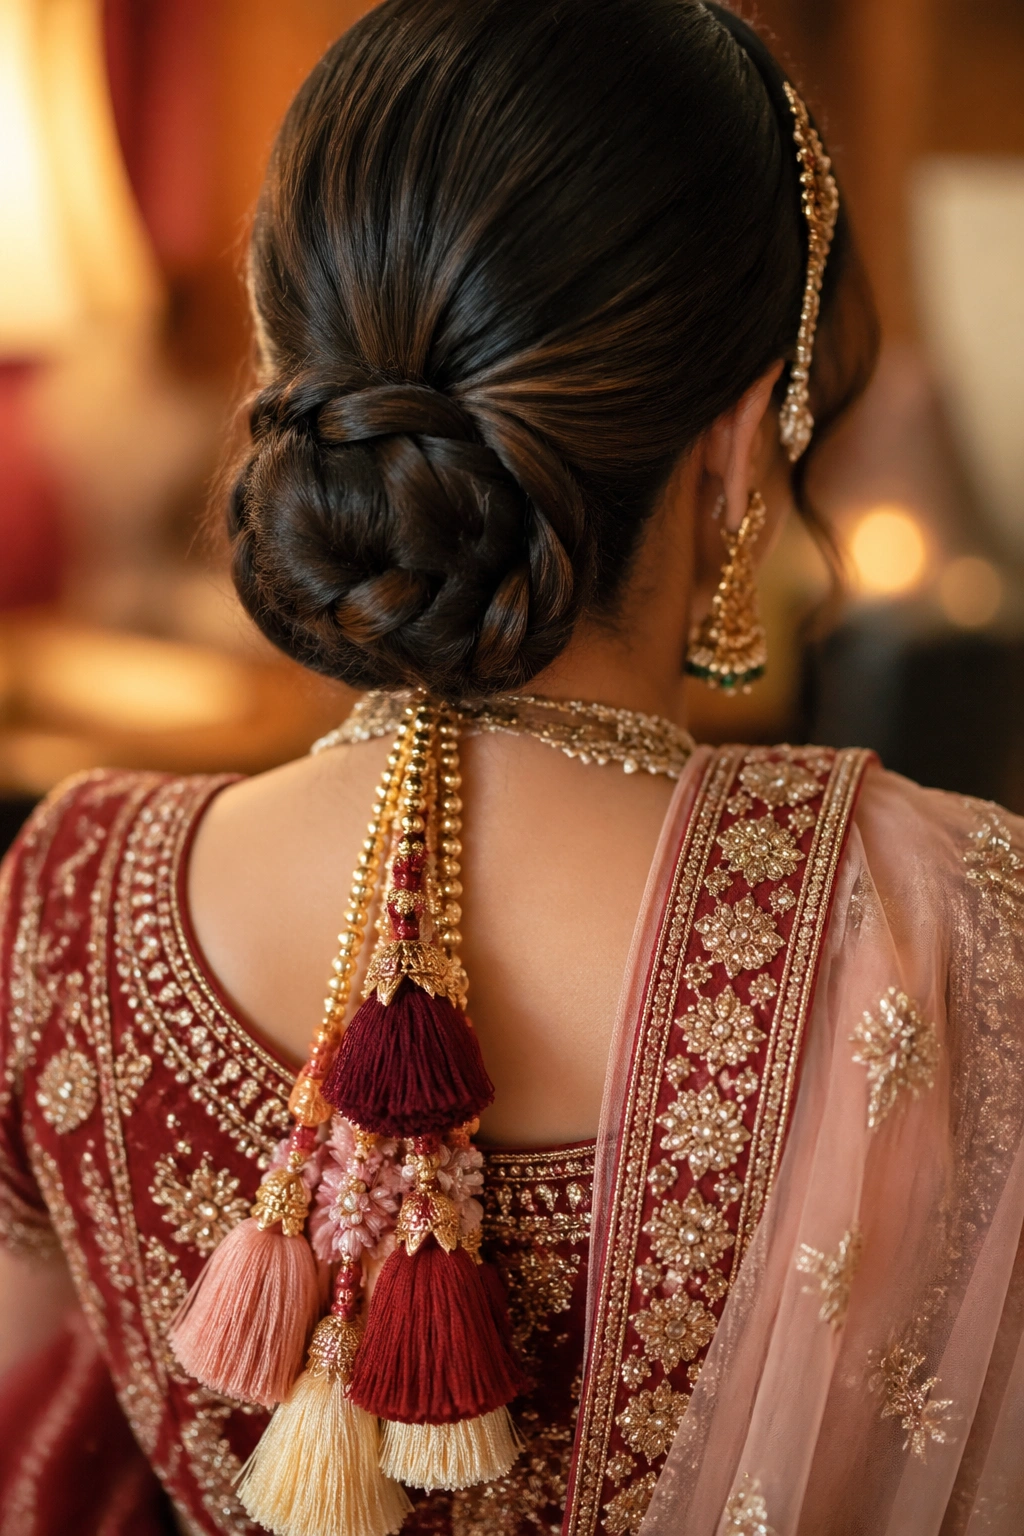
A low braided bun with a parandi tail is the easiest way to keep the braid off your neck and still get the bridal look. The braid starts like a normal plait, folds into a bun at the nape, and lets the decorated tail drop from the base. The shape feels anchored, which matters when a dupatta, kalire, or heavy nath already puts weight on the head.
It saves the neck.
This version is useful for brides who know they will sit, stand, bless, hug, and move between rooms all day. The bun gives the stylist a solid point to pin into, and the tail can be kept shorter than a full waist-length braid so it does not swing into the arms. If the parandi is dense, a few hidden loops can spread the weight instead of pulling from one elastic.
That last detail matters. A braid that looks gorgeous for ten minutes but starts tugging by the half-hour is not doing its job.
9. Bubble Braid Parandi
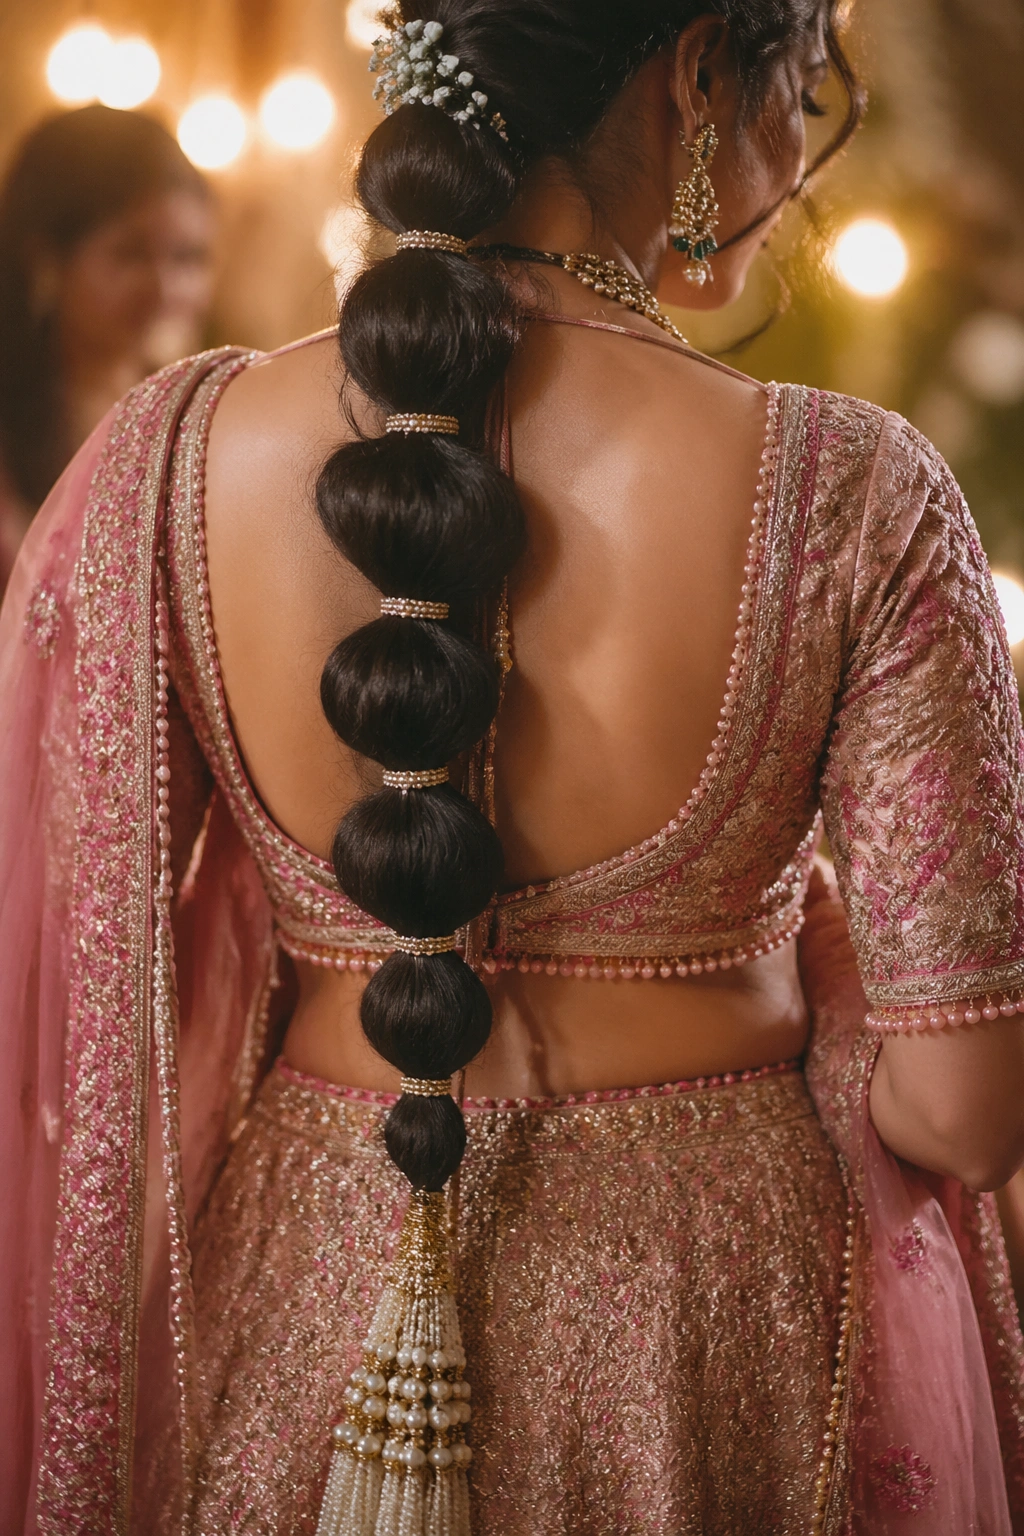
Can a parandi braid feel modern without losing the bridal feel? Yes, if the braid has enough structure. Bubble sections create rounded pockets that show off thread, beads, or tiny tassels, and the parandi can sit at the end or thread through the segments like a decorative spine.
How to Keep the Bubbles Even
The braid should start smooth, then each bubble should be tied off at the same distance so the shape stays clean. Clear elastics work well, though silk ties are gentler on hair that tends to snag. If the sections are uneven, the whole look starts to wobble, and that is hard to hide.
- Place elastics 2 to 3 inches apart.
- Tug each bubble softly so the round shape is even.
- Keep larger bubbles near the bottom for balance.
- Choose a lighter parandi if the hair is already thick.
This is a good option for brides who want something a little less expected without losing the long, decorated braid line that North Indian bridal hair is known for.
10. Ribbon-Woven Parandi Braid
Some brides want the braid to echo the blouse border, and ribbon solves that neatly. Weaving a ribbon through the braid lets you repeat the color of the dupatta edge, blouse piping, or a single thread from the lehenga embroidery. The parandi can stay plain, because the ribbon already carries part of the visual work.
The width matters. A ribbon that is too wide can fight with the braid and make the finish look stiff. A narrow satin ribbon gives shine; a grosgrain ribbon gives grip. Satin reads dressy, while grosgrain holds better when the hair is slippery.
- Use ribbon about 1/4 to 1/2 inch wide.
- Match one color already present in the outfit.
- Stop the ribbon a few inches before the braid ends.
- Let the parandi stay visually separate at the tip.
This style looks especially good when the bride wants detail up close. From a distance, it stays clean. Near the face and back, the braid has a little extra rhythm.
11. Floral Parandi Braid
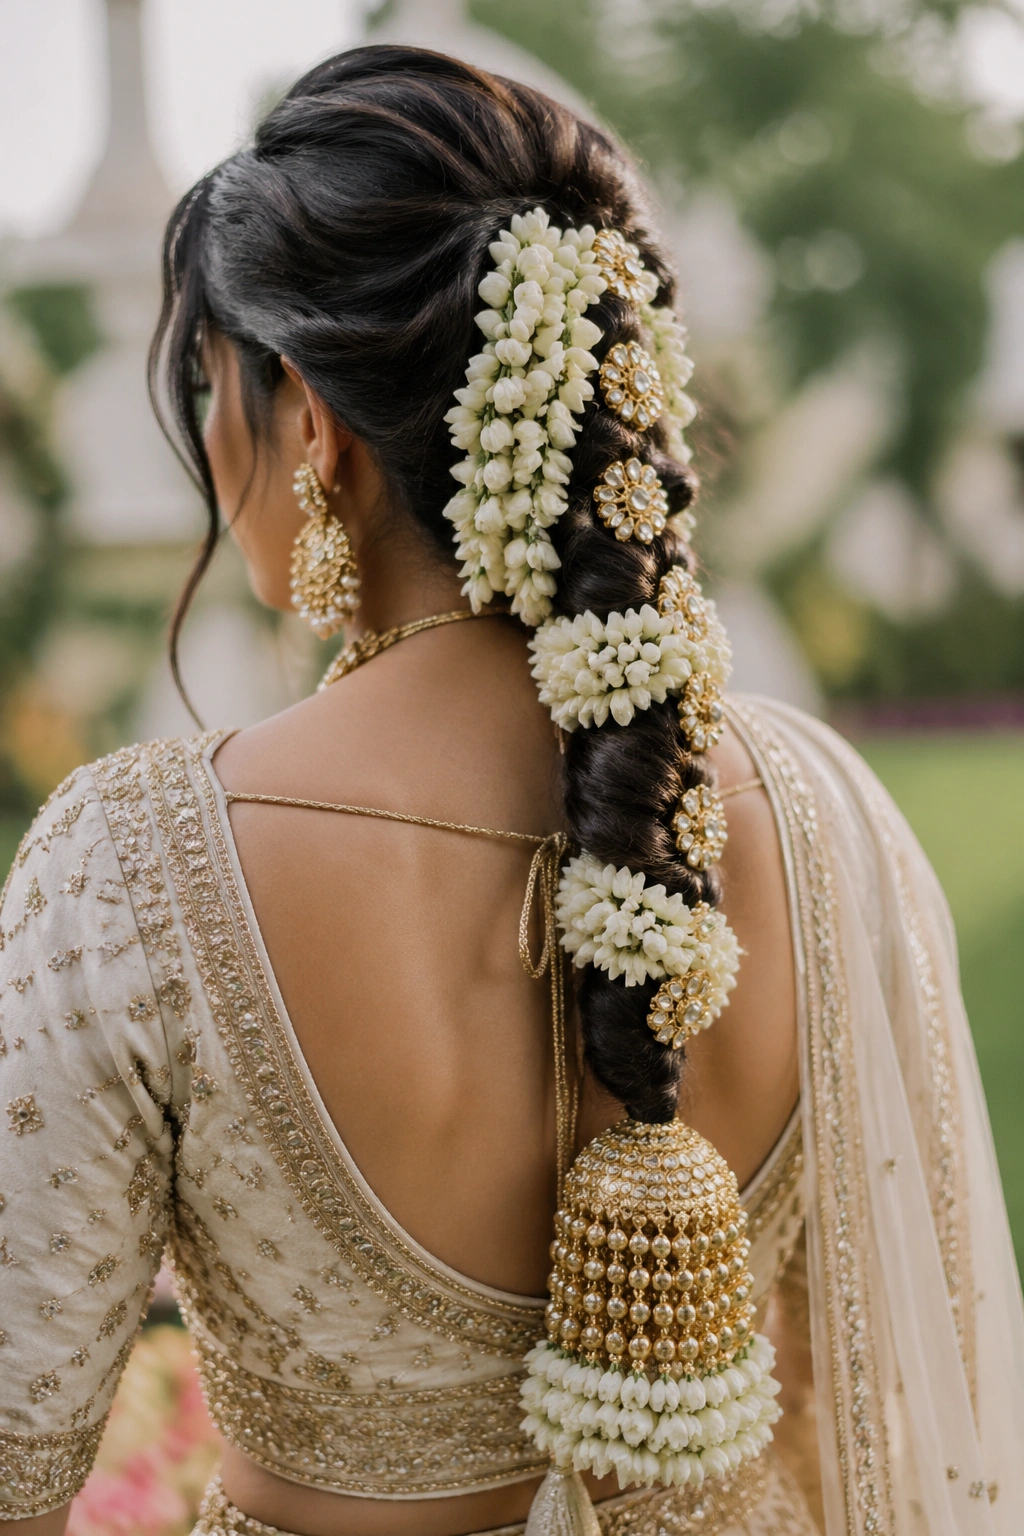
Jasmine smells different from gold thread. It softens the whole braid. A floral parandi braid feels almost like the hair is carrying a garland down the back, which suits brides who want warmth and softness instead of hard sparkle.
Fresh mogra, jasmine, or small roses can be tucked above or around the parandi so the braid looks alive rather than stiff. The catch is upkeep. Fresh flowers bruise, shed petals, and dry out under heat, so this style works best when it is assembled close to the event. A florist or stylist can wire tiny blooms into a base rather than relying on loose petals to hold shape.
This version is lovely for pheras, temple weddings, and daytime rituals where a floral note feels right. It is less practical if there is a long gap between hair setup and the ceremony.
Keep the rest of the braid calm. One flower type, one parandi color, and a clean braid line usually do the job. Too many colors start to fight each other.
12. Jadau-Accent Parandi Braid
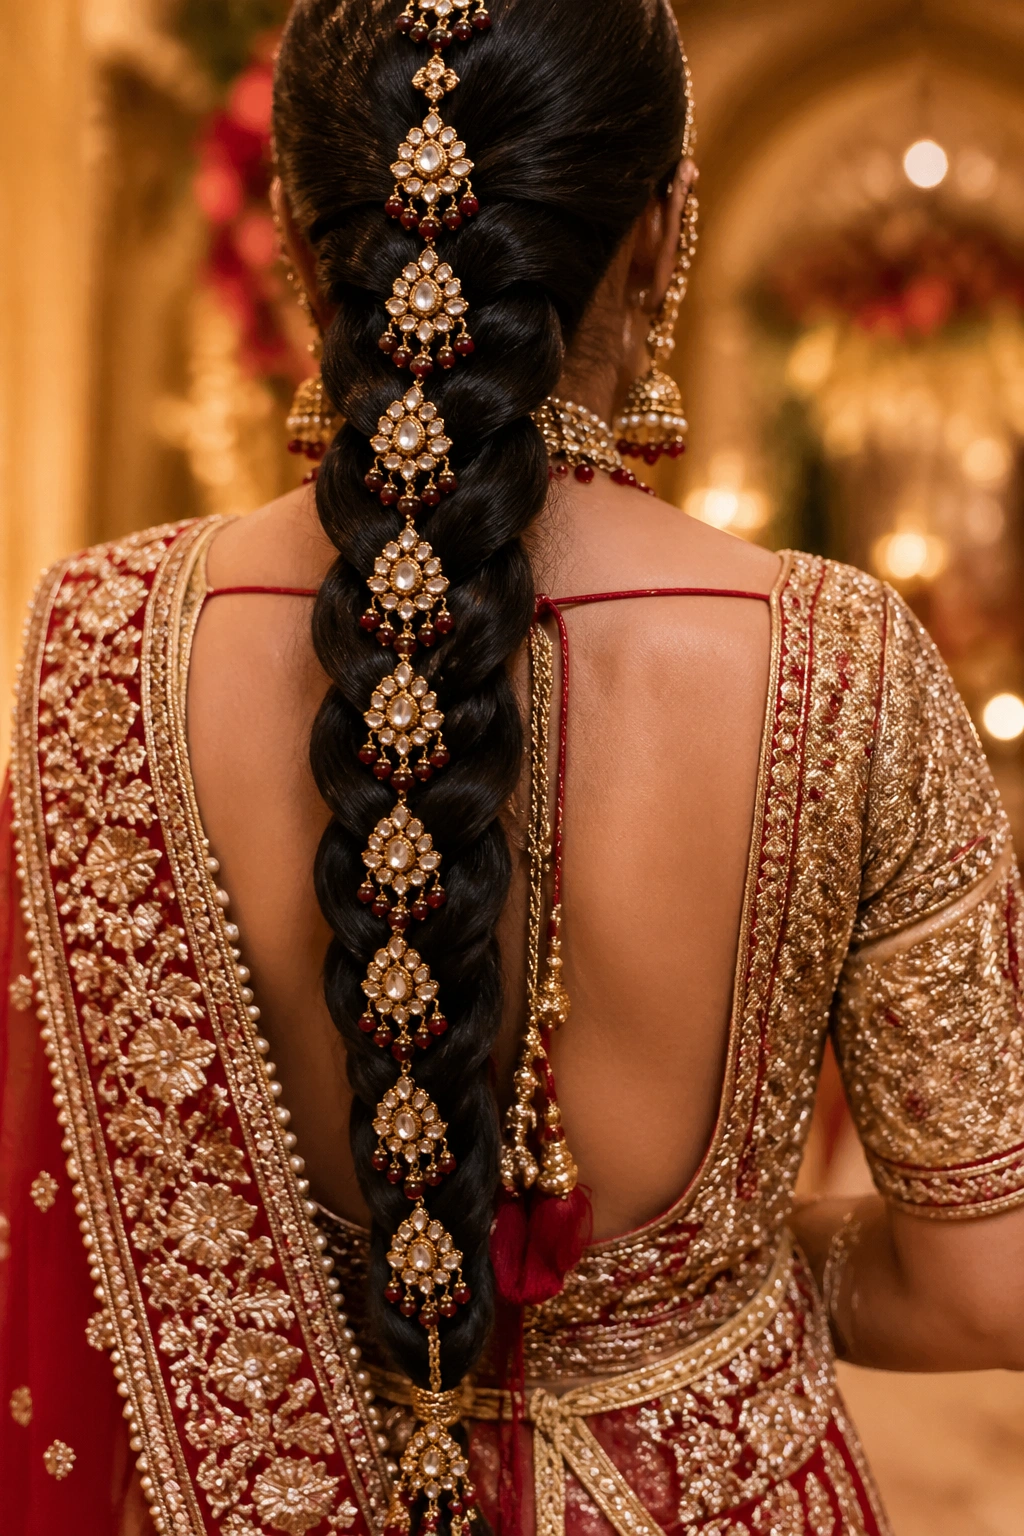
Unlike pearl strands, jadau accents bring sharper shine and a little more weight. That makes this braid feel richer and more formal, especially when the bridal set already includes kundan, polki, or jadau earrings. The braid becomes part of the jewelry story instead of sitting outside it.
The smartest version uses small jadau drops, not oversized ornaments. A few controlled pieces are enough. If the braid is loaded with big stones, the hair starts to look overworked, and the face loses focus. Keep the braid base simple, pin the parandi firmly, and let the jadau pieces catch light in small flashes.
This style suits brides who want the back view to match a grand necklace or a heavy headpiece. It is especially strong when the lehenga has stonework in the same family as the hair ornament. If the outfit already has a lot happening at the waist, keep the braid weight concentrated near the ends instead of along the full length.
13. Velvet Parandi Braid for Cooler Weather Functions

Velvet changes the feel of a braid fast. The surface looks dense and rich, and the parandi gets a softer edge than metallic thread can give. That makes it a strong choice for a North Indian bridal look that leans into depth rather than shine.
Where It Shines
Velvet works best with maroon, bottle green, navy, oxblood, and deep plum. It also likes silk and brocade outfits, because the fabric textures echo each other without clashing. If the lehenga already has velvet borders or a very heavy dupatta, the parandi should stay narrower so the back does not feel overloaded.
A velvet braid holds shape nicely, which is handy when the bride needs the look to stay put through long ceremonies. A light comb-through at the end is enough; too much brushing flattens the nap and kills the soft finish.
It is a strong choice, not a delicate one.
14. Waterfall Fronts with Braided Parandi Back
What if you want loose pieces near the face but still need a proper bridal braid at the back? A waterfall-front braid solves that tension. Soft face-framing sections, twisted front pieces, or a gentle waterfall effect keep the hairline from looking severe, while the back stays fully structured and bridal.
The parandi gives the braid a finished endpoint, which matters when the front is already doing some visual work. The loose pieces should be pinned securely behind the temple so they do not drift into the eyes or cling to makeup. A little curl at the front can soften the line, but the back should stay disciplined.
This hybrid works well for brides who do not like the feeling of every strand pulled flat against the scalp. It still reads traditional enough for a wedding ceremony, yet it has a softer edge that suits brides with delicate features or a very ornate forehead ornament.
15. Open-Crown Braid Hybrid
Unlike a single braid that starts low, an open-crown braid wraps the top of the head and gives the parandi a stronger frame. The style creates a bit of height up top without relying on a puffed crown, which some brides dislike because it can feel too stiff or dated.
The braid line around the crown helps hold a dupatta in place, which is useful when the fabric is pinned high or the ceremony involves moving around a lot. It also gives the forehead jewelry a neat backdrop. A broad maang tikka or layered passa sits more securely when the hairline has this kind of shape behind it.
This style is a smart fit for brides with fine hair that needs body near the scalp, or for anyone who wants more structure without a full updo. The parandi can stay medium-weight so the crown remains the star. Too much ornament at the end pulls the eye down hard, and that defeats the point.
16. Rope-Twist Parandi Braid
Thick hair and slippery hair both like rope twists. The rope-twist parandi braid uses two sections twisted around each other, which takes less time than a traditional braid and still gives a clean line for the ornament to hang from. The spiral texture makes even a plain parandi look deliberate.
Small Tricks That Help
This braid holds best when the mid-lengths have a little grip. A light mousse at the start is enough; heavy serum at the roots can make the twist slide apart. The sections should be secured every few inches so the braid does not loosen before the parandi is tied on.
- Use light mousse on mid-lengths.
- Avoid oily product near the crown.
- Secure the twist every 2 to 3 inches.
- Choose medium-weight tassels so the twist stays neat.
This is a quiet workhorse of a style. It does not shout, but it stays neat, which is often more useful than a fancier braid that needs constant fixing.
17. Heavy Statement Parandi for Phoolon Ki Chadar
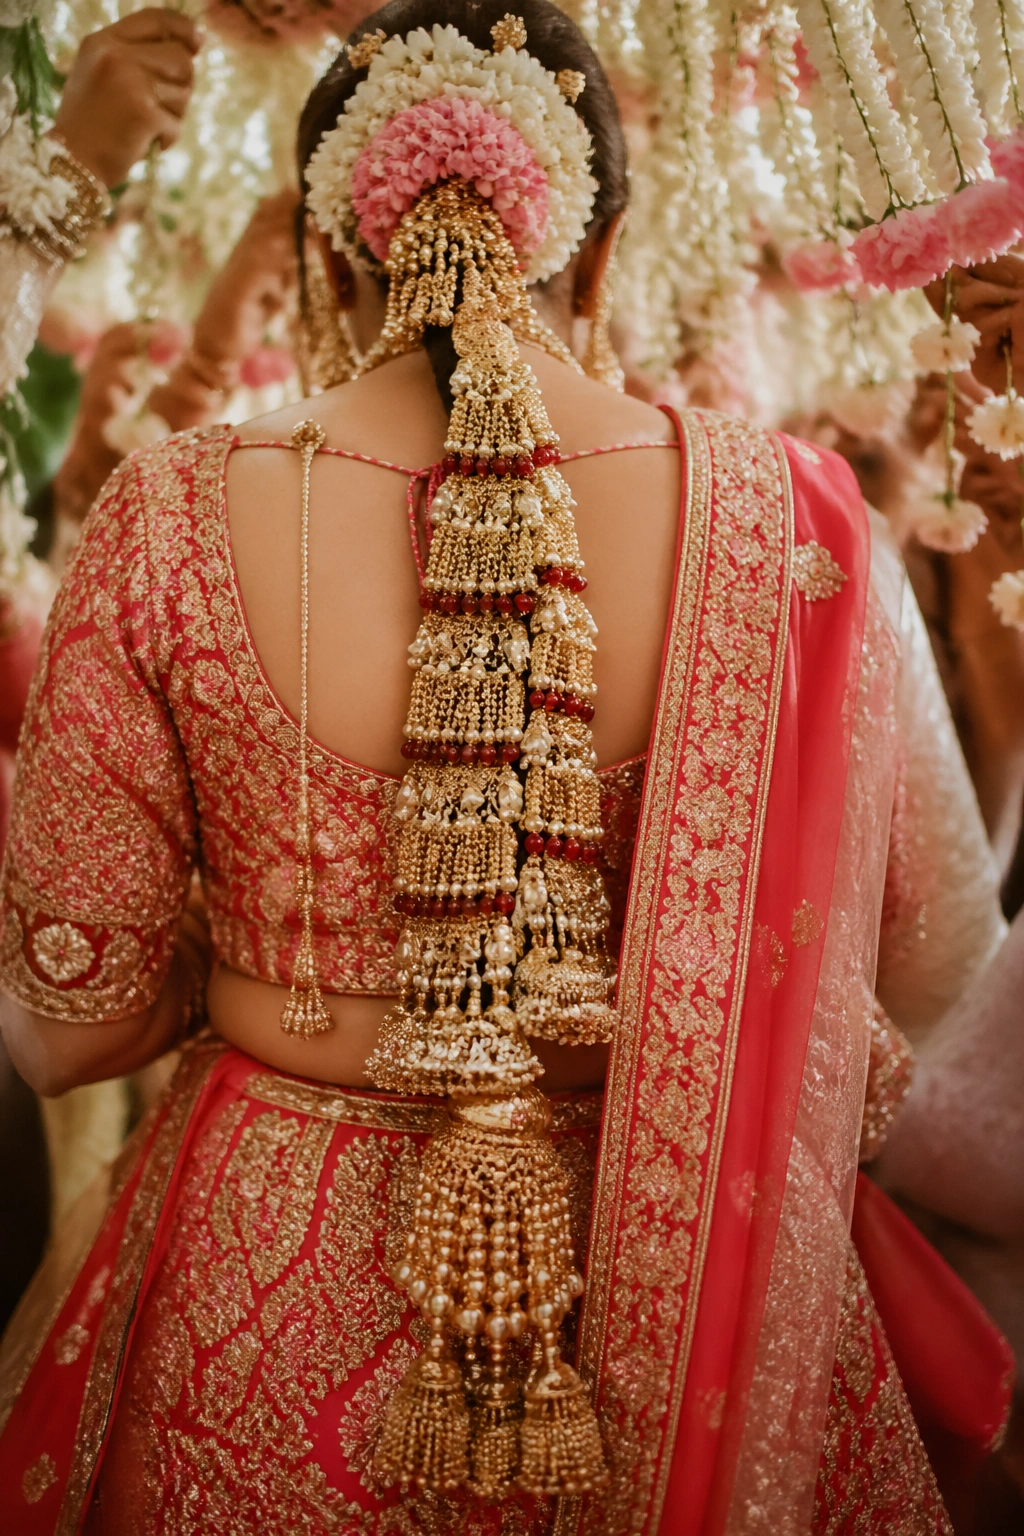
Under a phoolon ki chadar, the braid has to be readable from a distance. A heavier statement parandi with dense tassels, beads, or layered gota can hold that visual ground. The bride moves under flowers, people look down, petals fall, and the braid still needs to register as a bridal detail rather than a blur.
That is where extra width helps. A fuller parandi catches the eye against the moving canopy and balances the softness of the flowers overhead. It also photographs well in the sense that the braid remains legible when the bride is walking, not only when she is standing still.
The weight needs planning, though. Overloading the braid can pull at the scalp during a long event, so the base should be padded and pinned at several points. If the parandi has beads or metal trim, the braid underneath should stay simple and strong. The charm of this look is scale. It is meant to be seen.
18. Minimal Parandi Braid for a Softer Look
Not every bridal braid needs bells, beads, and a heavy fringe. A slim parandi with one accent color, a short tassel, or a single line of gota can feel cleaner when the lehenga already has dense embroidery. This version leaves breathing room for the outfit to stay in charge.
Less can work hard.
A minimal braid suits brides who want the hair to support the look rather than dominate it. That might mean a pastel suit, a silk drape, or a lehenga with a busy hem and a very detailed blouse. The braid stays neat, the parting is tidy, and the back view gets a clear line without too much shine.
This style is also kinder to brides who dislike extra weight at the nape. A smaller parandi is easier to move in, easier to pin, and easier to keep smooth under a veil. It is not plain. It is measured.
19. The Bridal Parandi That Holds Everything Together
After all the sparkle, the smartest bridal parandi is still the one that stays put. The braid should survive a head turn, a dupatta adjustment, and a small dance step without slipping or pulling. If it slips, the style is too weak. If it tugs, it is too heavy. The sweet spot sits in the middle.
A good stylist tests the braid against the outfit, not just against the hair. That is the part many people miss. A braid that looks gorgeous on a hanger can collapse once the bride starts moving, while a braid with fewer loose parts and smarter pins can carry the whole day with less fuss. Matching the parandi thickness to the braid thickness matters more than chasing more decoration.
If one detail has to be chosen carefully, pick the weight first, then the color, then the shine. That order saves a lot of regret. When the braid feels easy, the rest of the bridal look tends to settle into place with it.